Coffee table height X end table
Created over a week using Tasmanian oak. Pine for the shelf slats. Finished with a tea rust stain and polyurethane varnish. Weighs a whopping 35kg!
$100 on wood
$25 varnish
Polyurethane varnish
Created over a week using Tasmanian oak. Pine for the shelf slats. Finished with a tea rust stain and polyurethane varnish. Weighs a whopping 35kg!
What a great help for mom in the kitchen. Very stable even without the extra feet. Only thing I wish I had done differently is make it two inches shorter so it would slide under the edge of the counter. My kids love helping to bake now.
Thu, 09/24/2020 - 11:07
Thank you for sharing, I bet they love it just as much as you do!
We got our plans from here for this table and bench. It was our first project and the plans made it very easy. The bottom of the table is painted in Annie Sloans chalk paint and waxed, and the top is stained and sealed with polyurethane.
It was a great first bigger project for myself, with just basic tools and know how I was able to make that.
I built this using the Rustic X Coffee Table Plans, but modified by using 1x stock for the top instead of 2x. I also built mitered breadboards for the top. Finally, I added casters for mobility and an industrial look.
Sat, 09/26/2020 - 18:29
Thanks for sharing, love the finish and casters!
I am currently a university student and had some free time this Christmas break. I will graduate in May and move into a new, unfurnished apartment with my new wife. This is my first venture with woodworking, and I'm absolutely pleased with the results. I really was diligent about following Ana's instructions precisely and measuring twice.
I hope you enjoy the photos!
I used Ana's plan and made ten of these for our firepit area. The only thing that I changed was the back brace pieces....I couldn't get 1x2s so just used 2x2's.
I made a 1/4 scale model of The Modern Farmhouse Bed as a doll bed for one of my granddaughters. I just divided all the measurements by four to get the dimensions and cut my "lumber" from a single 2 x 4. I cut shallow slots in the headboard posts for the planks to fit into, then glued them and secured with clamps and tiny nails. I made the slots where the side rails met the headboard and footboard posts a little deeper, 1/4", glued, clamped, and tacked with the tiny nails. All the nails were countersunk and the holes filled. Stained with "Aged wheat" stain. Foam rubber mattress and pillow covered by fabric.
Since I was in the process of building my daughter a loft (http://ana-white.com/2012/12/camp-loft-bed-stairs-slide-and-fort) and she was getting a doll for Christmas, I wanted to maker her a bunk bed for her dolls. This was an easy project that I felt I could tackle in a short time period. My daughter loved both this and the loft, so it was worth it.
As mentiond in the comments (which I read too late), there's a couple things wrong with the shopping list and cut list (you need 1 more of each board, and there should be 4 1x1 at 19"). Since I couldn't find any 1x1 and I don't have a table saw to rip it, I bought 3/4 x 1/2 trim, and that worked fine for me. I used 3/4" foam for the mattress. The pocket holes worked well, but be sure to glue also, because since there's only 1 screw on each side the boards will twist.
The only thing I would do differently if I had it to do over again is to make it a little longer (maybe 20" or 21" instead of 19"). It's a snug fit with an 18" doll when you consider hair and shoes.
This is the third of three AG doll beds I made for my nieces.
We needed a media cabinet for our very large akward wall. Not wanting to spend a fortune for particle board, I decided to try to build it myself. Lil me did my first build!! Did use thinner tabletop and made single barn door in the back for easy access to cords. Possibly might paint the doors a bit to add more dimension. Not shown but had our 22 yr old cat walk across the tabletop with white paint so we could remember him forever.
My wife saw to beds and said she wants them put together, So here is the final project.
Scaled these to fit counter height and cushions already owned. Used pocket screws and wood filler.
This project took about a day. I used furniture grade pine. Very solid.
Wed, 02/01/2017 - 05:06
Hello! I've searched your site trying to find the plan and or the dimensions for the farmhouse buffet (altered from
cabin dresser). Do you happen to remember what these are?
Mon, 04/05/2021 - 10:29
Hello, i'm trying to find the plan and or the dimensions for the farmhouse buffet thank you
My granddaughter absolutely loves purple! She is almost 3 years old and she uses it for snacks putting together little puzzles and coloring. Very fun and easy project. I added a frame around the edges so it’s nice and smooth and her colors won’t roll off the desk.
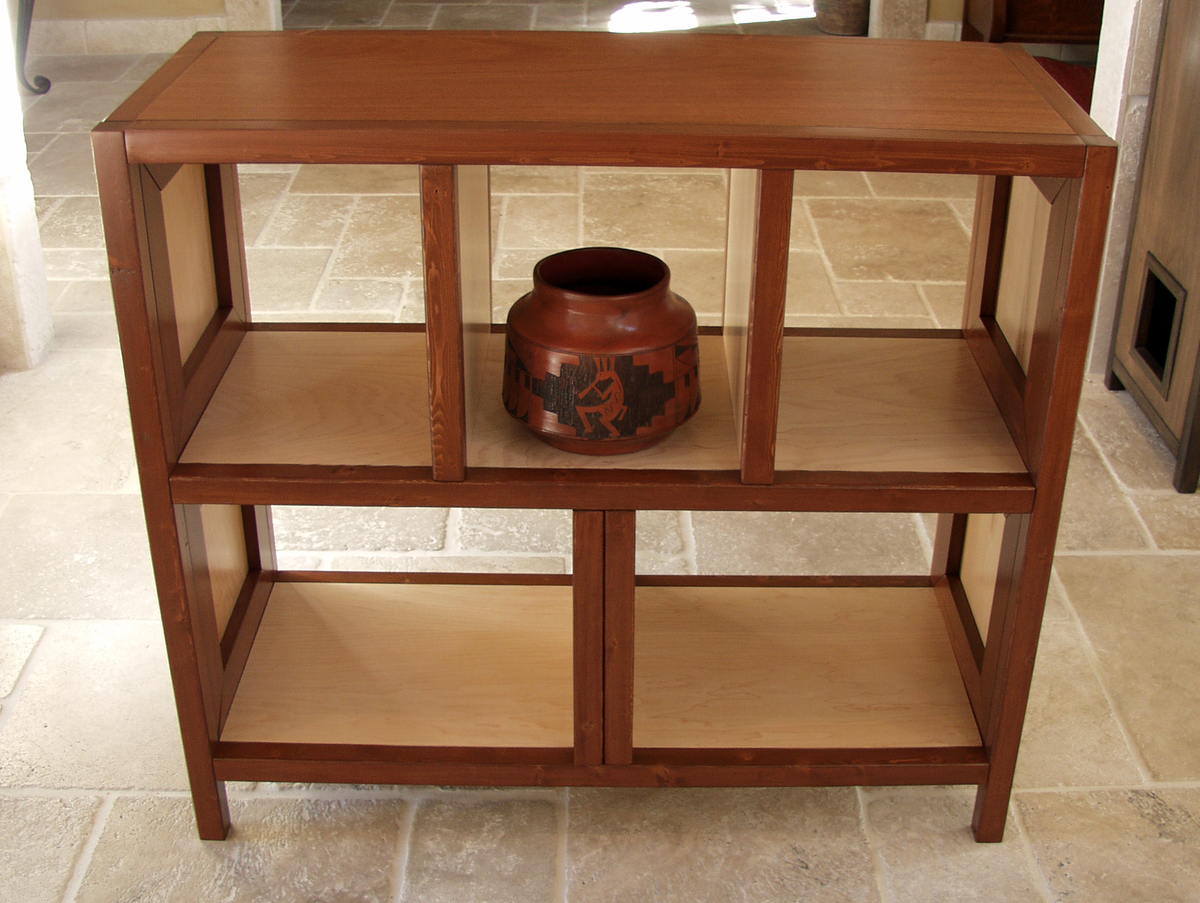
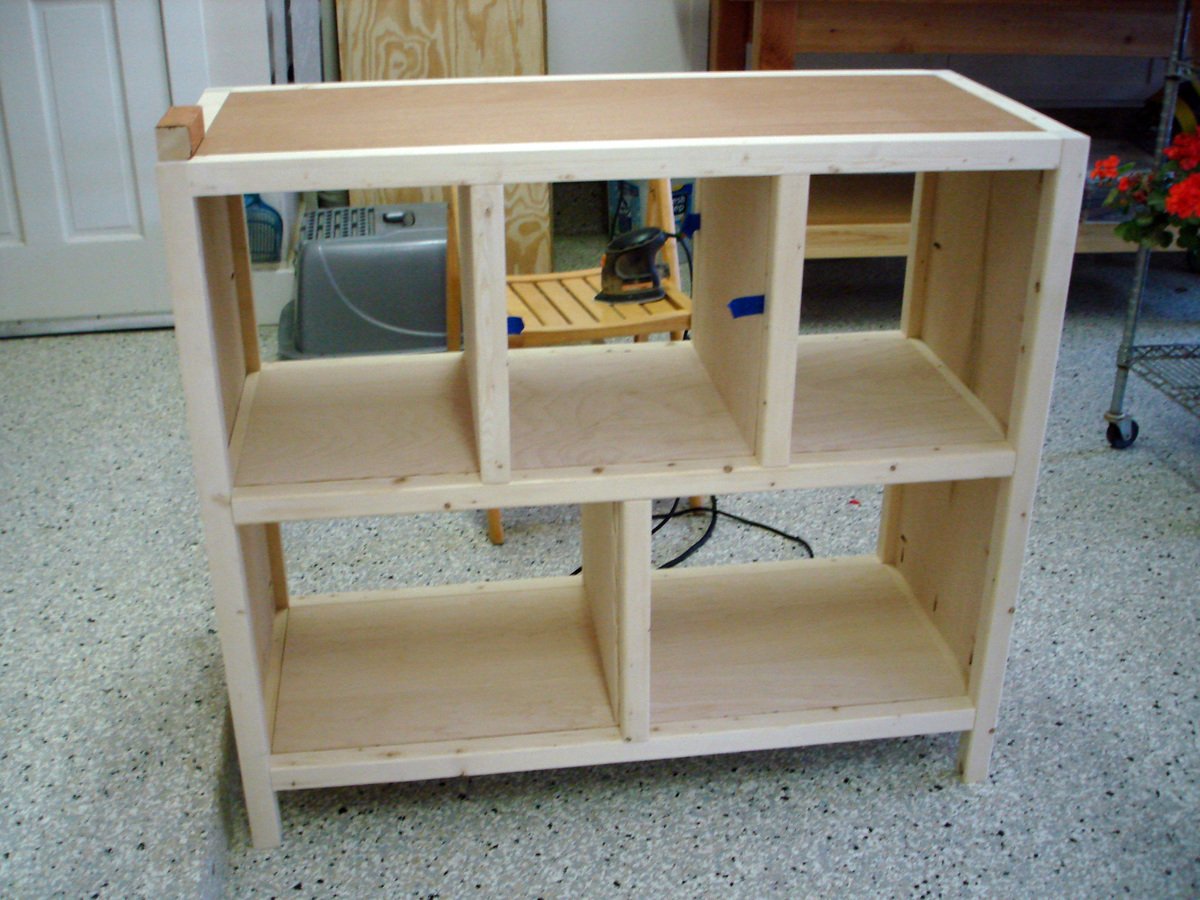
This was my first project without a set of plans, and all I had was a pitiful hand-drawn diagram and a lot of good ideas from prior Ana-White projects/plans (Google sketchup seems beyond my intellectual capacity!). I started with a spare piece of cherry that I wanted to use somewhere, so it became the basis for the top of this office shelf unit. I had to go with the dimensions of the cherry, so everything was built around that.
I used maple plywood for the base and sides of the cabinet, and pine furring strips for the frame/edging. Then, once I had the entire unit put together, I decided that I would like to stain just the frame. I had to take the whole project apart (all 51 pieces), stain the frame/edges, varnish the interior portions of the maple, and re-assemble without ruining the finish.
I try to never use glue because it's the one action that can't be reversed. I made a critical error on this (in a rush) when I installed the lower shelf in the wrong place and glued in a panel that hid all the screws. I thought the thing was totally ruined. My husband suggested adding a 2nd divider and calling it a "design feature". It saved the whole project.
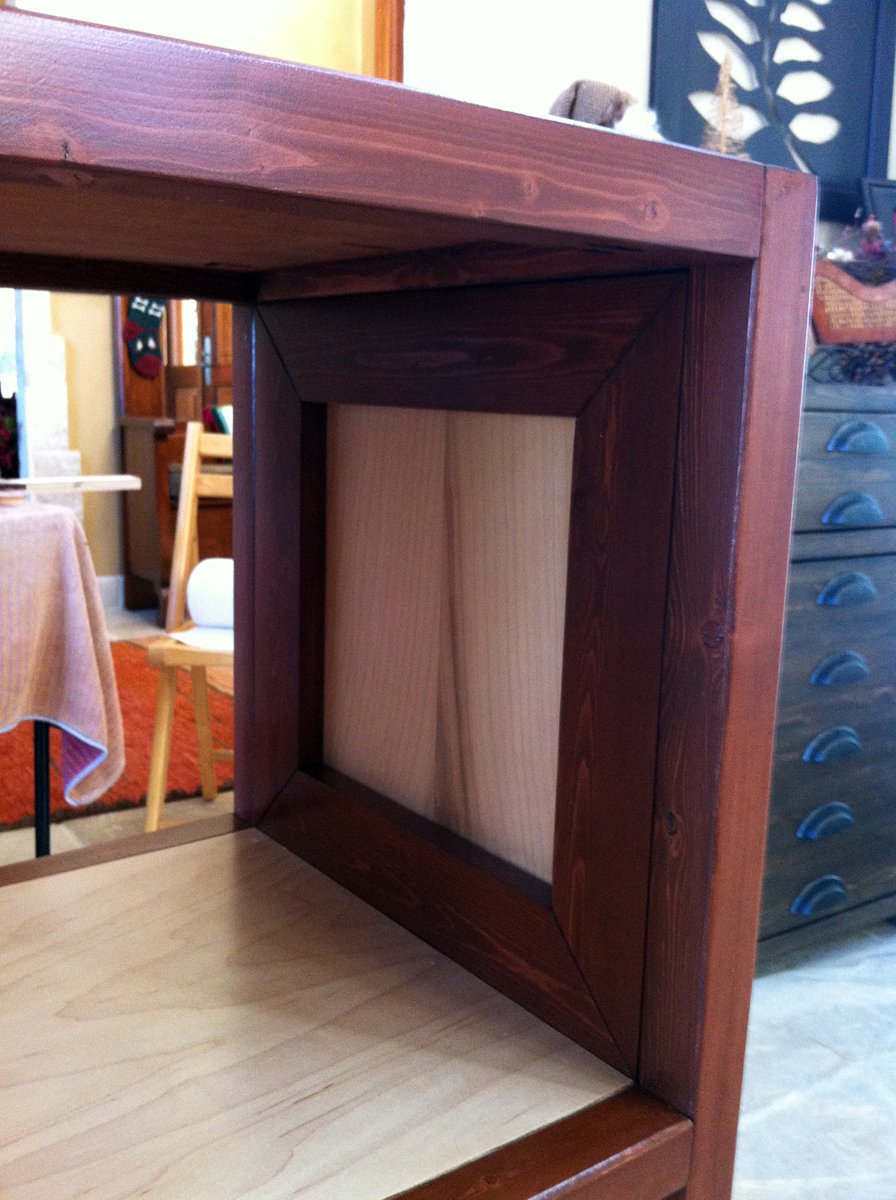
Once re-assembled, I didn't want my Kreg holes to show, and I haven't had much luck with the Kreg plugs. So, I added a mitered frame around the insides and stained it cherry to match the edges.
Minwax didn't have a water-based cherry that I liked, so I mixed my own out of various water-based stains. That process took over a week to get just the right tone. This was the first time I've used Minwax Polycrylic, and I will be using this product forever...it is fantastic.
I just took the idea of the farmhouse, and crossed it with a bed in a photo my wife found on Pottery Barn Teen.
The back is one peice of plywood, and I just used the planks for accent. The top of the headboard is a 4X4, with a routed bottom edge. I made the crown pieces on the posts out of a couple of routed squares of MDF stacked.
The footboard is quite similiar to the Farmhouse footboard just with the plywood and accent planks instead of just planks.
It was super easy and cost less than $150.
Our little girls playhouse....
L2.2m x W1.2m x H to apex 1.8m,
Made from overworked pallets and a rough sketch!
All planks were 2.2m in length which determined the house length and were 40mm thick.
Made in panels to ease assembly and if we decide to move it as it weighs an awful lot!!!
Comments
Lunar2
Fri, 04/21/2017 - 11:56
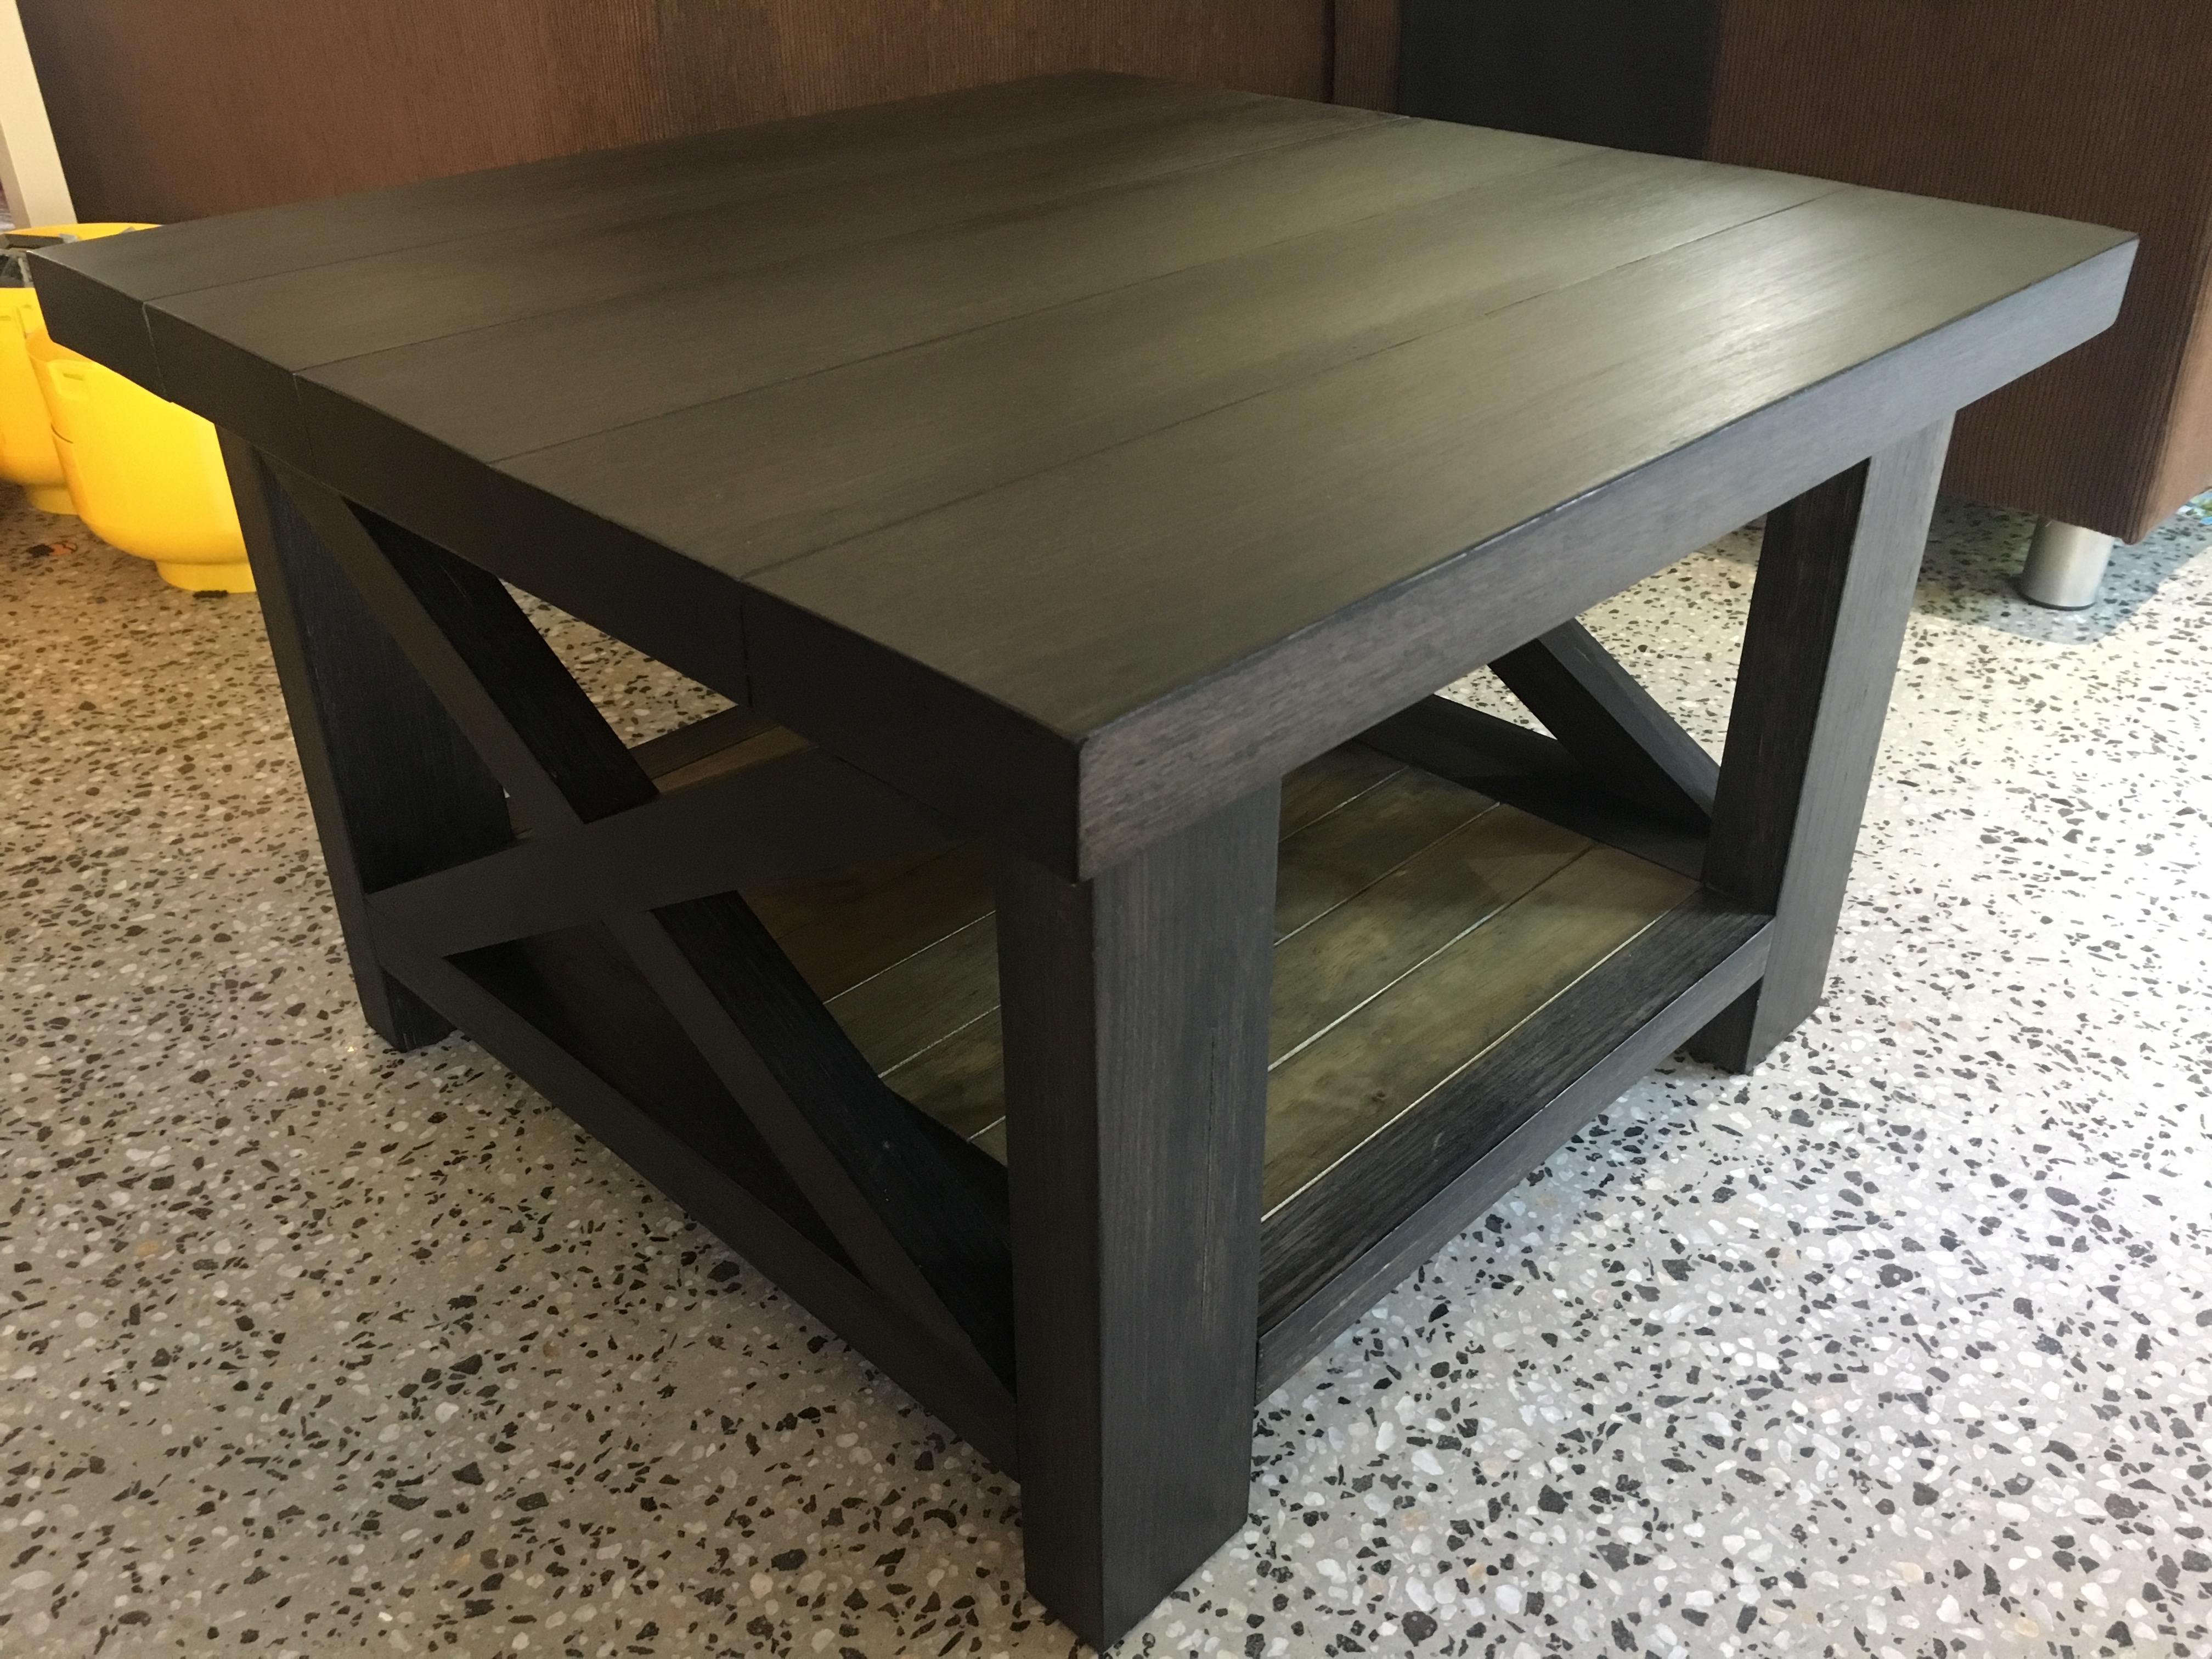
Tasmanian Oak
This is lovely! The table turned out well and the stain is beautiful - love the woods you chose. Thanks for sharing!