Community Brag Posts

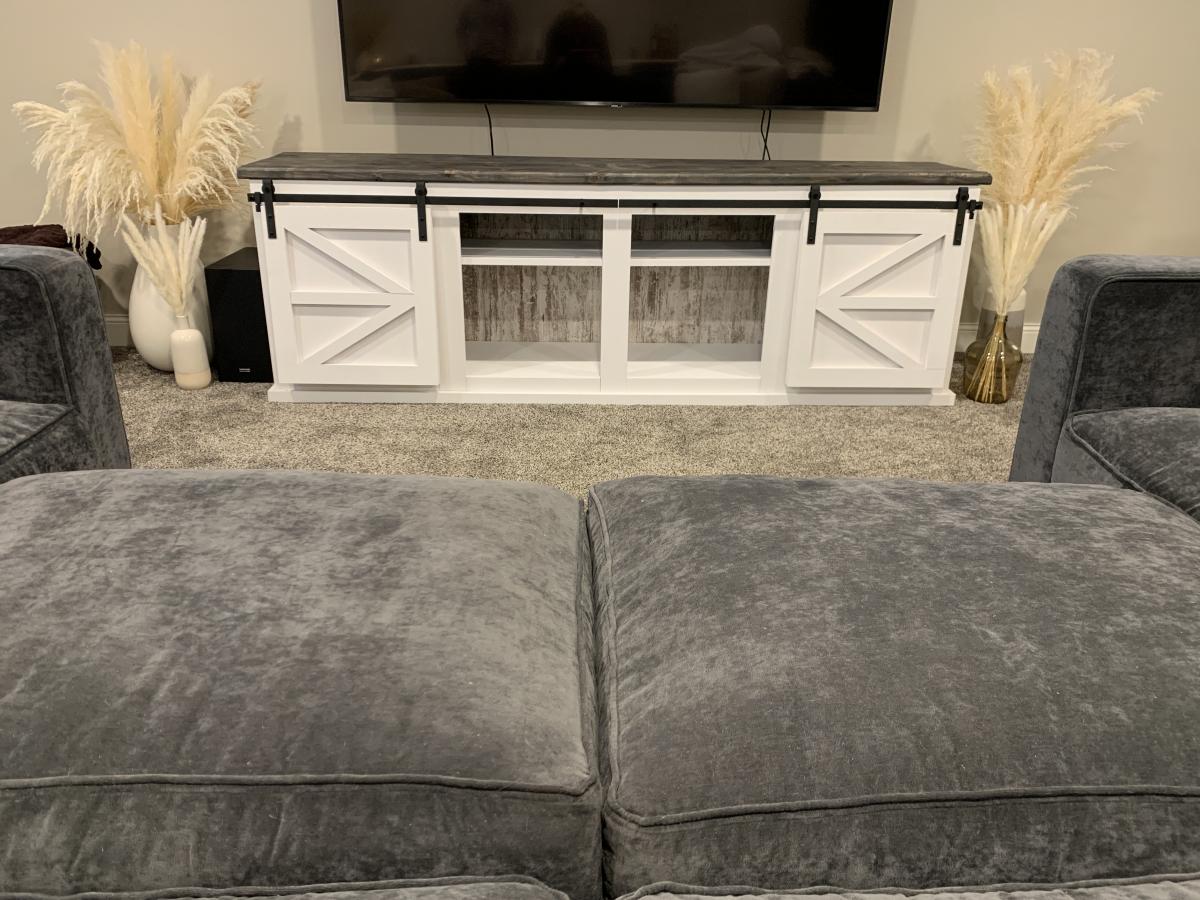
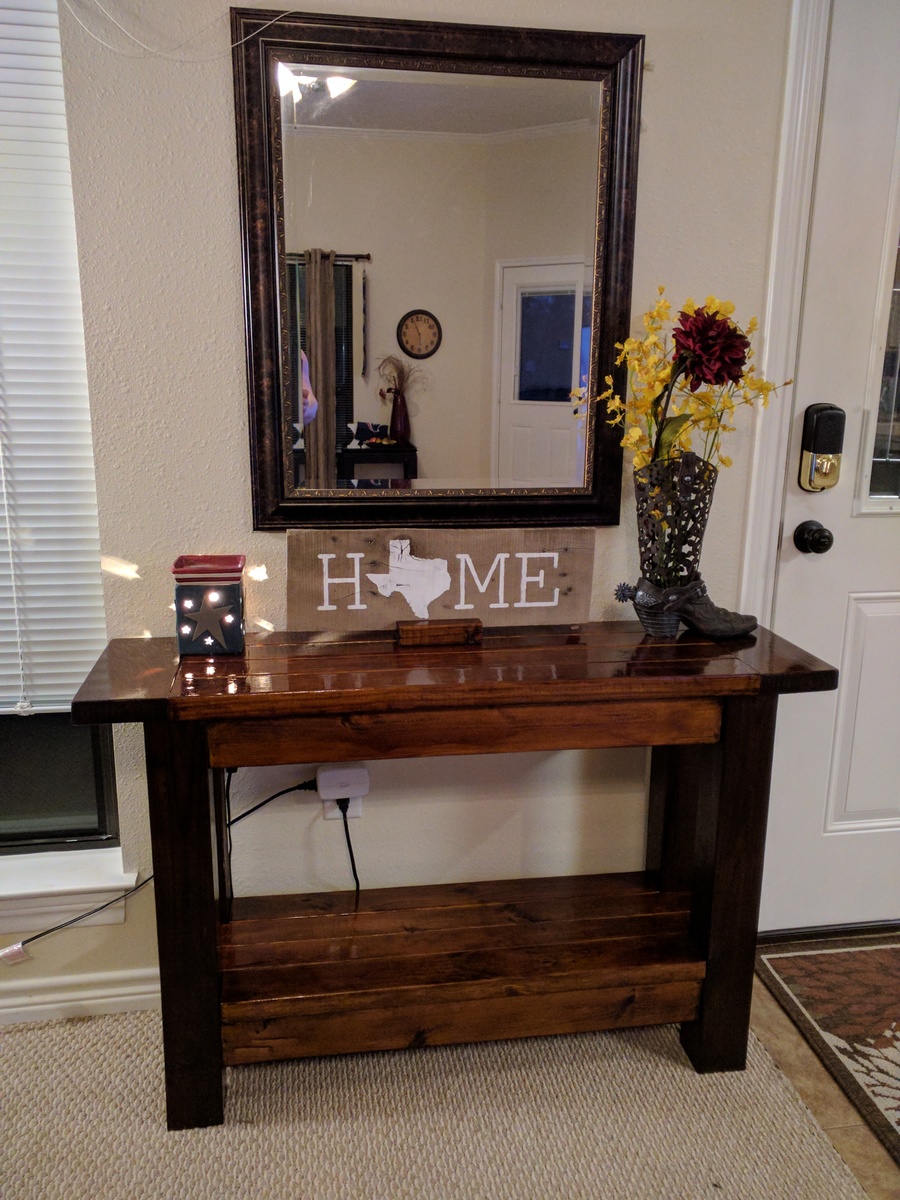
Barn door console
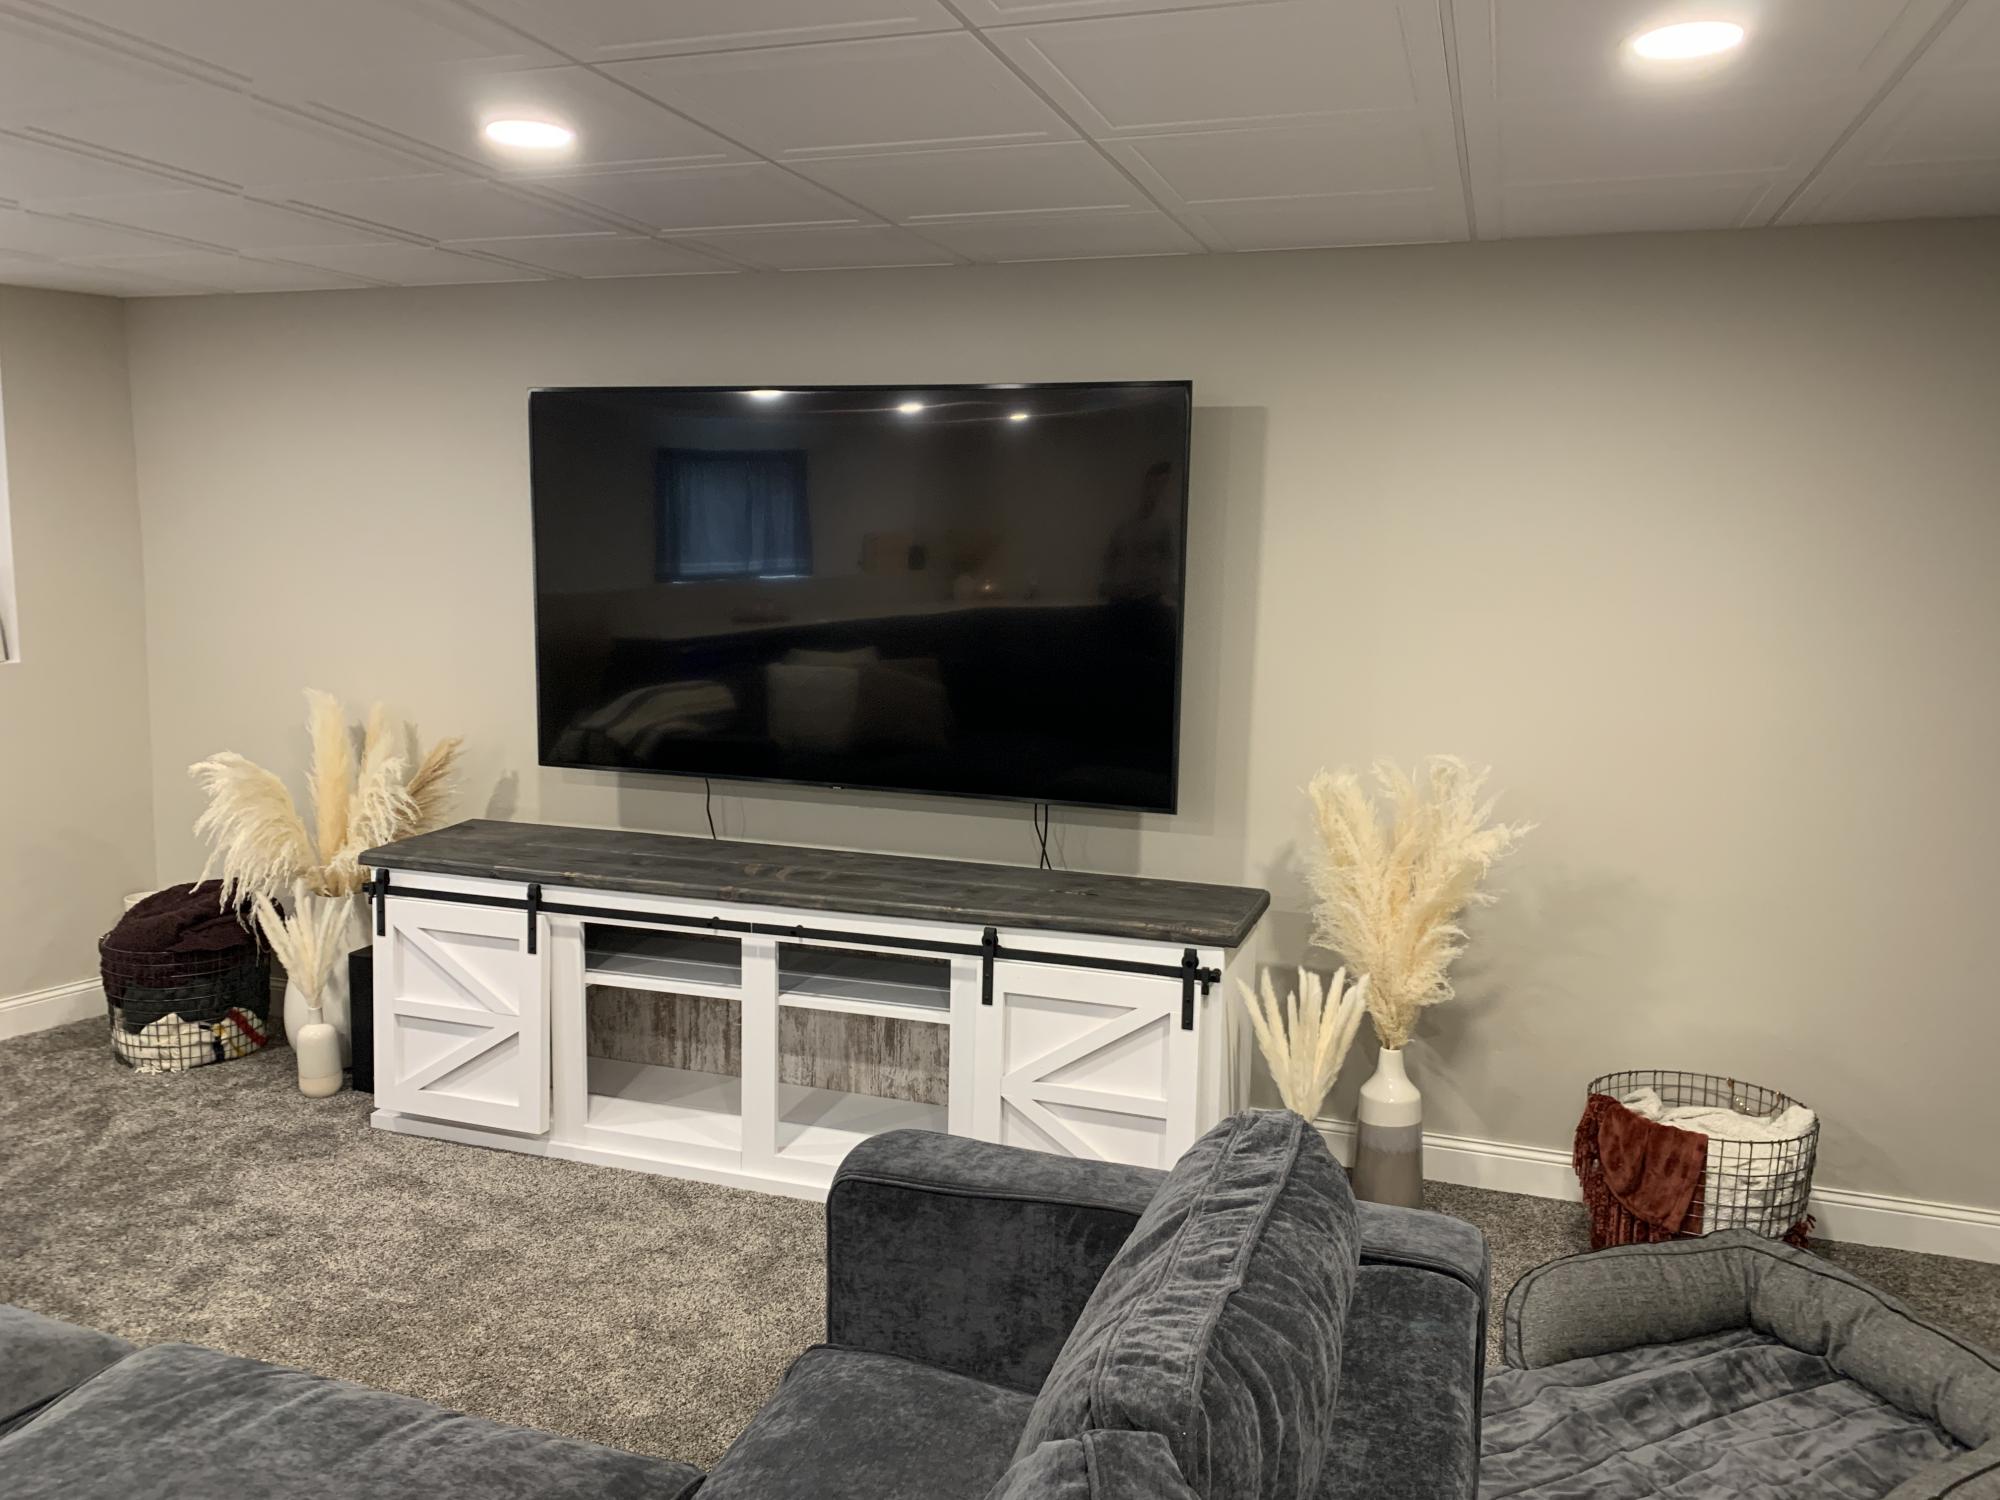
I am so happy with the way this turned out! (By no means is it perfect) My husband and I have been looking for a tv stand for our basement for months! Everything we liked seemed overpriced and still not exactly what we wanted. That was when we remembered the Adirondack chairs we had made from Ana’s plans and started looking to see what else she had. We found this tv stand and read through the step by steps and it all seemed manageable. Ana has the easiest plans to follow along with and so many tips and tricks also! We are by no means experts - we are very much still beginners, that’s how good her directions are!
Estimated Cost
$250?
Estimated Time Investment
Weekend Project (10-20 Hours)
Finish Used
We bought “chalked” brand paint from Menards in linen white. It comes in spray paint or little cans. We used a wood stain in “carbon gray” to match our barn door that’s not pictured. And the back of the console is a project panel/wall panel from Menards that looks like white barn wood.
Recommended Skill Level
Intermediate


$55 Fancy X Desk - modified

I made a new drawing since I updated some of the dimensions.
http://www.instructables.com/id/Simple-Low-Cost-DeskTable/
Video of the build:


Estimated Time Investment
Day Project (6-9 Hours)
Finish Used
Paint - white/green
Recommended Skill Level
Beginner
Comments

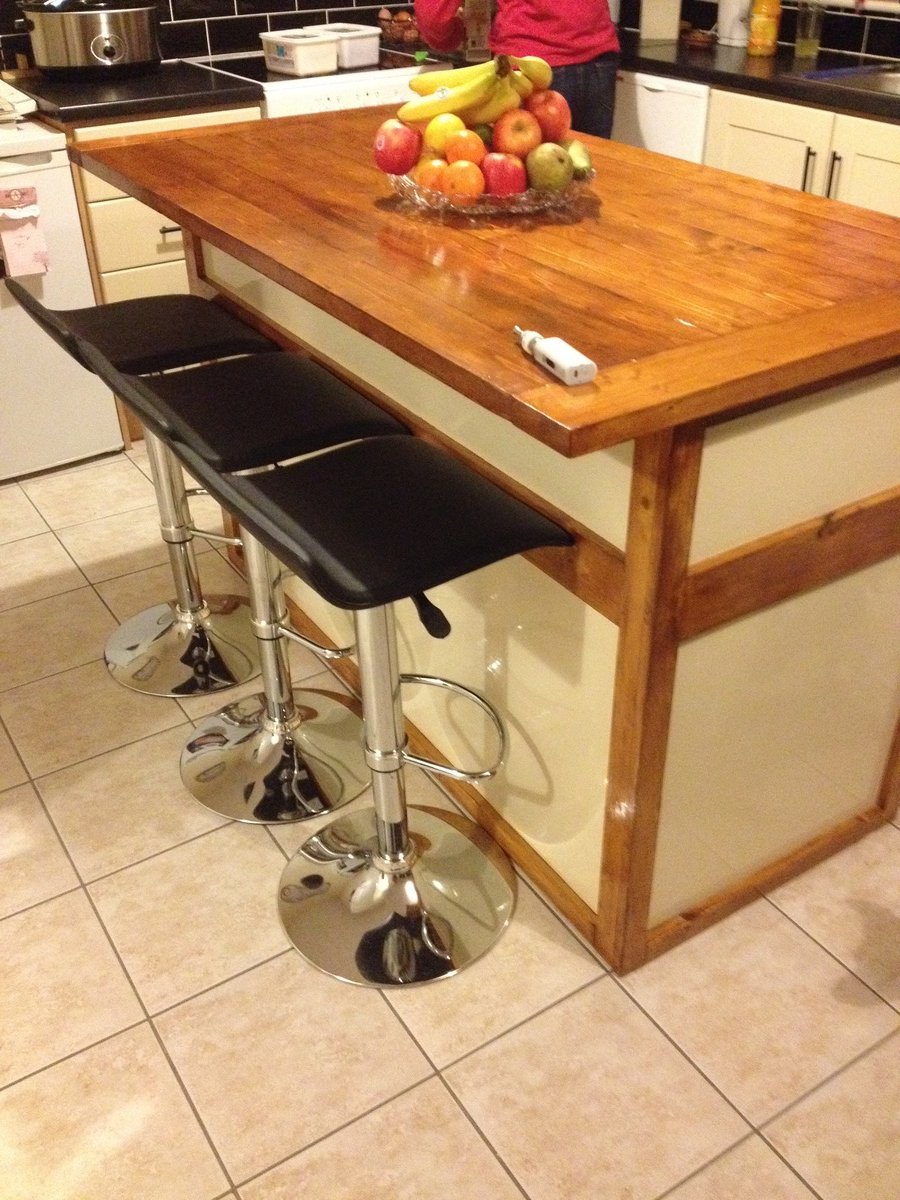
Salsa Console
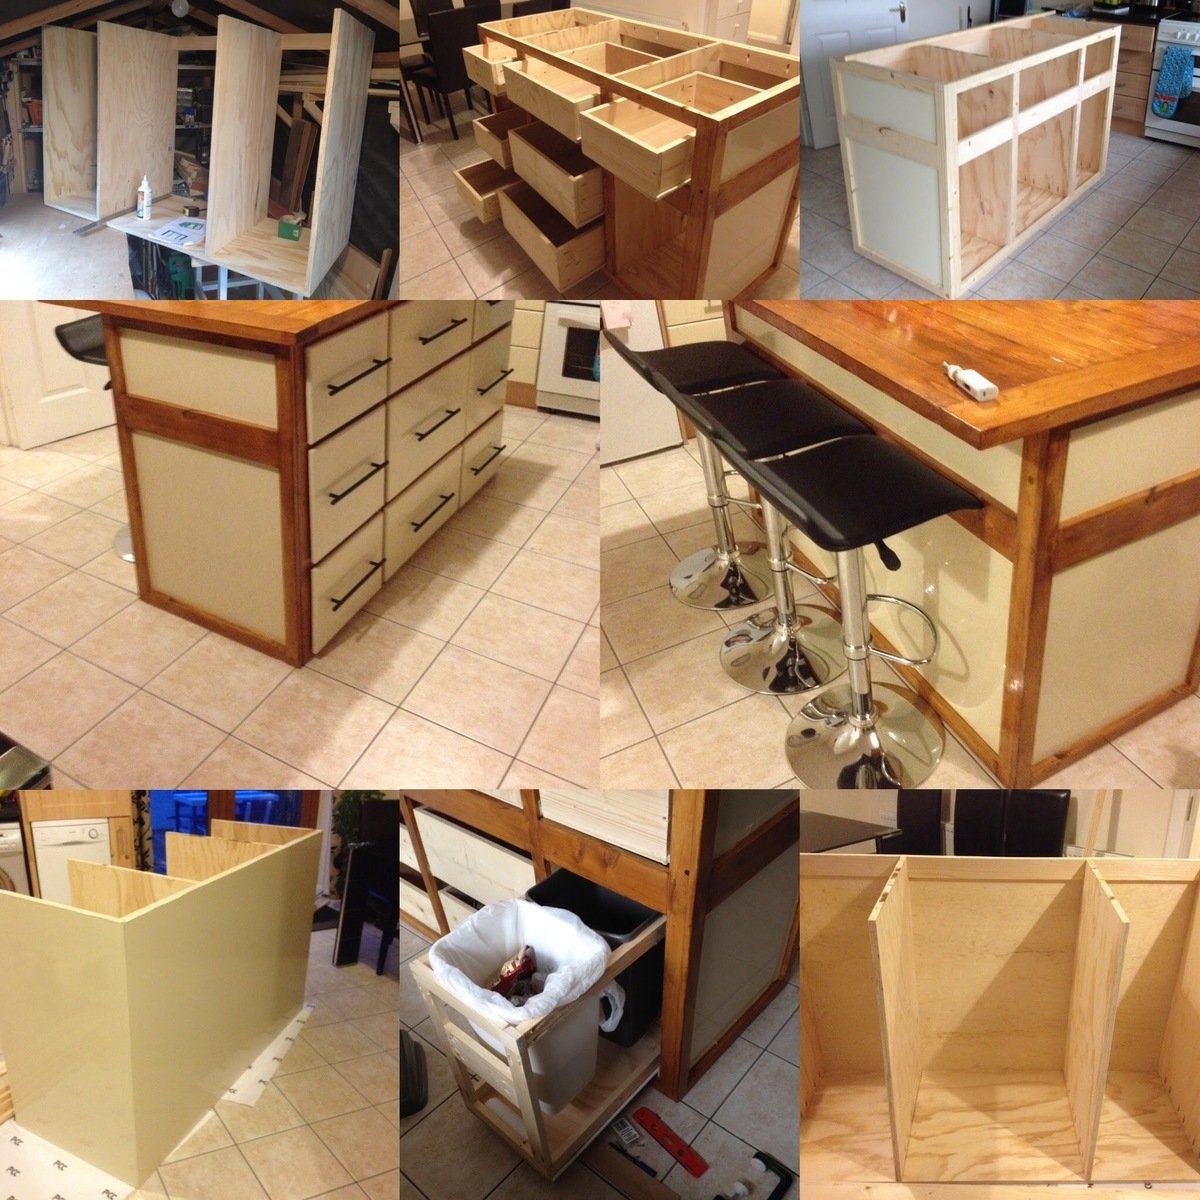
This was my biggest project yet and I am so proud of the final finish. I adapted the salsa console plans to make all drawers. I felt this made more use of the space in the island.
Built from Plan(s)
Estimated Cost
€500
Estimated Time Investment
Week Long Project (20 Hours or More)
Finish Used
I wanted a cream gloss finish and figured out it was cheaper to use car wrap to give the same effect. It also saved time. Top is 2x4's glued and screwed together. Stained and varnished.
Recommended Skill Level
Intermediate
Lift top table with storage

I used the lift top table for inspiration, we needed more storage in our livingroom for throws and blankets. This was the perfect solution as fall approaches. Thank you for your original design!
Built from Plan(s)
Estimated Cost
$100
Estimated Time Investment
Weekend Project (10-20 Hours)
Finish Used
Early American
Our First Ever Project!
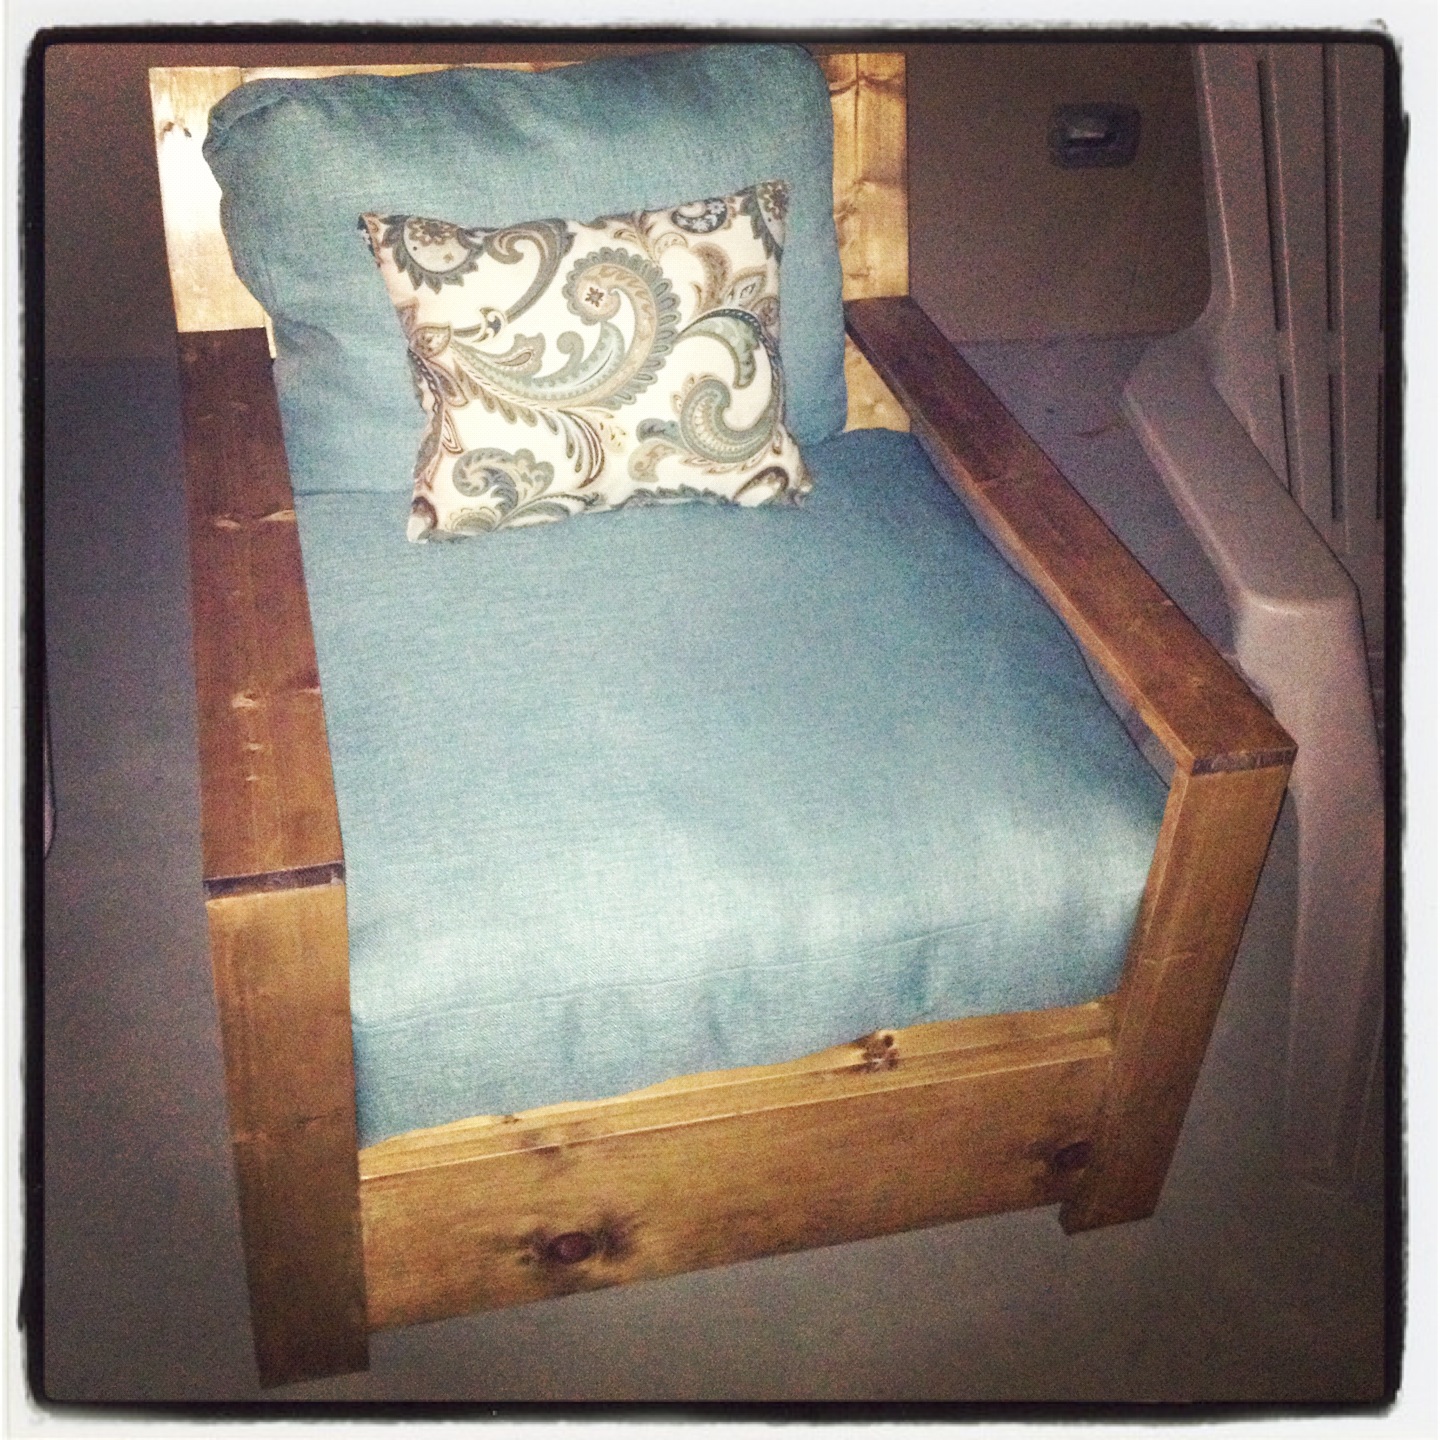
This was our first attempt ever at making a piece of furniture. We rented the miter saw and bought a kreg jig. My husband did the research after we discovered how grossly expensive attractive patio furniture is. We bought inexpensive white pine and used stain and I sewed the cushions myself. We are hitting a snag there as we've discovered that the high density foam for the inside is super expensive too! Right now I have it stuffed with a combo of some foam padding and batting. I figure if we stuff it enough it will last a while. Overall I am very happy and proud to say we made this!
Built from Plan(s)
Estimated Cost
$150
Estimated Time Investment
Weekend Project (10-20 Hours)
Finish Used
This was an indoor stain and we used a finish over it.
Recommended Skill Level
Beginner
Comments


Kids Trestle table
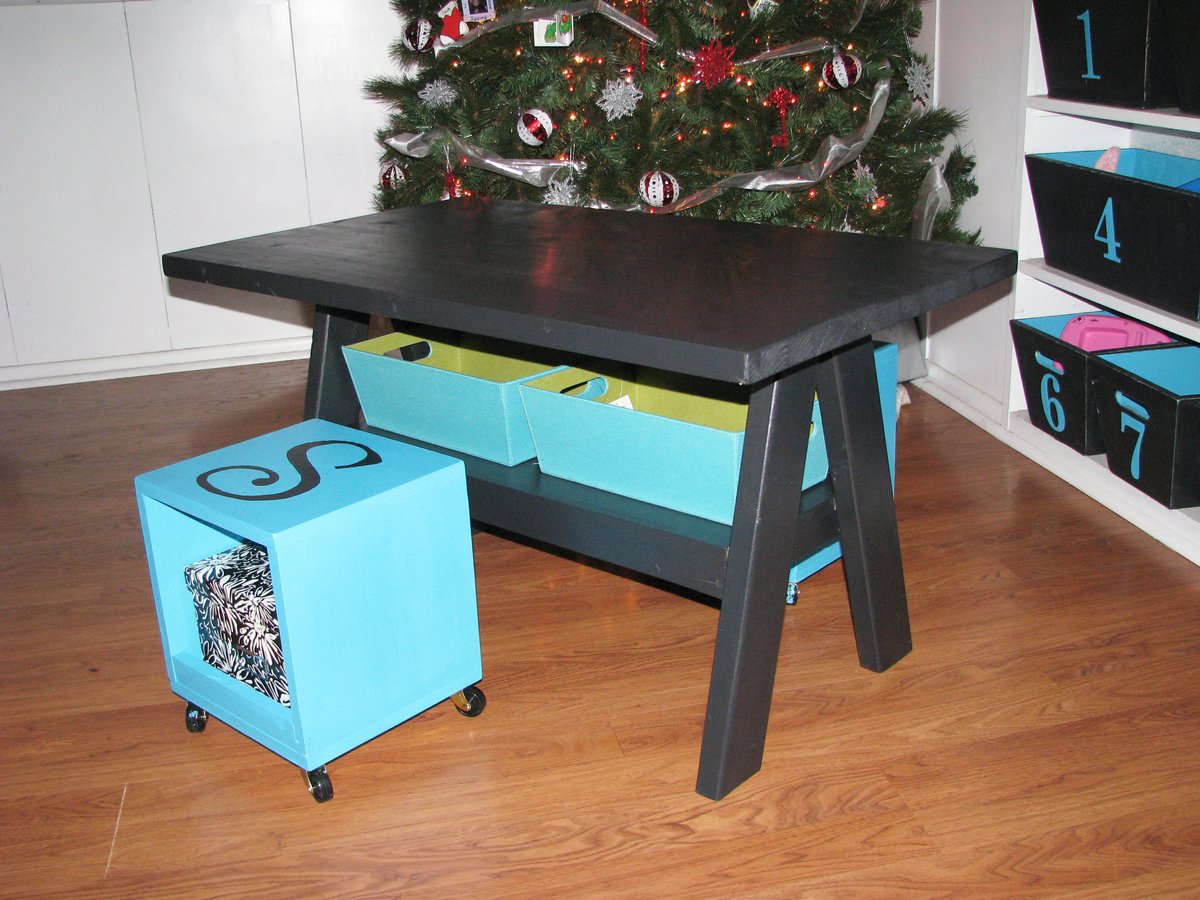
This is a last minute Christmas gift for my girls.It was very easy to build; took me just a couple hours to assemble it and a few days of secret sanding and painting.
It will be the girl's art table and will sit about where the Christmas tree is right now. Maybe now I can have my kitchen and dining table back:)
The cube seats were made from the plan over at Shanty2chic http://www.shanty-2-chic.com/2012/07/rolling-storage-cube-stools.html
And the tapered bins you see in the background on the right are made from this plan from That's my letter http://thatsmyletter.blogspot.com/2012/06/m-is-for-mudroom-bins-4.html
Built from Plan(s)
Estimated Cost
88.00
Estimated Time Investment
An Hour or Two (0-2 Hours)
Finish Used
Painted Black
Recommended Skill Level
Beginner
Ilie's Garden Planter
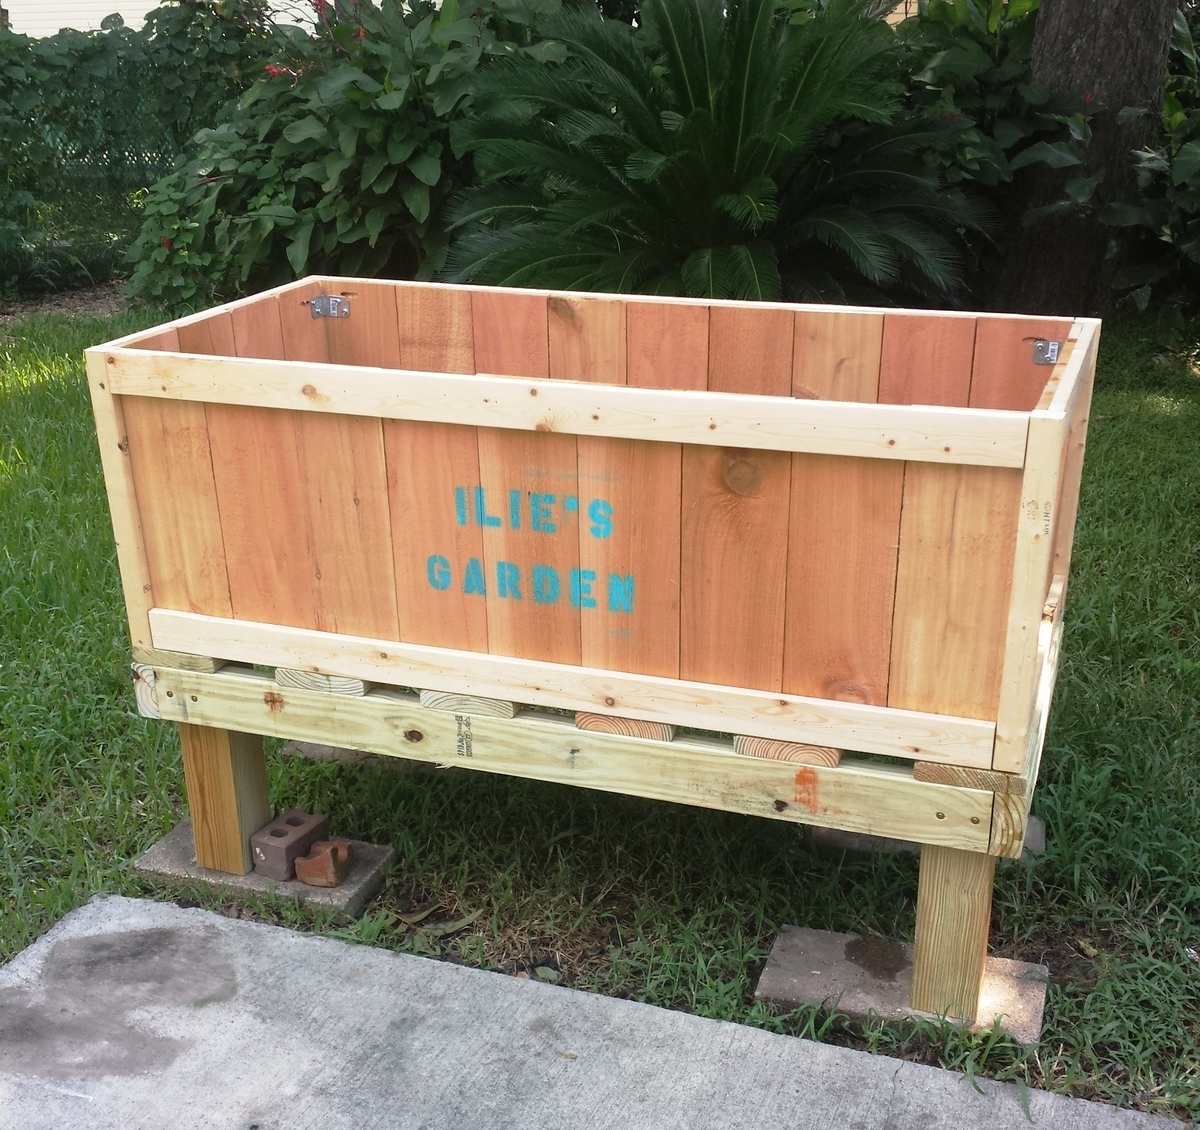
I built this elevated garden planter for my daughter who loves to plant veggies. This planter measures 22" x 49". It is made from cedar and pine. The bottom support is made from treated lumber. I used Ana's cedar planter plans with some added adjustments for my use. For the bottom support portion I also used Ana's Adirondack Coffee Table plan with some minor adjustments for my use.
Ana, thank you for your plans and inspiration.
Estimated Cost
$75
Estimated Time Investment
Afternoon Project (3-6 Hours)
Recommended Skill Level
Beginner
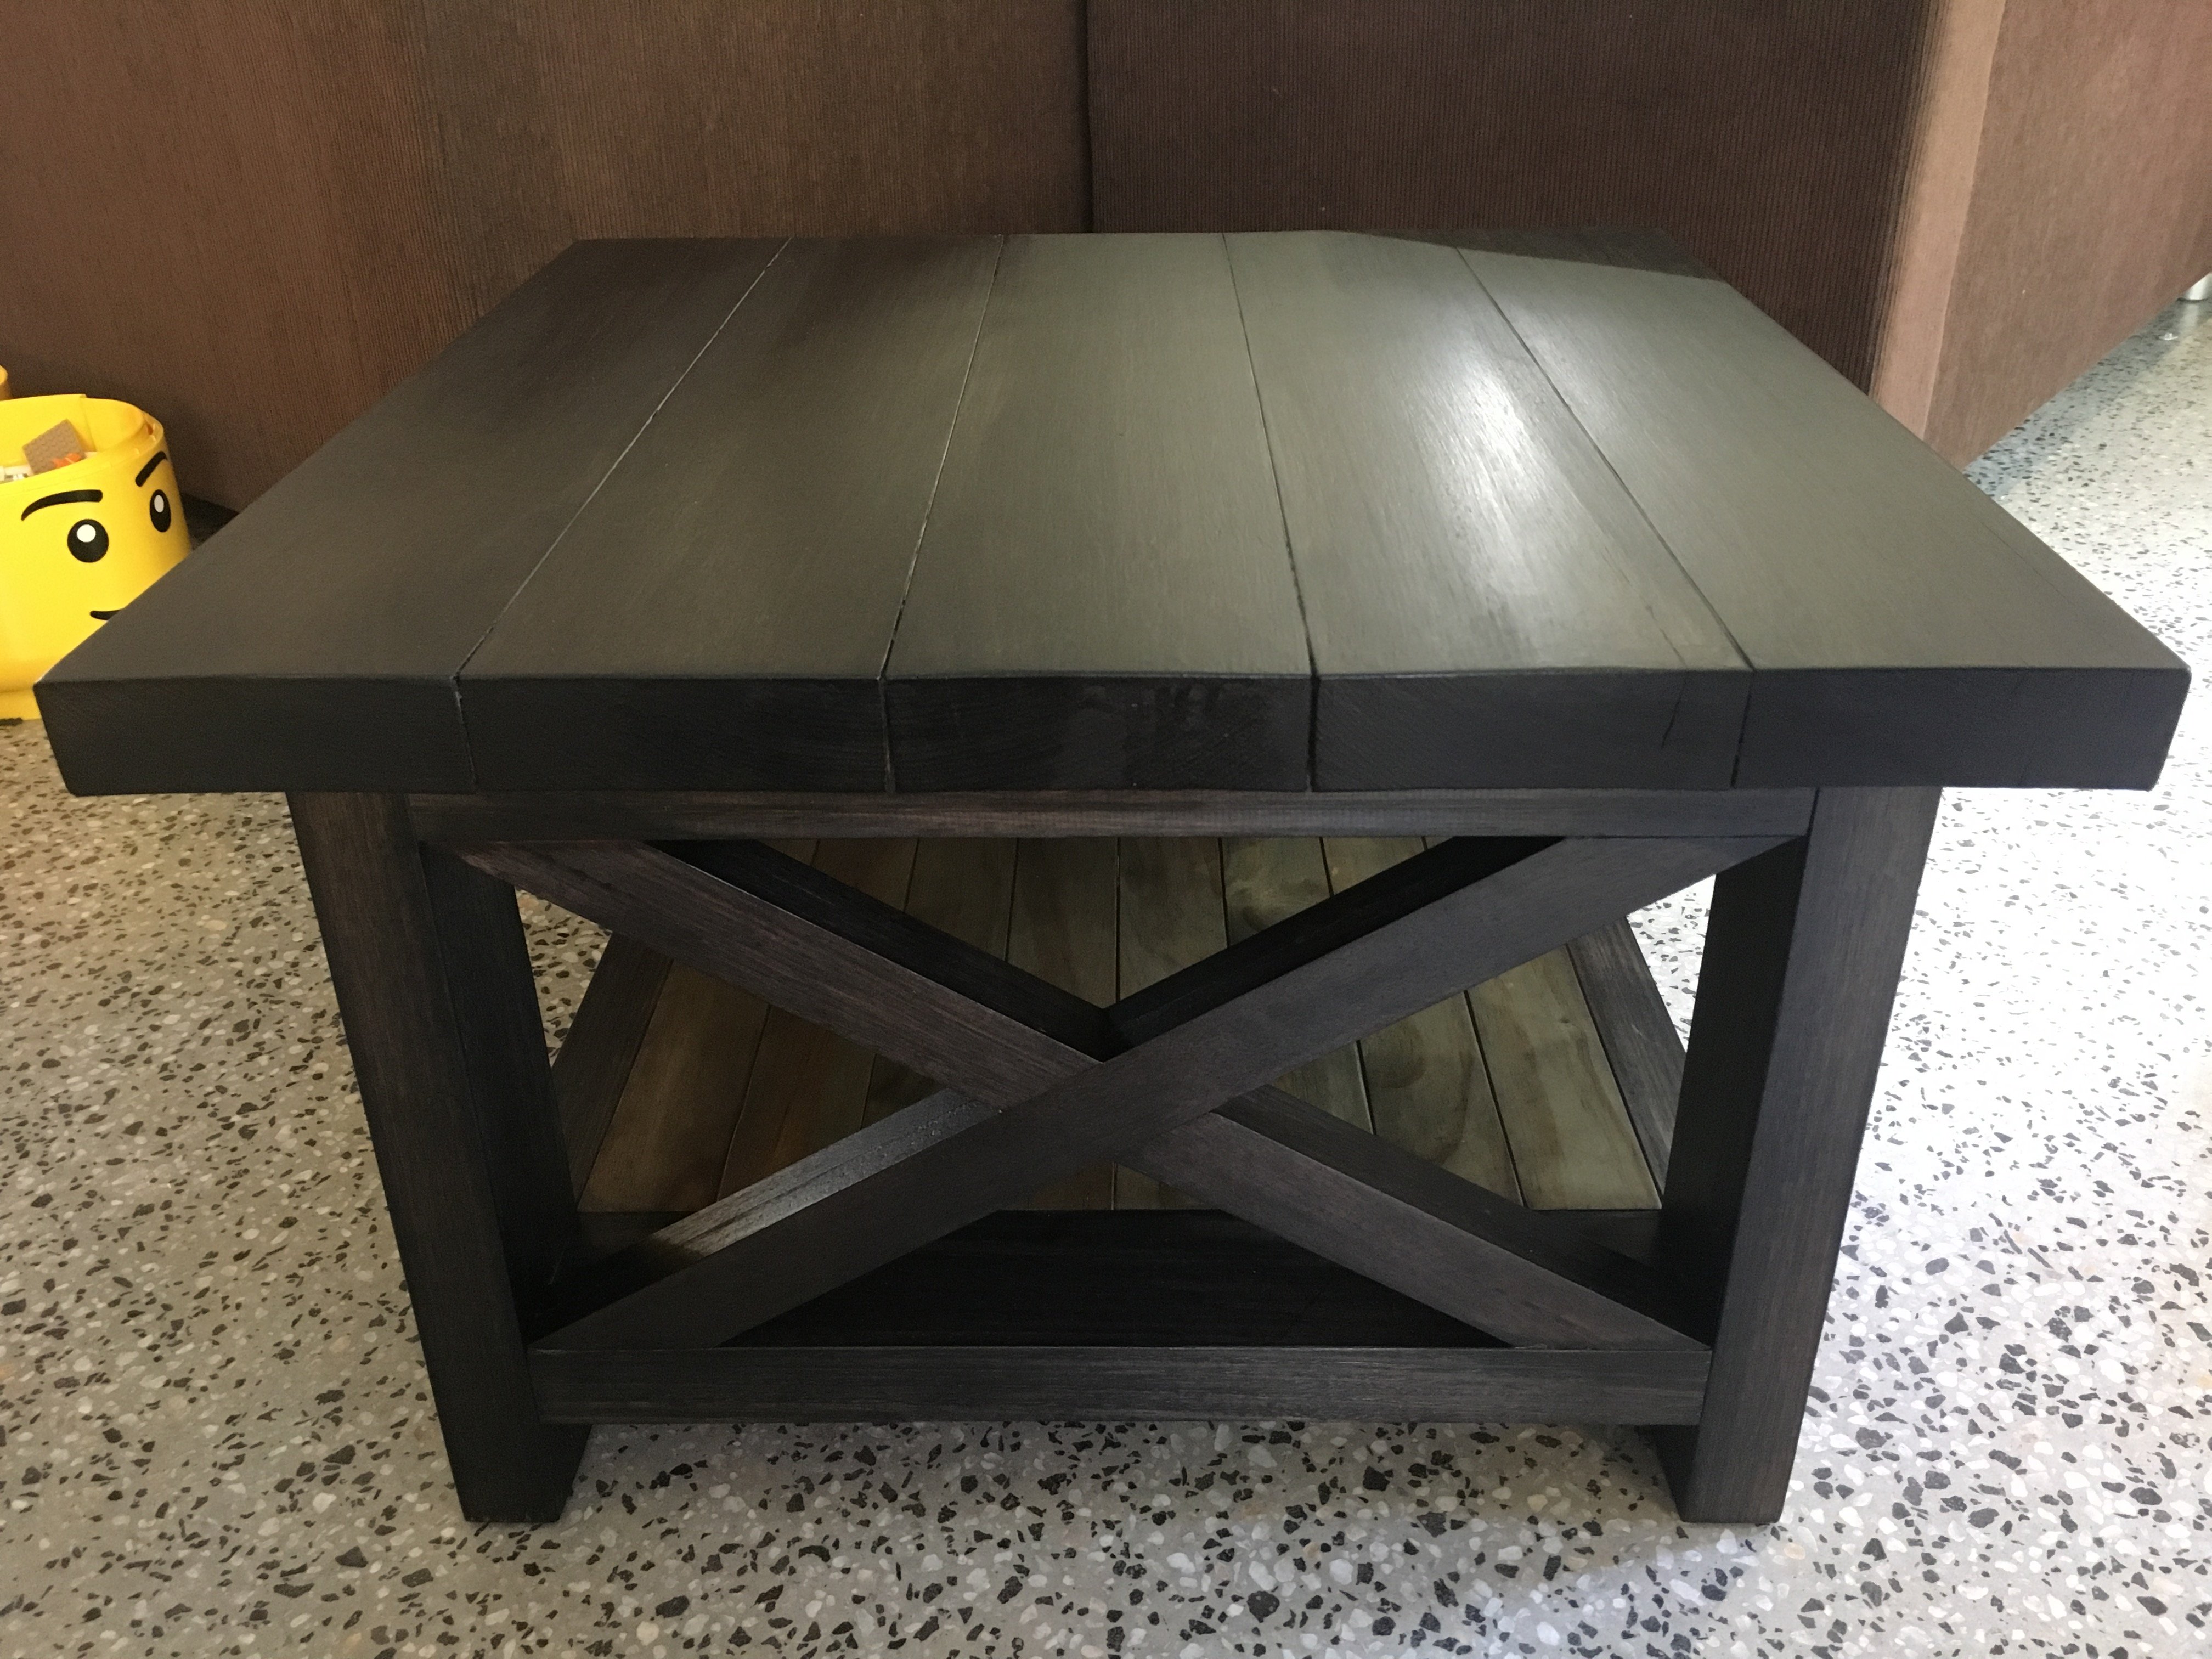
Coffee table height X end table
Created over a week using Tasmanian oak. Pine for the shelf slats. Finished with a tea rust stain and polyurethane varnish. Weighs a whopping 35kg!

Built from Plan(s)
Estimated Cost
AUD
$100 on wood
$25 varnish
$100 on wood
$25 varnish
Estimated Time Investment
Week Long Project (20 Hours or More)
Finish Used
Tea rust stain
Polyurethane varnish
Polyurethane varnish
Recommended Skill Level
Beginner
Comments
Fri, 04/21/2017 - 11:56
Tasmanian Oak
This is lovely! The table turned out well and the stain is beautiful - love the woods you chose. Thanks for sharing!
Kitchen helper
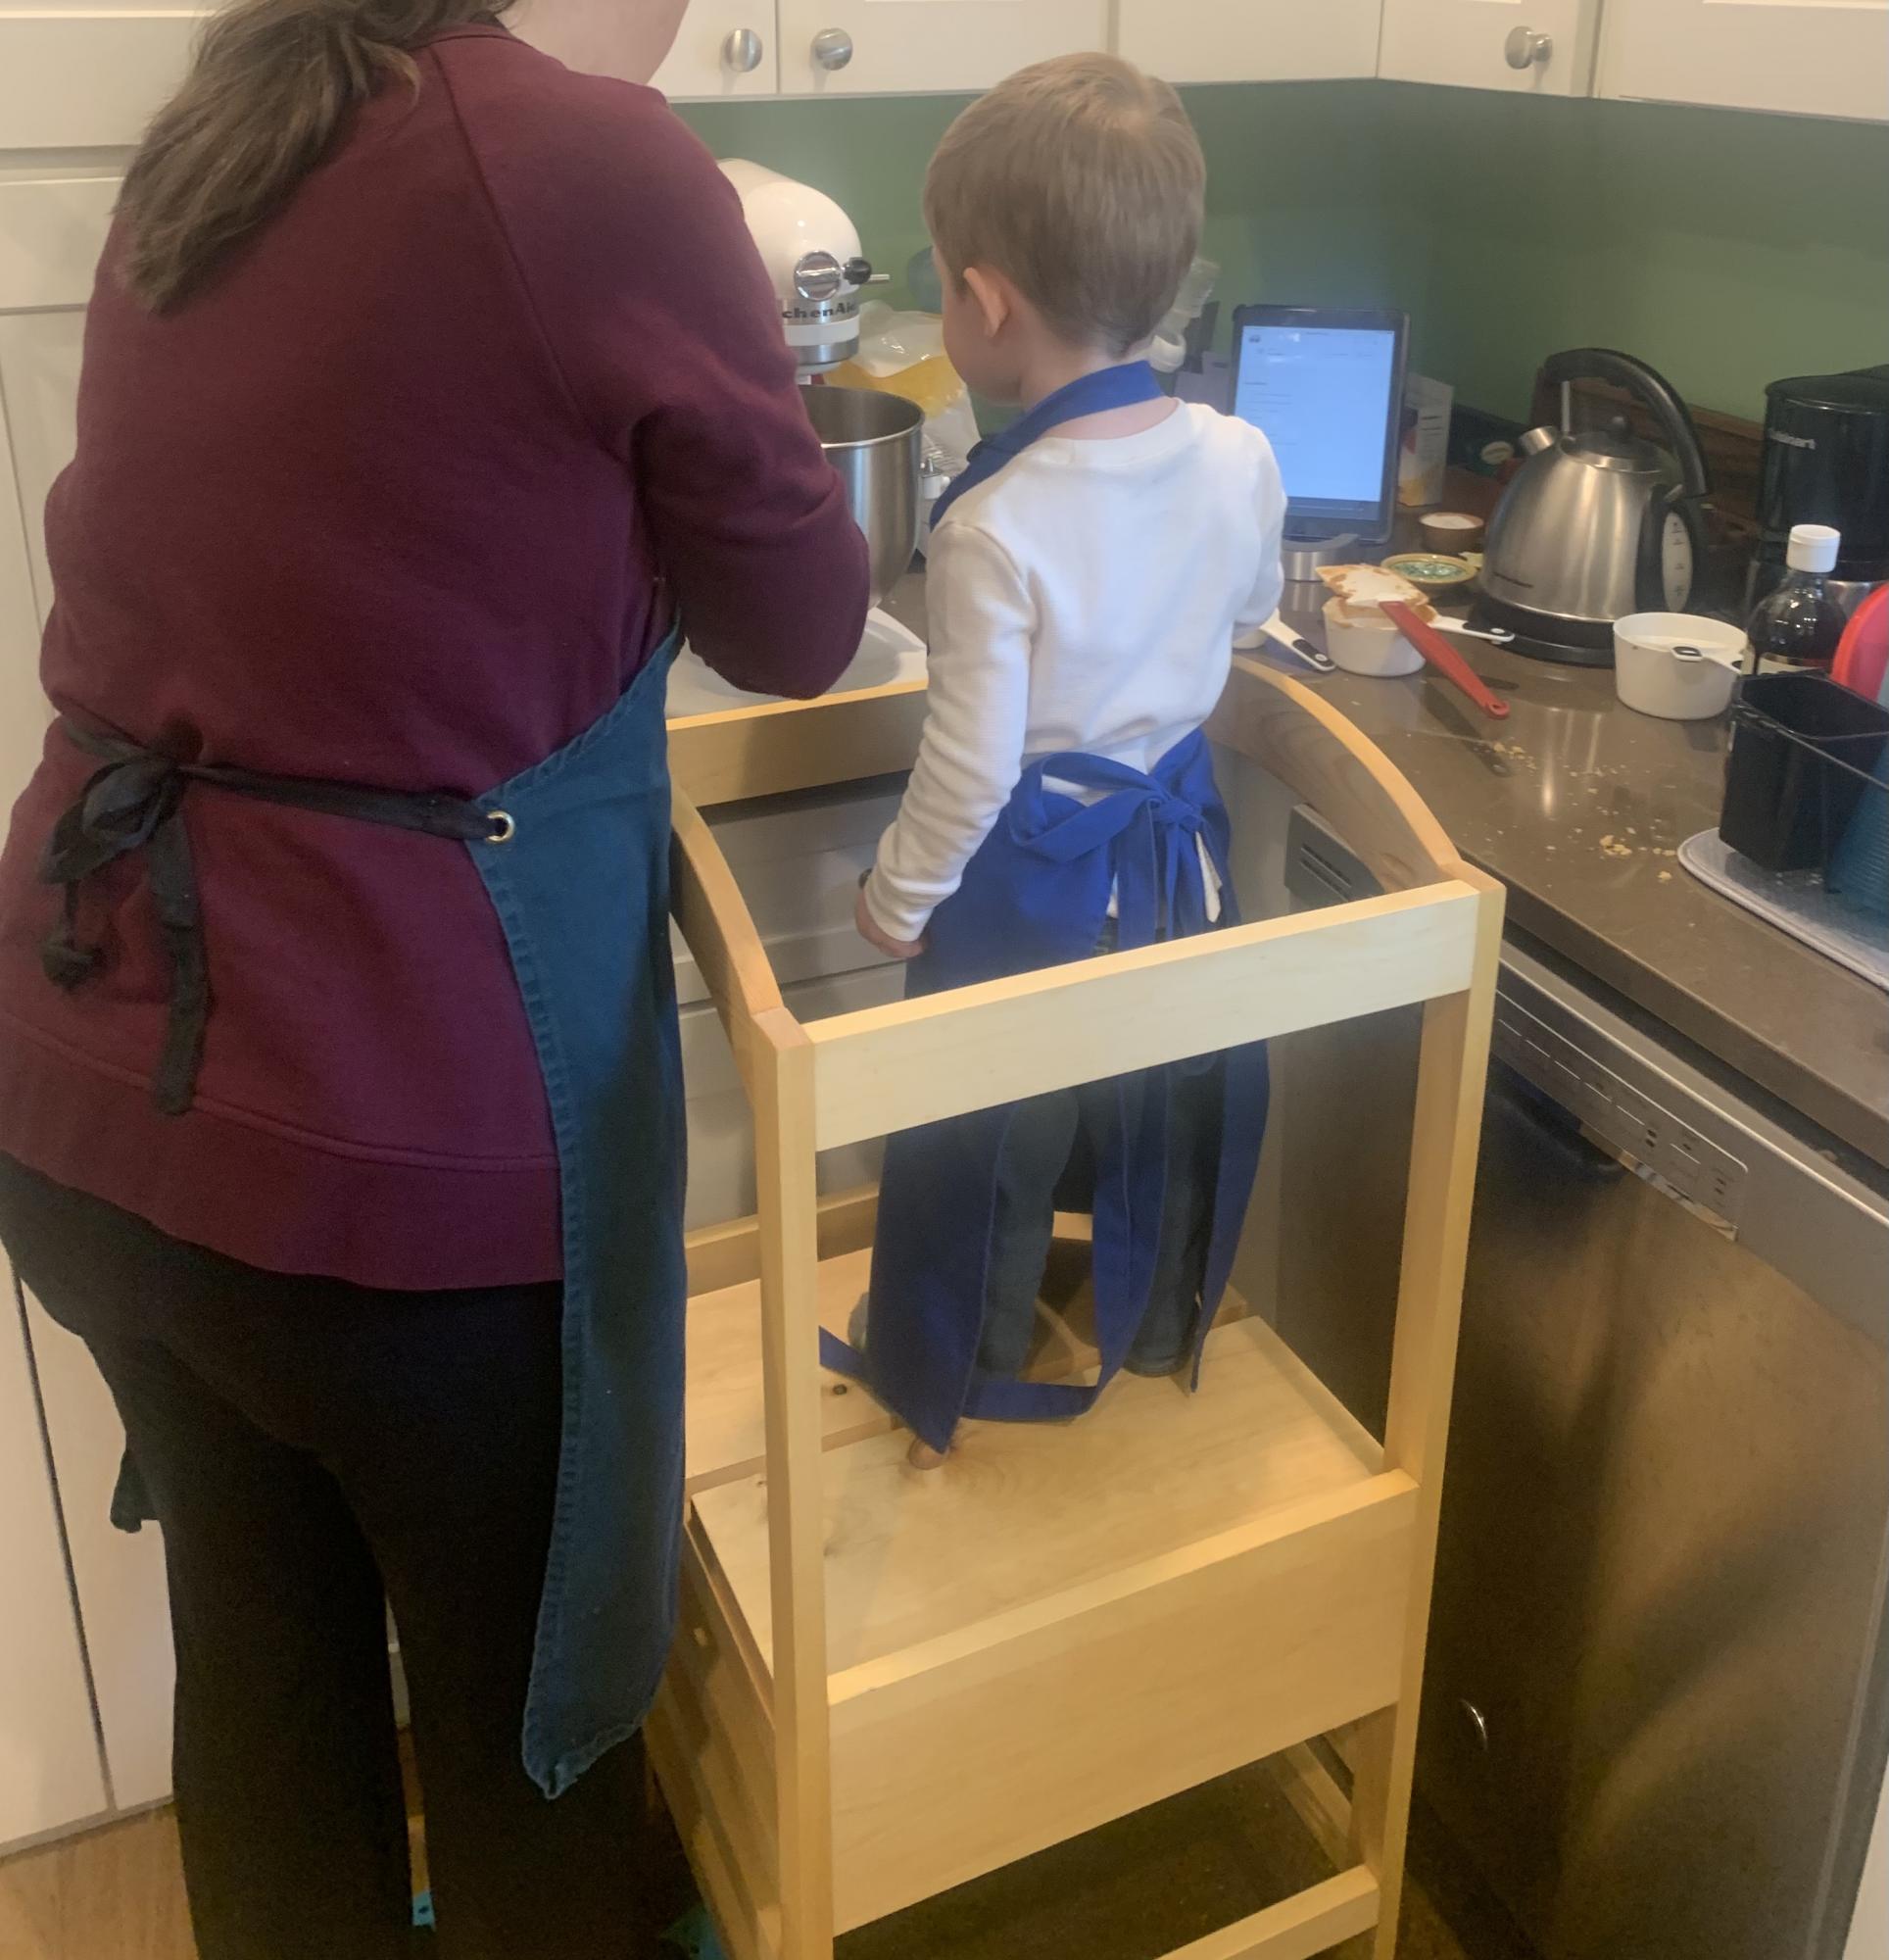
What a great help for mom in the kitchen. Very stable even without the extra feet. Only thing I wish I had done differently is make it two inches shorter so it would slide under the edge of the counter. My kids love helping to bake now.
Estimated Cost
$20
Estimated Time Investment
Afternoon Project (3-6 Hours)
Finish Used
Boiled linseed oil. So easy. Just wipe it on and let it soak in.
Recommended Skill Level
Beginner
Comments
Thu, 09/24/2020 - 11:07
Great job mom!
Thank you for sharing, I bet they love it just as much as you do!
Farmhouse table and bench

We got our plans from here for this table and bench. It was our first project and the plans made it very easy. The bottom of the table is painted in Annie Sloans chalk paint and waxed, and the top is stained and sealed with polyurethane.
Estimated Cost
300
Estimated Time Investment
Weekend Project (10-20 Hours)
Recommended Skill Level
Beginner
Providence Bench
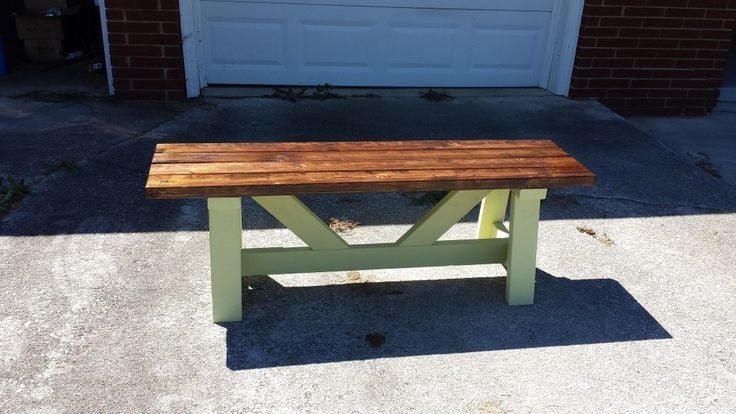
It was a great first bigger project for myself, with just basic tools and know how I was able to make that.
Built from Plan(s)
Estimated Cost
About $25
Estimated Time Investment
Day Project (6-9 Hours)
Recommended Skill Level
Beginner
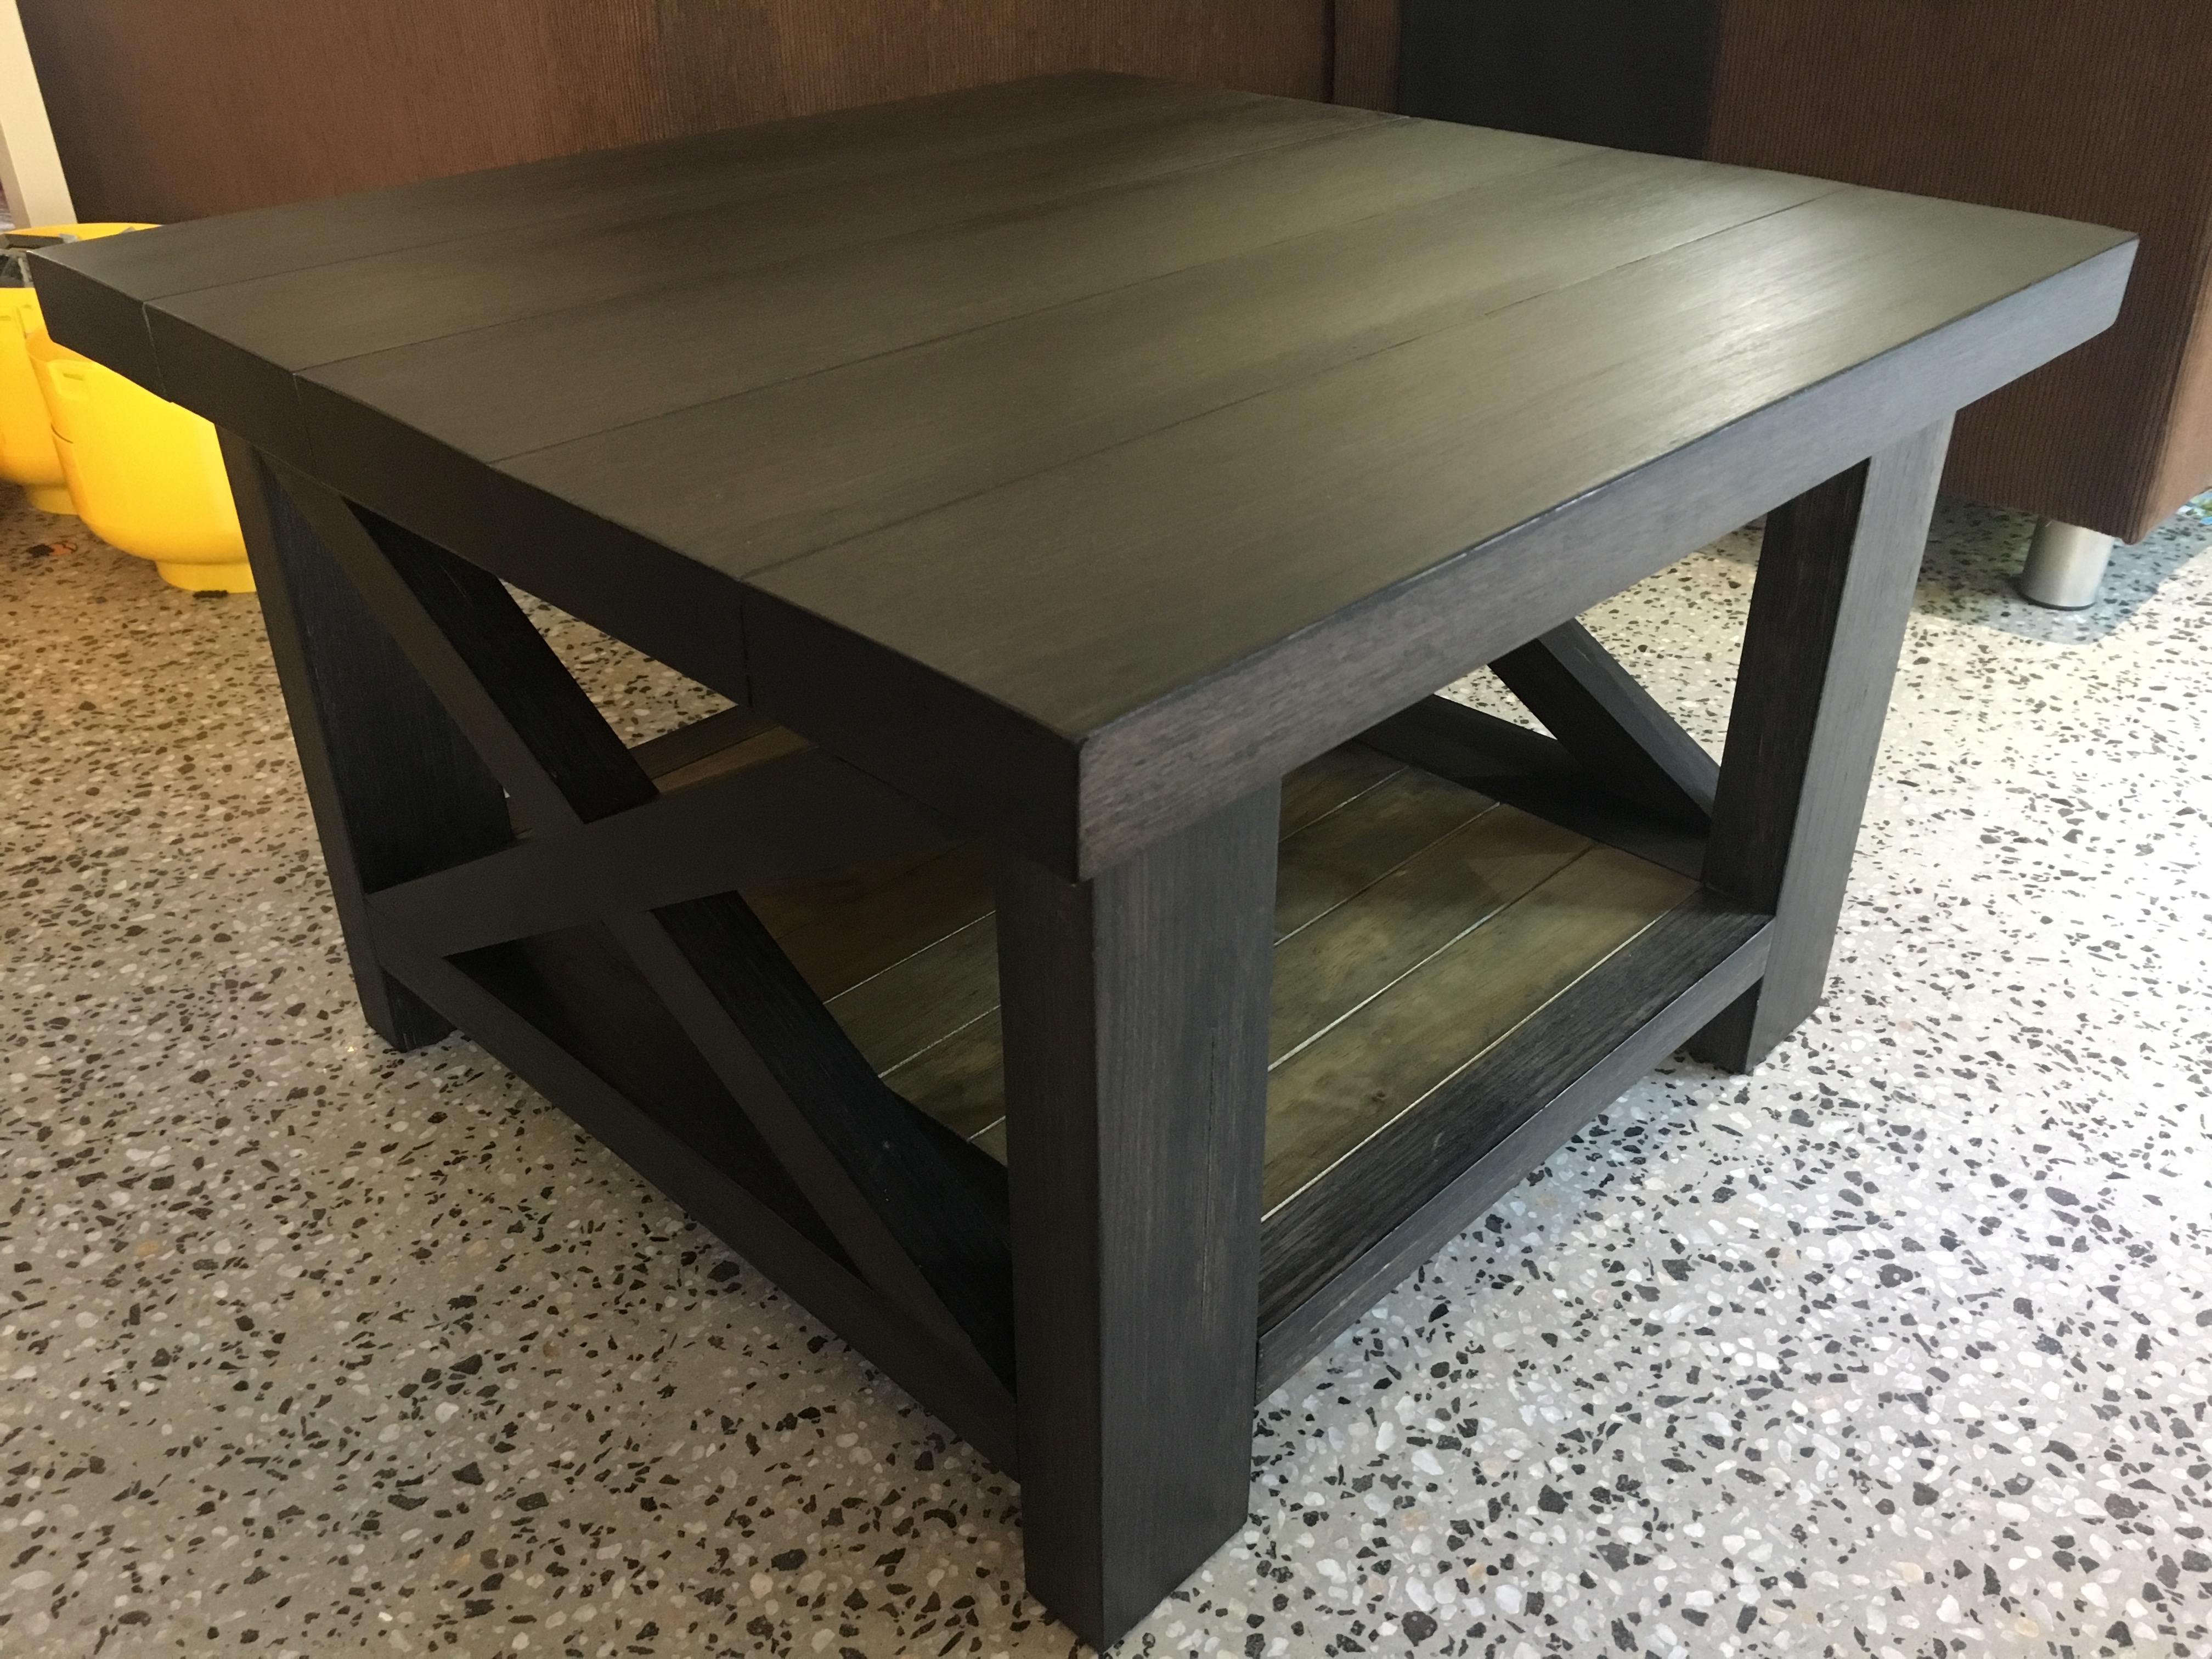
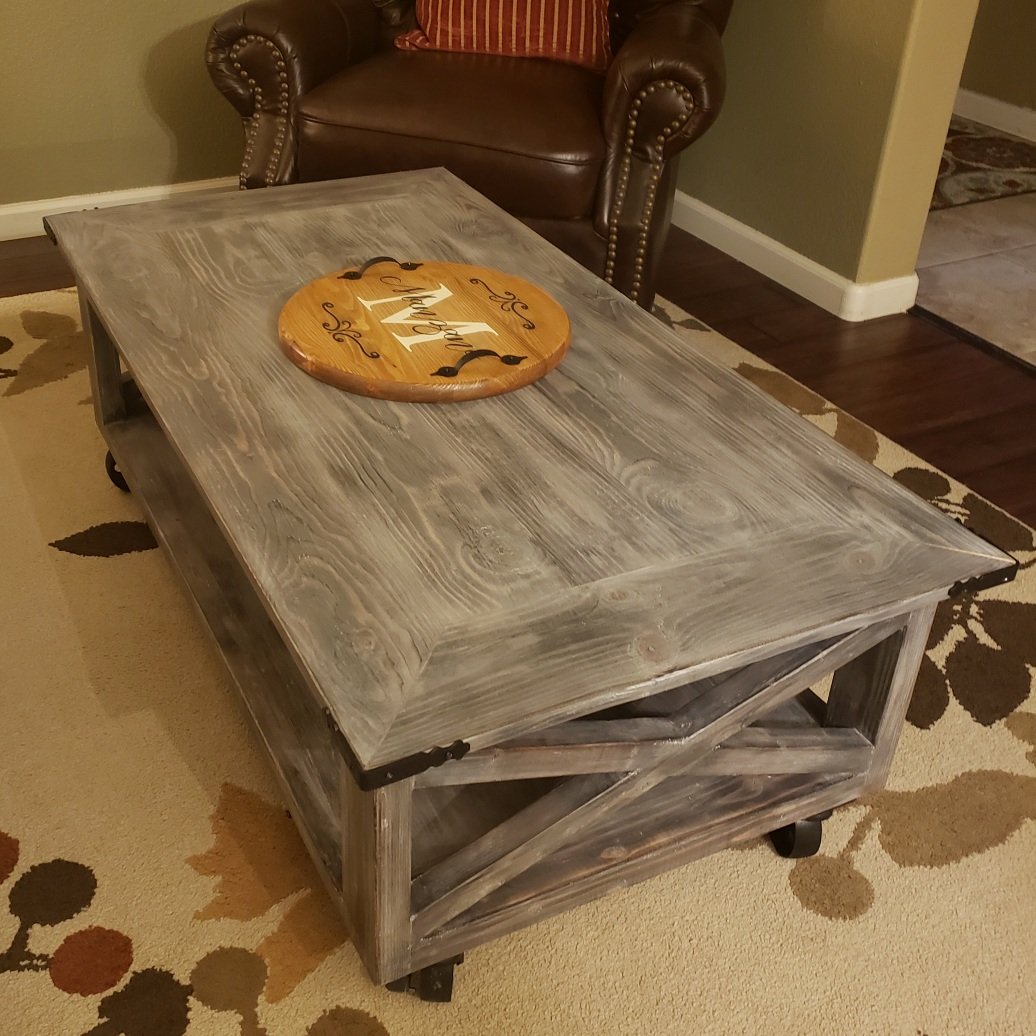
Rustic X Coffee Table (Modified)
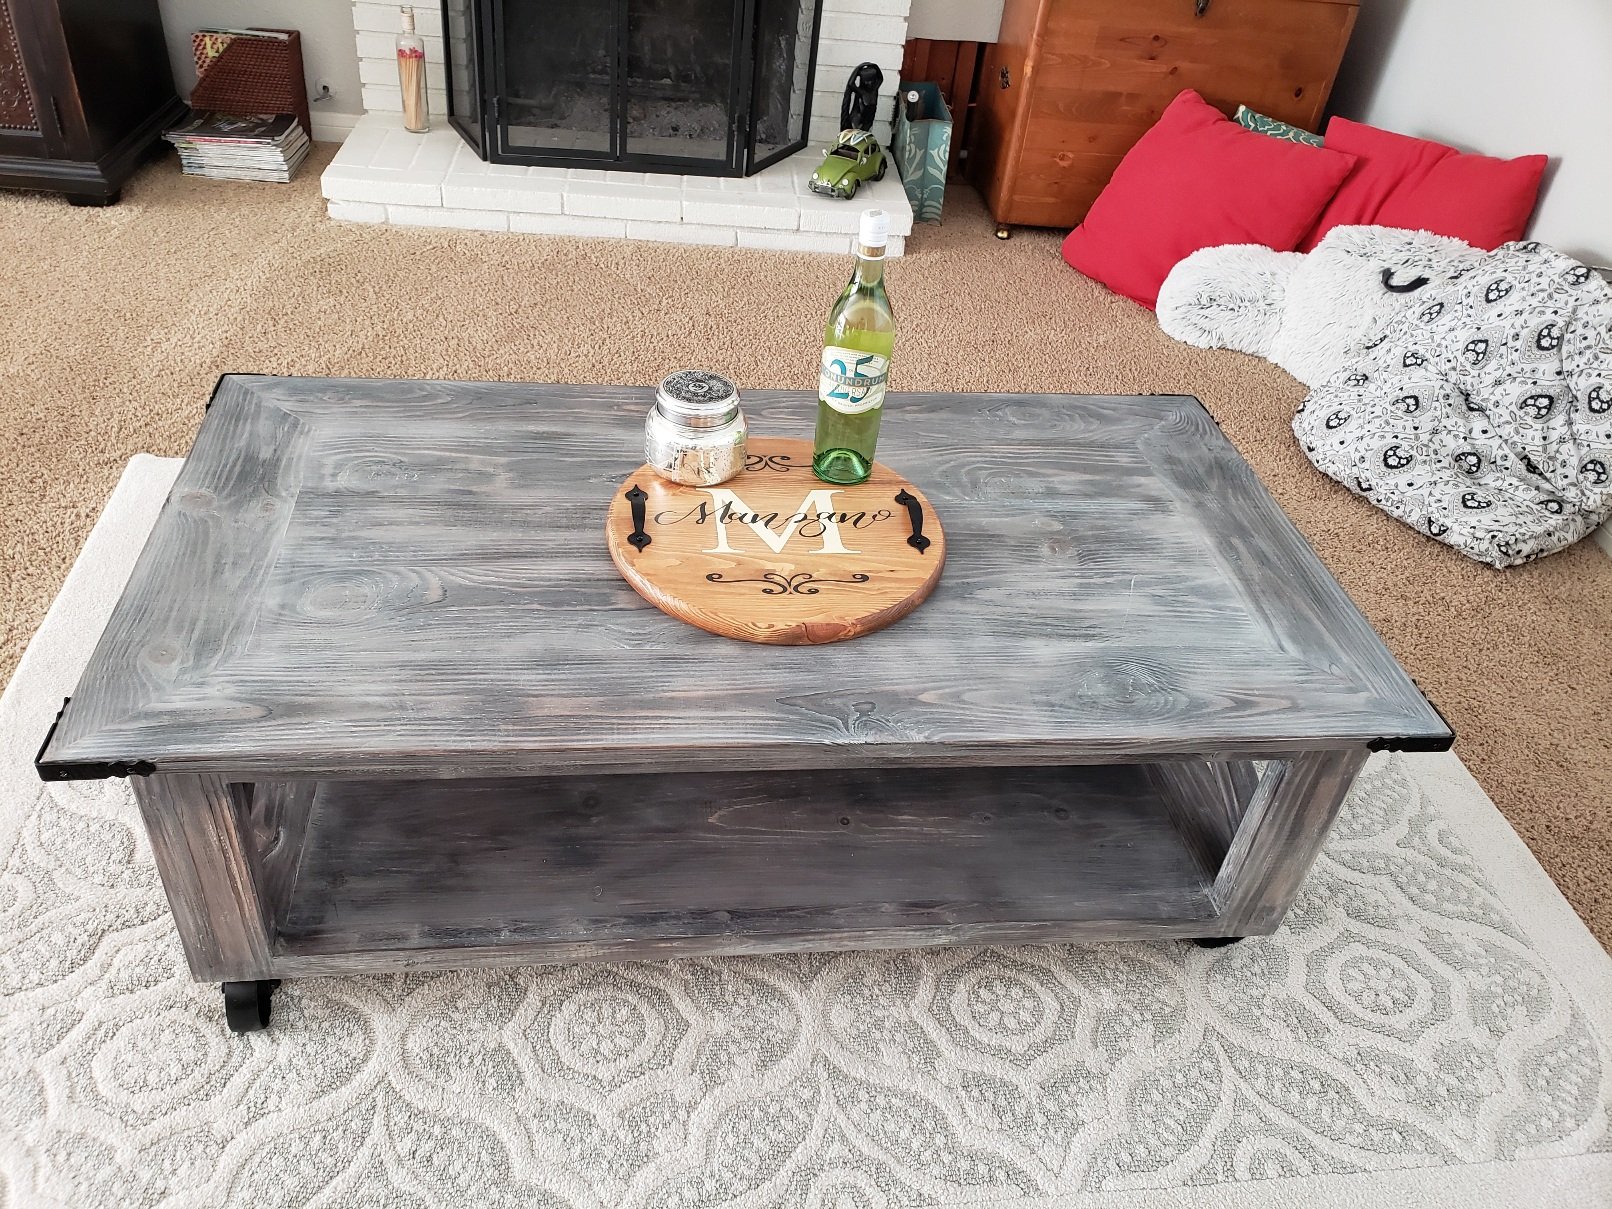
I built this using the Rustic X Coffee Table Plans, but modified by using 1x stock for the top instead of 2x. I also built mitered breadboards for the top. Finally, I added casters for mobility and an industrial look.
Built from Plan(s)
Finish Used
Burnt wood (shou sugi ban), white wash with Annie Sloan Chalk Paint, sanded to distress for a faux barnwood look finished with General Finishes water based polycrylic in matte.
Recommended Skill Level
Beginner
Comments
Sat, 09/26/2020 - 18:29
Great idea with the casters!
Thanks for sharing, love the finish and casters!
Tryde Coffee Table

I am currently a university student and had some free time this Christmas break. I will graduate in May and move into a new, unfurnished apartment with my new wife. This is my first venture with woodworking, and I'm absolutely pleased with the results. I really was diligent about following Ana's instructions precisely and measuring twice.
I hope you enjoy the photos!


Estimated Cost
$80
Estimated Time Investment
Weekend Project (10-20 Hours)
Finish Used
Minwax Early American and Minwax Matte Clear Coat
Recommended Skill Level
Beginner
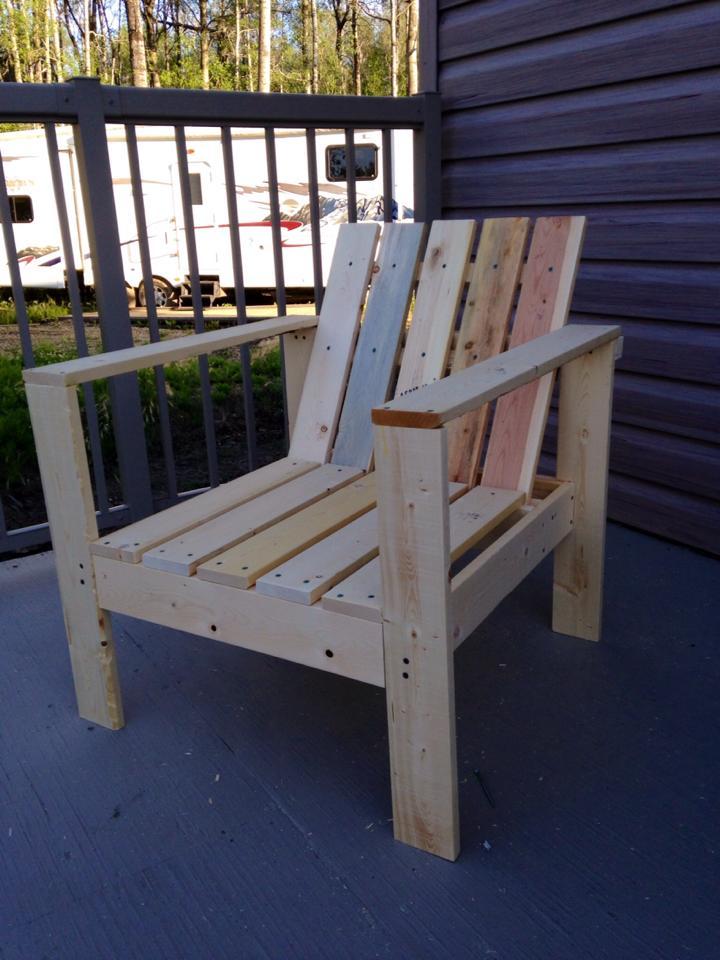
Simple Outdoor Chairs for the Firepit
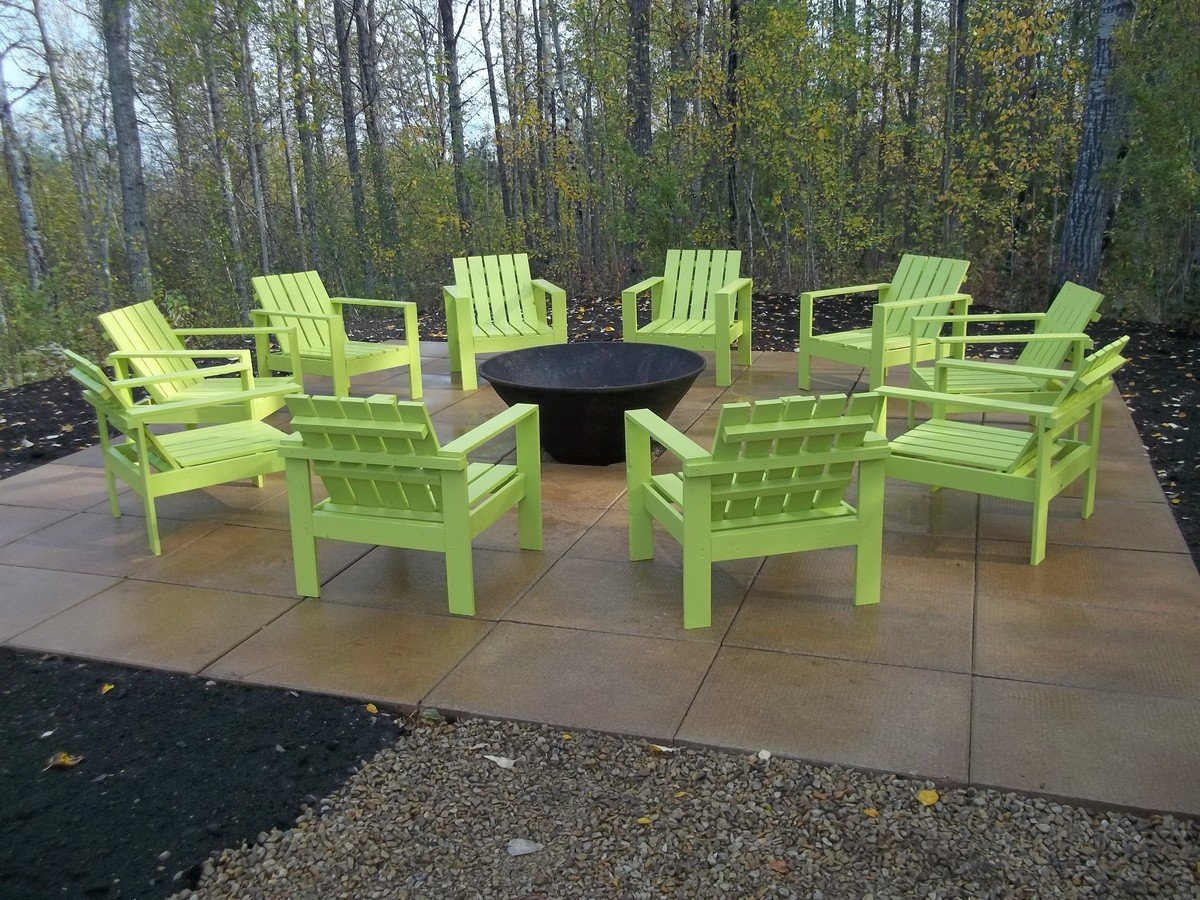
I used Ana's plan and made ten of these for our firepit area. The only thing that I changed was the back brace pieces....I couldn't get 1x2s so just used 2x2's.
Built from Plan(s)
Estimated Cost
$300 including paint
Estimated Time Investment
Week Long Project (20 Hours or More)
Finish Used
Exterior paint.
Recommended Skill Level
Intermediate

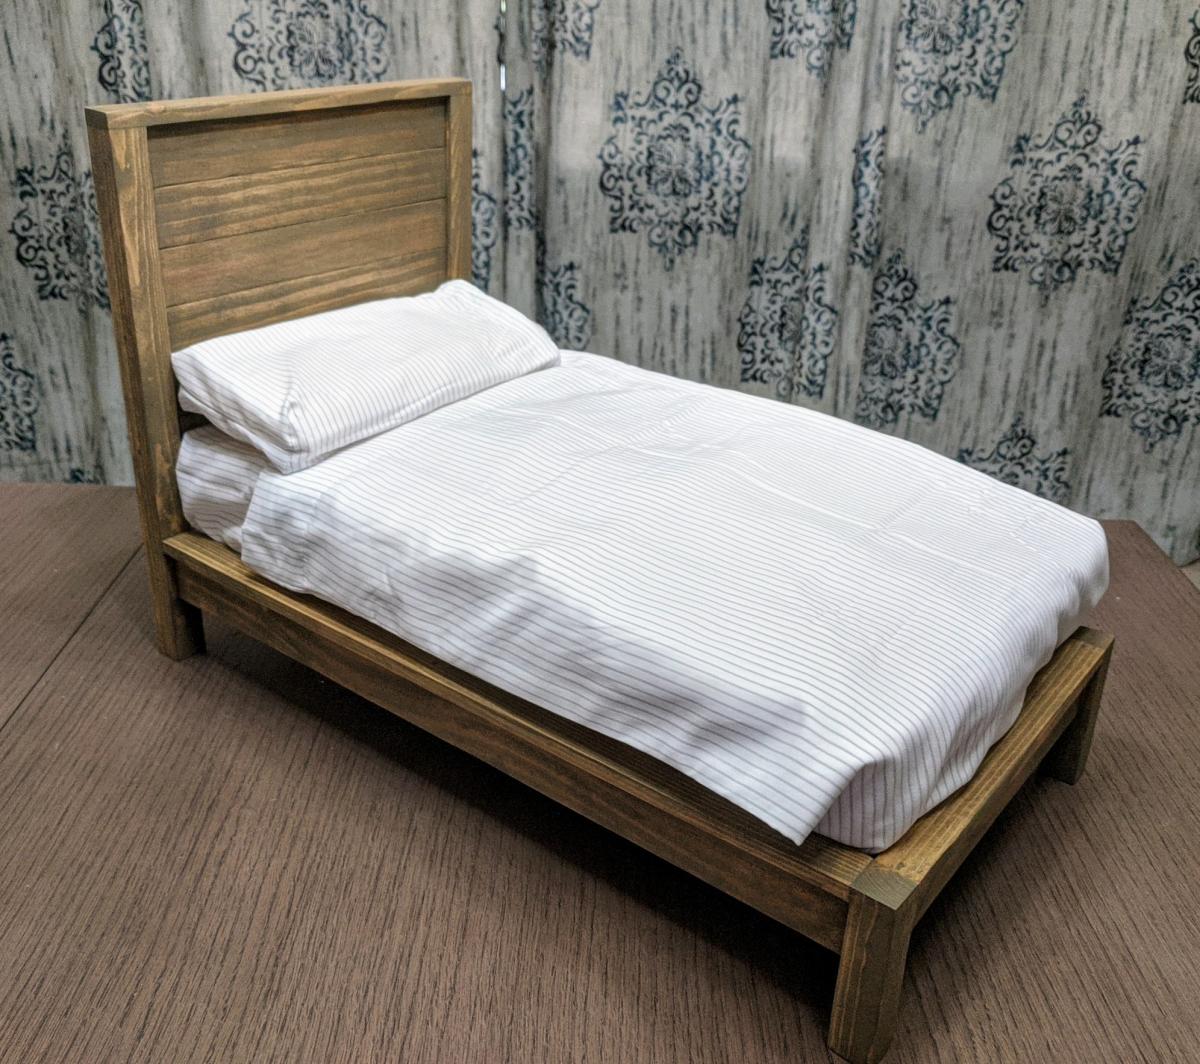
Modern Farmhouse Doll Bed
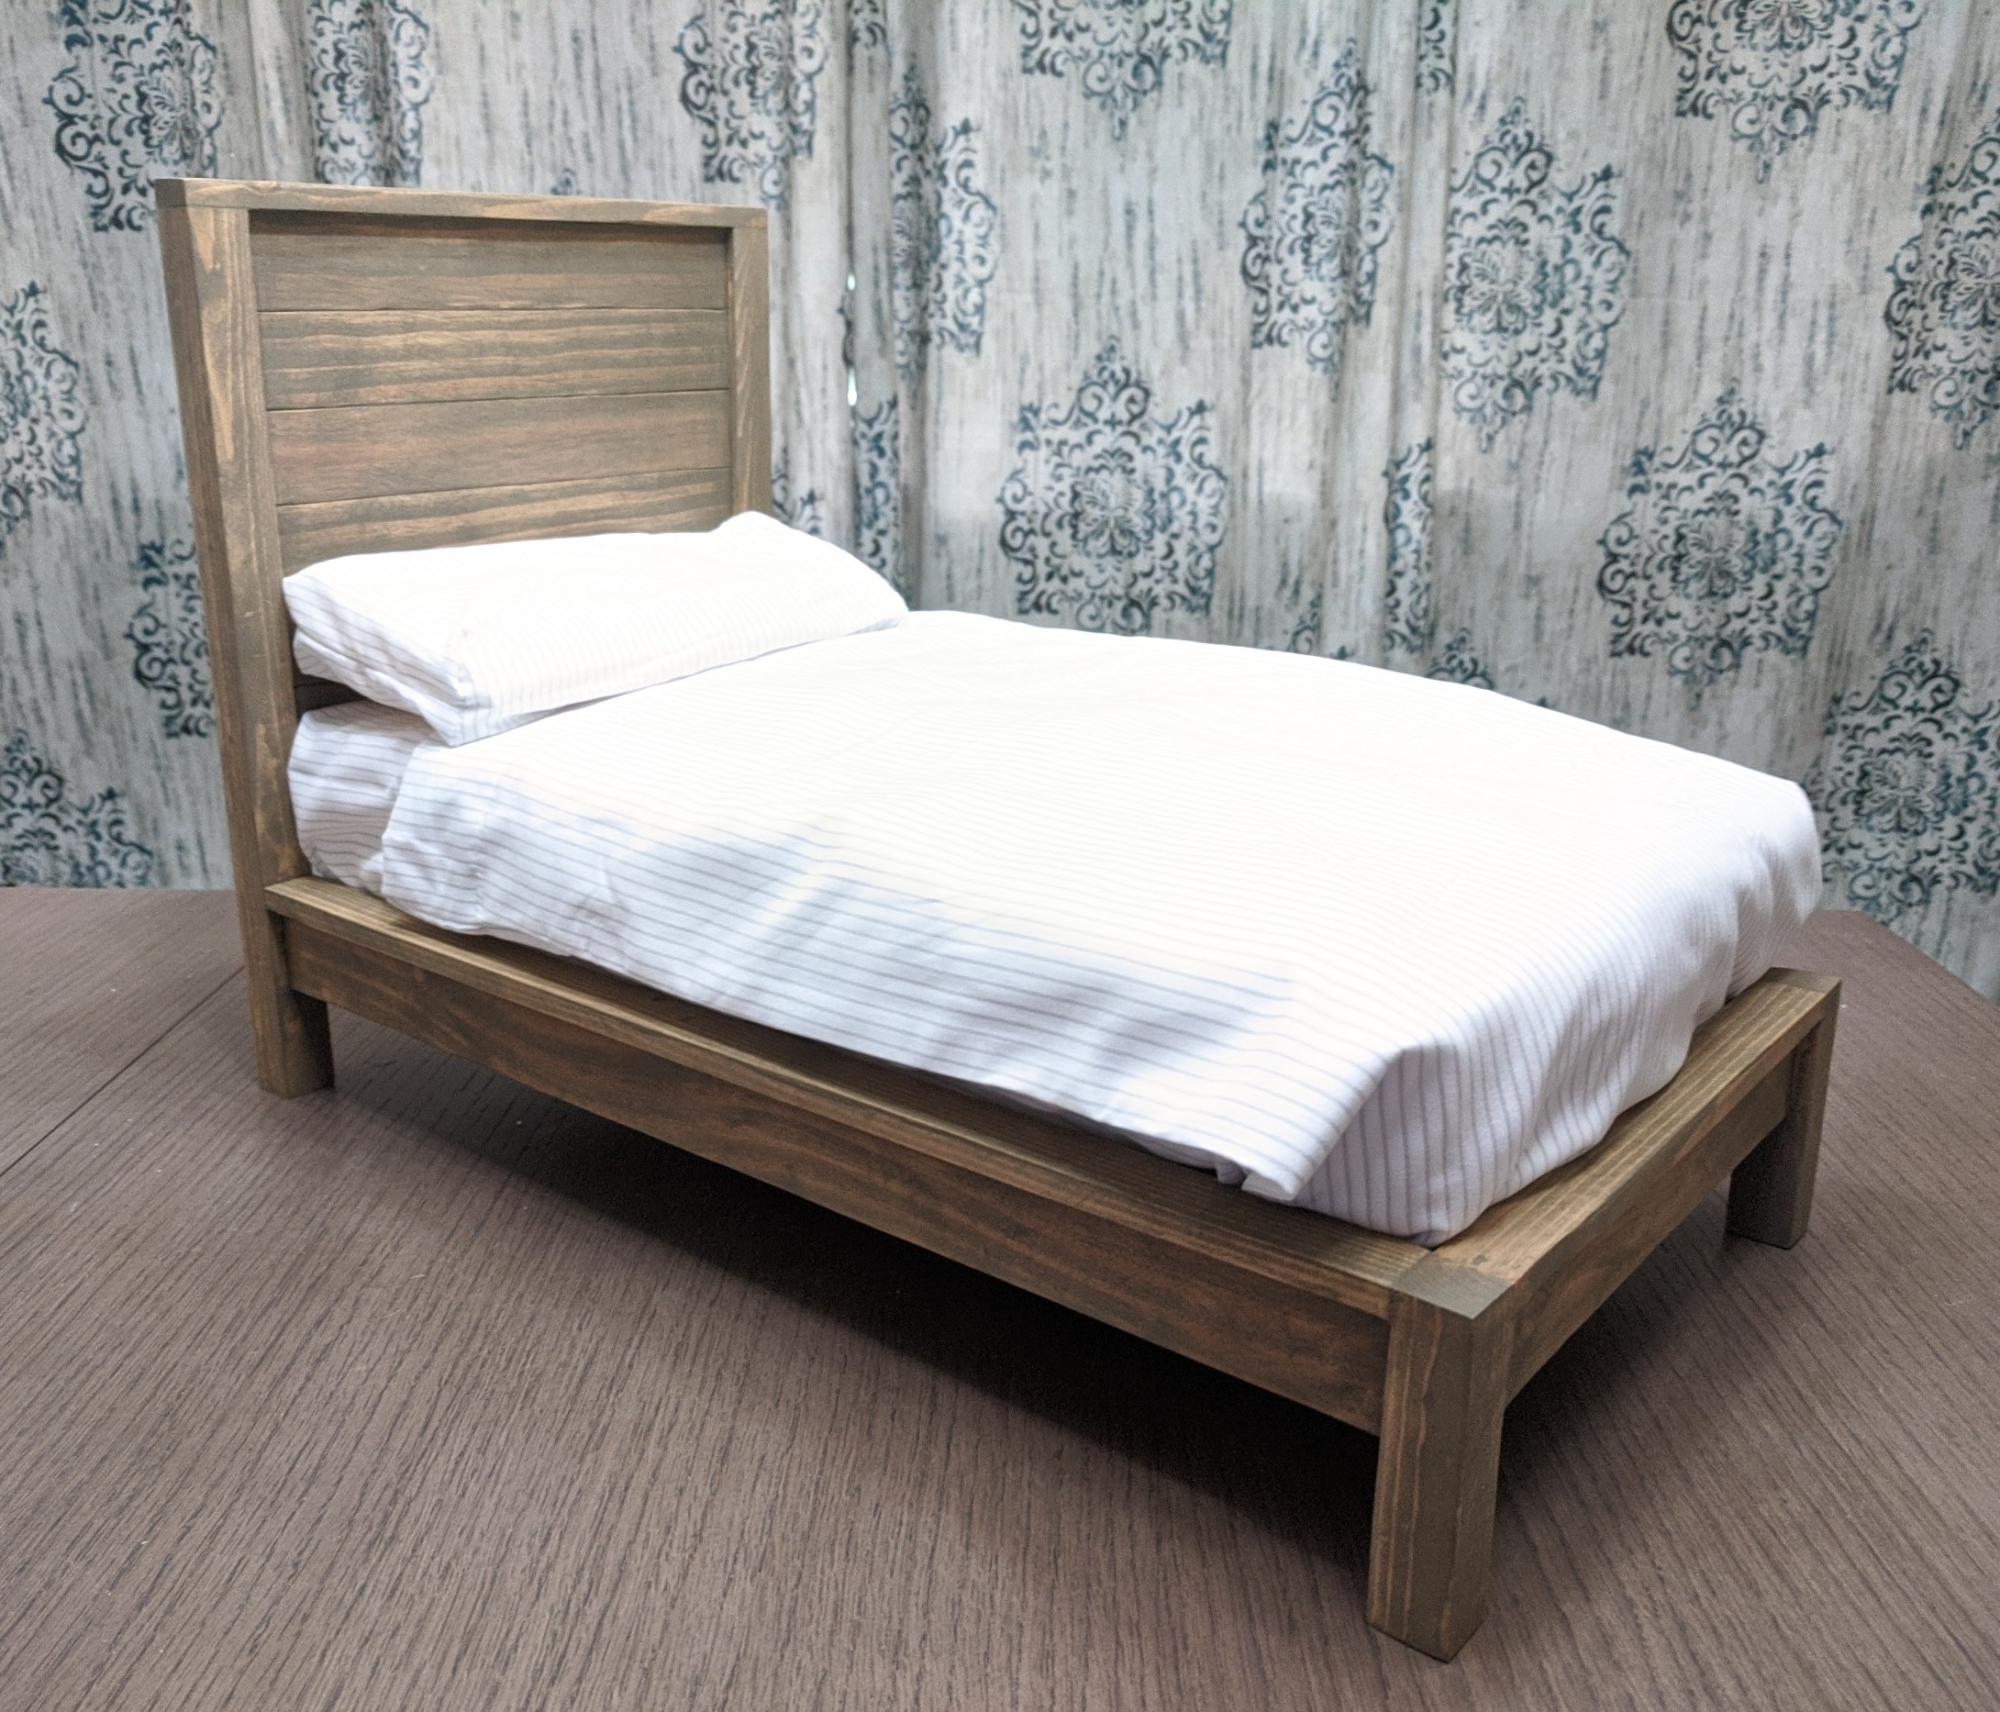
I made a 1/4 scale model of The Modern Farmhouse Bed as a doll bed for one of my granddaughters. I just divided all the measurements by four to get the dimensions and cut my "lumber" from a single 2 x 4. I cut shallow slots in the headboard posts for the planks to fit into, then glued them and secured with clamps and tiny nails. I made the slots where the side rails met the headboard and footboard posts a little deeper, 1/4", glued, clamped, and tacked with the tiny nails. All the nails were countersunk and the holes filled. Stained with "Aged wheat" stain. Foam rubber mattress and pillow covered by fabric.
Built from Plan(s)
Estimated Cost
$3.00
Estimated Time Investment
Afternoon Project (3-6 Hours)
Finish Used
Verathane Aged Wheat
Recommended Skill Level
Beginner
Comments
18" Doll Bunk Bed
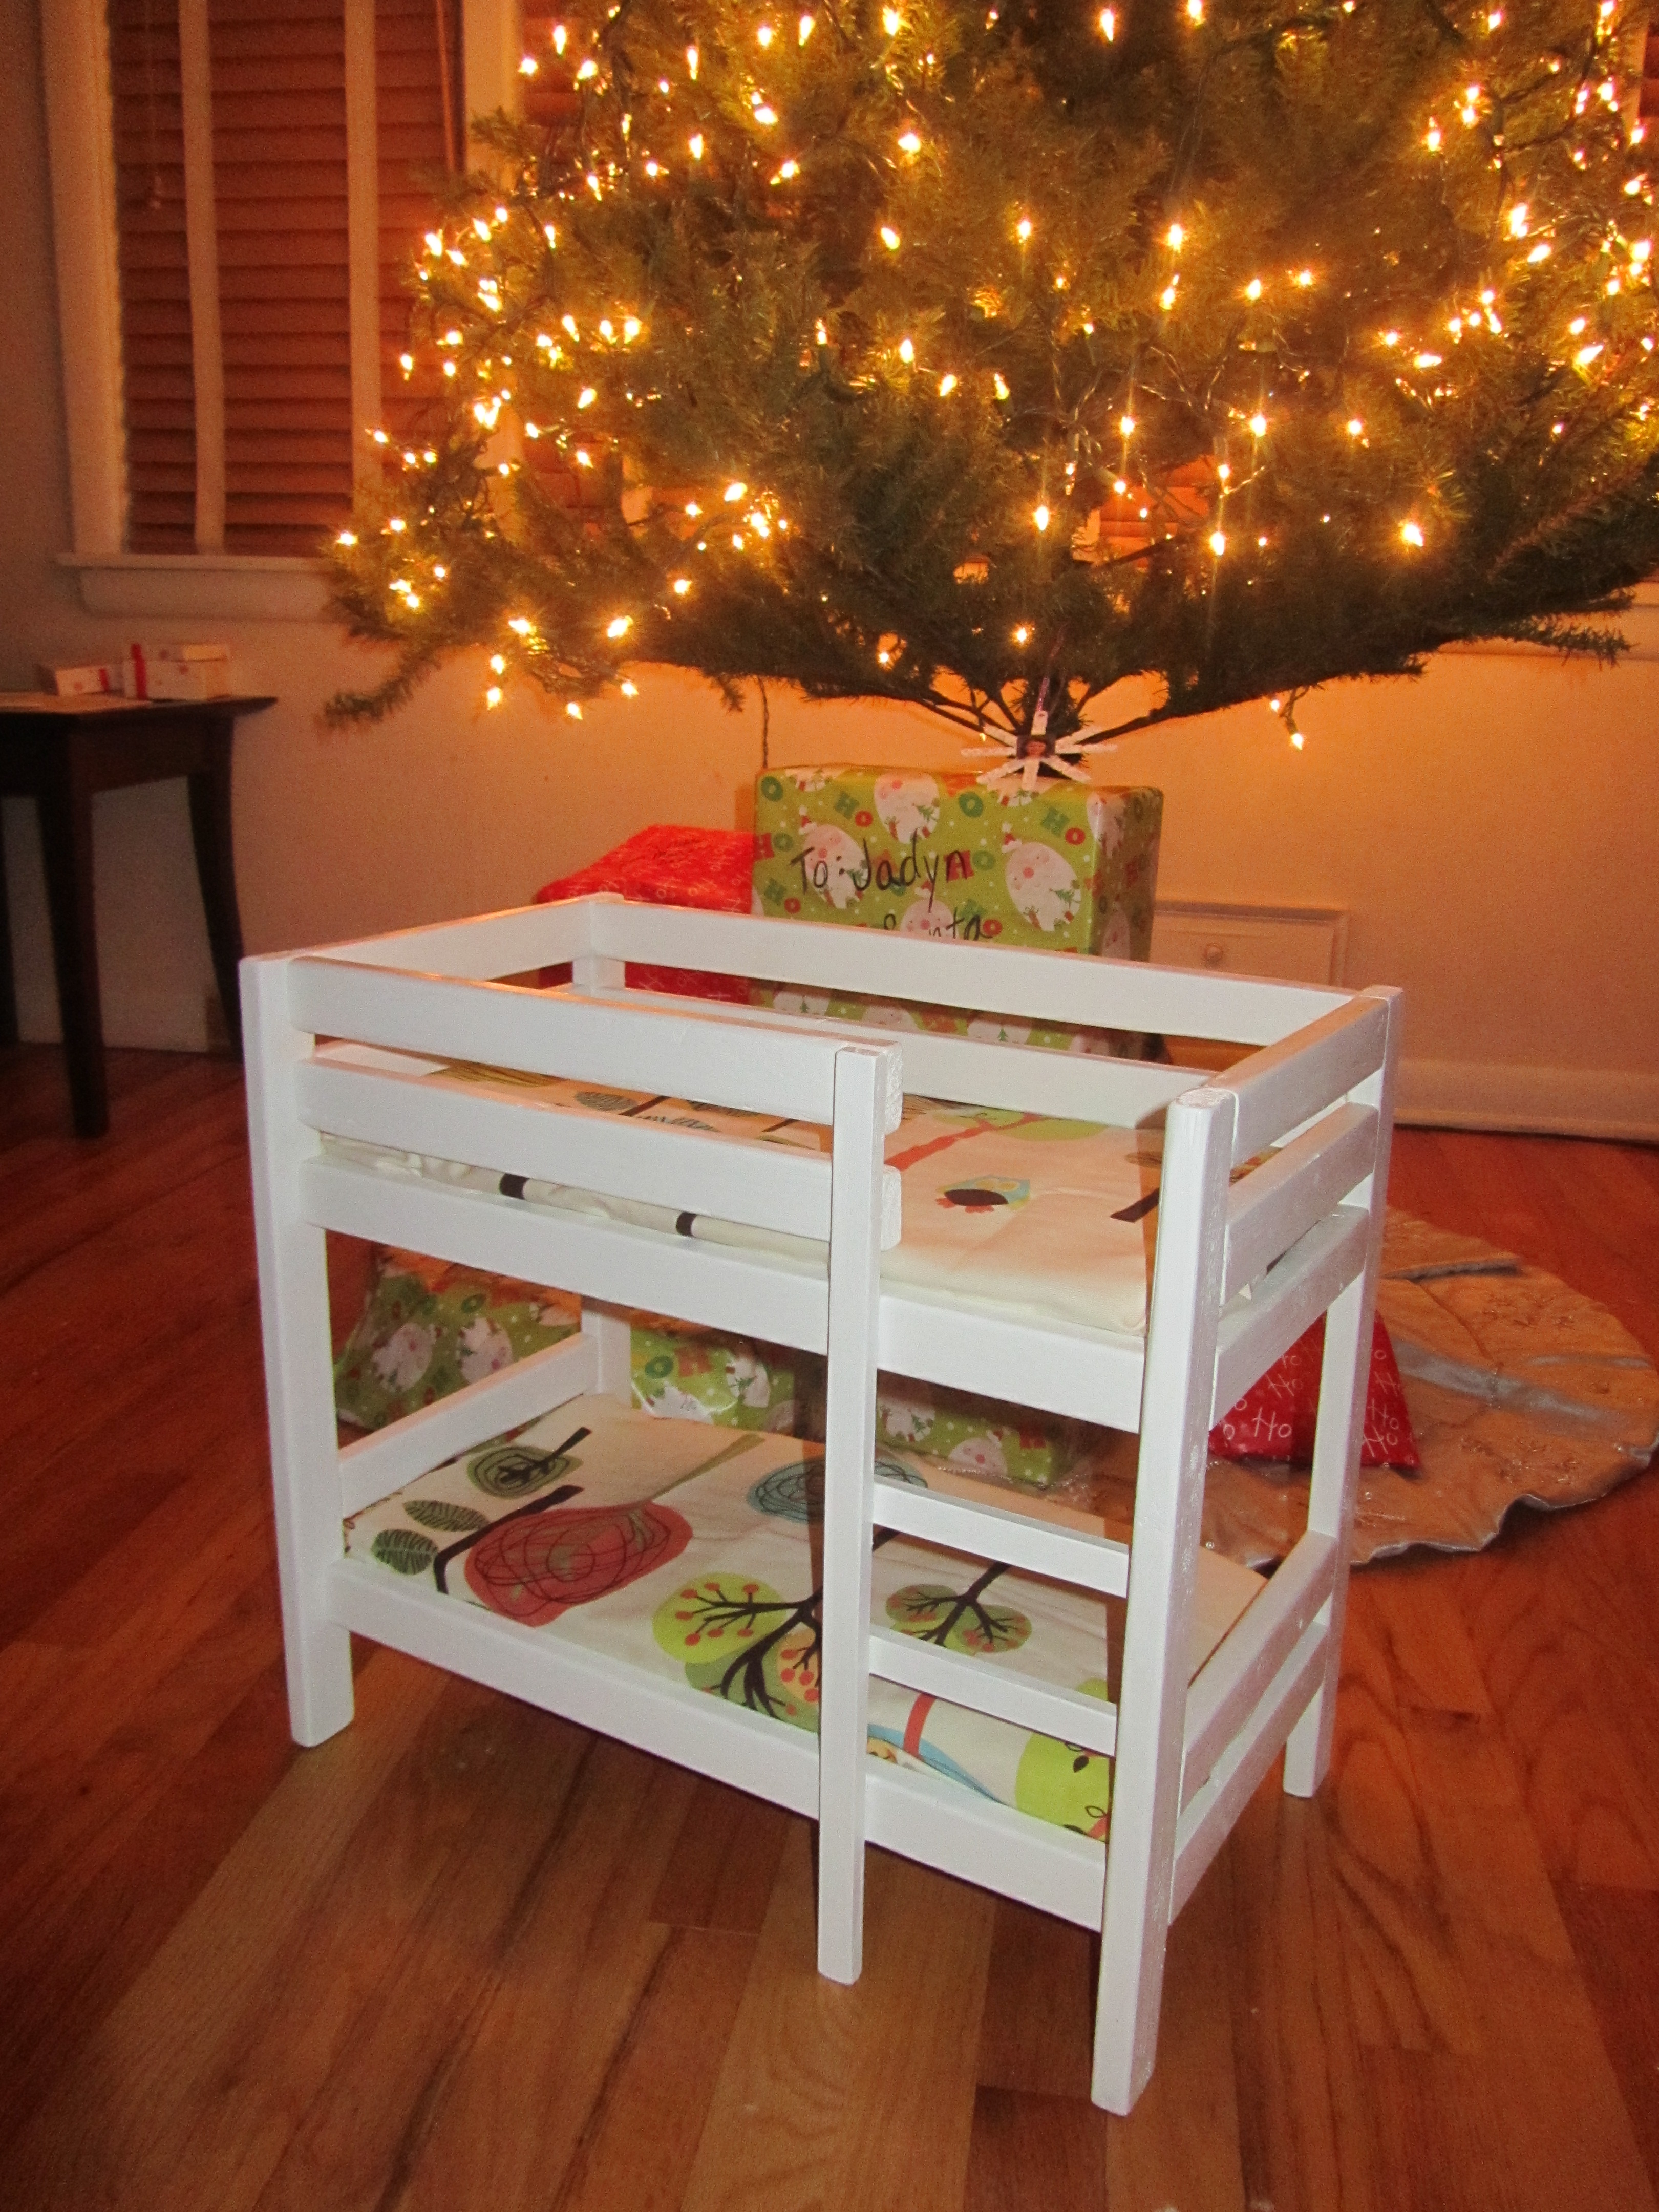
Since I was in the process of building my daughter a loft (http://ana-white.com/2012/12/camp-loft-bed-stairs-slide-and-fort) and she was getting a doll for Christmas, I wanted to maker her a bunk bed for her dolls. This was an easy project that I felt I could tackle in a short time period. My daughter loved both this and the loft, so it was worth it.
As mentiond in the comments (which I read too late), there's a couple things wrong with the shopping list and cut list (you need 1 more of each board, and there should be 4 1x1 at 19"). Since I couldn't find any 1x1 and I don't have a table saw to rip it, I bought 3/4 x 1/2 trim, and that worked fine for me. I used 3/4" foam for the mattress. The pocket holes worked well, but be sure to glue also, because since there's only 1 screw on each side the boards will twist.
The only thing I would do differently if I had it to do over again is to make it a little longer (maybe 20" or 21" instead of 19"). It's a snug fit with an 18" doll when you consider hair and shoes.
Built from Plan(s)
Estimated Cost
$20
Estimated Time Investment
Day Project (6-9 Hours)
Finish Used
Primer and 1 coat of ultra white semi-gloss paint
Recommended Skill Level
Starter Project