Rustic X coffee table
My first project and I love how it turned out
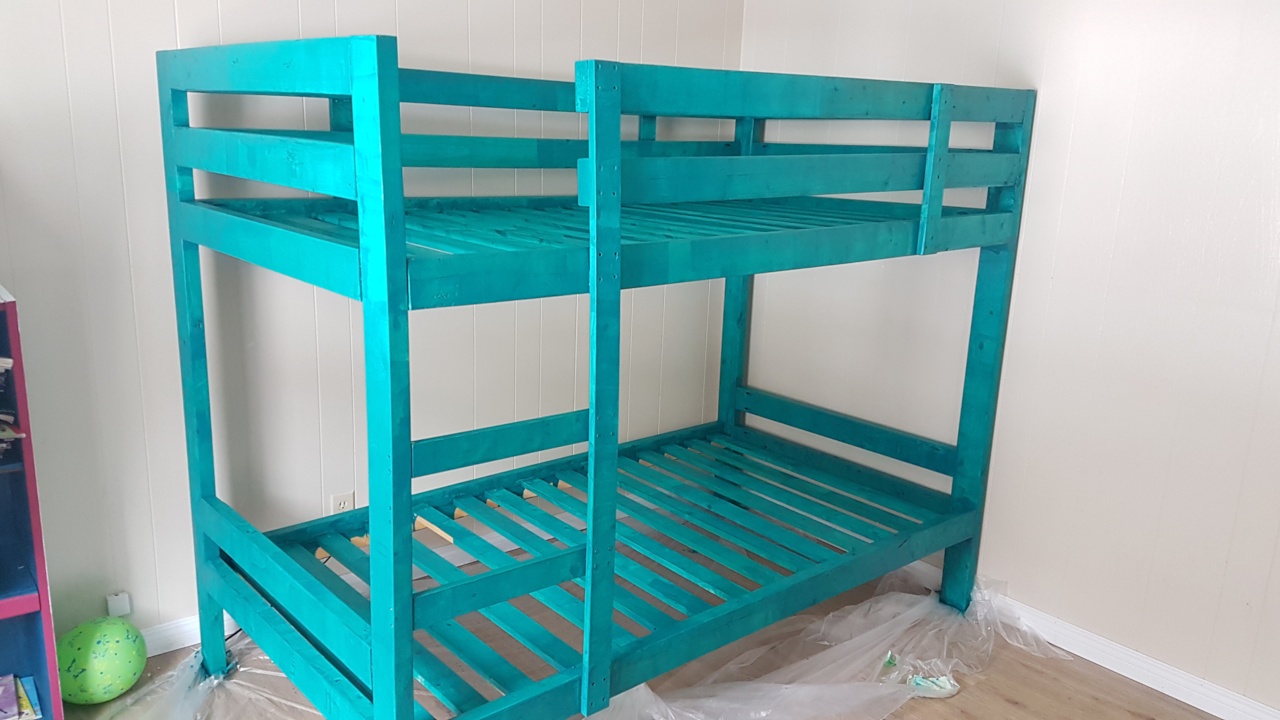
This was my second Ana White project and I LOVE IT. In the picture you only see the first coat of paint. This bunk bed is so heavy duty, even I can sleep with my girls in there in case they need me - we love it
When I built it I did not have a Kreg Jig yet so I bought a teeny tiny little one hole pocket hole thing- so it took me propably an hour longer than it should have... now with the real deal Kreg bam I'm laughing!!!
I already have three friends wanting me to build them one too (there is no store here to buy bunkbeds... everything is with shipping and we live remote in Dawson City so there is A LOT of shipping cost...
I buy the way could not find this awesome plan online but I have Ana White's "The Handbuilt Home" Book where it is in!
A customer asked me to make them two singles and a double. Unfortunately, not as comfortable as the single chair. There’s nowhere to put one of your arms. If I do another double, I’ll add an arm rest in the center. The middle is supported by a double 30 degree leg.
I followed Ana's plans for the farmhouse table and bench. This was my first project and it turned out really well! The flash makes some of the table top look discolored but it does not look like that in person - just a weird flash thing I think :)
The project took me about a week - table and bench and I only worked on it during nap times and when the kiddos went to sleep! The original plan was for a 96 inch table - I shortened mine to 75 inches to fit our dining room.
A great dining room table for us and it cost around $200 for both table and bench.
I am so proud that I actually built something that my family can use and I get so many compliments on!
Thanks, Ana!!!
I found a picture of this online but couldn't find the instructions on how it was built. With some trial and error, I recreated the illusion.
Watching the video is the easiest way to see how it works. I've included a drawing which is linked in the video description.
https://www.youtube.com/watch?v=b3vbaZP2cL8
Build Instructions:
http://www.instructables.com/id/Wooden-Illusion/
Sun, 03/16/2014 - 07:41
Built this over the better part of 3 days
After years of hand me down nights stands and using everything from milk crates to tv trays, it was definitely time to build something to be proud of. My wife decided mustard was her color of choice. I think when she chose this design, we planned on modifying the Farmhouse Bedside table to make it smaller and then Ana came out with the mini version. Pretty easy all around. I added a stopper block to back inside end of the drawer to keep the drawer from falling out when opened too far. It can be twisted to allow the drawer to come all the way out.
I had been looking for a carpentry bench project for some time that was easy to make and had the ideal dimensions for my space.
Here's what I did.
I added holes in the table to work with wooden clamps I made.
The end result was better than I expected. It's been very useful.
My sincere thanks to Miss White for this project.
Gidenilson A Santiago
I have been looking for a dresser to transform into a buffet. I posted on a facebook yard sale group and a wonderful woman offered me one she had been keeping in her garage for free.
Step one stripping a lot of old paint and sanding, sanding, and sanding some more. I found a stencil i like on etsy. Stenciled that design onto the top of my "buffet" with white paint and then when it was dry lightly sanded it. I then stained the entire top the color i wanted. 3 coats of varnish finish that off.
The next step was the bottom. The hardest part about that was getting all the old paint out of all the ins and outs of this piece. Once that was done, with the help of the husband, we removed all the rails and braces holding the bottom 2 sets of drawers. It was put together with interlocking pieces so taking it apart left some hold in the side and middle brace. My husband cut pieces to fit in there and were put in place with wood glue. Once dried they were sanded completely smooth. We used a 1/4" piece of luan for the back and 3/4 piece of pine for the bottom of the now open area. A little trim, 2 coats of white enamel and some new hardware for the drawers and tada a new buffet..lol.
Just got it in yesterday so I'm still decorating, but i love the way it turned out!
This was my husbands first time using a plan from the Ana White website. For finish we used Danish oil in "dark walnut" and we also put a coat of beeswax on it as well. We are so happy with the end project!
Changed the Grandy design just a little to bring it up off the floor and add legs to it. I notched 2x4 to line up with the 1x4 face pieces. Then I found barndoor hardware on Amazon for $47 a set. Needed two sets for this console since I wanted two doors. Only needed the one rail piece though.
Tue, 06/21/2016 - 14:50
This is my build. I guess I wasn't signed in when I posted this on the board. If you have any questions about it then I'll be glad to answer any. Let me know.
Thank God for these garage shelf plans! :D We have a one car garage that was disorganized and full of stuff. We tried to organize with some metal shelves, but they were very disappointing. They could not hold a lot of items because they were unstable and their measurements did not maximize the space we have. This was my first build and my husband thought I was crazy to attempt it. Neither of us knew what we were doing. However, the plans are simple, clear, and straight-forward and we had no difficulties. I can fit so much on these shelves because they are so sturdy. Love them!
Shiplap fireplace and distressed mantle.
Tina
This was my 4th woodworking project and boy did I learn a lot! I was dead set on building something with a drawer and also with staining it. My first for both. For one of my first wood projects, I think it turned out cute =) It's a definite improvement on my first 3 projects!!
The plan was great, I changed up the top a little but not by much. Otherwise followed it pretty step-by-step. I did not do pocket holes (a Kreg Jig is my next purchased).
I needed a skinny table for the kitchen. I build this with dog dishes built in to make life easier. It's an all purpose table that looks nice too. Custom plans made from ideas from other plans.
Built this for my daughter and son-in-law! It is 72"L x 42"W x 31"T per her request! I'm making 2 benches to accompany it! In part, I used ana's plans with some tweaking and adjusting for the 4x4's in the bases! I'm doing the same for the benches!
Rustic X Console Table with a Two Tone Finish
Train Table with removeable top.
Thu, 06/07/2012 - 07:52
that is a beautiful solution to beeing taken over by the toy monster! Great job!
I made this from scrap plywood in our garage for my step-daughter's five-month-old new boxer/lab mix Marley. I used my Kreg rip-cut and pocket hole jig. I even drilled pocket holes to put the four sides together.
That, however, is not Marley in the picture. That is our older Catahoula Leopard Dog Oreo. Marley's owner and her mom chose the color scheme and painted and afterwards, I hung the hardware back on.
The only change I made was to use 1x3 for the entire door rather than 1x2s for the sides.
Thanks for the plan Ana. You are great.
I made this out of wood I had from previous projects so it was made entirely out of what I had on hand. It's a perfect size for my kids to keep their books in and keep them very accessible to them. I made it based on what I had, the sides are 24" tall and the shelves are 18" wide. I did this because I had a 3 ft piece and a 6 ft piece so I had to plan carefully.