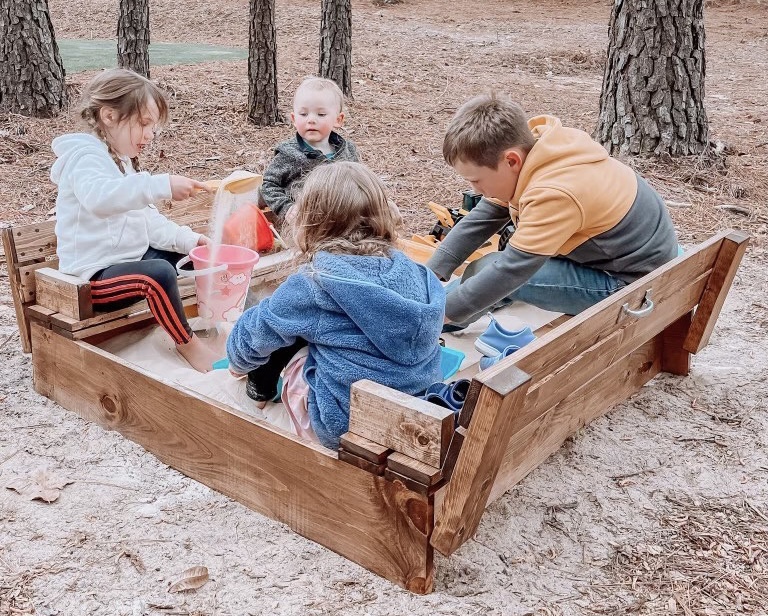
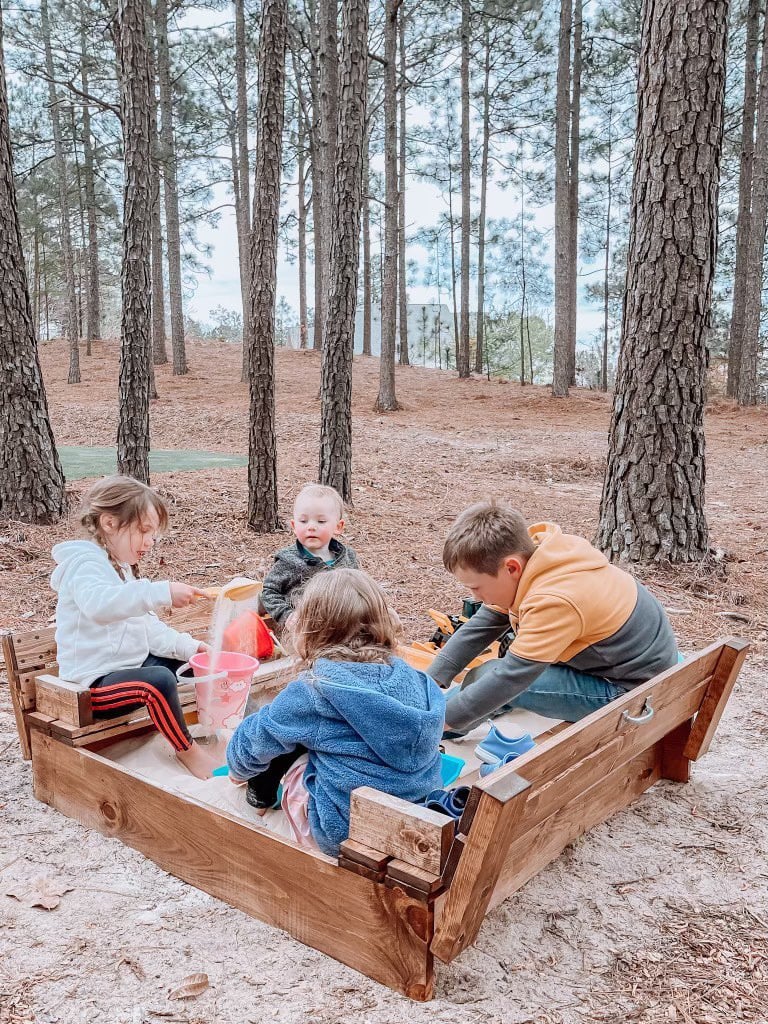
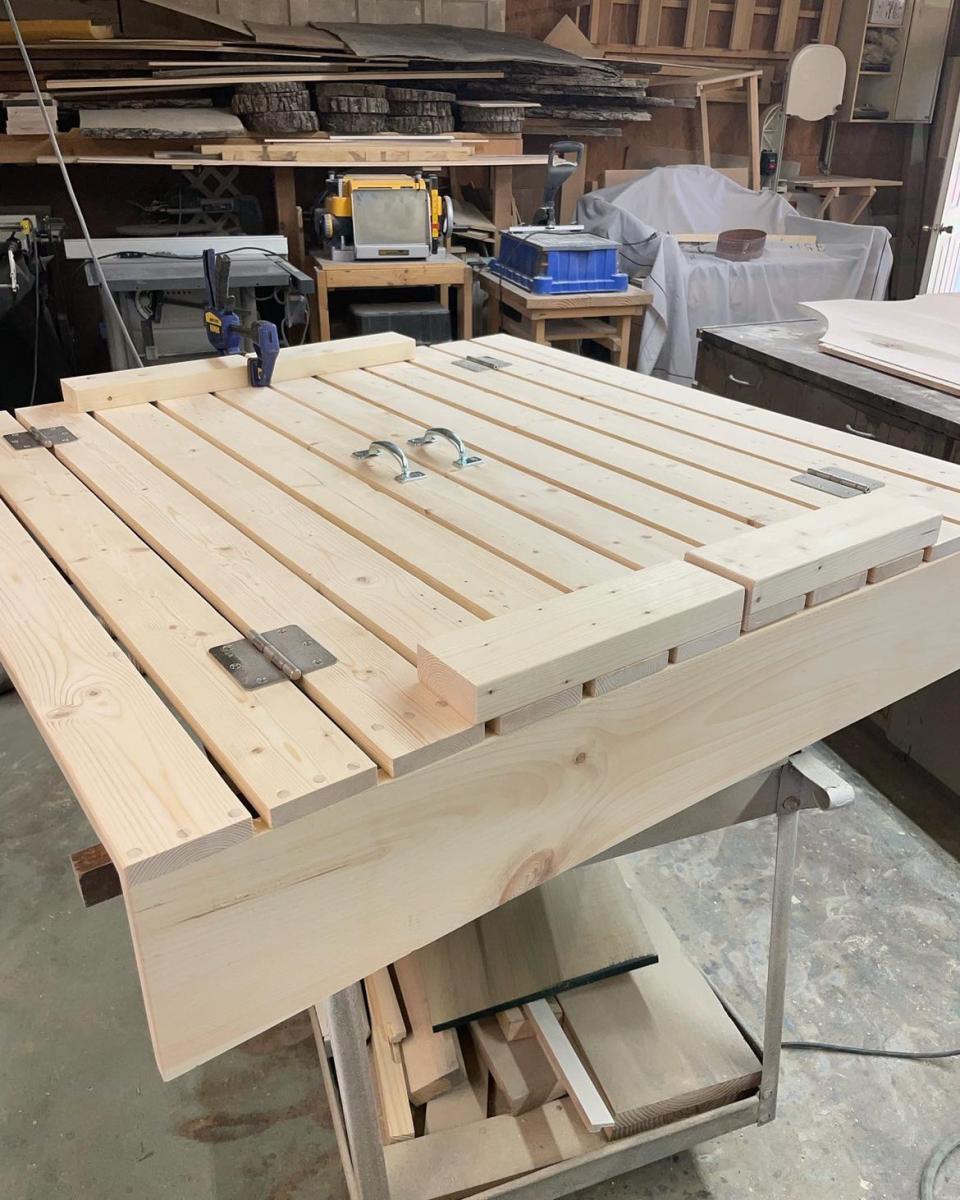
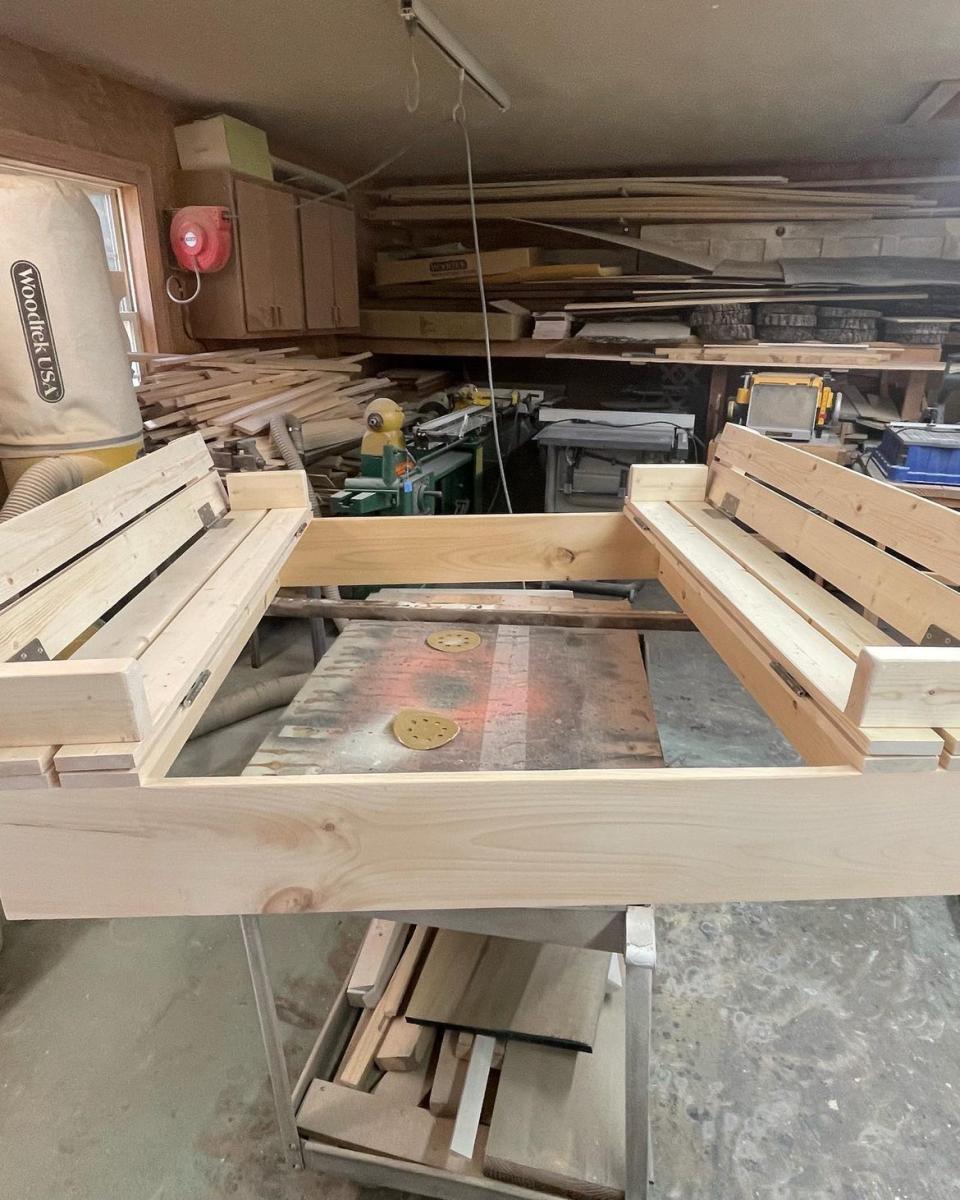
Sandbox with cover that folds into seats
See more photos and details here https://instagram.com/tom_morgan_nc?igshid=YmMyMTA2M2Y=
Built from Plan(s)
See more photos and details here https://instagram.com/tom_morgan_nc?igshid=YmMyMTA2M2Y=
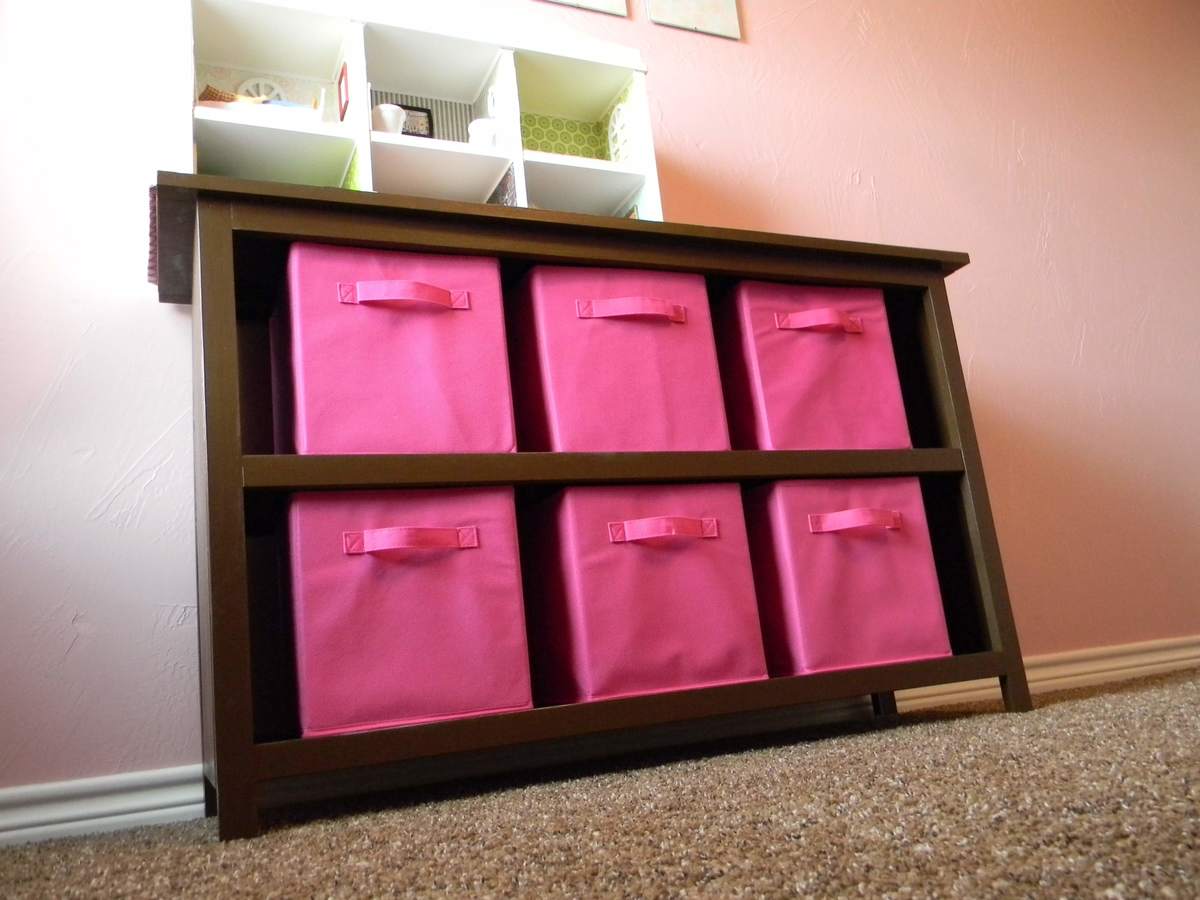
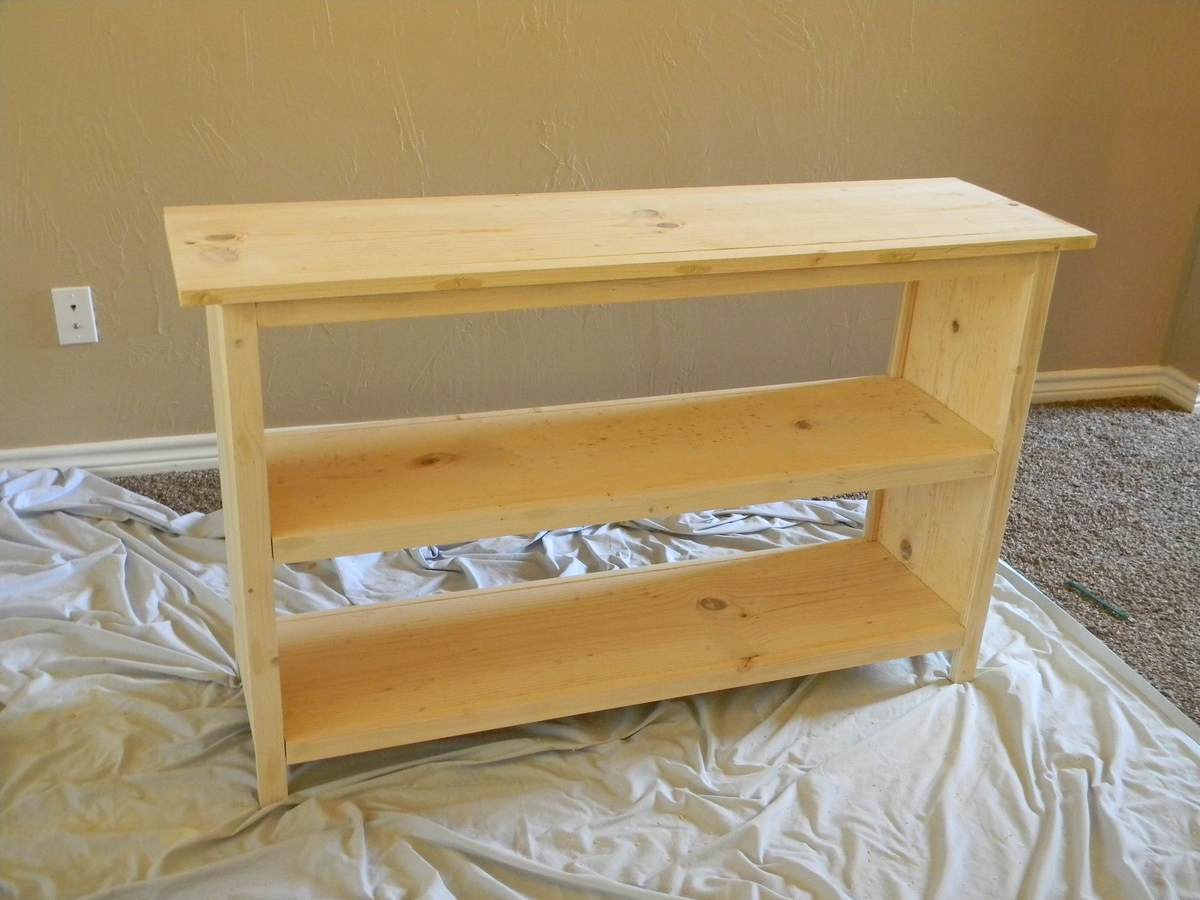
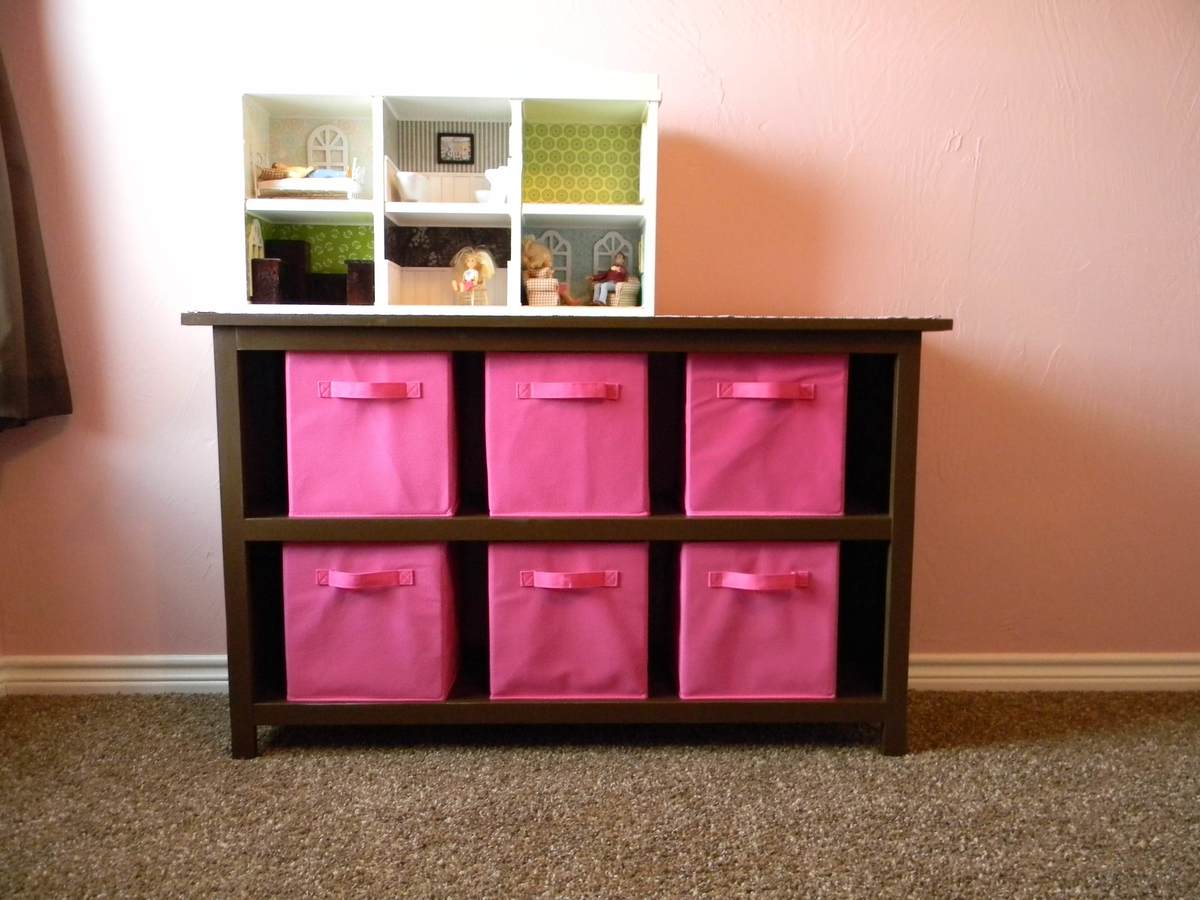
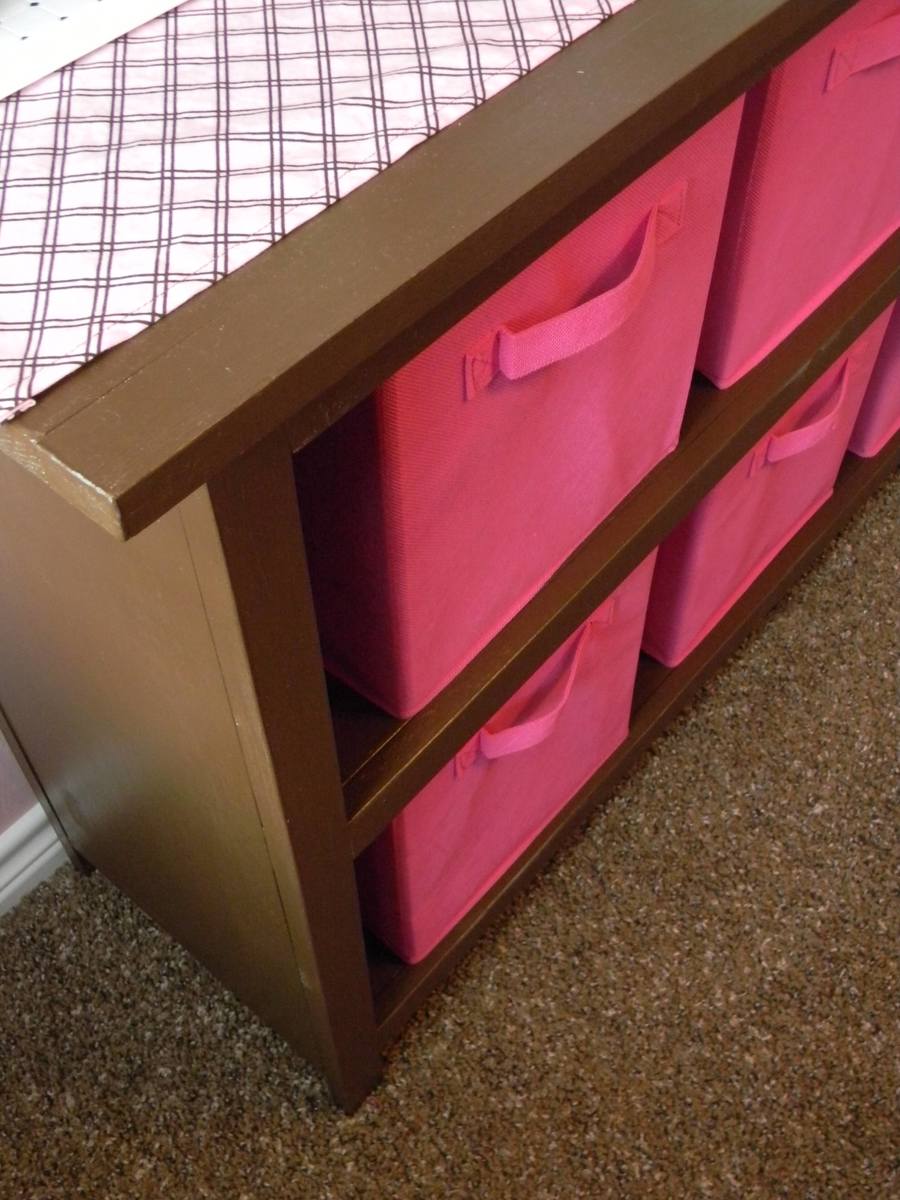
I just made one of the shelves instead of two like the plan calls for. It's painted a dark brown to match the bunk bed that I previously made for my girls. Mine was a little more expensive because I used 1x12's instead of plywood.
Mon, 07/11/2011 - 19:14
You did a beautiful job! Where did you get your pretty pink storage bins? I've been looking for some like them for my granddaughter's room.
Mon, 08/29/2011 - 19:56
They're just the closet maid bins. I think I bought mine at Lowe's.

First project for actual furniture ever. This stuff is better than a good book that you can't put down. I am so addicted!


This was a family summer project. I built the bed and furniture...my wife and daughter did all the painting and picked out the accent pieces!


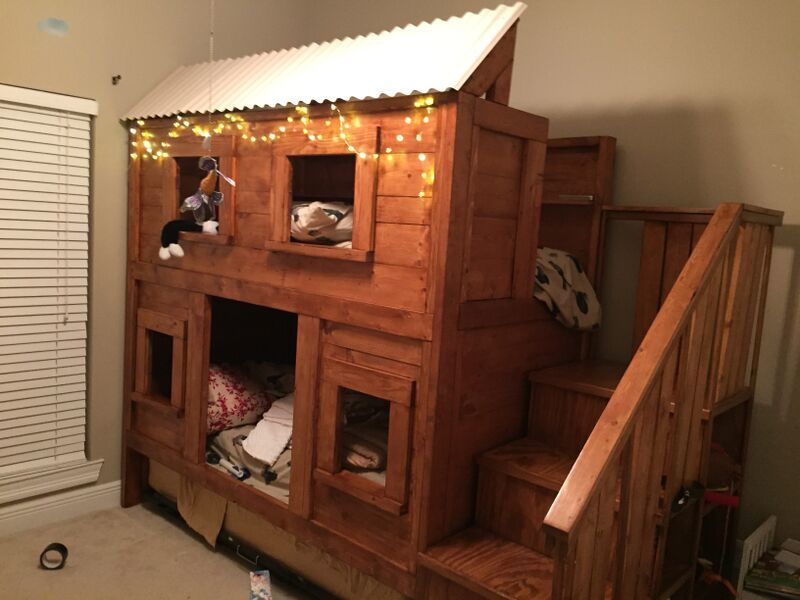
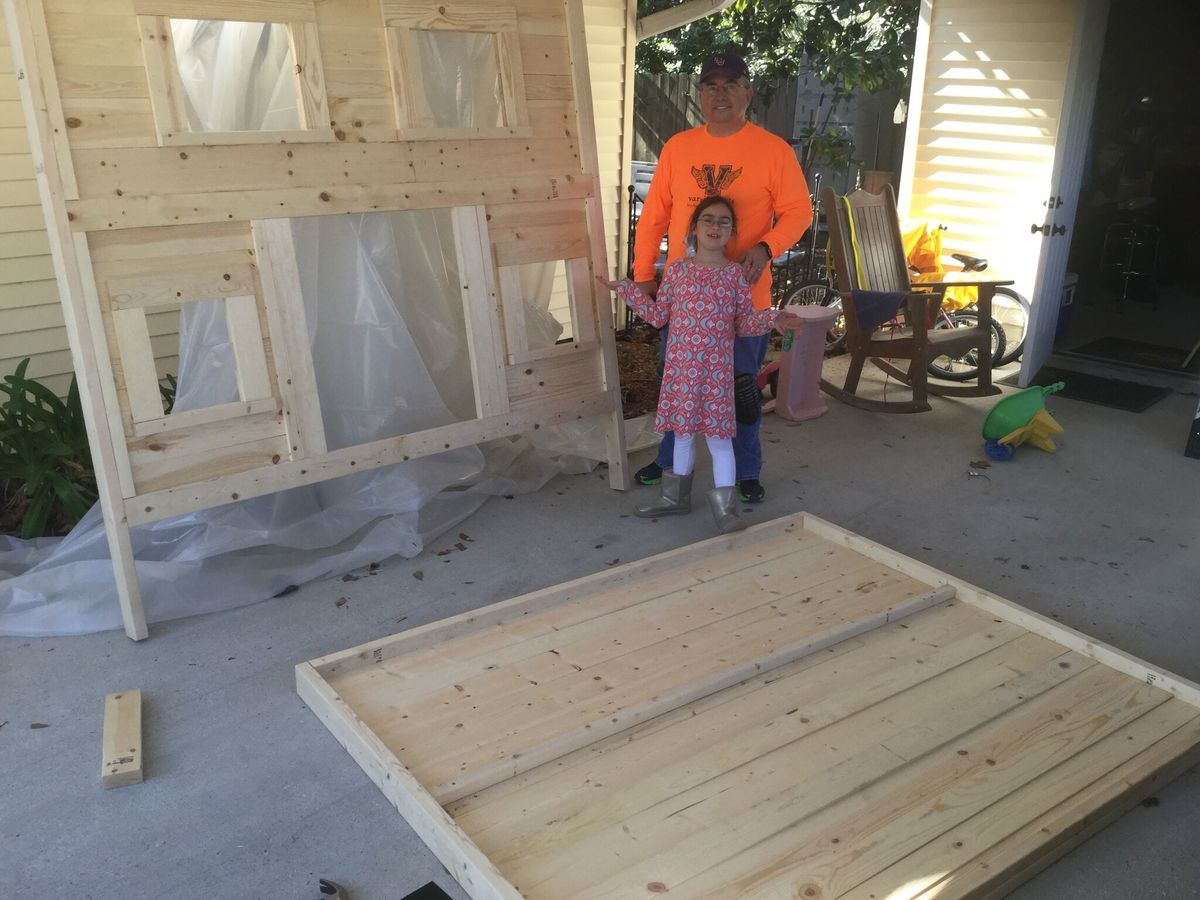
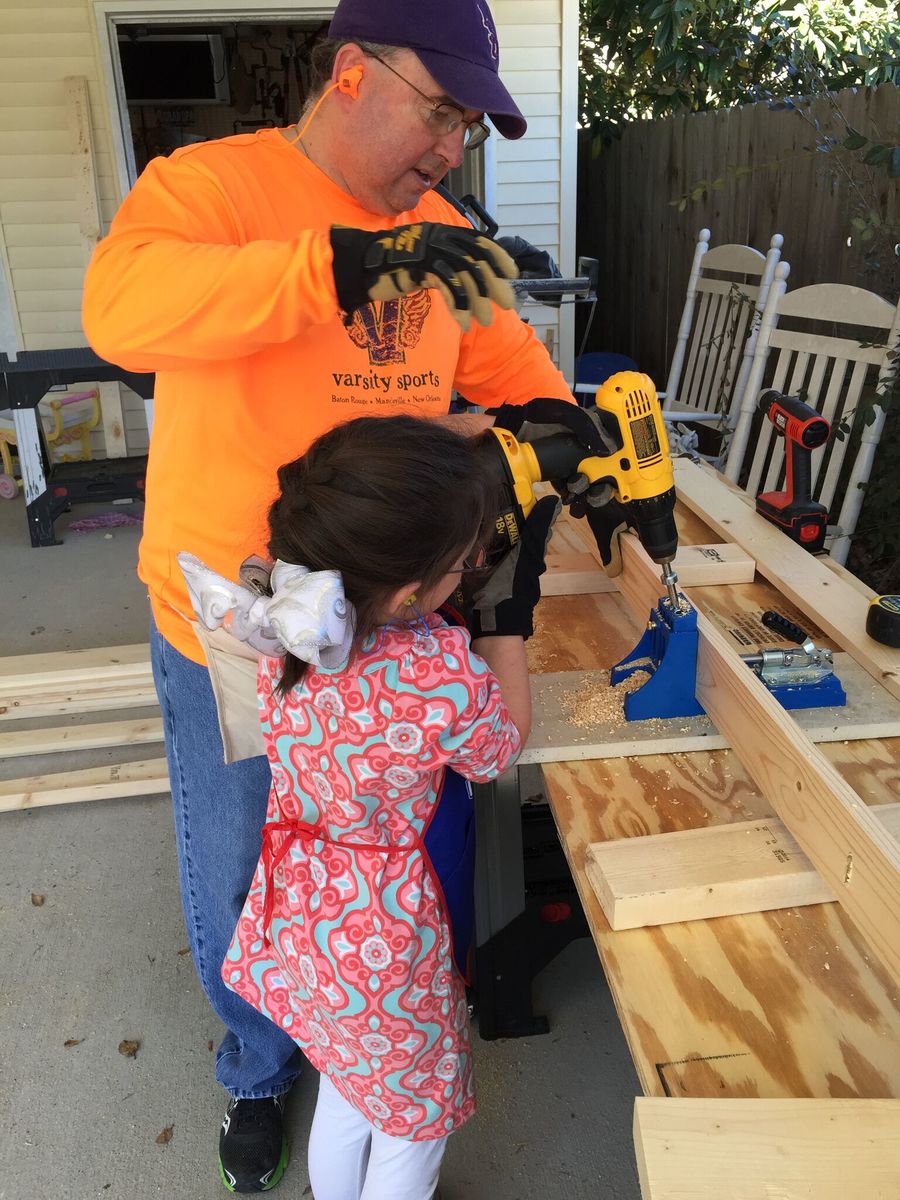
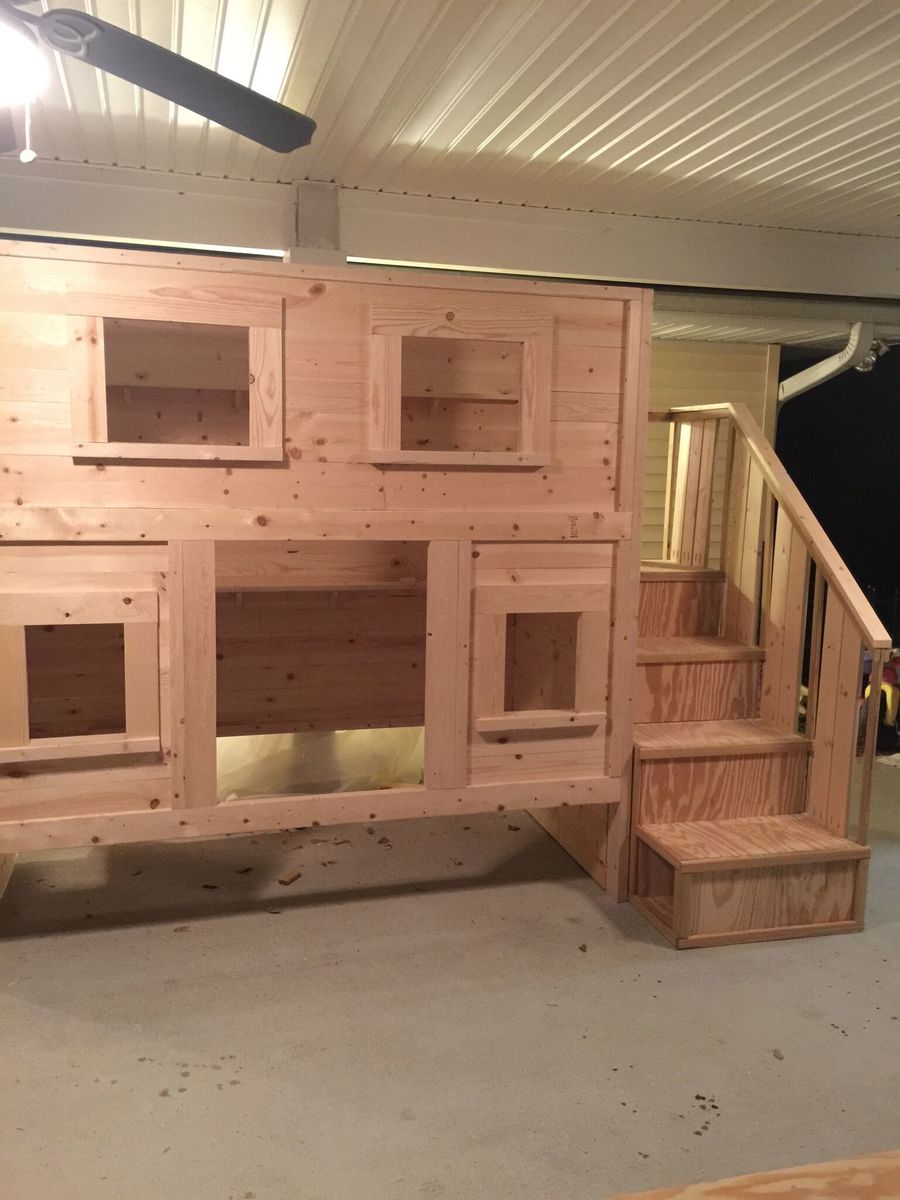
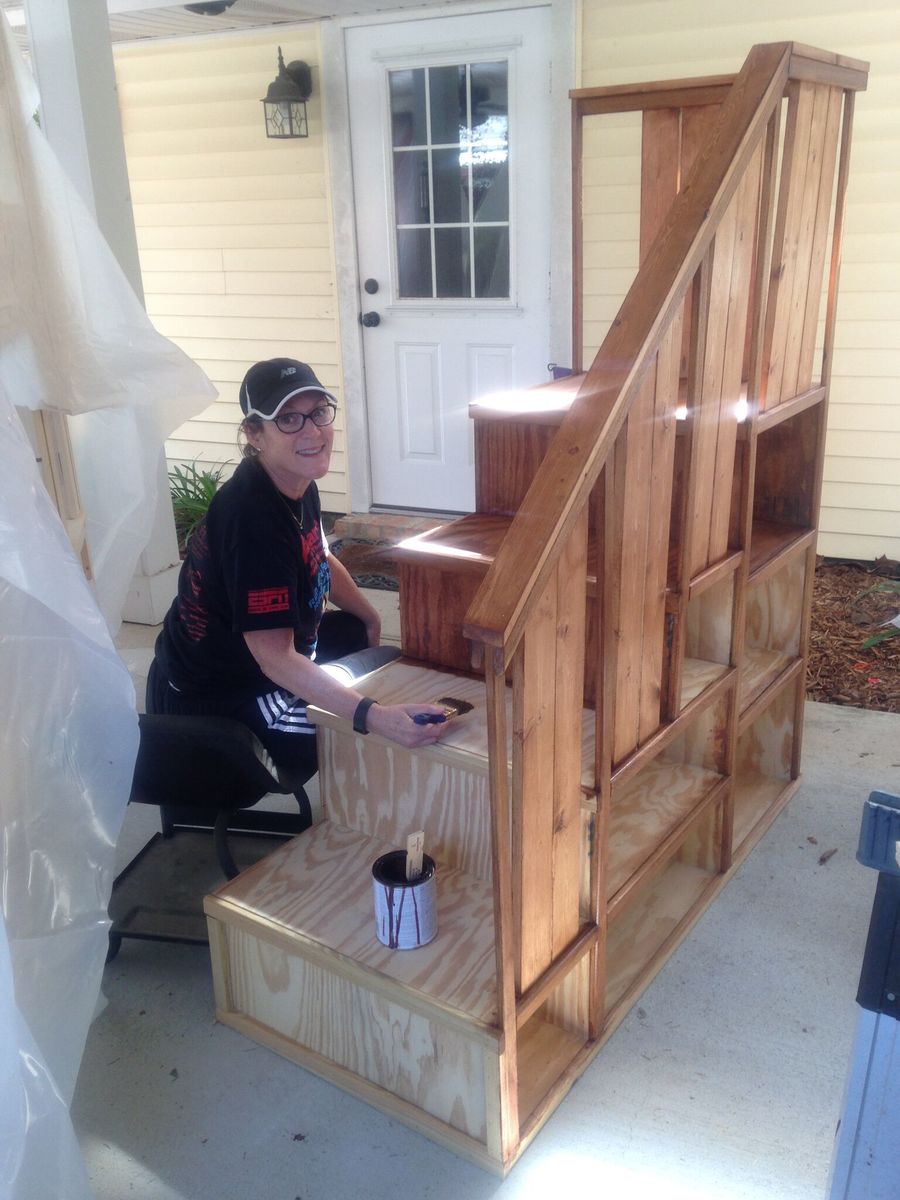
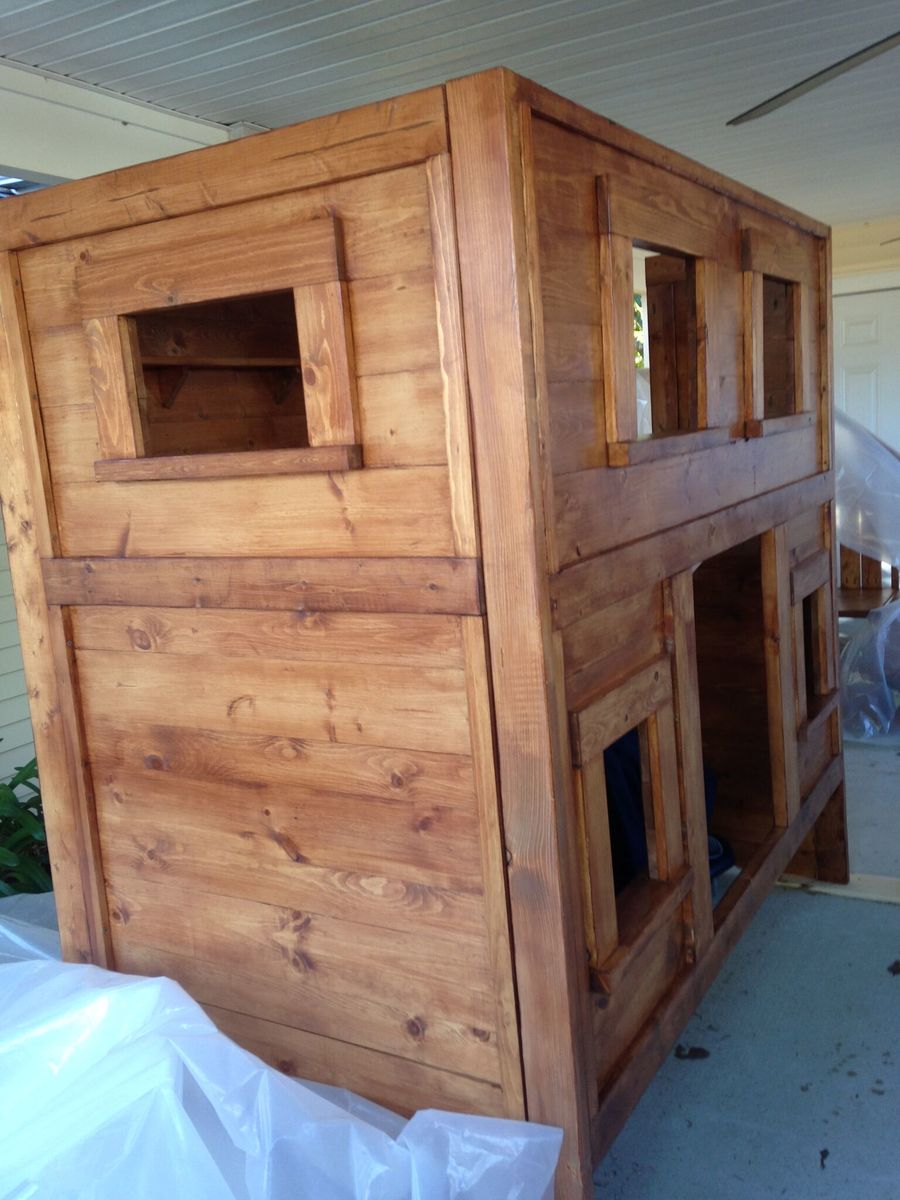
My wife, grandchildren, and I have spent the last 8 months building 2 bunk beds from the site. First we build this cabin version for my grandsons and then we built the sweet pea version for my granddaughters. I thank Ana White for using this website to enable amateur wood workers like myself a tool that enabled us to create a great piece of furniture that they use every day and collect childhood memories and know how much they are loved. Thank you Ana White.
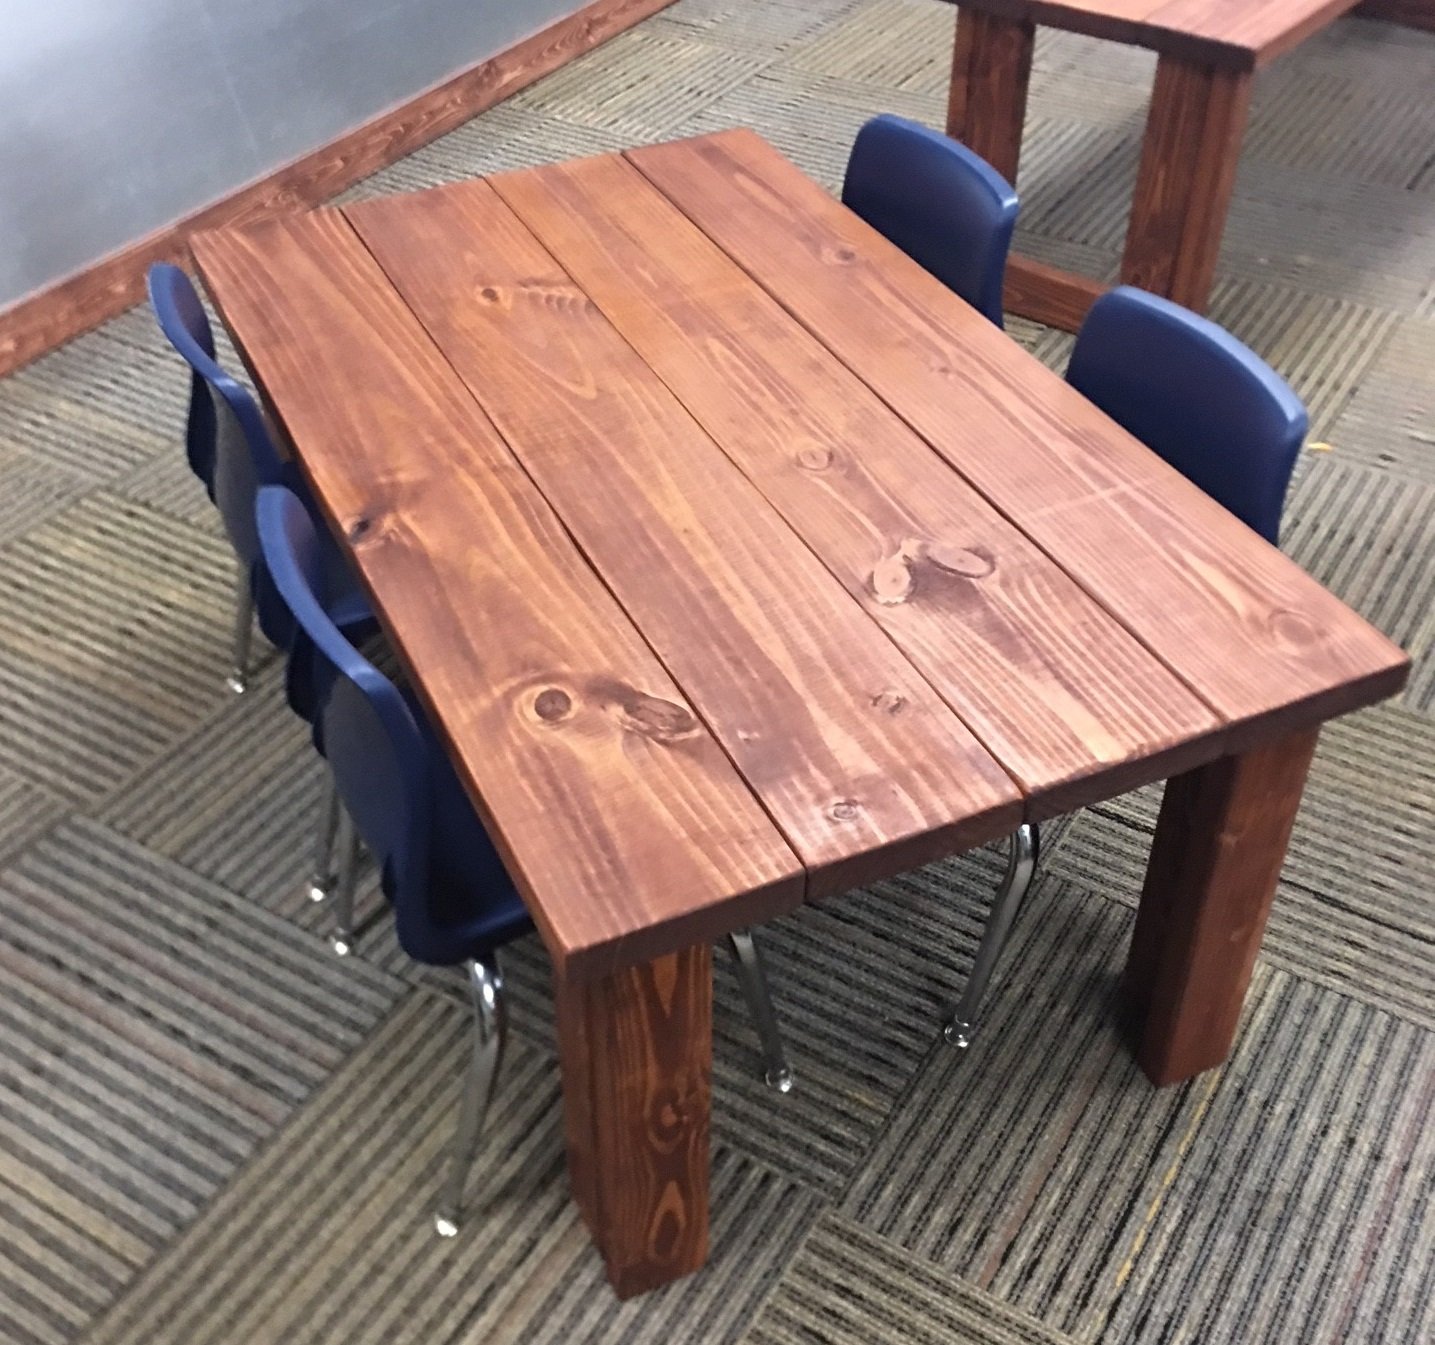
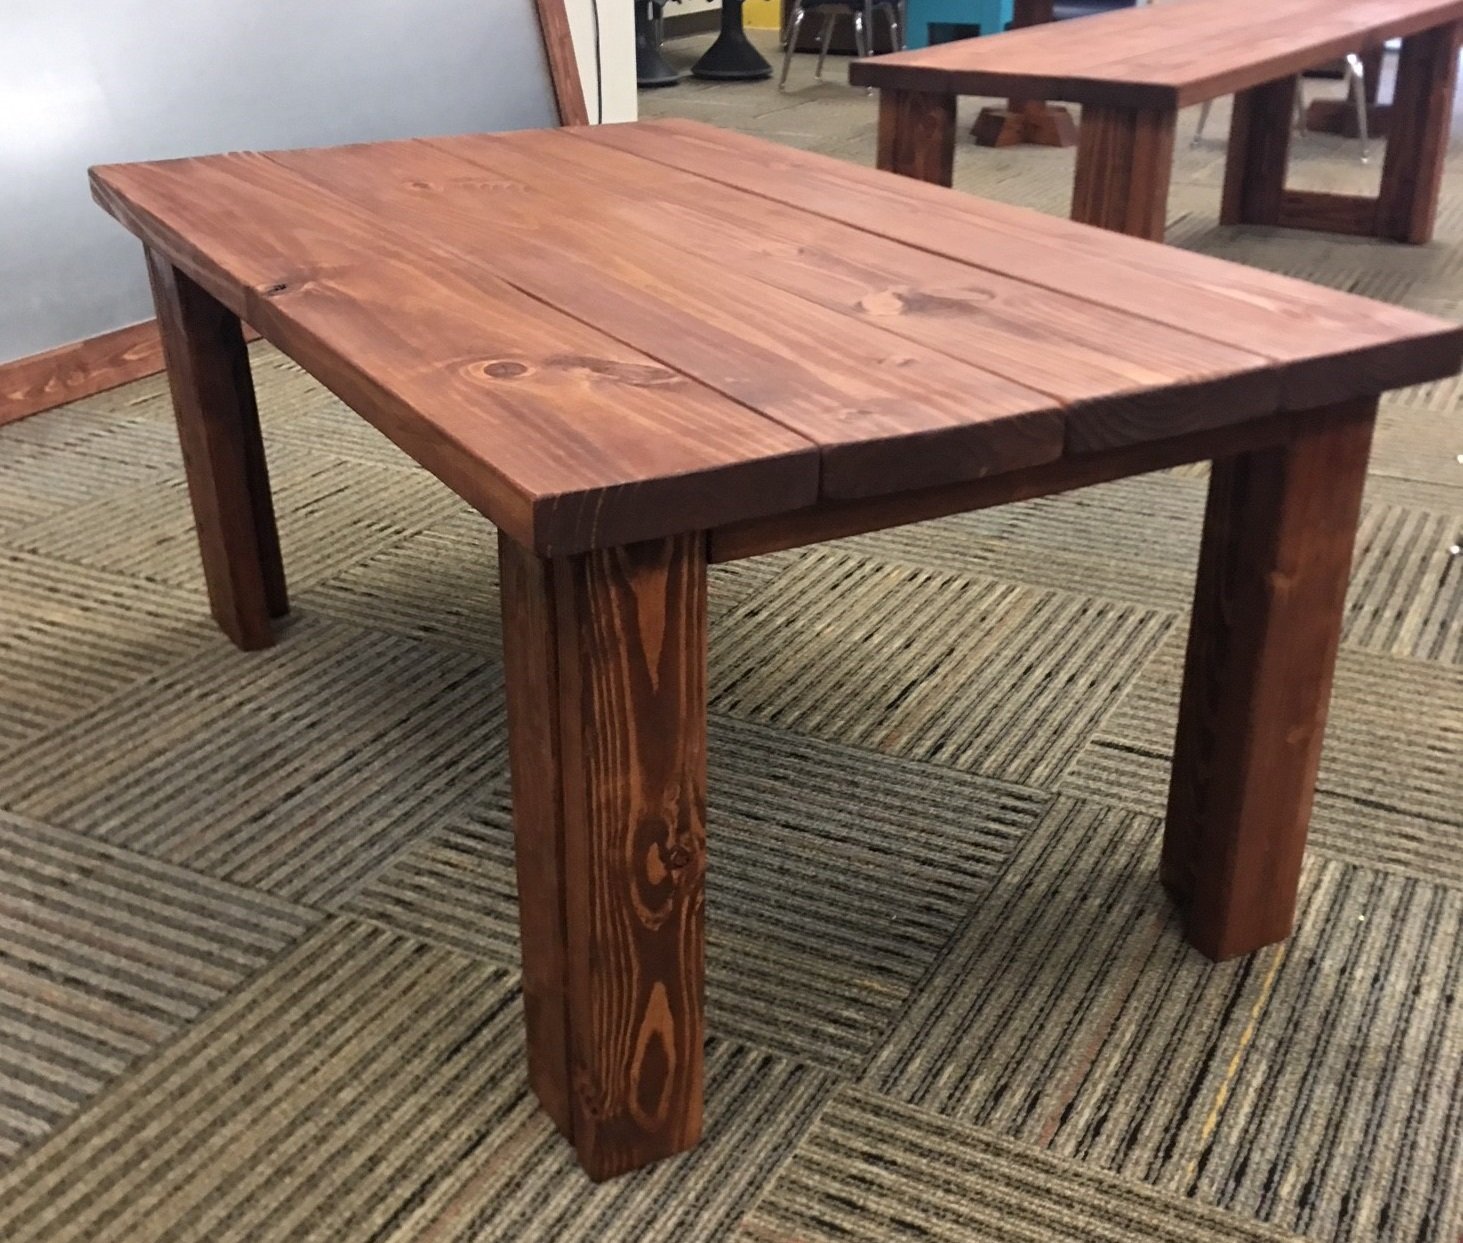
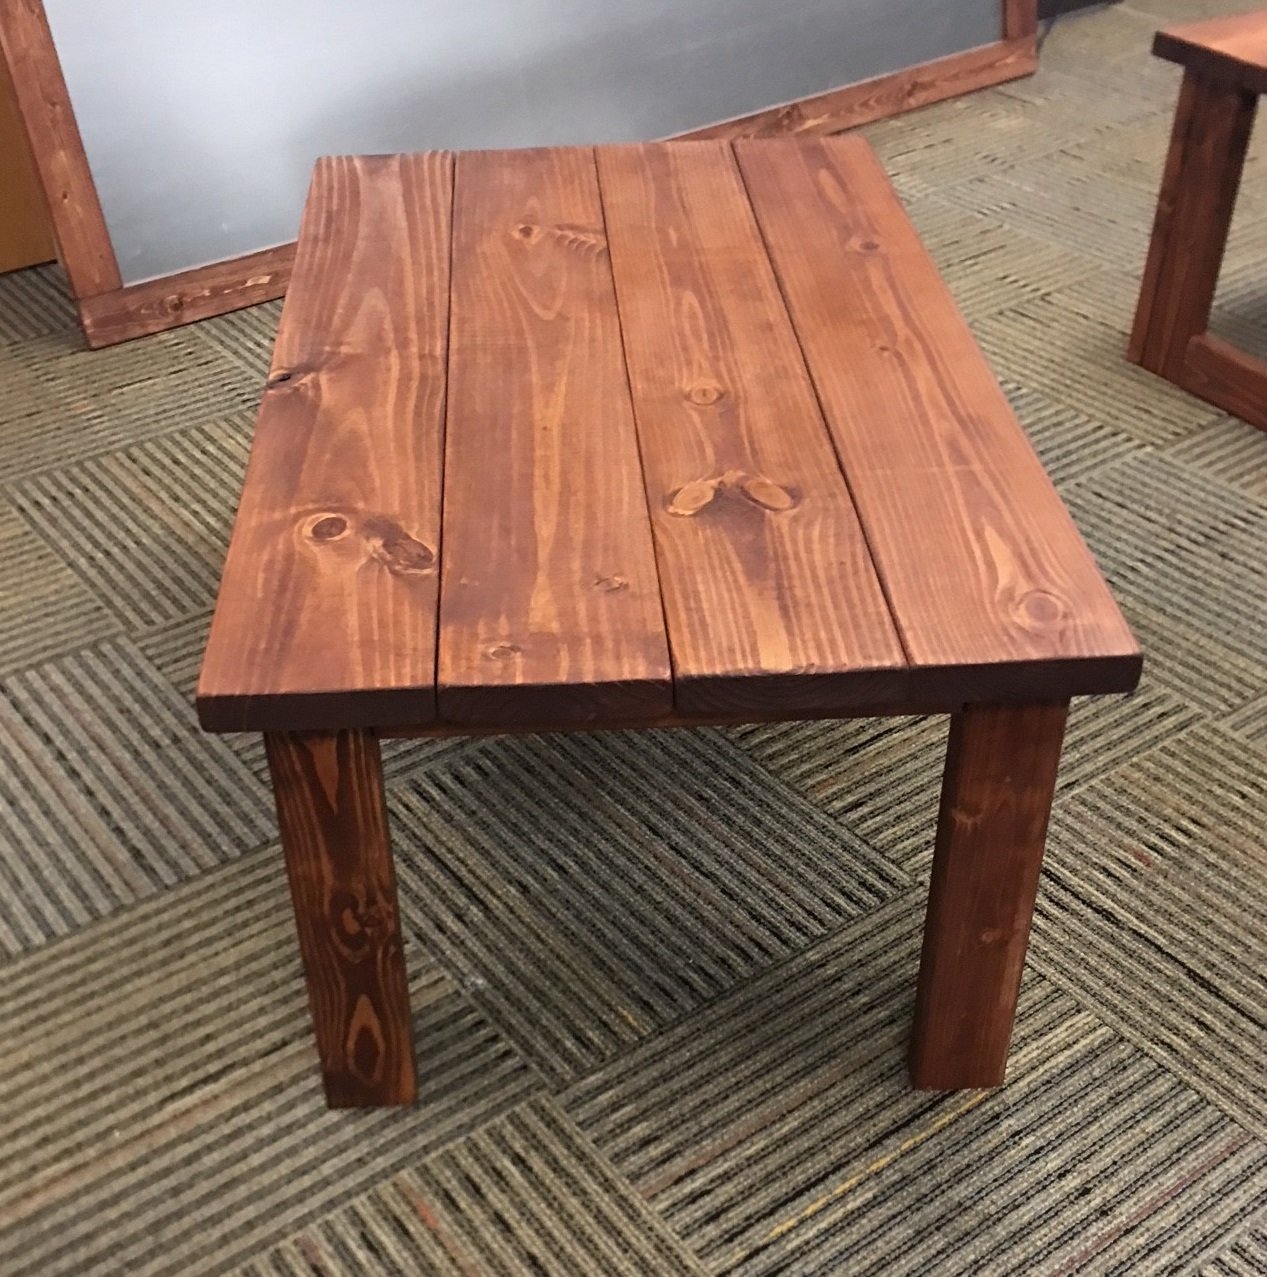
Been a while since I had time to actually build anything worth posting about! My wife wanted some items for her Kindergarten classroom this year, so built several items, most inspired by the Farmhouse family.
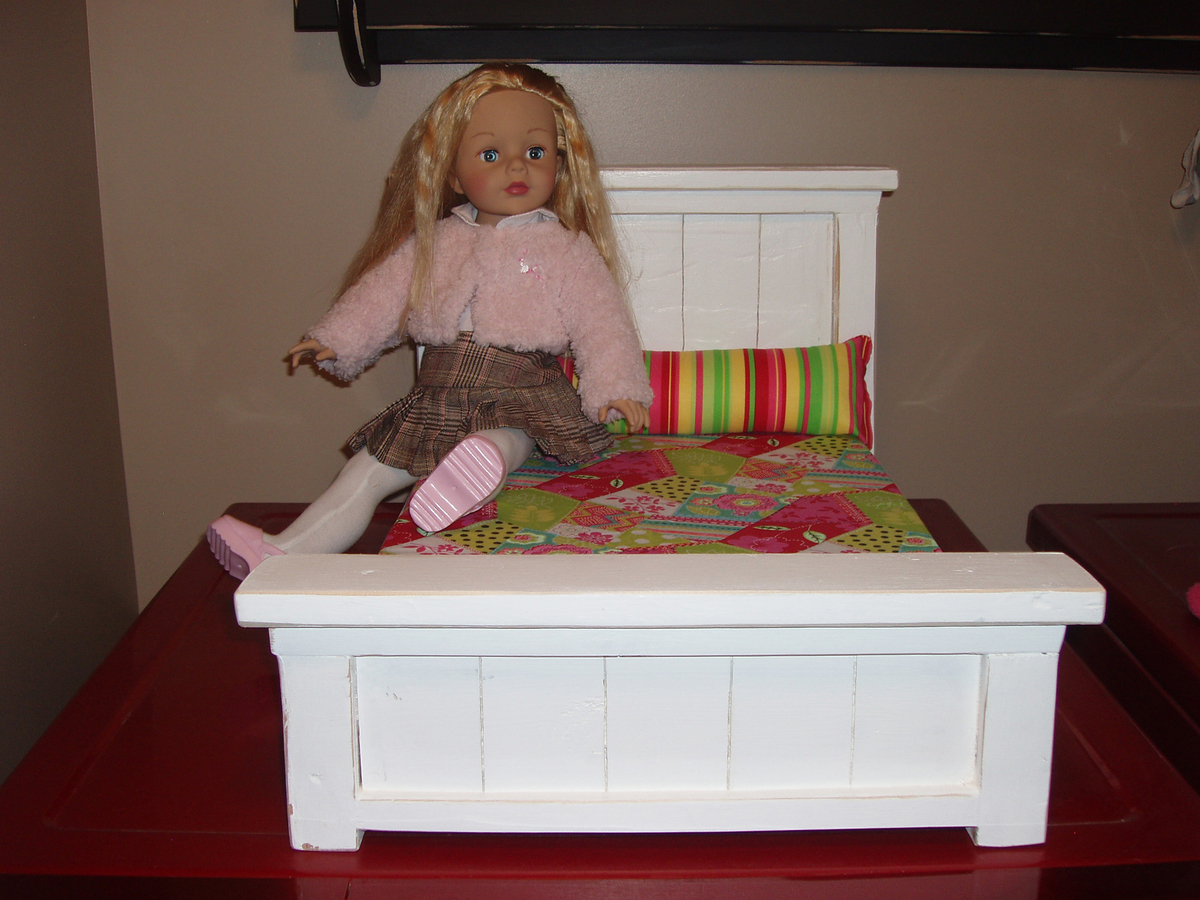
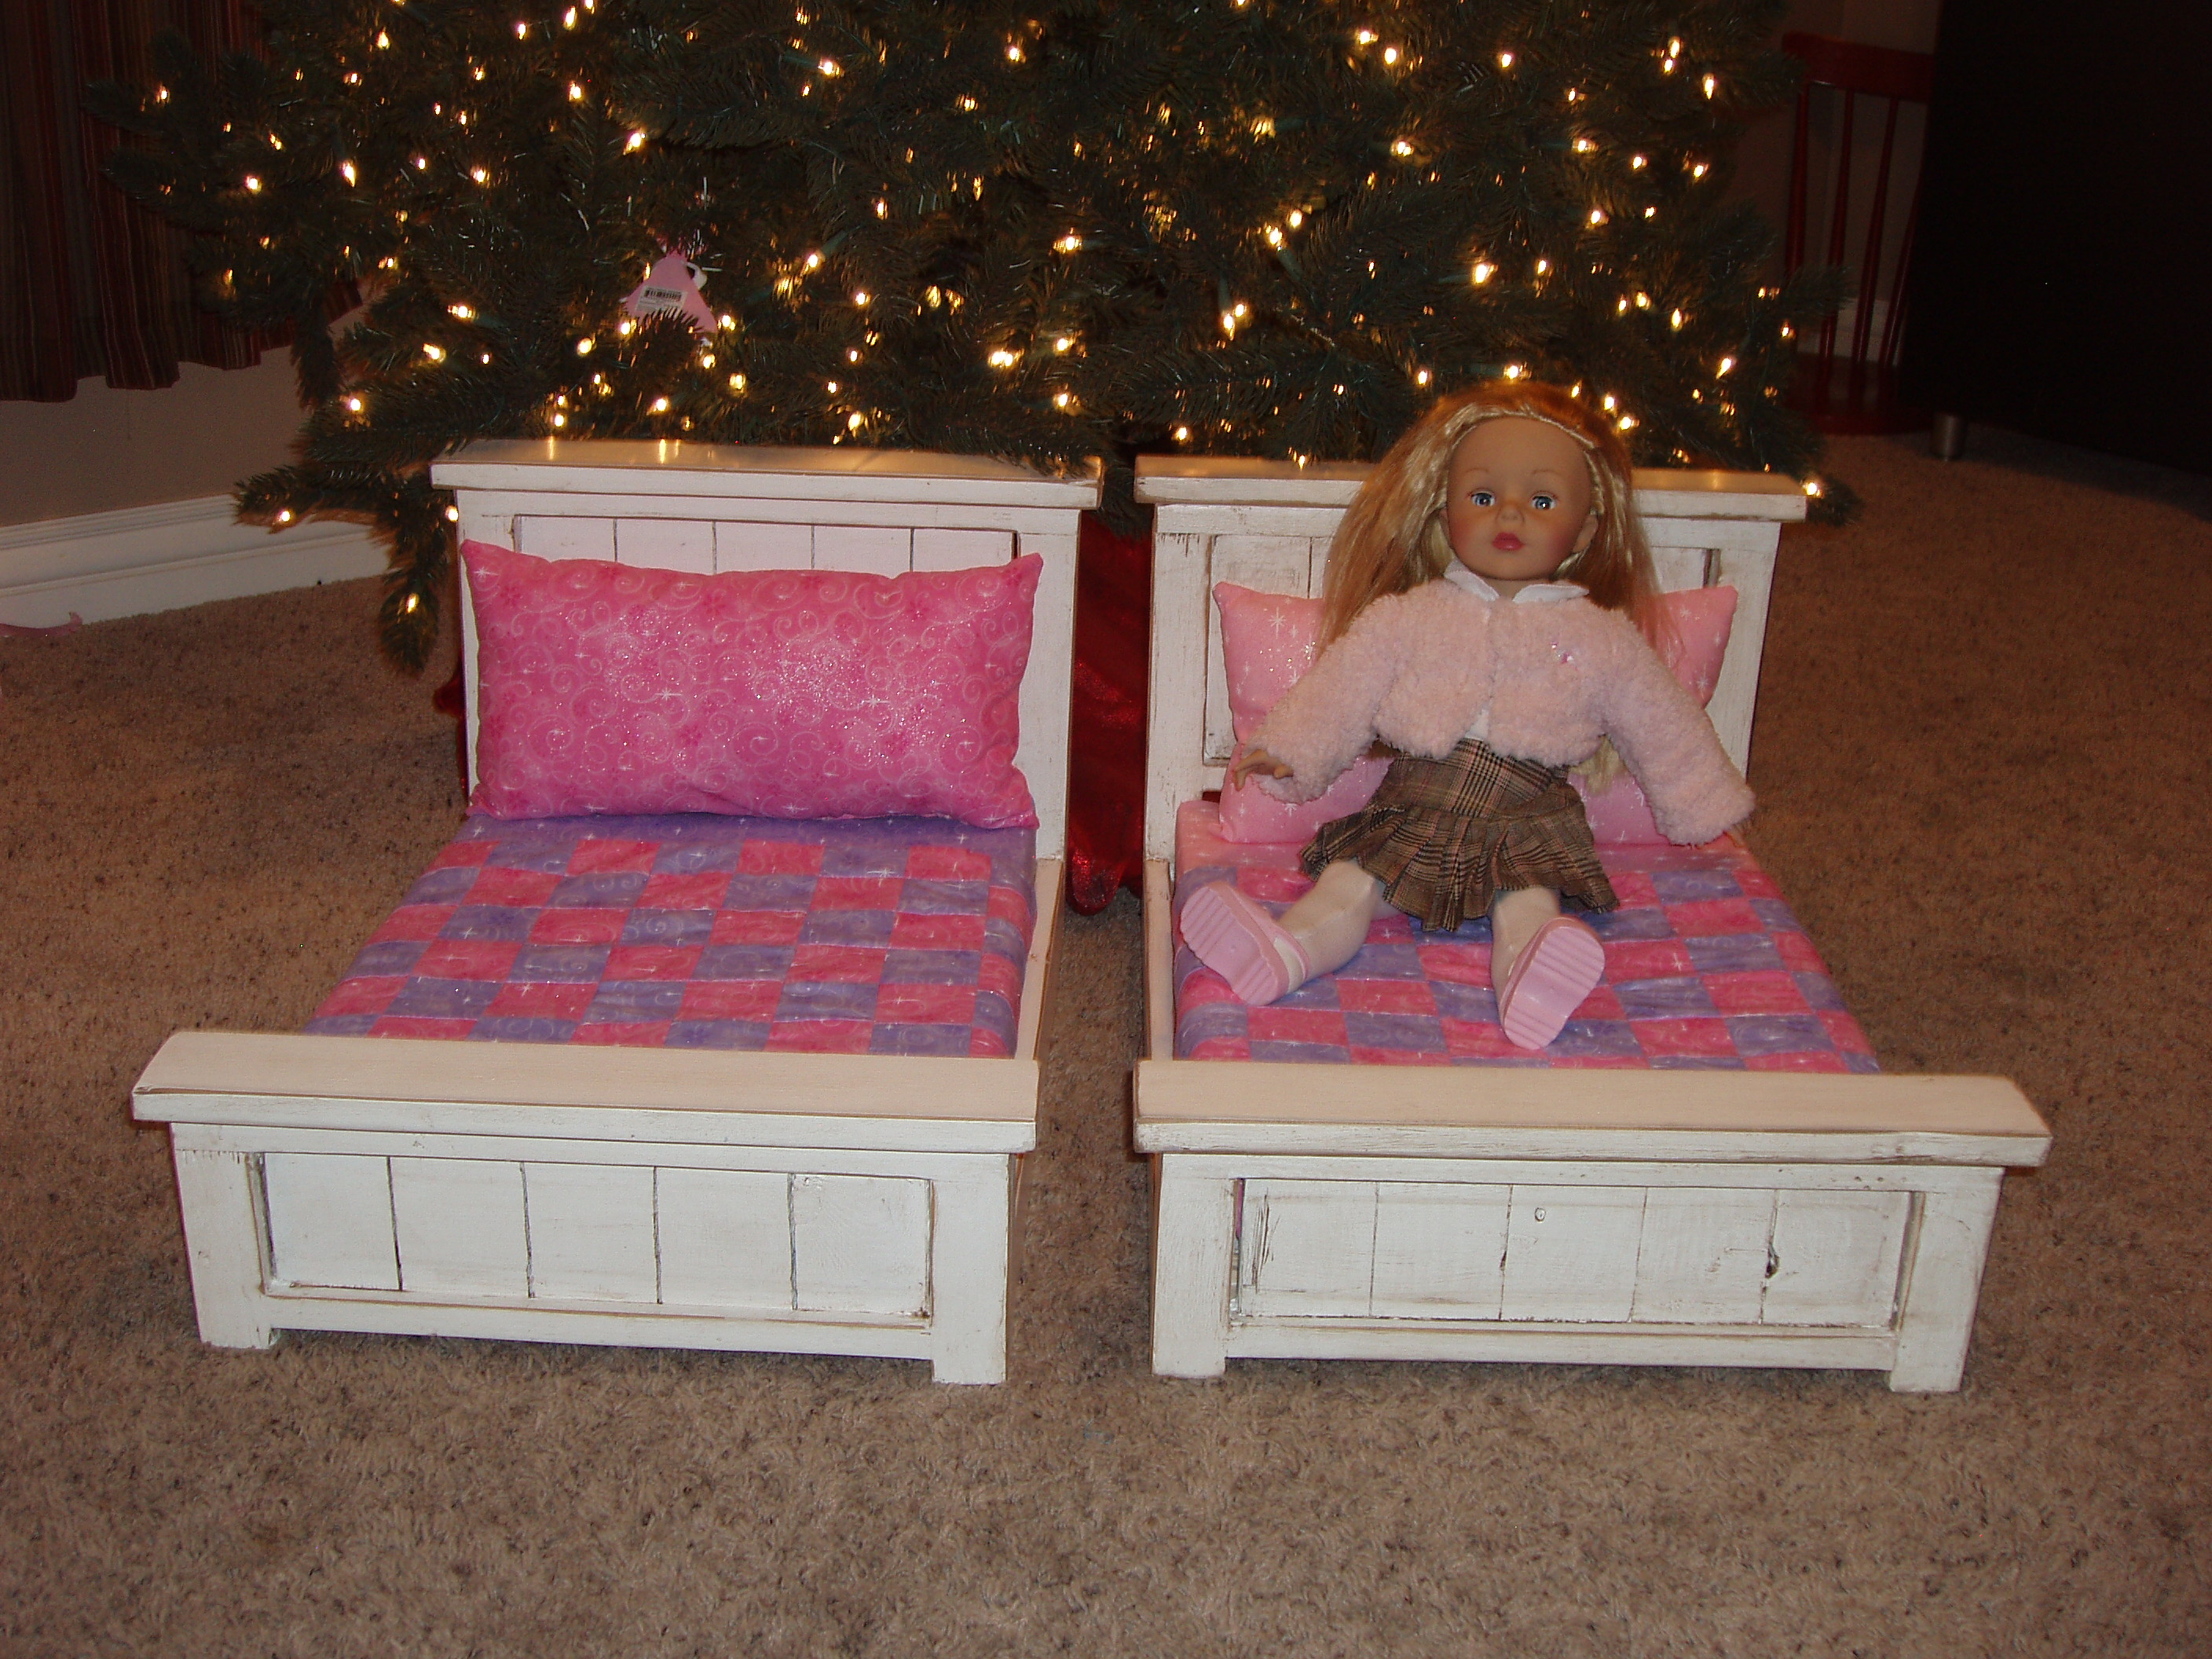
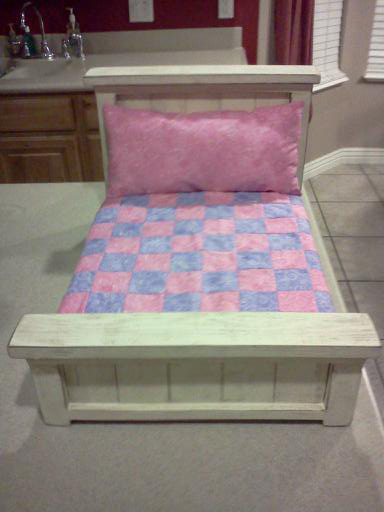
When Ana posted the plans for the Doll Farmhouse Bed I quickly started thinking of all the little girls I could build this for. I ended up building 4 of them. The first one was definitely my learning curb, the other three went a lot smoother and just looked better!

When we sold our last house, we sold the dining room furniture we had custom built with it. We did projects, homeschooled and ate off of a folding table for the first 7 months we lived in our new house. Until we built our new farmhouse table!
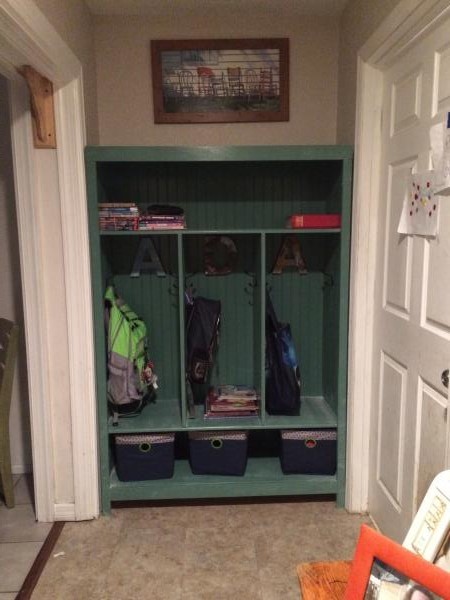
This is our second Ana White project, our first was the loft bed which turned out great! With this project we used 16" wide boards for the extra room for backpacks and it fit perfectly in our space at the end of the hall. We used Beadboard for the back panel and painted it with Valspar interior semi gloss paint I got off the reject shelf at Lowes at $10 for a gallon! This is my new favorite piece of furniture in the house!

Fri, 09/18/2015 - 09:26
Sorry about the sideways photo, I tried to fix it to no avail.
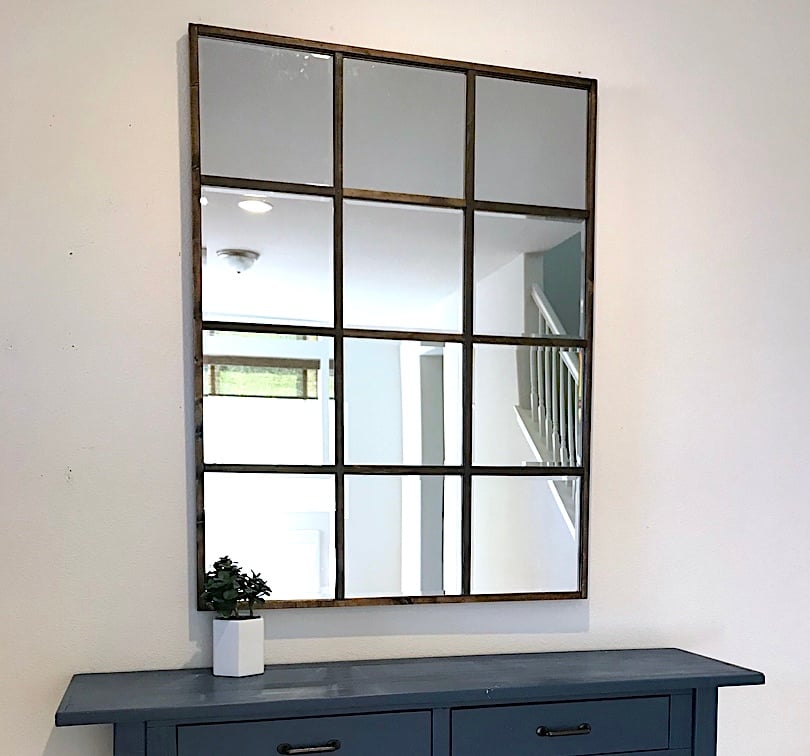
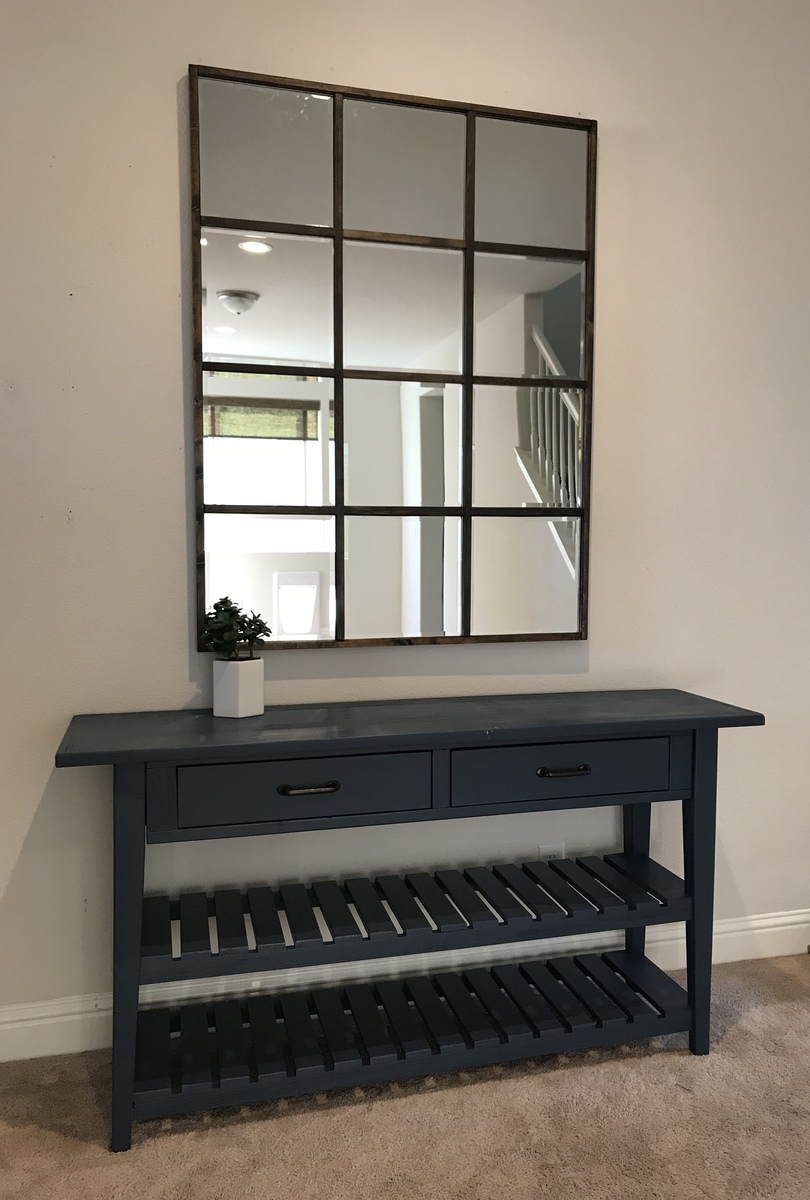
DIY grid mirror. Used exact plan.

This was my take on your Twin Sleeper Chair. I made it into a full. I used 2x4’s where there was suppose to be 1x4’s because I changed the width. This was a very fun project, my first project actually. Thank you for the plans and idea.


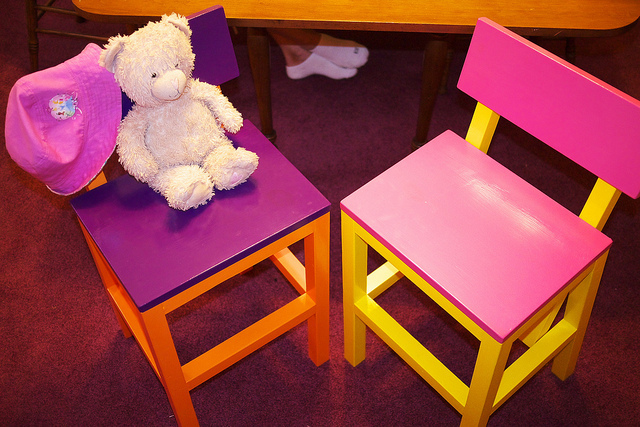
Well I decided for my first project/projects to make chairs for my girls. They turned 2 and 3 last month. I also made a couple of chairs for friends of ours who have twin boys that also turned 3. Once I got the hang of it making the chairs didn't take to long but painting seemed to take forever. But I love how all the chairs turned out.

Mon, 07/18/2011 - 13:51
I'm so glad you made these! The paint definitely looks like it took some time, but worth it! Love the second photo of the two chairs, they are sturdy, eh?
In reply to I'm so glad you made these! by Ana White
Mon, 07/18/2011 - 15:45
I am happy I made them too. The are super sturdy. Toddlers climb all over them and when they aren't looking adults sit on them. No problems. I am making a couple more but a little taller for our kitchen.

Modified the plan to use 2x2 with pocket screws to support the shelves.
Shelves were made edge glued board from Lowes https://www.lowes.com/pd/Common-1-in-x-24-in-x-4-ft-Actual-1-in-x-23-25…

Cedar and pine. The pine ,pine,head and foot board, on this project have ants holes, which one cannot reproduce.
Tryde coffee table made from a combination of pine and recycled wood from old pallets.
Fri, 01/06/2017 - 11:43
What stain color did you use? I'm looking for something similar
This was my second project. It took a little longer than I wanted because I don’t have a table saw :( I didn’t trust Lowe’s to cut the plywood for me since it needed to be perfectly square and they only guarantee their cuts to be within 3/4" so I had to wait to go to my dad’s house to borrow his, but other than that it went pretty fast!
I kept to the plans for the most part, but I added some trim and cabinet doors. I knew that at my house the inside of that cabinet would be a hot mess in a matter of days, so I wanted to have a way to cover it up! I just used 1x4’s to frame the doors and leftover scrap 1/4" plywood from the back for the faces. I used a router to rabbet out the doors so I could inset the plywood instead of it just sticking off of the back. They turned out pretty good considering they were my first and I had never used a router before! Overall, I am really happy with this one! I’ll be making the matching pieces this weekend - the coffee table, end table, and entry table.


I took the original plans and modified them to work with my requirements. Most of this piece is made with pallet wood. I made the rails from aluminum bars and sliding door pulleys.

I host an Airbnb and wanted to add a small fire table feature to the outdoor front porch of it. Everything prebuilt was either very large or very ugly, so I decided to build a small coffee table and add a tabletop lp gas unit I found. I had built Ana's Farmer's table before so I searched the site and found the Parsons Table series. Ana's plans are so straightforward and easy to customize so I scaled it to fit the space. I added some privacy panels to hide the lp tank making one hinged for access.

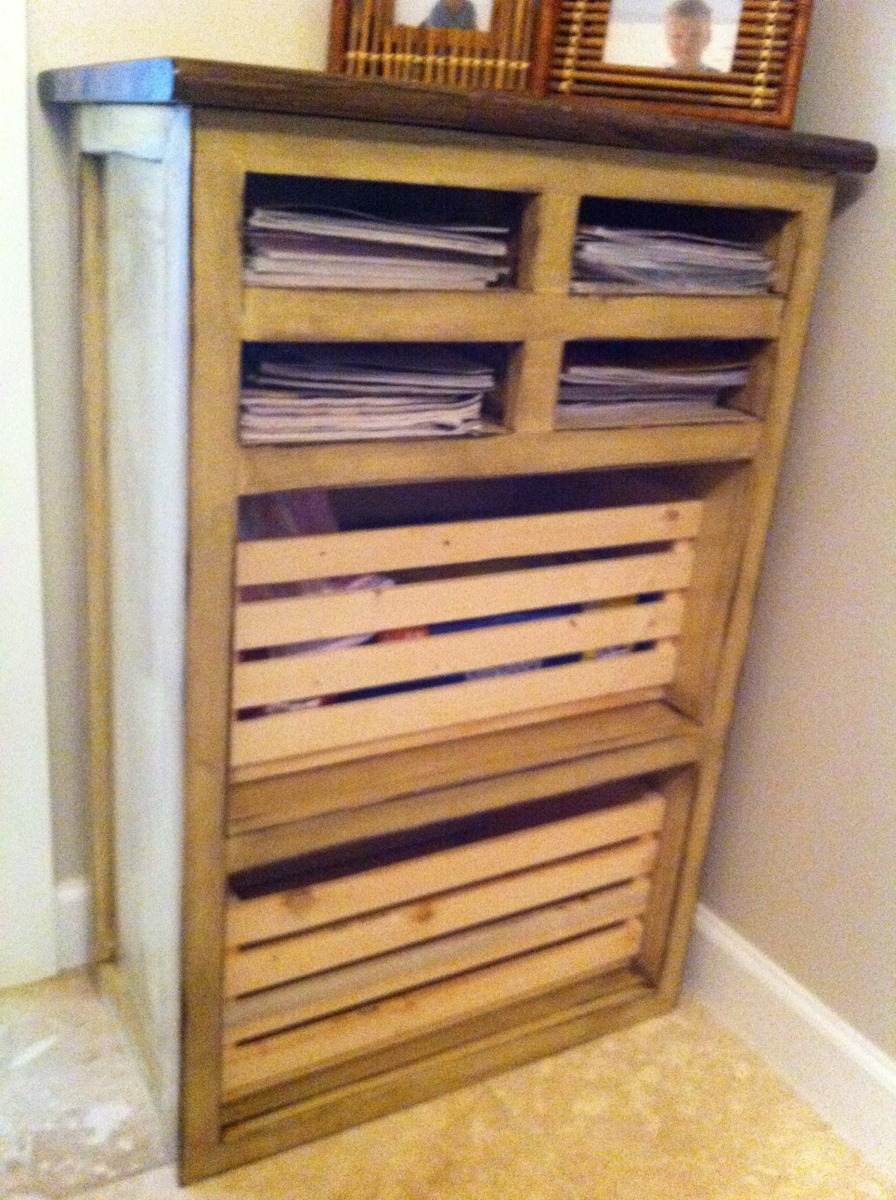
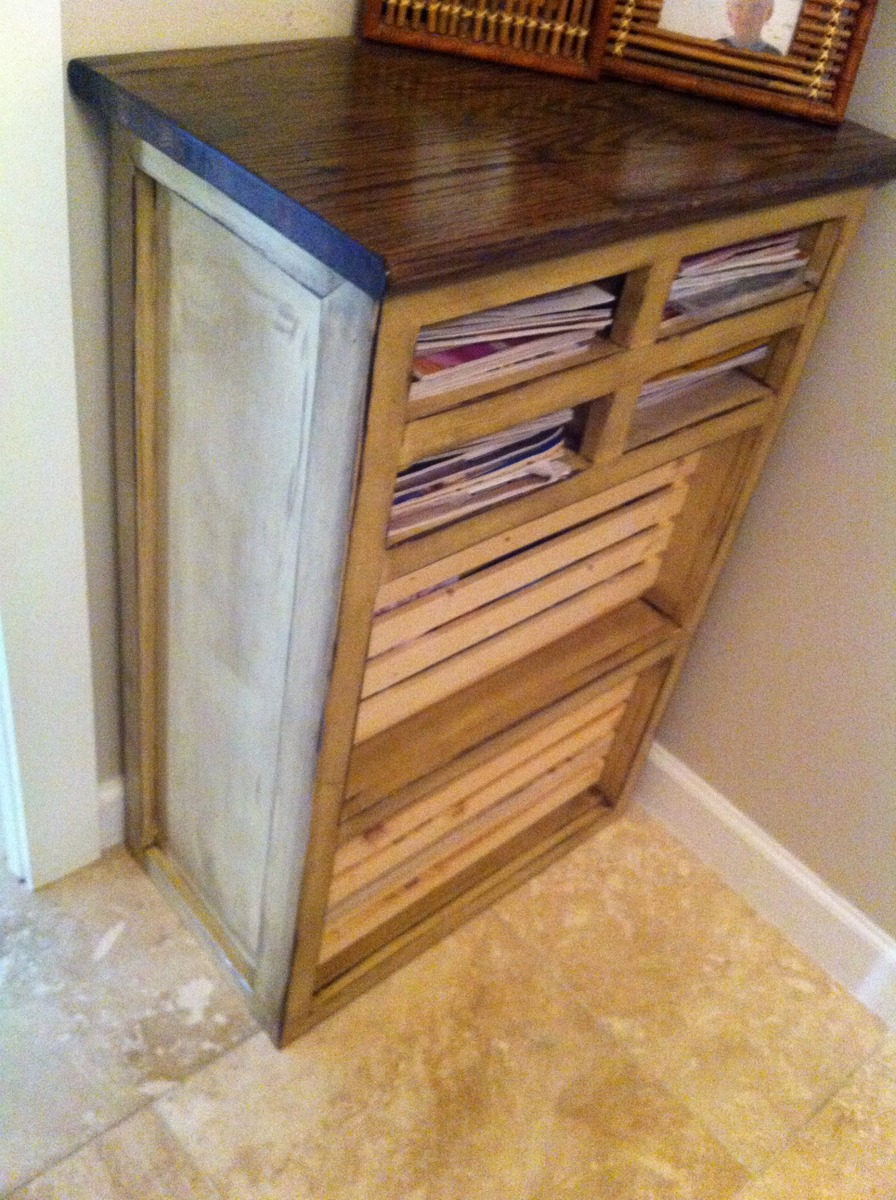
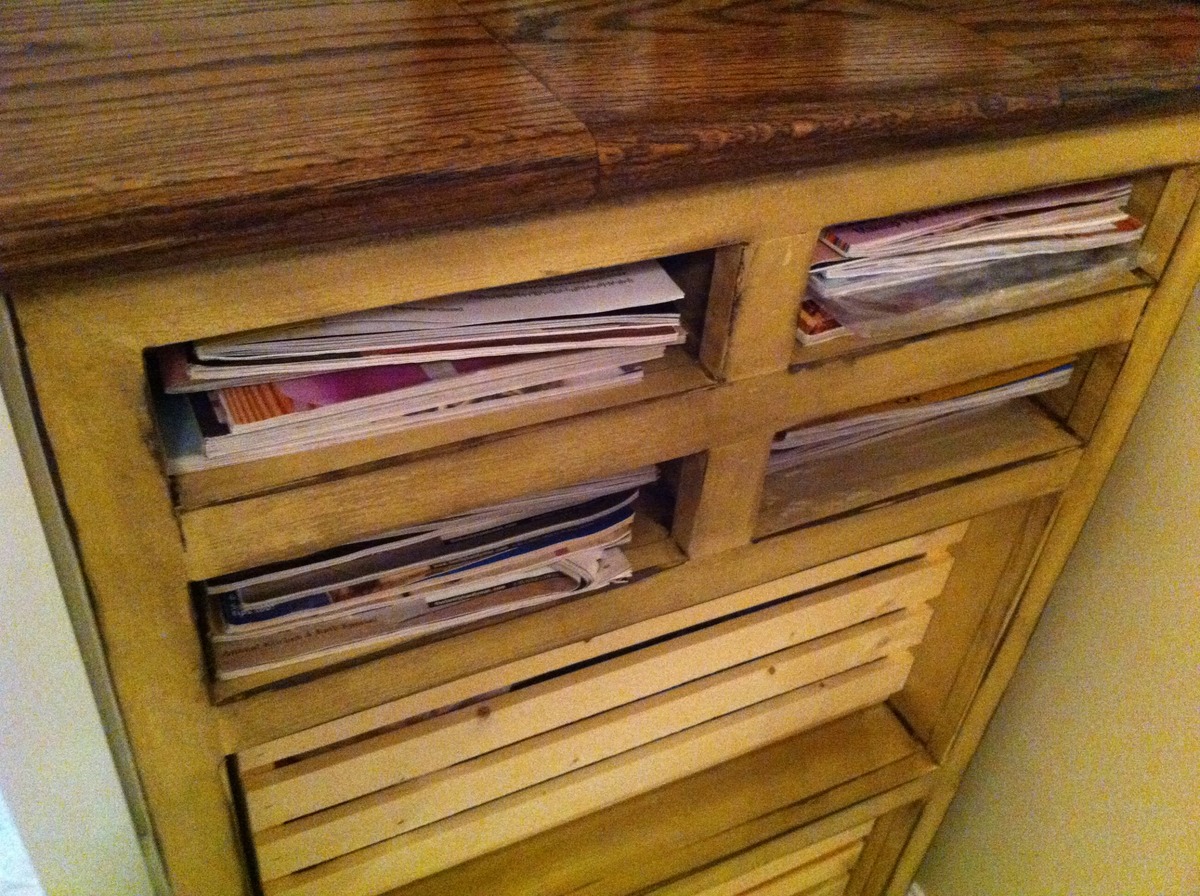
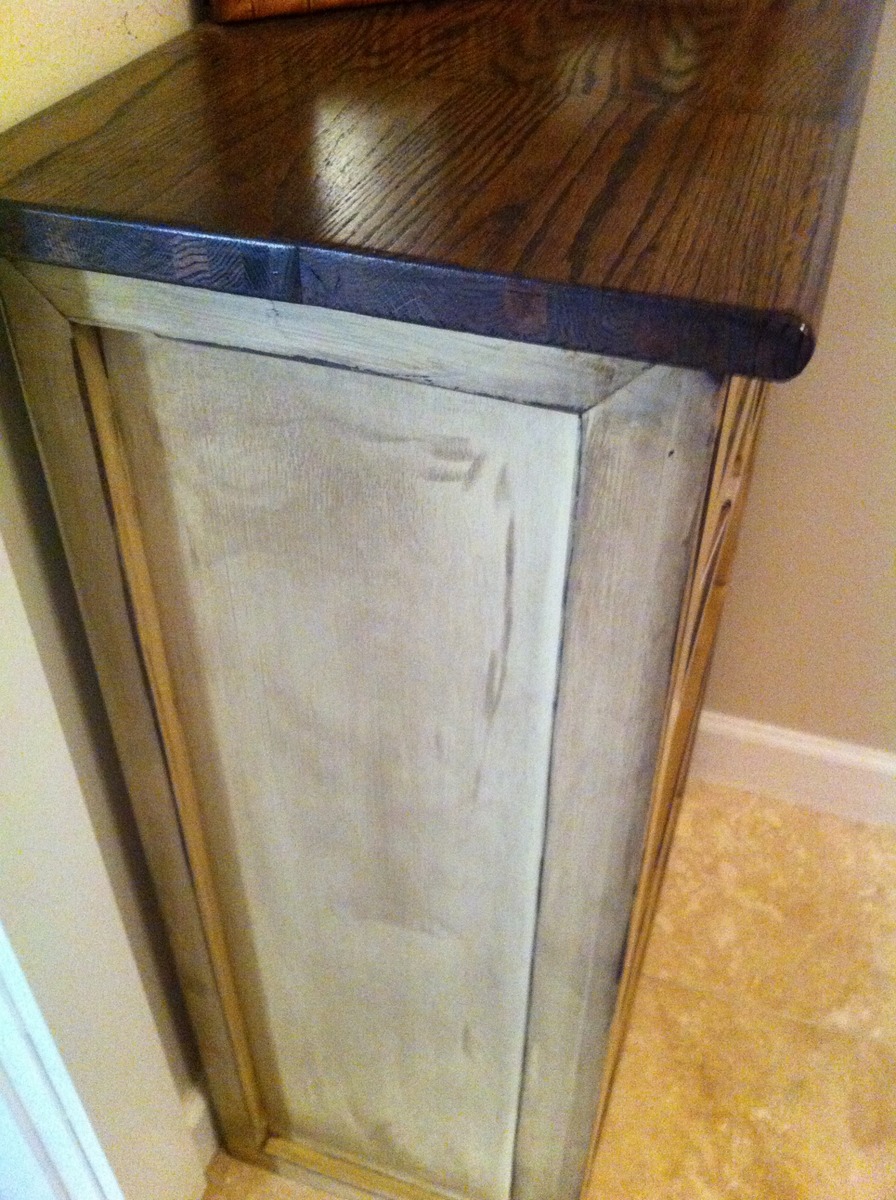
I built this cabinet to store magazines and diapers (towels when the time comes) in the small 1/2 bath.
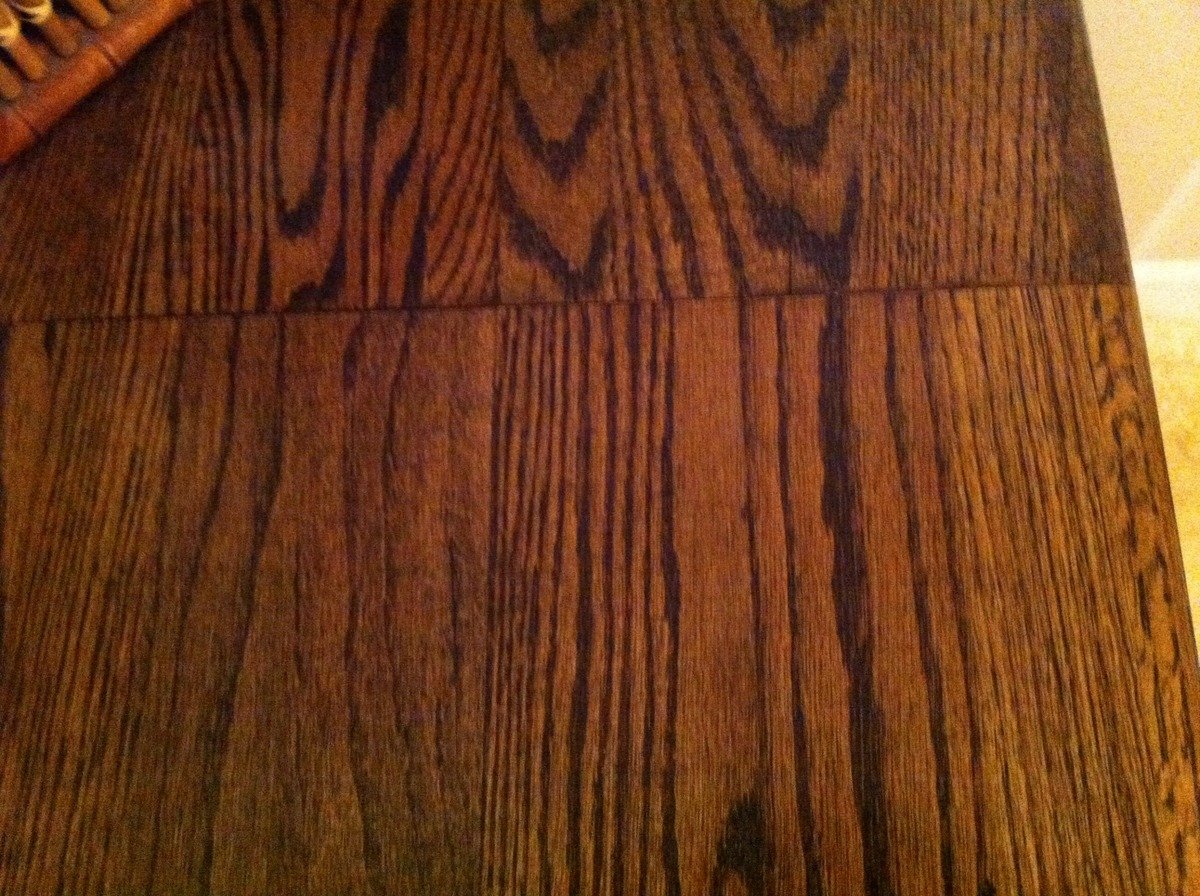
The top was made with left over oak pieces from when I ripped out the carpet and 2x12 stairs and replaced with oak treads.
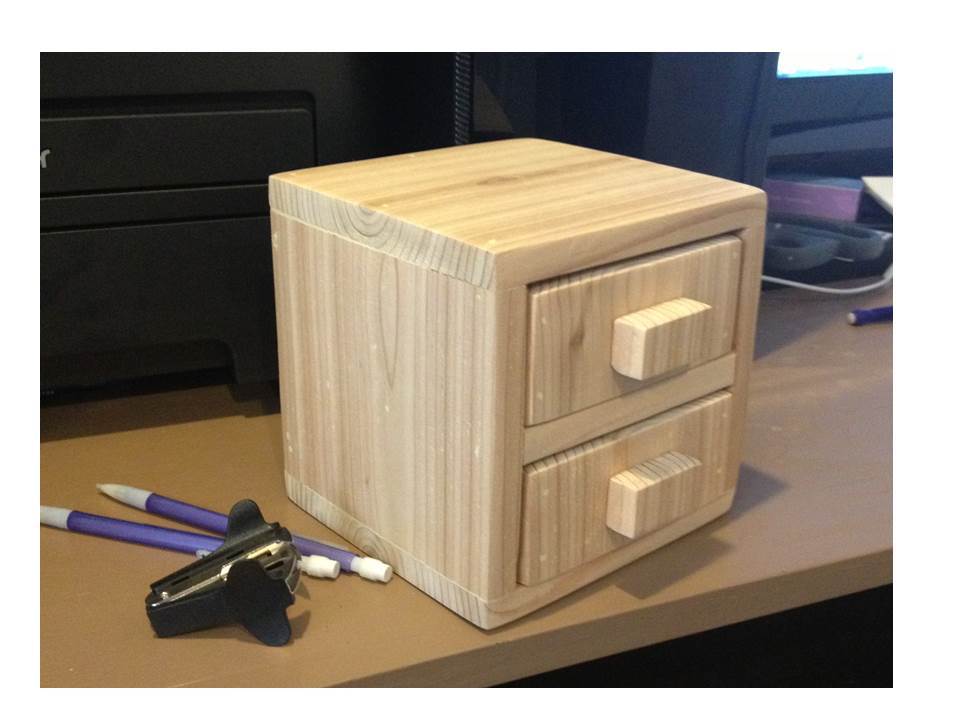
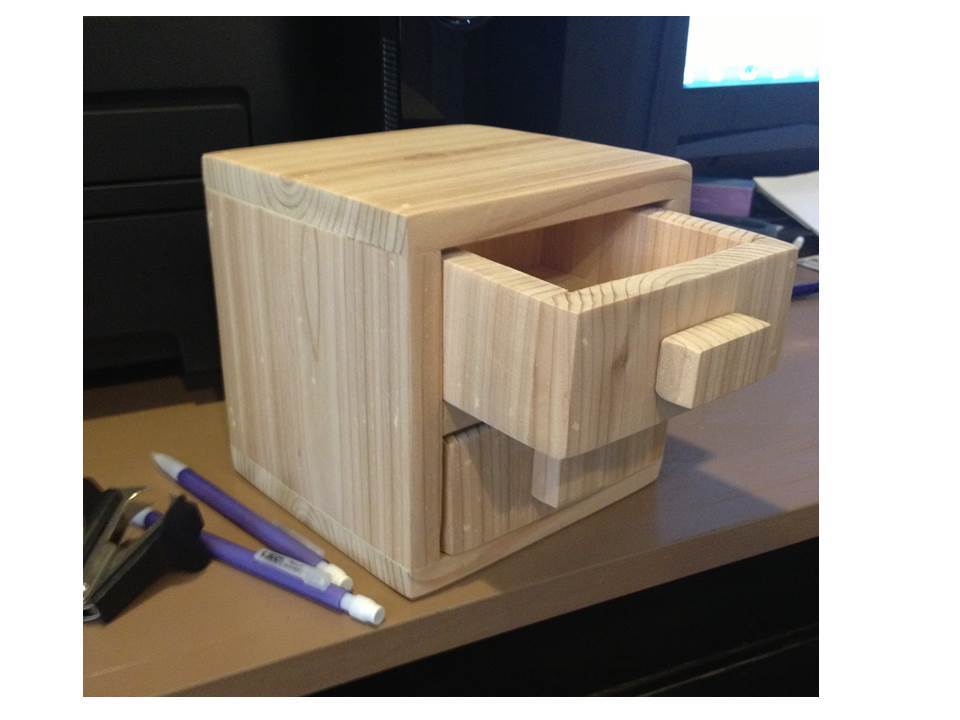
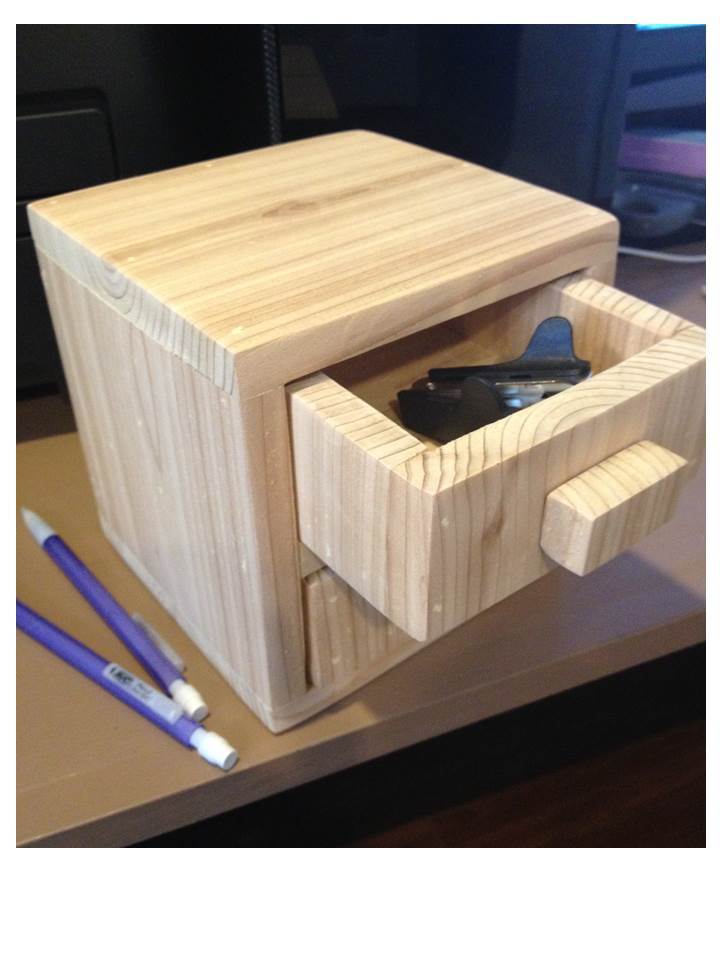
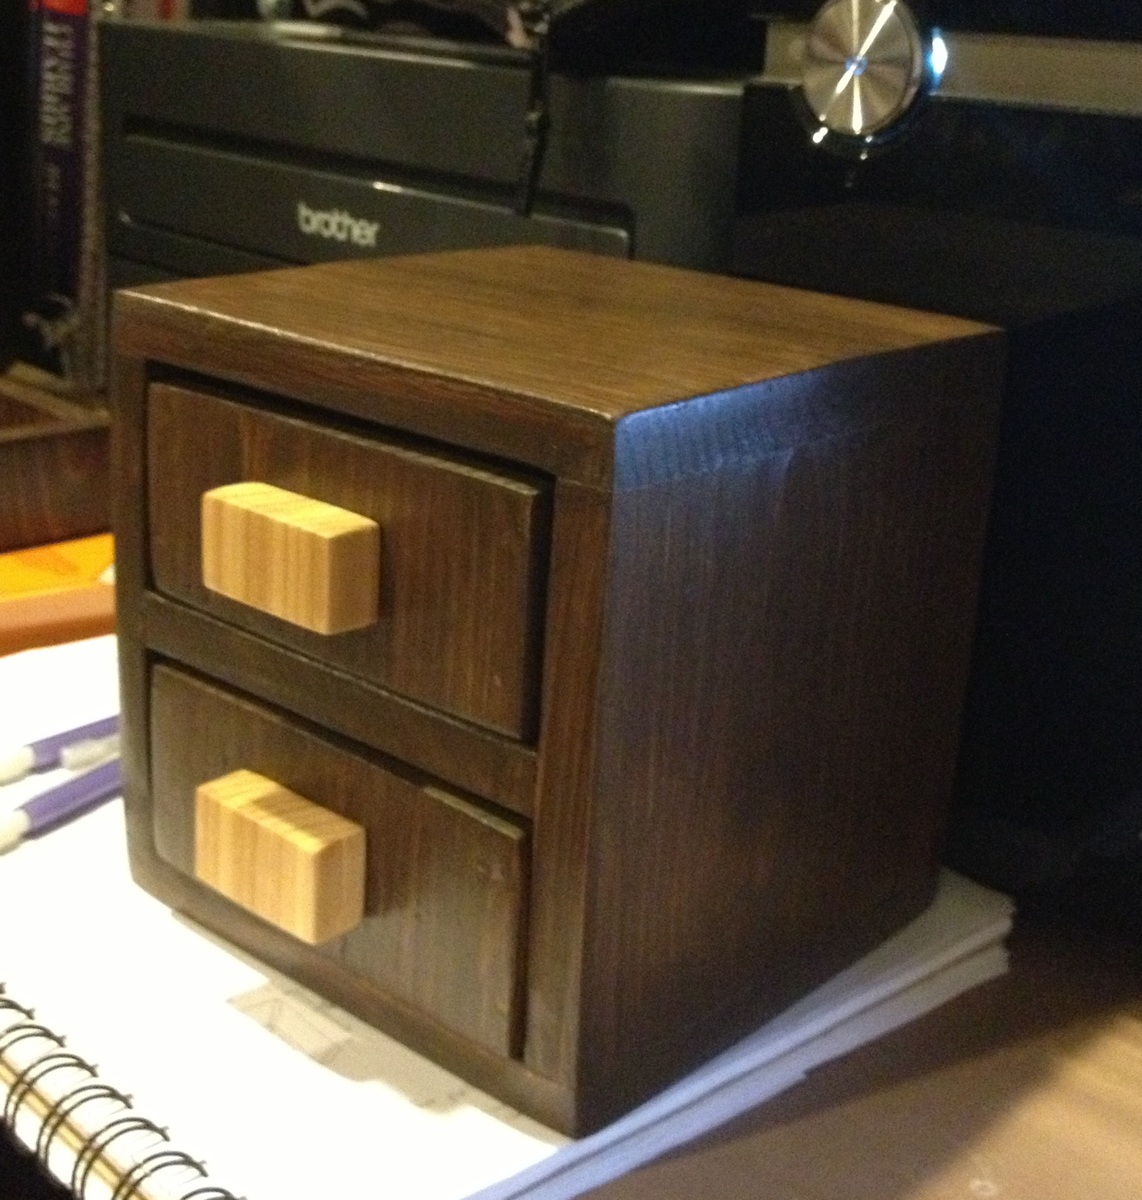
This is the prototype build for the Cedar 2-drawer desktop storage cube. It is made from 1 piece of ½” x 5 ½” x 6’ fence picket, about $3 for wood. I had based this plan on a board that is ½” thick and 5 ½” wide, and had identified areas in the plan where you’ll want to measure and cut as you build. I found this especially important on the prototype build, since it turned out the picket I bought was 5 3/8” wide, which affected the depth of the shelf, length of the drawer sides, and the size of the drawer bottom. Measuring and trimming as you go gives the best fit for all the pieces. Probably the most helpful thing besides keeping the measuring tape handy, was some 60-grit sandpaper. After everything was assembled, I used 60-grit sandpaper with my palm sander to sand down any high spots caused by cupping, to get the outsides nice and smooth. Followed up with some 220-grit for a nice smooth final sand. The pulls are some ¾” x 1 ½” pieces of the cedar, sanded well on all sides. I just cut these from the scraps, and they are glued on. You can use regular knobs or pulls if you like. You may need a shorter screw or a ¼” spacer, since the drawer face is only ½” thick. The screws for regular knobs are normally sized for a ¾” thick door or drawer face. This build took about 3 hours. Finishing time will depend on the type of finish used. My words of advice for building this would be: Take your time measuring. Measure twice before cutting. Sand thoroughly. Have fun!
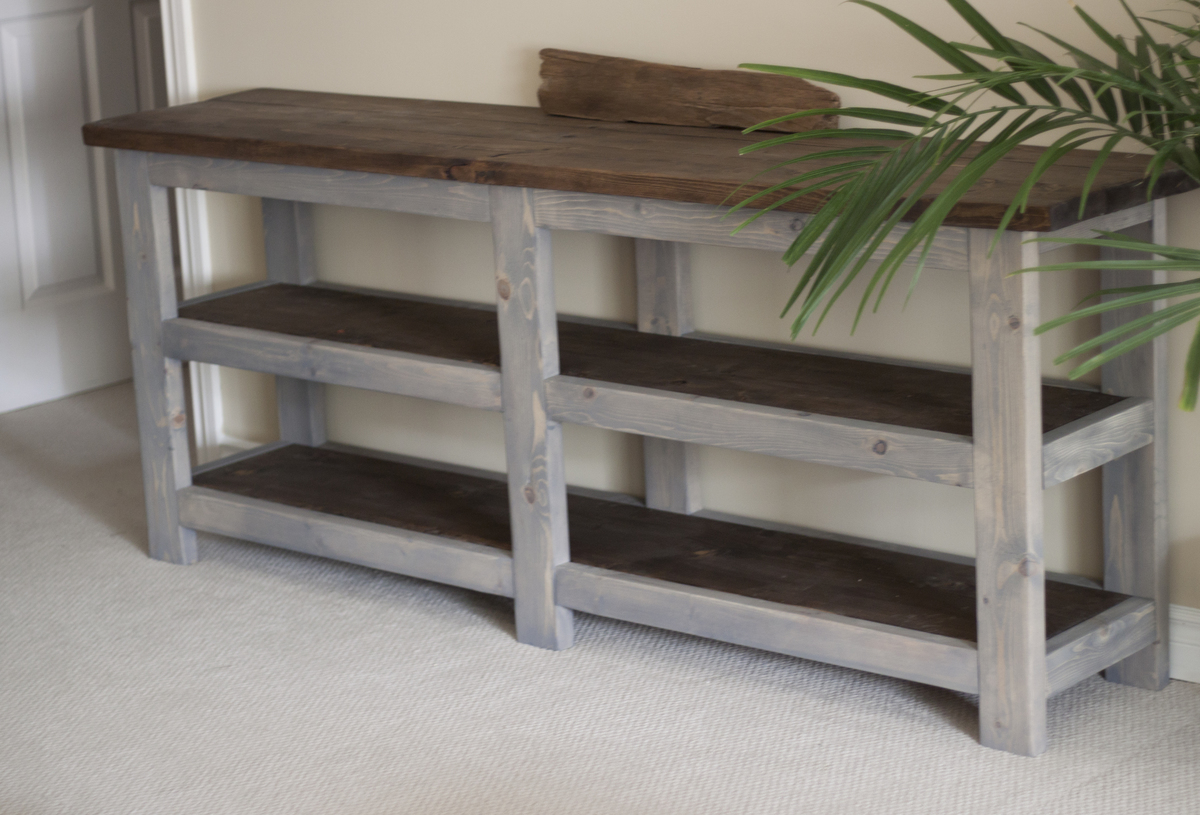
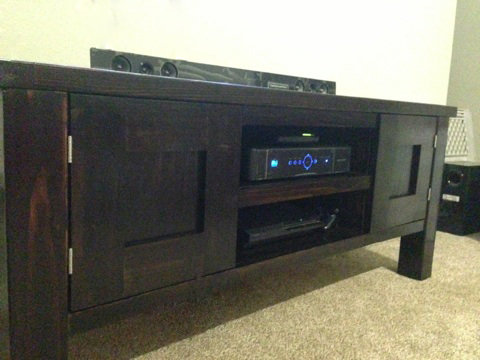
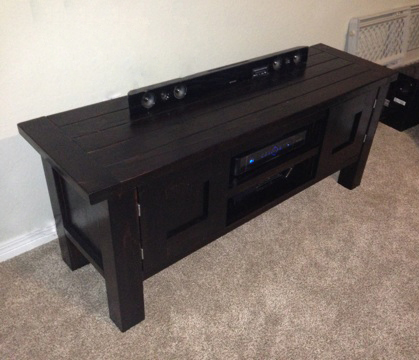
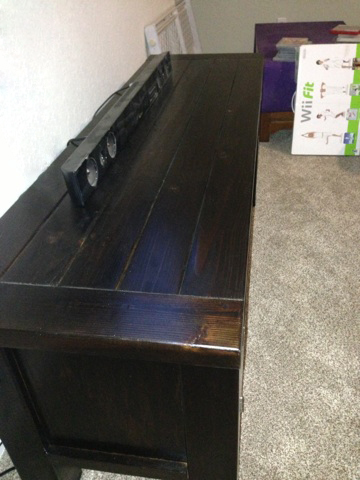
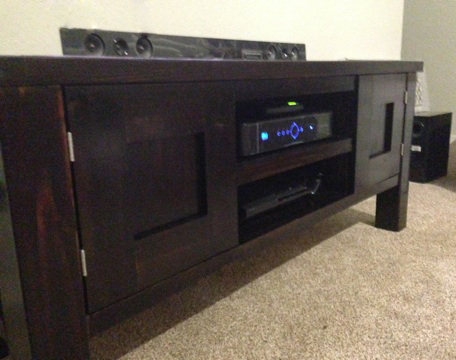
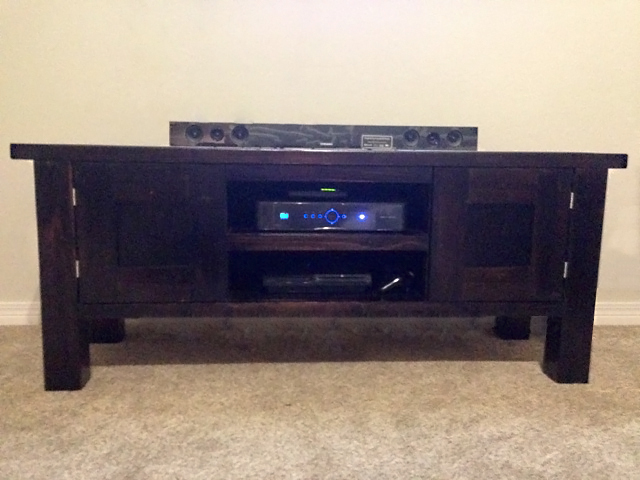
I made this using the Rustic X console plans but changed a few aspects. Instead of 2x2's I used 2x3's to beef up the cross beams and removed the X. Also extended the shelves out a few extra inches.