Community Brag Posts

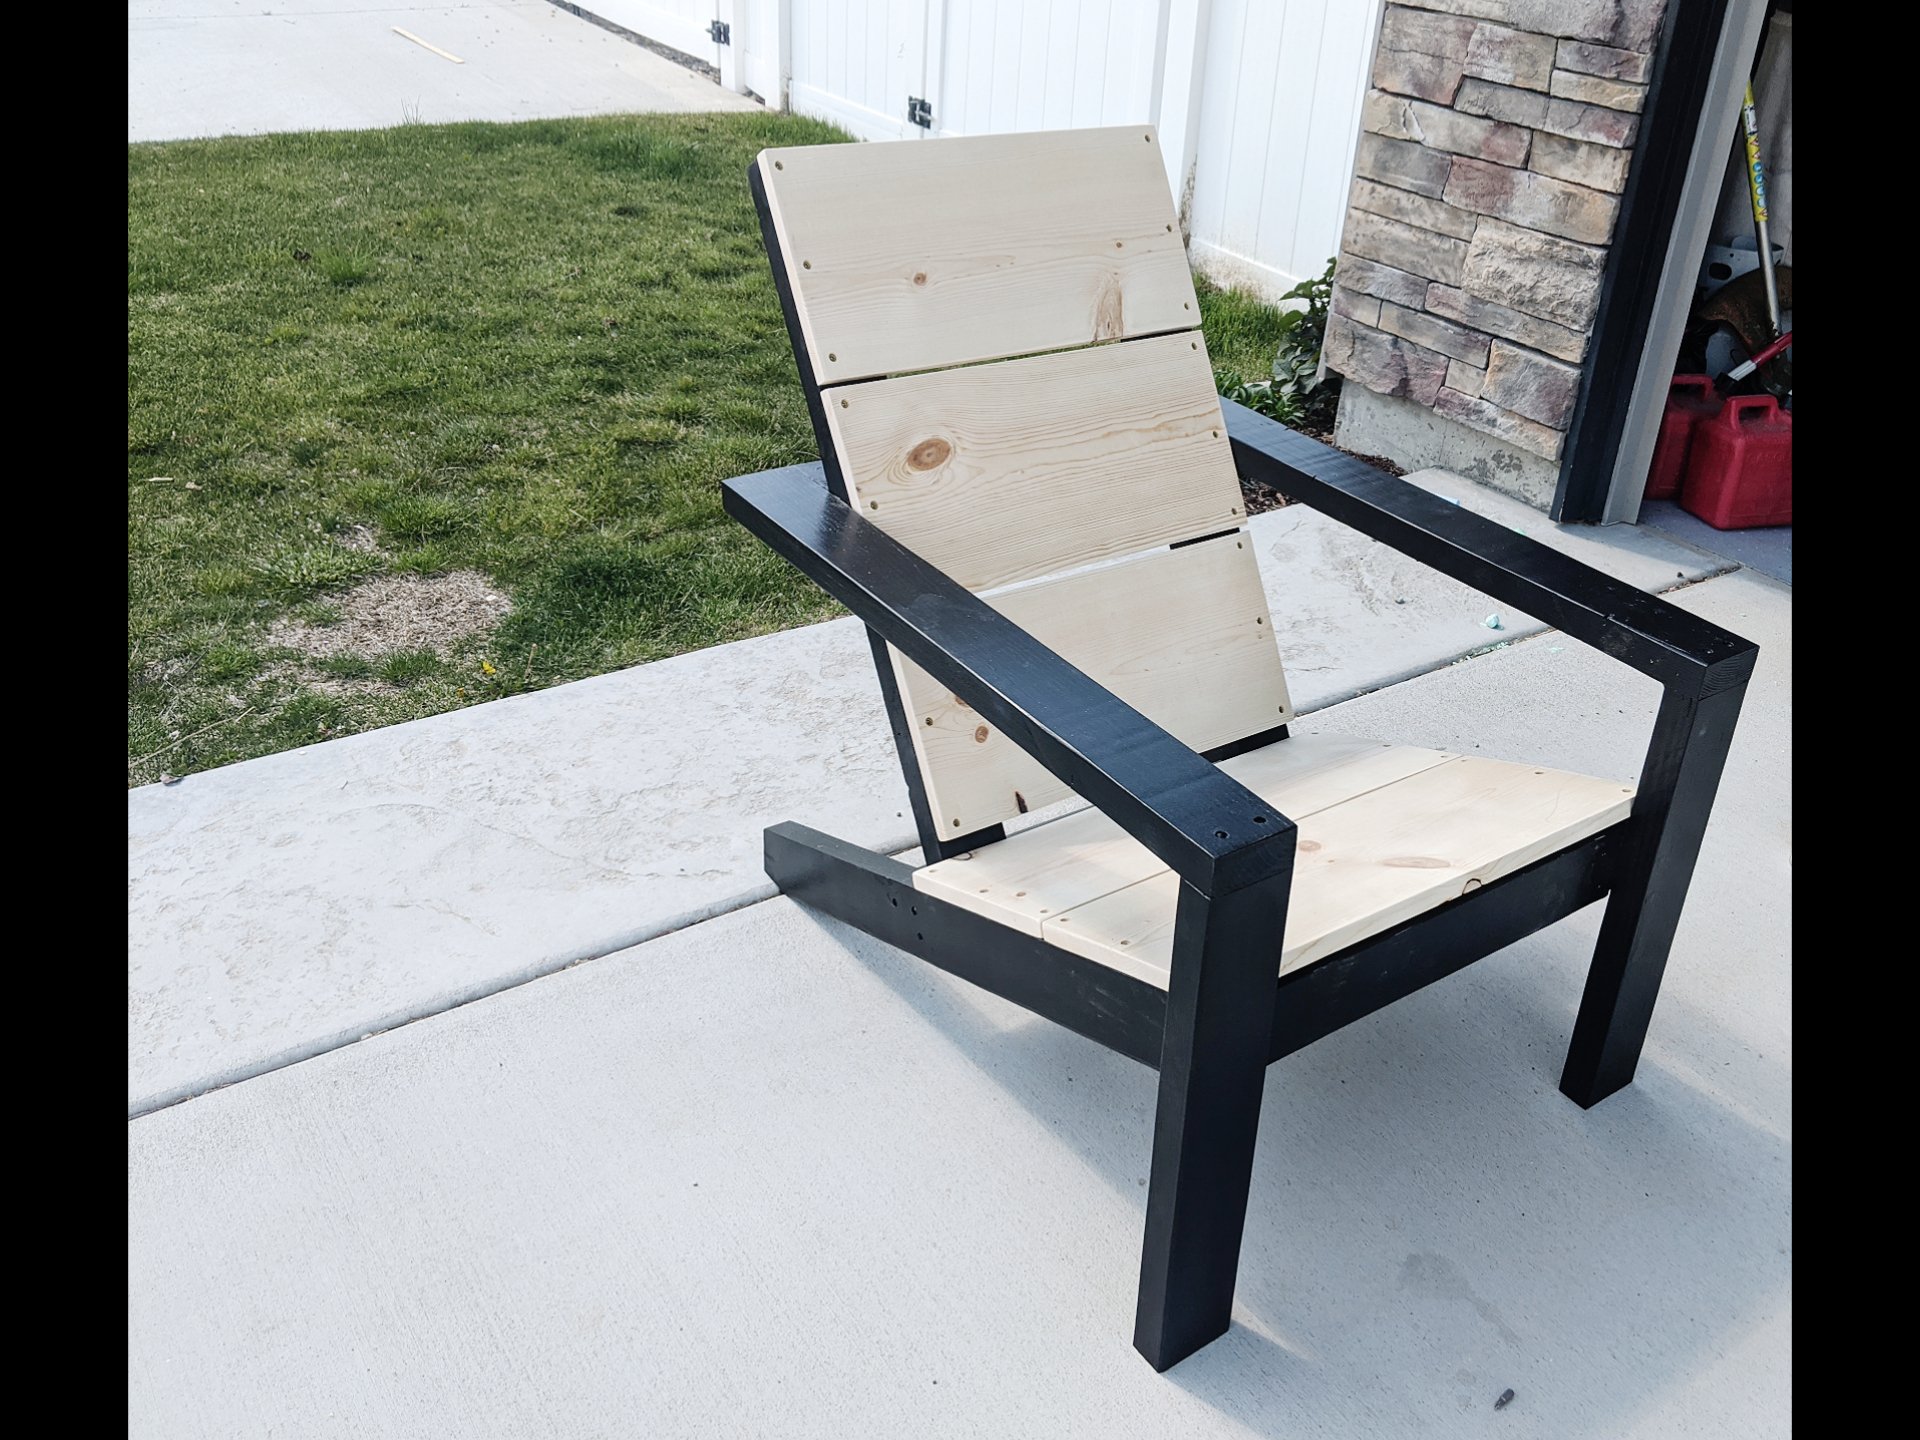
Modern 2x4 Adirondack Chairs
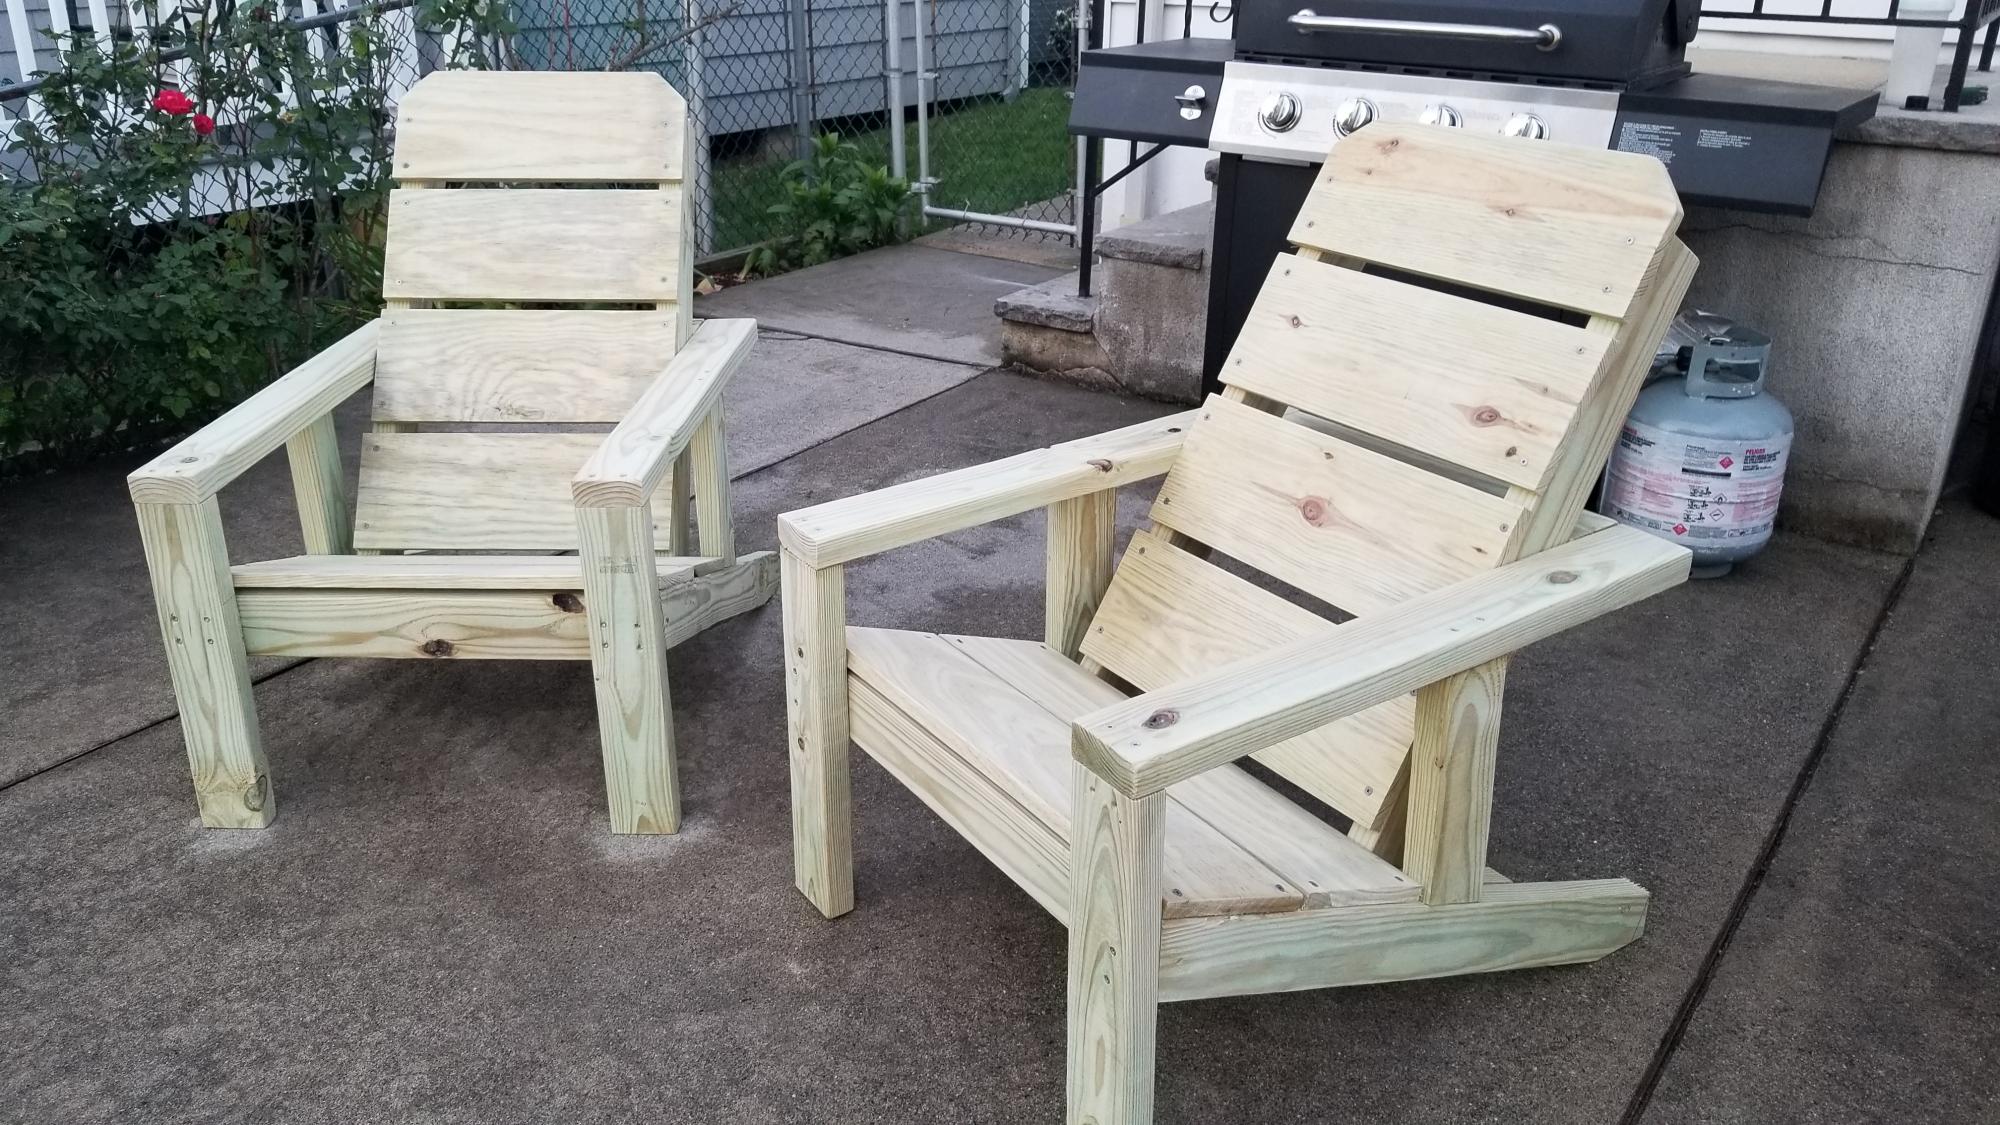
I'm pretty happy with this build being that I had no experience and I modified the plans a bit to add more support for the arm rails and only had access to 1x8x8 and not 1x10x8 lumber. Very comfy chair, my neighbor saw the build and offered to buy 4 if I would make them for him!
Built from Plan(s)
Estimated Cost
30-40 a chair
Estimated Time Investment
An Hour or Two (0-2 Hours)
Finish Used
none
Recommended Skill Level
Intermediate
Wood Farmhouse Bed
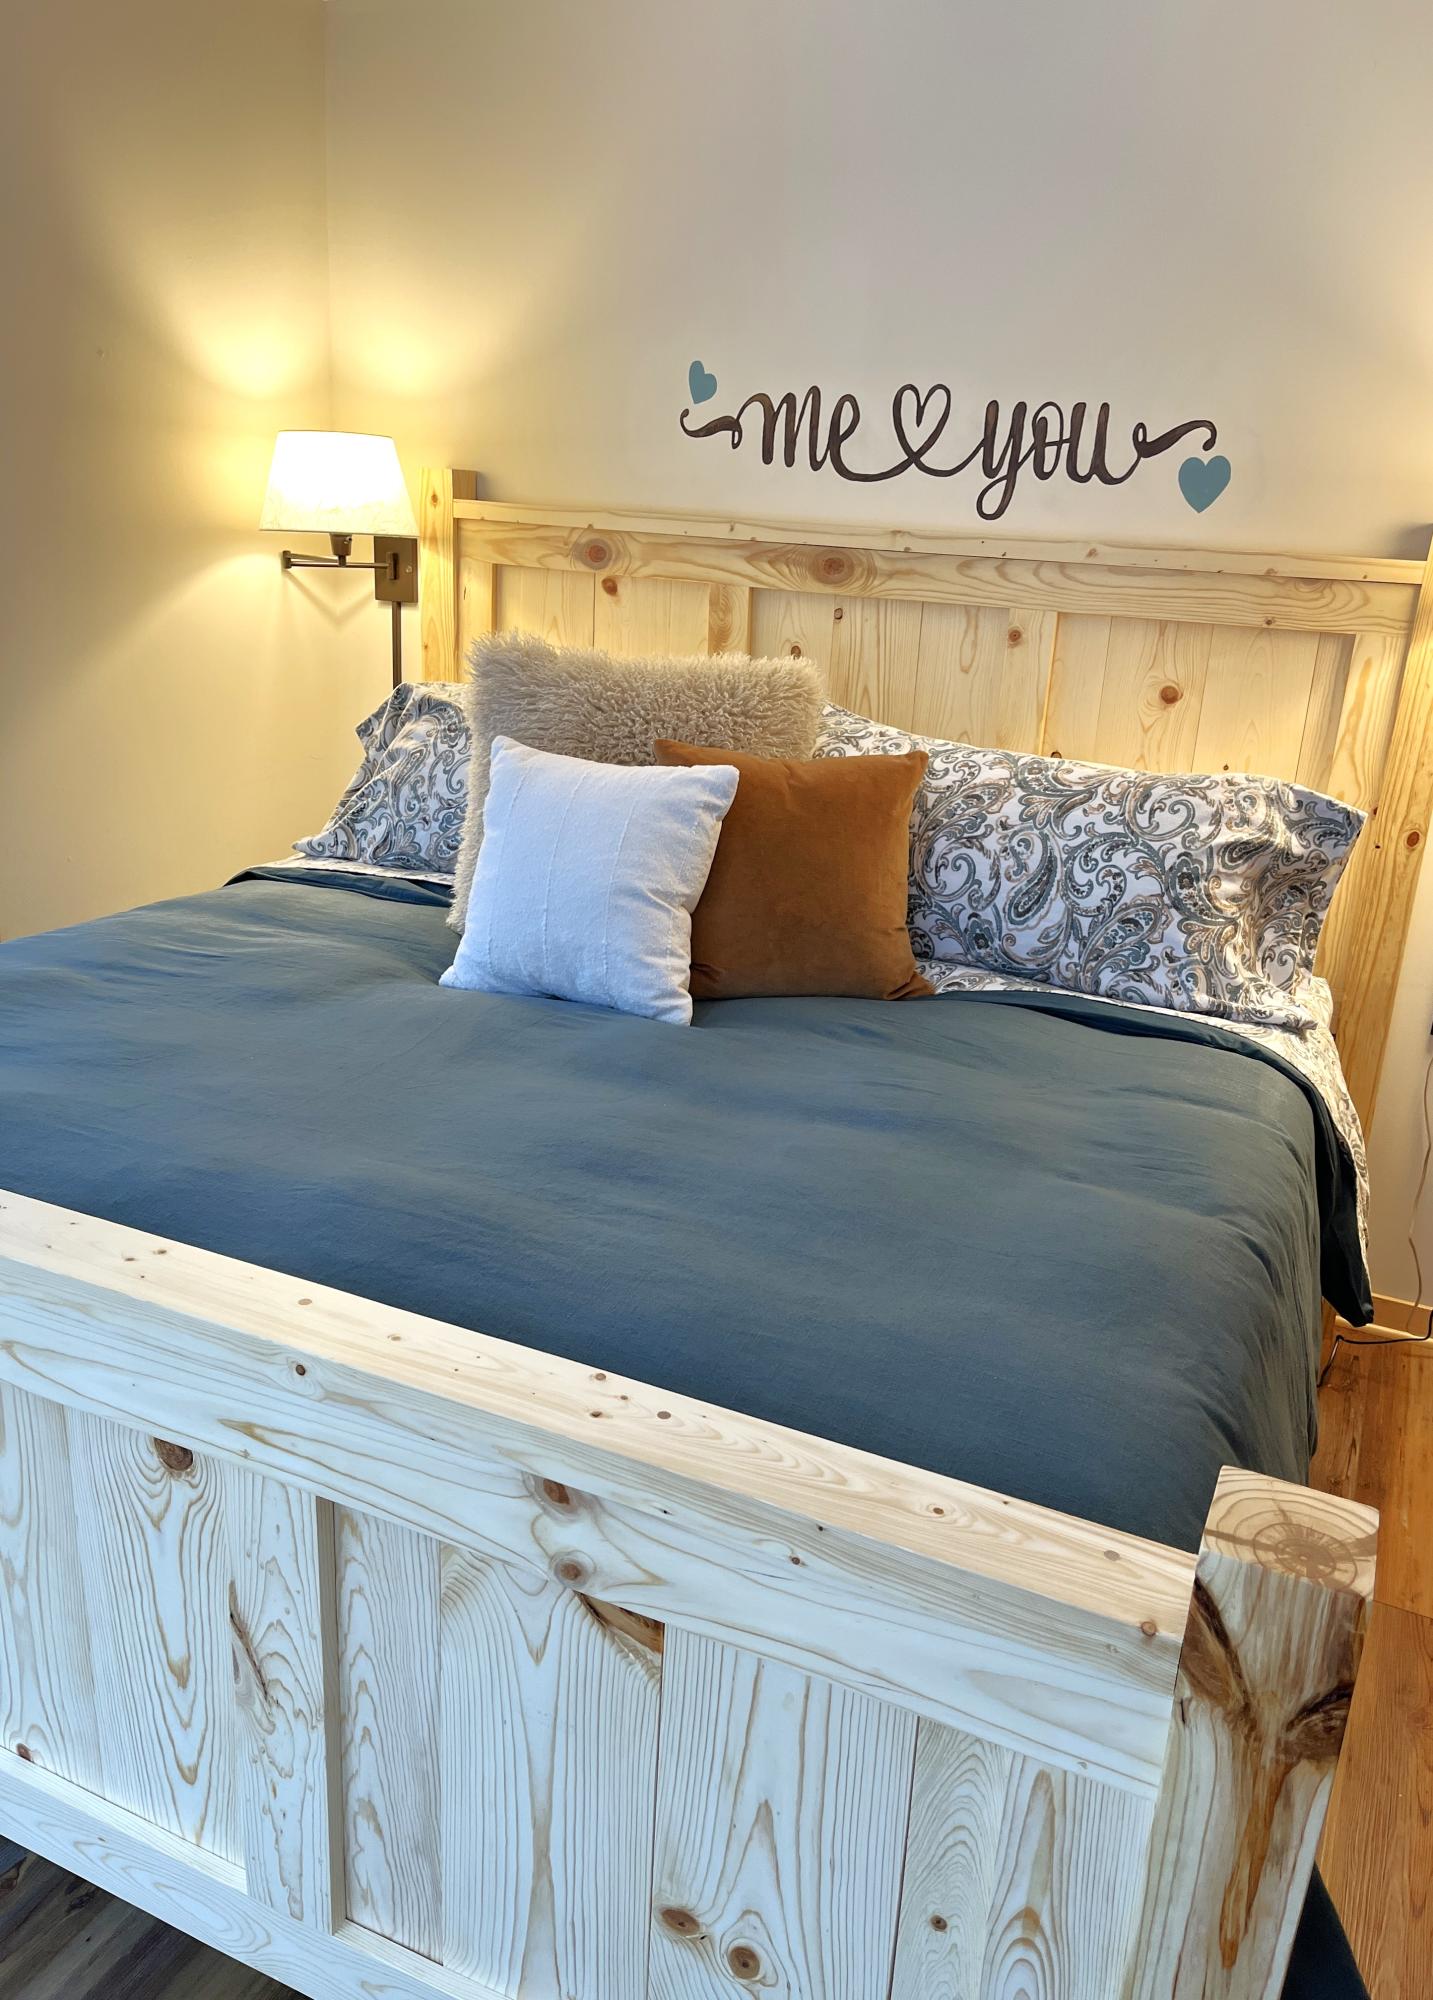
Made the Farmhouse Bed to fit our new adjustable bed. Thanks to Ana White and all her free plans, I’ve been able to build SO many things!
Jessica Benson
Built from Plan(s)
Sewing Desk
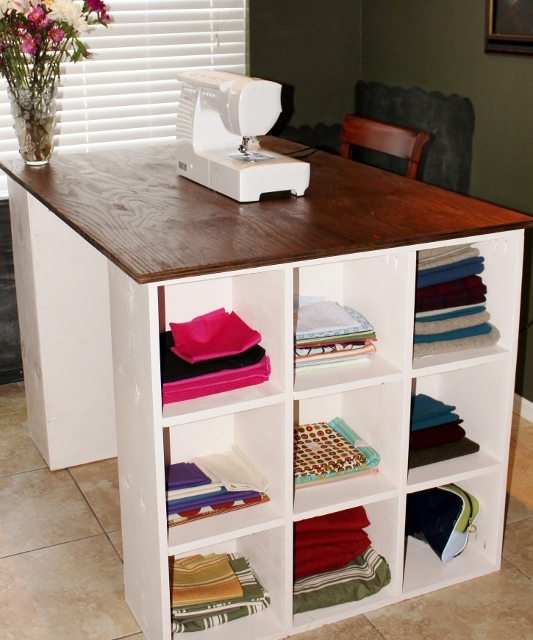
Our first woodworking project! A sewing desk that was featured on this site.
Built from Plan(s)
Estimated Cost
$60
Estimated Time Investment
Weekend Project (10-20 Hours)
Finish Used
make sure you sand the pieces multiple times. I used semigloss paint and also a stain and finished it off with a clear poly protector for the table top.
Recommended Skill Level
Beginner
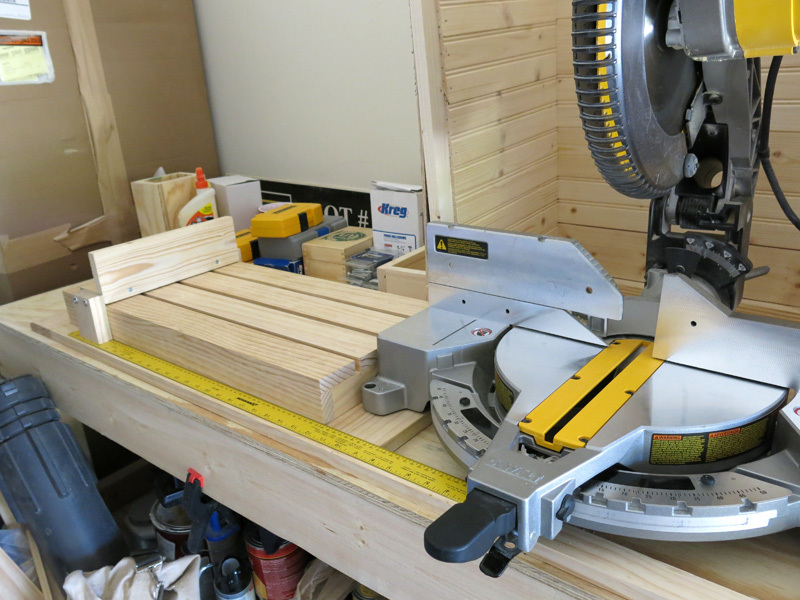
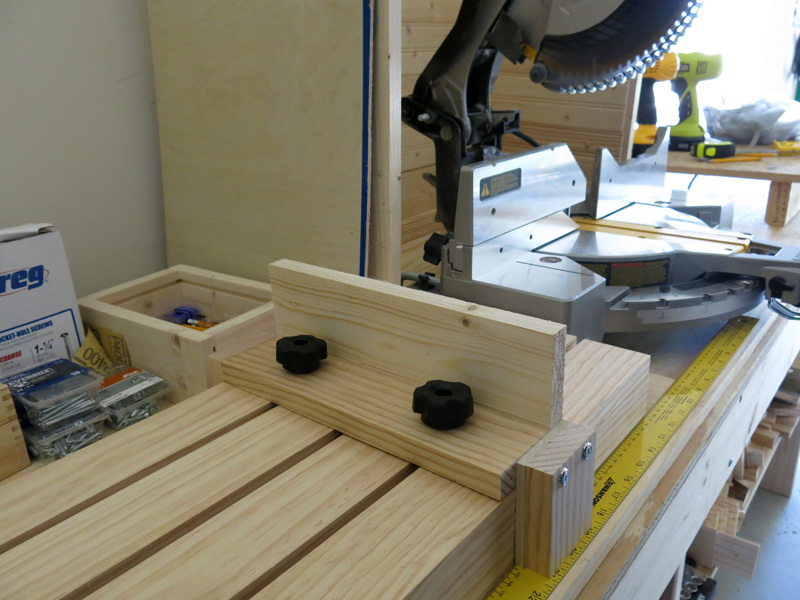
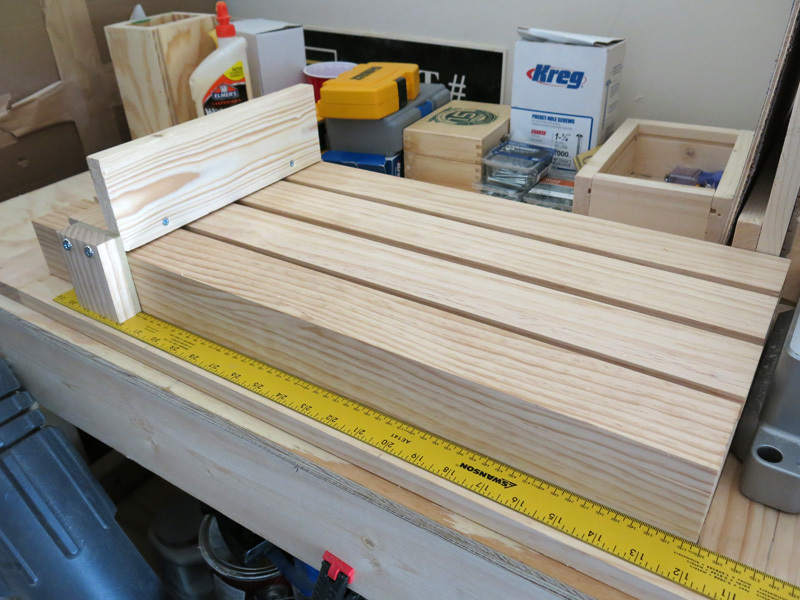
Mitre Saw Rip Guide
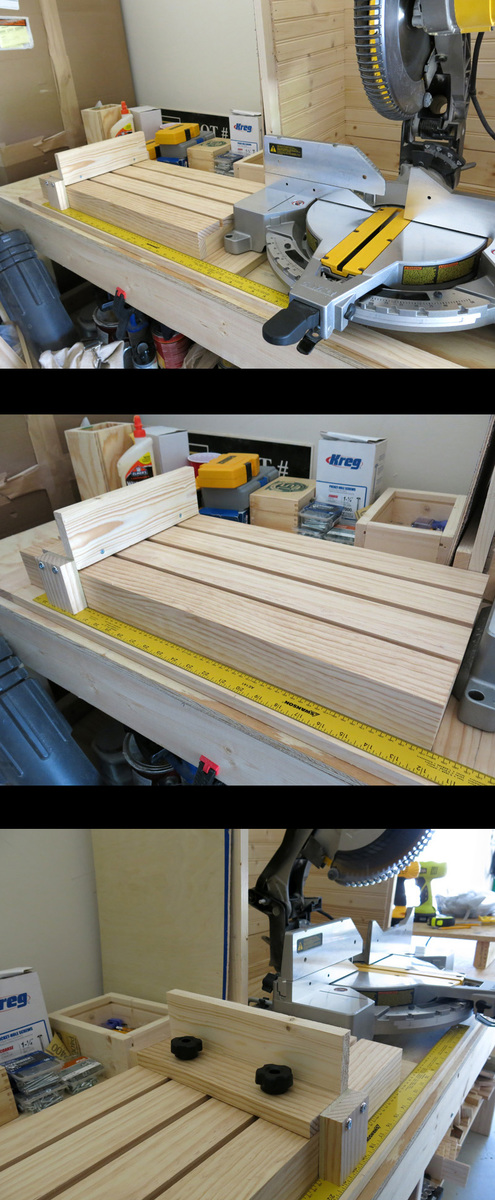
I wanted a jig/guide that would allow me to cut multiple pieces of wood exactly the same length using my Mitre saw. Designed this Jig and apart from the 4 screws you see everything is pocket holes. Now when I build from Ana's plans and my own designs I can guarantee all the pieces that need to be the same length will be!!
Estimated Time Investment
Afternoon Project (3-6 Hours)
Finish Used
Not finished yet but will put a clear protection on it.
Recommended Skill Level
Beginner
Comments


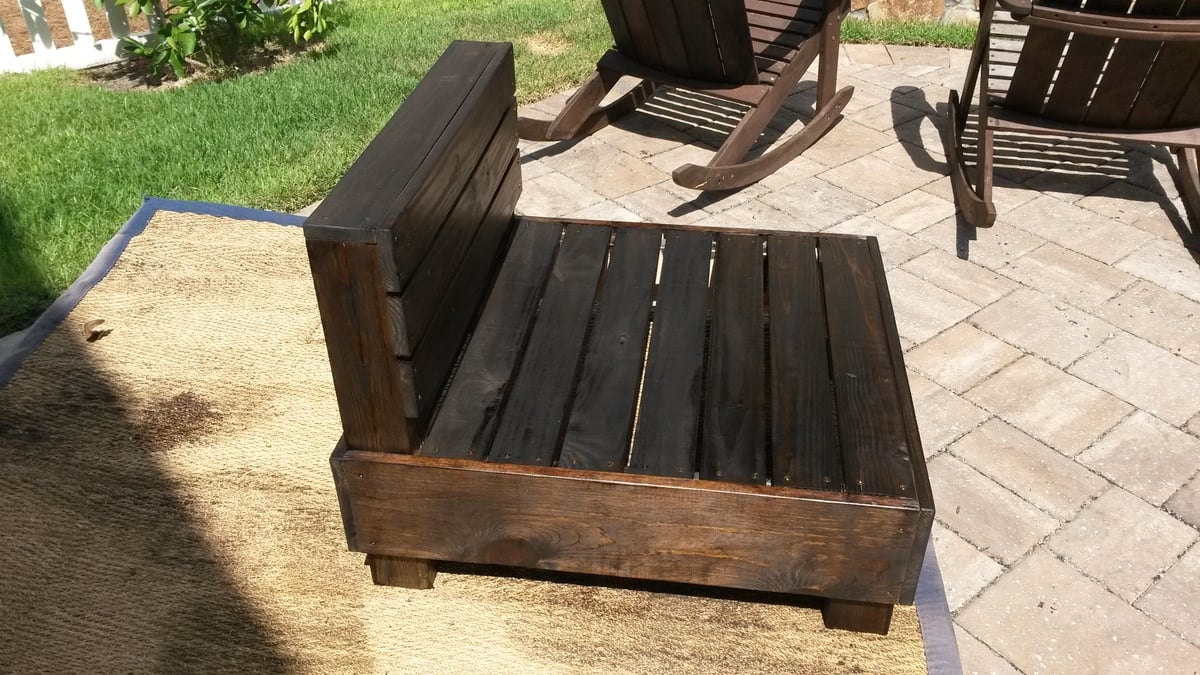
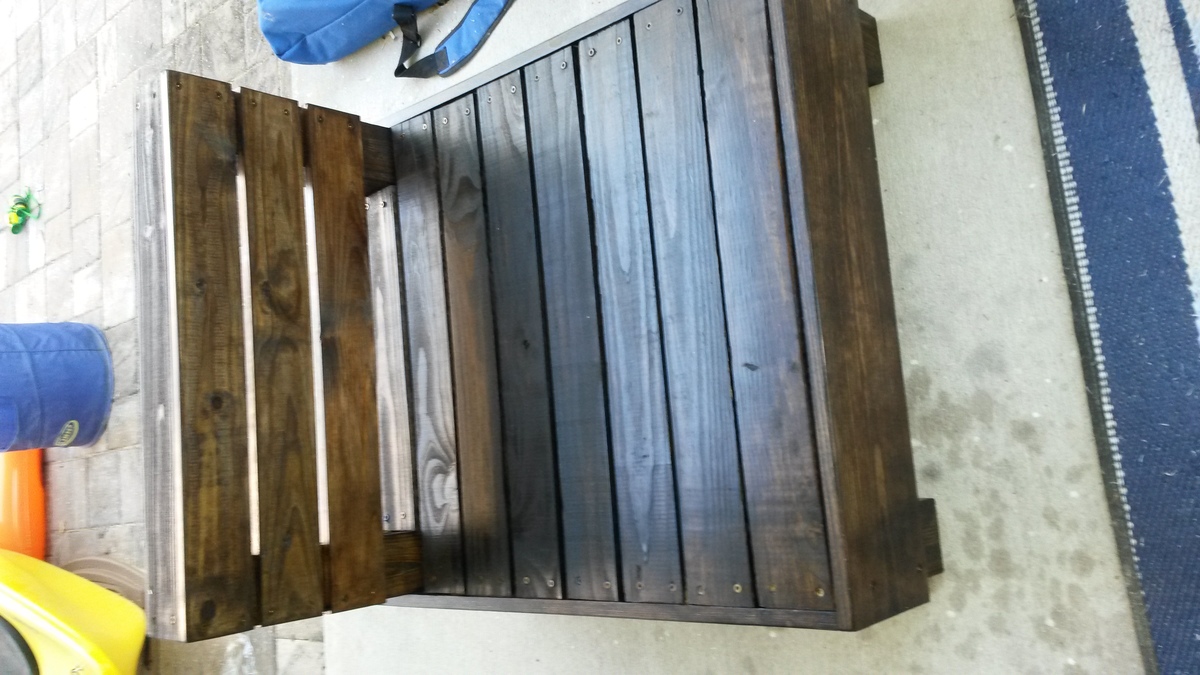
Outdoor patio chair
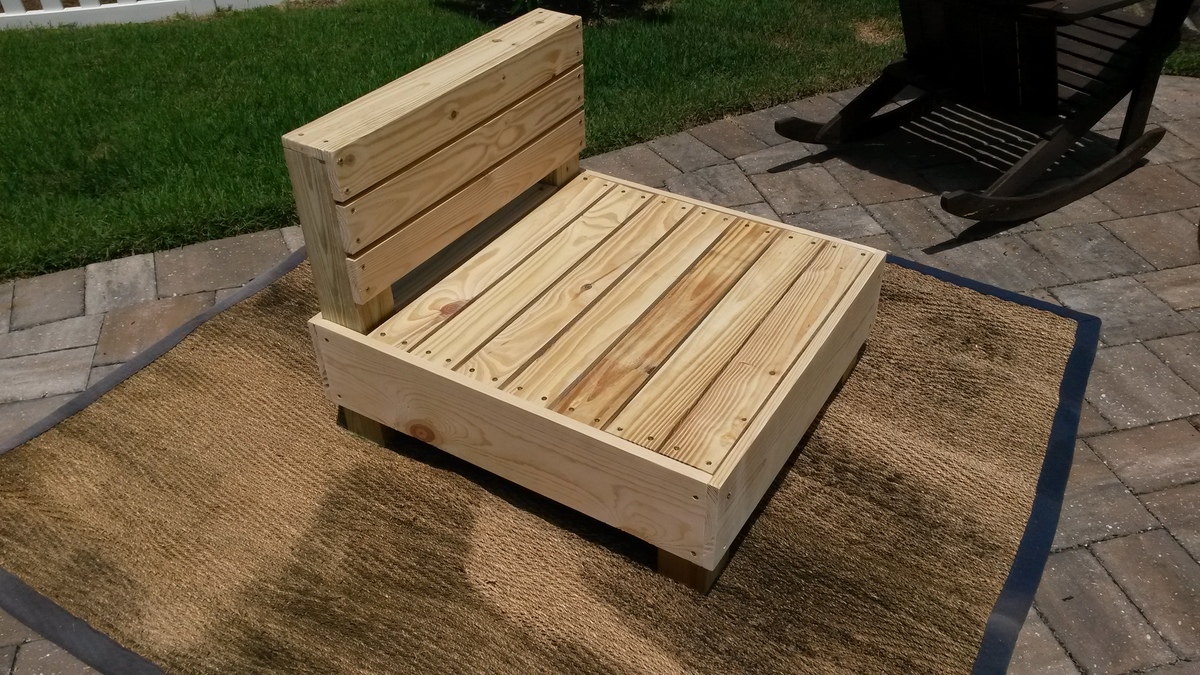
This is one of two chairs that I recently built to replace some outdoor furniture that only lasted 2 years in the Florida sun. Rather than buying a new set, I figured I could just rebuild them using wood which would last a lot longer. I built these off the measurements of the chairs I was replacing, and also had to keep the dimensions the same since they came with custom cushions that I wanted to re-use. They are approx. 15" high at the seat, 31" deep and 28" wide
I used 4 PT 4x4's for the support in the corners, 4 - 1x10 common board for the outside edges and 12 1x4's. I used decking screws and stained it with a dark walnut followed by a coat of poly.
They are on the heavy side, but came out great and will definitely last longer than 2 years!
Estimated Cost
Approx. $60 per chair
Estimated Time Investment
Afternoon Project (3-6 Hours)
Finish Used
Dark Walnut with one coat of clear poly. (it is under a covered patio, so I thought just one coat would be enough)
Recommended Skill Level
Beginner
Modern Adirondack Chairs
Just followed the plans, and am in love with the finished look!
Built from Plan(s)
Estimated Cost
50
Estimated Time Investment
Afternoon Project (3-6 Hours)
Finish Used
Exterior Grade Paint/Sealer
Recommended Skill Level
Intermediate
Comments
House Warming Gift
I built this Truss Table for a house warming gift for my daughter.
Rick Briere
Built from Plan(s)
PB Sawyer Trestle Look Alike
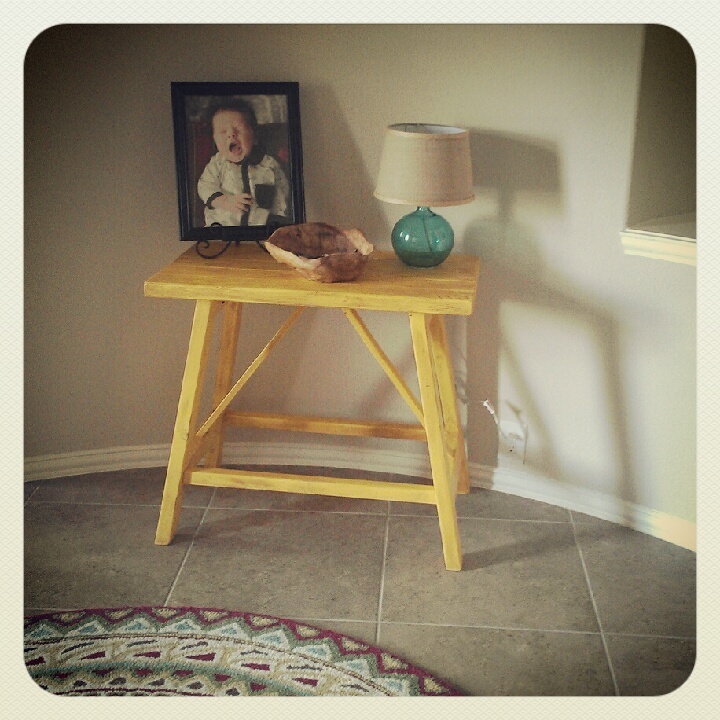
So my husband and I have this thing...I find the projects, he builds the projects and I get to finish it. I'm more of the artsy one and he is more hands on. So this is the first table we did from Ana!
Estimated Cost
$35
Estimated Time Investment
Afternoon Project (3-6 Hours)
Finish Used
Yellow Paint w/ Glaze...will update with specifics later!
Recommended Skill Level
Beginner
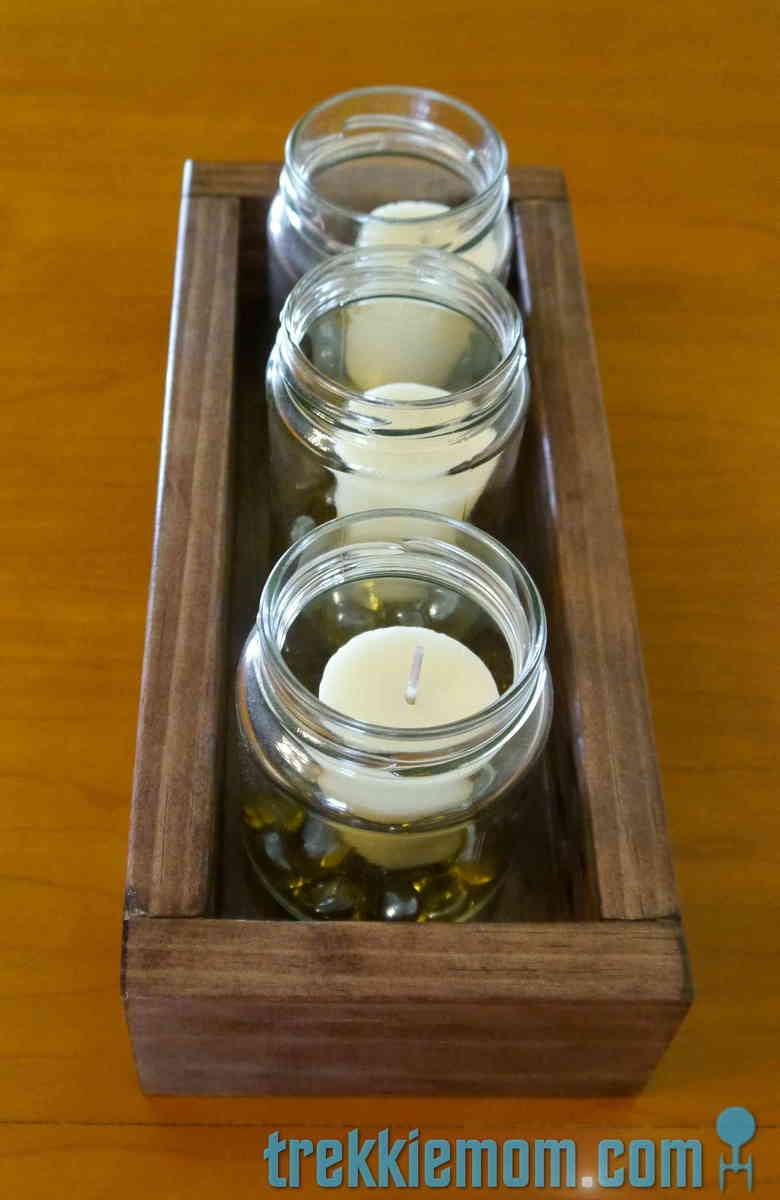
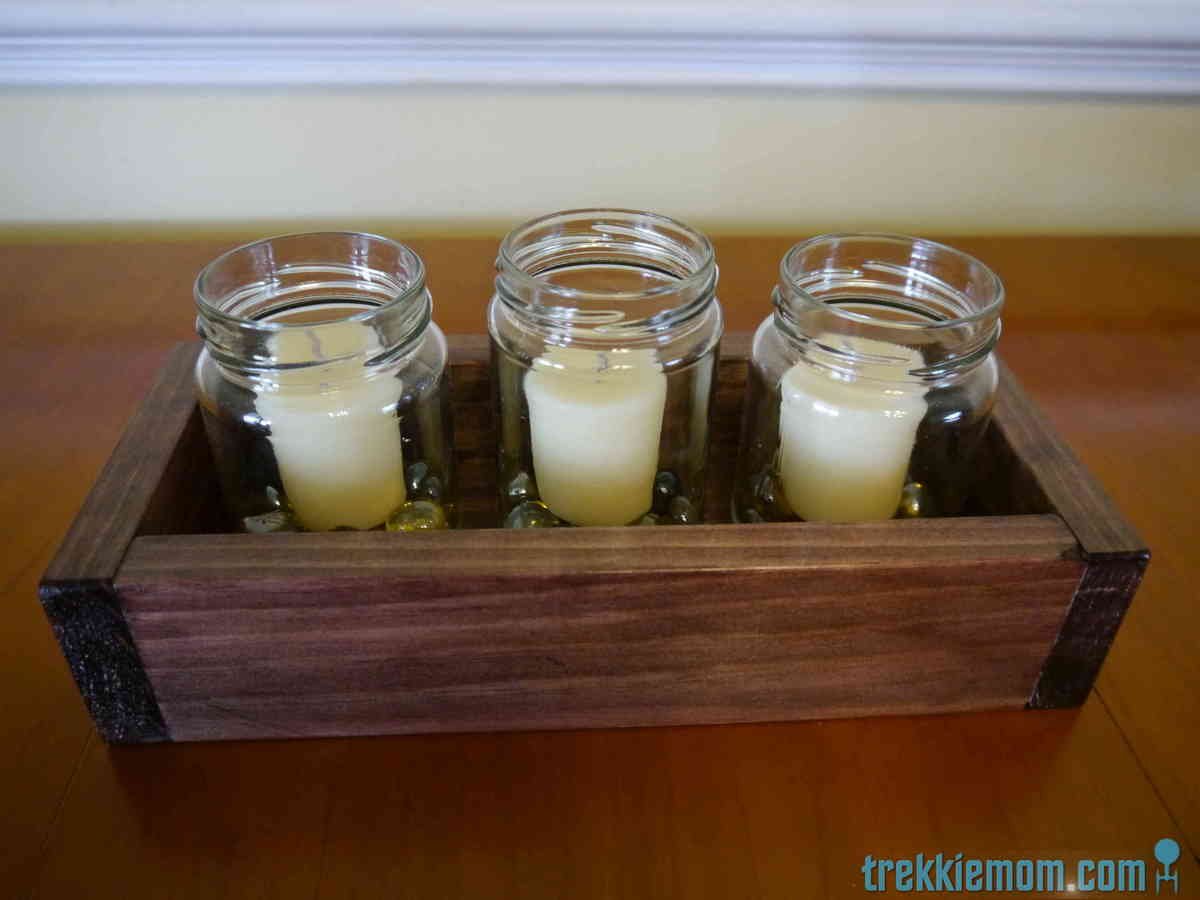
Table Centerpiece
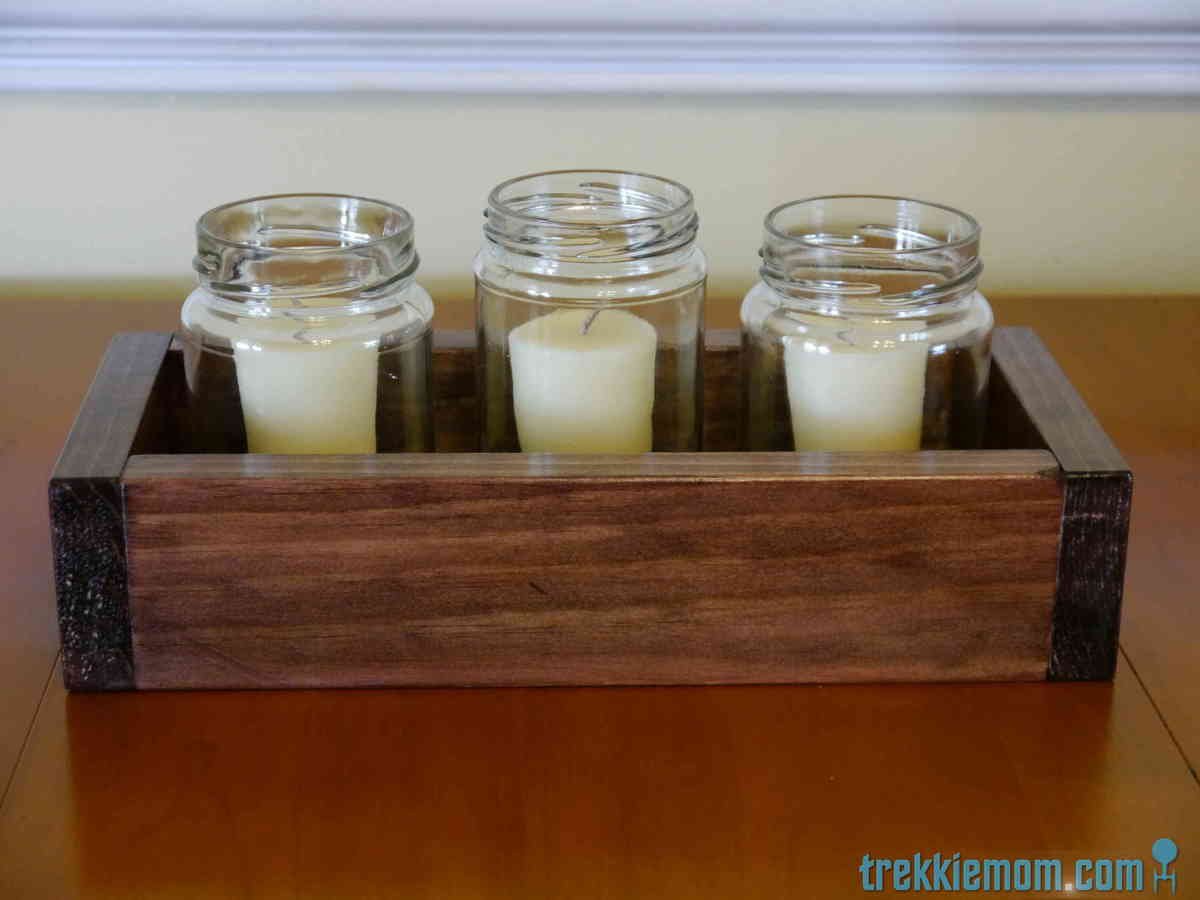
I had some leftover yellow pine, and when I saw addictedtodiy.com's Fall Centerpiece post (http://addicted2diy.com/2013/10/31/diy-fall-centerpiece/), I knew what I wanted to do with it. That's right - make my own version.
Now if you view Katie's post, she obviously has a much larger table than I do, but if you like hers, she did a very good tutorial on how she created hers. I think both are beautiful.
I fit mine to my dining space and the jars that I had saved. I also modified my version to take advantage of my kreg jig since I am sadly lacking my own nail gun. One day, I will have one. One day.
If you want more specifics, take a trip to my blog post (http://www.trekkiemom.com/2014/05/table-centerpiece.html) for my exact cuts, etc.

Estimated Cost
$10-15
Estimated Time Investment
An Hour or Two (0-2 Hours)
Finish Used
Minwax Red Mahogany Stain and 2 clear coats
Recommended Skill Level
Beginner
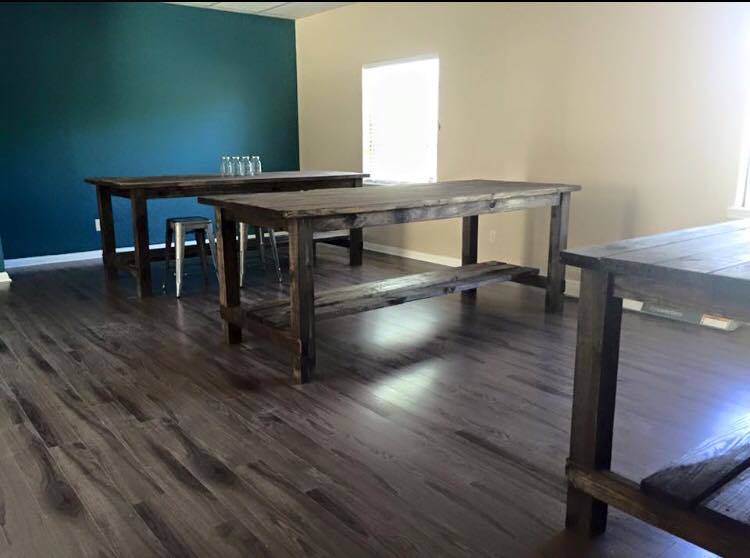
Perfect for our crafting studio!

We made this a bit bigger for our crafting studio, Creative Grain Studio! 8x4!! Rustic and we are building a fourth today!!
Estimated Cost
75.00-100.00
Estimated Time Investment
Day Project (6-9 Hours)
Finish Used
sanded and used minwax espresso stain
Recommended Skill Level
Intermediate
Comments

Toddler Helper Tower
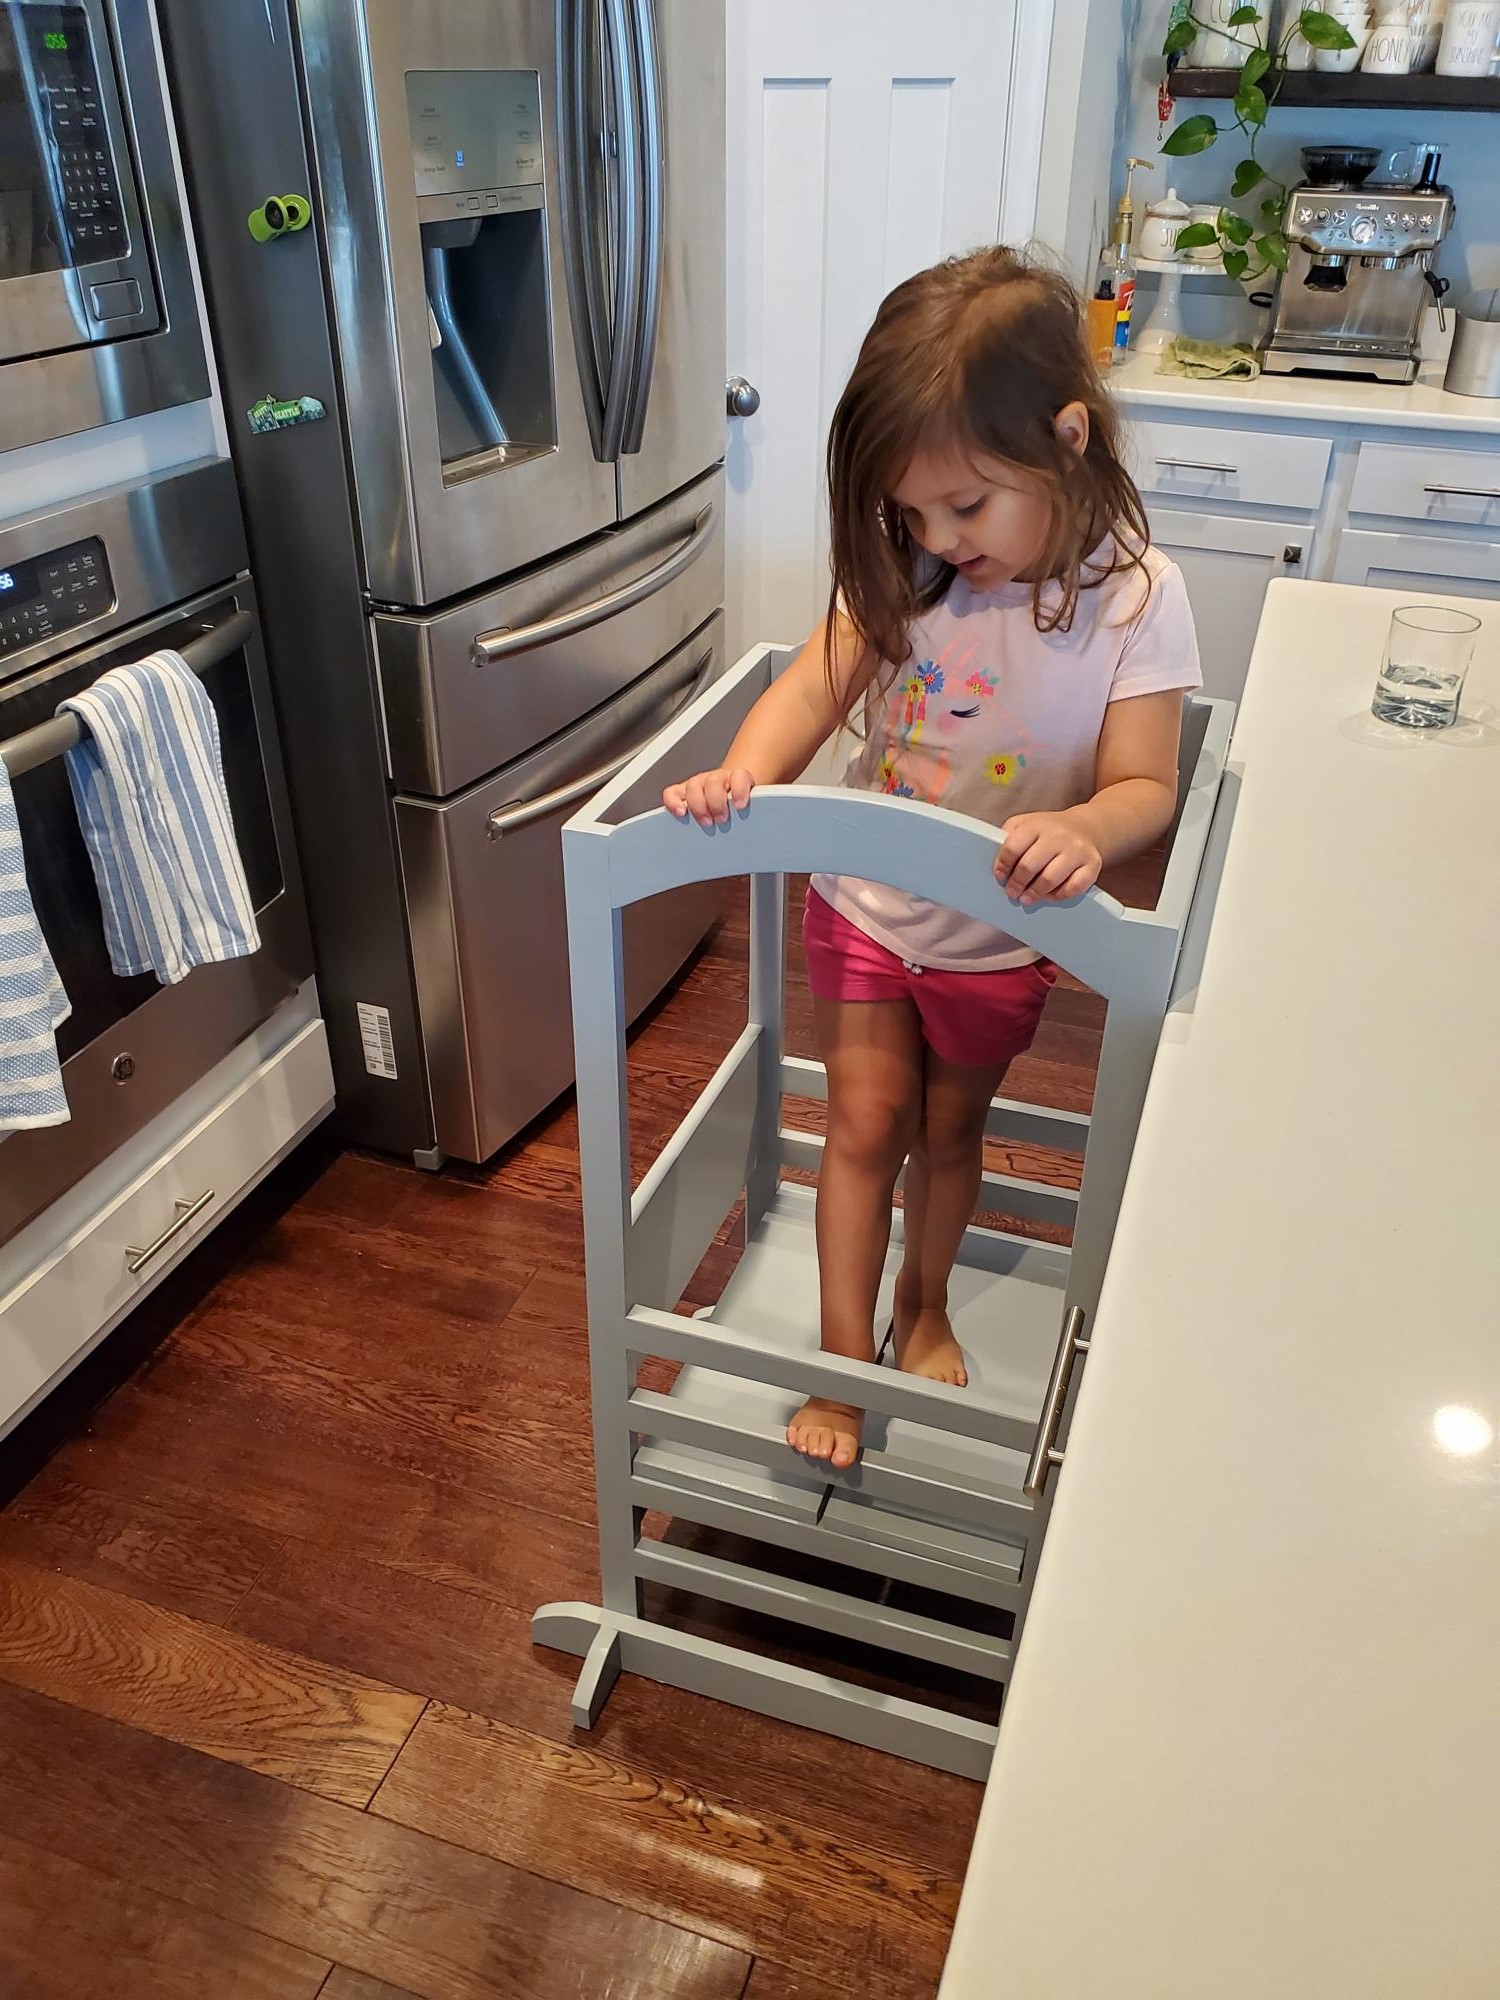
Great plan and instructions! My daughter loves it!
Built from Plan(s)
Estimated Cost
$50
Estimated Time Investment
Day Project (6-9 Hours)
Finish Used
Gray latex paint with satin finish poly
Recommended Skill Level
Beginner
Farmhouse Hall Tree

Modified the top of Ana’s plan for a Hall Tree and very happy with how it turned out.
Steve Nadler, High Springs Florida

Built from Plan(s)
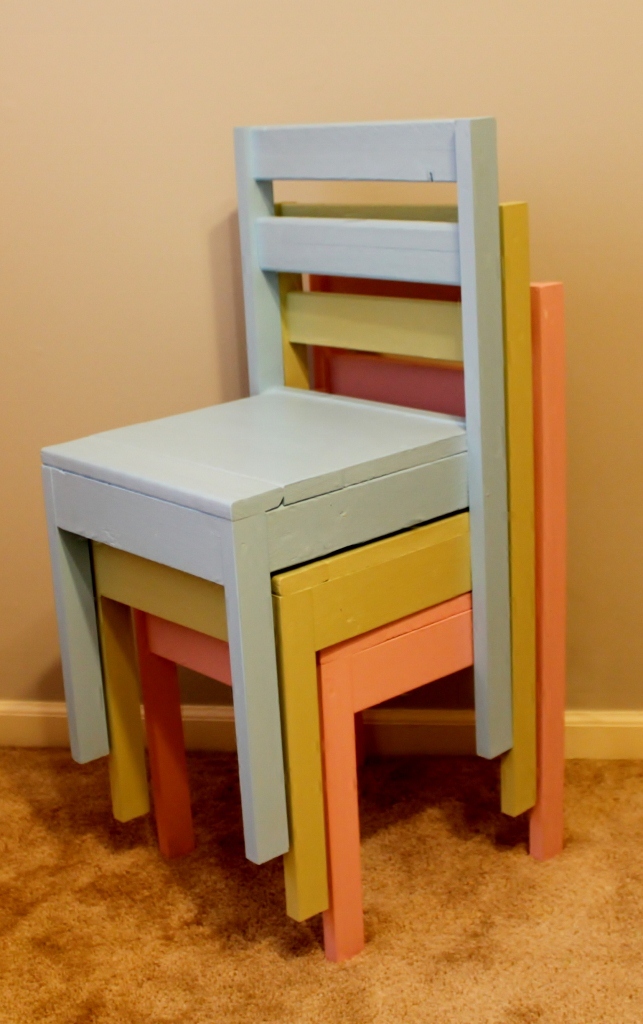
Clara Table and Stackable Chairs
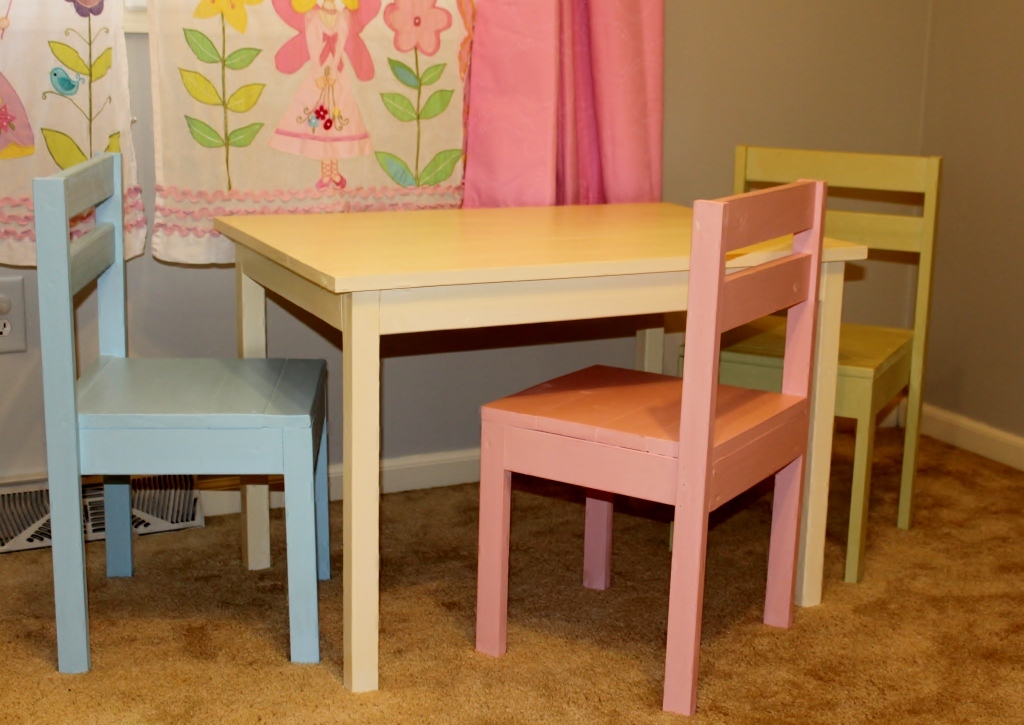
I made this table and chairs set to go with my daughters new playhouse bed. I used mostly of scrap wood for the chairs so they each have a slightly different look. The chair seats are solid rather than slats.
Built from Plan(s)
Estimated Time Investment
Afternoon Project (3-6 Hours)
Recommended Skill Level
Beginner
X Leg table
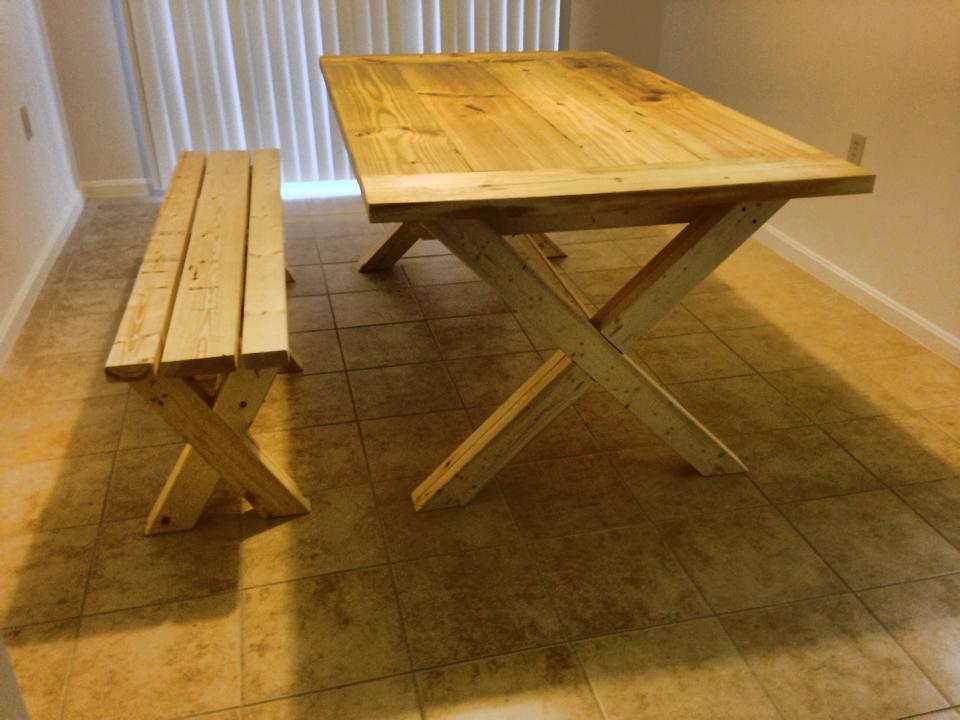
this is my intro to woodworking by myself and i think the table turned out ok. ana's website sure helped allot.
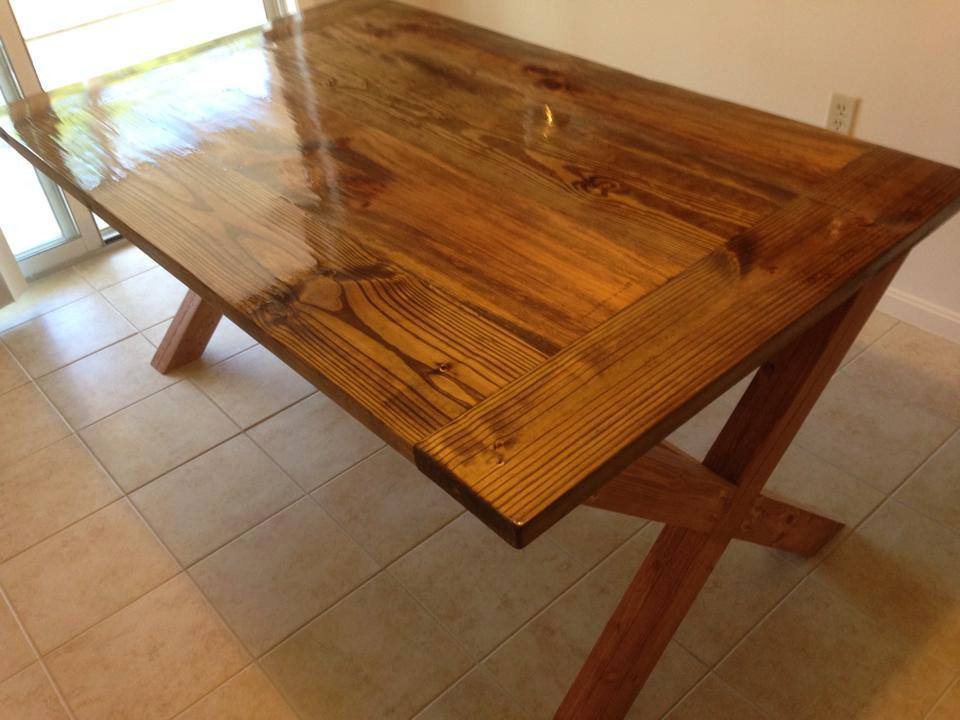
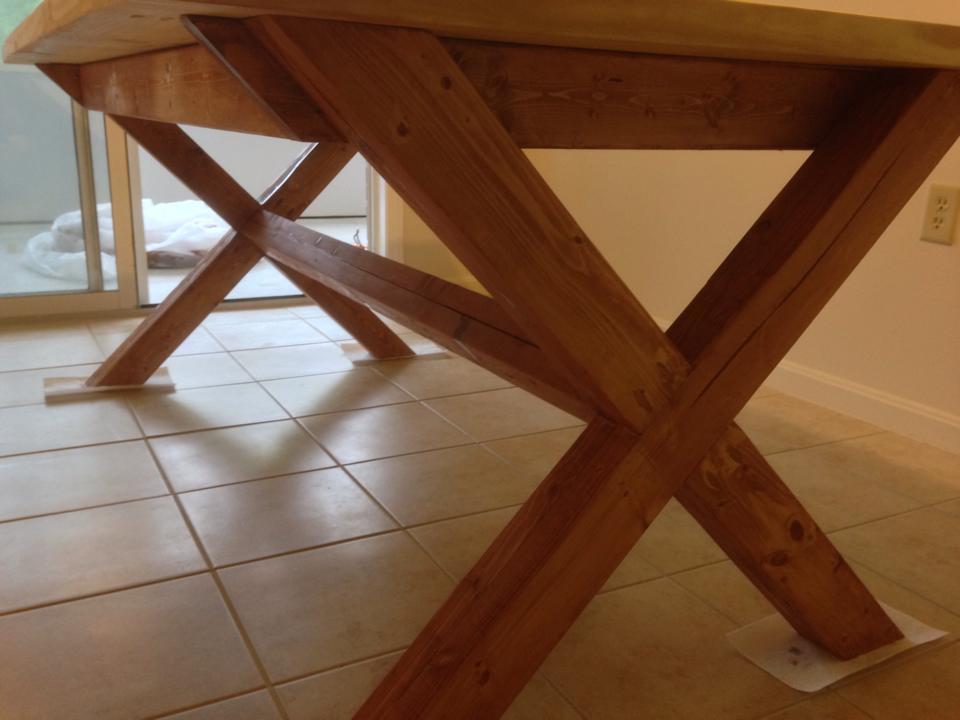
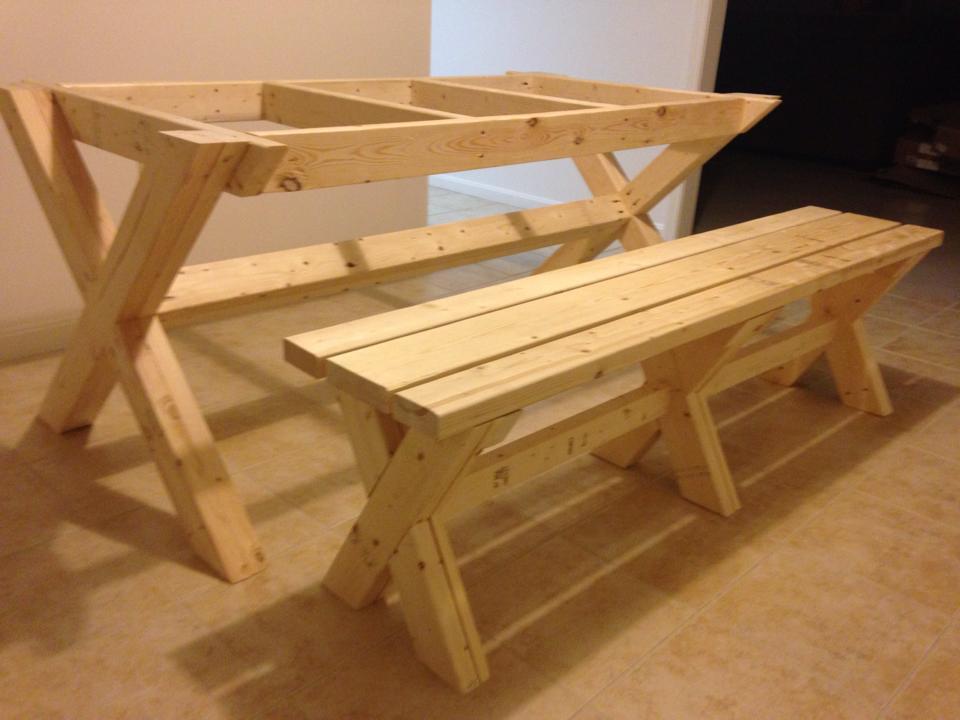
Built from Plan(s)
Estimated Time Investment
Weekend Project (10-20 Hours)
Recommended Skill Level
Beginner
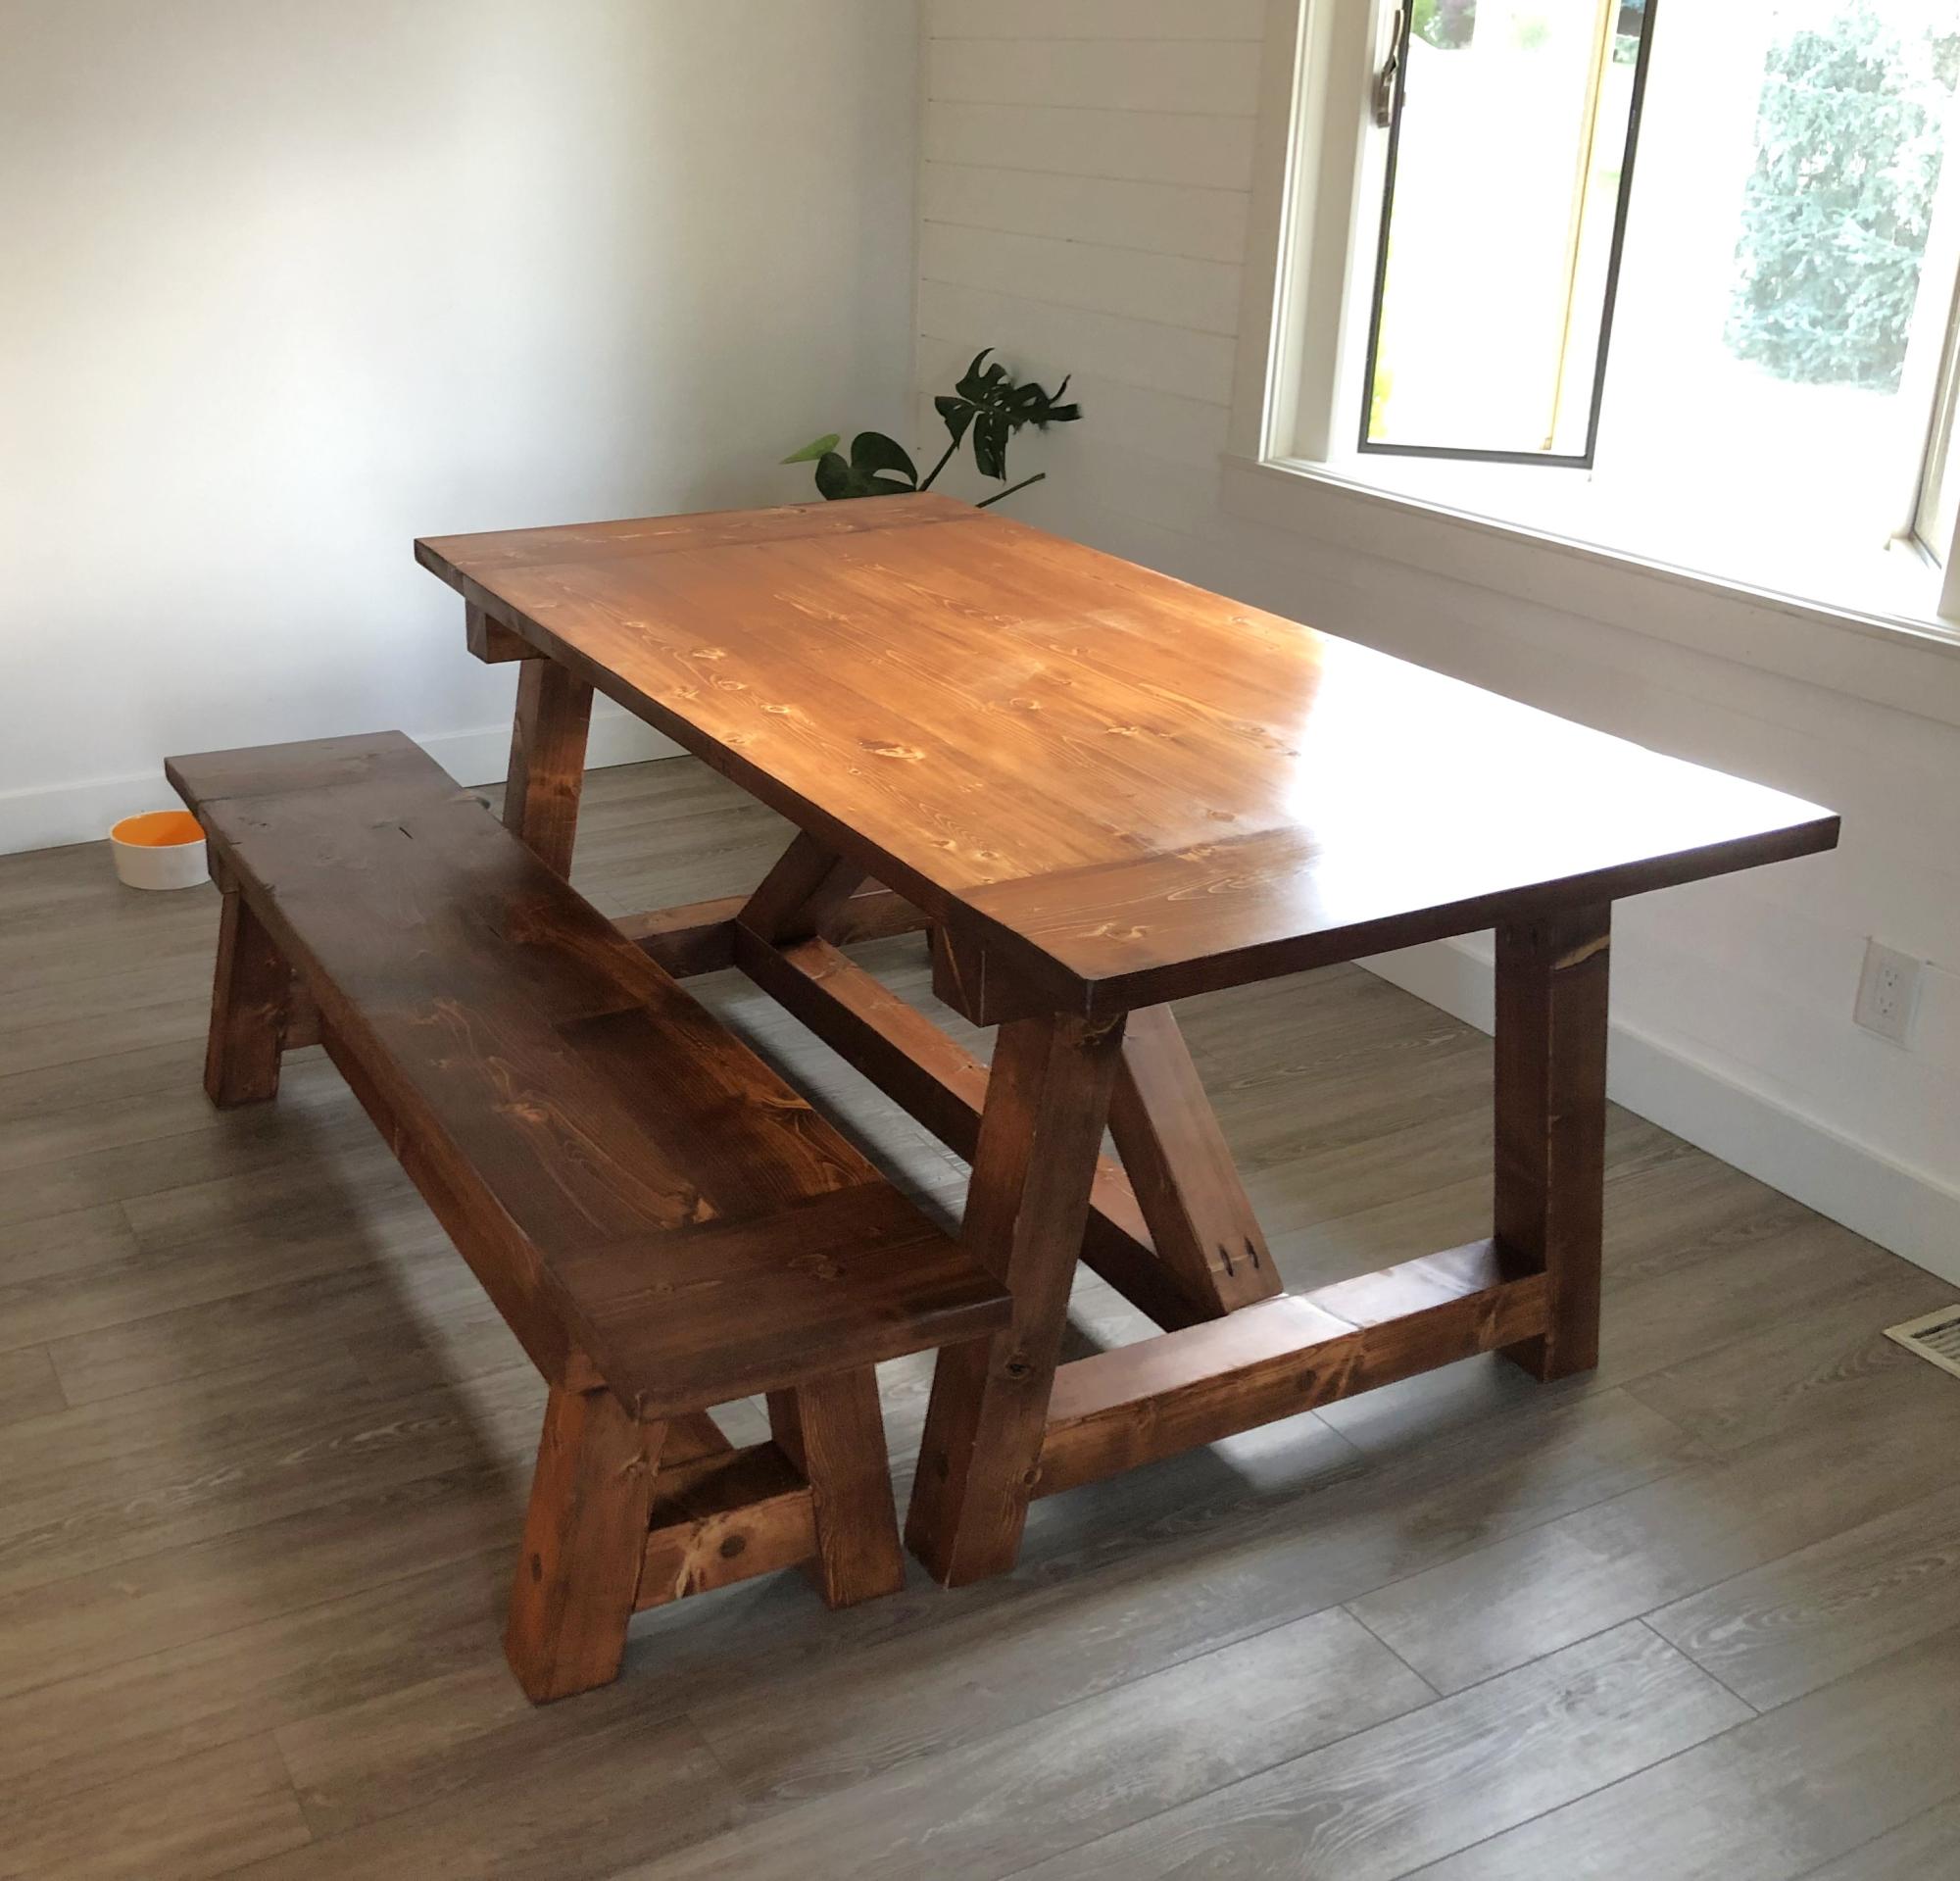
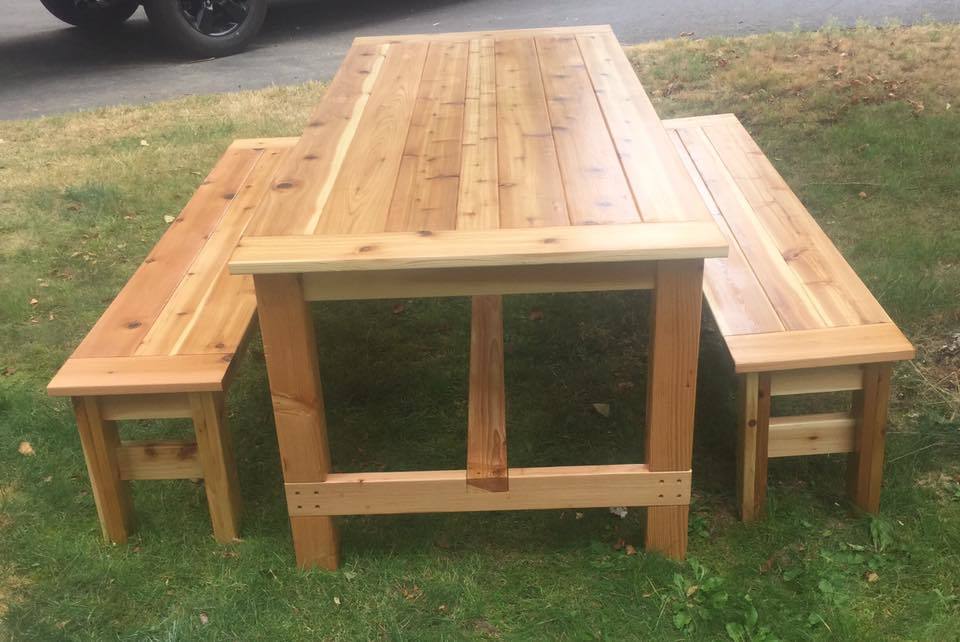
Farmhouse Table
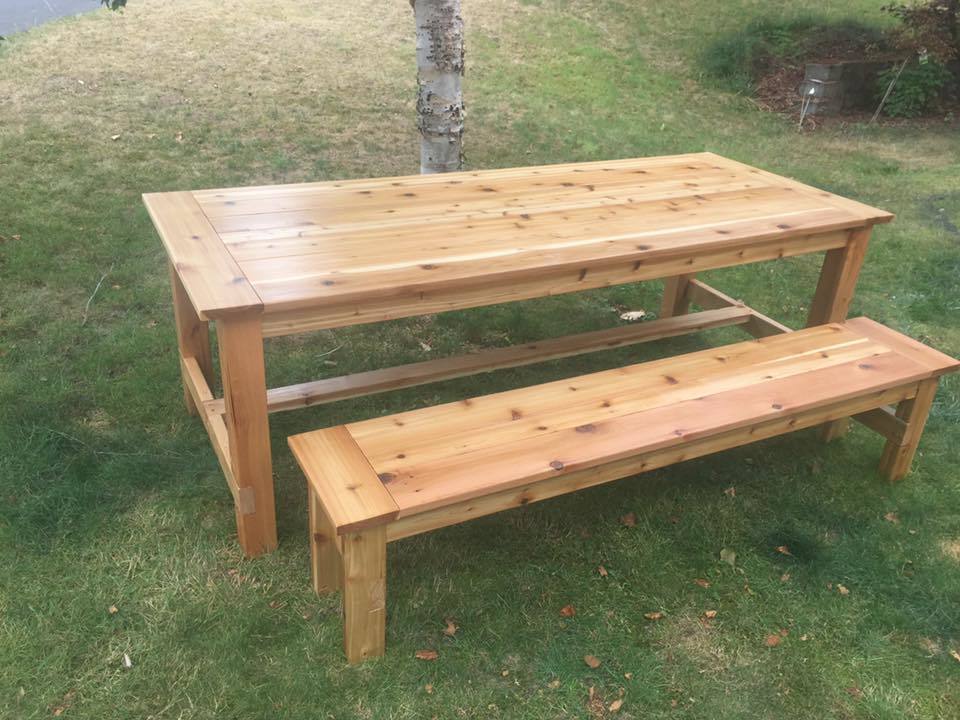
Plans were modified to change length of table to 8' and so that benches tuck under for winter storage. 5/4 cedar was used for table and bench tops-5/4 cedar was only available locally in 4" and 6" widths so we modified top slightly and made benches to match
Built from Plan(s)
Estimated Cost
$120
Estimated Time Investment
Day Project (6-9 Hours)
Finish Used
Tung oil and Spar Urethane
Recommended Skill Level
Beginner
Better Than I Hoped!
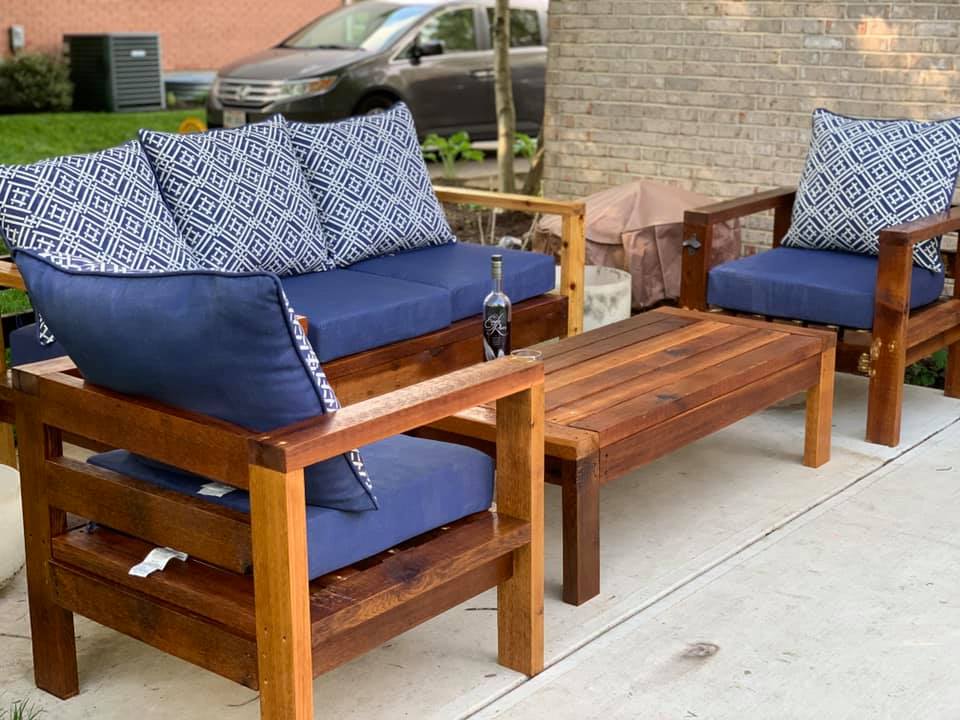
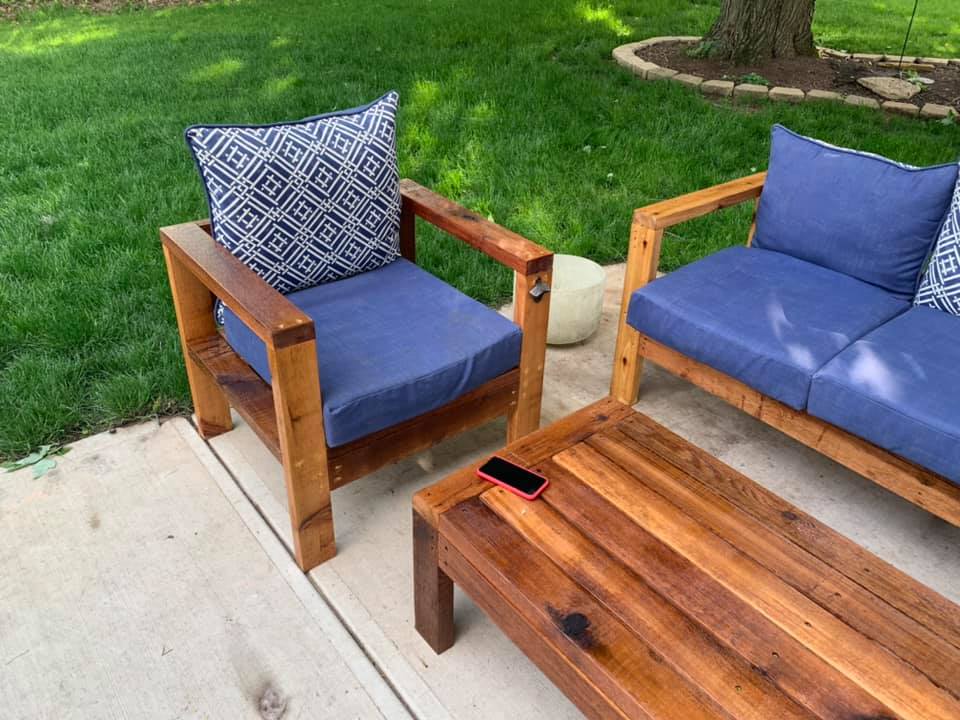
Been working from home for the past two months due to the health crisis. To stop from going crazy from being at home with my wife and four kids, I decided up pick up a hobby - here's where my homie Ana enters! I didn't want the sectional for my patio, but certainly the couch, chairs and table. The only mistakes had were my own (using wood putty, not sanding it well), but the plans were spot on. The only real issue I ran into was the cedar wood I used wasn't 1.5 x 3.5, but 1.75 x 3.5. This caused me to make additional cuts were I otherwise would not have needed it. Other than that, just remember to make the longest cuts first... I ended up needing to buy about five additional boards because it.
Built from Plan(s)
Estimated Cost
$350 (I used cedar, which is much more expensive)
Estimated Time Investment
Day Project (6-9 Hours)
Finish Used
Minwax Spar Urethane, clear
Recommended Skill Level
Beginner
Rustic X Sideboard and Hutch
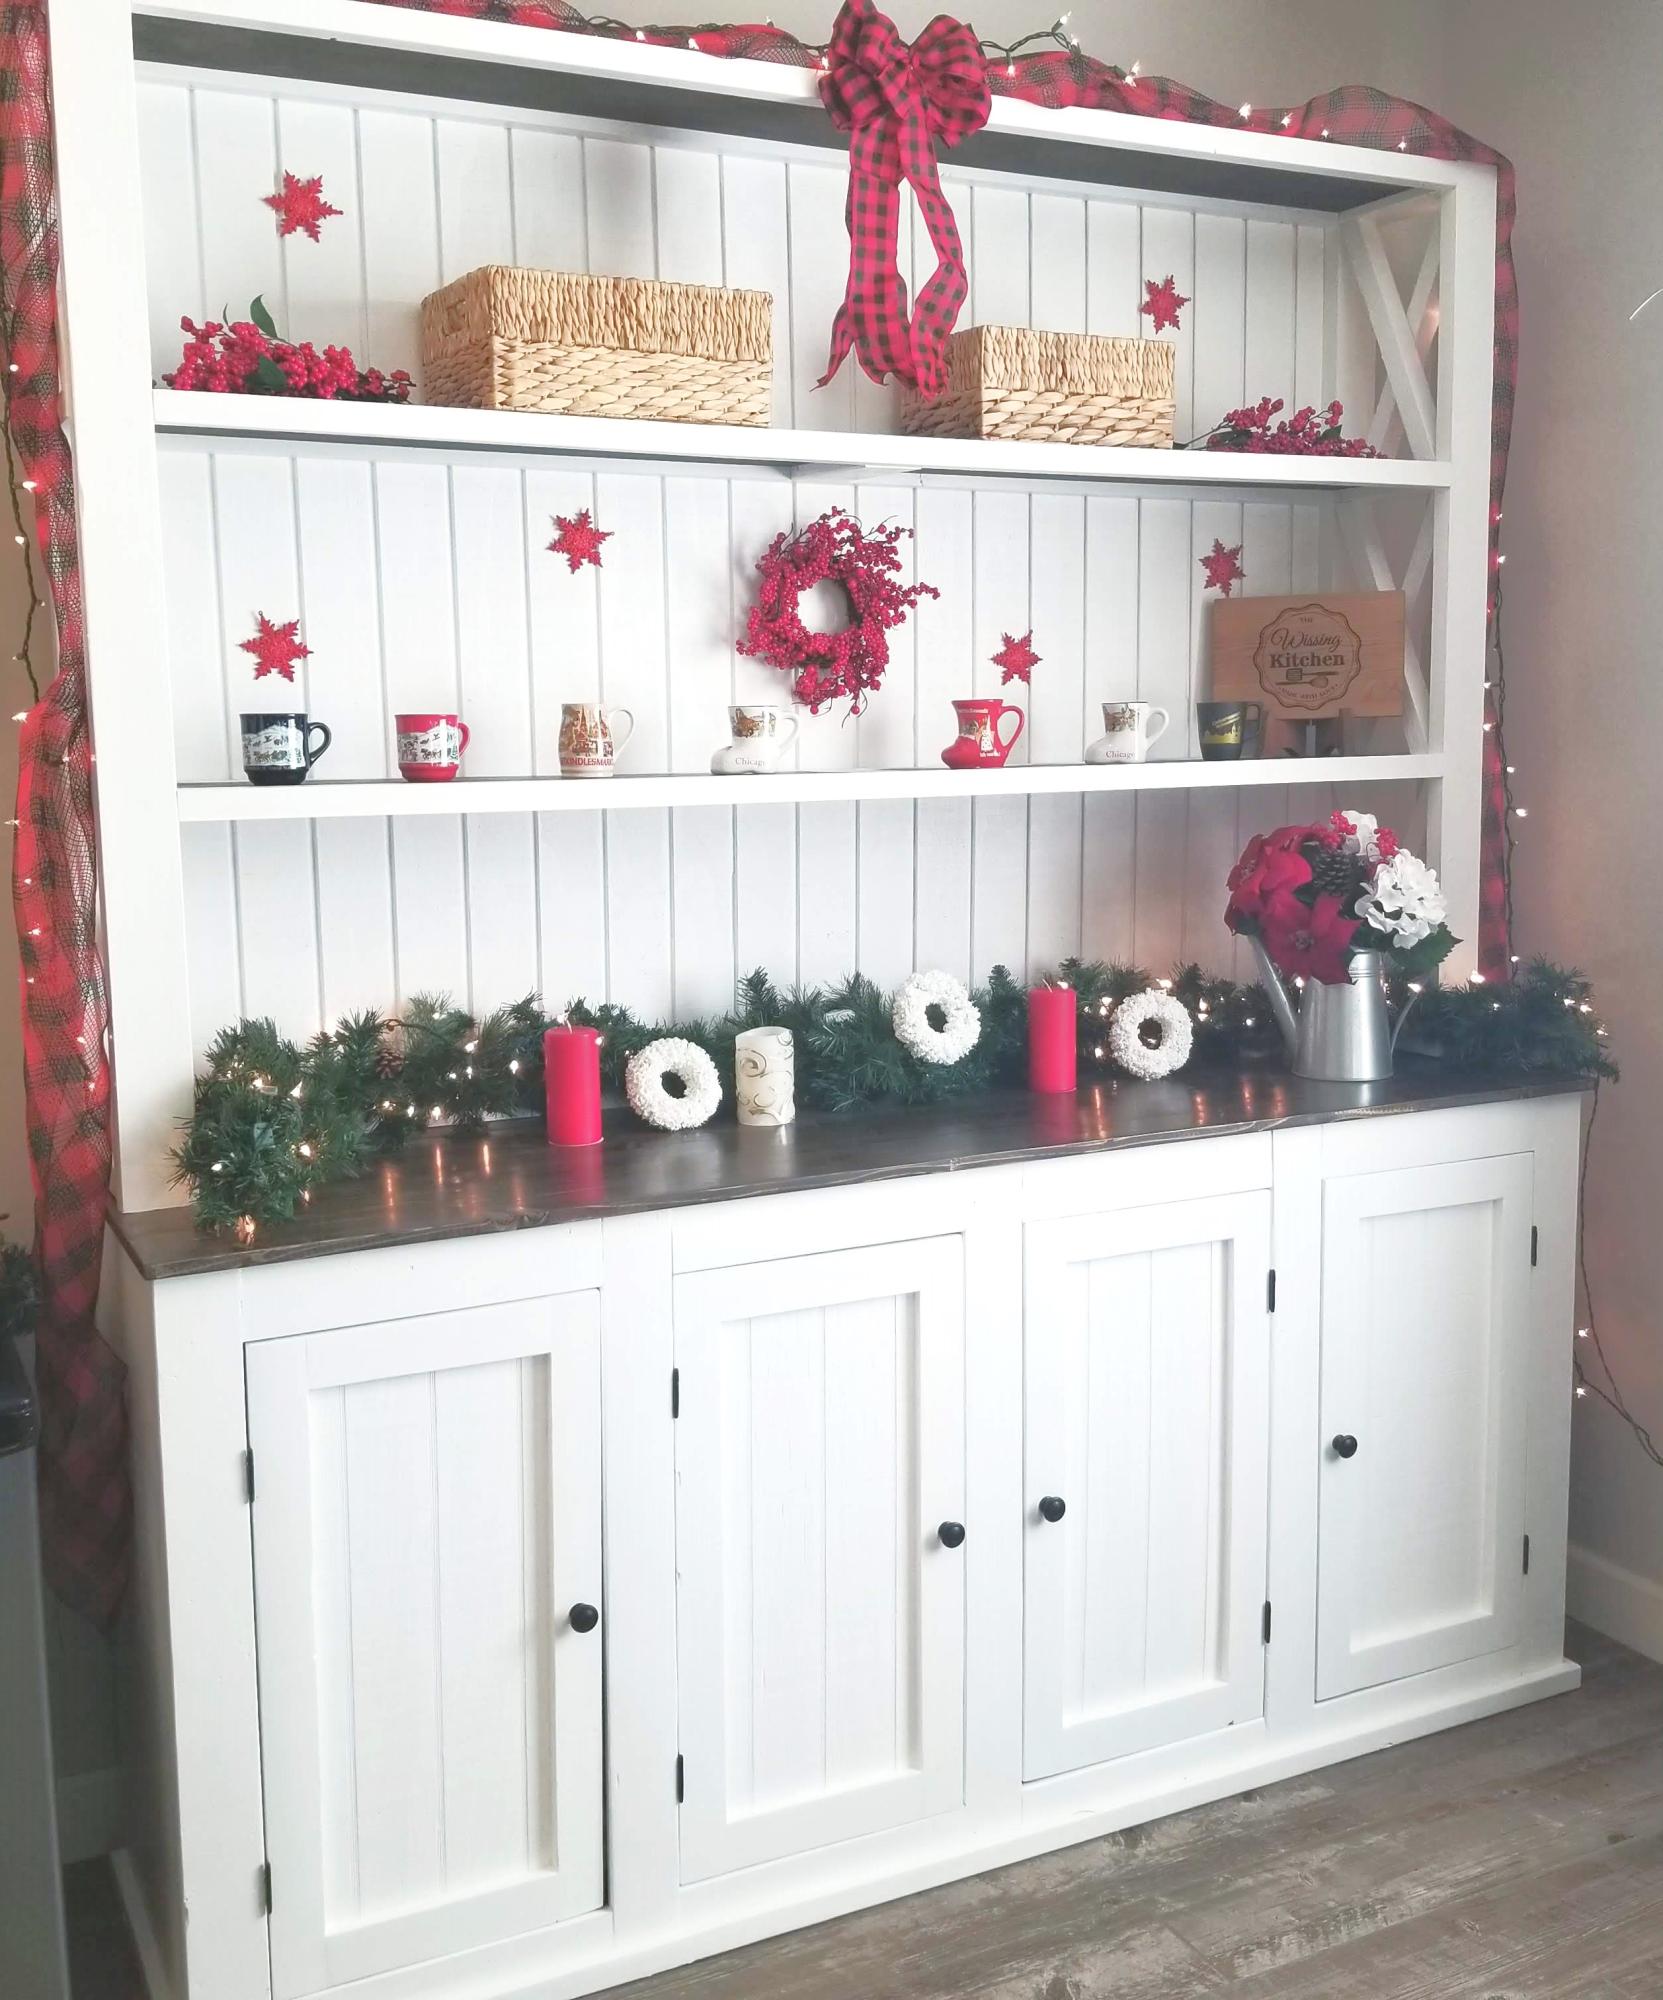
Sideboard and hutch project for my wife.
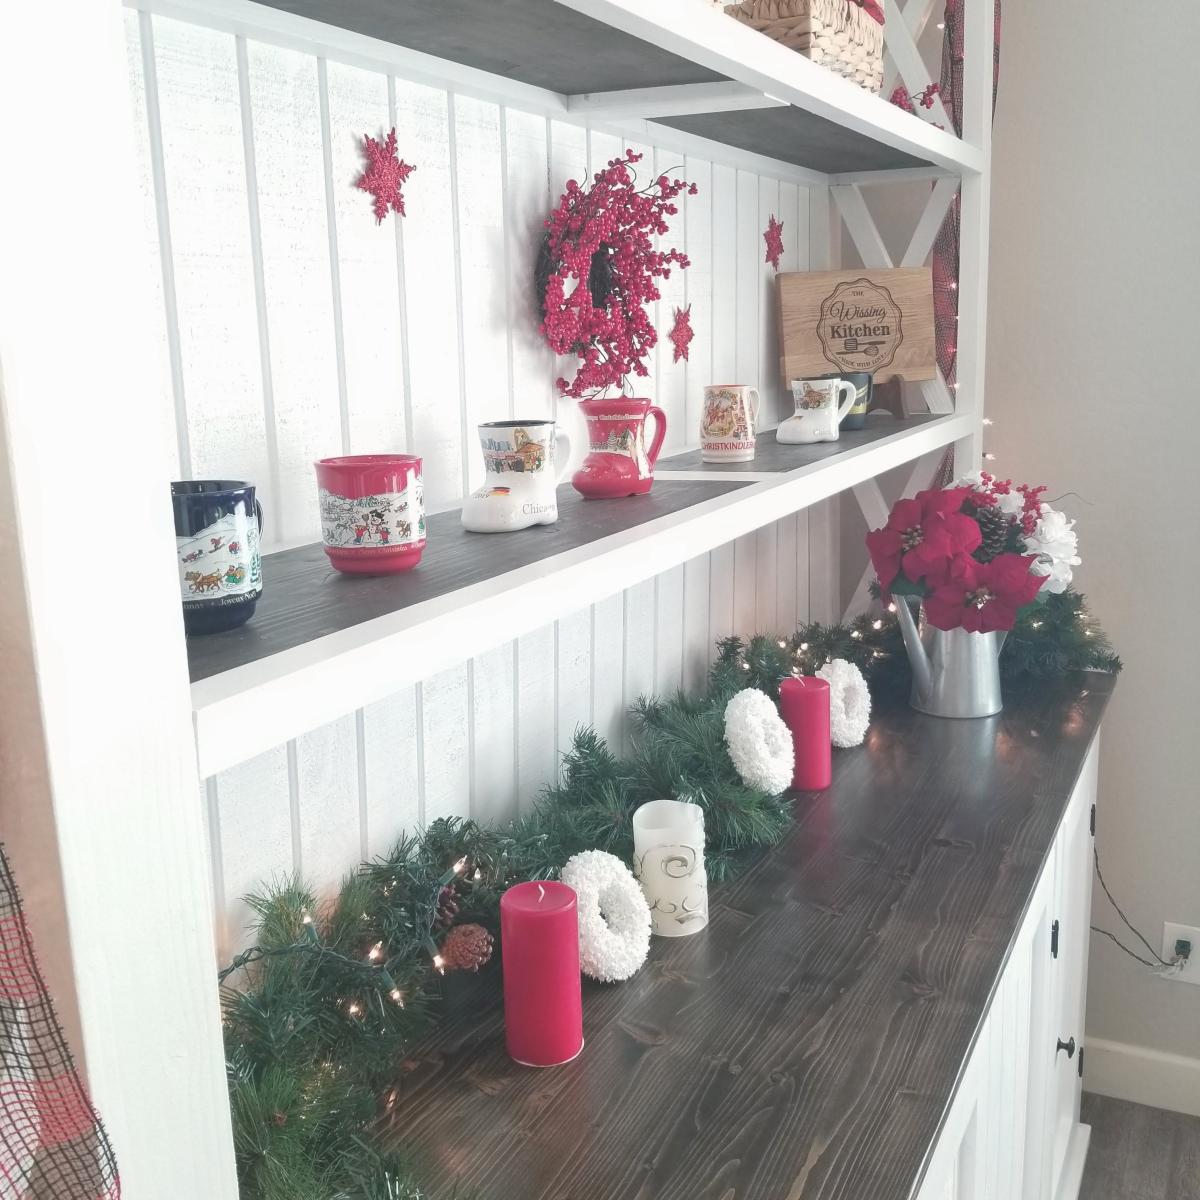
Built from Plan(s)
Seasonal And Holiday
Vanity Flair

This small vanity is having a huge impact in our powder room! We were thrilled to remove the builder's grade prefabricated vanity and replace it with this custom built table finished in multiple layers of homemade chalk paint and that will soon house a vessel sink.


Estimated Cost
$75
Estimated Time Investment
Weekend Project (10-20 Hours)
Finish Used
Wood stain, chalk paint, wax
Recommended Skill Level
Intermediate
Alden's two tone X book case
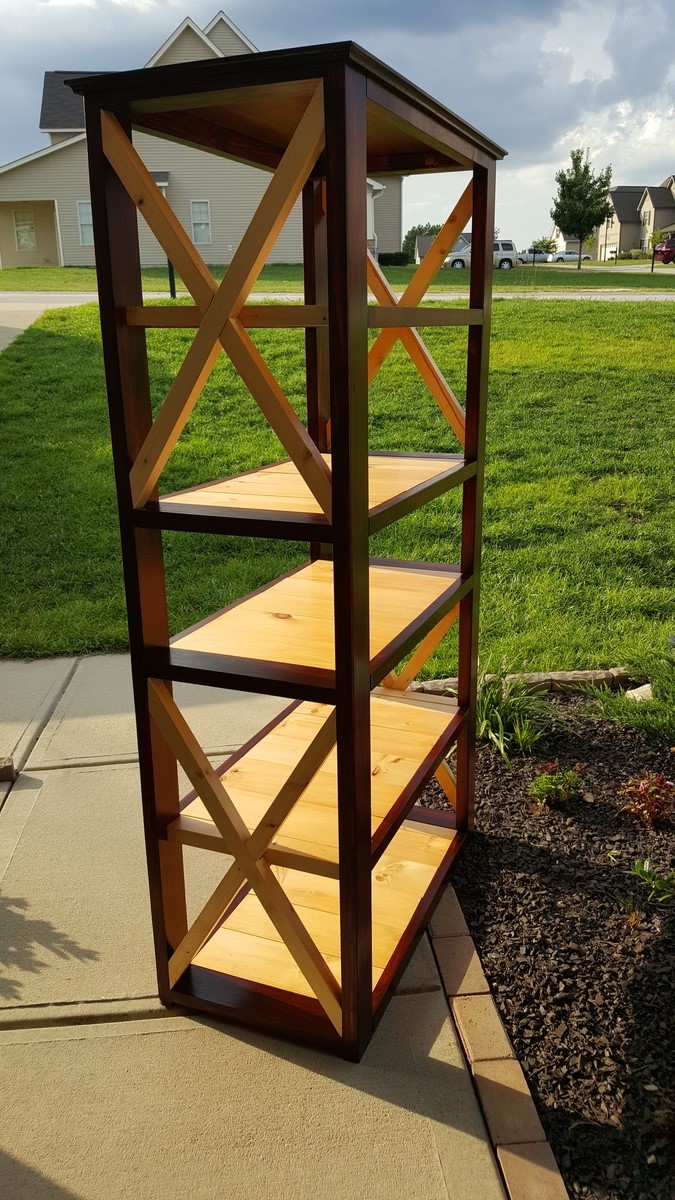
I built this book case for one of my Kids that wanted a new book case.

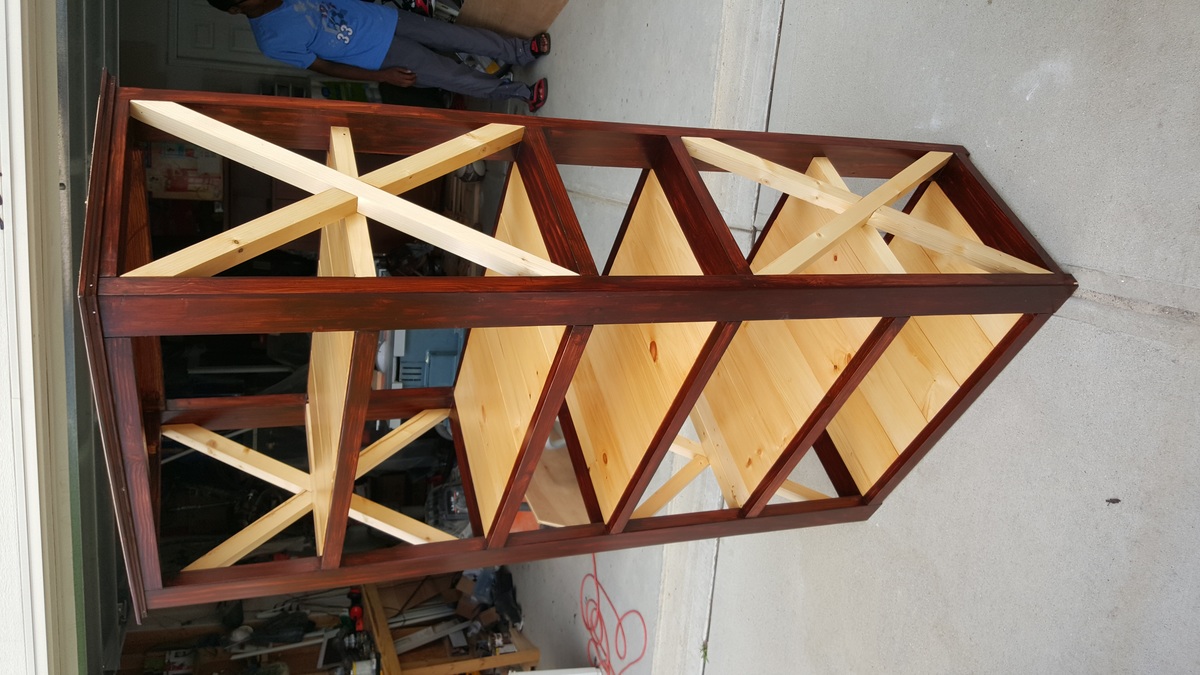
Estimated Cost
estimated cost $75,
Estimated Time Investment
Week Long Project (20 Hours or More)
Finish Used
rustic Mahogany wood stain (gel), apply Lacquer finish for additional protection and glossy finish.
Recommended Skill Level
Intermediate