Octagon Picnic Table with Open Seats - Modifications
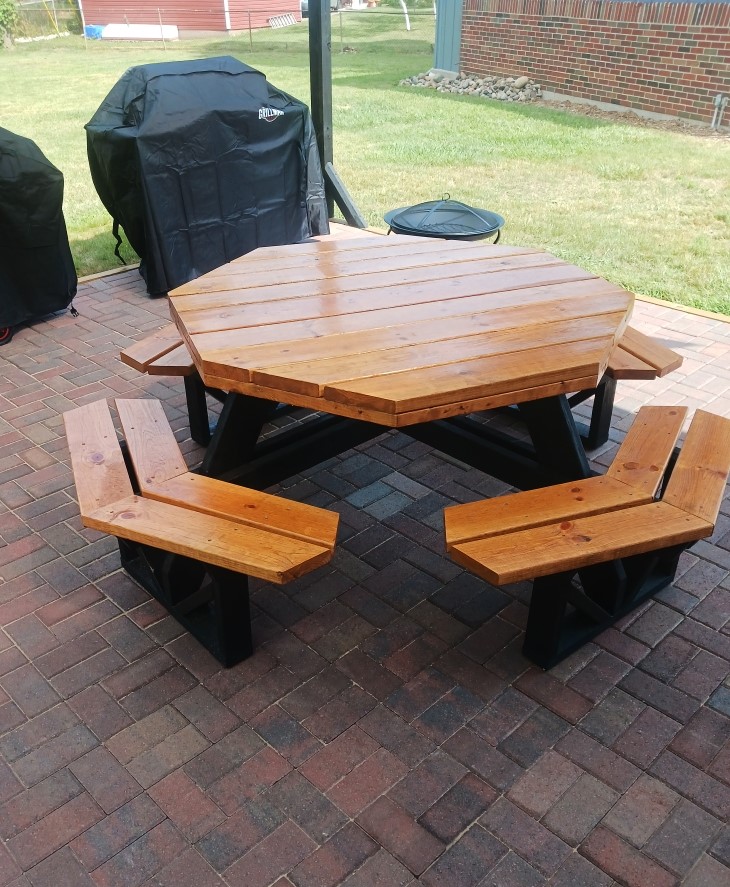
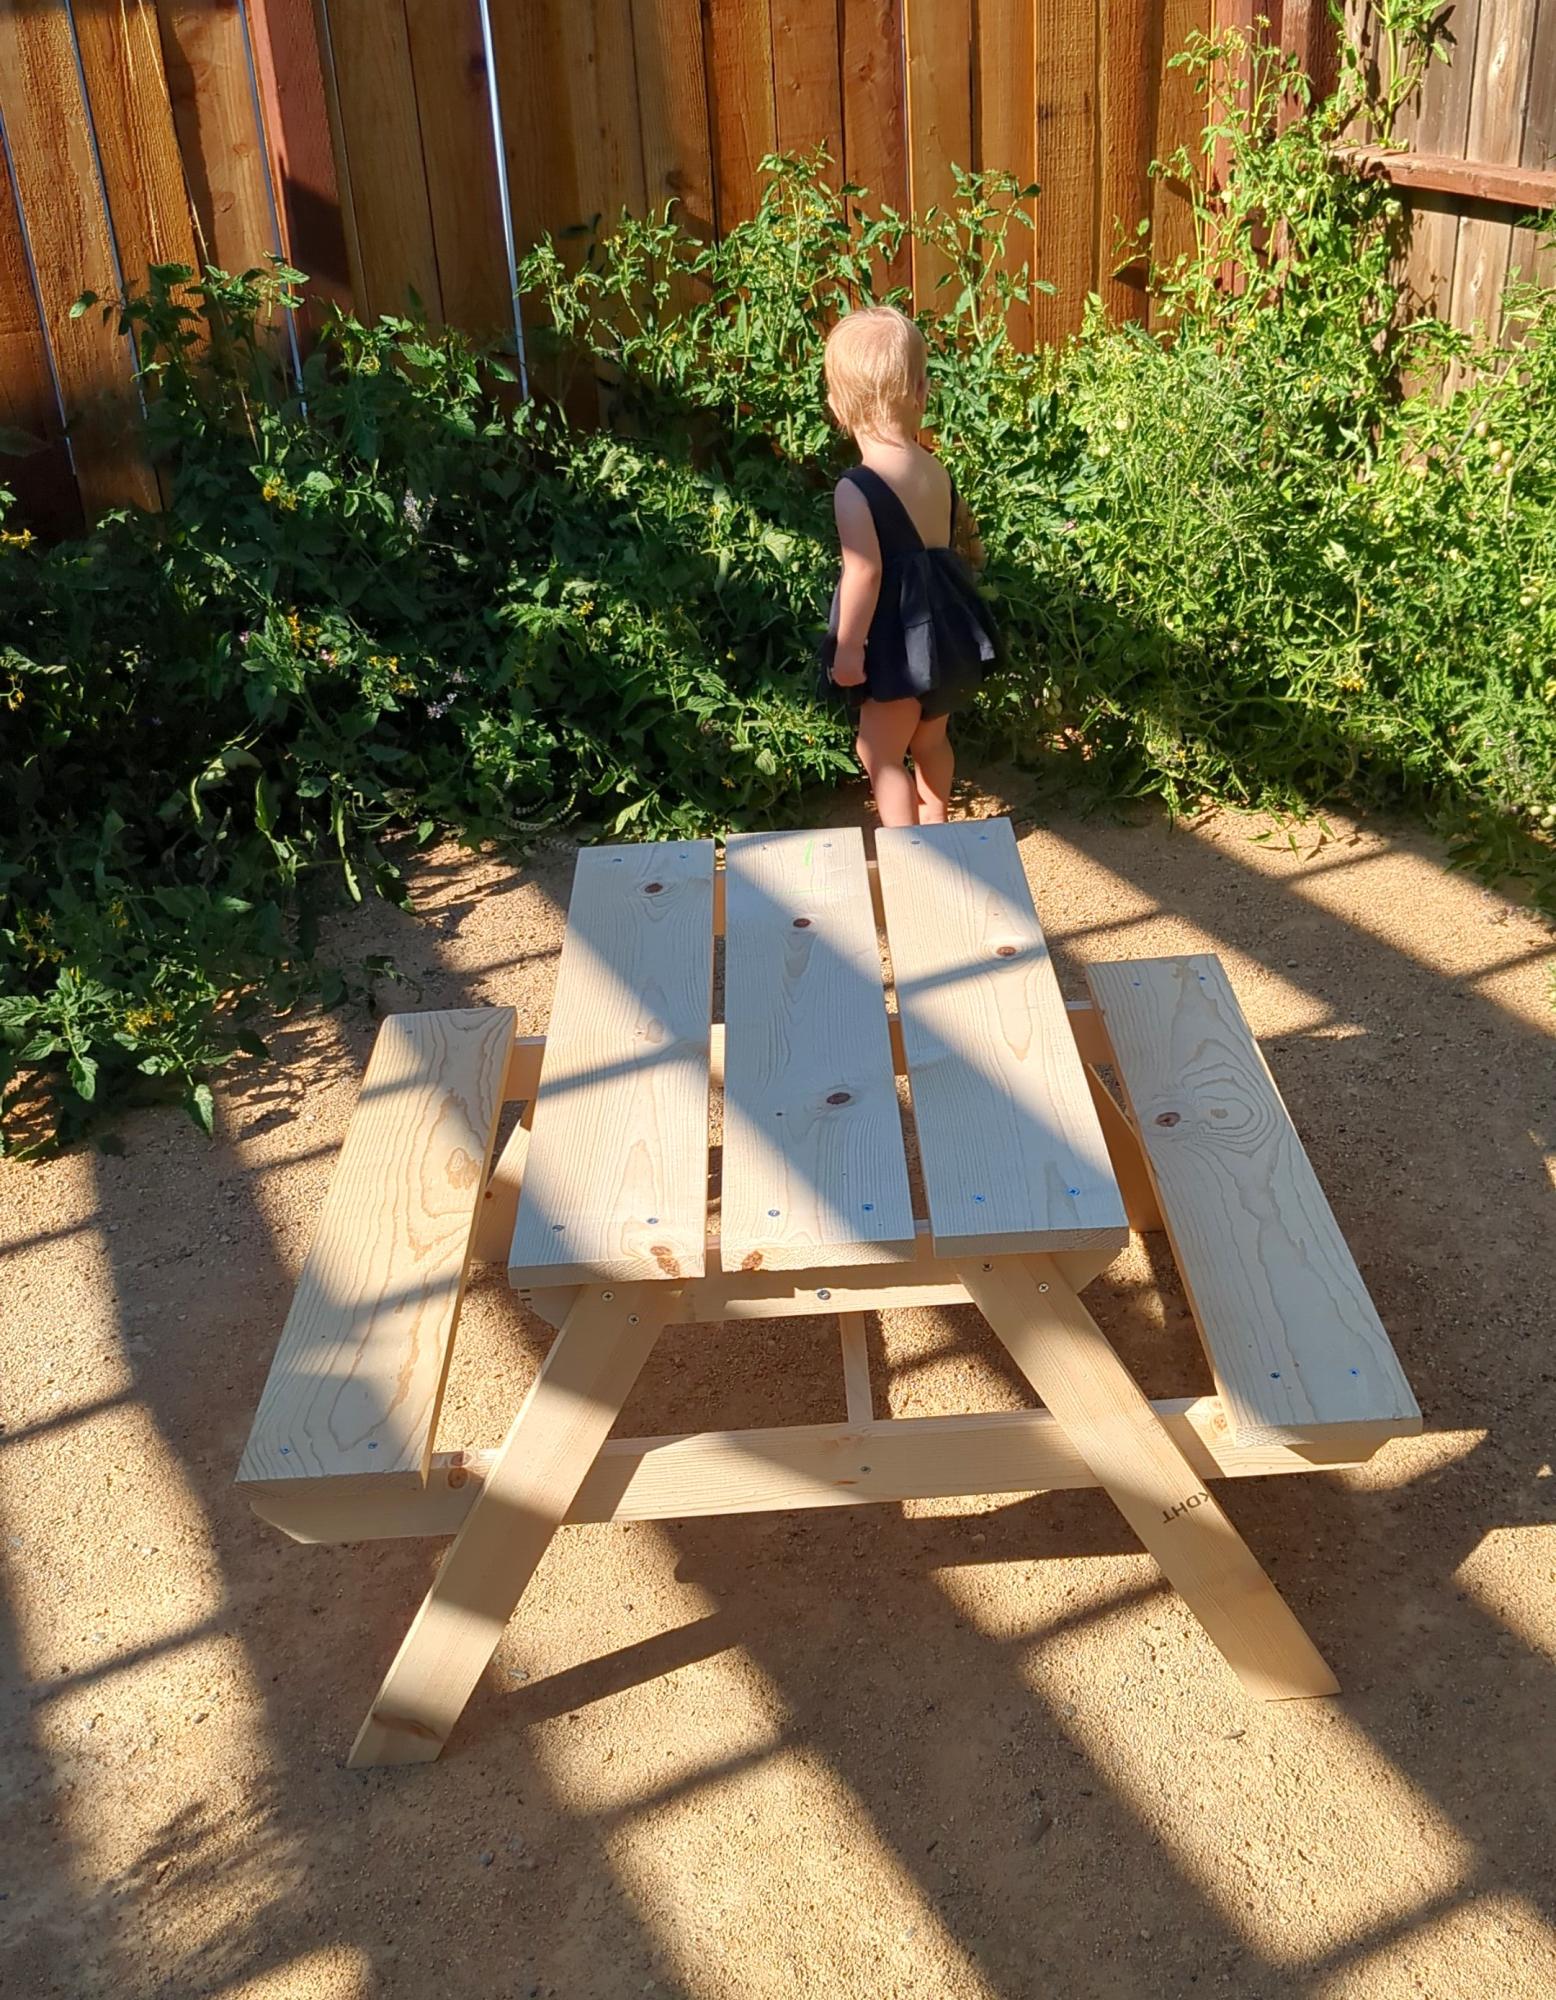
My table is done & here are a couple pictures & modifications. I just want to say THANK YOU for designing & posting plans!!! We DIY'ers really appreciate YOU!!!
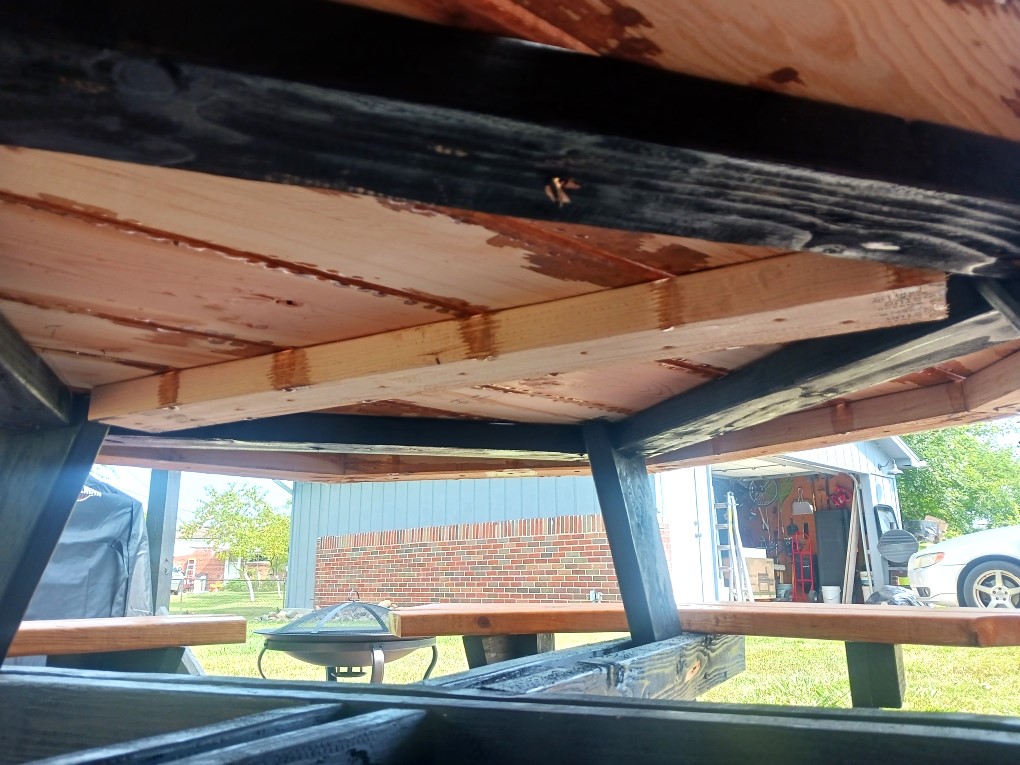
I added 1 2x8 to the center to reduce the gap to .250". I was going to add an umbrella hole & blocks in supports but I was planning on a canopy over the patio, so I chose not to drill a hole. But I could add it in the future. Also, I added a support under the table-top to keep everything flat in the future.
didn't use glue because I have planned on this not being the permanent table. I want to use cedar, but may only do top & seats in Cedar. We'll see how this weathers.
This was VERY difficult to paint. I would suggest painting before assembly, but if glue this becomes an issue. 'Catch 22'. I accidentally attached seats with screws from the top. I think pre-assembling with the 11.25" supports might work better... Next Time.
All in all, my family loves it & this completes our 2024 backyard makeover...
Shawn