Community Brag Posts

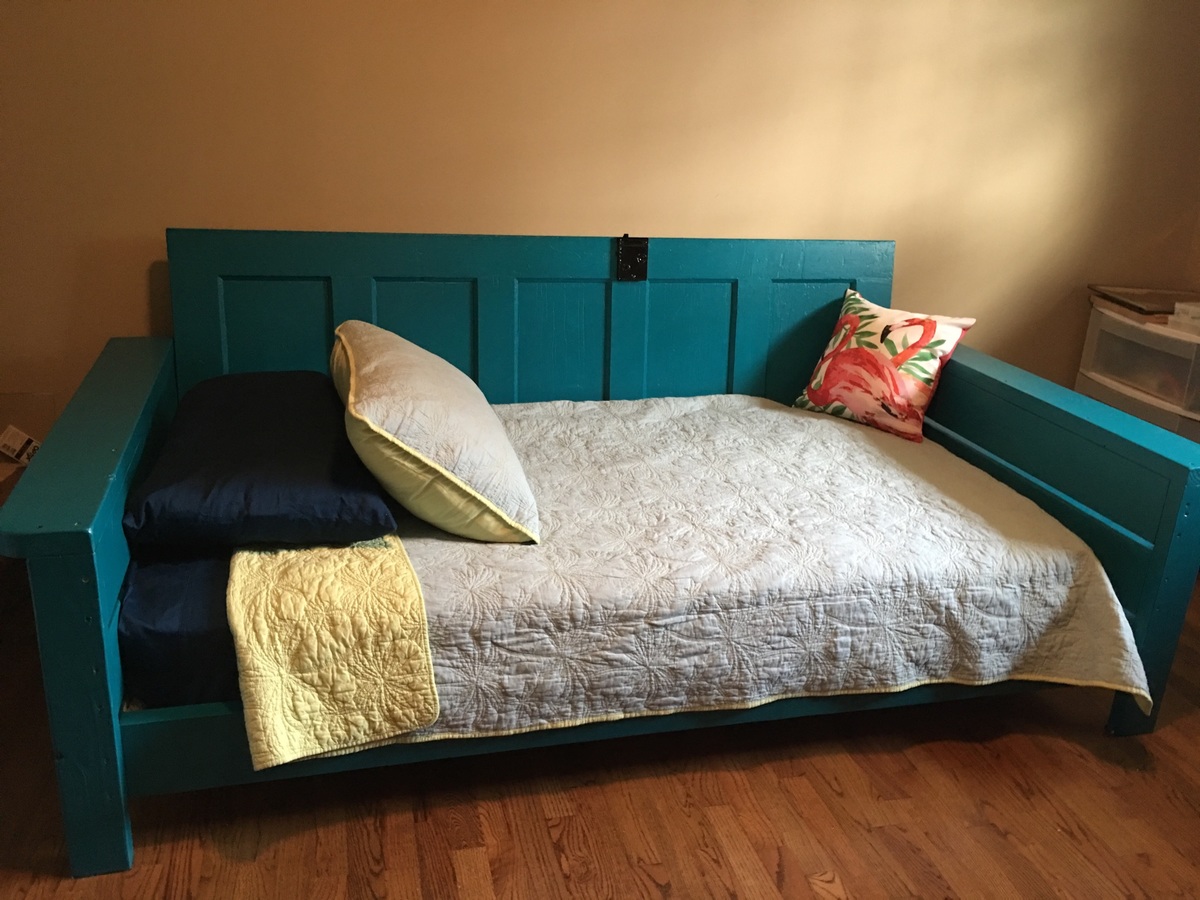
Day bed

Submitted by Christinna on Thu, 09/07/2017 - 17:05

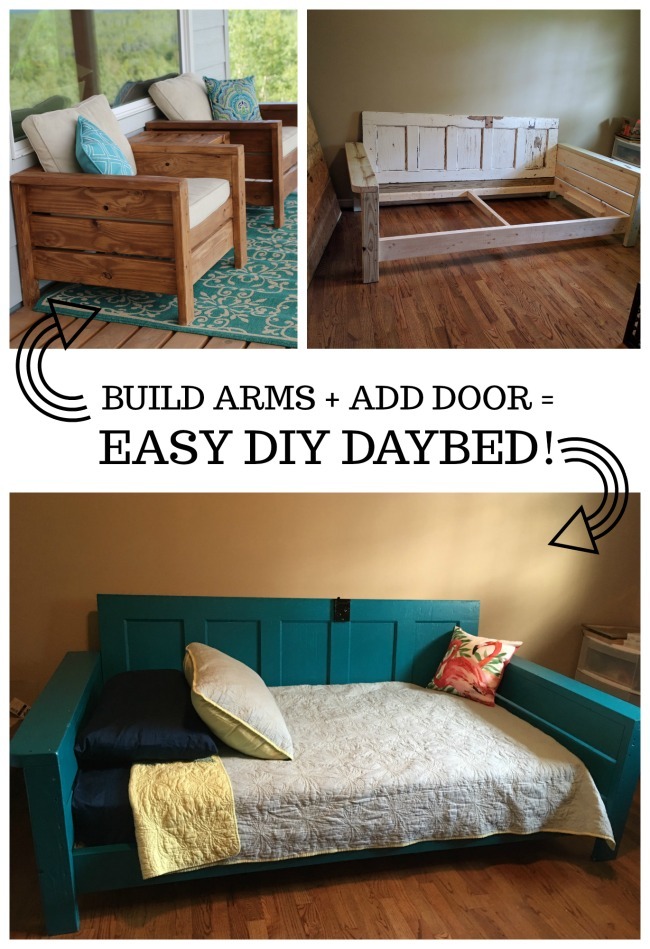
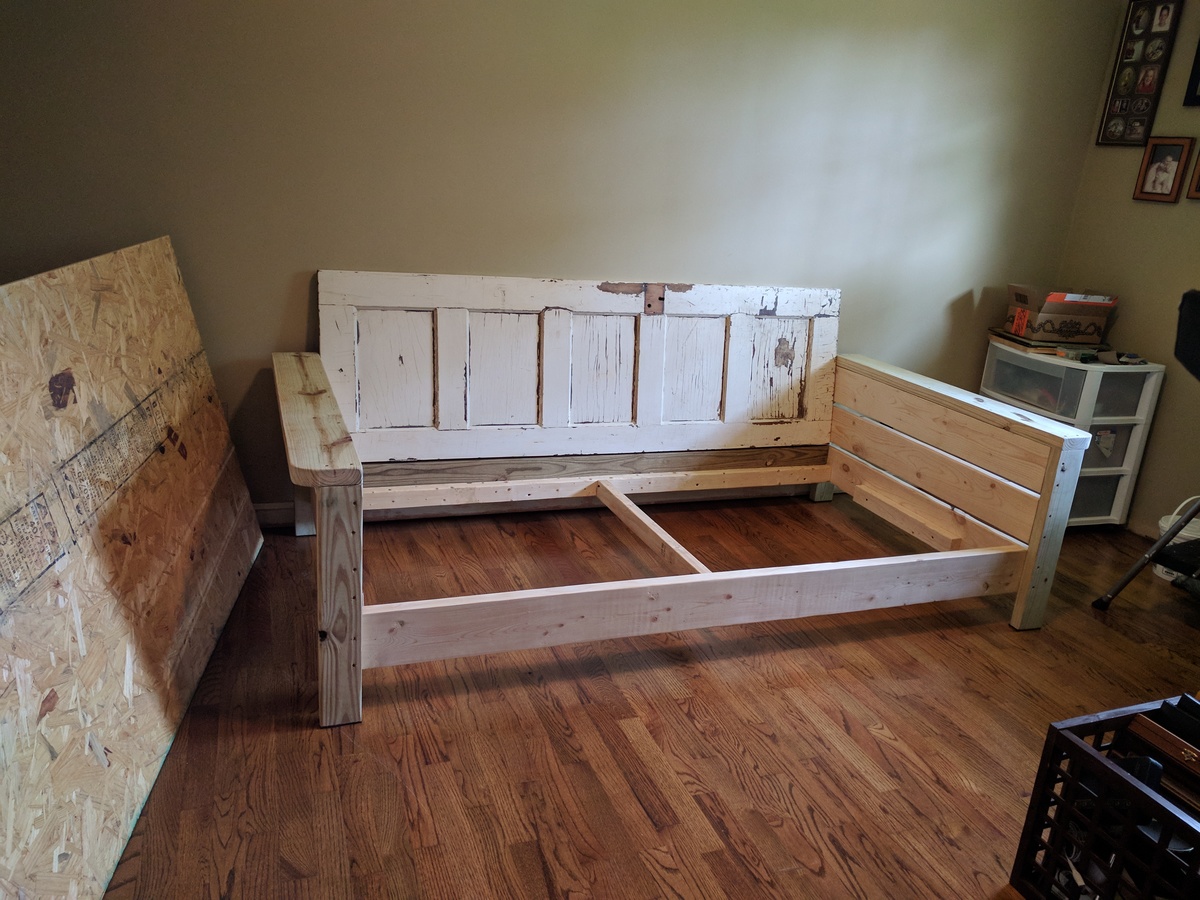
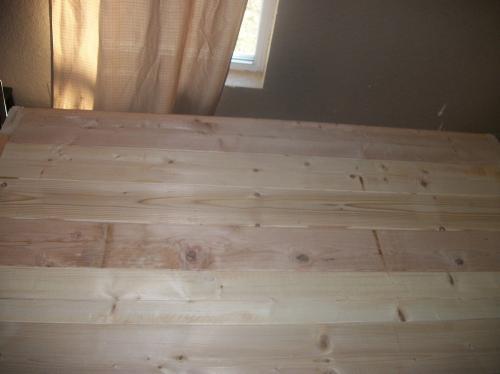
My sister needed a day bed for her guest room.  I modified the Modern Outdoor Chair plans to fit her needs.  We used an old door she found, even using the hinges as a means to attach the door to the bed frame.  This was my first real project.


Estimated Time Investment
Weekend Project (10-20 Hours)
Finish Used
Paint
Recommended Skill Level
Beginner

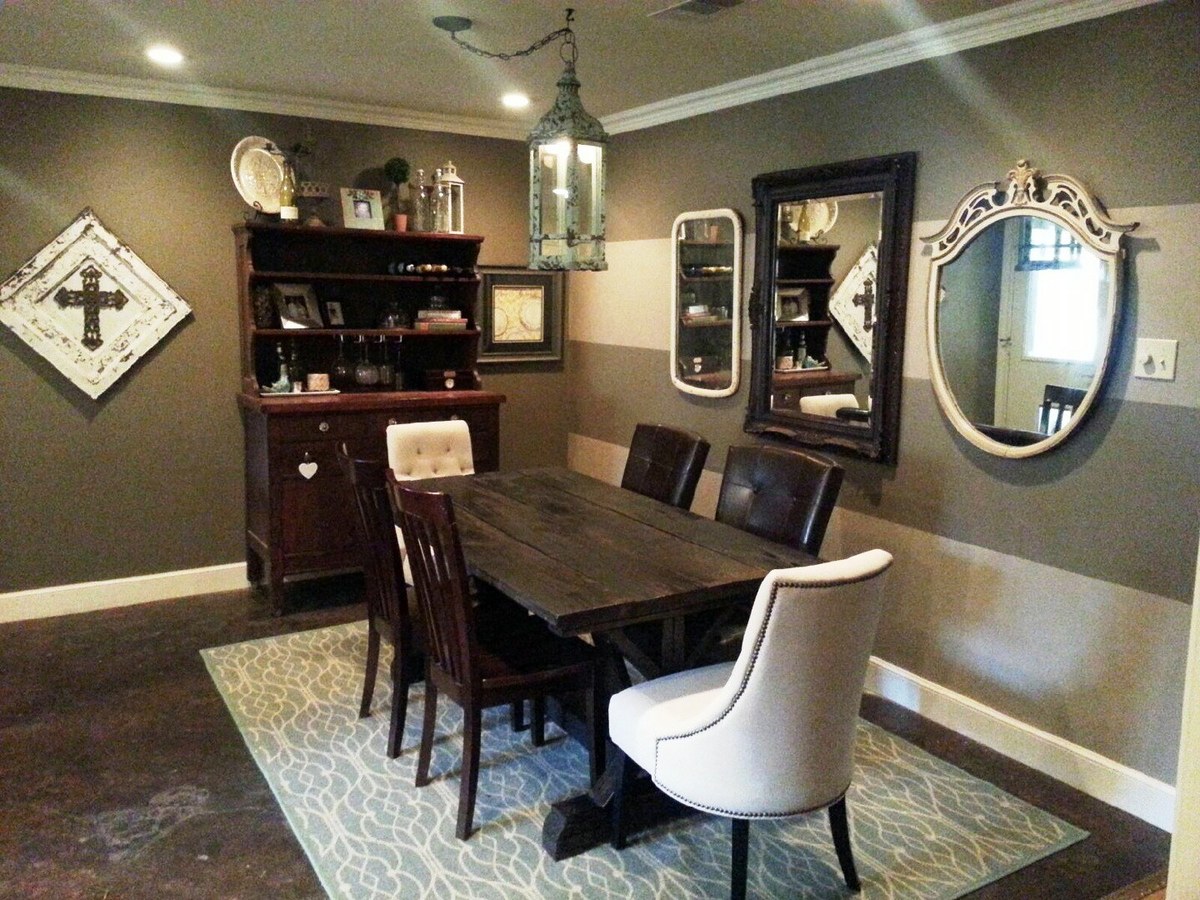
Our New Table...the table of my dreams!!

I have added hundreds of plans on my to do list, and some of them may have been a little easier, but I really wanted this table. Badly.

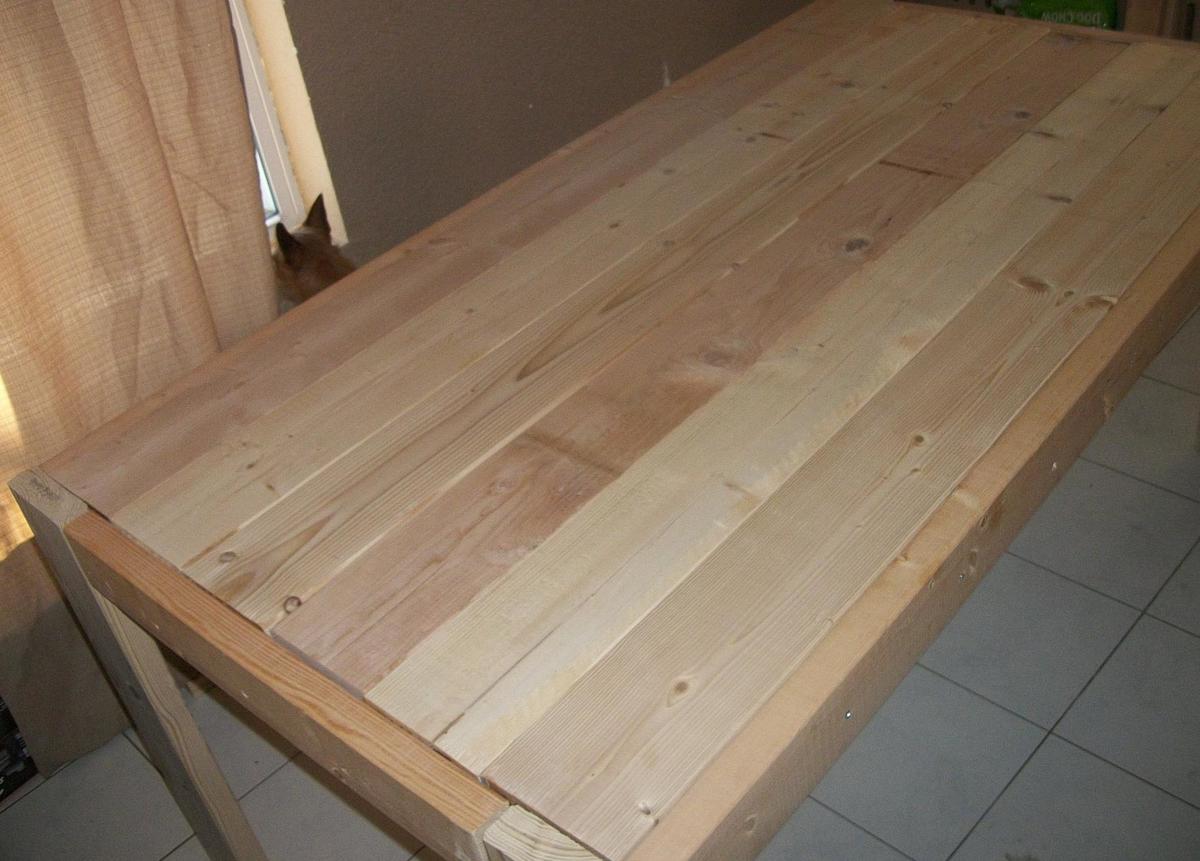
So, my husband and I, decided one weekend to build the Modern Farmhouse Table. Even though we have a saw, we decided since this was our first project, we would have Lowes cut our wood. Big mistake.

When we got home, we organized the wood as to what is what, and measured. It was while we were measuring, when we noticed that a lot of the wood was cut wrong :(

So let that be a lesson...ALWAYS CUT YOUR OWN WOOD!

We went ahead and put the table together, and even though there are some gaps, which I'm planning on filling, I am proud with it.

It's been 3 weeks since we've built the table, and I still have A LOT of sanding to do, and I still need to finish it, but I am proud of what my hubby and I built together so I have to brag!

Next on our list is to build the benches...
Built from Plan(s)
Estimated Time Investment
Week Long Project (20 Hours or More)
Recommended Skill Level
Starter Project

My Garden box

Submitted by Kabarie on Thu, 05/30/2013 - 13:29

Built this with the help of my Dad! Learned about threads as I've never used them before. Because of all the controversy surrounding having pressure treated wood touch the veggies and because I could not afford or find cedar 4x4's I decided to use the left over cedar to build a little cover around the 4x4's so my soil and veggies will never come into contact with it. Love it and the veggies are growing great!

Estimated Cost
$50/60
Estimated Time Investment
Afternoon Project (3-6 Hours)
Finish Used
I forget the stain I used on the outside of cedar...something natural looking.
Recommended Skill Level
Beginner

Comments

Janettx

Fri, 05/31/2013 - 04:22

I'm glad you were able to follow my plans. I'm not a plan writer so I wasn't sure if I gave good enough instruction. It is a shame you can not get all cedar. Sealing the legs will definitly help them last longer and with all that work you certainly want them to last! Just a hint...you can make 3 for not much more than you spent making one....Great job and thanks for the brag post LOVE LOVE LOVE

Trash cabinet with diamond plate

Submitted by Nate103 on Tue, 09/12/2017 - 12:49

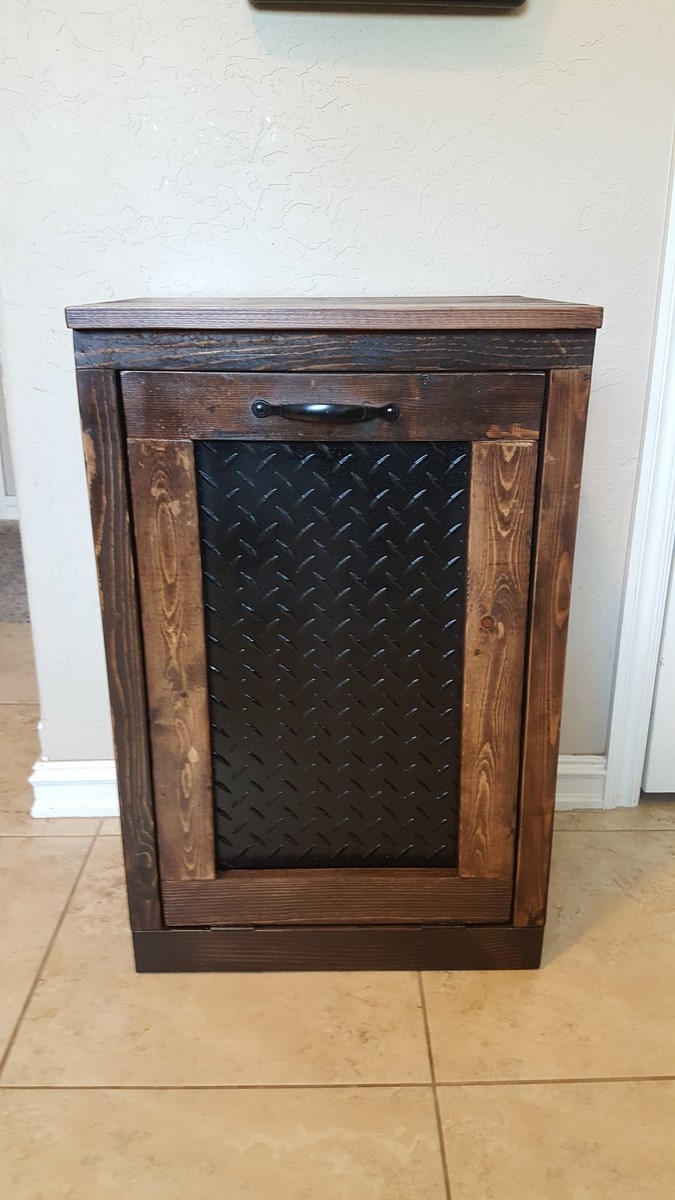
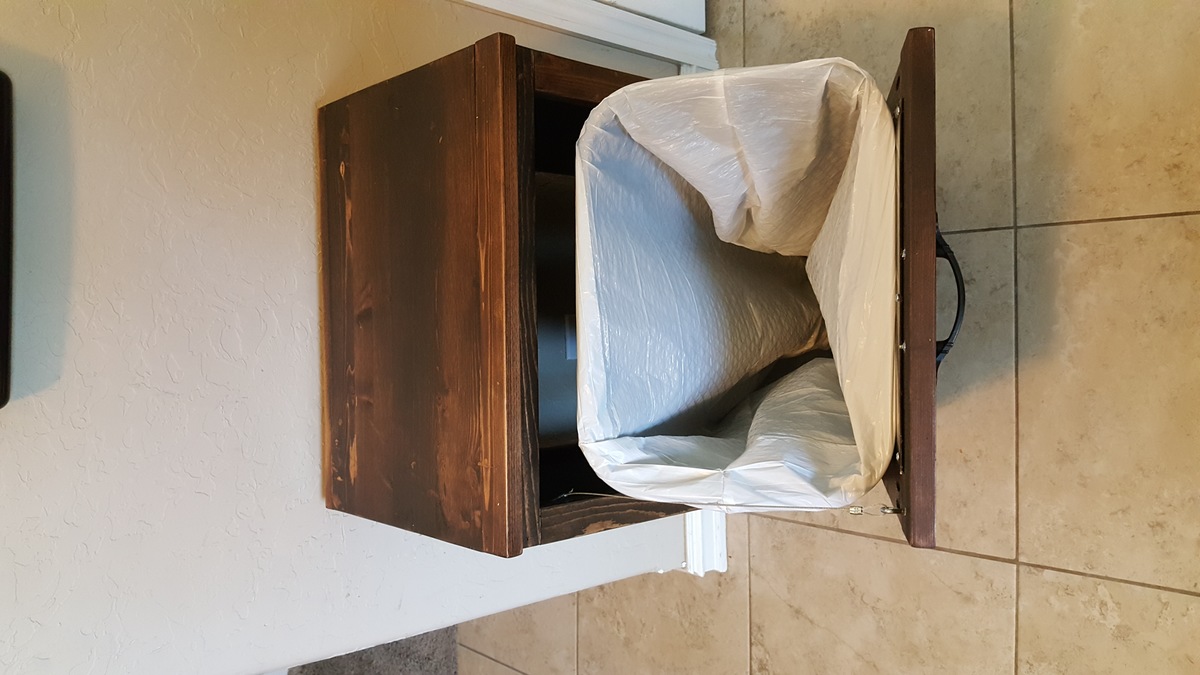
Built this by the plans with one modification.  I bought this diamond plate when it was on sale at lowes. It fit perfect. Used small self taping screws to hold  it in. Stained the same color(kona) as our caninets. 

Estimated Cost
$25-40
Estimated Time Investment
Afternoon Project (3-6 Hours)
Finish Used
Pine
Recommended Skill Level
Beginner

Planked Wood Headboard in Cal King

This project was a blast to make. And, it really is doable and a lot less time then you would think. And finishing it with milk-based paint is even more enjoyable. I used screws and a drill (pre-drill!) and it was wonderful.

Here's some advice for the plan:

- Mount the back of the headboard with a piece of wood and use a metal support as shown here. Just make sure the board is wide enough to be level with your back trim, or else the metal support won't be even when you screw it down. And when you pre-drill this board, make sure you don't go all the way through, or else you will have holes through the front! It stunk to have to putty them all in, but thank heavens for putty.
- Although the instructions say to make your top 1 x 3" trim to fit in line with the top of the headboard, I made mine one inch longer on both sides, and then the 2 x 4" one inch longer to go on top of that 1 x 3" on both sides. That was just the look I wanted. Although you can get your wood pre-cut, I would recommend cutting it all yourself, especially since you will need these cut afterward once the rest of your headboard is put together.
- Ana's 'get started' tips are very helpful. Be sure to check them out first!
- Make sure, make sure, make sure you dry thoroughly between coats. Patience is a virtue.

Estimated Cost
$125
Estimated Time Investment
Week Long Project (20 Hours or More)
Finish Used
I distressed with milk-based paint... it always gives it such a unique look every time! Here's what I did:
- Stain your wood with a foam brush that you can by essentially anywhere--craft stores, home improvement stores--going along the grain of the wood. Do this for all painting and staining. For a dark finish underneath, use a dark stain. I used Minwax in Dark walnut. Leave the stain on for at least 15 MINUTES before you wipe it with an old t-shirt or a lint-free rag, like the one you would use to polish your car.

-Buff with a crinkled brown paper bag. You won't need to do this too intensely, but make sure you're thorough.

- If you want some of those big, antiqued stain spots, take a candle and really rub certain spots, such as the knots and the edges of the wood. However, it can be easy to forget where you rubbed with the candle, so you might want to draw up a rough diagram of a headboard and mark an X where you rubbed the candle. Rubbing with the candle will make the spot of the paint come off much easier--you'll see how well it will come off when you sand. But I would hesitate from rubbing it too much, because it makes your paint 'peel off' eventually if you do it in excess.

- Paint your headboard, giving it at least thee coats. My first coat was really thin so during my first coat I went right ahead and painted it again right then. Then I did a second and third coat. Let it dry completely between your second and third coat. I waited at least eight hours between coats.

- Once it's dry, sand your headboard BY HAND with at least 100 grit sandpaper. If you want your piece to have a more distressed look all-around and not just in certain places, sand your piece after each coat of paint dries. Just rub with your hand smoothly in strokes, and you will see how easily the paint comes off, and how it will give you that distressed look like magic. I did this for my dresser and I loved the look. However, I did not use the candle-wax method because I sanded after each coat. If you wait until after the third coat to sand, you will have to work harder, but your paint will still come off and look distressed very nicely.

- Stain the top of your paint (I used the same dark dark walnut color). Immediately rub off the stain with an old t-shirt or a lint-free rag. Rub it down to get the desired look of your stain. If you choose to have it a little less antiqued, you can skip this step.

- Finish with a Polyacrylic topcoat. They are safe and it really gives a nice, finished (and less DIY) look.

- Mount it with bolts on to your bed frame!
Recommended Skill Level
Starter Project

Cute corner cabinet!

Submitted by rmurray87 on Sun, 06/02/2013 - 11:24

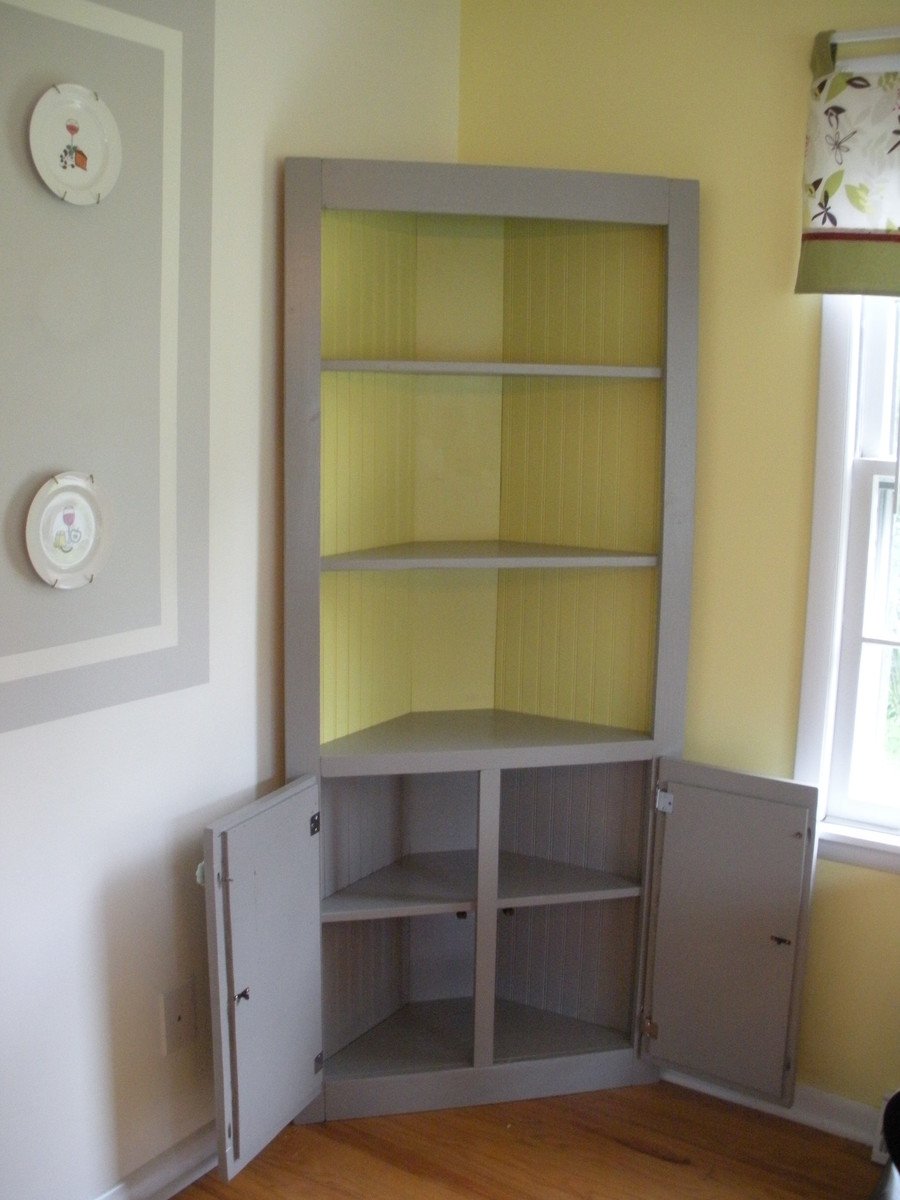
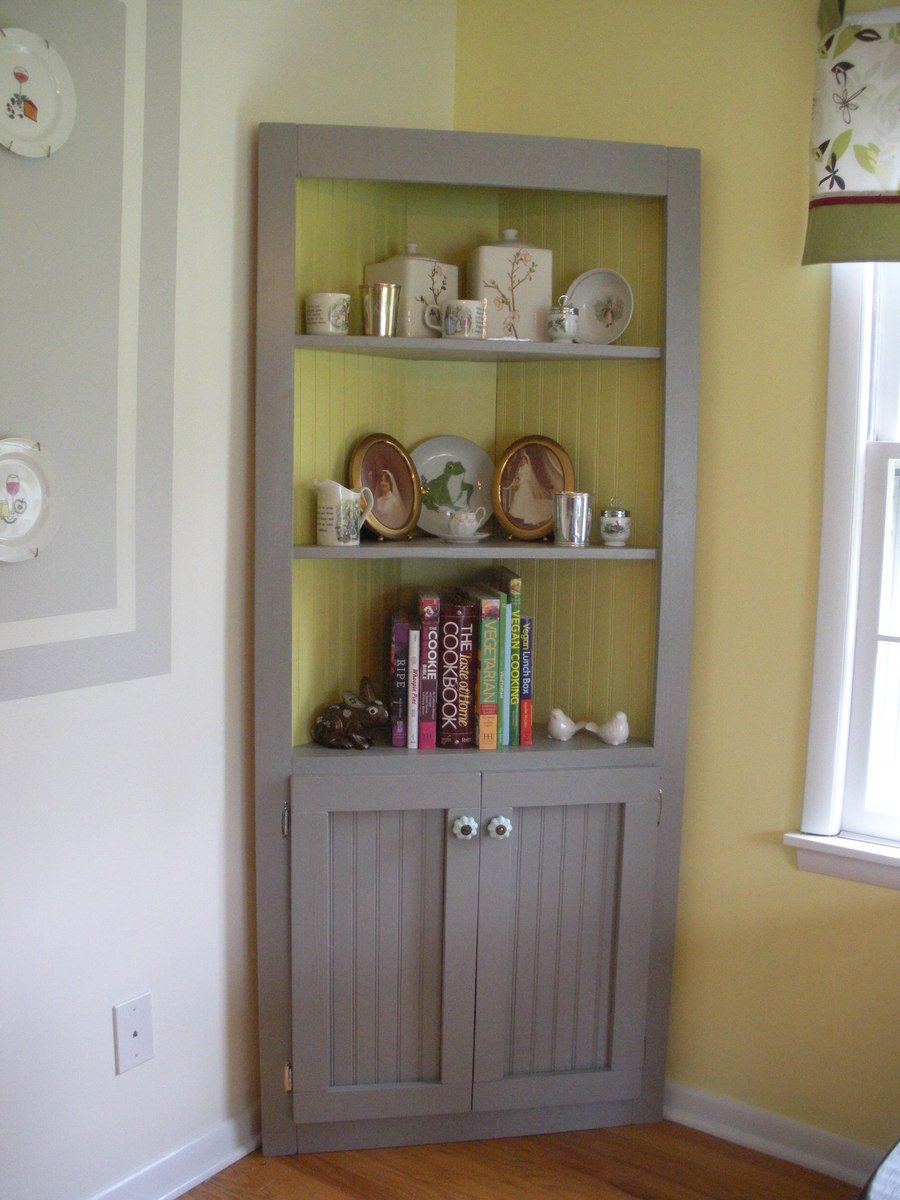
This project took me the majority of a three-day weekend to complete, but it was well worth it! I had the lumber store cut the beadboard panel for me so that it would fit in my car. This was also the first time I built something with doors on it, which was a bit of a learning curve, but came out alright in the end. I used pocket holes to build the face frame, and attached the shelves to the frame first before attaching them to the 1x8 back. I used 1 1/4" pocket hole screws and 2" wood screws. I left off the trim at the top and didn't bother to cut out the footer, but I think it still looks pretty cute.

Built from Plan(s)
Estimated Cost
$110
Estimated Time Investment
Weekend Project (10-20 Hours)
Finish Used
Accent color: Appletini from Valspar
Main color: Earthy Mushroom Taupe from Glidden

Everything was given a good sanding and a healthy dose of primer before painting.
Recommended Skill Level
Beginner

Comments

Harriet Chairs (by me)

Submitted by Medickep on Fri, 05/01/2015 - 09:01


I'm pretty happy with the way these chairs turned out.  It was a fun project as I did a few first, which included going to the fabric store (long waits) and got to tackle some upolstery for the first time!  I did end up with a few glue drops that did not take the stain, so I'll be researching tips and tricks to prevant that in the future!  


Also, I made these out of Popular, which pre stain was a must for cherry stain.  Next time, I would use Cherry!

Thanks to Joanne S for the original post and consults regarding the upolserty!!

Built from Plan(s)
Estimated Cost
80-100/chair (depends on materials used)
Estimated Time Investment
Weekend Project (10-20 Hours)
Finish Used
Golden Oak Wood Classics stain from Sherwin Williams. Tinted to match my existing chairs.
Recommended Skill Level
Intermediate

Comments

JoanneS

Fri, 05/01/2015 - 13:29

These are spectacular! Beautiful build! Love the finish and the upholstery. Also I'm super impressed that you can't see any of the filled screw holes. Would love to know the technique you used to hide them so well - I'm going to copy that! :)
JoanneS

Medickep

Fri, 05/08/2015 - 12:48

Thank you both for the nice comments. I was please with the way these turned out too, despite some glue spots not taking up the stain. I plan on getting more disciplined in this area. For hiding the screws, I finally upgraded to a real countersink like this one: http://www.rockler.com/8-pro-tapered-countersink-bit at Rockler.

Instead of always forcing a dull one in and getting a crooked openings, this razor sharp one cuts beautiful holes with no effort! But watch out, I cut myself just adjusting the depth of the drill bit. I discovered these the last time I made some wine oak barrel chairs!

Medickep

Fri, 05/08/2015 - 12:53

Since I use Kreg screws for almost everything, (even non-pocket hole stuff)because they are self tapping and won't crack the would I sure my countersink matched the head of the Kreg screws and than purchased a plug hole bit. Can be used on a drill, but better on a drill press. You have to keep the drill perfectly straight or the plug can break and get stuck in the bit!

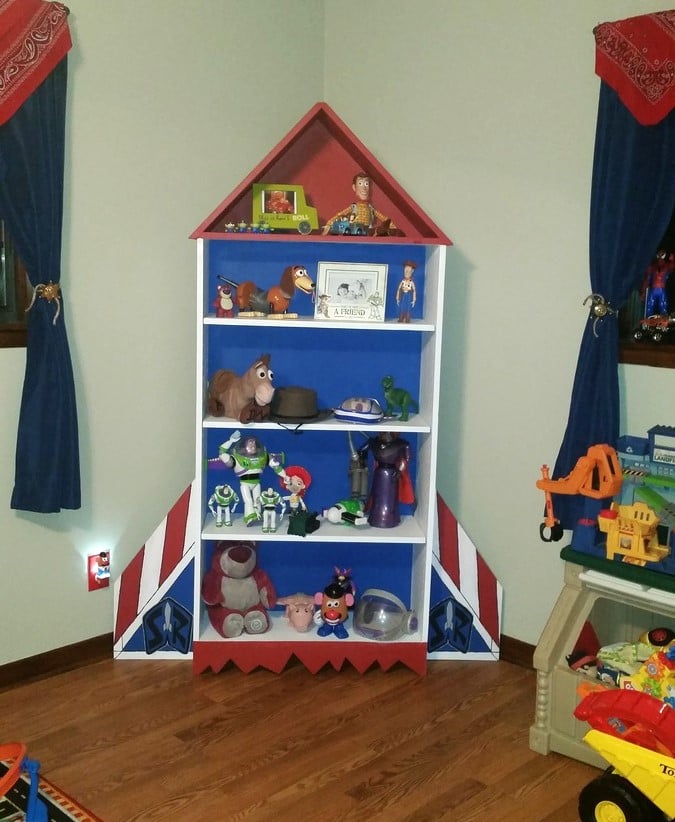
Buzz Lightyear rocket shelf

Submitted by Kboshers on Wed, 09/13/2017 - 09:39

I used Ana's instructional as inspiration but changed dimensions. My little guy adores this shelf.

Built from Plan(s)
Estimated Cost
100
Estimated Time Investment
Weekend Project (10-20 Hours)
Finish Used
Behr flat premium paints with waxed finish
Recommended Skill Level
Intermediate

Cabinet Doors

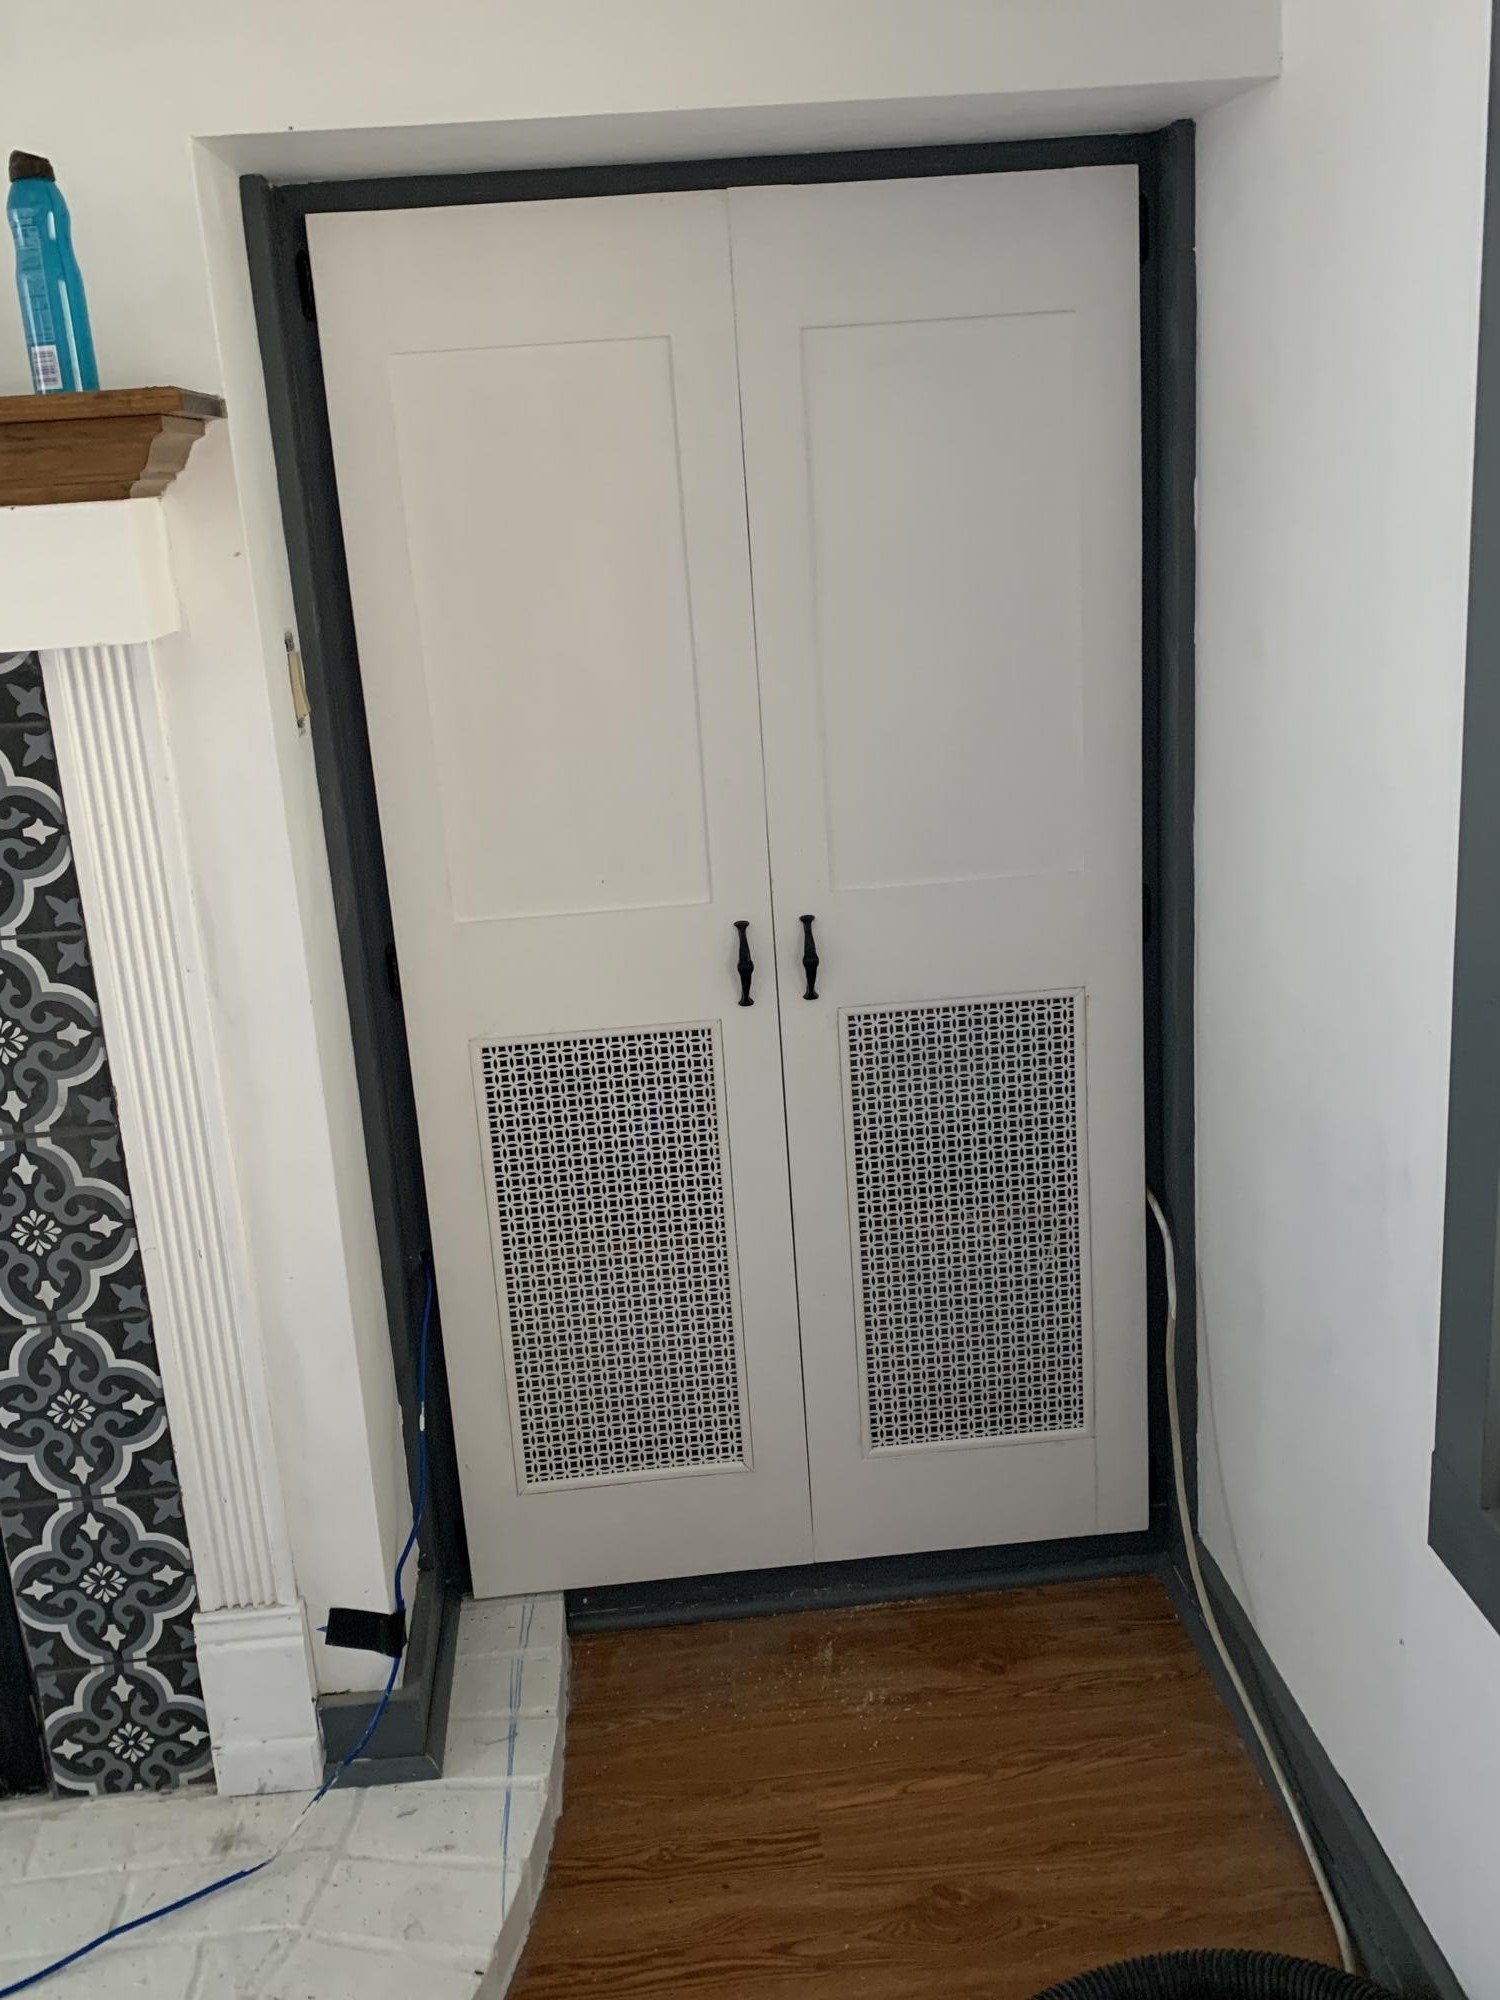
Submitted by Anonymous (not verified) on Fri, 10/08/2021 - 07:58

I made these cabinet doors based on your Entryway Console with Open Shelves. I wanted something to hide the clutter from the cables, modems and hubs for all our smart devices as well as the circuit box. I modified these with open grills in the bottom half to allow for the Wi-Fi signal to travel without being blocked. I love them and am so surprised at how nice they turned out. I am not used to working with wood routers or table saws but found that it was not as difficult as I thought it would be. I used pocket wholes to join the stiles and rails and did use glue also due to the expected high usage.

Comments

Old Door Cofee Table

This table was built out of an old 5 panel door and some scrap would that we had lying around. old hinges and knob came from a local antique store. To finish the door my wife crackled the top and clear coated it. 

Estimated Cost
50.00
Estimated Time Investment
Afternoon Project (3-6 Hours)
Recommended Skill Level
Beginner

Rustic X Farmhouse Table

We were able to finish this table after work one afternoon and stain it the next day. (we have a 16 month old also, so you can do it! :) ) I wanted a similar style I had found at World Market that retailed for $700 we were able to complete this entire table for $100 including all hardware and stain. LOVE it so much and get SO many compliments on it. Thanks so much!

Shelby
The Dandy Lion

Estimated Time Investment
Day Project (6-9 Hours)
Finish Used
A satin poly with espresso stain in one
Recommended Skill Level
Intermediate

Sturdy work table and tool box

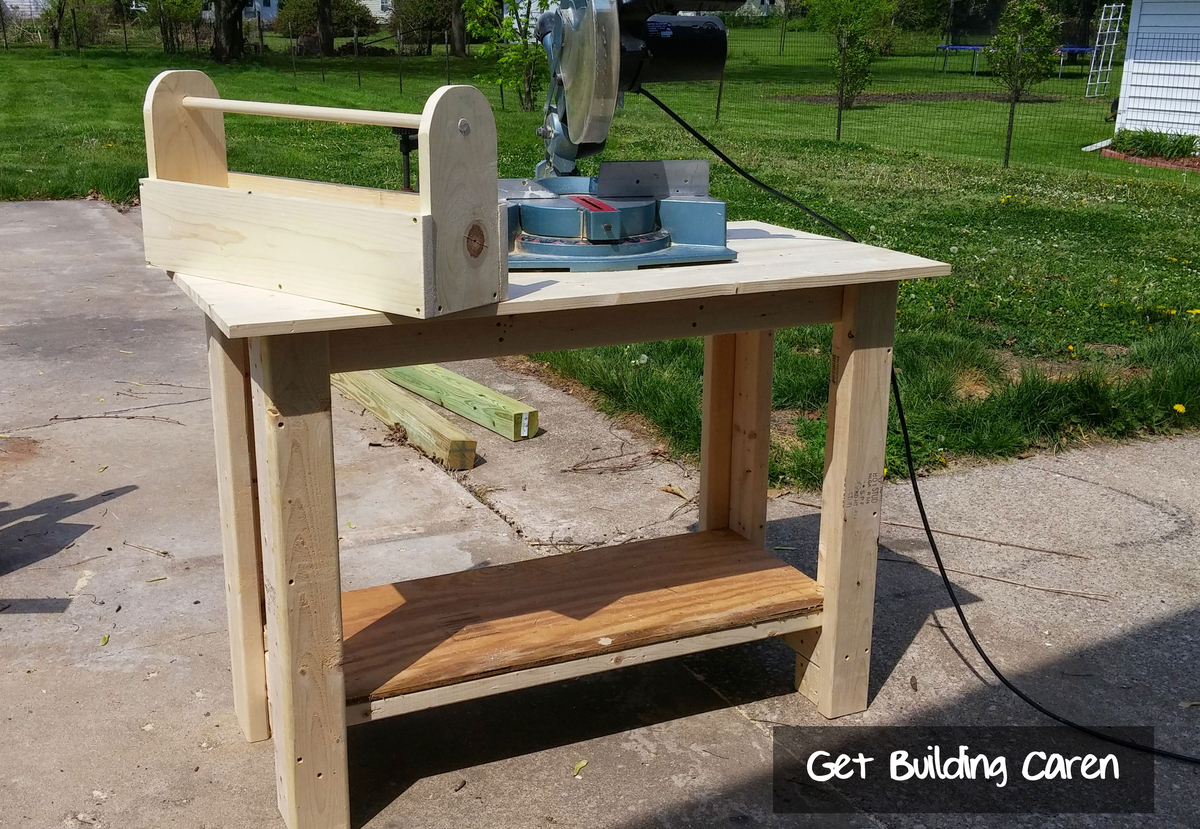
The first project I tackled from Ana White's wonderful plans was a building a sturdy work table for my miter saw that I bought at a garage sale for $25. I was using cinder blocks and plywood as a makeshift work table, and wanted an improvement on that as my first project. So, let the fun begin!

I started the project on Saturday after lunch, going to the lumber yard and picking up wood and screws for about $50. It's about the lumber limit I can haul in my Honda Civic, in the back seat, with the window open.

I followed the instructions, but found that the supports for the top were 13" not 12", and I had 3 2x4s left over (for future projects). I had some plywood in the shed, which I cut 16x40 to make a shelf. I only filled the screw holes on top with wood filler, so sawdust doesn't accumulate.

I finished the table before dinner time. The kids are getting me a bench vise for Mother's Day. Thanks kids!

On Sunday I started my second project, a tool box made out of a dowel and a 1x6 (see it on the ground in the second pic?). I cut the pieces first, then rounded the sides with the jig saw I bought at another garage sale for $3.

Everyone loves the toolbox! I plan on making one for my oldest son, and filling it with starter tools.

Built from Plan(s)
Estimated Cost
$50
Estimated Time Investment
Day Project (6-9 Hours)
Recommended Skill Level
Starter Project

Sweet Pea Cottage

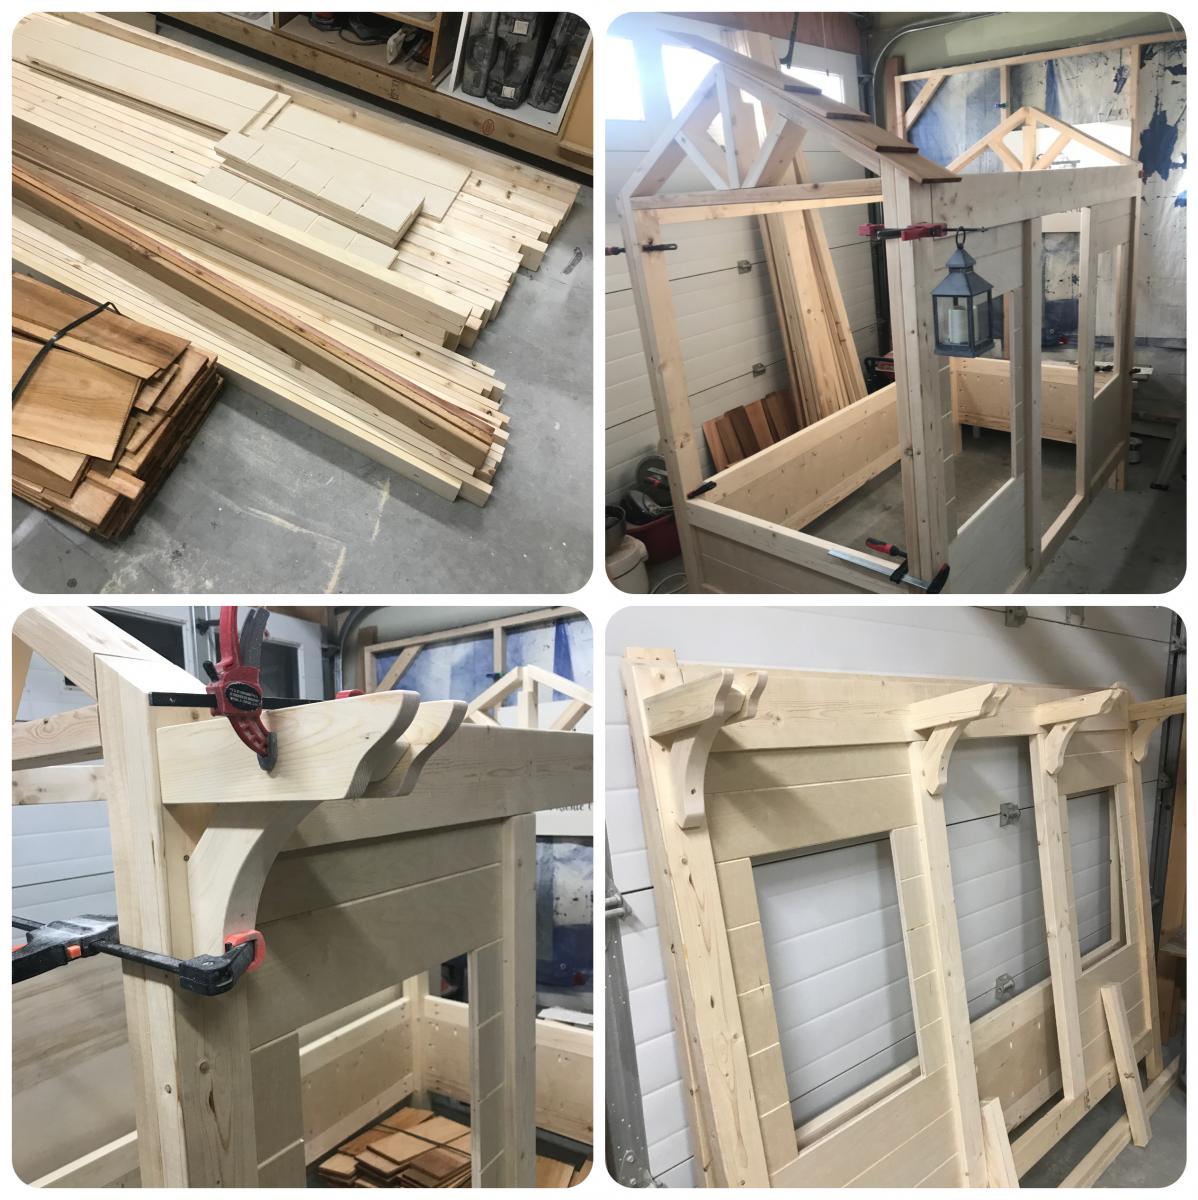
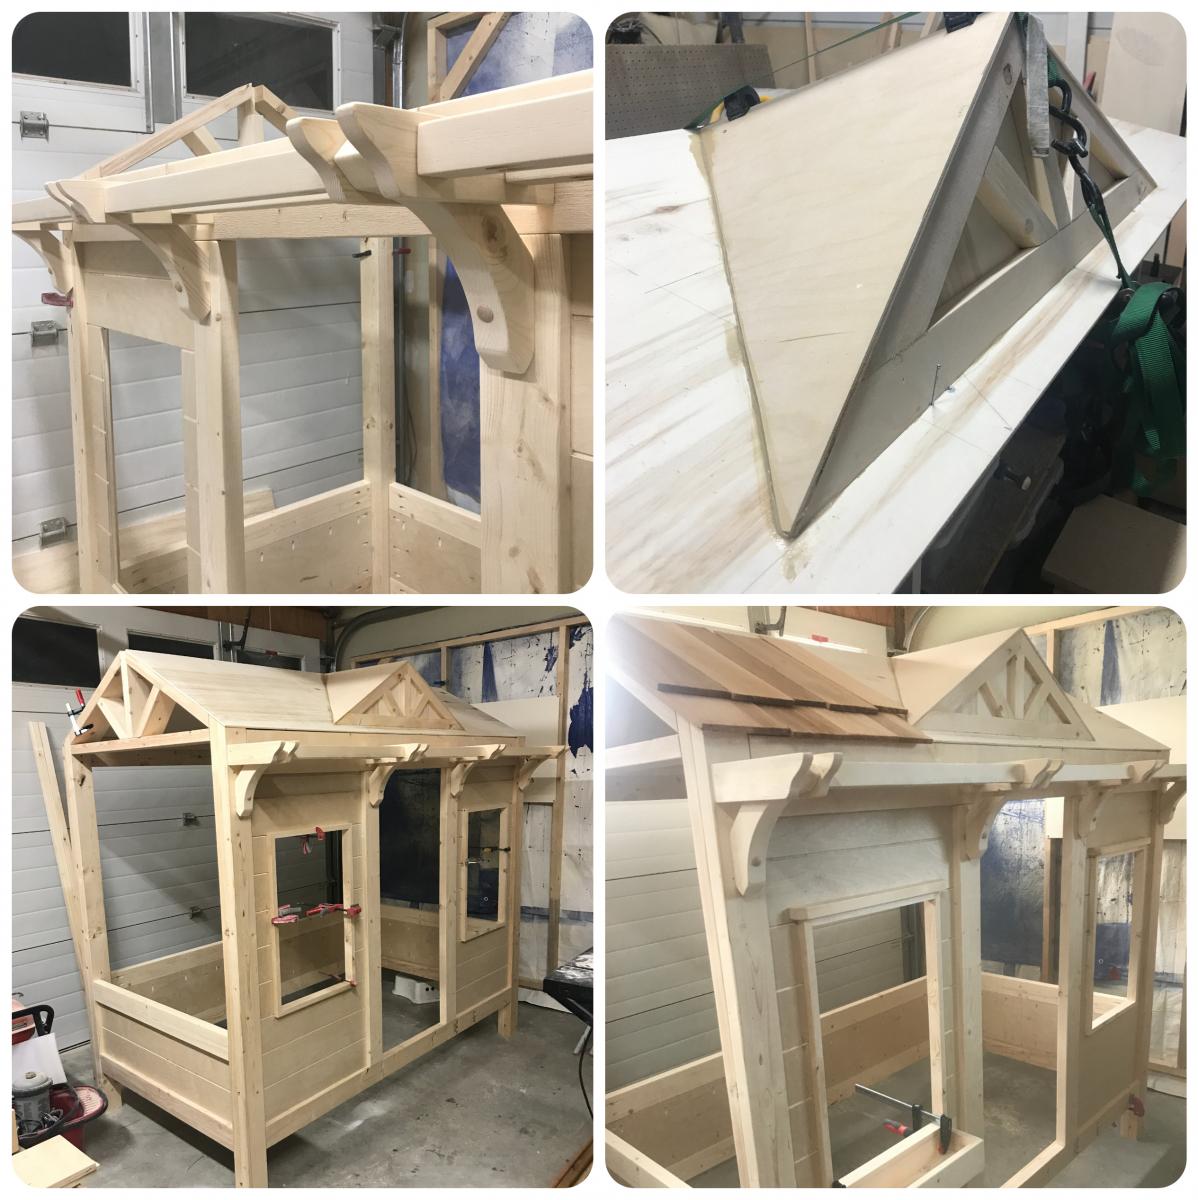
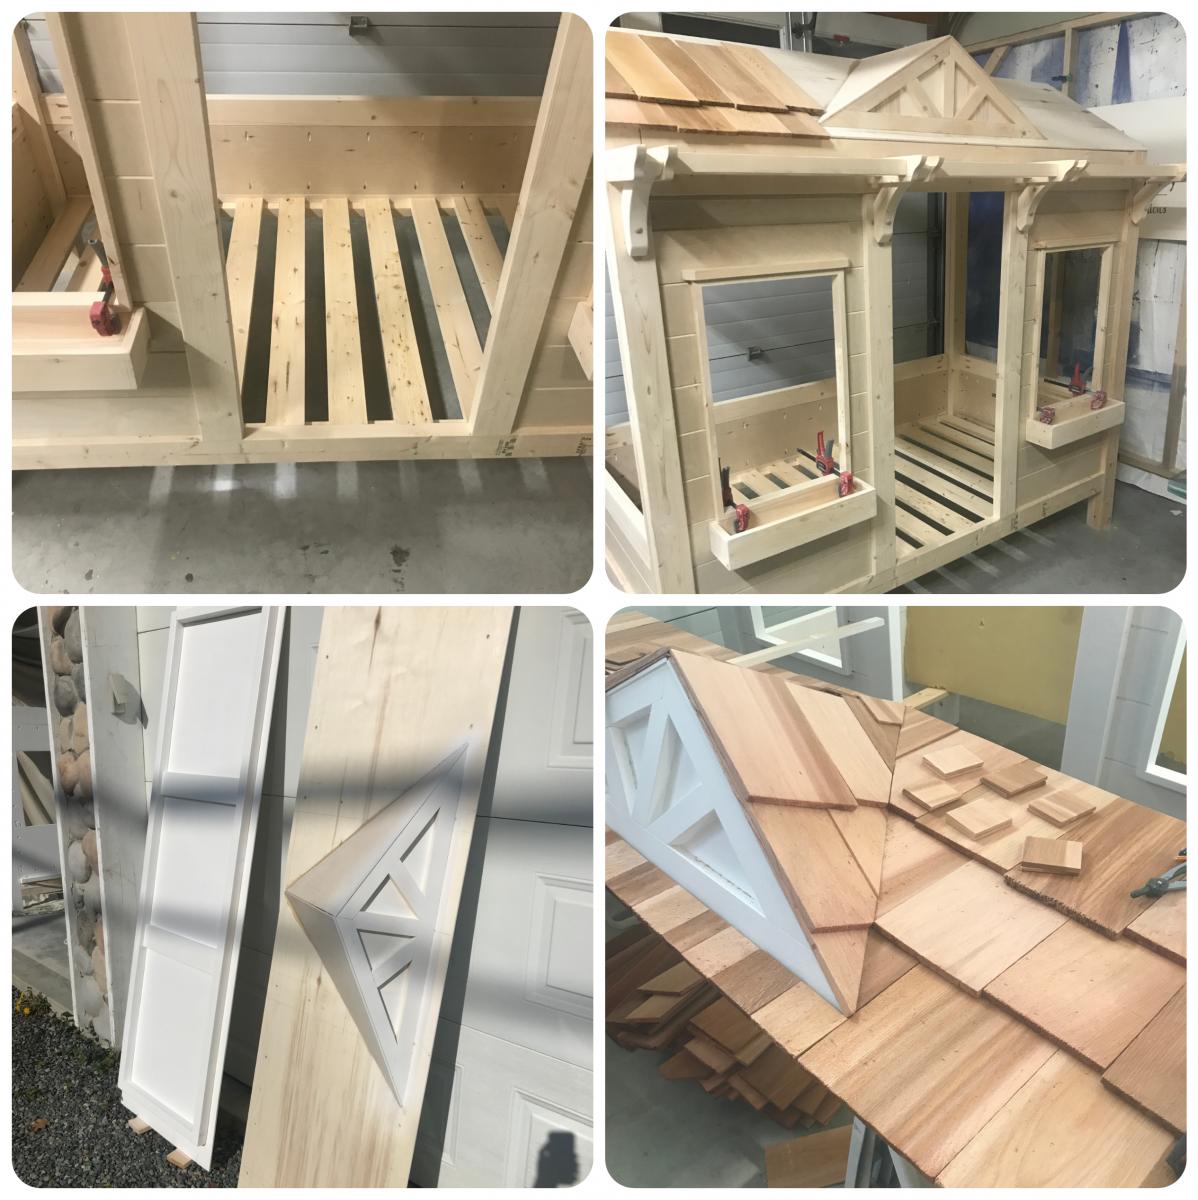
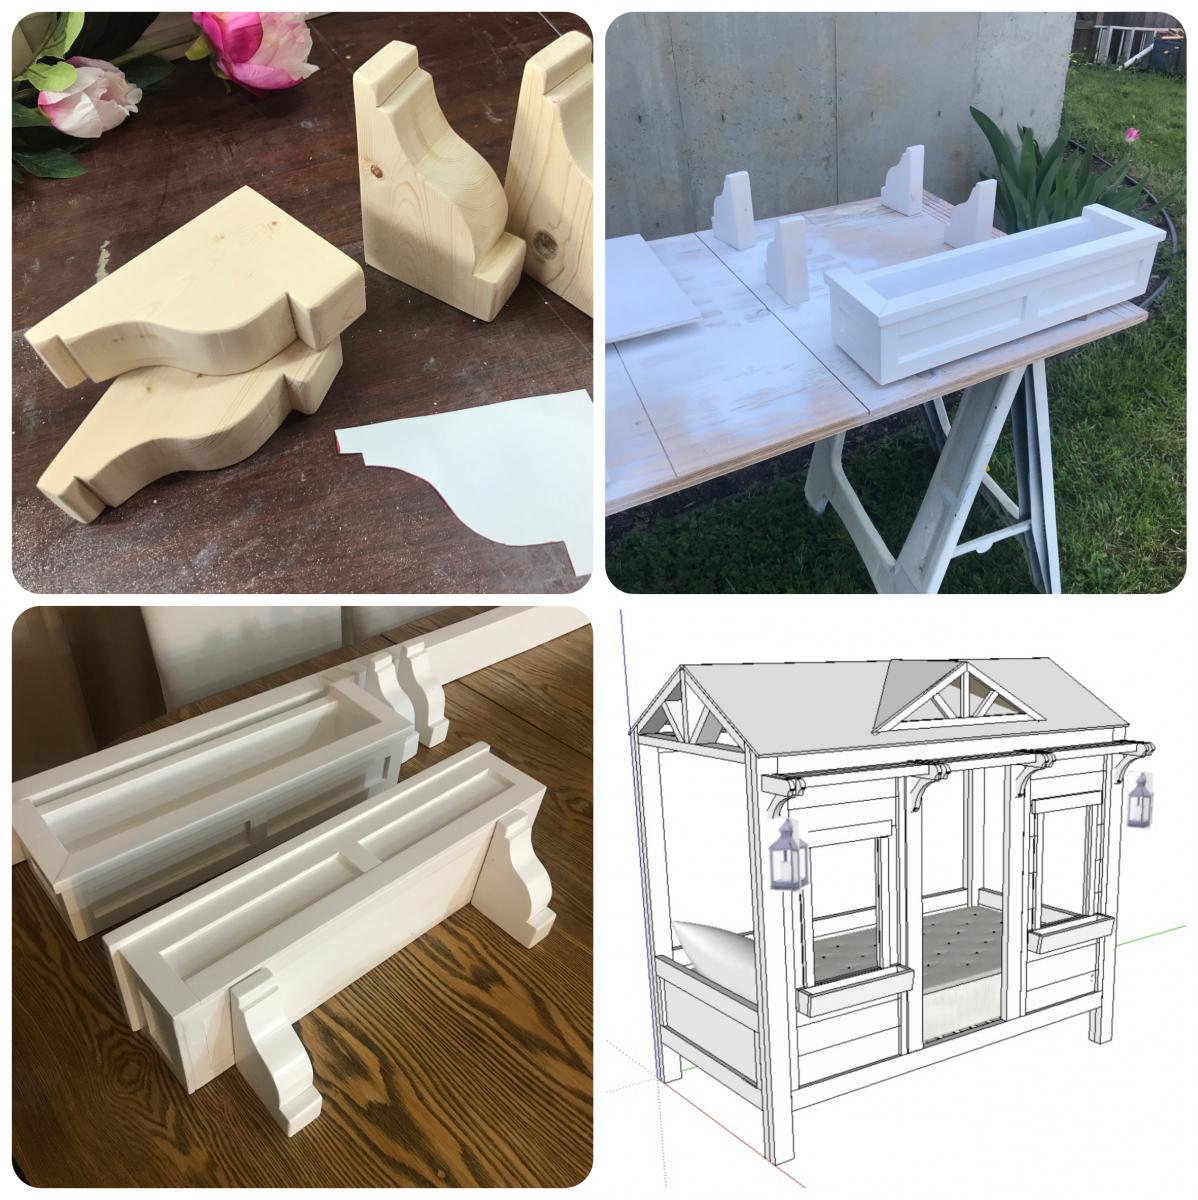
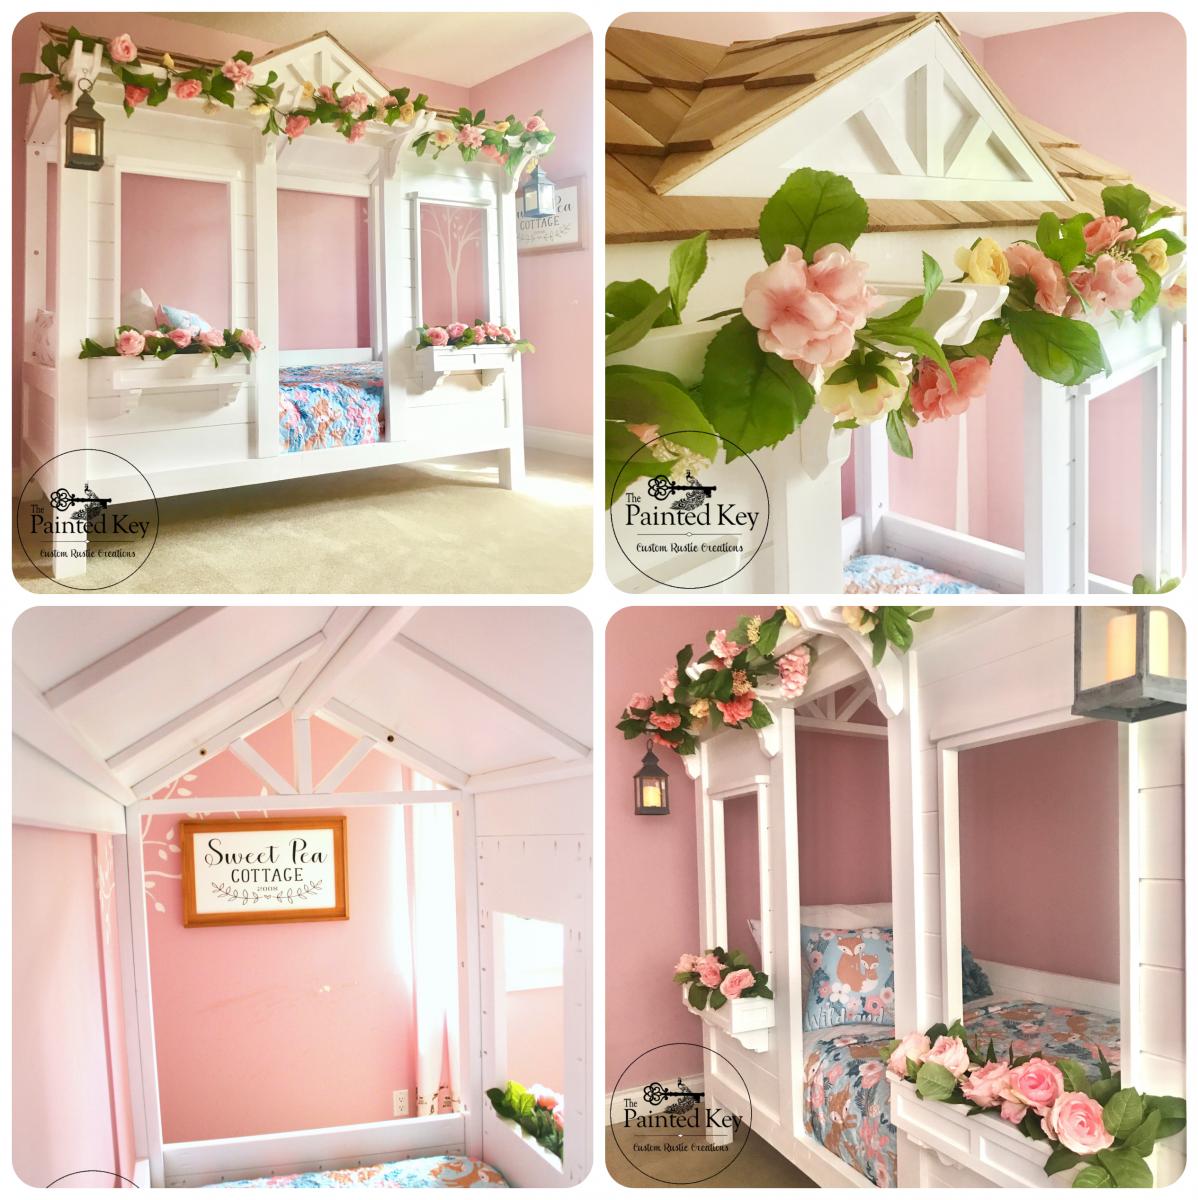
What's a mom to do when she can't choose between the cabin bed, the little cottage loft bed and the sweet pea garden bed? Head over to google sketchup and sketch up a set of plans incorporating favourite aspects of all three beds! This one had been in the planning stages for over a year and I’ve called it “Sweet Pea Cottage”. It took me about 3 months to build in my spare time and I couldn't be happier with how it turned out. Of course our daughter loves it as well! Who wouldn't want to sleep in their own little house bed! :) I used spruce and 3/4" purebond plywood for the main build. To give the plywood panels a planked look, I cut the front into various size rectangles so I could run them through my table saw using a 1/4" dado blade before assembling the pieces together with pocket holes. The roof panels and dormer are 1/4" plywood glued and screwed to a frame and then I used construction adhesive to adhere the dormer to the front roof panel as well as adhere the cedar shakes. Painted with Behr Pure Ultra White and topped with a satin polyacrylic. I left the cedar shakes raw but if I built it again, I think I would top them with some sort of flat or matt sealer as the rough texture makes dusting them a bit difficult. One of the first questions I get is "how difficult is it to make the bed?". Surprisingly it's not that hard. Because the bed is so open on each end and we have it set up in her room with access on three sides, it's easy to manoeuvre the mattress a bit to change the bedding.

Comments

April1360

Thu, 02/17/2022 - 08:15

I love this bed. I would like to make one for my Grand-daughter. Do you have plans for this cute bed? I just signed up today so I wasn't able to see the comment section. I'm sorry if this has already been asked.

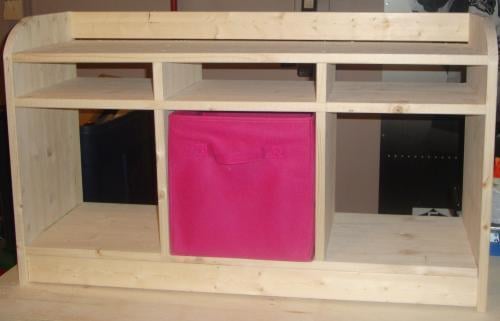
Cubby Bench

Submitted by dhenderson on Sun, 03/20/2011 - 17:57

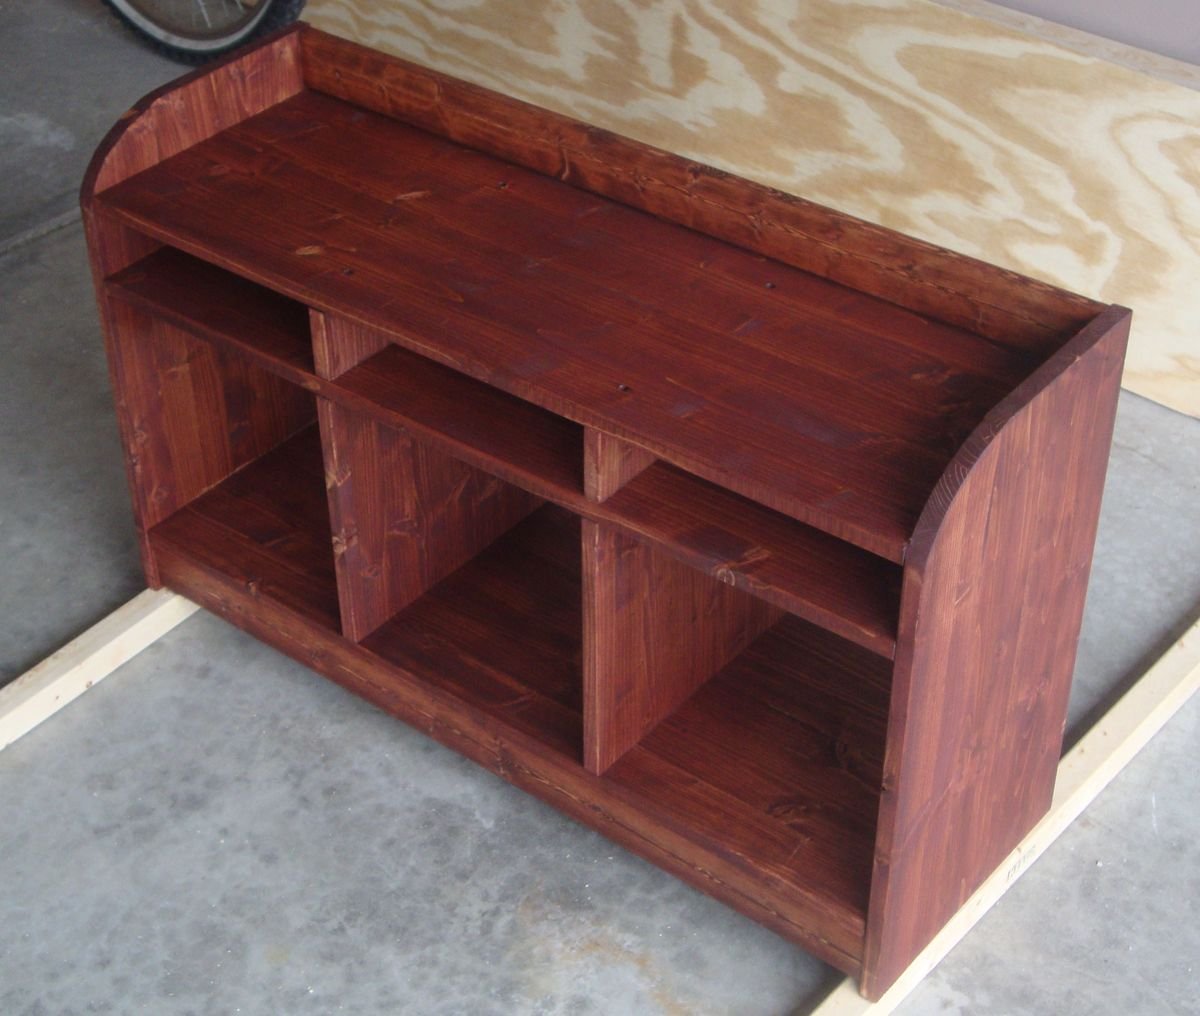
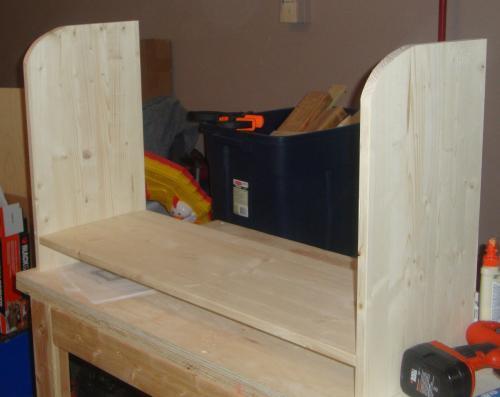
This was a very fun project to work on.  One of my first ones, I chose this to replace the store bought cubby book shelf in my daughters room with something she can sit on as well as use for storage. 


Built from Plan(s)
Estimated Cost
$25-30
Estimated Time Investment
Afternoon Project (3-6 Hours)
Finish Used
Two coats total - each of a different color stain. Haven't added the poly yet, that is on my to-do!
Recommended Skill Level
Beginner

Castle Bed

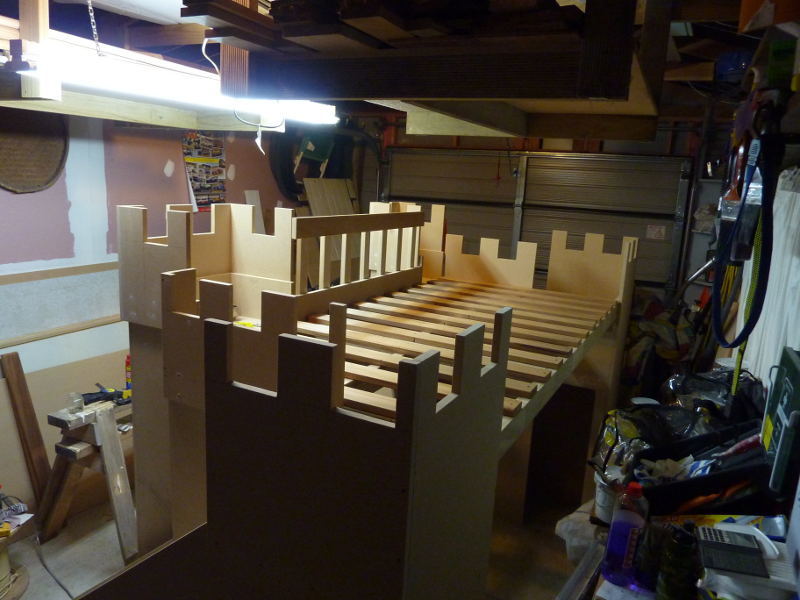
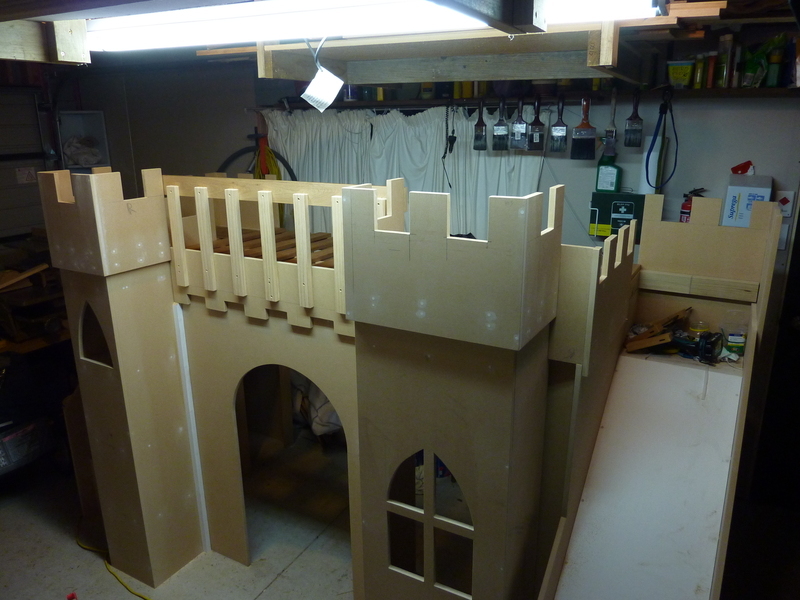
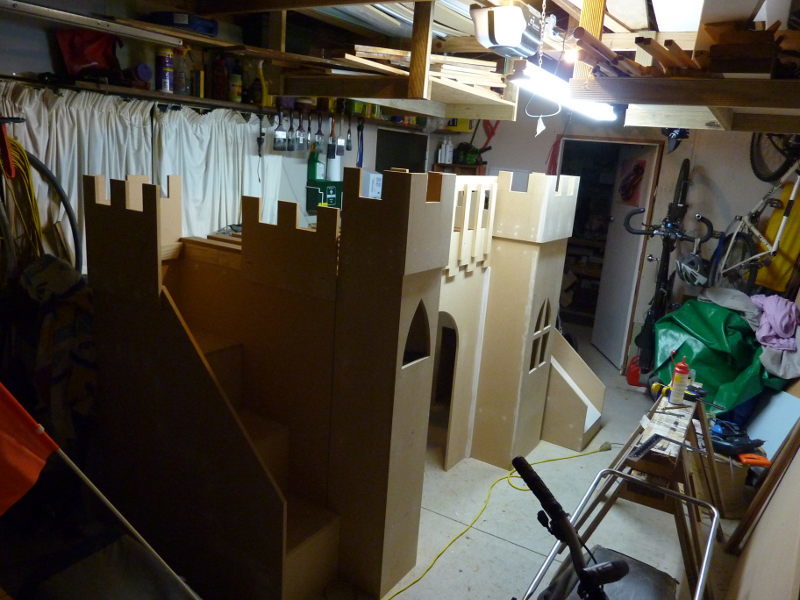
A big thanks to FSMumford for drawing this in Sketchup. I had to re-draw it to take into account metric wood dimensions and bed sizes here in NZ, and also to remove a foot or so from the length.

We just gave it to my daughter today, and already I need to make some modifications. I immediately put some vertical grab rails at the top of the steps and slide. The steps are too big for a toddler (she's 3 today) and I didn't take into account how thick a pillow top mattress is! I really needed to make the end guards higher. In fact, were I to make it again, I'd probably make the towers taller and lower the height of the bed by 8-12 inches. While this would lower interior room, it might make the steps a more reasonable height for a littlie. If you're building for a 5 or 6 year old, this may not be an issue. Also, it would make the angle of the slide shallower (it's a bit steep, I reckon). I used 7 sheets of 16mm MDF but if I'd laid them out like FSMumford did in her plans I would have used less. Our (one car) garage is too small and the whole build process, including painting, was a royal pain in the bum. Fun, but a pain. Speaking of painting, next time (riiiiight) I'd try to paint as much as possible before assembling. I built mine in modules but even so it's hard to get a nice coat of paint on the insides of things. Edges of MDF need to be painted and sanded at least twice to look nice. Don't underestimate the time needed to get a good finish - I spent a third of my build time finishing (mostly, again, due to limited space). A narrow foam roller is great for cutting in but doesn't seem to get enough paint on to cover well on larger areas. In places I have three coats and can still see my pencil marks. I used Dulux Aquanamel.

Estimated Cost
Don't get me started....
Estimated Time Investment
Week Long Project (20 Hours or More)
Finish Used
Dulux Aquanamel.
Recommended Skill Level
Intermediate

Comments

Chineselyons

Wed, 06/05/2013 - 10:47

This is gorgeous! I know there are modifications to take into account but it's stunning none-the-less.

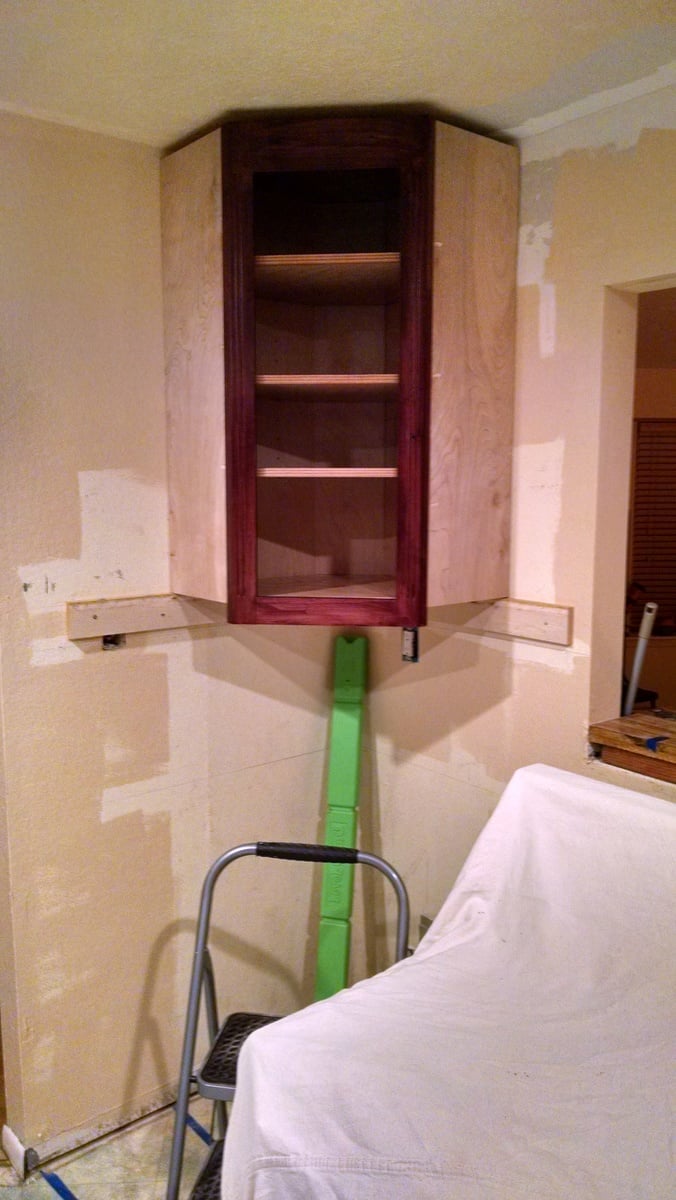
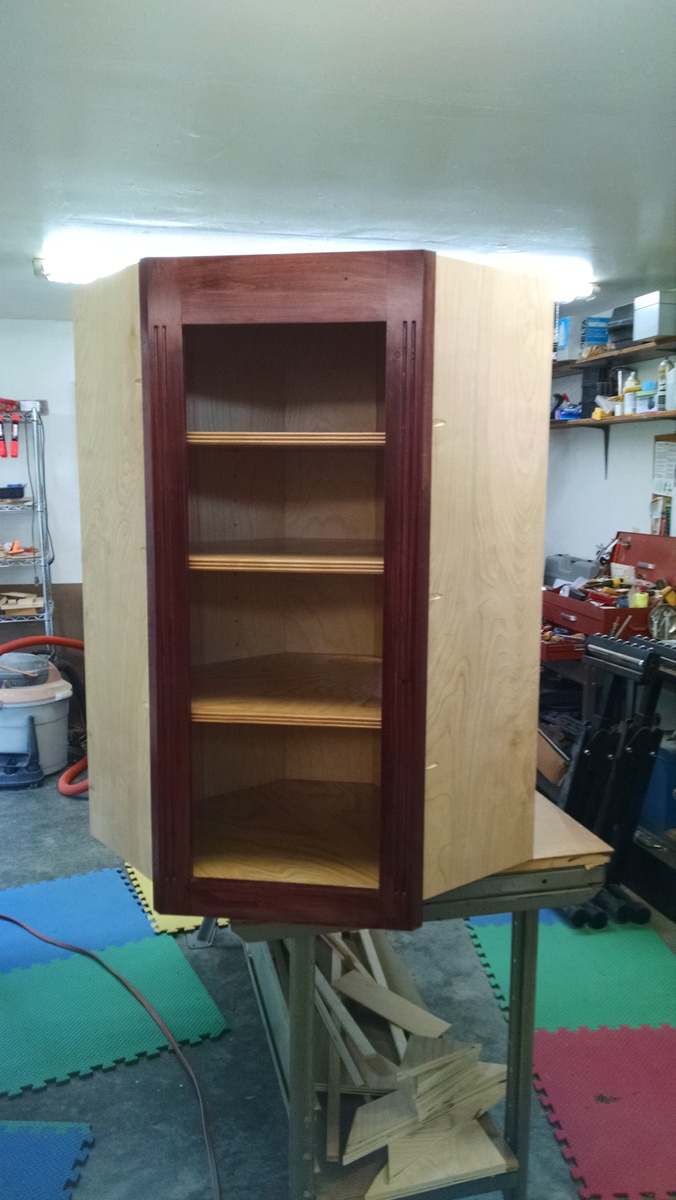
inside corner wall cabinet

First cabinet in my kitchen remodel.


Built from Plan(s)
Estimated Time Investment
Weekend Project (10-20 Hours)
Finish Used
Sherwood by Sherwin Williams. Special purchase 5 gallon minimum. Water based lacquer. Dark Mahogany stain, HVLP sprayed on lacquer.
Recommended Skill Level
Intermediate

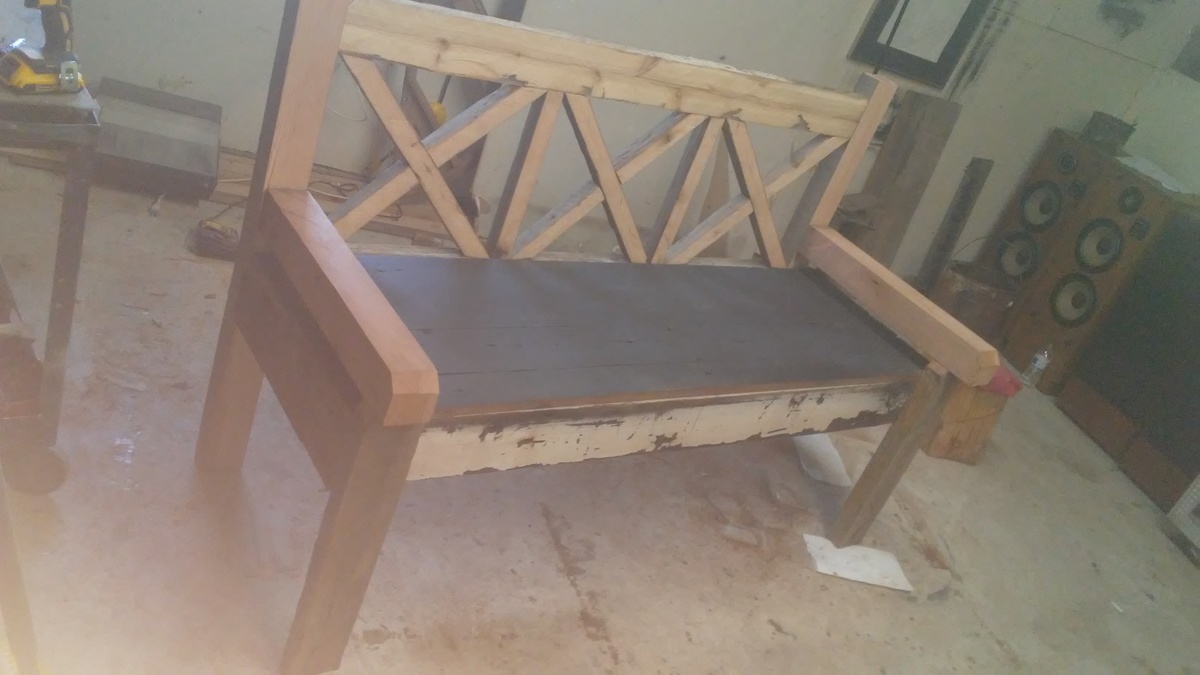
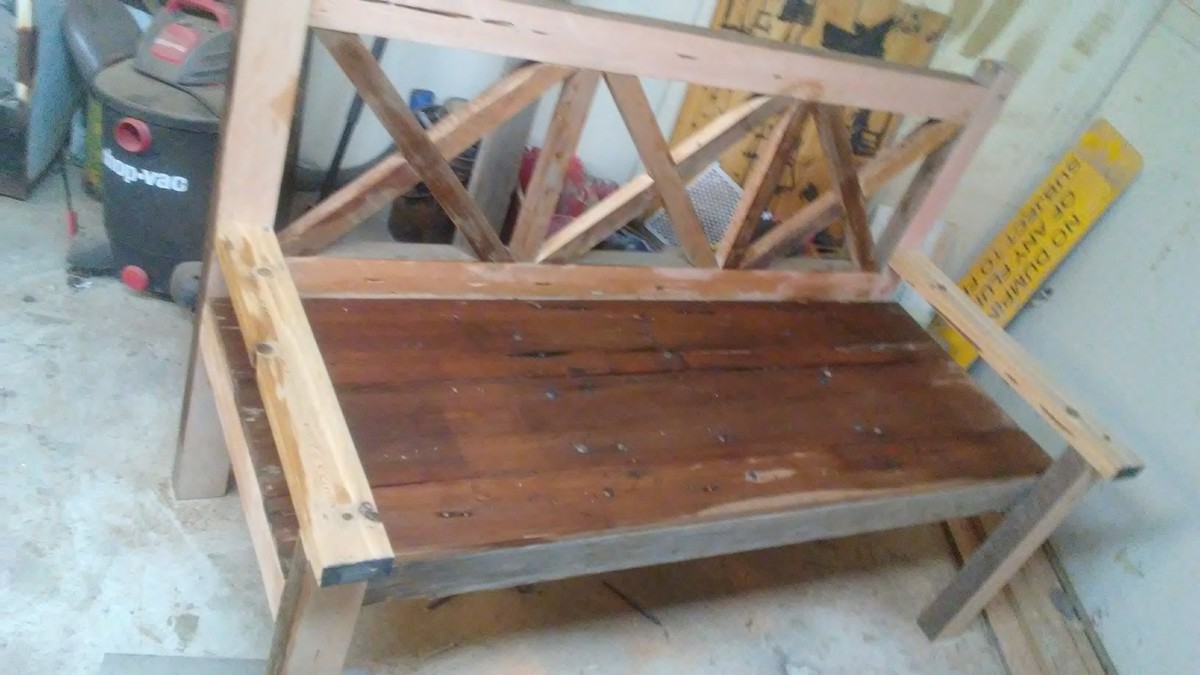
Alaskan lake cabin bench

Im building these for a friend to sell at alameda county flea market. It takes me a couple day to do one if its on spare time

Estimated Time Investment
Day Project (6-9 Hours)
Finish Used
One was painted with chalk paint cut in half with semi gloss black and clear laquer. Other is all clear laquer
Recommended Skill Level
Beginner