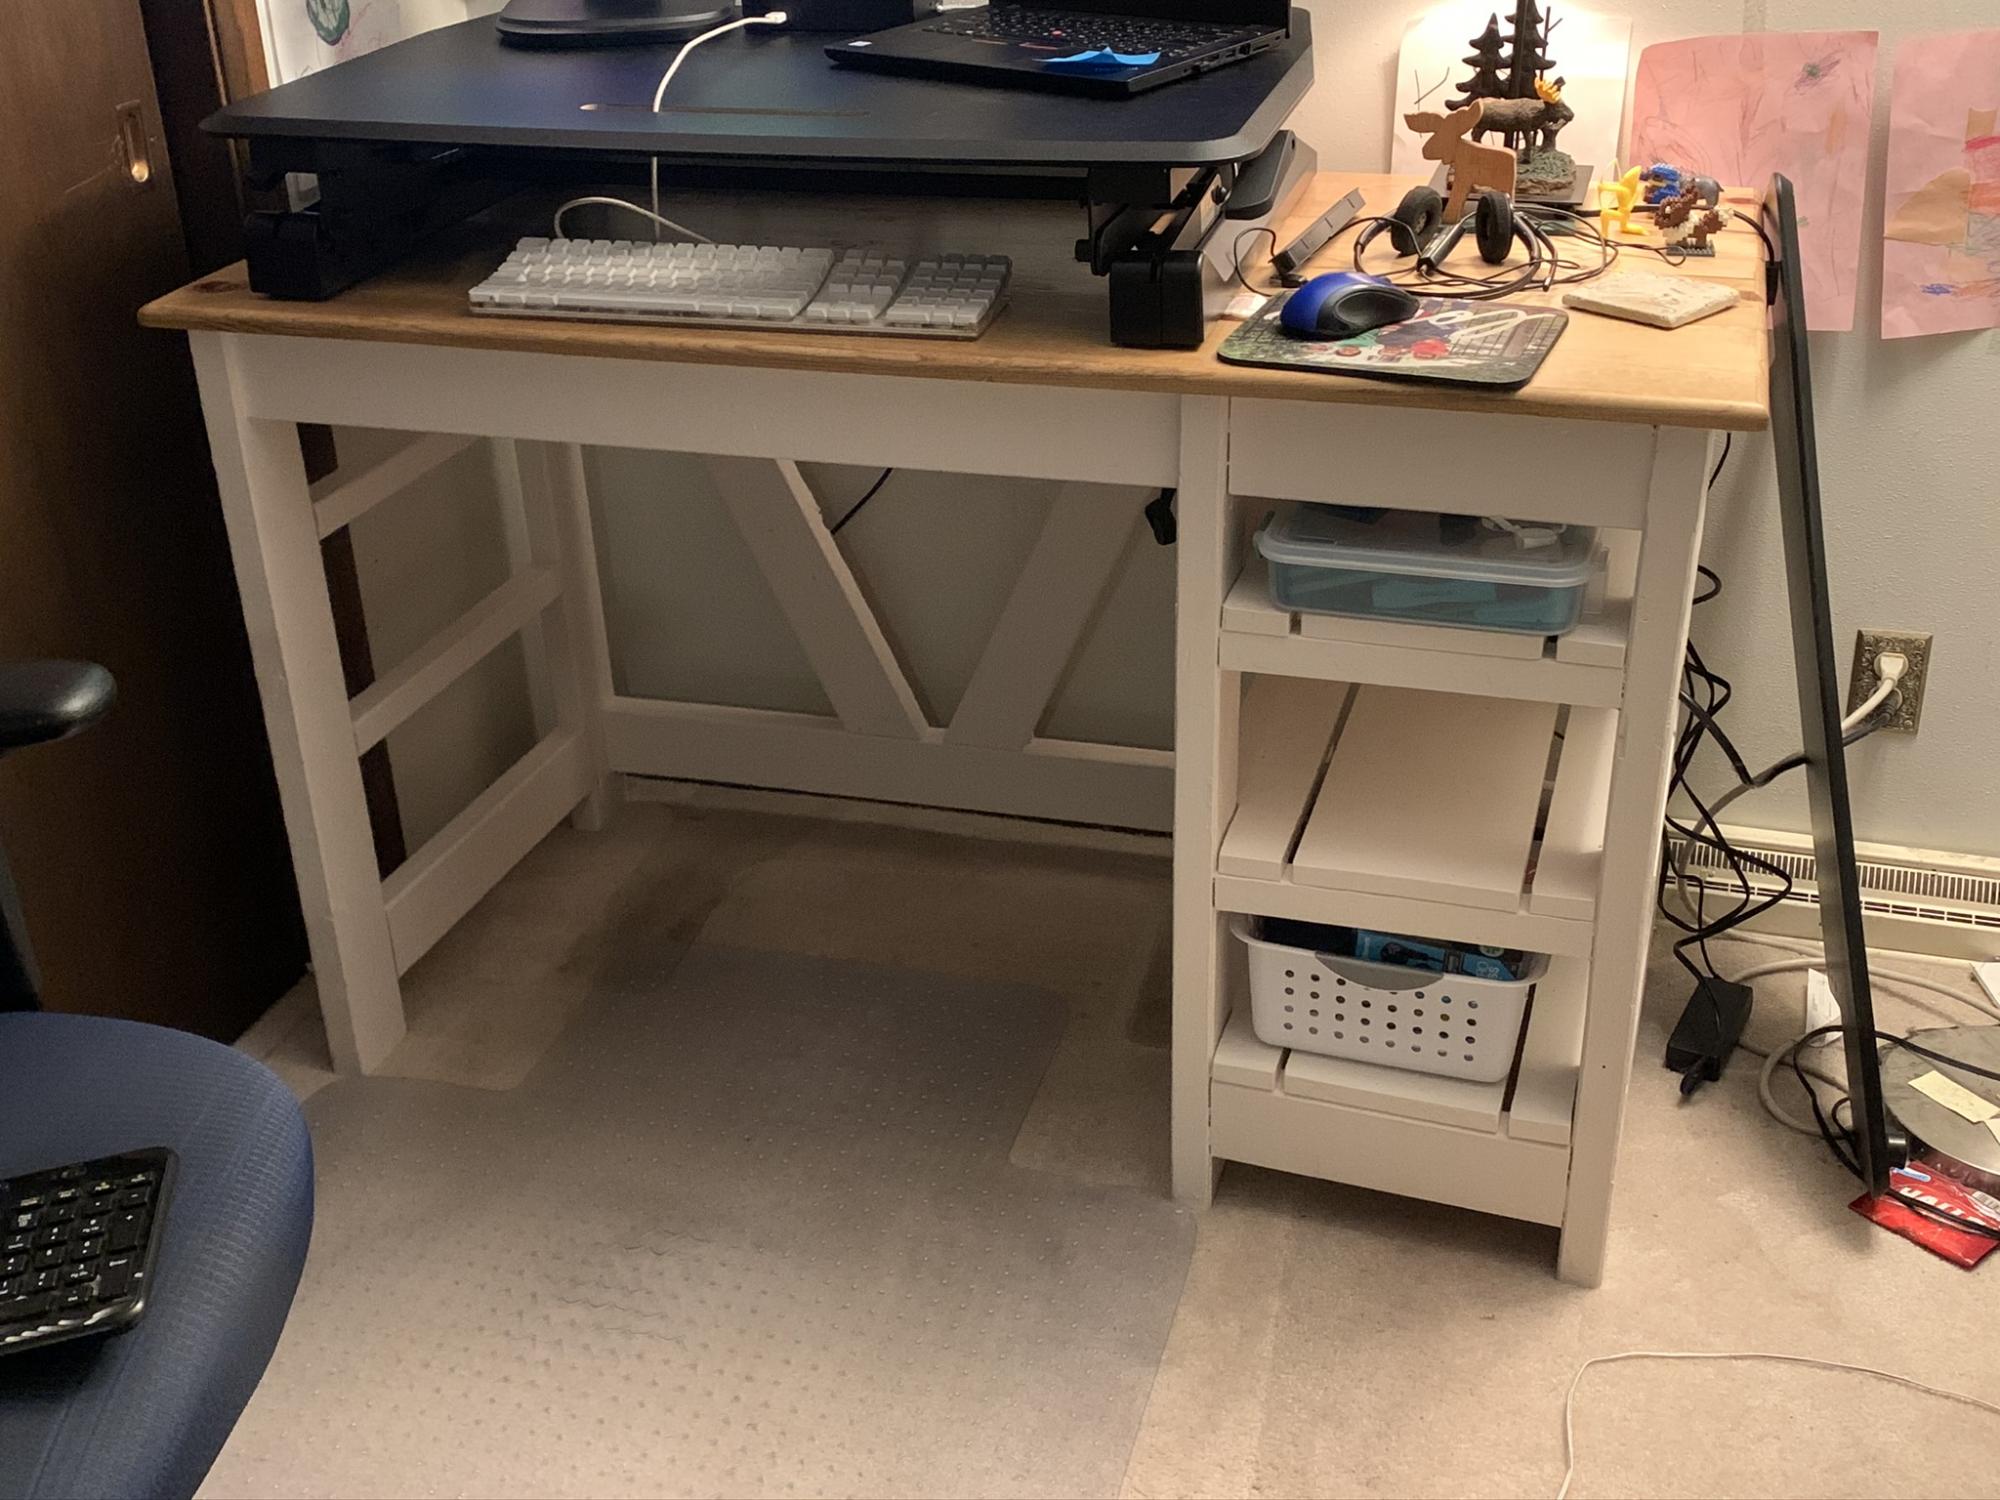
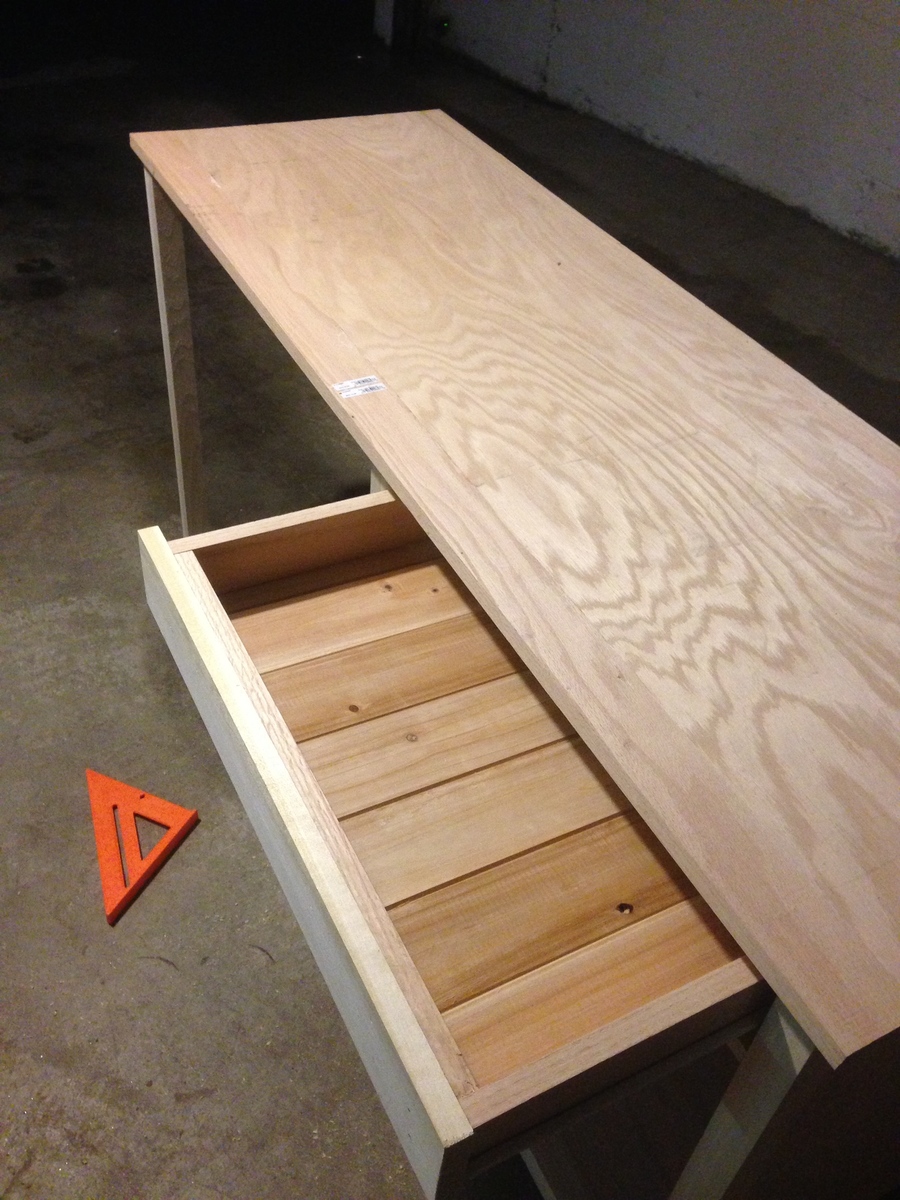
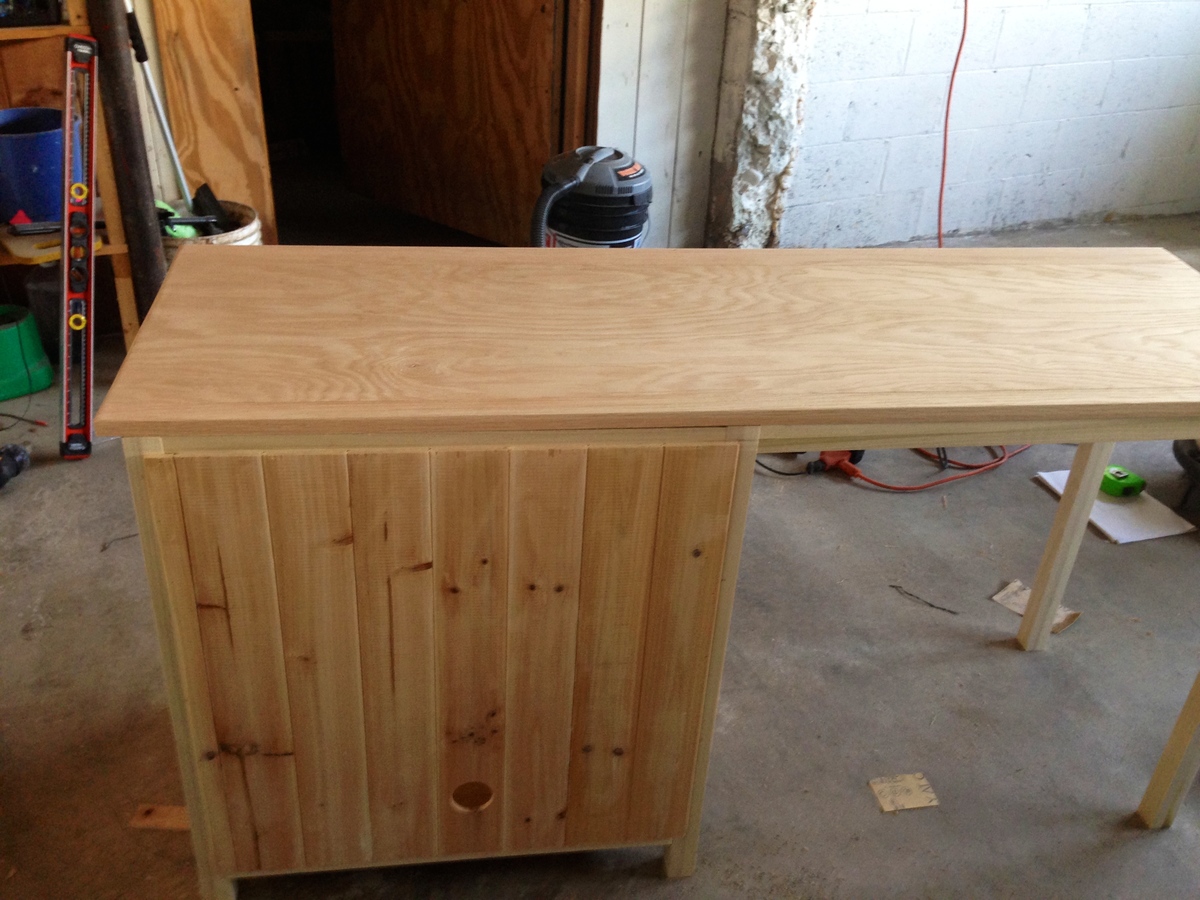
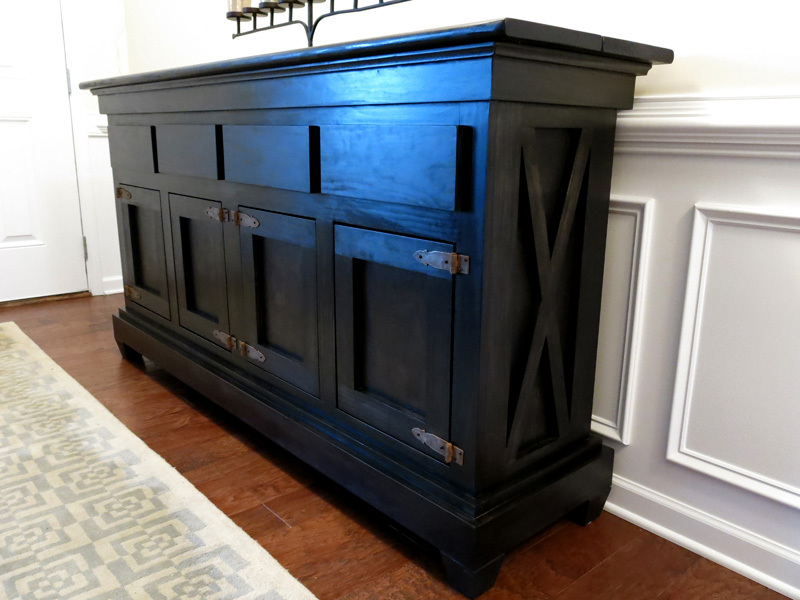
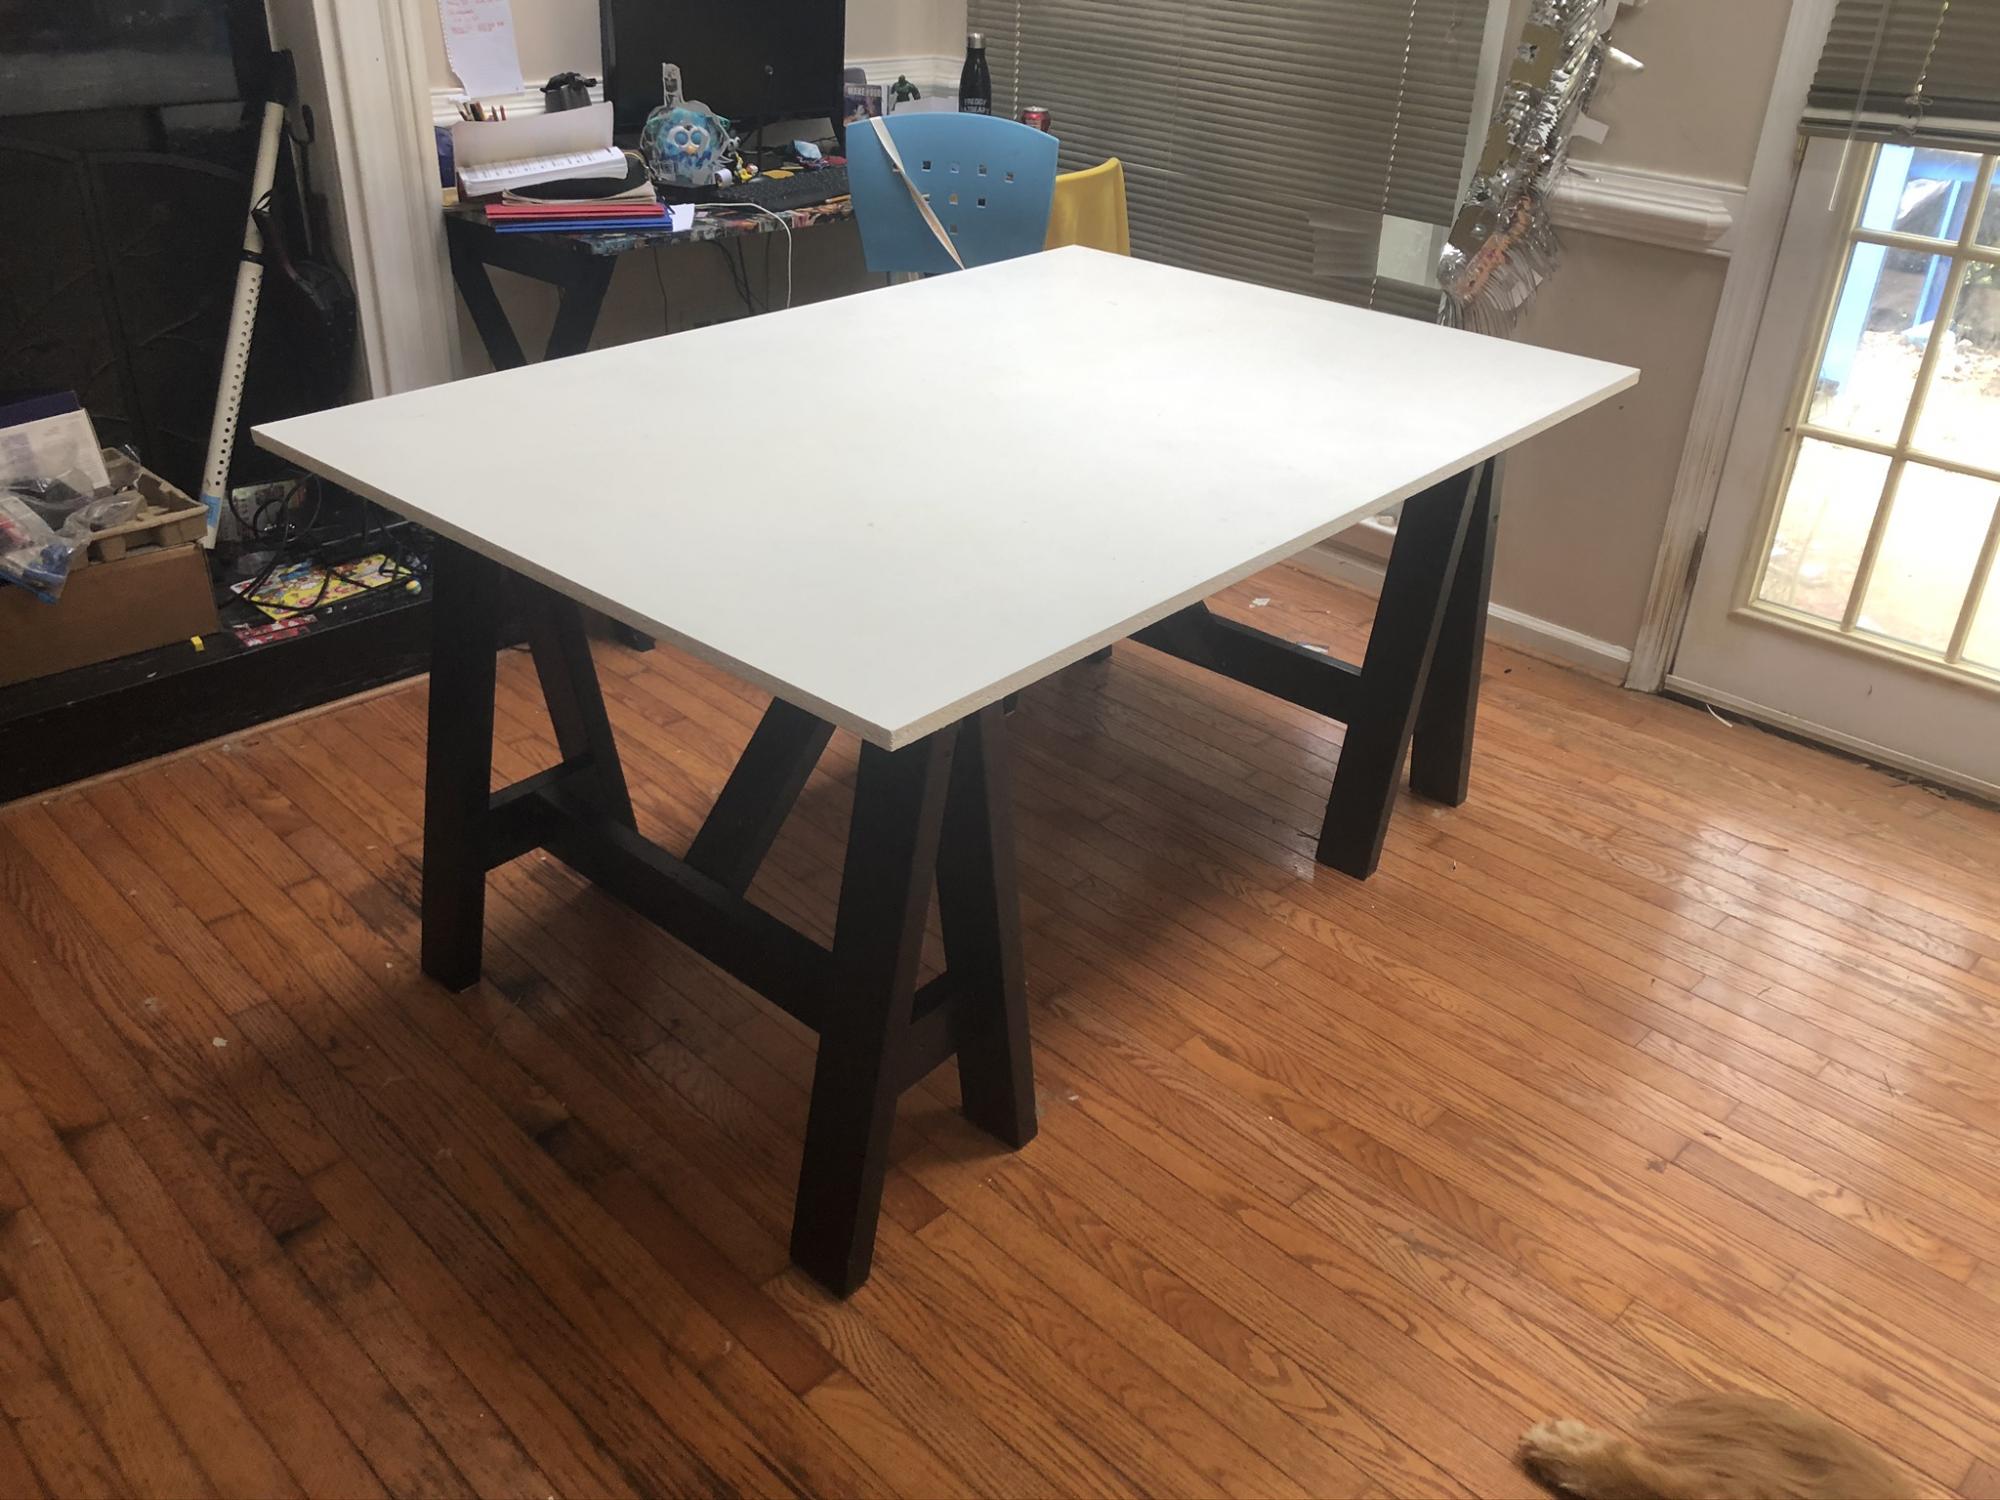
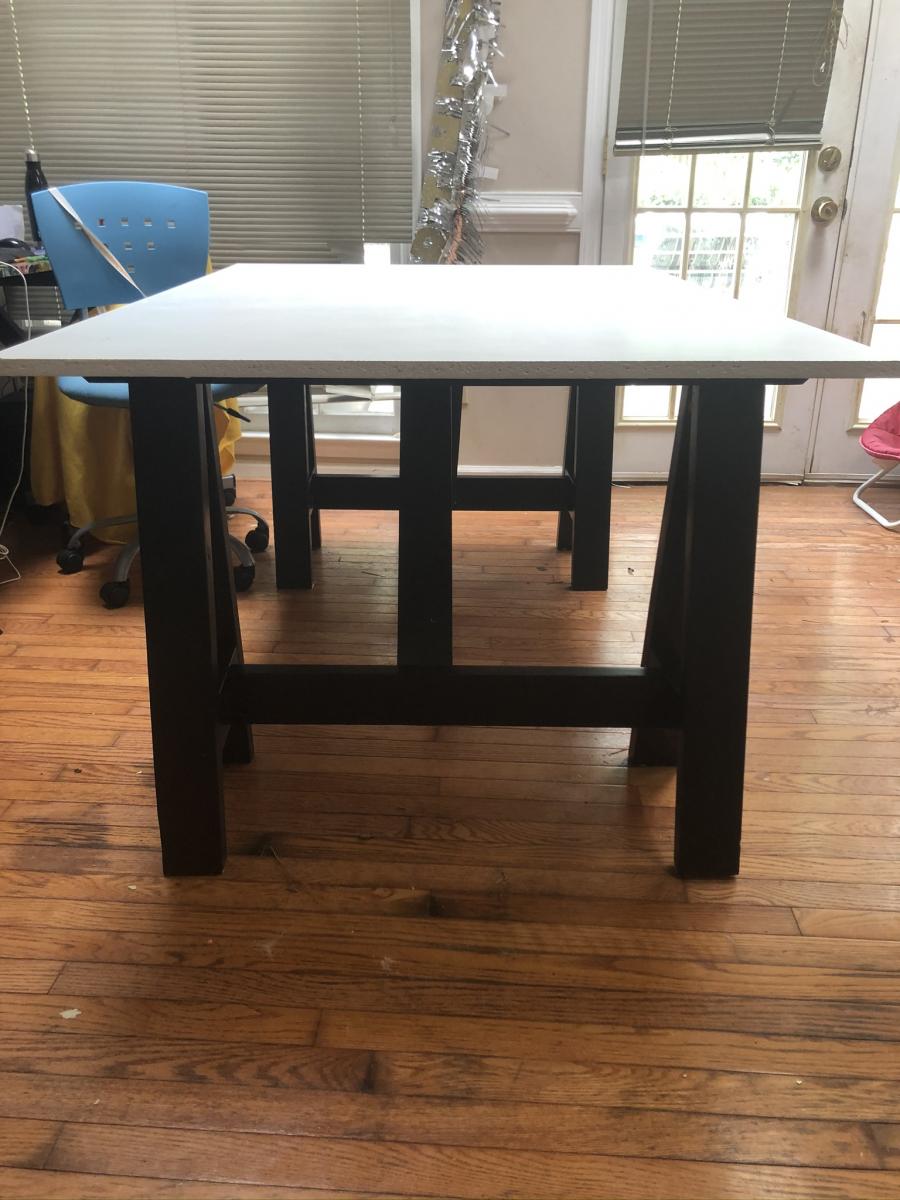
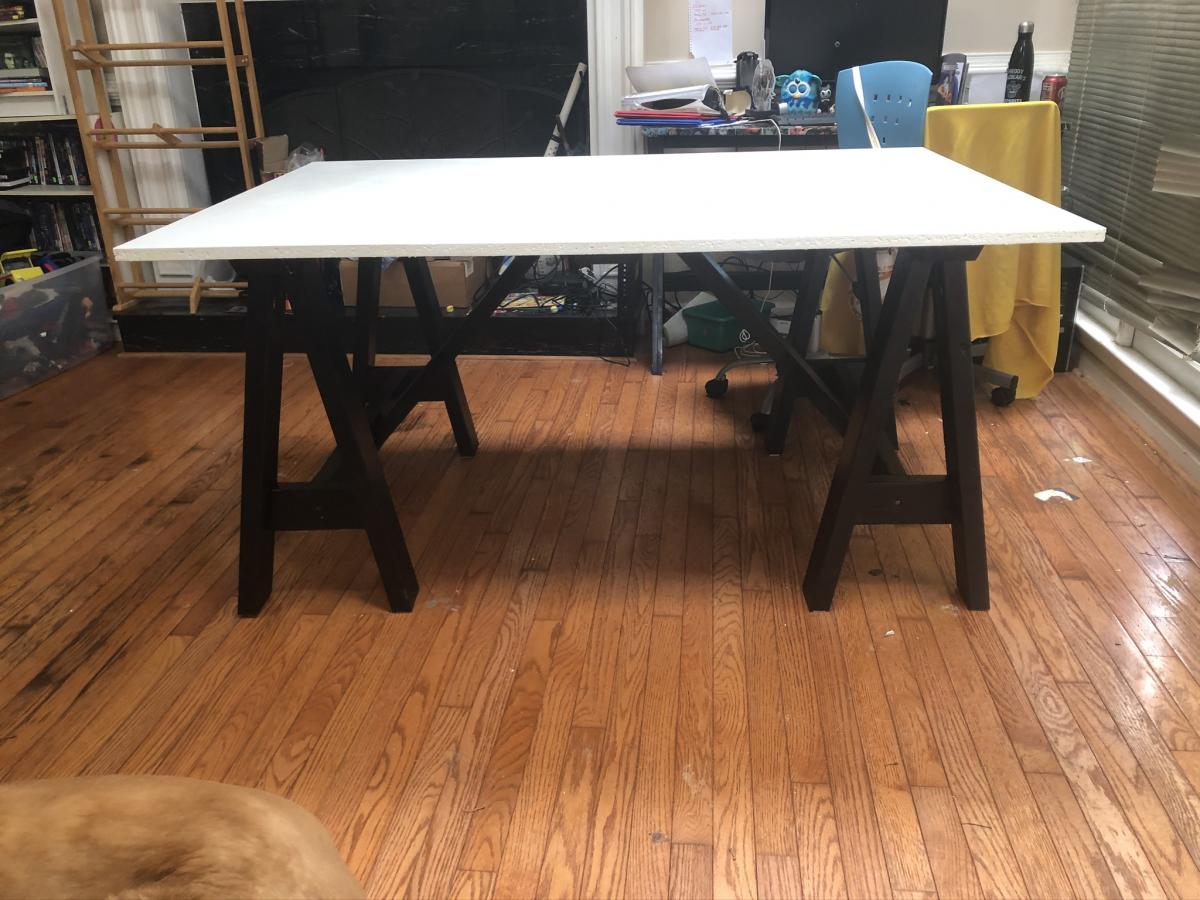
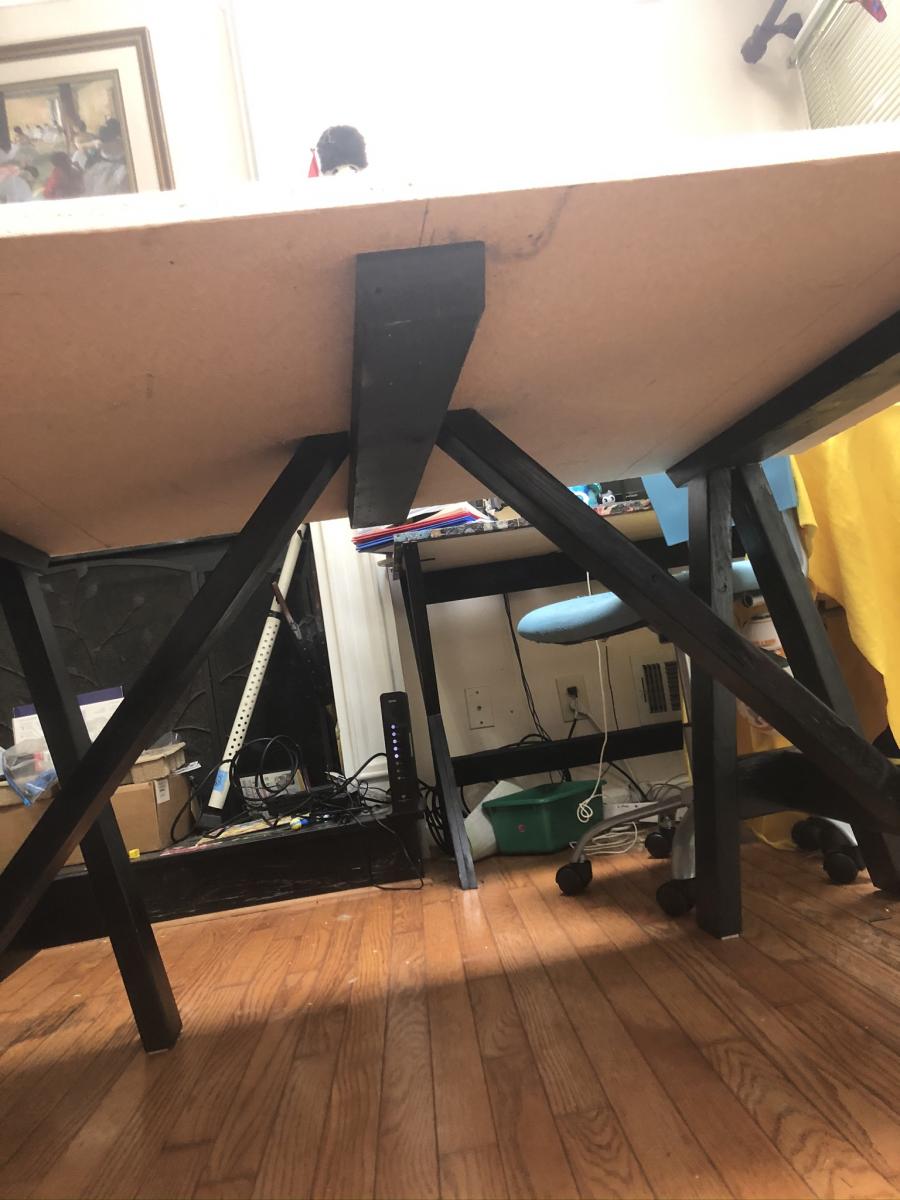
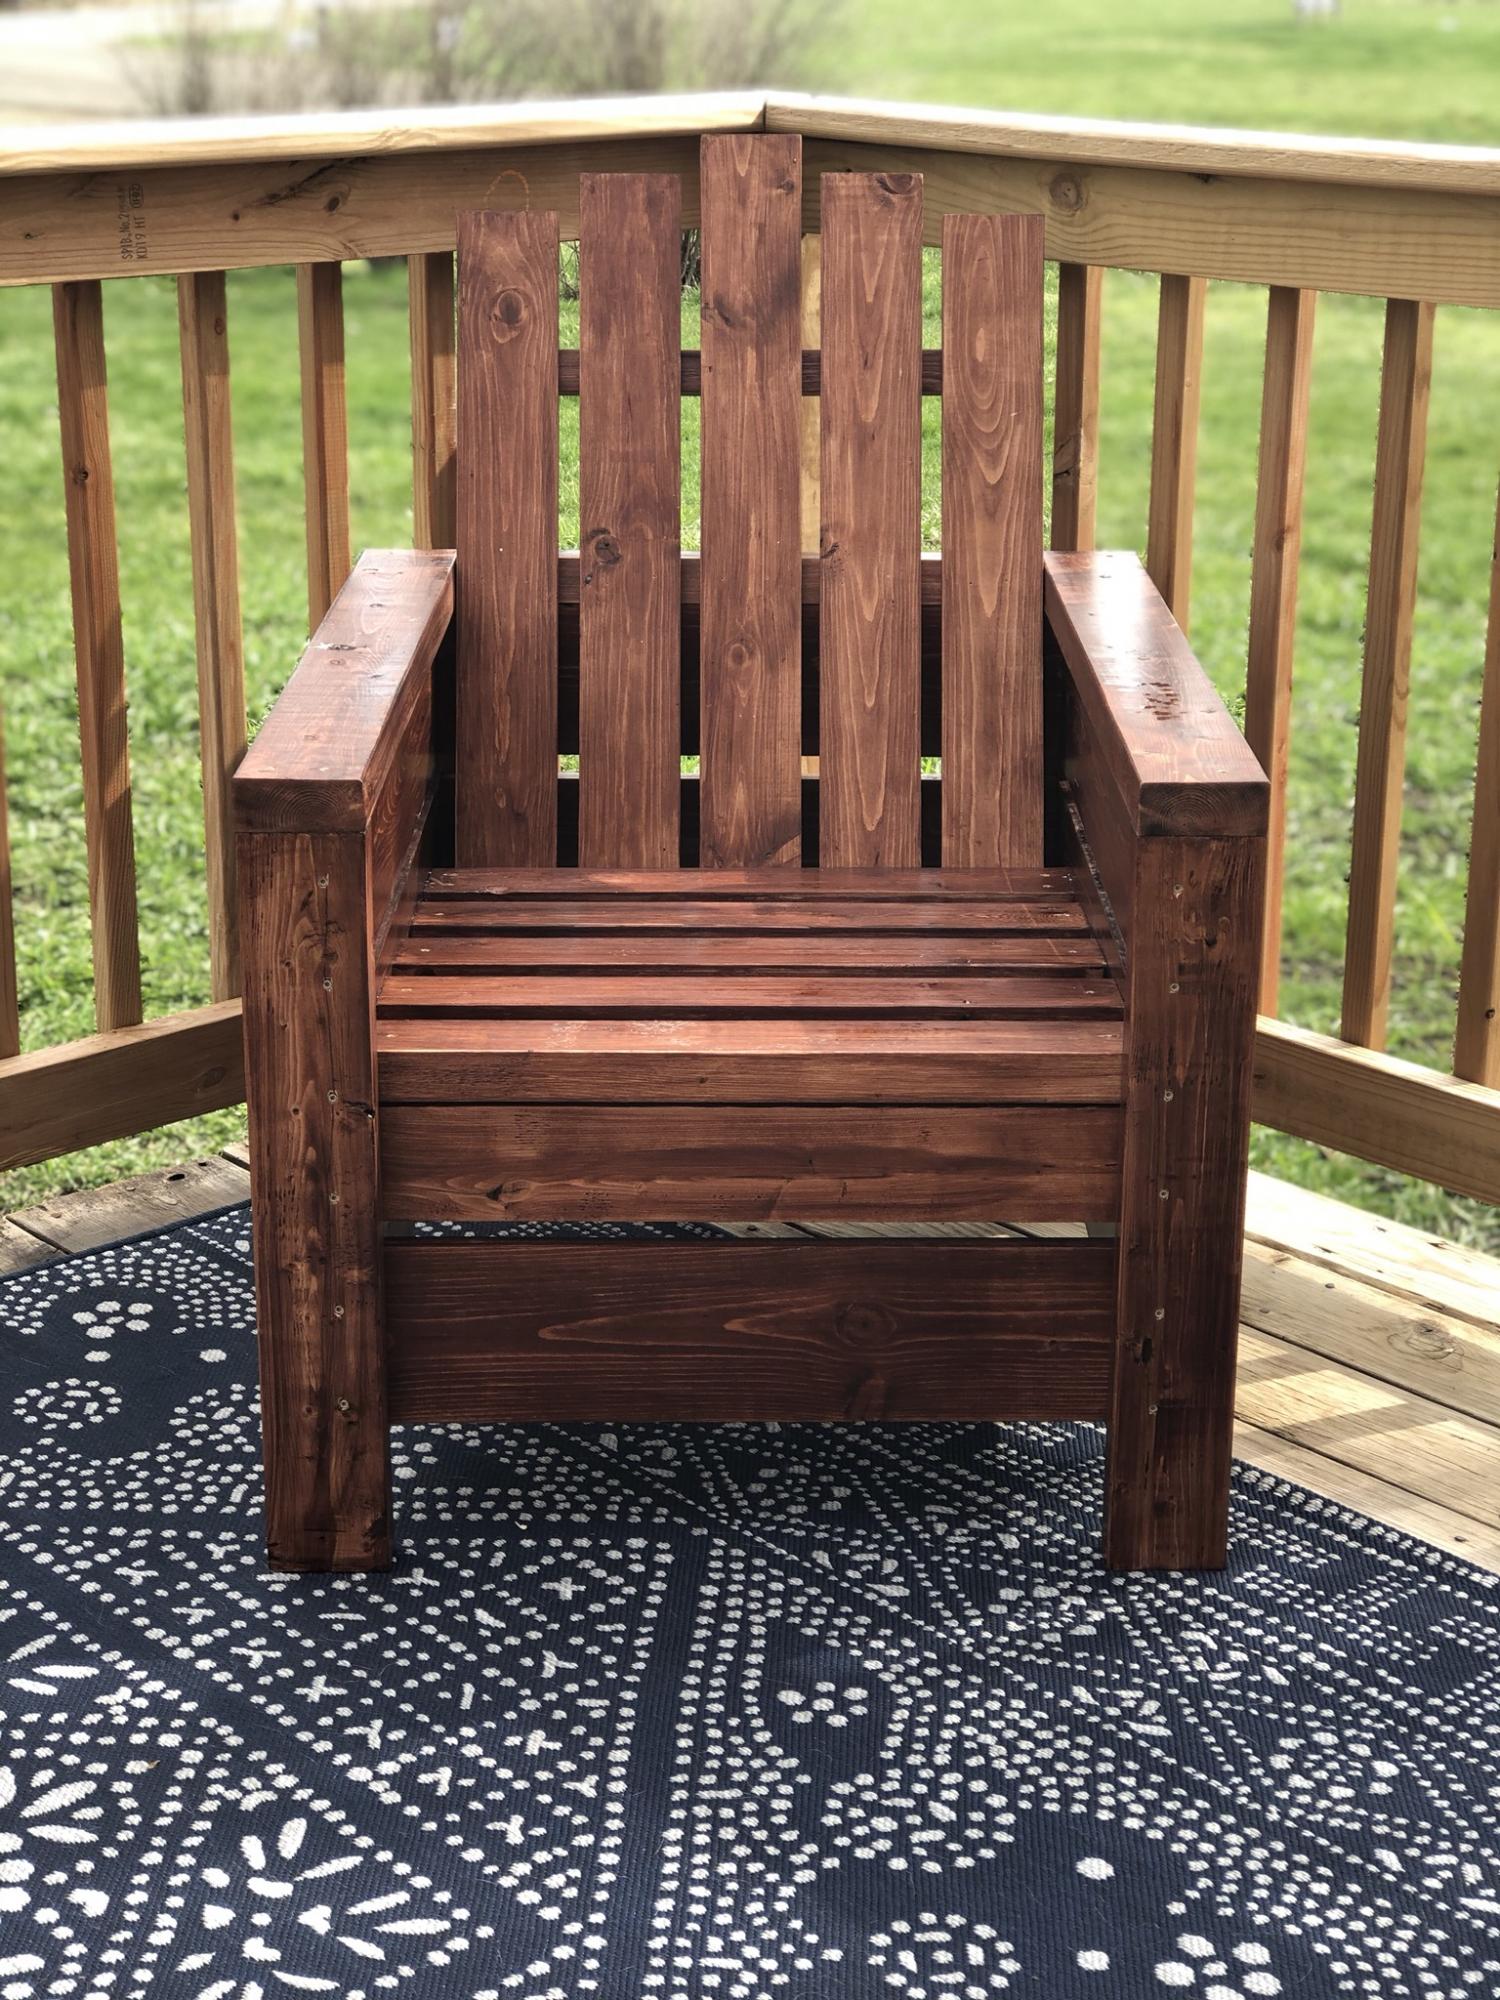
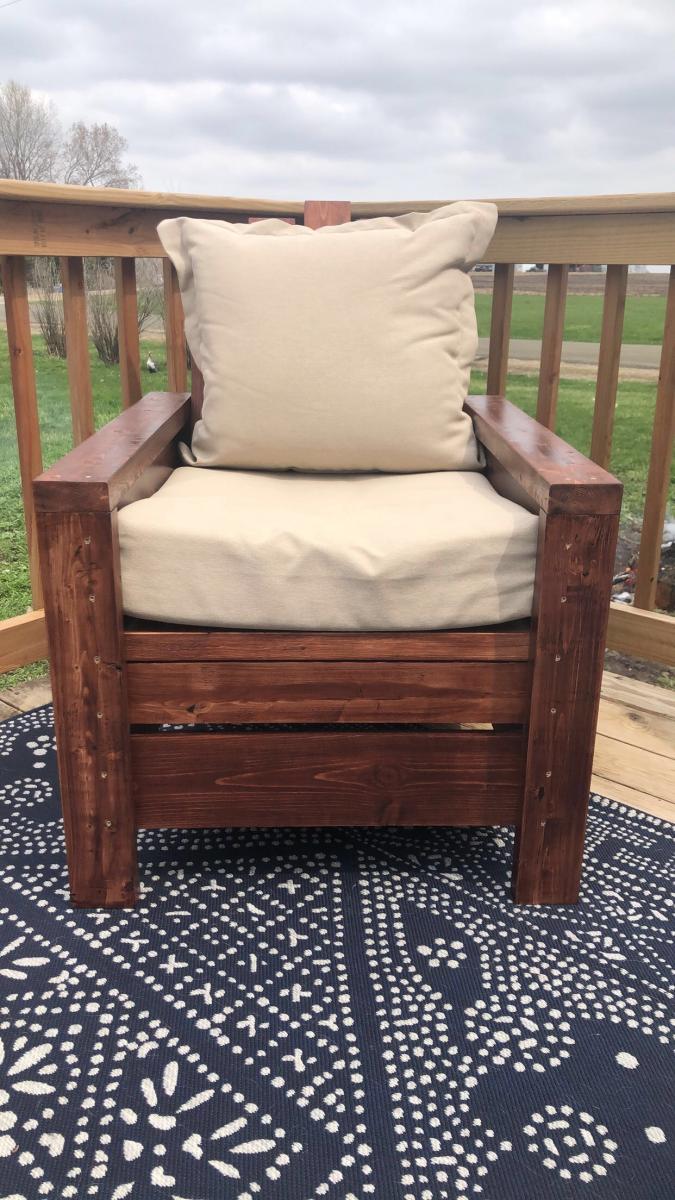
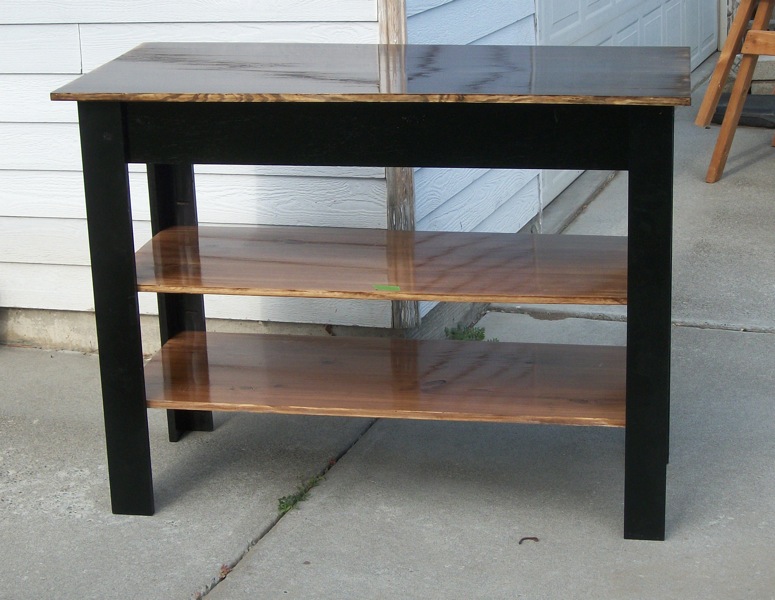
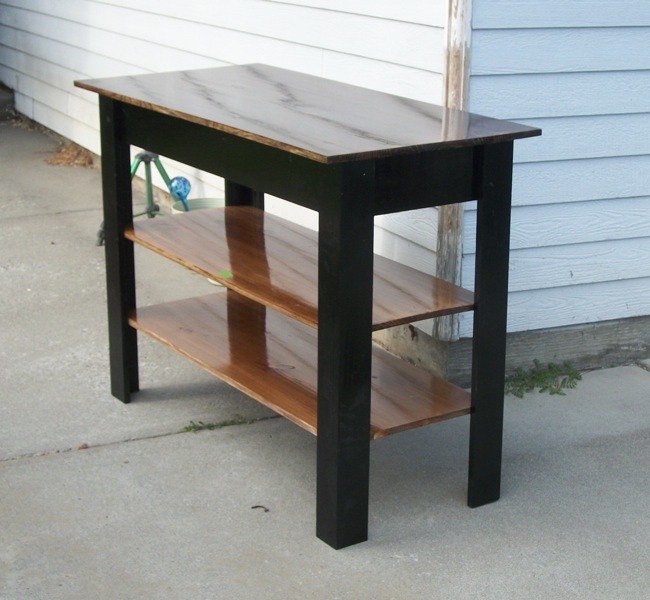
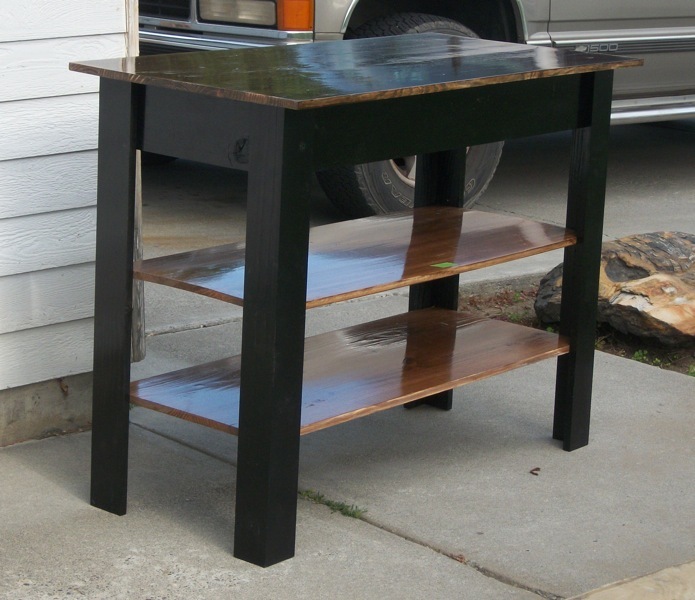
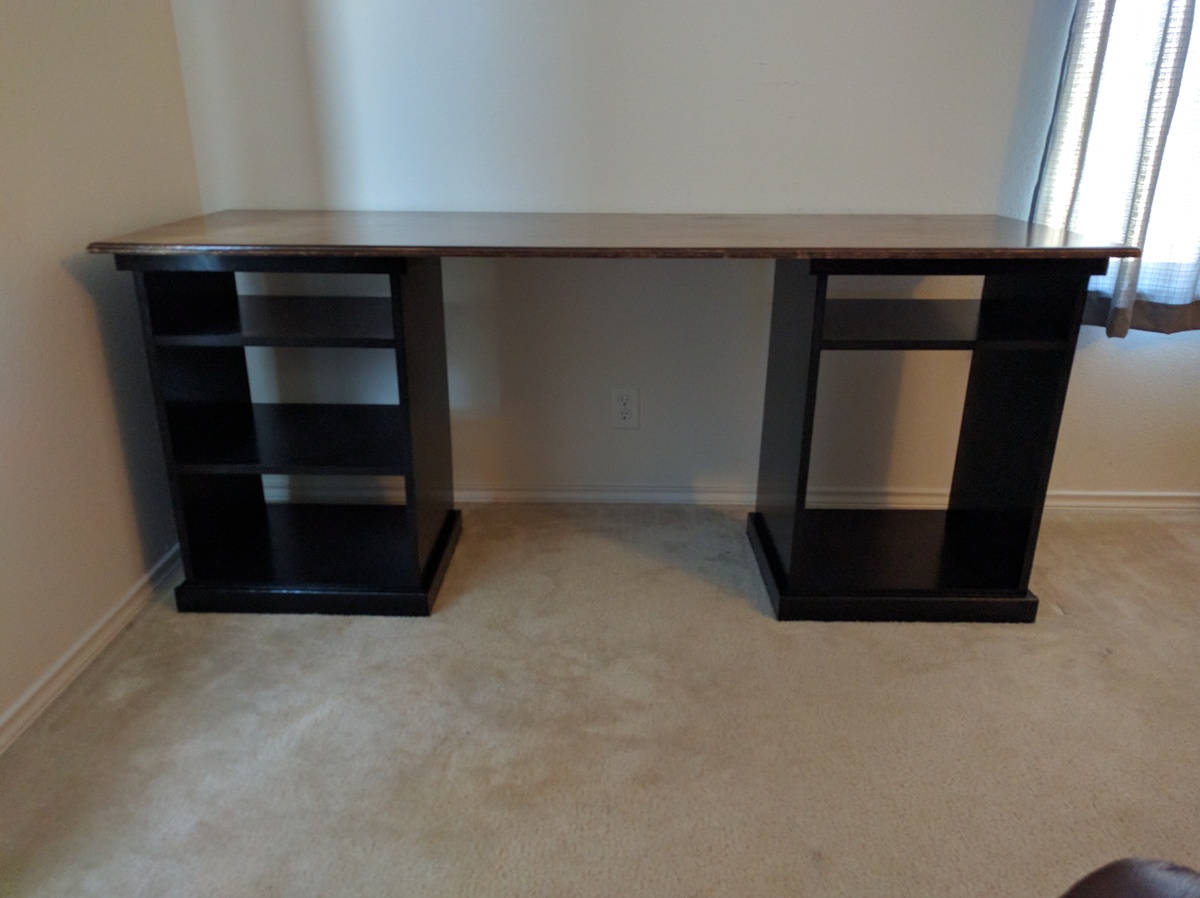
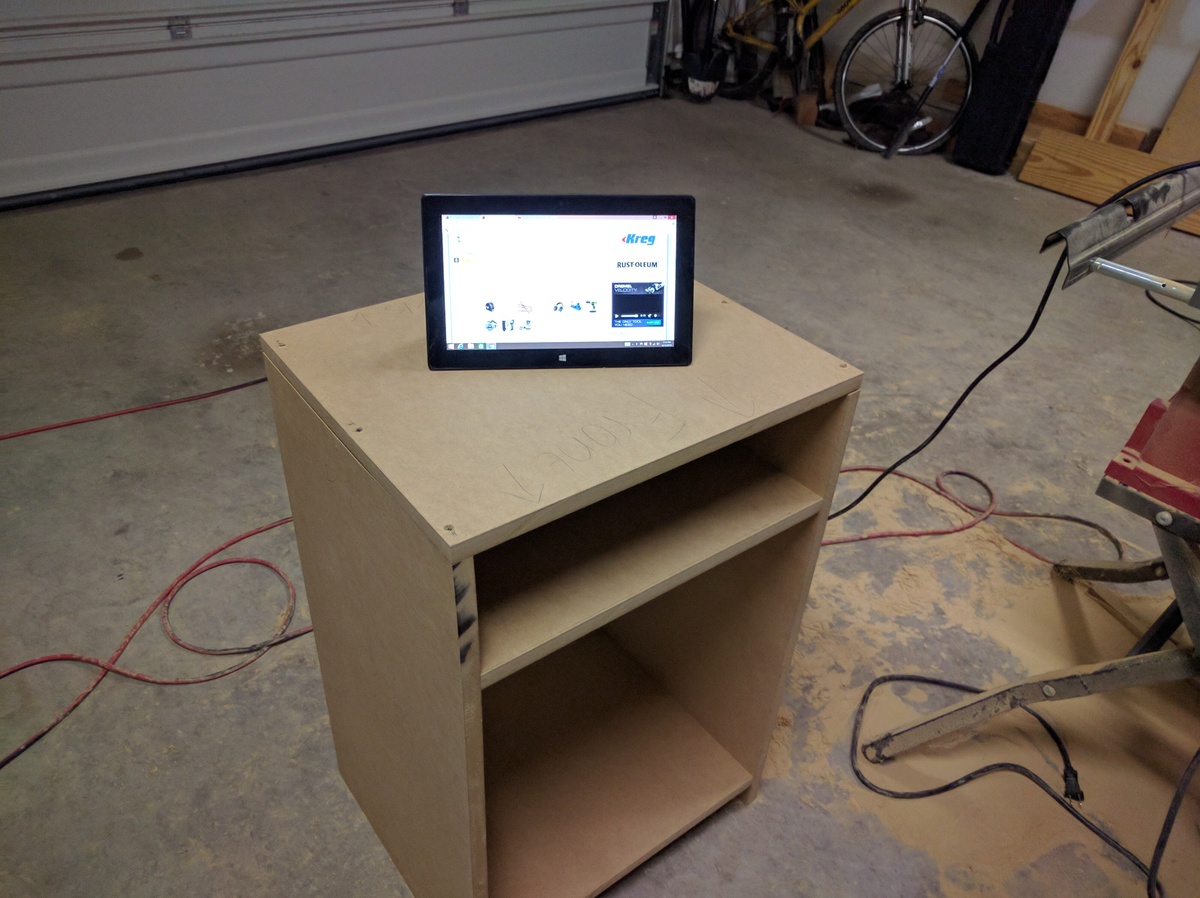
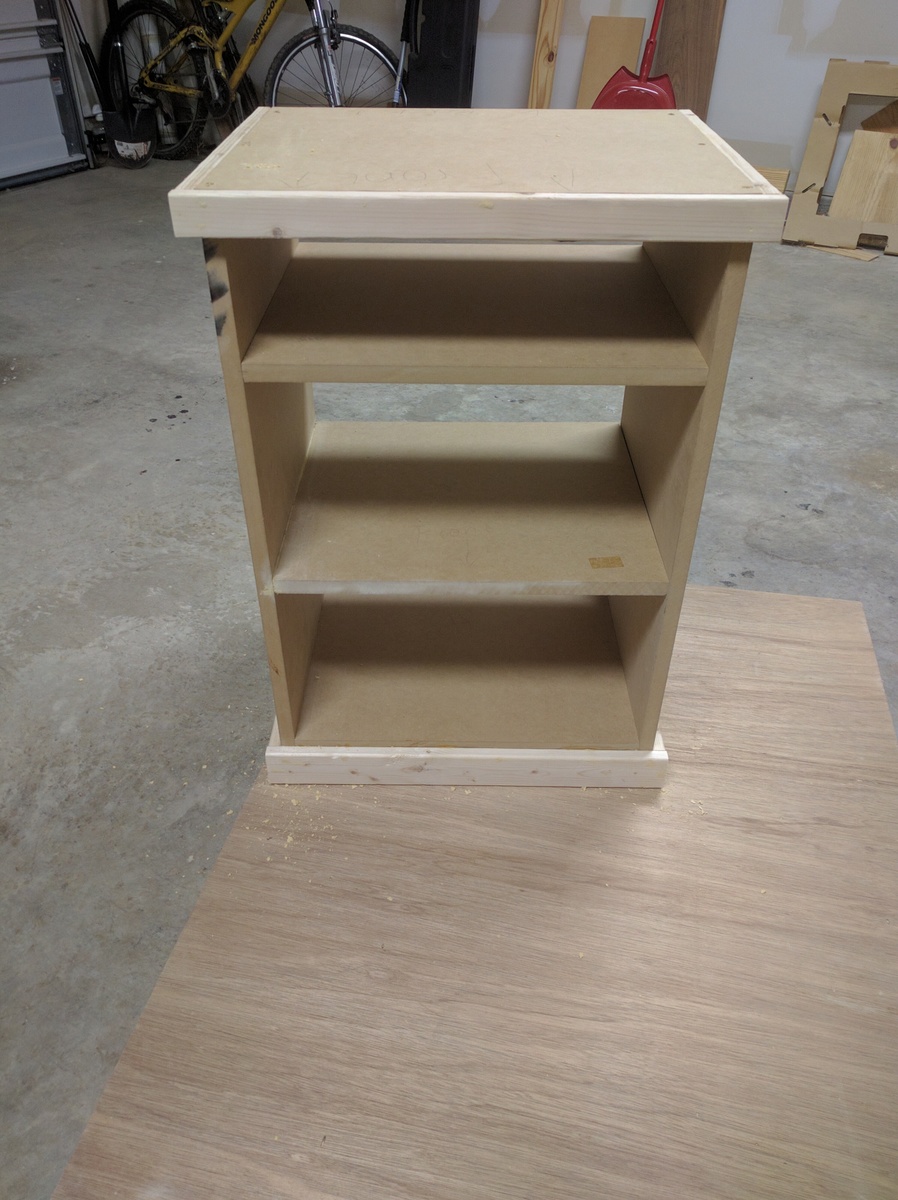
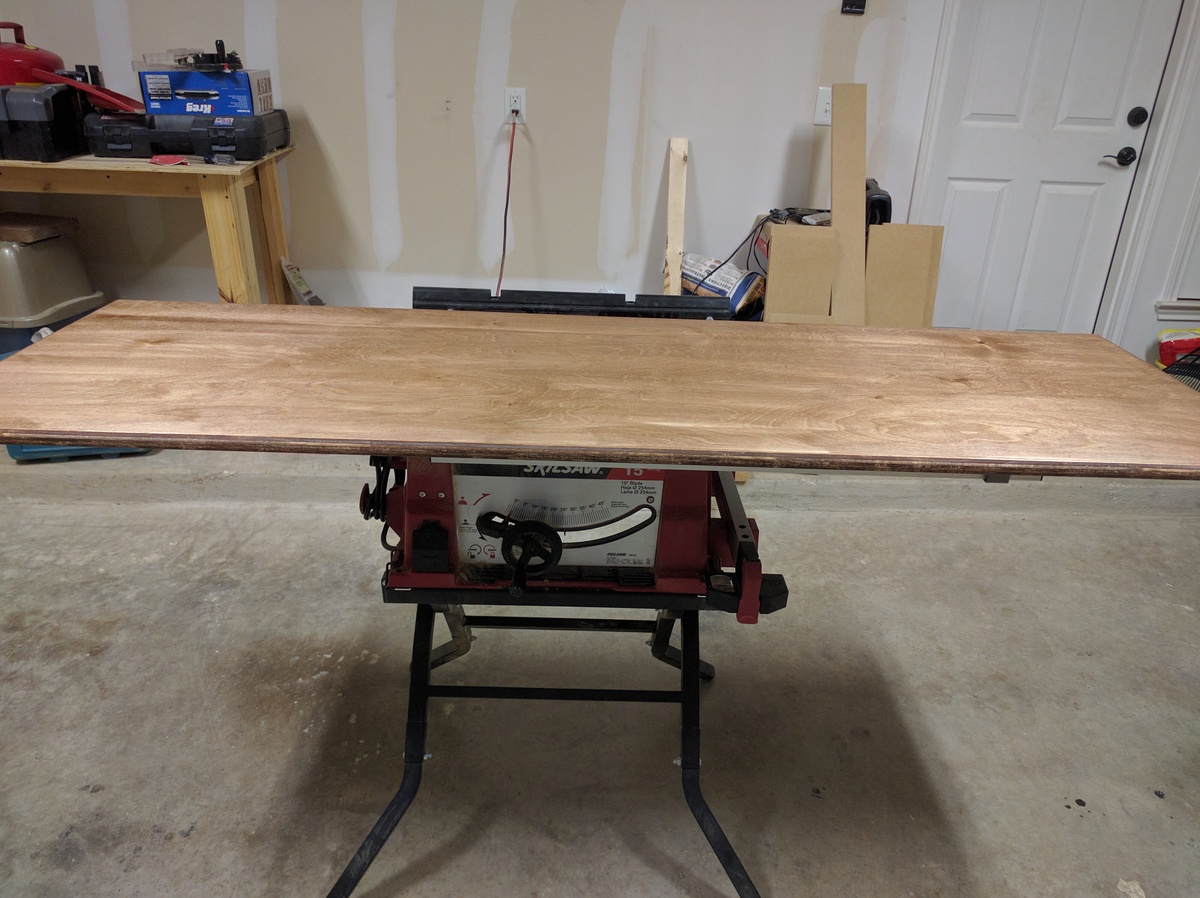
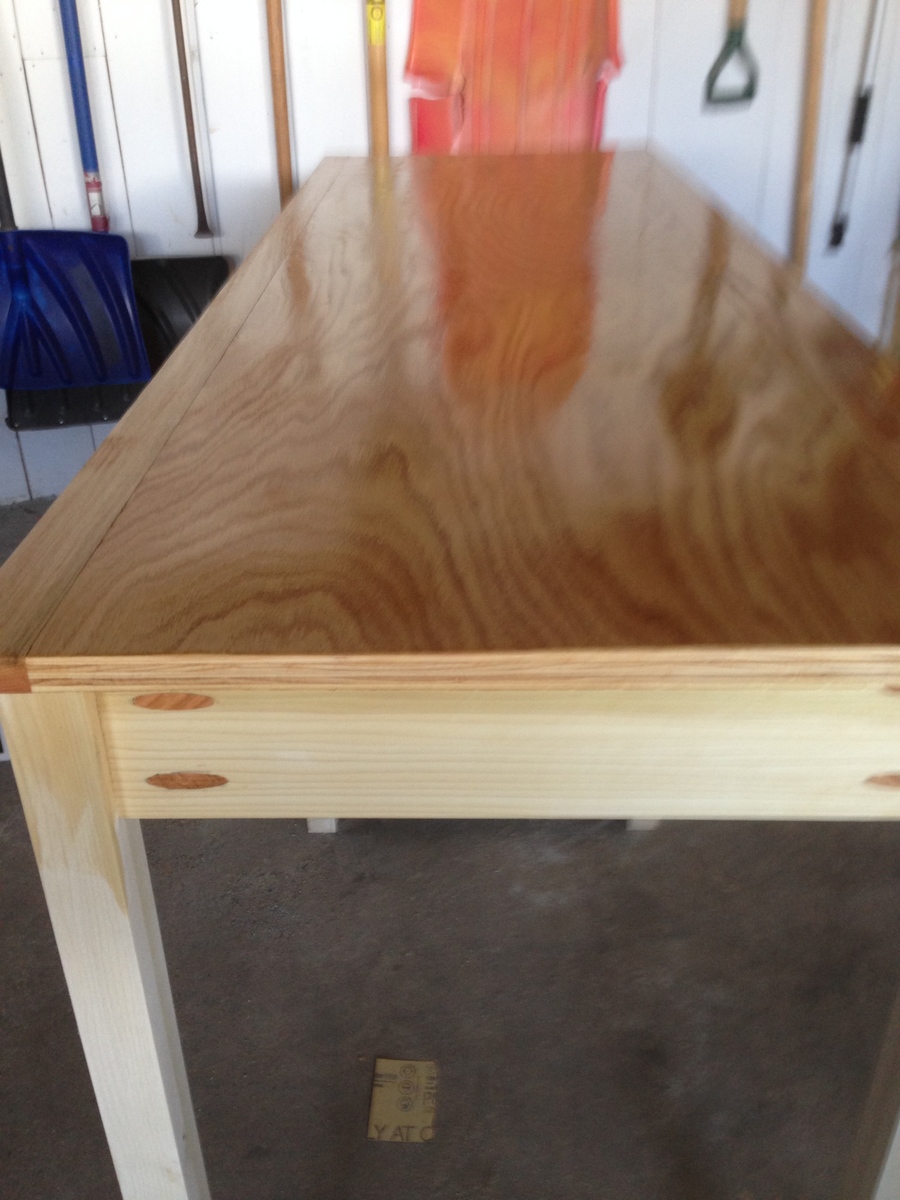
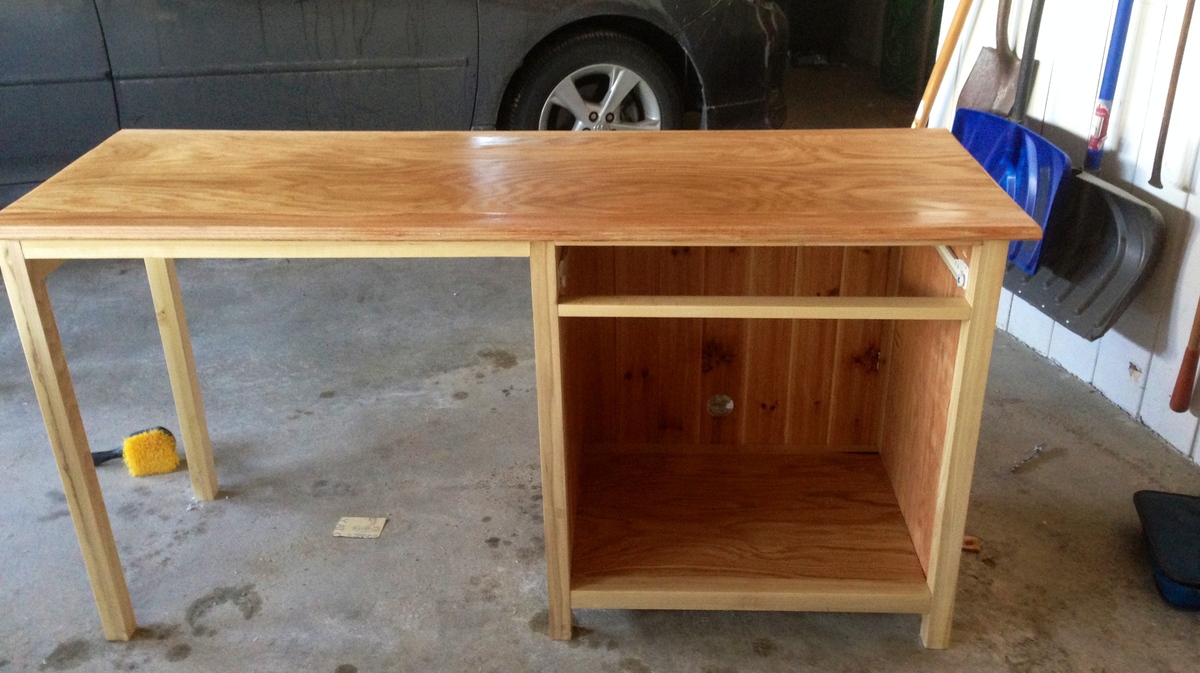
Community Brag Posts

Thank you!

Submitted by Anonymous (not verified) on Sat, 02/06/2016 - 17:12

Thank you for the plans!  Love the shelves! 

Estimated Cost
$150
Estimated Time Investment
An Hour or Two (0-2 Hours)
Recommended Skill Level
Starter Project

Nightstands

Submitted by kwlogue on Sat, 05/06/2023 - 20:08

Fun and rewarding projects to finish. Took me way too long to finish, but 2 sever TBIs will do that to a person. Made a few modifications to the original King and nightstand plans but worked out fine. Thanks for these plans Ana!

Built from Plan(s)

Comments

A small twist on the legs

This was a fun project that I made for my wife. I saw a Crate & Barrel table with legs that alternated directions. The plans were easily adapted to match. I stained the standard pine boards with Minwax Prestain, Minwax Red Mahogany stain (2 coats) and sealed with a matte polyeurathane. The matte finish cut down any shine and should prevent any fingerprints from showing up, though witha 2-year and 6-year old this is inevitable. I may still add some small 3-4" triangular braces on the ends of the table at the legs to add stability, but it seems quite stable as it is. The bench is next on the list, but this will have to wait until after Thanksgiving.

Built from Plan(s)
Estimated Cost
$80
Estimated Time Investment
Day Project (6-9 Hours)
Finish Used
Minwax Prestain, Minwax Red Mahogany, Polyeurathane matte
Recommended Skill Level
Beginner

Farmhouse Table

Submitted by glanzer on Fri, 11/29/2013 - 14:13

I had a few hiccups in the early stages building those X shaped bases. I relied a lot on eyeballing it and firmly holding things into place by hand. Very touch-and-go. I took them apart multiple times and rebuilt them.

I wasn't quite sure how to go about attaching the table top, and I finally decided that NOT attaching it was the way to go. I built some braces that firmly held the top onto the base without actually being attached permanently. This helped to move it into the house and will help in the future if we ever want to move it, as it's two very separate pieces.

After that it was pretty much smooth sailing. I had some issues with the staining, but that was largely due to the humidity in the area at the time. Once the temp cooled, the stain dried and all was fine.

From start to finish this project took me about two months, but I only worked on it once or twice per week for a few hours at a time. I'd say I spent 20-25 hours of actual time working on this.

I received 94 likes on Facebook for my project which I consider a win.

Built from Plan(s)
Estimated Time Investment
Week Long Project (20 Hours or More)
Finish Used
Minwax
Recommended Skill Level
Intermediate

Comments

SmileyFamily

Fri, 12/06/2013 - 13:54

Hi,

I was wondering now that you have used the table- do you think the top is secure enough to be unattached with kids around? Like does it move or tilt at all- what if you put heavy items on the side?

Thanks!

Corn Hole Boards

Submitted by Anonymous (not verified) on Sun, 05/28/2023 - 10:53

The Ana White corn hole board plans were straightforward and easy to understand. Building was a breeze. Our boards turned out great!

Comments

Coffee bar with kitchen island

Submitted by Bachdenise on Sun, 12/08/2013 - 10:23

Built to be used for my coffee bar.

Estimated Time Investment
Weekend Project (10-20 Hours)
Finish Used
Followed the plan exactly. Used early american stain.
Recommended Skill Level
Intermediate

Comments

My First Project

Submitted by Anonymous (not verified) on Mon, 06/19/2023 - 15:34

I took a woodworking course through the community college and built this cedar bench for my front porch. I learned so much throughout this process and am proud of how it came out. I am now building up my own arsenal of tools and supplies. I can’t wait to choose my next project!

Plans from myoutdoorplans.com/2x4benchplans

Comments

Gage's Fort Bed

Submitted by Anonymous (not verified) on Sat, 02/27/2016 - 21:17

This was an all day project but we bought cheaper wood and had to do some serious sanding. The plans are missing a 44 1/2" 2x2 for the ladder. We also plan to brace the middle of the back with another 2x2  post because our 4 year old loves bouncing around. So glad we did this I stead of spending $100 extra dollars at ikea!

Estimated Cost
100
Estimated Time Investment
Day Project (6-9 Hours)
Recommended Skill Level
Beginner

Simple Shower Stool

Submitted by lbrown on Sat, 02/18/2012 - 11:43

I love my 3' x 5' shower and with all that space I thought that having a little spot to sit down would be really nice. After looking around online and at some stores I couldn't find anything that I liked that was also reasonably priced so in the end I decided to make my own.

For details about how I built it check out my blog: http://www.homeandawaywithlisa.com/blog/2012/2/18/simple-diy-shower-sto…

Estimated Cost
Under $20
Estimated Time Investment
An Hour or Two (0-2 Hours)
Finish Used
I used a dark grey spray paint primer on the stool first before applying two light coats of black spray paint.
Recommended Skill Level
Starter Project

Comments

lbrown

Wed, 02/22/2012 - 17:17

Cedar would definitely be a great option. For the finish I used Rustoleum outdoor spray paint which is supposed to stand up to the elements. I figured that would help it stand up to the water in the shower.

4x6 Truss Beam Farm Table

Submitted by Anonymous (not verified) on Thu, 03/10/2016 - 13:48

Easy project, had it done in about 8 hrs, staining and paid ting took another 4 hrs. Not bad at all.

Built from Plan(s)
Estimated Cost
175.00
Estimated Time Investment
Weekend Project (10-20 Hours)
Finish Used
Mike wax walnut and antique flat white latex paint.
Recommended Skill Level
Intermediate

Comments

adamwknox

Sun, 05/22/2016 - 06:16

The stain and distressed painting turned out fantastic. Do you remember which stain you used, or your process for the distressed white for the bottom?


Looking to jump into this project this weekend.

Snowboard Display Rack

Submitted by LampAtFeet on Sun, 12/15/2019 - 13:49

My son wanted a way to display his snowboard, so I modified the pallet display rack plans to fit his snowboard. It's constructed with 2x4s for the sides and 1x4s and a 1x2 for everything else. The 2x4s have an angled notch cut out so the snowboard can slide in and out. I built a top and bottom shelf to display pictures, as well as provide storage. The hooks are great for hanging boots, gloves, etc.  He loves the way it came out.

Estimated Cost
$30
Estimated Time Investment
Afternoon Project (3-6 Hours)
Finish Used
Dark Walnut stain followed by a coat of wipe on polyurethane
Recommended Skill Level
Beginner

Comments

Farmhouse Table

We recently moved and wanted a larger table. My wife came across this website and it had the table we wanted! I have never built anything before so this was my first attempt at something like this and we are very happy with the results! More builds to come.

Estimated Cost
$200-$250
Estimated Time Investment
Weekend Project (10-20 Hours)
Finish Used
A minwax conditioner
Started off with a coat of Minwax Weathered Oak but found it was too light so the next coat we used was Minwax Special Walnut. For the final protective coat I used Circa 1850 Antique Paste Varnish.
Recommended Skill Level
Beginner

Comments

Entryway (mudroom) Bench

Submitted by Anonymous (not verified) on Wed, 01/08/2020 - 13:29

This was my first time building anything from scratch! I used the plan "Mudroom Bench with Easy Drawers" for the bottom section. I did not make any modifications, but I did have some trouble with the drawers. First I made the drawers 1/8" wider than the available space (after adding the hardware); so to resolve that I had to notch out the frame and sink one of the drawer slides.

I never realized how finicky drawers can be, but I learned a lot from this project, and my family loves the finished product.

I chose not to use the plan for the hutch, because the cost was starting to creep up, I didn't want walls on the left and right. So I just added bead board directly the wall (glue and brads) and added some trim. For the upper unit (cubbie), I just made a basic structure out of 1x10's, and I used some bead board scrap as a backer (turned the pattern out). I then sunk a couple of anchoring screws into the back (which will be hidden behind baskets) and added a couple of decorative shelf brackets for added stability.

Built from Plan(s)
Estimated Cost
$300
Estimated Time Investment
Week Long Project (20 Hours or More)
Finish Used
Bright White Acrylic Paint
Recommended Skill Level
Intermediate

Comments

Farmhouse coffee table

We wanted to create a table to fit perfectly within the space of our living room. It turned out great. Using the pocket holes definitely helped and gives it a more professional finish. We stained it with early american and then used pickling.

Estimated Cost
$75
Estimated Time Investment
Weekend Project (10-20 Hours)
Finish Used
early american and pickling
Recommended Skill Level
Beginner

Comments

King Headboard w/ Charger and Lighting

Submitted by Malka on Sat, 02/01/2020 - 15:21

I designed this headboard on the back of a napkin, after we couldn't find one at a box store that met our needs. I used Douglas fir 2x10 for the headboard/shelves and Pine T&G for the backing. My fiance etched a mountain range into an unframed mirror, which I then framed from the scrap fir wood, and stained to match. Also attached an LED Lightbar above the mirror, Dimmer switch LEDs on each bookshelf, and a recessed USB/Plug port. This wasn't the cheapest project with the electrical accessories added, but we now have a custom wooden headboard with bookshelves, lighting and chargers that will last us years and be far beyond anything we could have bought at a big box store for the same cost. 

Estimated Cost
250
Estimated Time Investment
Weekend Project (10-20 Hours)
Finish Used
Varathane Honey
Minwax Semi-Gloss
Recommended Skill Level
Intermediate

Magazine file turned shelf

Submitted by kari on Sat, 04/28/2012 - 10:20

A long time ago I saw a picture of an old magazine file turned on it's side and used as a shelf. I loved it. And it had a curve that I loved too. After waiting over a year for vintage magazine file to fall into my lap, I decided it was time for me to take action.

I have it attached in the corner by my son's bed. It is a perfect little spot to hold his glasses, water, pills, and of course Darth Vader.

A few changes I made-
After cutting the side panels I drew a curve on them. It was 12 inches tall, and I started the curve up 4 inches from the front. I used painters tape to hold the 2 side pieces together and cut them on my scroll saw, you could also use a jig saw.

The old one in the picture had a whole on the front, so I added one too.

Because I planned to turn this on it's side, I attached the front and back to the bottom first. Then attached the sides. That way the sides rest on the back and front for a little support. I had to adjust the width on all sides for that.

It was super quick and super easy.

Built from Plan(s)
Estimated Cost
all scraps - so free for me
Estimated Time Investment
An Hour or Two (0-2 Hours)
Finish Used
some blue oops paint I had
Recommended Skill Level
Starter Project

Comments