Community Brag Posts
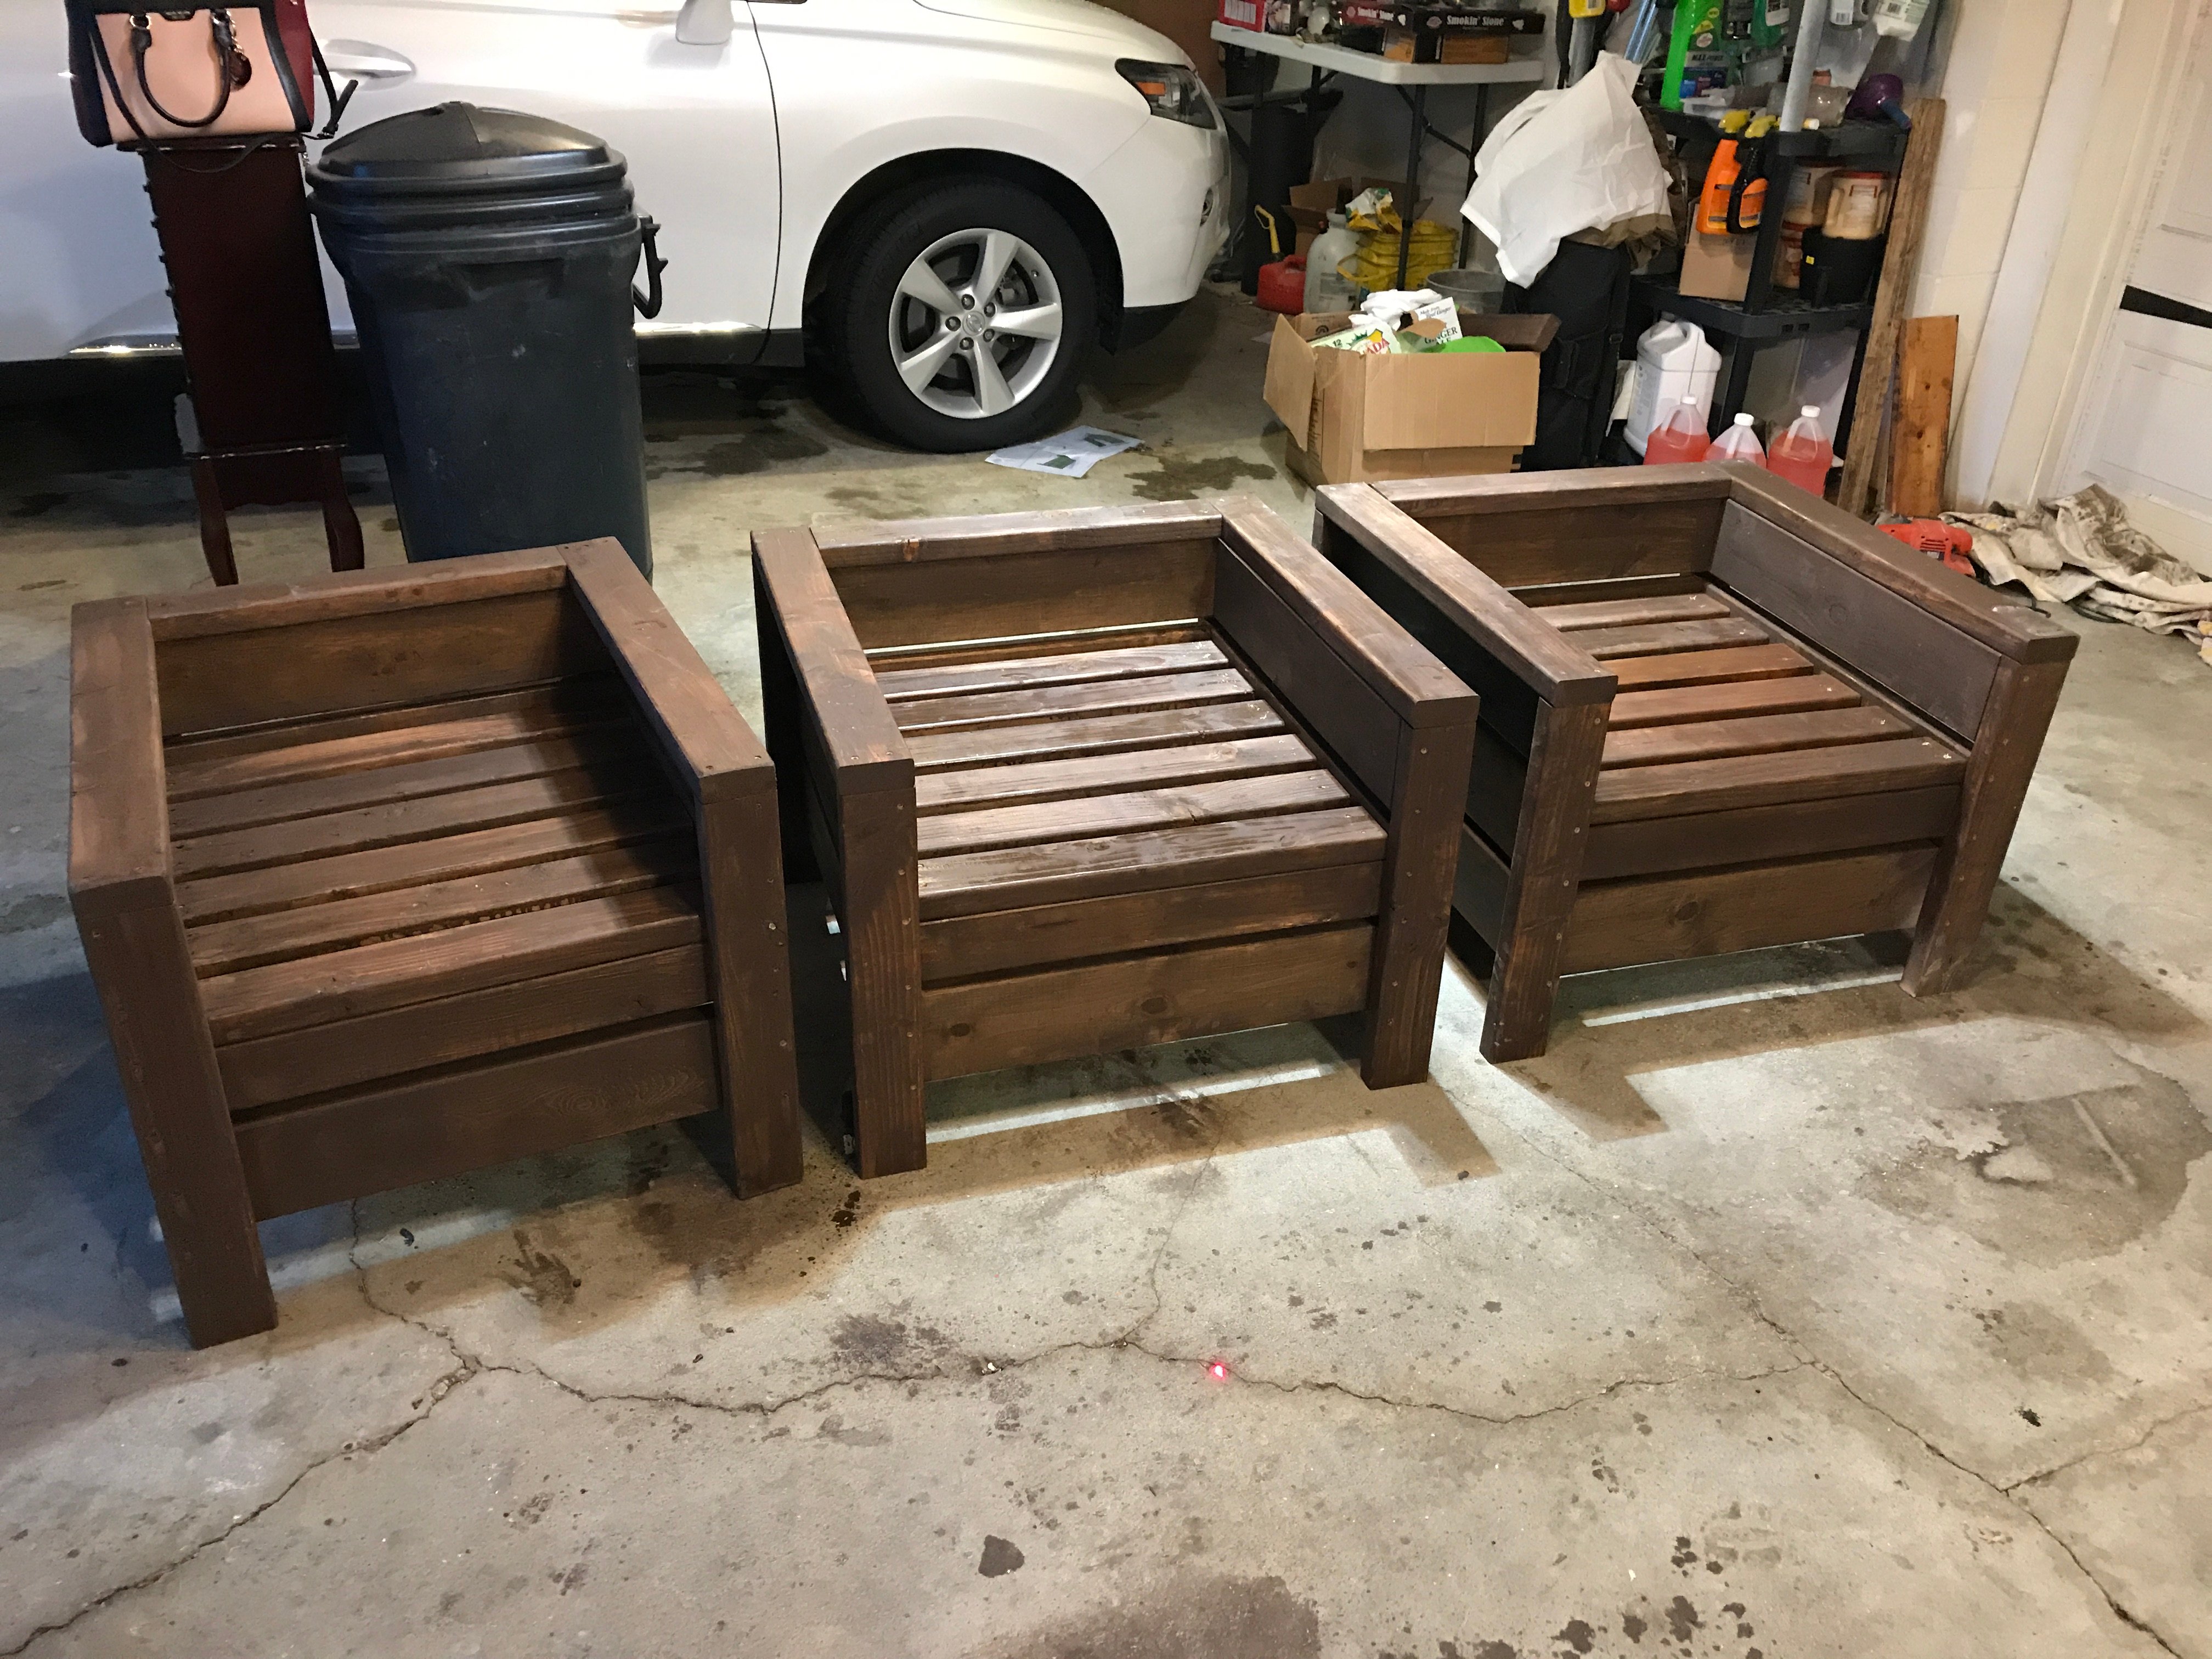
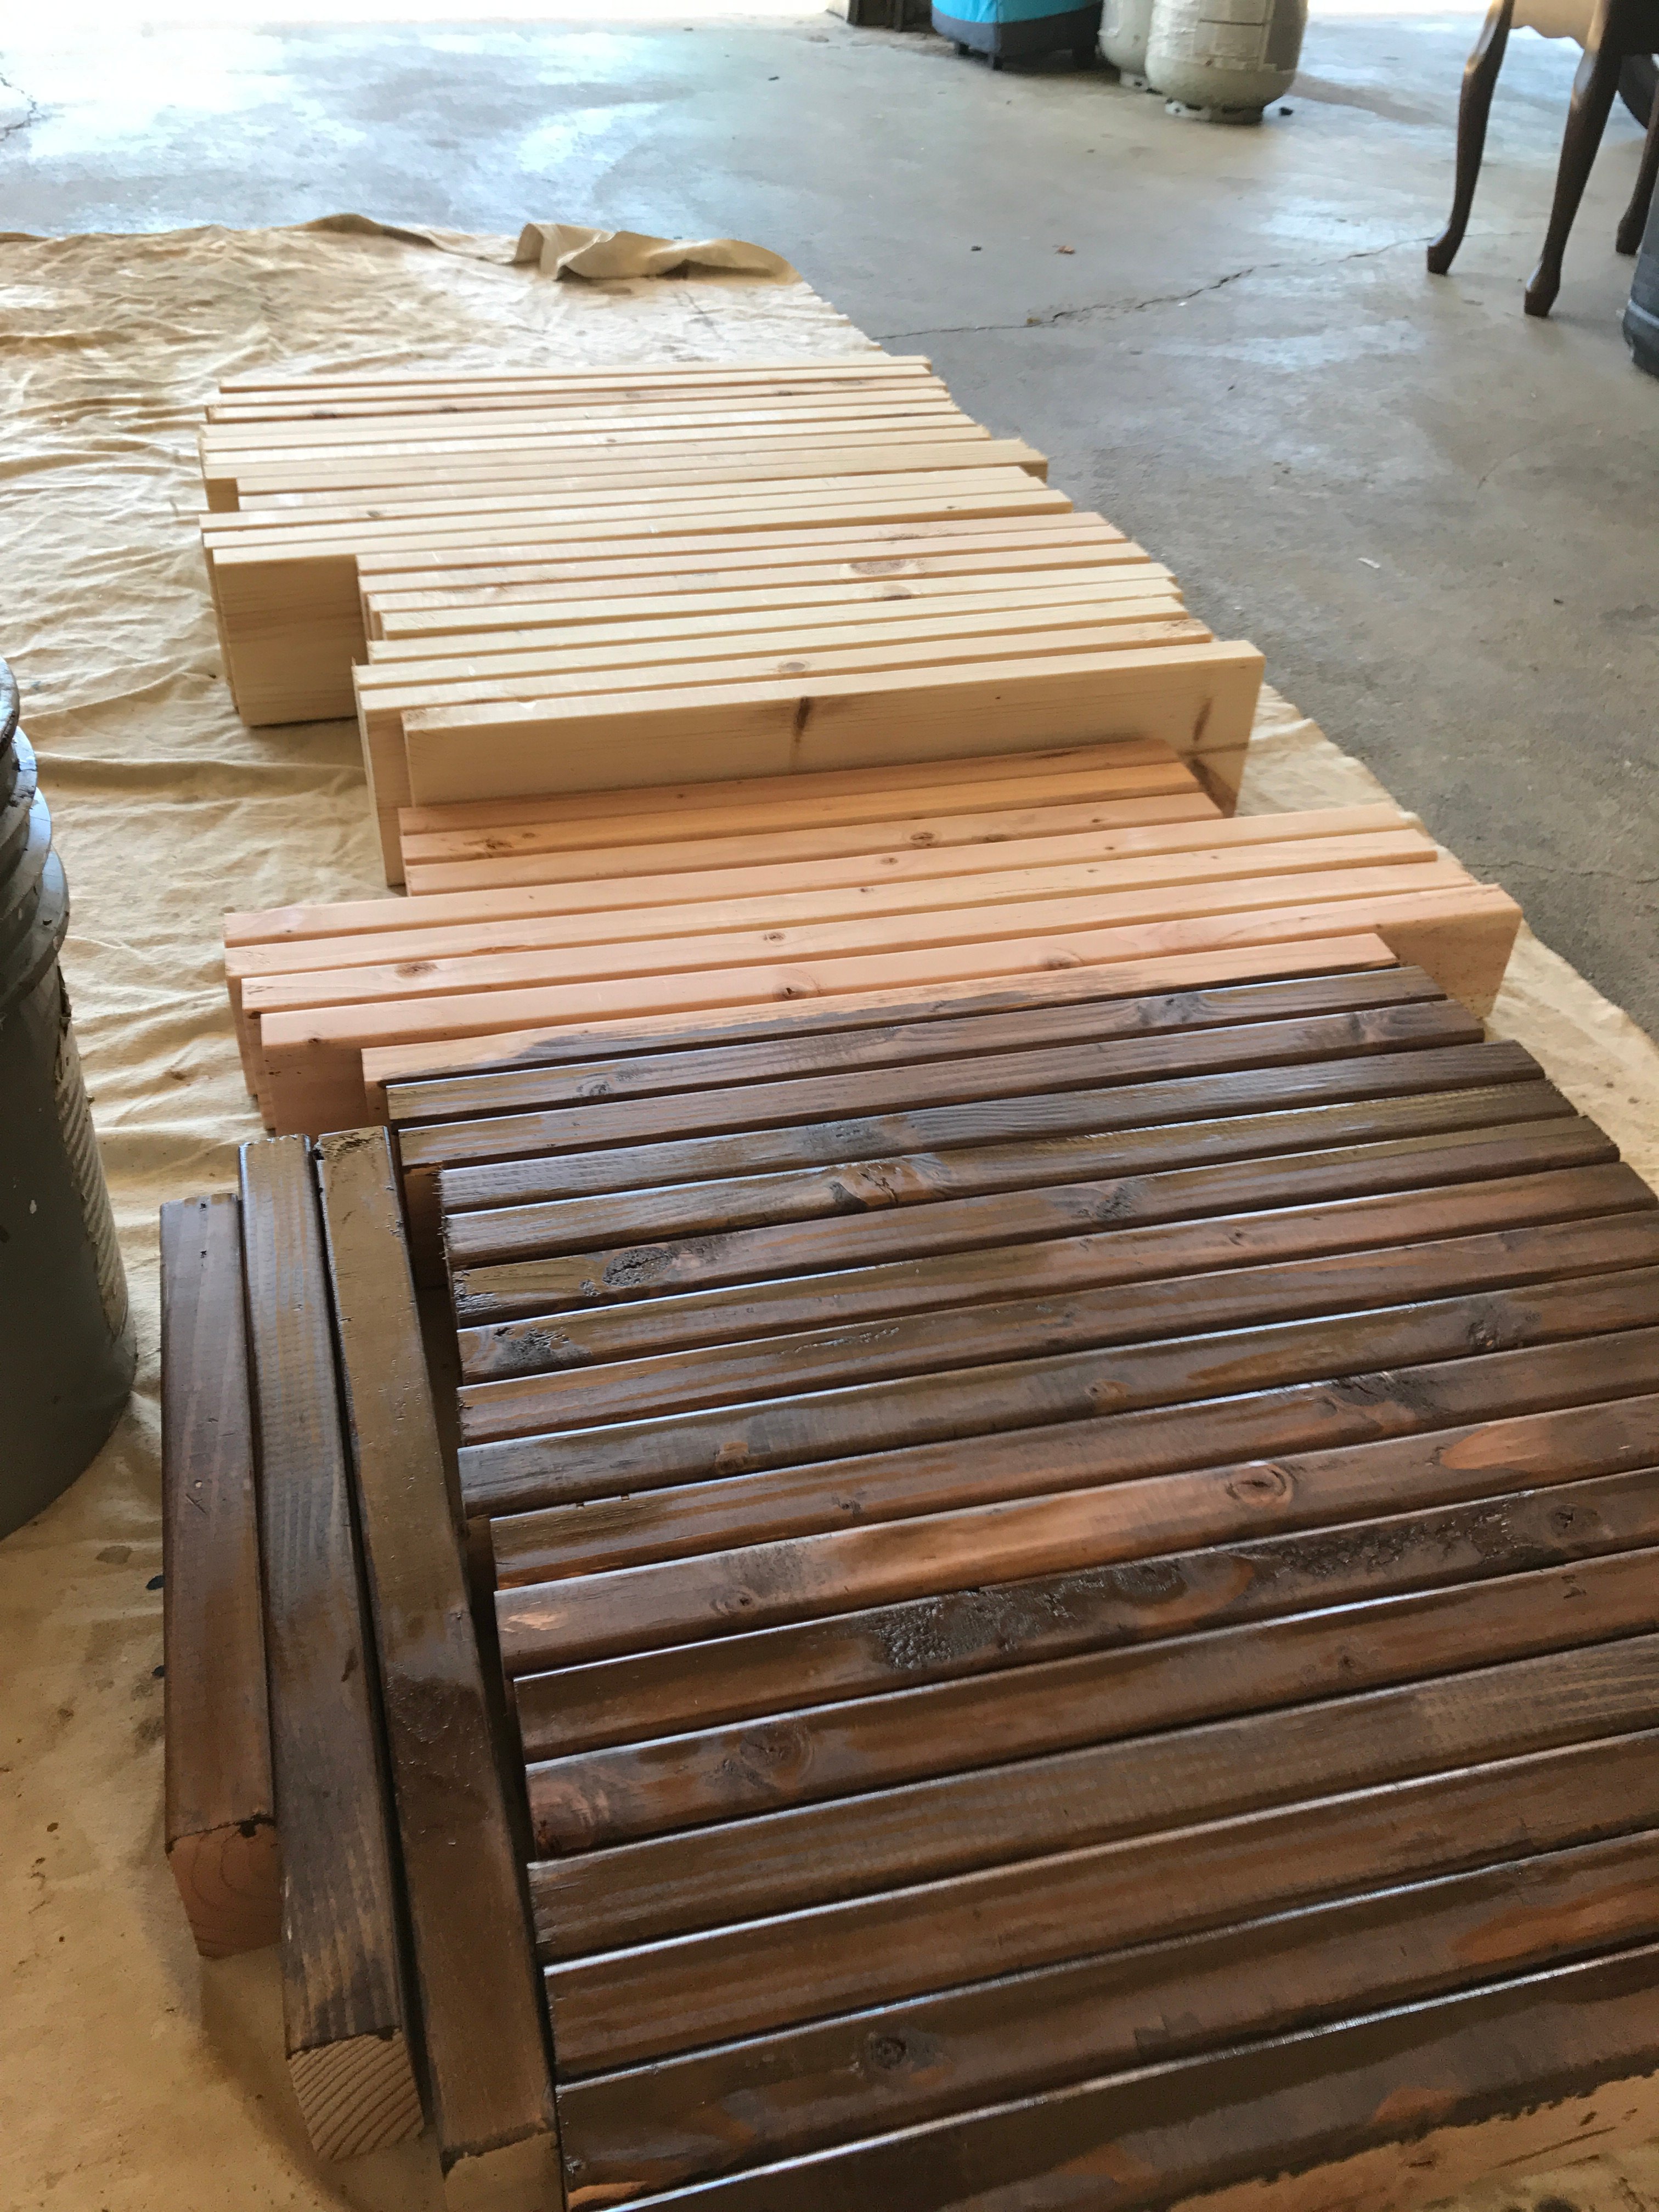
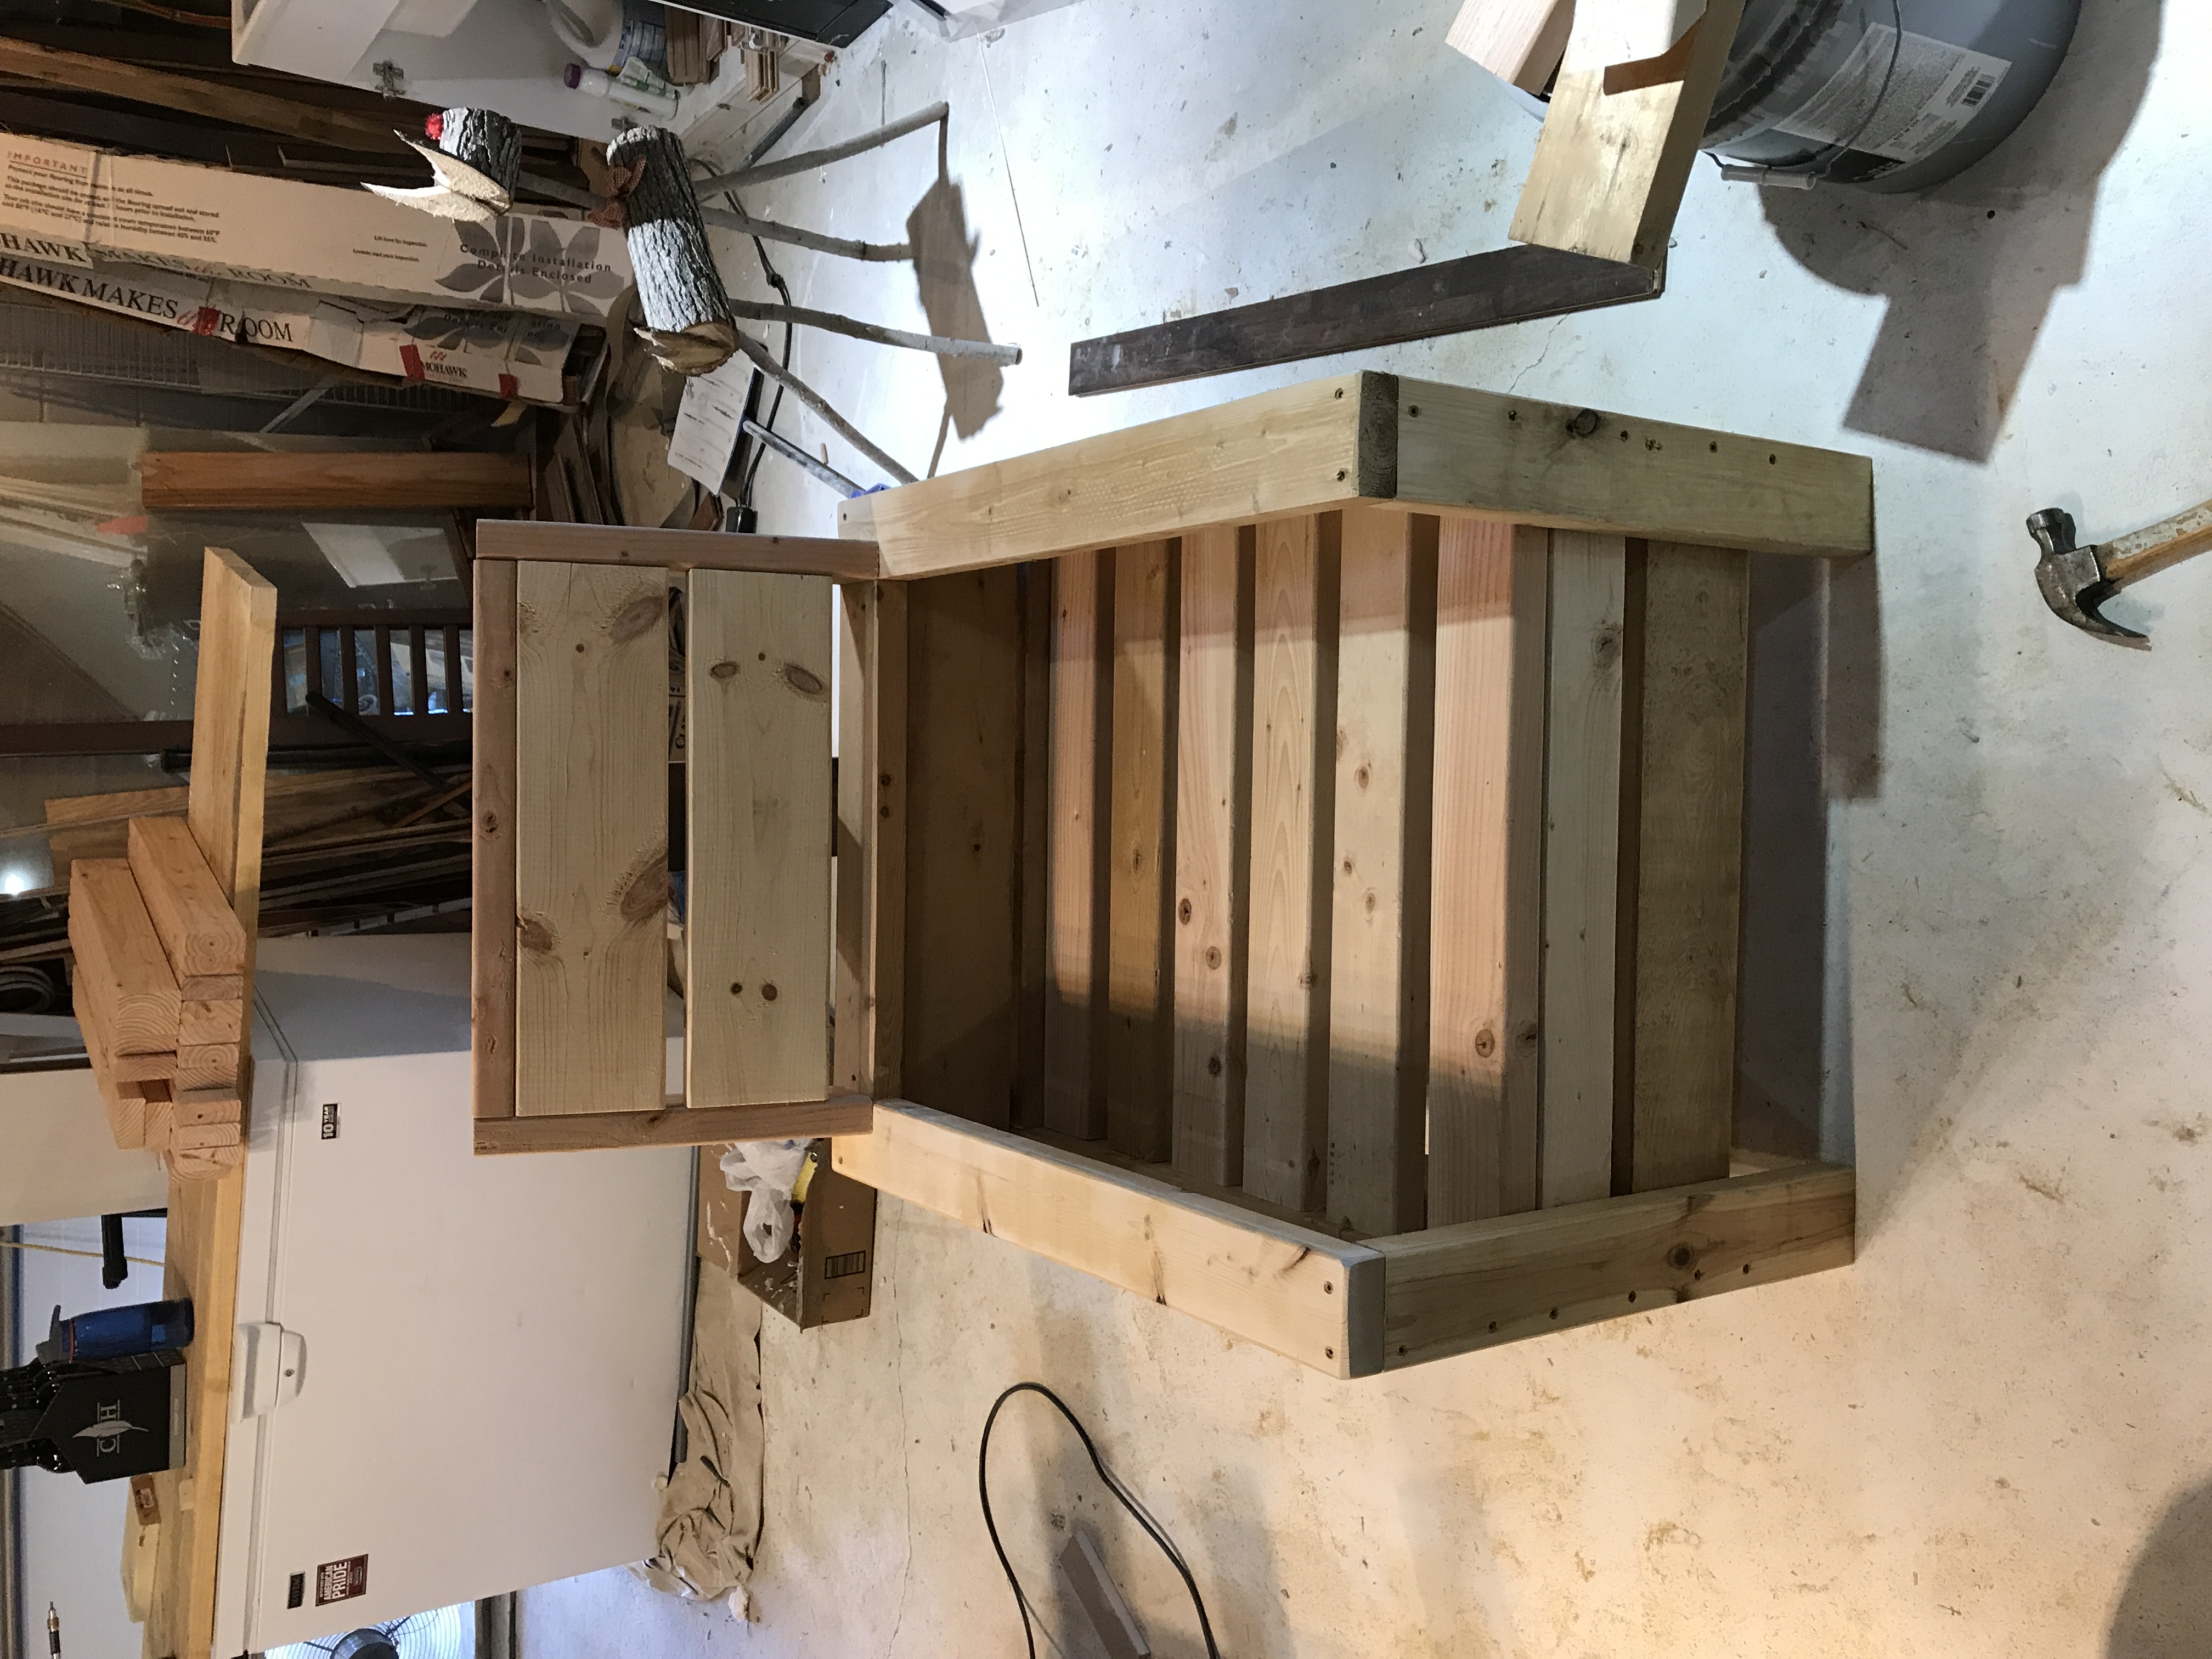
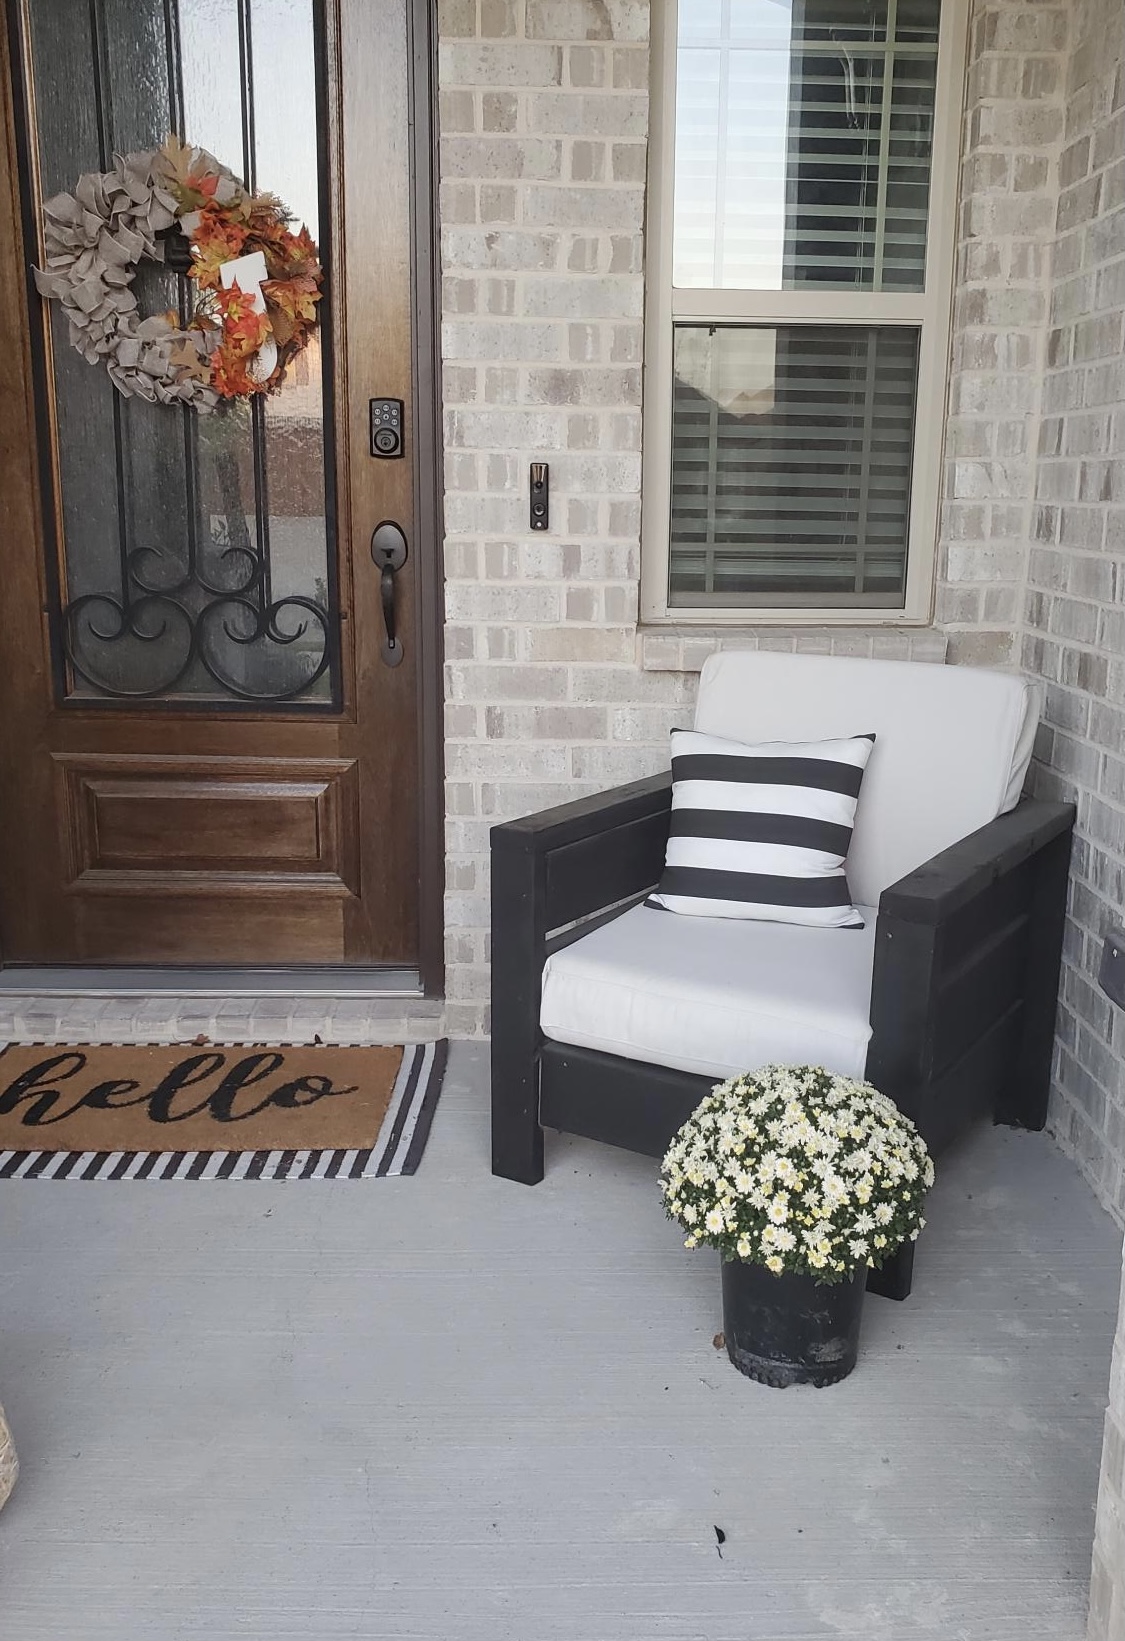
Outdoor Chairs
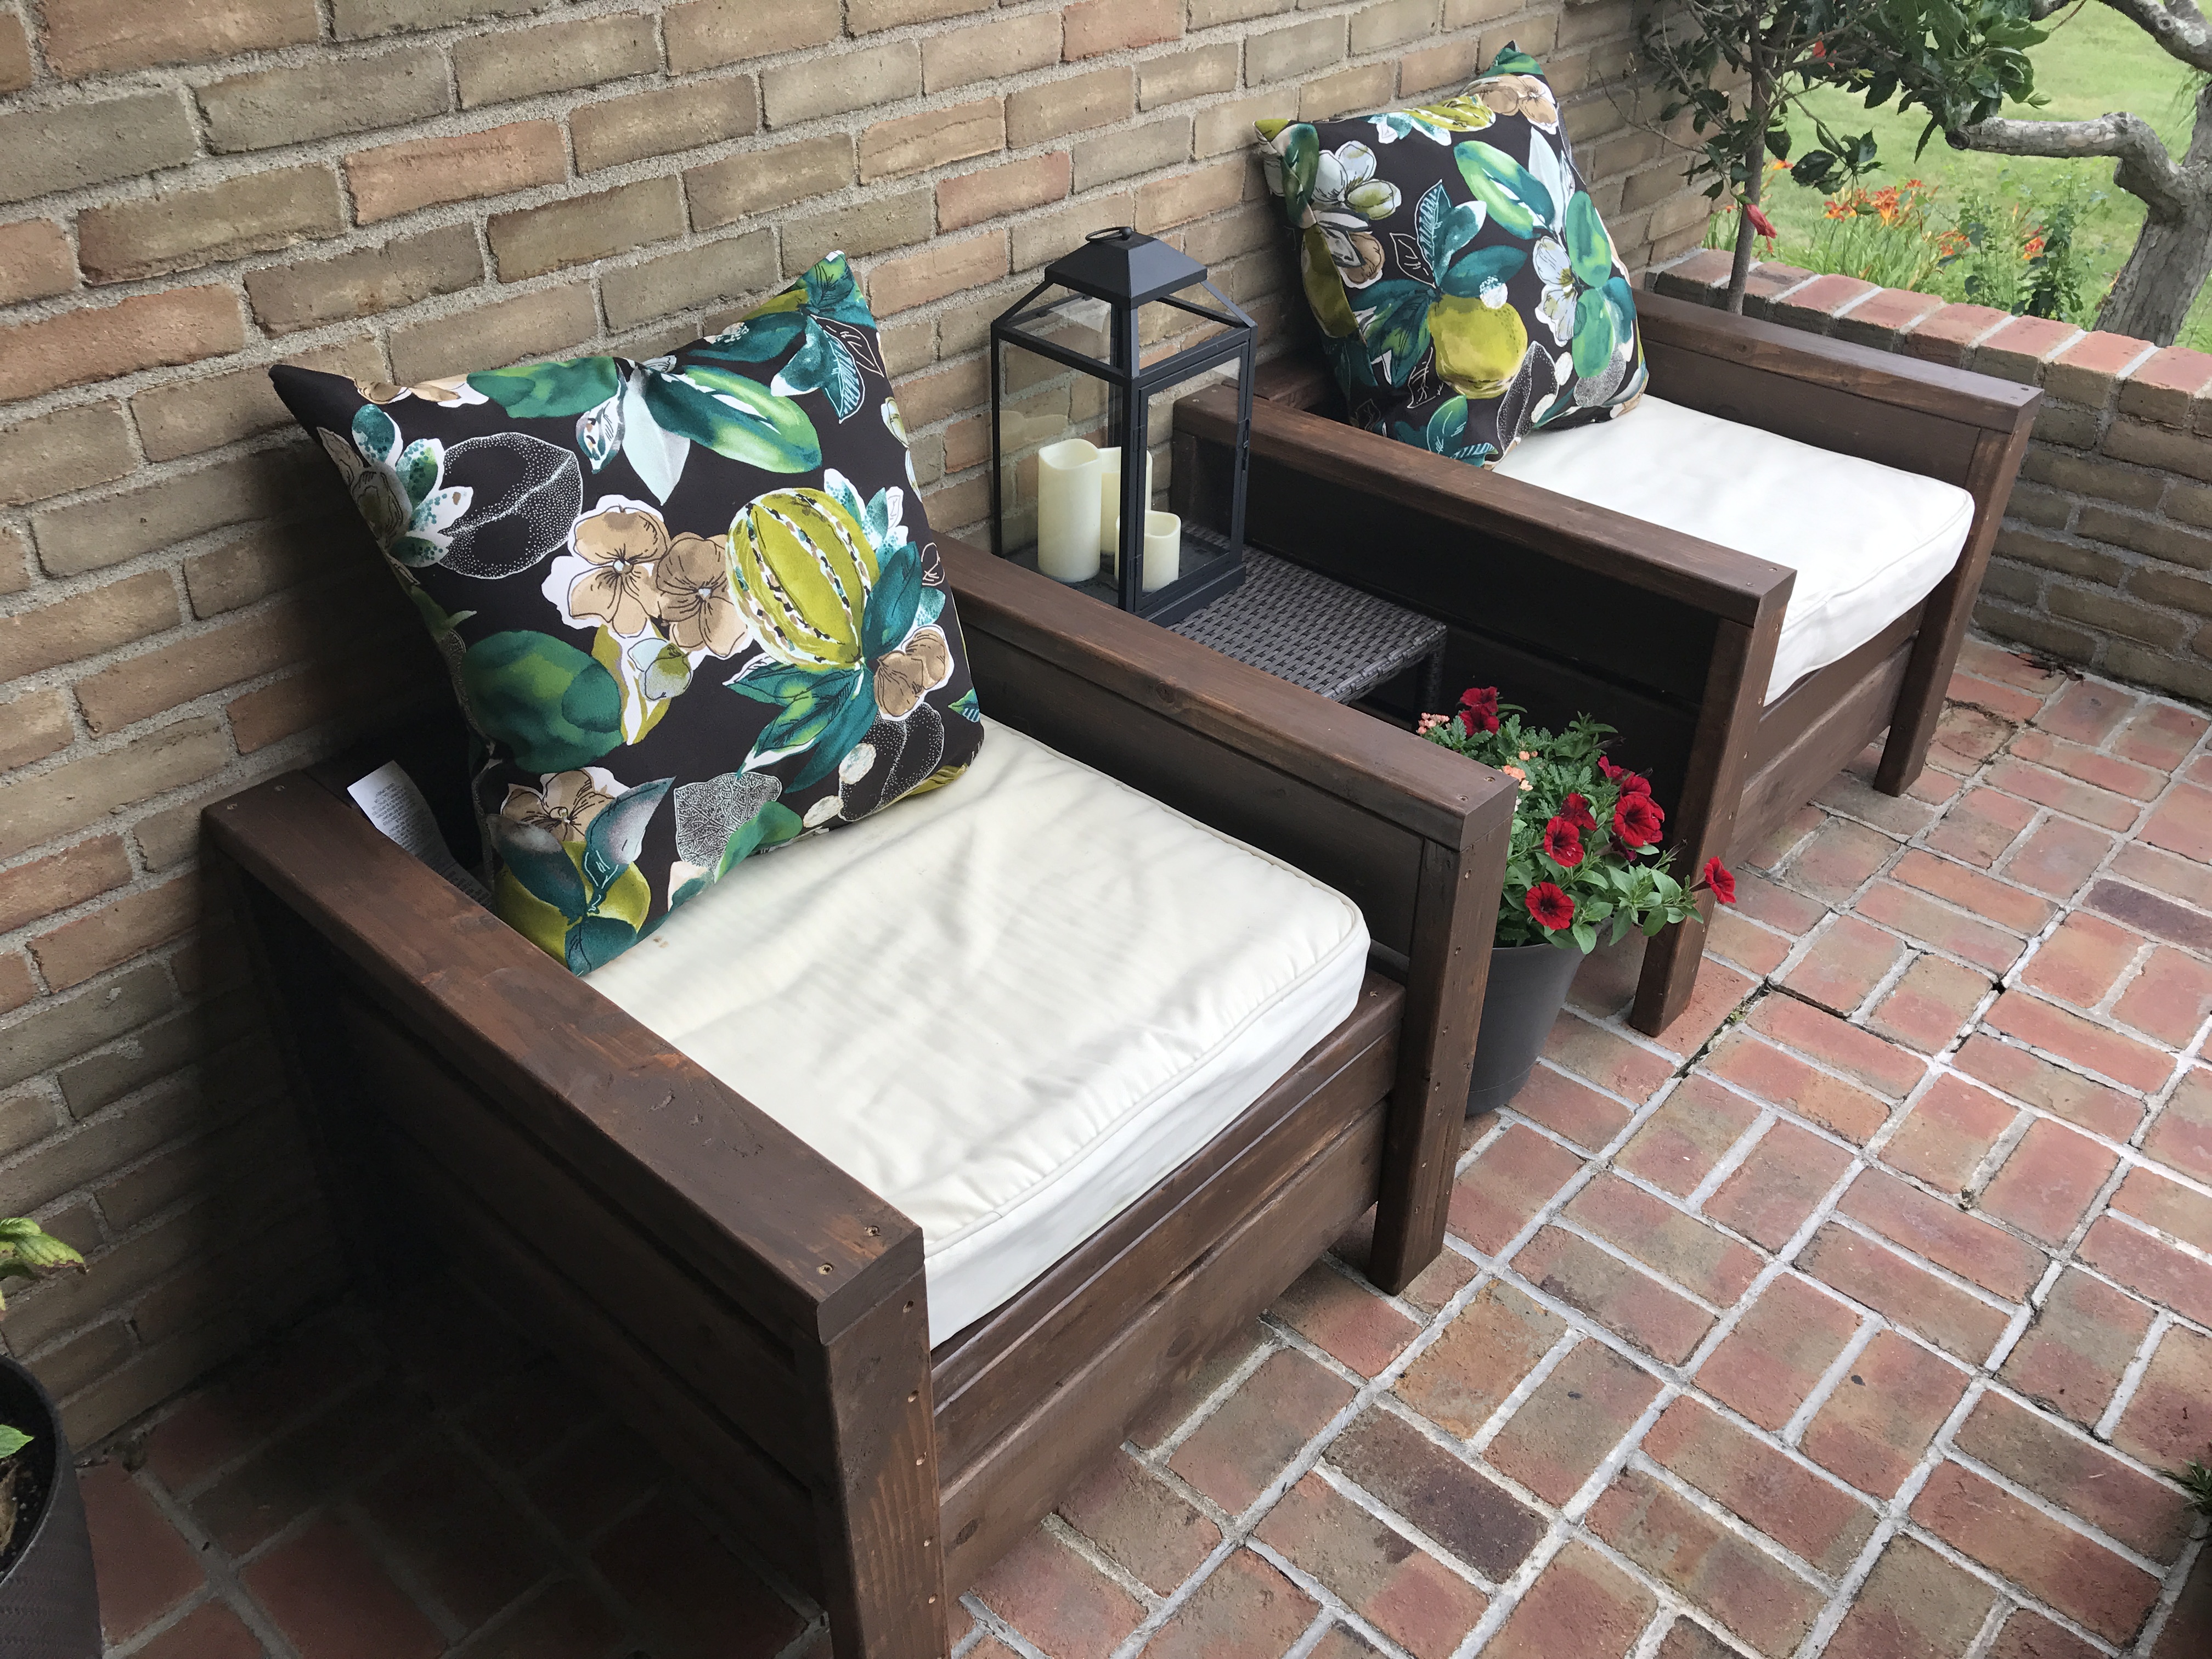
These were a fun build and pretty easy to put together. Certainly need to pre-drill pilot holes or risk splitting your boards.
I contemplated putting a back rest on the chairs but didn't end up needing them due to close proximity to the walls. Having the cut-list on hand was super handy as I just set a stop on my miter saw and was able to cruise through the cuts quickly.
Built from Plan(s)
Estimated Cost
60 dollars for materials, not counting cushions and pillows.
Estimated Time Investment
Day Project (6-9 Hours)
Finish Used
Olympic Deck Stain (709 in color) semi-transparent. Likely will seal with a clear coat later.
Recommended Skill Level
Beginner
Farmhouse table Ana White
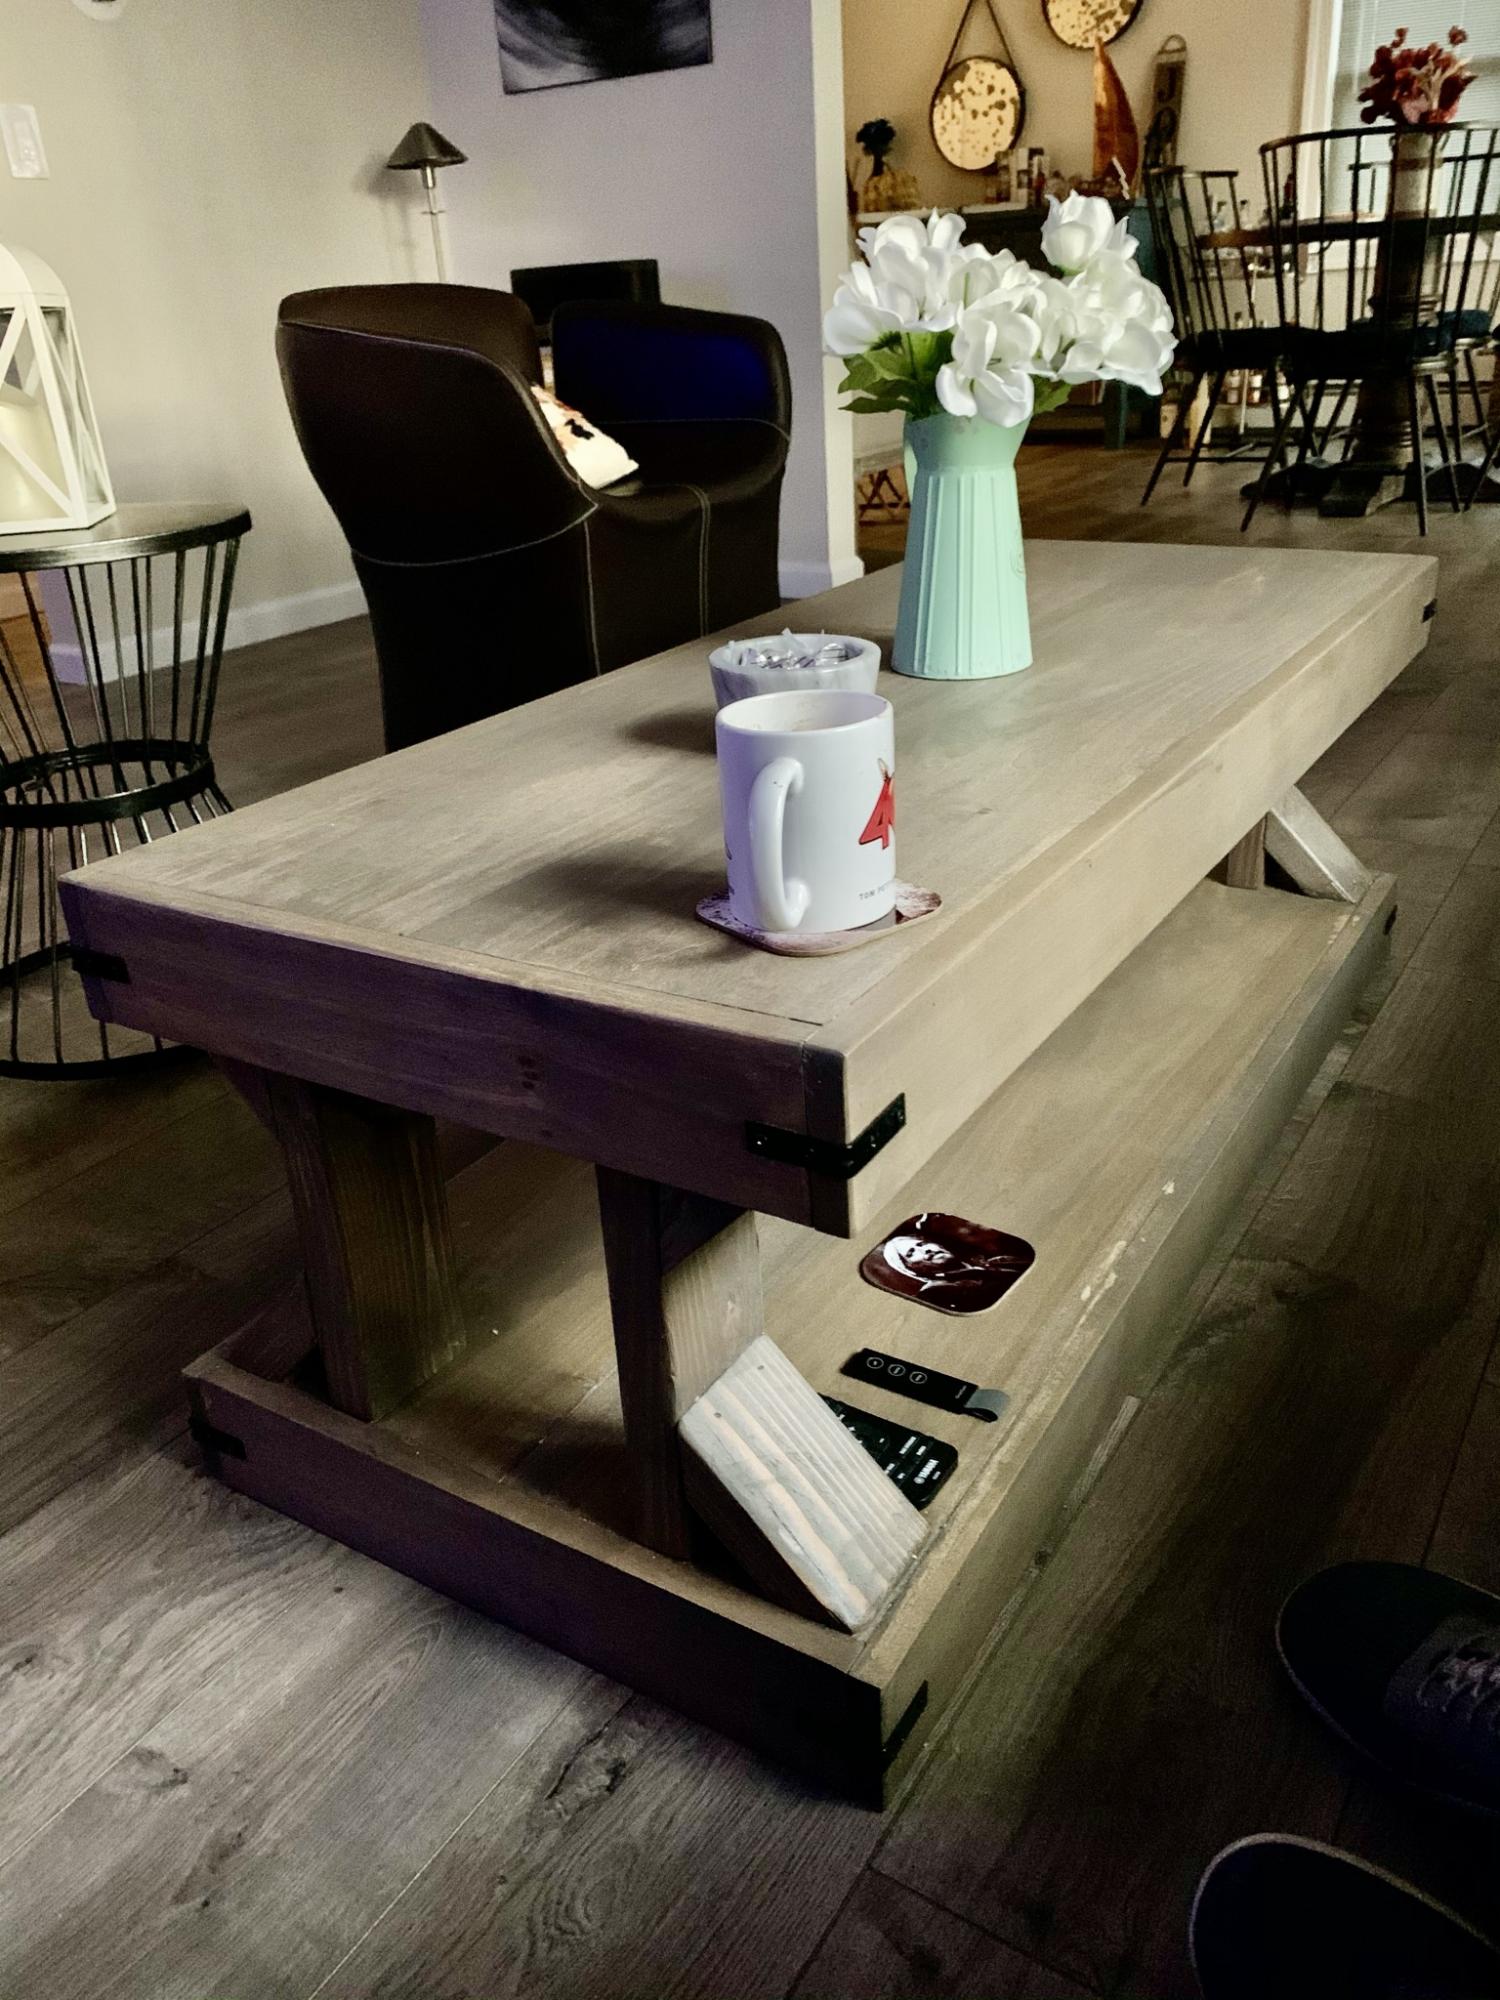
Most of my builds come from Ana White inspiration . Jobs simplified and cost effective. She is the absolute best . !
Built from Plan(s)
Comments
Mon, 10/04/2021 - 16:57
You've been busy!
WOW! These are all great projects, thank you so much for taking the time to share!
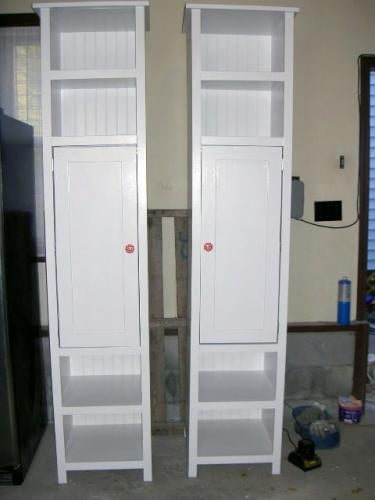
tower shelves

Custom tower shelves with hanging space and four shelves.


Built from Plan(s)
Estimated Cost
$200.00
Estimated Time Investment
Week Long Project (20 Hours or More)
Finish Used
1. one coat primer
2. two coats white semi gloss
2. two coats white semi gloss
Recommended Skill Level
Intermediate
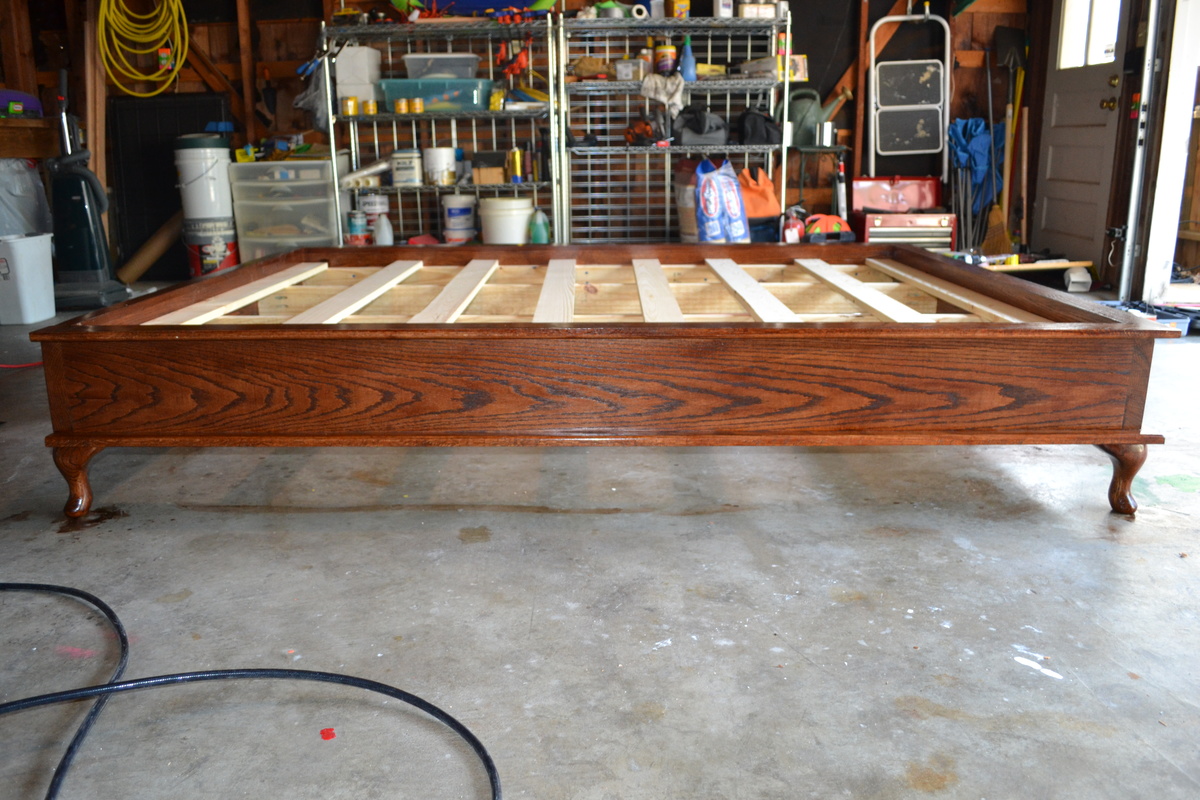
Chestwick Queen Bed
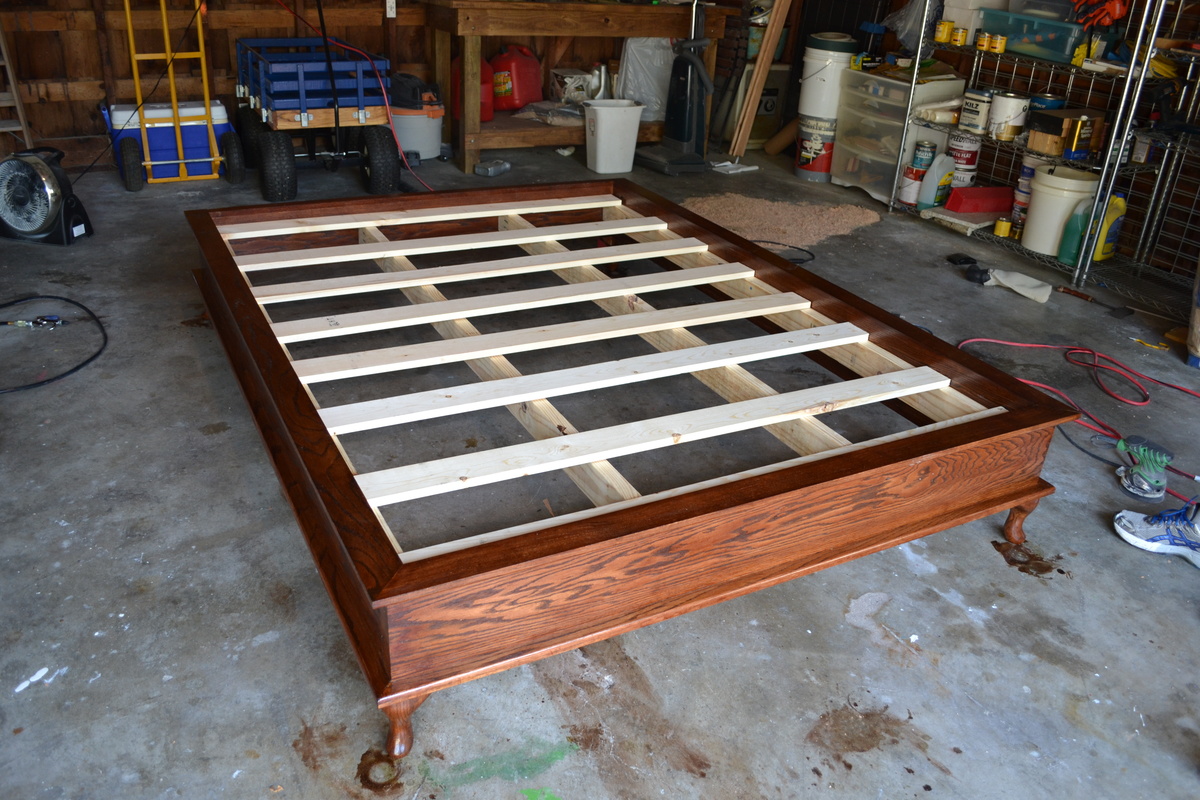
My husband was thrilled to build us a new bed - it meant he got to buy a Kreg Jig. Of course, he refused to buy plain ol' pine off the shelf at the Big Box stores and just HAD to buy the solid red oak from our local lumber yard. (So much for keeping the costs low. Oh well.) It's stunning and I love it. If it weren't for Ana's plans for this, we'd be settling for some hunk of junk off Craigslist or, worse, one of those furniture chains. For still roughly half the cost of something out of a store, this is a far superior bed frame and will last forever.
My hubby's no stranger to using power tools, but this still took him a few weekends due to life and letting the stain/finish set. He still has to attach the quarter-round, which he broke out the router to customize himself, but I was super impatient and told him to finish the base and put the trim on later. I'll try to remember to update this when that happens.
He also found the Queen Anne style legs off http://www.osbornewood.com/

Built from Plan(s)
Estimated Cost
$400
Estimated Time Investment
Weekend Project (10-20 Hours)
Finish Used
Minwax Honey stain with Waterlox Original Sealer/Finish
Recommended Skill Level
Beginner
Triple Printer Console
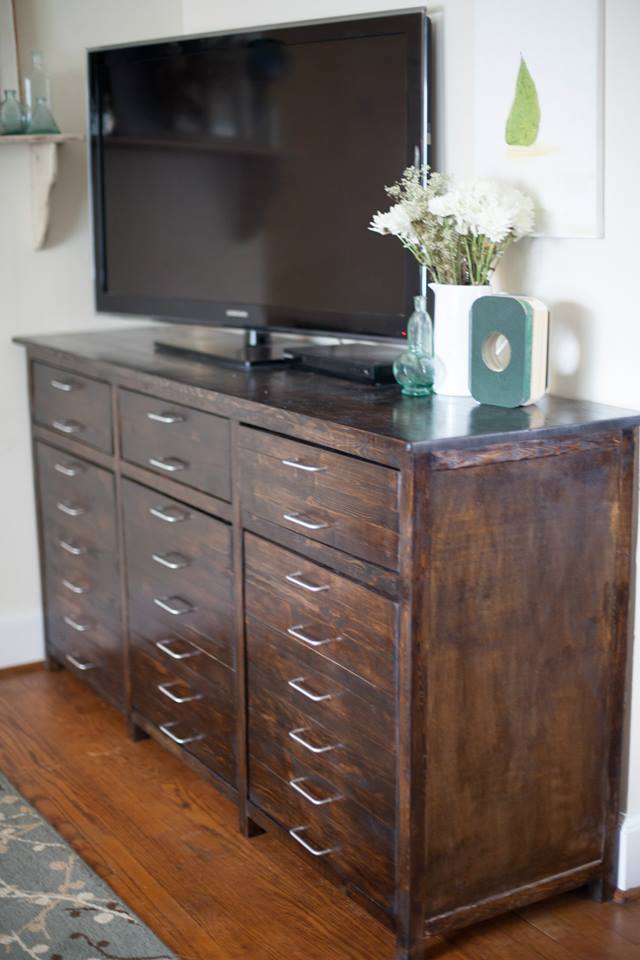
We made this and a dresser just like it. We wanted matching furniture.
Estimated Cost
$350
Estimated Time Investment
Week Long Project (20 Hours or More)
Finish Used
Danish Oil
Recommended Skill Level
Intermediate
Comments

Patio chair
I chose to make the chair which came out great although the plans were only for one chair I thought it waa easy to do.
Built from Plan(s)
Comments
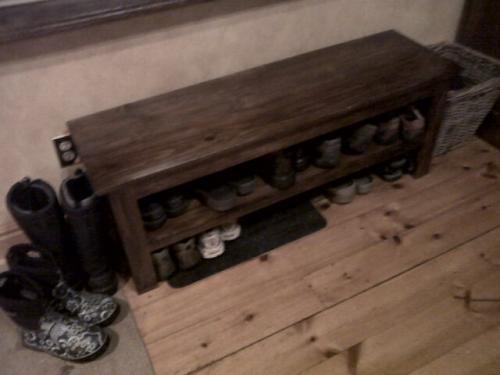
Entry Shoe Bench
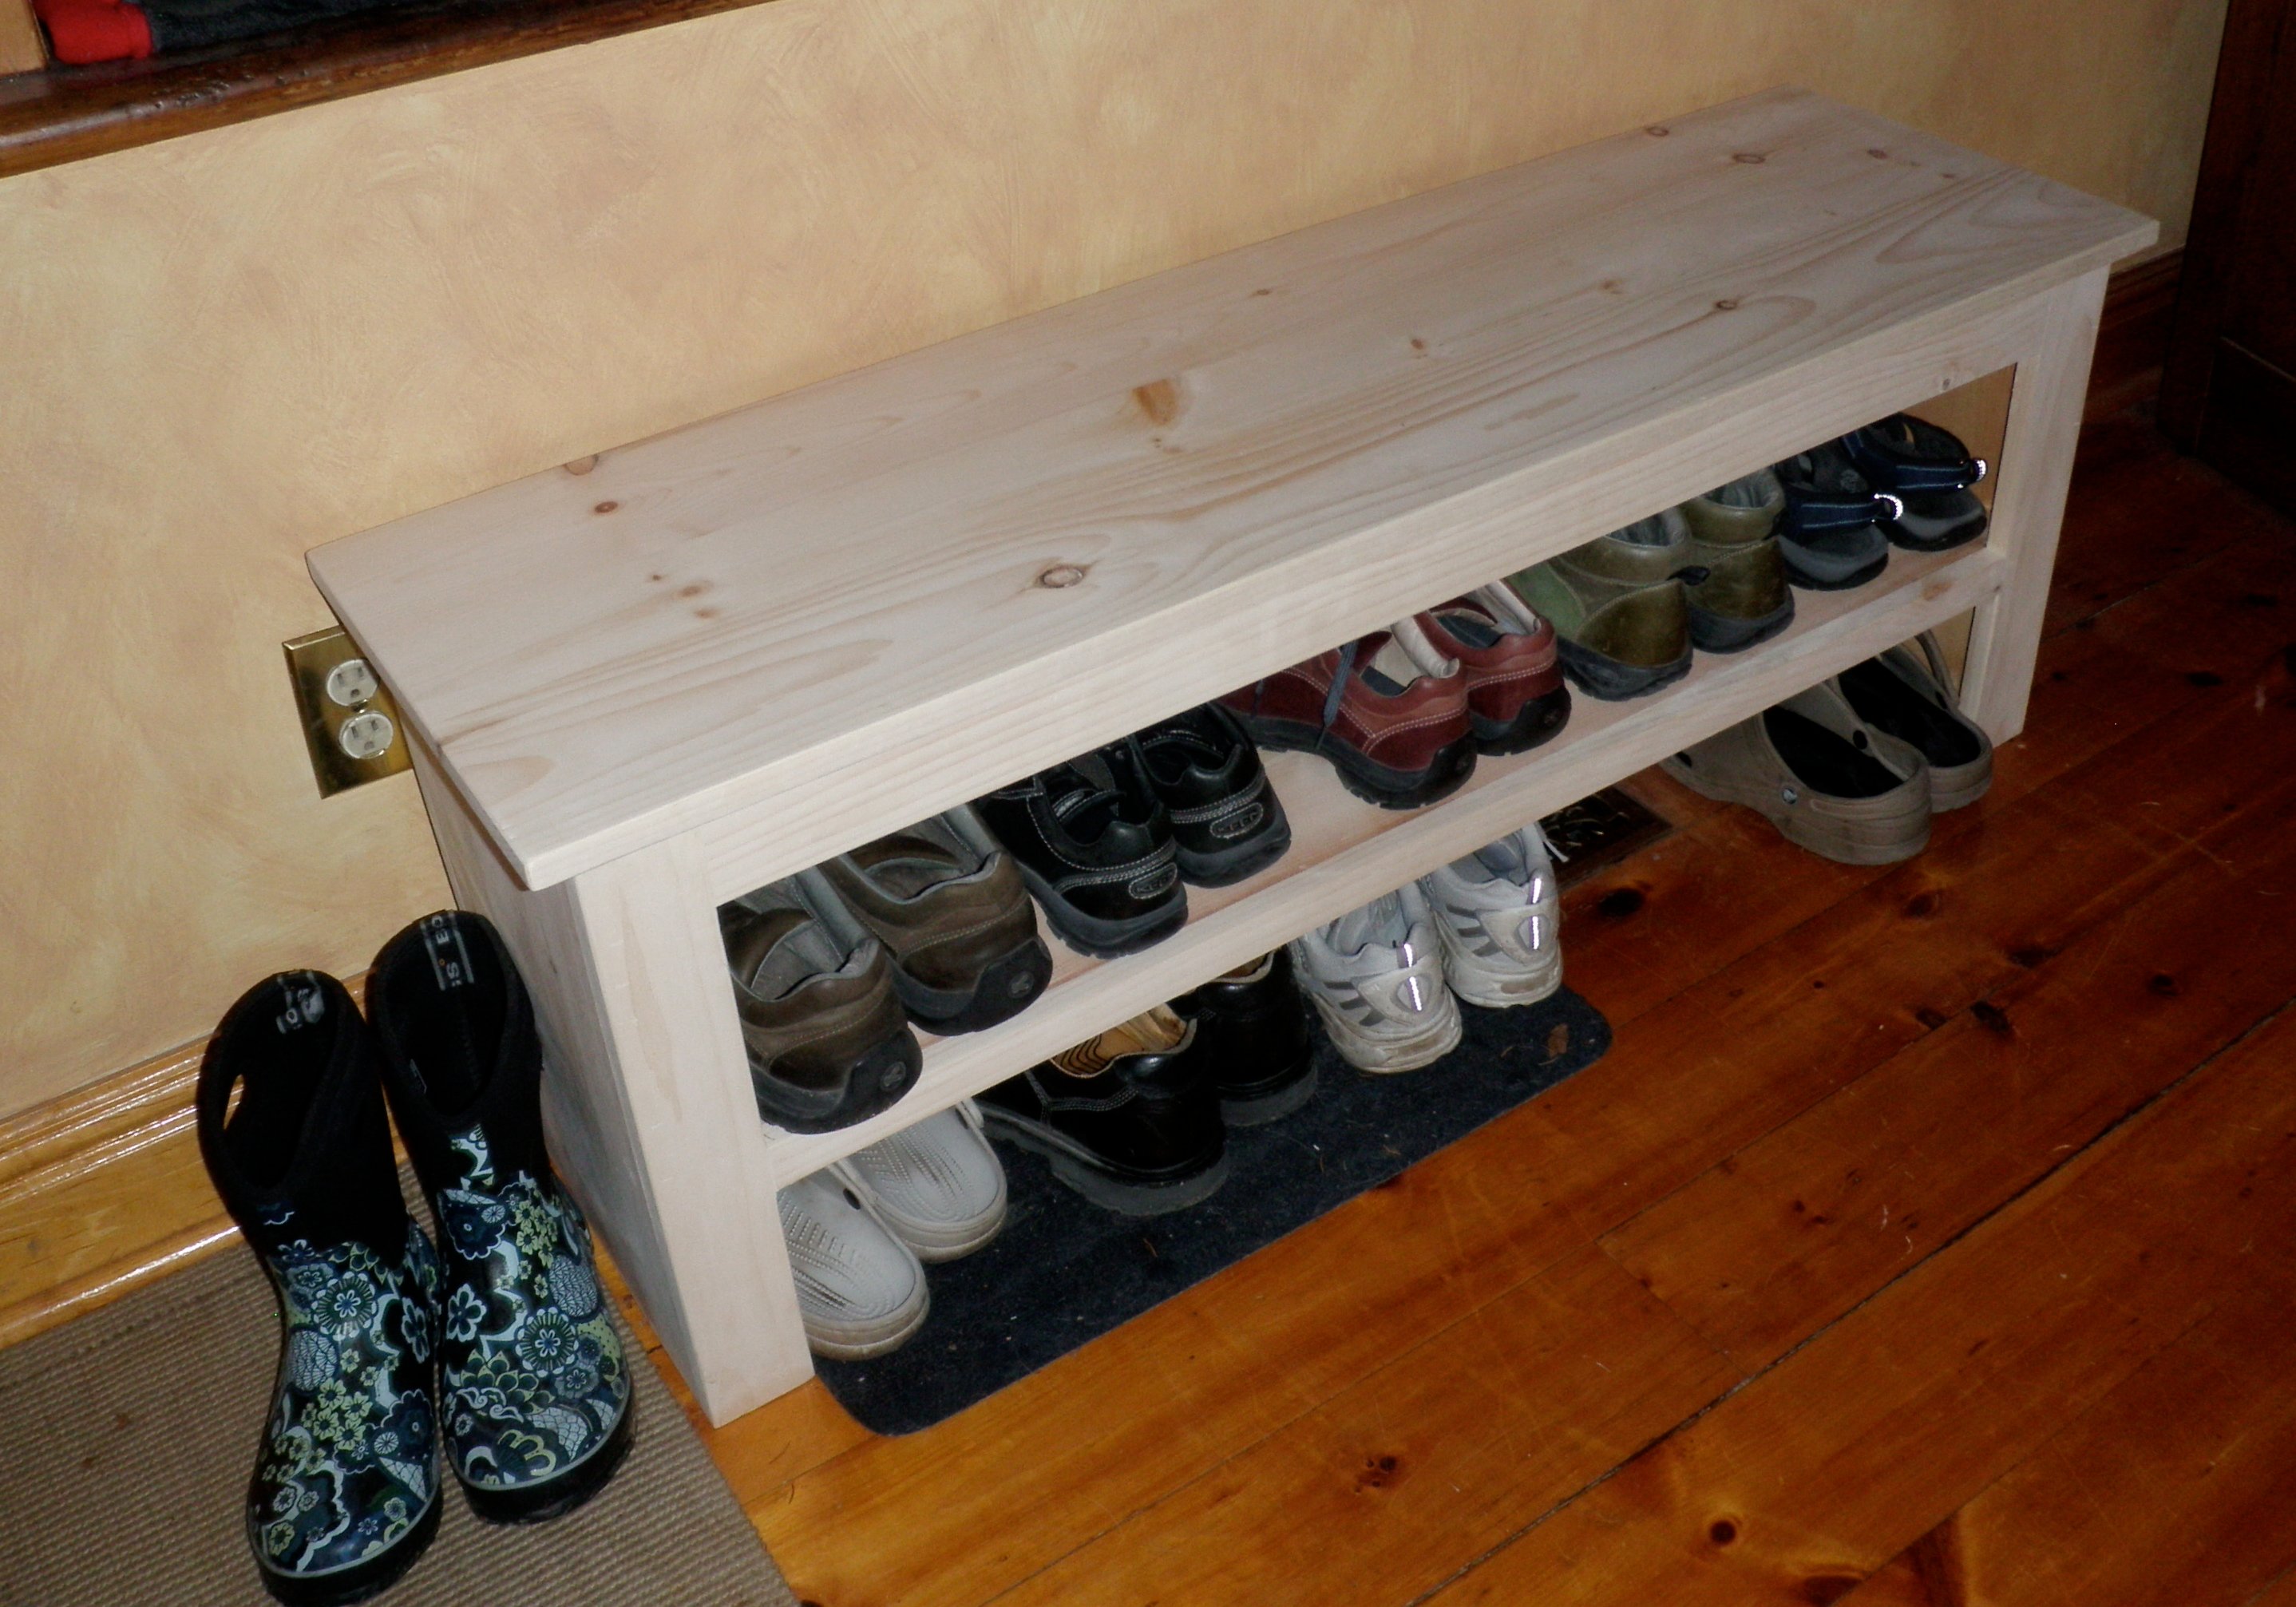
I've officially stopped stalking and started building! First project a modified spa bench. Still have to stain it, but it already makes the big pile of shoes by the door look neater! I'm a hands-on person and not afraid of power tools (got a band saw for my birthday!) but it's still a challenge building a piece of furniture. I've already learned lots of do's and don't do's for next time!
Thanx a bunch for your site, Ana! It definitely gets the mind plotting great projects to come!
Built from Plan(s)
Estimated Cost
~50$ (honestly, I can't remember!)
Estimated Time Investment
Day Project (6-9 Hours)
Finish Used
PolyShades Royal Mission, several coats... and a spray can of clear coat too.
Recommended Skill Level
Beginner
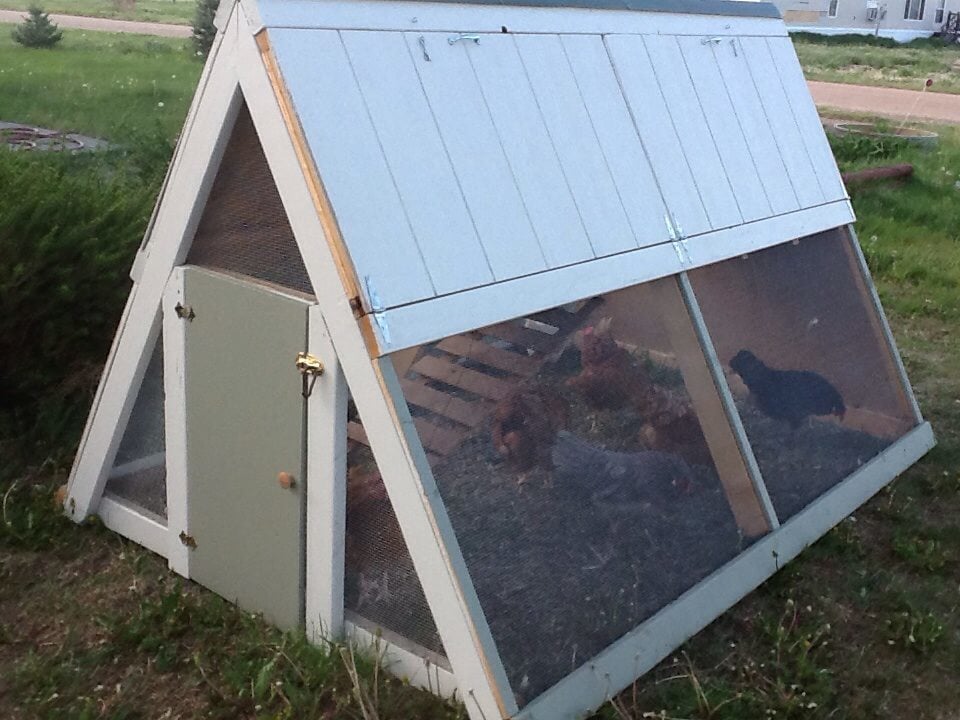
Chicken Coop A Frame
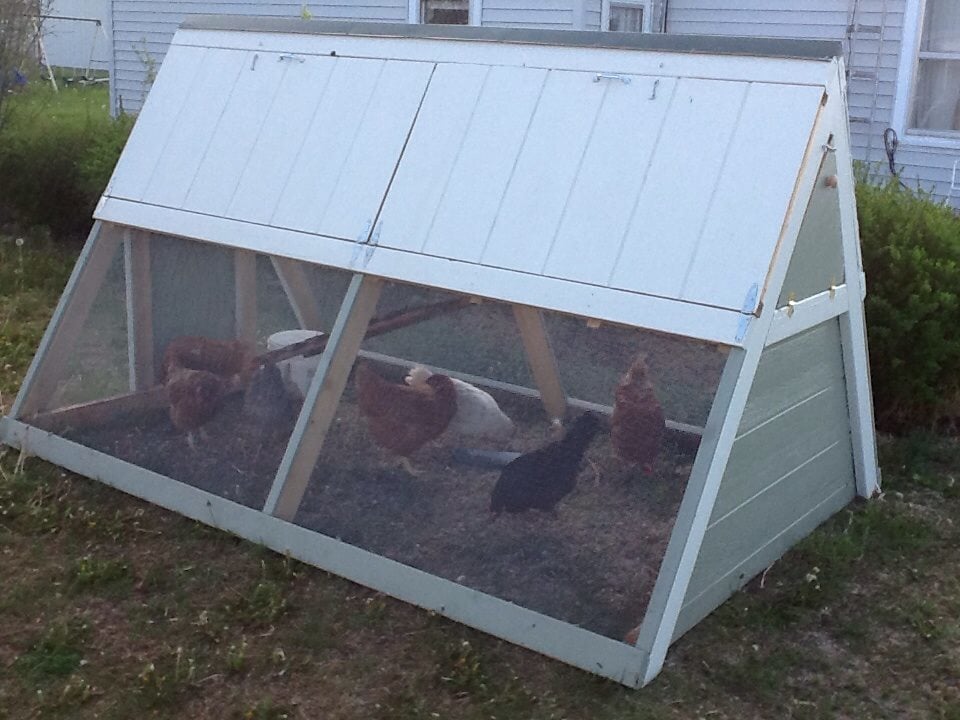
I built this A-Frame Chicken Coop using the Ana White plans. It turned out adorable, strong, and I am very pleased. Final cost was $250, and it took me 4 days (in real time, as a mom of 3). One Saturday at Lowes shopping, one Sunday afternoon cutting, and two days of assembly. Then a 5th for painting. Give or take a dozen extra runs to the hardware store! My brother-in-law helped cut the angles on his miter saw, and my uncle helped with assembly. I kinda doubt this could be done for $100 - maybe if you have a bunch of scrap materials and spare paint. We even have 7 or 8 hens in there! I only intended 3 to live in it, but my uncle added the extras and they all get along happily. I found the roof cap at Home Depot (didn't find at Lowes).
I would also like to point out that I was very afraid to do carpentry - I was afraid to even buy the lumber. But I asked for a lot of help from a lot of Lowe's and Home Depot people, and resisted the naysayers, and just got brave and did it. And it came out beautifully! If you are new to using power tools, get someone to assist, and you would need help anyway with holding things up while another drills.

Built from Plan(s)
Estimated Cost
250.00
Estimated Time Investment
Week Long Project (20 Hours or More)
Recommended Skill Level
Beginner
Comments
Wed, 05/22/2013 - 11:59
I used Hardware Cloth
As an extra note, I used Hardware cloth, not chicken wire. Wire will not keep dogs or predators out (and my dog immediately tried but failed to claw his way in). I bought I believe 36 inch tall rolls - the standard size that I could tell (not 30 inches like in the plans). But it fit perfectly, so I think maybe the plans had a typo? Lay out the lumber according to the plans and it will fit perfectly.

Wed, 05/22/2013 - 21:33
Very nice! Hardware cloth is
Very nice! Hardware cloth is definitely the way to go.
Cedar picket shed
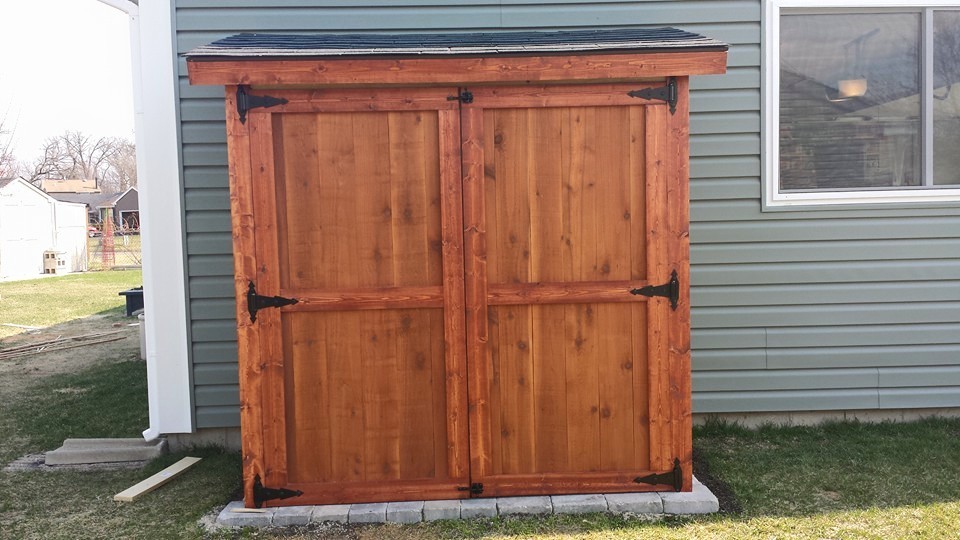
I poured a 3 1/2" concrete pad first then bolted the completed shed to it.
Shed was easy enough to make, the plans were well done. Spent about 25 total hours on shed, including staining. Hinges were very expensive ($20 a pair with latches), spent about $400 NOT INCLUDING gravel, sand, & concrete for the pad or clamps.
Built from Plan(s)
Estimated Cost
$400
Finish Used
Flood UV on cedar, minwax gunstock on pine.
Recommended Skill Level
Beginner
Comments

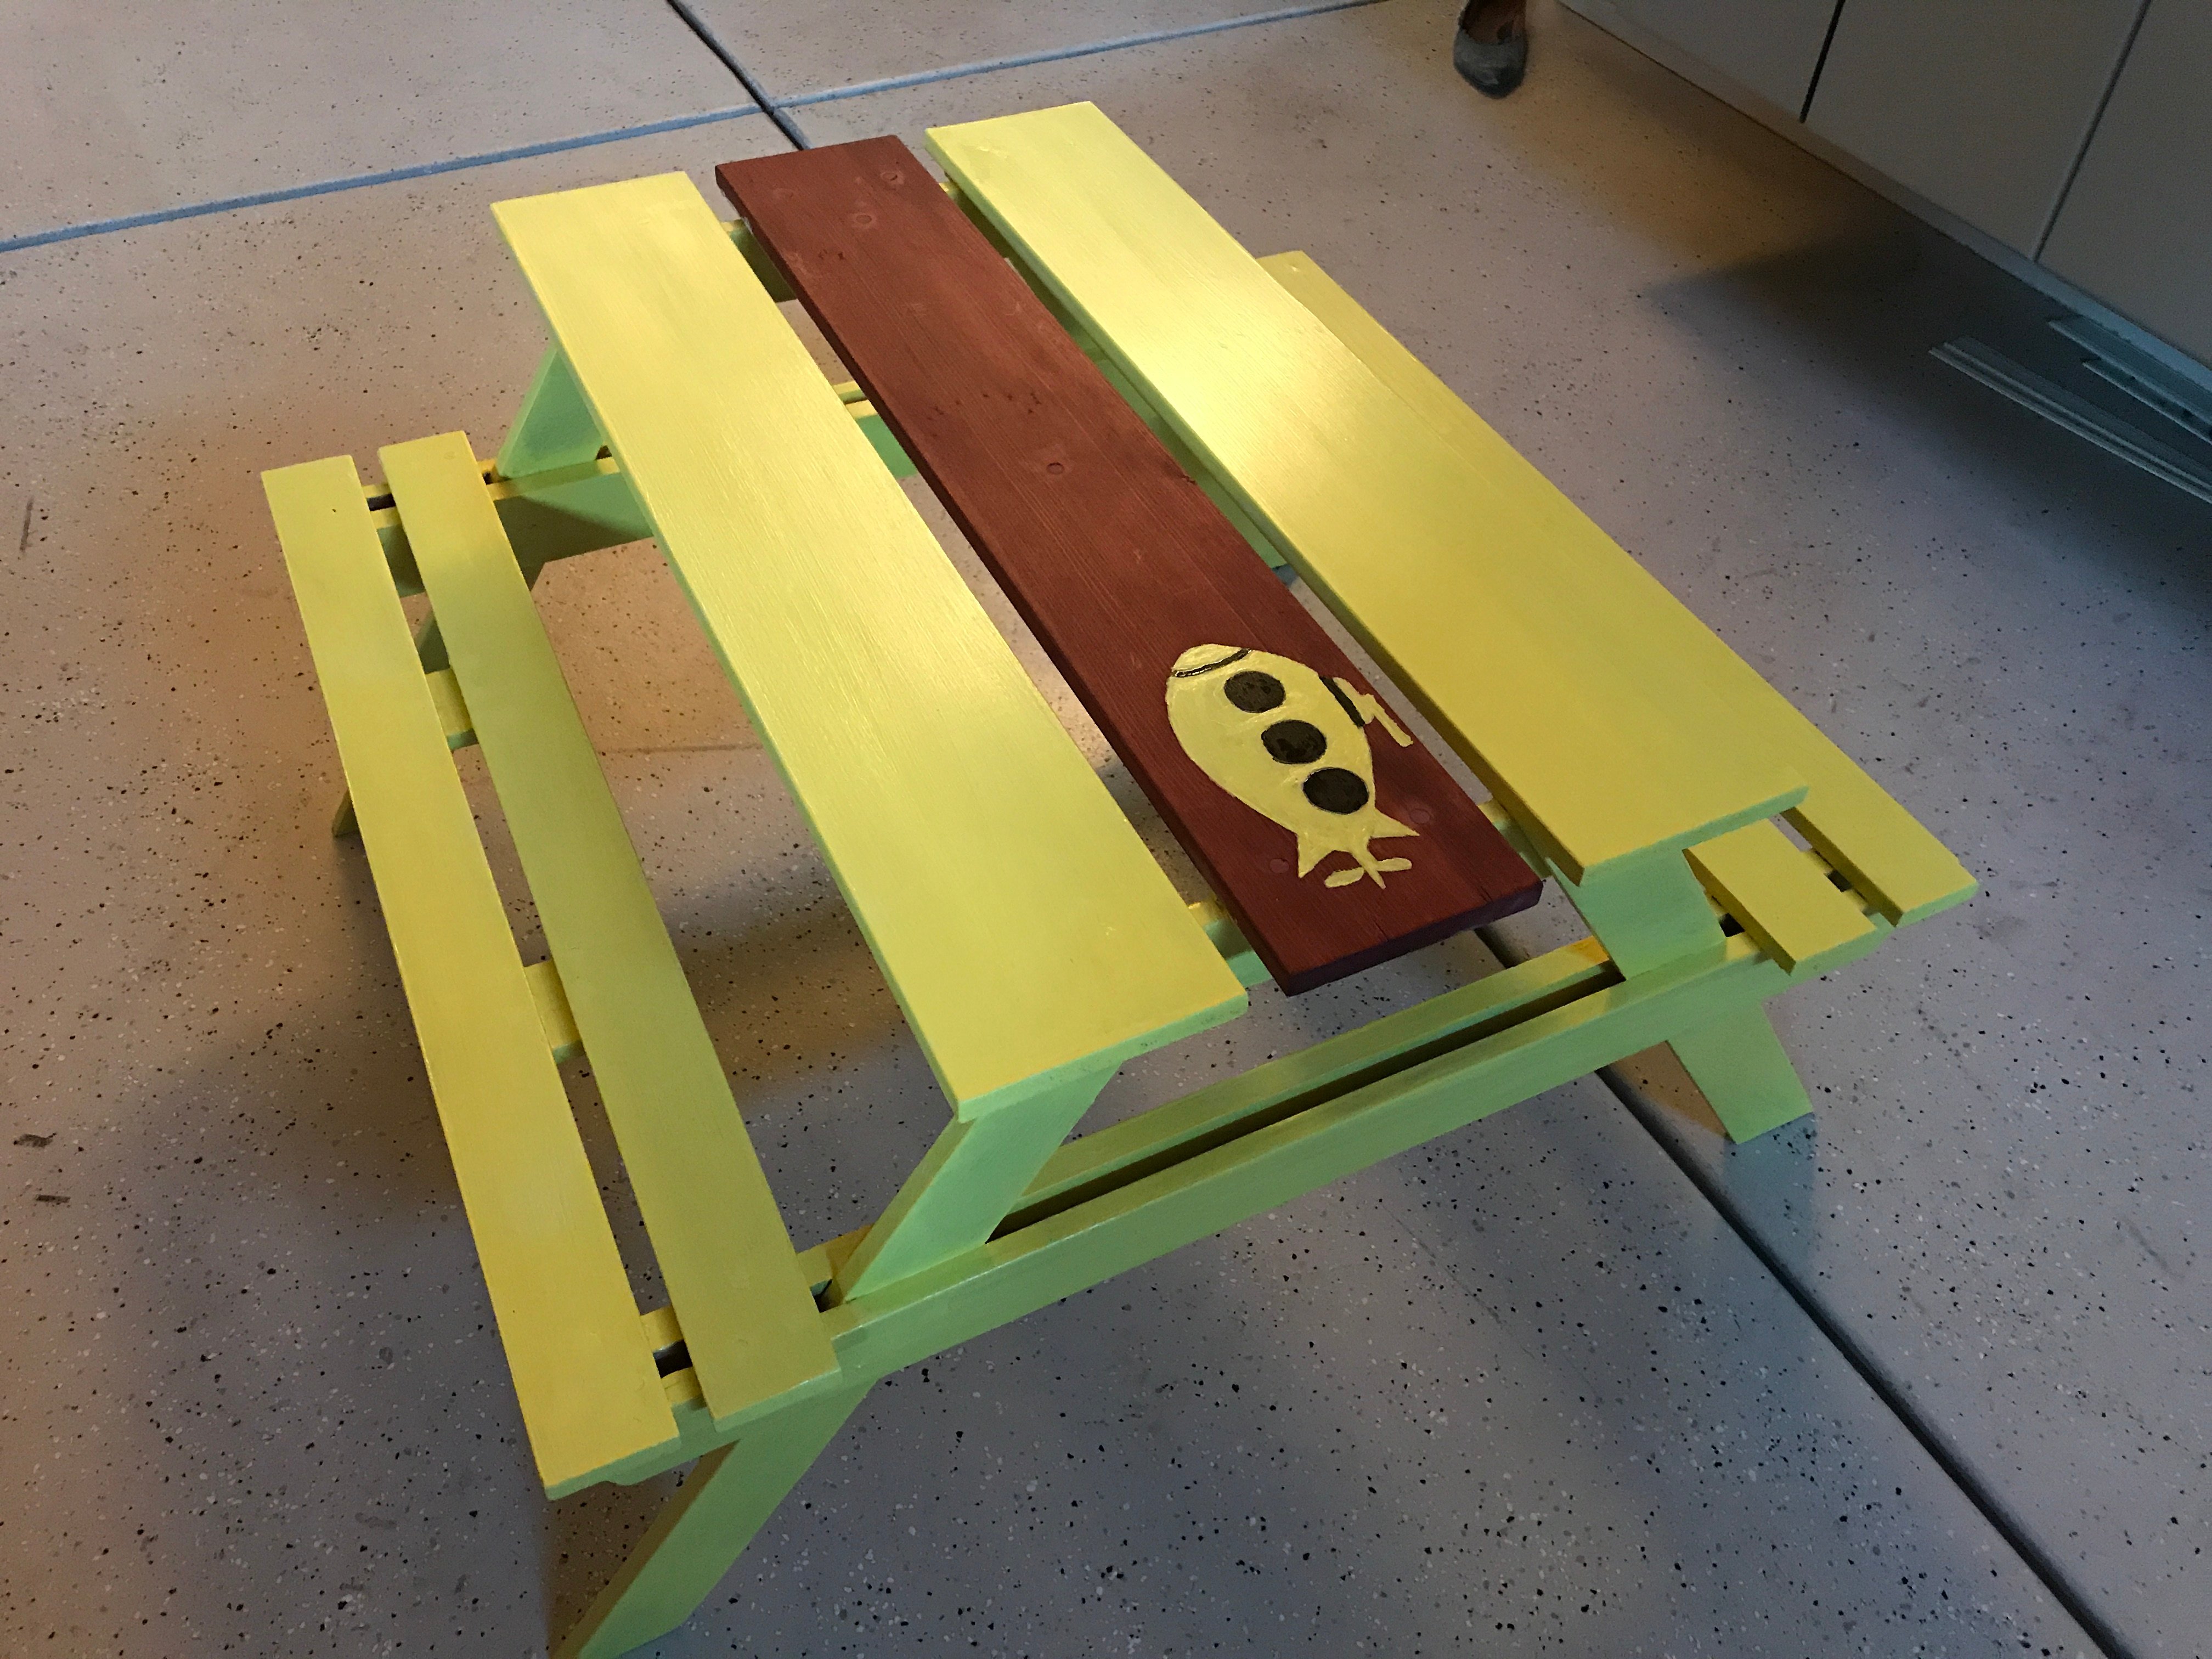
Birthday Bed
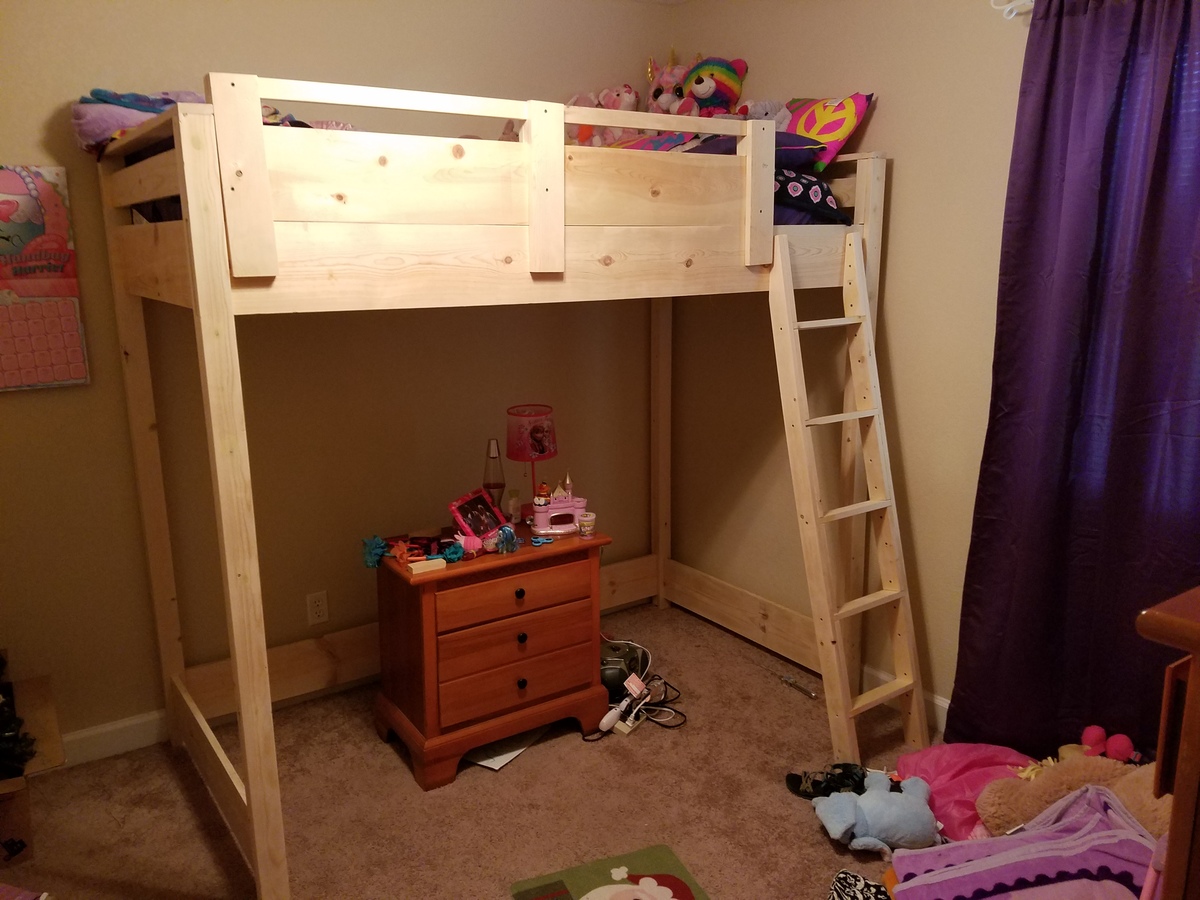
I told our daughter I would build her this bed for her birthday. She is still choosing what colors to paint it. Overall cost was $217 using white pine. She is's in love with this bed. started it Saturday morning and had it all put together by Sunday afternoon. I changed up the guard rail. Instead of screwing it in, I added a second set of 1×3s on the back side, so it is easy to slide on and off to make the bed.
Built from Plan(s)
Estimated Cost
$217
Estimated Time Investment
Weekend Project (10-20 Hours)
Recommended Skill Level
Beginner
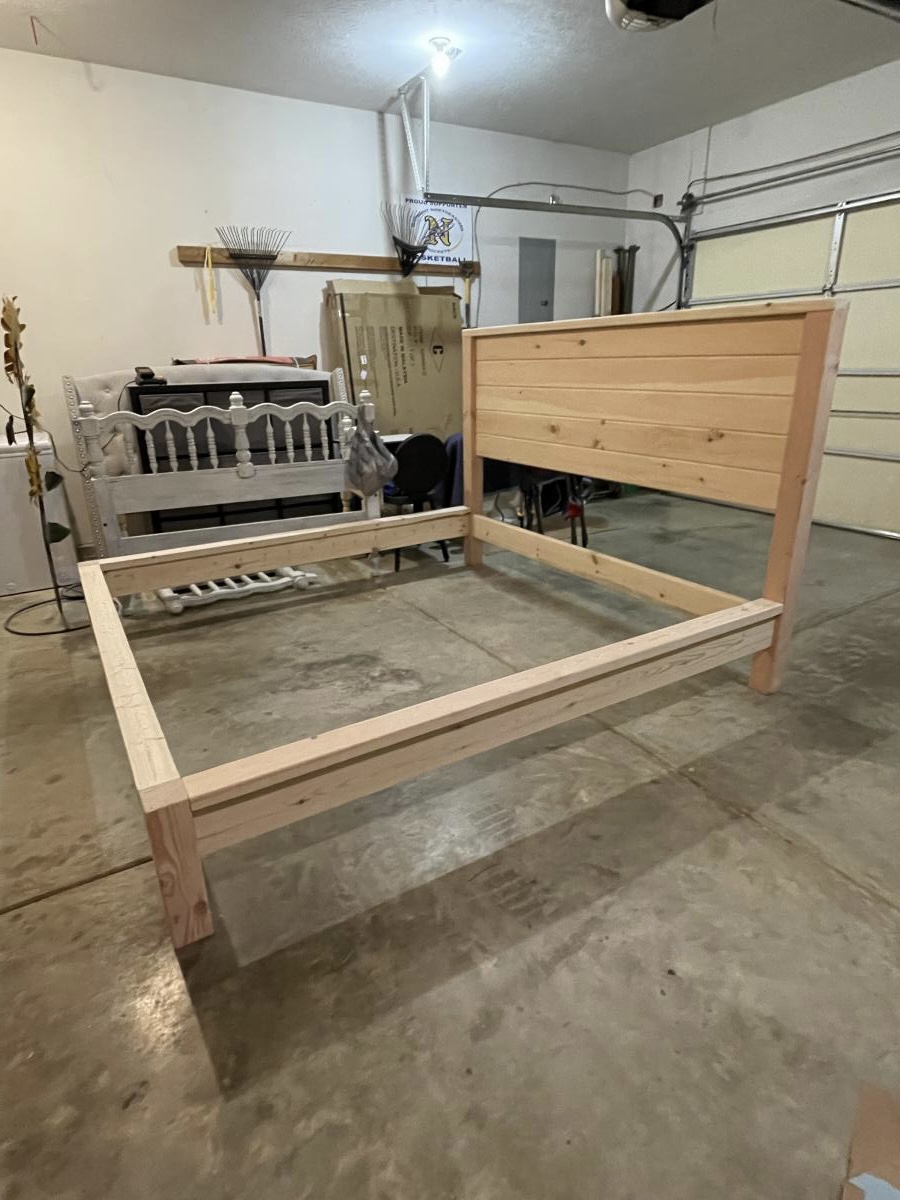
Modern Farmhouse Bed
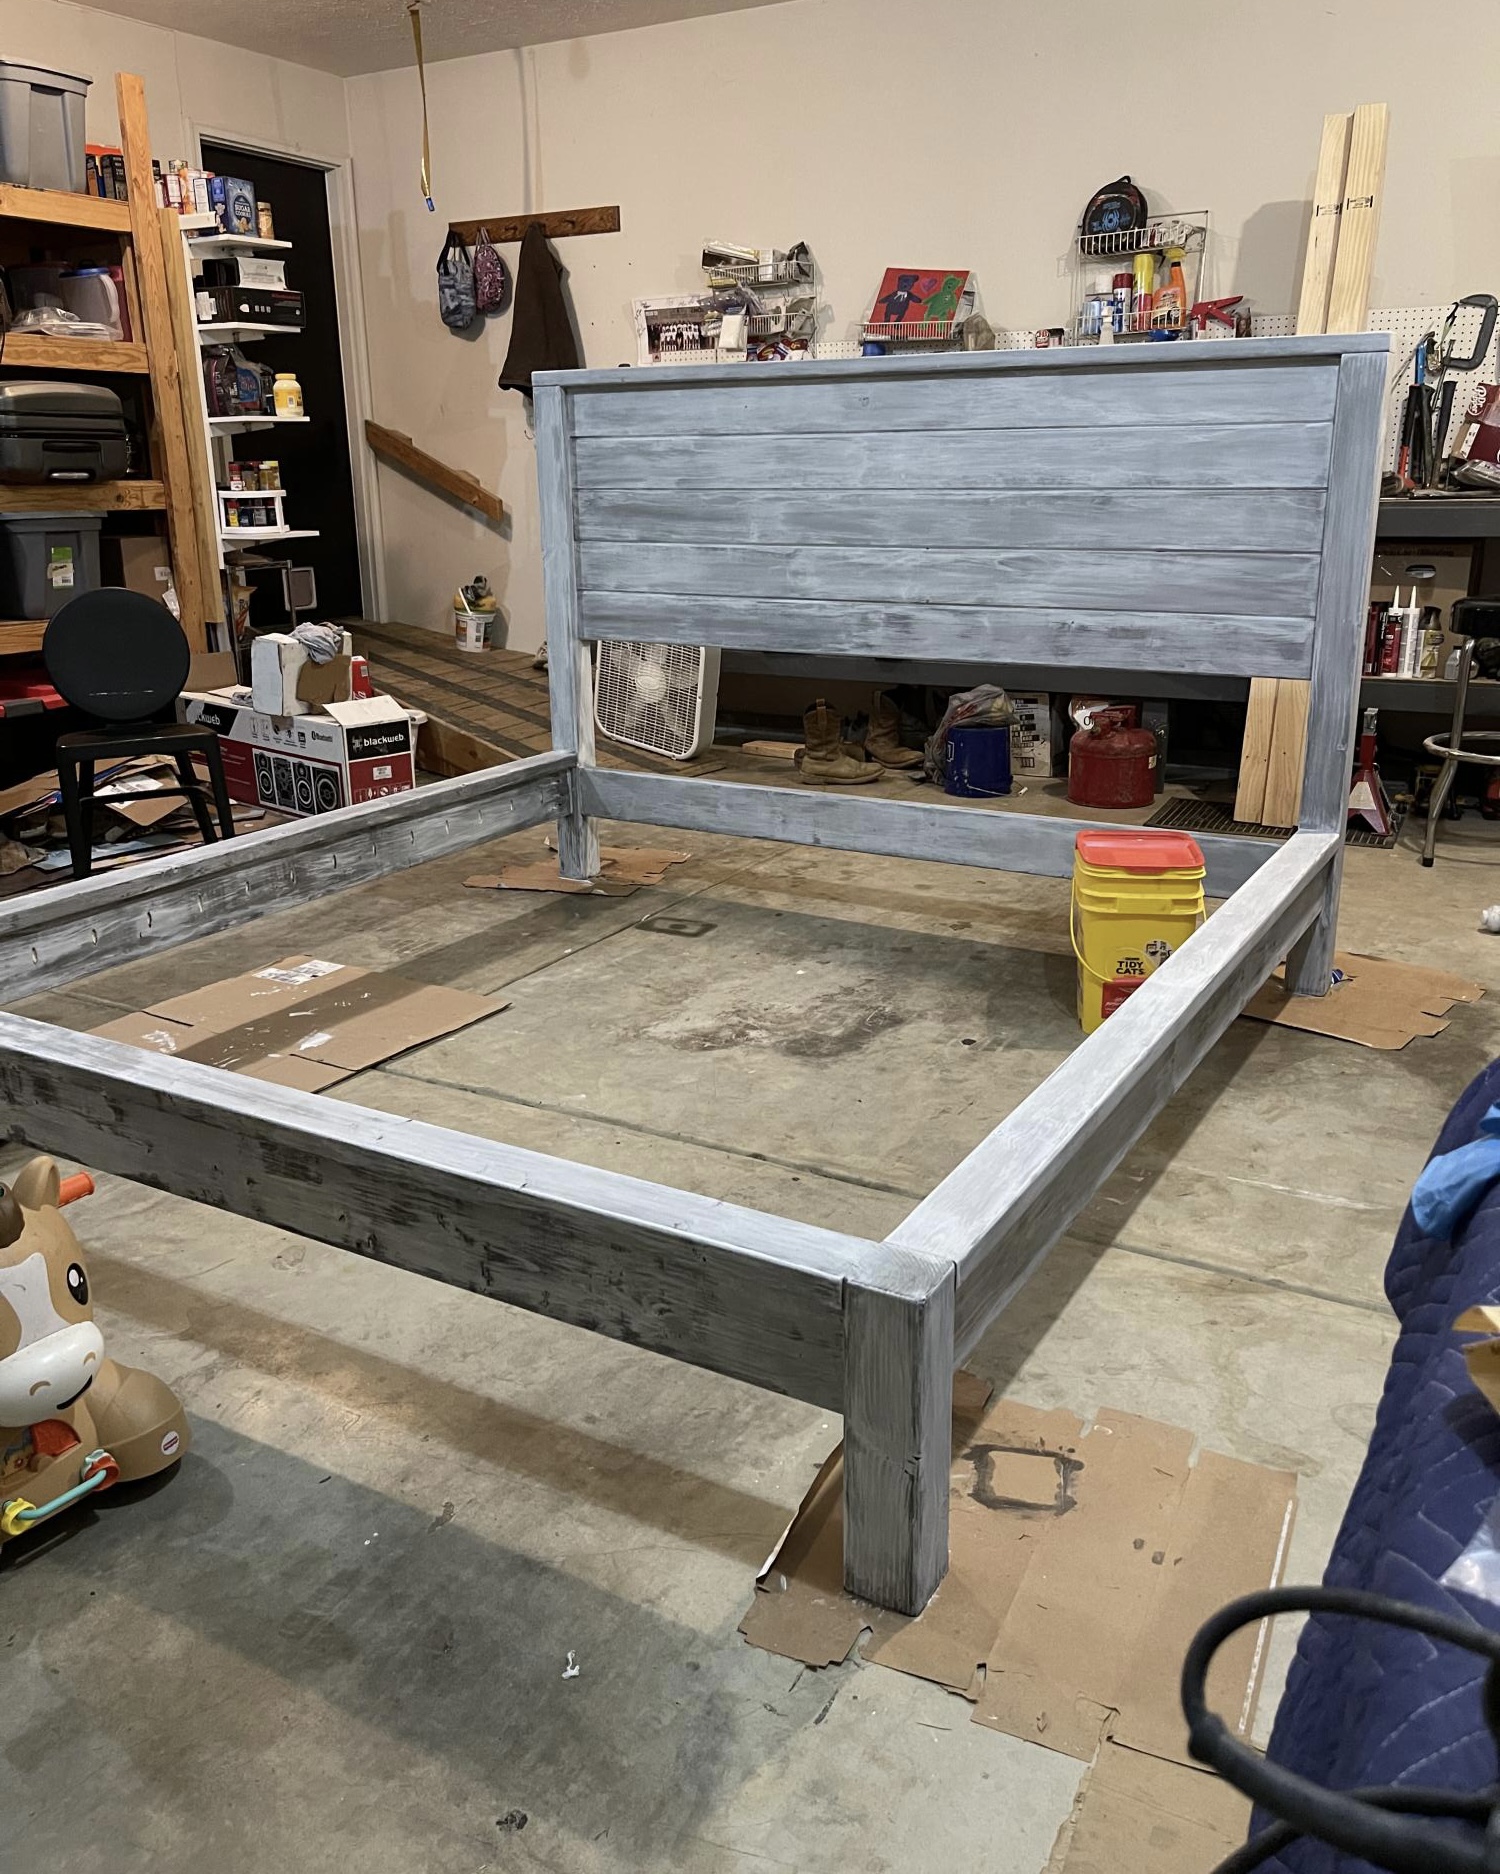
My husband and I made this for our son and daughter-in-law. They absolutely love it!
The project took about two days to build, and about three days for the finish (stained and weathered). The photos do not show the slats that support the mattress.
Built from Plan(s)
Comments

Sun, 10/10/2021 - 21:43
Modern Farmhouse Bed
*Edit to original post*
The only thing I wish we had done differently with this bed, was to count how many “tongue & groove”panels to attach to the headboard. We used 5 as stated in list, but 6 would have been preferred.
Solid bed for certain.
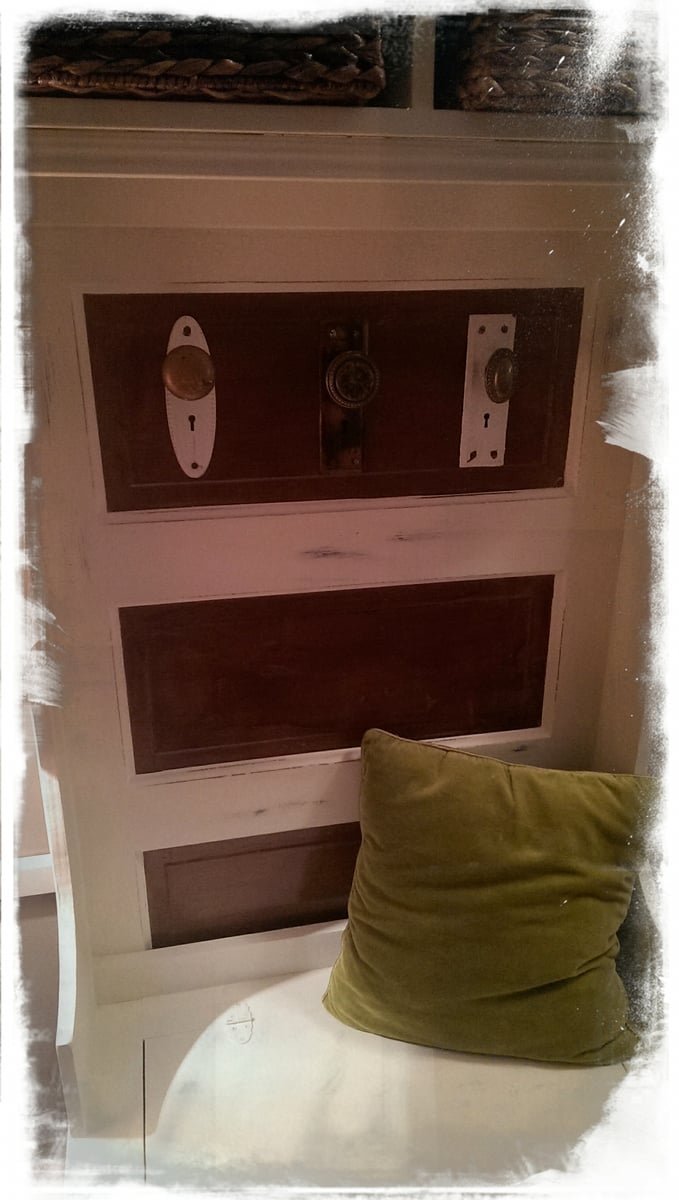
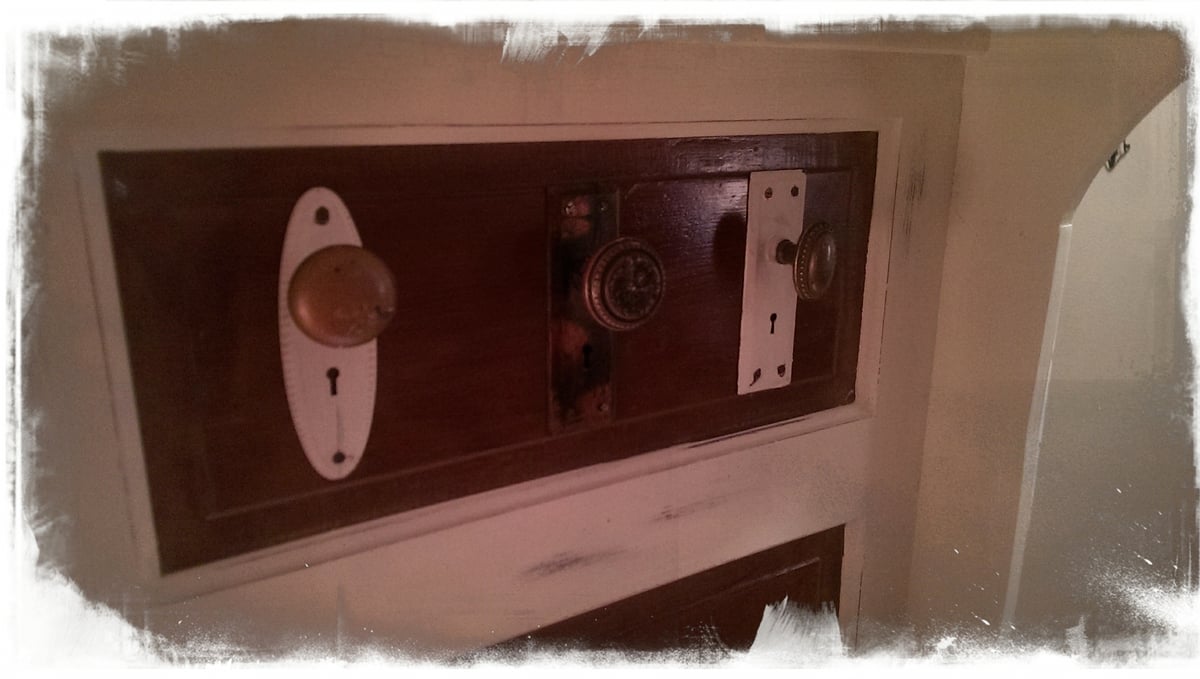
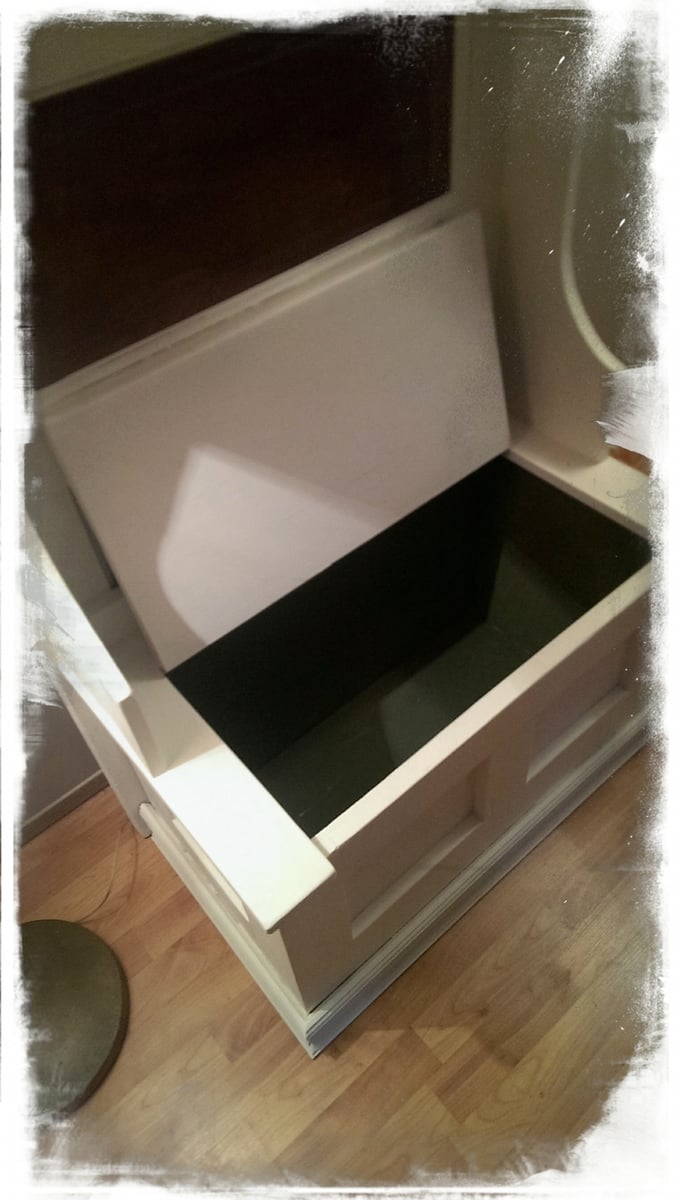
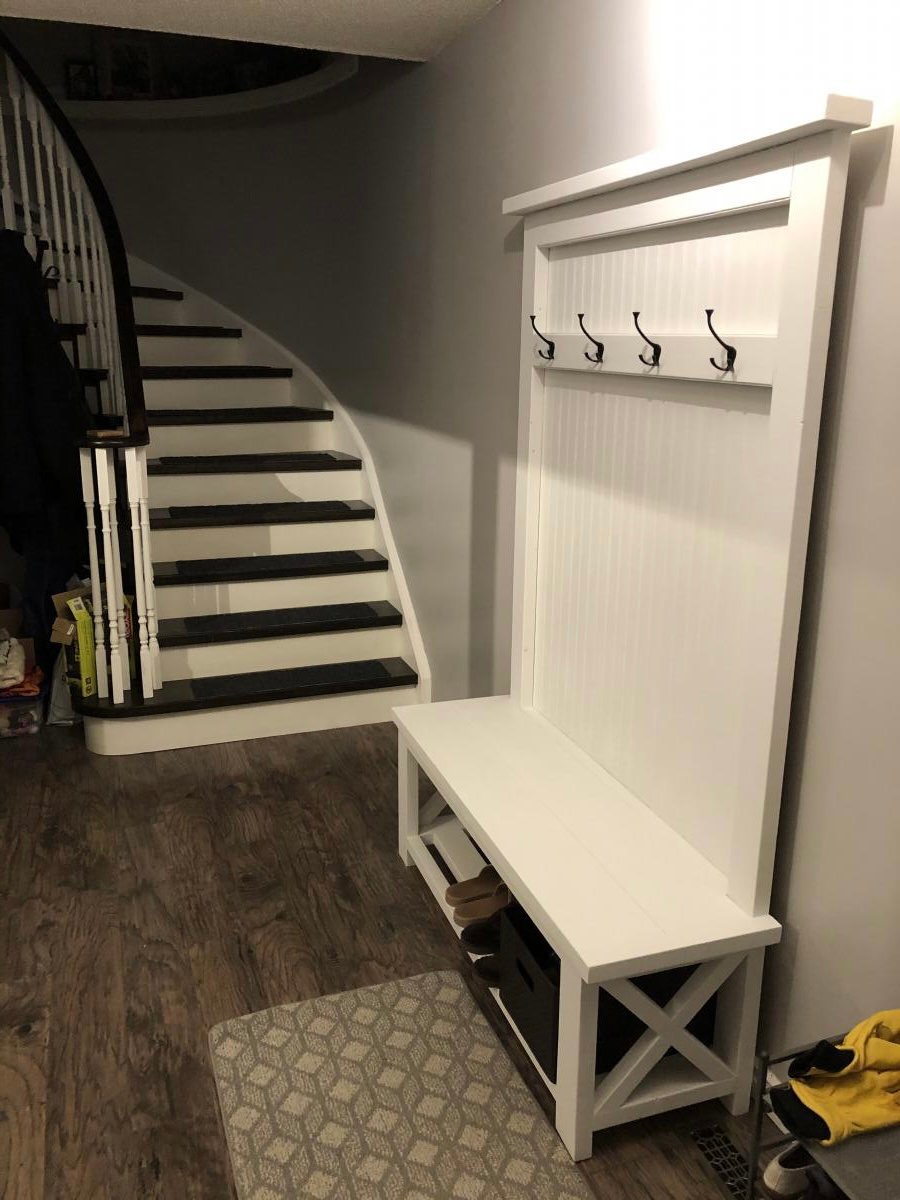
Hall Tree made from old door
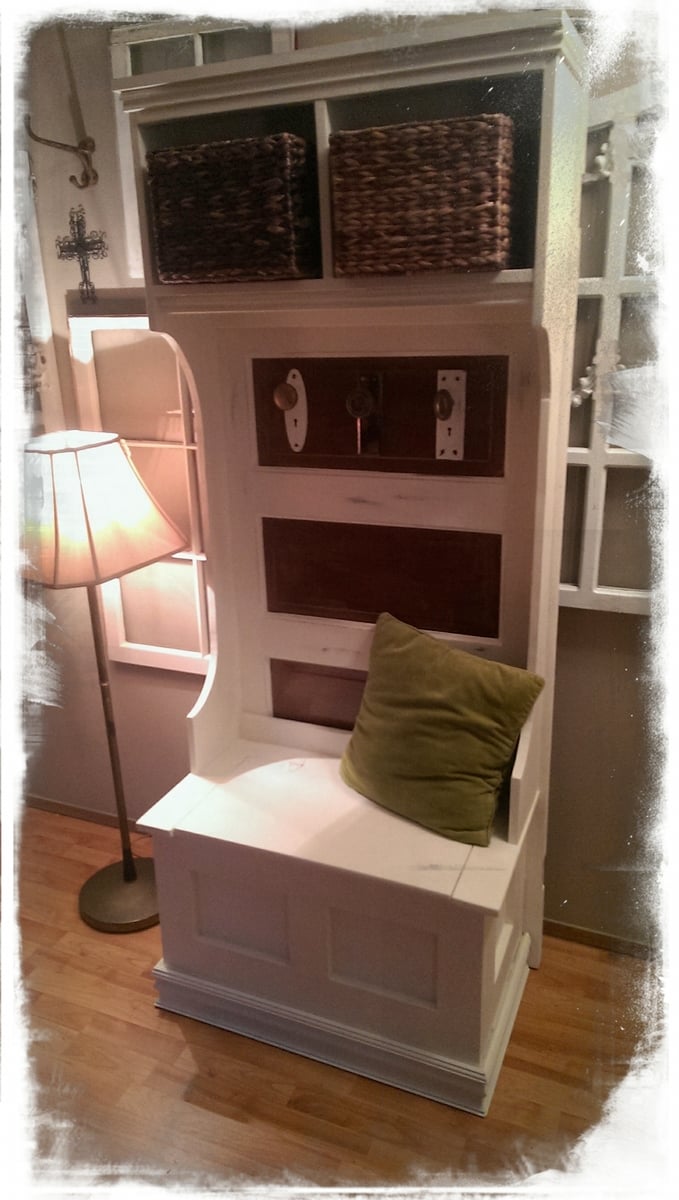
This is my first Ana-White build and I love it so much! I used a 100 year old door for the back and antique knobs for the hooks. I plan on making a farm house table next :)
Built from Plan(s)
Estimated Cost
120
Estimated Time Investment
Weekend Project (10-20 Hours)
Finish Used
Annie Sloan chalk paint in old white and olive on the inside. Waxed and lightly distressed.
Recommended Skill Level
Intermediate
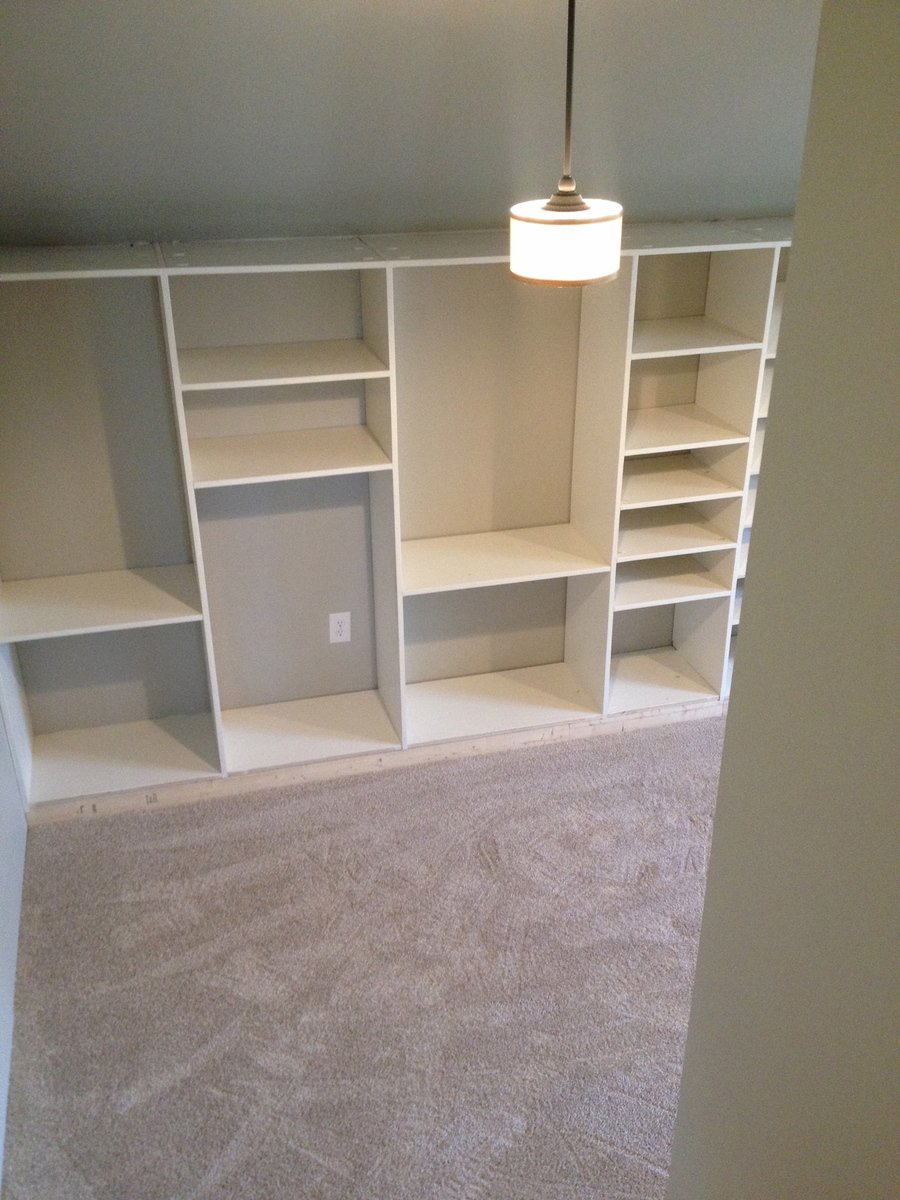
Master Walk In Closet with Bookshelf Door
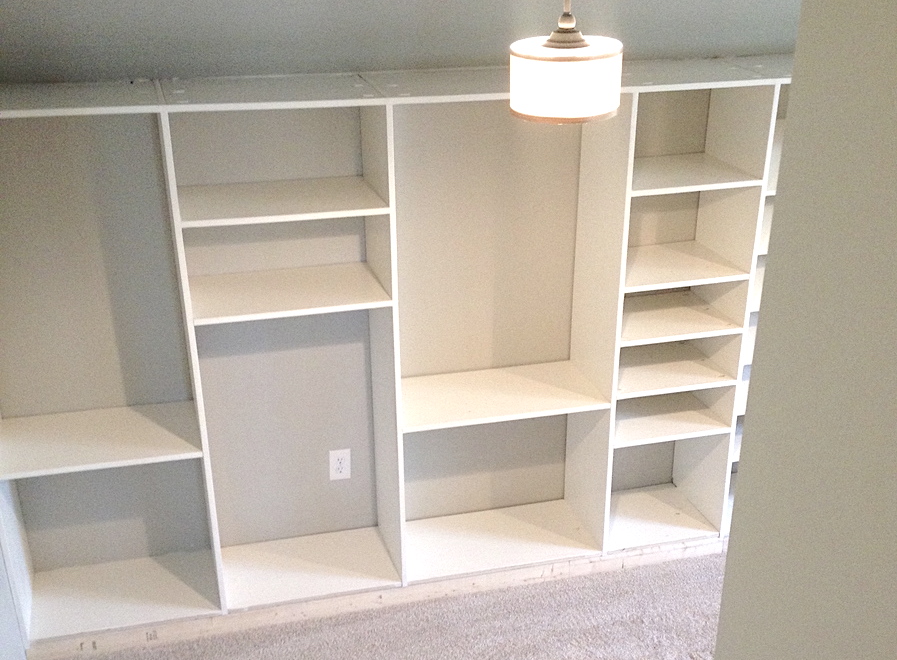
We used an unfinished attic space above our garage that was connected to our bedroom to make a walk-in closet with great shelving. This project took a lot of time but we are so happy with the results! There is a side for my husband and a side for me. Although it is hard to see we also incorporated a small door/bookshelf into the room to allow us access to attic storage space.


Built from Plan(s)
Estimated Cost
$500
Estimated Time Investment
Week Long Project (20 Hours or More)
Finish Used
White painted finish.
Recommended Skill Level
Intermediate
Comments


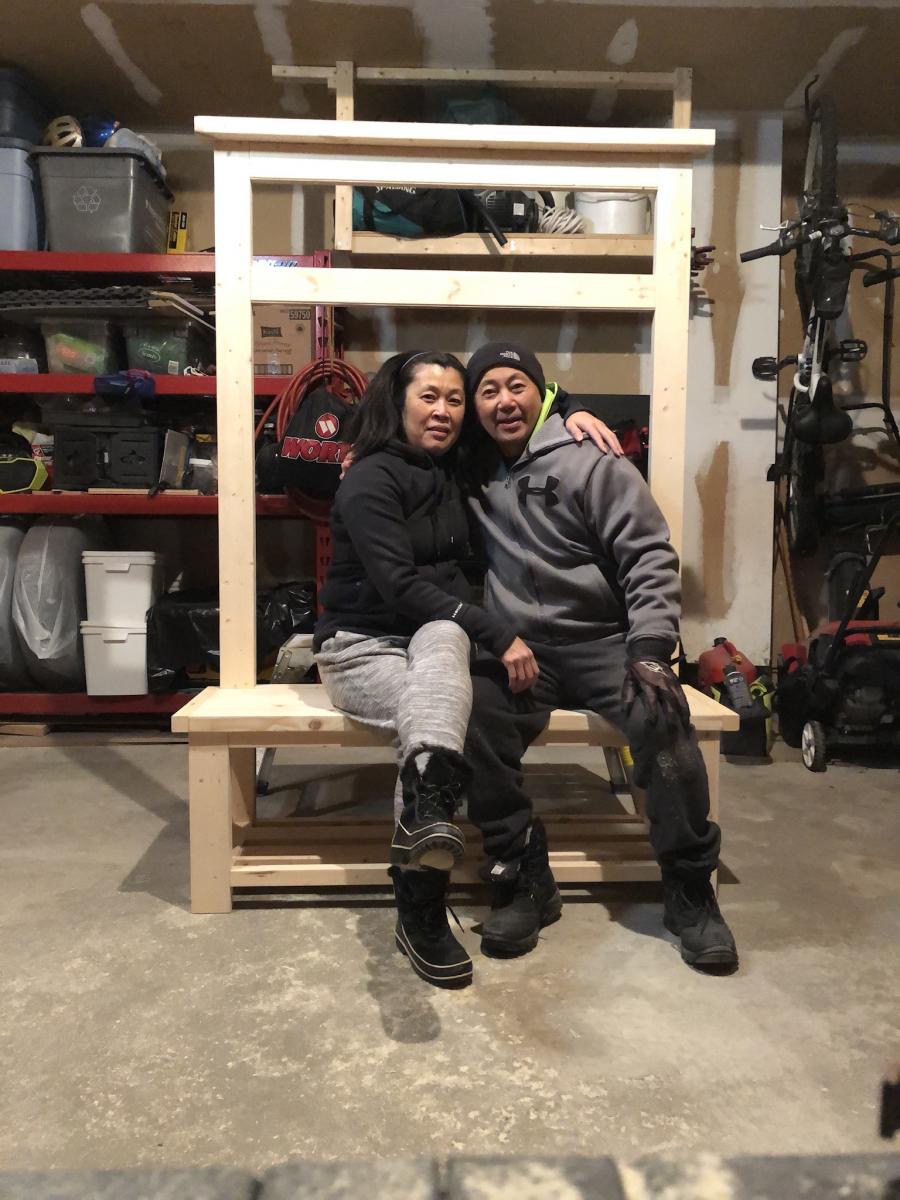
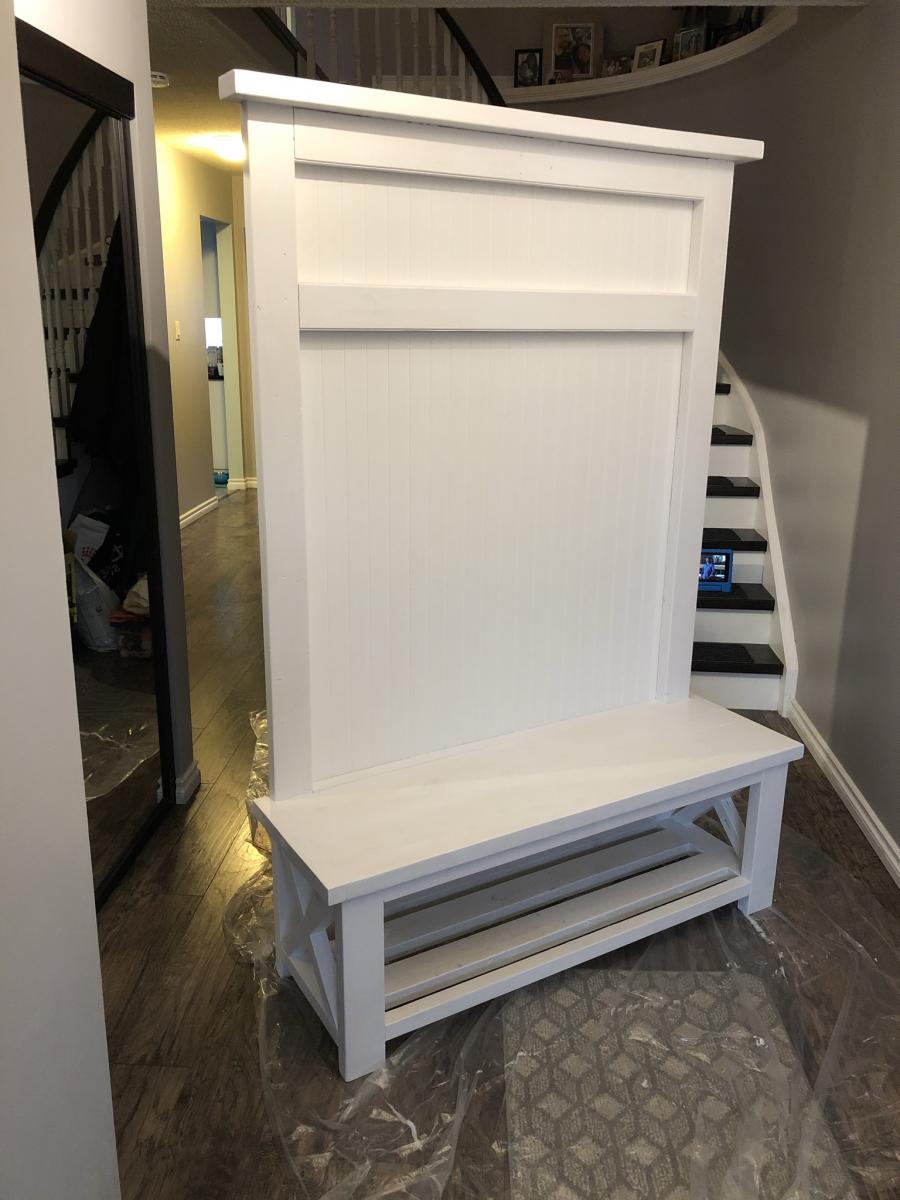
Mud bench
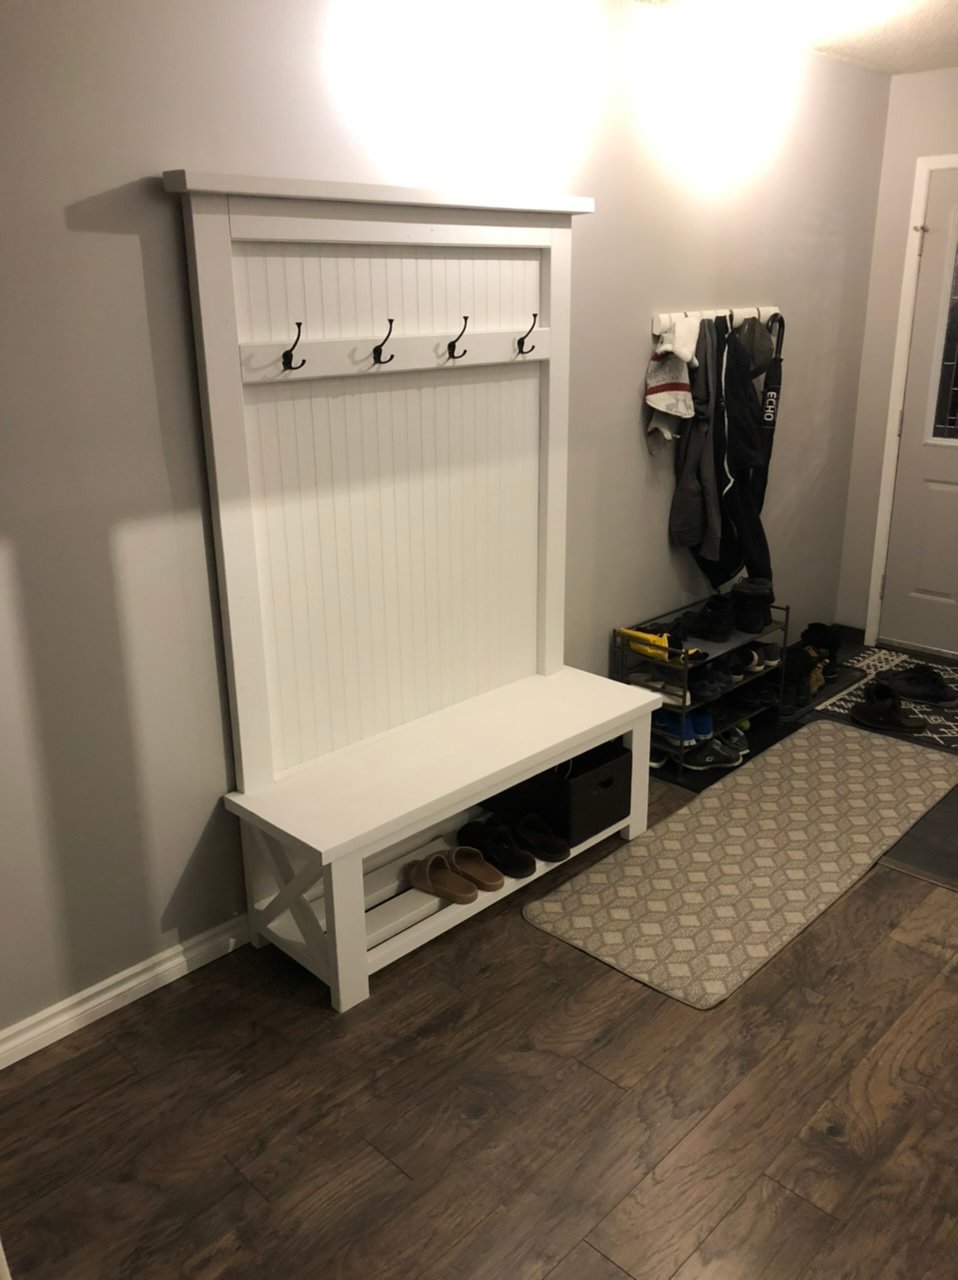
My husband and I love to build together as our hobby so we always look to Ana White for different plans.
It all started originally when I came across Ana’s closet organizer a few years ago and we haven’t stopped! Thanks Ana!
Built from Plan(s)
Storage End Tables
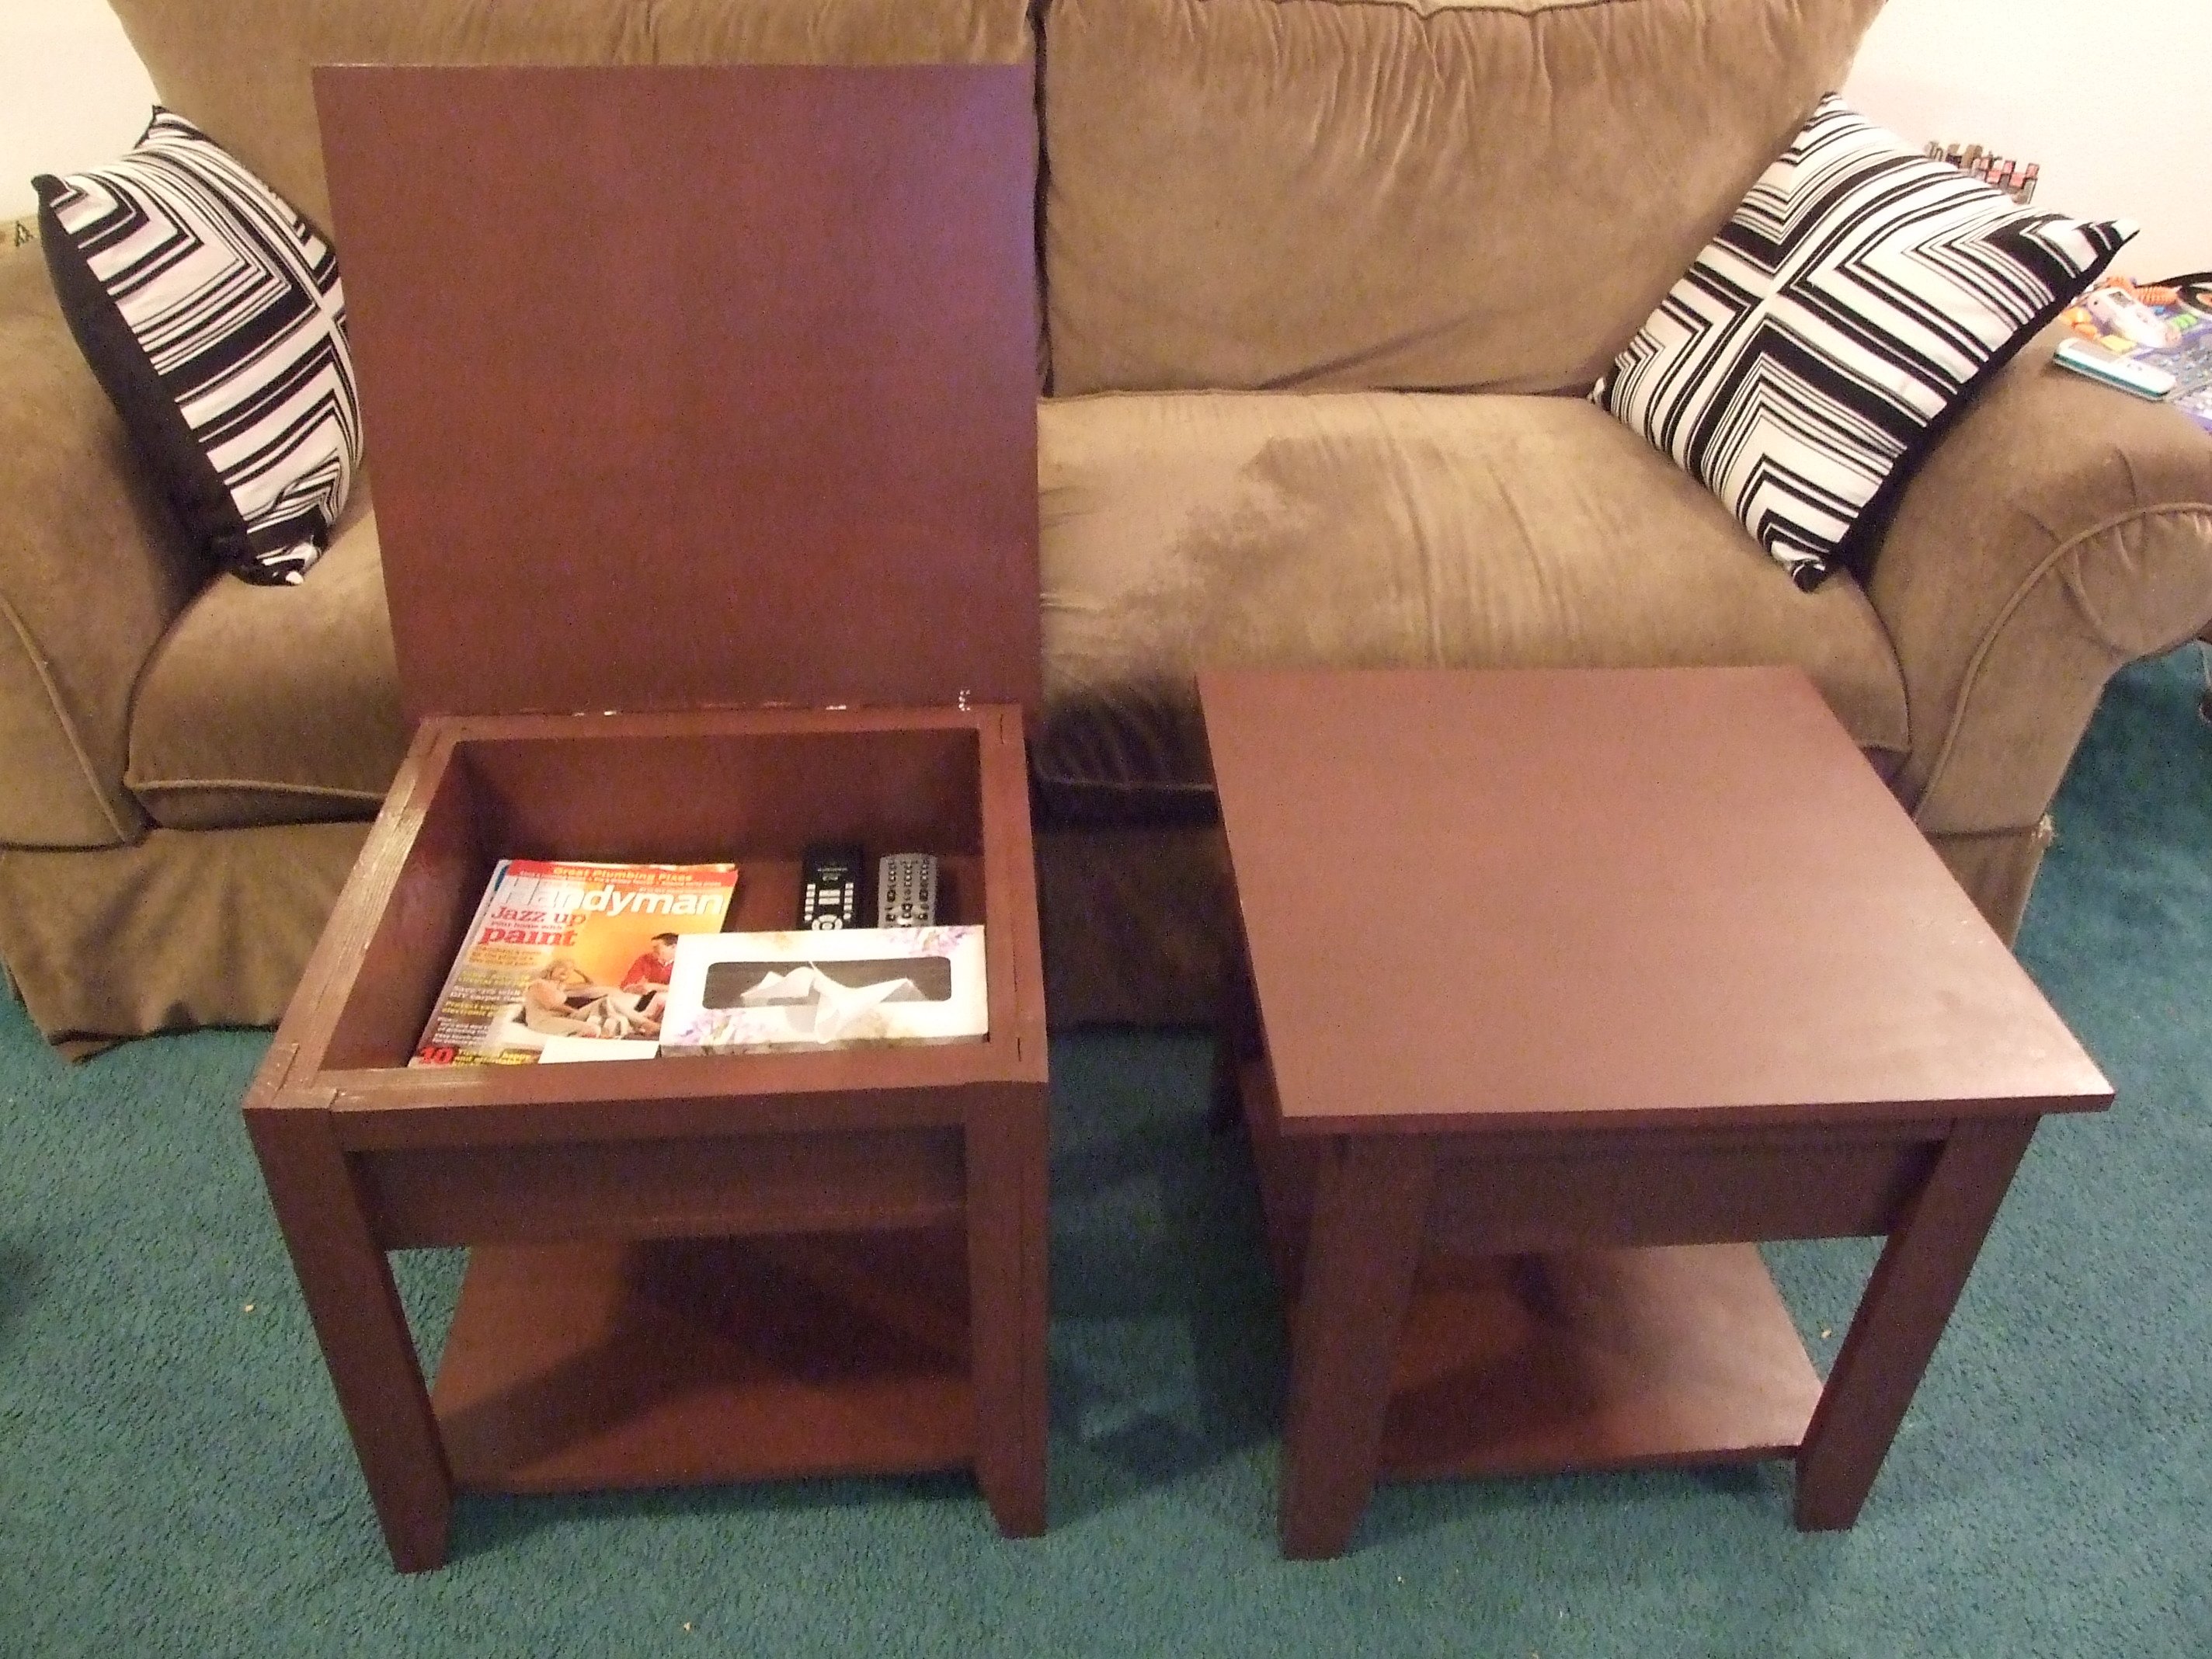
This was my first build ever. I loved the storage lego table, but it wouldn’t work well in our long, narrow living room so I decided to make them end tables instead. I also changed them so that the tops were hinged to the back. I love the way they turned out! Now on to the long list of other things I want to build from this site. Thanks so much Ana!
Built from Plan(s)
Estimated Cost
About $40 each
Estimated Time Investment
Afternoon Project (3-6 Hours)
Finish Used
One coat primer followed by three coats Behr "bear rug"
Recommended Skill Level
Starter Project

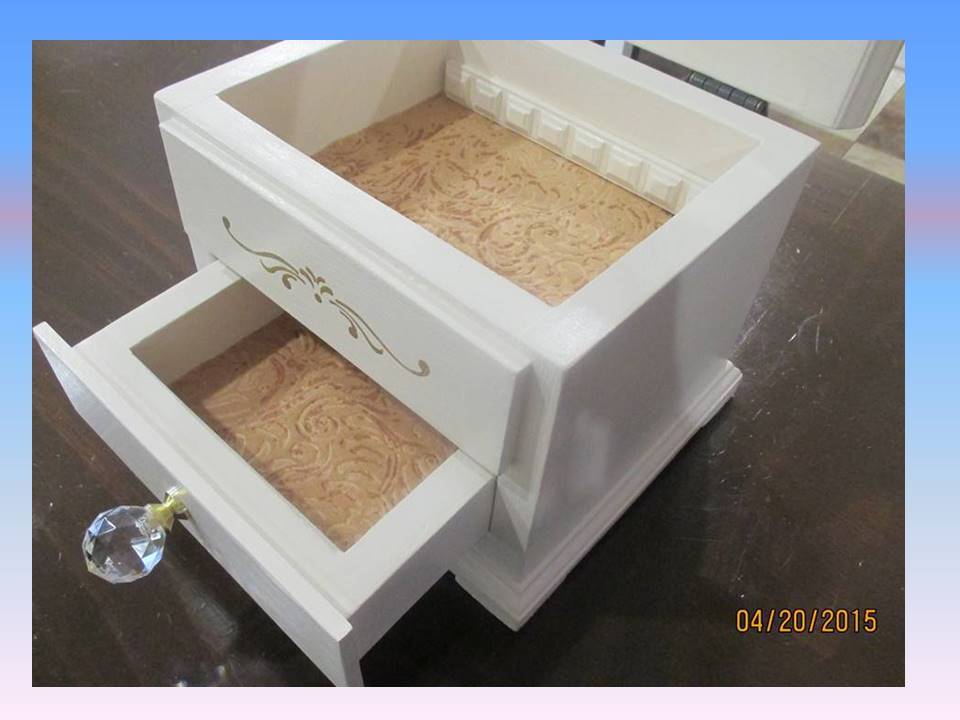
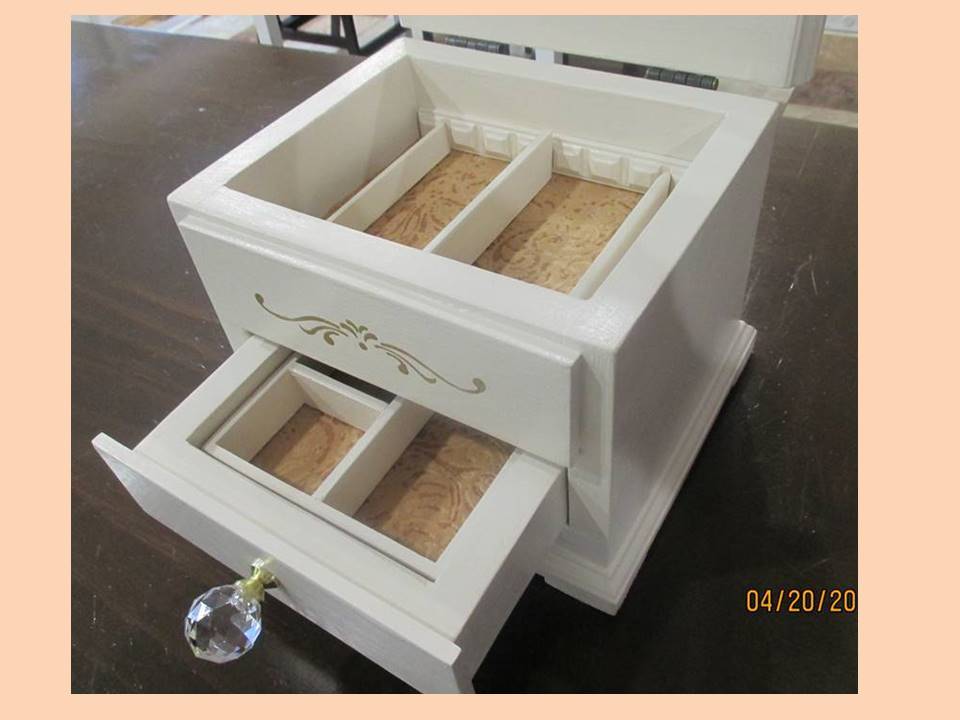
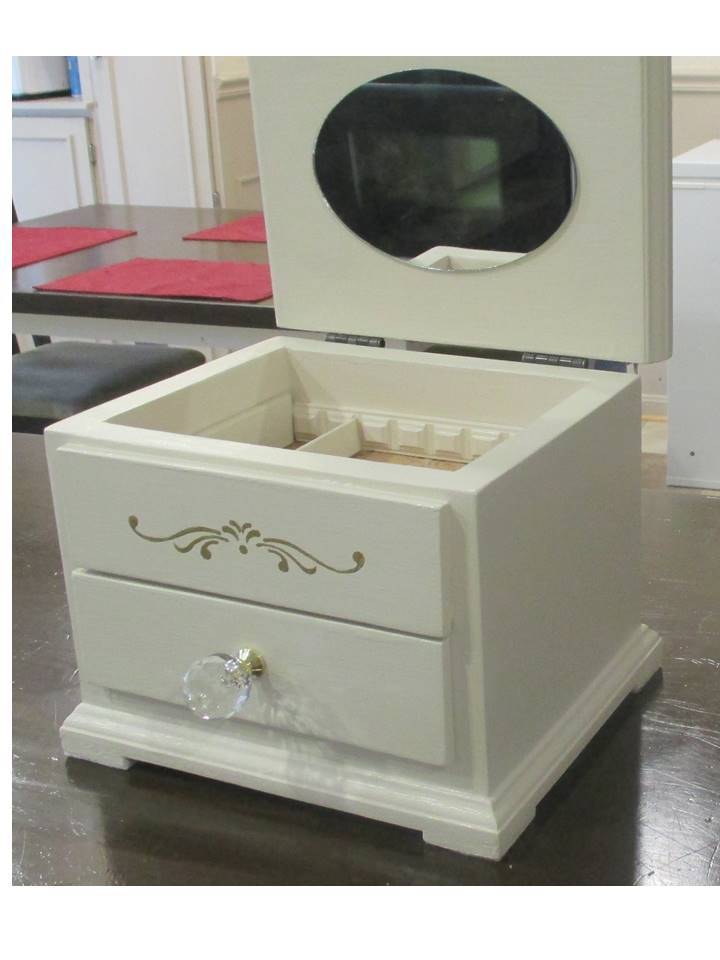
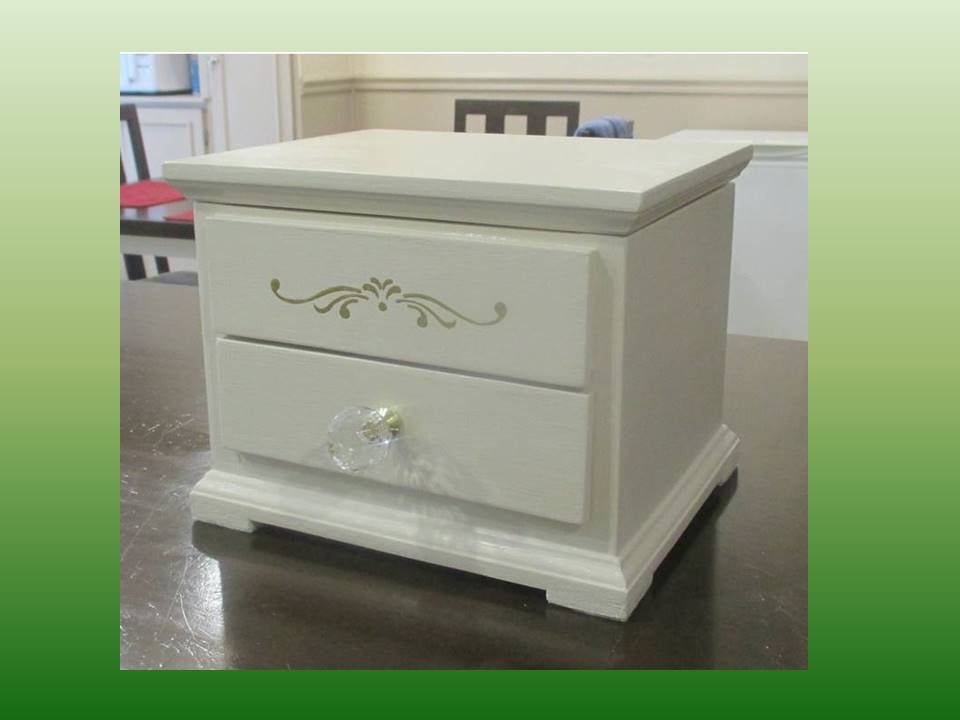
Jewelry Box Retirement Gift

This jewelry box is a gift for a friend at work who is retiring. It is a variation of the Easy Jewelry Box, with the following modifications:
Hinged lift-up top with mirror
Overlay drawer fronts from ¼” craft wood (Gold stencil on top false drawer front, and drawer boxes are 1/8” shorter than the shelf from front to back, to ensure the fronts sit flat against the box front and drawer back doesn't touch the box back at all)
The bottom is 2 pieces thick, to allow space for the drawer overhang and attaching the bottom moulding.
Solid wood back (instead of plywood)
Top and bottom edged with mini stop moulding to make the overhangs, and added feet made from lattice
Removable drawer divider tray and 2 heights of removable dividers for the top, made from dentil, lattice and screen bead mouldings
I really took my time on this build to get everything just right with the build and the finish. Probably spent about 6 hours spread out over the last few weekends.
Built from Plan(s)
Estimated Cost
Cost: 1x8 and 1x2 Lumber and finishes were already on hand (left over from other projects) and I spent about $25 for the mirror, hardware, felt, mouldings, and craft board.
Estimated Time Investment
Day Project (6-9 Hours)
Finish Used
3 coats Clark & Kensington semi-gloss paint + primer in Crushed Peanut, sanded between coats. Stencil: 1 coat Americana Gloss enamel metallic in glorious gold. Soft wax on the shelf and drawer bottom.
Recommended Skill Level
Beginner
Comments

Wed, 04/22/2015 - 18:29
Thank you!
Hi Linda, thank you for the nice comment! This was a fun build, and I'm very glad to say the gift was a big hit! :)

Ladder shelf
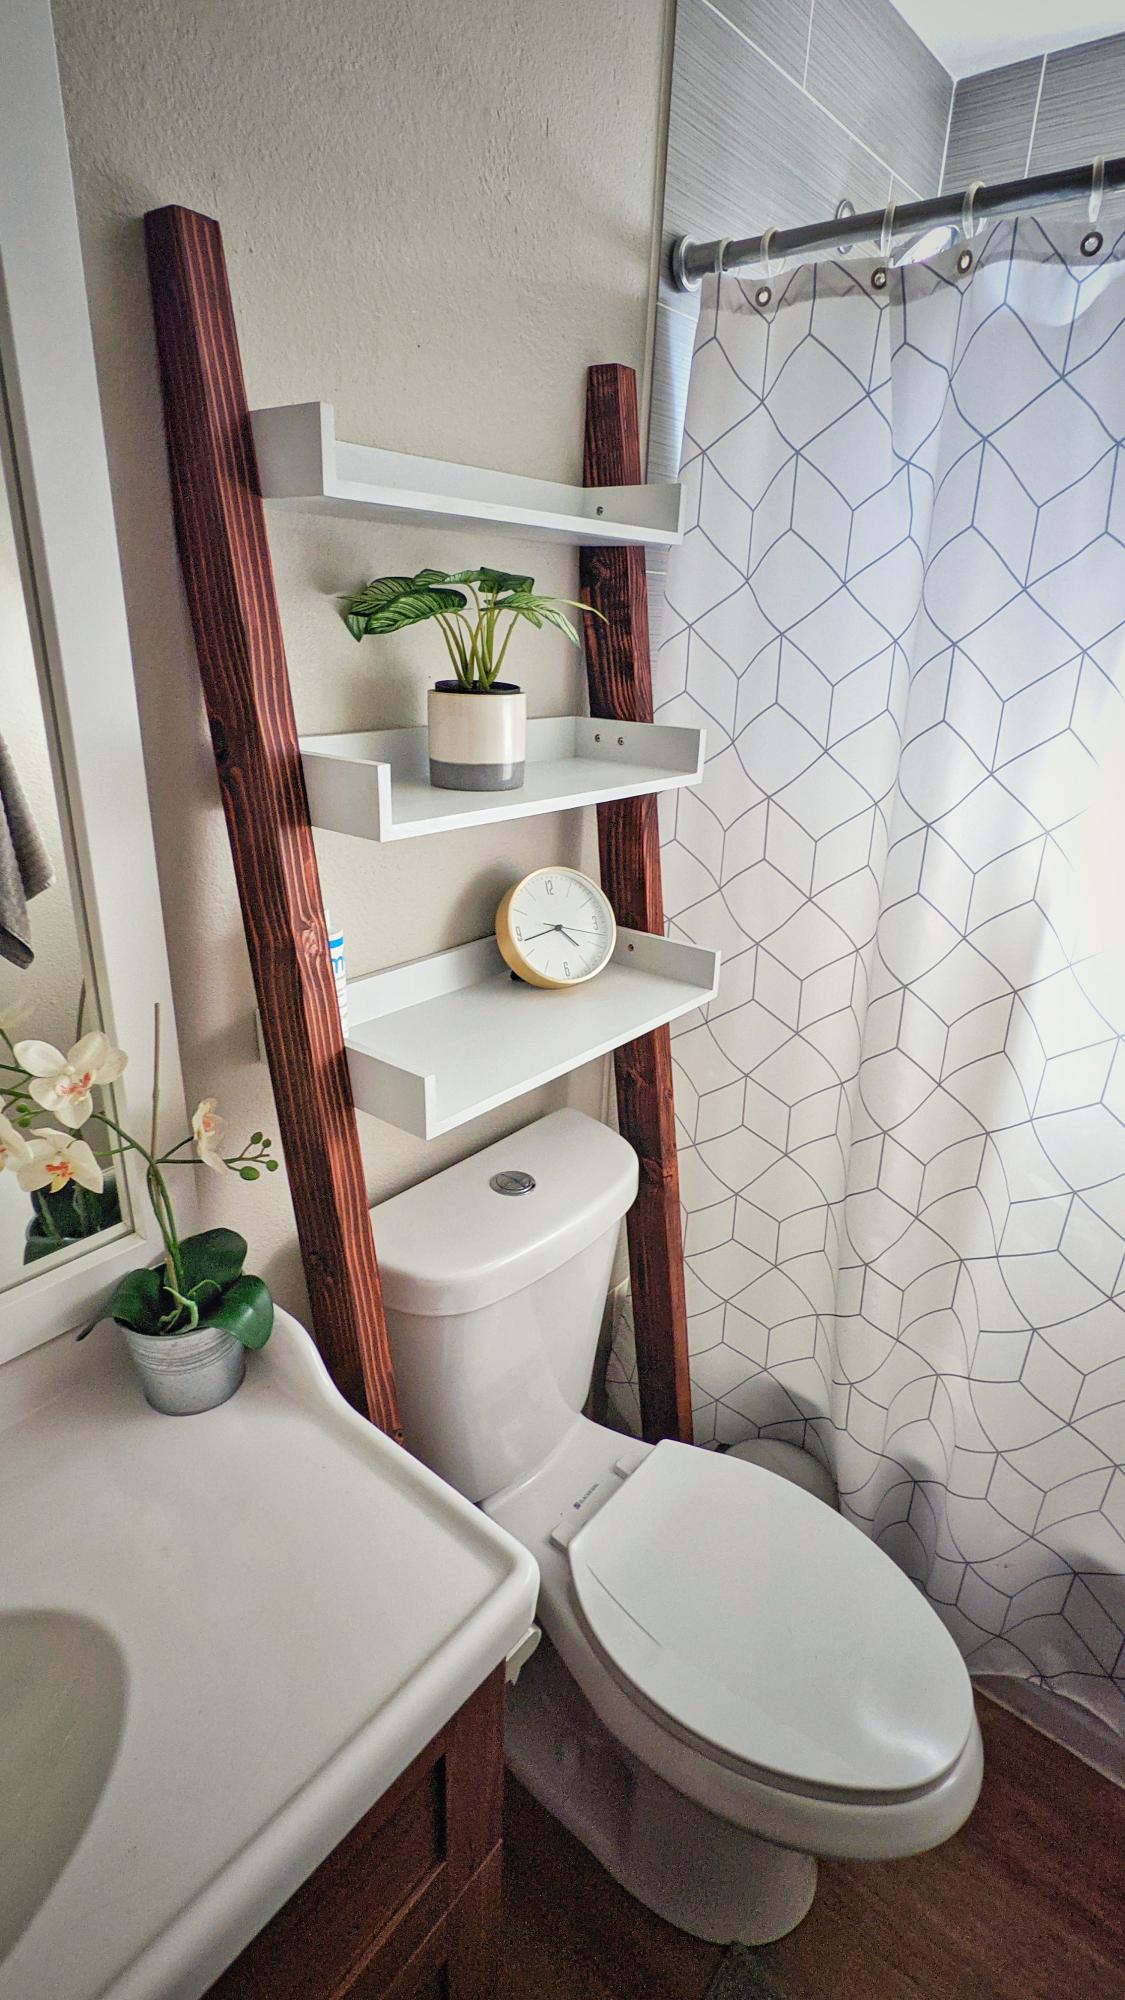
I've made a ladder bookshelf with some leftover mdf board and 2x4's. The plans were very helpful and really happy with how it turned out.
Built from Plan(s)
Comments
Ana White
Mon, 04/20/2015 - 15:25
These look incredible!
These look incredible!