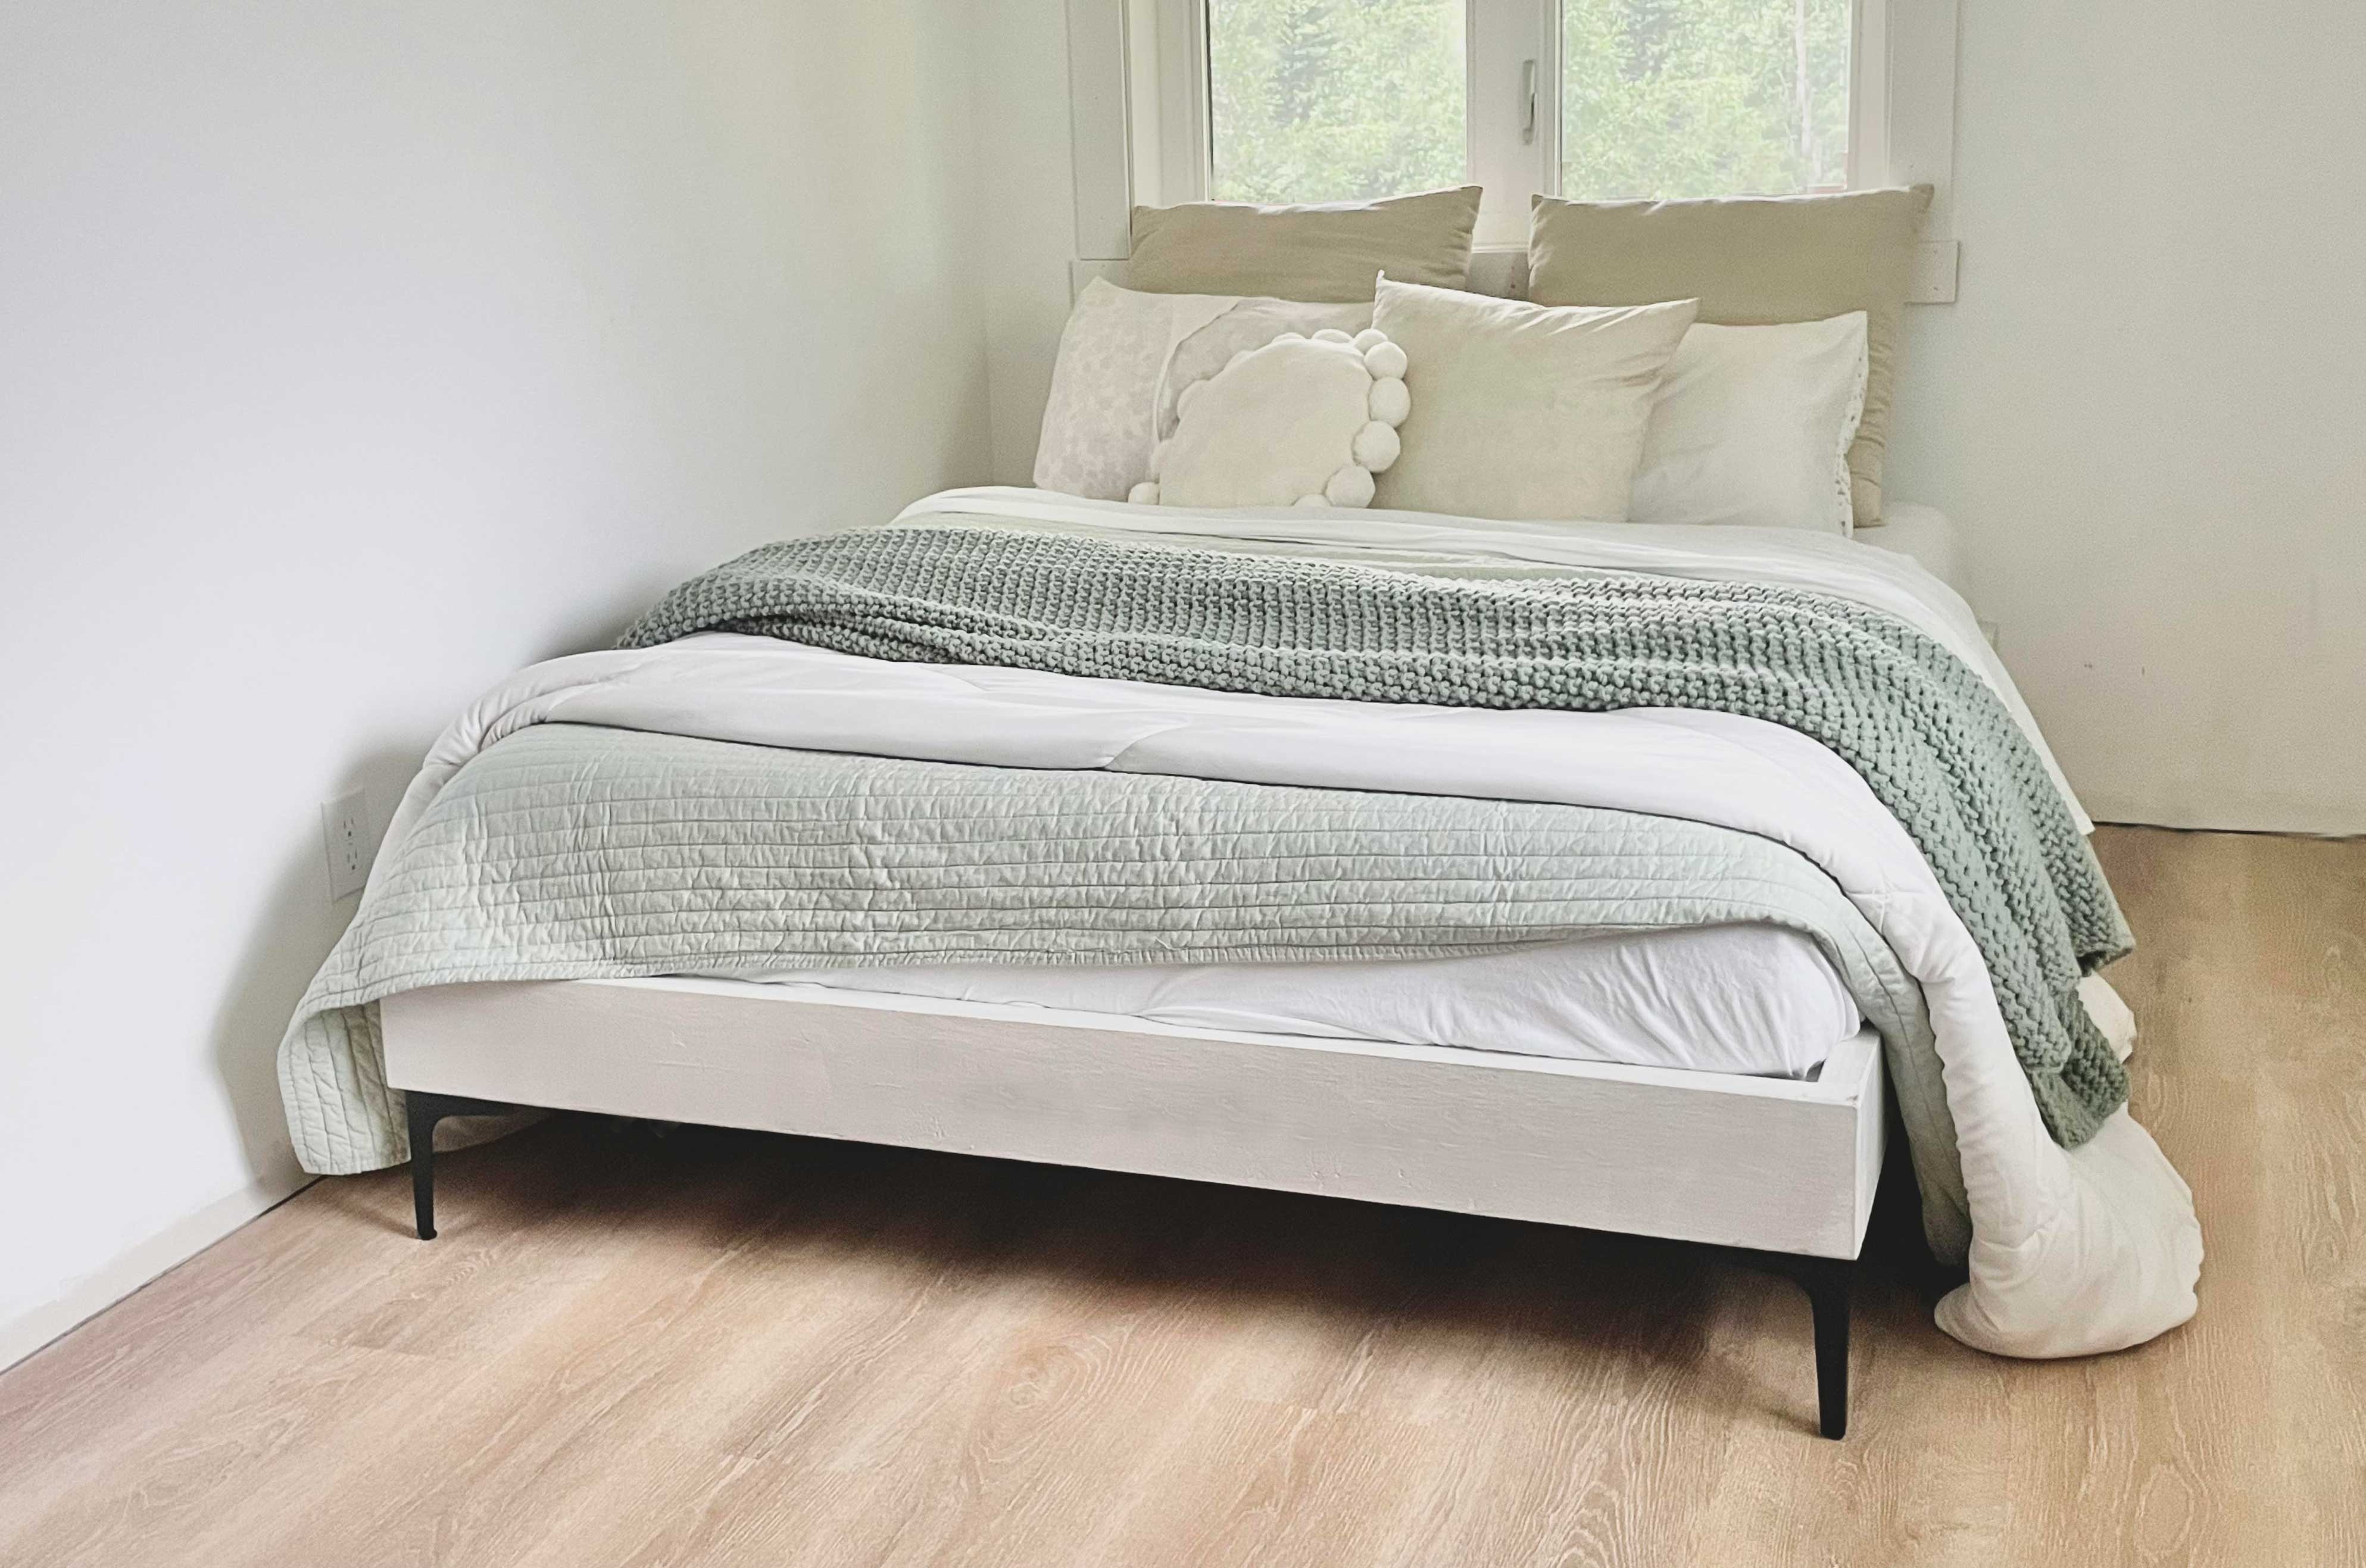
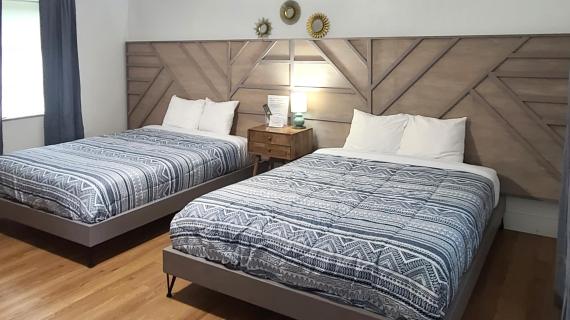
Skip the box spring or the metal bed frame and build your own DIY bed frame - costs about the same as a bed skirt! It's easy - just screwing together some lumber and adding legs. In this step by step plan you'll find a detailed shopping list, cut list, and diagrams.
Collections
Pin For Later!

Dimensions
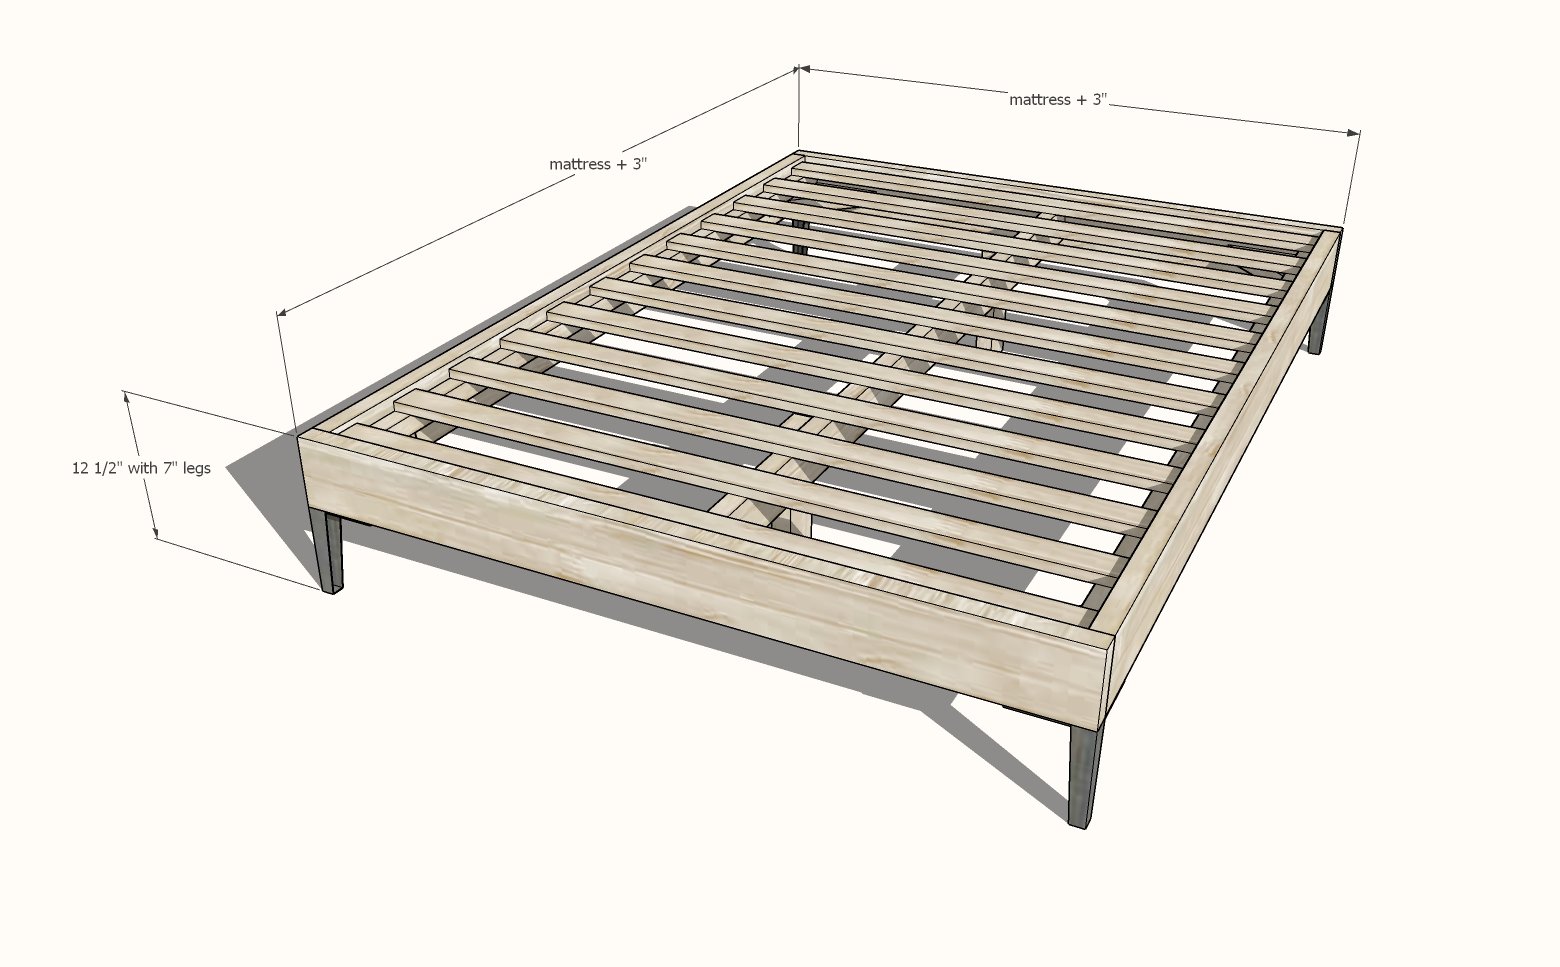
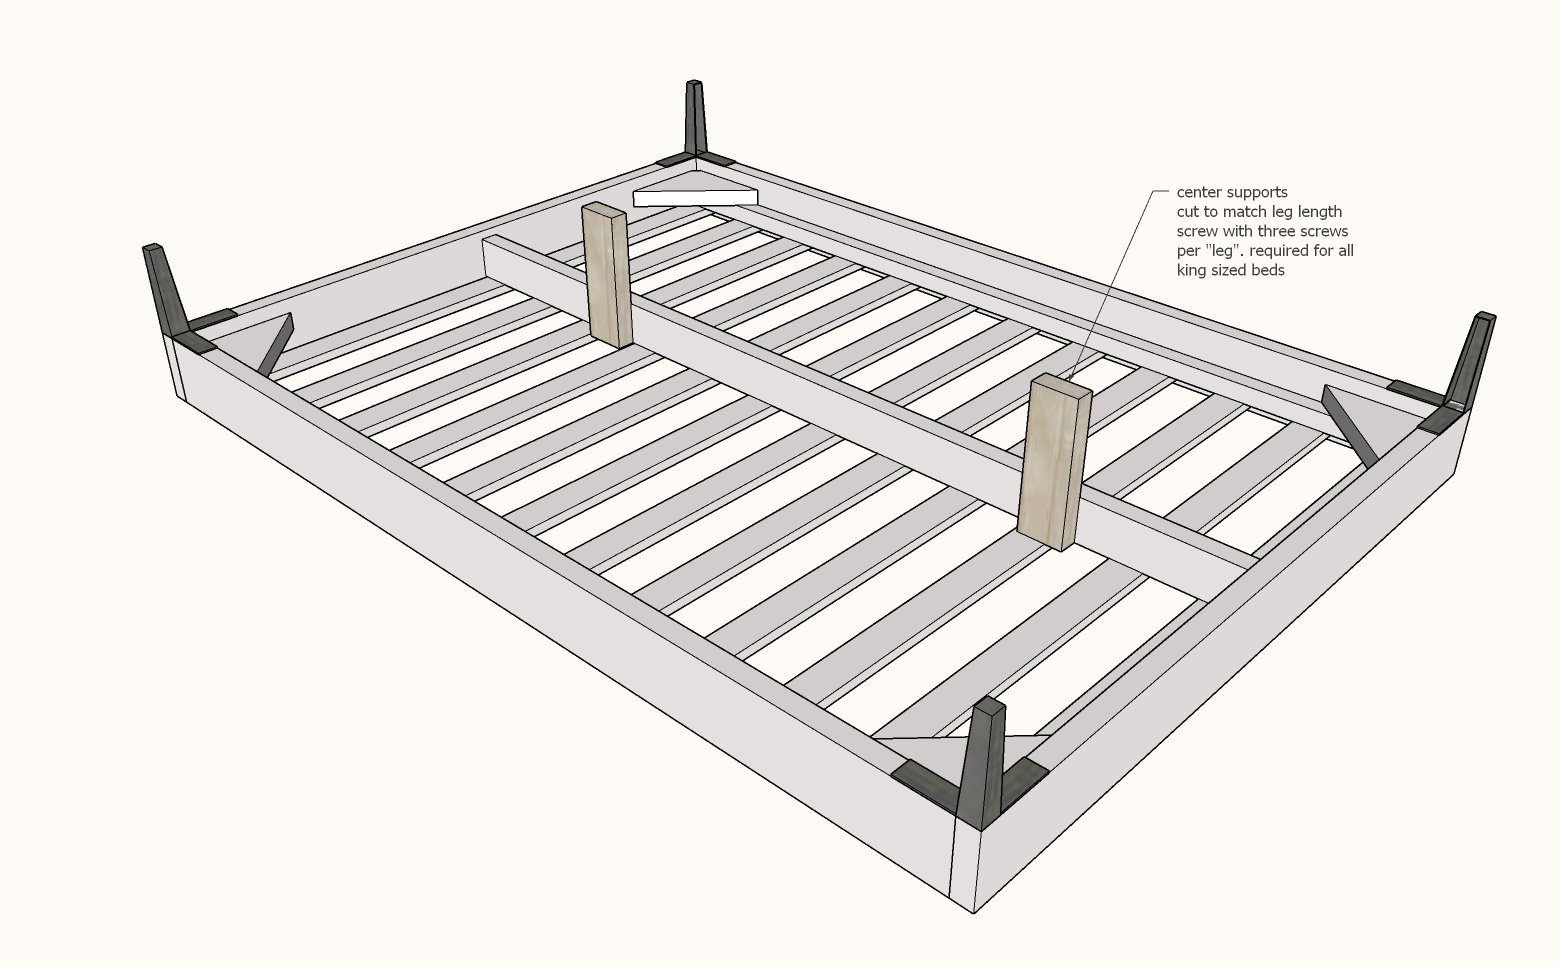
Platform height is about 12" with 7" legs - overall size is 3" larger than the mattress
Preparation
Shopping List
Twin (38" x 75")
- 3 - 2x6 @ 8'
- 2 - 2x2 @ 8'
- 5- 1x4 @ 8' (used for slats, can be scrap wood material)
- 25 - 2-1/2" long self tapping screws (star bit) for general construction
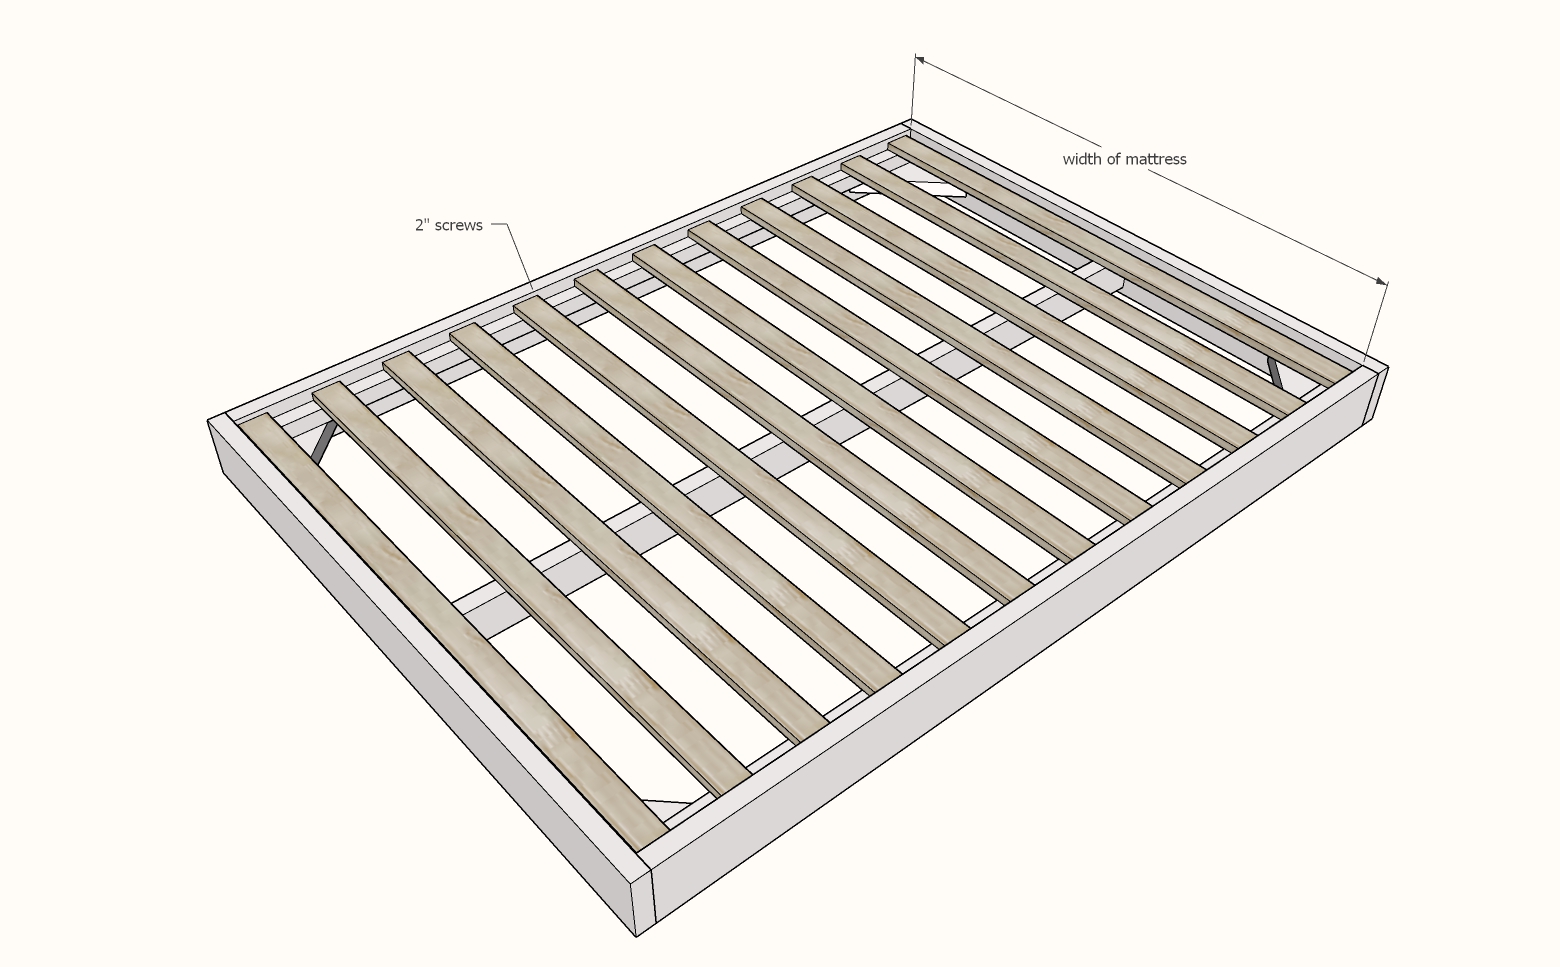
- 20 - 1-1/2" to 2" long self tapping screws (star bit) for screwing down slats
Full (54" x 75")
- 2 - 2x6 @ 8'
- 2 - 2x2 @ 8'
- 1 - 2x6 @ 10' - can be cut in half for transport, used for the 57" cuts
- 1 - 2x4 @ 8'
- 5 - 1x4 @ 10' or 10 - 1x4 @ 8' (used for slats, can be scrap wood material)
- 30 - 2-1/2" long self tapping screws (star bit) for general construction
- 20 - 1-1/2" to 2" long self tapping screws (star bit) for screwing down slats
Queen (60" x 80")
- 4 - 2x6 @ 8'
- 2 - 2x2 @ 8'
- 1 - 2x4 @ 8'
- 5 - 1x4 @ 10' or 10 1x4 @ 8' (used for slats, can be scrap wood material)
- 30 - 2-1/2" long self tapping screws (star bit) for general construction
- 20 - 1-1/2" to 2" long self tapping screws (star bit) for screwing down slats
Standard King (76" x 80")
- 4 - 2x6 @ 8'
- 2 - 2x2 @ 8'
- 1 - 2x4 @ 8'
- 10 - 1x4 @ 8' (used for slats, can be scrap wood material)
- 40 - 2-1/2" long self tapping screws (star bit) for general construction
- 20 - 1-1/2" to 2" long self tapping screws (star bit) for screwing down slats
California King (72" x 84")
- 4 - 2x6 @ 8'
- 2 - 2x2 @ 8'
- 1 - 2x4 @ 8'
- 10 - 1x4 @ 6' or 5 - 1x4 @ 12' (used for slats, can be scrap wood material)
- 40 - 2-1/2" long self tapping screws (star bit) for general construction
- 20 - 1-1/2" to 2" long self tapping screws (star bit) for screwing down slats
Cut List
Twin (38" x 75")
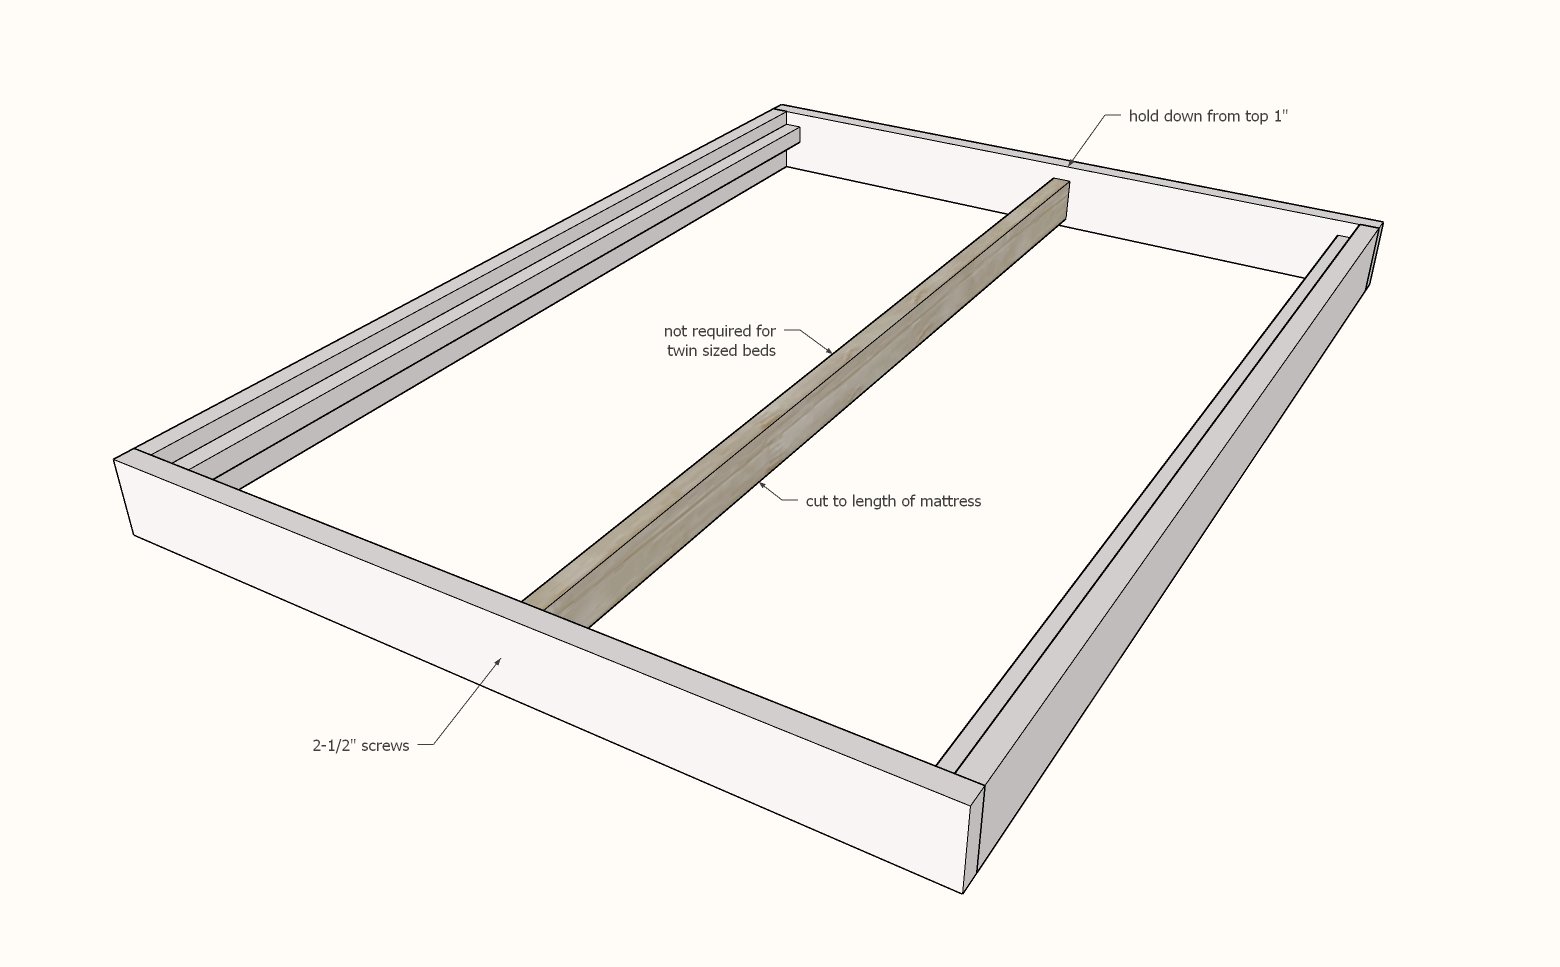
- 2 - 2x6 @ 75"
- 2 - 2x2 @ 75"
- 2 - 2x6 @ 41"
- 10 - 1x4 @ 38"
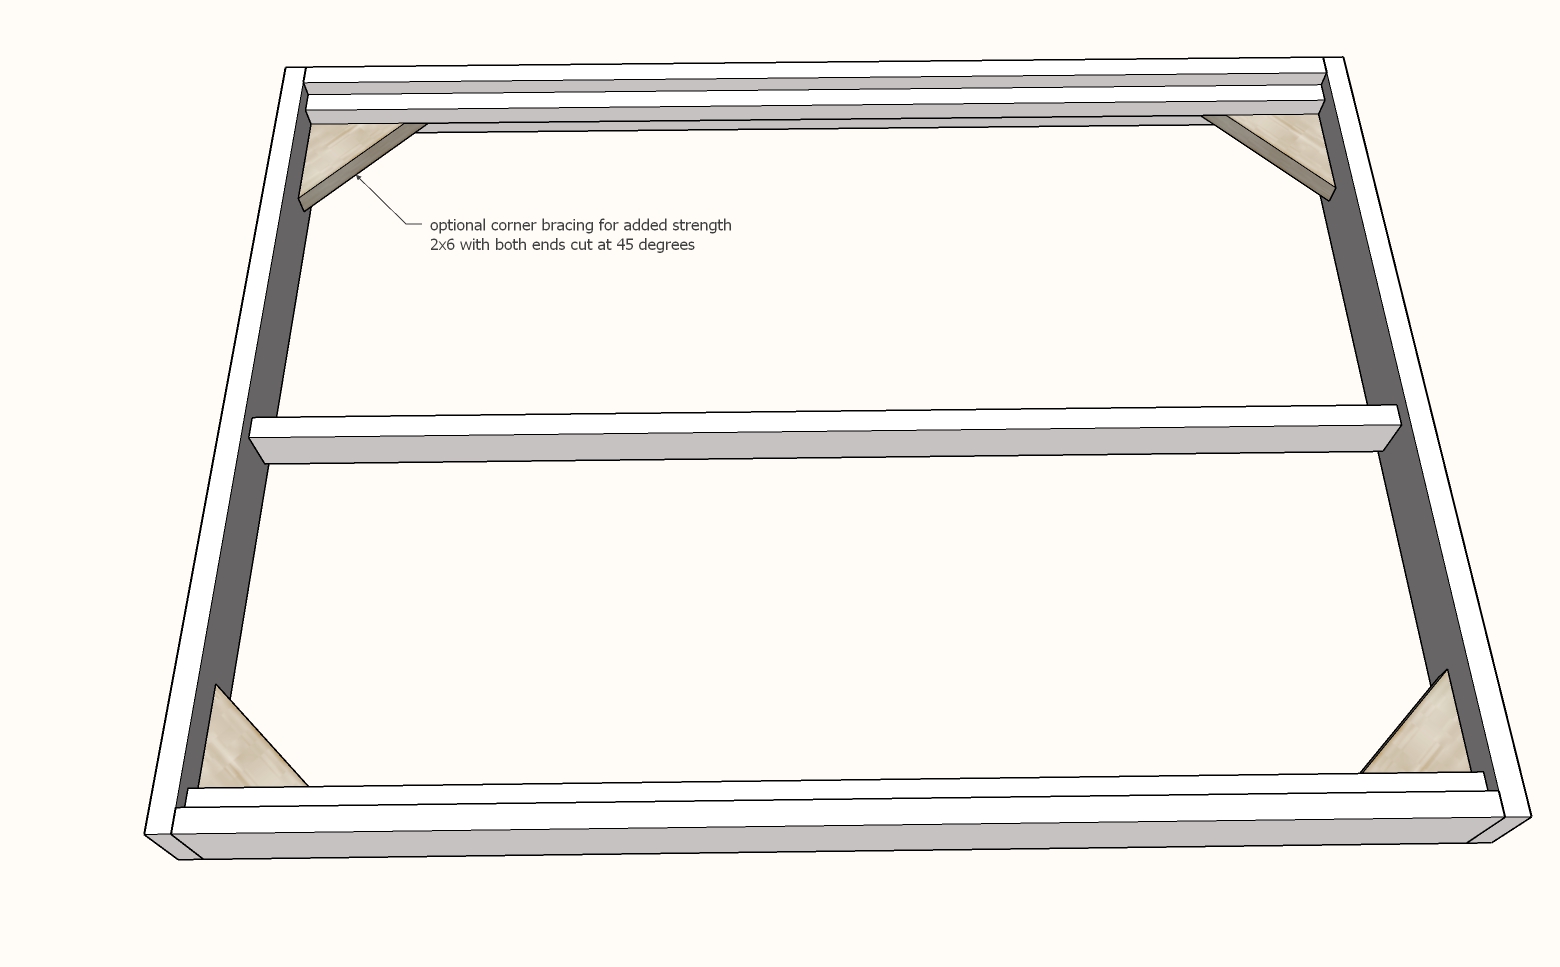
- 4 - 2x6 @ cut both ends at 45 degrees (optional corner supports)
Full (54" x 75")
- 2 - 2x6 @ 75"
- 2 - 2x2 @ 75"
- 2 - 2x6 @ 57"
- 1 - 2x4 @ 75"
- 10 - 1x4 @ 54"
- 4 - 2x6 @ cut both ends at 45 degrees (optional corner supports)
- 2 - 2x4 @ about 11" - measure and cut to fit - center "legs"
Queen (60" x 80")
- 2 - 2x6 @ 80"
- 2 - 2x2 @ 80"
- 2 - 2x6 @ 63"
- 1 - 2x4 @ 80"
- 10 - 1x4 @ 60"
- 4 - 2x6 @ cut both ends at 45 degrees (optional corner supports)
- 2 - 2x4 @ about 11" - measure and cut to fit - center "legs"
Standard King (76" x 80")
- 2 - 2x6 @ 80"
- 2 - 2x2 @ 80"
- 2 - 2x6 @ 79"
- 1 - 2x4 @ 80"
- 10 - 1x4 @ 76"
- 4 - 2x6 @ cut both ends at 45 degrees (optional corner supports)
- 2 - 2x4 @ about 11" - measure and cut to fit - center "legs"
California King (72" x 84")
- 2 - 2x6 @ 84"
- 2 - 2x2 @ 84"
- 2 - 2x6 @ 75"
- 1 - 2x4 @ 84
- 10 - 1x4 @ 72"
- 4 - 2x6 @ cut both ends at 45 degrees (optional corner supports)
- 2 - 2x4 @ about 11" - measure and cut to fit - center "legs"
Instructions
Step 4
Step 5
Project Type
Room







Comments
homefor3
Thu, 07/28/2022 - 04:58
An idea
I love the simplicity of this plan! And glad to hear lumber is coming down in price. I made a similar bed - one of your plans - years ago and because my daughter moved so frequently, I ended up attaching two strips of heavy cotton webbing to the spread out slats so we wouldn’t have to keep screwing them in each time she moved. I’m sure we just attached the strips with a staple gun. Just thought I’d share what has been a huge timesaver for us! I also did it when I made another bed (same plan) for my son. Thanks for all your amazing plans!!