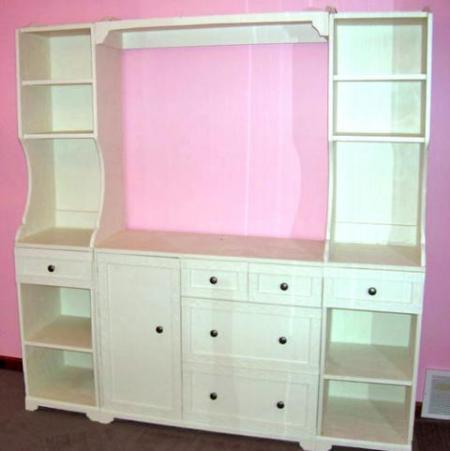
Madeline Side Hutch for Changing Wall

The free plans on this website are made possible with advertising and affiliate links.  Thank you for helping us keep plans free.


Difficulty
Advanced
| Print this plan

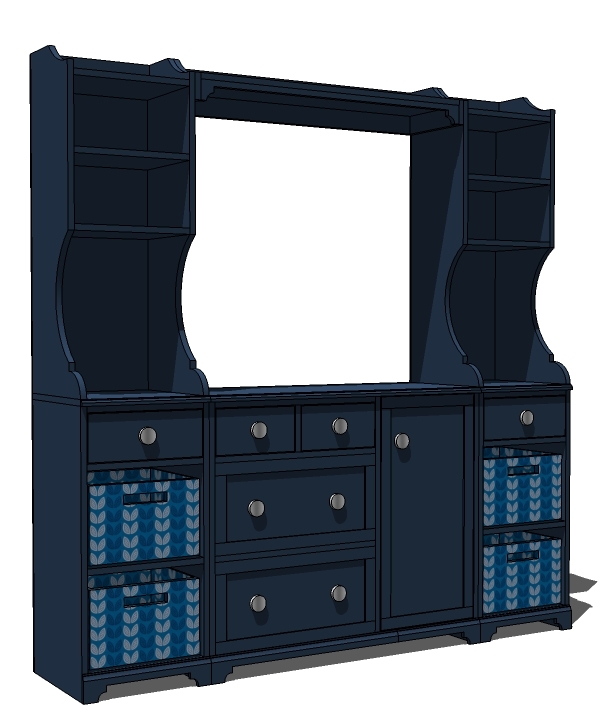
Free plans to build a Pottery Barn Kids inspired changing wall - this is the side hutch plans from Ana-White.com DIY your own furniture and save tons!
Collections

Well, here's an oldie but goodie!

Quite a few of you have commented that these plans have disappeared from the site - and I couldn't find them either! 

We already have the changing table plans and the bridge and side bases - but this changing wall is not complete without the side hutches!

So I'm happy today to reintroduce the side hutch plans for the Madeline Changing Wall!

Enjoy the plans!

Dimensions
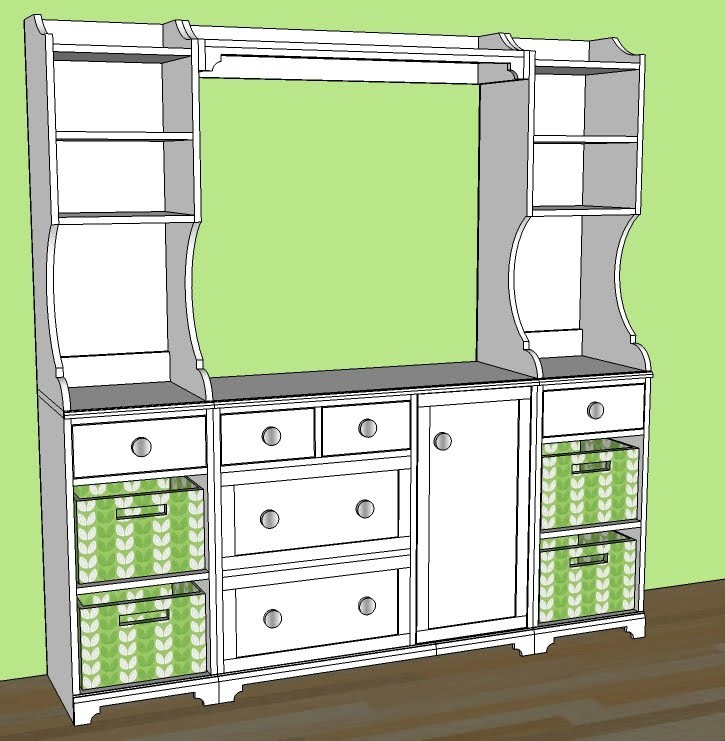
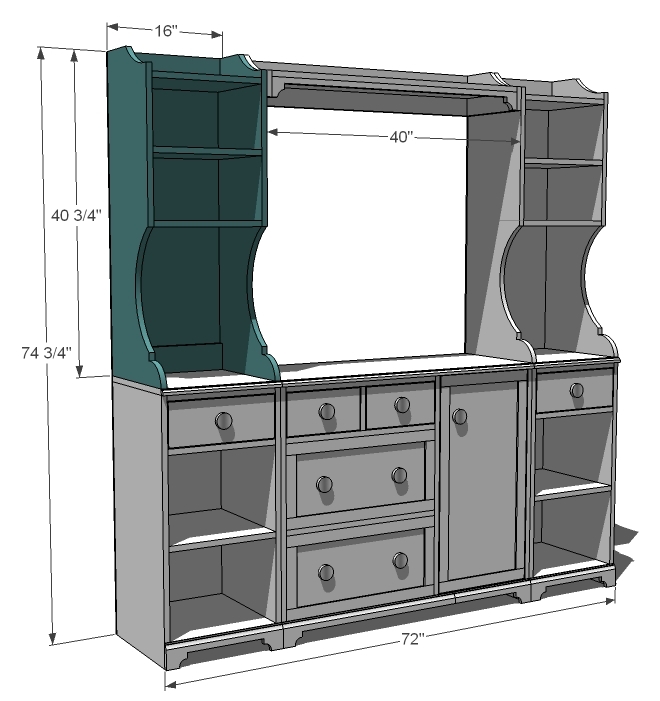
Dimensions are shown above

Preparation

Shopping List

Shopping List for ONE Side Hutch

1 - strip of plywood 8 feet long x 15 1/2" wide
1 - 1/4 sheet of 1/4" thick plywood for back
1 - 1x4 @ 30" long
1 - 1x12 @ 4 feet long
Favorite fasteners
1" nails for attaching back to the 1x4s
Also recommend hardware to attach bases to hutches and a tip resistant kit

Cut List

Cut list is for ONE side hutch

2 - 1x16 boards (15 1/2" width) @ 40 3/4" long (sides)
3 - 1x12 @ 14 1/2"
2 - 1x4 @ 14 1/2"
1 - 1/4" plywood @ 16" x 40 3/4"

Tools
Tape Measure
Speed Square
Pencil
Safety Glasses
Hearing Protection
Drill
Circular Saw
Jigsaw
Brad Nailer
Drill Bit Set
General Instructions

Please read through the entire plan and all comments before beginning this project. It is also advisable to review the Getting Started Section. Take all necessary precautions to build safely and smartly. Work on a clean level surface, free of imperfections or debris. Always use straight boards. Check for square after each step. Always predrill holes before attaching with screws. Use glue with finish nails for a stronger hold. Wipe excess glue off bare wood for stained projects, as dried glue will not take stain. Be safe, have fun, and ask for help if you need it. Good luck!

Instructions

Step 1

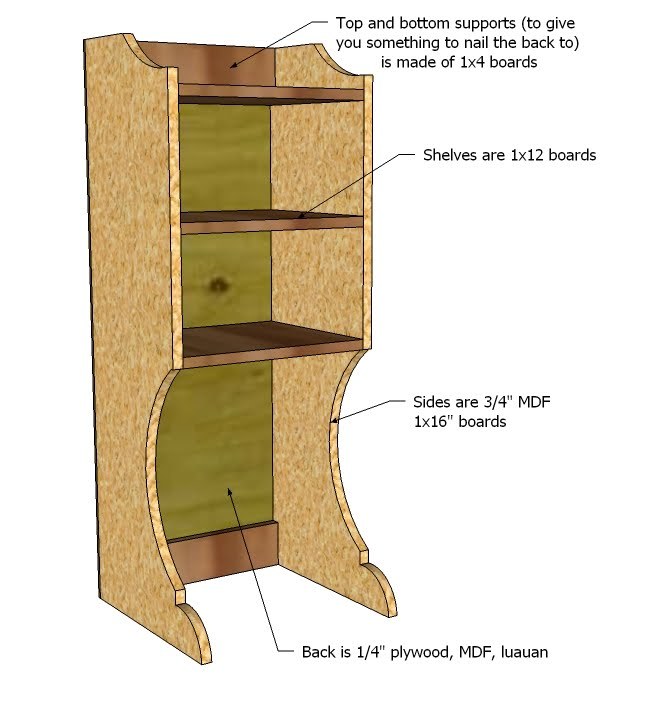
Here's a view of the composition of this project. You can build the entire hutch from 3/4" thick plywood or MDF - it's up to you. One note, I don't recommend staining this project because those exposed plywood front edges will be difficult to finish out (unless you are super good with the edge banding).

Step 2

Start by cutting out the sides.  

I recommend cutting one as pattern and then using it to cut the remaining. Once the sides are cut, clamp the two together and sand to make sure they match up.

Step 3

Now add the shelves. You can add shelves with shelf pins, nailed in place with glue or pocket holes or countersunk screws.

Shelves will sit inset a bit - this is expected. If you want shelves flush to front, you can cut from plywood.

Also at this step add the 1x4s to the top and bottom.

Step 4

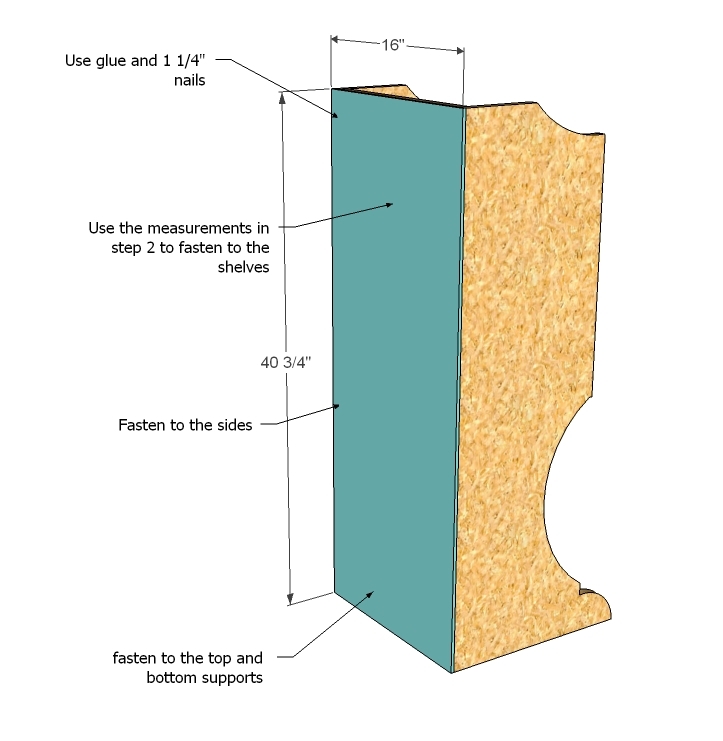
Now attach back to the project with finish nails and wood glue. When you attach to the 1x4 boards, use nails less than 1" long.

Finishing Instructions
Preparation Instructions
Fill all holes with wood filler and let dry. Apply additional coats of wood filler as needed. When wood filler is completely dry, sand the project in the direction of the wood grain with 120 grit sandpaper. Vacuum sanded project to remove sanding residue. Remove all sanding residue on work surfaces as well. Wipe project clean with damp cloth.

It is always recommended to apply a test coat on a hidden area or scrap piece to ensure color evenness and adhesion. Use primer or wood conditioner as needed.