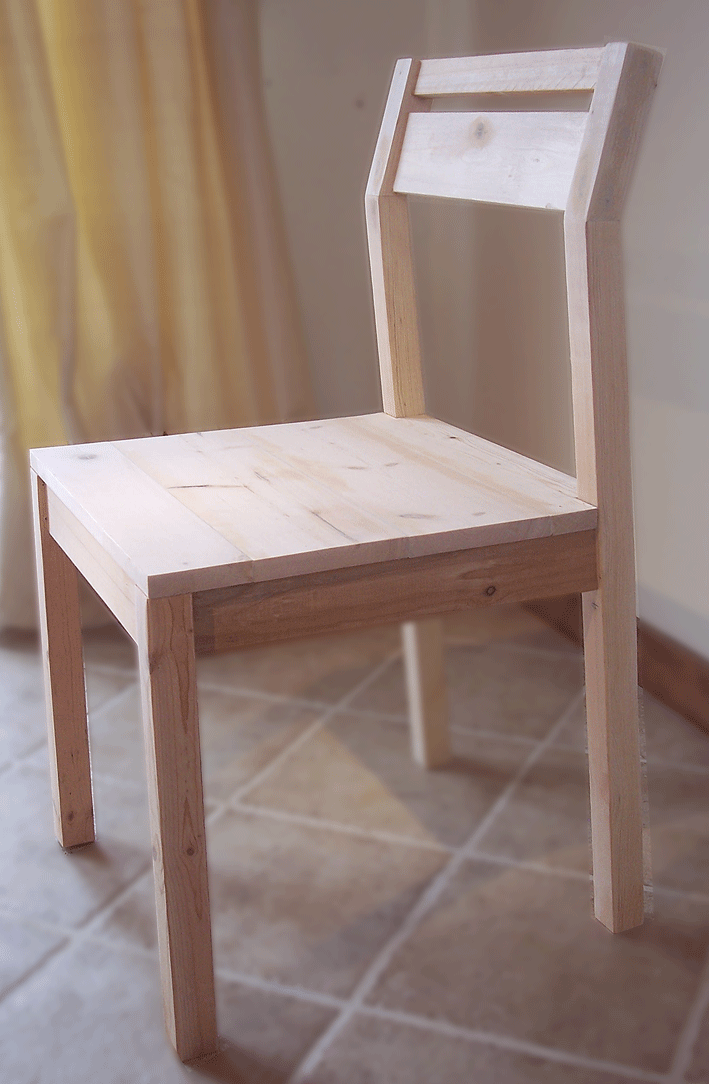
Chairs can be very difficult to build just right because cutting back legs requires precision and often special tools. With this simple project plan based off of pocket hole technology, anyone can create surprisingly comfortable and modern style chairs. Special thanks to our readers for sharing their photos.
Preparation
2 – 2×2
1 – 1×3
Scrap 1×2 and 1×4 15″ Long
Project Panel 18″ x 18″ (Purchase a 36″ x 18″ for 2 seats)
2″ Screws
Wood Glue
Wood Filler
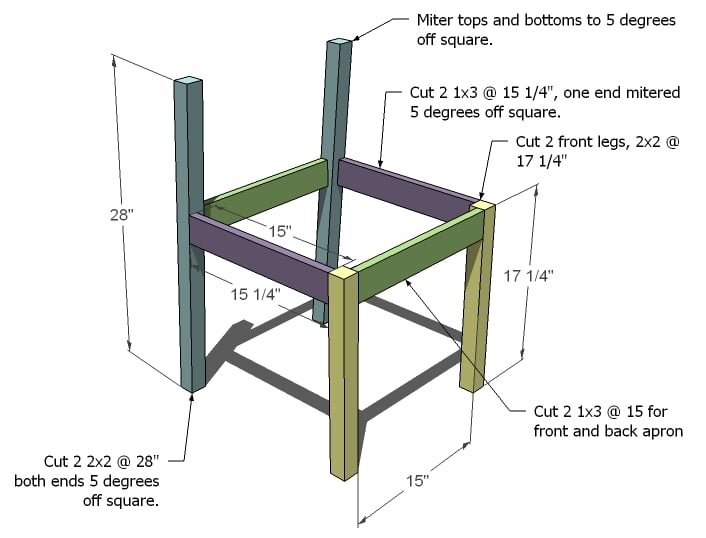
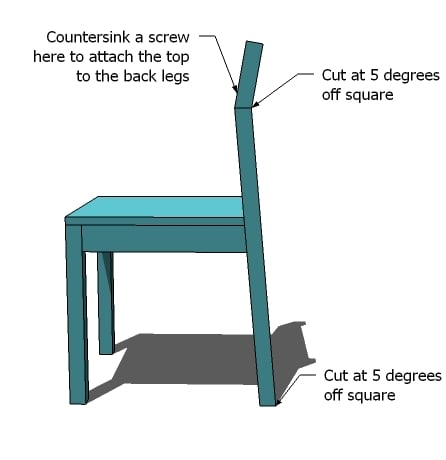
2 – 2×2 @ 28″, Ends Mitered at 5 degrees off square, short point to long point (Back Legs)
2 – 2×2 @ 17 1/4″ (Front Legs)
2 – 1×3 @ 15 1/4″, One End Mitred down 5 degrees off square (Side Aprons)
2 – 1×3 @ 15″ (Front and Back Apron)
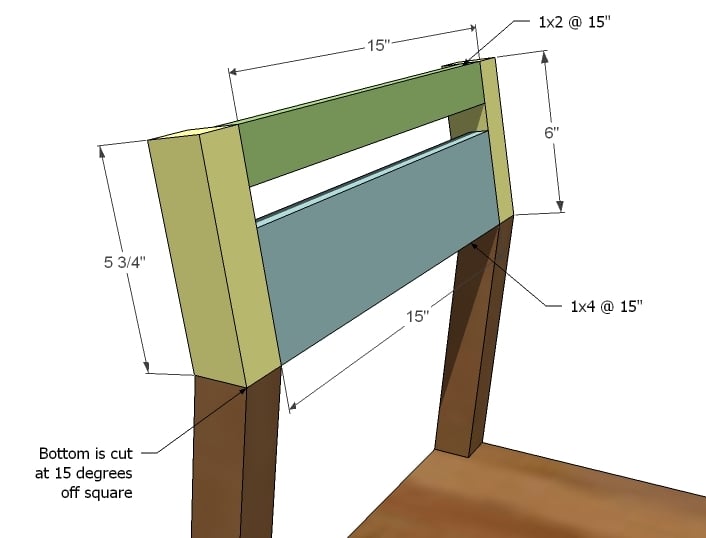
2 – 2×2 @ 6″, Bottom end mitred down at 15 degrees (Back Rest)
1 – 1×2 @ 15″ (Top Rail on Back)
1 – 1×4 @ 15″ (Bottom Rail on Back)
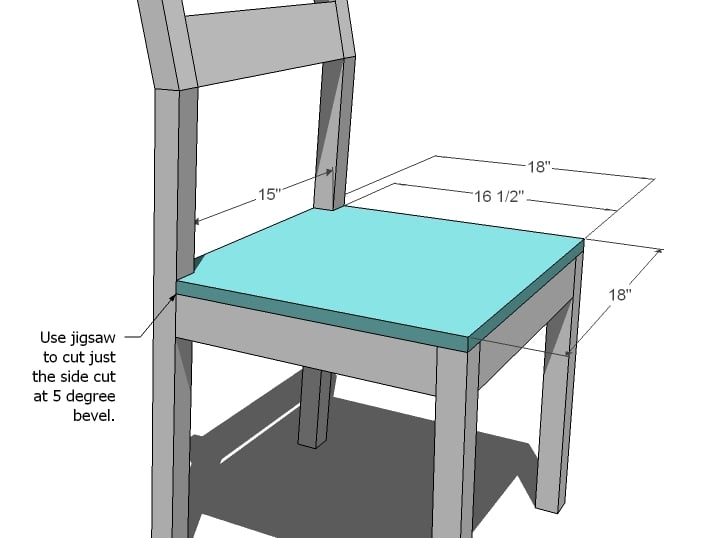
Pine Project Panel Cut at 18″ x 18″ or Boards Joined to create a surface 3/4″ thick 18″ x 18″ (Seat)
Instructions
Step 1
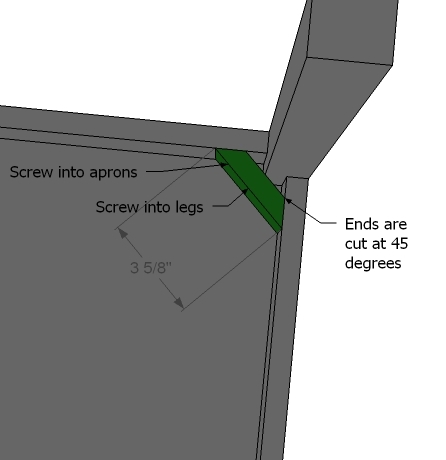
Build the Chair Frame. I started with the front legs and with my Kreg Jig™, fastened the front apron to the front legs. I used a 1/4″ piece of plywood to inset my aprons from my legs by placing the apron on the plywood and not the legs to create a 1/4″ difference. Then I fastened the side aprons to the front legs in the same manner. The I used a level rested on the side apron as I fastened the side apron to the back legs. Finally, using the Kreg jig, I fastened the back apron to the back legs. You can predrill and countersink screws without the jig. Just make sure you add corner bracing (which I did anyway).
Step 3
Back Rest. Build the back rest first by attaching the rails to the sides, as shown above. I attached by screwing together with the Kreg Jig™ but you can also predrill and countersink your screws to fasten. I also centered my back rails on the sides, leaving a 3/8″ gap on both the front and back.
Step 4
Seat. First cut your seat at 18″ x 18″. Then notch out the sides 1 1/2″ x 1 1/2″ on the backs as shown above. I ended up not cutting the back angle at 5 degrees and my chair looks great. I attached the seat from underneath using the Kreg Jig™, but you could also attach the seat by simply screwing through the top of the seat into the aprons. Also, if you have a Kreg Jig™, you can use it to join 1x stock together to get a seat that measures 18″ x 18″ (this is what I did).




Comments
Carrie Nelson (not verified)
Sat, 08/28/2010 - 03:25
Tell me how high your bar is
Tell me how high your bar is and I can give you a comfortable height. We have 2 different heights in our kitchen so we can figure it out for sure!
Jim (not verified)
Wed, 09/01/2010 - 16:34
I came upon your site via the
I came upon your site via the Kreg e-newsletter. What a great site! Keep up the good work!
Ana White (not verified)
Wed, 09/01/2010 - 16:55
Hi Jim, welcome! The Kreg
Hi Jim, welcome! The Kreg Jig is amazing, and we are so proud to be in their newsletter! Thank you!
Juicy Bits’ Ba… (not verified)
Fri, 09/10/2010 - 13:49
[...] Plans for dining room
[...] Plans for dining room chair. [...]
Chris (not verified)
Sun, 10/03/2010 - 20:58
Hi, I've built the frame of
Hi,
I've built the frame of this chair, now working on the platform for the seat. After that, i'll have to put the angled top part of the backrest on.
I don't have a kreg jig or a pocket hole jig - can you suggest any way to attach the vertical back to the angled top backrest part, without using a pocket hole?
Thanks!
Sarah Kelly (not verified)
Wed, 10/06/2010 - 10:02
I'm here for the woodworking,
I'm here for the woodworking, but I know more about the juice...
If you just keep sneaking up the water to juice ratio bit by bit, you can get that beverage to be simply juice-flavored water. I did this trick for myself. I am lucky that my daughter has always loved her water, so I never had to do that with her juice.
DIY Magnetic S… (not verified)
Mon, 10/18/2010 - 20:01
[...] Continue screwing tin
[...] Continue screwing tin to the furring strips. When you get to the last sheet, you may need to rip it to fit. Use the metal saw blade and a circular saw. Snip around any baseboards. And yes, that is my beloved angle chair [...]
Chris (not verified)
Fri, 11/19/2010 - 21:34
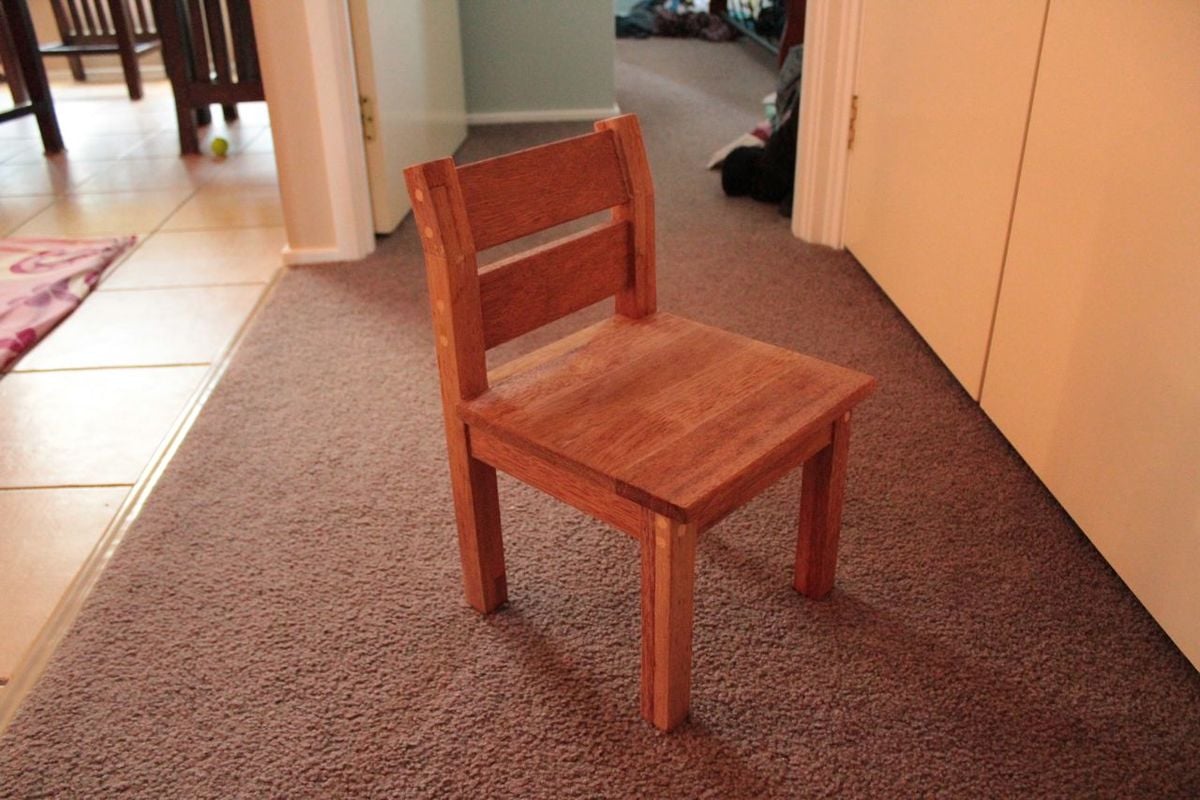
Finished making a 1/2 scale
Finished making a 1/2 scale one of these for my baby daughter, she likes it!

Vic (not verified)
Wed, 01/19/2011 - 05:36
Do you think we could modify
Do you think we could modify this to make a bar stool instead?
Melisa (not verified)
Sat, 01/22/2011 - 06:41
Ana, I'm with Vic... I really
Ana, I'm with Vic... I really like these plans and am in search of stools and can't find one I'd like but I think this would do nicely! How can we modify it for a bar stool?
Love, love your site and plans and I got my first Kreg Jig for Christmas!
Melisa
Clay Dowling (not verified)
Wed, 01/26/2011 - 05:53
I'm amazed at the simplicity
I'm amazed at the simplicity of this design. I've made a stool before (post and rung, on a lathe), but the complexities of a chair have always stopped me from pursuing it further.
Now I'm feeling like maybe I should tackle this subject again and not let the chair intimidate me.
Shani (not verified)
Sat, 01/29/2011 - 04:06
I made the chair exactly as
I made the chair exactly as instructed. I'm a female and the guys at the wood shop seemed shocked how well it turned out. Especially with the 5 degree angle. It is very very sturdy. I think I will add a mending brace on the back restat the top angle though. Also, for legs I used two 1x2s and pressure glued them to make the 2x2s. It was cheaper for me and looked great.
Rob Hurley (not verified)
Sat, 02/05/2011 - 09:29
Anna, I stumbled along
Anna,
I stumbled along your web site a few weeks back, while surfing through the Kreg Tool web site. I must say that I am addicted to your web site. I built a few of the smaller projects & Plan on making all of my furniture, once all the work on my new apartment is completed, using the plans that you have.
I have one question. How do I get the Sketch-Up plans for the Angled Chair, as I would like to modify them a bit to make them into a padded barstool.
ShoelessTim
Tue, 01/07/2014 - 08:12
Questions
Ana,
The top of my chair is rubbish, do you have any suggestions on how to connect the top to the legs for my next attempt?
https://www.facebook.com/shoelesstim/posts/1412068702364636?comment_id=…
mrcleland
Wed, 05/14/2014 - 05:25
top of chairs
I haven't attached my tops yet but thought it wouldn't be too sturdy with the pocket hole. I'm thinking about using a dowel and wood glue to attach them. Have you found a way yet?
mrcleland
Wed, 05/14/2014 - 05:20
Modern Angle Chair (Attaching the top angled part)
I worry about the pocket hole joint holding the top of the chair on. Do you think a dowel will work better in this case? I am almost done with the first of five and it was really easy. Thank you for the plans and website.