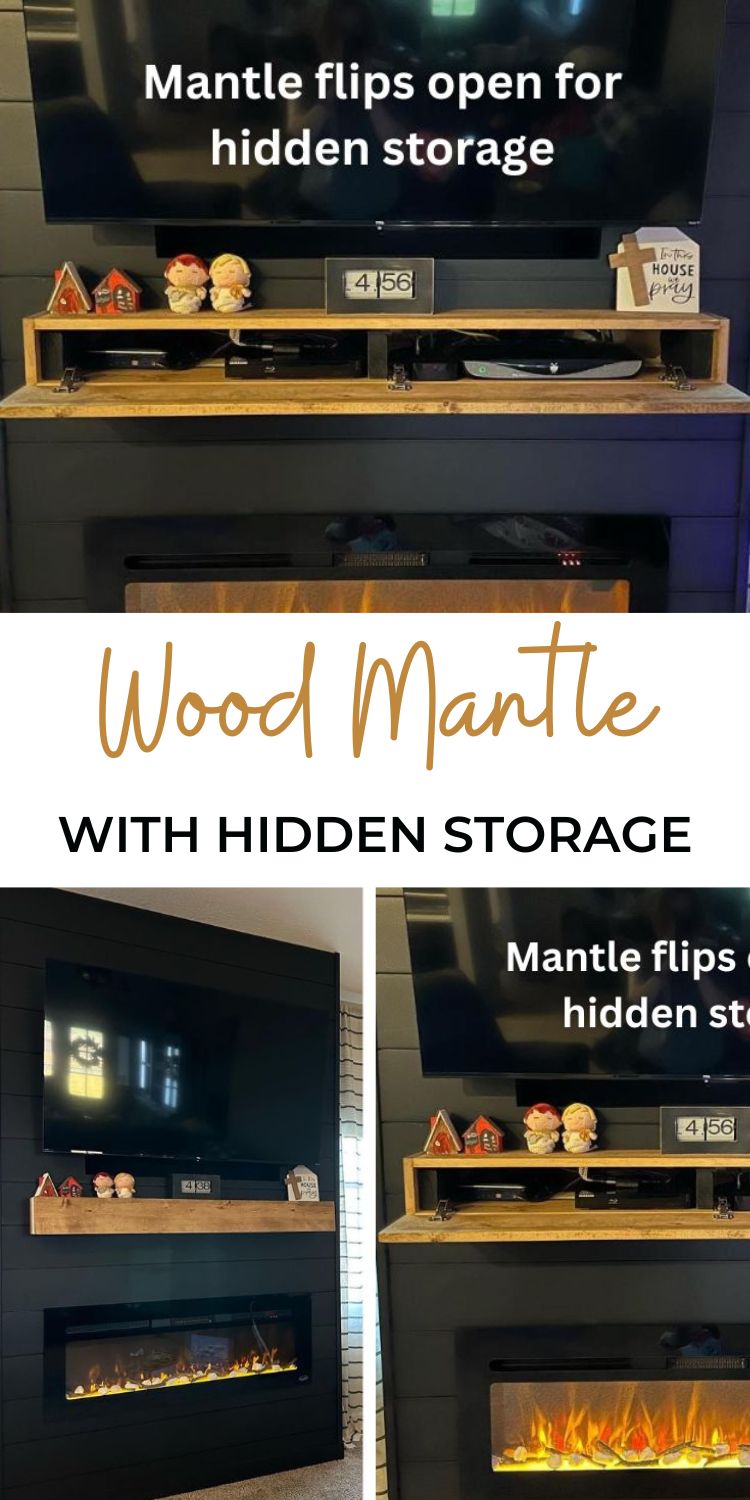
This easy to build wood mantle has a flip down front - so you can hide controllers and remotes inside. Free step by step plans from Ana-White.com
RELATED: DIY Shiplap Fireplace Tutorial
Designed and photographed by IBSEENU
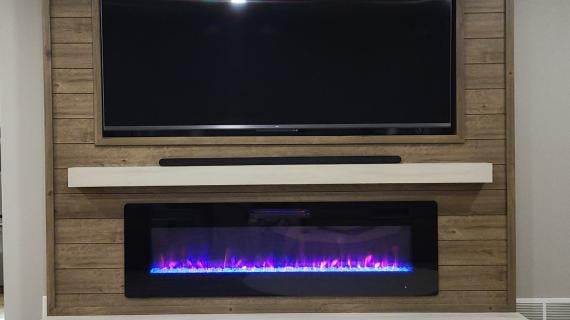
This fall, I tackled a shiplap fireplace build. It wasn't a hard project, but it was a large project that requires more materials and more time. And with it being the holiday season, I was not expecting to see any brag posts anytime soon.
Well, boy was I wrong! We've had many brand new brag posts shared on Instagram, Facebook, and as brag posts.
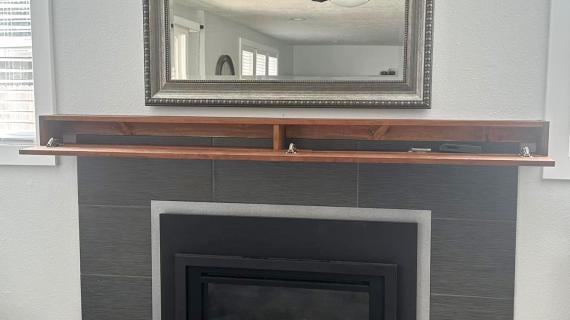
One reader, IBSEENU shared a post that blew our minds!
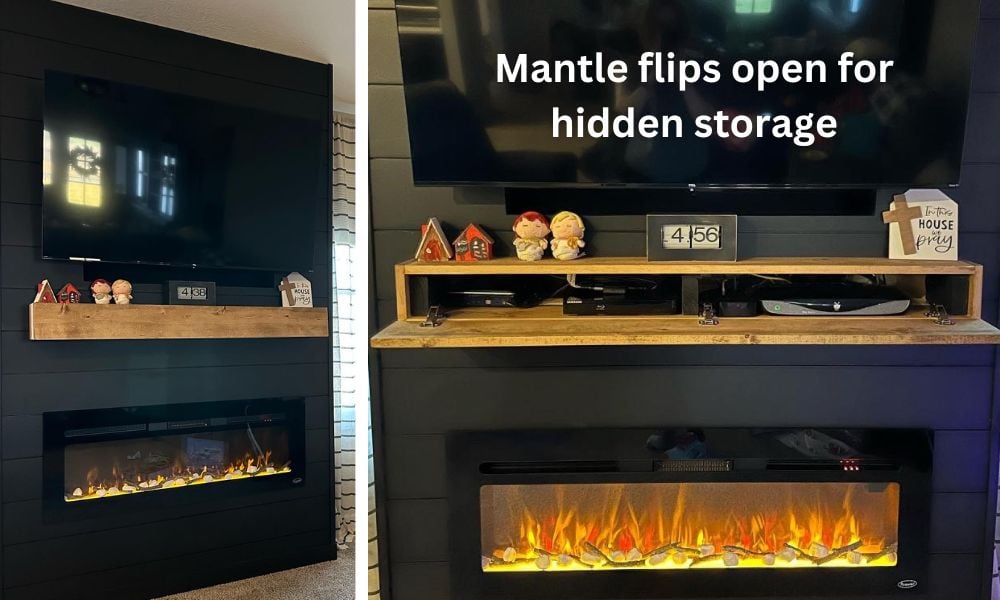
The mantle part was one of the more challenging parts of my build because I used an authentic wood beam (that was heavy and required blocking and lag screws).
It would have been so much easier and smarter to do mantle like this - that also adds flip down storage for controllers and remotes.
Lucky for you, you can! IBSEENU has been generous enough to let us share plans from this design.
Pin For Later!
Preparation
- 1x6 boards, approximately 3 times the overall mantle length plus another foot
- 1x3 boards for hanging
- Concealed surface mount hinges like this
- 1-1/4" brad nails
- wood glue
- 2-1/2" long self tapping star bit screws (for hanging)
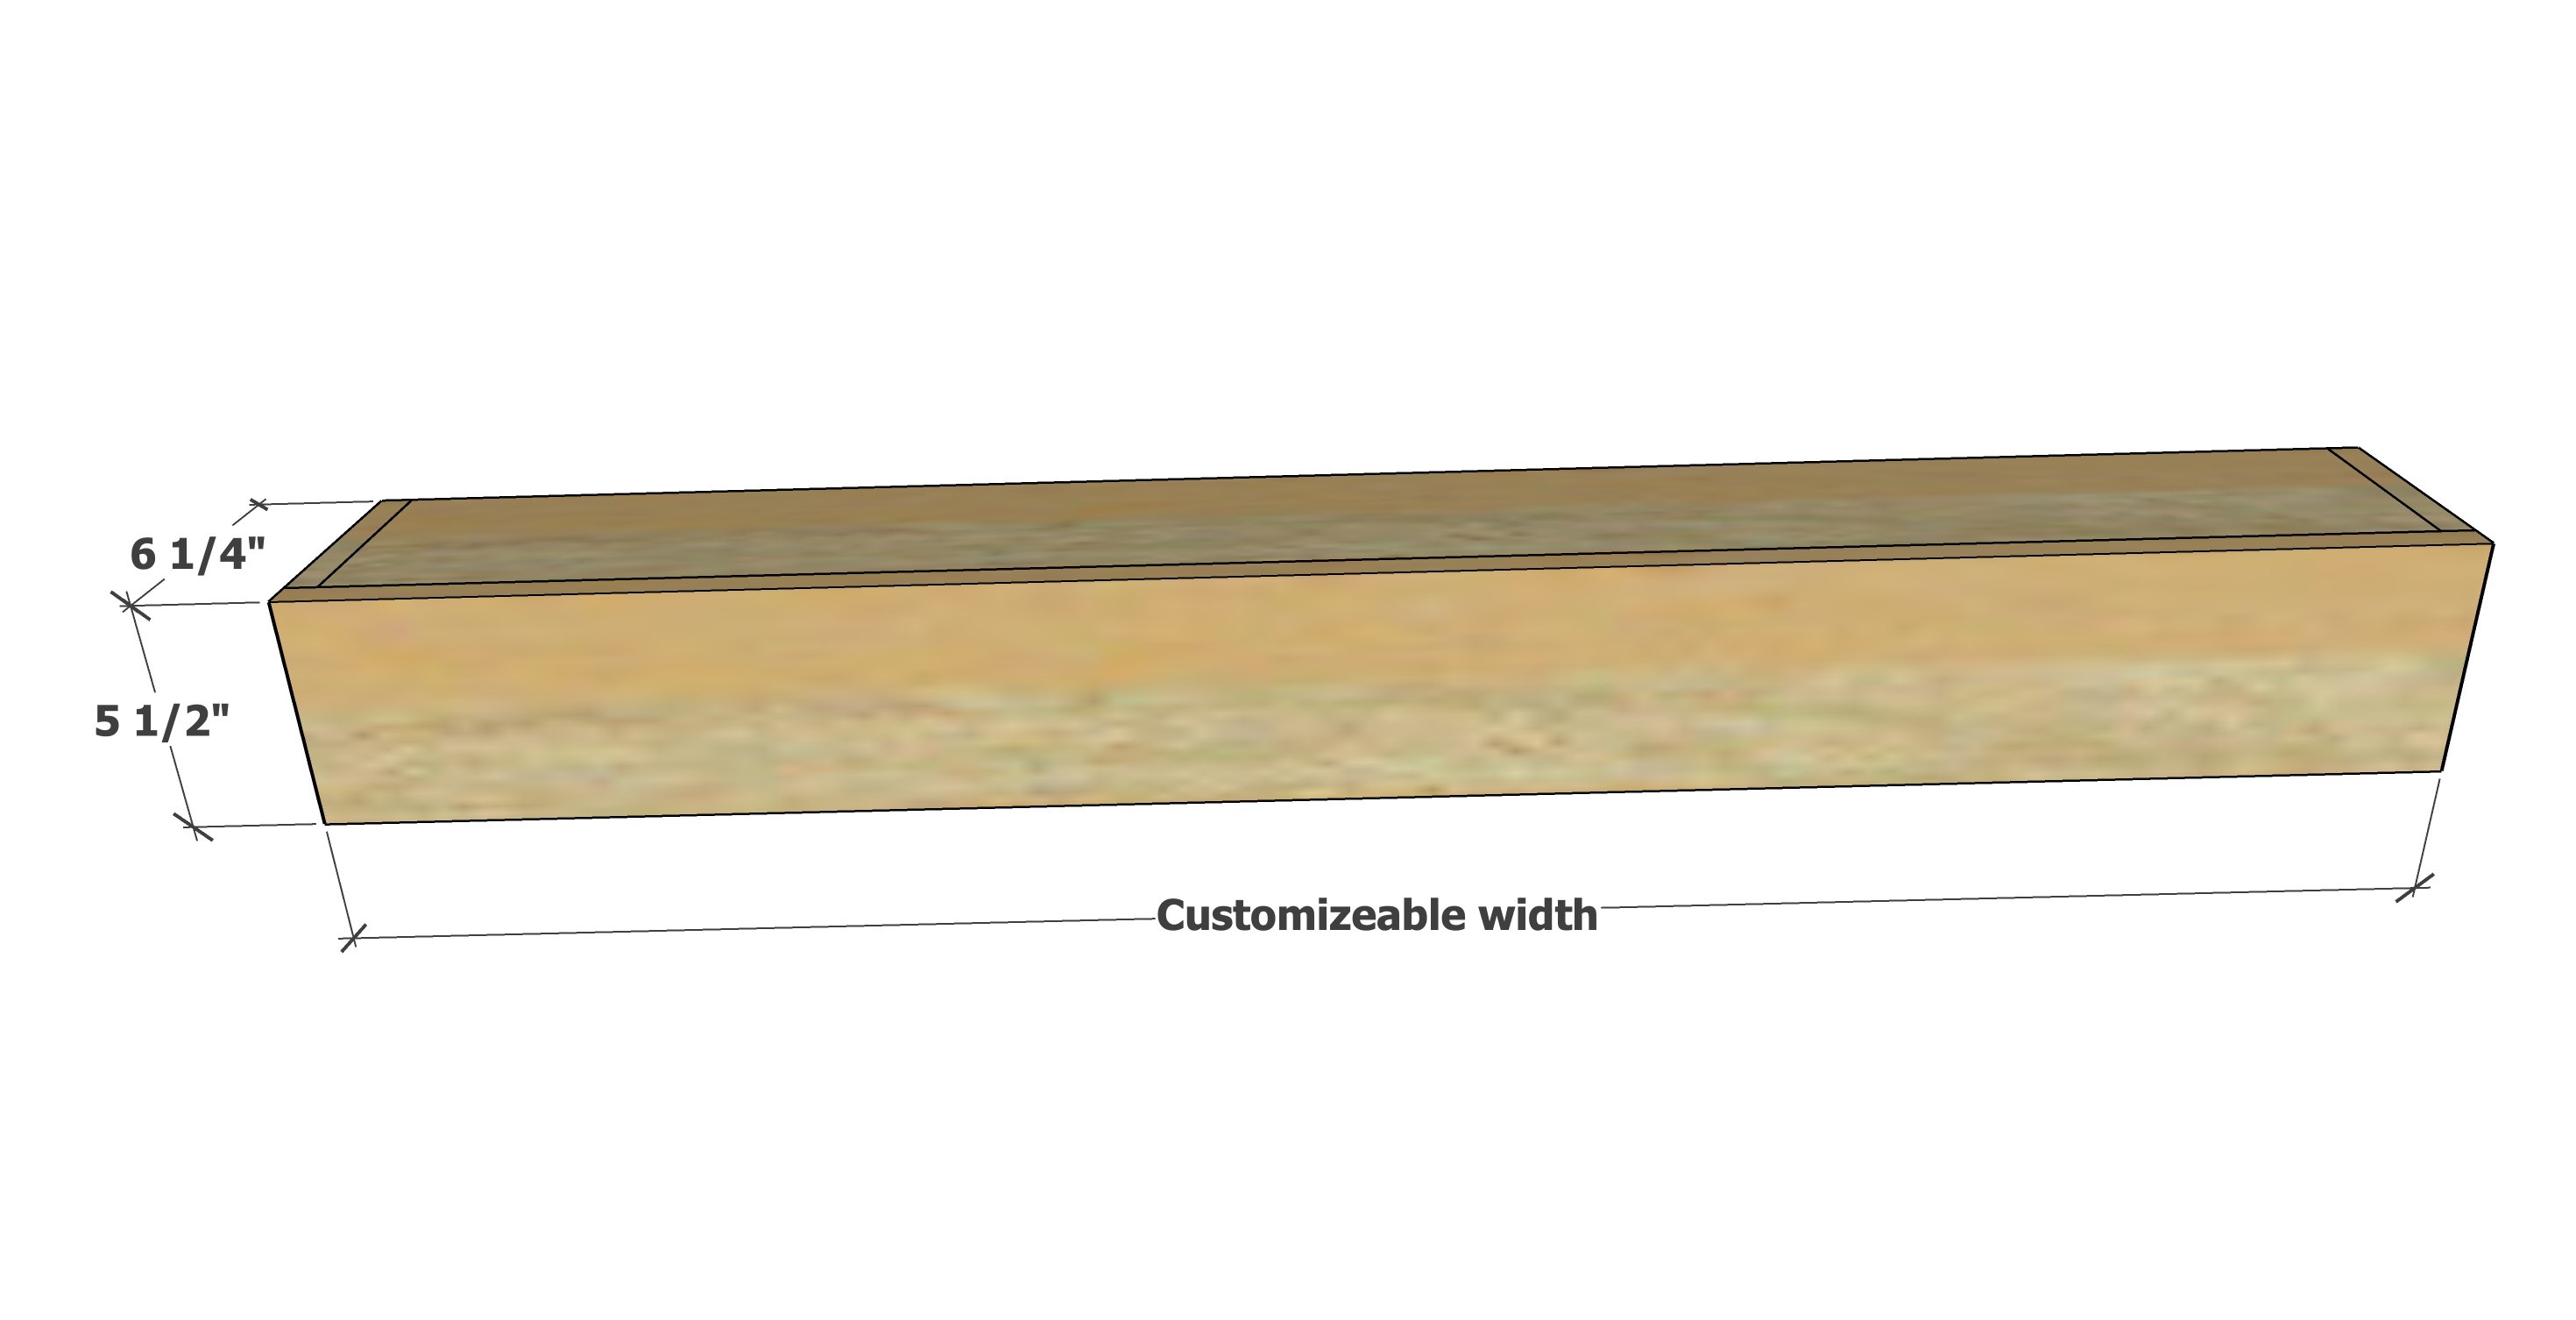
- 2 - 1x6 @ desired length of mantle MINUS 1-1/2" (top and bottom)
- 2 - 1x6 @ 5-1/2" (ends)
- 1 - 1x6 @ 4" (center)
- 1 - 1x6 @ desired length of mantle (front)
- 2 - 1x3 - measured and cut to fit


Instructions
Step 1

Attach the sides to the bottom and center divider with glue and 1-1/4" brad nails.
Orientate the sides so the wood grain runs horizontal.
Step 2
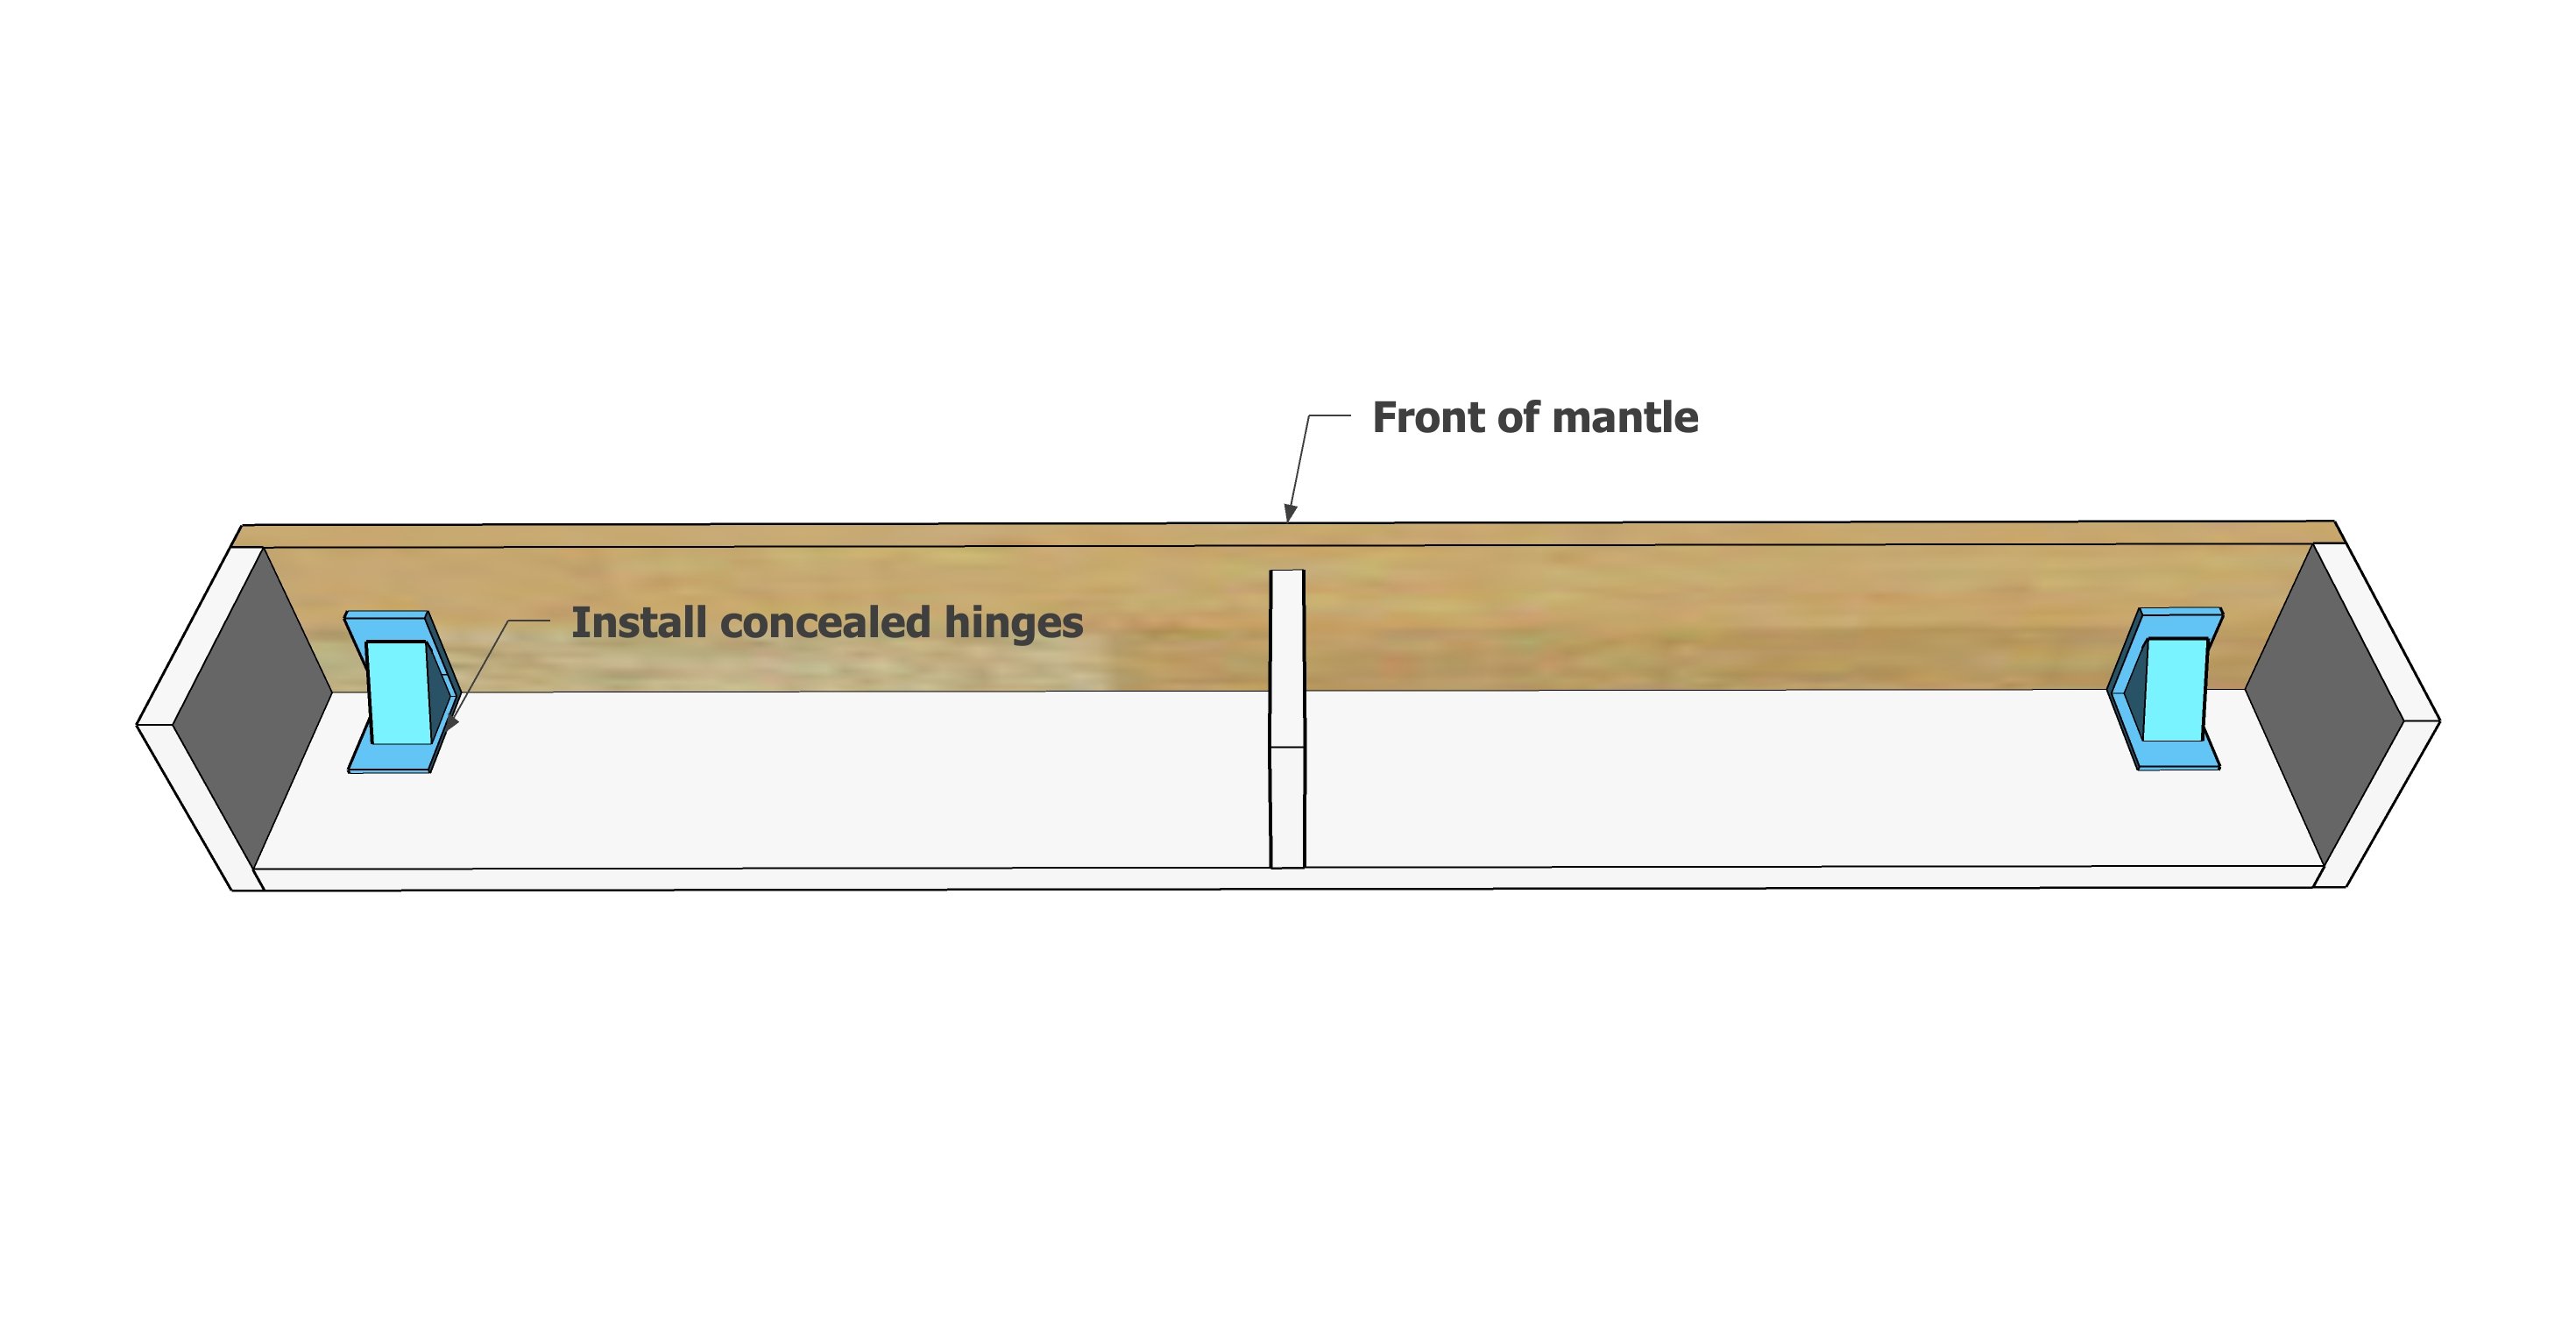
If you wait to install hinges after the building is complete, it will be very difficult to reach inside with a drill.
Install the front so it's flush on the bottom and sides using the concealed surface mount hinges. Test and adjust for a perfect fit.
Step 3

Attach the top of the mantle to the sides and center divider, do not attach to the front.
Step 4

Measure and cut the 1x3s to fit inside and nail and glue in place.
Hang the mantle to studs in the wall using the 2-1/2" screws, using a level to make sure the mantle is hung level.