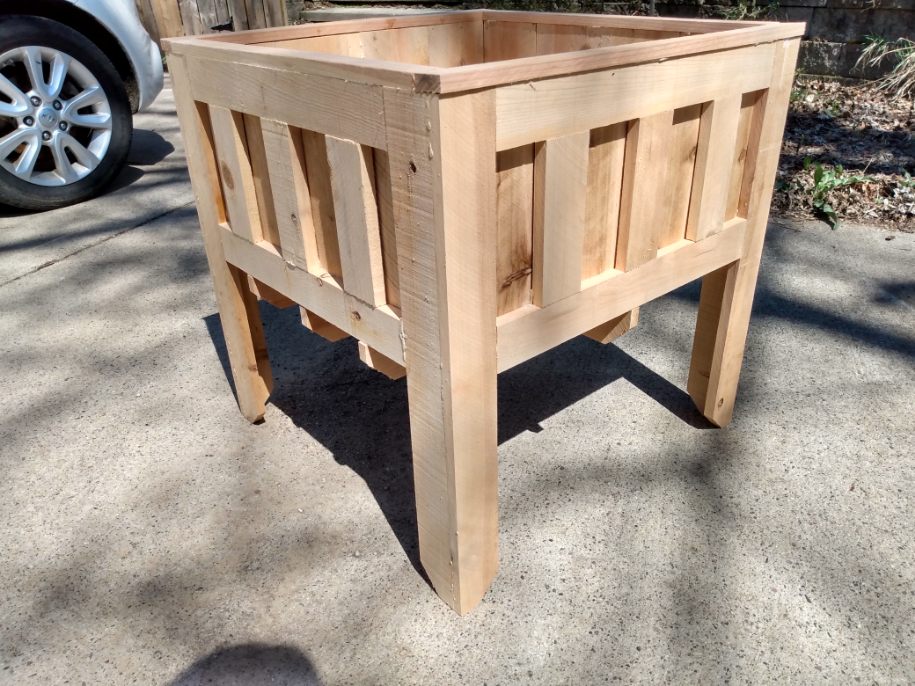
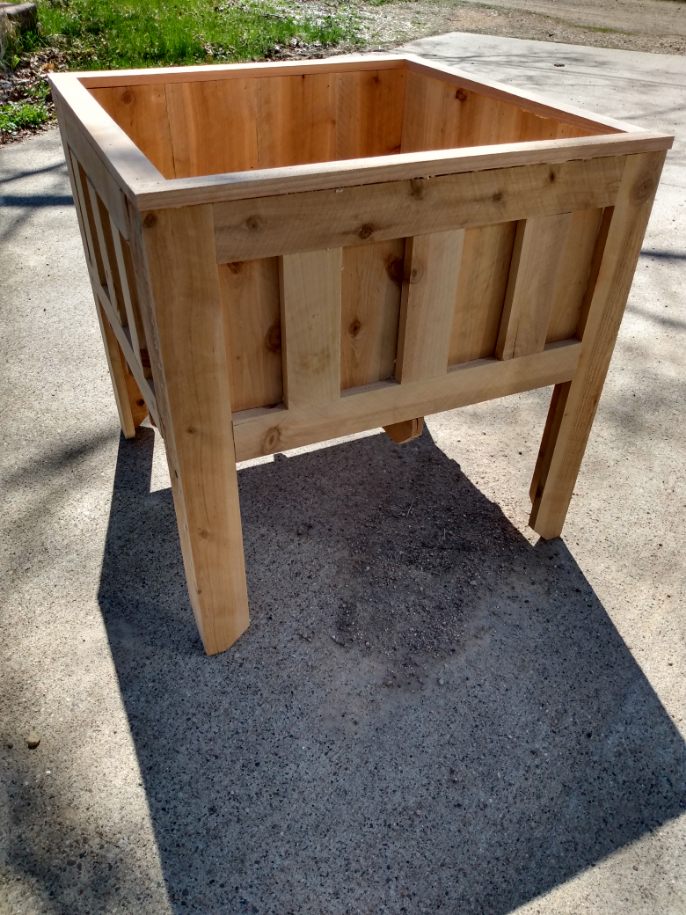
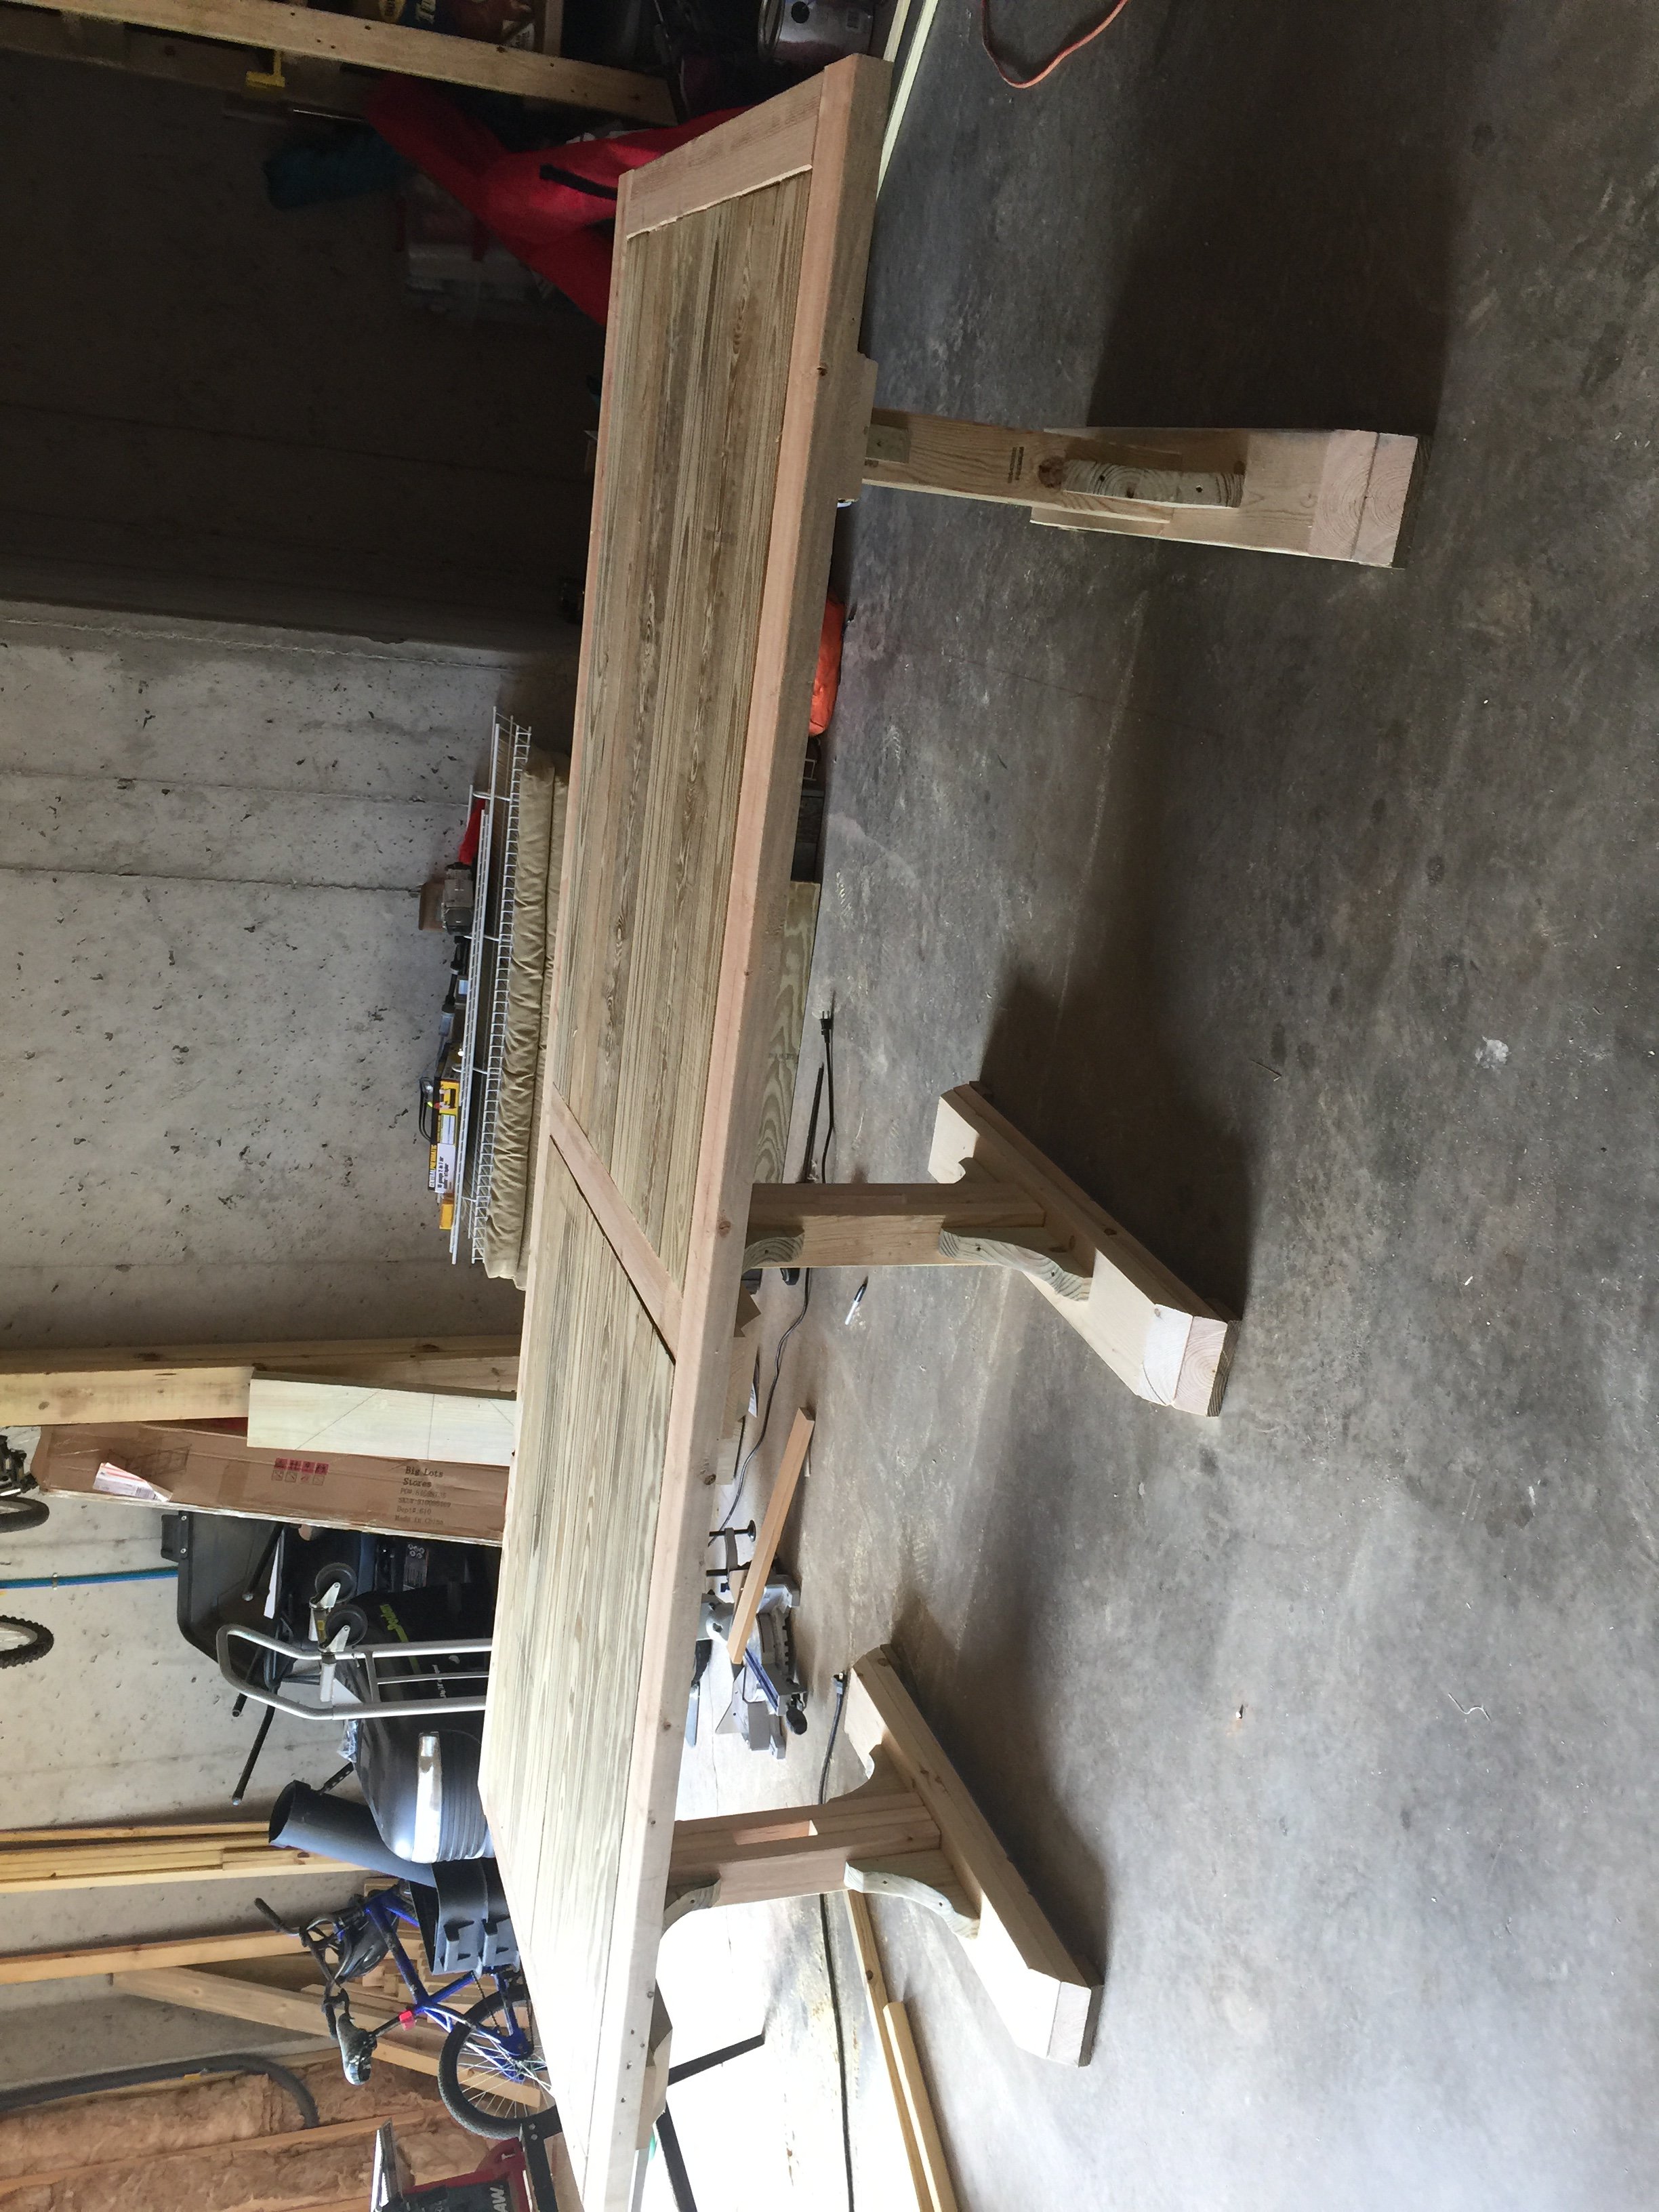
Community Brag Posts

Cedar Flower Box

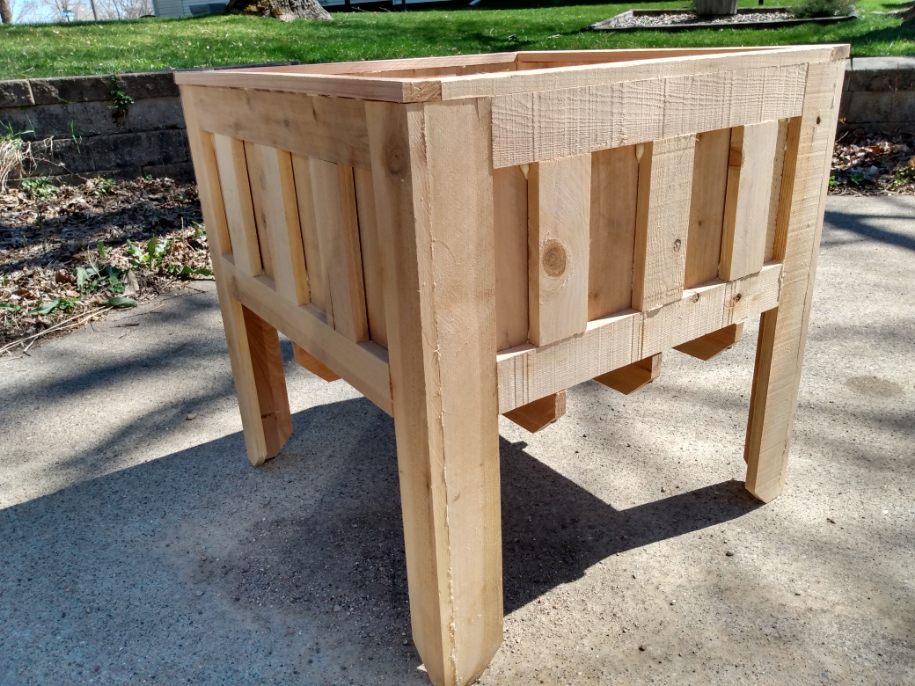
My supervisor wanted me to build her a waist high planter so I found pictures online and then came up with an idea in my head and carried it through. I had some pieces left over so I made it's little brother as a gift to my mom for Mother's Day. I posted it on a FB share site the other day, now folks want the plans for it. I am great when it comes down to thinking the plan in my head but putting it on paper, well lets just say not so much.

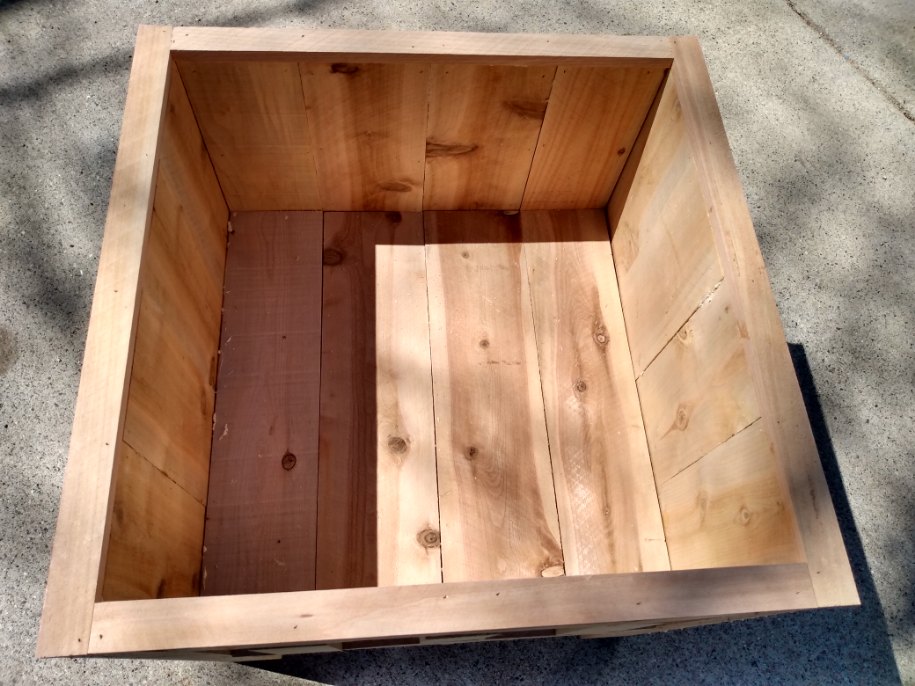
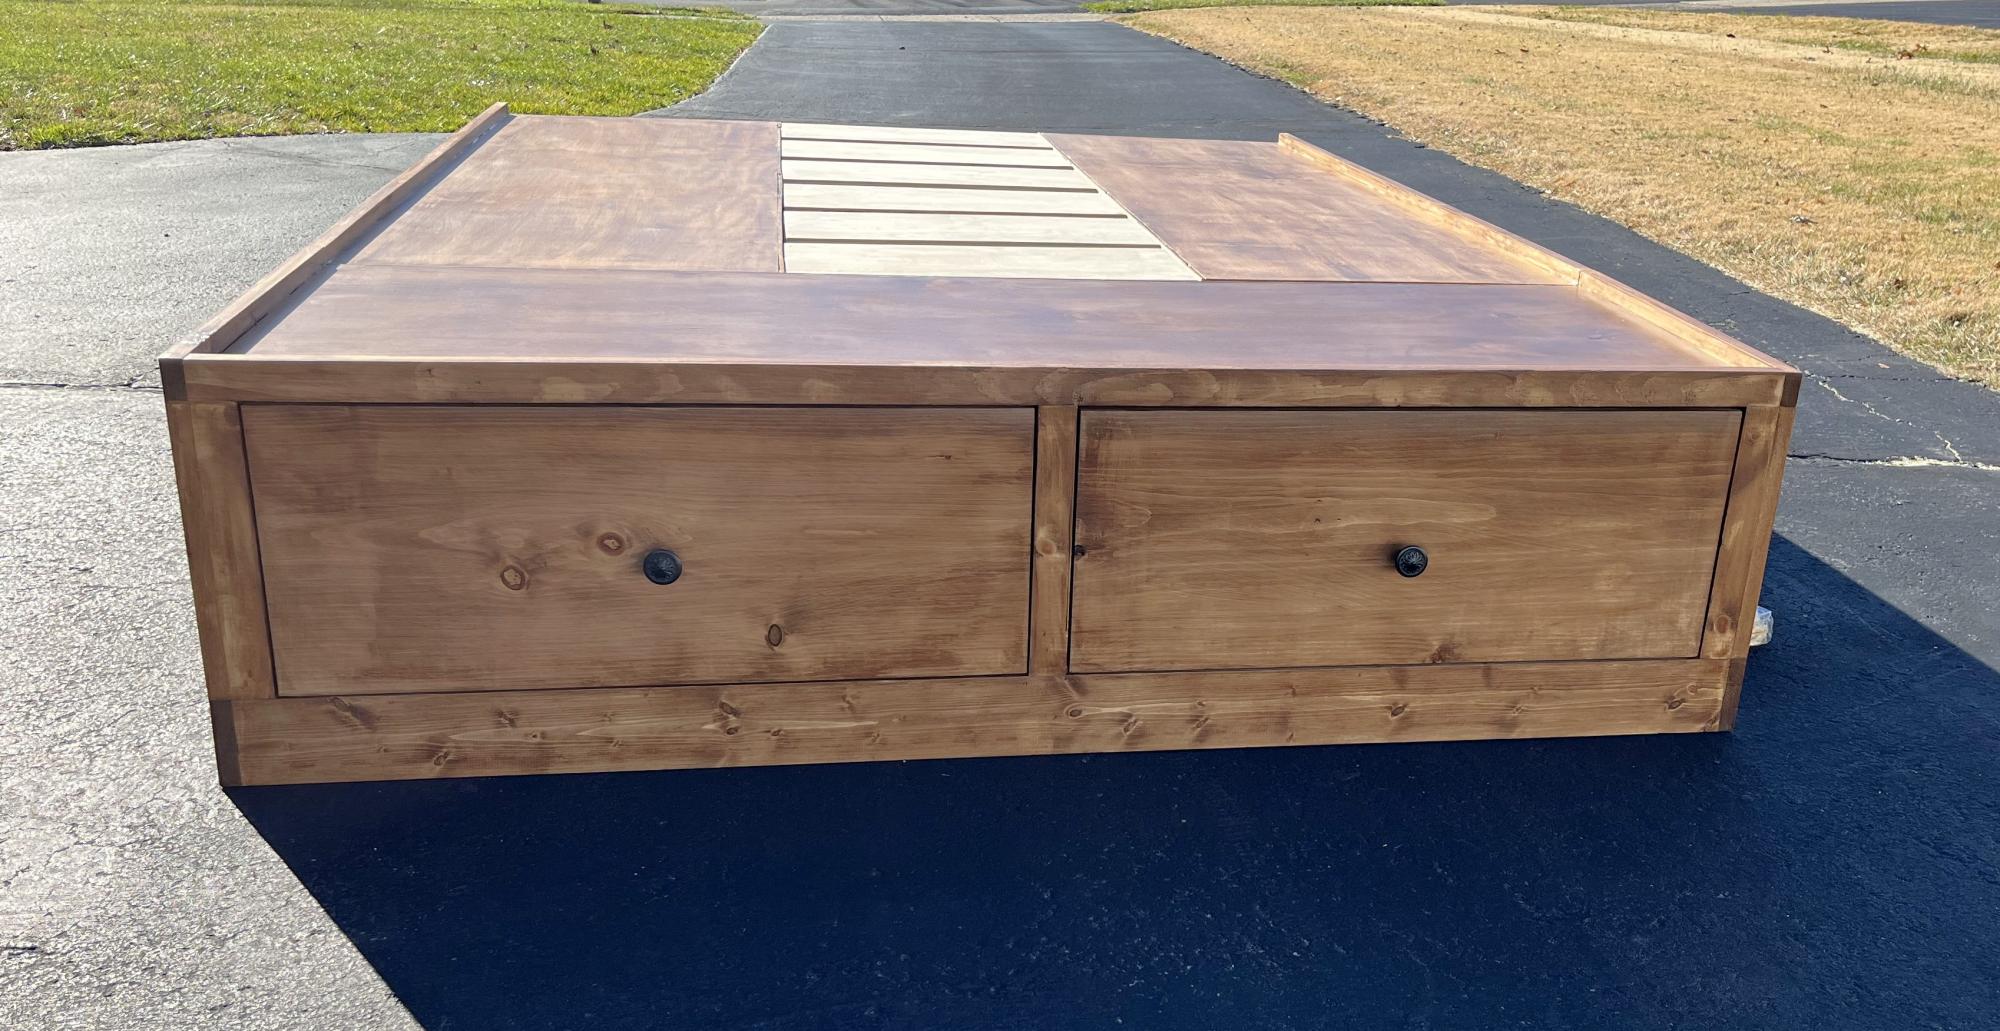
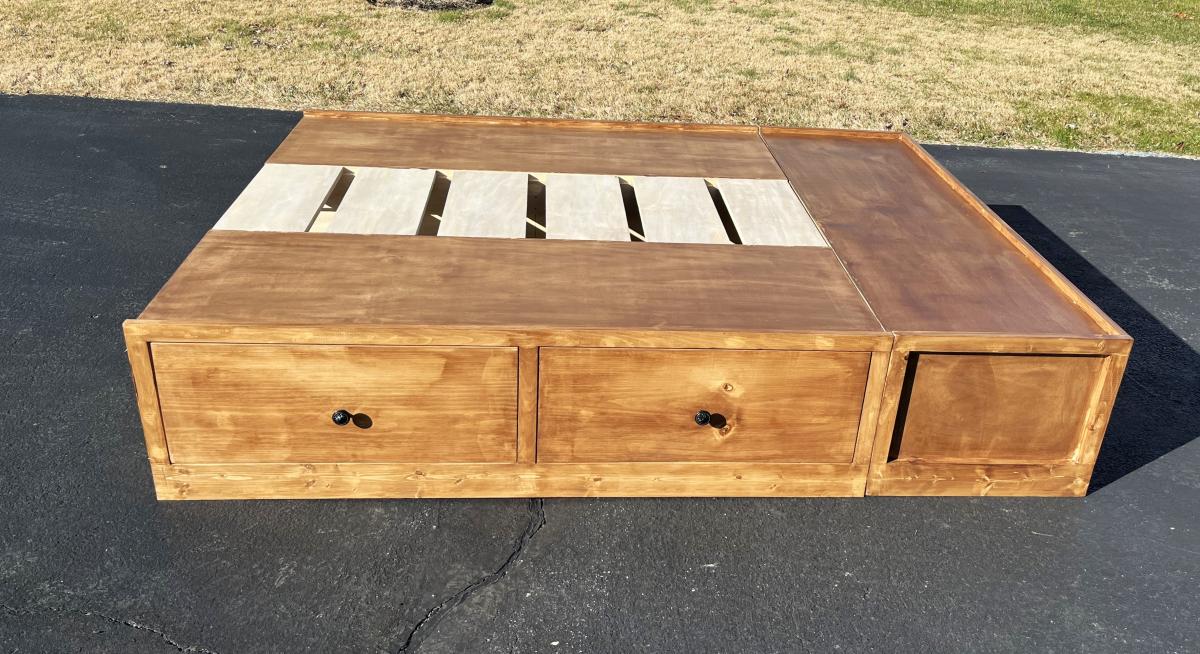
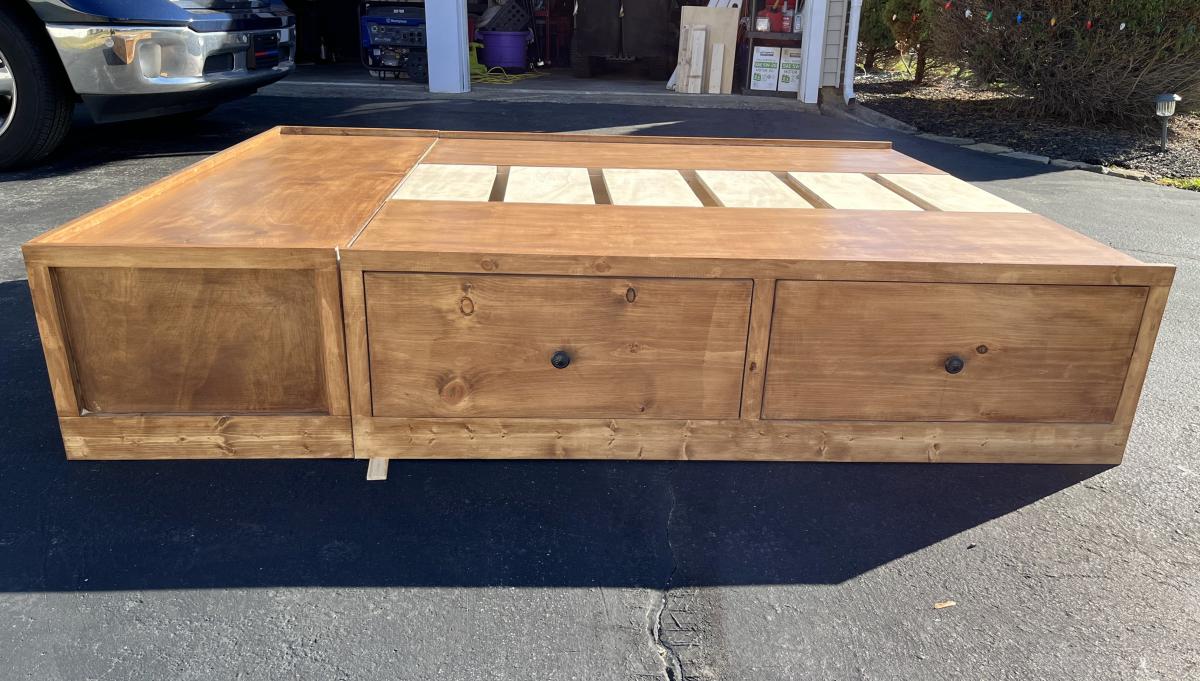
It measures 24" X 24" X 24" with a 12" deep planter basin. The bottom has a dadoed grid of 4 boards on the first and 6 in the newer versions to hold the bottom boards on top.

The entire project was 8-1X6 6' dog ear cedar fence pickets from The Home Depot that cost $2.35/each. I glued (Gorilla Glue), brad nailed and screwed the entire thing together So total, this cost me about $25.

Estimated Cost
25
Estimated Time Investment
An Hour or Two (0-2 Hours)
Recommended Skill Level
Beginner

DIY Doll Stroller

Submitted by Anonymous (not verified) on Wed, 01/03/2024 - 07:33

Thank you for the inspiration. In Australia I could not get the same size timber so needed to trim the sides. Next time will create the main frame and use it as a template. Made my own wheels, lock nut (also super glued) to ensure nut does not come off with little ones.

For my granddaughter and finished with Winnie the Pooh stickers.

Lawrie Kirk

Built from Plan(s)

Farmhouse Storage Bed - Solid Maple

My Dad and I started with solid maple lumber. We altered the plan to use mortise and tendon joints and adjust drawer sizes to that night stands would not interfere with the drawers. Final product weighs about 500lbs.

Estimated Cost
$1600.00
Estimated Time Investment
Week Long Project (20 Hours or More)
Finish Used
Cherry Minwax
Recommended Skill Level
Advanced

My first homemade table

Submitted by Anonymous (not verified) on Sun, 07/17/2016 - 03:04

This was my first time building something like this. I used reclaimed wood from my wife's family farm and decided to use thinner materials. I'm very pleased with the results.

Built from Plan(s)
Finish Used
Linseed oil
Recommended Skill Level
Beginner

Modern Farmhouse Nightstands (Own Plan)

We built the Modern Farmhouse Bed Frame, but wanted matching nightstands. Since we made the bed frame taller than the original plans, we needed taller nightstands. I also wanted a drawer and cabinet in the nightstand. We used the same panel pattern as the headboard for the side of the nightstands, and we used 4x4’s as the corners. We used euro sliders for the drawers. We used Minwax - Dark Walnut and Polycrylic in Clear Matte to finish the pieces. The nighstands dimensions are 32” in height, 26” wide, and 17” (top edge to edge) deep. They turned out amazing!

Estimated Cost
80
Estimated Time Investment
Weekend Project (10-20 Hours)
Finish Used
Minwax - Dark Walnut and Polycrylic in Clear Matte
Recommended Skill Level
Intermediate

Modified Outside Table

Submitted by NRFitzJr on Thu, 07/05/2012 - 06:14

I'm just starting out. I built this from scrap wood I had laying around. I followed the plan except for the table top. Here I used a 2x6 that I cut on the miter saw, and used bowties to help give the middle more strength.

Estimated Time Investment
Afternoon Project (3-6 Hours)
Finish Used
Minwax Wood Finish, Provincial
Recommended Skill Level
Beginner

Husky Farmhouse Table

Submitted by J Williams on Sat, 04/19/2014 - 20:21

Took about a week to build and put together. Most expensive part was the table legs but the most challenging part was to get the table top smooth and level. I built the benches based off the farmhouse bench plans and then picked up some chairs from a local second hand shop for just two bucks a piece. So far the feedback has been very positive!

Estimated Cost
350
Estimated Time Investment
Week Long Project (20 Hours or More)
Finish Used
Minwax Dark Walnut
Recommended Skill Level
Intermediate

Comments

The Kelley's Triple farm house table

Submitted by Anonymous (not verified) on Wed, 07/20/2016 - 14:09

This was more or less a honey-do project for my birthday. My husband was able to use the entire length of the original plan that was downloaded from this site. It took him the entire weekend to complete all of the cutting and assembly. the wood glue application and staining went well-basically, after the wood glue was dry he sanded then applied two coats of a stain that has a white wash appearance. After letting it dry he sanded then applied two applications of matte poly. This project actually took about three weeks for us because we were in the mist of moving. I believe it could have been completed in the course of one weekend if there were know distractions. The table is now a piece that is the conversation of all who visit our home and it will be in the family for many years to come.

This honey do project gets a 100% thanks to making this tool available to others!

Thank you

The Kelley's


Finishing products: minwax water based white wash pickling 32oz.

minwax water based polycrylic clear matte


The $200 dollars was due to other materials and tools that were required

Built from Plan(s)
Estimated Cost
$200
Estimated Time Investment
Week Long Project (20 Hours or More)
Finish Used
white wash followed with matte poly
Recommended Skill Level
Intermediate

Dining cart

This dining cart is very versatile. It could be used in any room of the house. I love that it has wheels on the bottom so you can move it easily if needed.

Built from Plan(s)
Estimated Cost
100.00
Estimated Time Investment
Day Project (6-9 Hours)
Finish Used
Rustoleum Early American, Polyurethane
Recommended Skill Level
Beginner

Toy Box finished today!

Submitted by Anonymous (not verified) on Sat, 07/23/2016 - 15:27

Thanks for the step by step! That Kreg jig was amazing I didn't even know that existed. 

Built from Plan(s)
Estimated Time Investment
Afternoon Project (3-6 Hours)
Finish Used
White Gildens Premium
Recommended Skill Level
Intermediate

Dry Can Storage - Holds 144 Cans!

Submitted by Anonymous (not verified) on Sun, 01/14/2024 - 18:27

can holder

can holder

144 can dry storage for a pantry. In Amarillo Texas.

Jeremy Racette

Comments

Miter Saw Cart

Submitted by solomonson on Sat, 07/07/2012 - 20:41

I saw Gina's post and this moved straight to the top of the to-build list. It's gotten my saw off the floor of my garage and provided a ton of storage for my other tools and bits. I also added another shelf after taking this picture. I modified this slightly: I made the wings 24" only, added a short back to provide more stability and reinforcement to the top shelf, added a diagonal support to the wings, and reinforced the top shelf from the sides with 3" dowels. I got my wood from a local lumberyard and the wheels from Blue.

Built from Plan(s)
Estimated Time Investment
Afternoon Project (3-6 Hours)
Finish Used
I sanded the heck out of everything. Other than that, nothing.
Recommended Skill Level
Beginner

Toybox with shelf

Submitted by jandmhough on Thu, 04/24/2014 - 18:13

After building the farmhouse table, I got really excited about doing another project. While I was on spring break (nice benefit of being a teacher) I put together this toybox for my son. It's great to finally get the toys out of the laundry basket we had them in and into something more appropriate. We decided to make the lid a chalkboard for a little added fun.

Estimated Cost
$80-$100
Estimated Time Investment
Day Project (6-9 Hours)
Finish Used
The toybox is painted with Glidden Sea Glass Green. The top of the lid we used Rustoleum's tintable chalkboard paint in Periwinkle. It's a really cool combo and our boy loves the chalkboard.
Recommended Skill Level
Beginner

Tv stand from Grandy sliding door console

Submitted by Anonymous (not verified) on Mon, 07/25/2016 - 20:52

Built this at the request of my pregnant wife, got to crunch time with baby and sliding doors will have to wait until the craziness of the baby dies down. Prioritiezed and built the changing table first.   Cut it down from 4 openings to 3 due to size of our wall.  

Built from Plan(s)
Estimated Cost
$160
Estimated Time Investment
Weekend Project (10-20 Hours)
Recommended Skill Level
Intermediate

Comments

Modern Farmhouse Bed

Submitted by Anonymous (not verified) on Sun, 05/17/2020 - 16:52

Made this in a weekend, took us about 12 hours total. Loved how it came out and used the recommended stain. I ended up doing three coats on the headboard. My boyfriend and I used douglas fir, definitely came out very sturdy. We did have to make some adjustments and it was a bit of a learning process with the pocket holes. The plans should be a little more detailed but if you take your time the pieces come out so great!

Built from Plan(s)
Estimated Cost
$200
Estimated Time Investment
Weekend Project (10-20 Hours)
Finish Used
We used varanthane weathered wood accelerator in gray. I sanded everything done with 320 grit and stained the wood twice. The boards for the headboard needed a third coat. I also used a rag and rubbed additional stain on any errors that looked thin and to remove excess brush marks.
Recommended Skill Level
Intermediate

Comments

Bar Cabinet with Floating Shelves

Submitted by Anonymous (not verified) on Mon, 01/15/2024 - 18:36

I had never built cabinets before, but I’ve been wanting to learn how to, and this corner in our house had been screaming for a bar area for awhile. I’m quite happy with the result, given that I’m only one year into woodworking! Thank you, Ana, for all your inspiration!

Jaclyn Pietrafetta

Wood Plank Magnet Boards

Submitted by sraper2 on Mon, 07/09/2012 - 19:56

I actually got the idea from Shanty 2 Chic and I thought I would share my take on it here. It was super simply...I just kreg jig'd the boards together and built a frame to the size I wanted. I bought the aluminum from Lowe's and cut it down. I actually built 6 of these so I could give 5 away as thank you gifts. The price for all 6 was under $50 and I think only about $30 of that was the materials to make the boards. The rest was spend on the stuff I made for the boards.

Here is a link for their post! http://www.shanty-2-chic.com/2012/05/diy-12-magnetic-memo-board.html

Estimated Time Investment
An Hour or Two (0-2 Hours)
Recommended Skill Level
Starter Project

Di Bello Family

We needed a table for the breakfast nook in our new home that we will be moving to in June. We were so excited about this table that we built it ahead of time and sold our other dining room table. We love this table! Thank you so much for the awesome plans.

Estimated Time Investment
Week Long Project (20 Hours or More)
Recommended Skill Level
Beginner

Comments

Smaller Version finished in colonial

Submitted by Anonymous (not verified) on Thu, 07/28/2016 - 09:21

I modified the table to be a little smaller for a space. it came out beautifully. Love this build as it allows for a very large yet stable table that allows for seating on the ends as well. 


Side note i found notching out the x brace and using only two solid pieces to a be a more effective way of creating both a solid joint as well as well as a smoother looking joint. 

Built from Plan(s)
Estimated Time Investment
Weekend Project (10-20 Hours)
Finish Used
Minwax Colonial
Recommended Skill Level
Intermediate
Back