Community Brag Posts
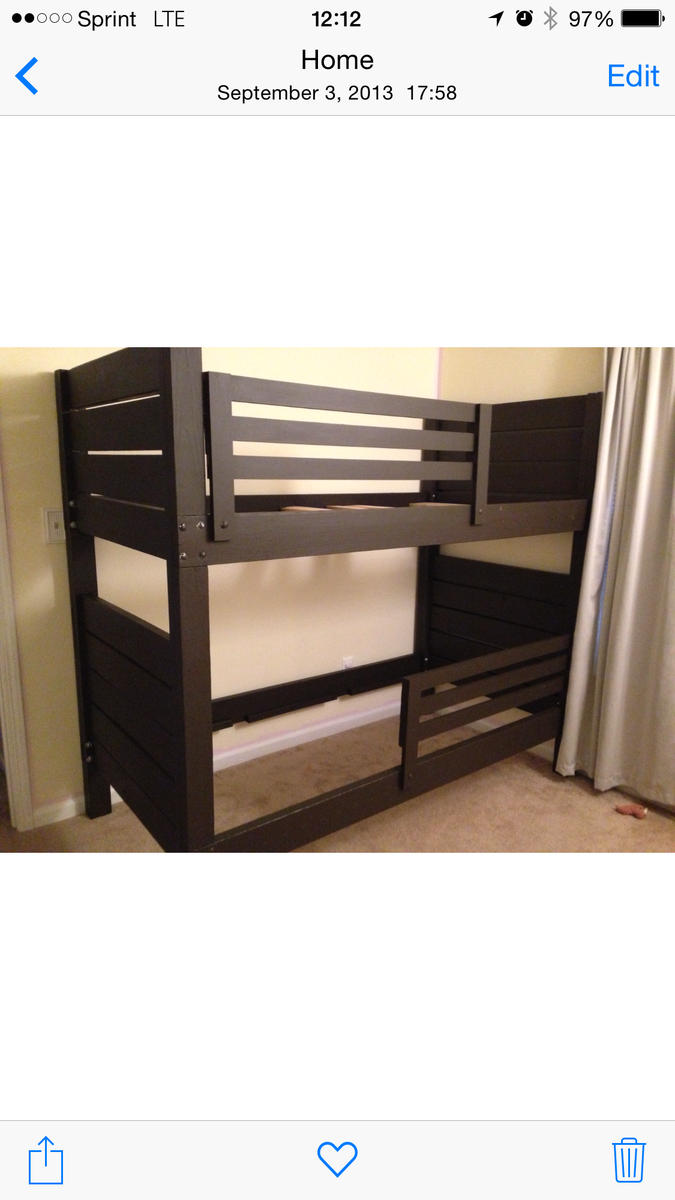
Matching Adirondack Chairs
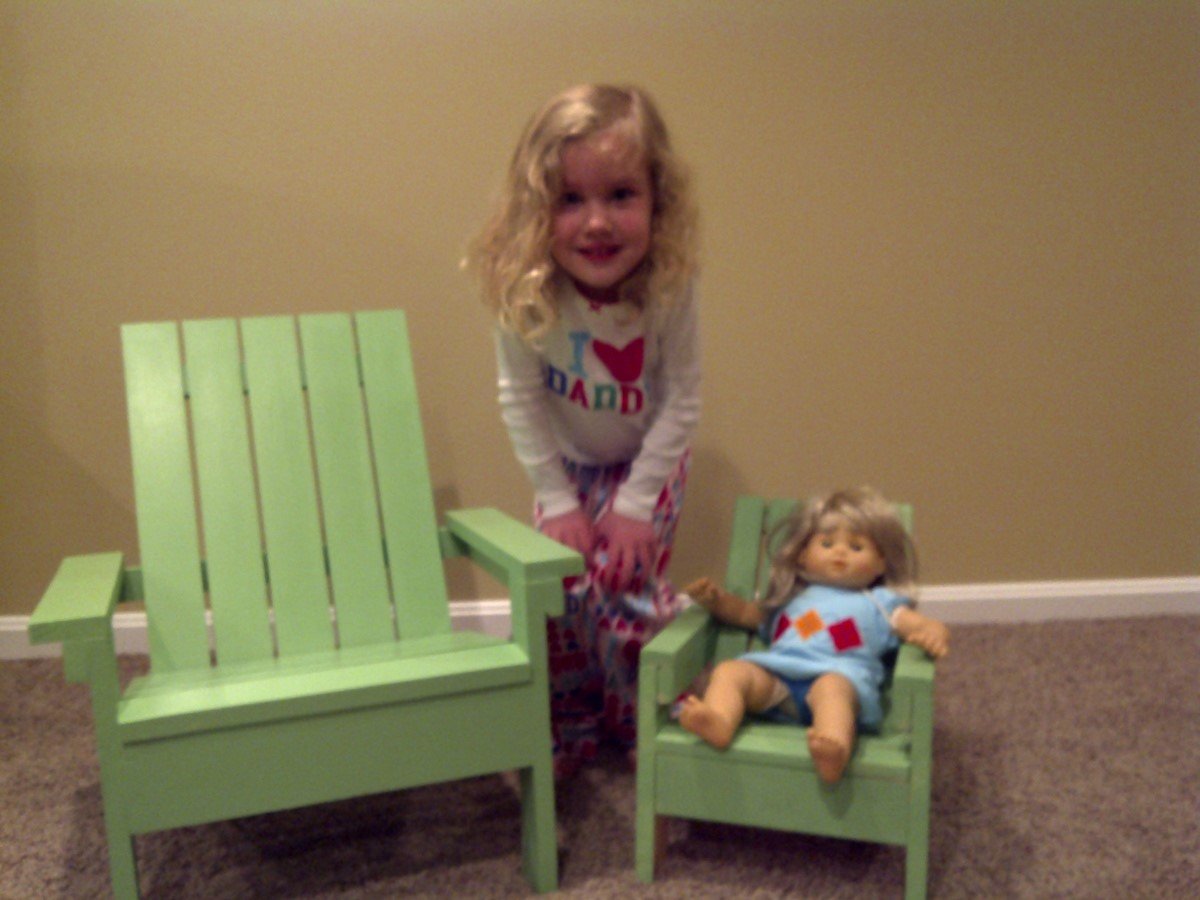
Matching American girl Adirondack chair and kids Adirondack chair build!
Built from Plan(s)
Estimated Time Investment
Afternoon Project (3-6 Hours)
Recommended Skill Level
Beginner
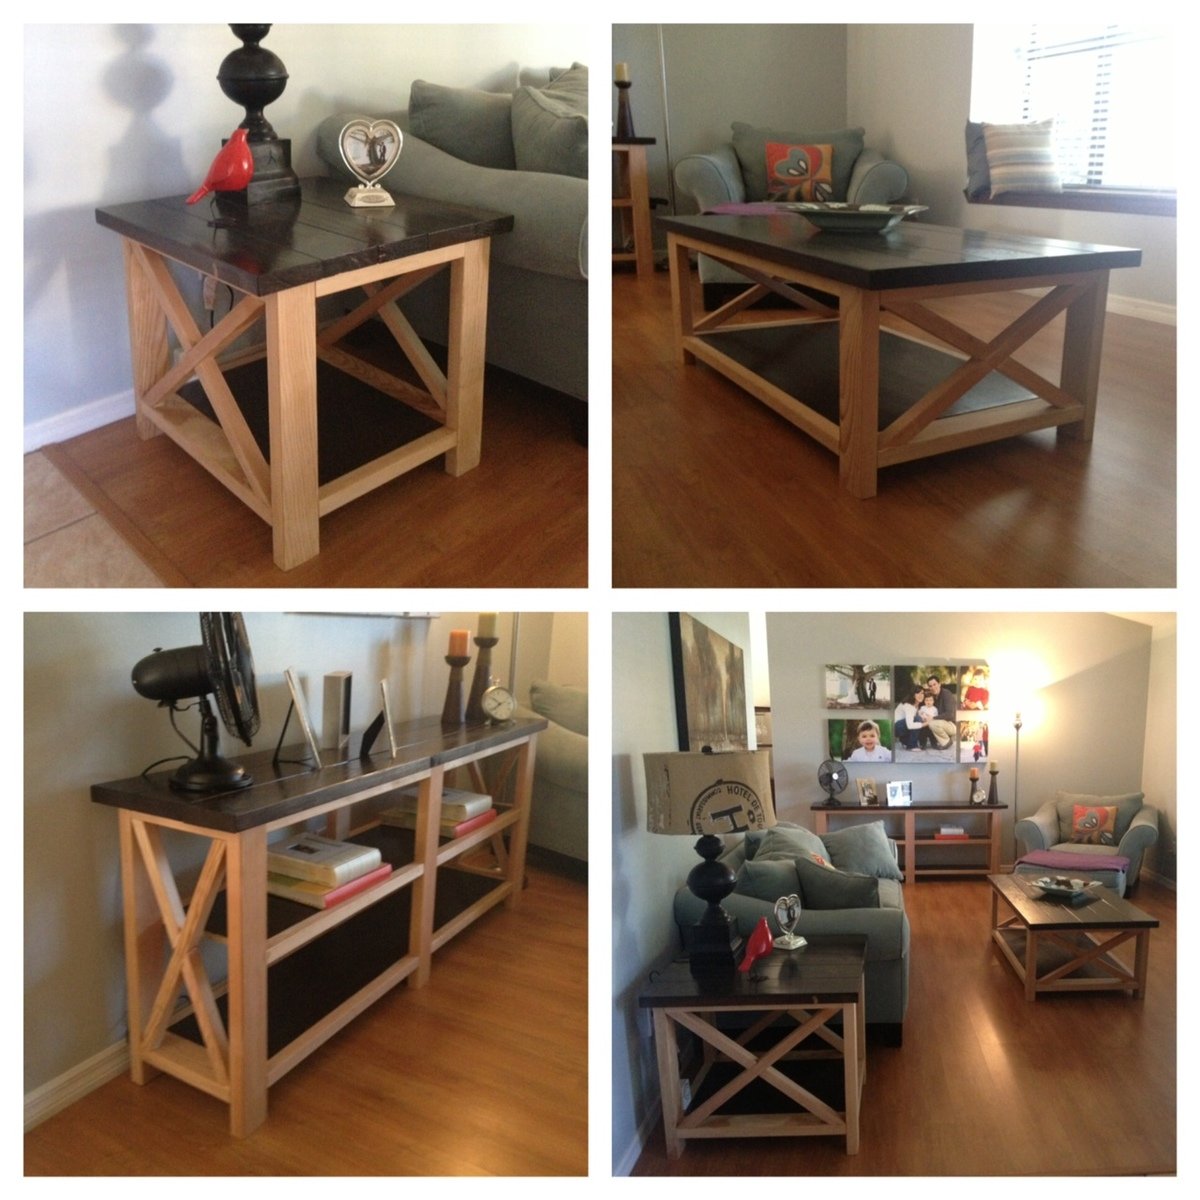
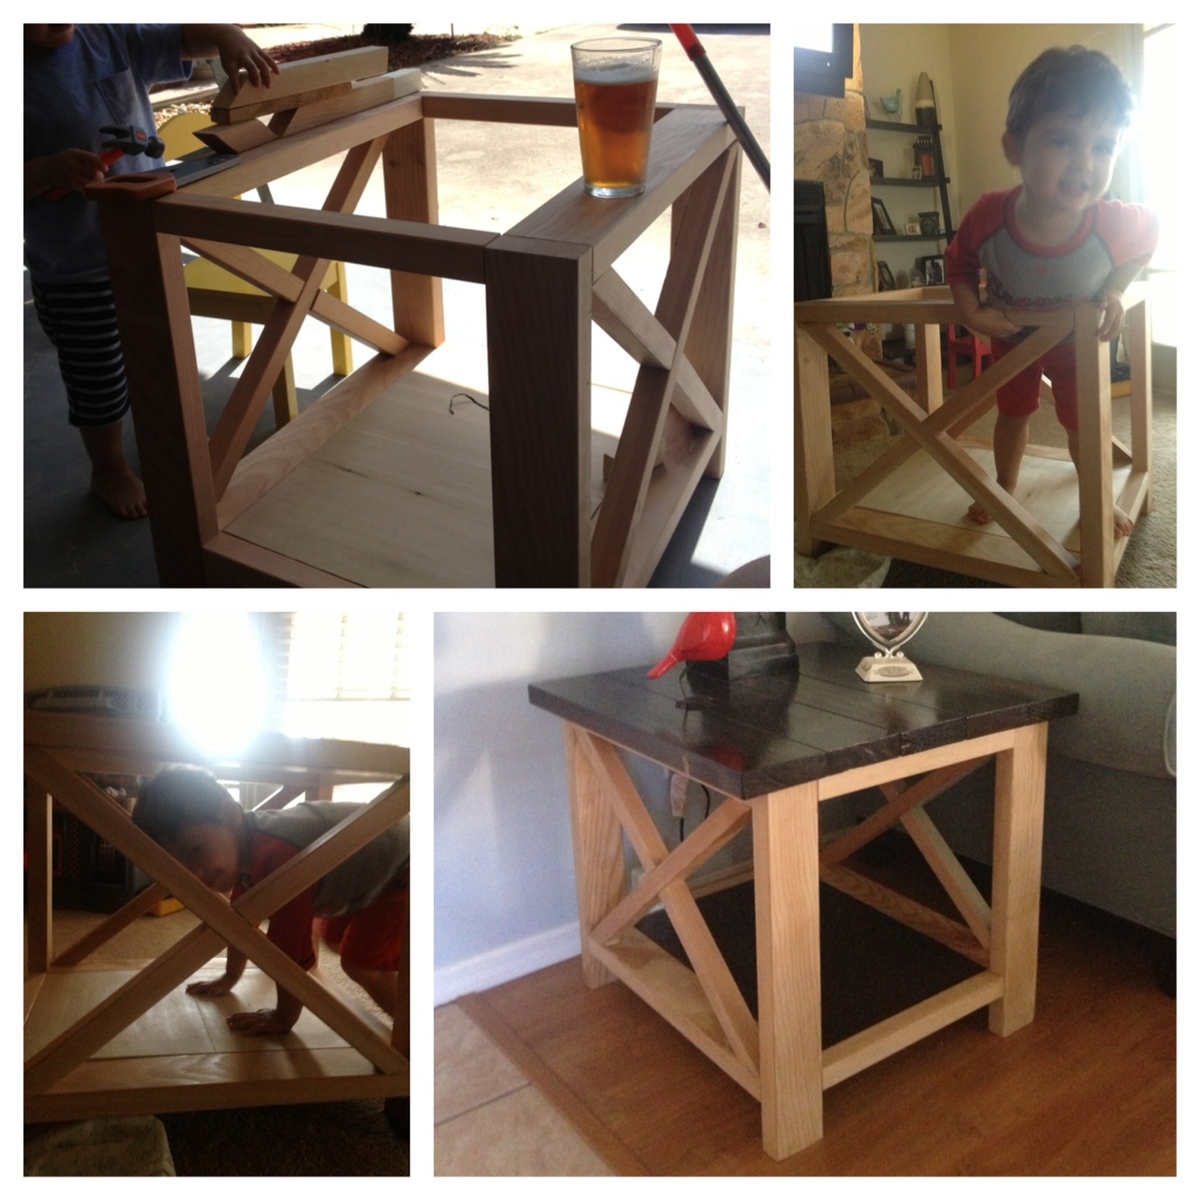
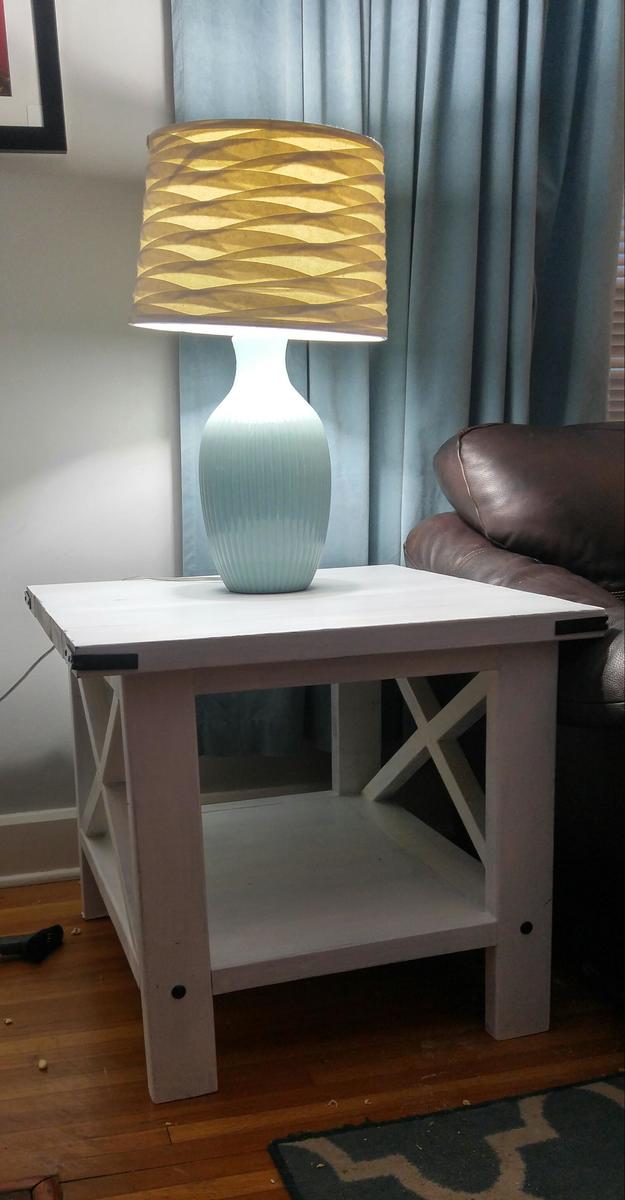
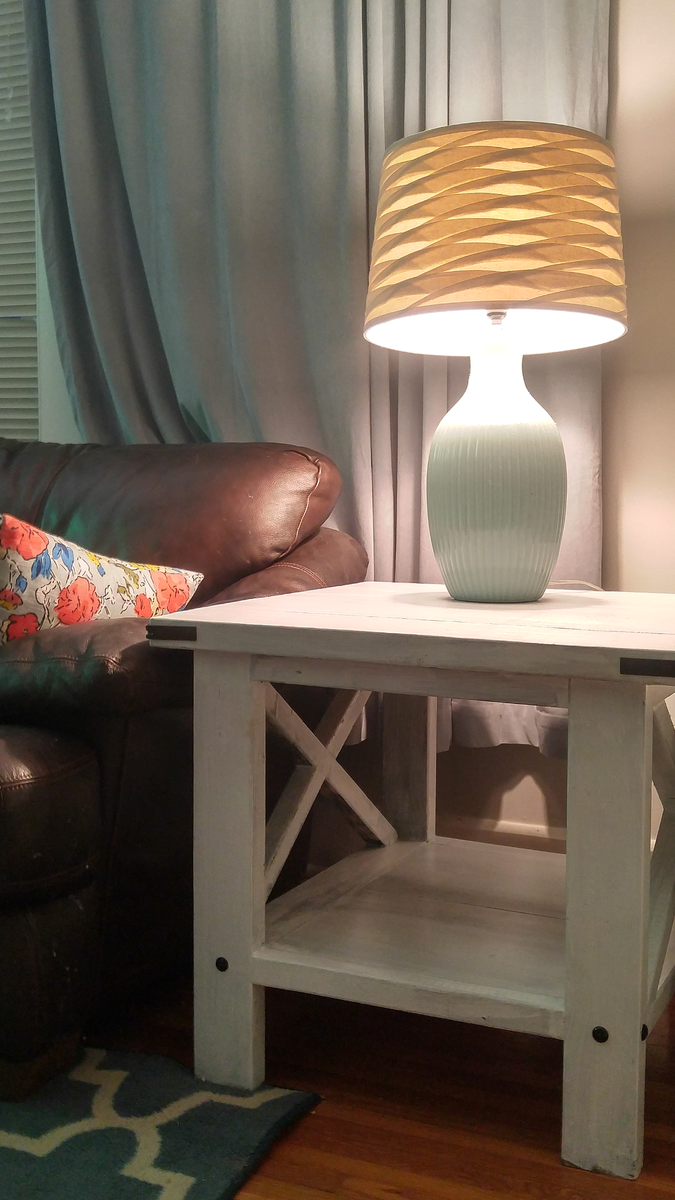
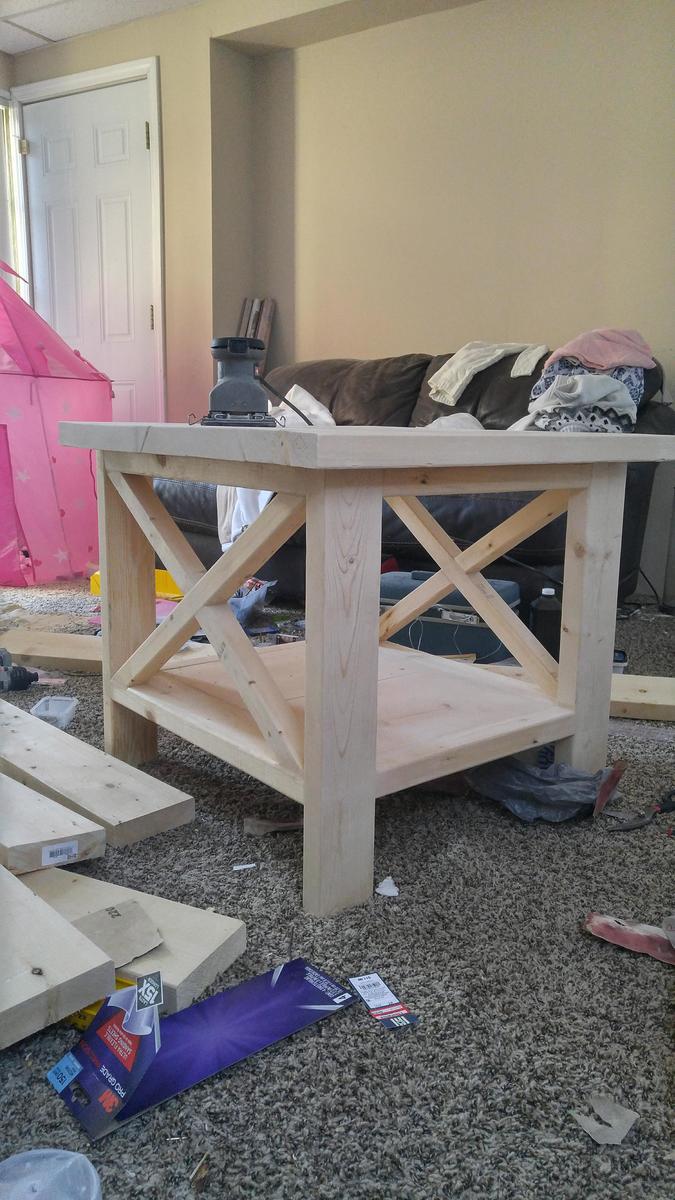
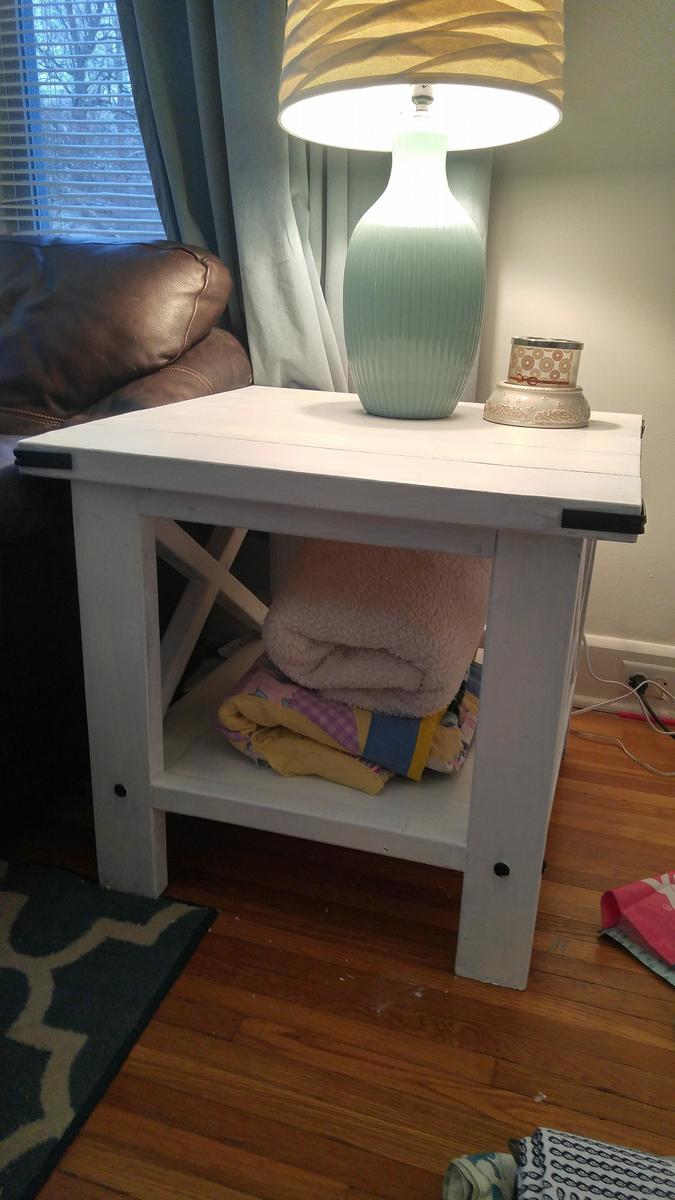
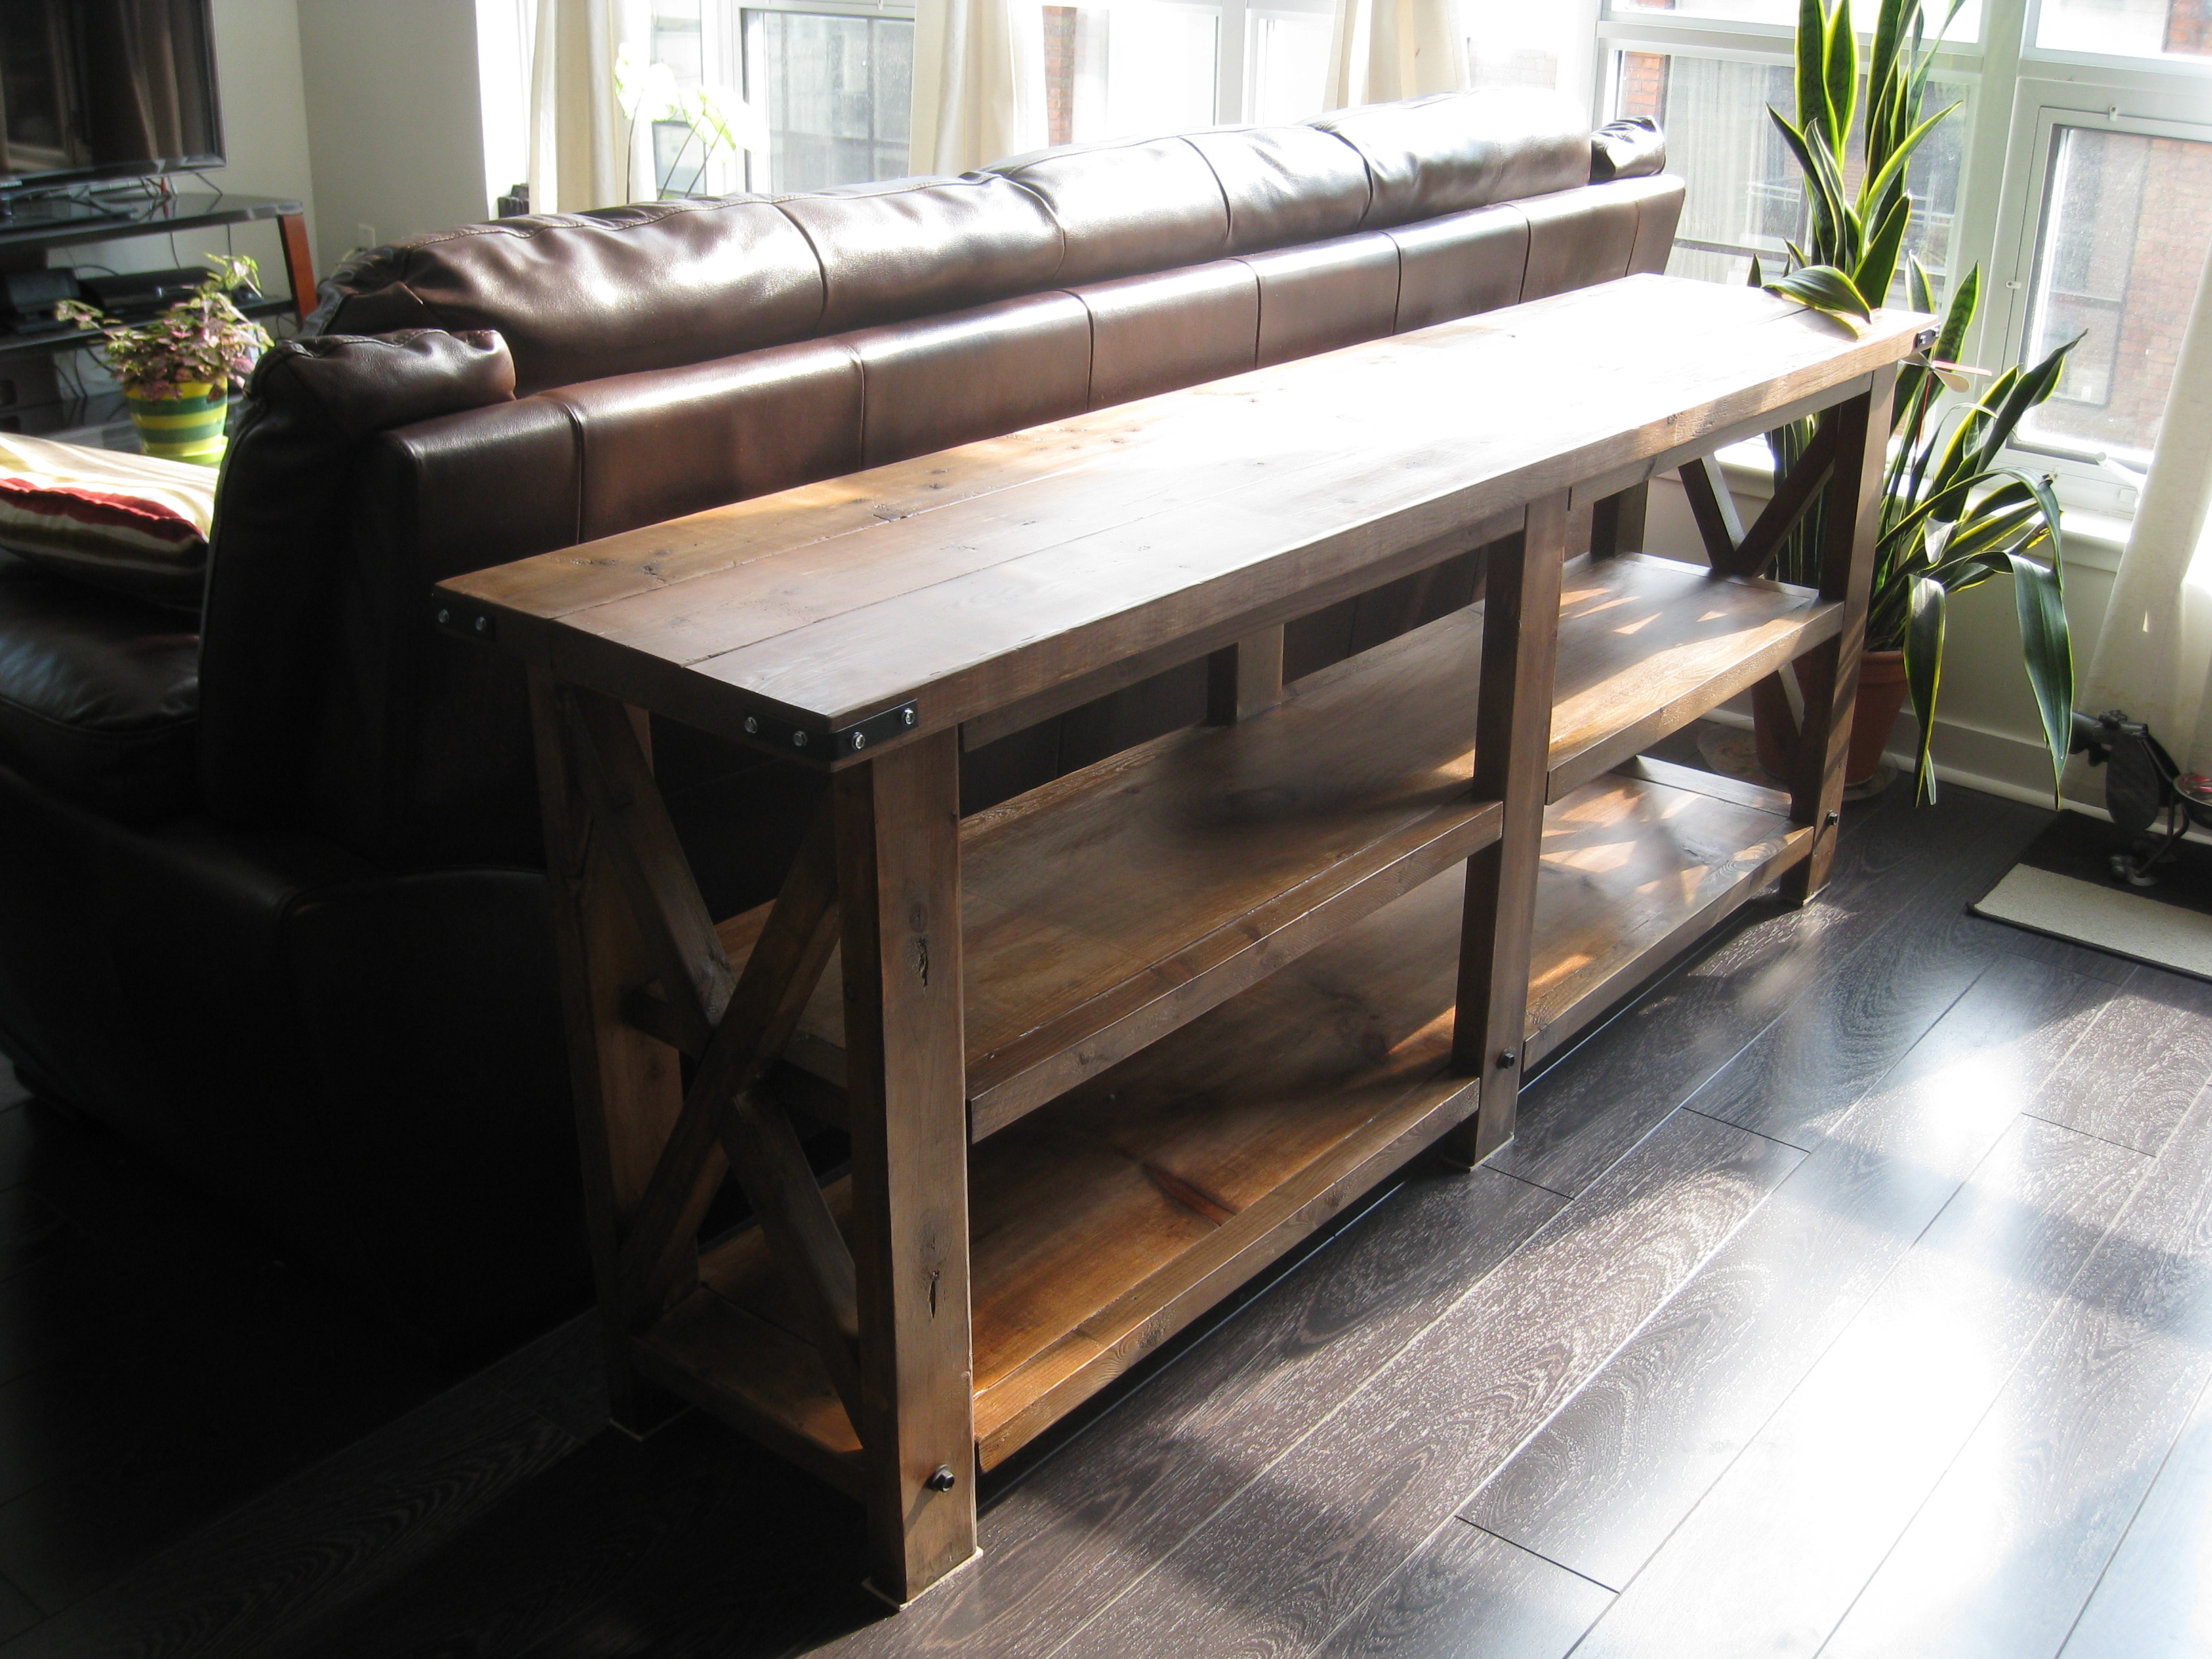
Rustic X Coffee Table, End Table and Console

This was a blast to build. This was all a gift for my wife since the traditional 5th anniversary gift is wood.
The coffee table and console are both awesome! The only thing I would change/modify is the end table, because its kinda big and doesn't really look its part of the set other than the "X". I would maybe take about 2 or 3 inches off all sides or maybe 3 off the sides so its not such a box.
Built from Plan(s)
Estimated Cost
$500
Estimated Time Investment
Week Long Project (20 Hours or More)
Finish Used
Kona on top and shelf (s) with 4 coats of polyurethane. Currently there is nothing on all other parts because I wasn't sure what I was going to do. I think I'm just going to put a few coats of poly on the "naked" parts and call it a day. I thought about painting the other pieces but that would hide the beautiful grain in the Douglas Fir. I don't like the idea of the entire thing being Kona because it looks too dark on the others I've seen on here (for my house only), then I thought about a very light stain but think I settled on it being naked with the poly. I would honestly love to hear what you guys think as I have not touched it yet.
Actually I was thinking it would be nice for Anna to have a section with a "poll" for someone like me who is kinda stuck on a finish to post a picture and have other vote on a few options....thoughts??? Anna??
Actually I was thinking it would be nice for Anna to have a section with a "poll" for someone like me who is kinda stuck on a finish to post a picture and have other vote on a few options....thoughts??? Anna??
Recommended Skill Level
Beginner
Comments

Thu, 06/20/2013 - 07:31
Stain or Poly Poll
I'll start one! Go for the poly. You're absolutely right, it will bring up the beautiful grain, and show off the "X" accents. Nice work, by the way!
Thu, 06/20/2013 - 07:32
Stain or Poly Poll
I'll start one! Go for the poly. You're absolutely right, it will bring up the beautiful grain, and show off the "X" accents. Nice work, by the way!

Thu, 06/20/2013 - 08:39
Yes to the poly!
Beautiful builds! Wow, they look wonderful. What an amazing gift! From the pics, the end table looks fine, too, as the furniture isn't a small scale. I love the two-tone so I say go for just the poly!
Thu, 06/20/2013 - 12:08
Poly is A great choice
I think you did an amazing job :) love the contrast of the two tones. Using poly for the rest would be beautiful. I cant wait to do this project myself.

Thu, 06/20/2013 - 15:47
Love these tables!
What a wonderful gift! These tables are beautiful, great job on this build! I love the two-tone - One more vote for the poly! :)

Fri, 06/21/2013 - 13:04
Poly it is!
I'm going to go with only the Poly over the bare wood. Thanks for the comments and advise! It will be a few weeks due to work and travel but I'll send updated pics once its done.
Sat, 02/24/2018 - 21:18
Poly, or paint white
I like the naked/poly look too. The other option I think would look good would be painting it white. The contrast between the white frame and darker kona top and shelf would be cool.
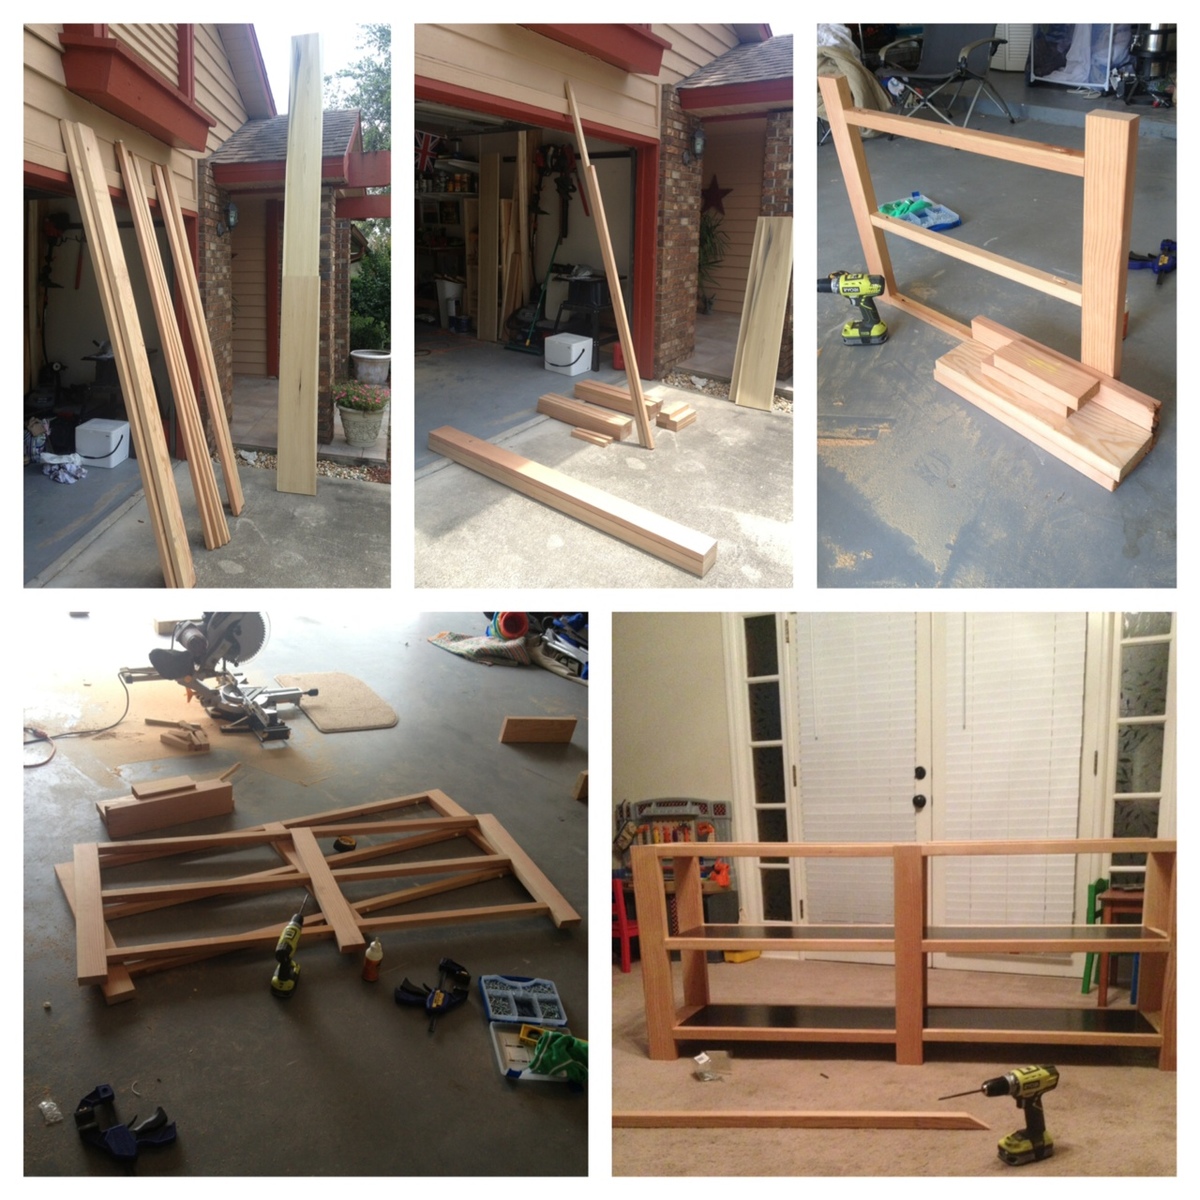
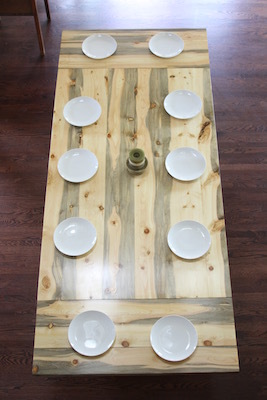
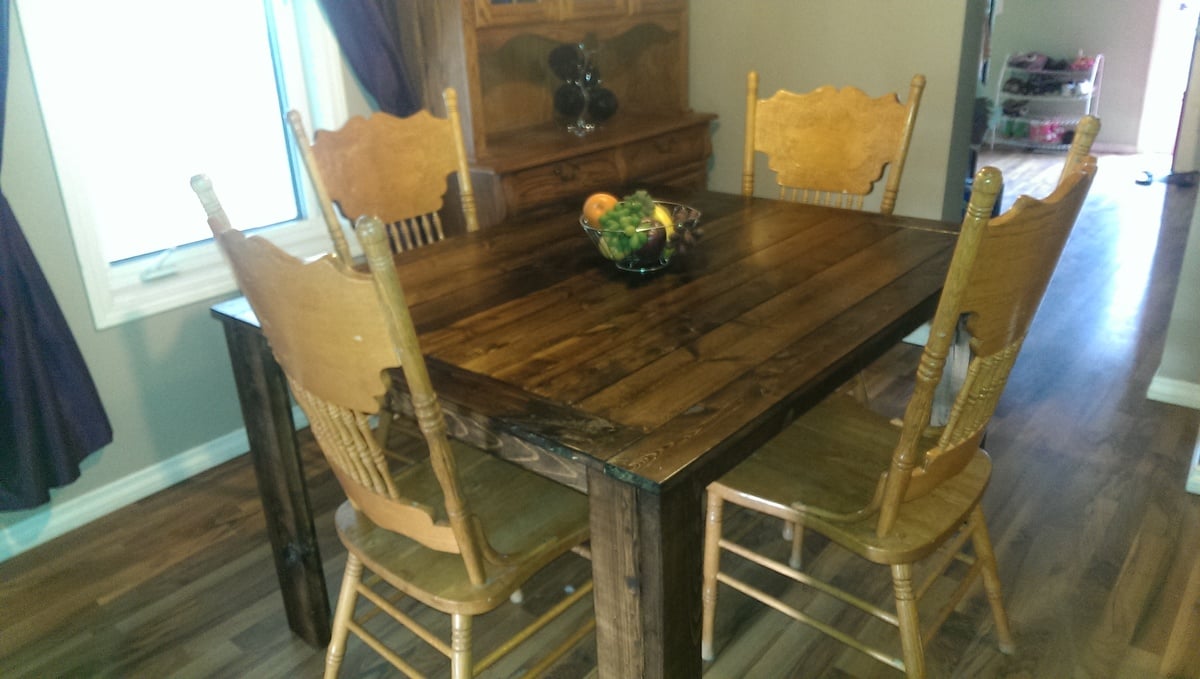
Farm House Table
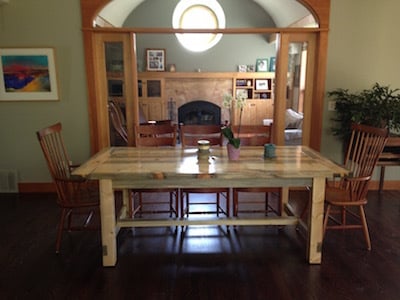
I used local Colorado beetle killed pine. I based the table on Anna's Farm House Table plans. I used the bread ends to create pull outs for 11 inch extensions on each end.
Estimated Cost
$350, not counting the planer that burned out during the milling of the wood.
Estimated Time Investment
Week Long Project (20 Hours or More)
Finish Used
seven layers satin wipe on poly, two layers finish wax using steel wool
Recommended Skill Level
Intermediate
Last minute Christmases gift. Bunny hutch.
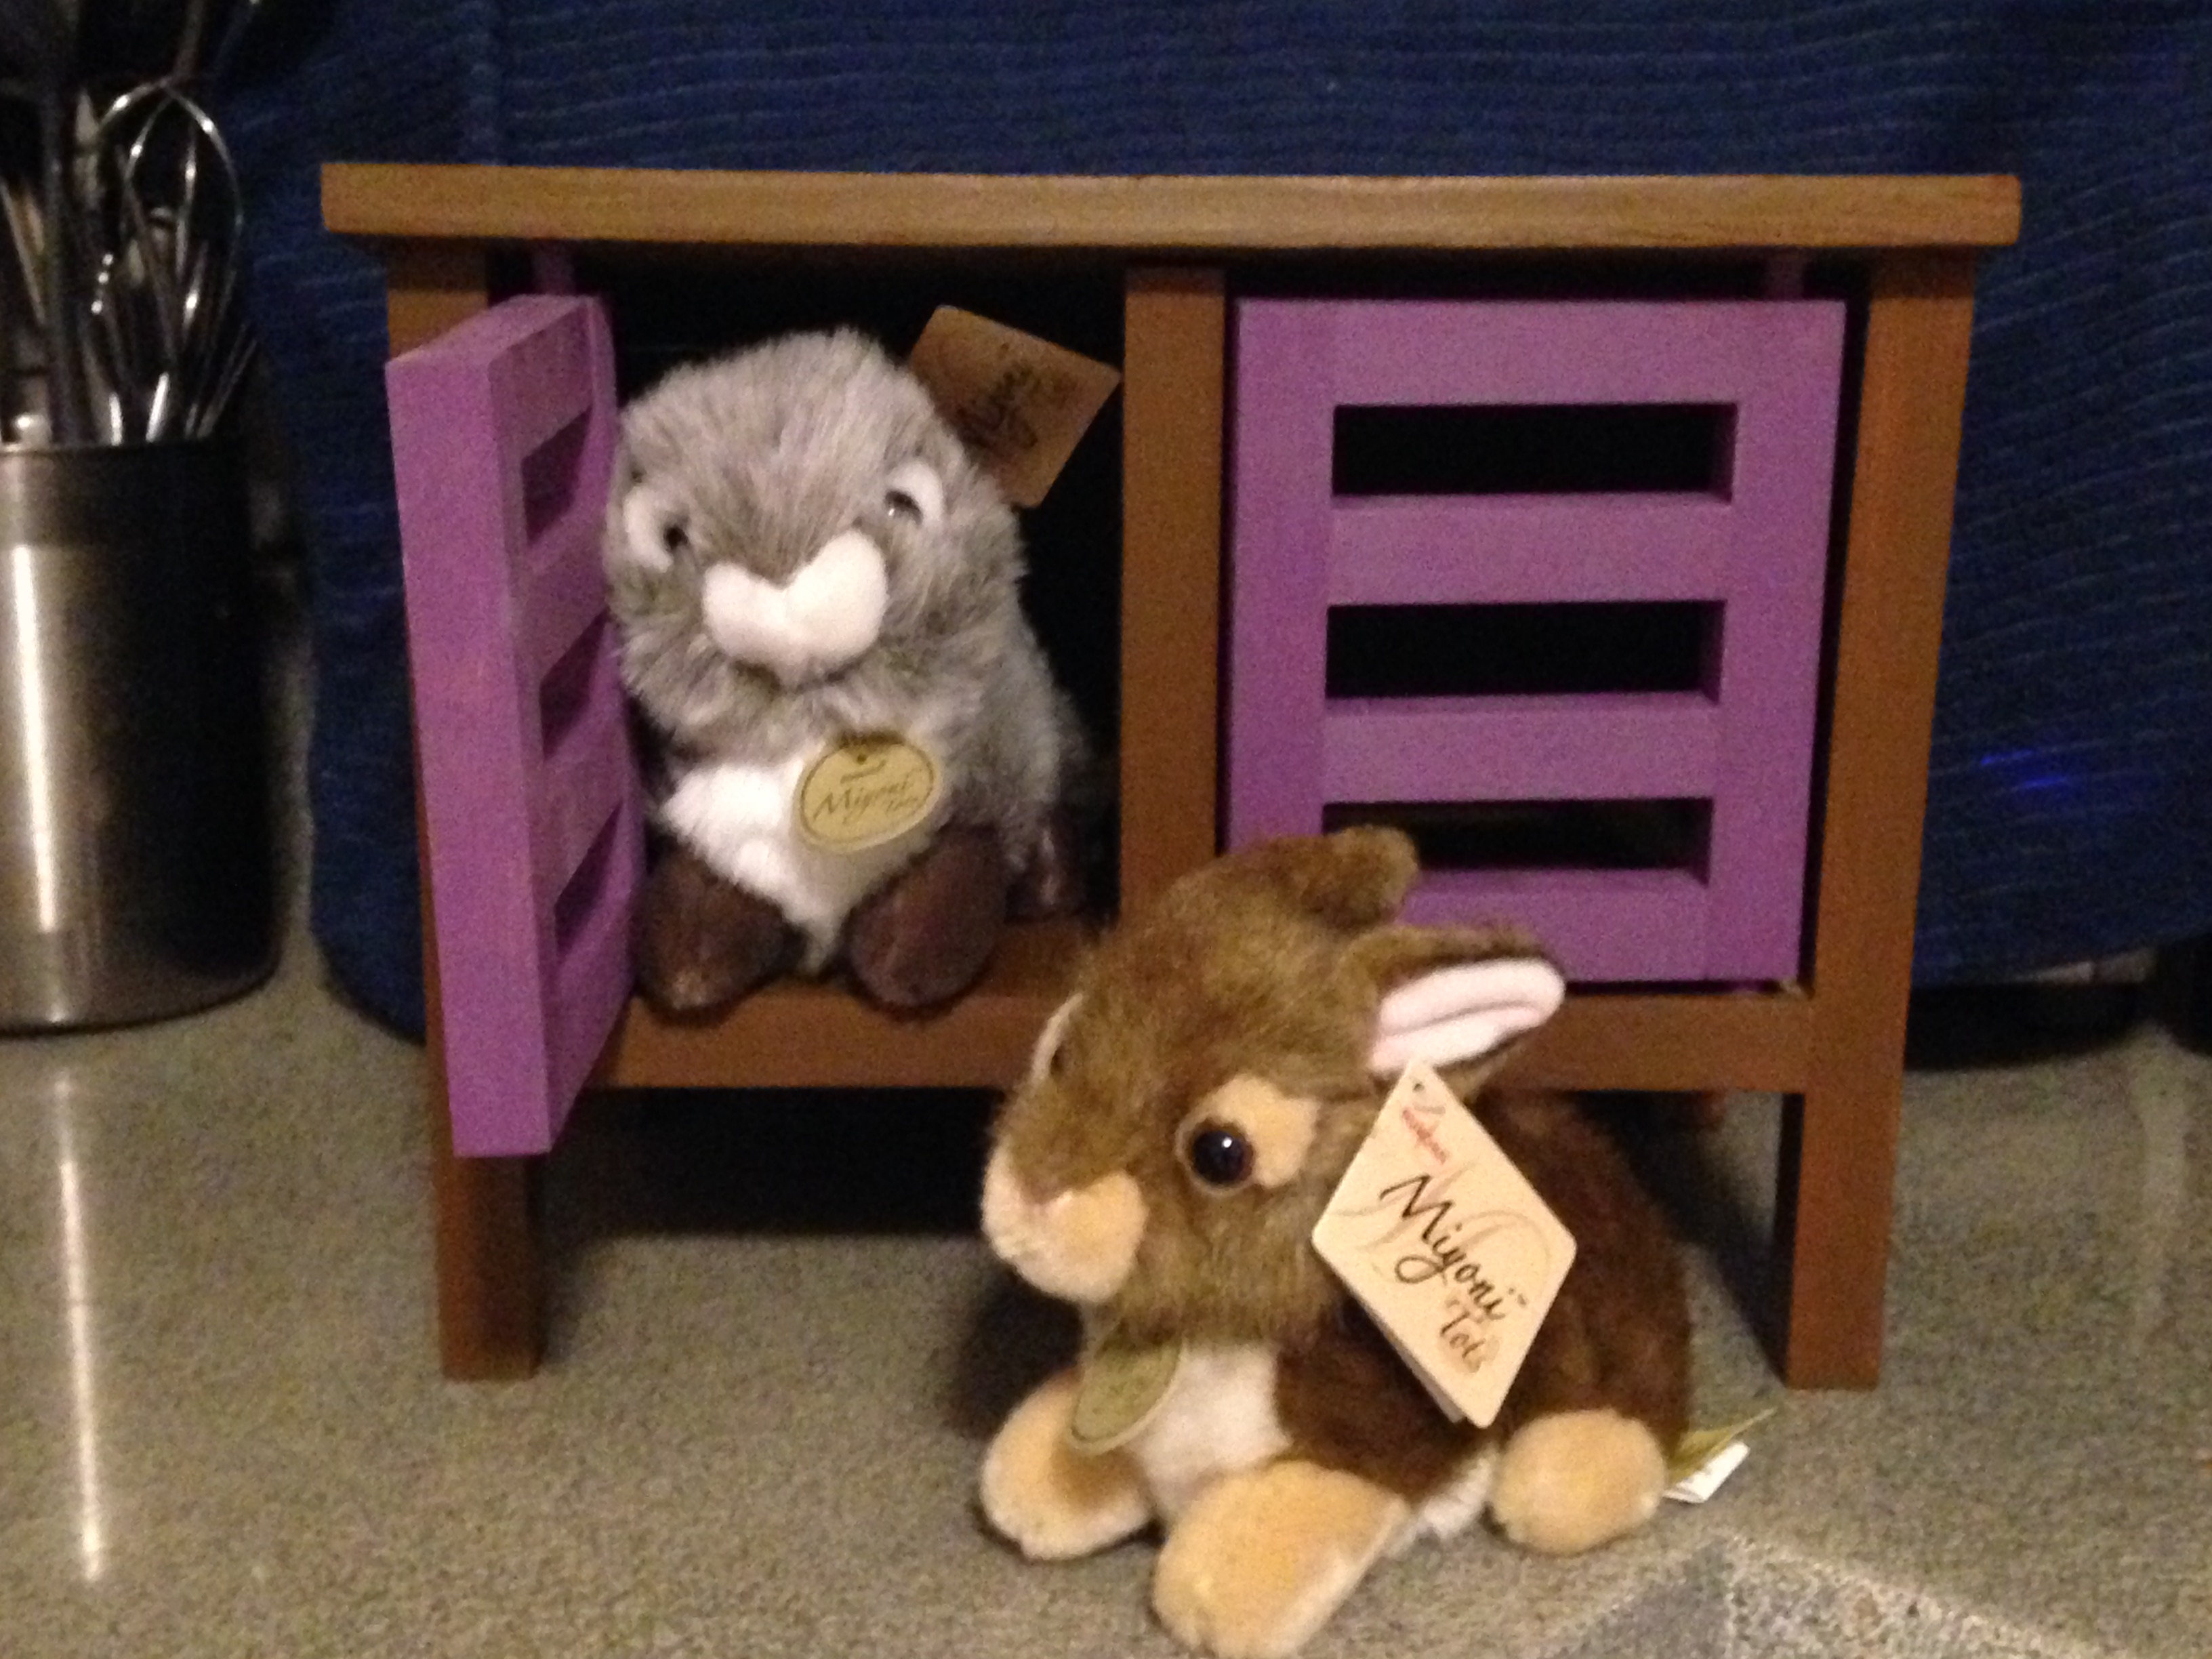
Thank you Ana for the plans. Our daughters dolls needed some pets and this project was the perfect home for her New bunnies! I can't wait for her to open this gift Christmas morning.
Estimated Cost
Used all scrap wood
Estimated Time Investment
Afternoon Project (3-6 Hours)
Recommended Skill Level
Starter Project
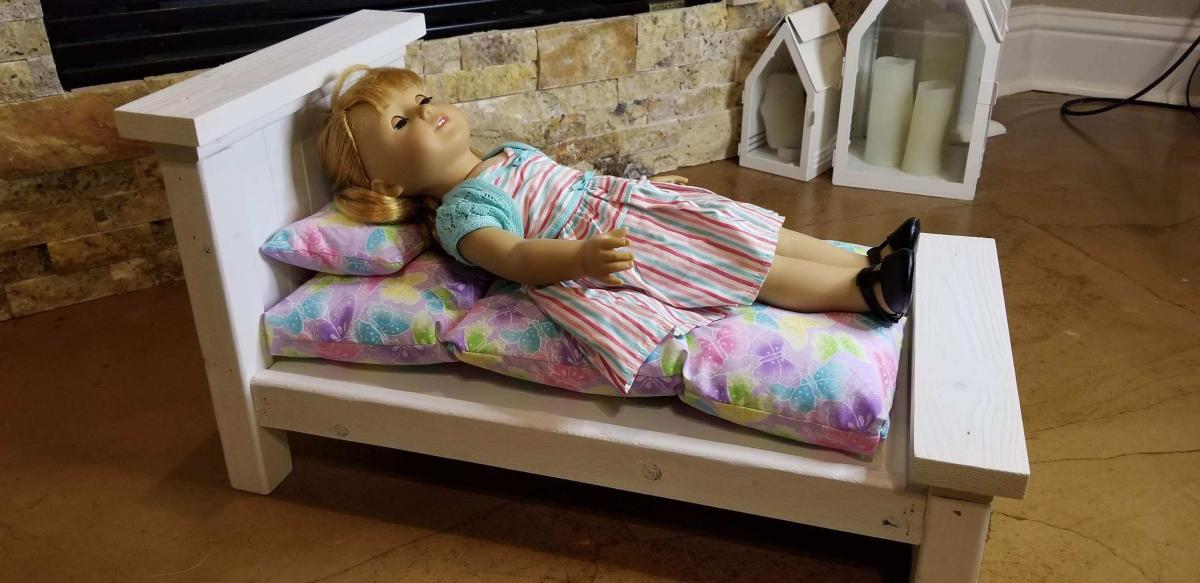
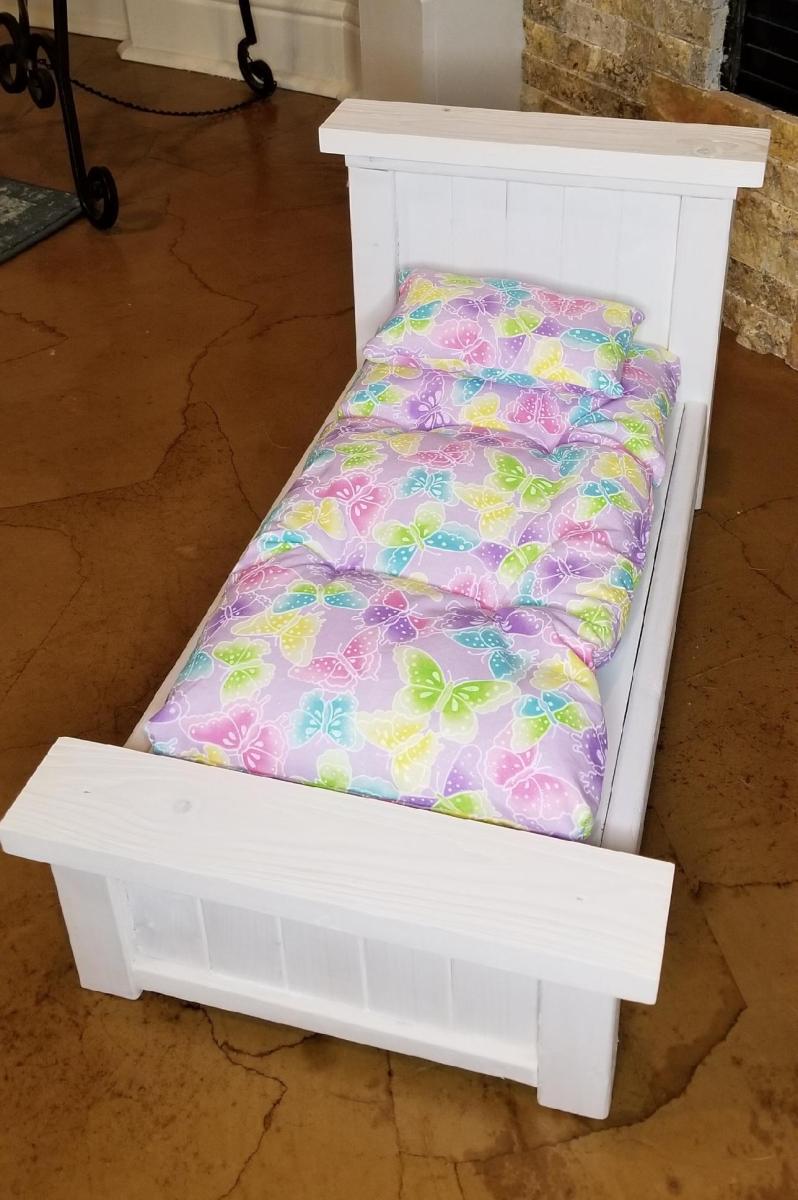
Farmhouse Doll Bed

Created from scraps using Ana’s plans for the bed and the mattress.
Built from Plan(s)
Comments

Fri, 12/24/2021 - 14:33
Thanks for the great plans…
Thanks for the great plans and making the mattress so simple (for those of us who feel like just threading a sewing machine is like playing the game Mouse Trap while under the influence! 😄)
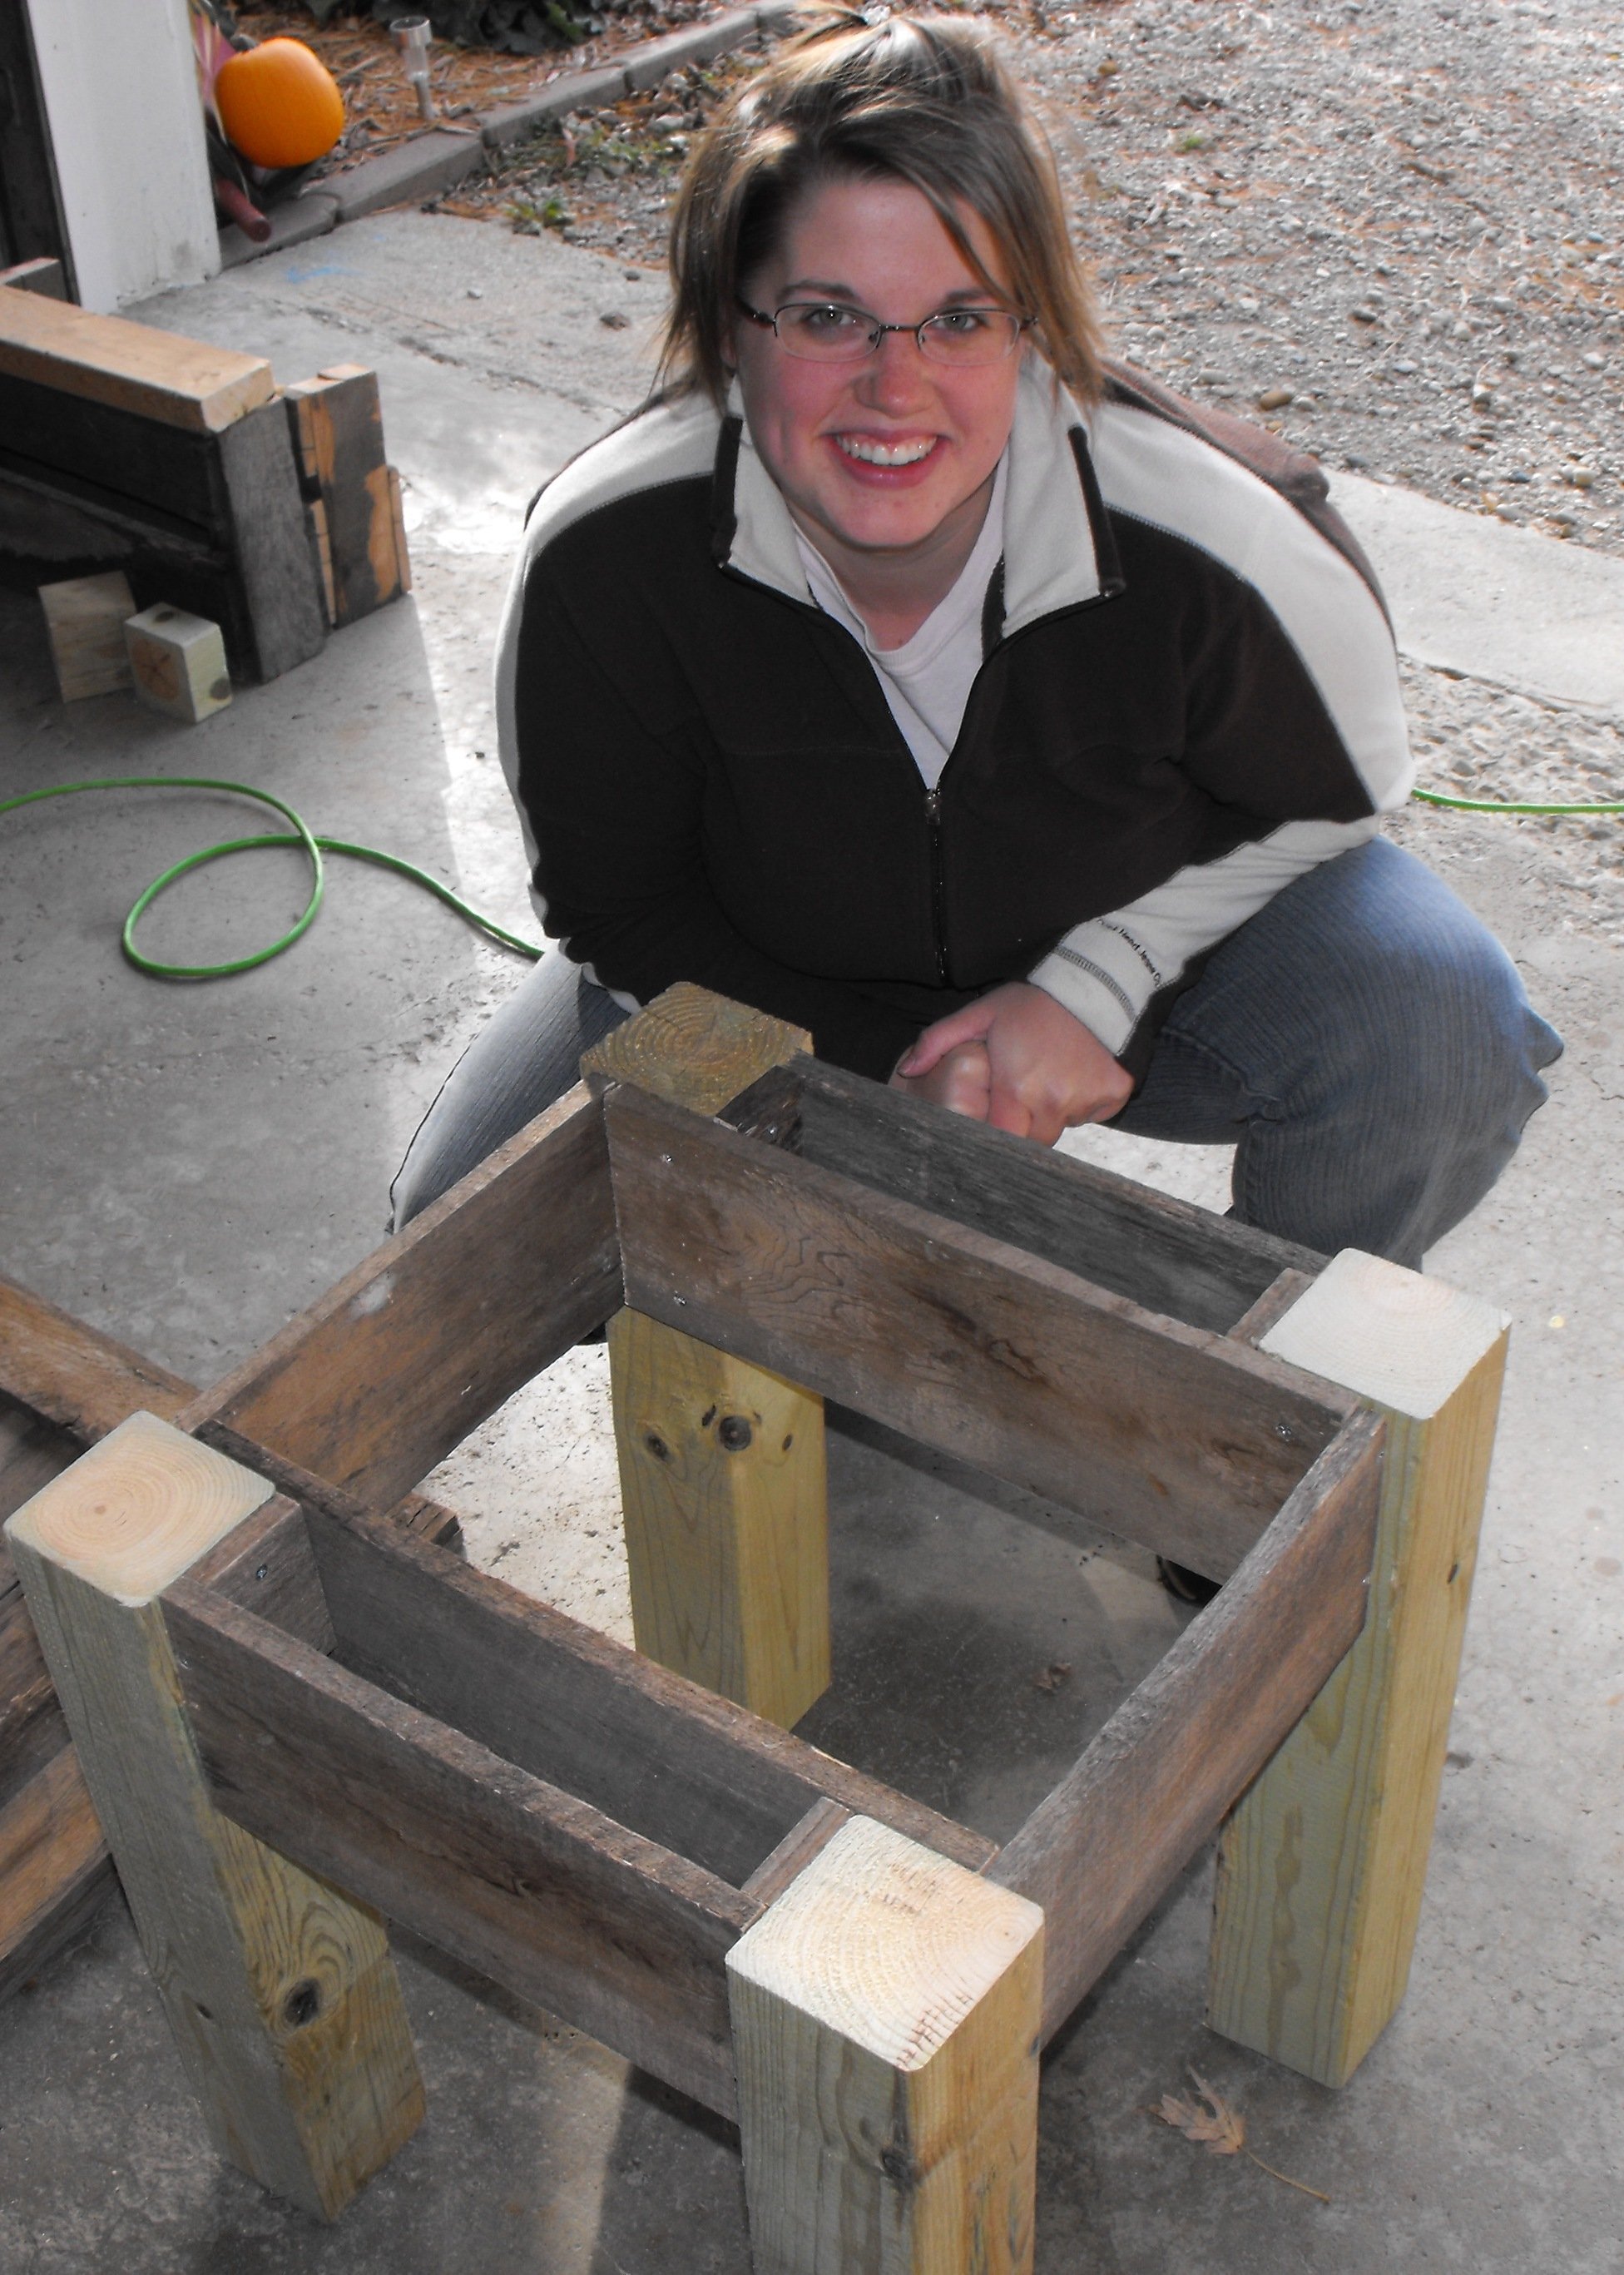
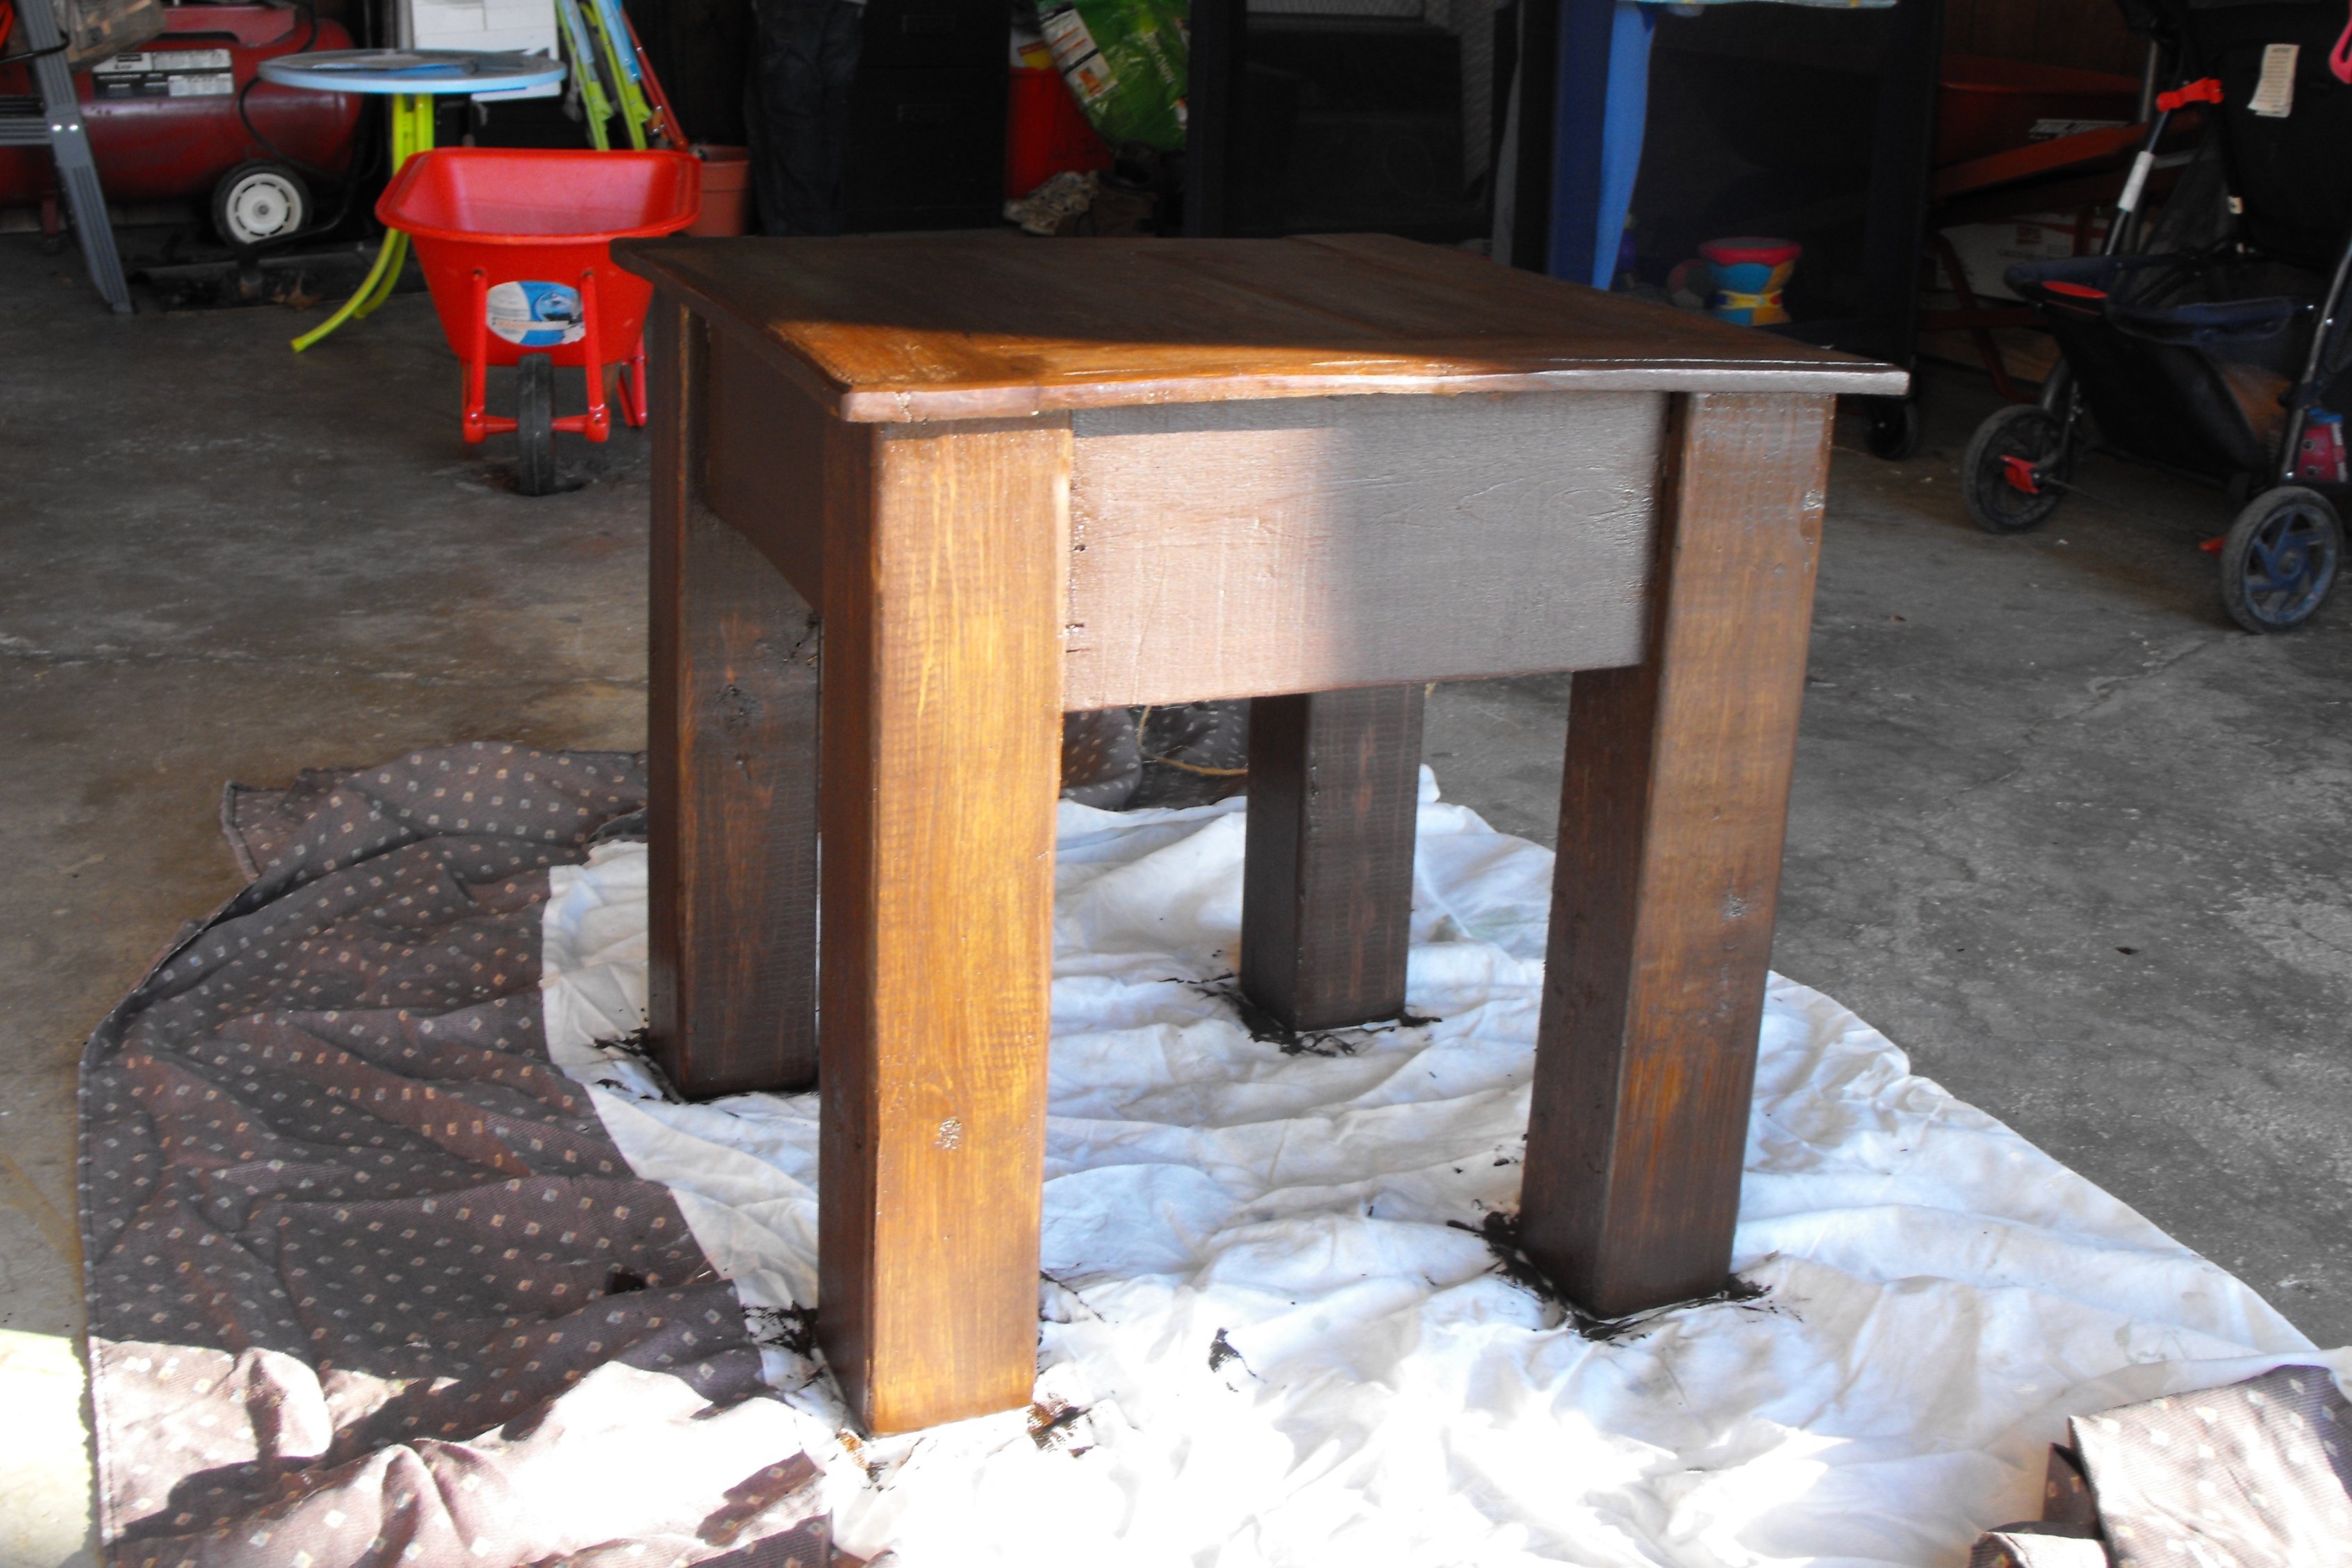
Side Table with Pallet Top
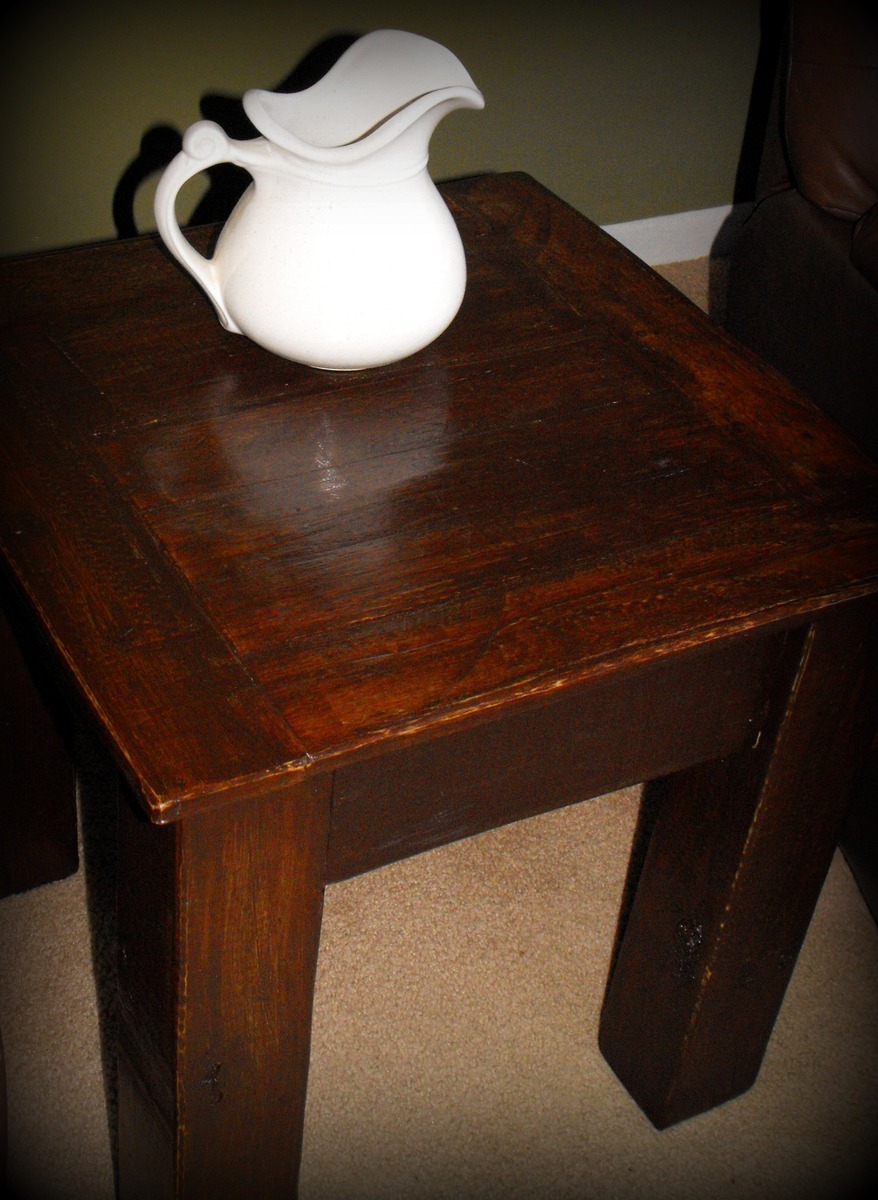
I wanted to make a custom sized side table to fit just right between our two recliners. And I really wanted to make use of some pallet scraps. So I built this frame the same as Ana's plan (adjusting for my size), and then came up with a layout for the top to make use of my small 15 inch pieces of pallet wood.
Built from Plan(s)
Estimated Time Investment
Afternoon Project (3-6 Hours)
Finish Used
I screwed the top on, filled the holes, sanded like a mad woman, and stained with a gel stain. I then applied two coats of shellac. It accidentally purchased the shellac but I really like the way that it turned out and it has held up quite well so far!
Recommended Skill Level
Beginner
Cedar Table/Stool
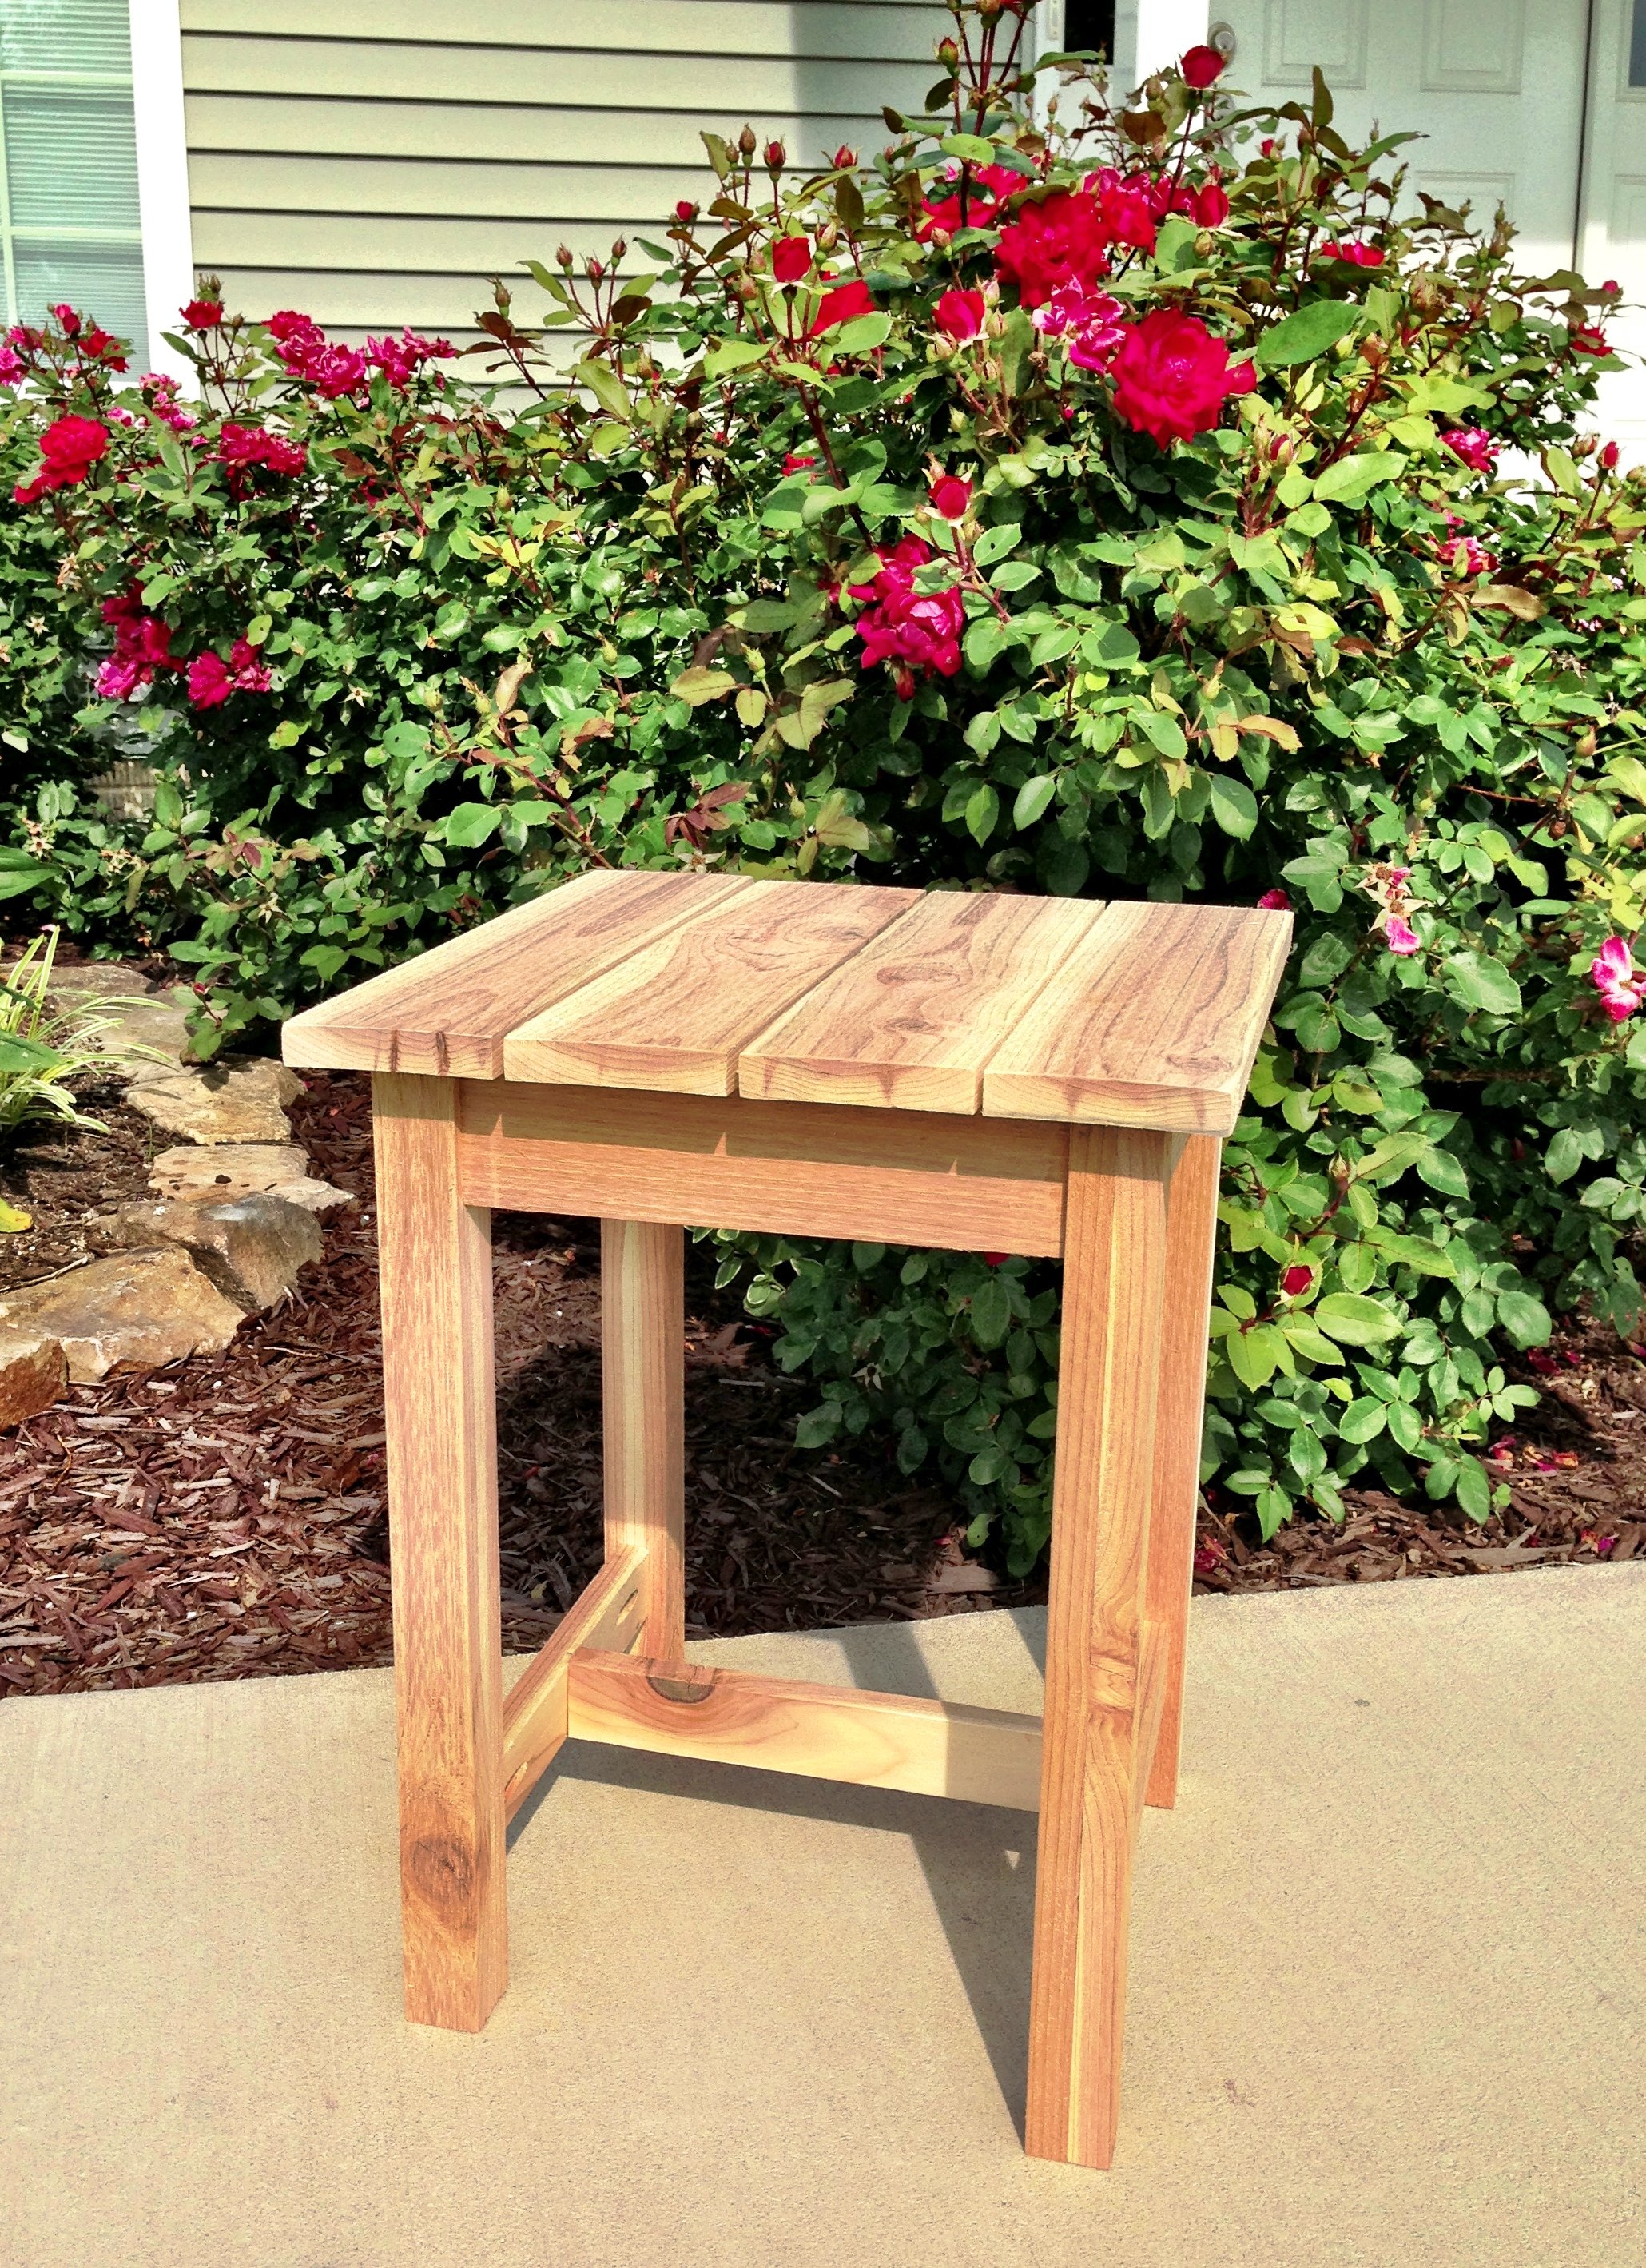
Made with western red cedar from Lowes. So pretty!
Built from Plan(s)
Estimated Time Investment
Afternoon Project (3-6 Hours)
Finish Used
none
Recommended Skill Level
Starter Project
Comments
Wed, 08/21/2019 - 09:00
Did you use any kind of…
Did you use any kind of finish on the cedar? I’m making one as an indoor end table.
What grit sand paper did you use?
Looks great by the way. Excellent job!
Love these end tables!
I loved this project! I had been wanting a new set of end tables for a while and I came across these plans and was in love! I altered them just a smidge by raising the bottom shelf a little so I could fit a vaccuum/broom under it more easily, but other than that I left it as is! For the decorative hardware, I used L brackets and large upholstery nails/tacks...you can find them in most craft stores...I picked mine up at Hobby Lobby.
Built from Plan(s)
Estimated Cost
$50
Estimated Time Investment
Weekend Project (10-20 Hours)
Finish Used
I used a coat of pickling stain, and then a watered down latex paint to 'wash' over it to give the finish a subtle layered effect. I used Varathane Matte Poly on top.
Recommended Skill Level
Beginner
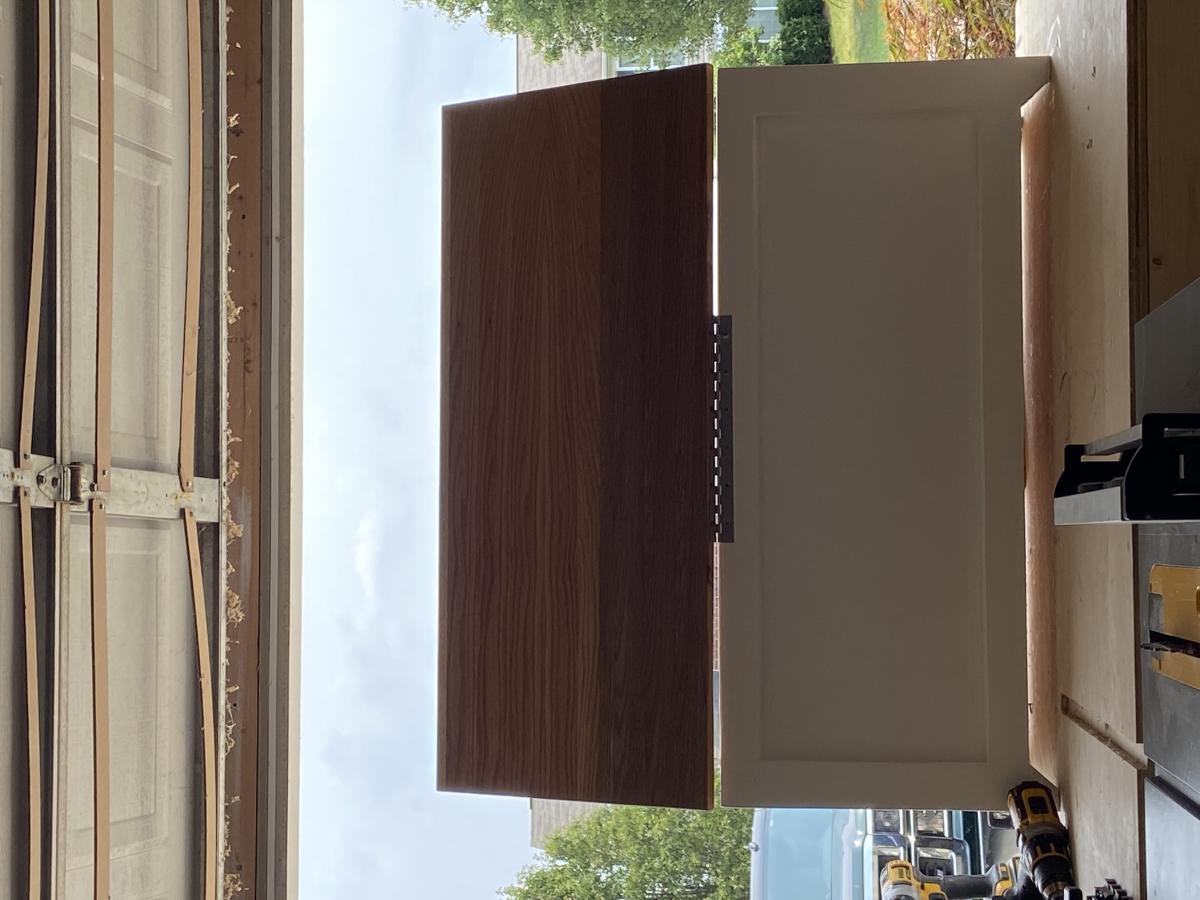
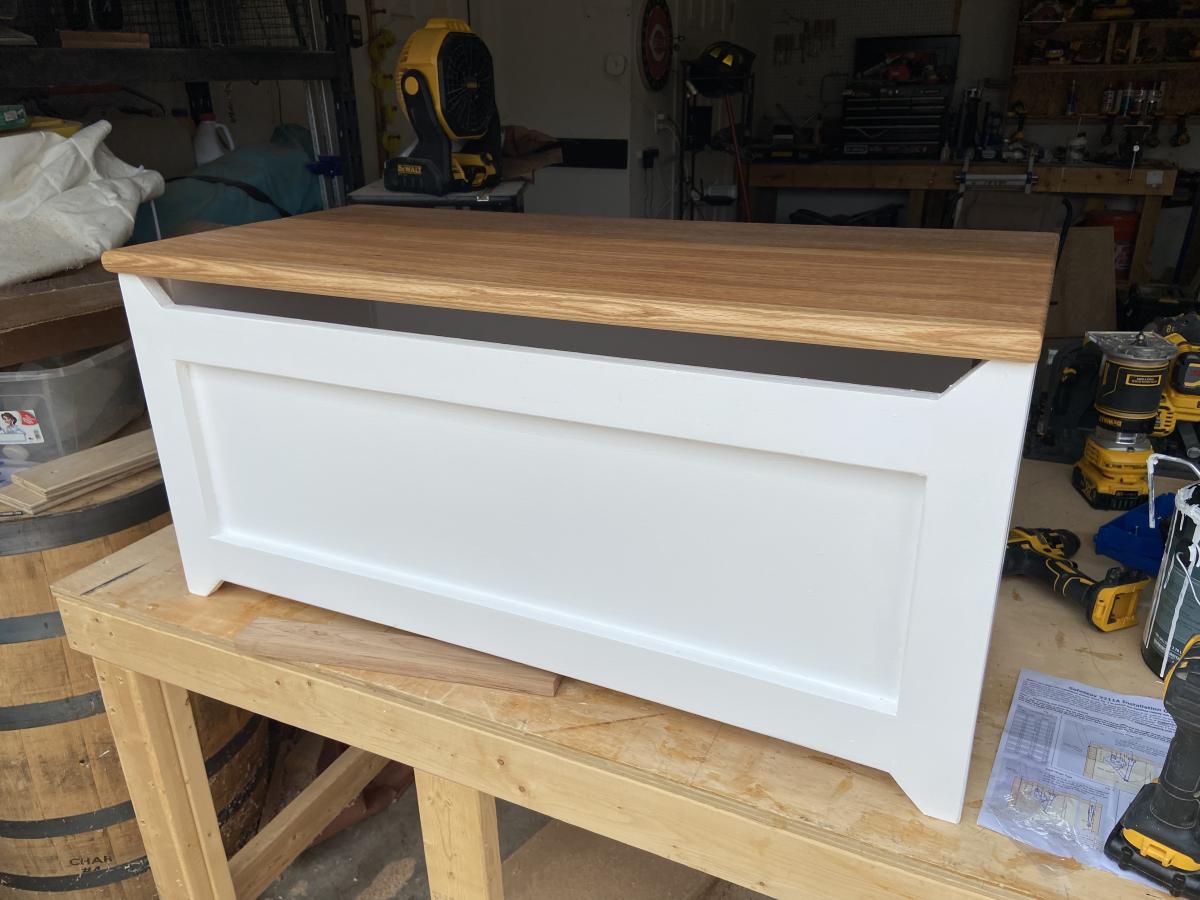
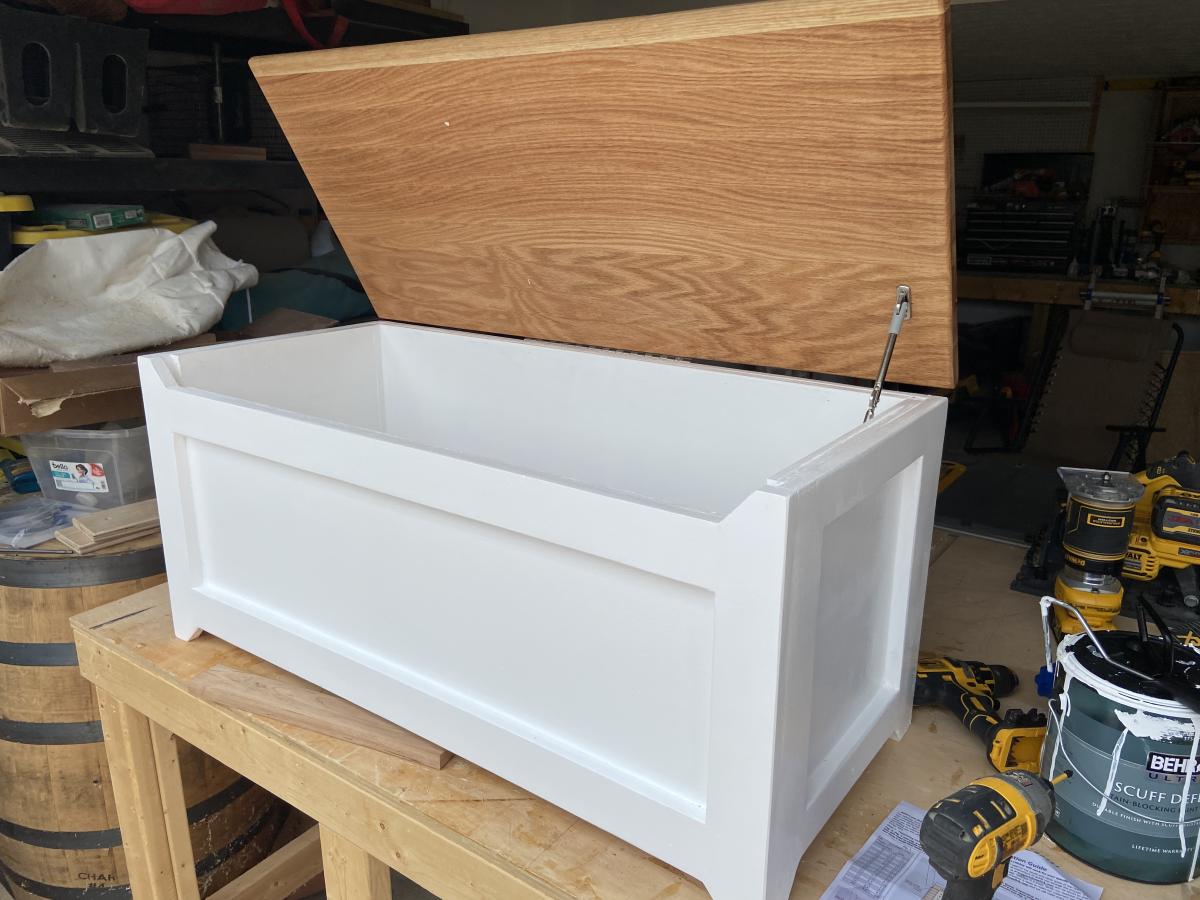
You chest
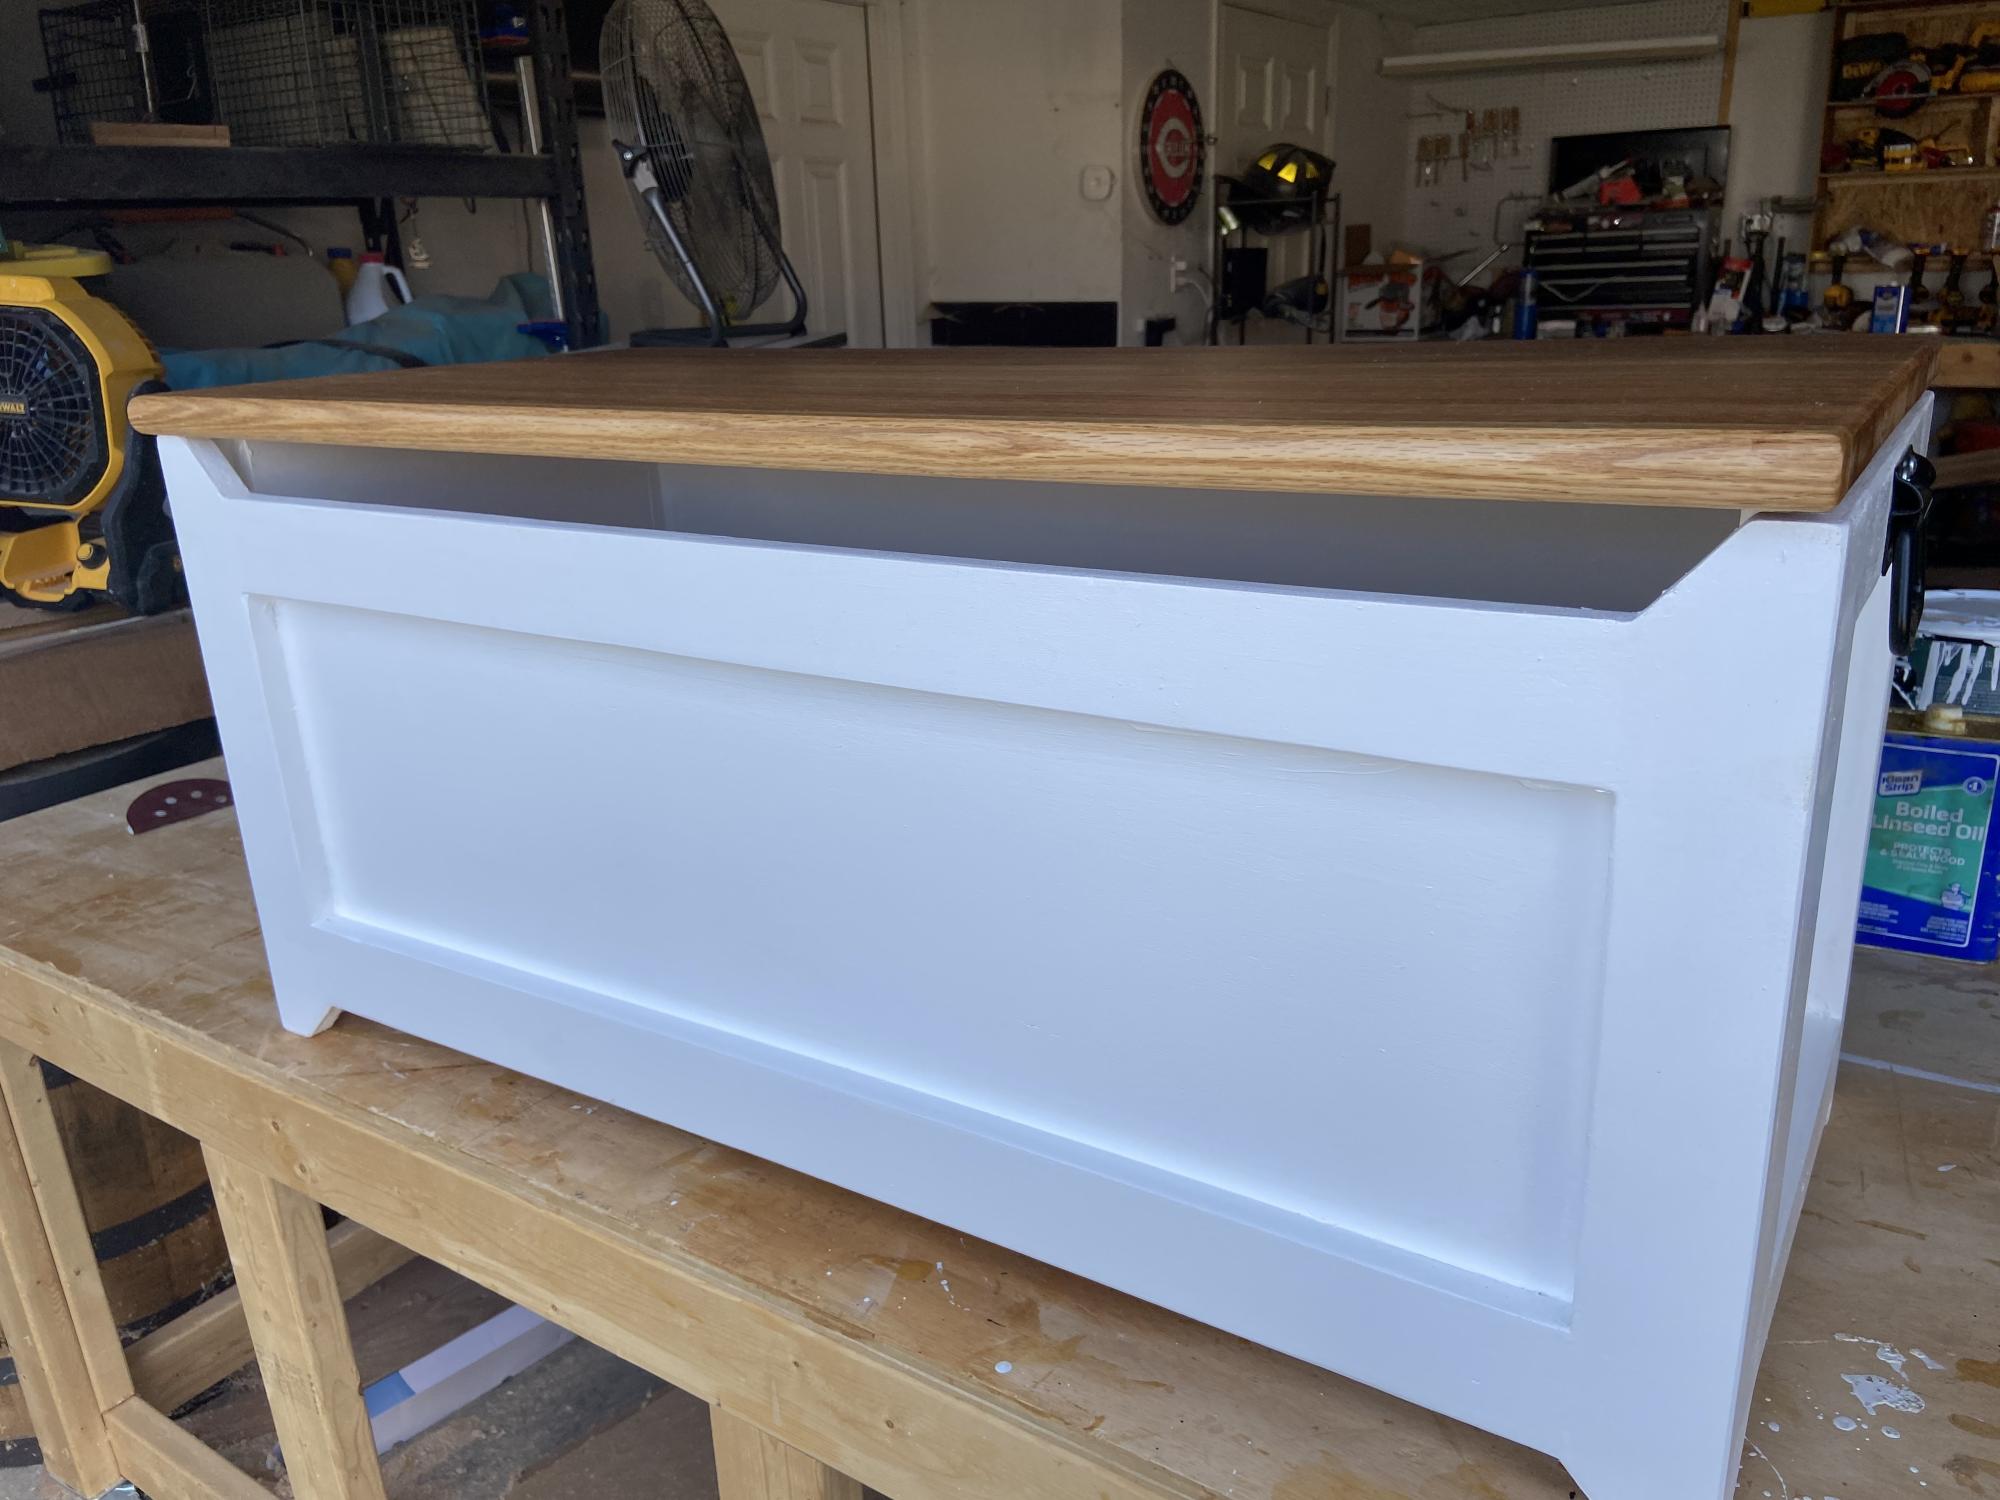
Ana White’s plans are the best I’ve seen. Some are easy and some are challenging builds. She’s so very encouraging in her videos. She makes me feel like I can keep on building. I’m very happy to say I started my business from her inspirations.
Built from Plan(s)
Comments
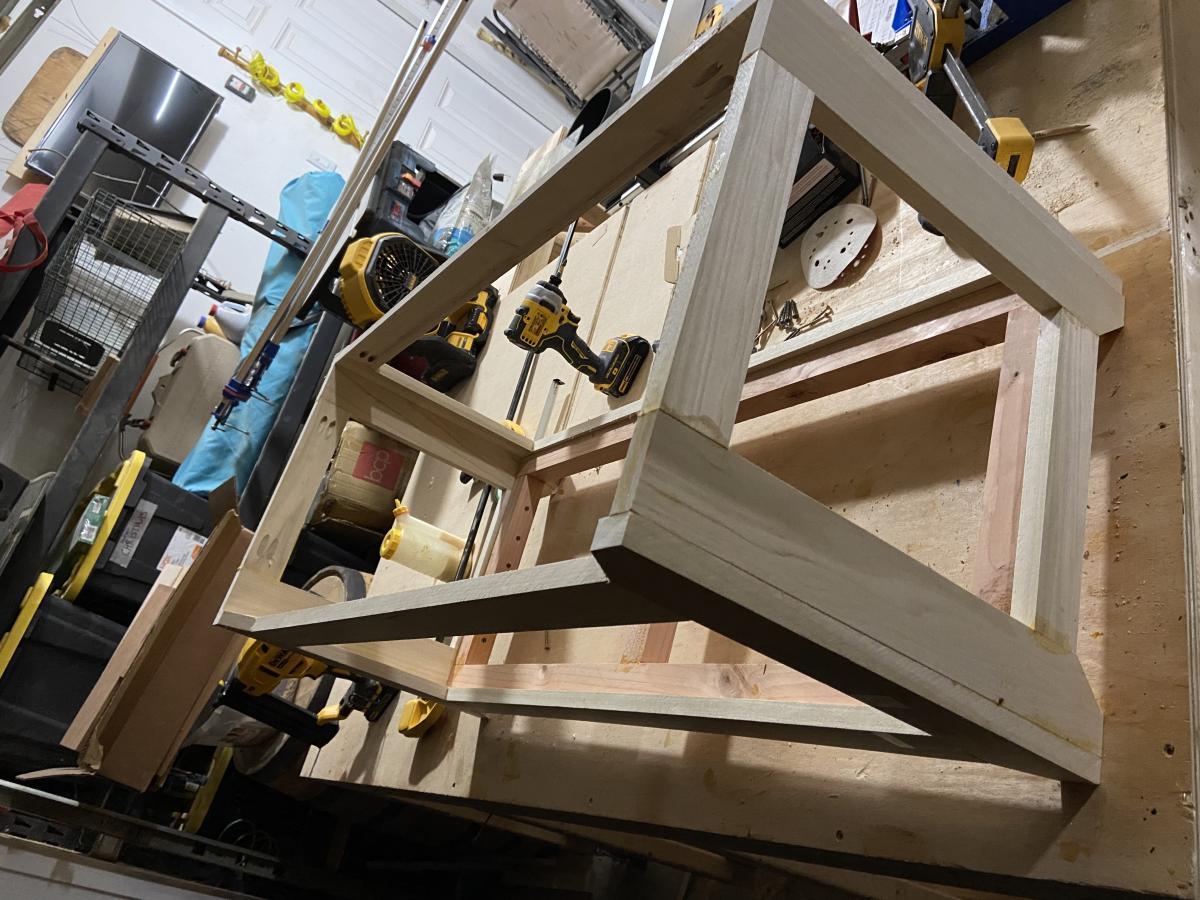
Rustic X console
This was my first project from ana white. Thank you for making such great and easy to follow plans! I will be making the matching coffee table next!
Built from Plan(s)
Estimated Cost
120
Estimated Time Investment
Weekend Project (10-20 Hours)
Finish Used
- brushed on black tea
- Stained with steal wool #0000 dissolved in vinegar for 3 days.
- Sealed 3 times with Vermont Natural Coatings wipe on polywhey satin
- Stained with steal wool #0000 dissolved in vinegar for 3 days.
- Sealed 3 times with Vermont Natural Coatings wipe on polywhey satin
Recommended Skill Level
Beginner
Comments

Mon, 07/08/2013 - 10:16
Color
Was the color of the table brown like that after just the oxidation process or did it turn brown like that because of the Vermont Natural Coatings Polywhey?
The reason I ask is we're trying to decide between the wax finish, which we love, or the more protective and durable PolyWhey.
Mon, 08/12/2013 - 12:43
Sorry for the late reply. I
Sorry for the late reply. I hope this advice is still useful for you. I figured I would have got an email if someone replied to my brag post. I just changed my settings so I will get emails in the future.
After the oxidation process It was a fairly dark brown. At this stage the colouring was not even everywhere so I used 220 grit sandpaper on a sanding block to lighten the colour and even it out. I sanded fairly lightly. After applying the Polywhey the colour did not change much. It is hard to describe as I am not a very artistic person, but it definitely made the colour richer and more pleasing to the eye after applying the Polywhey. As for the Polywhey, it is oderless and very quick and easy to apply. I put on 3 coats. I hope that helps. Let me know if you have any other questions.
Rustic x side table

It was a fun and easy build. I did the oxidation finish for the first time on this project and am really happy with how it turned out. I also added washers to the lag screws on the legs to make it stand out a little more.

Built from Plan(s)
Estimated Time Investment
Weekend Project (10-20 Hours)
Finish Used
First I applied a strong brew of black tea to the wood let that dry then went over it with the Vinegar/steel wool oxidation treatment. Let it dry for 24 hours then sanded it to give it a more rustic look. Then I Top coated it with a flat finish poly.
Recommended Skill Level
Beginner
Coffee cart
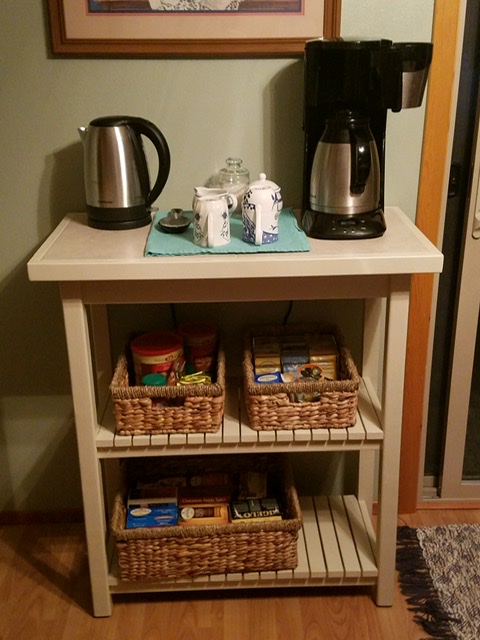
My husband built this a few years ago to free up counter space in our tiny kitchen and we just love it.
Comments
Library Cart - First Build
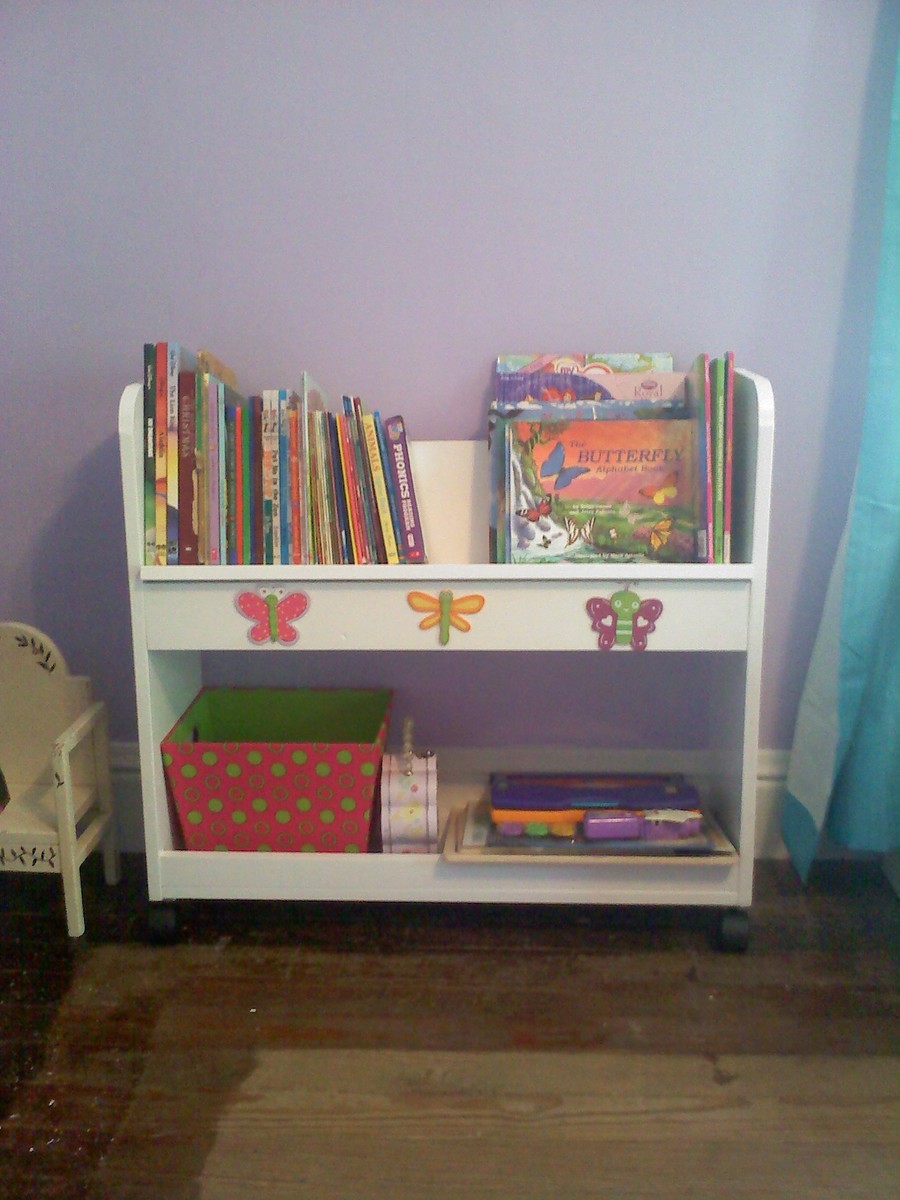
This is my first build from ana-white.com and it was a success. I am glad that I started out with a beginner project as my carpentry skills were a bit rusty but eventually everything came back to me, the step by step plans certainly helped! According to my daughter, I am the best mom ever!
The dragonfly/butterflies I found at Hobby Lobby for 67 cents a piece, what a steal!
Built from Plan(s)
Estimated Cost
$30.00
Estimated Time Investment
Afternoon Project (3-6 Hours)
Finish Used
Ultra White Satin Finish
Recommended Skill Level
Starter Project
Farmhouse Table
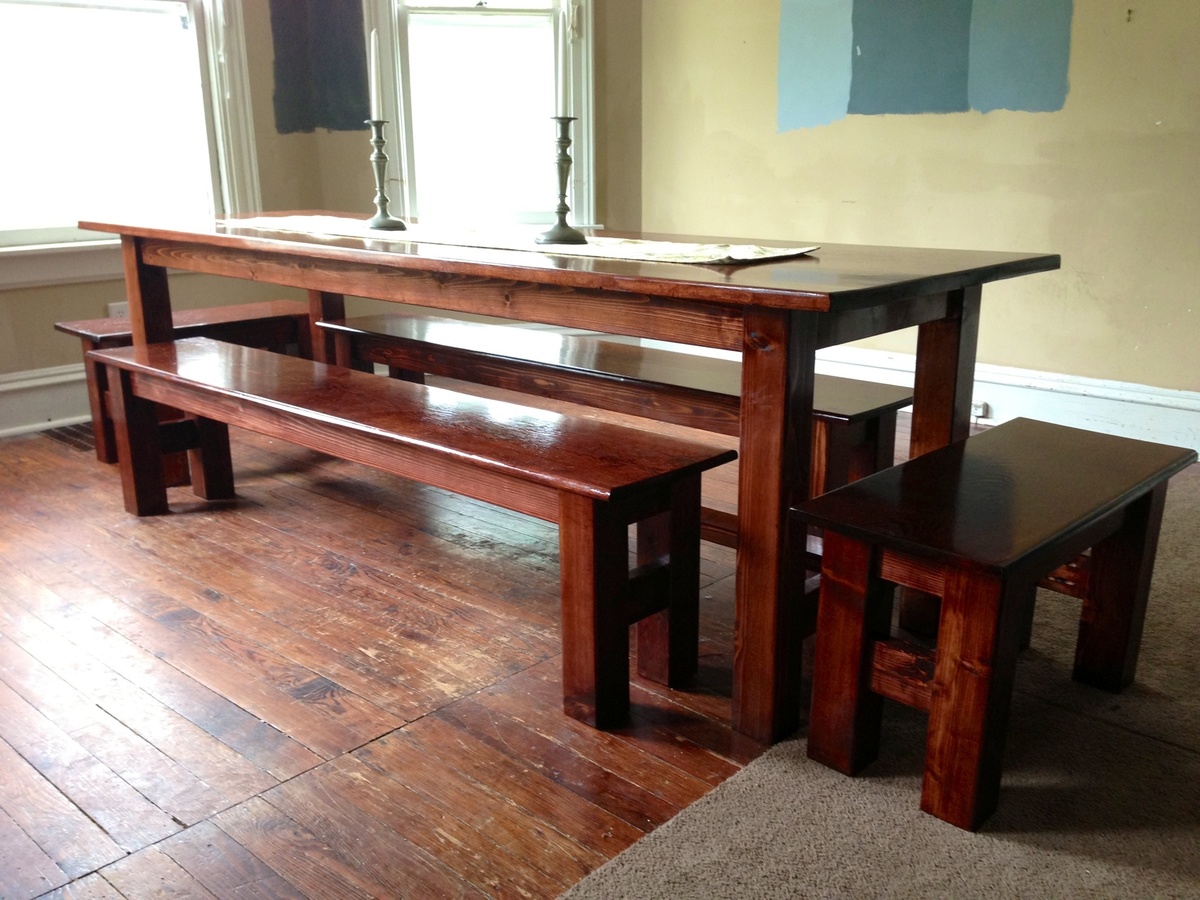
Table was built using refinished tops from an old table/bench set. Cedar was used for the base of the table and benches. Also created two half-size benches that can be used to add seating at the table, or moved to the living room when additional seating is needed there. Finished with mahogany stain and several coats of clear gloss polyurethane.
Estimated Time Investment
Week Long Project (20 Hours or More)
Finish Used
Minwax in " Mahogany" and clear gloss poly also by Minwax
Recommended Skill Level
Intermediate
Comments
Duck-Egg blue kitchen Island w/ Butcher Block Top
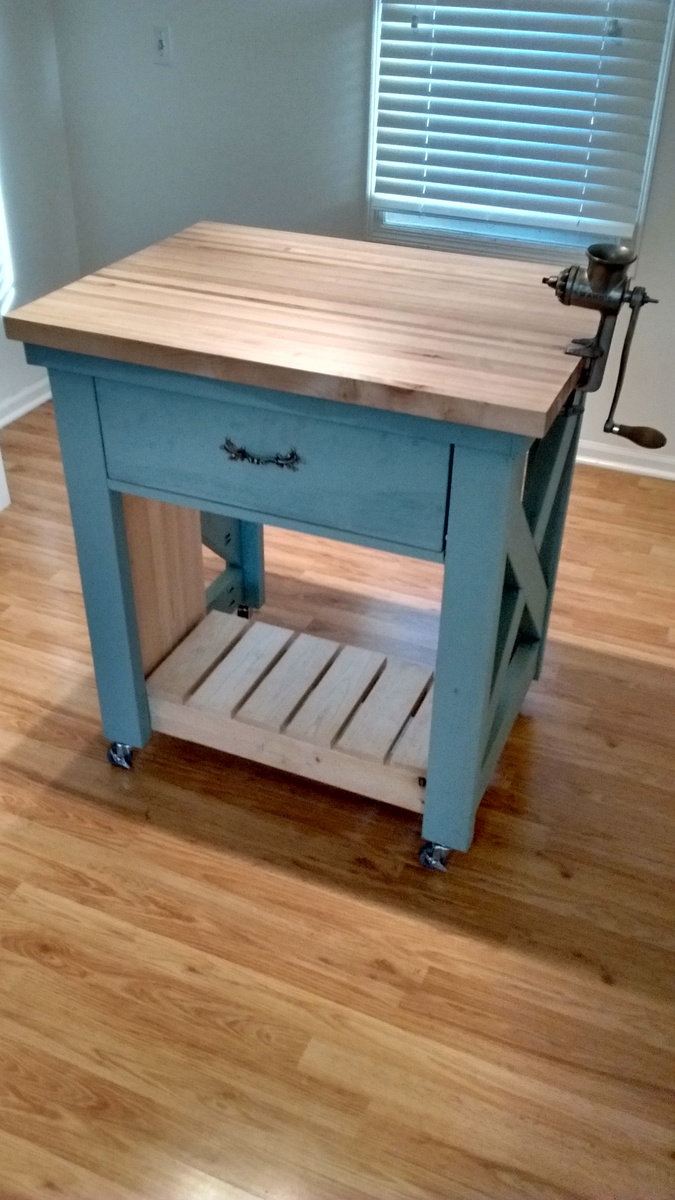
Used Annie Sloan duck egg blue paint and glued 1x2s end up to make a butcher block top
Built from Plan(s)
Estimated Time Investment
Day Project (6-9 Hours)
Finish Used
Annie Sloan Duck egg blue
Recommended Skill Level
Intermediate
Art cart
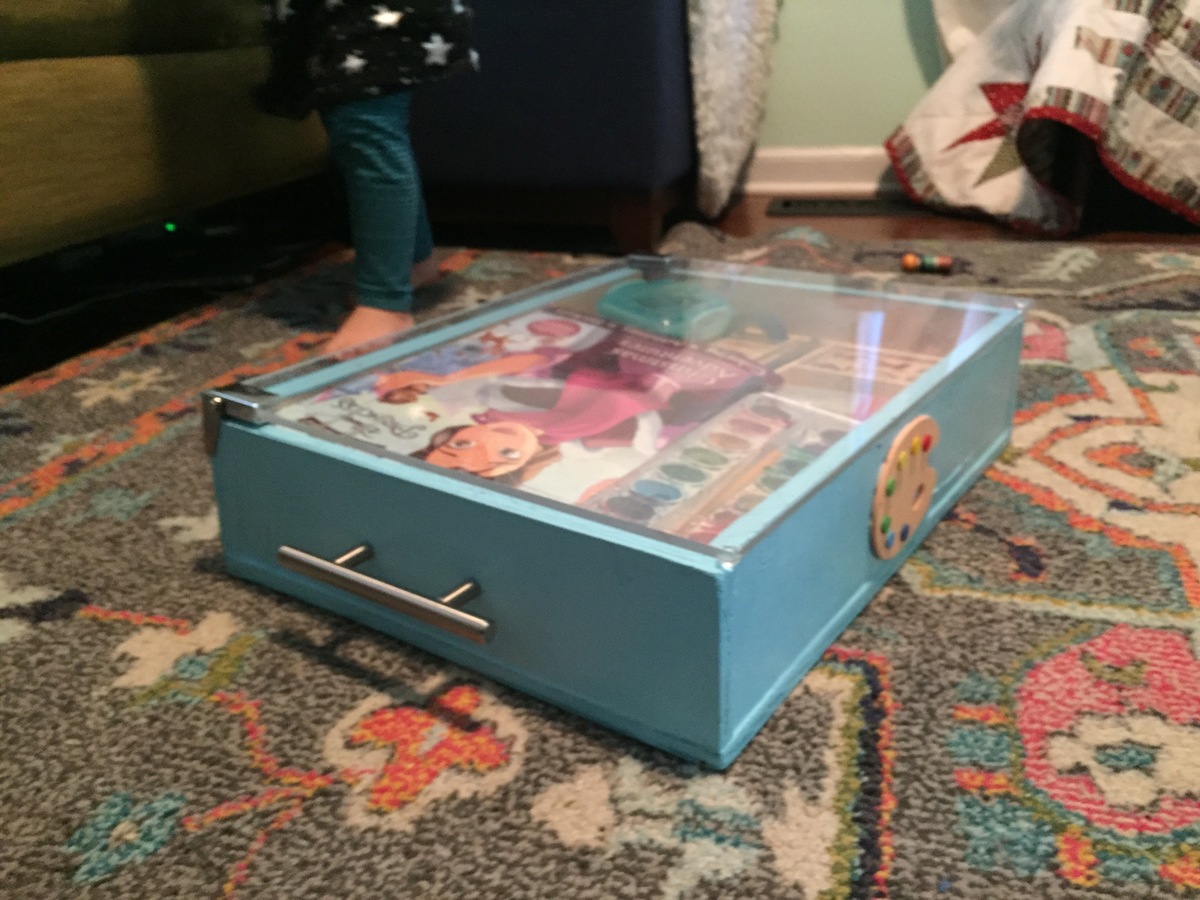
Art cart!
i used furniture glide feet instead of wheels. I put the plexi on hinges. All scrap materials except for hinges.
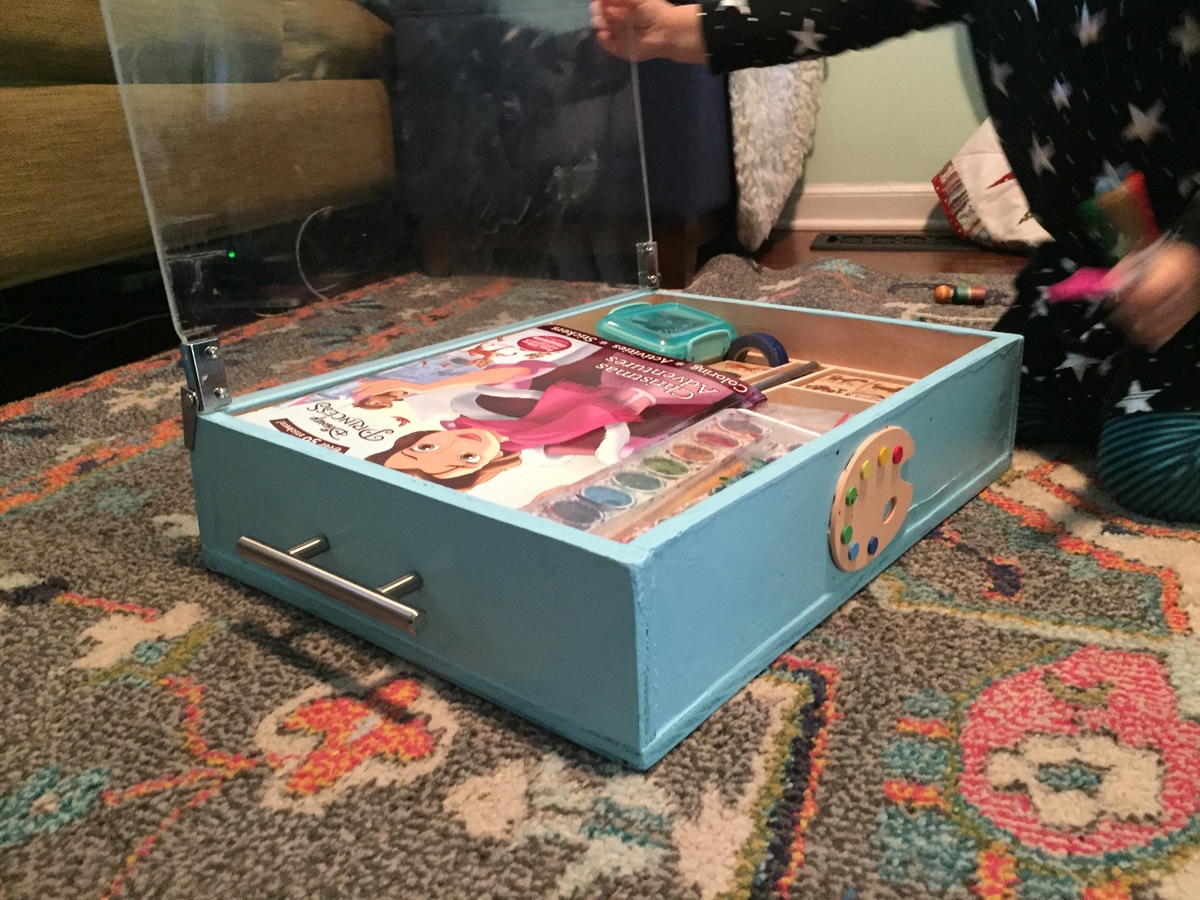
Built from Plan(s)
Estimated Time Investment
Afternoon Project (3-6 Hours)
Recommended Skill Level
Beginner
Nightstand 3 different ways
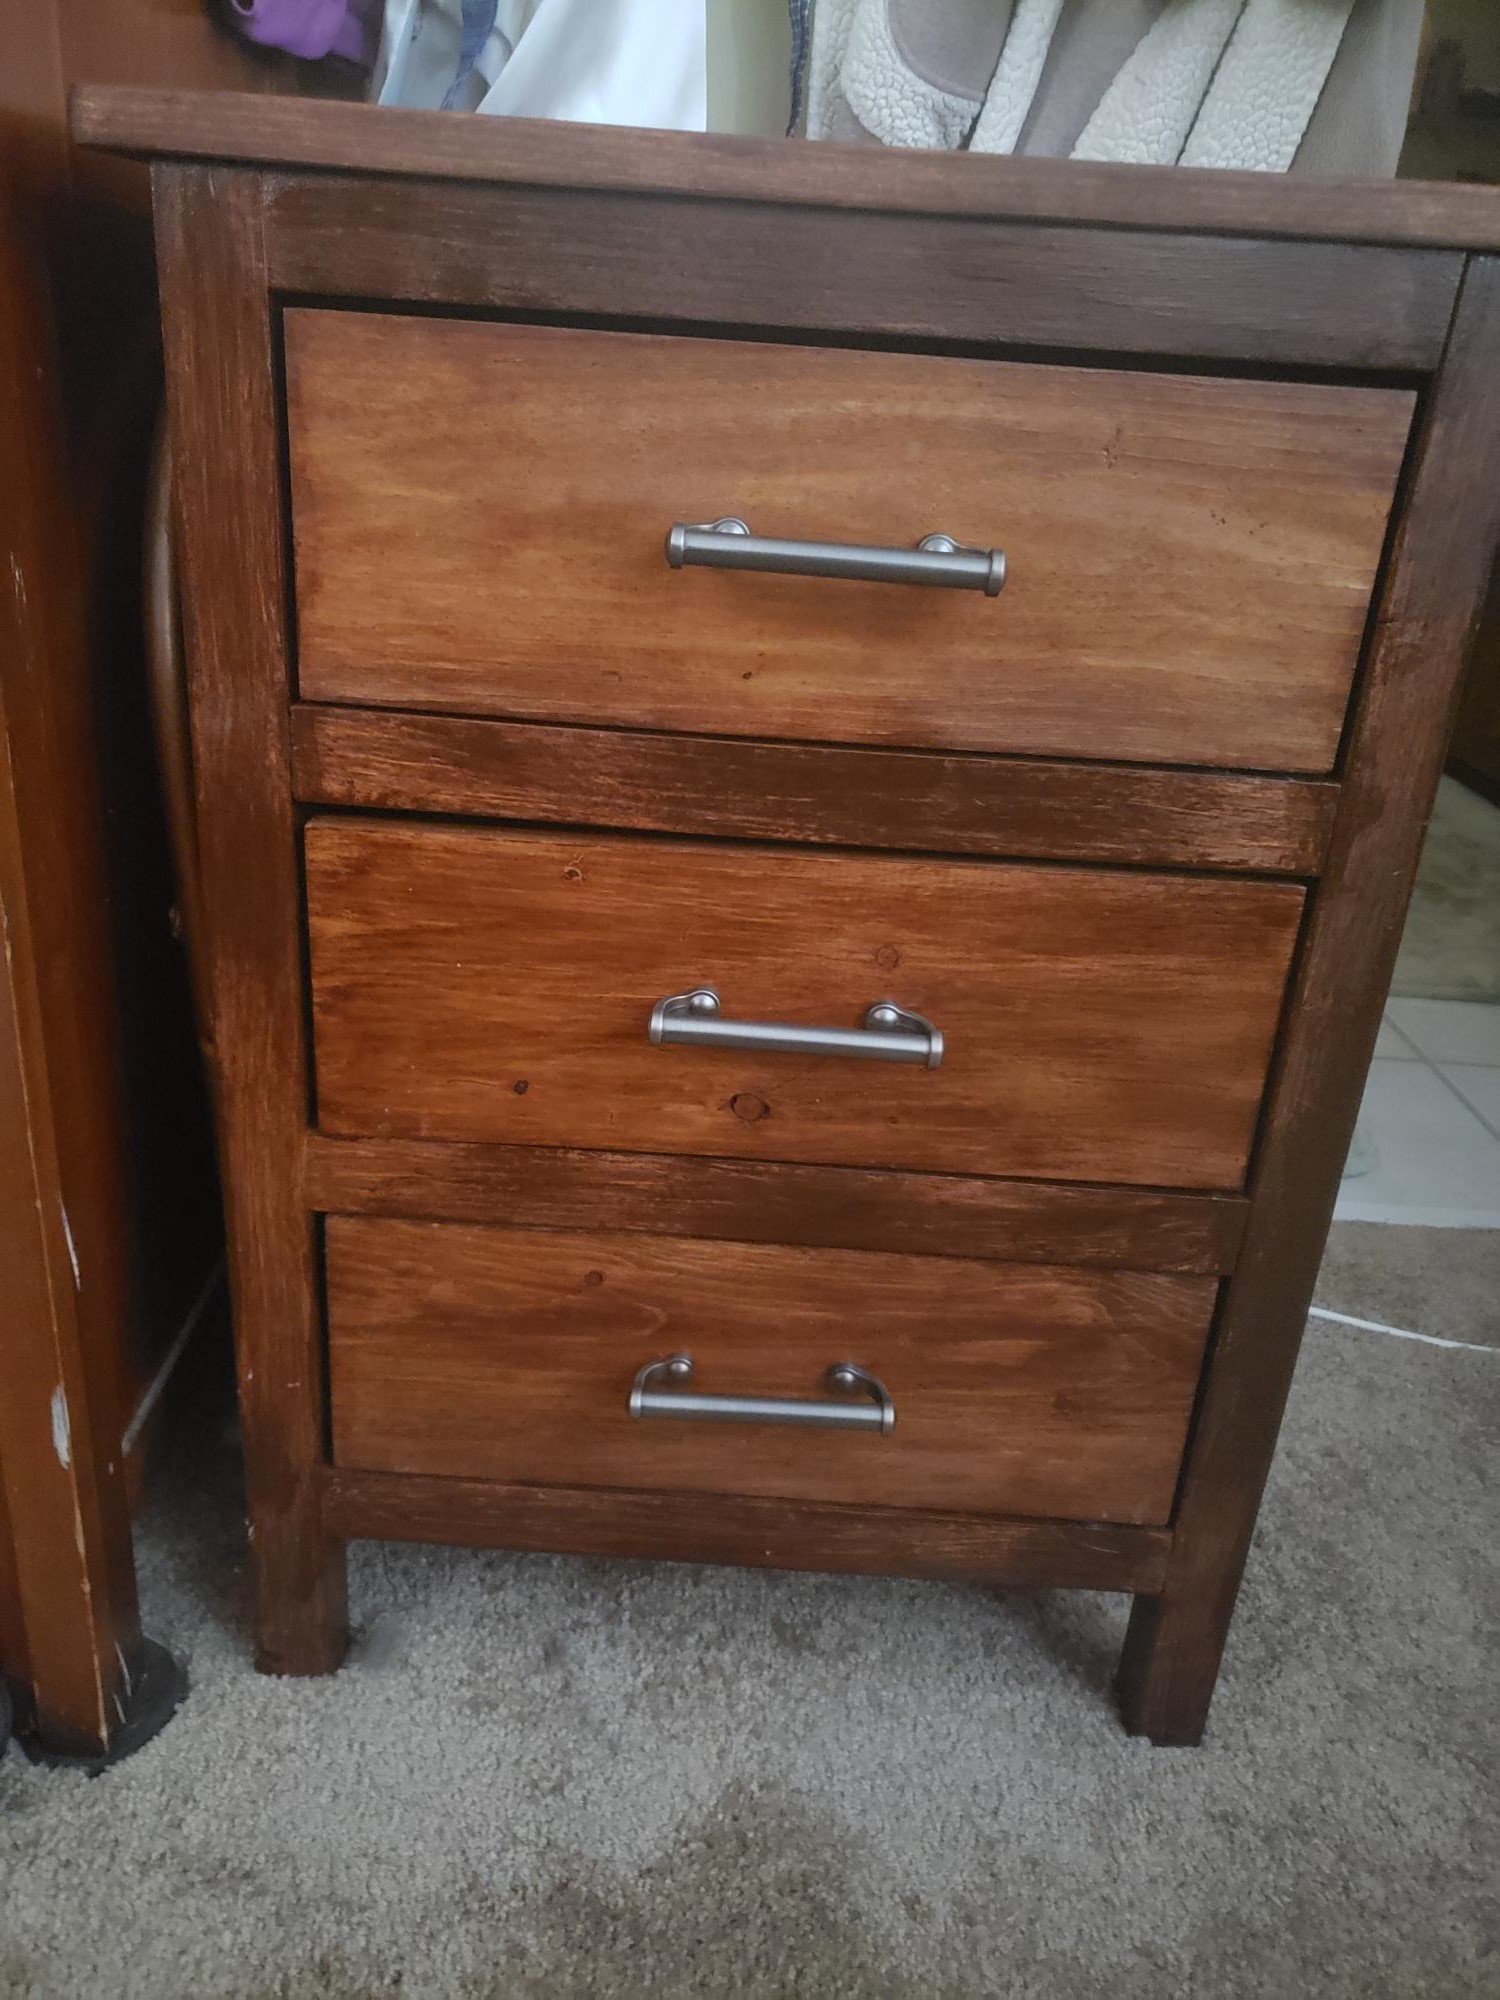
We took this plan and modified it a bit. The first photo is as a nightstand. We resized the red cabinet, made it deeper and a little wider, gave it a contrasting finish of chestnut stain on the drawer fronts and barn red on the body to make my sewing storage/desk (2 cabinets with a hollow core door on top). The green cabinet is higher and wider, with a cabinet at the bottom. This is used in our stained glass shop at a Renaissance Festival in a remote area, which is powered by hidden solar. The drawers house my paperwork and sales tools and a solar inverter in the open back cabinet at the bottom.
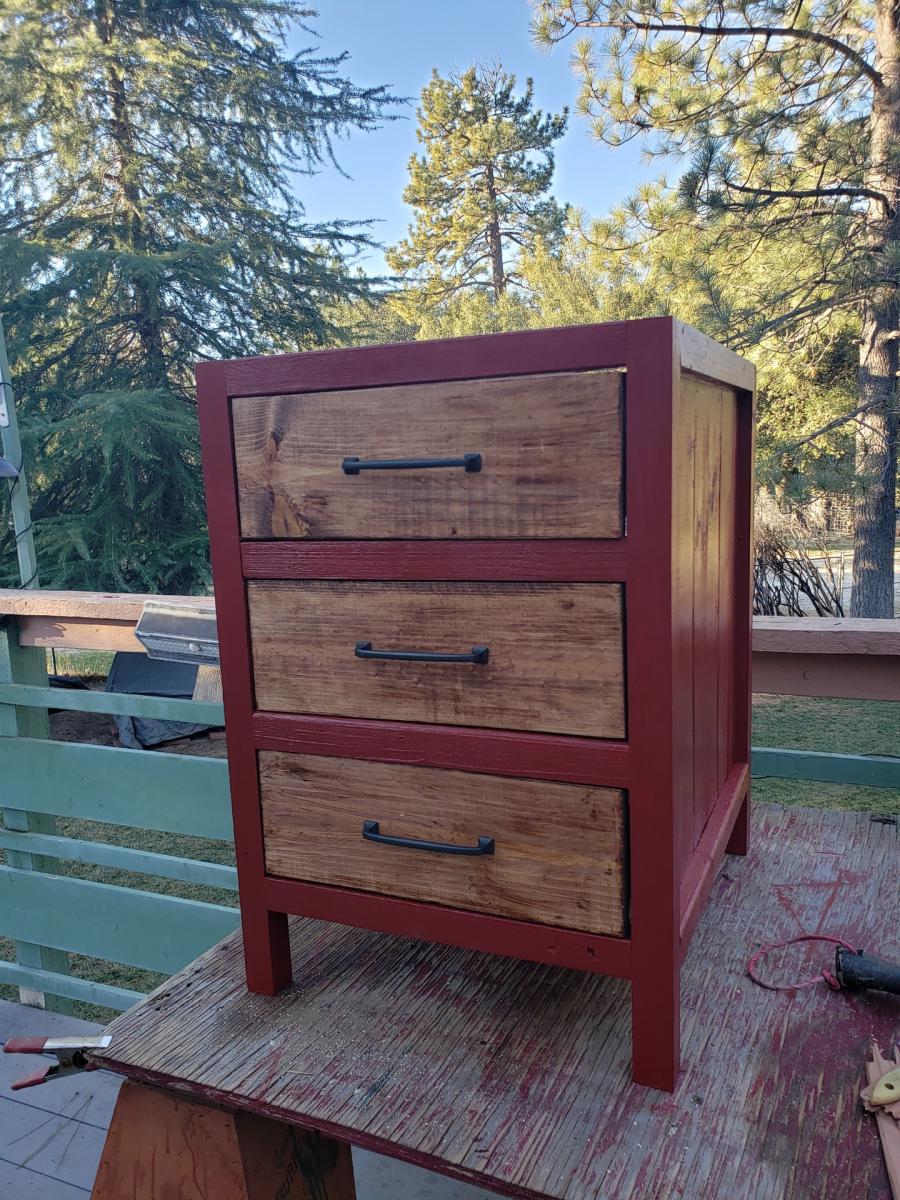
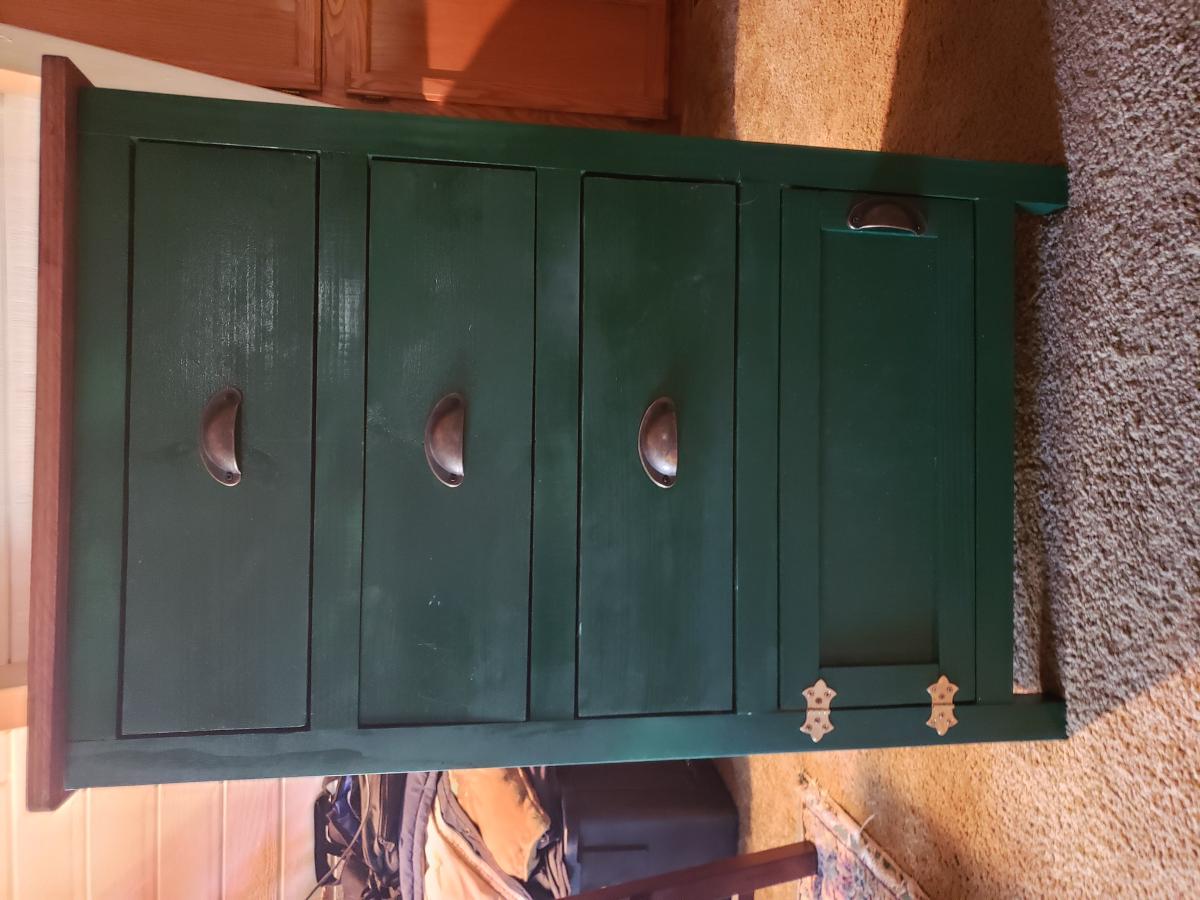
Built from Plan(s)
Comments
My new yellow cubby shelf

Totally lovin' my new cubby shelf. I painted it bright yellow, but I may paint it a more nuetral color after noticing it does not math anything haha! This is a super sturdy shelf...LOVE IT! Thanks ANA!

Built from Plan(s)
Estimated Cost
$30
Estimated Time Investment
Afternoon Project (3-6 Hours)
Finish Used
Primer and Satin Paint. I sanded it with 120 grit, then primed and painted with two coats each.
Recommended Skill Level
Beginner
Comments
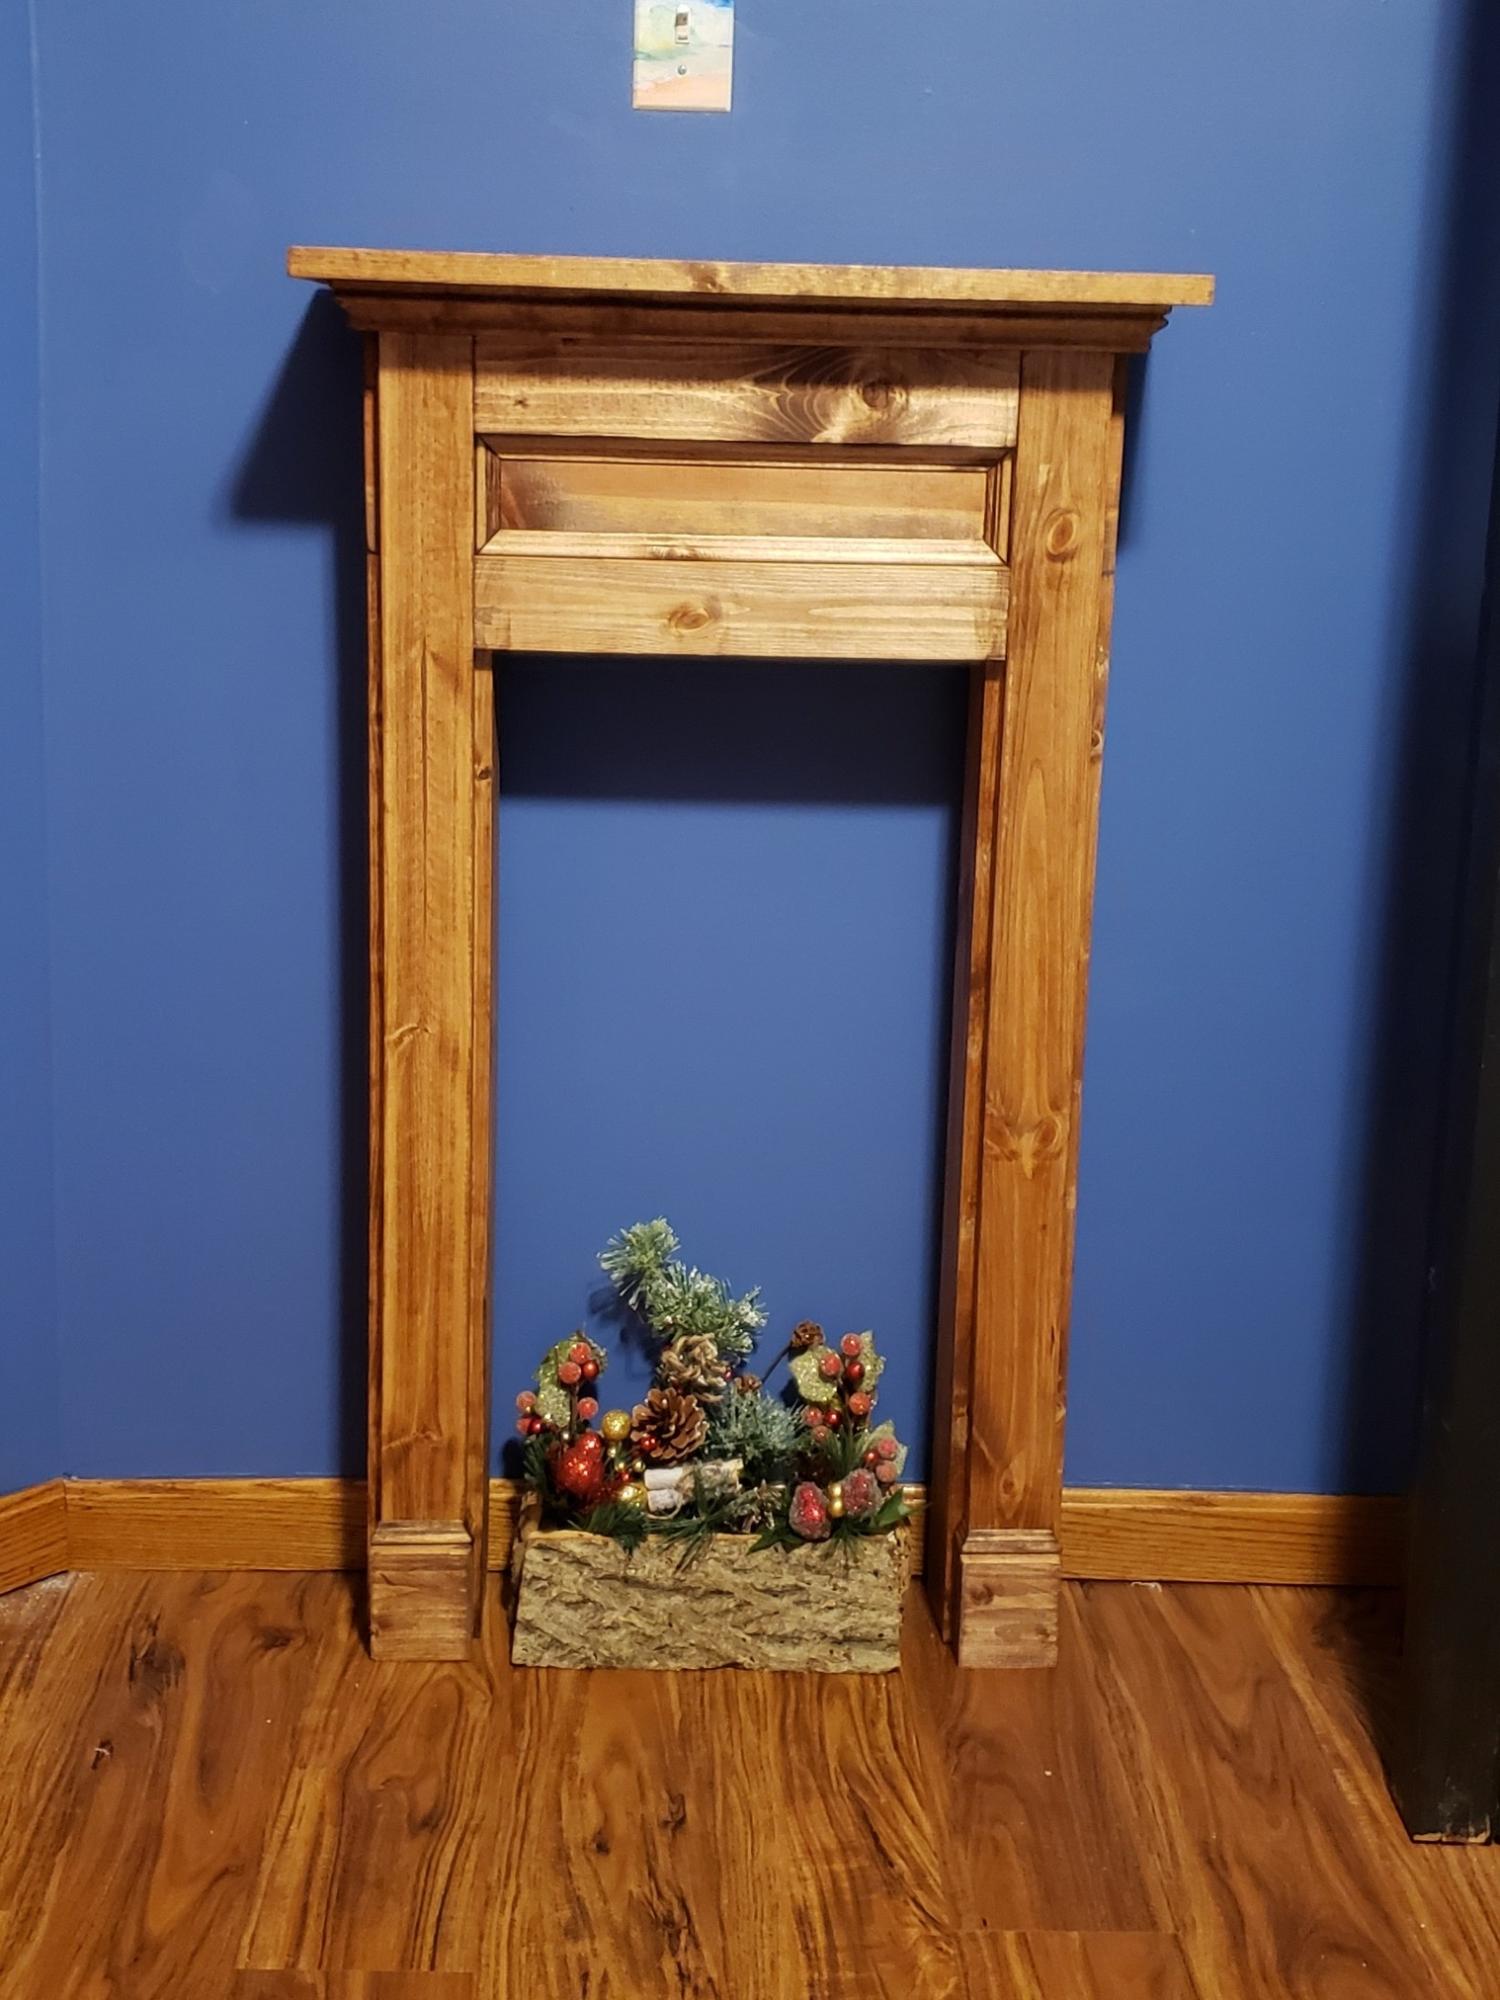
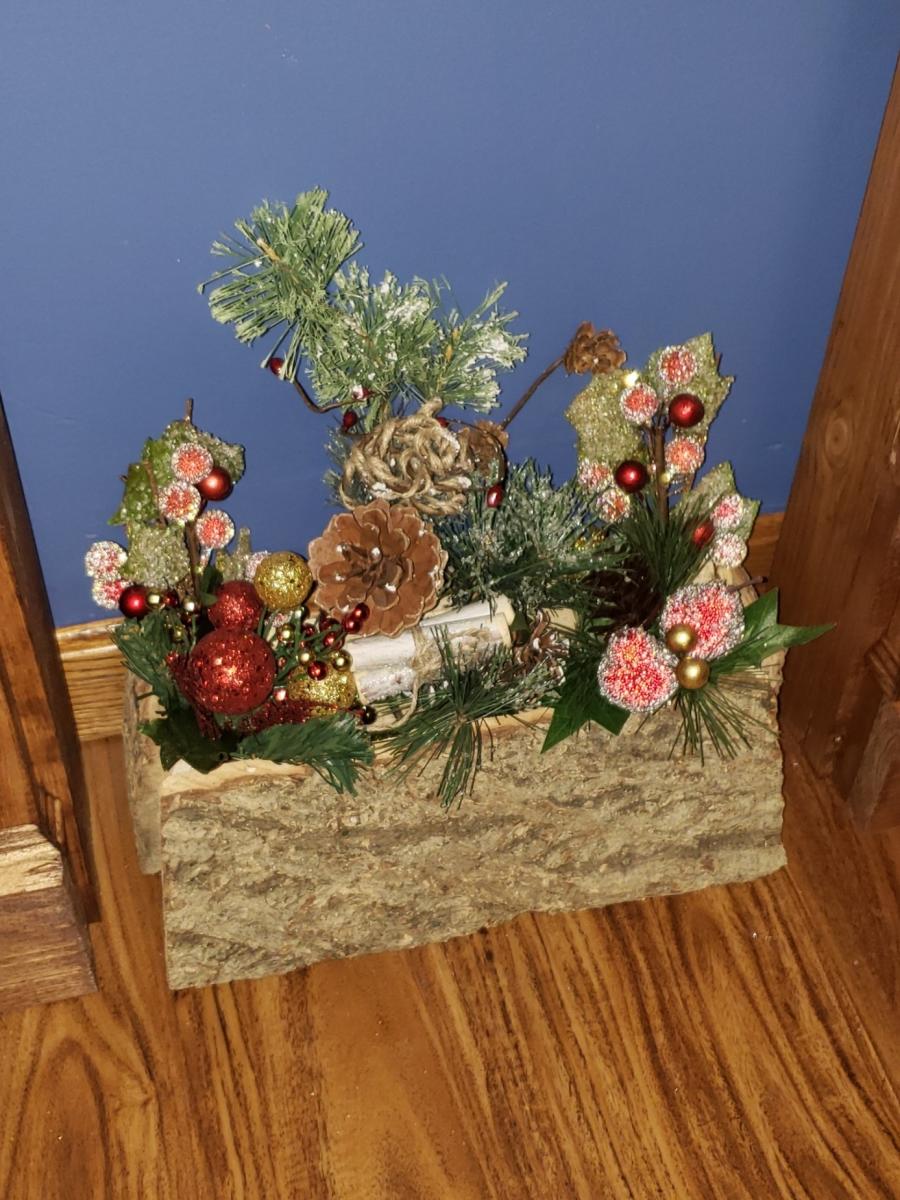
bobgaivin
Thu, 12/16/2021 - 07:44
The wood is white pine…
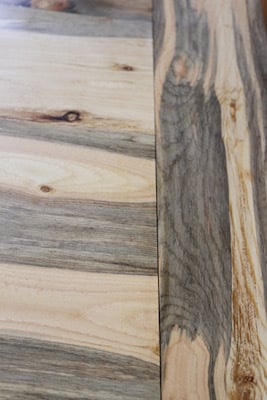
The wood is white pine finished with Minwax Early American with 10.32's red added per quart.
Ana White Admin
Thu, 12/16/2021 - 13:38
Cute Mantle!
Thank you for sharing, it looks great in your space!