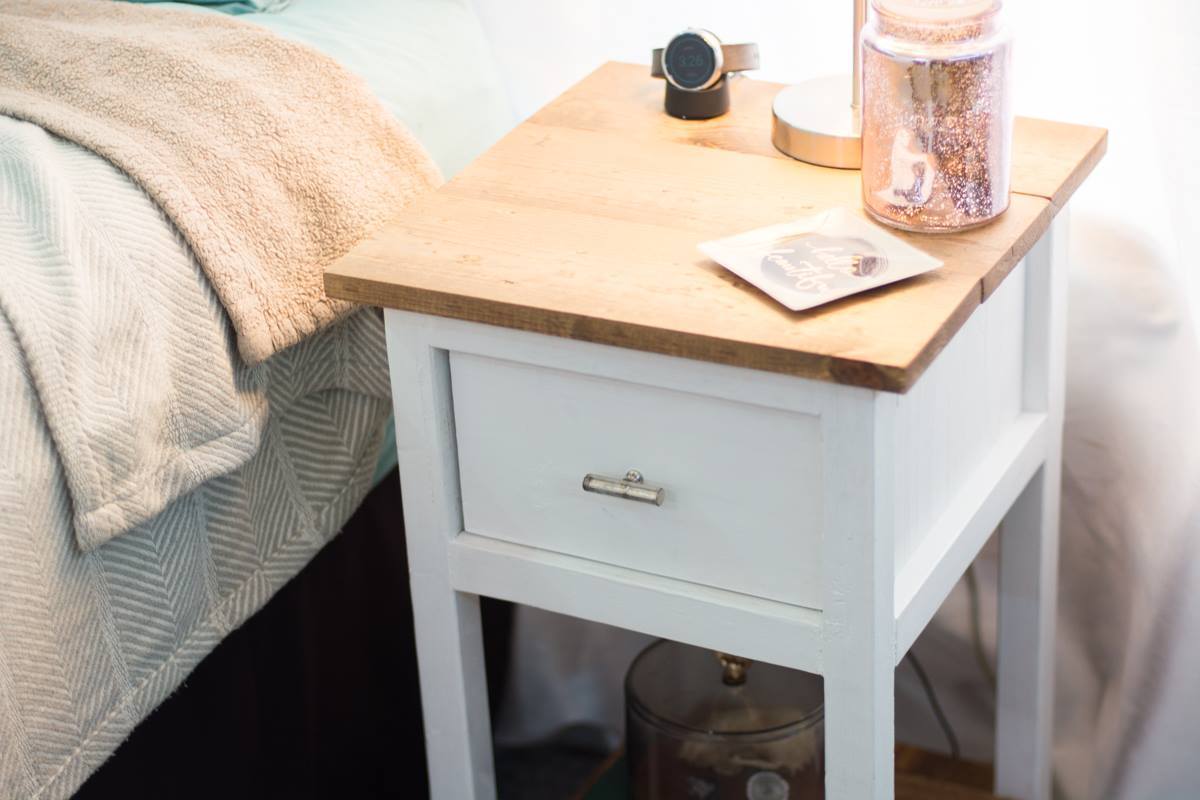
Side Tables
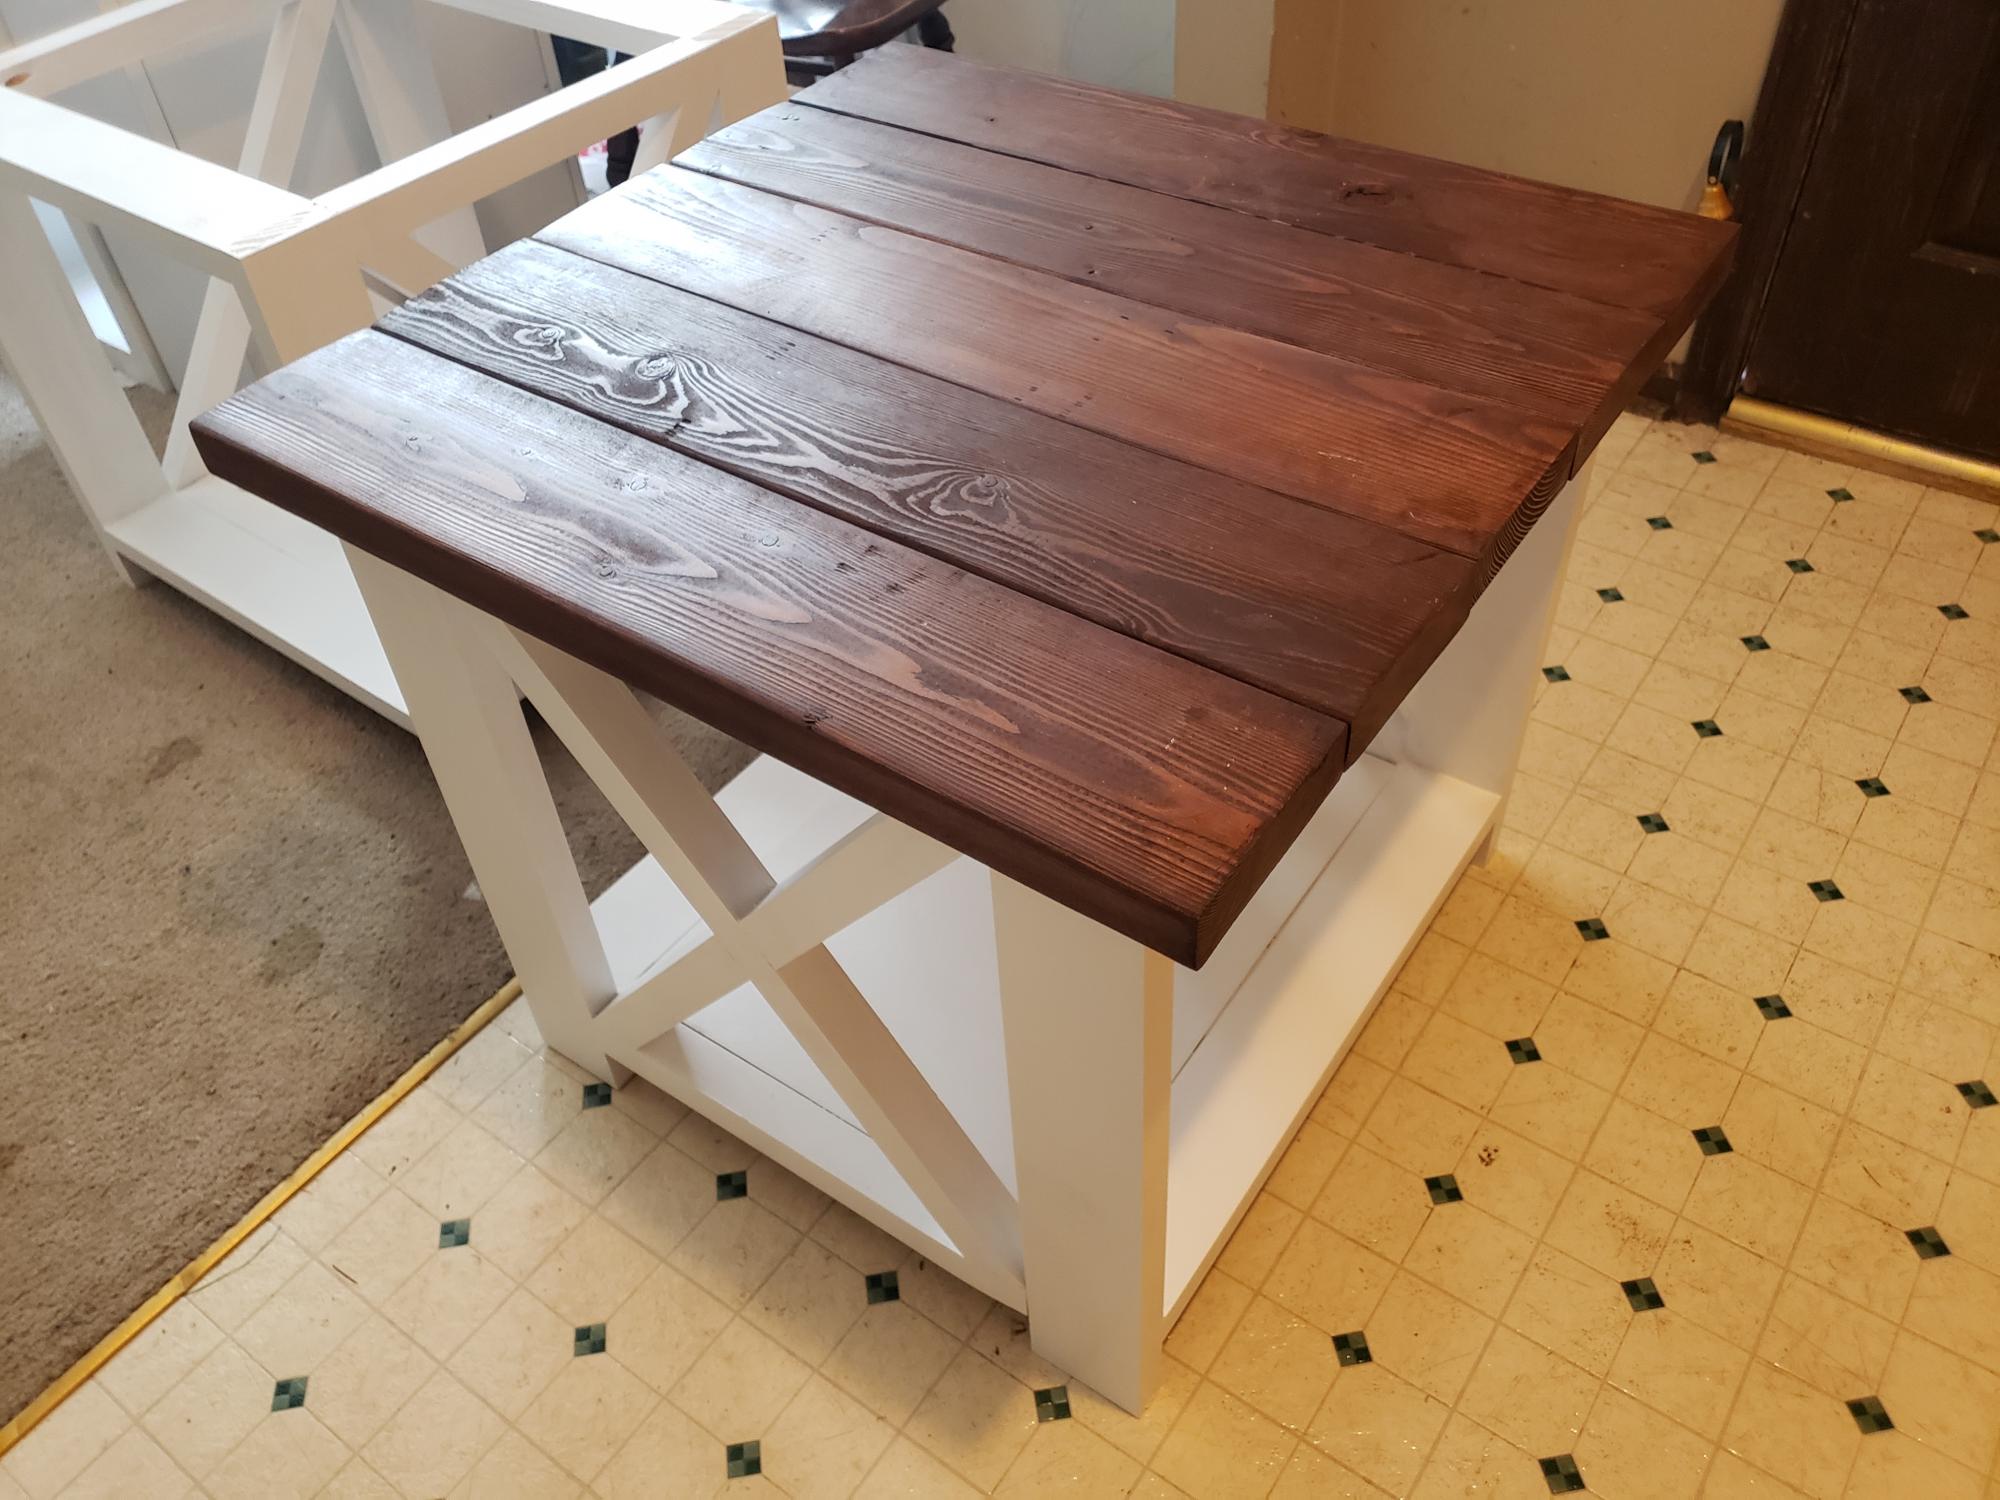
My wife and I made 2 of these for our living room. Plenty of mistakes, but we love them. Hardest part was the X.
Built from Plan(s)
Finish Used
White paint and dark gel stain
My wife and I made 2 of these for our living room. Plenty of mistakes, but we love them. Hardest part was the X.
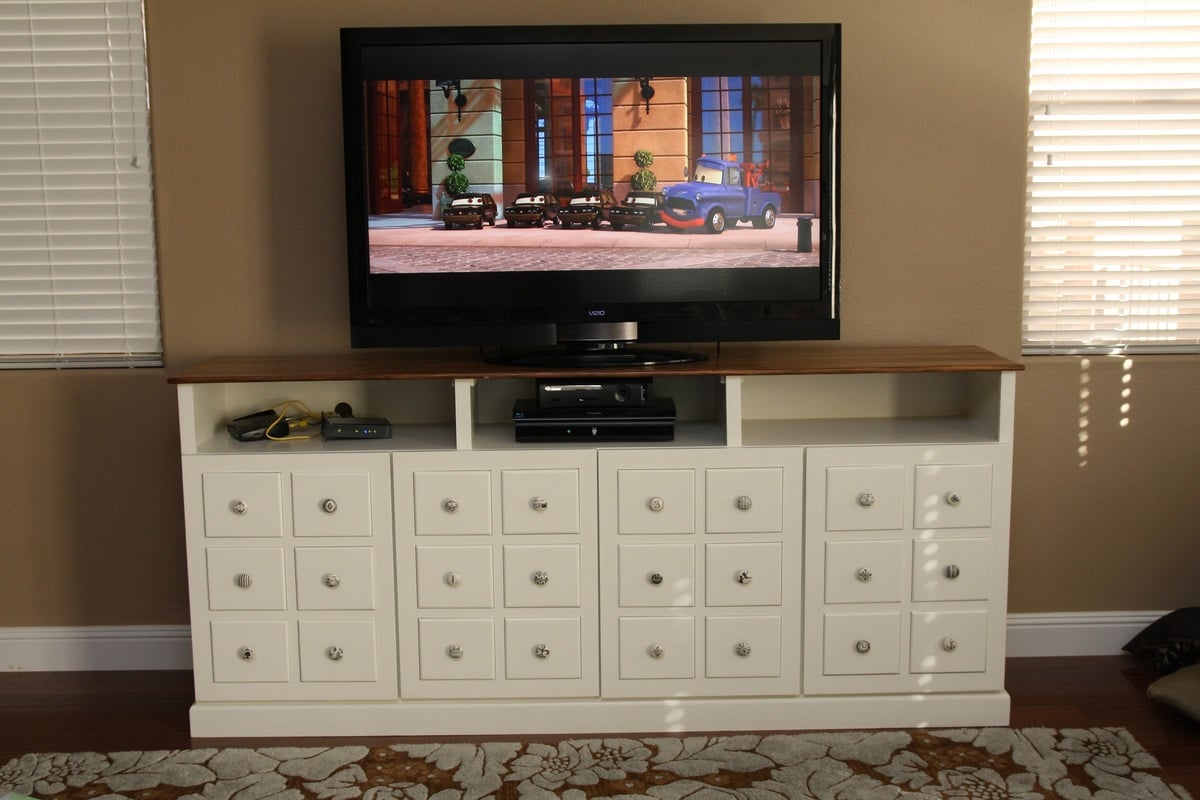
This is my first wood project. It was probably a bit ambitious for a first project, but what can I say other than Ana White inspires me.
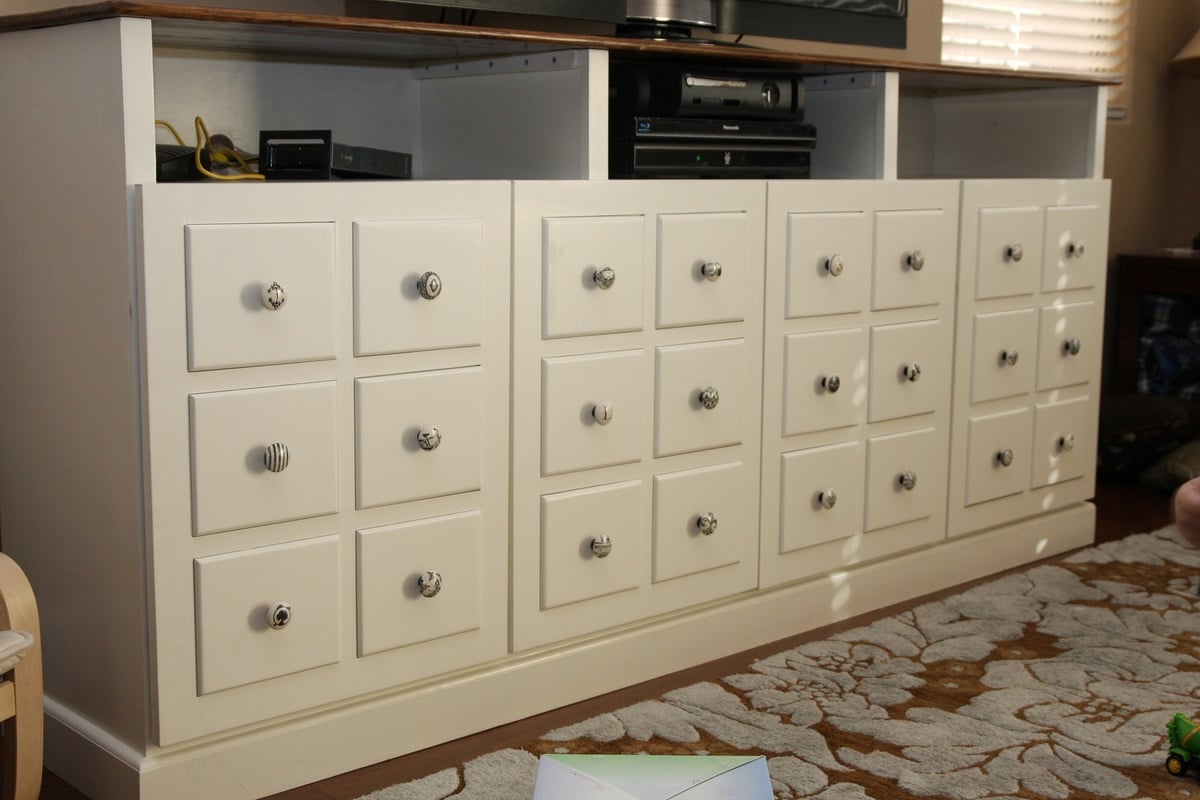
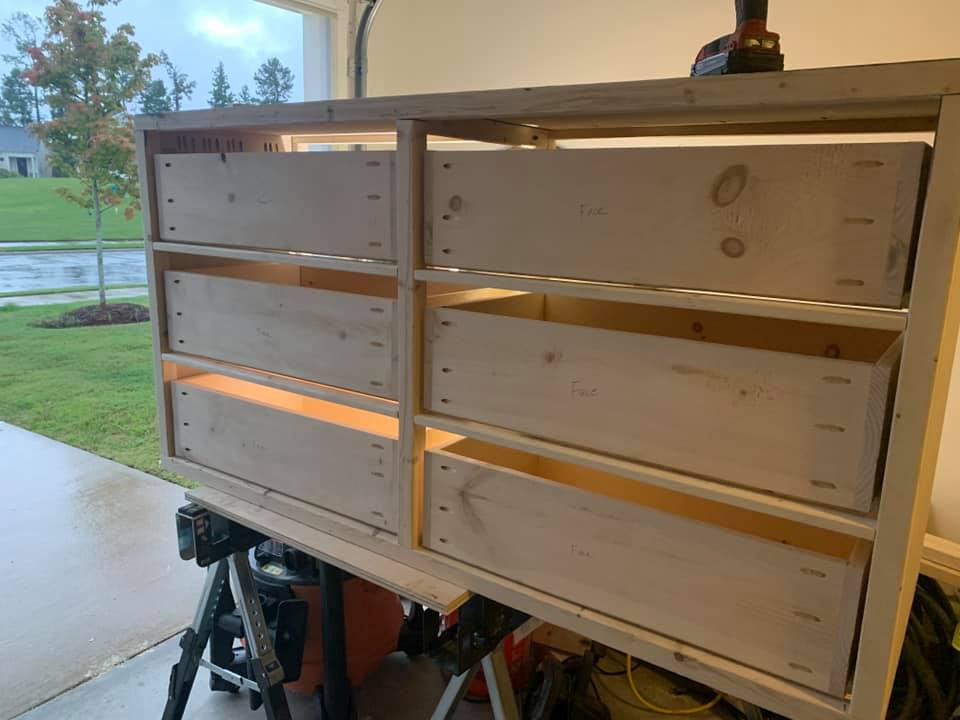
It all started with buying that big ol' TV. We had a chunky armoire that wasn't going to work anymore and I really liked Ana's Apothecary Console and I REALLY liked kayleentheobald's take on the Console in the brag posts. My wife went out of town for the week and I had redhead_61 help me take the design and make it bigger to fit between our windows and be big enough for my son's bigger toys. I was going to be the good husband and surprise her with a finished product when she got back. So I went to work, every night after work with redhead_61 and got the carcass put together pretty fast and really the only thing we needed was the top and the doors. I decided to pack it all up in the back of the truck and ask my neighbor for help on the doors.
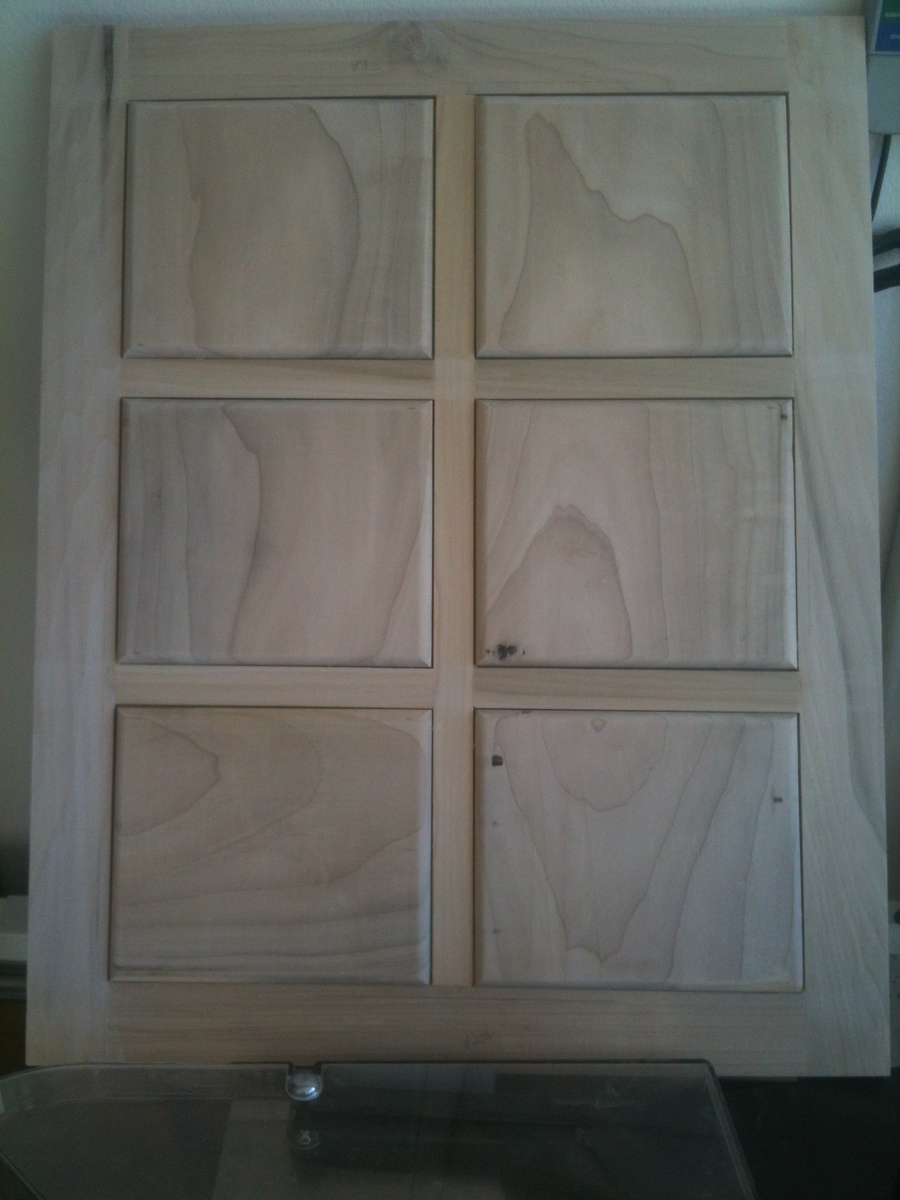
Now this is where the amount of time I put into the project got a little out of hand (BTW there is no button for "way more than a week" for estimated time investment). I told my neighbor that I wanted my faux drawers to look a lot more like an apothecary cabinet with smaller drawers, so we came up with a plan to make 6 panels per door all done tongue and groove using muntins and styles (like window panes) and do it without any screws or nails. If we knew what we were doing maybe we would have got the doors done in only a few days, but it took closer to a few weeks spread over a couple months due to work and other obligations.
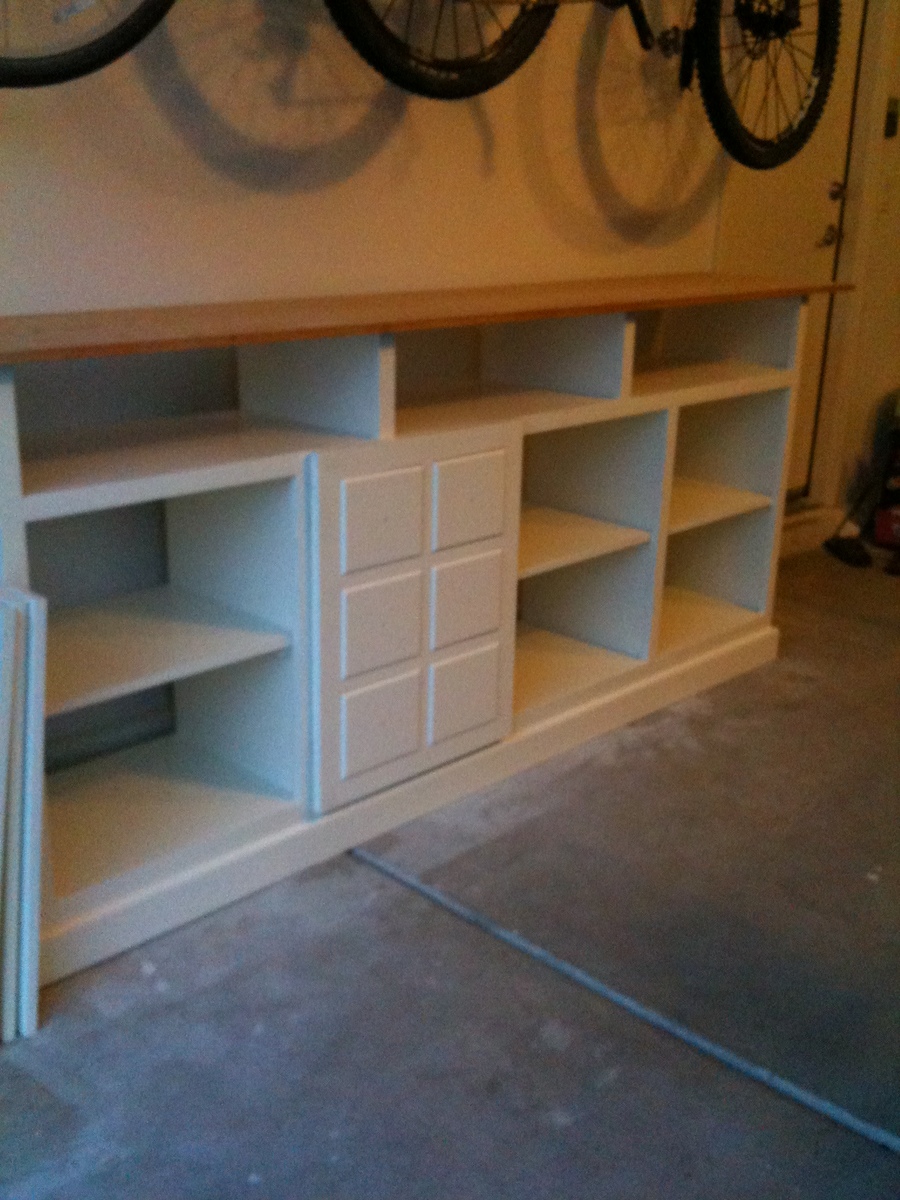
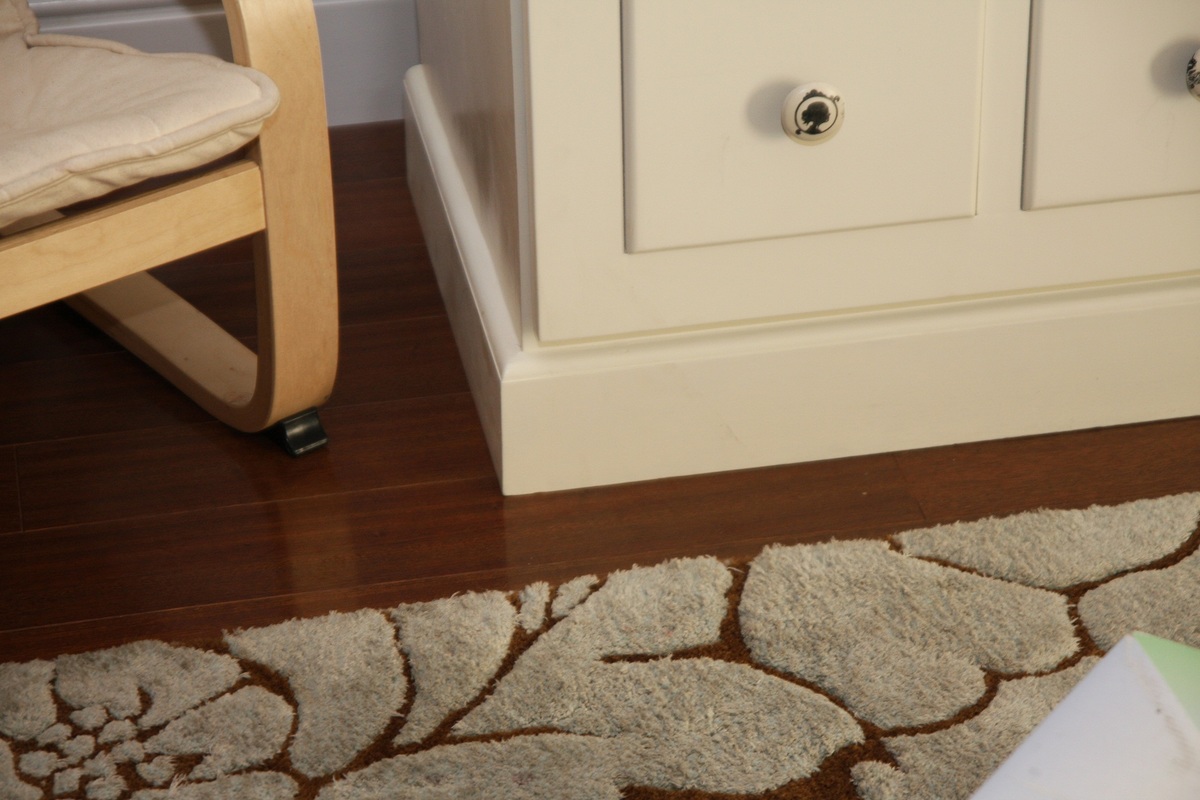
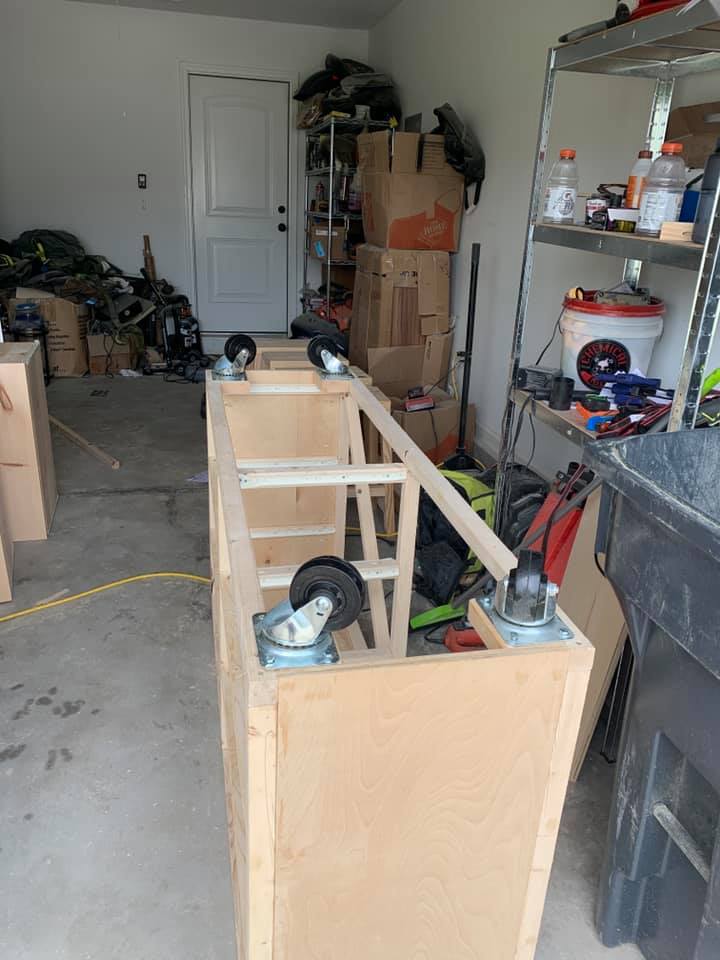
Building the base is not that hard; just square everything up and use wood glue and screws. We added a little molding at the bottom for some aesthetic appeal.
The real time came in the finishing I described below. After I had spent several weekends building the thing I no longer wanted something I could just throw in the family room and put a TV on top; I wanted a real piece of furniture that would last forever. This is where my wife interjects, "well it better since you took over a year to finish it." I love you too, honey.
I wood filled, primed, sanded and repeated many times over until I had it just right. (BTW if you're going to use plywood, take the time and effort to find a place that sells good high quality stuff that is meant to build furniture not the construction grade crap I got from Home Depot - it'll only save you about 100 hours of wood filling, priming and sanding)
Finally, after 14 months (I didn't work on it constantly - being a lawyer and a dad kind of sucks up disposable time) I could haul my masterpiece into the house put the TV on top, sit back and admire the work. I can tell you it was worth every moment. Thank you Ana White for inspiring me to bite off more than I could chew. That said, I think my next project is going to be a shelf or something.


Wed, 12/12/2012 - 08:33
I love the whole design....it fits perfectly in your space, the colors are perfect, and the detail is amazing. As someone who takes a long time to finish a project, I appreciate your 14-month timeline! It's awesome!
Thanks for all the detail on how you did it.

Wed, 12/12/2012 - 11:38
I love what you did with the knobs! That is one beautiful piece of furniture!

Wed, 12/12/2012 - 14:20
So beautiful! It will last forever, I love it all (esp. the doors), I am sure you family does as well!
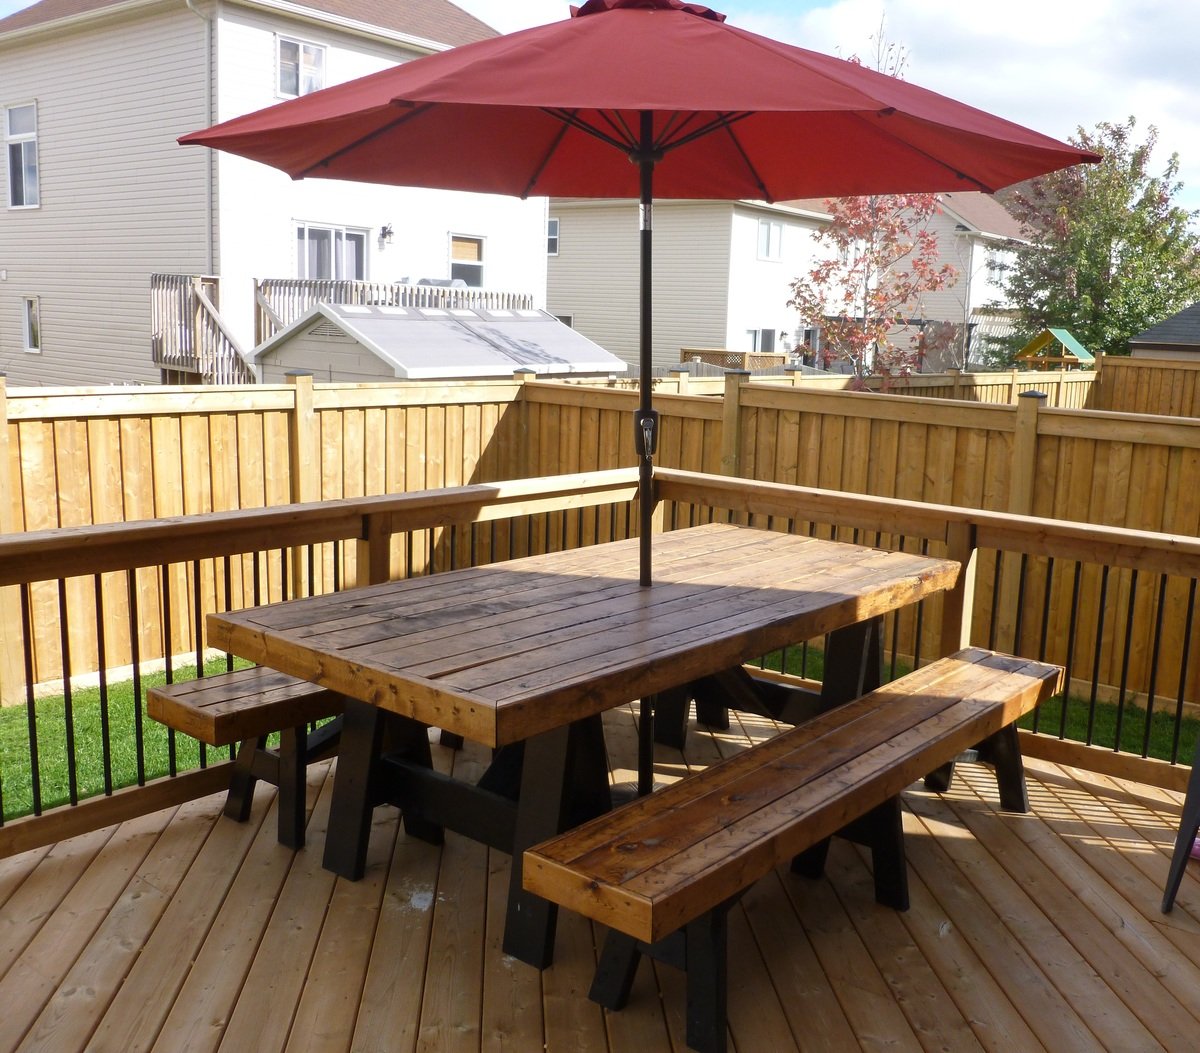
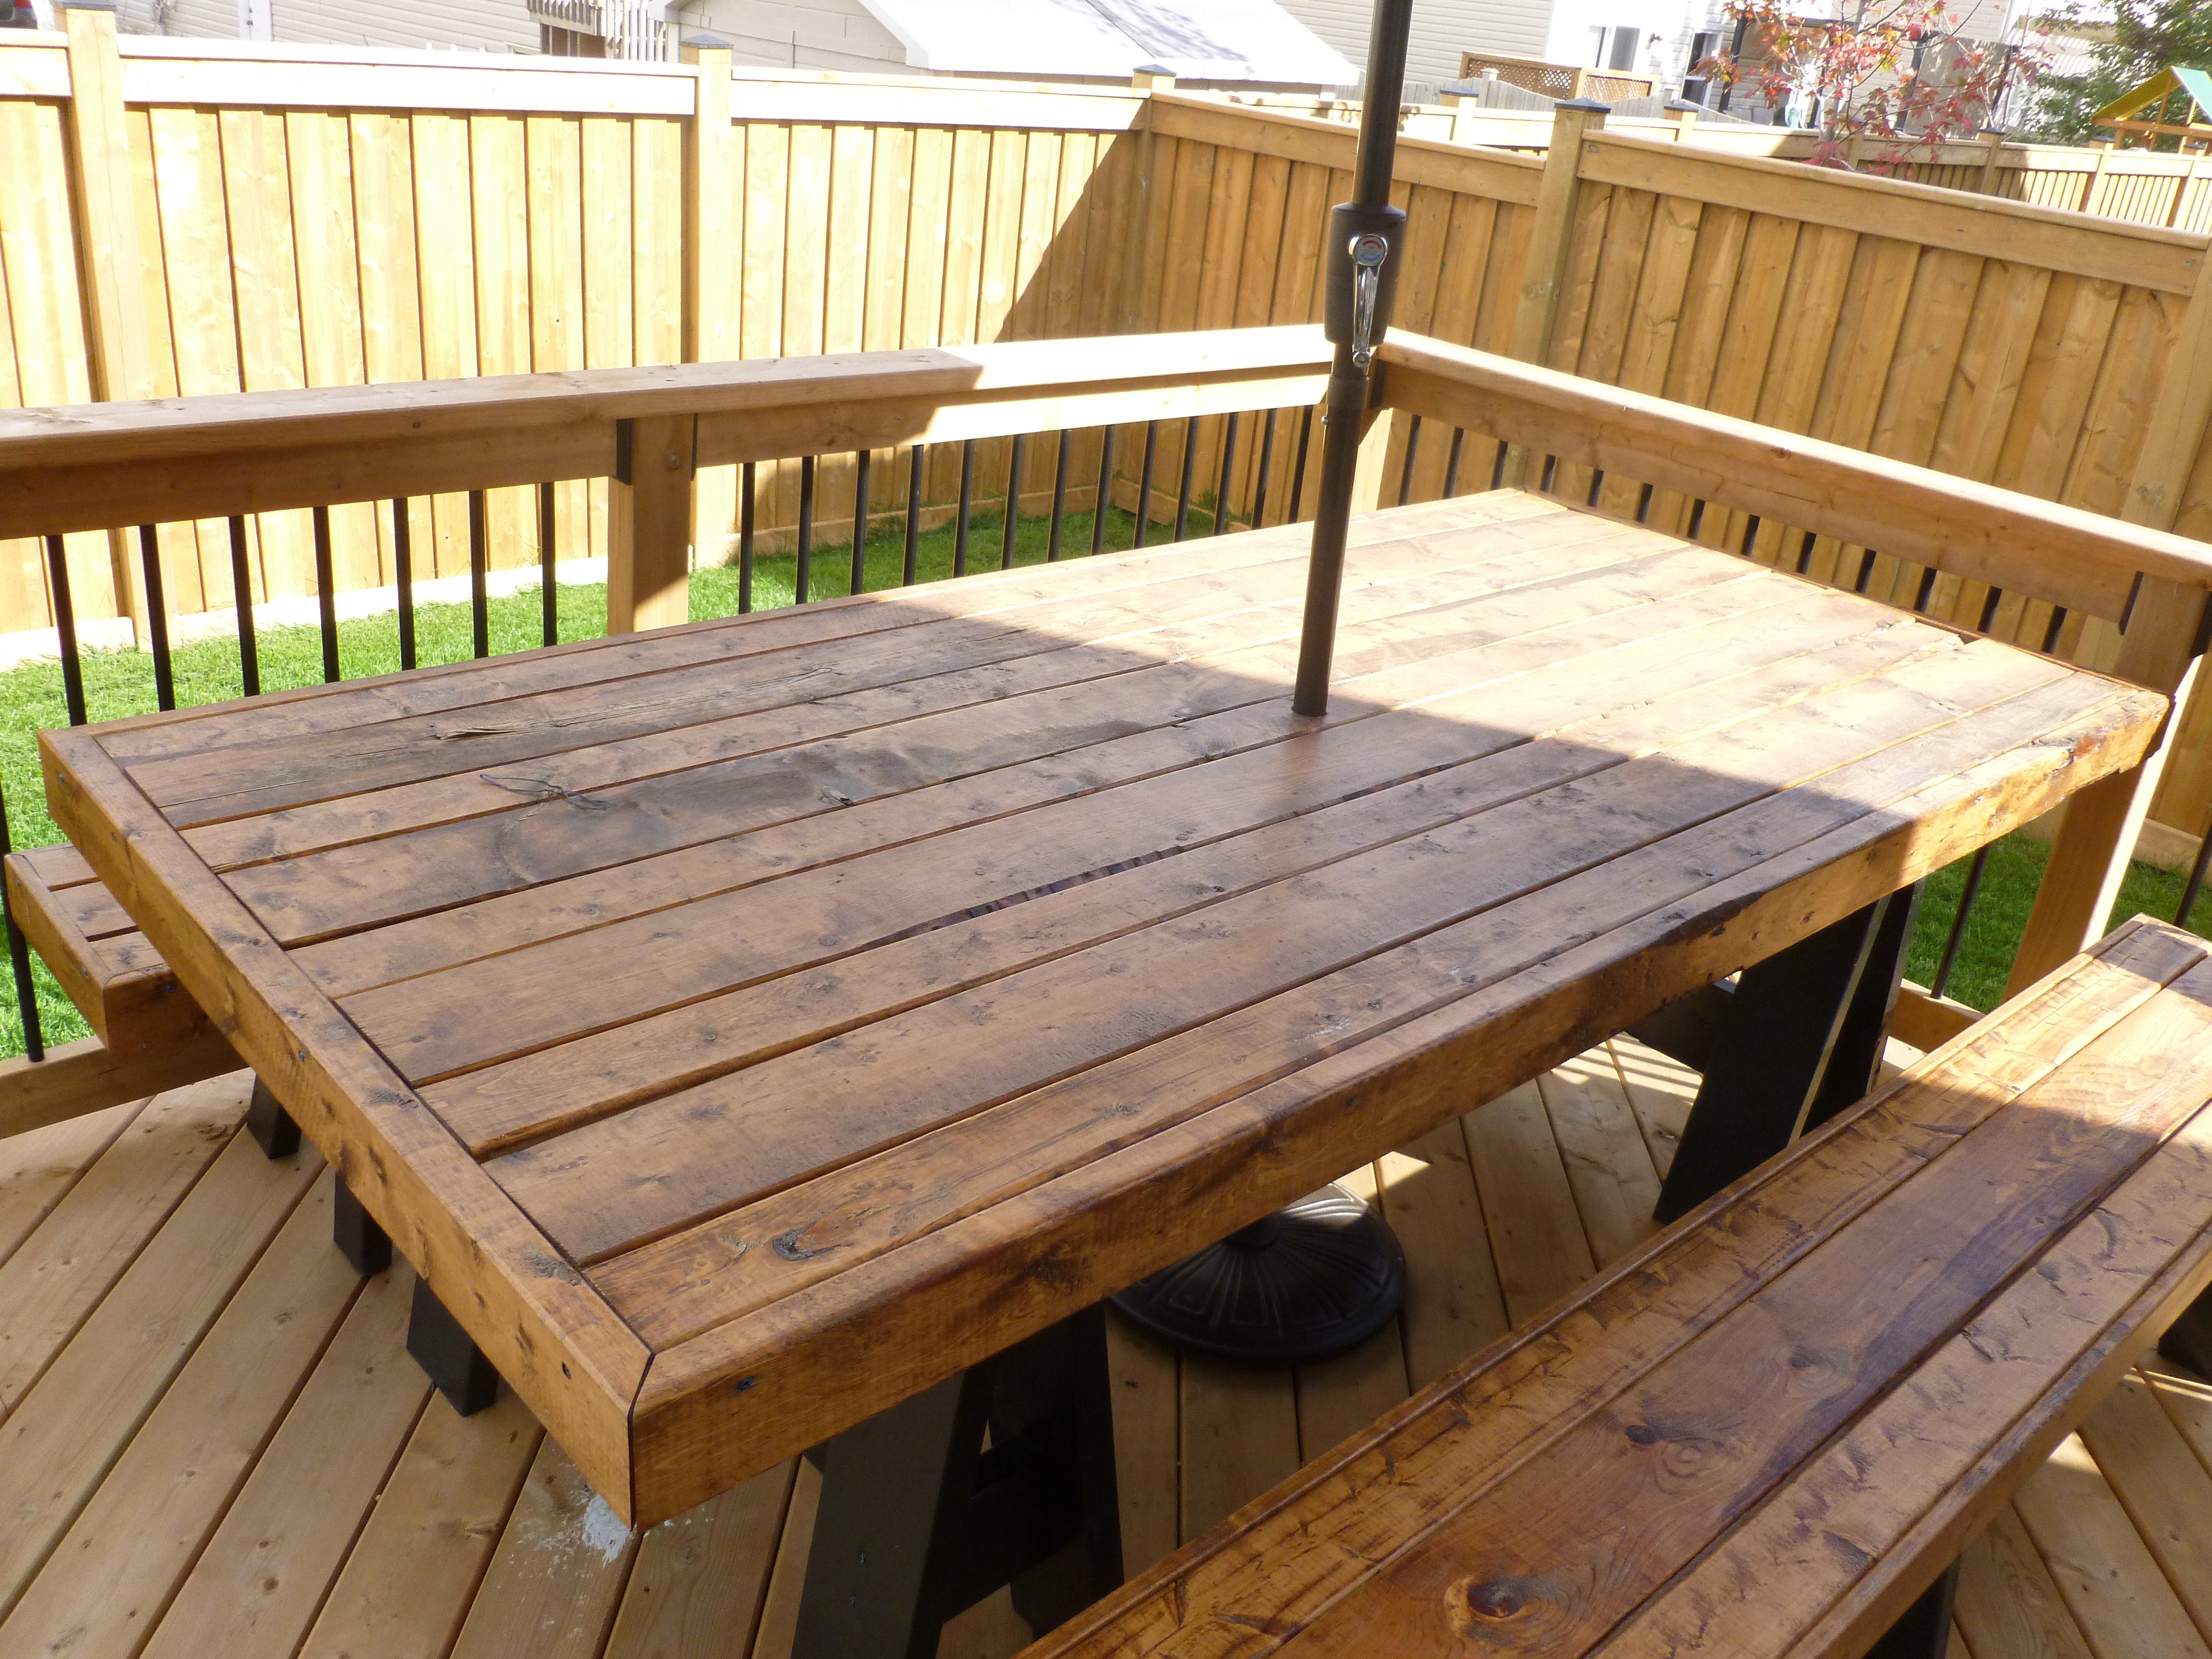
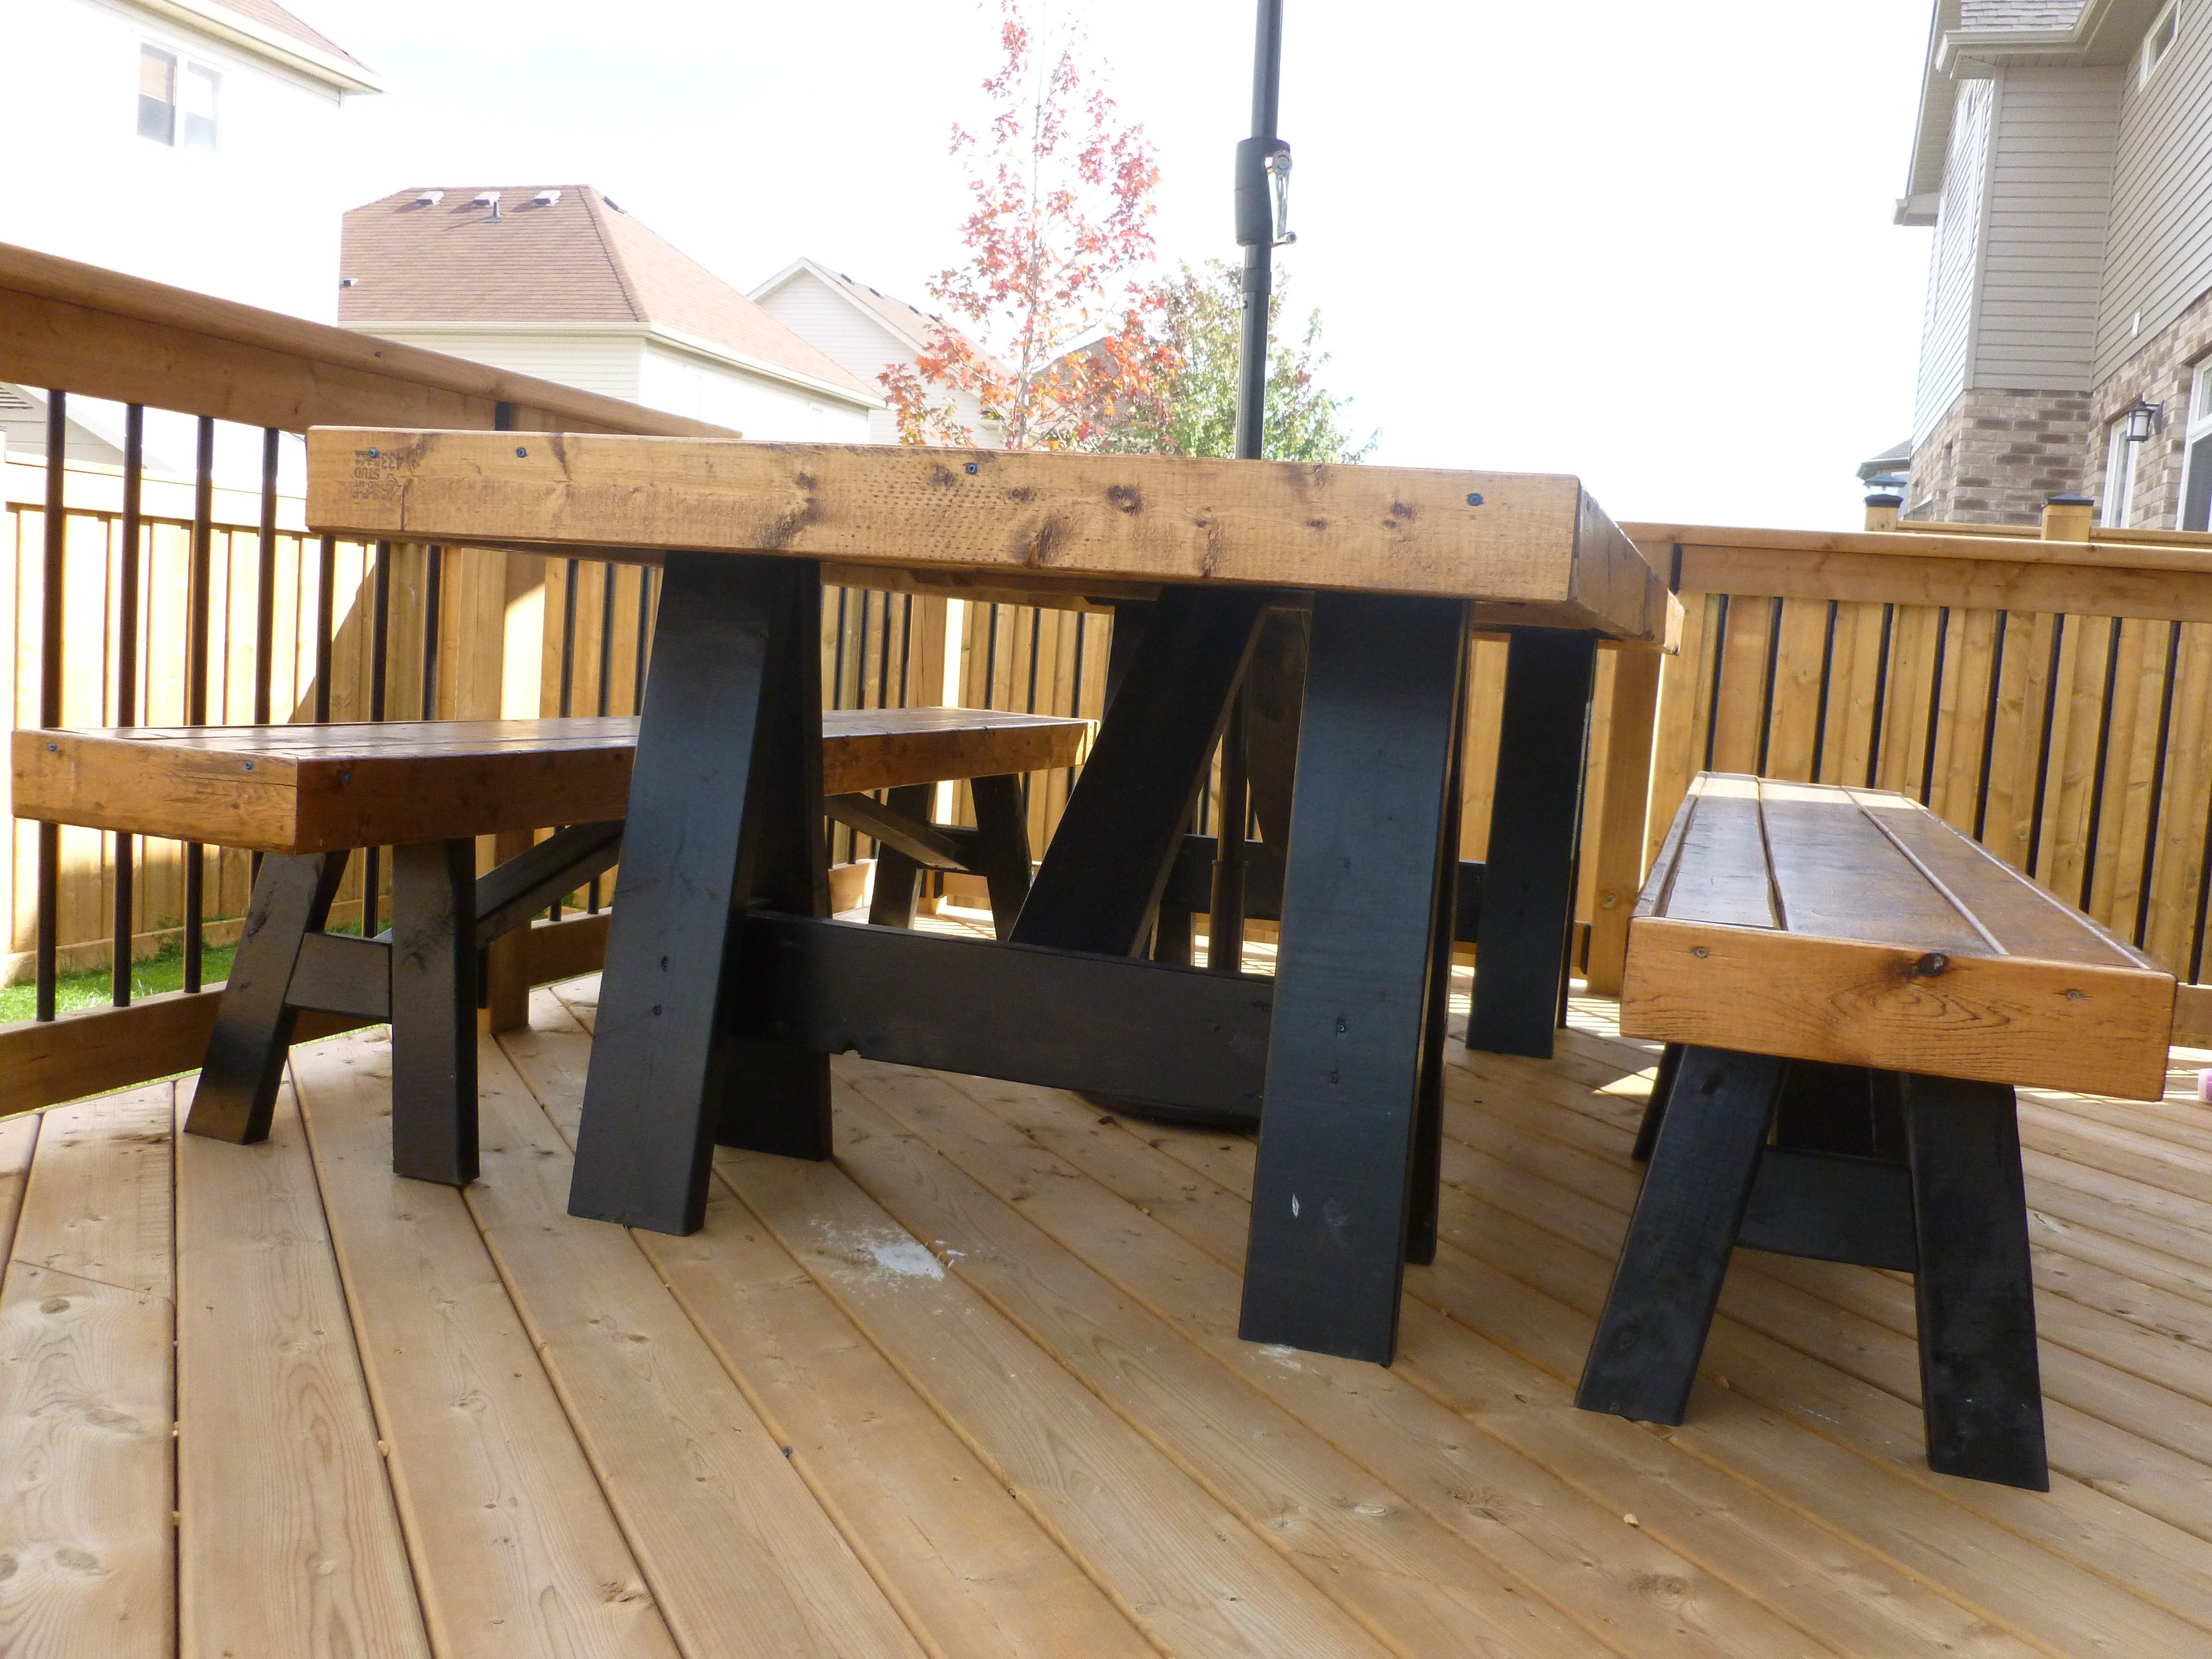
I fell in love with this set from the moment I saw it on Shanty-2-Chic's website. I knew I had to have it for the deck I just built in my backyard. It's pretty straightforward, the only difficulty I ran into was assembling the legs. I copied the angles provided in the instructions to a "T" but there are still some gaps where the angled pieces join. After spray painting it they are not very noticeable. It is a heavy beast of a table and took everything in me to help my husband heave it up on to the deck, but it's absolutely lovely. It is so large we can easily have people over for a BBQ and everyone fits around the table. I'm so thrilled with the results. Thanks, Ana!

Mon, 03/30/2015 - 16:34
What adjustments did you made to the plans for creating an umbrella hole?

In reply to Umbrella opening in the table by liamtoh1
Tue, 06/13/2017 - 15:41
So sorry, I just saw this question now! Wish I had received an email to let me know you asked a question. You need to use a hole saw bit. It's just a bit that you can use with any drill. You need to determine the diameter of the umbrella pole first and then use the appropriate bit. Hope this helps. :)
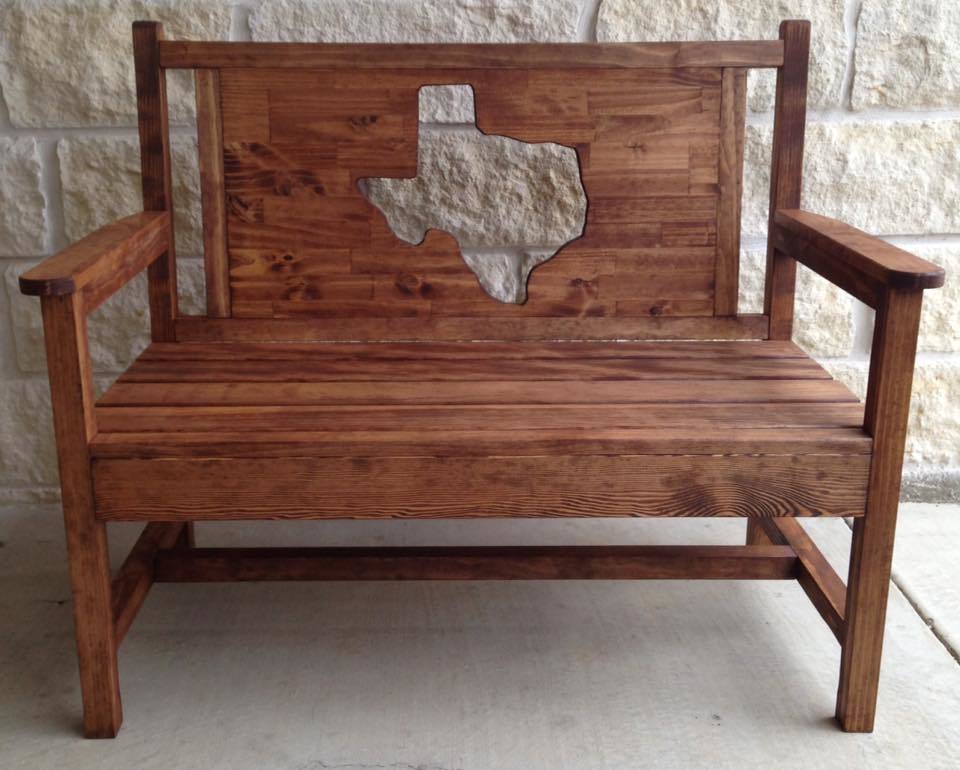
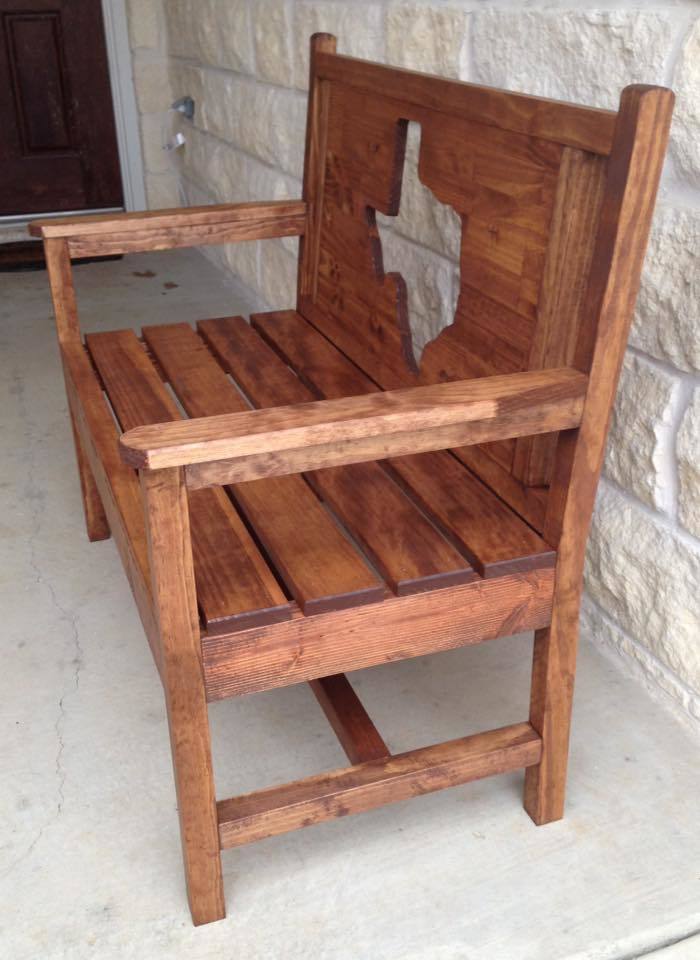
I modified this bench to incorporate a Texas theme. I traced a Texas shaped cutting board onto a 1x16 piece of edge-glued board, and then cut it out with my jigsaw.
Wed, 01/11/2017 - 08:21
This is AWESOME!!!! We Texans are so proud of our state! :-)
Modern twist on sweet pea bunk bed plans. We opted to close up the bottom instead of storage. Changed windows and railings on staircase. Took around 50 hrs for me and my husband who are beginner builders. Per recommendations we painted boards before assembling. I ended up Sanding when it was assembled to get a smoother finish. If you are particular about the finish like I am I would skip painting boards before assembled. Great plans thanks for sharing!
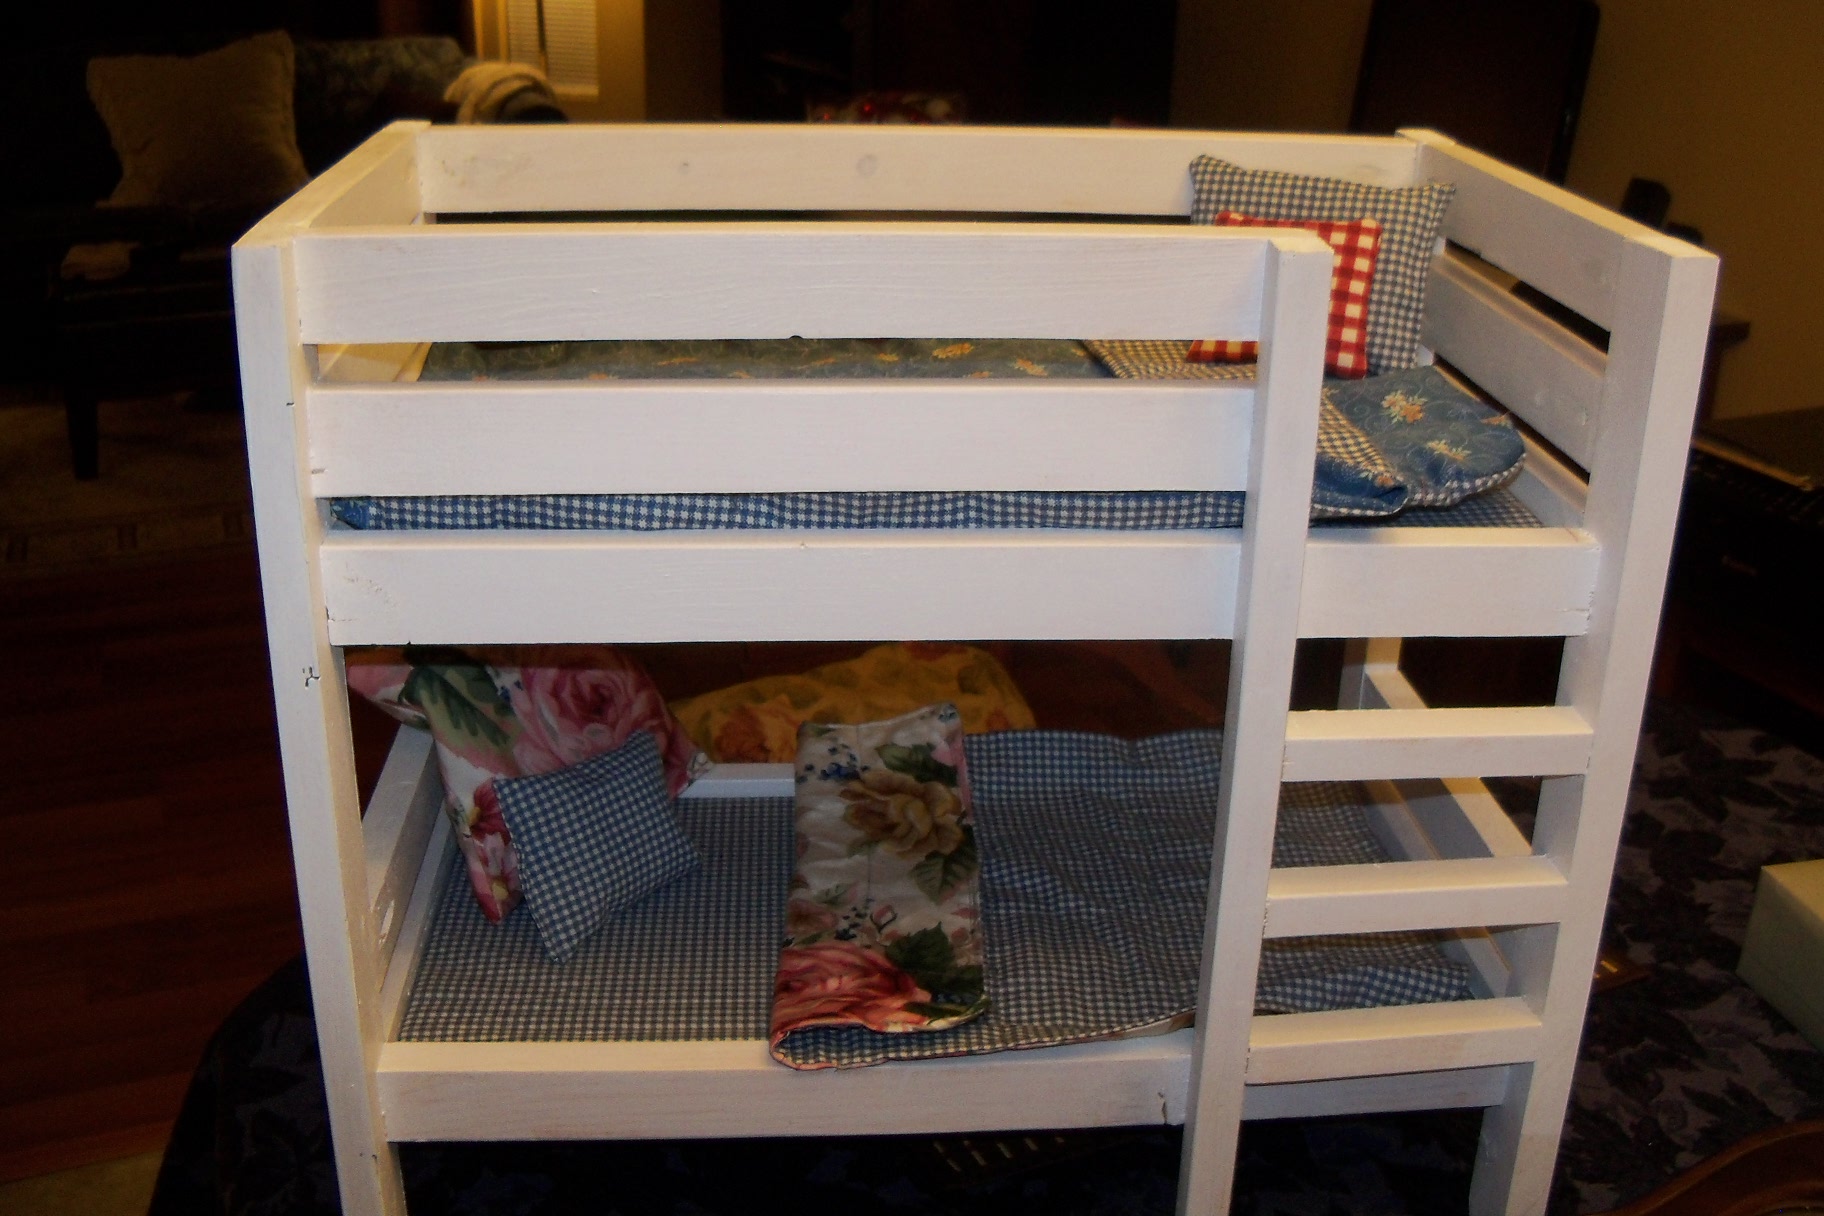
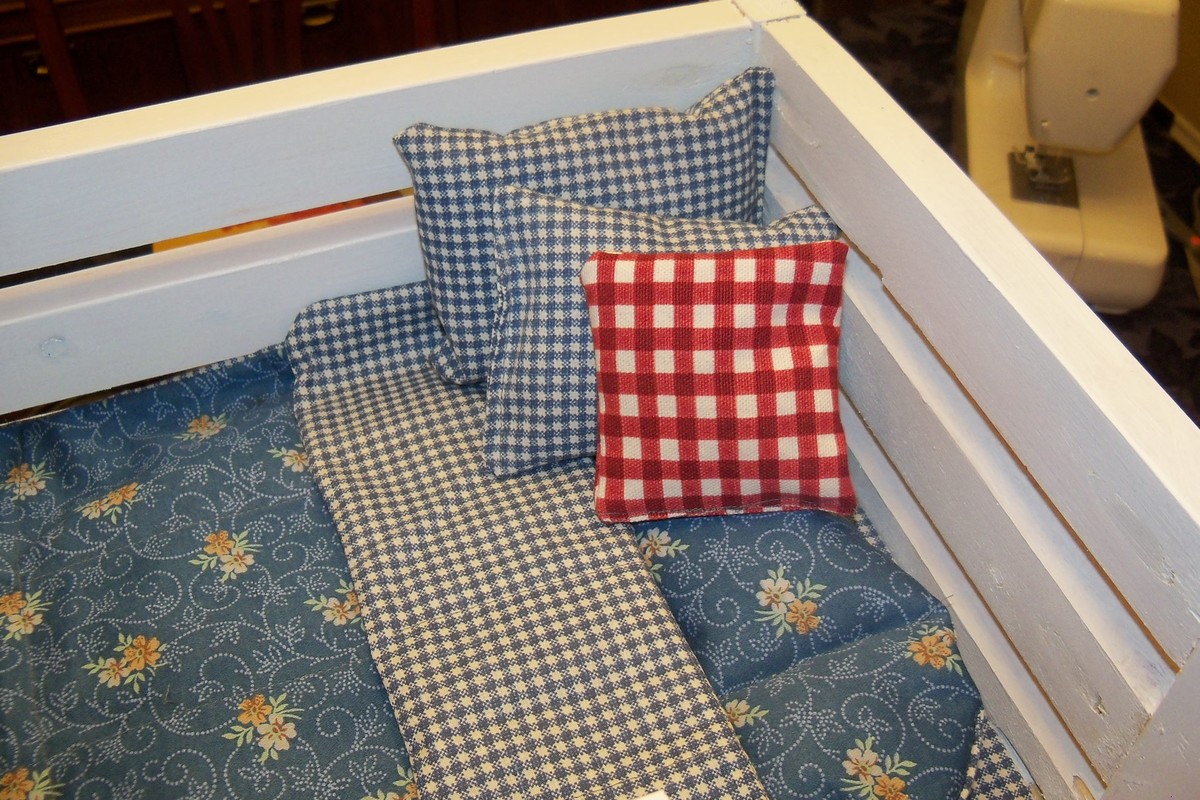
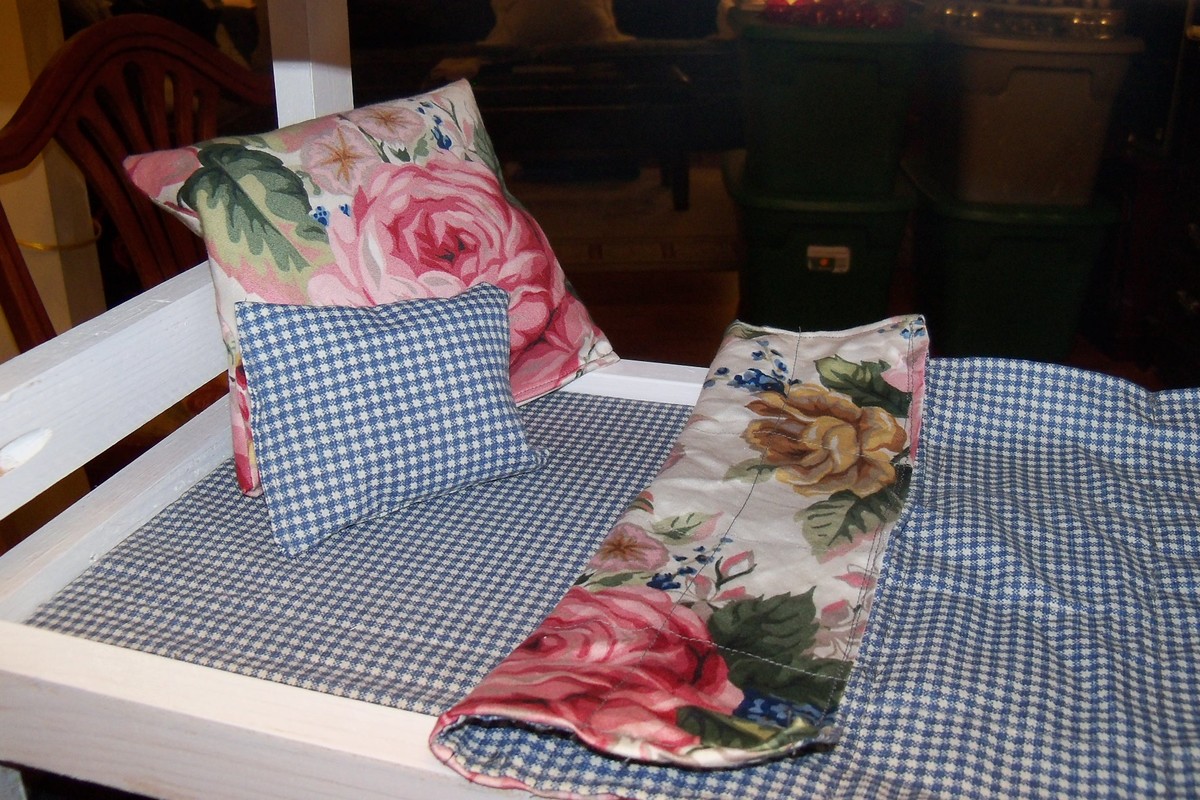
Doll Bunk bed, this was a lot of fun to make the plan was laid out well and very easy to follow.
This was a gift to a friend's 10 year old and it really made her happy.
I enjoyed sewing the bedding. It was just an over all load of fun.
I made it very quickly, I think the filling, sanding painting took longer.

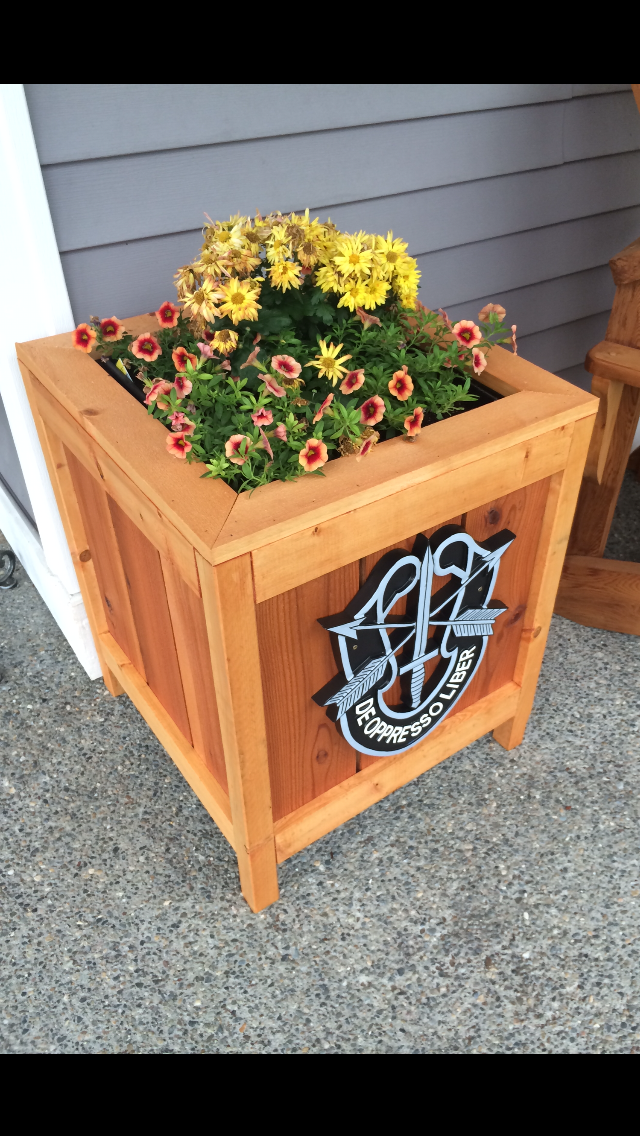
This was a pretty straight forward design! I am so in love with my new planters. This was my second Ana White build. I can't wait to do more. The only changes I made to the plans were adjusting the side up so they were even with the legs. Then I added a 1X3 topper as some of the others have done. The crests that are attached my husband had made while in the Phillipines. I've been waiting for a special project to use them on and this was definitely it! Thanks Ana!!
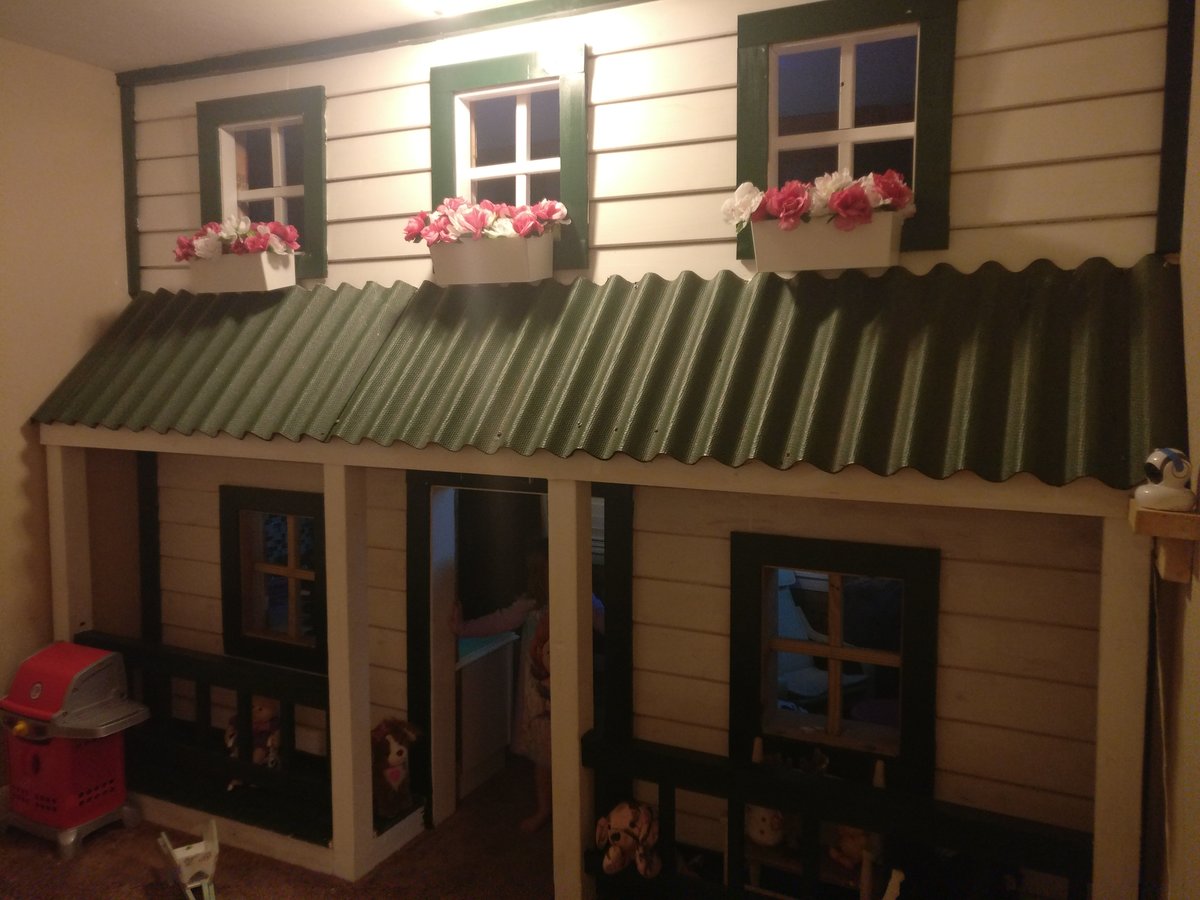
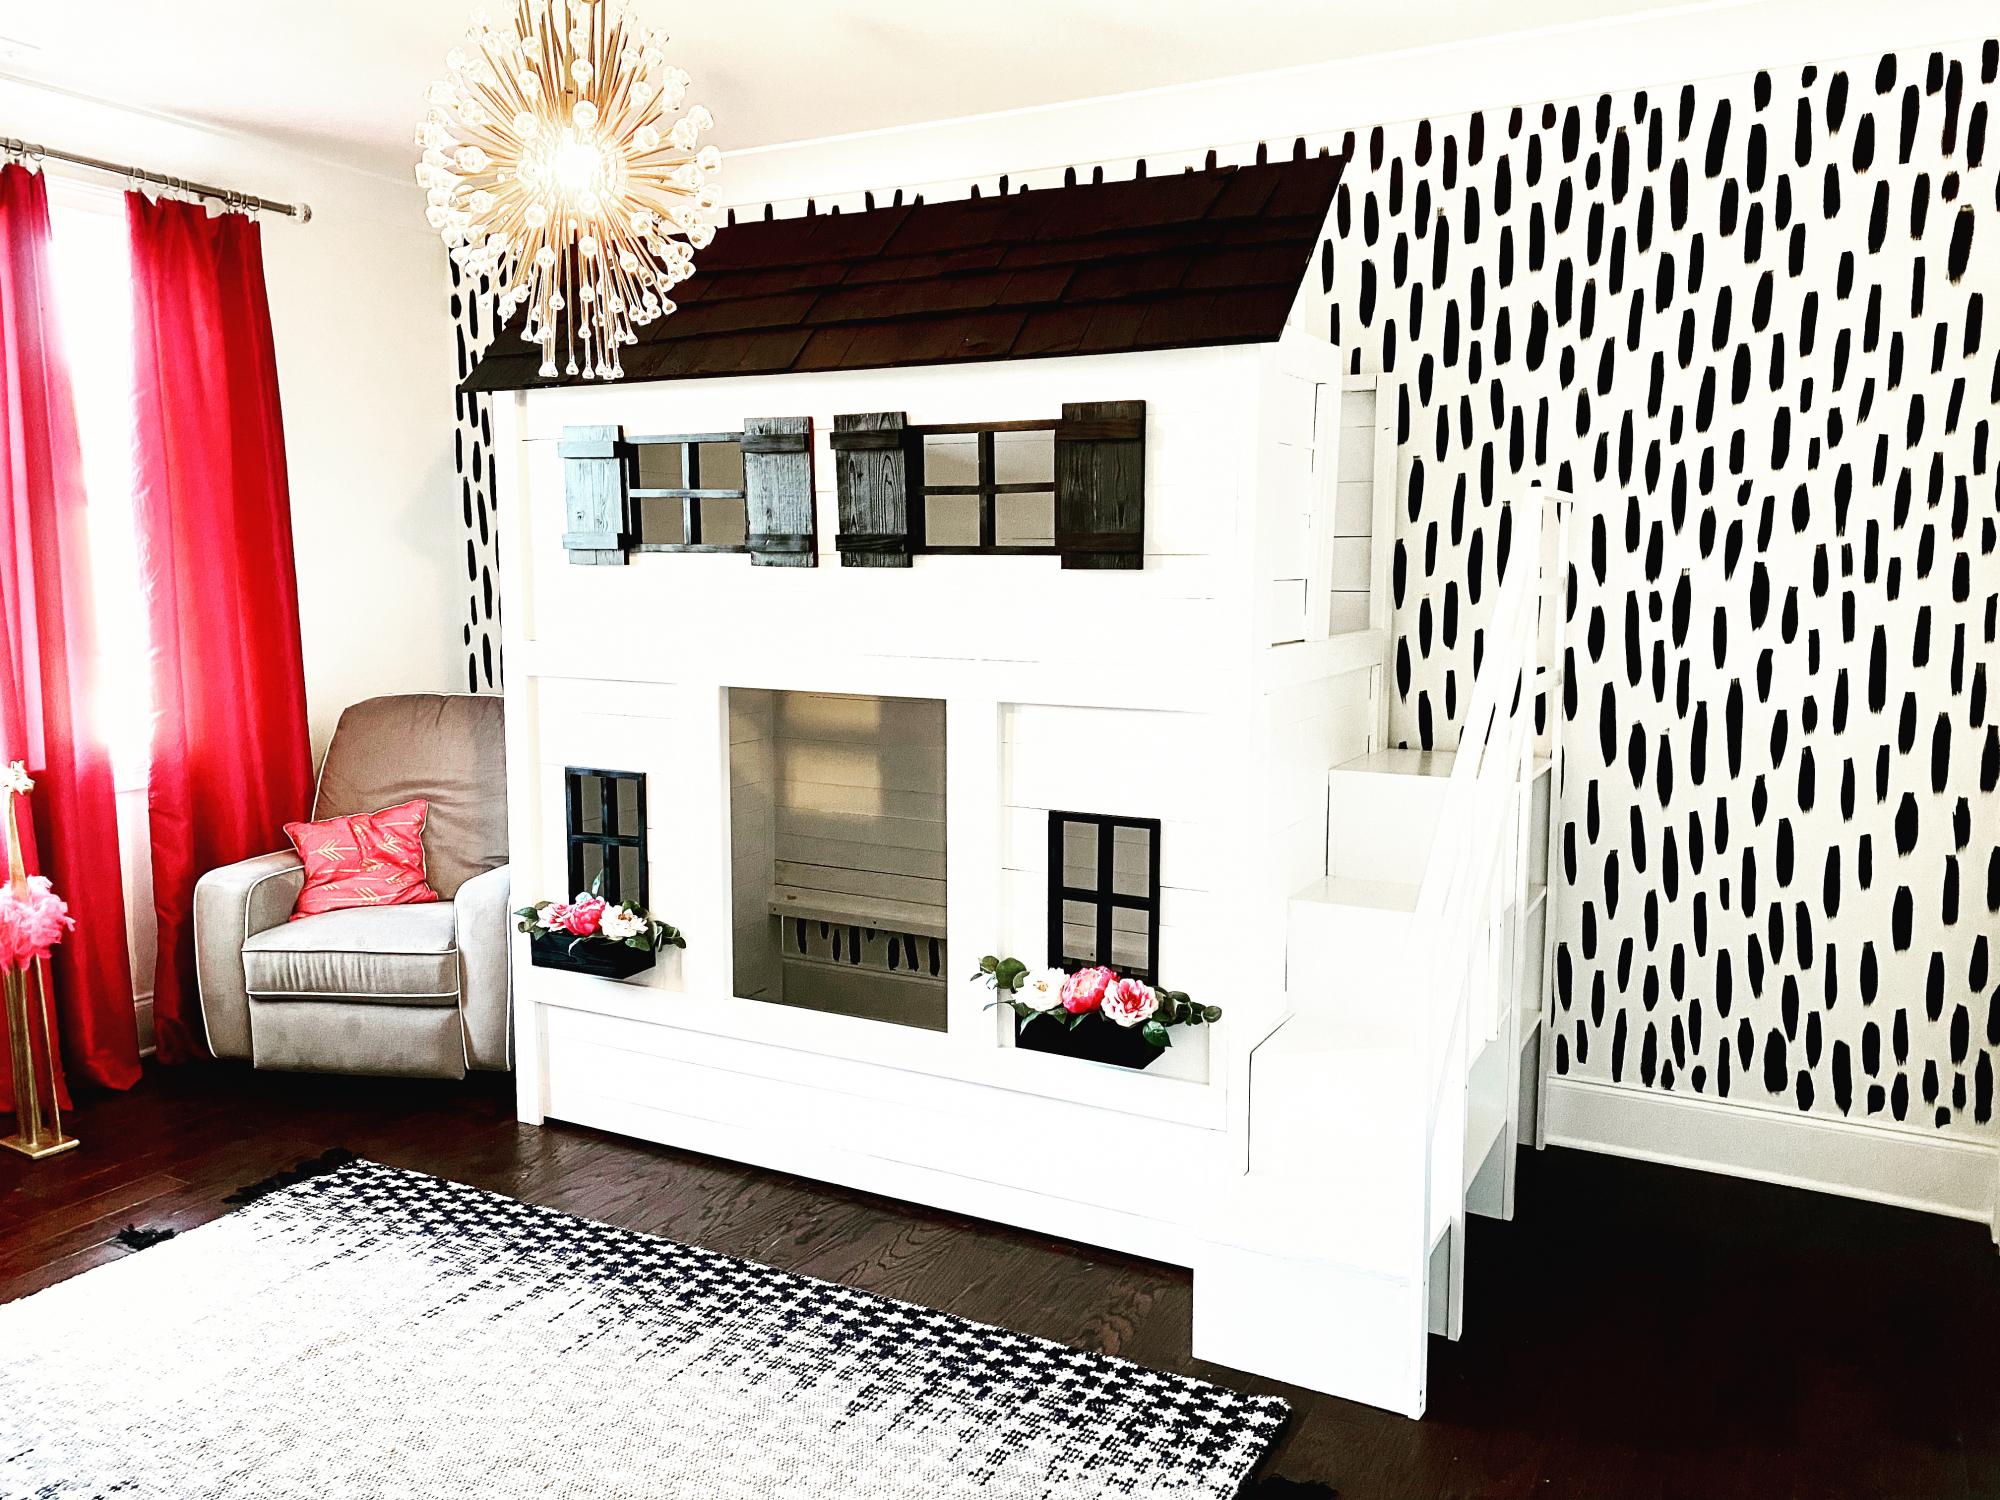
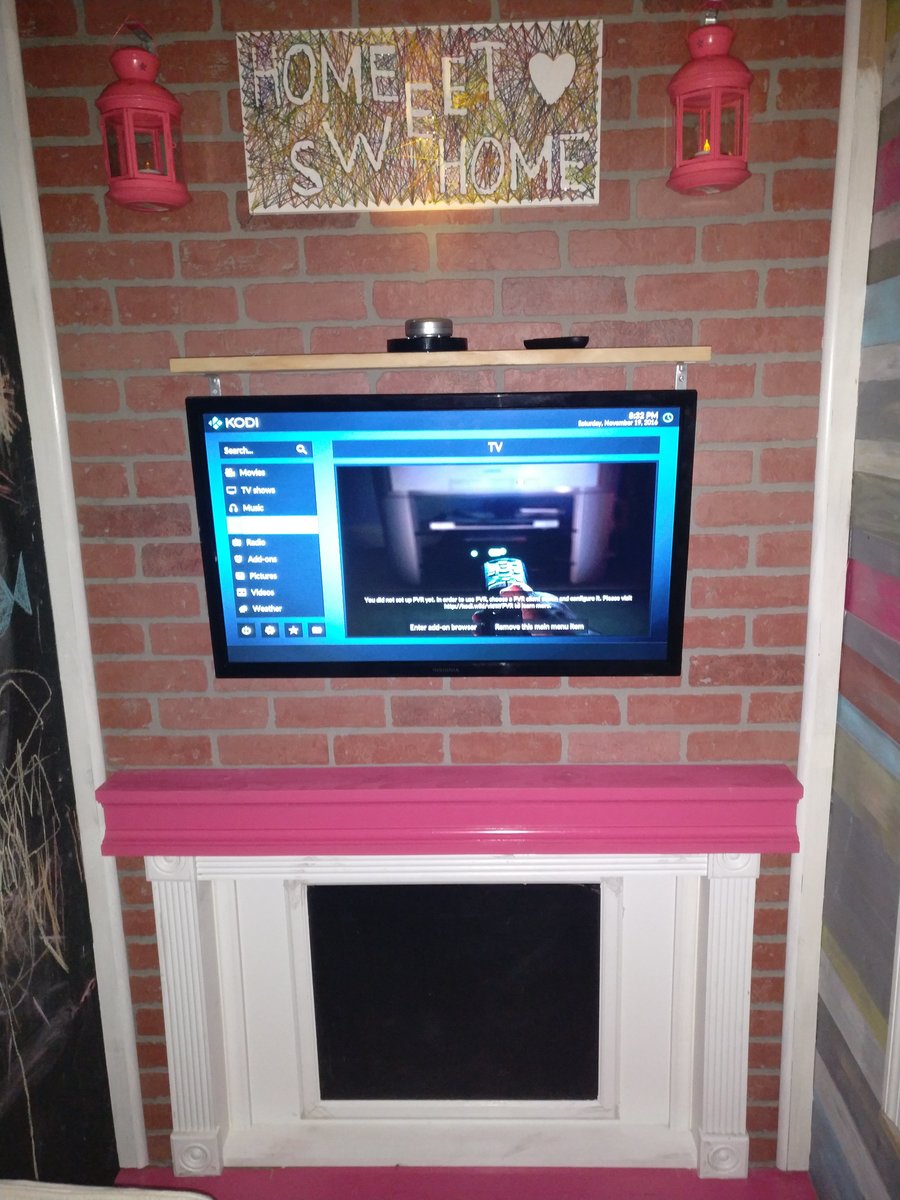
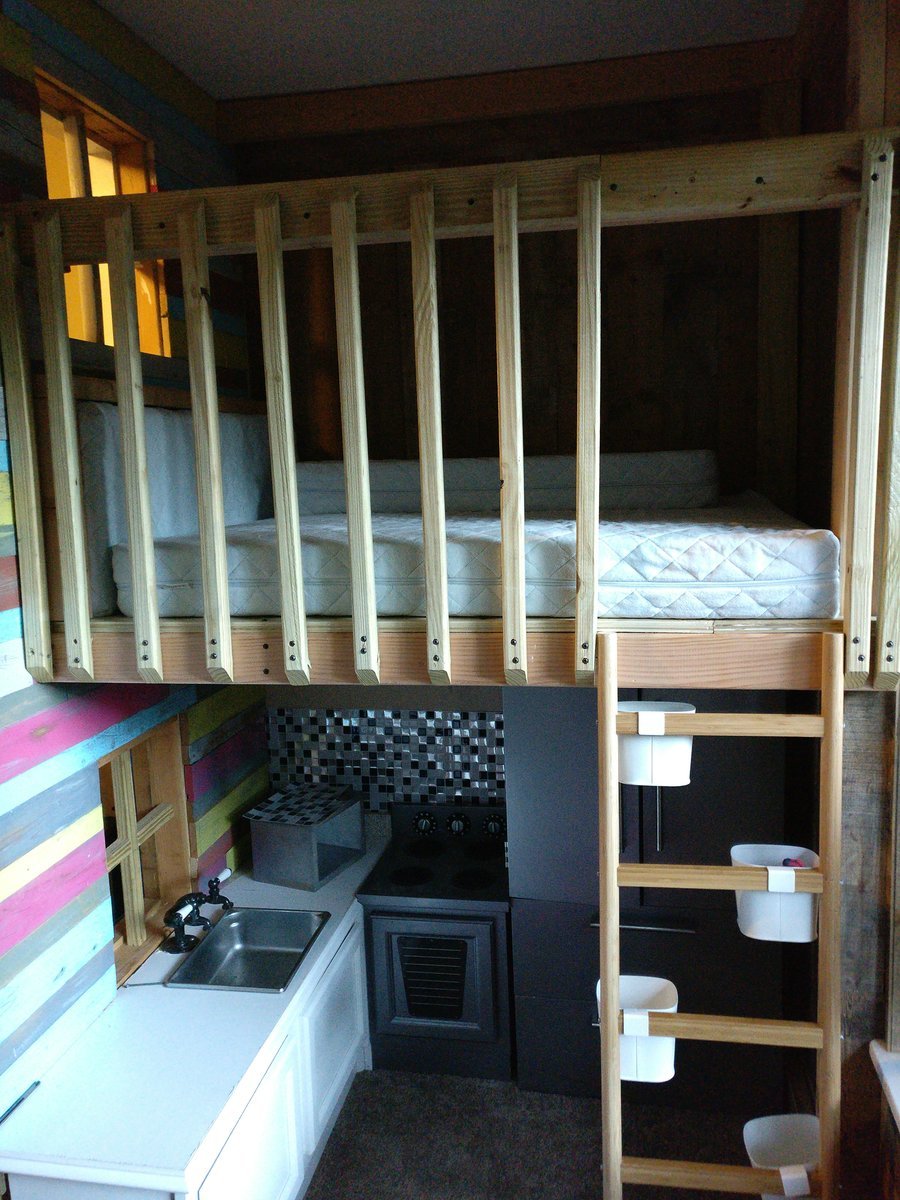
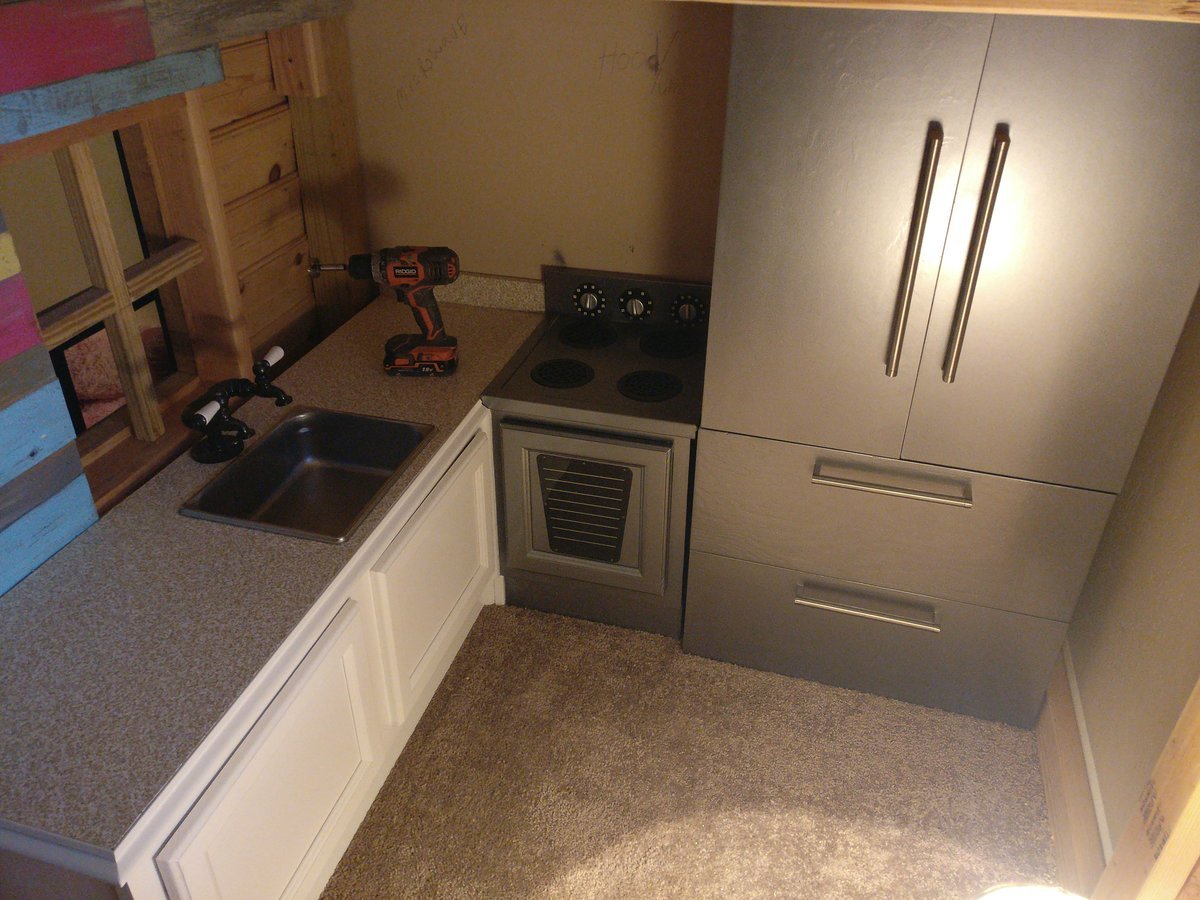
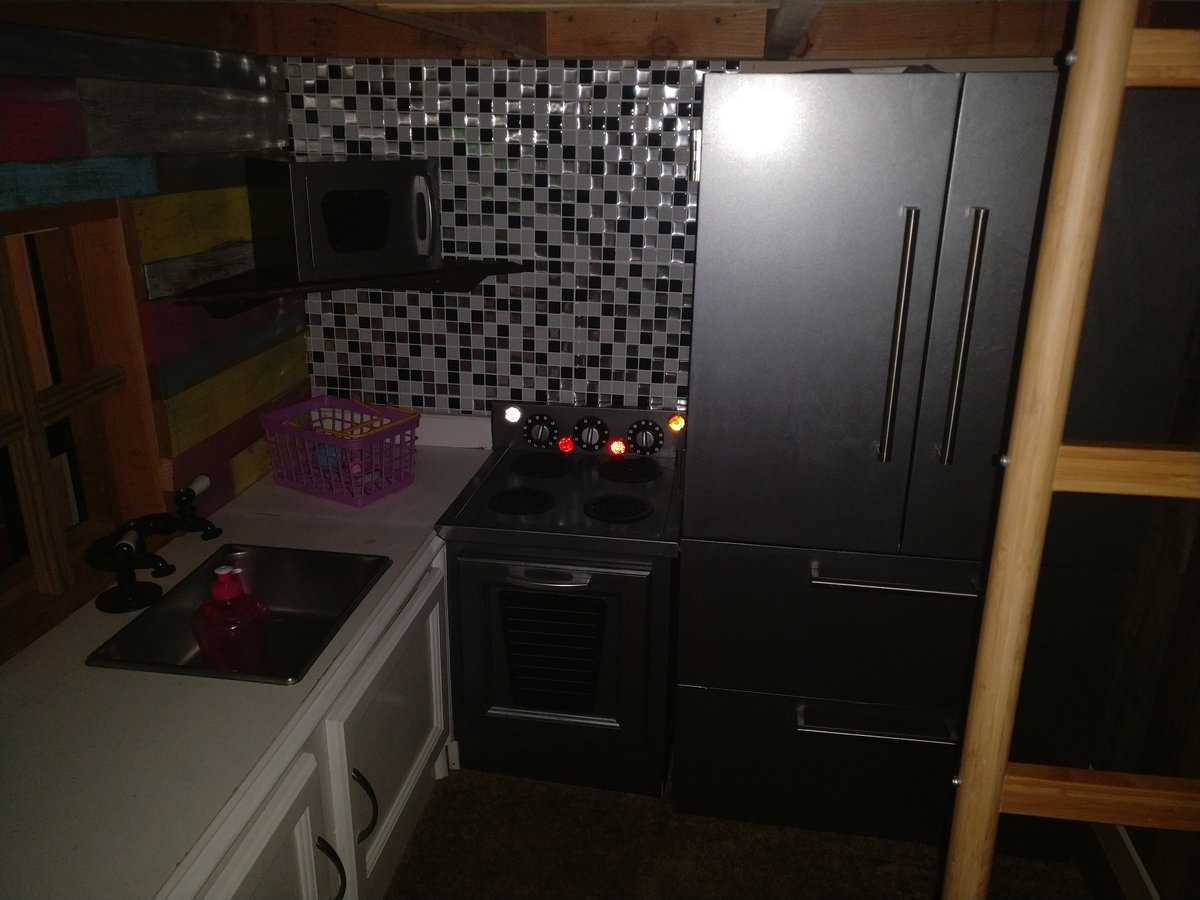
The best part about having a child is you get the opportunity to be a kid again. So when we bought our house I told my wife I was going to build our daughter her very own tiny house. Since our daughter is only 3 years old and can't afford a mortgage of her own we had to settle for a condo in her bedroom. After watching episode after episode of tiny house living and getting inspired it was time to get to work. With some help from my little girl (and mommy) this is what we came up with. To be honest I have to admit my crowning achievement was the faucet I put together with some pipe fittings and 50 cent faucet handles I picked up at a salvage yard. I know, I know after building everything in and out of her tiny house it's the kitchen faucet I'm most proud of HA, HA, HA! . One of these days i'll learn to actually take good photo's but i'm sure you guys get the idea. I hope you guys like it and get inspired to be a little kid again like my wife and I got the opportunity to be.
Thu, 01/12/2017 - 05:32
What a fantastic idea to build a tiny "house" for your little girl. Love all the details!
draft

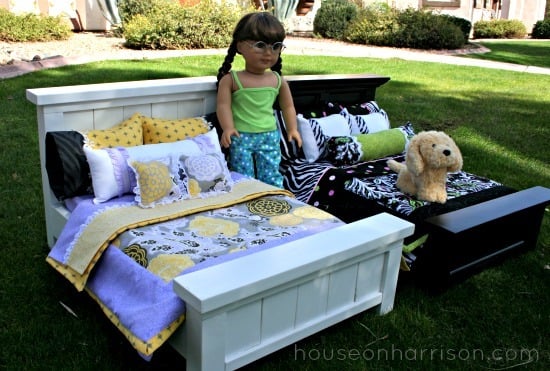
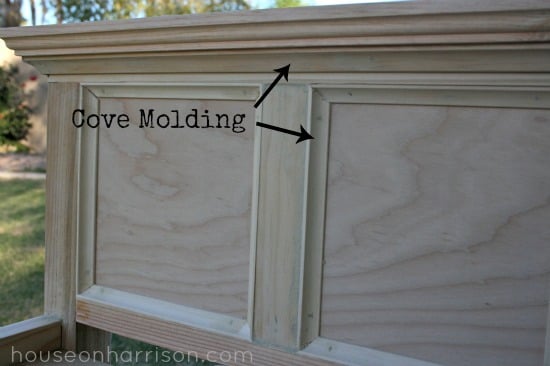
I made these two American Girl doll beds for my nieces. For one bed, I followed Ana's plans exactly. For the other, I used plywood and cove molding in place of the 1x3 slats.
You can find more details about the build and finish I used on my blog.

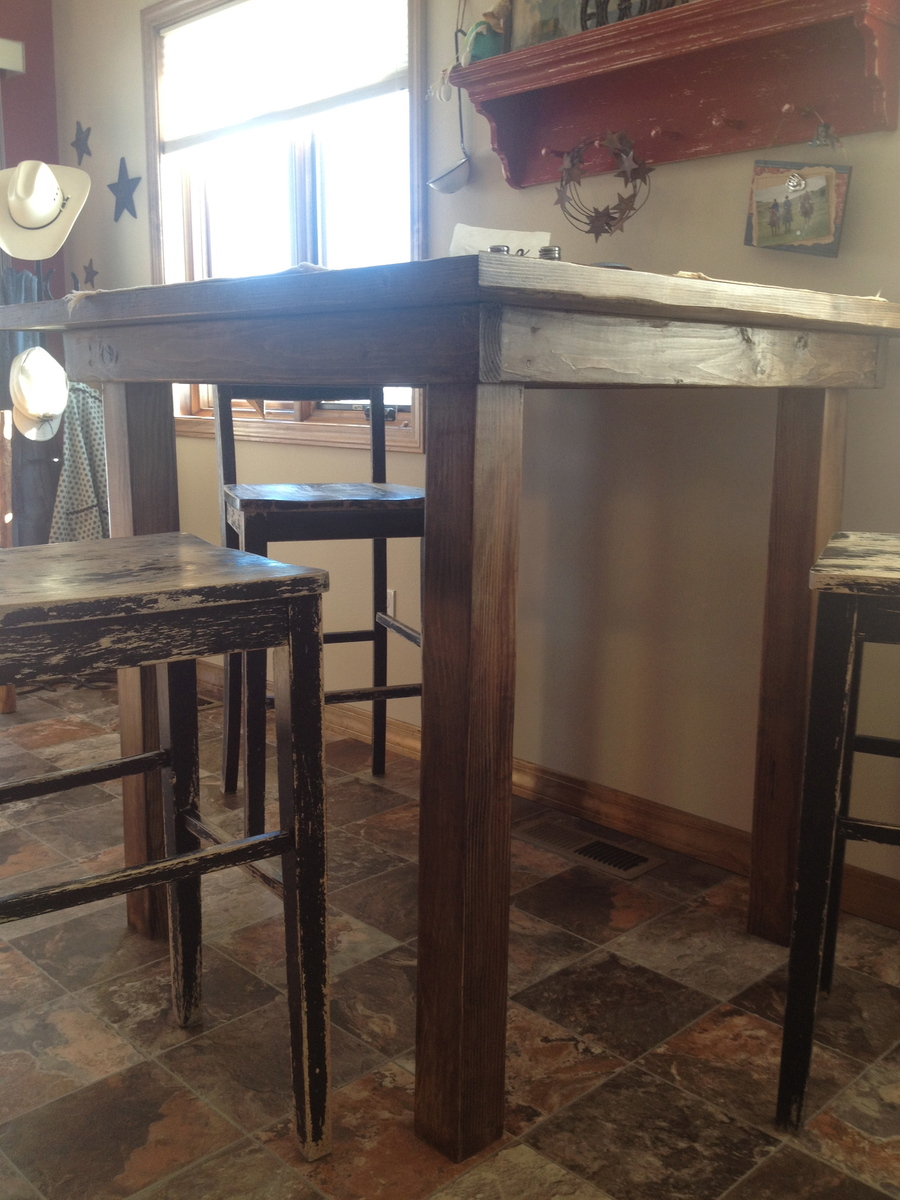
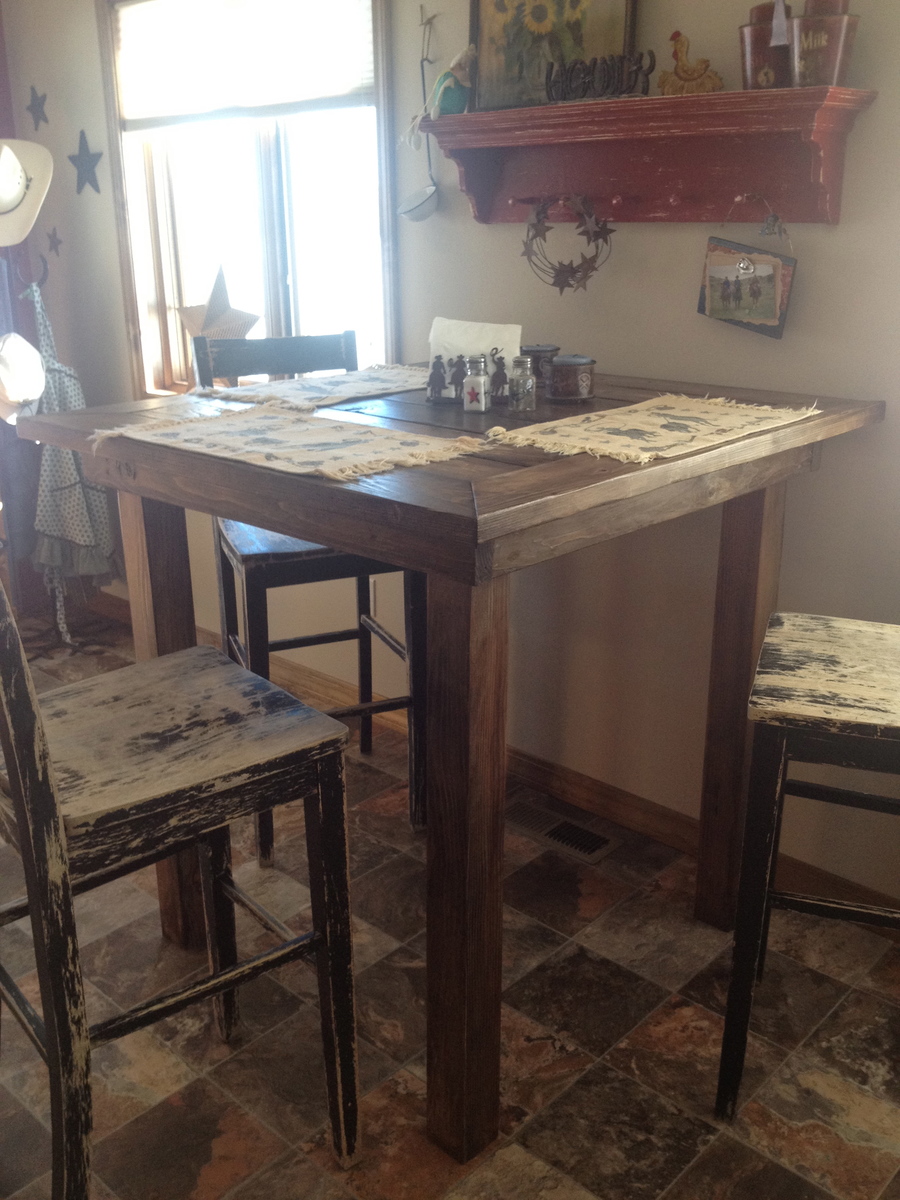
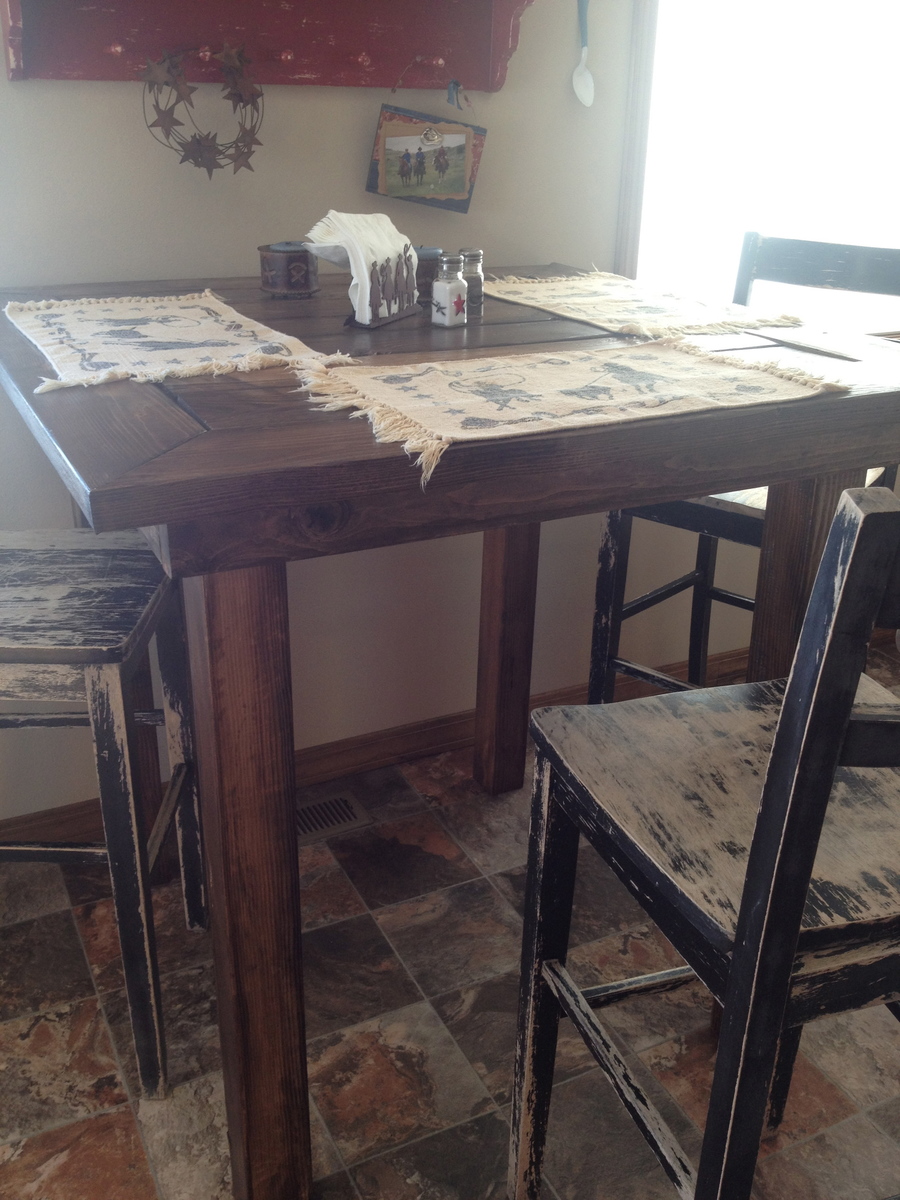
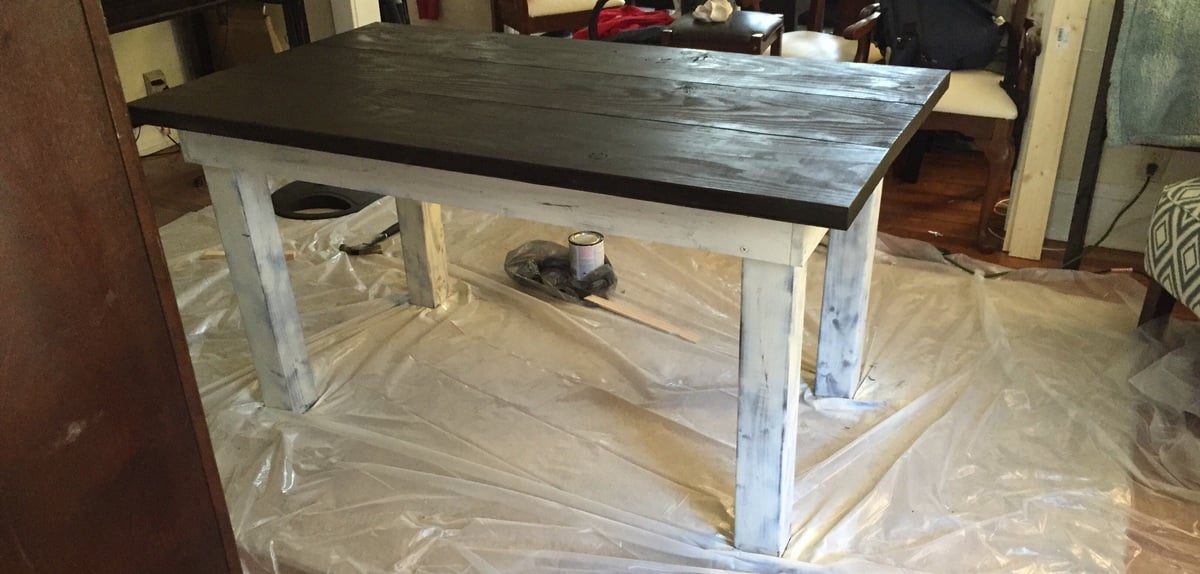
This was my first build so I learned a lot!!! I love this table but looking back I know more now than I did then and would have done things a little different. I would have plancked the top using my Kreg Jig Jr. and looked for straighter boards at Home Depot. I also altered the design for the look that I wanted, a rustic one. The table is 44" square and stand 43.5" tall. I also mitered the corners of the top outside boards wanting to give it a more finished looked. It took me about 3 days of nap times to build. We use it almost every night to eat dinner. I found the chairs at Habitat for Humanity and have plans to build a few more. My Husband thinks I should paint the table and distress to match the chairs, but that has not happened yet. All together I had a great time and learned a ton.

Fri, 10/10/2014 - 19:13
I love the smaller version of the table! Awesome!!!!
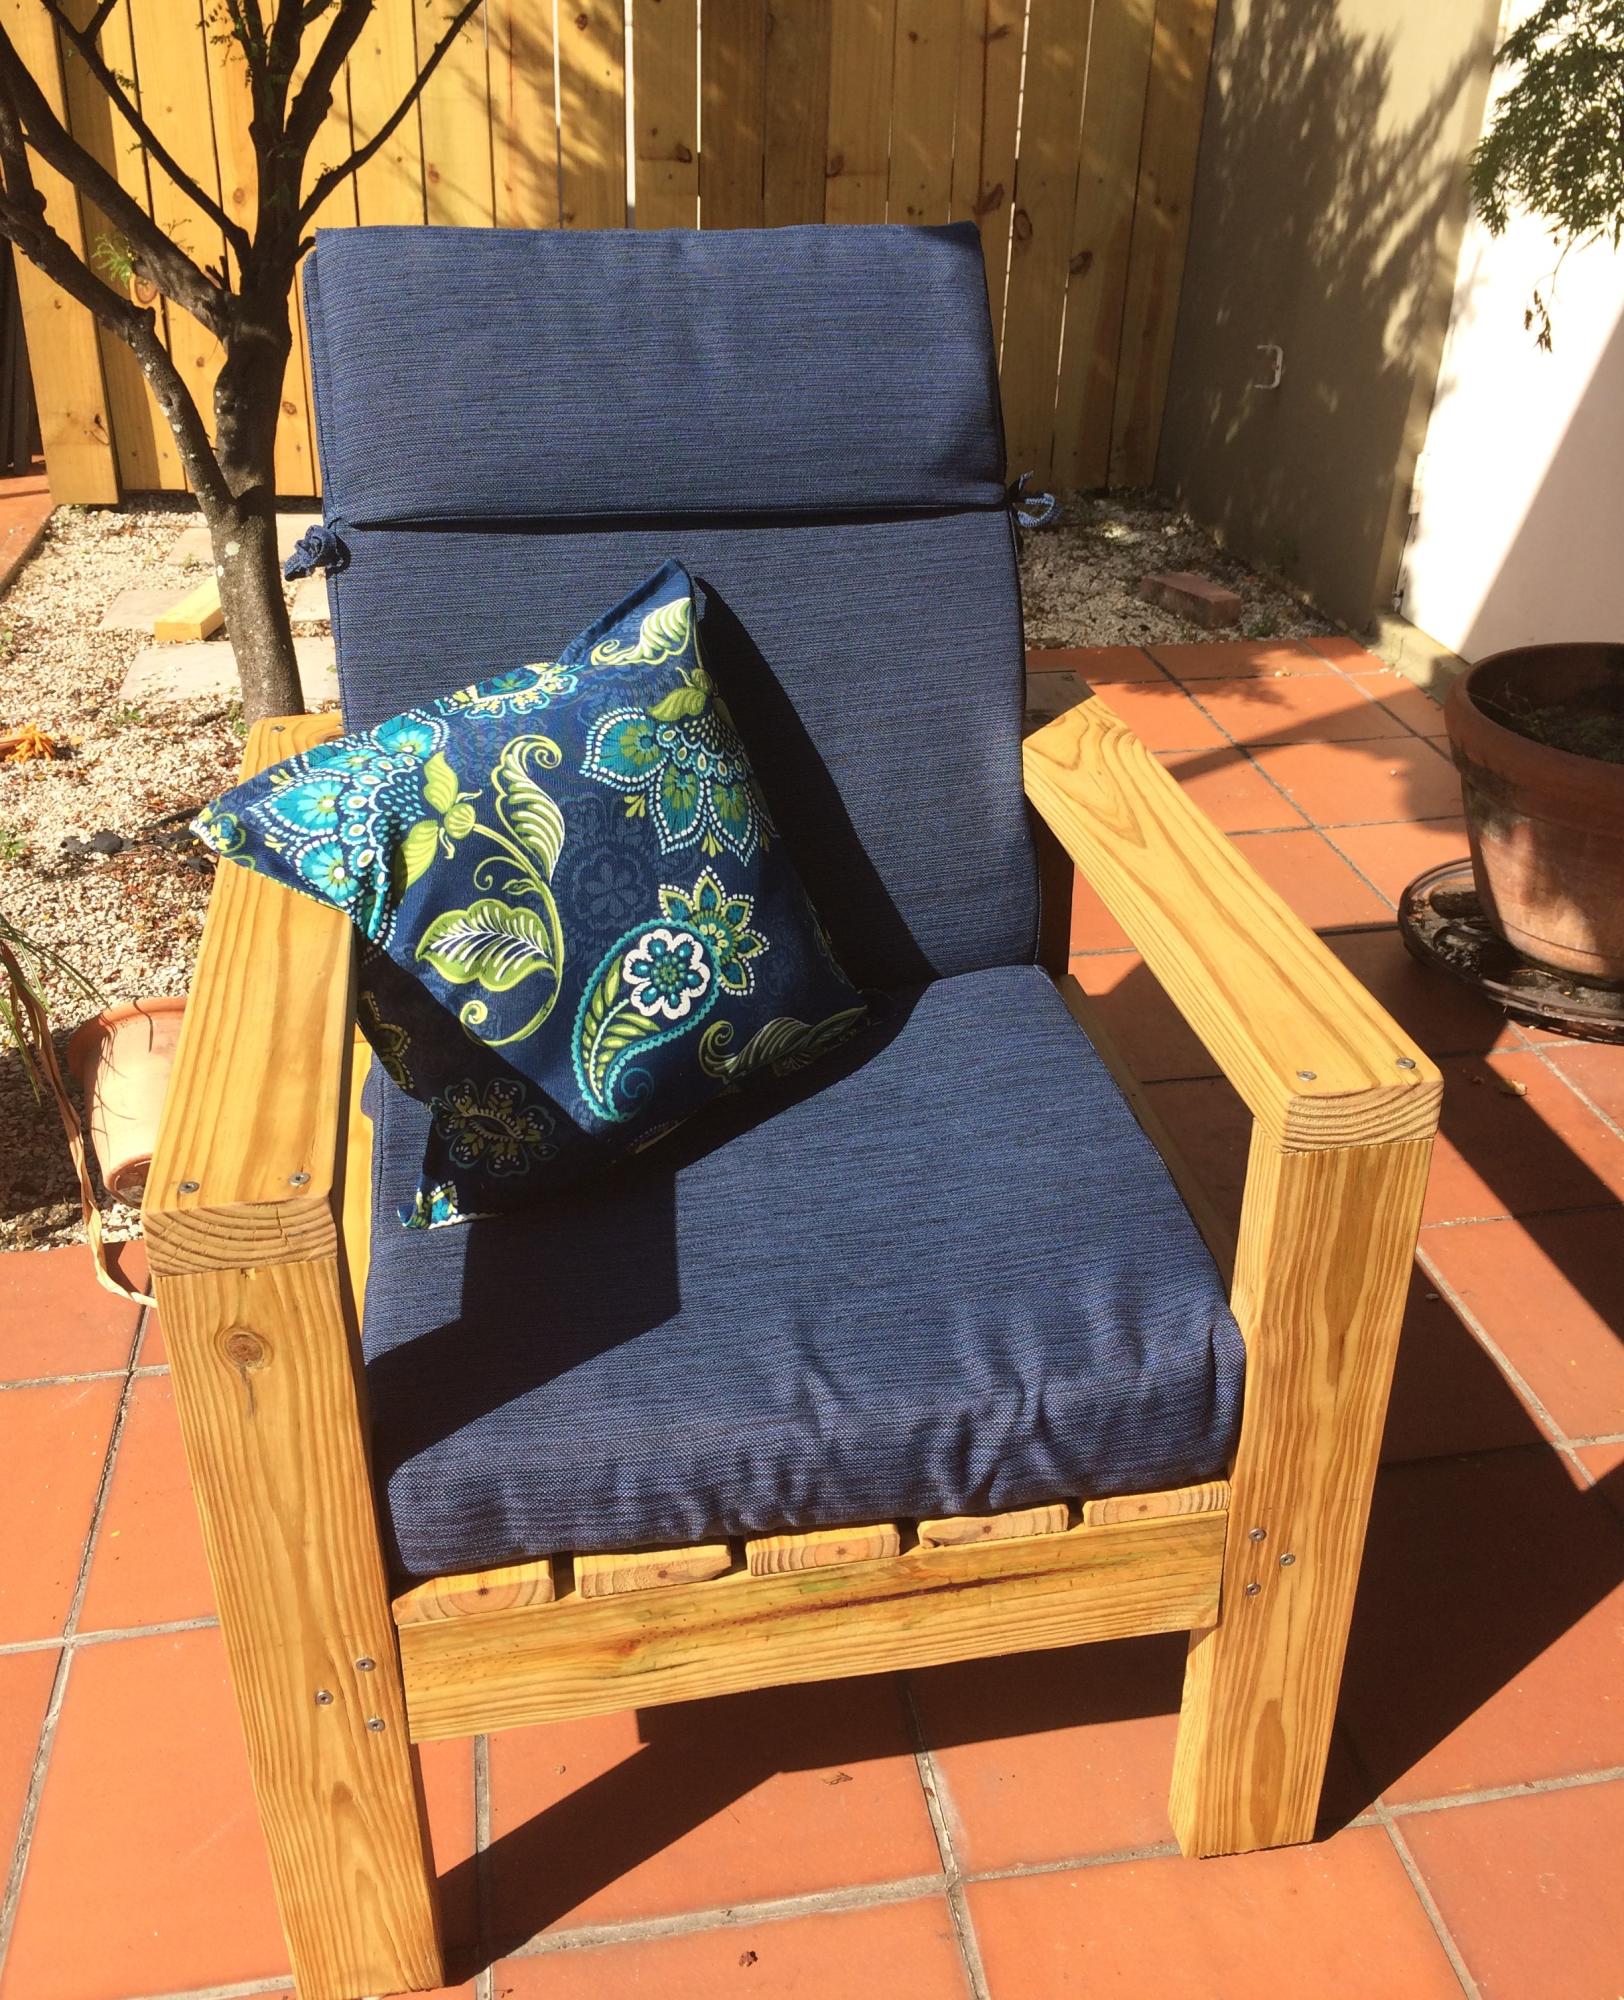
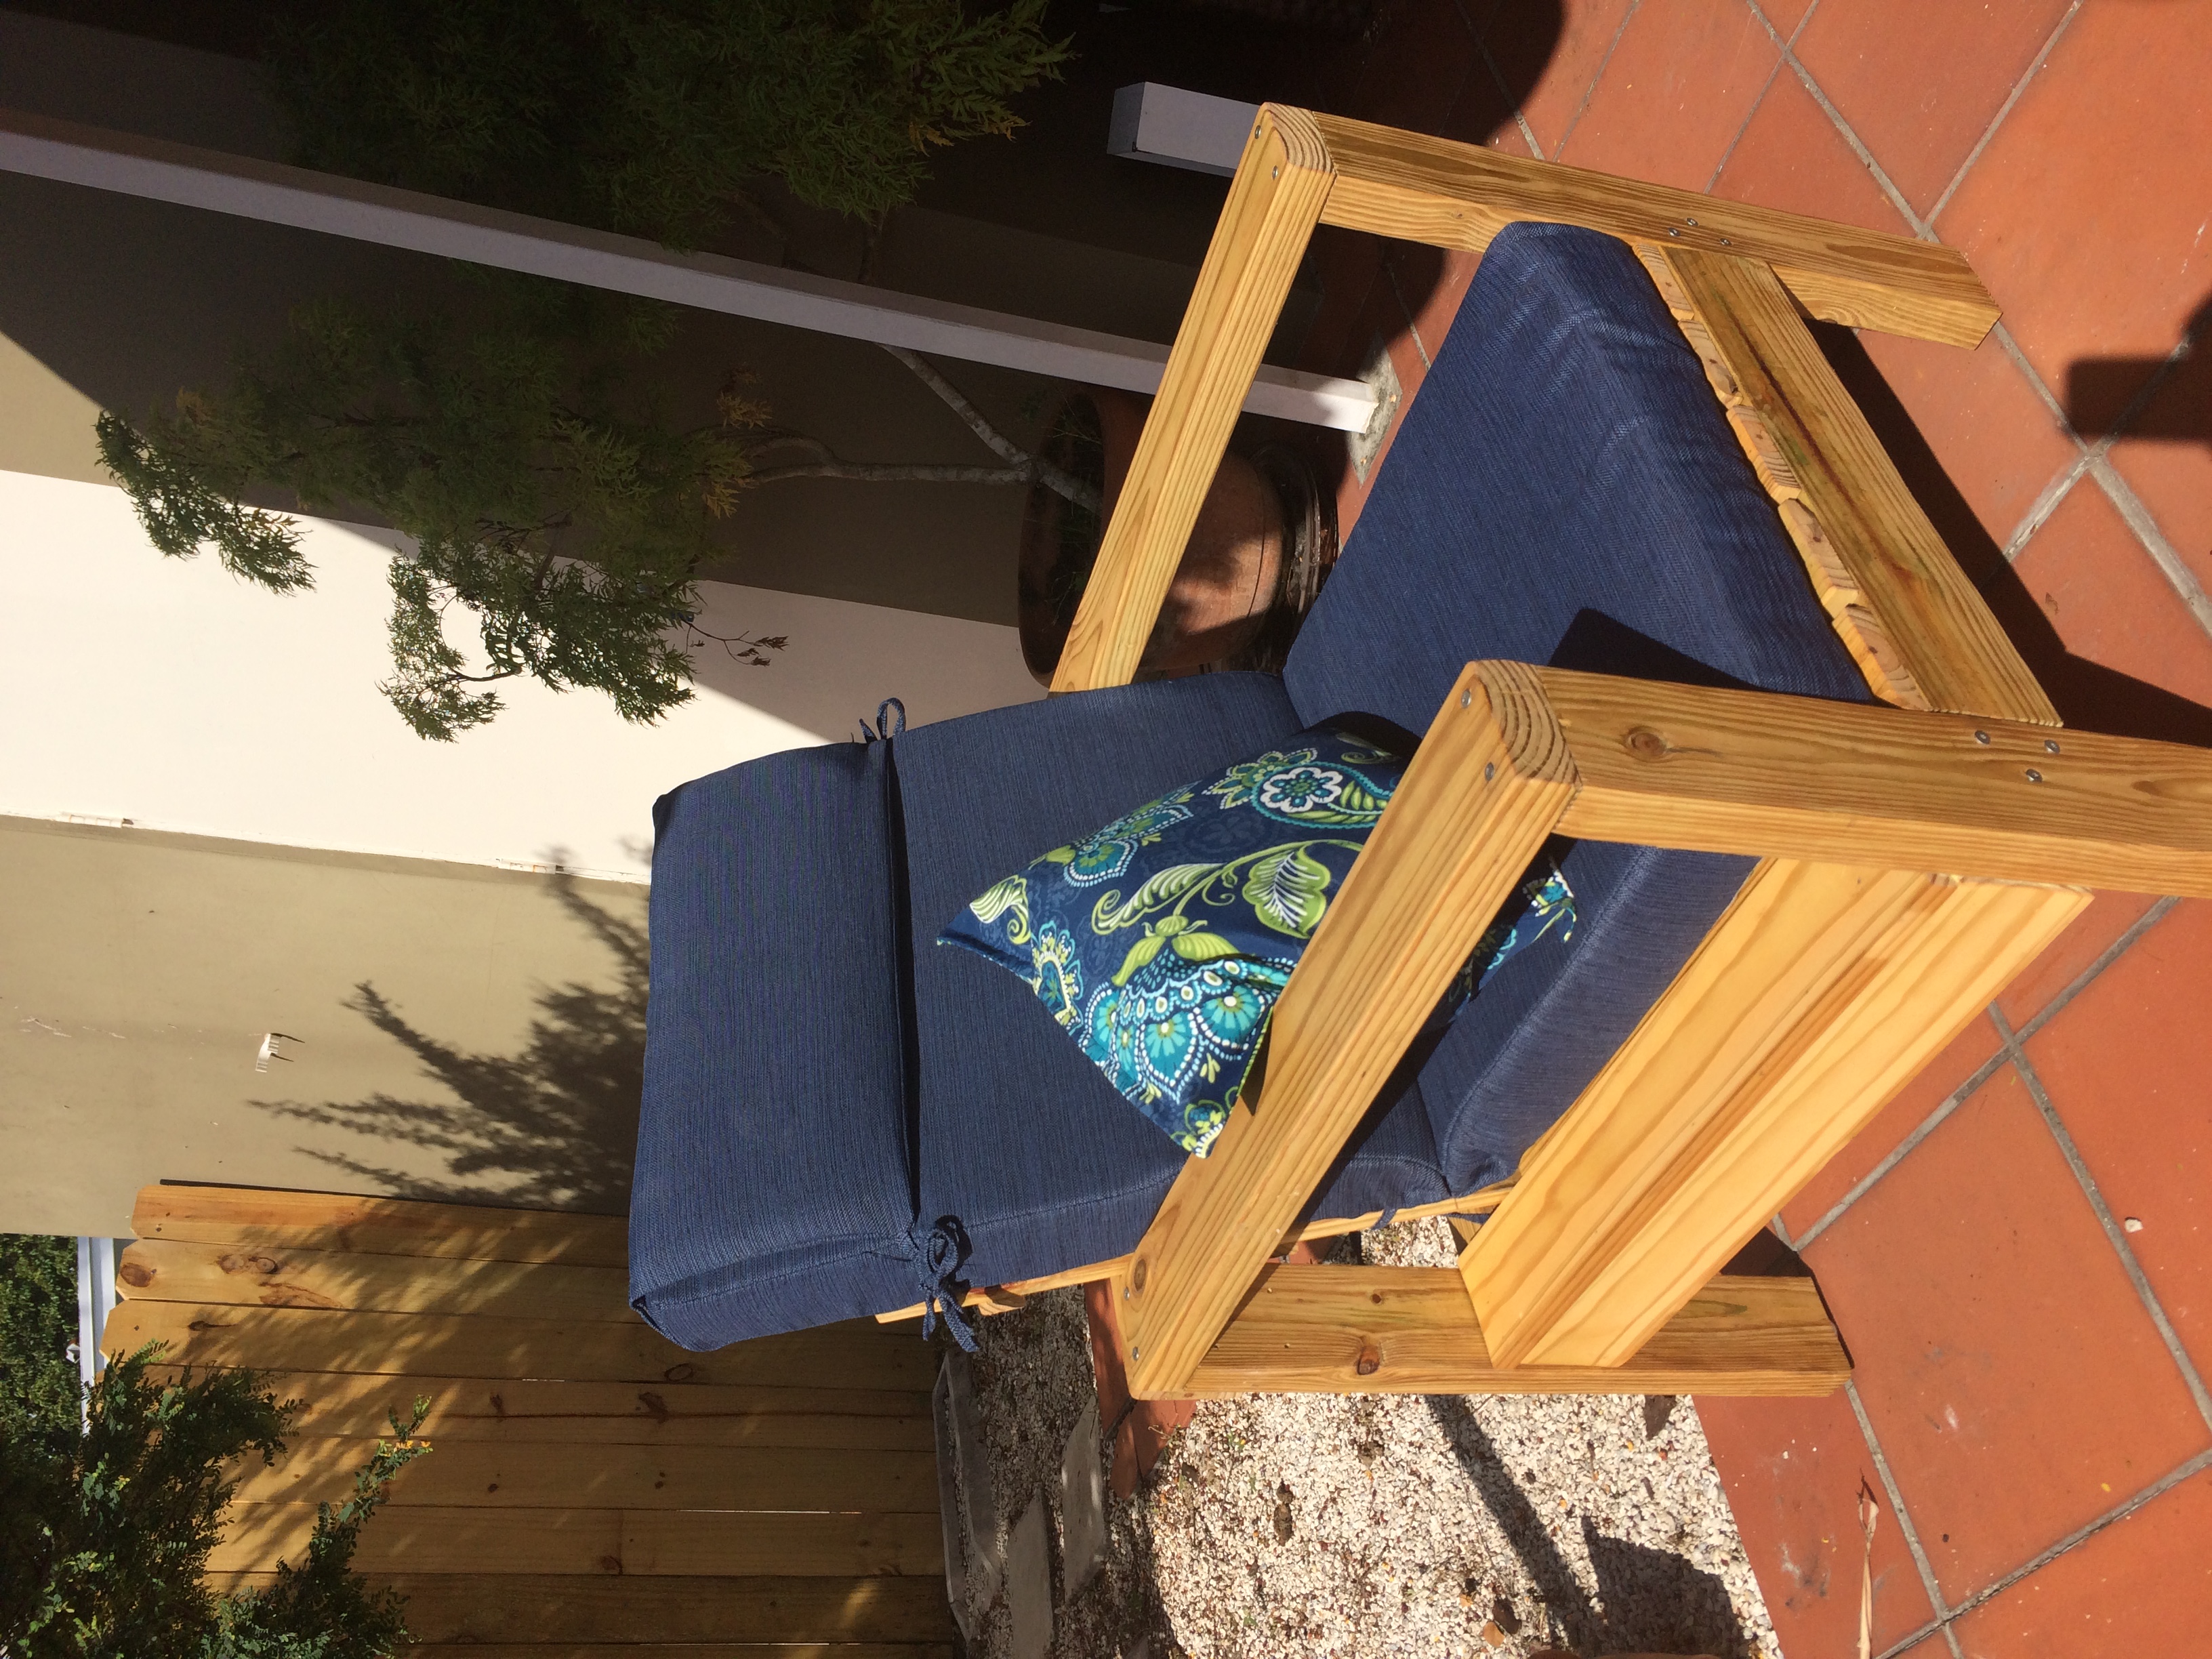
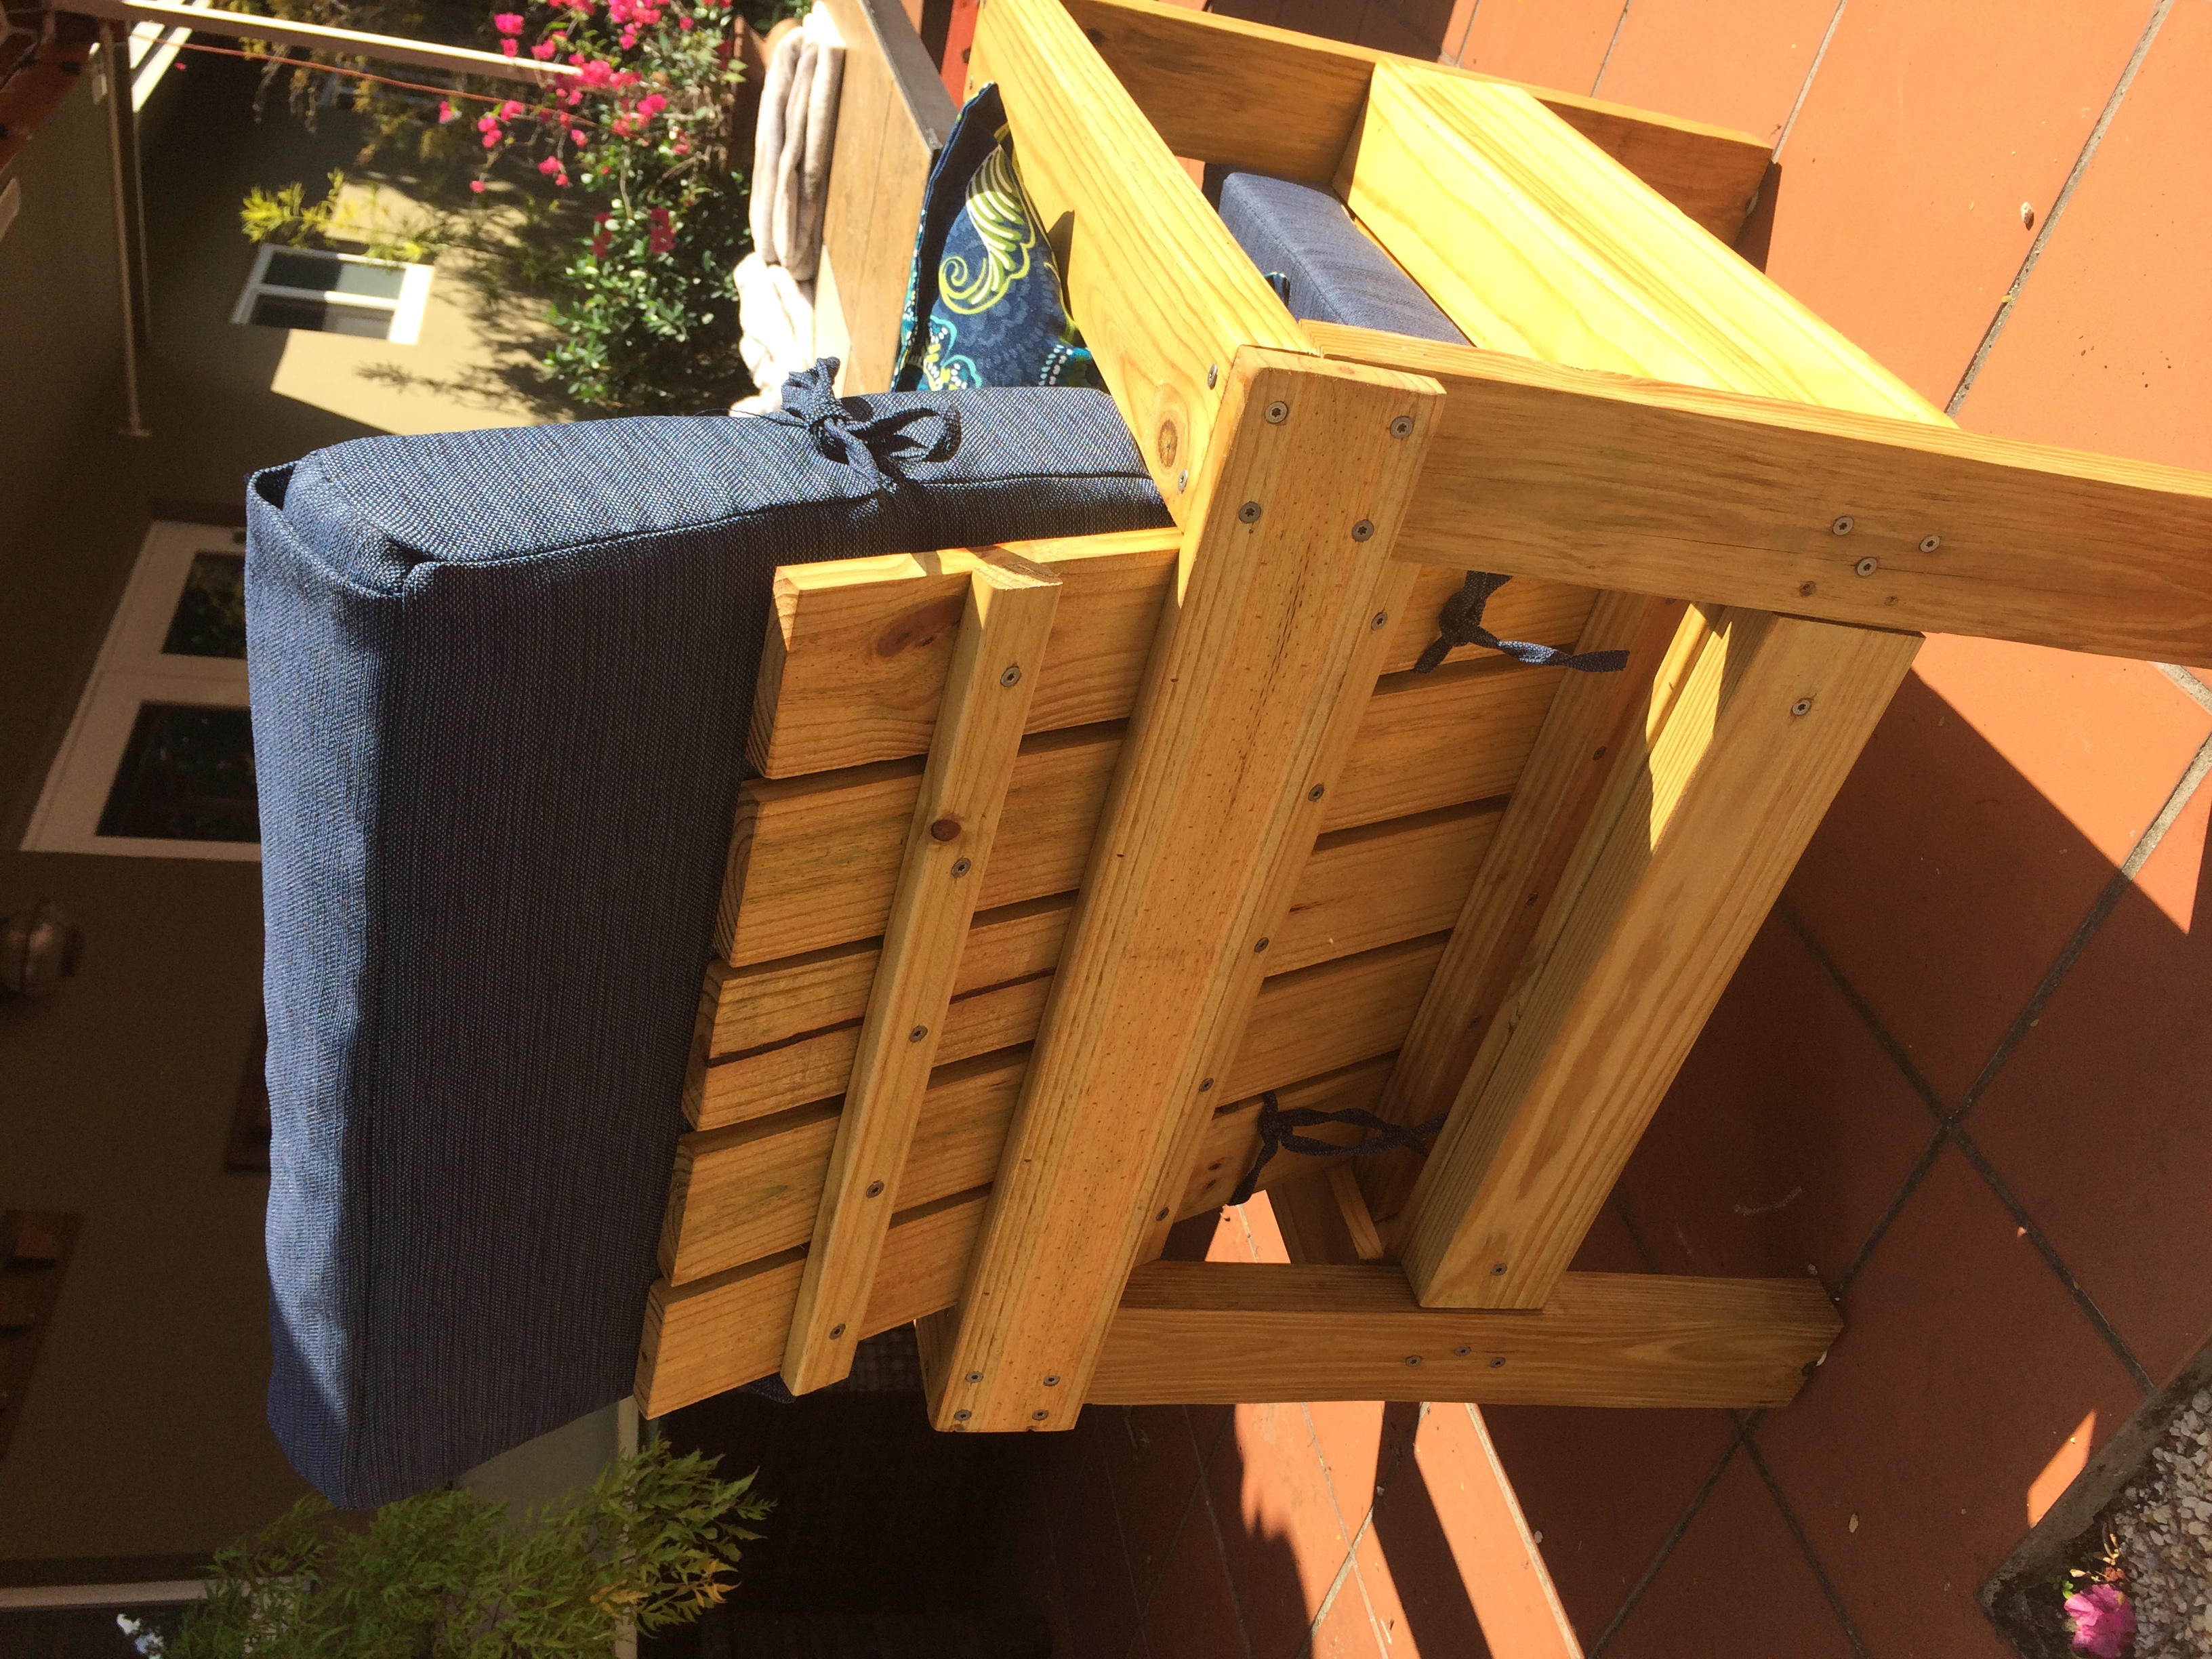
This was my first chair. I made the arms and base with 2x4's. I added a 2x4 apron in the front and back and 1x4 apron to the sides. My next chair I will try to use the Kreg for the arms, the base will be hidden with aprons, so it doesn't matter. The slates are 1x4 as the instructions provided recommended. I got the cushion from Lowes for $50
Farmhouse bed for my daughter, Thank you Ana for sharing planes .
I tried to make it exactly as your plane.
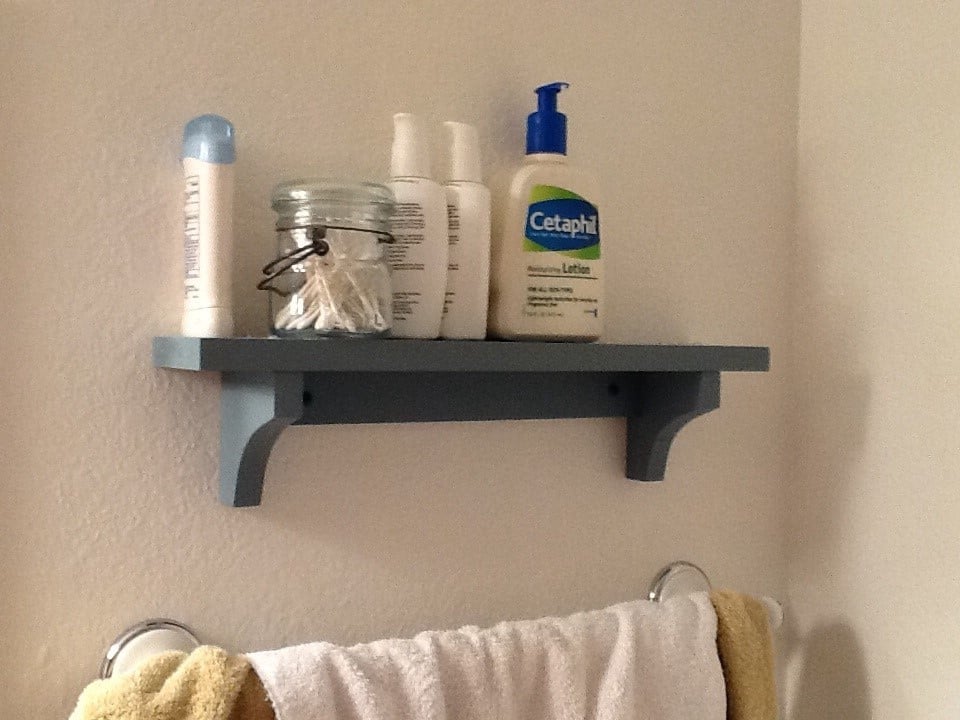
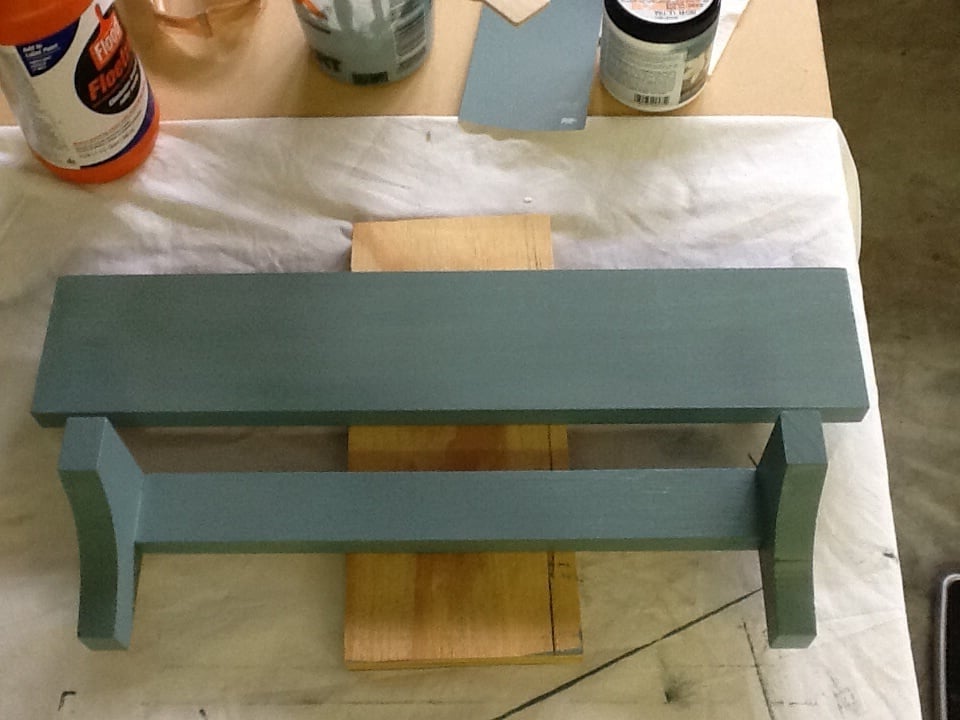
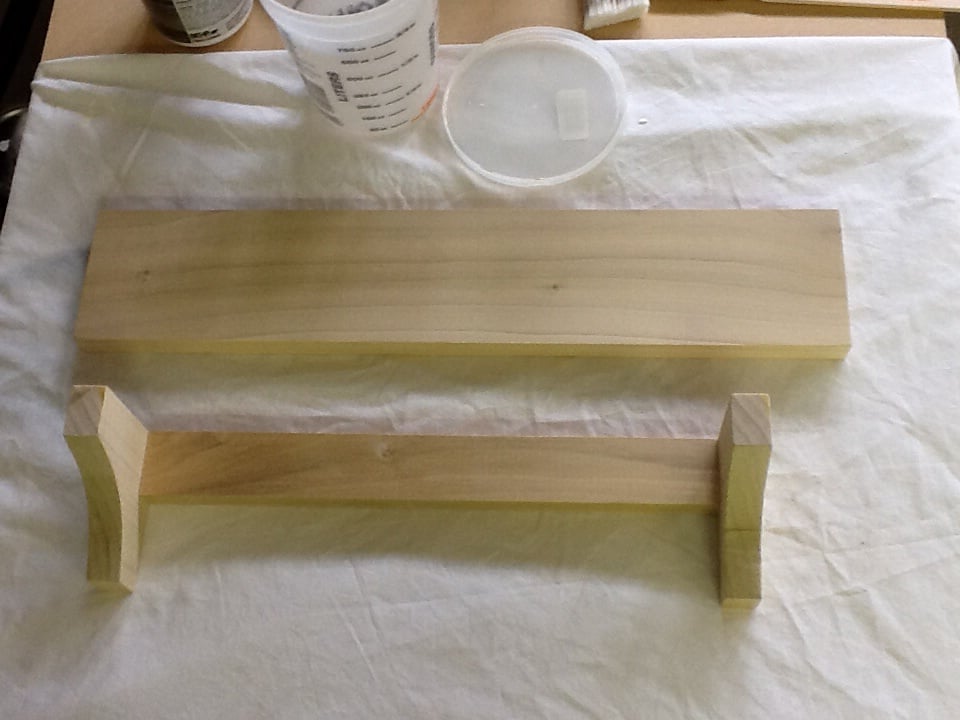
I made a mini version of the Haley Simple Shelves as my first project from this site. I had only practiced with the Kreg Jig before making this, and learned that you should not make any project too small, or your Kreg holes won't fit.. Hence I had to face screw the shelf onto the frame. Nevertheless this was fun to make, I love the color (Peacock by Behr) and best of all, it gets stuff off the bathroom counter!
Sun, 10/05/2014 - 17:53
Hi!
No.. I did use pocket holes and screws to attach the rear support (1x2) to the arched sides, but couldn't use pocket holes to attach the top to the back, hence face screwing the top on. Kreg screws are very strong without the pockets too.
This is the second thing i have ever built and I am SO excited with the result! This has inspired me to take on new ambitious woodworking projects. Love it, thanks for the free plans!
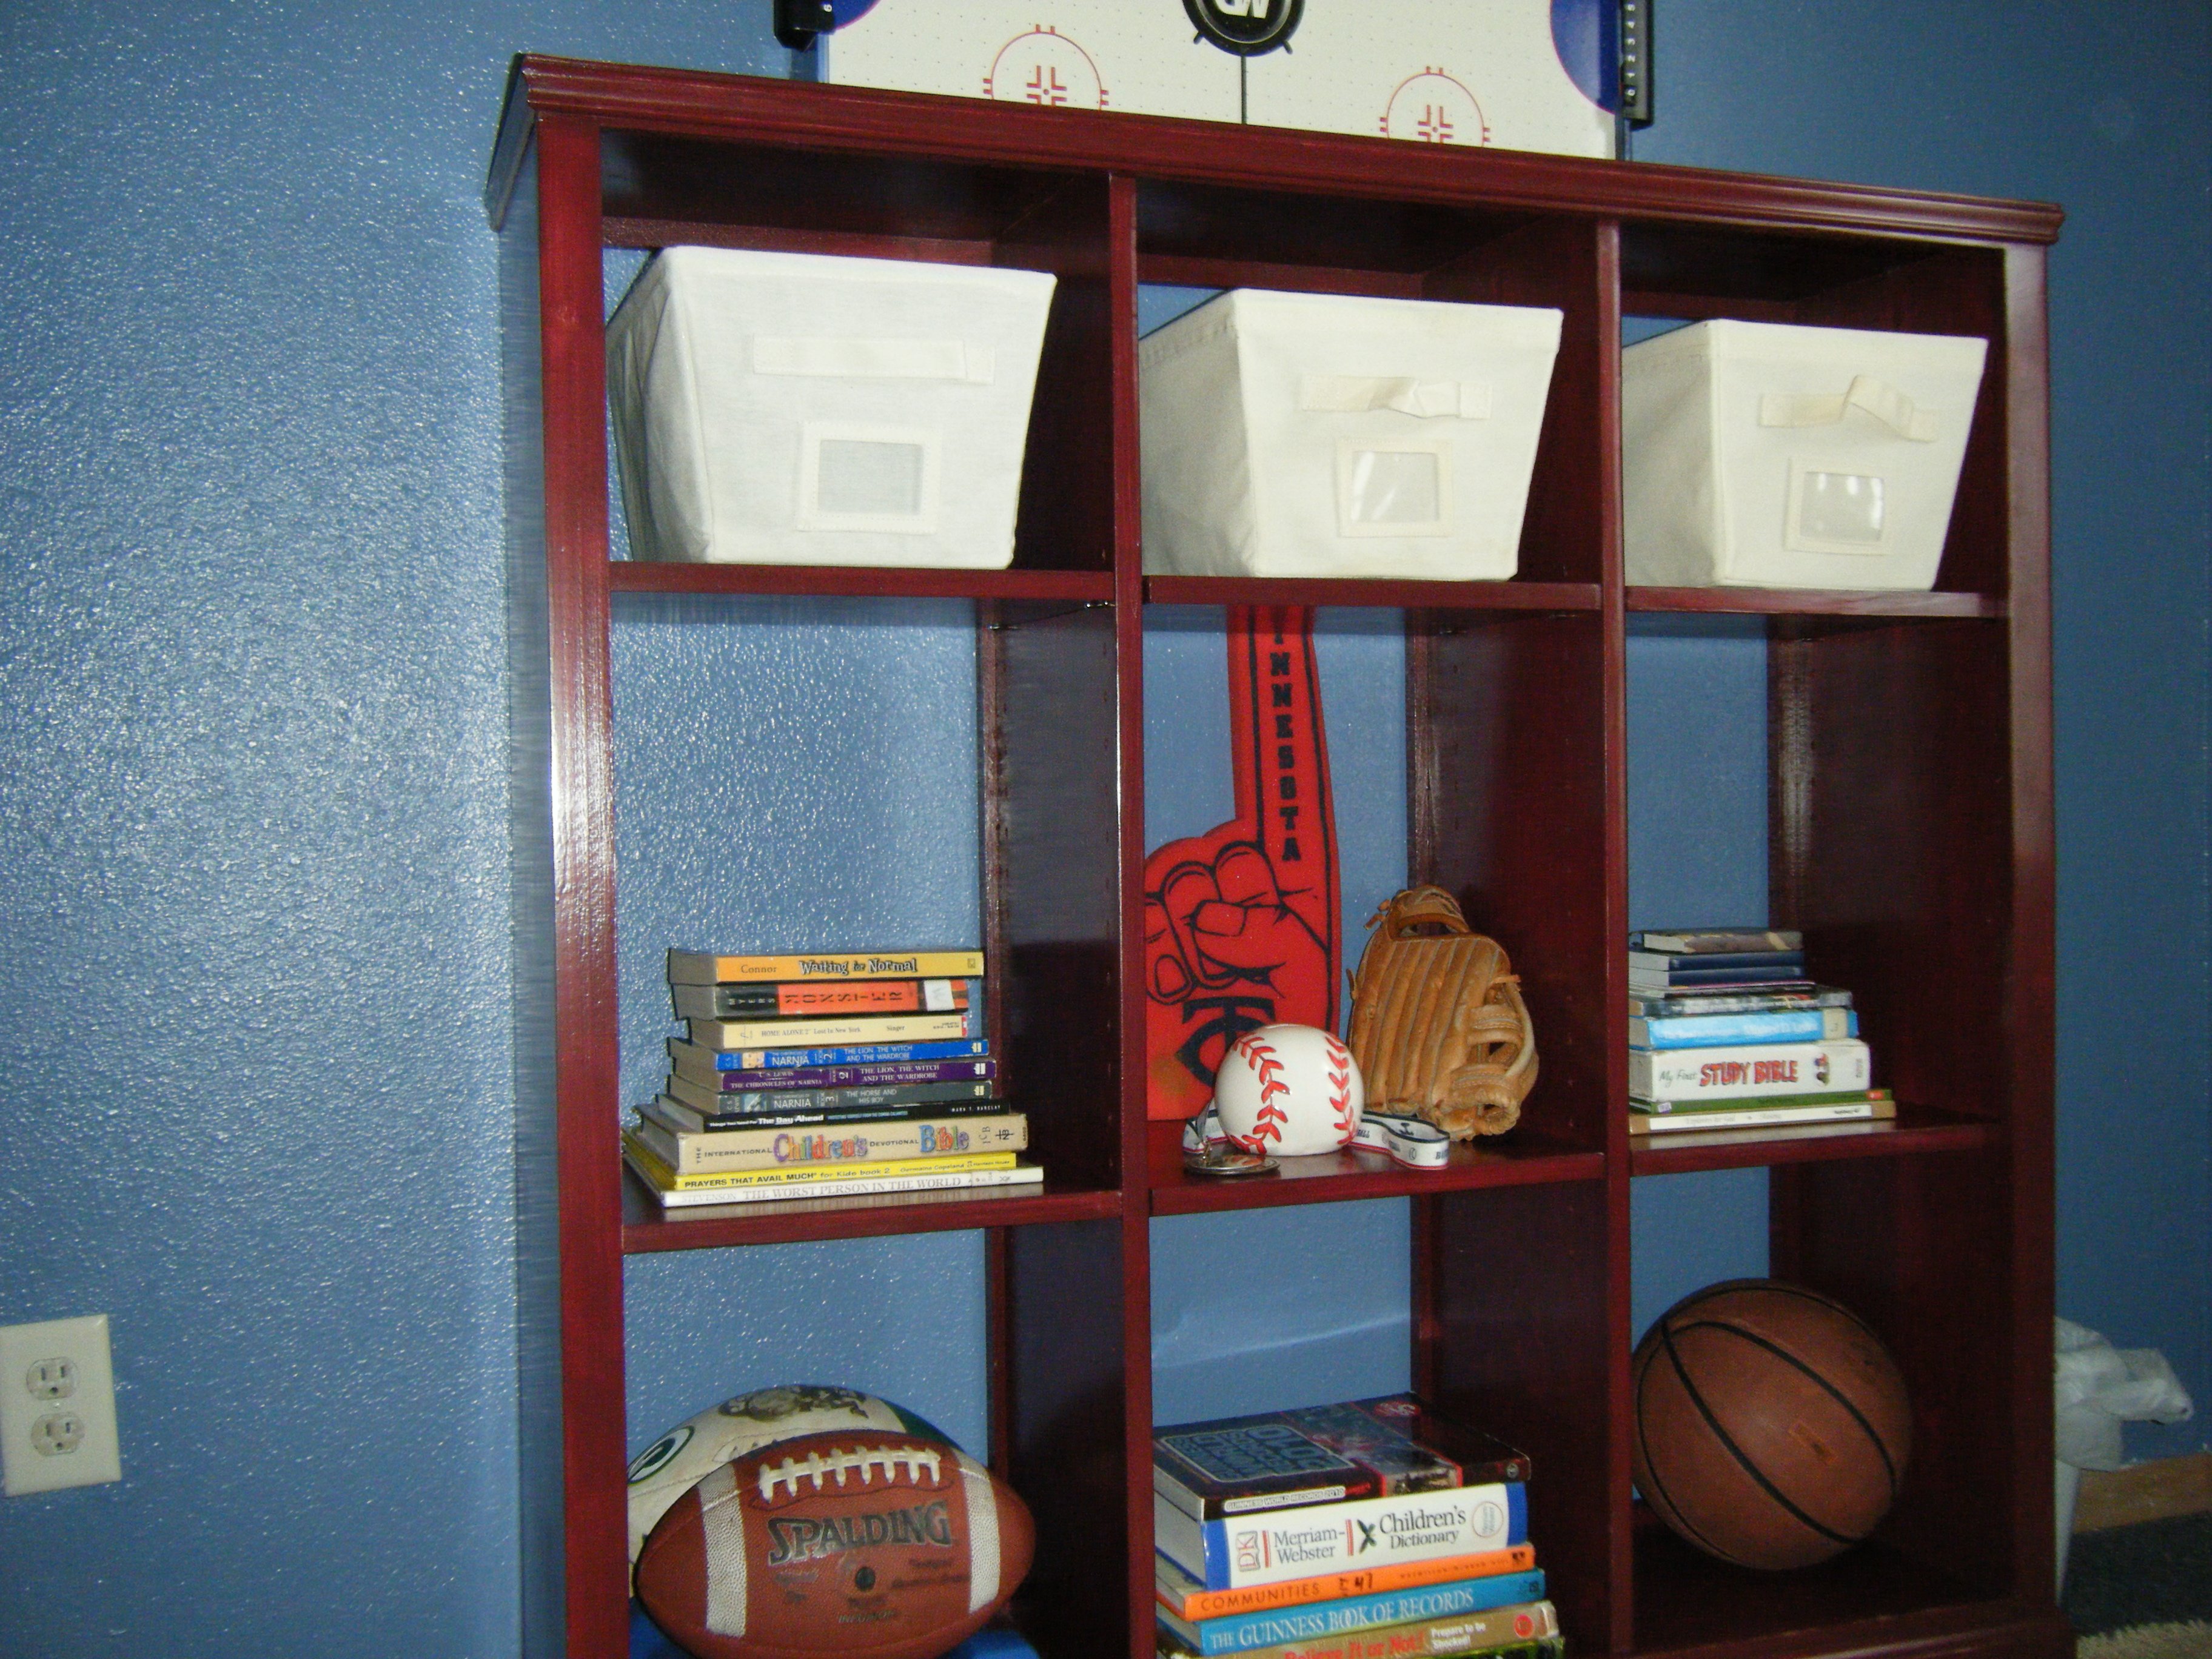
I didn't really follow any of Ana's plans for this build, but it is a result of using her plans up to this point in my woodworking journey that enabled me to complete this one! I don't own a table saw, so this was constructed using a circular saw, miter saw, Kreg jig, and a nail gun. It was the first time I've had to cut and attach crown molding, and I also learned how to cope baseboard trim using a Dremel. Another first was using a router to rabbet out the back so the plywood back wasn't visible from the sides. I learn something new every build :)
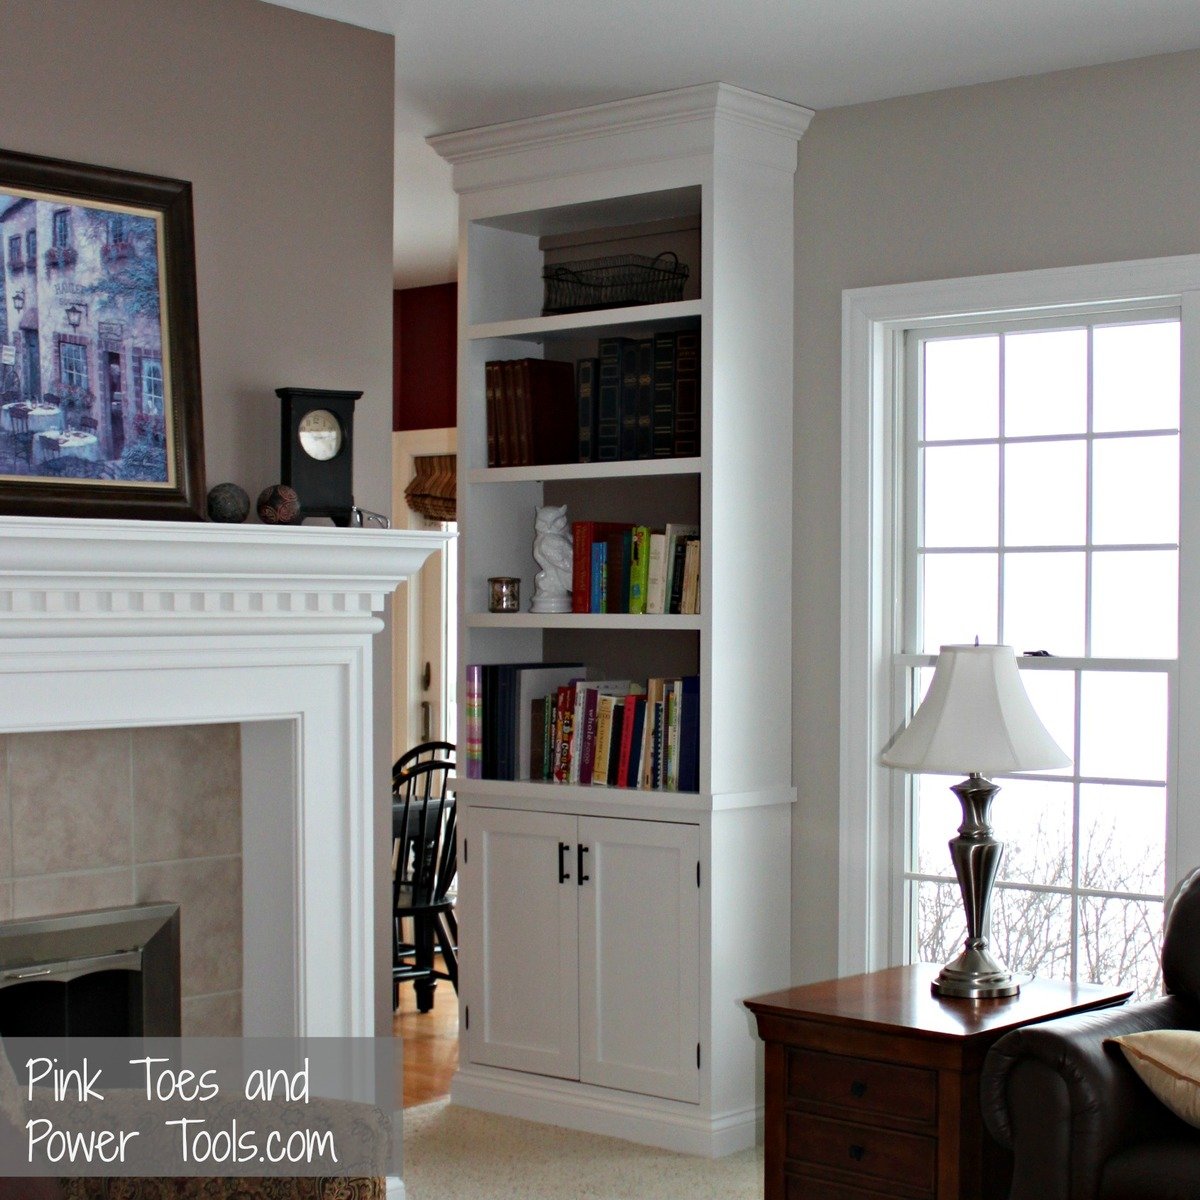
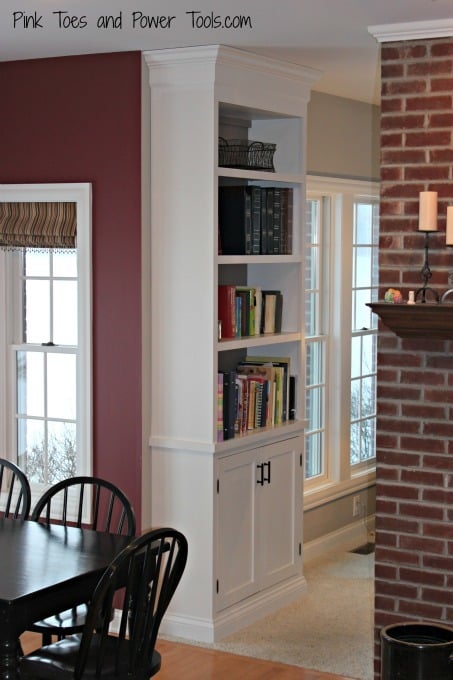
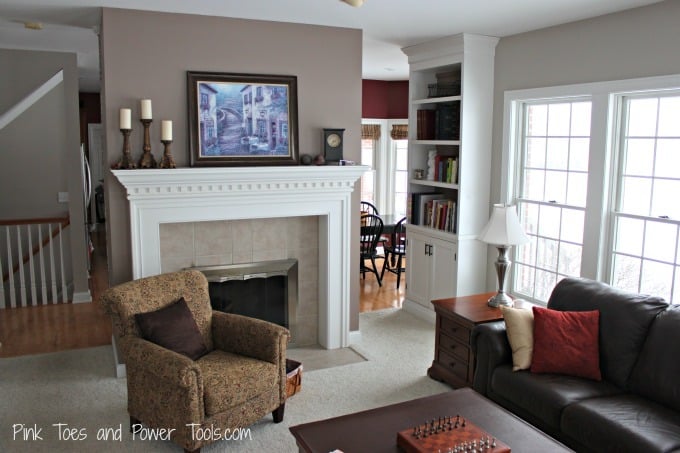
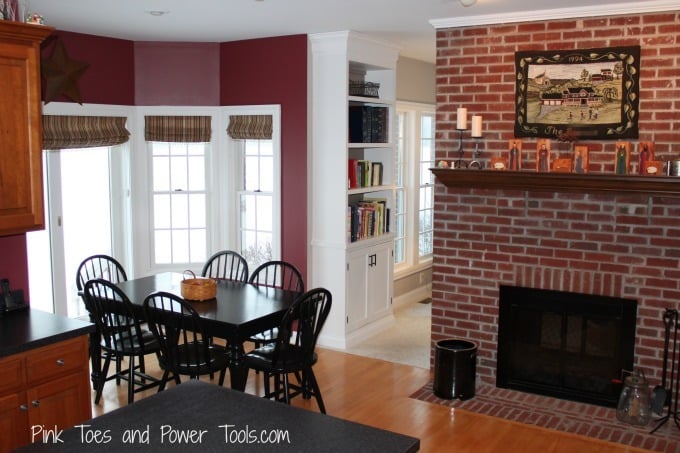
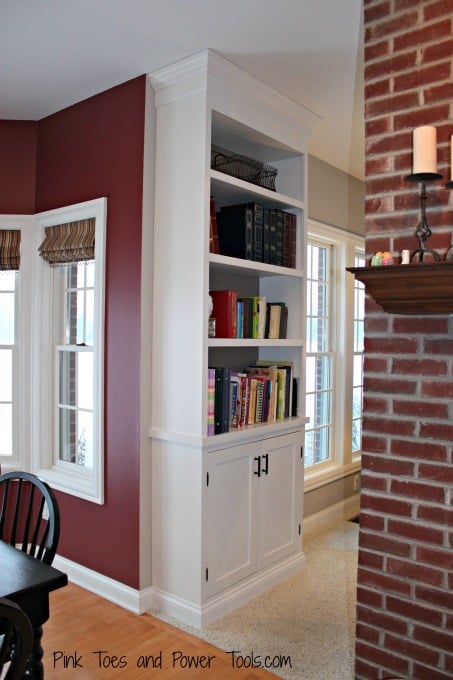
I'm thrilled with the change in the room with this new project. We had two narrower bookcases side-by-side in there before, and they were about the height of the windows with a stain color that didn't match any of the other wood pieces in the rooms. This cabinet looks like it belongs in the room.

Thu, 12/27/2012 - 07:54
Very well done. It fits right in and looks absolutely beautiful. I am working and practicing to reach your skill level so I can do amazing things too!

I had a lot of fun building this table and these benches for our Tuscan-themed kitchen. The weathered turquoise gives the surroundings a pop! Thanks, Ana, for the inspiration and for sharing the plans! The benches were built according to the plan, but I did modify the table without the runner underneath so that side chairs could be pushed in.

A few years back, I built a twin version of Ana's Farmhouse Storage Bed for my step-daughter. After she moved out, I converted it to a huge toychest for my three-year-old.
I would have left it as a bed, but with a quality mattress it was so high I was afraid he could get hurt if he fell out.
The conversion is simple. Remove 24 screws, reconfigure, add back the screws in different places. The support blocks become feet for the chest, and the slats become spacers under the top part.
He loves being able to get his toys out himself, and I love that he can put them away by himself. A big upgrade over plastic storage boxes on high clost shelves!
Once he's a bit older, I'll probably turn it into a bad again.

My first woodworking project ever. Used spruce dimensional lumber from the hardware store, some Minwax Red Oak Stain and Minwax Satin Polyurethane to finish.
Awesome learning experience, and looking forward to my next project.
This was my second project that I completed to go along with the Daybed With Three Trundle Drawers For Storage that I made for my son.
The original plans for this bed state that you need three 1 x 12 x 8's, but you actually need 4. The two middle 42 3/4" boards on the inside are missing from the cut list, but you can see them in the diagram.
I am so happy with the way this turned out! It was a little more challenging with the wider width boards--I had to force them on the line because they weren't perfectly straight. But overall, I am very happy with this.
When I drilled the holes for the shelf pins using the Kreg shelf pin jig, I used the 1" inset on the outside 2 columns, and the 2" inset on the center column. This way I avoided have holes that were drilled all the way through the board.
Between this and the storage daybed, I have really freed up so much space in my son's small bedroom! Happy building!
Tue, 01/01/2013 - 18:13
Your first two projects are very professionally done. KUDOS for such a great job. Keep it up and your kids will soon be in the shop with you and it will become a family affair.
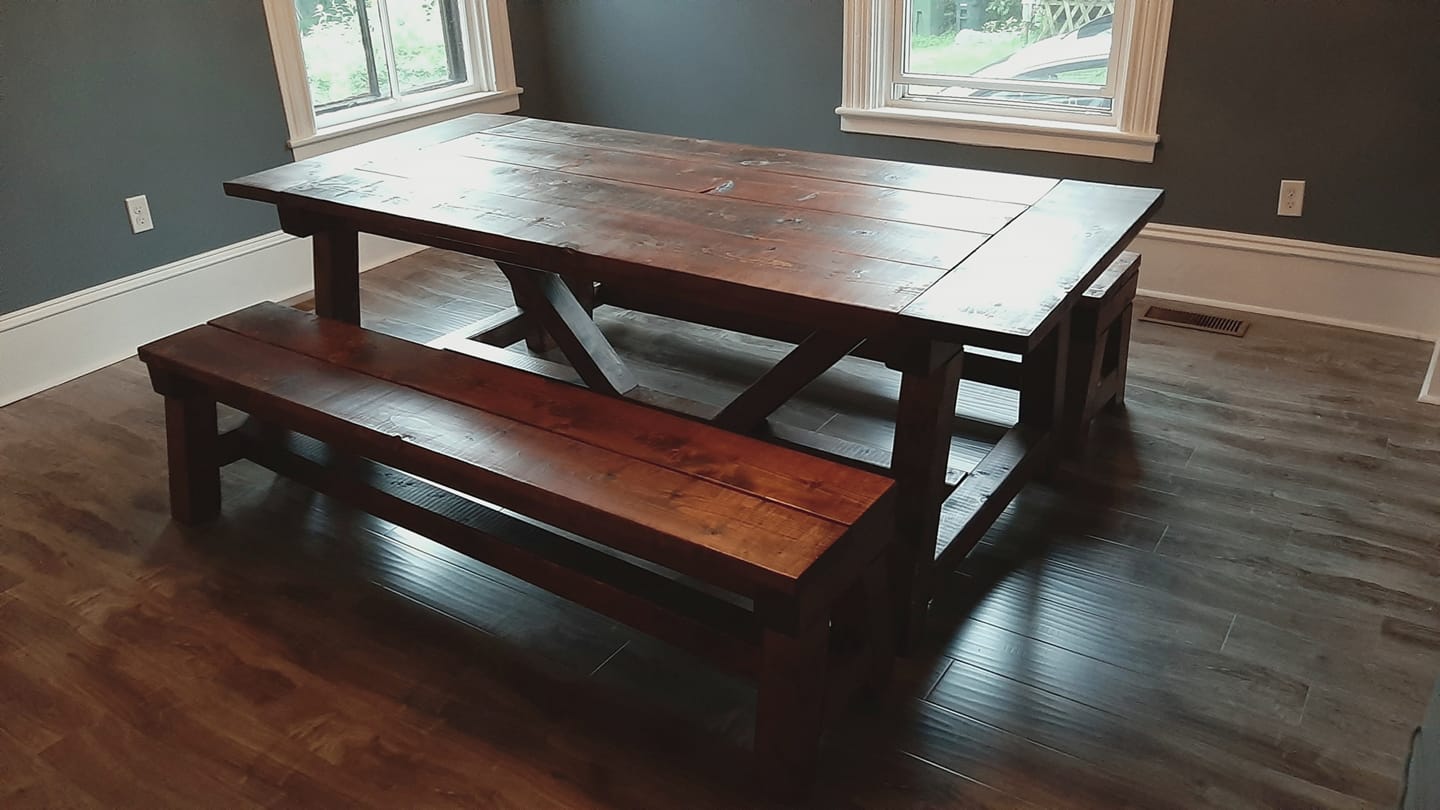
I used three 2x12s for the top and 4x4s for the legs. Everything else pretty much the same. Final table size 36"x60". Longest/hardest part was sanding and staining


Comments
Ana White Admin
Sat, 09/19/2020 - 20:54
Great Finish!
Looks great, "X's" and all!