Community Brag Posts

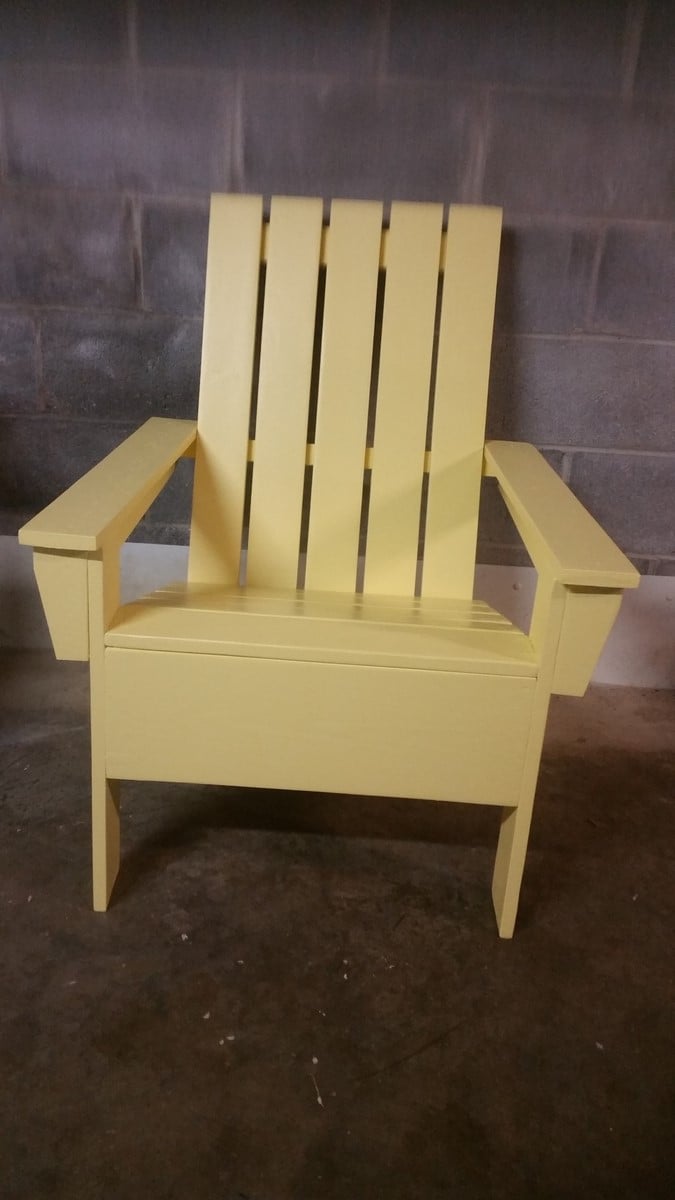
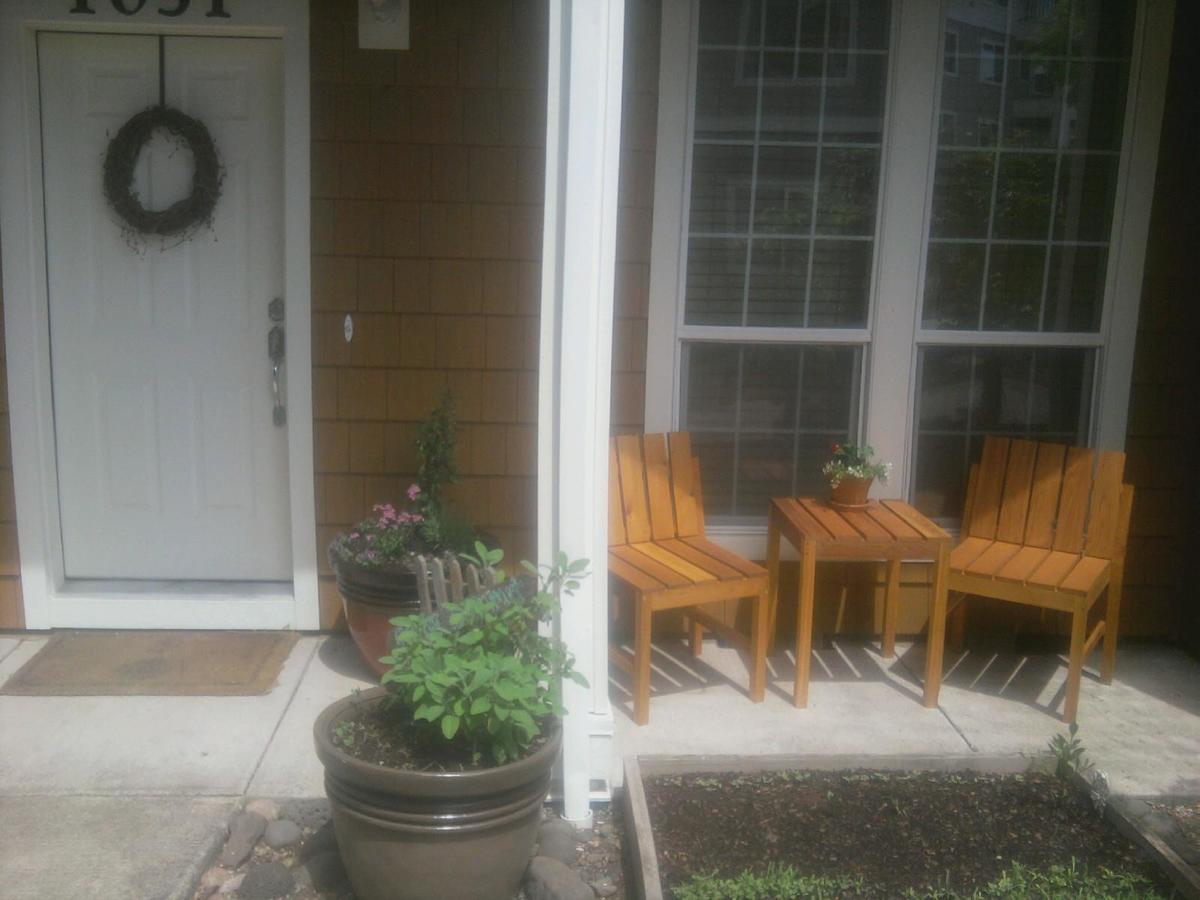
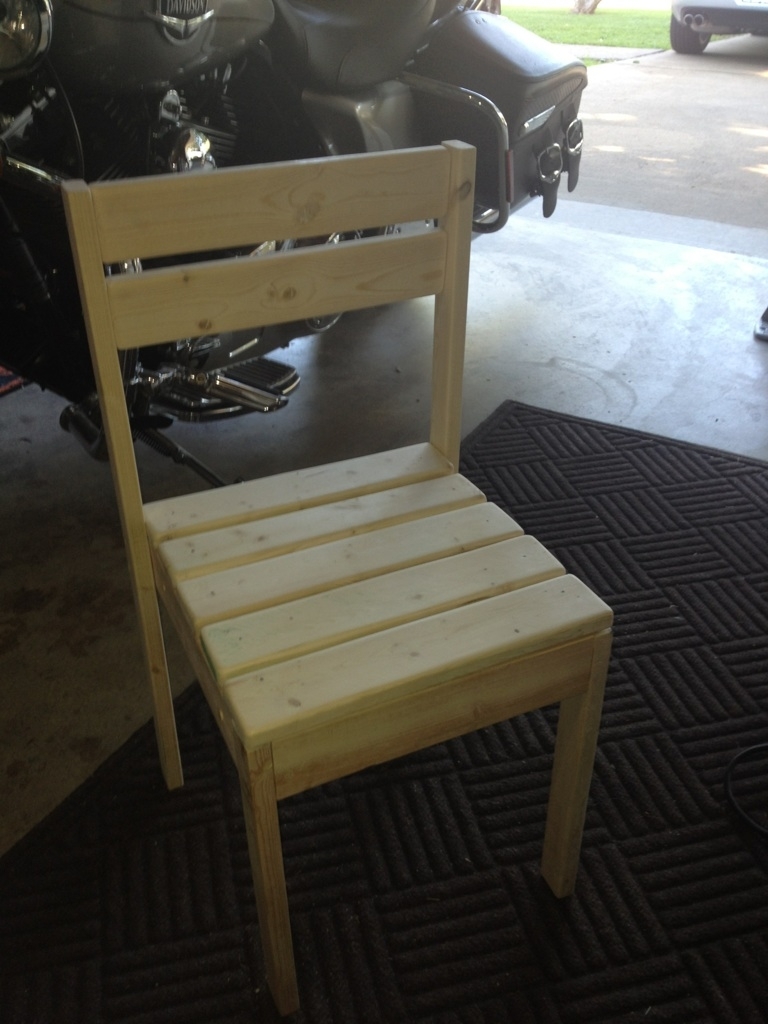
$4 chairs with chalkboard top storage table

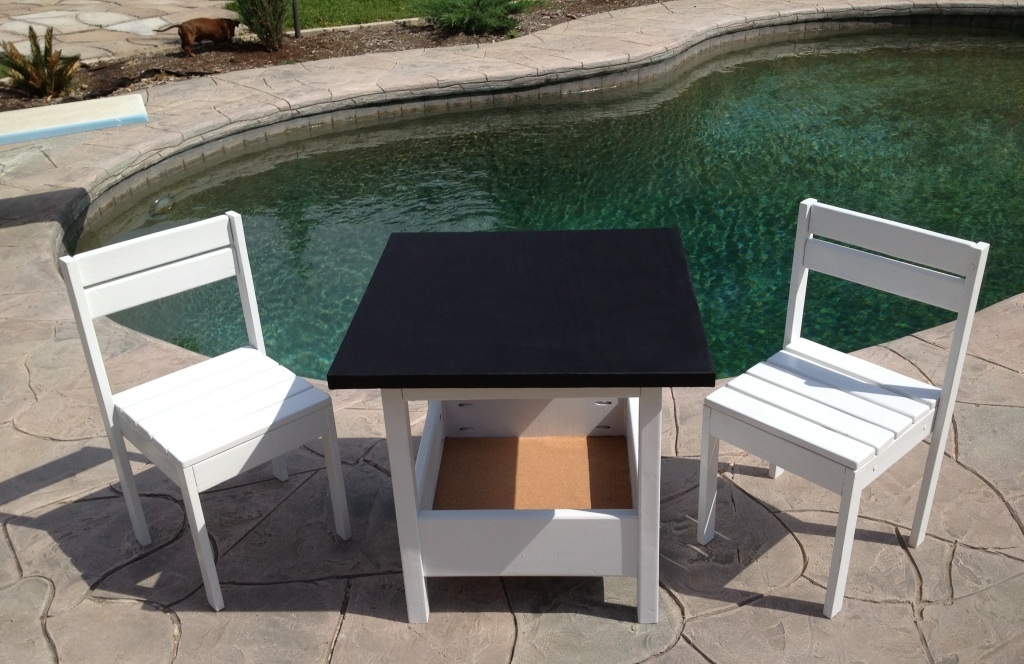
These were made for a charity auction and ended up selling for much more then I expected.
I was suprised and how strong the chairs ended up being. I'm thinking of making another table chair set only with 4 chairs and a longer table.

Estimated Cost
$50 majority of cost was paint
Estimated Time Investment
Day Project (6-9 Hours)
Finish Used
white spray pain in a flat finish then a glossy clearcoat. Tble top is chalkboard spray paint 3 coats. Table storage bottom is covered with cork.
Recommended Skill Level
Beginner

farm house table

With the new addition to the family it seems that most holidays everyone in the family will be coming to our house. So with that in mind we needed a new table to fit everyone. Ana you great website has pulled me out of a jam yet again. Finding the plans for this table was a life saver. Hope you all enjoy!

For the finish I found a website that showed me how to mix steel wool, vinegar and tea together to make a beautiful stain. It took a couple coats and a couple days to dry but I think it turned out great. Even though it was kind of scary at first when it started to turn shades of green rather than a dark color but after the stain soaked in and it dried it turned out the way i wanted it.

Built from Plan(s)
Estimated Cost
$200.00
Estimated Time Investment
Week Long Project (20 Hours or More)
Finish Used
steel wool, vinegar, tea and polly.
Recommended Skill Level
Intermediate

Comments

Rebecca Media Center-Side Base

Oak Plywood and Oak Trim

We just love your work and detailed plans!

Hubby and I built the Console Unit and now the Base Units and plan to add on the hutches. We built the units only 30" tall vs. the 34-1/2" height from the plans. We used oak plywood and oak trim and finished it with a Minwax Fruitwood Stain and Minwax Polyurethane Seal. My hubby loves to make You Tube videos and made one of our work and posted it at:

https://www.youtube.com/watch?v=YtB6LK1xEHg

Keep up the great work and we plan to post more pics!

Estimated Cost
$100 for 1 piece of oak plywood and approximately 3 pieces of oak trim. We also used approximately 40 kreg jig screws.
Estimated Time Investment
Weekend Project (10-20 Hours)
Finish Used
Minwax Fruitwood with Polyurethane Seal. Watch the video to see it applied at:

https://www.youtube.com/watch?v=YtB6LK1xEHg
Recommended Skill Level
Intermediate

A not so modern version

Submitted by BJ D on Tue, 05/08/2012 - 10:14

A friend contacted me about building a custom sized desk to coordinate with a set of dressers that she purchased used (I refinished them years before). We started with the Simple Modern desk (more in overall look), but made some changes away from "Modern" such as the bases, overhanging and routed top and trim on the side aprons. The legs of the desk aren't solid 4x4, but1x4s and 1x3 furring strips kreg jig'd and sanded till nearly seamless. The support under the desktop was redesigned to create a large, single drawer faced as two. The top is made from pine boards edge joined together. The two "bases" combined, have 96 pieces of trim to create this look. It was alot of work to get some tiny pieces just right, but well worth it in the end.

There are two comparison pictures uploaded. the photoshopped photo is the inspirational photo that came with the "Can you build me one of these?" and the second is the side by side with one of the dressers I was asked to compliment.

At 4 ft by 2 ft, she says its the perfect size for her home office laptop.

Overall, I was pretty surprised about how different of a turn this desk could take in style as I went from bare to adding the trim. Perhaps it can inspire others as well.

Built from Plan(s)
Estimated Cost
Materials were around $130
Estimated Time Investment
Week Long Project (20 Hours or More)
Finish Used
The stain is a combination of Minwax Gunstock and Golden Oak with 6 coats of Semi-gloss poly on top.
Recommended Skill Level
Intermediate

Comments

washington4x4

Tue, 05/08/2012 - 12:49

I have been looking at some different design ideas for a desk. I love what touches you put on the table legs. I might have to try something like this when I start building.

Patrick Hosey (not verified)

Tue, 05/08/2012 - 17:13

Gorgeous finish. What's your method? Pine has been killing me. I put 6 coats on my last table top or polyurethane. Time after time the wood just soaked up the finish. I could never get a smooth surface. Maybe if I would have applied 10 more coats...

BJ D

Wed, 05/09/2012 - 05:22

Washington- keep in mind the size of the trim pieces if you do a base like this. Some of those trim pieces are 1/2 wide and angled... not the easiest to get to fit right. If I were to do it again, I would cut in more to make the cuts a little easier. However, I loved this result.

These legs are hollow also, a definite idea to keep in mind for anyone wanting to do a 4x4 leg project but unable to find treated 4x4's.

Patrick- everything was well sanded in advance. then a coat of wood conditioner. Then the stain (2 coats of the gunstock and 2 coats of the Golden Oak). With the Poly, In between coats, I buff with 0000 Steel Wool then wipe clean. That surface, minus the places where I left the charachter in the wood on purpose, is VERY smooth.

BJ D

Wed, 05/16/2012 - 05:40

Patrick.. you apply poly, give a very light sand with the 0000 steel wool (A little more than running over the surface with minimal pressure) until the surface feels smooth with no drag. Then wipe down with tack cloth and apply a new layers of poly.

Keep in mind that with polyacrylic.. the water based stuff, you can't use the steel wool. I'm told it will rust. This is strictly for polyurethane.

BJ D

Wed, 05/16/2012 - 05:42

Washington- the middle layer of trim is on top of spacer to raise it up. It provided a great look.

s2miller123

Wed, 03/27/2013 - 21:25

The desk looks great. I was trying to figure out how you attached the four pieces of wood that make the legs. You indicated a Kreg jig, but it would seem that there would need to be some pocket screws on the outside. I don't see any...what am I missing here?

Master Closet Overhaul

This project was desperately desired and needed! We had old wire shelving which previous owners of the home had installed improperly and were falling off the wall. This took about 6 weeks from start to finish, but I am SO happy with the results. Unfortunately, here in south Florida, our homes are built with metal studs which are more often than not spaced all over the place. So, attaching anything to a wall securely is next to impossible. I believe I've gotten things as securely attached as possible and things seem to be holding up really well. The icing on the cake was my mother-in-law purchasing 100 Huggable Hangers for me for my birthday! The OCD in me was ecstatic! Anyhow, thanks Ana for the great plans and helping bring custom organization to our homes!

Estimated Cost
$375
Estimated Time Investment
Week Long Project (20 Hours or More)
Finish Used
Varathane Ultimate Stain in Carrington (LOVE-5 stars) and satin polycrylic
Recommended Skill Level
Intermediate

Indoor Playhouse Fun

Submitted by Anonymous (not verified) on Sat, 05/21/2016 - 18:21

This project was a success!! I had a week of vacation that I dedicated to this great project! The directions were easy to follow...thank you Ana! 

I managed to get the slide from someone's outdoor play set that they were giving away :)  I secured it to the side of the upper level. It's been the kids favorite part! 

Estimated Time Investment
Week Long Project (20 Hours or More)
Recommended Skill Level
Intermediate

First project!

Submitted by adi1166 on Tue, 02/25/2020 - 08:03

We finally finished our first project - definitely made mistakes, but learnt a lot. I feel ready for tackling the next one 

Estimated Cost
20
Estimated Time Investment
Day Project (6-9 Hours)
Finish Used
Medium Walnut - I wasn't a fan with the end result, so I'll probably try a lighter stain with 2x4s the next time
Recommended Skill Level
Starter Project

Radiator Covers

Submitted by pde00311 on Mon, 02/24/2014 - 22:15

We loved the radiant air in our new early 20th century house, but as our daughter learned to crawl, we needed to prevent her little fingers from touching the two radiators that were still uncovered. After I finished my first few builds, I custom designed these radiator covers with 1x2s, 1x3s 2x2s and 1x12s. Needless to say, I got a ton of use out of my Kreg Jig. On the middle panel of the larger cover, I used a bit of decorative metal that they sell at the Big Box stores (of course, it would have been easier to use more of it, but I am a bit paranoid about little fingers touching a metal cover). For a final touch, I covered the top of the larger cover with decorative glass. For the smaller cover, I matched the distressed pink throughout the rest of my daughter's nursery.

Estimated Cost
200
Estimated Time Investment
Weekend Project (10-20 Hours)
Finish Used
Behr camembert paint (for the larger living room) and Behr Kashmir pink paint with distressed w/Martha Stewart vintage gold specialty finish (for the nursery)
Recommended Skill Level
Intermediate

My first Adirondack chair

My first attempt at building an Adirondack chair. Ana's plans were easy to follow and very accurate. I would classify myself as a Beginner+.. Recently suffered bad thumb cut making cedar planters. Always think safety first. 

Built from Plan(s)
Estimated Cost
$55.00
Estimated Time Investment
Week Long Project (20 Hours or More)
Finish Used
Glidden Latex. One coat of primer and 3 coats of Glidden canary yellow latex.
Recommended Skill Level
Beginner

My first project!

Submitted by rwaldo on Sun, 03/01/2020 - 10:59

For my first project I chose the farmhouse coffee table. It turned out much better than I expected! The hardest part for me were the angle pieces on the ends. The design was super easy to follow and I love the rustic look. It didn’t turn out perfect but I am pretty happy with it. Can’t wait to see my husbands reaction when he gets home :)

Thanks Ana!

Estimated Cost
$60
Estimated Time Investment
Day Project (6-9 Hours)

Simple Outdoor Stabackable Chairs and Table

We used cedar for these nice, little chairs and based the table on the chair model, only 24" tall, rather than the 18" of the chair seats. It took longer to cut than assemble these - total time: @4 hours for all.

Thank you, Ana!

Darin

Built from Plan(s)
Estimated Cost
$60
Estimated Time Investment
Afternoon Project (3-6 Hours)
Finish Used
Stain with weather protectant.
Recommended Skill Level
Beginner

Farmhouse table!

Built this for a friend of mine and his fiancé. They just bought a house and thought I would help them fill it. This is my 2nd farmhouse table. I really like the thickness of the table. 

Estimated Cost
$125 with bench and stain
Estimated Time Investment
Weekend Project (10-20 Hours)
Finish Used
Dark walnut on top and white paint for the frame
Recommended Skill Level
Intermediate

Sectional Couch

Submitted by Anonymous (not verified) on Sun, 10/29/2023 - 19:09

We had an ugly yellow/orange flowered couch and rocker in the living room when we bought this place. I usually build stuff, but he is much faster at it than I am, so he did it this time. Finally got rid of it and my husband built the 2x4 outdoor sofa set. I love them. If we need to, we can also take this outside for our annual family/friends reunion we have.

Susan Jeanblanc

Built from Plan(s)

modified outdoor dining table

My wife has been wanting new patio furniture so here is my version of the simple outdoor table, I shortened it to fit our needs. Next is the chairs to match.

Built from Plan(s)
Estimated Cost
$55
Estimated Time Investment
Day Project (6-9 Hours)
Recommended Skill Level
Beginner

Comments

Greenhouse - BC, Canada

Submitted by Anonymous (not verified) on Tue, 03/24/2020 - 07:49

*NOT SURE MY PICTURES ARE UPSIDE DOWN??* This is the second time i've built this greenhouse. We recently moved to a bigger property so I built it 4ft longer at 16ft. I had some old windows to I modified the front and rear so I could incorporate them into the design. The cedar shake really adds to the appeal of the greenhouse as well. I still have to flash it off, but we are very happy with this greenhouse.

Built from Plan(s)
Estimated Cost
$2000
Estimated Time Investment
Week Long Project (20 Hours or More)
Finish Used
Stained the cedar shingles with a clear stain
Recommended Skill Level
Intermediate

Comments

Kids Storage Bed

Submitted by Anonymous (not verified) on Sat, 11/04/2023 - 14:34

Grandson needed a bed at our house for when he comes and stays. Designed and built this bed, features a bookcase headboard. Drawers on one side and storage cubbies on the opposite side.

Retro Style Wall Hanging

Submitted by Joni on Mon, 05/21/2012 - 14:40

This piece began with finding a unique piece of walnut that had been discarded by a custom cabinet manufacturer. When I saw it, I thought I could make a beautiful wall hanging out of it. The walnut wood is absolutely beautiful; pictures don't do it justice. The majority of the piece is not stained; the natural color is enhanced with a clear polyurethane designed to give a hand-rubbed finish. The darker walnut section was lightly stained for contrast. The frame is made of pine 2x2s. I built a platform in the grooves with shims, and embedded earth-toned glass and stone tiles (as well as river rocks) in the grooves around the "waves".

While this didn't come from any specific plan, most any inspiration and techniques come straight from what I've learned on ana-white. Ana's site has really changed my life and given me a passion for building.

Recommended Skill Level
Beginner

Comments

hammertime

Tue, 05/22/2012 - 10:15

Joni, I've been admiring your work all along, but this one takes the cake! You have such imagination and vision. I think this is an outstanding piece.

Back