Community Brag Posts

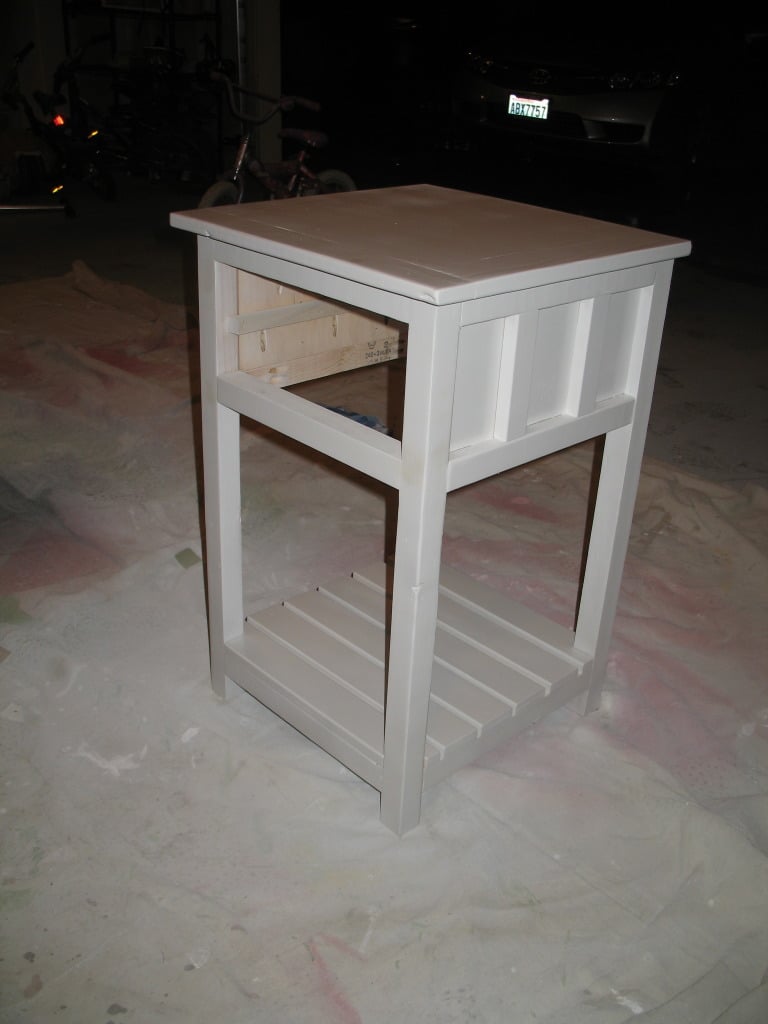
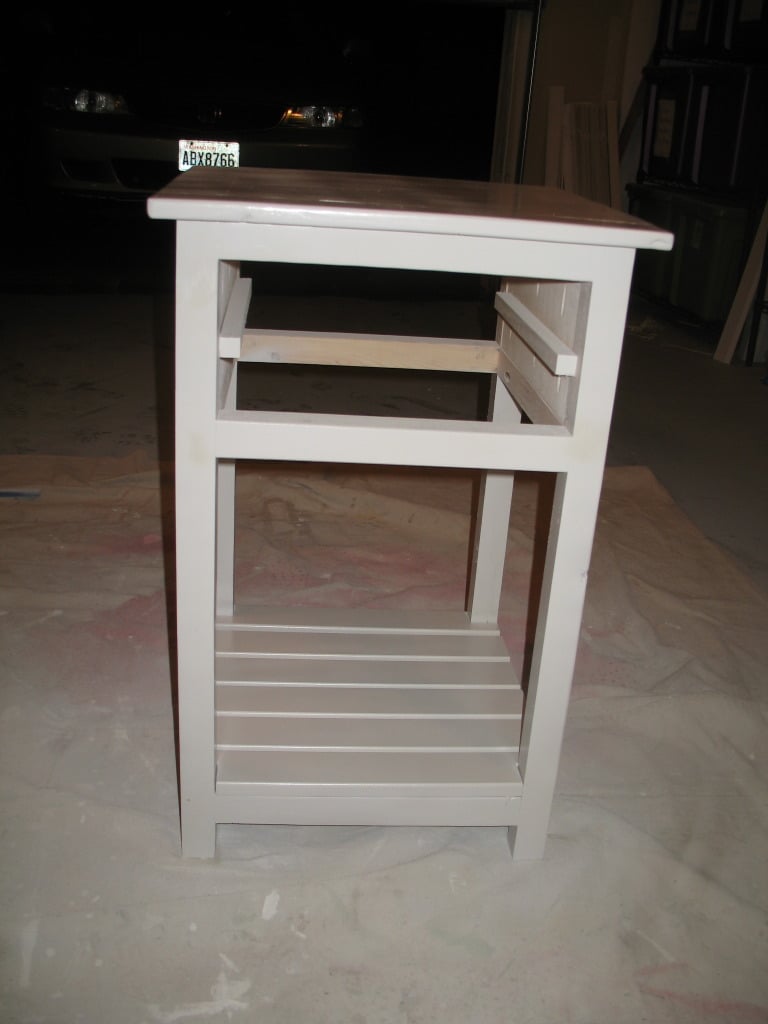
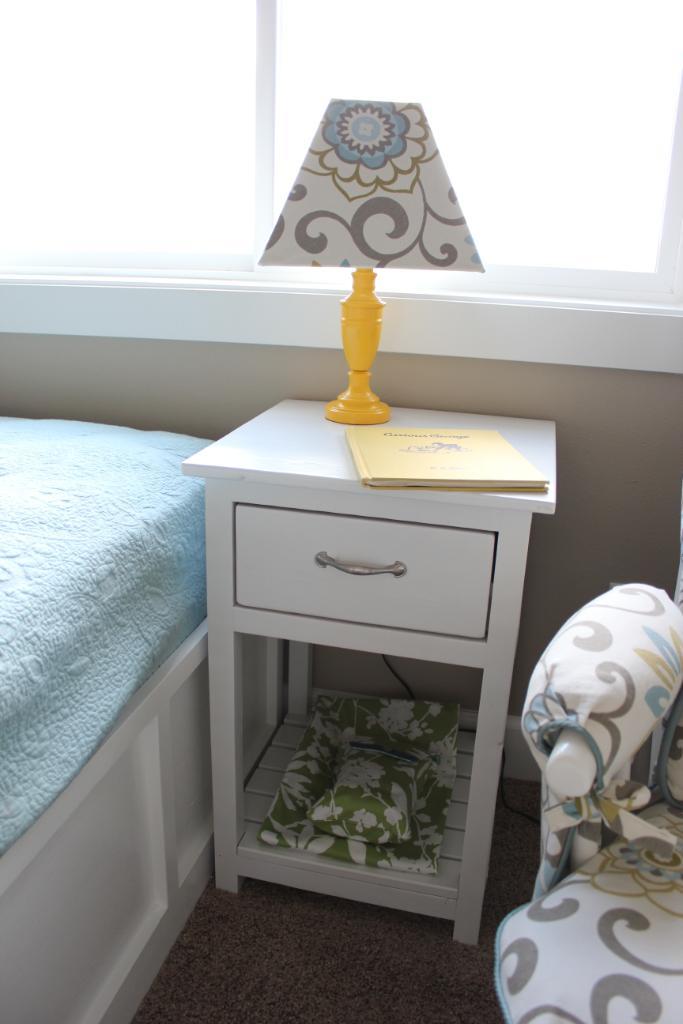
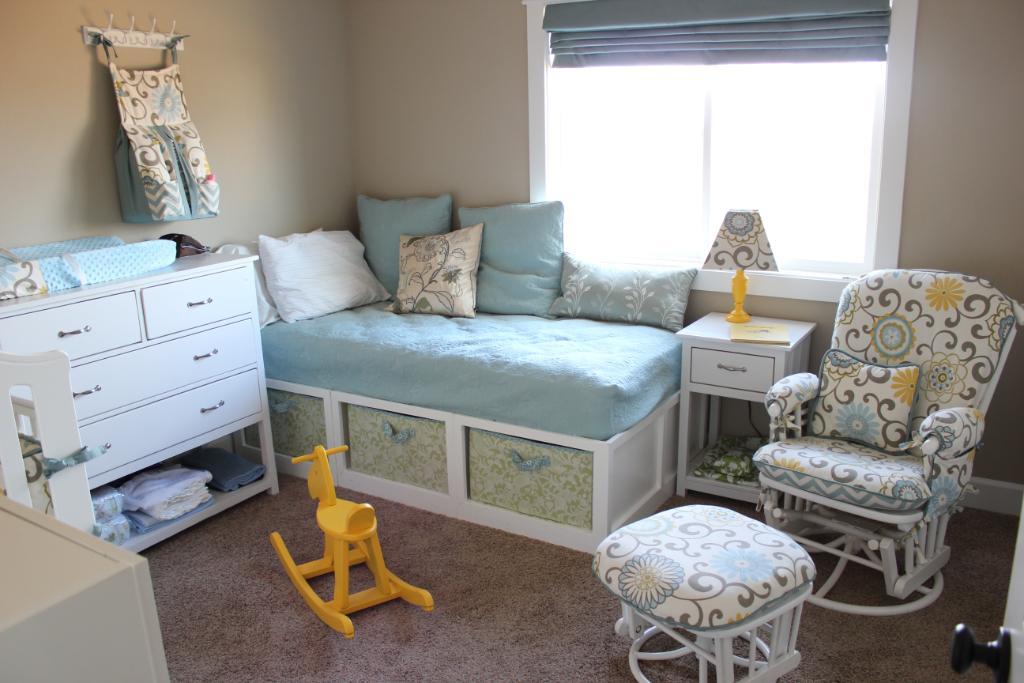
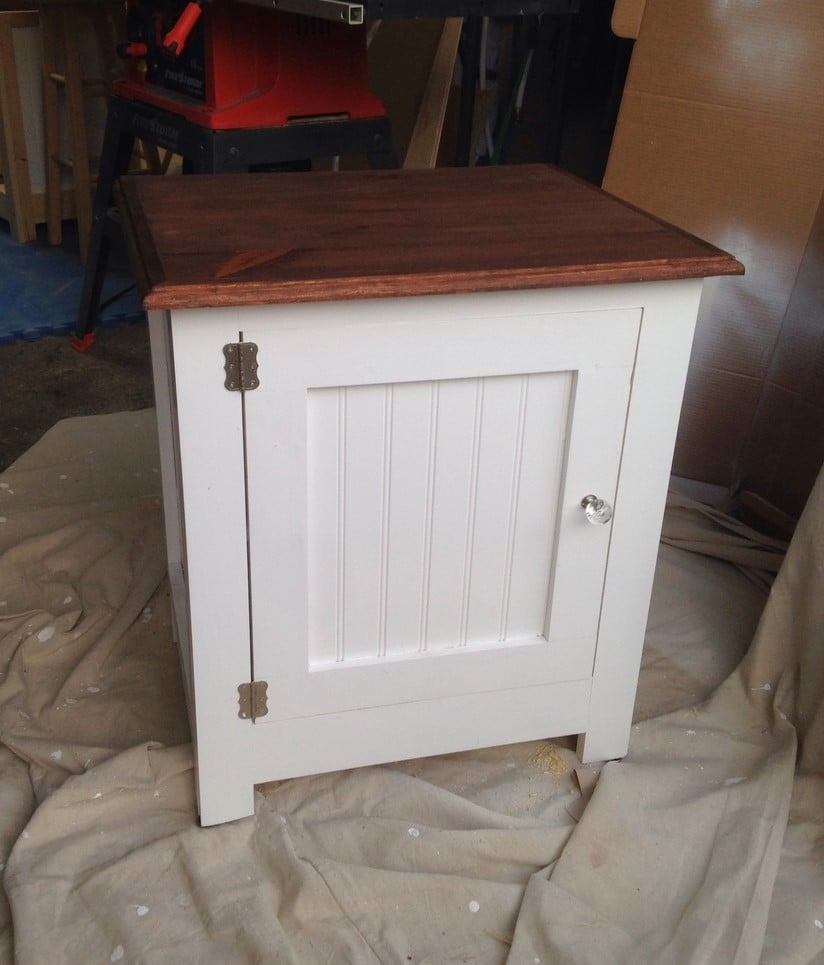
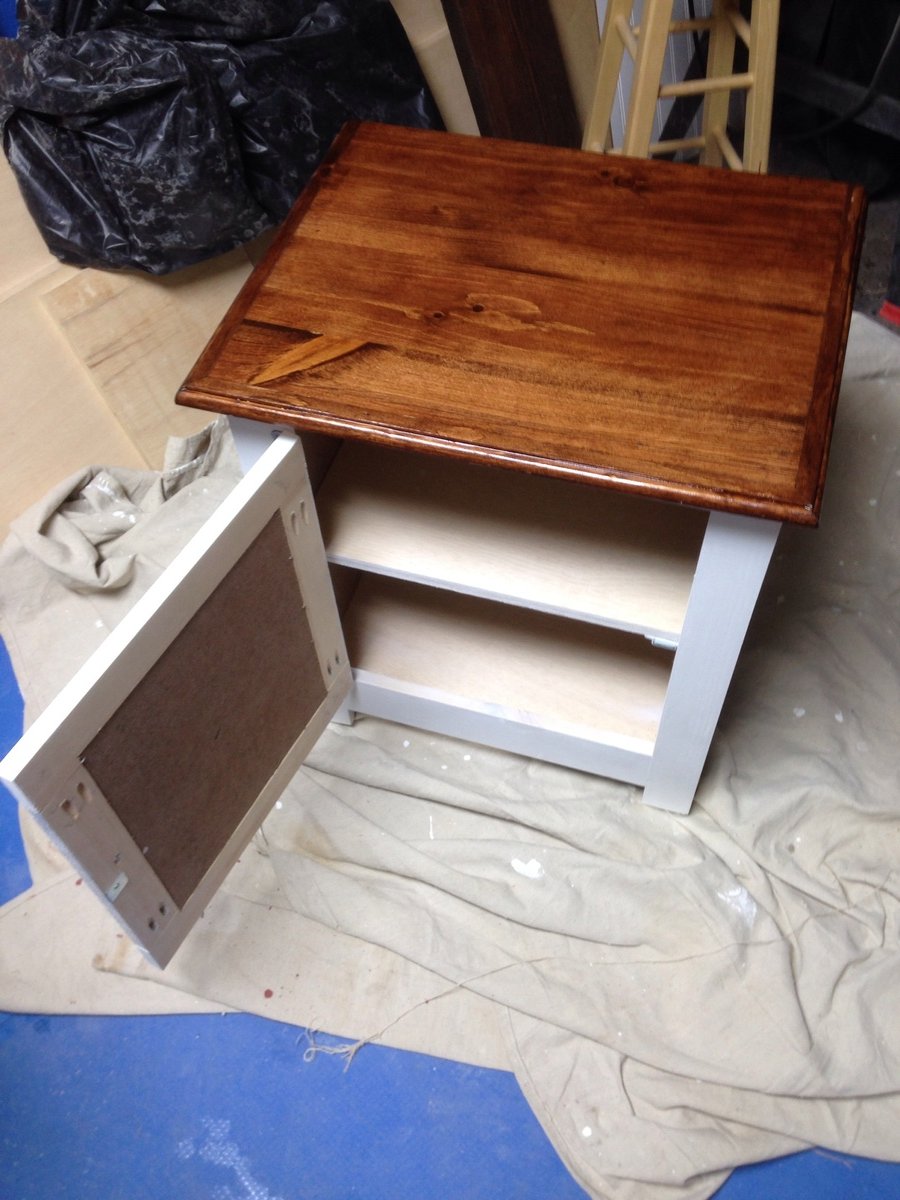
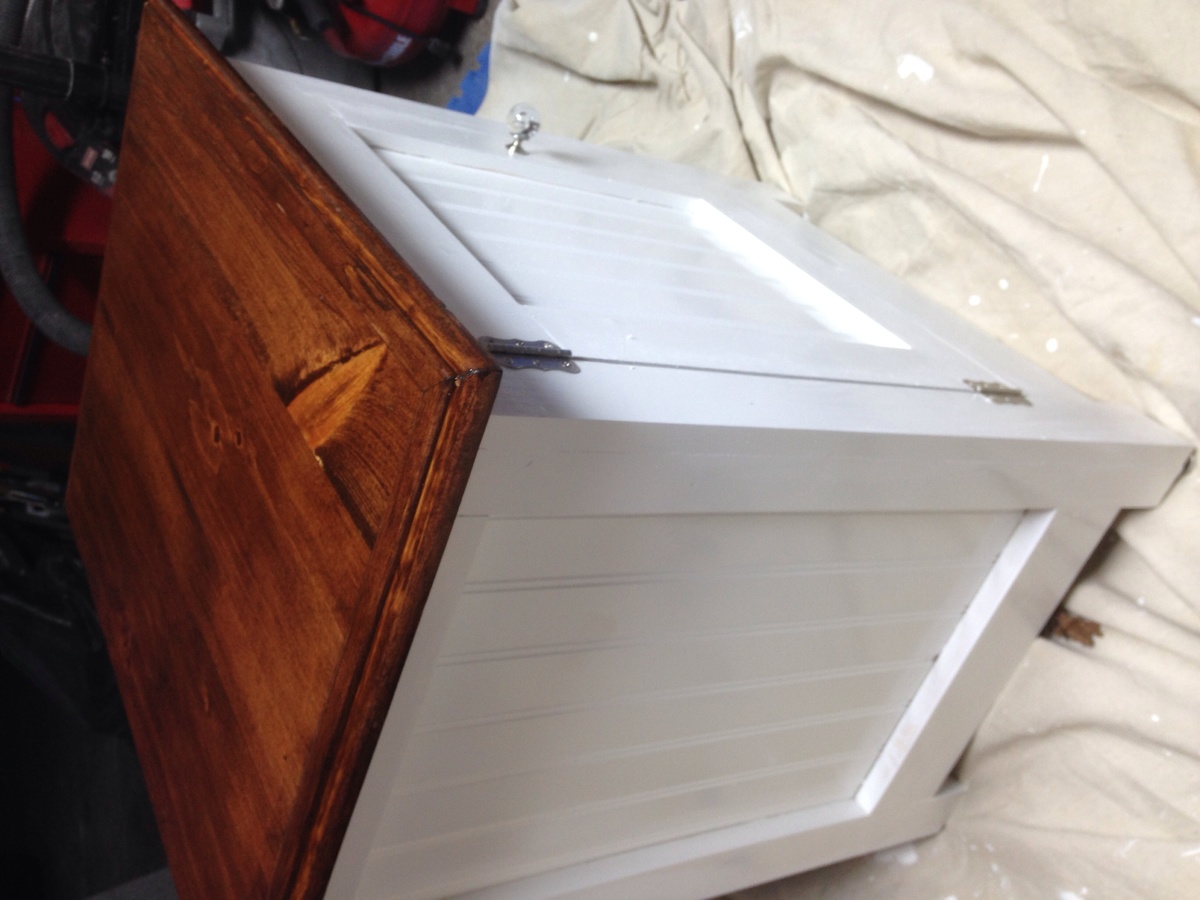
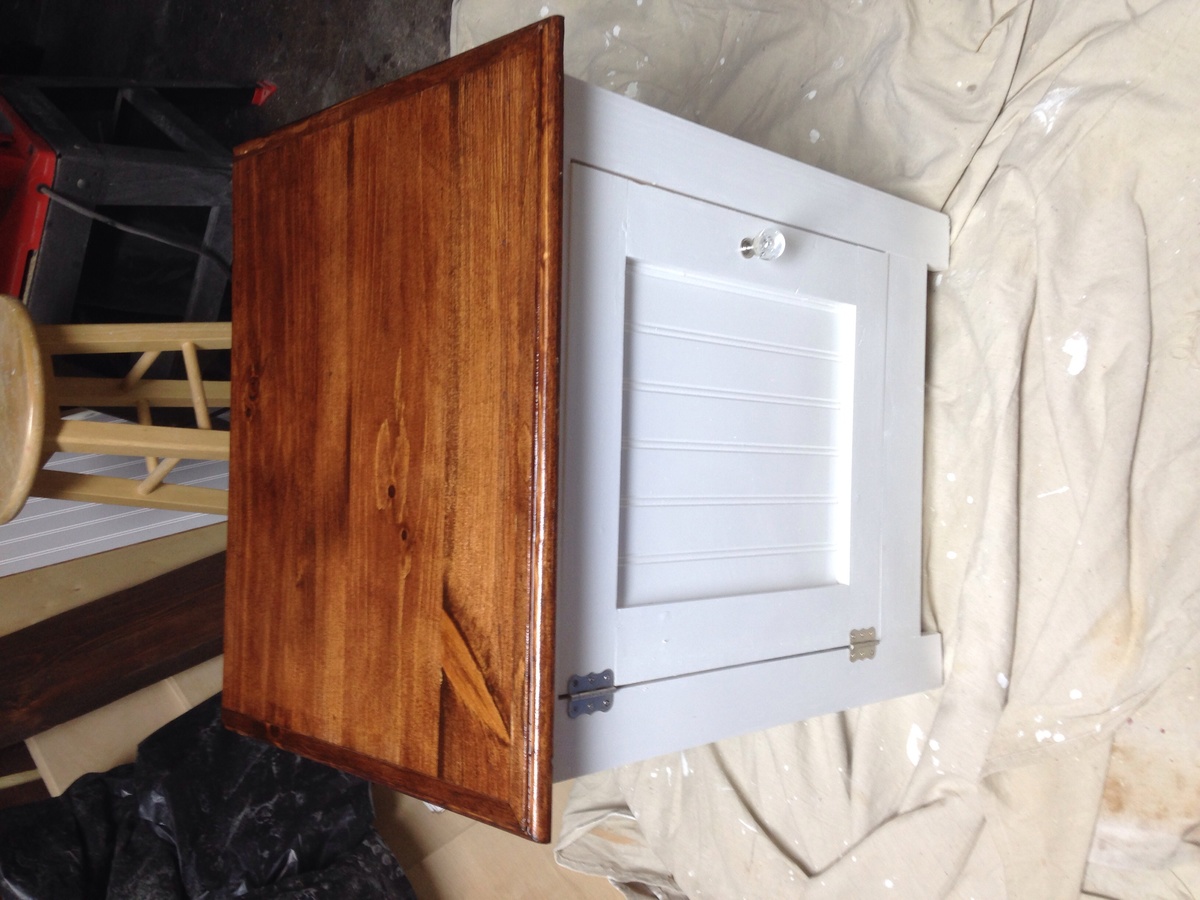
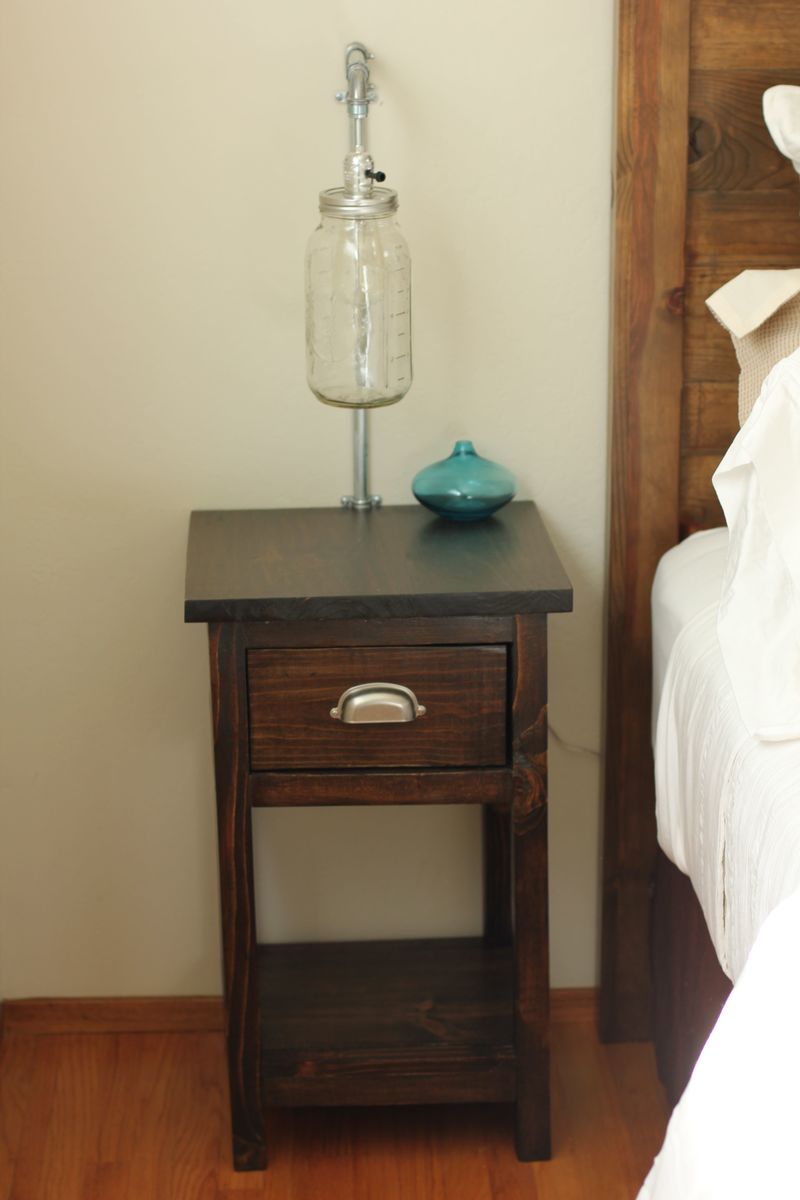
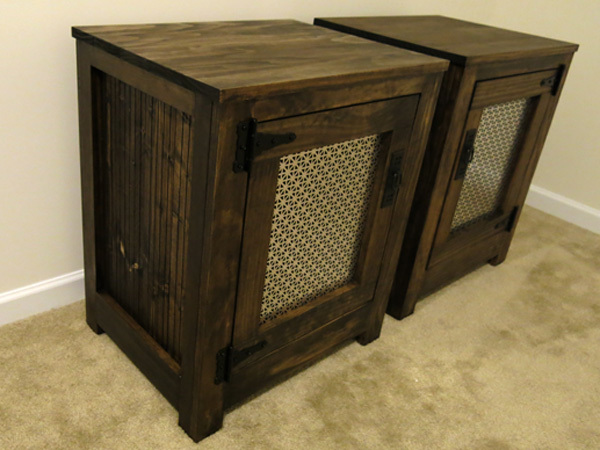
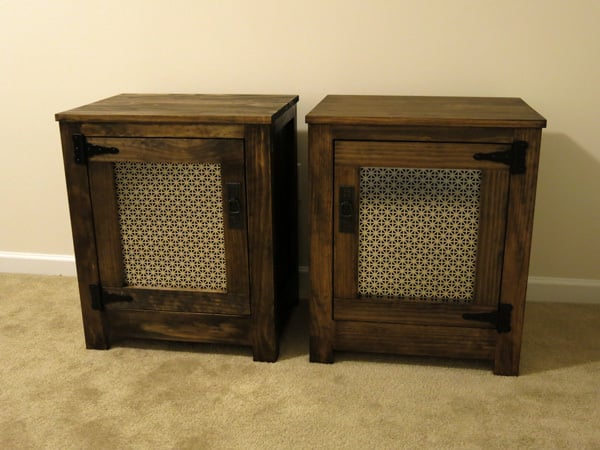
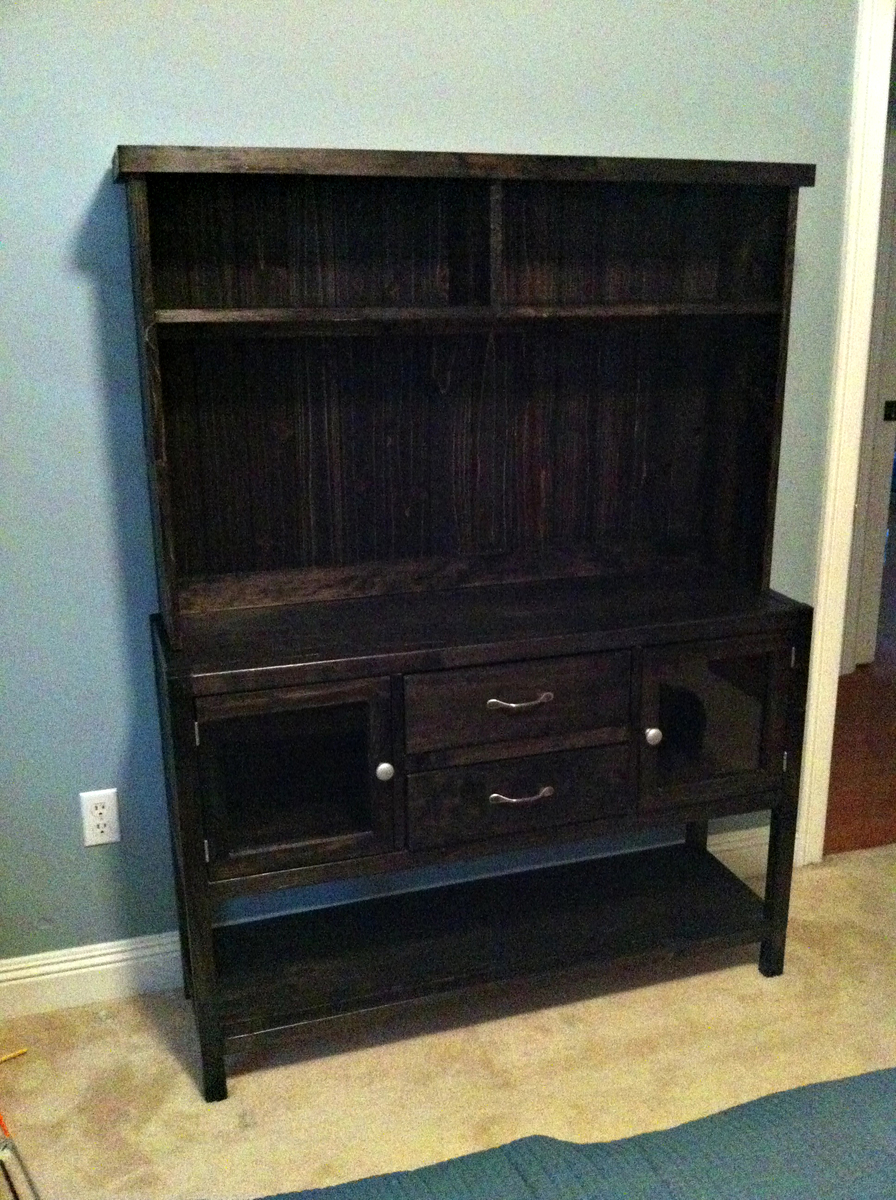
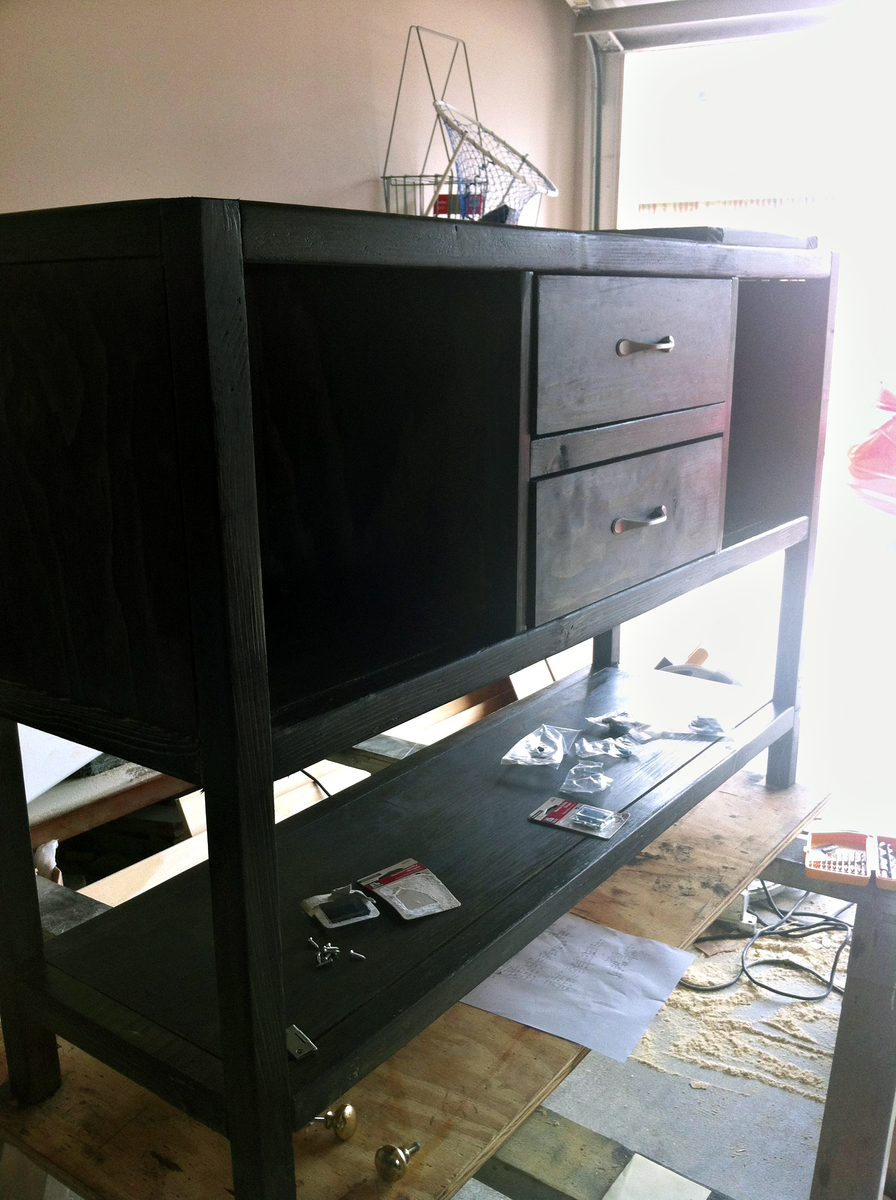
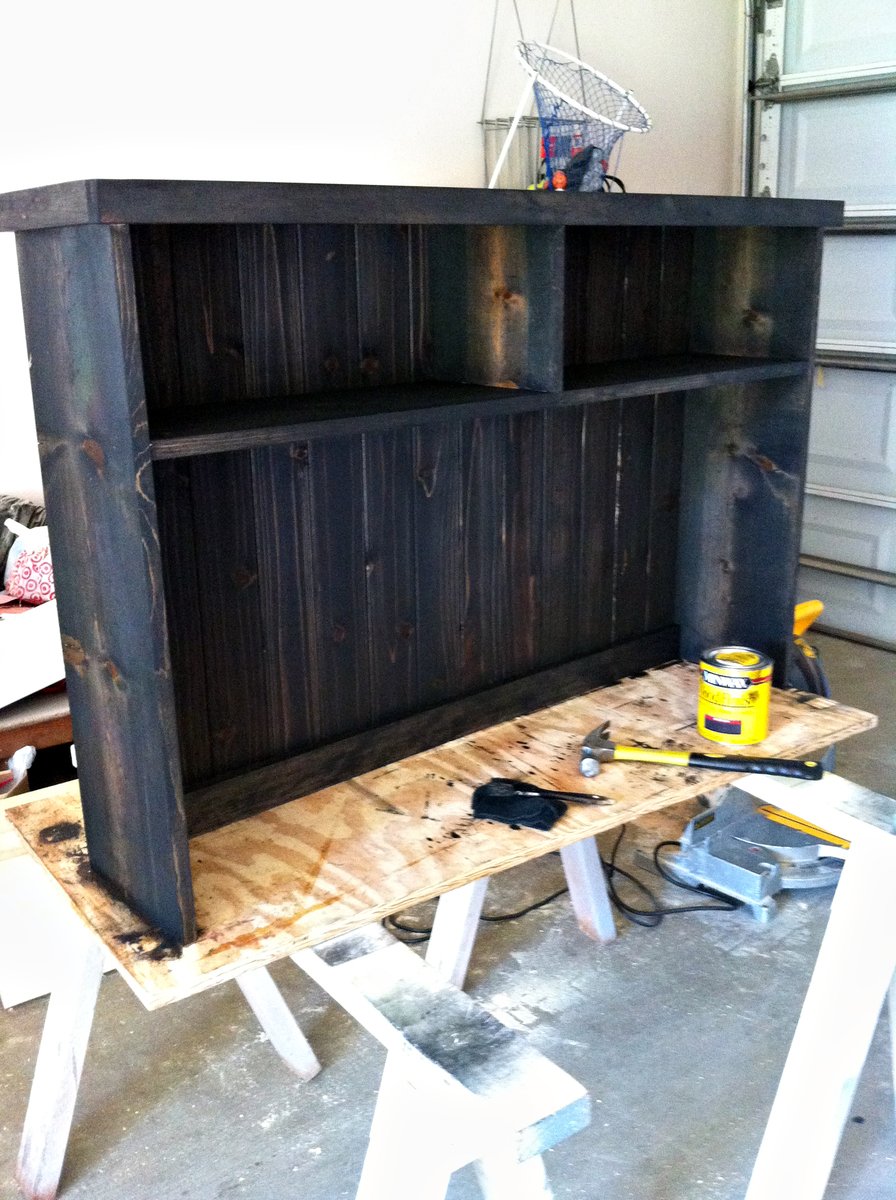
Cabin (Camp) Collection Side Table

After building the small dresser from the cabin (or camp) collection, we wanted a side table to match. Pottery barn makes one, and there were some similar plans on Ana's site, so we kind of made it up as we went, following the same basic design as the dresser, only with modified dimensions, and less drawers, etc. This was a super quick build after the dresser, and we made it all from scraps we had lying around - only things were purchased were the hardward for the drawer, and 1 square dowel for the drawer slides - less than 5 bucks! Used left over paint from the dresser as well.

Estimated Cost
$5 + scraps!
Estimated Time Investment
Day Project (6-9 Hours)
Finish Used
white spray paint - Krylon primer, rustoleum paint in semi-gloss, krylon clear coat in satin.
Recommended Skill Level
Intermediate

Comments

Bunnie1978

Fri, 03/16/2012 - 15:19

Your room is so sweet. It makes me want to have more babies so I can build a room just like it... though I think it's supposed to go the other way around. :)

First Build - "Platform" Bed and Hailey Headboard

Submitted by stsa84 on Tue, 01/07/2014 - 10:25

After finally getting fed up with having our mattress on one of those cheap metal "frames", and no headboard, I decided to try my hand at a platform bed and plank headboard.

I followed the headboard plans to a T, with the exception of using 1x4's for the front trim instead of molding (at HD/Lowe's, the cheapest option would have set me back $40), and making it higher and wider to fit my bed plans. Everything came together very easily.

For the bed, I drew up the plans myself. I wanted clean lines and a modern look, with short wide legs. Instead of having the mattress rest on slats, I elected to hide the box spring within the wood frame, with the mattress sunk down 4" below the lip of the frame.

Total cost for headboard: $100
Total cost for bed: $80

Do NOT waste your time going to Lowe's or HD to buy any of the 1x's. The only frustrating part of this project was finding un-warped wood, and the big box stores had me pulling my hair out. Find a local wood place in your area, give them a call, and ask if they sell to non-contractors. My local yard was actually cheaper than the big box stores, and their wood was straight as a board, as it should be.

Built from Plan(s)
Estimated Time Investment
Weekend Project (10-20 Hours)
Finish Used
Stain: Minwax Jacobean
Clear: Minwax Satin Polyurethane (3 coats)
Recommended Skill Level
Starter Project

Comments

amt47

Mon, 03/10/2014 - 04:29

This looks great! Can I ask, is it a solid board at the bottom, or two boards? What did you use for the nail heads that you can see connecting the bottom boards? I'm fairly new at this. Is that just decorative or are they the screws holding it together? How do you get that look?

Thanks! I am going to try to do something like this.

Kentwood Night Stands

Submitted by Anonymous (not verified) on Mon, 03/28/2016 - 16:35

 Made these for my both my daughters and they love them. I think I may make some to sell as so many people seem to like them. I used a routered edge on my tops which deviates from plans a bit. I also used a biscuit jointer and glued in some biscuits to create my top made from 1x6 and 1x4 boards. Great plans and thanks for doing what you on this amazing website.

Estimated Cost
50$ with paint and hardware.
Estimated Time Investment
Weekend Project (10-20 Hours)
Finish Used
Min Wax Honey, white semi gloss gloss and primer from Rustoleum
Recommended Skill Level
Beginner

Comments

lsieu

Fri, 10/21/2022 - 05:44

These are really beautiful. I love the white wainscot (?) in contrast with the natural wood top. I wonder if this design can be stretched upward and elongated into a cat little box cabinet enclosure? My mom could use one that's easy to open up to clean tall enough for a bit of enclosed storage, and a table top height for a place the cat can relax away from the dogs.

KIDS WORK BENCH

Submitted by kwildman on Thu, 11/21/2019 - 15:54

This is a kids work bench that I saw on pinterest.  I couldn't find plans anywhere so I just winged it.  If anyone knows who I should give credit to, I would be happy to do that.

This is made from pine studs.  The dimensions are 24" wide x 42.5" back height, 19.75 bench height, 19" deep.  The peg board is 24" x 18".

I used Early American stain with dark wax finish.   I painted the peg board with Rustoleum Navy spray paint.

I used a plan from Jen WoodHouse for the red tool box.

Estimated Cost
$50
Estimated Time Investment
Afternoon Project (3-6 Hours)
Finish Used
I used Minwax Early American Stain with Minwax Dark Wax.
Recommended Skill Level
Beginner

The Entertainment Center

Submitted by a.mcdaniel on Mon, 03/19/2012 - 00:34

It took 2 1/2 months and a LOT of wood, but my husband created this masterpeice. Thank you to the inspiration provided by Ana White and Kristen Lotz, we have finally done our biggest project yet!

Estimated Cost
1000.00
Estimated Time Investment
Week Long Project (20 Hours or More)
Recommended Skill Level
Advanced

Comments

a.mcdaniel

Wed, 03/21/2012 - 10:22

Thank you so much, Ana! That comment means a lot to my husband and I! He is so amazing at building things now and your website has been a major inspiration for him - THANK YOU! THANK YOU! THANK YOU! Now our new home is becoming more "ours."

Christie (not verified)

Thu, 07/26/2012 - 20:44

Both yours and Ana's centers are beautiful! I am a little more drawn to yours with the lighting and architectural touches you've added. Did you have a formal plan drawn for it? I would like to make an exact replica of it if possible. It is just stunning and exactly what I am looking for. GREAT JOB!!!

kristenlotz

Wed, 12/19/2012 - 15:58

I love it. I am so glad our project inspired you to build this! You incorporated a lot of the things we considered during the build such as fluted stiles on the bookcases, downlights, and faux raised panel doors. Now, we just need to see pictures with it all decorated.

kristenlotz

Mon, 12/31/2012 - 14:42

I finally got around to making the plans for our entertainment center (well, actually my husband did it). It is very similar to yours with a few exceptions. Hopefully that helps those looking for plans for this beautiful entertainment center. I love finding brag posts of similar entertainment centers because they are absolutely beautiful at a fraction of the cost of buying one. And we love telling people that we built it!

http://www.jrlwoodworking.com/2012/12/furniture-plans-custom-entertainm…

Thanks,

Horse stable for 18" dolls

Submitted by petera on Thu, 01/09/2014 - 08:03

This was a neat project that made a great Christmas present, along with some horses, of course. What really finished it off was the shim shingled roof. I also liked the hinged doors which gives it a little action for the kids to play with.

Thanks for the plans.

Peter

Estimated Time Investment
Weekend Project (10-20 Hours)
Finish Used
Minwax golden oak on the roof.
Recommended Skill Level
Beginner

Mya's Dollhouse

Submitted by Kiwilisa on Thu, 03/31/2016 - 03:40

I eliminated the bottom floor and created a shorter storage area instead. To make the project more manageable for one person, I chose 1/2" birch plywood, however, I think 5/8" would have been a bit more sturdy for this project. I love the plans and found them very easy to customize to fit my project.

Estimated Cost
$150-$200
Estimated Time Investment
Weekend Project (10-20 Hours)
Finish Used
Benjamin Moore Advance in Winter Grey (Exterior)
Benjamin Moore Advance in Decorator White (Interior and trim)
Minwax Dark Walnut wood stain (Floors)
Varathane interior polyurethane in Gloss to finish entire project.

I used the HomeRight HVLP sprayer to finish all the pieces (Except the stain) prior to assembly.
I also stained the floors prior to assembly simply using a wipe on stain. All the plywood edges were finished off with a white melamine iron on edge band.
The BM advance paints and Homeright sprayer are my absolute favorite combination for any furniture project.
Recommended Skill Level
Beginner

Storage Coffee Table with Lift Top

Submitted by Anonymous (not verified) on Tue, 08/01/2023 - 15:04

I wanted my top to be a lift top, so I used 1x3's adding breadboard ends. I ordered the lifts from Amazon. I applied a single coat of stain and then sanded it down to give it a more rustic look before applying a satin poly coat.

A. Henry

Comments

Mini-Farmhouse Bedside Table

Submitted by saracrow on Wed, 03/21/2012 - 11:34

After completing the Queen Farmhouse headboard, we wanted tables to go with the set. Our guest room is small, so we opted for the mini-farmhouse table rather than the normal size that Ana has listed. It was quite a process, the little drawers are harder than they look! We do love the end result though!

Built from Plan(s)
Estimated Cost
$50
Estimated Time Investment
Weekend Project (10-20 Hours)
Finish Used
Minwax wood conditioner, Mixwax Dark Walnut, Minwax Polyacrylic
Recommended Skill Level
Beginner

Comments

Pair of Kentwood Inspired Night Stands

Submitted by AndyH on Fri, 11/15/2019 - 11:08

Wanted to build matching nightstands based on the Kentwood design which I liked. I also wanted to make sure the doors were hung for the appropriate side of the bed for easy opening. Hopefully guests will love these in their room!

Estimated Cost
$105
Estimated Time Investment
Weekend Project (10-20 Hours)
Finish Used
Minwax pre stain. Minwax Jacobean stain. Minwax Satin Polyurethene. Only one cost of Jacobean stain was enough. Two coats of Polyurethane.
Recommended Skill Level
Beginner

My project with coastal theme

Submitted by Anonymous (not verified) on Sat, 04/02/2016 - 08:12

My Brandy Scrap bed with drawers, with a coastal theme. Made from scrap left over from an accent cedar wall. Originally stained with vinegar and steel wool and added some white wash and blue wash for color!

Estimated Cost
$200
Estimated Time Investment
Week Long Project (20 Hours or More)
Finish Used
Vinegar and steel wool with white wash and blue wash
Recommended Skill Level
Starter Project

Farmhouse Console Table

Submitted by LatvianGal on Sun, 12/01/2019 - 18:31

This was my first furniture build, and my 20 year old daughter did it with me! We made some rookie mistakes, but we love it!  Super excited to make some matching end tables and or coffee table!

Built from Plan(s)
Estimated Cost
$85
Estimated Time Investment
Weekend Project (10-20 Hours)
Finish Used
We whitewashed the bottom and stained the top with Minwax Red Mahogany.
Recommended Skill Level
Beginner

Comments

Tall Loft

Submitted by Anonymous (not verified) on Sun, 08/06/2023 - 13:55

We just finished building this room and decided to finish it off with Ana's loft bed. It's mounted at height of 6 feet in order to accommodate our 18 year old.

Renae Gilford


Princess Bed

Submitted by camcginty on Fri, 03/23/2012 - 20:17

The bed was modified to allow room for a trundle, but decided we didn't want the trundle after all. The extra space does allow for more storage area and our daughter uses a stool since the bed sits up a bit higher. Brackets were added so that the bed could be taken down and moved easily. So glad the brackets were added, they made the bed solid for lots of little girls jumping. Decorative trim and accents were added to dress it up. Pratt & Lambert's Ovation Paint was used. I used a latex base coat and then applied the metallic pearl finish. The metallic finish needed to be sprayed on and ran easily, but what a beautiful finish!

Built from Plan(s)
Estimated Time Investment
Weekend Project (10-20 Hours)
Finish Used
Pratt & Lambert's Ovation Paint-Metallic Pearl
Recommended Skill Level
Beginner

Comments

Char O (not verified)

Sun, 04/08/2012 - 22:46

How much clearance did you have to add for the trundle? I am going to make my daughter this daybed and I would like for it to have a trundle beneath. Thanks for your help!

Farmhouse Table

Submitted by AmieH on Sun, 01/12/2014 - 14:38

We used the farmhouse table plans from this website, and modified the length and width. The finished length is about 8 1/3' long (100") and 45" wide.

This was our first build and my husband and I learned a lot! We could not find untreated 4x4s ANYWHERE in our area. We searched for days and called probably 10-15 places. We were just going to build with 2x4s, but my husband's work ended up having some pallets that used 4x4s come in with a shipment. They were not in the best shape, but we wanted it to look rustic so we weren't too concerned. Also, our 2x6s were a little warped, so they bow down at the ends. We searched through piles and we didn't really notice until they were on (breadboards). We did buy a Kreg Jig Kit and are so glad we did! We have used it for other projects and can't wait to use it for more. Such a great purchase!

I learned to ALWAYS do a test piece of stain first. This was new to us. We stained it the first time, and then had it spray coated with polyurethane (my stepfather does cabinets). I hated the finish! So I ended up spending an entire day (from 8 in the morning until midnight) stripping the 3 coats of polyurethane and stain. We could not get it all out, but got most of it. We then re-stained it with a lighter color (custom stain left over from our kitchen) and finished it with Minwax Wipe-On Poly. I like the more natural finish much better. If I could talk my husband into it, I would build another one so I could get the stain right.

Overall, I'm pleased with how it came out! The plans were easy to follow, and not hard to modify using a little math.

Estimated Cost
$150
Estimated Time Investment
Weekend Project (10-20 Hours)
Finish Used
Custom stain from Sherwin Williams (close to an espresso with a little bit of a cherry color). Wiped on, waited a few minutes, wiped off. Finished with 4 coats of Minwax Wipe-On Poly.
Recommended Skill Level
Beginner

Comments

krsparks

Thu, 05/21/2015 - 08:00

I'm new to this. Did your apron cuts/measurements change when you increased the length and width of the table? By the way, your table looks beautiful!

Barn Door Entertainment Center

Submitted by Anonymous (not verified) on Mon, 04/04/2016 - 19:27

I took the Grandy Sliding Door Console plans and added another middle section to make the entire plan fit the nook in my man cave. I manipulated the plans to have openings without shelves to fit a mini fridge and an area for blankets (currently in the wash). Total length is 12 ft and height is 37.5 inches high (36 inches + the top). I tried to stain it to match another table in the room and it worked out pretty well.

Built from Plan(s)
Estimated Time Investment
Week Long Project (20 Hours or More)
Finish Used
Minwax Ebony for the face/base and Minwax Colonial Maple for the top.
Recommended Skill Level
Intermediate

Wood star

Submitted by Anonymous (not verified) on Tue, 12/10/2019 - 17:53

First project in my back porch turned into a makeshift wood shop

Estimated Time Investment
An Hour or Two (0-2 Hours)
Finish Used
Non yet , still going tru options
Recommended Skill Level
Beginner

Closet Makeover

I hated the way my bi pass closet doors wasted so much precious space, as well as only having a single rod for hanging. I can't even post my before photo because of the embarrassing mess billowing out. On the both sides there are two bars based on the height of our own clothing and space needs. On the left side I made the bottom bar about 18 inches shorter than the top so that dresses can hang in that space. I also attached spare 1x12's to the rod brackets and am using them for shoes.

Another great thing about this closet system is my dirty laundry sorter! Before we just had random baskets in another part of the room for this job. Now we have a nice tidy spot and it really helps be keep up on our laundry.

Estimated Cost
Under $50
Estimated Time Investment
Weekend Project (10-20 Hours)
Finish Used
Sand smooth, prime, 2 coats of white semi-gloss paint.
Recommended Skill Level
Intermediate

Comments

Jaymee (not verified)

Sat, 03/31/2012 - 14:40

Closet makeovers on our to-do list as well, and I was wanting to incorporate the laundry dresser in them as well. Glad to see this done !

Rhyan Console Table

Submitted by Stacie on Wed, 01/15/2014 - 10:37

I built this console table for my son's room, and added a matching hutch for additional storage and display. It's a versatile piece of furniture. He uses it for games, books and collectibles, but it would be great for a tv and game system too. Thanks for the plans!

Built from Plan(s)
Estimated Cost
$75
Estimated Time Investment
Afternoon Project (3-6 Hours)
Finish Used
Minwax Ebony stain with several coats of polyurethane
Recommended Skill Level
Beginner

Comments

moosmani

Wed, 01/15/2014 - 12:52

Great! Thank you so much! I think this will be the perfect size for what I need. Yours looks so nice that I'd like to copy it. Did you use any plans to build the hutch or did you just make it up? I just love how yours looks! Thank you so much for posting!

Stacie

Wed, 01/15/2014 - 14:09

Moosmani, I made it up just based on a very simple hutch. Two days later, Ana posted plans for the School Desk Hutch. :/ A plan to follow would have been nice but honestly, the hutch was a very easy build. Good luck building yours and I look forward to seeing pics.

Dining Room Table

Submitted by RetroFit on Thu, 04/07/2016 - 18:18

This is our first real furniture project. We wanted a large enough table to be able to sit 10 people comfortably around without the table legs getting in the way of the people on the corners. We are really happy with the way this turned out. Each leg was joined with a double floating mortise & tennon. The overall dimensions are 47" wide by 80" long by 31.5" tall.

Estimated Time Investment
Week Long Project (20 Hours or More)
Finish Used
Danish oil and Polyurethane.
Recommended Skill Level
Intermediate

Comments

Brandiville

Sun, 04/10/2016 - 04:26

I would be very interested in the plan for this table. Do you mind sharing? It is beautiful!

Back