Community Brag Posts

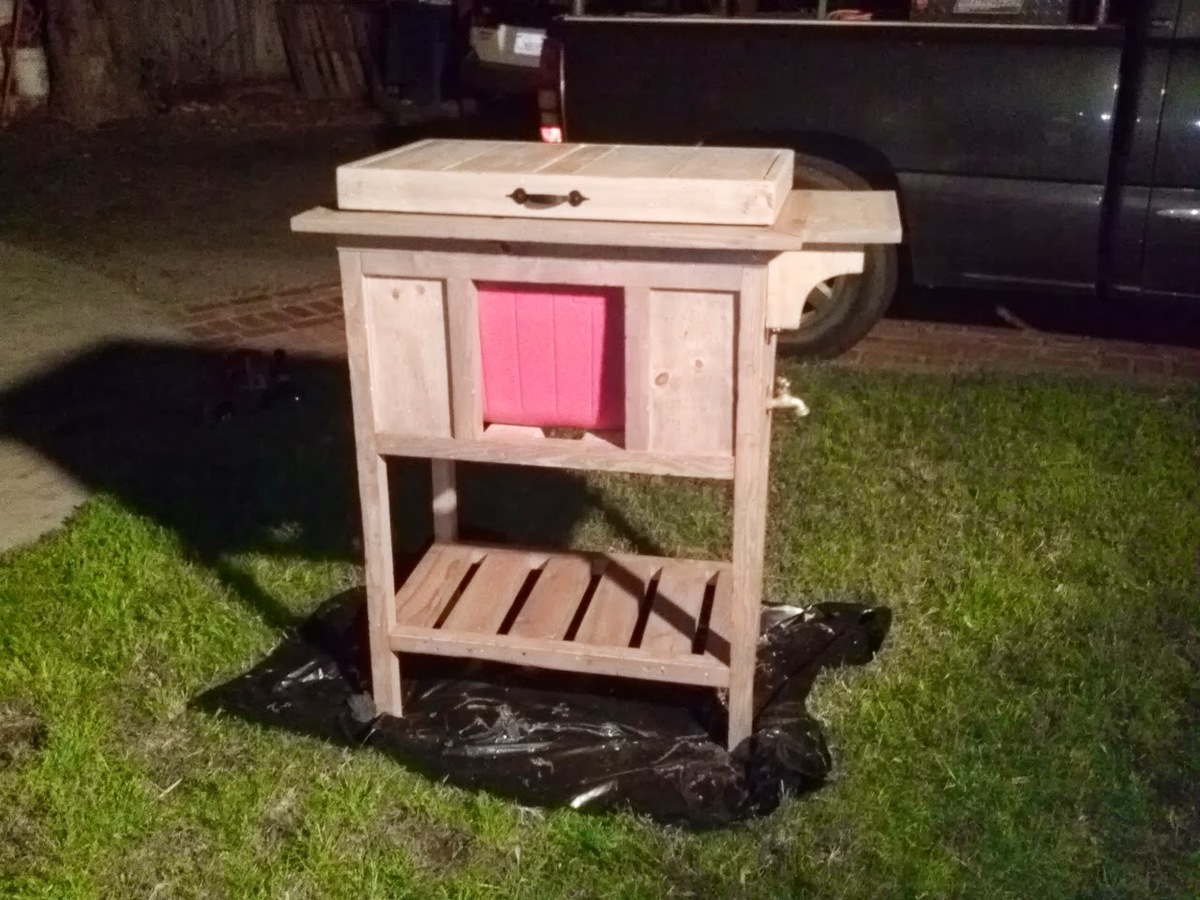
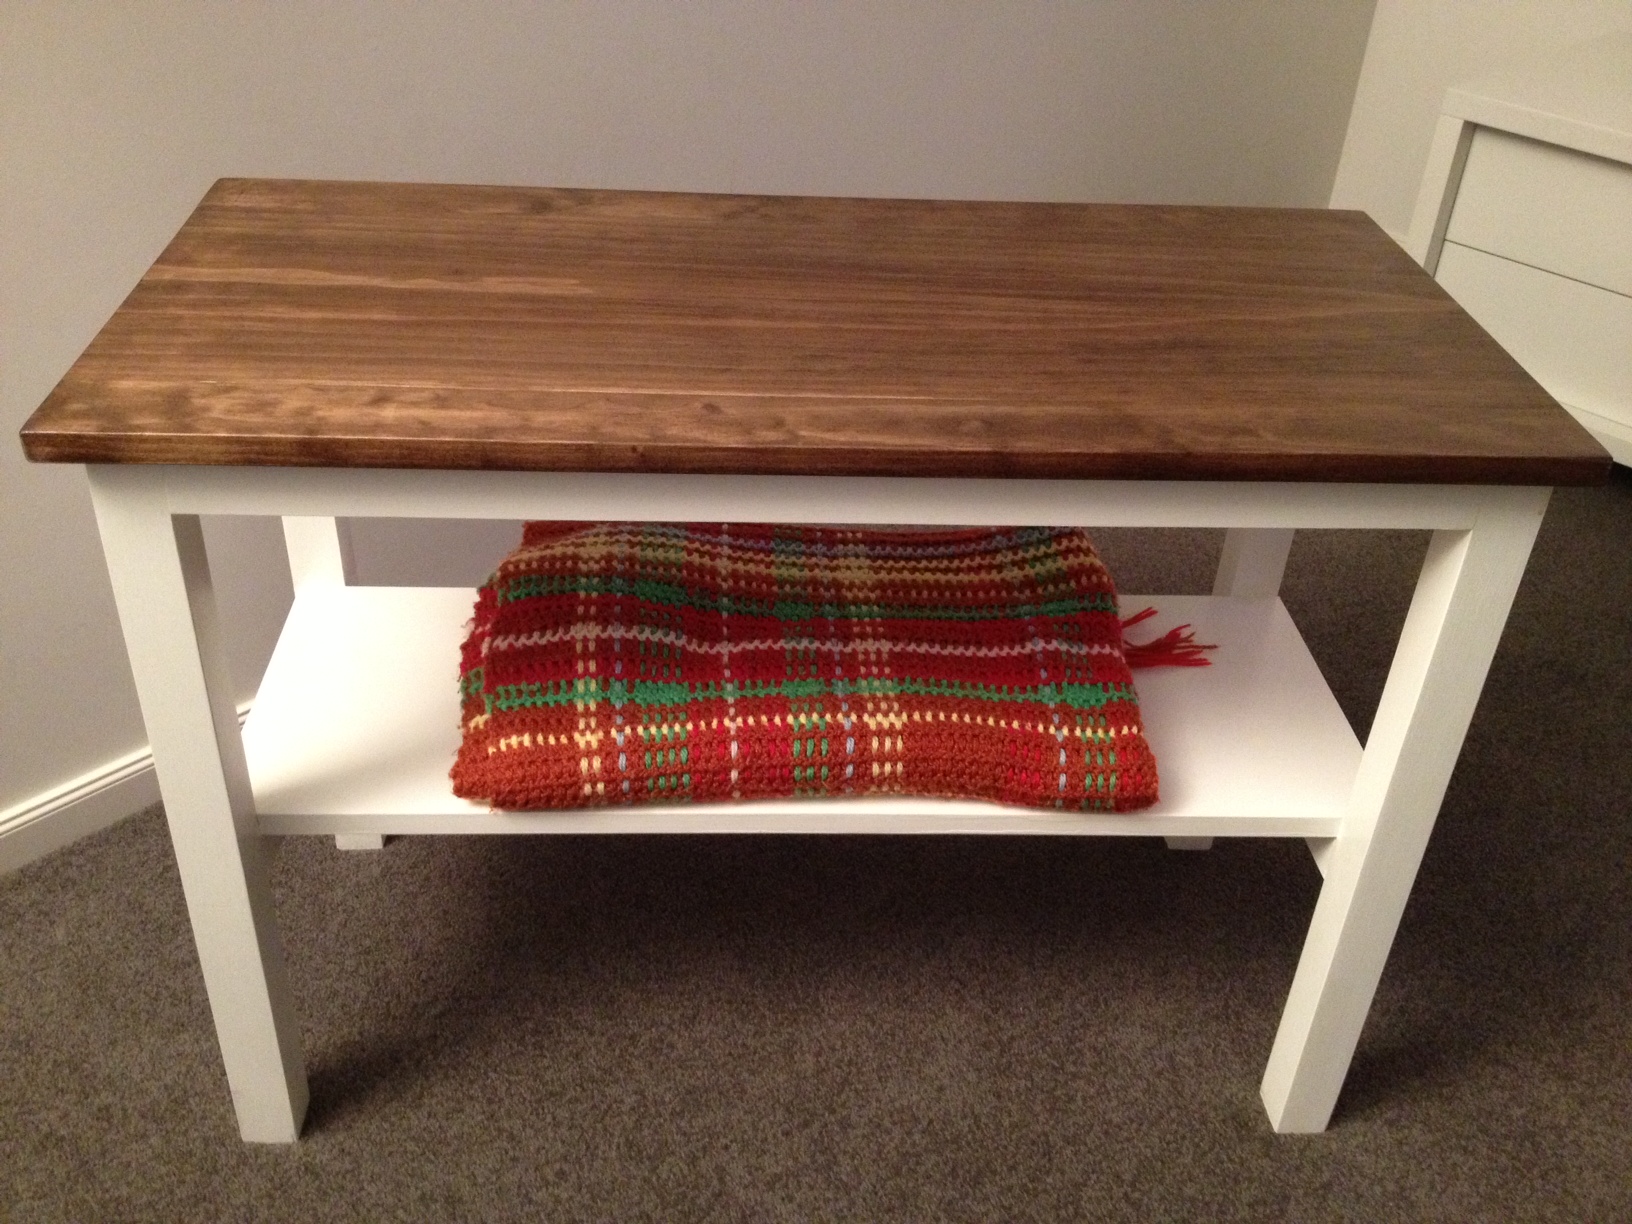
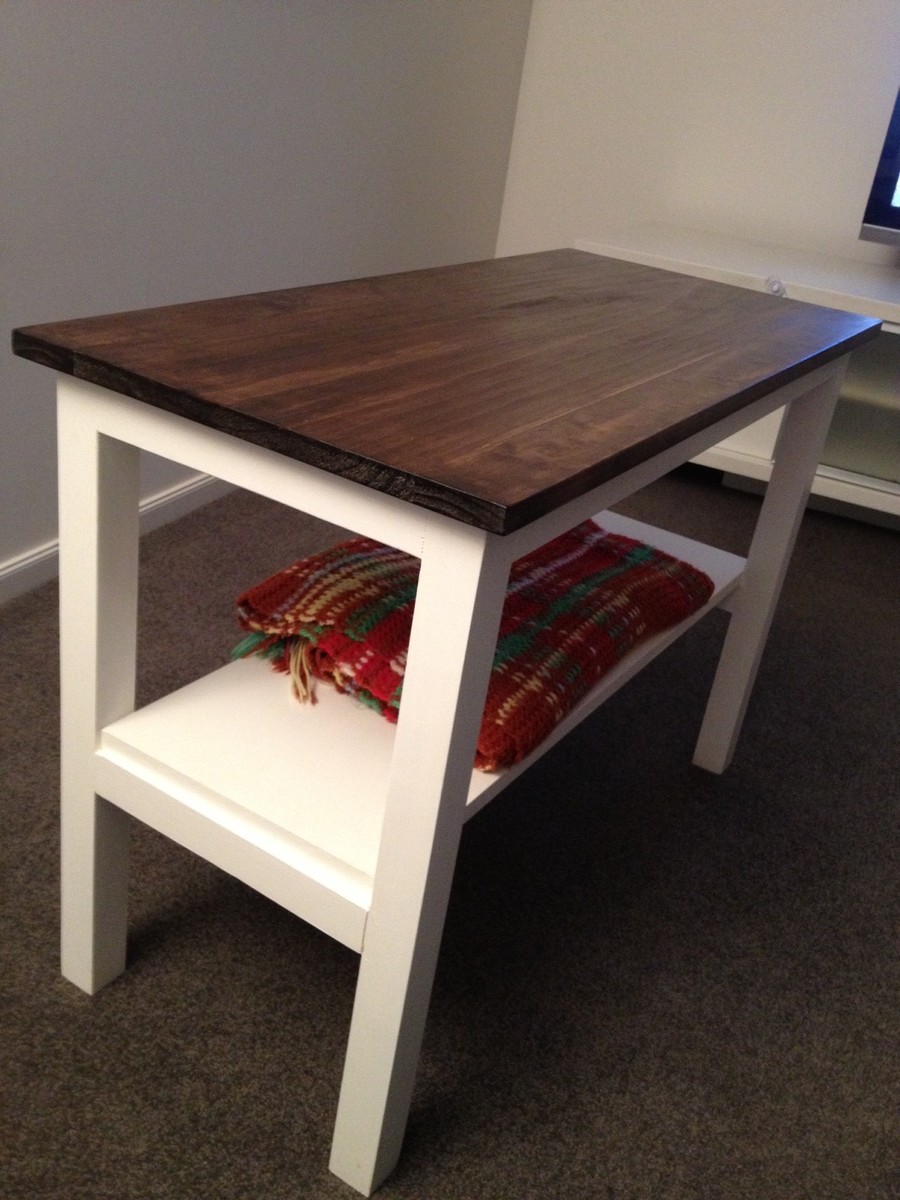
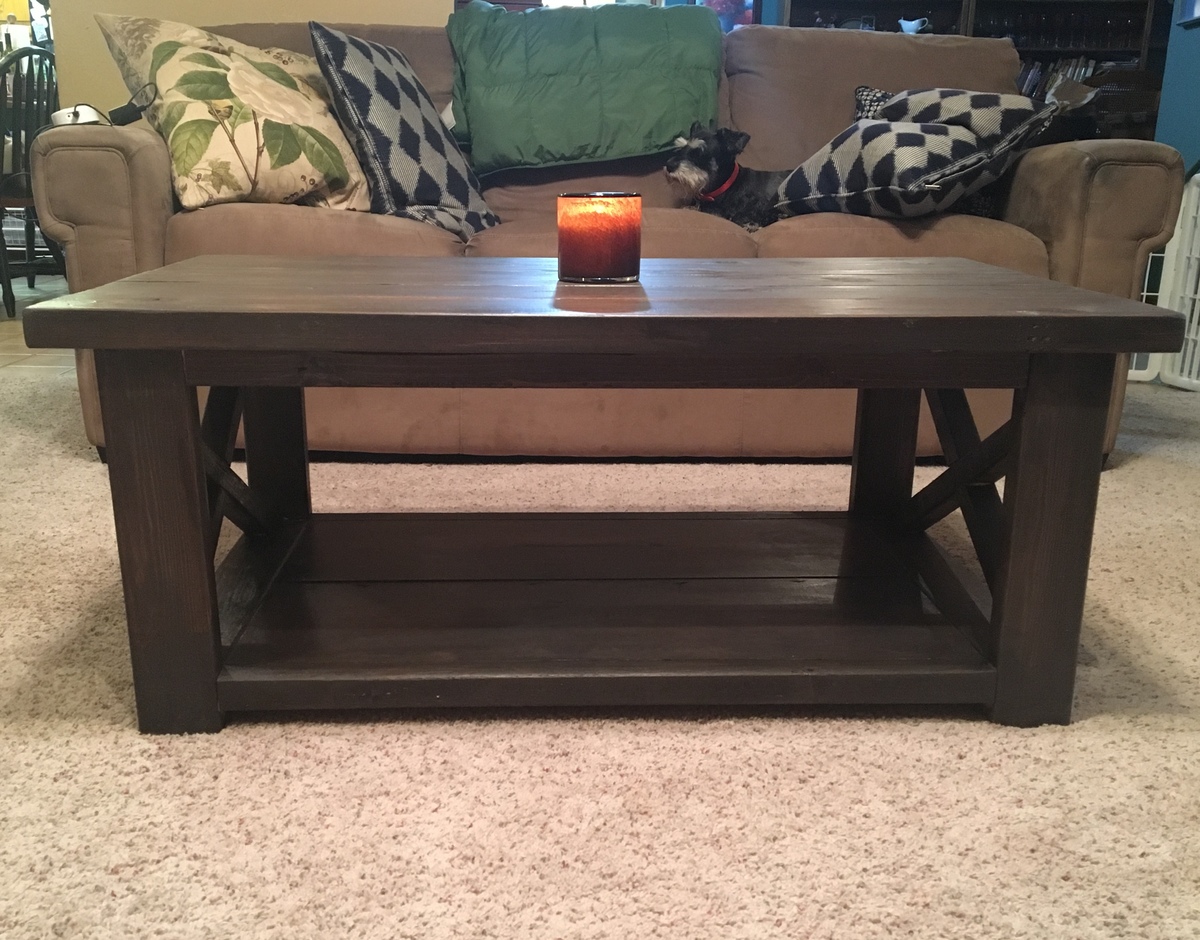
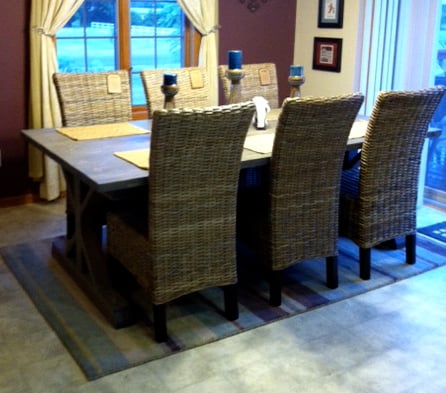
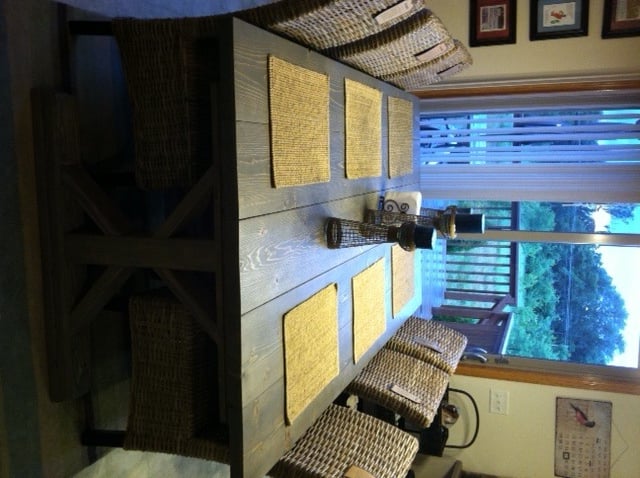
4x4 Table w/ "Restoration Hardware" Finish

Submitted by AndyAlva on Fri, 09/06/2019 - 12:57

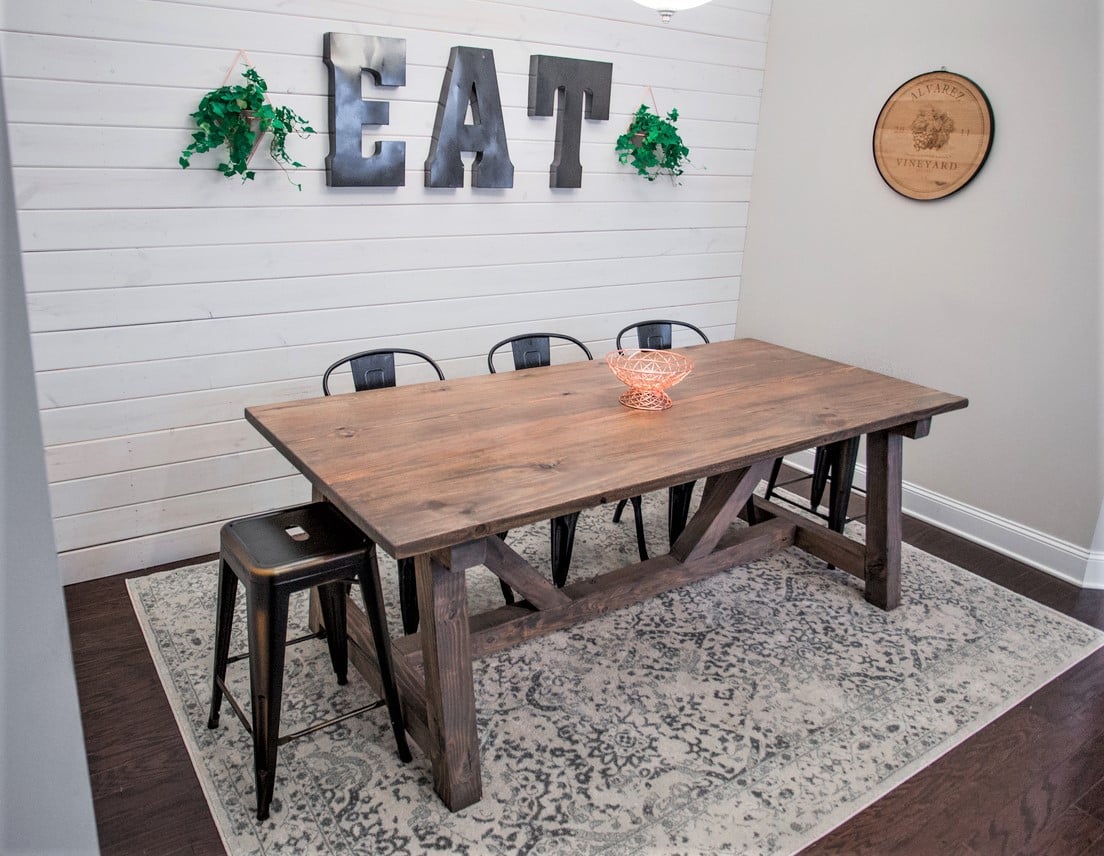
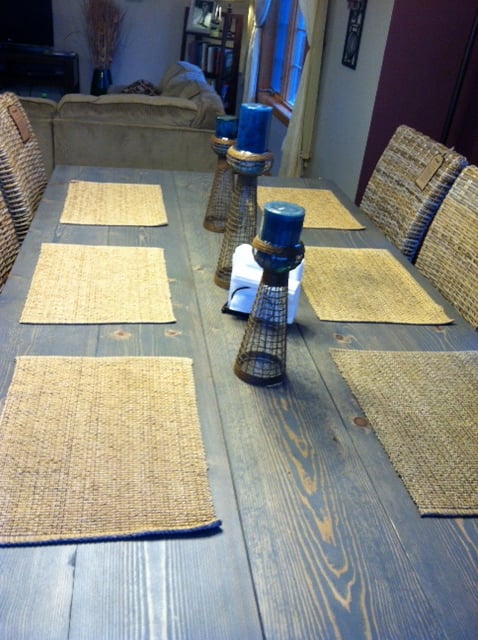
Loved how rad this table turned out. I wanted a mad beefcake table top -- so I chose 2x12s for a more industrial look. To get perfect seams and a completely flat surace for the table top, I planed each 2x12 multiple times, followed by many sessions in a jointer to get my edges to a beautiful 90 degrees. Once I had the top measured out to the length and width I wanted, I ripped the pieces down closer to a 2x10. Following that, I domino joined the pieces with a crap-ton of glue and clamped it for 2 days. To finish, I created an original 5-step stain process (including white wash) to get a weathered, Restoration Hardware-inspired final look. So stoked on it! (Wifey loves it too, so that's a huge win). 

-Andy 

Built from Plan(s)
Estimated Cost
$150
Estimated Time Investment
Week Long Project (20 Hours or More)
Finish Used
Minwax Stains Used:
- Jacobean
- Classic Grey
- Weathered Oak

Varathane Stain:
- Briarsmoke

White Wash -- 80% Walmart Matte White, 20% Water
Recommended Skill Level
Intermediate

Comments

Corner Cupboard

Submitted by tylerdr on Thu, 06/02/2011 - 00:10

This was my first project and it was perfect for our small kitchen.

Estimated Cost
$75
Estimated Time Investment
Weekend Project (10-20 Hours)
Finish Used
One coat of Chestnut stain applied with a rag.
Recommended Skill Level
Beginner

cooler for dads day

My dad made most everything I have ever had in life including the house I live in. So I wanted to make him something this dad's day that he could really use and enjoy. He just built a hang out place in his back yard that I call "his fort" Since he's in his 60's now and a little more mellow, he has a lot of little parties with friends, family, basically anyone who wants to come hang out in his back yard. lol. (He claims to have made the fort a covered stage for my 12 year old and his band. But I know the truth. hehe. it's his fort :) ) So I thought this cooler stand would come in handy. He saw me working on it a few days before fathers day and told me he was afraid I was gonna make his something girly. hehe. He's such a man's man. I love my pops and am soooo happy he likes my gift. Its already in use in the fort. hehe

Built from Plan(s)
Estimated Cost
about $80 for wood, stain, polyspray and hinges and handles. I had the cooler and faucet spout and plastic tubing and screws already
Estimated Time Investment
Afternoon Project (3-6 Hours)
Finish Used
Minwax "weathered oak" 3 coats on the pine 2 on cedar. Sprayed with Vurathane spray polyurathane in a spray can. I love it. The sheen is satin so you can hardly tell its there, no gloss at all.
Recommended Skill Level
Intermediate

Comments

sgilly

Sun, 07/21/2013 - 13:00

Turned out really nice! I'm sure he was very happy with your gift.
PS: I'd love to have a fort like your Dad's. What a cute little place to escape to!

In reply to by sgilly

Melodys socal …

Mon, 07/22/2013 - 20:43

Thank you Sue :) his fort is so awesome. both my sister and I have houses on my dads property. The picture of his fort is from my balcony and I can see my dad in his fort every day. It makes me so happy to see him over there just relaxing (with his cooler hehe) looking around the yard at the trees, creek and all of his hard life's work. Everyone needs a grown up fort in my opinion.

Adirondak Trio

Submitted by ricwit on Mon, 07/27/2015 - 10:09

New to building, but it went together fairly easily. I think next time I'll decrease the width of the foot stool, so I can just step over it and sit in the chair. Give it a try!

Estimated Time Investment
Afternoon Project (3-6 Hours)
Recommended Skill Level
Beginner

DIY Locker

Submitted by Cjmoore27 on Sat, 02/24/2018 - 07:57

Thank you so much for the well explained plans! We had HD do all our 1x12 cuts so it would fit in the car (they were happy to help). We ended up painting it in Polar Bear White Semi-Gloss, and It turned out great! 

Built from Plan(s)
Estimated Cost
$230 (had to buy the kreg jig and paint)
Estimated Time Investment
Weekend Project (10-20 Hours)
Finish Used
Polar Bear White Semi-Gloss Behr Premium Ultra Latex
Recommended Skill Level
Intermediate

Apothecary Media Console

Submitted by utmikeg on Sun, 06/05/2011 - 09:11

First Anna-White project...

Would recommend using ply instead of MDF due to the total weight of the unit. The higher cost comes from more expensive materials, but still much more affordable than Pottery Barn's Andover Media Console.

Built from Plan(s)
Estimated Cost
$300-$350
Estimated Time Investment
Week Long Project (20 Hours or More)
Finish Used
Paint
Bottom Coat: Light Sage (Valspar)
Top Coat: La Fonda Jalepeno (Valspar)
Weatherized Crackle Glaze (Valspar)

Stain:
Wood Conditioner (Minmax)
Natural (Minwax)
Oil-based Polyurethane
Recommended Skill Level
Advanced

Comments

SmilingMom

Fri, 09/09/2011 - 20:48

This is gorgeous! Great job!

Marisol, you need to post yours! They are all beautiful.

jtray41

Wed, 01/14/2015 - 23:02

Are your drawer fronts made from one solid piece of wood with a rabbet down the middle? If so, how did you do the doors?

Side Table

Submitted by NickZed on Tue, 07/23/2013 - 04:33

I spent a few hours on a Saturday cutting the wood for this project and drilling the holes and putting it all together. It's a very sturdy side table....

I made two small errors -
1) When I bought the 285mm * 17mm pine for the centre piece of the top I neglected to check whether the board was dead flat - it wasn't and was bowed slighty, however, after the top has been attached to the base it's not noticeable.
2) The other error was my shelf - it wasn't quite long enough....I think that I made this error because my legs may have had a slightly different size to the wood/lumber from the USA (where the plans are from).

All in all, I'm very happy with the table. It looks great and is super sturdy.

Built from Plan(s)
Estimated Time Investment
Afternoon Project (3-6 Hours)
Finish Used
Top finished with:
1) One coat of Minwax Pre-Stain Wood Conditioner - applied with a rag and left to dry for about an hour, then,
2) I applied Minwax Wood Finish Stain - Dark Walnut colour. I left the stain to soak for about 4-5 minutes and then wiped the excess off the table top.
3) Finally, three coats of Minwax Water Based Wipe on Poly - Clear Gloss. I sanded this gently with 240 grit sand paper between coats.

Base:
1) I primed the base with a Taubmans white primer, then
2) I applied three coats of a Dulux low sheen acrylic paint.
3) As per the table top, three coats of Minwax wipe on Poly were applied.

Note: I primed and painted the base of the side table and then conditioned and stained the top. After both of these were done I screwed the table top with 50mm 8G self tapping wood screws to the base. I then applied the three coats of wipe on Poly mentioned above.

The wipe on poly rocks!!! No smell what so ever....

The cutting, drilling of the pocket holes and putting the tab;le together was reasonably quick - 1 to 2 hours, however, it's the painting, sanding, staining and applying the poly that takes the bulk of the time with this project.

The table is 42inches long in Ana's plans - I shortened mine to 37 inches to suit my room better.
Recommended Skill Level
Beginner

Two tone planter

Submitted by Markb25 on Mon, 04/18/2022 - 11:49

Nice and simple planter, the frame uses 2x4 for the legs with 2x3 to frame the lower section internally, along with 1x2 to provide a base for plastic plant pot to sit on. The sides are use 1x4 attached internally with pockets screws and glue so there are no visable fixings ruining the look, additional strips of 1x2 are placed at the very top to give the rim a wider and more aesthetically pleasing finish. Finished in ebony and medium oak followed by three coats of Polyurethane and the addition of small plastic feet/sliders on each corner to prevent damage to the paint if slide along concrete floors.

Comments

Simple Kitchen Island

Submitted by mefisher on Wed, 06/08/2011 - 18:08

My first project! I modified the plan to make the island 2'x3' instead of 2'x4' and also added a second shelf. It was definitely a learning experience, but I'm happy with how it turned out!

Built from Plan(s)
Estimated Cost
$40
Estimated Time Investment
Day Project (6-9 Hours)
Finish Used
Minwax stain in mahogany for slats and white latex paint for everything else
Recommended Skill Level
Beginner

Comments

trukinranger

Fri, 07/08/2011 - 12:12

Seems like that's what I do.. browse plans and think of ways to make it my own... Keep up the good work!

Bathroom Organizer

Submitted by Jake on Thu, 07/25/2013 - 07:31

I think it is human nature that in the bathroom nothing is ever returned to its proper place in the cabinet or drawers. Everything has a place on the counter. Well it looks kind of messy so I decided to try to organize just a bit. I figured that if a person is OK with laying something on the counter they might actually put it in a designated slot if their arm movement was the same as before.

So I just came up with a simple box that is 22" long and 7" wide and it contains 12 cubby holes or slots of varing sizes. Two have holes in their tops to put toothbrushes and razors. By the way since I live in a 60+ year old home that has never been updated the original toothbrush holder will no longer hold modern toothbrushes.

The picture can give you some idea of how it is supposed to work.

I took 1x4s from the scrap pile and re-sawed them using a band saw to produce a number of fairly thin (about 5/16" ) thickness boards. Then through trial and error plus a lot of measuring of toiletry items I came up with the final product. The size of the box and the internal cubby holes and slots are really just a guess in hopes it is functional. It is held together with Tightbond II glue and some copper nails in strategic locations.

Estimated Cost
I just used what I had in the scrap pile so give the cost at $2
Estimated Time Investment
Afternoon Project (3-6 Hours)
Finish Used
Stain covered by antiquing oil.
Recommended Skill Level
Beginner

Outdoor Suite

Submitted by klB1953 on Wed, 08/05/2015 - 05:27

Outdoor Suite based on $40 backyard chair.

Finish Used
None yet but to be oiled after weathering in
Recommended Skill Level
Beginner

Wardrobe

Submitted by MERCMAN on Mon, 03/05/2018 - 08:44

Made from Mirroed Door Wardrobe Plans. Built from pine shelf boards at a cost of approx $7.00 per board. Light grey cabinet paint, primed with Bins primer as it also seals the knots. Used a kreg jig and glue to attach boards to each other to get then wide enough. No ply-wood was used. 

Estimated Time Investment
Week Long Project (20 Hours or More)
Finish Used
Bins Primer and Cabinet paint.
Recommended Skill Level
Intermediate

Craft Lair

Submitted by Anonymous (not verified) on Thu, 04/21/2022 - 13:51

I used the plans for barn door TV cabinet and adapted it to make a craft area cabinet in a small loft space.

Built from Plan(s)

Comments

Corner Desk

Submitted by bryantxst on Sun, 06/12/2011 - 08:15

a variation of the corner desk plans. for more pictures visit: http://www.facebook.com/media/set/?set=a.10100136762454037.2548324.2960…

Built from Plan(s)
Estimated Cost
150
Estimated Time Investment
Weekend Project (10-20 Hours)
Finish Used
mahogany stain with poly sealant coating
Recommended Skill Level
Beginner

Comments

Ryan (not verified)

Fri, 02/24/2012 - 22:02

Hey i love the elevated platform, can I get you to post dimensions & Cuts?

kuwaitrepair

Wed, 08/11/2021 - 04:20

Immersing yourself in your own area significantly improves productivity and motivates you when you decide and select best design of corner table admin should allow everyone to share their best comments for help to find best experenice
This is great topic

Classic Grey Fancy X Dining Room Table

Submitted by collins814 on Sat, 07/27/2013 - 19:56

I recently made the end table and console table from the "Rustic X" collection and those were my very first wood projects that I have EVER done. I think I am addicted now! I have had NO experience in working miter saws, kreg jigs and barely drills before this. If I can do it, anyone can do it :)

My husband and I made this table over a weekend and I am very excited about how it turned out. I was inspired by the color and size (and chairs!) of Sawgrasshomegirl "weathered grey fancy x farmhouse table with extensions" and I used the classic minwax stain. Thank you so much to Anna White and Sawgrasshomegirl for their plans, ideas, and inspiration!

Built from Plan(s)
Estimated Cost
$100
Estimated Time Investment
Weekend Project (10-20 Hours)
Finish Used
Minwax Pre-stain, Minwax Classic Grey and Minwax Polycrylic Protective Finish
Recommended Skill Level
Beginner

Comments

camkin02

Mon, 08/12/2013 - 20:40

Those chairs are beautiful(table also) where did you find them.

collins814

Tue, 08/13/2013 - 05:37

The chairs are from Pier 1 (Kubu hand-woven dining chair). They have a hint of grey in them too which I love!

Around the corner, outside

First of all, sorry for my english, i'm french and i don't speak english often in life, so i don't know now if i still speak and write it well enough to be understood.


We needed some space outside our appartment to room bootles.

When i found the plans on this website i decided to start this project.

It was the first time i used my device "undercaver jig" to assemble or link all the wood pieces together.

Once all the "wooden wall parts" made, i strated assembling the whole wooden furniture.

Then i painted them and once the paint was ok, i protected the wall furniture (painted parts and unpainted parts) whith an uncoloured protective product.

After that the inside was done to be able to store milk and water bottles.


The last part to be done was the upper part. I decided to make it in 4 indepedant concrete parts to be abble to replace it in case it breaks.

Estimated Cost
150 Euros
Estimated Time Investment
Week Long Project (20 Hours or More)
Recommended Skill Level
Intermediate

Japanese Inspired Black Walnut Stool

Submitted by Anonymous (not verified) on Fri, 04/22/2022 - 08:06

As my first piece of furniture, I made a Japanese design inspired dining stool. The motivation was requiring a few extra seats around the dining table when we exceeded the seating capacity of 6.

This stool is all black walnut. I started with a template for the curve, made from 1/2” mdf. This template was used to curve the legs (curves on both outer faces), the long and short stretchers, and also the bench style 18x12” seat. Joinery was done with mortises and floating tenons (dominos). The stool was finished with two coats of Odies Universal Oil. 

Console Table

Submitted by jrees09 on Wed, 06/15/2011 - 07:22

This was my first attempt at building anything. Ever. I am fairly pleased with how it turned out. There was a bit of uneveness on the back side of the table, where the top joined with the back and where the back joined one of the side pieces. They were hardly noticeable and I was able to sand it down. All joints on the front side of table were prefectly aligned, though. I don't know if the wood was uneven or if it was just an error that was likely due to my less-than-ideal work space. You can check out my blogspot for pictures of the completely finished project.

Estimated Cost
About $50, for a first time builder who needs basic supplies....
Finish Used
painted, distressed, then stained.
Recommended Skill Level
Starter Project

Comments