Superhero House

The free plans on this website are made possible with advertising and affiliate links.  Thank you for helping us keep plans free.


Difficulty
Beginner Projects
| Print this plan

Free plans to build a folding superhero house from ana-white.com
I hope you had a very wonderful Christmas this year! We've been taking a little down time for the past week, and I did not realize how much I needed it! With such a busy year, it's been nice to be part of family gatherings instead of hiding out in my office as I normally do working away. So a big thank you to you for giving me a chance to recharge and relax. It was much needed! 


We've been putzing around working on odds and ends up at the Momplex, and will resume regular Momplex posts in the New Year. We need to get the Momplex done .. new goal set is now Mother's Day 2013 - exactly two years after we started! Can we do it?????


And I know, I know we don't do enough "boy" projects. We are surrounded by beautiful girls. But thankfully, I have friends with boys! 


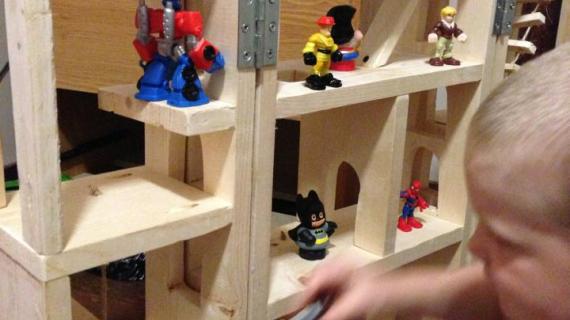
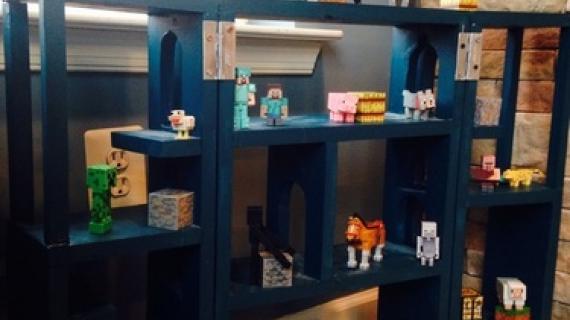
My dear friend Jaime from That's My Letter wrote me the week before Christmas with a brilliant idea. She wanted to build a Superhero House for her little one to play with. It needed a dungeon, doorways, and ledges for hiding, ladders for escaping. 


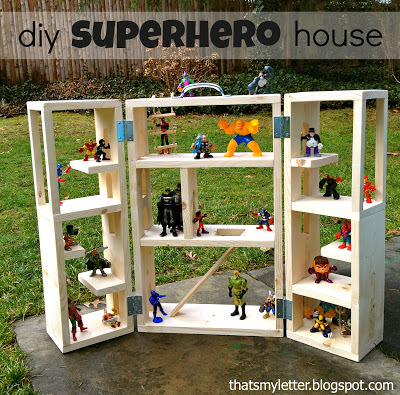
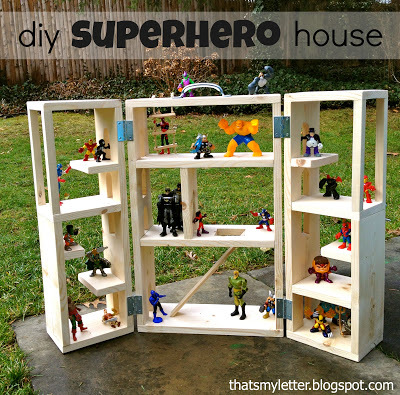
Well ... this is what we came up with!


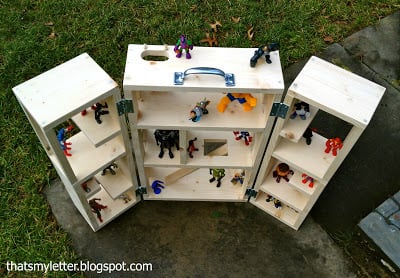
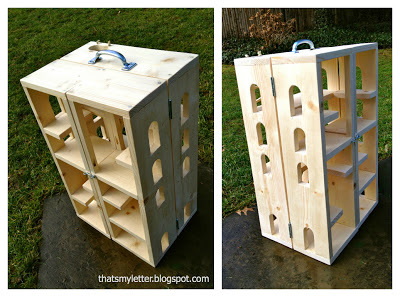
And of course, it folds for easy storage and added stability.


Jaime says it weighs about 17 pounds, so easy to put away too.


And of course there is a dungeon!


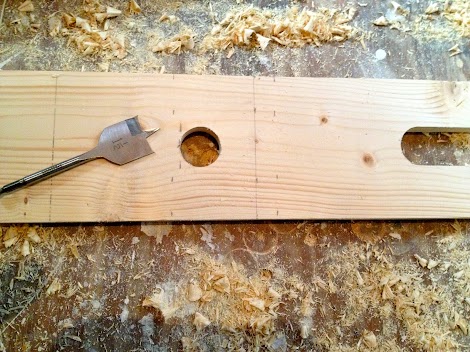
Building is going to be a piece of cake.  It's the doorway cutouts that might take some time.  But of course, Jaime is sharing with you all her tips and tricks and building process right here, so go check it out!


Thank you Jaime!


And of course, we've got you covered with plans too!

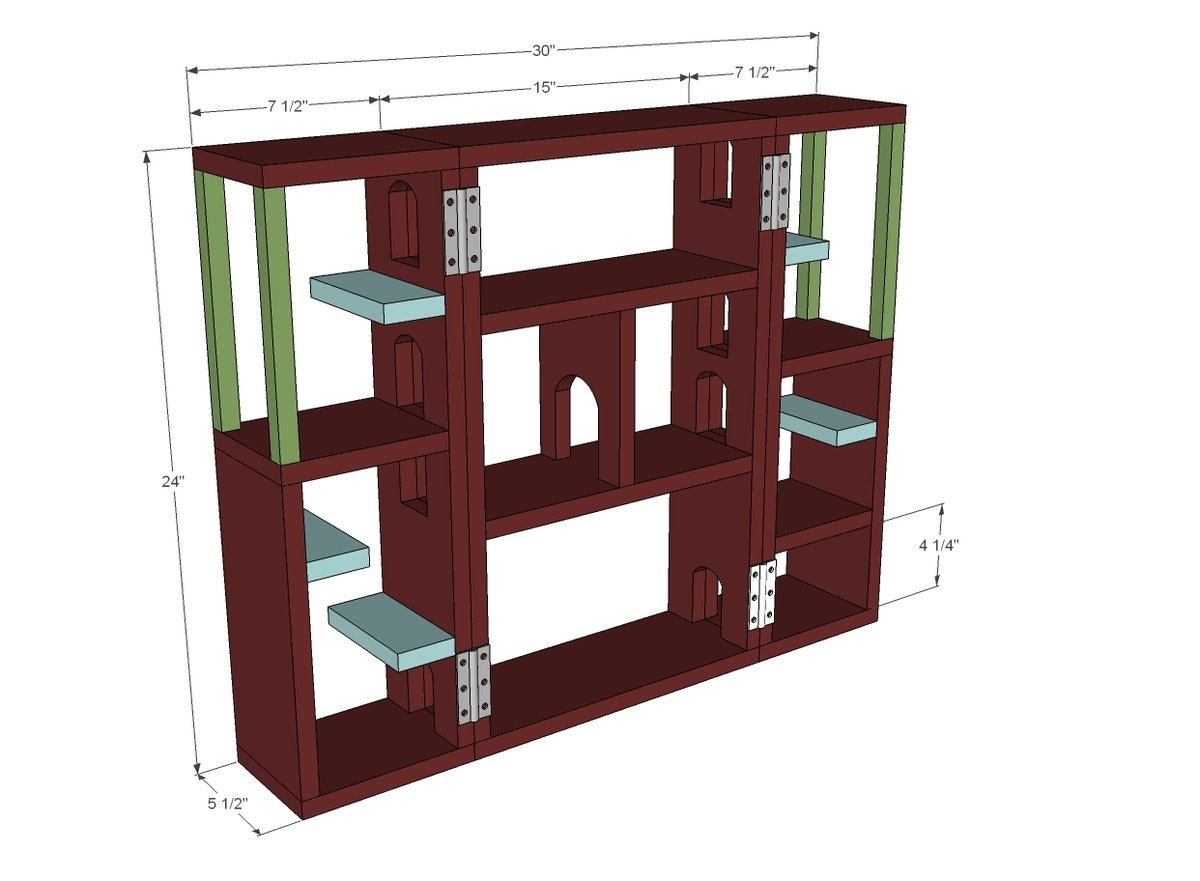
Dimensions
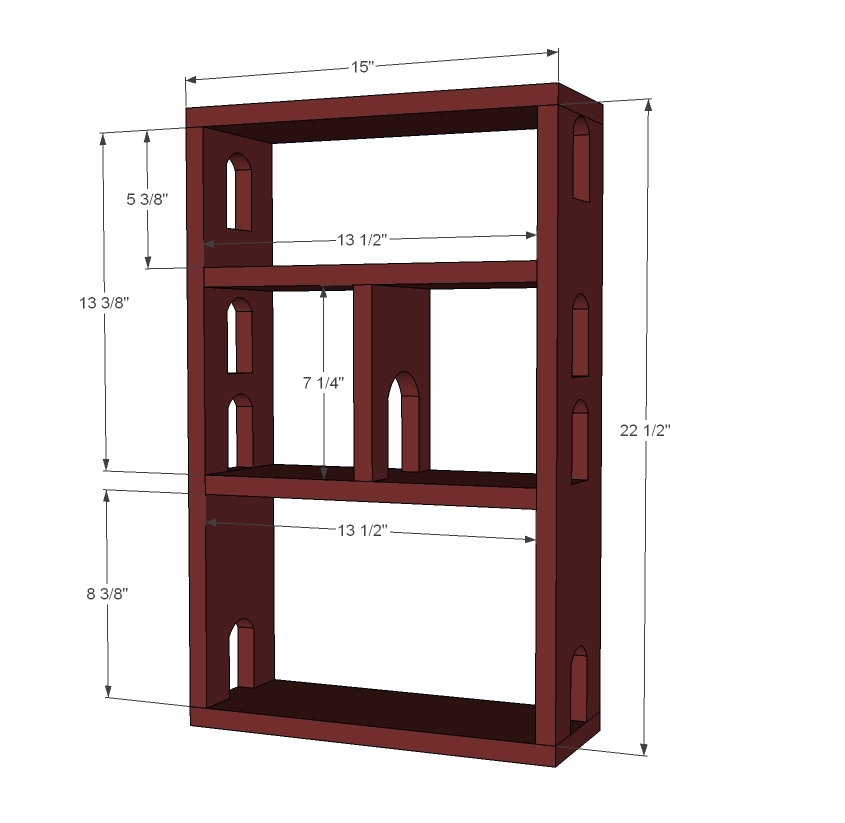
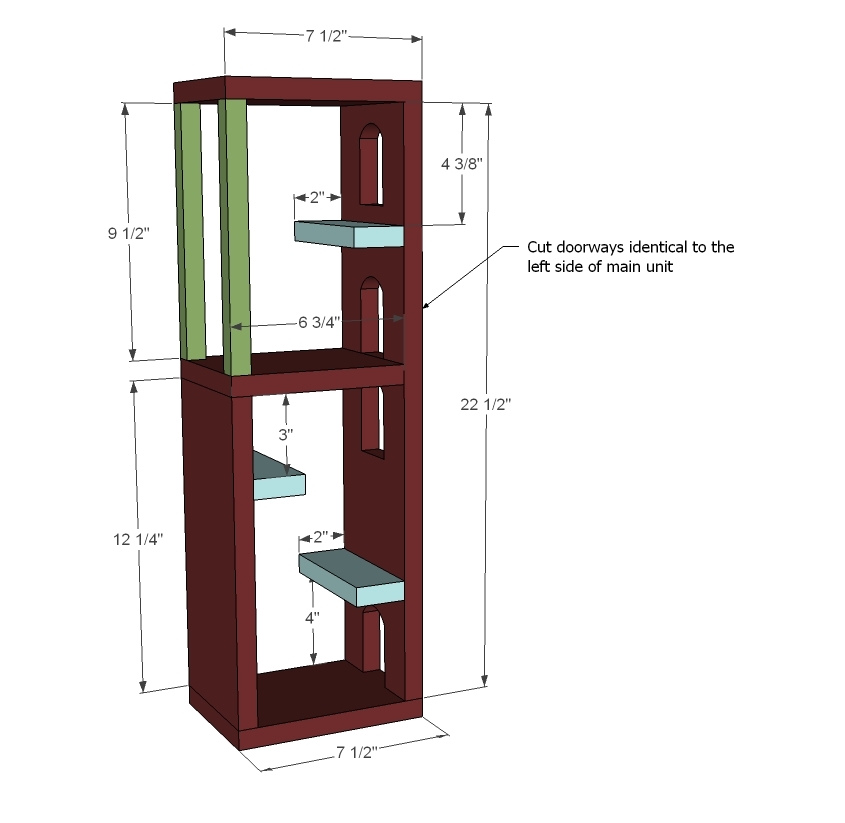
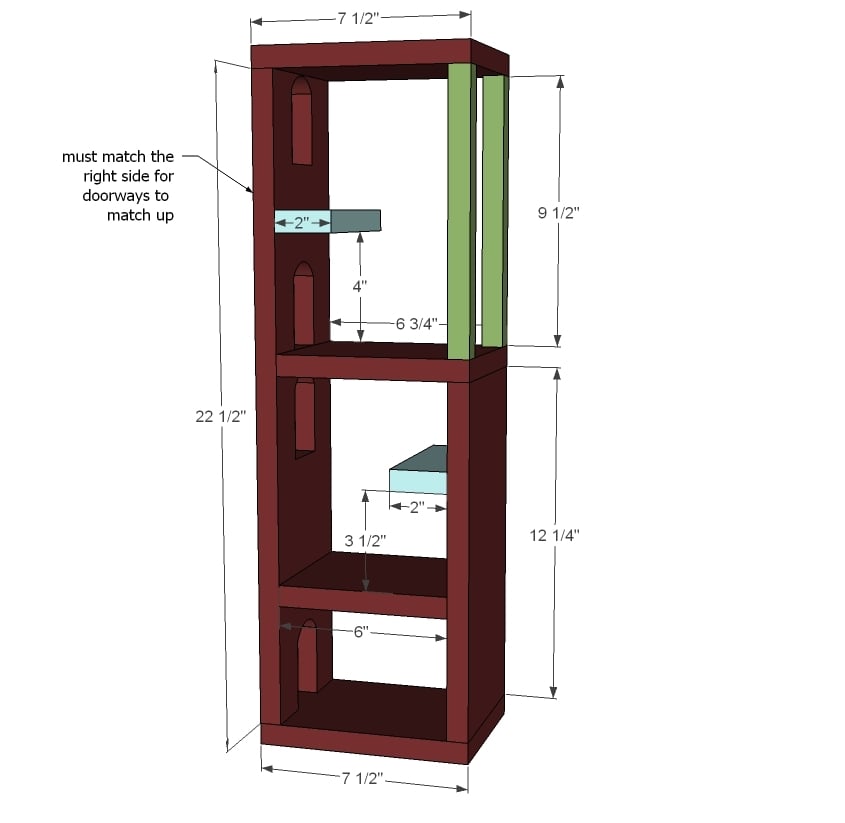
Dimensions shown above.

Preparation

Shopping List

3 - 1x6x8' 2 - 1x1x3' 2 sets hinges (the cheapo basic ones work perfect) 2 - hook and eye closures Handle Screws or pocket hole screws (1 1/4")

Cut List

CENTER 2 - 1x6 @ 15" 2 - 1x6 @ 13 1/2" 1 - 1x6 @ 7 1/4" 2 - 1x6 @ 22 1/2" SIDE (RIGHT) 2 - 1x6 @ 7 1/2" 1 - 1x6 @ 6 3/4" 1 - 1x6 @ 22 1/2" 1 - 1x6 @ 6" (full floors) 1 - 1x6 @ 12 1/4" 2 - 1x1 @ 9 1/2" 2 - 1x6 @ 2" SIDE (LEFT) 2 - 1x6 @ 7 1/2" 1 - 1x6 @ 6 3/4" 1 - 1x6 @ 22 1/2" 1 - 1x6 @ 12 1/4" 2 - 1x1 @ 9 1/2" 3 - 1x6 @ 2"

Tools
Tape Measure
Speed Square
Pencil
Safety Glasses
Hearing Protection
Drill
Circular Saw
Jigsaw
Power Sander
General Instructions

Please read through the entire plan and all comments before beginning this project. It is also advisable to review the Getting Started Section. Take all necessary precautions to build safely and smartly. Work on a clean level surface, free of imperfections or debris. Always use straight boards. Check for square after each step. Always predrill holes before attaching with screws. Use glue with finish nails for a stronger hold. Wipe excess glue off bare wood for stained projects, as dried glue will not take stain. Be safe, have fun, and ask for help if you need it. Good luck!

Instructions

Step 1

Start by cutting out all the doorways first, and sanding well. Then build the center with either 2" trim screws and glue or 1 1/4" pocket hole screws (pocket holes drilled on 3/4" setting).

Step 2

Match the left side of the center to the doorways on the left tower. Cut out and sand. Then build the left tower. If you don't have 1x1s you can use 1x2s or even dowels or pipe pieces.

Step 3

Then build the last tower as you did the left tower.

Step 4

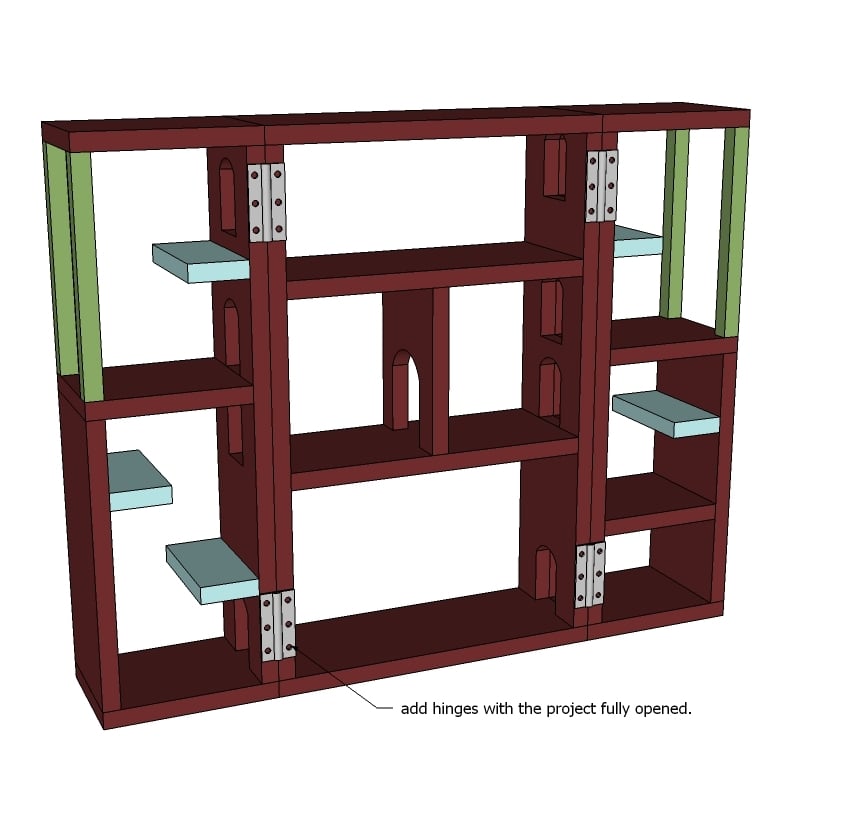
Hinge the three sections together. Add hook and eye closure to secure when closed. Add the handle to top. Bring on the superheros!

Finishing Instructions
Preparation Instructions
Fill all holes with wood filler and let dry. Apply additional coats of wood filler as needed. When wood filler is completely dry, sand the project in the direction of the wood grain with 120 grit sandpaper. Vacuum sanded project to remove sanding residue. Remove all sanding residue on work surfaces as well. Wipe project clean with damp cloth.

It is always recommended to apply a test coat on a hidden area or scrap piece to ensure color evenness and adhesion. Use primer or wood conditioner as needed.

Comments

dmcarwin

Fri, 12/28/2012 - 20:37

This is so great for my boys! They would seriously LOVE it, we have a whole bucket of guys that need a Superhero house! I especially love how it folds up. Thanks Ladies!

jennt6

Sat, 01/12/2013 - 06:29

Built it! My boys love it!!! It did take a while to get all those doors etc cut out but once the cuttings done it does go together quickly.

nexeustrio8

Tue, 05/21/2013 - 03:59

I love what you have created superhero gallery this is an amazing creation you have and thanks for posting this thing here this inspire me also to make my own super hero gallery. You may as well teach your kids to arrange this prototype. Good job...

------------------------------------------------------------- 

sims 3 seasons crack