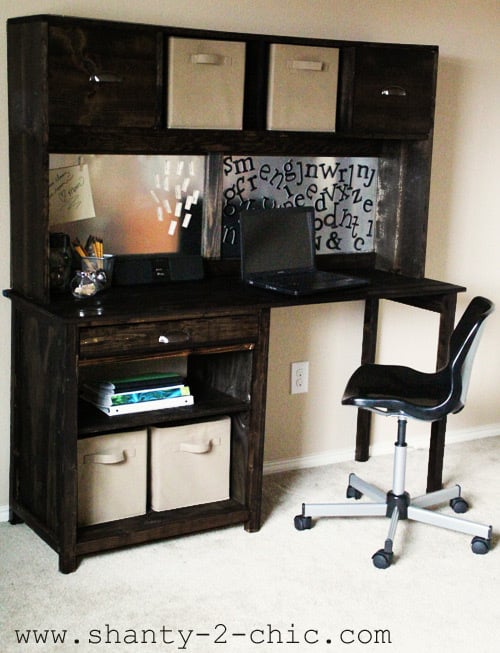


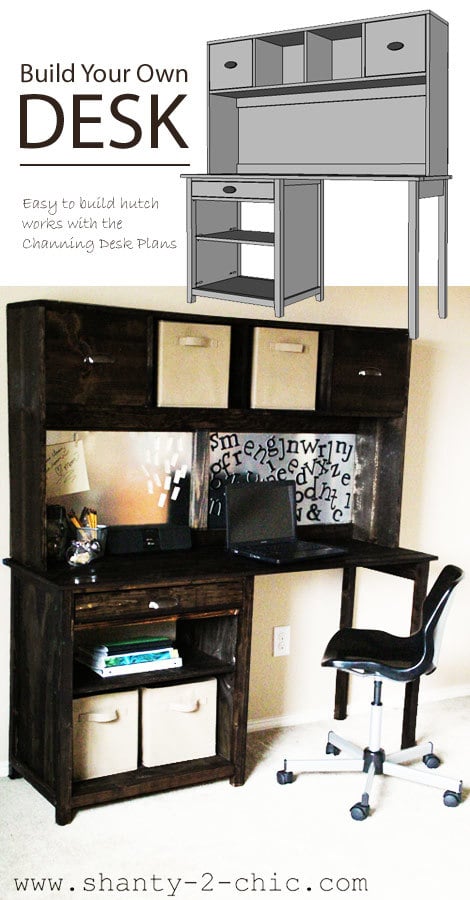
Free plans to build a desk hutch inspired by Pottery Barn Teen Chatham desk and hutch. Build your own with free step by step plans including shopping list and cut list.
Remember yesterday's plan for Ashley's beautiful wood Channing desk? [plans here]

Don't Forget!
Preparation
3 - 1x12 @ 8 feet long
3 - 1x3 @ 8 feet long
1 - sheet 1/4" plywood or backerboard
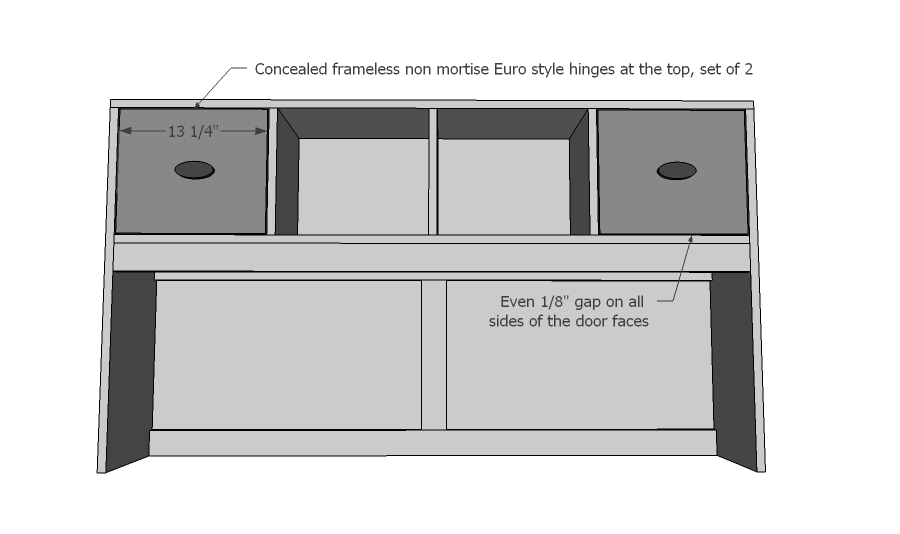
2 sets Euro Style hinges
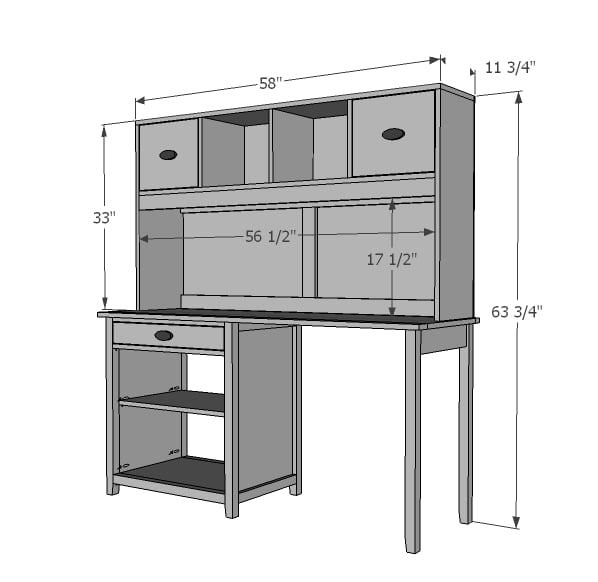
1 - 1x12 @ 58" (top)
2 - 1x12 @ 32 1/4" (sides)
1 - 1x12 @ 56 1/2" (bottom shelf)
2 - 1x12 @ 11 1/2" (CUT TO FIT - dividers)
3 - 1x3 @ 56 1/2"
1 - 1x3 @ 15"
1 - 1/4" plywood @ 58" x 33"
2 - 1x12 @ 13 1/4"


Please read through the entire plan and all comments before beginning this project. It is also advisable to review the Getting Started Section. Take all necessary precautions to build safely and smartly. Work on a clean level surface, free of imperfections or debris. Always use straight boards. Check for square after each step. Always predrill holes before attaching with screws. Use glue with finish nails for a stronger hold. Wipe excess glue off bare wood for stained projects, as dried glue will not take stain. Be safe, have fun, and ask for help if you need it. Good luck!
Instructions
Step 1
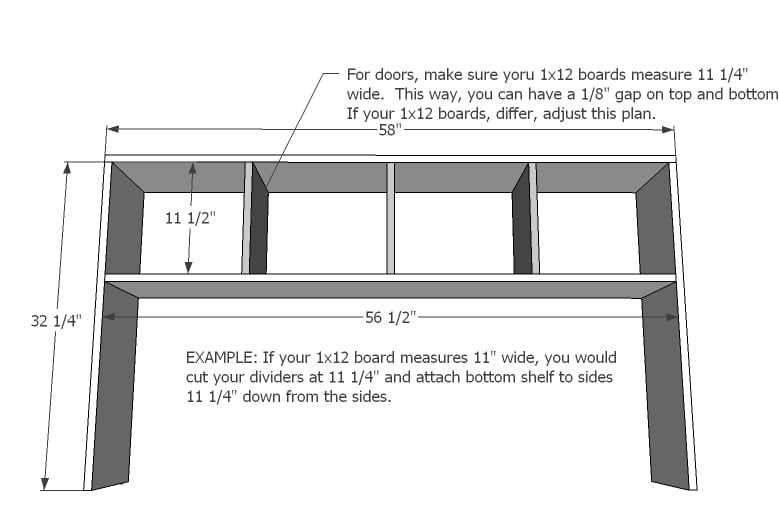
Build the box. Note that if your 1x12s are NOT 11 1/4" wide, you will need to make adjustments as noted in the plan. You can build with 2" countersunk screws or 1 1/4" pocket hole screws but I don't recommend nails because there is no face frame on this one. Check for square.
Step 2
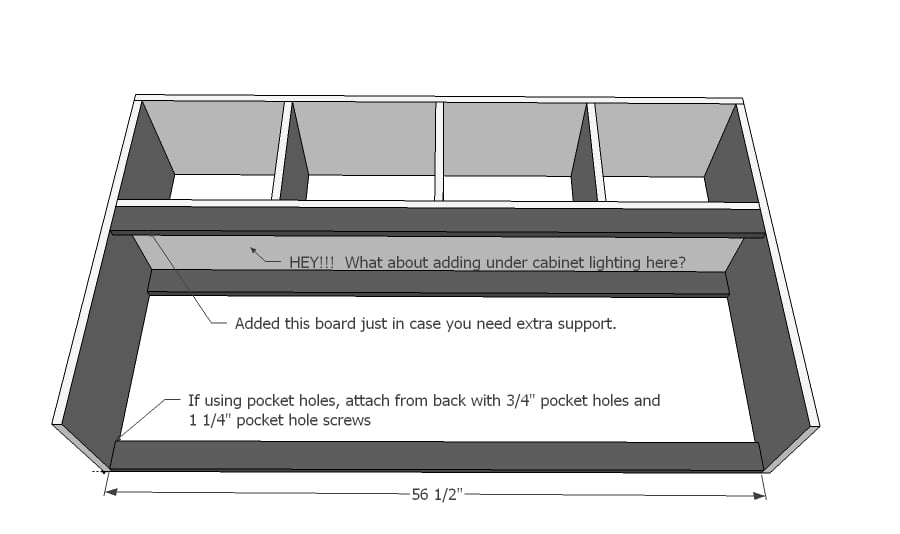
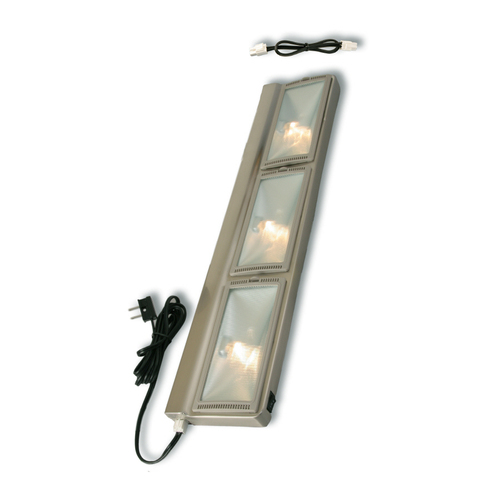
Supports - I added the front one just in case you need extra support. It's also a great spot to hide under cabinet lighting!
Step 3
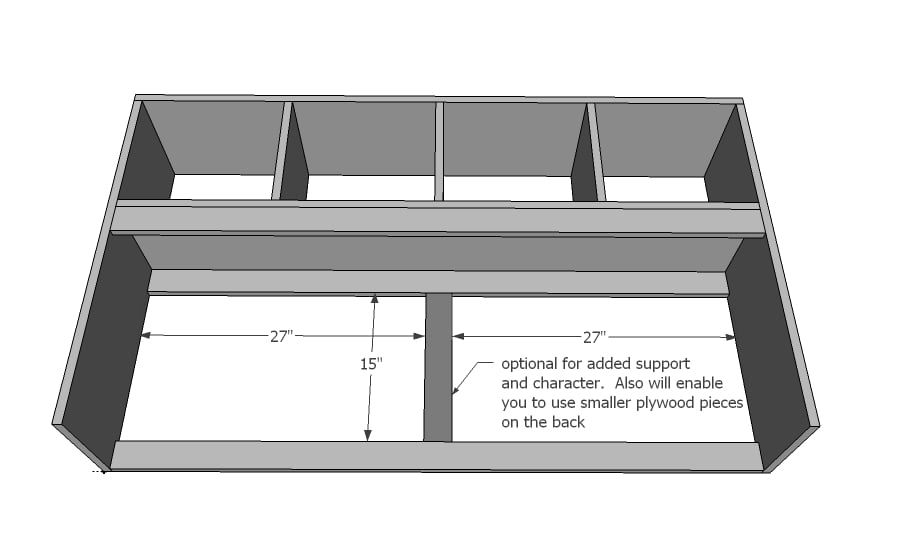
This is optional, but will add some extra support to the center and looks charming.
Step 4
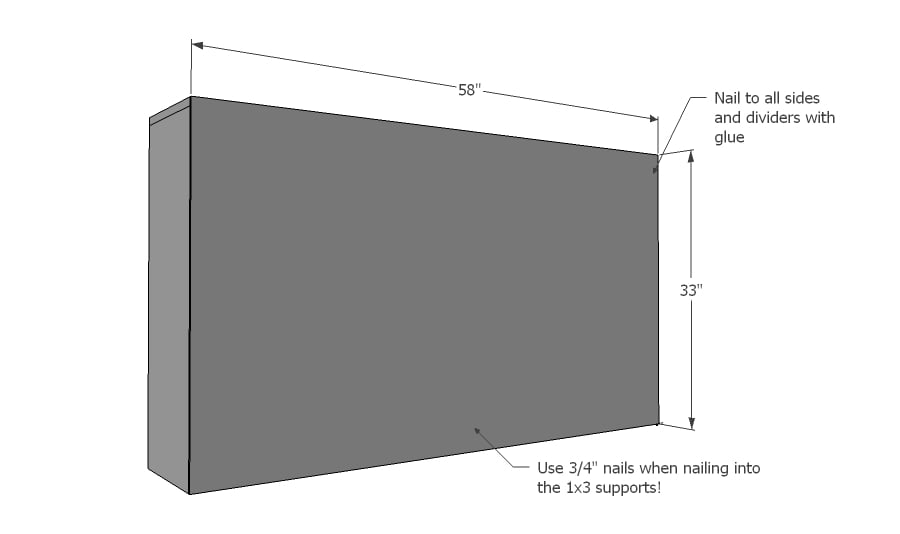
Attach back - be careful - you will need to use 3/4" nails when attaching to the 1x3 support boards.
Step 5
It is always recommended to apply a test coat on a hidden area or scrap piece to ensure color evenness and adhesion. Use primer or wood conditioner as needed.

Comments
dananryan
Fri, 01/13/2012 - 18:26
Love it!
What a clever and creative addition to the back. All we need now is the file cabinet to make the set complete...pretty please....
Guest (not verified)
Thu, 03/08/2012 - 05:09
PDF link not working!
I am so excited to finally have these desk plans posted, but the pdf link isn't working! Help!
AlLewis
Sat, 05/02/2020 - 04:31
Hinges
Hi I was just wondering exactly which hinges you used for the doors?
Thanks
Al