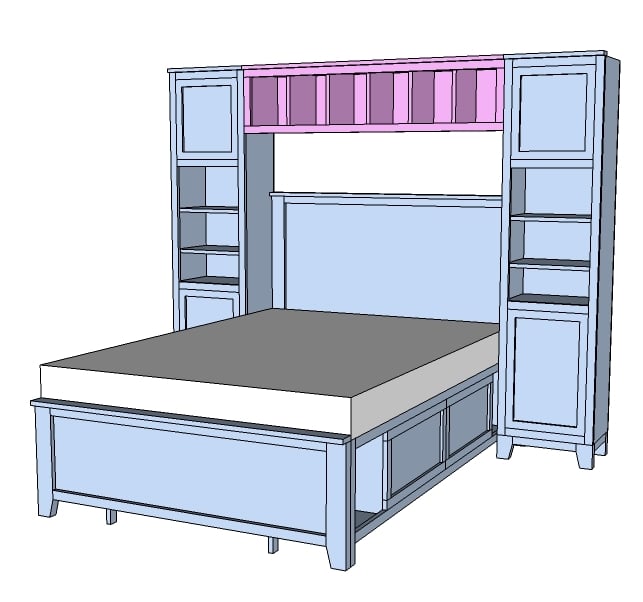


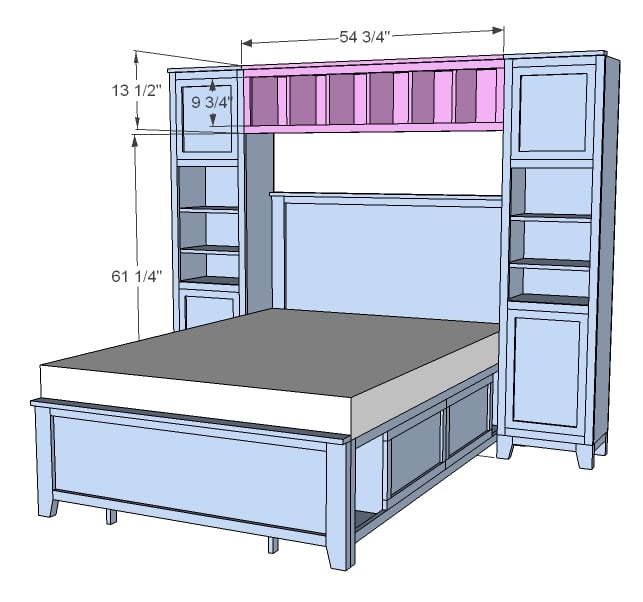
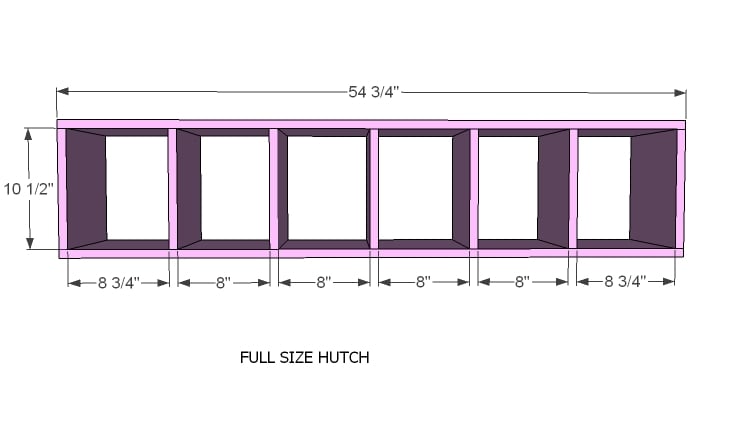
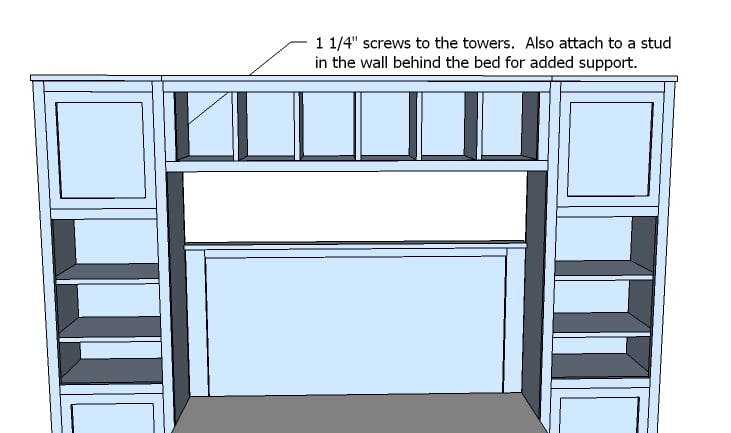
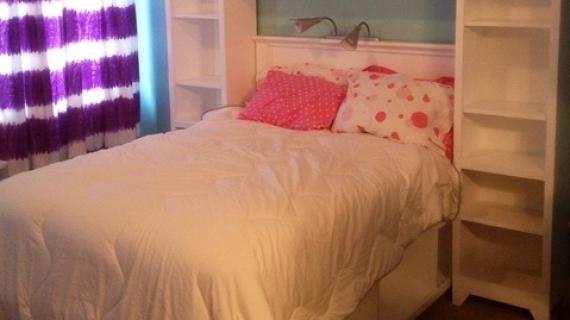
The hutch for the Hailey Storage Bed Collection. Plans show both full and twin sizes. Please note that this hutch is designed for a very tight fit around the bed, and you should measure your headboard and bed width before building to ensure enough space around the bed.
We couldn't be more pleased with Grace's Hailey Bed

Preparation
2 - 1x12 @ 8 feet long
Full Size Cut List


Please read through the entire plan and all comments before beginning this project. It is also advisable to review the Getting Started Section. Take all necessary precautions to build safely and smartly. Work on a clean level surface, free of imperfections or debris. Always use straight boards. Check for square after each step. Always predrill holes before attaching with screws. Use glue with finish nails for a stronger hold. Wipe excess glue off bare wood for stained projects, as dried glue will not take stain. Be safe, have fun, and ask for help if you need it. Good luck!
Instructions
Step 1
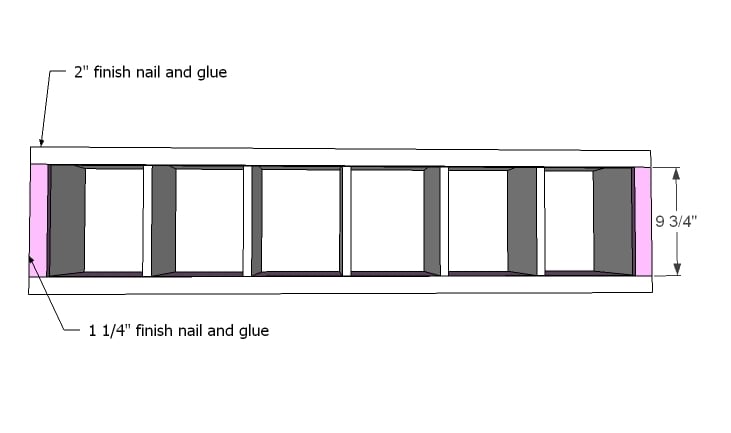
As with most storage, start by building a simple box. As this is fully framed with plywood on the back, if you have a nailer handy, go ahead and nail this one (with glue of course and 2" finish nails). You can also use screws. Adjust for square.
Step 2

Now add the plywood back with 1 1/4" finish nails and glue.
Step 3
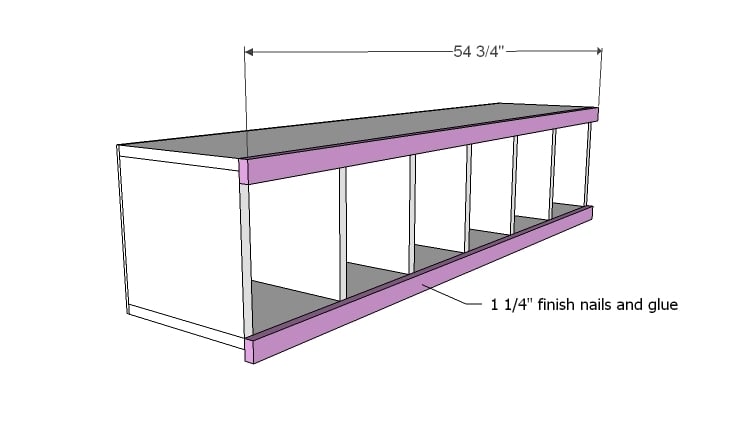
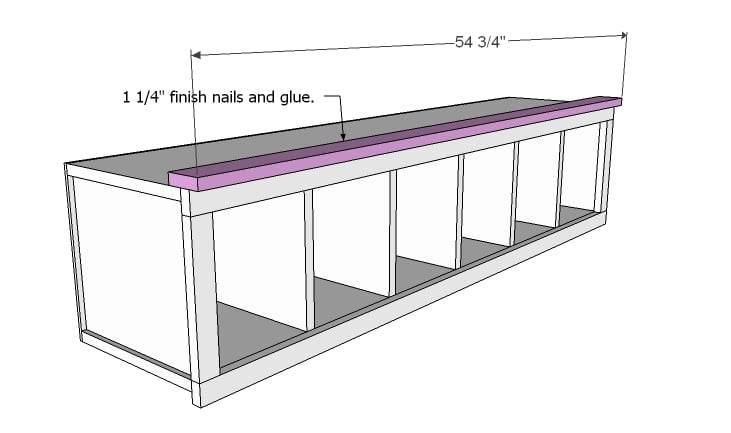
Trim the front out as shown above with 1 1/4" finish nails and glue.
Step 4
And now the sides.
Step 5
Step 6
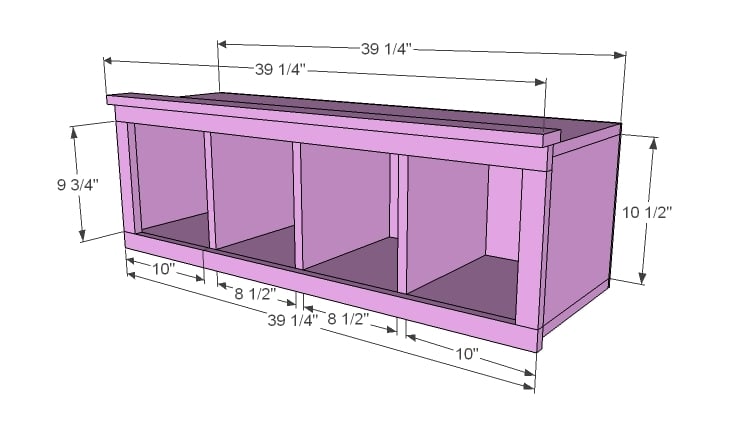
If you are building a twin size, here are the dimensions. Make sure you measure your bed - as this is a very tight fit.
Step 7
It is always recommended to apply a test coat on a hidden area or scrap piece to ensure color evenness and adhesion. Use primer or wood conditioner as needed.

Comments
Stefanie Gott-… (not verified)
Fri, 04/15/2011 - 13:44
hailey hutch/ bed
This is just screaming for a murphy bed version! :)
prcutie71
Fri, 04/15/2011 - 14:17
I AGREE!!! :o)
I AGREE!!! :o)
kasey (not verified)
Sun, 05/01/2011 - 15:07
how much is the haily hutch
how much is the haily hutch for a twin bed :) thanks
,write back
Daniel Cook
Wed, 02/15/2012 - 18:53
Sketch Up Model
Is there any whay that I would be able to get a copy of your Twin bed Sketchup Model? It would be greatly appreciated. Thank you.
James Sampson (not verified)
Sun, 01/06/2013 - 13:49
I would like the plans for the hutch and Towers
Hi there do you have the plans for the hutch and Towers I would love to make both. thank you
Brandeyg
Fri, 02/08/2013 - 20:43
Towers
I would love the plans for the towers:) Please this is awesome!!
Shelbert123
Thu, 09/04/2014 - 19:53
Queen size
Is there a way I could get these plans in a queen size? Also, can I get the plans for the towers as well? Or possibly the whole bed?
itybty1313
Thu, 04/23/2015 - 00:54
larger plans
do you have plans to fit around a king size bed?
mlambert527
Wed, 07/08/2015 - 06:48
Hailey Hutch
I'd love to see plans for this for a queen size bed. I have need for LOTS of storage in my new smaller home. Is there any special considerations I would need to take into account other than just scaling it up? (Like extra support for larger mattress)?
jgiannandrea
Thu, 11/03/2016 - 14:53
Can I get the plans for the
Can I get the plans for the bed and towers some place?
In reply to Can I get the plans for the by jgiannandrea
Ana White
Thu, 11/03/2016 - 19:00
http://www.ana-white.com/2011
http://www.ana-white.com/2011/04/plans/hailey-storage-bed-twin
http://www.ana-white.com/2011/04/hailey-towers-storage-bed-system