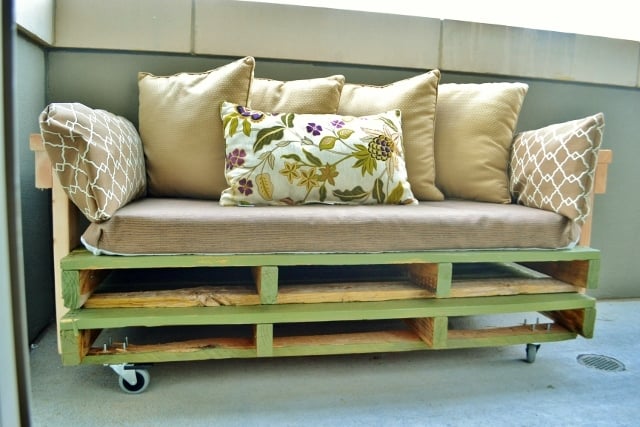
Build your own pallet sofa! Free step by step tutorial from Ana-White.com
Preparation
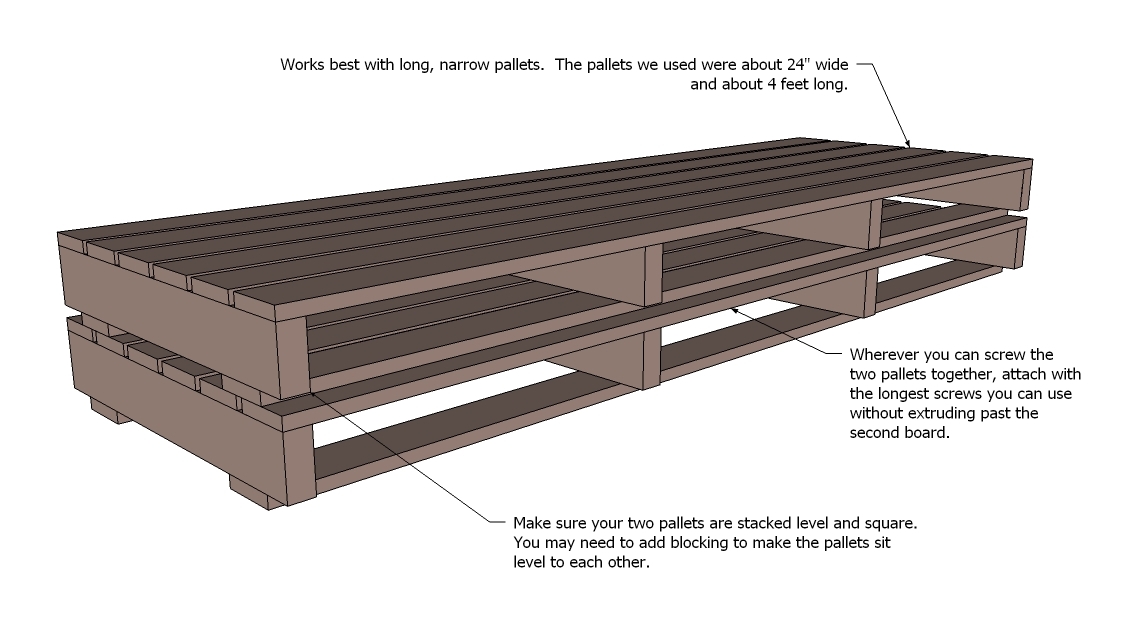
2 Pallets - the long narrow pallets work best. Tacoma's pallets were 24" wide x 48" long
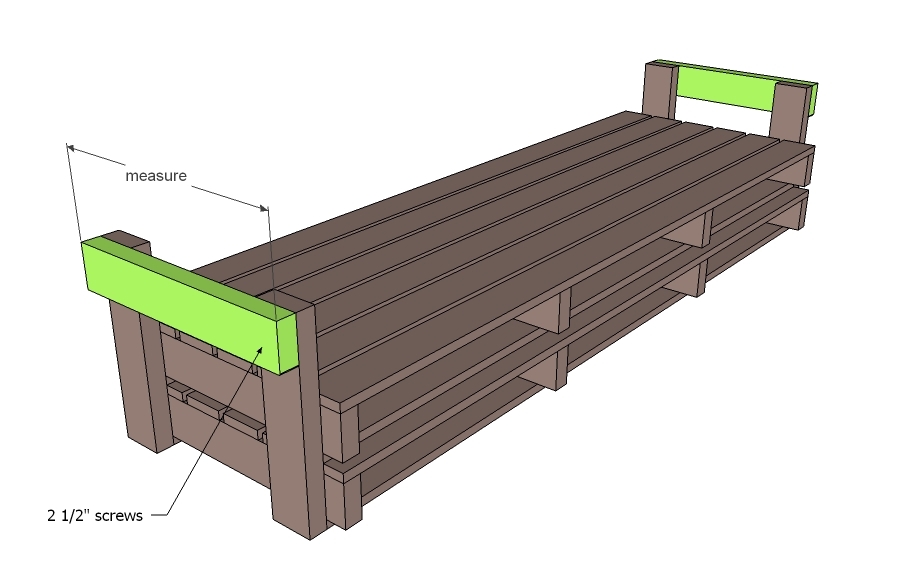
2 1/2" exterior self tapping trim screws
wood glue
caster wheels
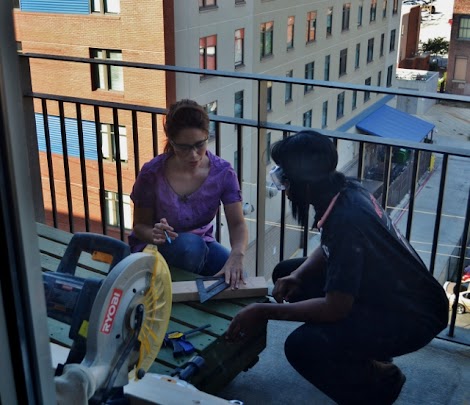
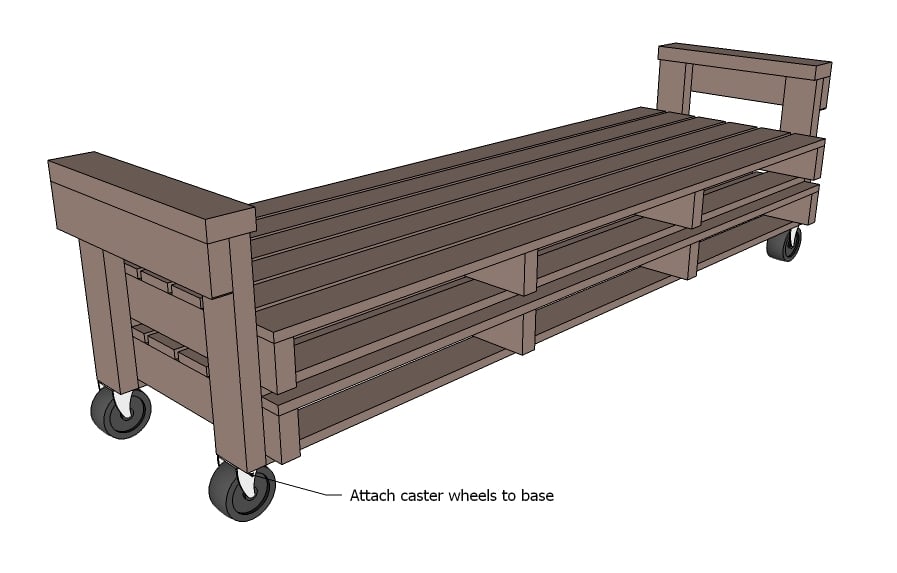
For Tacoma's pallet sofa, we cut 4 - 2x4 @ 20" long PER ARM. You can make your arms any height/width that works for you.
Please read through the entire plan and all comments before beginning this project. It is also advisable to review the Getting Started Section. Take all necessary precautions to build safely and smartly. Work on a clean level surface, free of imperfections or debris. Always use straight boards. Check for square after each step. Always predrill holes before attaching with screws. Use glue with finish nails for a stronger hold. Wipe excess glue off bare wood for stained projects, as dried glue will not take stain. Be safe, have fun, and ask for help if you need it. Good luck!
Instructions
Step 1
Step 2
There's two ways you could do this - you could build the arms in place, or build the arms first, and then attach. Because we wanted to test the arm height, we decided to build the arms in place. 4 screws per pallet per arm really tightened things up and secured the two pallets. You can also glue the two pallets together, or screw to make sure they don't go anywhere.
Definitely make things easy on yourself and predrill holes and use a countersink bit.
Step 3
It is always recommended to apply a test coat on a hidden area or scrap piece to ensure color evenness and adhesion. Use primer or wood conditioner as needed.






Comments
dmcarwin
Thu, 10/11/2012 - 10:57
Super fun!
This is great! I am wishing that you would be at my Home Depot in Colorado! Looks like fun!
terrillr (not verified)
Thu, 10/11/2012 - 12:37
Next time, add Ft. Worth TX
to your schedule!
I got my book today, WOOT WOOT!! I can't wait to see what I need to build. :D
mandy seaman (not verified)
Thu, 10/11/2012 - 13:49
It was so great to meet you
It was so great to meet you at the book signing yesterday! I look forward to building my next project from your book! :)
Thanks!!!
tracysmith
Thu, 10/11/2012 - 21:42
My book arrived!!!
I was soooo happy today - I got some Kreg products and your book all in the same day! It was like Christmas!!! I really wish I could go to Seattle (my nearest location) to see you...without this sounding too creepy, it would literaly make a dream come true to meet Ms Ana White! Maybe some day. Congrats again on the book and the book tour! So very excited for you!
Shawn B! (not verified)
Fri, 10/12/2012 - 05:09
Love your site, and all your plans
Jen sent me over from Tatertots & Jello - we've made 6 of your plans, and have been very pleased with all of them! Keep up the great work - can't wait to get my book!!!!
Toni (not verified)
Fri, 10/12/2012 - 06:29
My copy of your book arrived
My copy of your book arrived yesterday and made my trying day oh so much better. I LOVE it! I wish you were doing a signing in California.
Kat F (not verified)
Fri, 10/12/2012 - 06:34
You are so amazing Anna
You are so amazing Anna White! I hope your book tour is going splendid!!
Kim Olea (not verified)
Fri, 10/12/2012 - 07:06
How fun! I am excited that
How fun! I am excited that you will be in Salt Lake on Monday!
Bree (not verified)
Fri, 10/12/2012 - 08:03
This is so cute. Cant wait
This is so cute. Cant wait to see your book.
Lindsay @Artsy… (not verified)
Fri, 10/12/2012 - 10:21
Love!!
Absolutely love your projects! Can't wait to get one of your books :)
Yaren Agustin
Fri, 10/12/2012 - 10:44
I was looking for your book...
... in the Philippines! 'Coz that's where I'm at! The local bookstore said that they can order one for me. I love your projects! I've been telling all my friends about you!
Deej (not verified)
Fri, 10/12/2012 - 11:26
I am getting ready to move
I am getting ready to move into a new house and this would be perfect in the basement for the teenagers! Thanks for all your wonderful patterns.
Janet @ I HEAR… (not verified)
Fri, 10/12/2012 - 11:29
This looks AMAZING!
This looks AMAZING!
Tammi D (not verified)
Mon, 10/15/2012 - 07:21
Congrats on your book!
Congrats on your book!
Breanne (not verified)
Tue, 10/16/2012 - 08:37
Thank you so much for your
Thank you so much for your site! I have followed since knock off wood started but have never left a comment :) I have had a love for building ever since I was able to get enough courage to build my first project. My husband and I have done a few small projects together and we love it for a date night. A month ago I lost my baby girl due to a birth defect and I built a few projects while I was pregnant with her. I will always have something fun that we built "together". Thanks for giving me that gift. Wish I could have been in SL last night!!! Hope you had a great turnout.
Sylvia (not verified)
Wed, 10/17/2012 - 21:47
This is such a great project,
This is such a great project, I was just writing in my blog about doing stuff like this in your spare time! People dont dont realize the amazing things they can do in a few hours and with very inexpensive materials!
Sylvia from
http://killing7ime.blogspot.com/