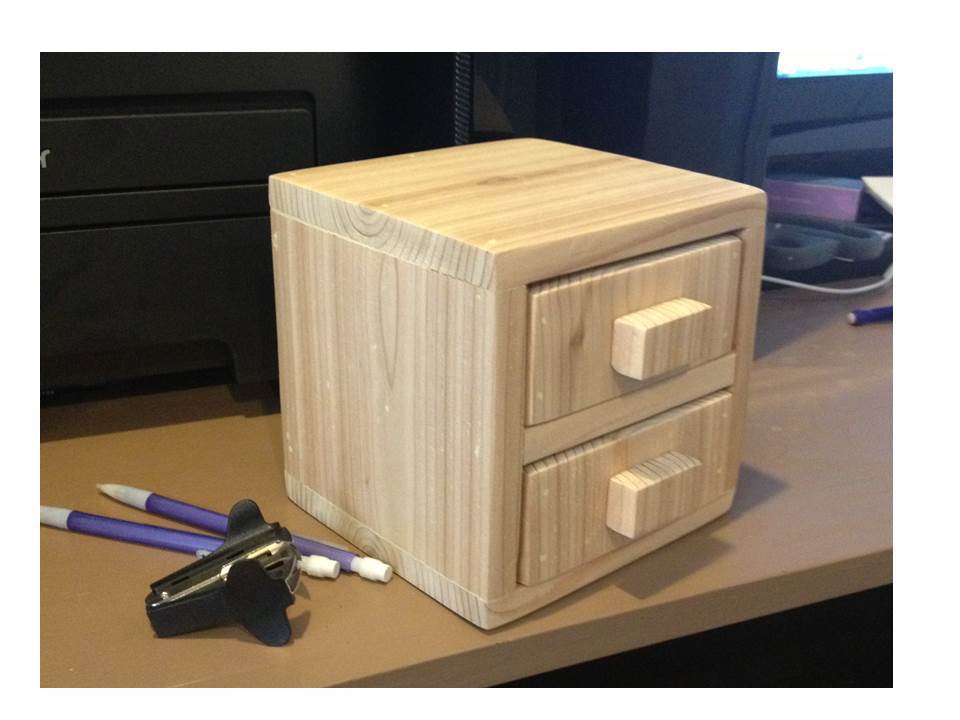


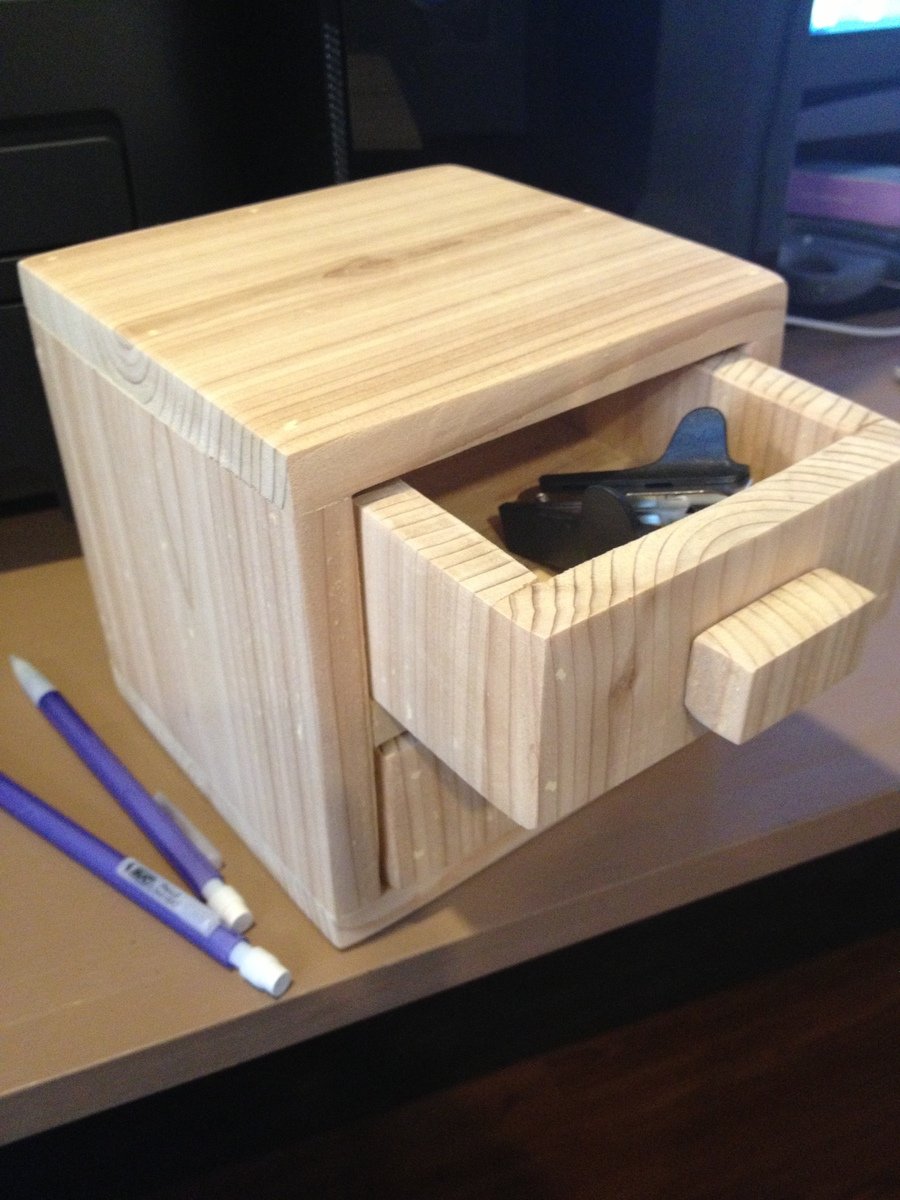
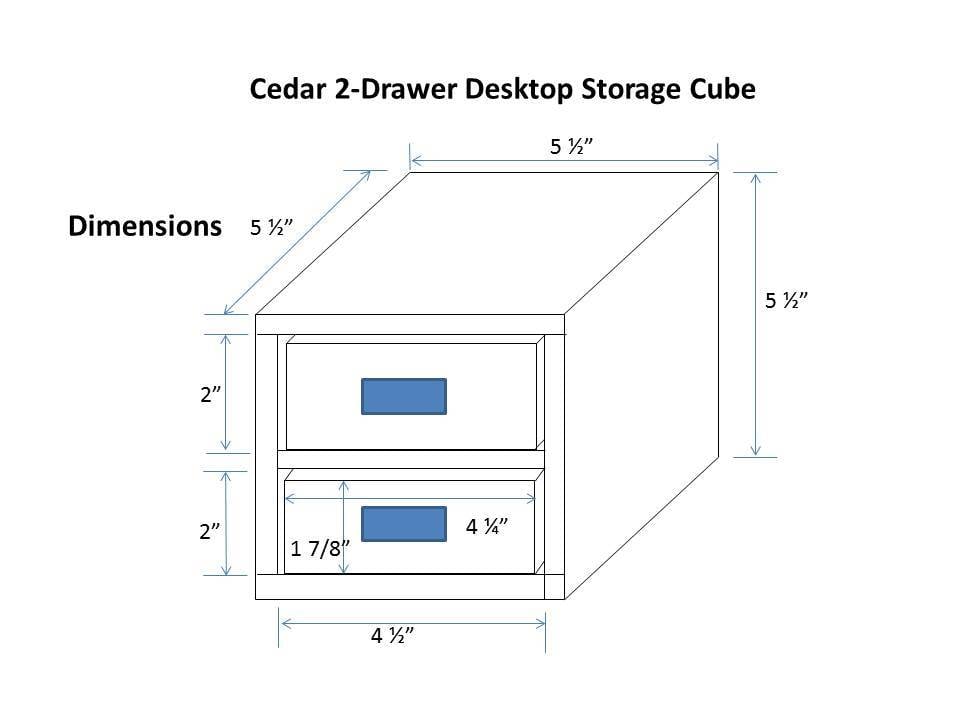
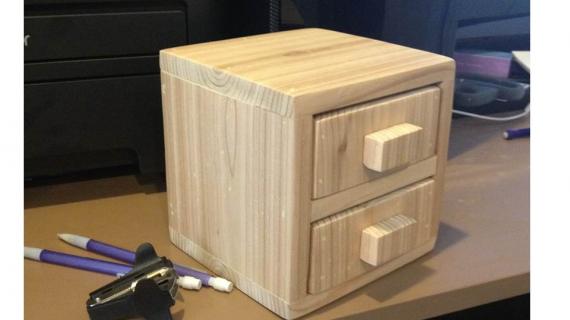
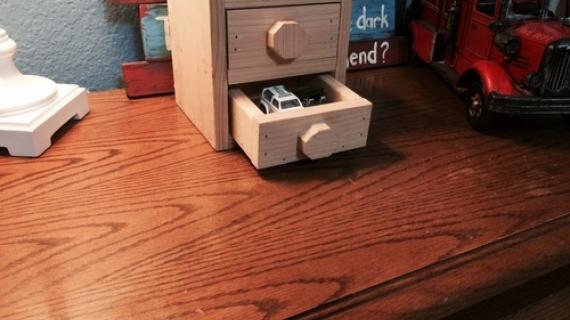
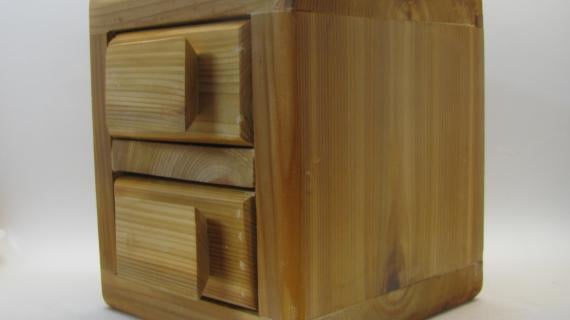
Build a 1-Board Cedar 2-Drawer Desktop Storage Cube, from 1 cedar fence picket, about $3 for wood.

Preparation
Shopping List:
1 cedar fence picket, 1/2" x 5 1/2" x 6'
wood glue
1" finish nails
Finishing materials for desired finish
Knobs or pulls (optional)
Tools:
measuring tape
square
pencil
safety glasses
compound miter saw
nailer
Sander
If using store bought knobs/pulls, you will also need:
Drill
Screwdriver
Box:
3 pc @ 4 ½” (sides and back), then cut back down to 4 1/2" x 4 1/2"
2 pc @ ~ 5 ½” (top & bottom, cut these to fit during step 2a)
1 pc @ ~ 4 ½” (shelf, cut this to fit during steps 4a and 4b, will be 4 ½” x ~5”)
Drawers:
4 pc @ 1 7/8”, then cut to 4 ¼” (drawer fronts and backs)
4 pc @ 1 7/8” (drawer sides, cut length to fit during step 1a of drawer build, will be 1 7/8” x ~4”)
2 pc @ 3 ¼” (drawer bottoms, cut to fit during step 3a of drawer build, will be 3 ¼” x ~4”
Pulls:
2 pc @ ¾” x 1 ½” – cut these from the scraps
Measure and cut as you go, in the order of the cut list. The cut list and step by step instructions will show you which pieces to measure first.


Please read through the entire plan and all comments before beginning this project. It is also advisable to review the Getting Started Section. Take all necessary precautions to build safely and smartly. Work on a clean level surface, free of imperfections or debris. Always use straight boards. Check for square after each step. Always predrill holes before attaching with screws. Use glue with finish nails for a stronger hold. Wipe excess glue off bare wood for stained projects, as dried glue will not take stain. Be safe, have fun, and ask for help if you need it. Good luck!
Tip: sand board thoroughly on both sides before cutting
Instructions
Step 1
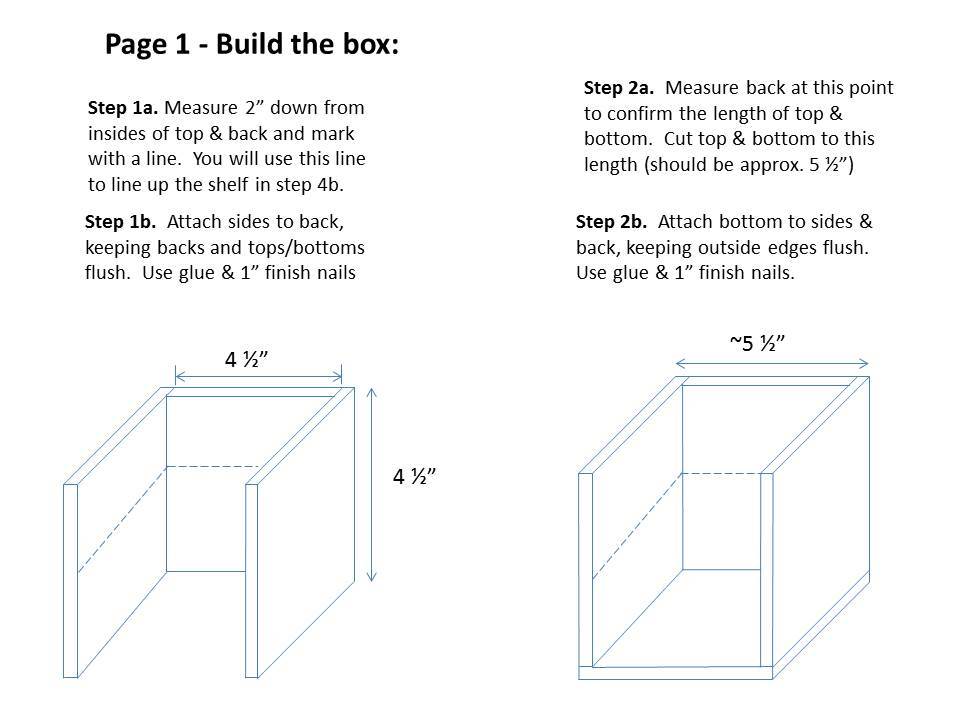
Building the Box, Page 1:
Step 1a. Measure 2” down from insides of top & back and mark with a line. You will use this line to line up the shelf in step 4b.
Step 1b. Attach sides to back, keeping backs and tops/bottoms flush. Use glue & 1” finish nails
Step 2a. Measure back at this point to confirm the length of top & bottom. Cut top & bottom to this length (should be approx. 5 ½”)
Step 2b. Attach bottom to sides & back, keeping outside edges flush. Use glue & 1” finish nails.
Step 2

Building the Box, Page 2:
Step 3. Attach top to sides & back, keeping outside edges flush. Use glue & 1” finish nails.
Step 4b. Measure bottom front to back, (should be about 5”) and trim shelf to this length. This will be the length of the drawer. (You’ll need this # for the drawer build.)
Step 4c. Attach shelf inside box, keeping top edge of shelf flush with the line drawn from
step 1a. Use glue & 1” finish Nails.
Step 3
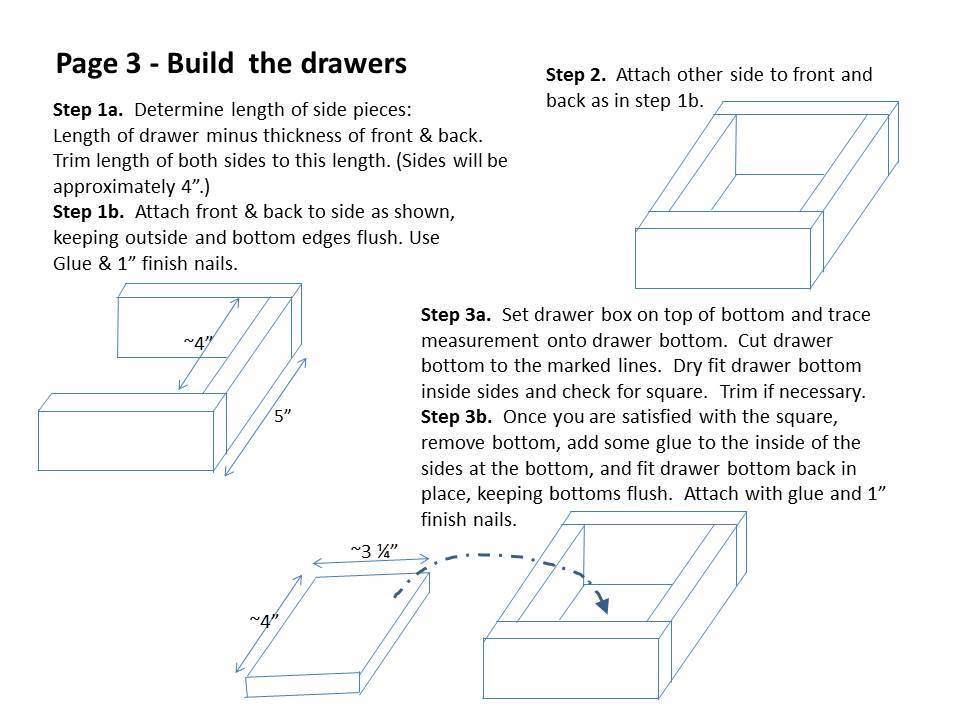
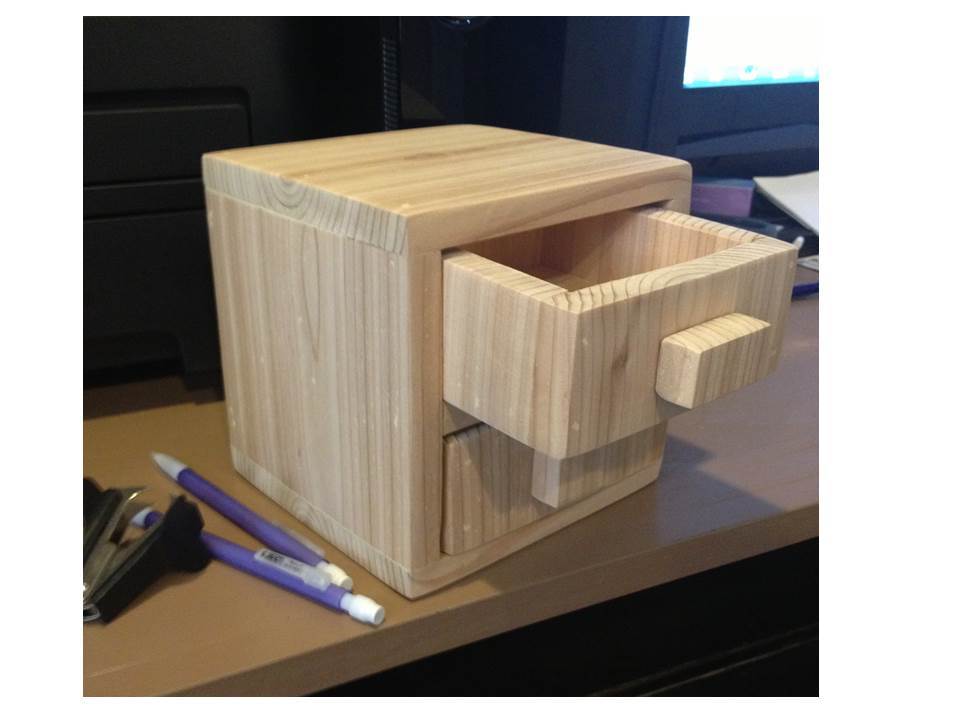
Build the Drawers, Page 3
Step 1a. Determine length of side pieces:
Length of drawer minus thickness of front & back. Trim length of both sides to this length. (Sides will be approximately 4”.)
Step 1b. Attach front & back to side as shown, keeping outside and bottom edges flush. Use
Glue & 1” finish nails.
Step 2. Attach other side to front and back as in step 1b.
Step 3a. Set drawer box on top of bottom and trace measurement onto drawer bottom. Cut drawer bottom to the marked lines. Dry fit drawer bottom inside sides and check for square. Trim if necessary.
Step 3b. Once you are satisfied with the square, remove bottom, add some glue to the inside of the sides at the bottom, and fit drawer bottom back in place, keeping bottoms flush. Attach with glue and 1” finish nails.
Step 4

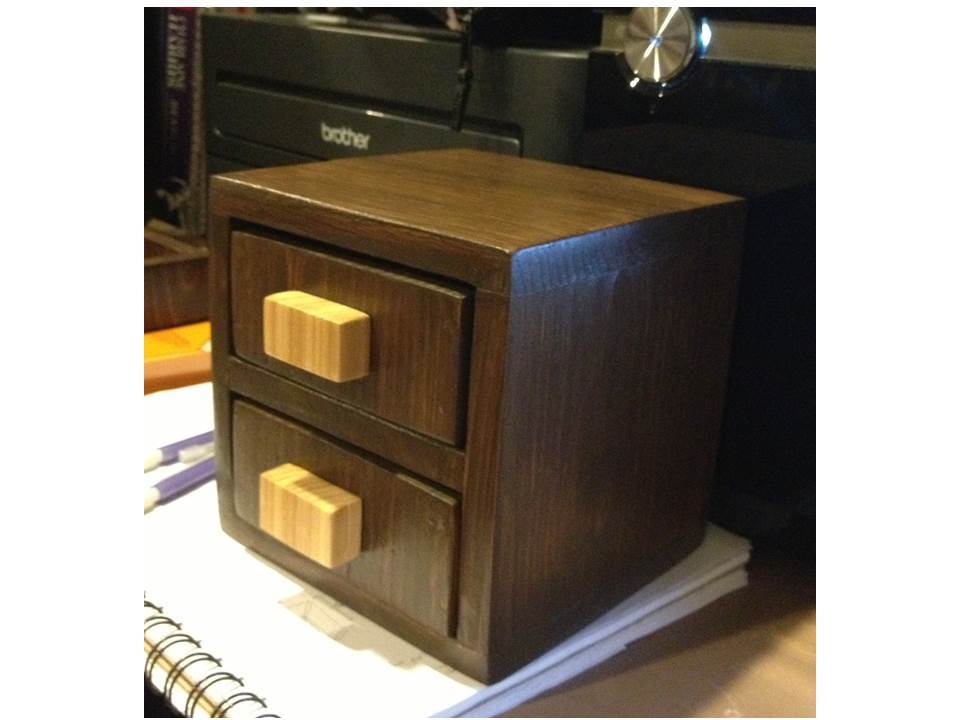
Page 4 - Finishing tips:
Sand all pieces before assembly.
Fill nail holes and sand after assembly. (recommend stainable filler if staining)
Apply finish (paint or stain) as desired.
Attach knobs/pulls:
Plan calls for wood pulls made from scrap cedar pieces. These are glued in place.
If substituting regular knobs/pulls, measure for placement and drill holes, and attach. Since the drawer front is only ½” thick, you may need either a shorter screw or some ¼” spacers (some washers or a ¼” piece of wood will work for spacers). Regular knobs/pull screws are usually sized for a ¾” thick door or drawer front.
It is always recommended to apply a test coat on a hidden area or scrap piece to ensure color evenness and adhesion. Use primer or wood conditioner as needed.

Comments
yurra-bazain
Mon, 08/26/2013 - 17:24
Must make!
I really want to add these to my bathroom storage plans next month. :) I love the two drawers, and especially love that it is made of a single cedar fence picket. :) I may just have to make one for my closet too! =D
JoanneS
Tue, 08/27/2013 - 02:36
Thank you!
Yvonne, thank you so much for your nice comments! I can't wait to see what you build for your next project. Although I am not sure how you can make that bathroom in your apartment more beautiful, the pictures if it are stunning. If you would like something else cedar for your closet, let me know the sizes - I'll draw something for you. Cedar is fun! Thanks again! :)