


Build these beautiful 2x4 benches, free plans by ANA-WHITE.com
Hi everyone! Greetings from our cabin today!

We've headed south to do some fishing and take some family time before I take off to Atlanta for Haven Conference later this week.

I'm going to cry like a baby when they drop me off at the airport, all by myself. The kids will be fine with Dad ... it's me that I'm not so sure about.
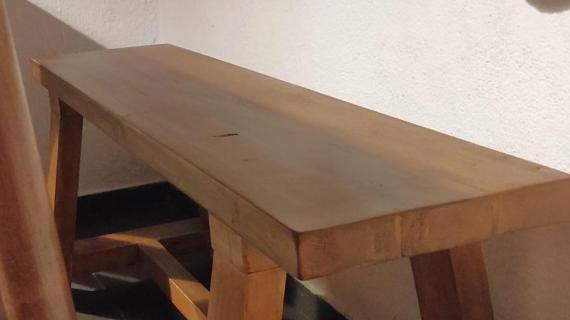
I'm writing this post to you today on this bench -

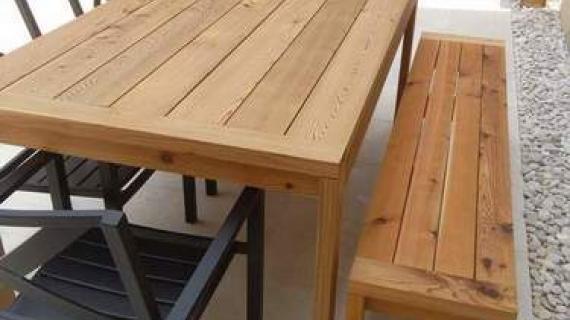
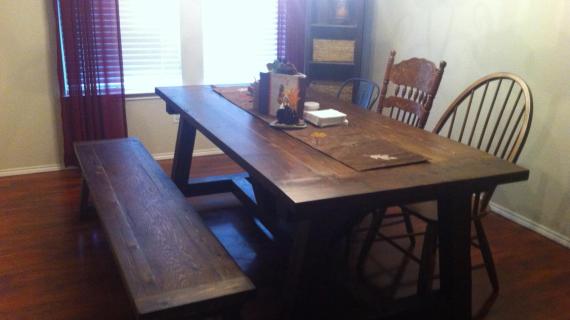
This bench pairs with this 2x4 truss style dining table -
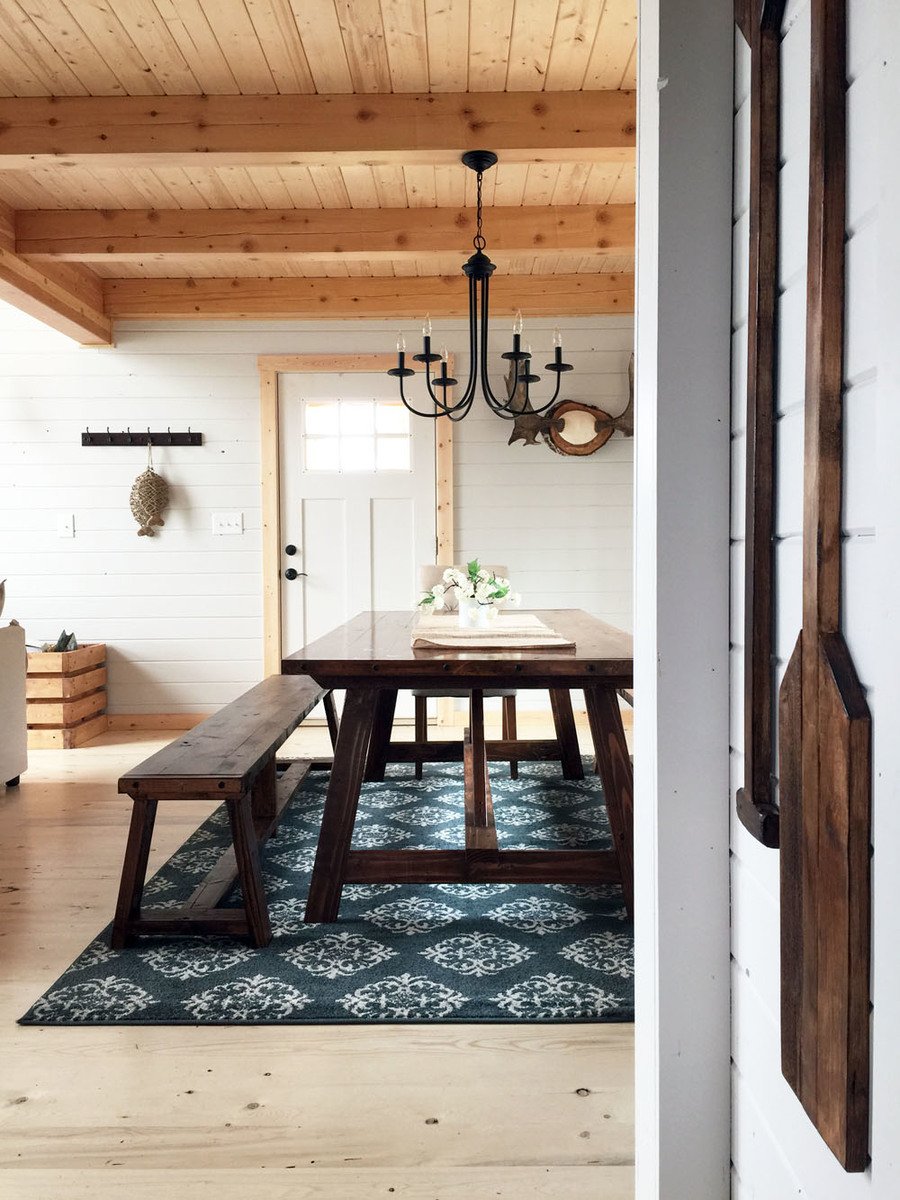
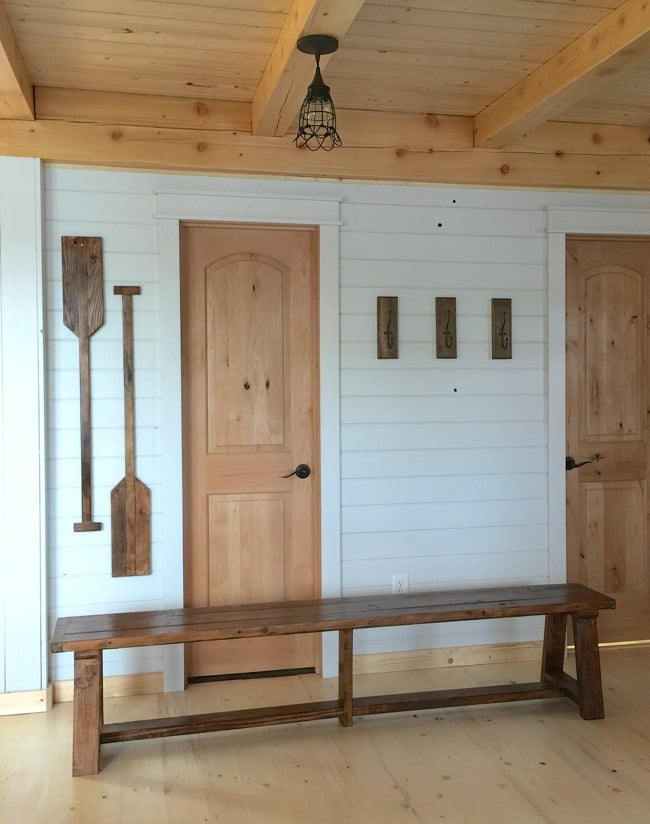
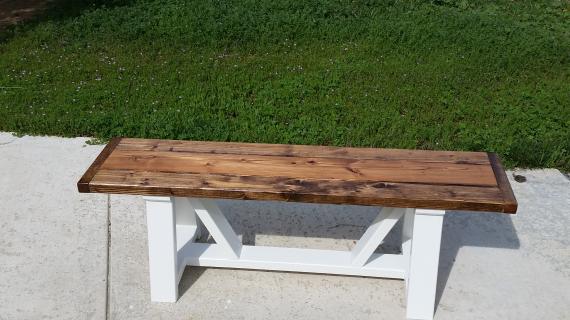
I love this bench because it is long enough to fit a whole family on.

But with the splayed end legs, this bench will not tip over on you. Yet the seat width is narrow enough that you can easily step over it to sit at the table (if you are lucky enough to be able to find a place at the middle of the table).
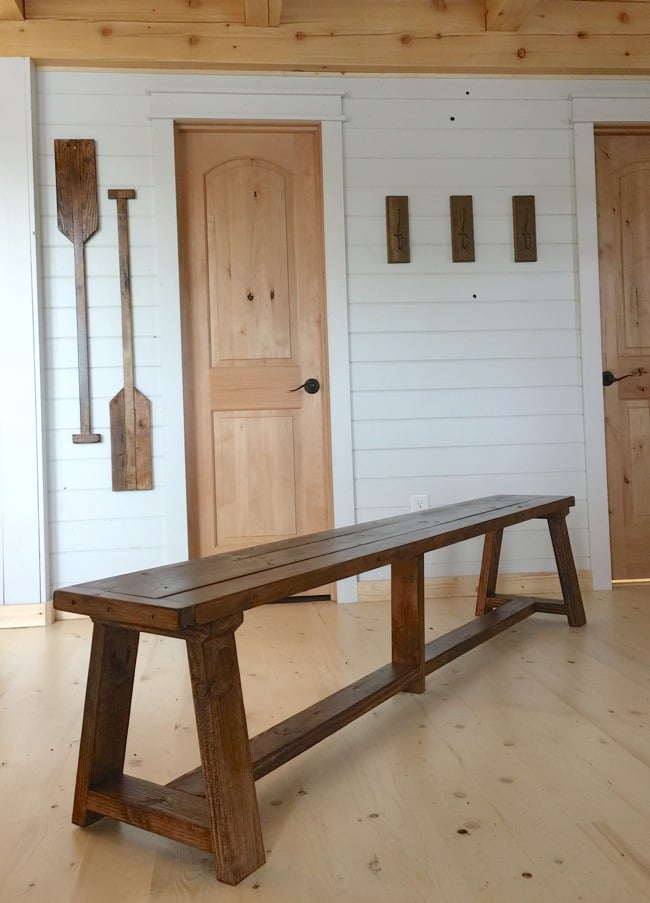
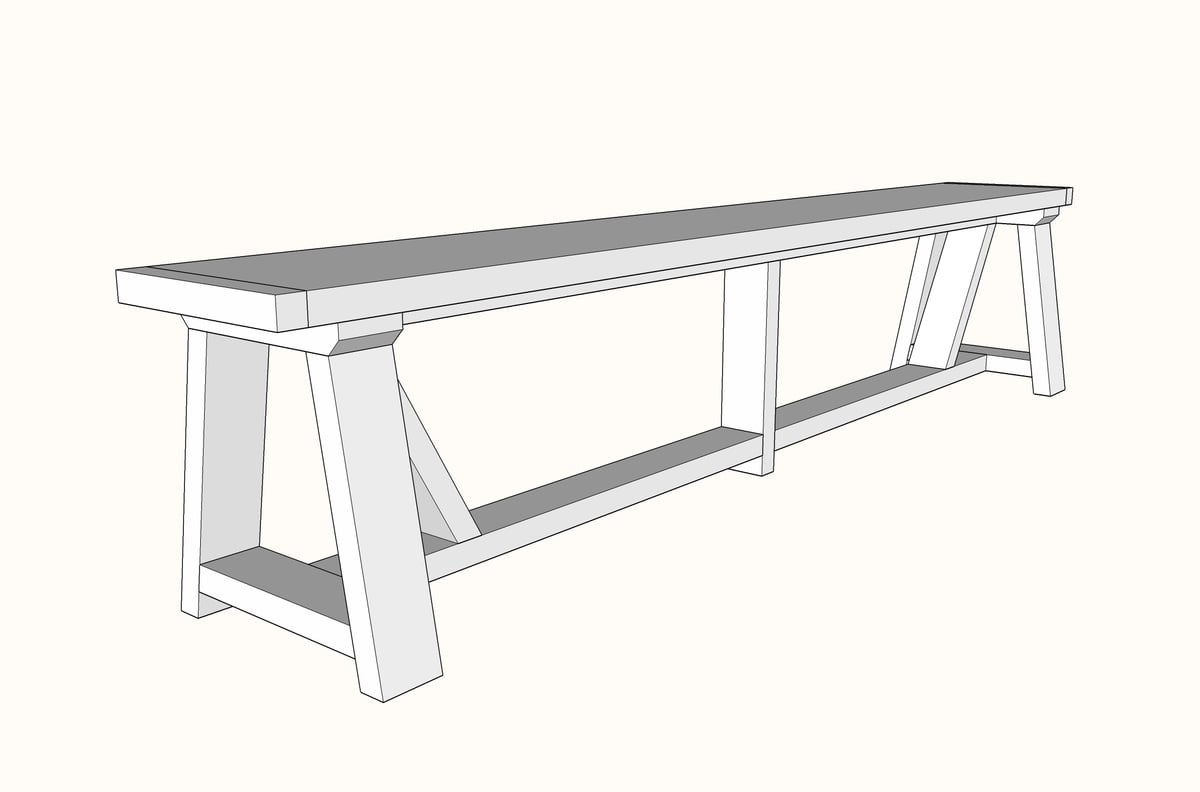
To support the extra long width of this bench, I added the center leg. I love how it adds character and strength, but not bulk to the center of the bench. It's nice that there are only full legs to manuever around on the ends.

I was inspired by the Wells Bench from Pottery Barn, loving the simple lines and the cross support.
But needed something longer, and had to use 2x4s (because that's what was leftover from building the cabin).
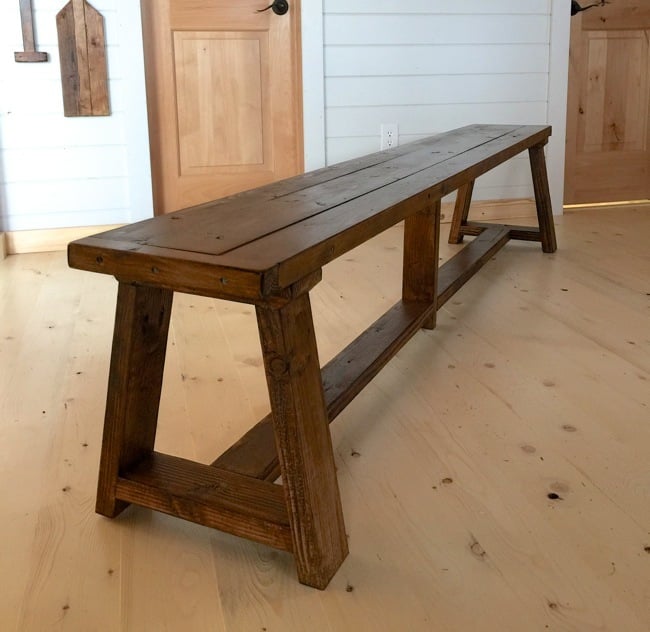
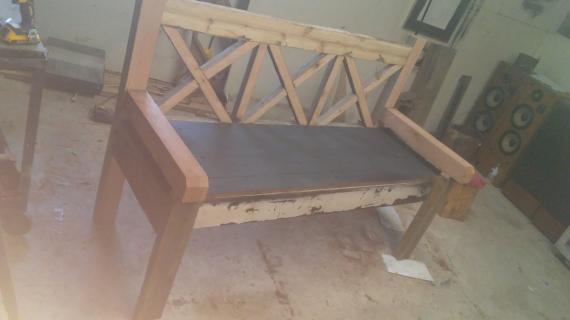
I drew up this design (and plans follow for it), but in our mad rush to build all the furniture for the cabin in two days, I forgot to add the cross supports.
We kinda love it simple, so never went back and added the cross supports. But you can!
For the finish, I used Varathane Early American in one step Stain + Poly -

This is my new favorite finish, ever. Not only is it a one step stain and poly that goes on with a brush, and cleans up with water -

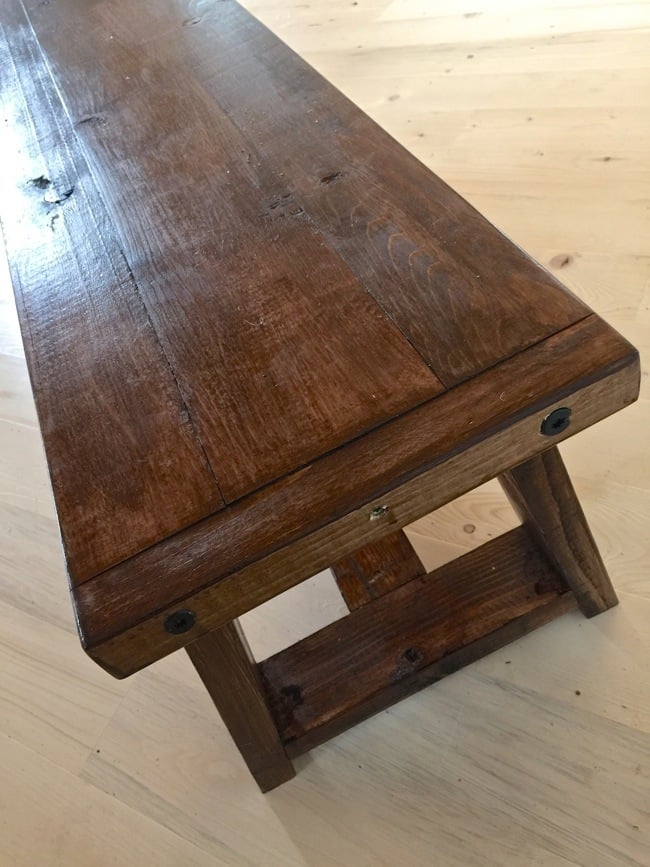
But the way that it goes on is why I'm madly in love. The finish is very vintage, hand brushed, aged stain, with inset areas like joints and knots pooling the stain and organically darkening, with brush strokes subtly visible. I used the satin sheen, it is gorgeous! If you are looking for a quick and easy stained finish that has a distressed and aged feel, this is your ticket.
For those of you with eagle eyes, yes, we did run out of lag bolts for the bench ends.
You know the drill by now - no pun intended - I'm hooking you up with the free plans following (click read more below if this is the home page). Just please share if you build because we all can't wait to see how your bench turns out too!
XO Ana

Preparation
6 - 2x4x8'
1 - 2x6x8'
1 - 2x2x4'
LEGS
2 - 2x4 @ 12-1/2" - bottom ends cut off at 45 degrees - see step 1
4 - 2x4 @ 15-1/4" - both ends cut at 10 degrees off square, ends ARE parallel
2 - 2x4 @ 12-3/4" - both ends cut at 10 degrees off square, ends are NOT parallel, long point to long point measurement
CENTER SUPPORTS
1 - 2x4 @ 73-1/2"
1 - 2x4 @ 15" (center leg)
2 - 2x4 @ 36"
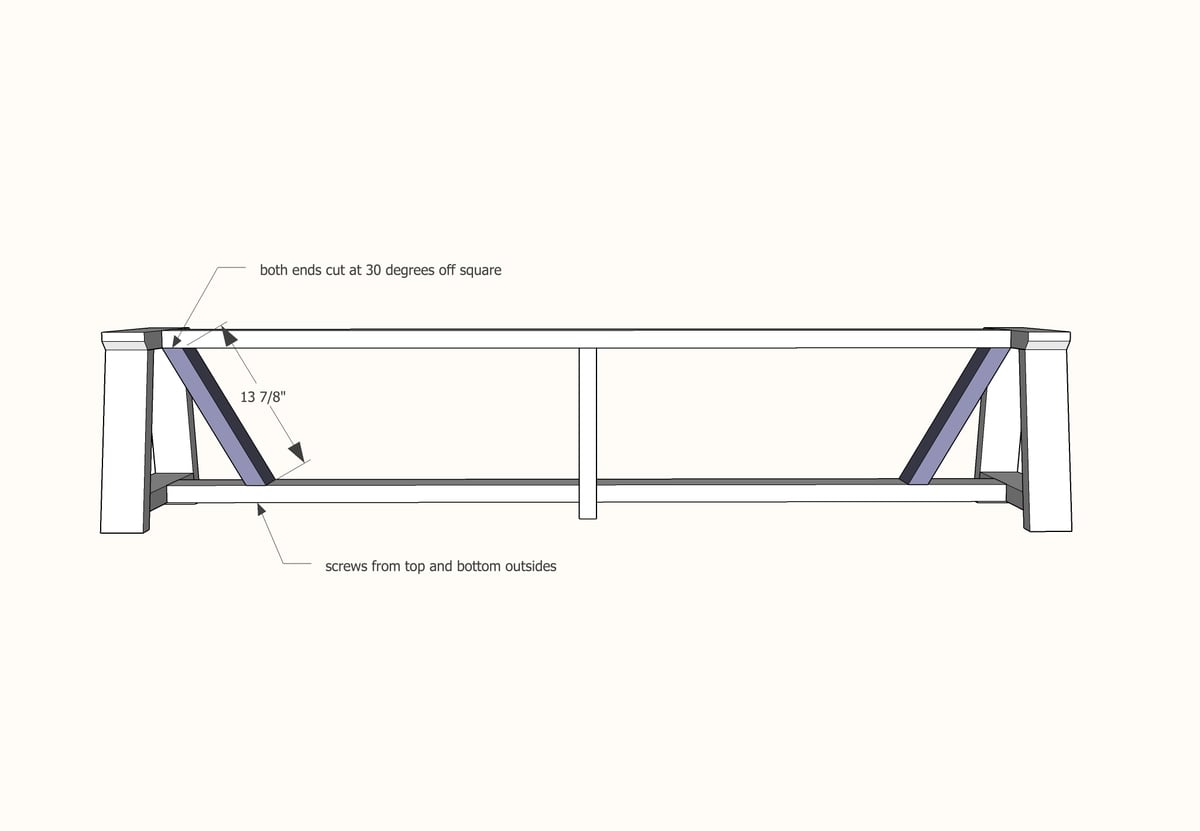
2 - 2x4 @ 13-7/8" - both ends cut at 30 degrees off square, ends ARE parallel
TOP
2 - 2x4 @ 83-1/2"
1 - 2x6 @ 83-1/2"
2 - 2x2 @ 12-1/2" (cut to fit)


Please read through the entire plan and all comments before beginning this project. It is also advisable to review the Getting Started Section. Take all necessary precautions to build safely and smartly. Work on a clean level surface, free of imperfections or debris. Always use straight boards. Check for square after each step. Always predrill holes before attaching with screws. Use glue with finish nails for a stronger hold. Wipe excess glue off bare wood for stained projects, as dried glue will not take stain. Be safe, have fun, and ask for help if you need it. Good luck!
Instructions
Step 1
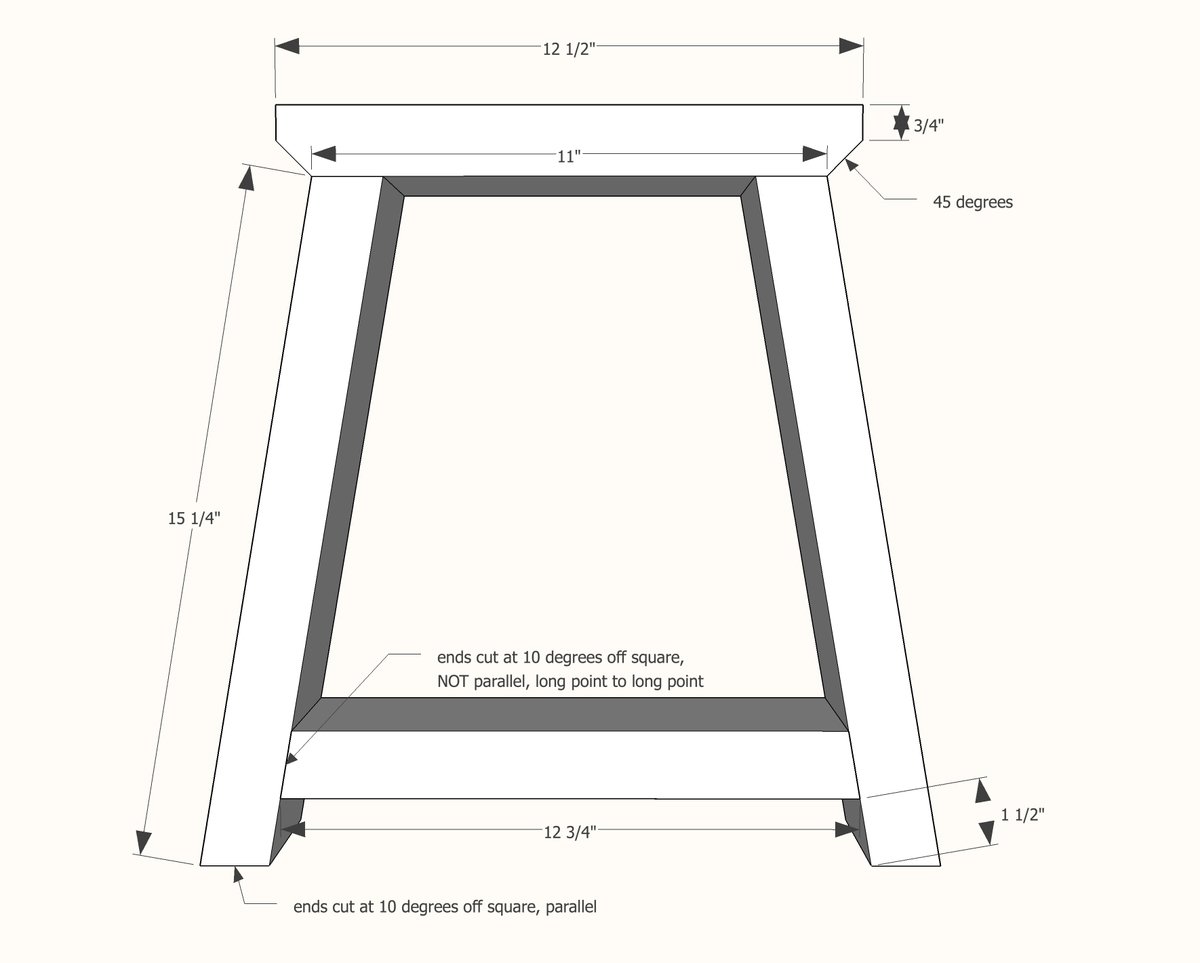
Build the two legs sets first. I used pocket holes first to joint the two legs to the top piece, and then pocket holes again to attach the bottom stretcher piece to the legs. Set your kreg jig for 1-1/2" thick stock and use 2-1/2" pocket holes. Mark the centers of the top and the bottom stretcher.
Step 2
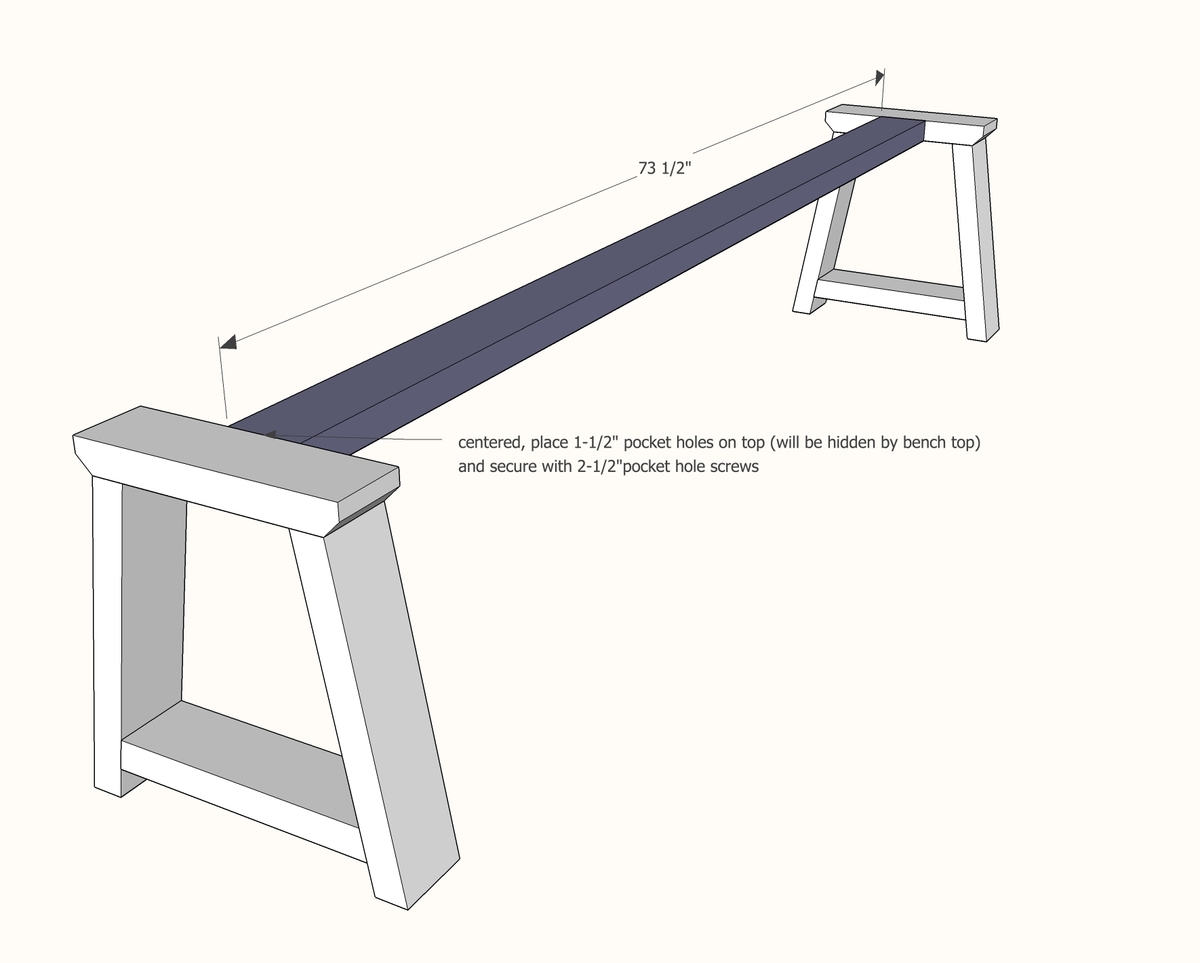
Drill 1-1/2" pocket holes on both ends of your top board, and attach, centered on the leg sets, to the two legs, with 2-1/2" pocket hole screws.
Step 3
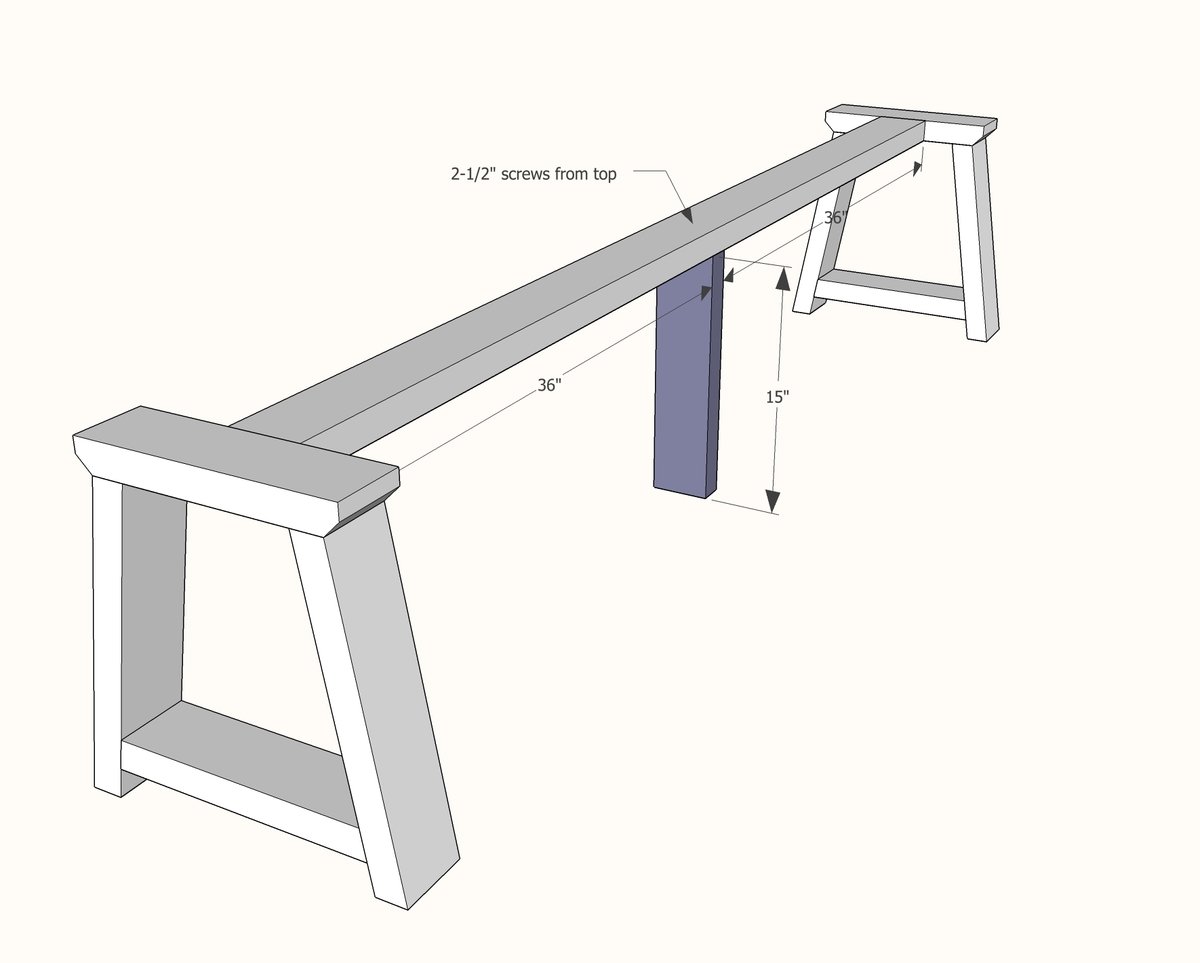
Attach the center support leg. I used 2-1/2" wood screws, from the top. If you don't want to go out and buy different screws, pocket hole screws will work just fine, but you will need to countersink the screw head so it sits below the surface of the wood.
Step 4
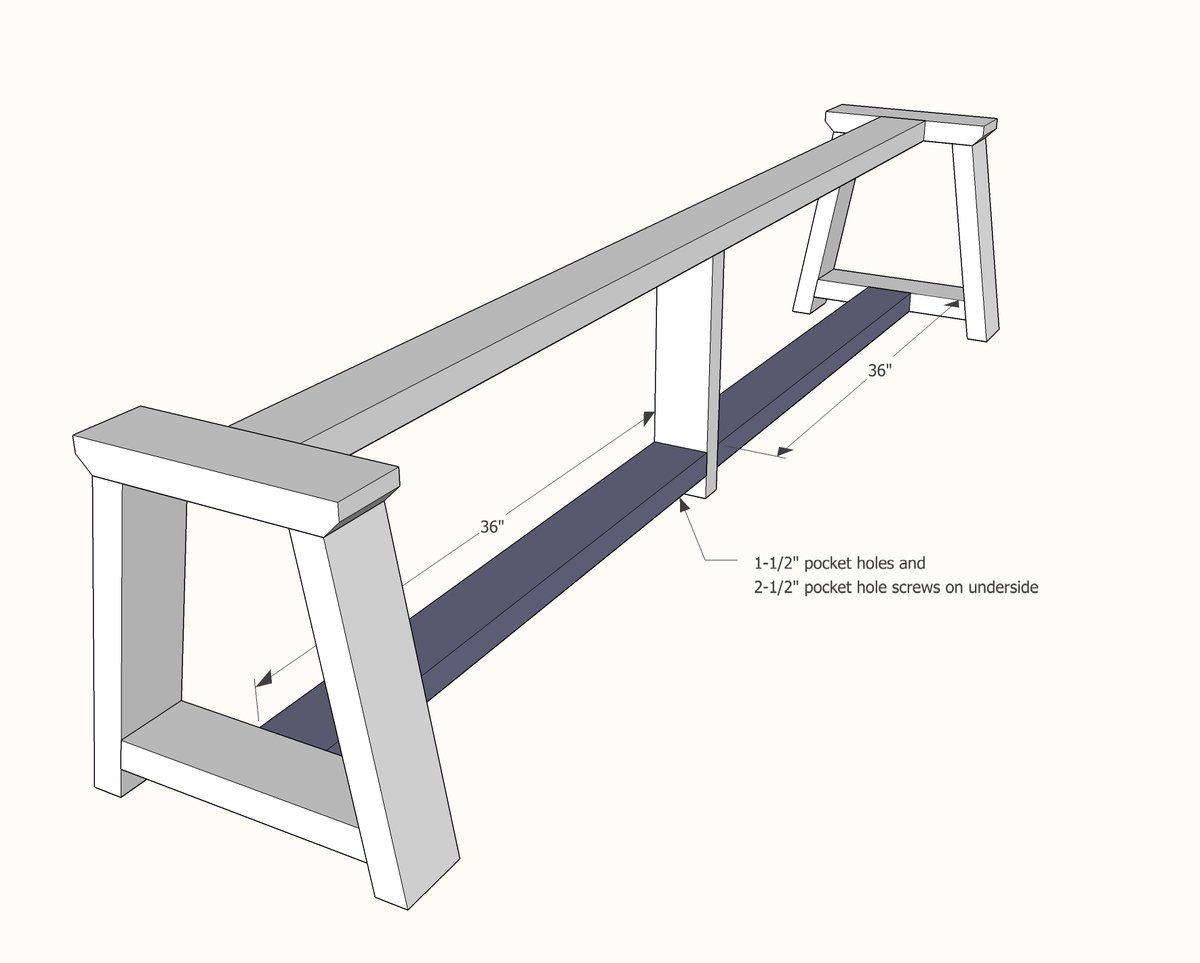
Drill 1-1/2" pocket holes on both ends of the smaller stretcher boards, and attach to legs with 2-1/2" pocket hole screws.
Step 5
Step 6
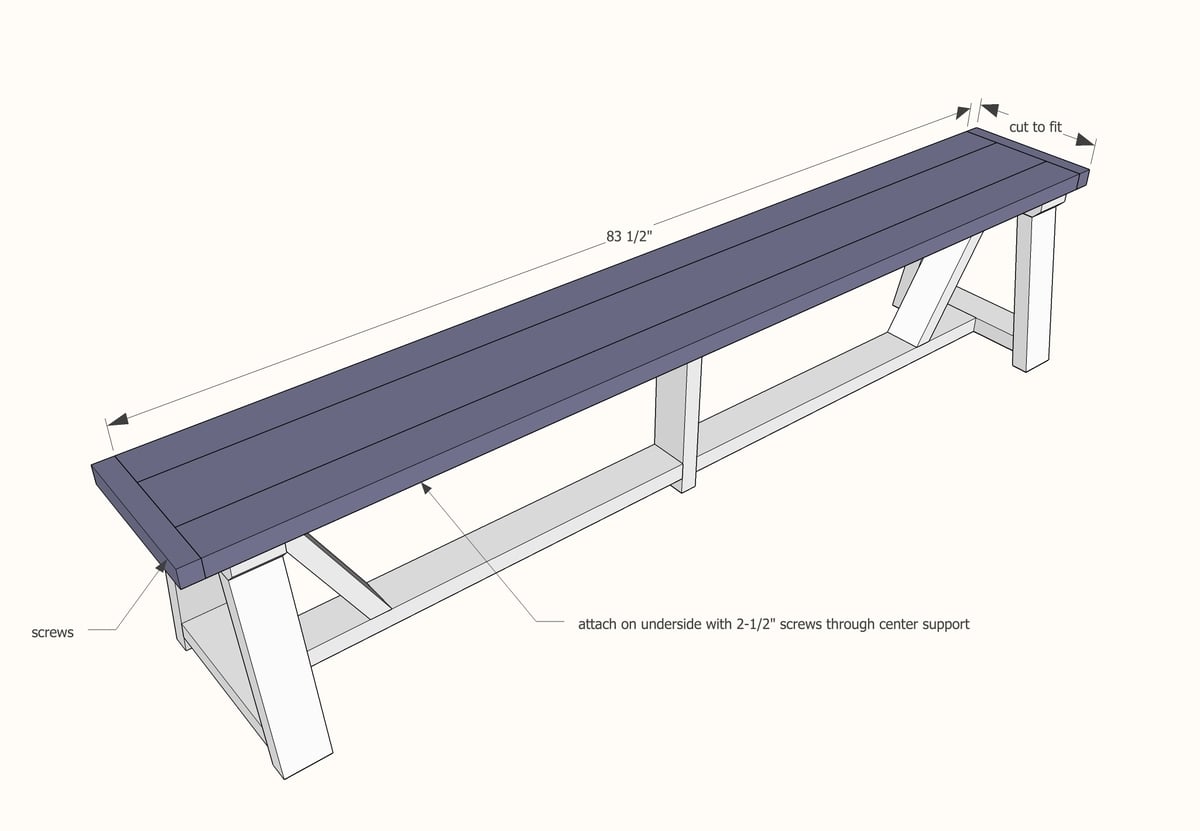
Build the top first (check out this post for some tips on building tabletops). Then attach from underside with 2-1/2" screws.
It is always recommended to apply a test coat on a hidden area or scrap piece to ensure color evenness and adhesion. Use primer or wood conditioner as needed.

Comments
TheLight
Tue, 07/14/2015 - 07:21
Center post seems off
Great design overall, but that center post seems like an afterthought. With the other legs being canted, and that one vertical and centered, it just doesn't seem to jive. Why not use the same type of center support as the table? Specifically, this picture.
almostacowgirl
Sun, 06/25/2017 - 09:51
Where's the rest of the instructions?
It looks like there's supposed to be more to the instructions? Where are 7 through 27 at? I mean, the instructions given look pretty thorough, but IS there more to it that I'm missing? I love this idea and I came across a free redwood patio set that needed quite a bit of refurbishing. All of the table and the bench seats were salvageable, but the legs on the benches need a major overhaul! These instructions will be perfect to make new legs!
Thank you!!!
Stacy
In reply to Where's the rest of the instructions? by almostacowgirl
Ana White
Wed, 07/05/2017 - 13:00
Those are the plans in
Those are the plans in entirety:)
Mike B
Wed, 07/19/2017 - 17:05
not printing
Hi, I'm trying to print the plans, but the images are bigger than the paper. Any suggestions?