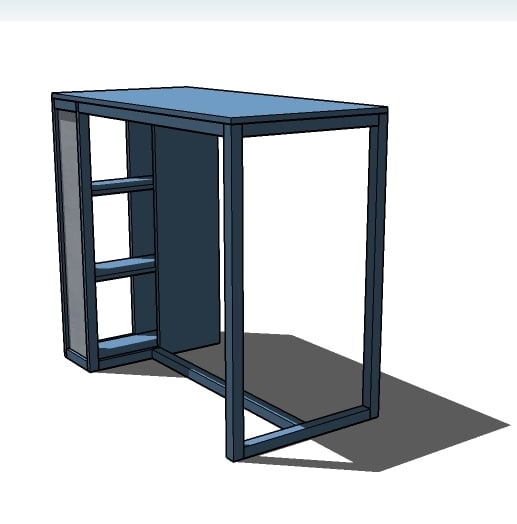
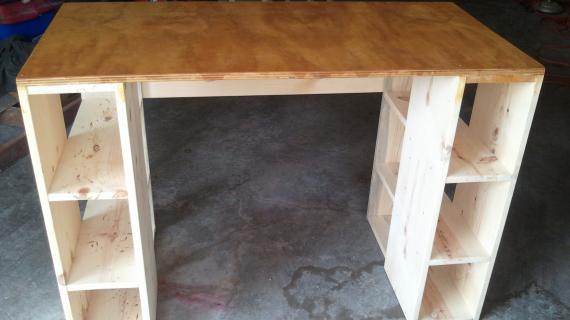
Bar height dorm desk designed to be used with bar stools. Adds modern storage, a base support, and is easy to assemble/disassemble.
 Thank you all for understanding and giving me what feels like a vacation yesterday! It's been more like a building break (not a break from building, rather a break to build :) ), but I wouldn't have it any other way. Do you find when you've got too much on your plate, when you've got too many goals going on at the same time, that maybe everything doesn't get the love and attention it should? I was feeling that way yesterday as I was drawing up a plan, and having trouble being passionate about the design. I know I've got a good design, and one I can be proud of, when it's all I can do to restrain myself from building it myself. The buildies. And if a design isn't giving me the buildies, well, maybe that is a plan that I shouldn't post. Well, this desk, table, whatever you want to call it, but I'm calling it the dorm desk, it's giving me some serious buildies.
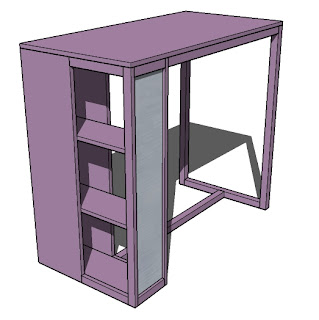
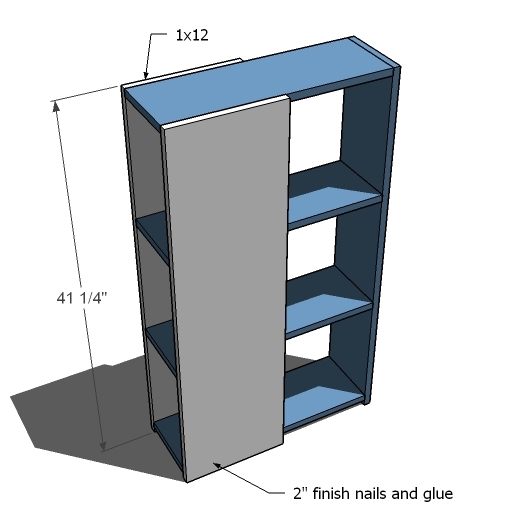
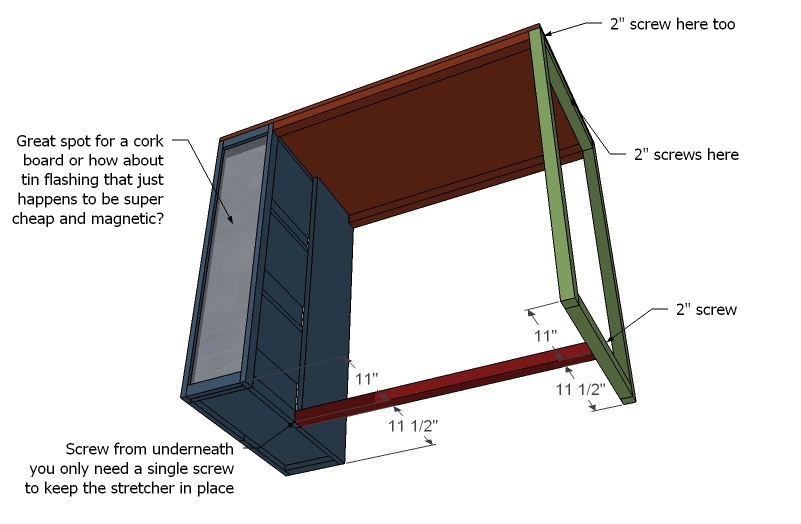
I tend to be a storage junkie, with a dream of a bare house. No stuff visible anywhere. Everything has a place. And the dorm desk that I designed does just that, stores stuff, but is practical and compact. It's also bar height, so some cool stainless stools would look amazing under it. And here's another secret for those of you who read my ramblings: cheap tin flashing is magnetic. Cut it with tin snips and glue it in the space shown above for a magnet board. It's available in rolls at most any hardware store.
I choose to keep the storage open so that the desk could be placed against a wall or cords run through. Also, the stretcher on the bottom will help keep the legs from spreading and stripping screws.
And yes, for those of you (I'm both happy and sad for you) with their babies taking their station wagons to college, I did design the dorm desk so that you can break it down into manageable pieces.
Pin For Later!


Preparation
1 - 1x8 @ 12 feet long 1 - 1x12 @ 8 feet long 2 - 1x2 @ 8 feet long 3 - 2x2 @ 8 feet long 1 - 24" x 36" Pine Project panel or 1/4 sheet of plywood
Please see PDF for cutting list.
Please see PDF for full instructions.
Instructions
Step 1
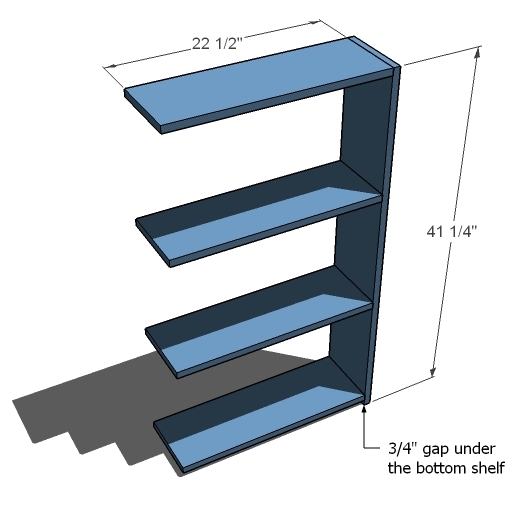
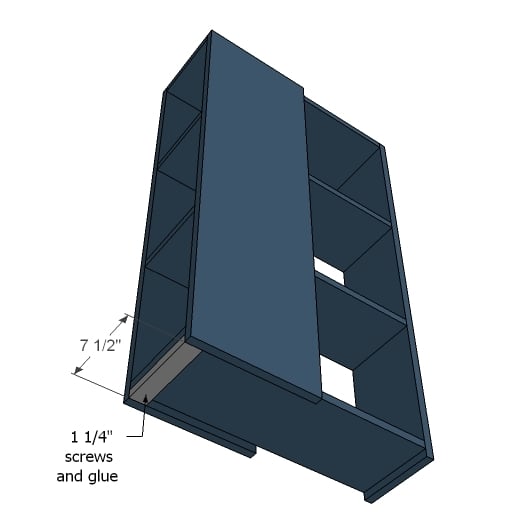
First we simply screw the shelves to the sides. The sides and shelves are 1x8s. I’ve been using my Kreg Jig™ for most of my joints lately and am in love. But if you don’t have a Kreg Jig™, you can countersink and screw from the outside. Unless of course, you are planning on storing gold on those shelves. But then again, if you had that much gold, you could afford a Kreg Jig™ LOL
Step 2
Step 4
Step 6
Step 7
Step 8
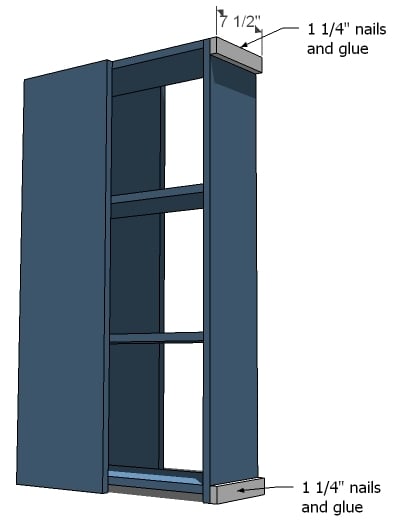
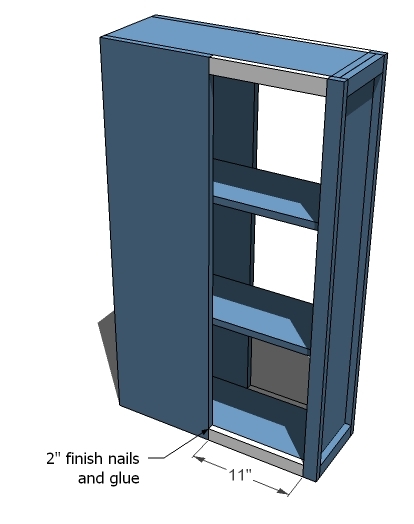
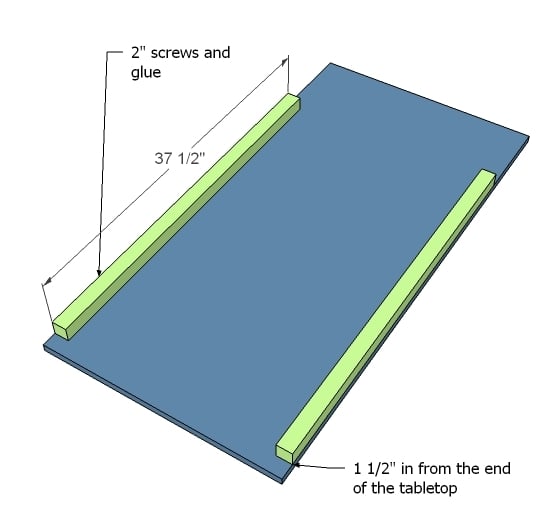
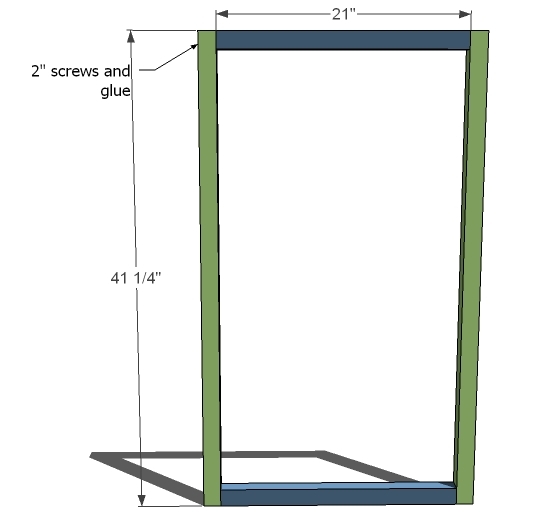
I know you can build a square. Just make sure you check for square. Oh, a little tip from someone not so wise, maybe elevate the bottom blue board up just a hair. Sometimes floors aren’t completely level, and if you have just the two posts flush on the ground, you will decrease your chances the tabletop will “rock”. Or you could ad cork pads under the legs.





Comments
clarissa (not verified)
Fri, 08/13/2010 - 04:32
very cool, not sure why I did
very cool, not sure why I did not see the post on facebook. :( But I love it. now where can I put it?
Meredith (not verified)
Fri, 08/13/2010 - 04:49
Could this work as a small
Could this work as a small kitchen island??
Erika (not verified)
Fri, 08/13/2010 - 04:51
hmm i can't get the PDF to
hmm i can't get the PDF to open...just goes to 'error on page' anyone else having trouble or is it just my connection?
P&J(or one or … (not verified)
Fri, 08/13/2010 - 06:02
I love it! I think I need
I love it! I think I need about 3, lol.
I get an error for the PDF as well.
linda from vegas (not verified)
Fri, 08/13/2010 - 06:07
Hey Ana, Do you have any
Hey Ana, Do you have any plans for the crafters out there who have tons of 8 1/2 x 11 and 12 x 12 scrapbook paper and need a place to store it where it is easy to see? My scrapbook paper runneth over!
kelly (not verified)
Fri, 08/13/2010 - 06:36
I can't get the PDF Plans to
I can't get the PDF Plans to open either. Love the concept Ana!
We Fix Pcz (not verified)
Sat, 08/14/2010 - 04:18
I can't get the pdf to open.
I can't get the pdf to open. Broken link.
Brooke (not verified)
Sat, 08/14/2010 - 16:36
Good news: the PDF opened
Good news: the PDF opened just fine for me :-) Bad news: The project panel listed and the measurements for the aprons and stretcher don't match up. Is the project panel supposed to be 24" X 48"?
Katherine (not verified)
Sat, 08/14/2010 - 17:23
Hey Ana, I know you like
Hey Ana, I know you like things that save space. Have you seen this thing yet? It was designed by Swedish college students. http://www.matroshka.se/
keridahling (not verified)
Thu, 09/16/2010 - 04:14
I am so very excited to build
I am so very excited to build this desk for my 13 year old son. I am actually recruiting him to help with this. I think he will develop a sense of pride in making something of his very own. We are starting this tomorrow and hope to have a pic after the weekend! Wish me luck!
keridahling (not verified)
Mon, 09/20/2010 - 04:48
We did it!! I think my son
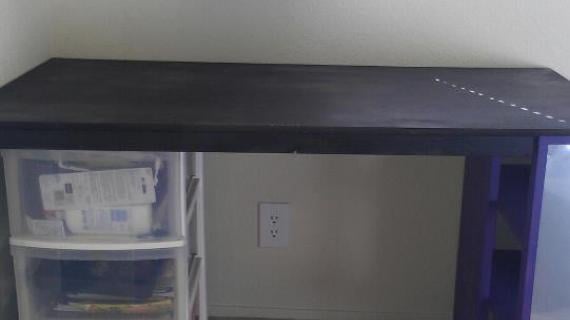
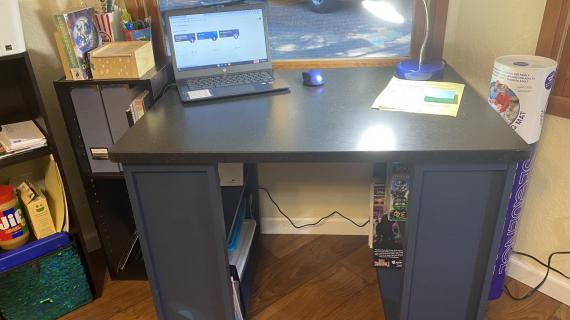
We did it!! I think my son has met his first true love!! This DESK! We were able to get this put together on Saturday afternoon. It seems a bit tall for a 13 year old, but he is already 6' tall, so we won't have to worry about him outgrowing it, slouching over a short desk, or hitting his knees. As soon as that top was secured with the last screw, he didn't waste any time. He had his lamp, stapler and model car kits ready to stock the shelves! Will post a photo once we complete the finishing steps. Thank you Ana!
mier
Tue, 09/06/2011 - 13:30
I want to build the desk, but....
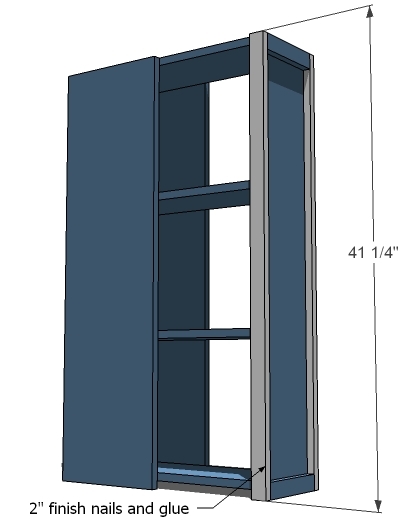
I love this desk it's so simple and I want to build a couple for my grandchildren. I don't quite understand why it's so tall? 41 1/4" legs are going to put this desk up there pretty high.The computer desk I'm setting at to type this message with, is only 29" high. From the floor to the very top. I can't imagine the chairs I must need for this? is there a shorter version of this desk?
Natalie P (not verified)
Tue, 09/20/2011 - 17:29
Hope to see a picture soon :-)
keridahling - PLEASE PLEASE post a picture of your desk. I want to build this for myself to use as a standing desk
jenamiles (not verified)
Fri, 11/30/2012 - 09:07
Cut list wrong
The cut list says to get a 24" x 36" pine panel. This should be a 24" x 48" based on the measurements of the desk itself and the remaining cut directions. Just getting ready to build two of these. These are exactly what I needed.