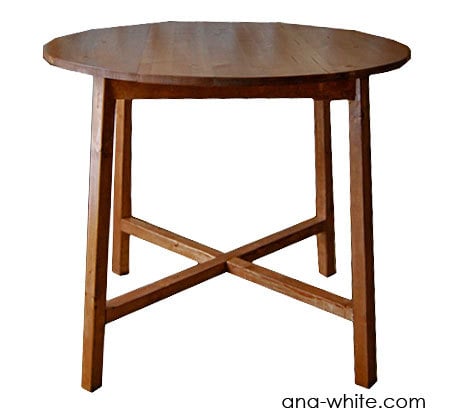


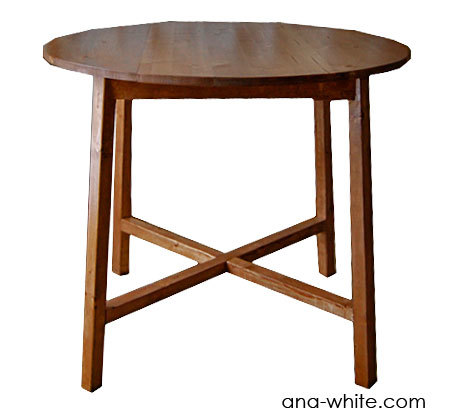
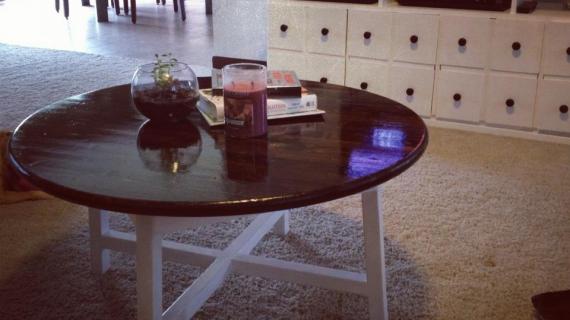
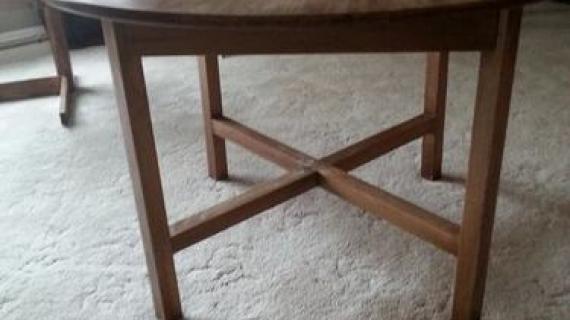
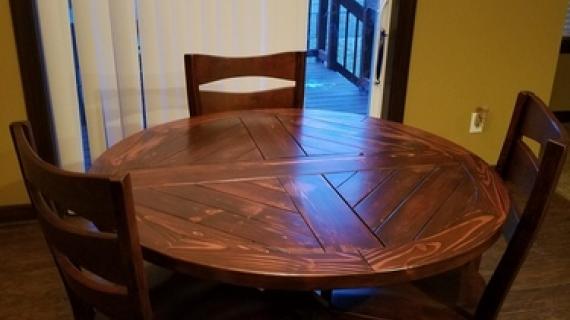
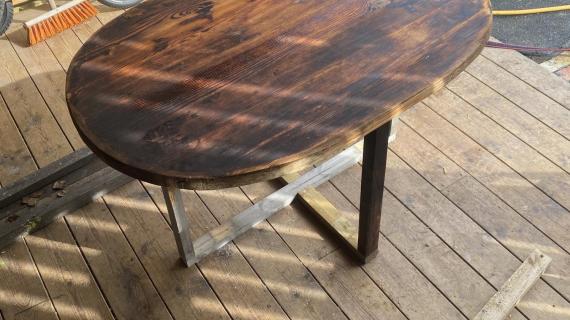
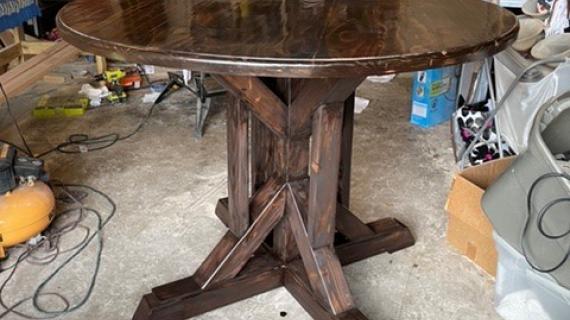
A sturdy small round table with an X base.
Preparation
36″ Tabletop or 3/4″ MDF or 3/4″ Plywood cut into a 36″ circle
3 – 2x2s
1 – 1×4
3″ Screws or 2″ pocket hole screws
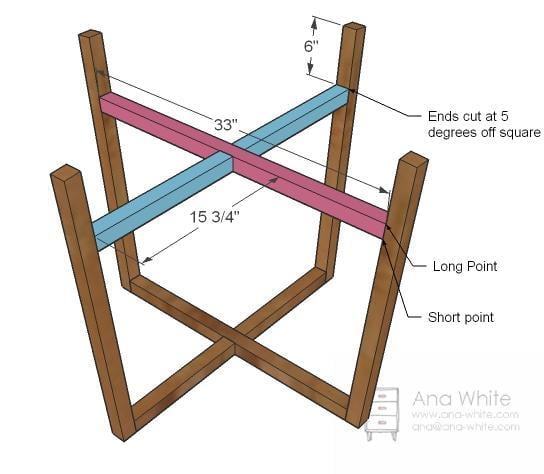
2 – 2×2 @ 13 7/8″ (Top X, one end cut at 5 degrees off square, measurement to long point)
1 – 2×2 @ 29 3/16″ (Top X, both ends cut at 5 degrees off square, measurement long point to long point)
4 – 2×2 @ 29 1/8″ (Legs)
2 – 2×2 @ 15 3/4″ (Bottom X, one end cut at 5 degrees off square, measurement to long point) 1 – 2×2 @33″ (Top X, both ends cut at 5 degrees off square, measurement long point to long point)
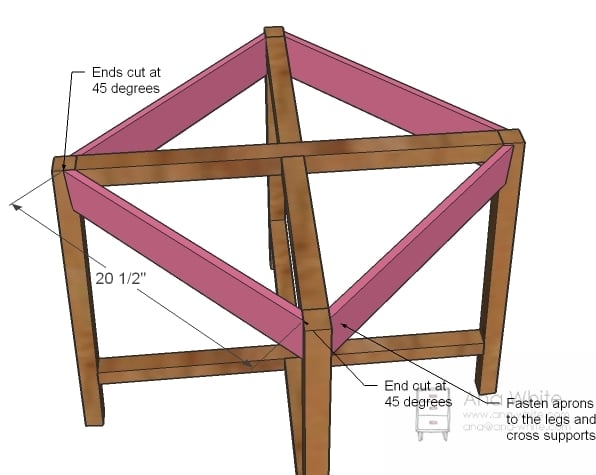
4 – 1×4 @ 20 1/2″ (Both ends cut at 45 degrees perpendicular to each other)


Instructions
Step 1
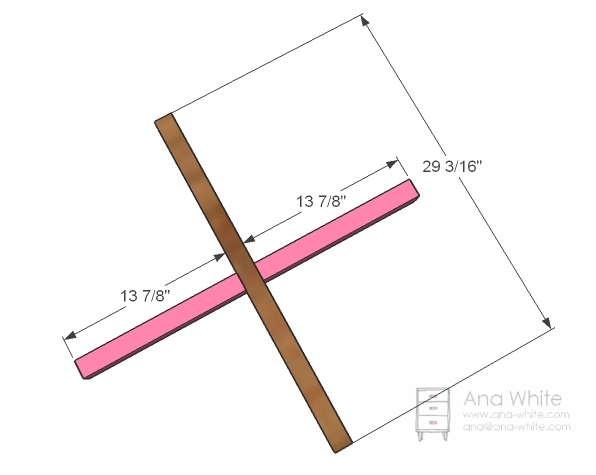
Build the Top X
Cut all of the boards as directed in the cut list. Lay out so the bevel cuts all taper downward. Mark center (13 7/8″ from outsides of longer board) and screw the shorter boards to the longer boards. I used pocket hole screws, but if you do not have a Kreg Jig™, simply screw at an angle to join the second board to the longest board.
Step 2
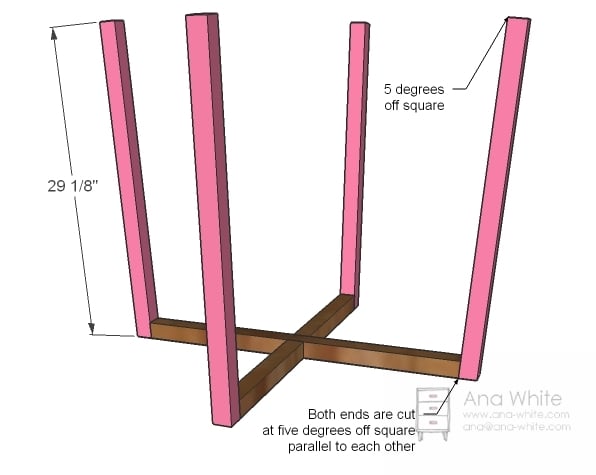
Attach the legs
Now attach the legs so that the legs lean outward.
Step 3
Bottom X
Now build the bottom X as you did the top X. Mark all legs 6″ from ends. Attach bottom base to legs.
Step 4
Aprons
Now this was the toughest part for me, but doesn’t have to be for you. Start by lining up the inside corners and either gluing and nailing (nailer would be super handy here) the aprons to the legs and top X or predrilling holes and screwing the aprons to the top X base. Now notice how the apron does not follow the line of the leg? Rather, it remains perpendicular to the ground. Note that and you’ll be good.
Step 5


Comments
Jack (not verified)
Wed, 11/03/2010 - 18:23
Awesome (and simple) round
Awesome (and simple) round table.
I've watched Norm Abrham and he always rotates round table top so that the grain never runs in the same direction as the aprons; I believe the top's grain runs from corner to corner. This add support all the way through the top and there is less chance of the edge boards breaking off later.
I L-O-V-E the blog!! My wife and I have 3 smaller kids and I"m just looking for time to build a lot of your plans.
Keep up the great work!
Scarlet (not verified)
Wed, 11/03/2010 - 18:36
ooh ohh, can we have a mini
ooh ohh, can we have a mini end table version? Pretty please with a cherry on top?!
michelle (not verified)
Wed, 11/03/2010 - 18:36
I am so making this for my
I am so making this for my bedroom....a little table for next to my reading chair. Yay!!! Thanks Ana....HD is going to love me when I keep going in to buy more supplies. :)
Silky (not verified)
Thu, 11/04/2010 - 02:24
This has to be the cutest
This has to be the cutest dining room set I have ever seen.
Ana, reading your amazing blog every day makes me want to move out of my current appartment just to get another excuse to build.
Sandi Anderson (not verified)
Thu, 11/04/2010 - 02:50
Your table is gorgeous! Take
Your table is gorgeous! Take it from me - with a little one running around, you do not want a glass tabletop. Fingerprints cover it ALL the time!
Lynn (not verified)
Thu, 11/04/2010 - 02:52
This would be awesome at
This would be awesome at kid's height, too with small chairs or stools.
IspeakWhale (not verified)
Thu, 11/04/2010 - 02:55
What a perfect size for a
What a perfect size for a game table. I can see my boys playing hours of chess on this little beauty!
Heather C (not verified)
Thu, 11/04/2010 - 03:34
That is stunning! I so wish I
That is stunning! I so wish I had room for this!! and those chairs! Wow.
Jenny (not verified)
Thu, 11/04/2010 - 04:03
I love that table! What is
I love that table! What is the best way to cut a round top? Thanks for all you do, your plans are great!
Kristin (not verified)
Thu, 11/04/2010 - 04:10
I LOVE this! Those chairs
I LOVE this! Those chairs have jumped to the top of my list if I ever get everything else finished.
And am I foreseeing a nice upholstered storage bench in the future? Love it!
Nan Tovar (not verified)
Thu, 11/04/2010 - 04:23
Oh. Wow! Cutest table I have
Oh. Wow! Cutest table I have ever seen! Great job, Ana.
So, hint, hint, when are we gonna have corner cabinet plans ;)
Theresa (not verified)
Thu, 11/04/2010 - 04:59
This one is is terrific. It
This one is is terrific. It may be my next patio table. You chould keep count on how many of these are made. I'm sure it will be a favorite. The new chairs go perfect with it.
AmyK (not verified)
Thu, 11/04/2010 - 06:08
Love it! I had to LOL@the
Love it! I had to LOL@the comment you made about trying to figure how the heck you could be off square by so much...I'm almost finished with a laundry-storage built-in area & I spent more time than I care to admit to spending, trying to figure out how it could possibly be out of square. Still have no idea...had to take it apart and fix it though. :D
love love love this site & I'm so happy to hear your Mom is doing better! Thanks for the great site!
Jami H (not verified)
Thu, 11/04/2010 - 07:29
This is the cutest thing
This is the cutest thing ever! Love it. And did you say "watch TV"?? How do you find time to do it all?
Jenn (not verified)
Thu, 11/04/2010 - 09:42
6" off. oh my. Thank you
6" off. oh my.
Thank you for sharing the head-scratchers along with the victories. You keep it real, and we appreciate that SO MUCH!
Jen (not verified)
Thu, 11/04/2010 - 10:45
I love the lines of this
I love the lines of this table, it's so clean and elegant! It would fit in with anything. Great job!
Katie (not verified)
Thu, 11/04/2010 - 11:45
Ana, I love it! Can you give
Ana, I love it! Can you give us a tour of your house? I'm really curious to see how you have incorporated all your furnature. Can you show us your workshop area too? Does all this beauty come from a modest workshop or do you have a super organized area with tons of tools? Just curious.
Rebecca (not verified)
Thu, 11/04/2010 - 14:21
I am impressed you even own a
I am impressed you even own a tv. It sounds like there is no way you would ever have time to sit down!!! Love this table just like everything else!
Keri (not verified)
Thu, 11/04/2010 - 17:06
I second that!
I second that!
Tara S. (not verified)
Fri, 11/12/2010 - 06:03
Ana, what color stain did you
Ana, what color stain did you put on that table and chairs? It's beautiful!
Ana White (not verified)
Sat, 11/13/2010 - 13:01
Tara, the table is stained in
Tara, the table is stained in Walnut by TrueTone. True Tone is sold at True Value and it creates a much richer, less blotchy stain. No wood conditioner was used. The Ram added two coats of satin poly.
leslie lozano (not verified)
Tue, 11/16/2010 - 02:35
Hello Ana, What
Hello Ana,
What measurements would I need for the base for the top to remain sturdy if I wanted my top to be 55 round?
Ana White (not verified)
Tue, 11/16/2010 - 08:07
What I would do is subtract
What I would do is subtract 55-36 to get 19". Then add 19" to the longer support, and 8 1/2" to the shorter supports. Then build, and adjust your aprons accordingly. HOWEVER, I cannot guarantee the base would be as strong that big - but I can tell you this, my table is very very strong with the added cross bracing on the bottom.
Danielle (not verified)
Sat, 11/20/2010 - 09:23
I third!
I third!
Holly Y. (not verified)
Fri, 02/18/2011 - 12:47
What would you suggest for
What would you suggest for turning it into a bar-type table for the patio? Thanks!
Guest (not verified)
Tue, 09/06/2011 - 23:48
round-x-base table
nice basic setup and easily modifiable to meet the type of table you are making. I am modifying it for 24" round marble laminate tops with rubber T-edge for coffee end tables. I have 3 so I think I will modify a little further and make the 3rd for my granddaughter's play table. Again, thank you very nice simple design with so many possible modifications and applications.