U-Shaped Banquette Bench with Storage
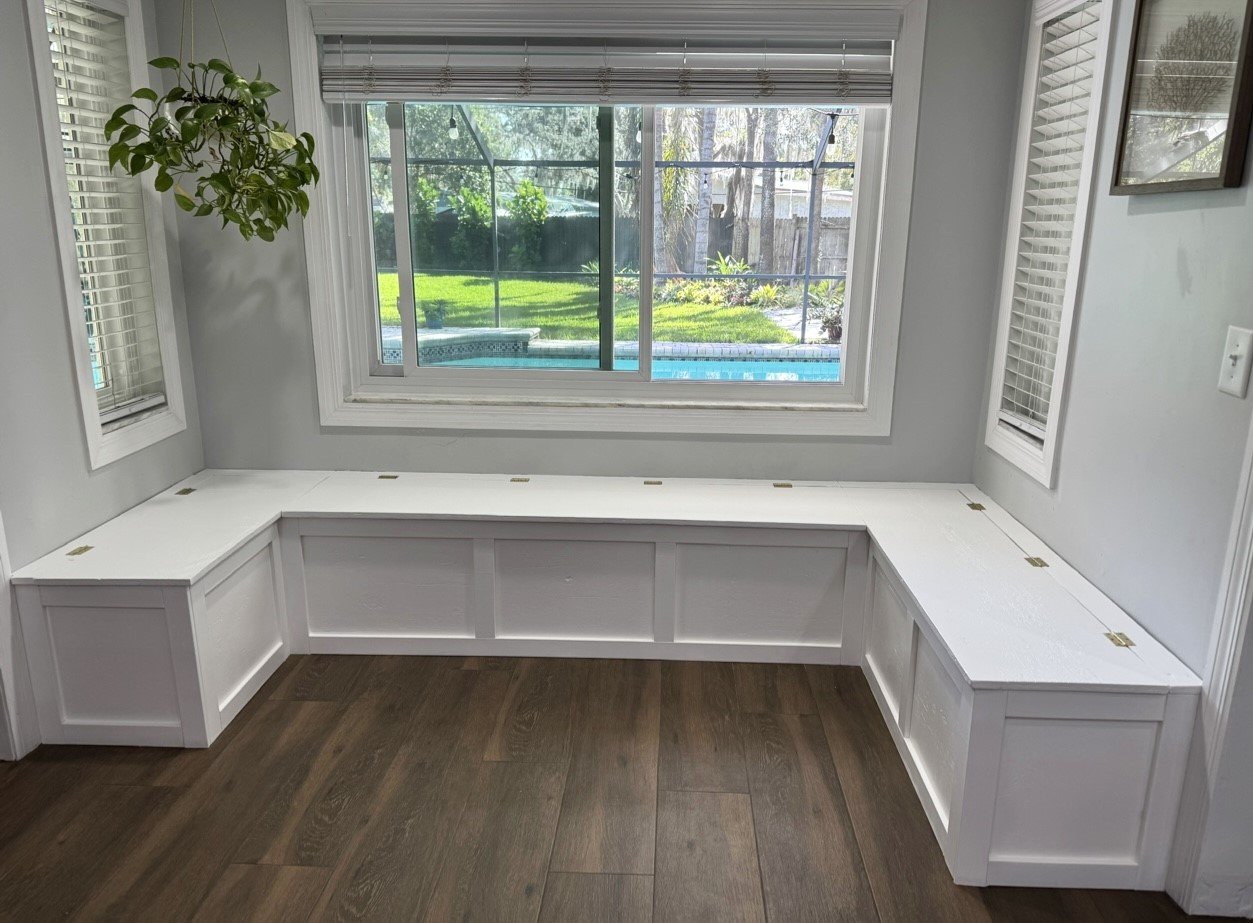
Hi! I just finished your bench plans! Omg it looks so good! Your plans are so easy to use. I am so pleased with the outcome! You have def inspired me! Especially for a beginner like me! - Andrea Eifel

Hi! I just finished your bench plans! Omg it looks so good! Your plans are so easy to use. I am so pleased with the outcome! You have def inspired me! Especially for a beginner like me! - Andrea Eifel
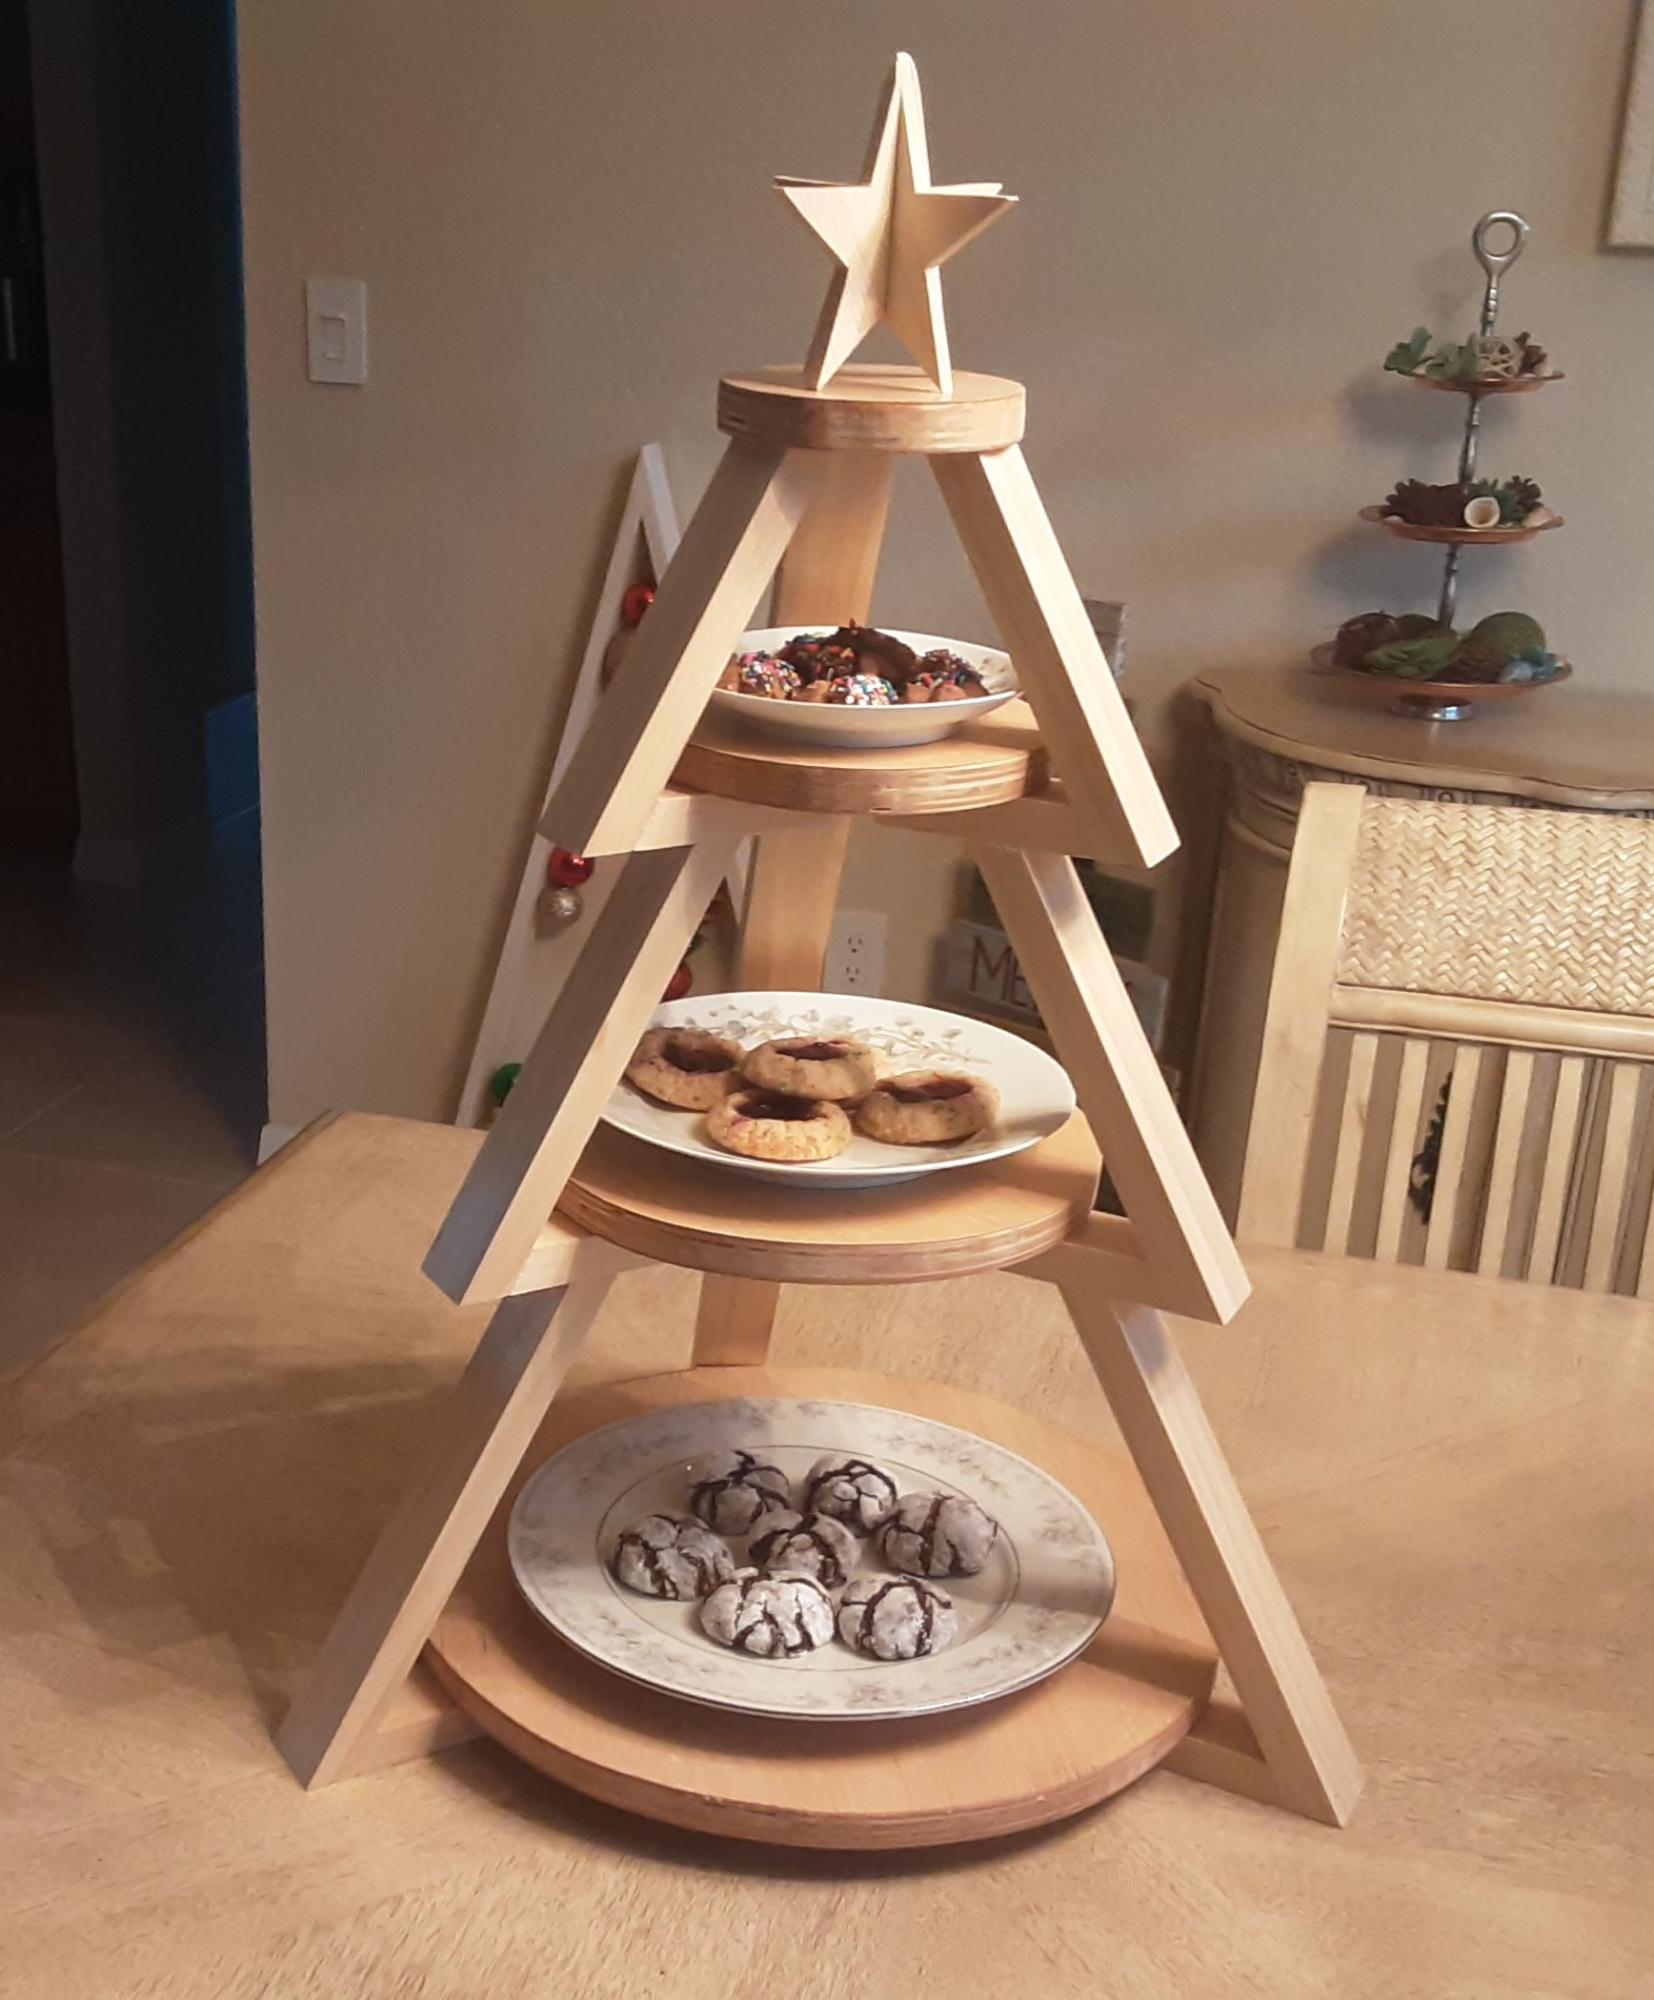
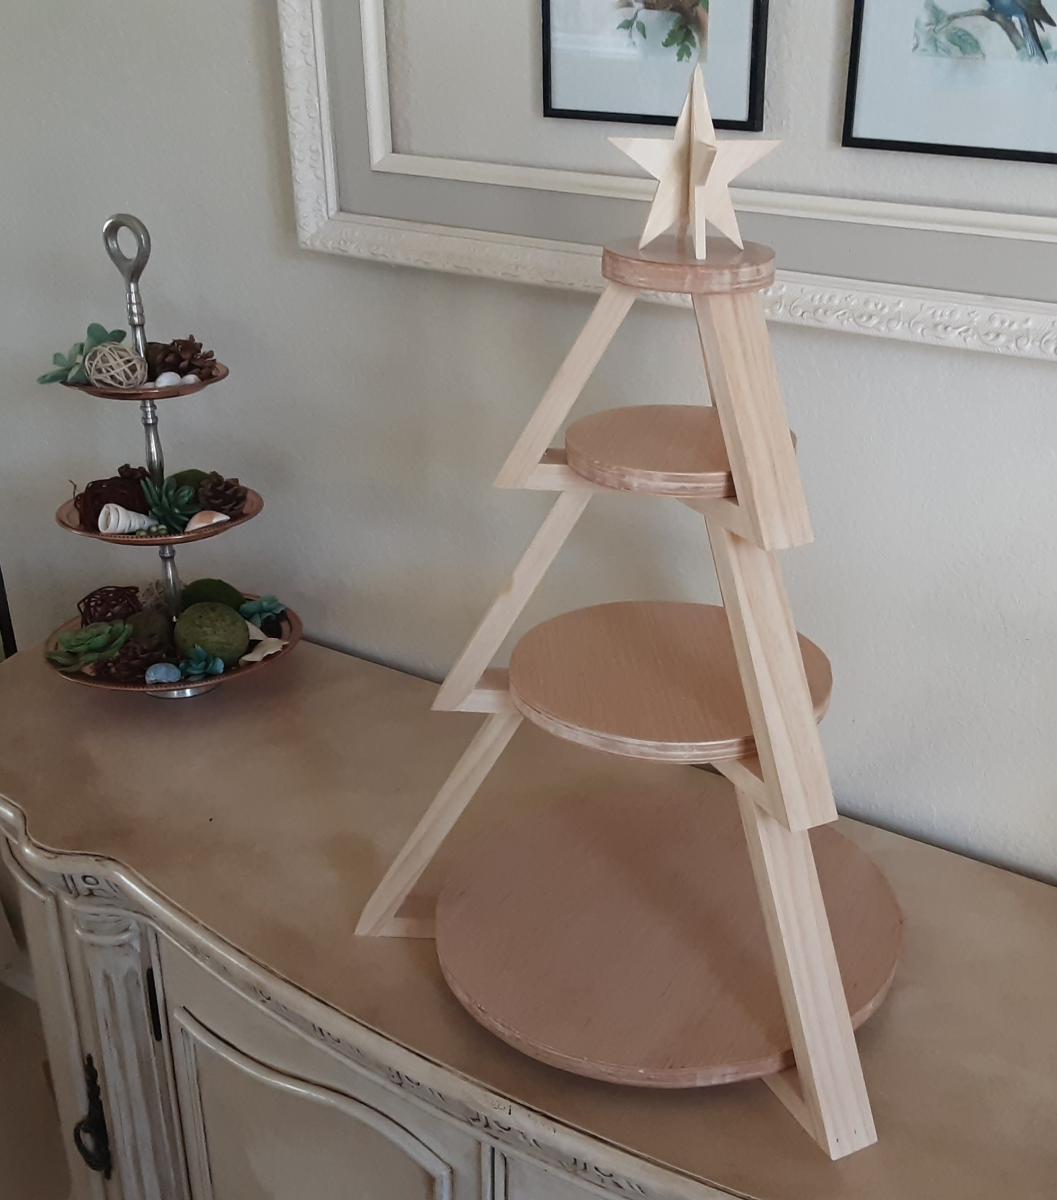
Inspired by Shara of Woodshop Diaries, created this 3 tier tray for displaying cookies for Santa. Added a 3 dimensional star as the topper and simply followed the excellent photos and schematics on Shara's website.
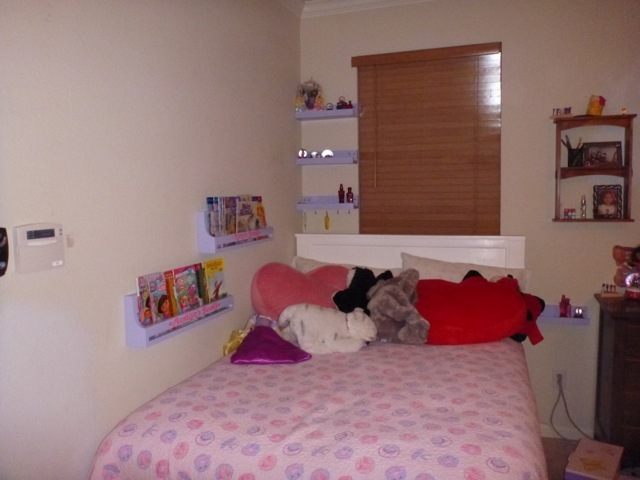
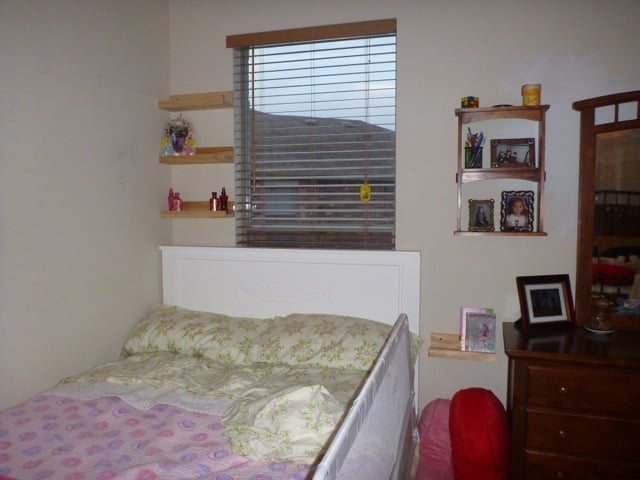
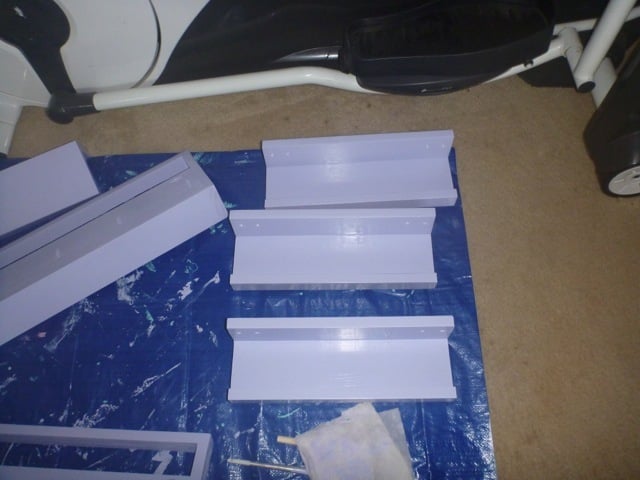
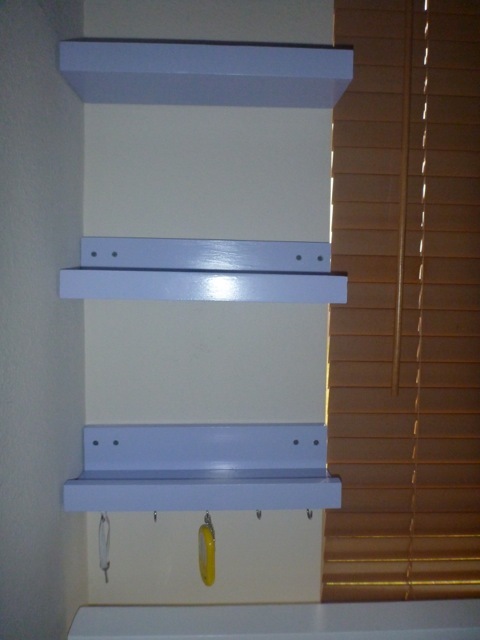
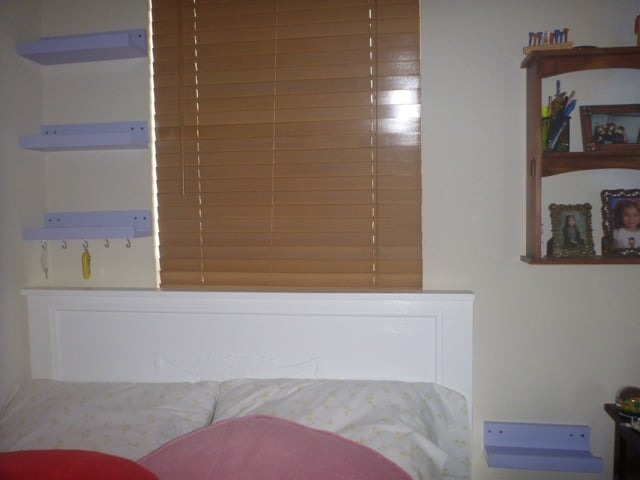
Here are a few of the ten dollar ledges we added around the girls bed. We had no room for tables so we thought we would give this a try. It's working beautifully. We hung the ledges in studs and they are standing up to constant use perfectly. The girls have space for their most cherished nik naks and a drink in case they wake thirsty in the night. We couldn't be more pleased. Now I'm seeing the possibility for ledges in every room.
Thu, 03/22/2012 - 00:34
nice post,thanks for sharing! BTW,check out my new android 4.0 tablet newfreeshipping.
Mon, 04/23/2012 - 22:14
It is nice that you posted something like this [url=http://www.pandawill.com/twilight-turtle-night-star-constellation-p3557… ] Twilight Turtle [/url] and I am quite lucky to read it. Thanks for posting this!
Mon, 10/22/2012 - 03:56
I like all your post. I will keep visiting this blog very often.
Tue, 06/26/2012 - 20:01
Your knowledge of this subject comes through clearly in this article. I love to read this kind of articles, I hope you will update it. Thank you for sharing it with me.
http://www.sbwire.com/press-releases/how-to-get-your-ex-back/magic-of-m…
Thu, 04/19/2012 - 19:01
If converting existing floor space into a half-bathroom, such a renovation can cost as little as a few thousand dollars, making the addition of a powder room one of the few home improvement projects where the value added to the home exceeds the cost of the renovation.water damage Pearland tx
Fri, 04/20/2012 - 02:14
You can also use vinegar to remove heat stains on stainless steel cutlery and pans, or remove streaks and heat stains by rubbing with club soda or olive oil.Basement water Atlanta GA
Sat, 04/21/2012 - 00:28
Before you go to use it...if it's been sitting for awhile...give it a good shake. As you can see in this picture...it does tend to separate a bit. But after a quick shake it's good to go. To use: spray on stains as you normally would. I usually let mine "soak in" for a few minutes at least. Then launder as usual.water damage Temecula CA
Mon, 04/23/2012 - 22:11
It is nice that you posted something like this [url=http://www.pandawill.com/mini-led-lcd-projection-clock-digital-keyring-…] Projection clock [/url] and I am quite lucky to read it. Thanks for posting this!
Fri, 04/27/2012 - 10:11
I have no experience to build a site like you said on this page. I need to learn to create a site and develop it, perhaps using new versions of Drupal could improve and make my blog more often visited by Internet users.water damage restoration Raleigh Durham NC
Fri, 04/27/2012 - 10:13
It is very fascinating, You’re a very professional blogger. I’ve joined your feed and look ahead to in search of more of your excellent post.water damage restoration Raleigh Durham NC
Fri, 05/11/2012 - 07:40
This blog is really very interesting and easy to understand the information provided in it. It is very nice to view this blog and it's nice to see the best information cited here.Water damage Lafayette LA
Fri, 05/18/2012 - 19:54
I used to be more than happy to seek out this internet-site.I wanted to thanks in your time for this glorious read!! I positively enjoying each little bit of it and I have you bookmarked to check out new stuff you weblog post. Water Damage Anaheim CA
Fri, 06/01/2012 - 04:59
Quite insightful submit. Never believed that it was this simple after all. I had spent a very good deal of my time looking for someone to explain this subject clearly and you're the only one that ever did that. Kudos to you! Keep it up. Water extraction Lakeline OH
Sun, 06/17/2012 - 20:37
I'm so excited that I have found this your post because I have been searching for some information about it almost three hours. You helped me a lot indeed and reading this your article I have found many new and useful information about this subject. Paint Contractor Glendale AZ
Mon, 06/25/2012 - 03:45
Your knowledge of this subject comes through clearly in this article. I love to read this kind of articles, I hope you will update it. Thank you for sharing it with me.
http://www.hcgrevival.com/
Wed, 06/27/2012 - 04:10
Sometimes it is so hard to find good and useful posts out there when doing research. Now I will send it to my colleagues as well. Thank you for being one of them.
http://www.reklama-internete.com/
Fri, 06/29/2012 - 01:15
Thanks for this exciting post. It is well written and has some great content. Do you have any others that I can go to about this subject?
http://www.californiahealthinsurancenow.com/Kaiser_Permanente.html
Tue, 07/03/2012 - 05:21
This information very useful! I've been looking for books of this nature for a way too long. I'm just glad that I found yours. Looking forward for your next post. water damage restoration Raleigh Durham NC
Tue, 07/10/2012 - 15:35
This is great stuff. Very handy these ledges are. lets see how many more can be added.
Nice, Thanks
Mon, 07/16/2012 - 22:55
The program is designed under the same model as new homes built for Habitat families where the veteran will repay the zero interest loan necessary for these repairs, which is then deposited into a revolving fund to assist additional families in need of decent housing. Mold Inspection Covington LA
Thu, 07/19/2012 - 04:32
I hope people listen, too, but I'll be surprised if they do. In all the years I've been in the business, we're still fighting the same battle we were when I first started - most folks want the lowest ... Water Damage Restoration Colorado Springs CO
Wed, 08/01/2012 - 22:13
If you're involved in a head-on crash, the windshield must stay in place to keep you inside the car and to keep flying debris out. If the windshield flies out, so too may you or your kids. Improperly installed windshields can easily be dislodged during a crash. Architectural Engineer NYC
Thu, 08/02/2012 - 03:41
This blog is really amazing due to its unique and outstanding post.
Fri, 08/17/2012 - 06:48
You have to put efforts in home maintenance to make sure everything is in right condition. If any part of your house needs repairing then have it repaired immediately. If you neglect the problem for too long then it might become even more complicated. Masonry contractor West Hartford CT
Mon, 09/03/2012 - 02:11
The girls have space for their most cherished nik naks and a drink in case they wake thirsty in the night. We couldn't be more pleased. Now I'm seeing the possibility for ledges in every room. http://www.genericviagratab.com/
Sat, 09/29/2012 - 09:29
I am very enjoyed for this site. Its year informative topic. It help me very much to solve Some Problems. Its so fantastic and Opportunity are working style so speedy.
Outdoor Lighting Batavia IL
Tue, 11/20/2012 - 00:17
This is represented partly in the significantly higher frequency and register neutrality of connectives such as tak or totiž when compared with the English so and therefore but primarily by the nature of the mental spaces set up by the Czech lexemes. water damage Anaheim CA
Fri, 11/30/2012 - 03:19
The contemporary strategy is often focused on the development of specific skills and abilities. As a result, it fails to provide with the broader education and, instead of the formation harmonious, balanced personalities, it breeds specialists trained to work in a specific field. This is a good example like the ones http://bestsamplepapers.com does. People prefer more broad basis.
Thu, 02/07/2013 - 02:08
Pretty good post...
I just stumbled upon your website and wanted to say that I have really enjoyed reading your blog posts. Any way I'll be subscribing to your feed and I hope you post again soon.
Thu, 02/14/2013 - 23:45
A lot of interesting things found on your blogs, like the topic! The author thanks and success in the blog. http://bbrencontresexe.com
Fri, 04/12/2013 - 05:55
As a Newbie, I am permanently exploring online for articles that can be of assistance to me. Thank you
http://healthpharma.blogsome.com/
Darling Cabin Bed All Ready for the Holidays - Credit Unknown
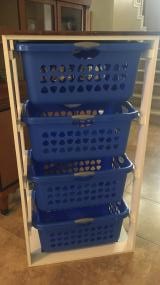
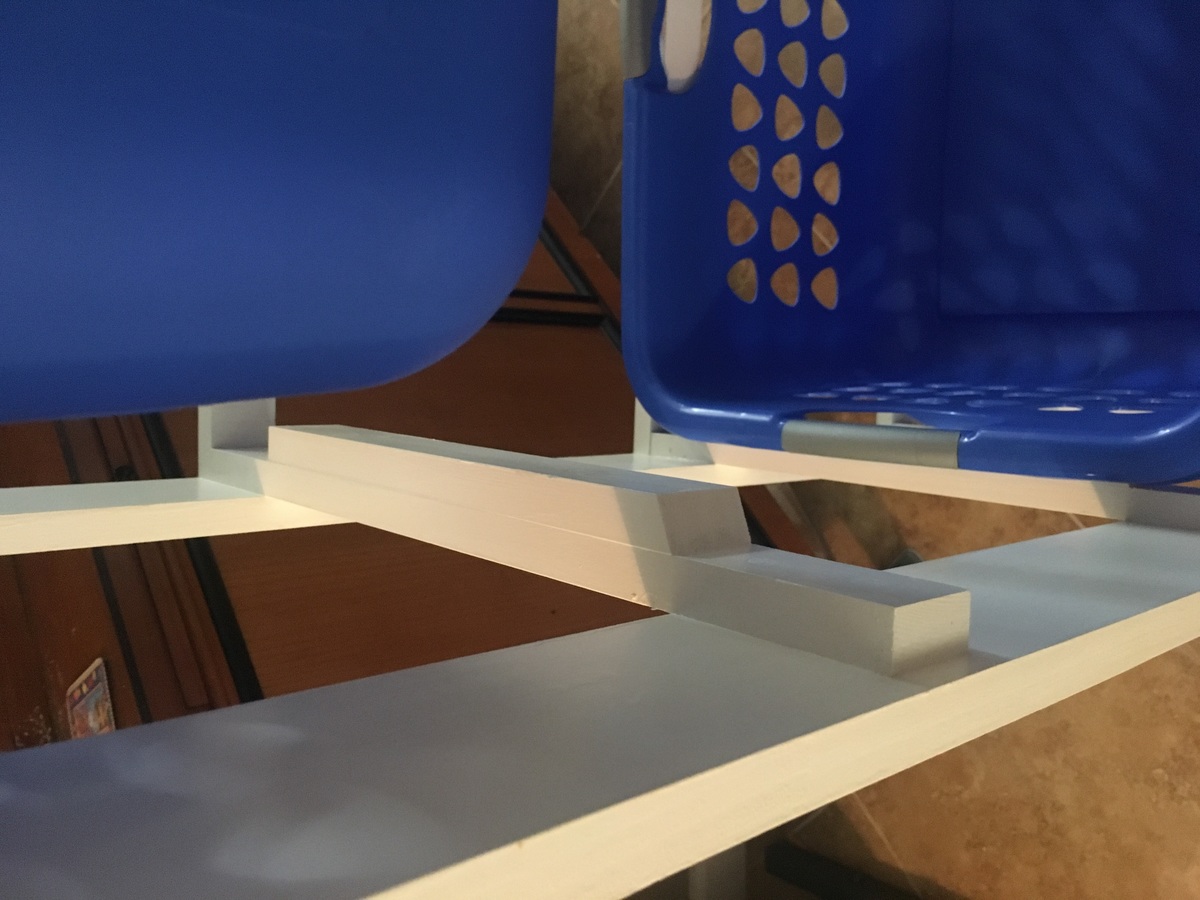
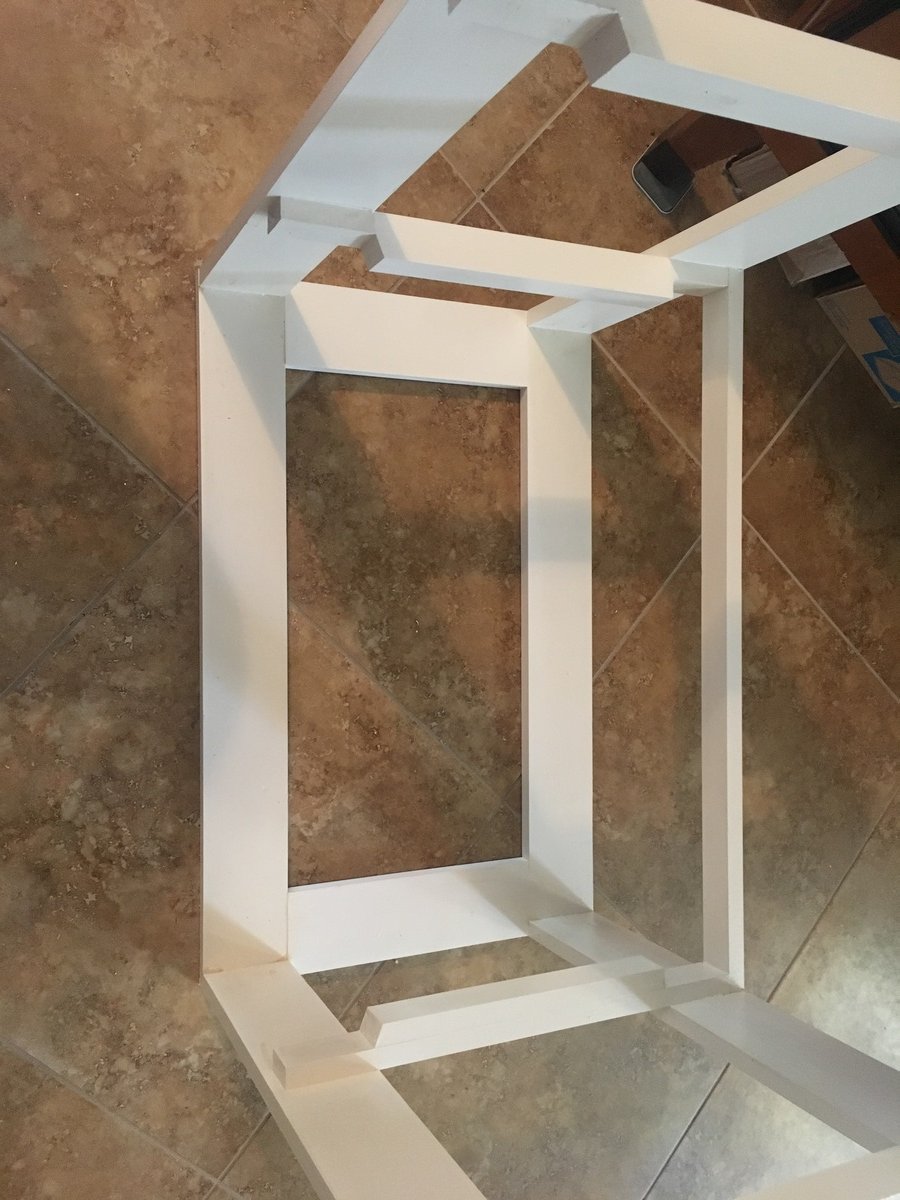
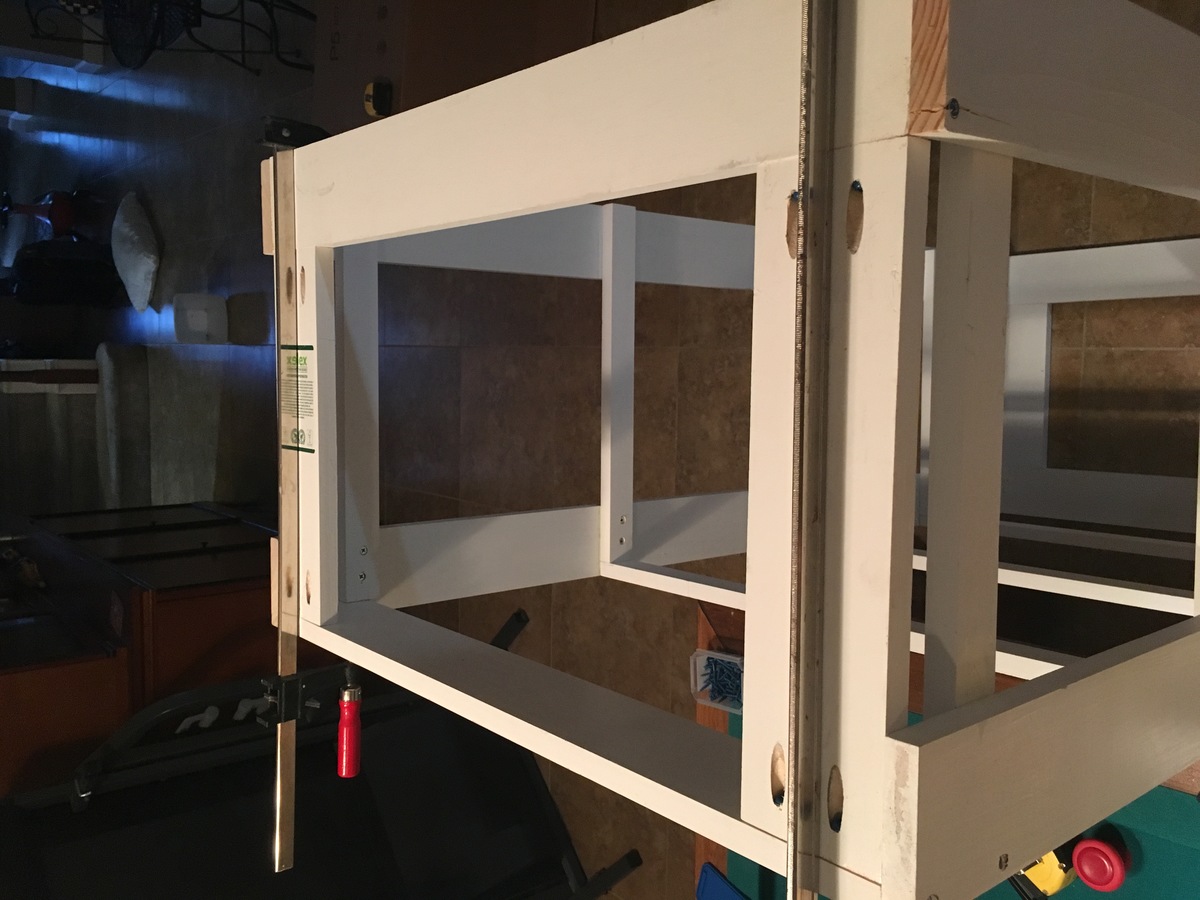
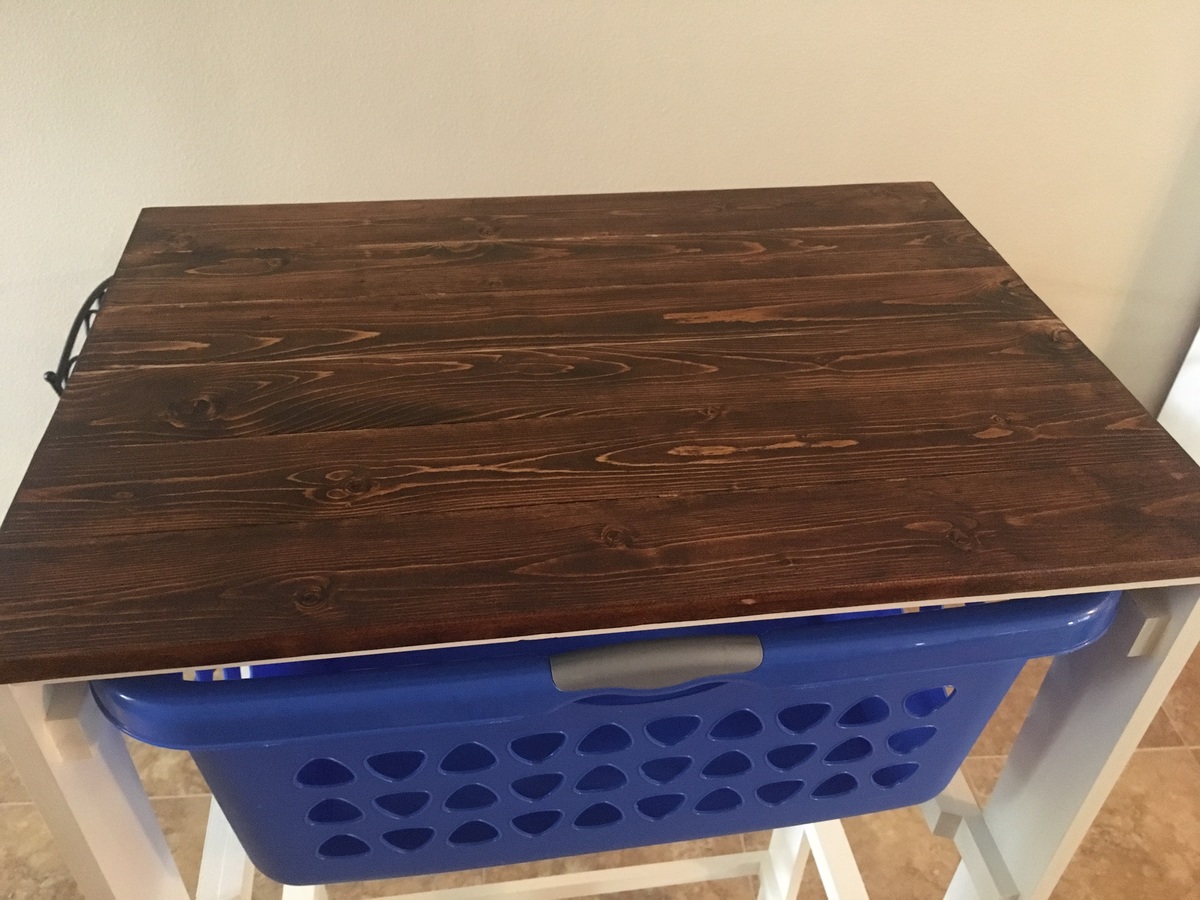
i made a laundry dresser about three years ago, but we had a water filtration sytem installed in our laundry room and I had to build another one to fit the new dimensions. I loved this idea because it’s simple, and more open. I wanted to choose some larger, sturdier baskets, so I chose the Sterilite 2-bushel baskets. I bought them at Walmart. I am not an expert in woodworking, but I am very happy with the results. I accidentally made it a little too wide, but I added another 1x2 to the rack where the baskets hang, and now the baskets fit perfectly. I chose pre-primed pine boards because I hate sanding and I hate painting. The top are just normal 1x4 pines that I glued together and fastened from underneath. I did have to sand those. I also did add a coat of paint that matches my baseboards. All in all, I am pleastly surprised that it turned out.
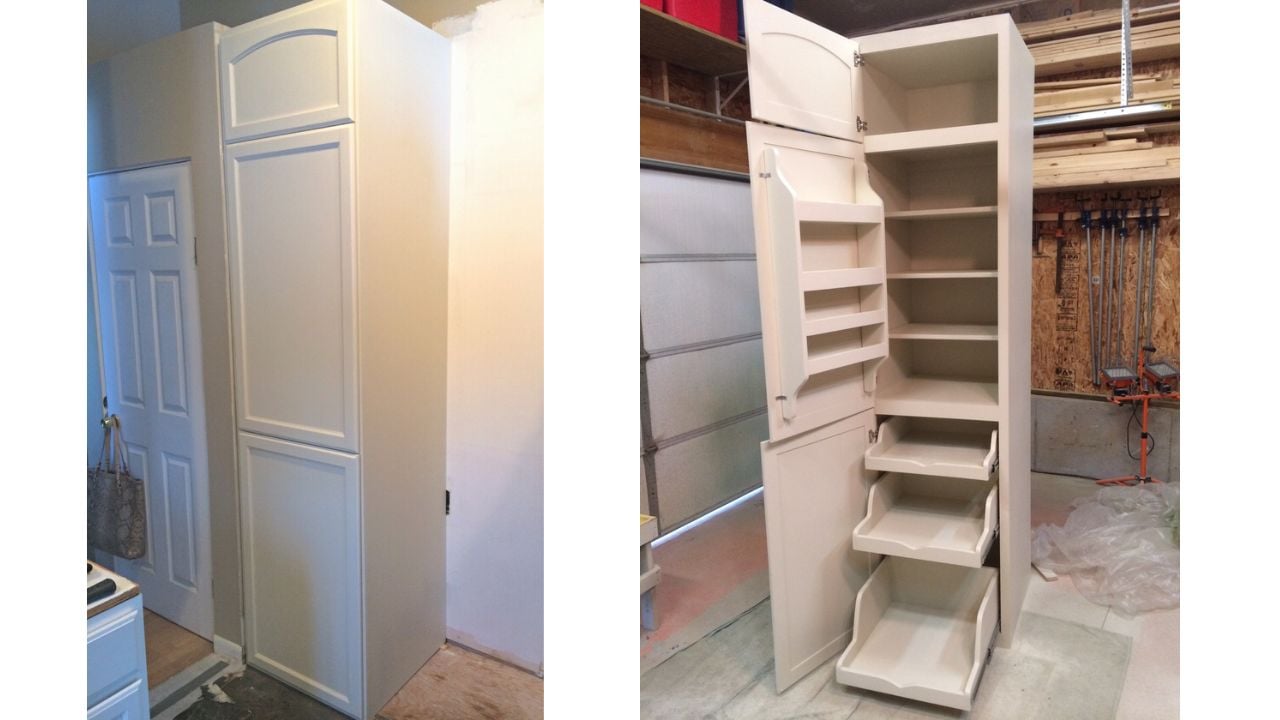
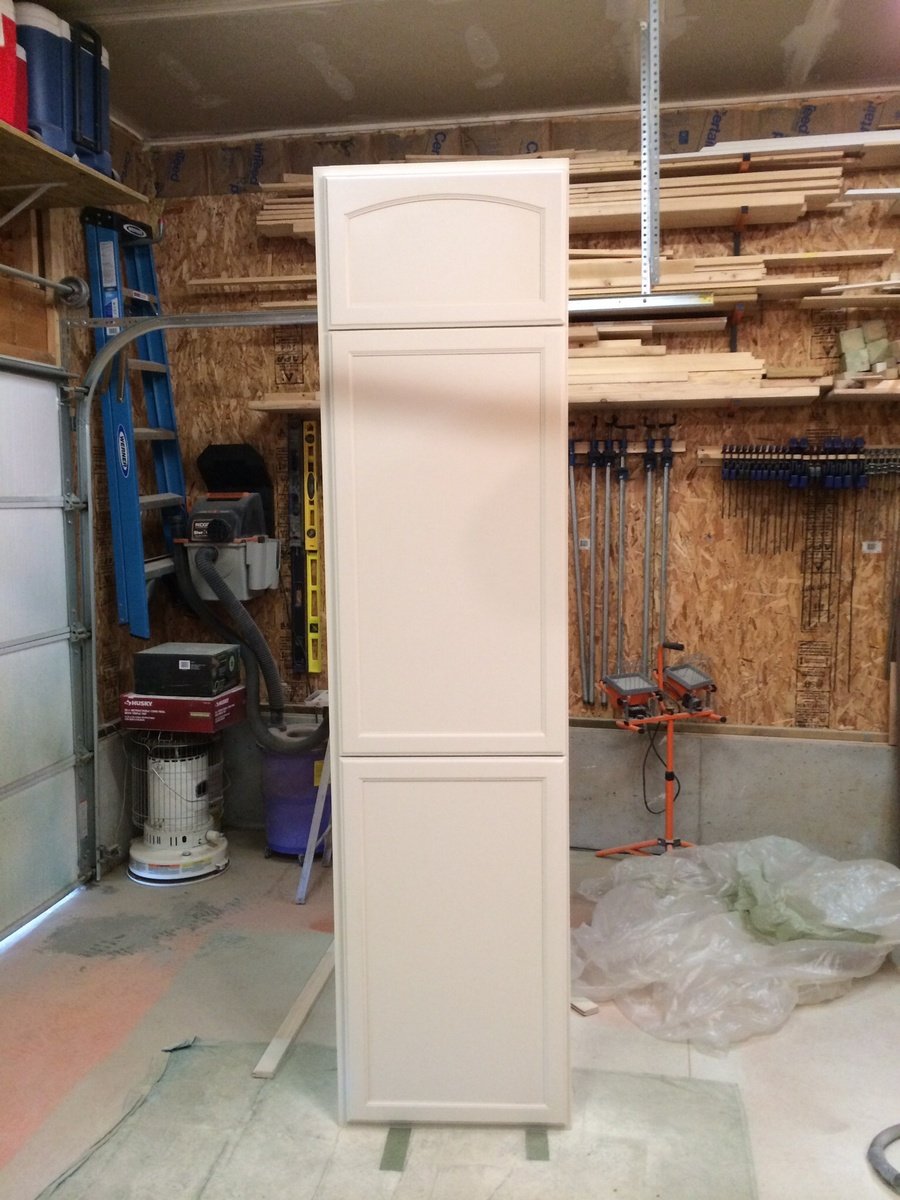
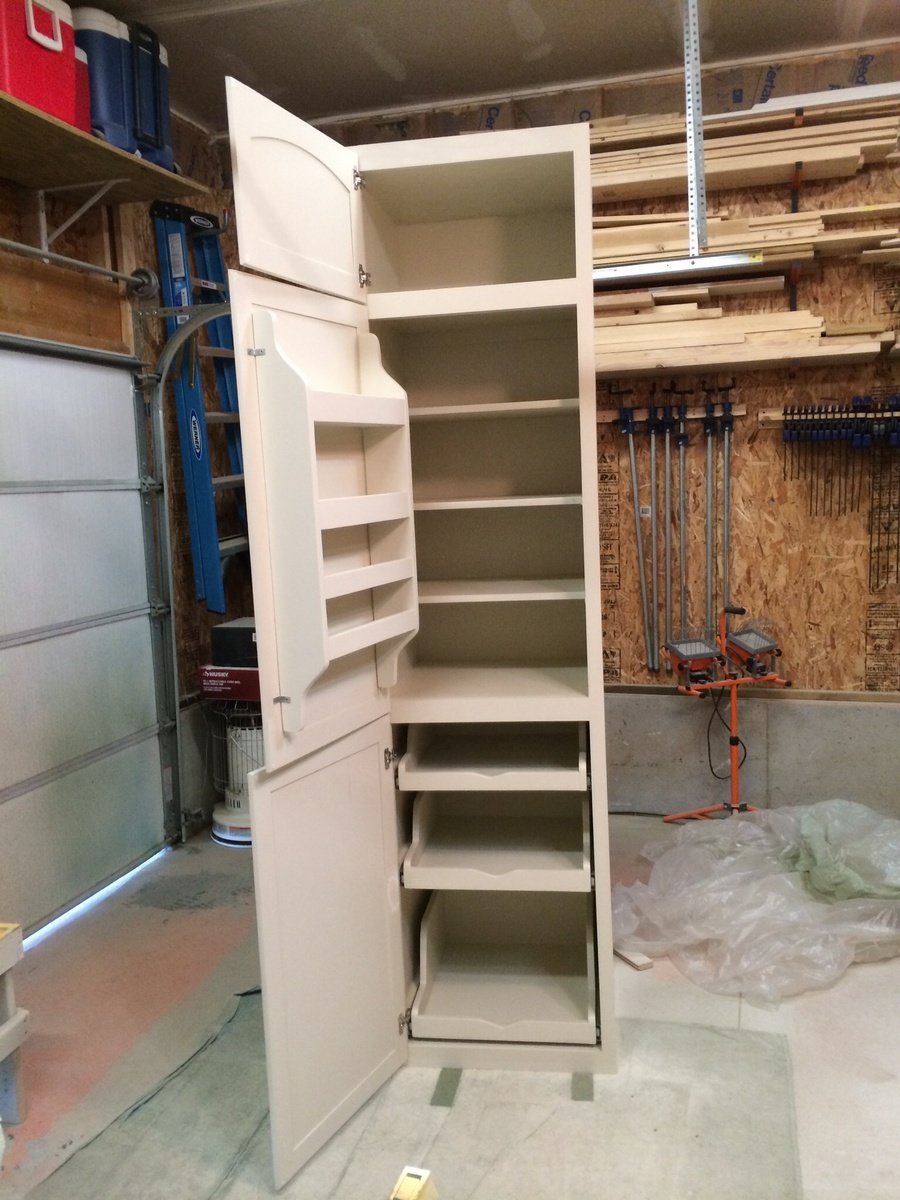
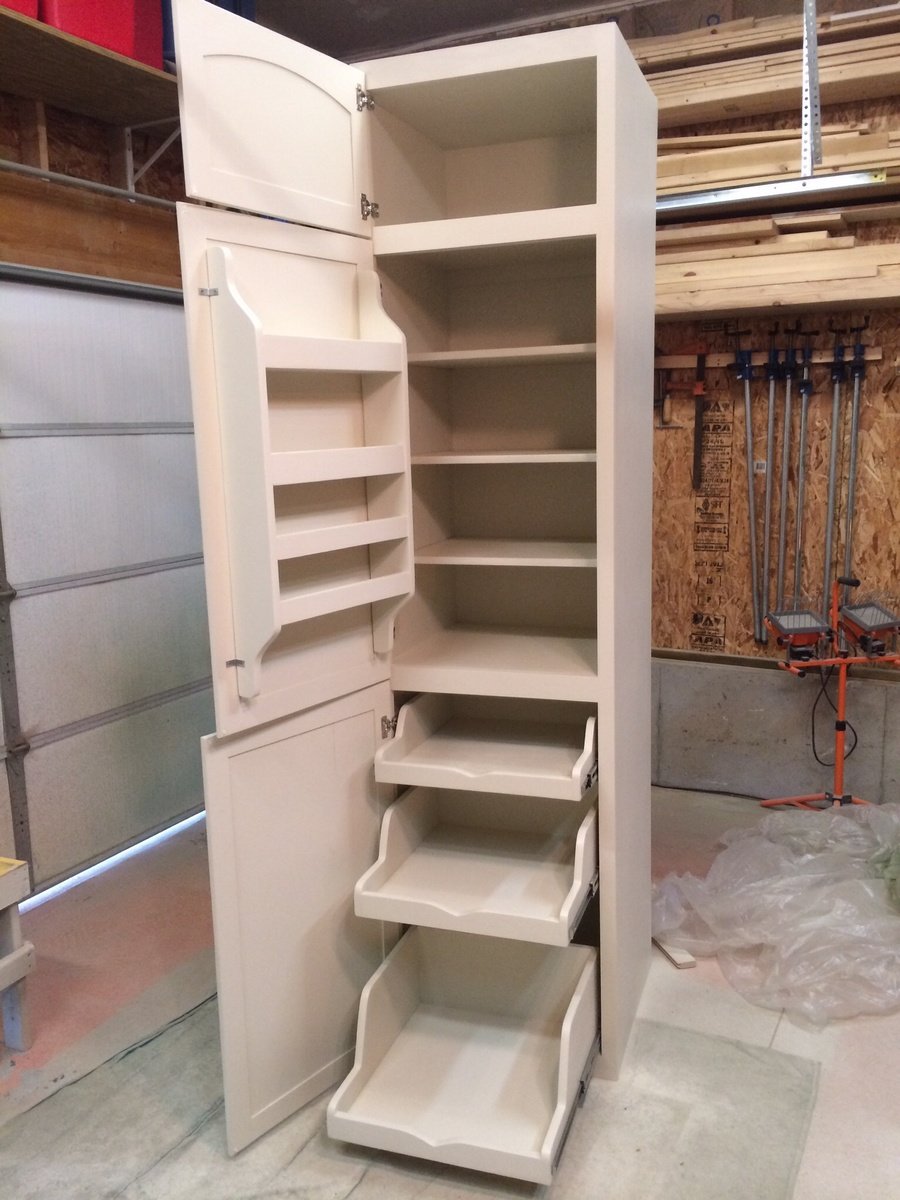
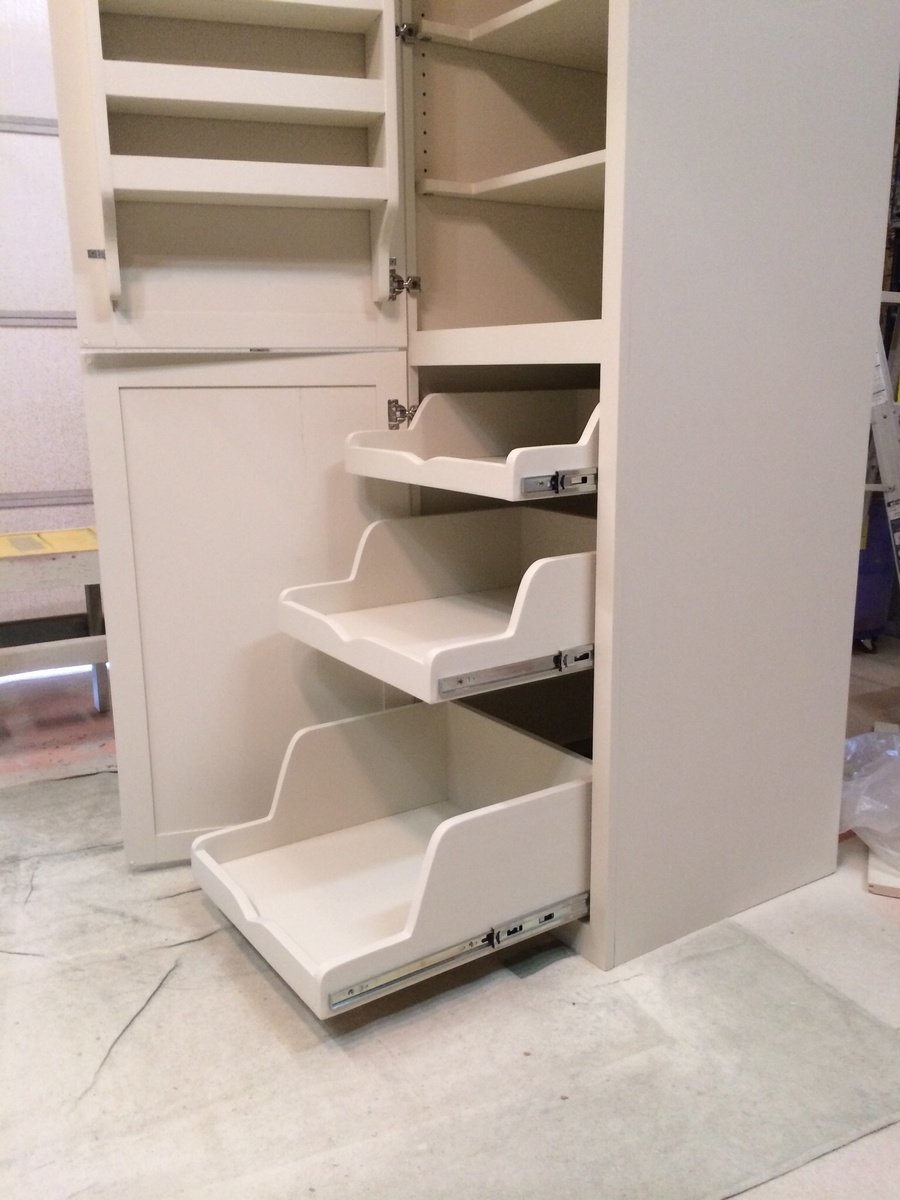
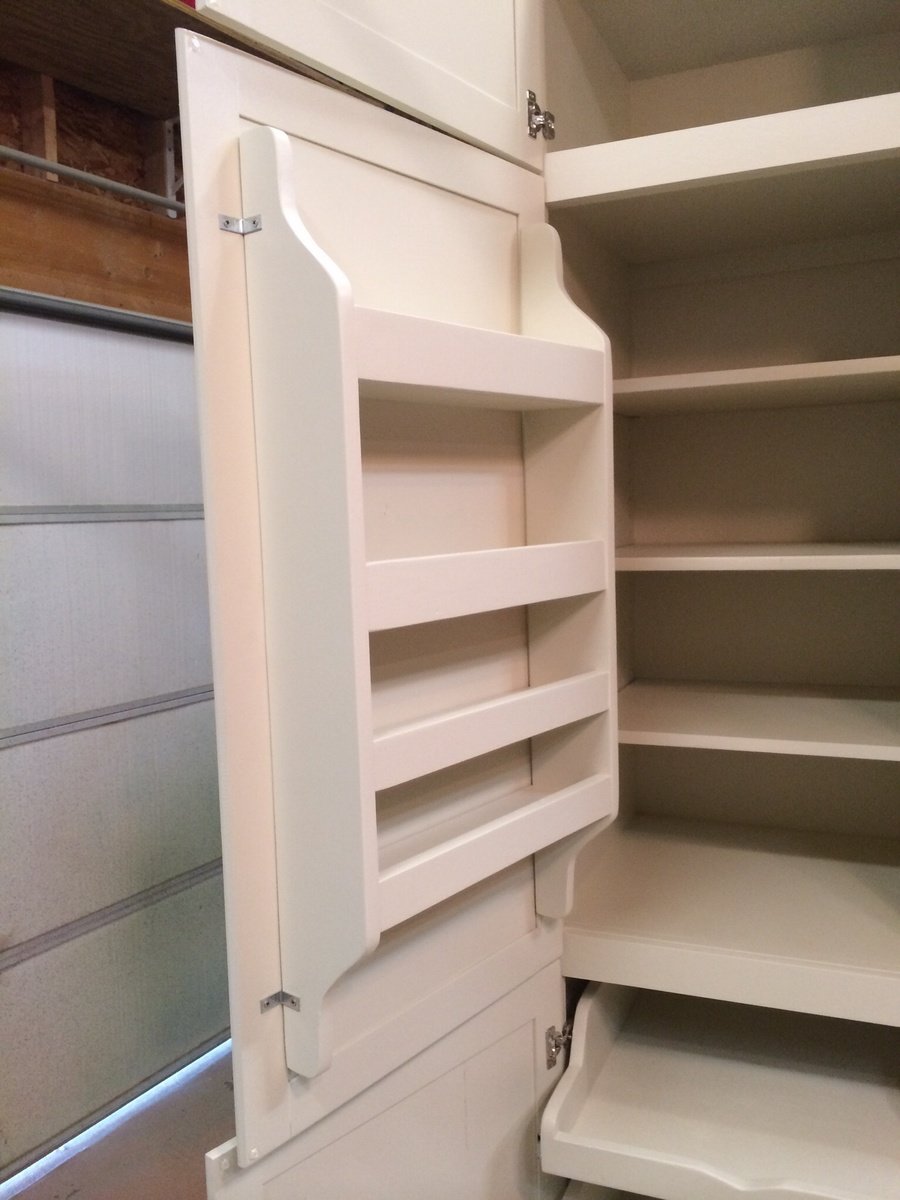
I made this pantry to match some new kitchen cabinets that my friend ordered from lowes. He wanted me to make all of his cabinets but unfortunately I didn't have enough time, it was kind of one of those things hey I'm redoing my kitchen can you make this. This was all built and designed from a picture his wife found on pinterest with just the measurements for the space it needed to fit in.
Mon, 02/10/2014 - 10:25
Great job! We're planning a pantry build in the near future and yours is just lovely! I love the pull out drawers!
Mon, 02/10/2014 - 10:25
Great job! We're planning a pantry build in the near future and yours is just lovely! I love the pull out drawers!
Fri, 06/17/2016 - 18:39
HI -
My husband and I have been trying to find a DIY Pantry for our kitchen. We've looked everywhere and finally came across this! We love it and would like to try and build it. Do you have the plans available to share? I look forward to hearing back from you.
Fri, 11/27/2020 - 21:33
I tried the link for crafted perfection in attempt to get the plans for this. It led me back to this website. Is there ANY chance of getting the plans for this pantry PLEASE?
Thu, 12/24/2020 - 07:18
Where can I get the plans for this pantry -- Please advise.. Love your work..
Fri, 08/06/2021 - 14:55
Please send me the plans for the kitchen pantry!!
Wed, 09/01/2021 - 13:59
Okay, Ana, where are the Plans? You're killing me with this teaser! I'm not smart enough make something this great without serious plans like you usually produce. Help this old guy, please.
Wed, 03/23/2022 - 12:03
I would love to get these plans. We are in a new house and I need extra storage and this is perfect.
Thu, 08/11/2022 - 18:08
Hi Ana! Do you have plans? My daughter is moving and could always use more kitchen cabinets. She loves kitchen gadget everything!
Potting Bench Build! 🪴🛠️❤️
.
Another project I’d been working on 😍💪🏼 I love building things and woodworking. Been wanting to build a potting bench for a couple years now. Finally decided to do it. Found a little plan on Pinterest by Ana White, headed to Home Depot, and bought a bunch of 8ft 2x4s and 1x4s. Customized the plan by adding additional shelves, lattice-like backing, hooks, and knobs.
Had a bunch of leftover paint and stain, finished it off with a few coats of spar urethane. - Kendra

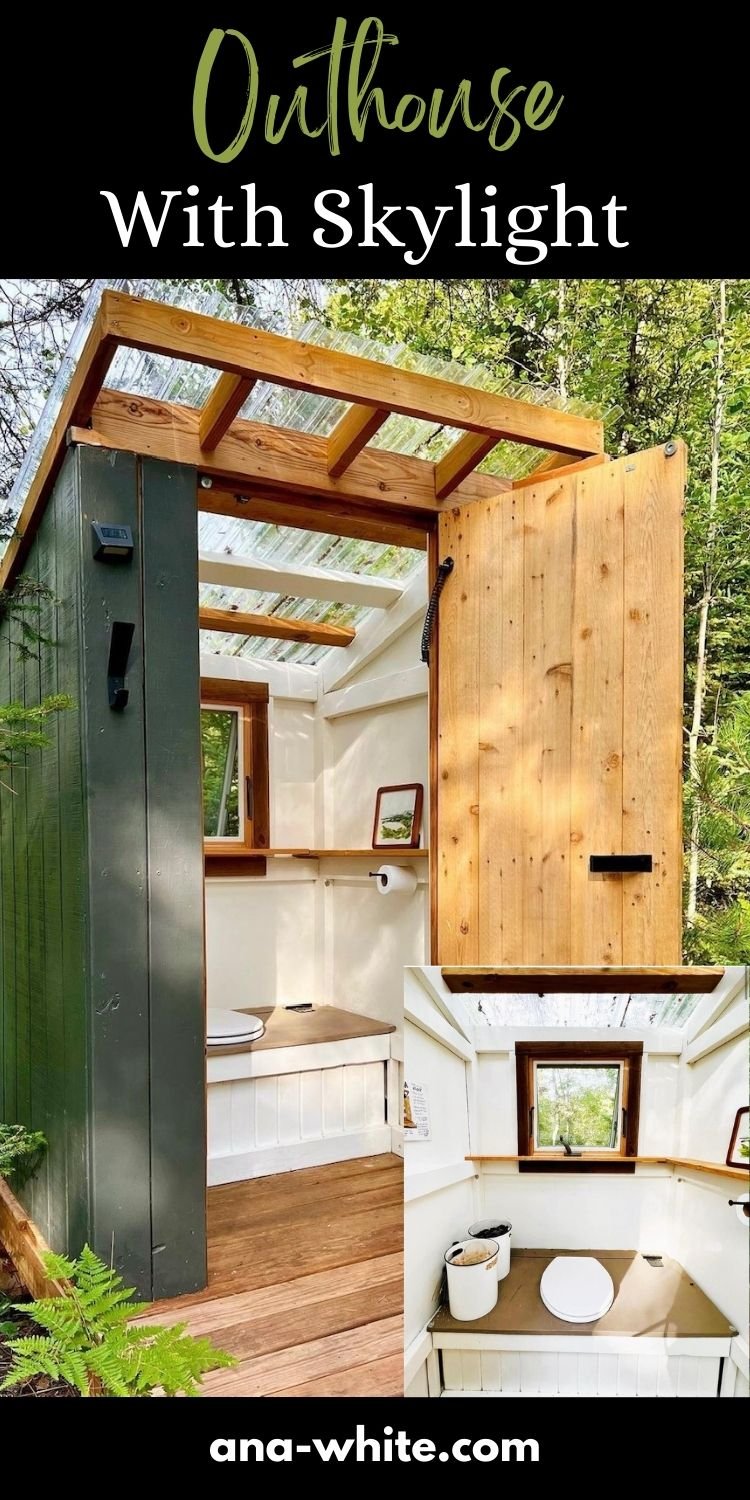
Our favorite throne in town.
My daughter and I built the outhouse in the snow a few years ago. Once the TwoGa was named after the Stuga, the outhouse quickly became “The PooGa” (aka “The Ash-Hole “🤣). We use ash in the winter and sawdust in the summer, to keep away the stink, which works like a charm.
This is an adaptation to an Ana White outhouse design.


Fri, 08/04/2023 - 11:06
Love what you did here, the natural light and bright cheery interior, well done!
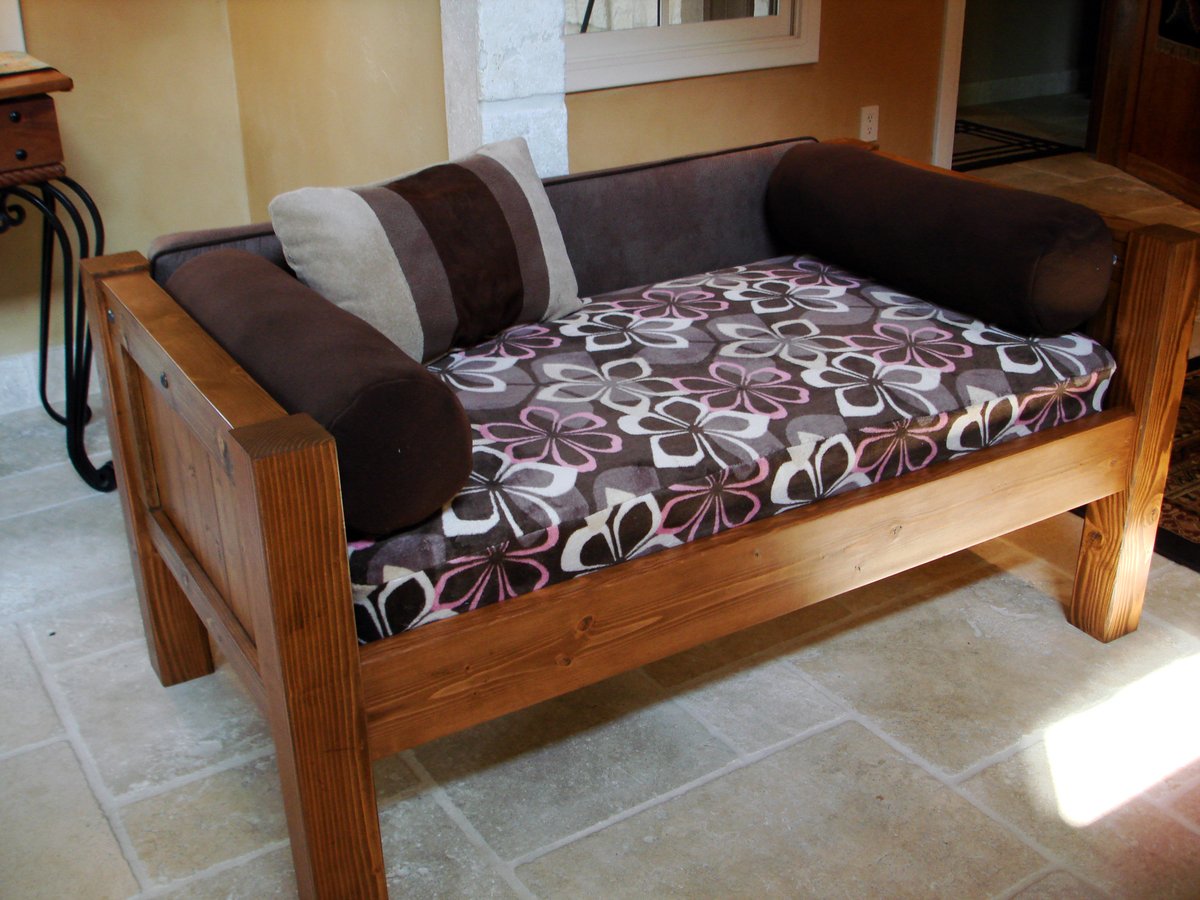
Yes, my husband and I share our bedroom with 6 dogs and an occasional cat (or 4). Our older dog (Petra) has slept on our bed for over 10 years, and she's getting too old to jump anymore. We didn't want her to feel like she was getting kicked off the bed, so I made Petra her very own bed at the end of ours so that she wouldn't feel left out. I was inspired by MurdaRae's dog bed (http://ana-white.com/2012/06/doggie-daybed), and thought it was genius to use a toddler/crib bed. So I went looking for plans on Ana-White, and came up with a mixture between a couple of twin bed plans. I love that the plans are easy enough to modify my sizes, and come up with exactly the custom solution that I need. This was my first big project using Bri-Wax. The last one was kind of a disaster when the wax changed the stain color to something not-so-great. With this project, I learned to wait at least 2 weeks before attempting to wax it. I was blown away with the results. It is a beautiful subtle satin finish that feels great to the touch. Plus, I can easily touch up all the dog fingernail scratches that will inevitably occur. When I re-assembled the bed in my bedroom, I actually nicked it in a few places. No problem -- slap on some more Bri-Wax! My Bri-Wax was 11 years old, and pure liquid. I tossed it in the fridge (per Bri-Wax's recommendation), and it was as good as new. The only real problem I had with this project was leaking sap from one of the 4x4s. I'm still fighting this today. In talking with Rustoleum/Zinsser reps, they said that no sap could penetrate their "Seal Coat" shellac product. After 5 coats, the sap is still penetrating, but only if I turn it on it's side or upside down. I'm still baffled. I made the mattress cover out of a dog blanket, and made the cushions from some remnant fabric (suitable for dogs and weekly washing), so this was a fairly inexpensive project. It was a success because Petra slept in her bed from the fist night and loved that she had all the room to herself, and no boston terrorists (I mean terriers) attempted to bother her.


Sun, 08/26/2012 - 10:24
It matches the woods in your bedroom so well and looks great! Also, I love the bolster pillows around the edges. That is something I need to make for our dog bed. Thanks for sharing.
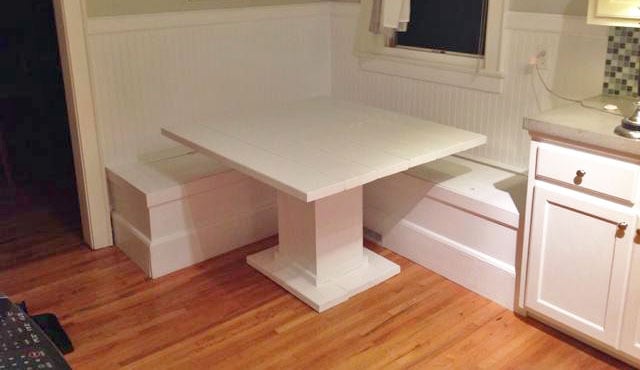
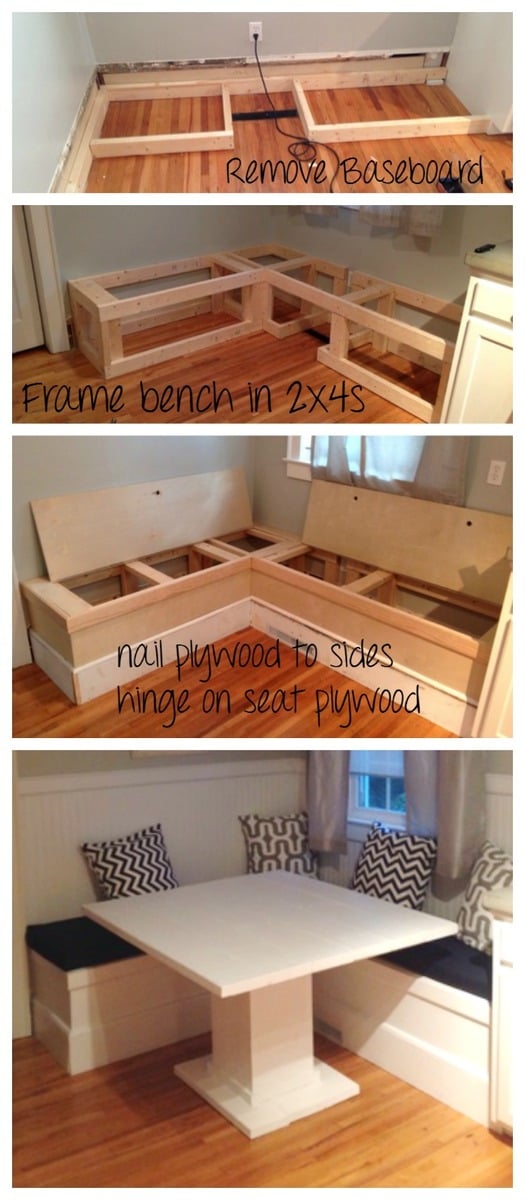
I completed this project in a weekend, over 2 days. The space was an empty void in the corner of our kitchen, so I decided to fill with a functional seating and eating space.
I first removed the trim from the wall, so I could reuse it on the front of the box later, to make the bench match the rest of the kitchen. One challenge I came across was rerouting the a/c vent through the front of the box so we didn't lose that circulation.
My sister-in-law chipped in to make the cushions and pillows to soften it up. I added the DIY table, and further defined the space with wainscoting and trim.
Sun, 01/09/2022 - 16:45
Hey there,
Absolutely love your DIY breakfast nook. Unfortunately the additional blog/info link is no longer working as I'm trying to gather more information. Would anyone be able to send the instructions and/or new link?
Thank you

Needed a shed to store bikes and mowers, etc, so I'd have more room in the woodshop : ) I made a lot of modifications to the plan to fit my space and make it much larger. The completed size is 7 foot tall at the peak, 6 feet deep and 5.5 feet wide. I made it as a 3 sided shed, using the wall as the 4th to save on cost, increase air flow, and make the exterior house wall accessible. I also made an egress in the back of the shed in order to get behind the shed if needed.
Instead of roofing shingles, I opted for ribbed metal sheets and one clear sheet in the middle to make a skylight, so there would be light in the shed. This is my favorite part of the project. It was a huge pain to attach the roofing from a ladder with very limited access, but it looks great and I love the light coming in. We have very little rain in CA, so I'll have to wait until winter/rainy season in order to test out its waterproofing.
Since the shed sits between the house and the neighbors block wall fence, and I wanted to use as much of the space as I could, I decided to design the shed to have the side wall against the house rather than the back wall, as shown in the plan. This took a large amount of modifications, but with careful planning and measuring, it can be done. This also meant blocking off access to behind the shed, so I cut an egress in the back wall and added hinges so you can lift the back cut out panel, and rest it on a stop block attached to the fence behind it in order to have access. That's what woodworking is about- problem solving. Love it.
As you can see by the full shed picture, it fits a large amount of stuff- 2 adult bikes, mower, edger, trimmer, chainsaw, hedge trimmer, garden tools, shovels, etc, with plenty of room for more. I now have a free corner in my garage that I've already filled with a DIY rolling workbench and more pegboard space for tool hanging. Woodshop increased space= happy Brittany.
I should also mention that building the frame and adding the pickets was quite a quick and easy job. The hardest and most time consuming part was the roof (I didn't have metal cutting tools), rolling each very heavy wall to the site (I was alone) and the previous 2 weeks in which I built the paver patio the shed sits on. Hard work, but worth it. I love it!


Thu, 08/20/2015 - 05:56
And for under $300! Nice touch with the skylight also. Two thumbs up.
In reply to This is awesome! by Cross35
Thu, 08/20/2015 - 09:42
Thank you! I'm very pleased with how it turned out!
Mon, 04/27/2020 - 10:28
SWEET!!! What a great use of space! That skylight was a brilliant idea. No lights needed to see what you need to get at in there. Well done!
In reply to SWEET!!! What a great use… by carewarner
Mon, 01/25/2021 - 13:15
It has been incredibly useful for storing! One thing about the skylight- Over time the sun has warped it and there is now a hole and crack there. So I wouldn't plan on the clear roofing being a long term solution- I will be replacing it with either thicker clear roofing or 2 layers.
Wed, 05/06/2020 - 13:15
Love the design and space saver idea, brilliant! How can I get the dimensions? Tks
In reply to Love the design and space… by shed man
Mon, 01/25/2021 - 13:25
I just went out and measured- 6' wide and deep, 7' tall at its tallest point, tapering down to about 5' tall. Hope this helps!
In reply to Love this! by V2theicki
Mon, 01/25/2021 - 13:14
I based it off of this plan, but heavily modded it to fit our space. https://www.ana-white.com/woodworking-projects/small-cedar-shed
Hope that helps!
Tue, 06/23/2020 - 20:26
This is exactly what I want to do for the side of my home , I also would love to get the plans for this .
In reply to This is exactly what I want… by ajg1972
Mon, 01/25/2021 - 13:16
I used Ana's plans here, but heavily modded it to fit my space: https://www.ana-white.com/woodworking-projects/small-cedar-shed
Sun, 02/21/2021 - 09:39
Did you use cedar pickets?
And what did you use for the roofing material?

I modified this plan so I could have 4 total work areas. Total Size: 48" x 96"

Tue, 09/08/2020 - 19:42
Is there anyway you can share these plans with me!? I drew out some plans for an identical table but I think my cuts may be off! It would be so helpful.
Fri, 11/06/2020 - 12:47
Is there a full update post with instructions for the table shown?
Tue, 12/20/2022 - 22:03
LOVE this! Just what I'm looking for! Can you tell me what you used for the top?
Thu, 09/26/2024 - 16:24
Hi! Are the plans for this section posted anywhere? I would really really LOVE to build the XL one!!
Mon, 10/14/2024 - 09:10
I'm taking it that nobody ever received the plans for this table :-(
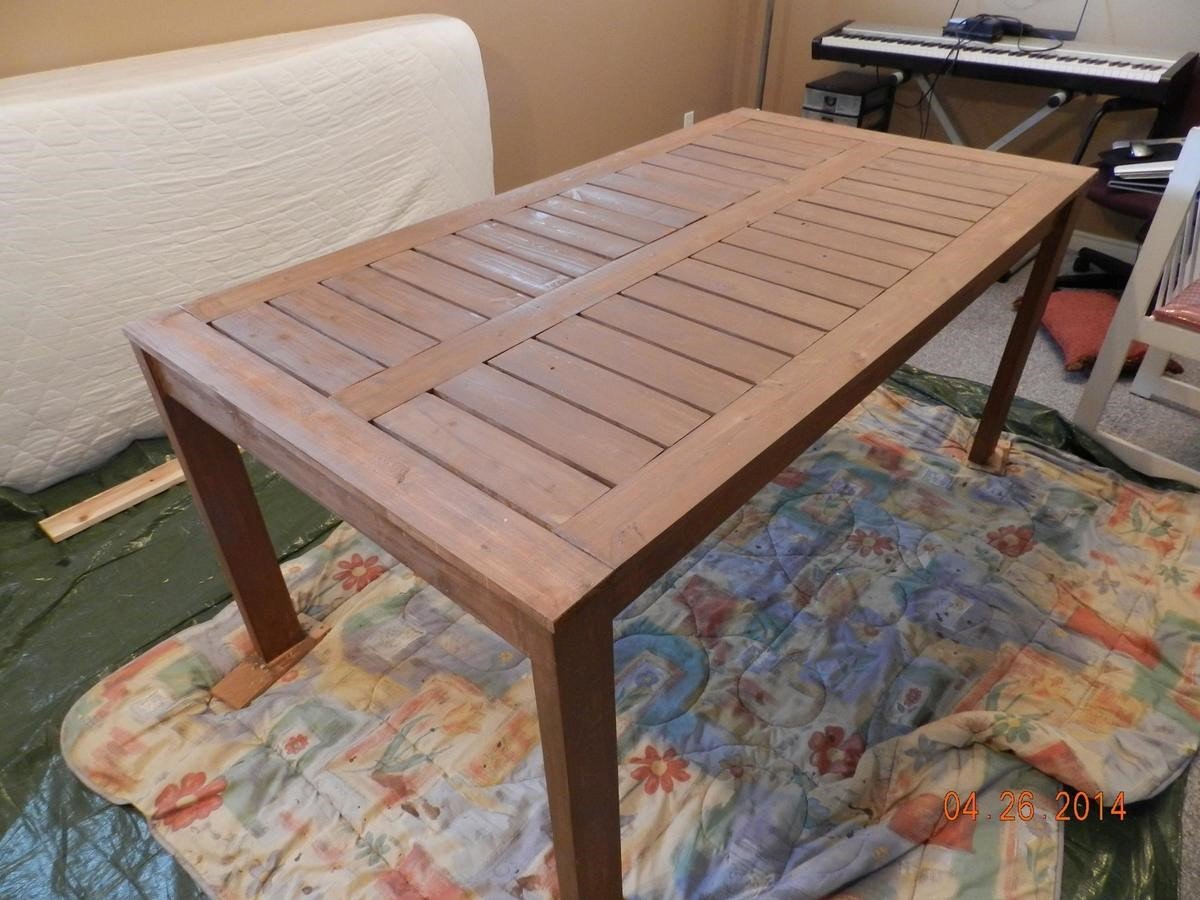
I didn't make any changes , his orginal design was great. Hope these pictures help others. I tried to link to the modified-simple-outdoor-dining-table but wasn't able too.
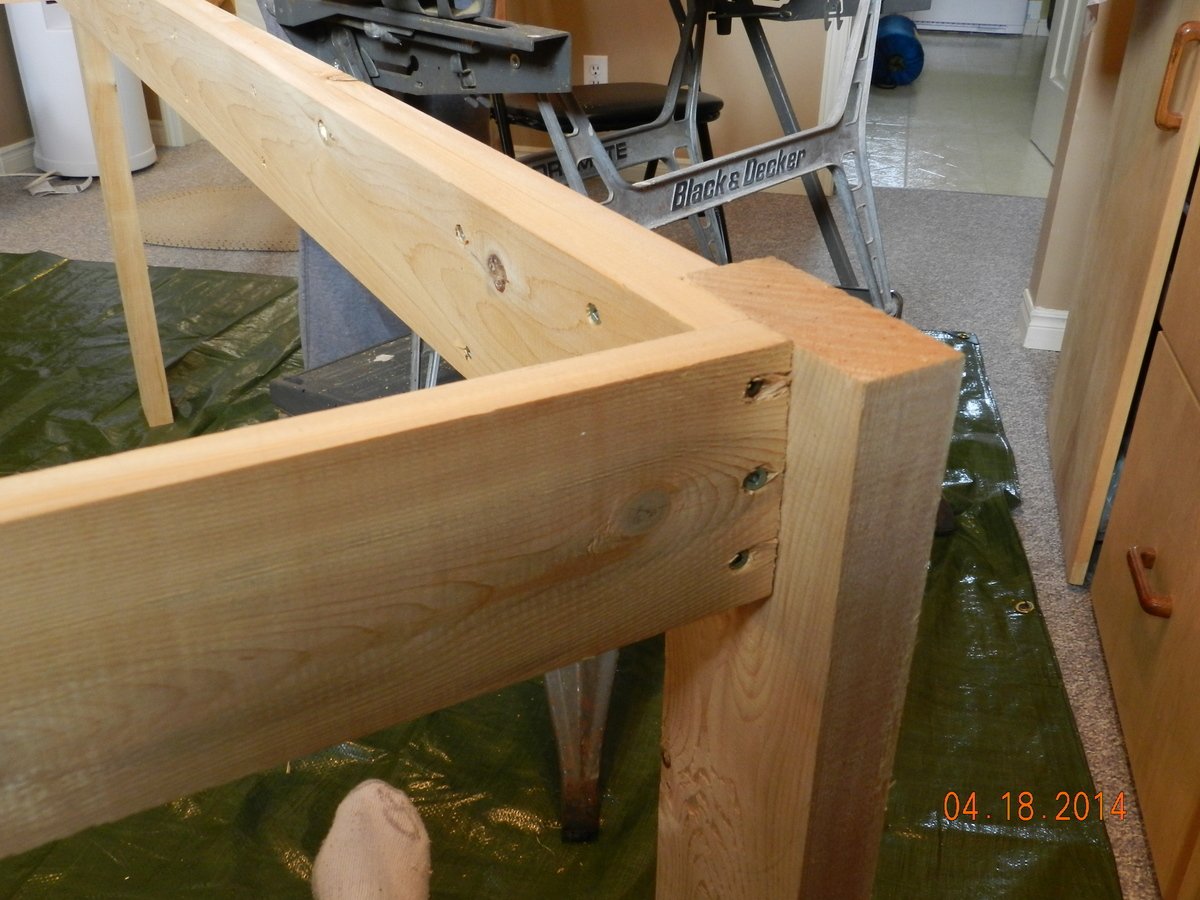
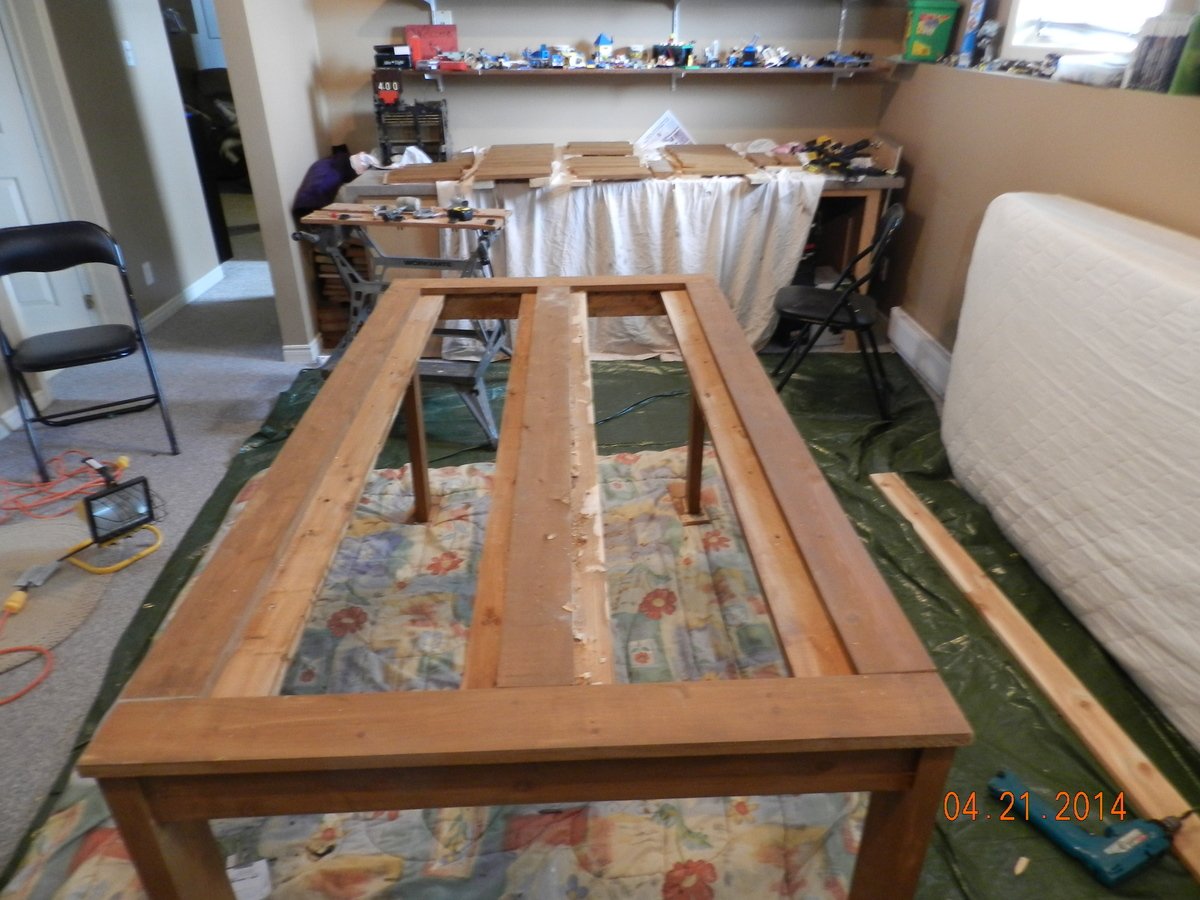
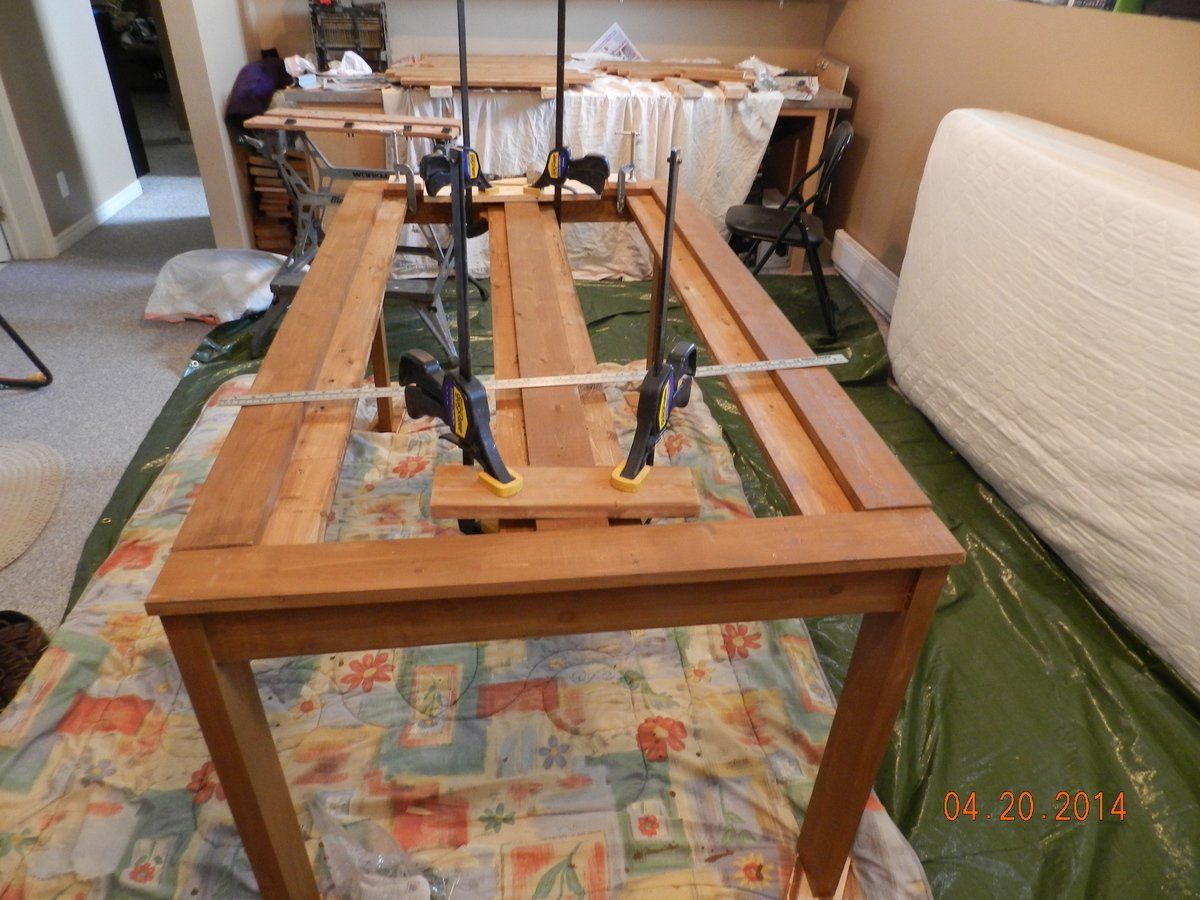
Sun, 04/27/2014 - 14:06
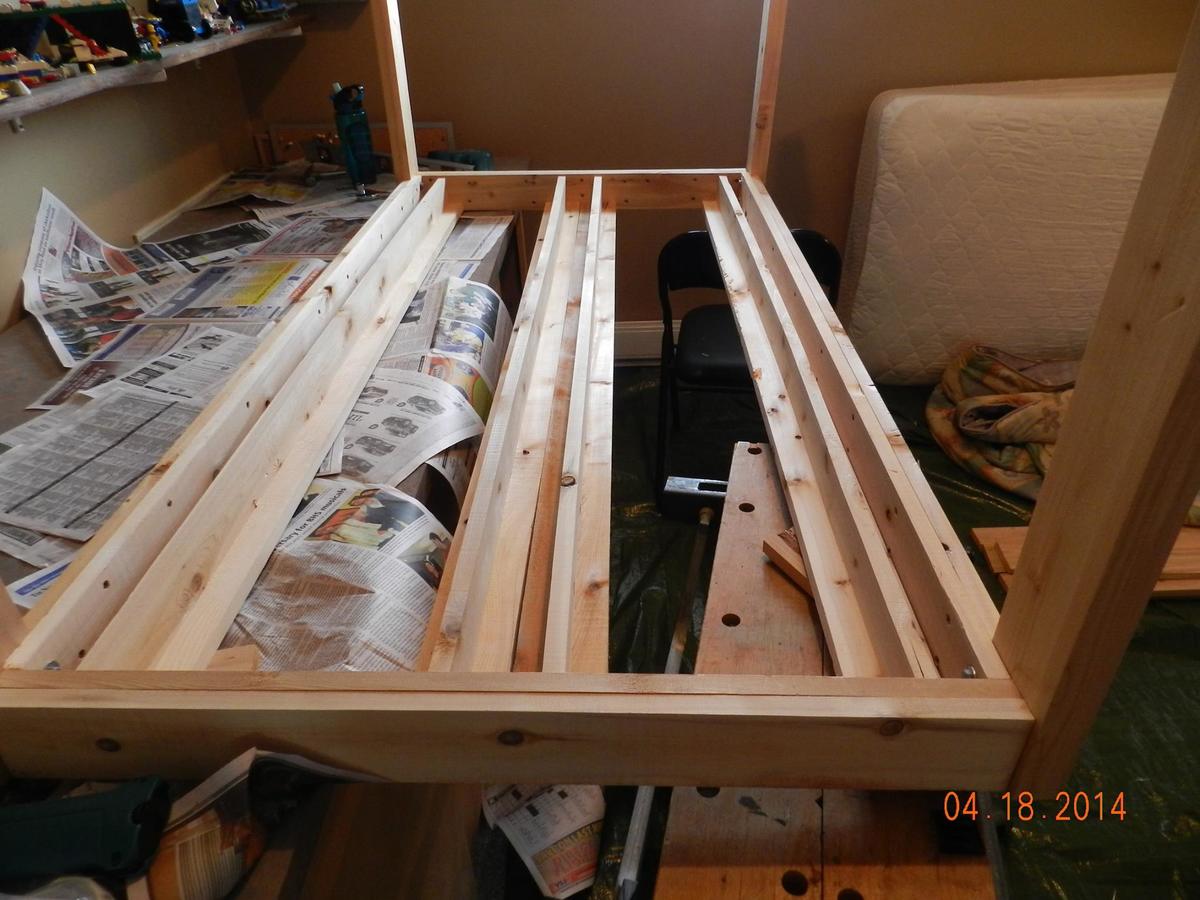
Found the plans "modified-simple-outdoor-dining-table" and I built it. Very nice table, I posted more pcitures to help others
Sun, 04/27/2014 - 14:06
Found the plans "modified-simple-outdoor-dining-table" and I built it. Very nice table, I posted more pcitures to help others

Instead of attaching the top to the coffee table base as done in the plans, the top is attached using a set of coffee table lift top hinges.

Fri, 08/21/2020 - 23:38
Looks wonderful, love the finish. What kind of stain did you use?
Wed, 09/30/2020 - 19:59
I love this table. It is just what l have been looking for. Is there any instructions. I would love to make this.
thanks
peggy
Wanted a Patio table and when I saw the plans on this site I really liked it; I just changed the plan a bit. Everything was screwed from the underside of the table, also I attached the legs with 2" lag screws.
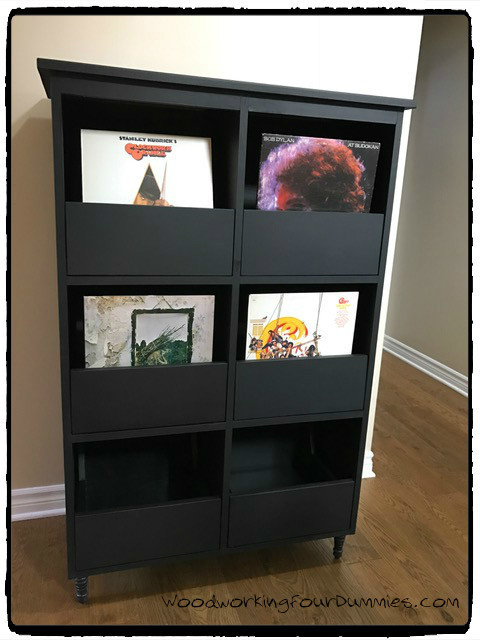
I built another record cabinet for a client. I actually made two since because the person wanted 12 drawers!
More details and photos on my blog if interested:
http://www.woodworkingfourdummies.com/blog/vinyl-record-cabinet
Cheers,
Ian

We needed a bench to fill the space in our front entry and provide some storage for seasonal gear. We couldn't find anything to buy that would work for us, so when my wife found these plans, I had to try it! Couldn't be happier with the results. We widened the bench by a foot to 84" to fill the space. Basically, it just made each drawer 4" wider. Everything else was built to plan. The most expensive thing was the soft-close 24" drawer slides (~$100). As soon as you go above that 24" depth, they get pricier! It was also tricky to get the drawers to catch properly on the soft-close mechanisms, but I made sure to take the time to get it right before closing it all in. Now I just open and close the drawers for the pure satisfaction of it! I used premium pine plywood for the top and I find it still doesn't give that smooth finish I like, even after sanding. I think I'll create a new top out of joined knotty pine planks later and just attach it to the top.


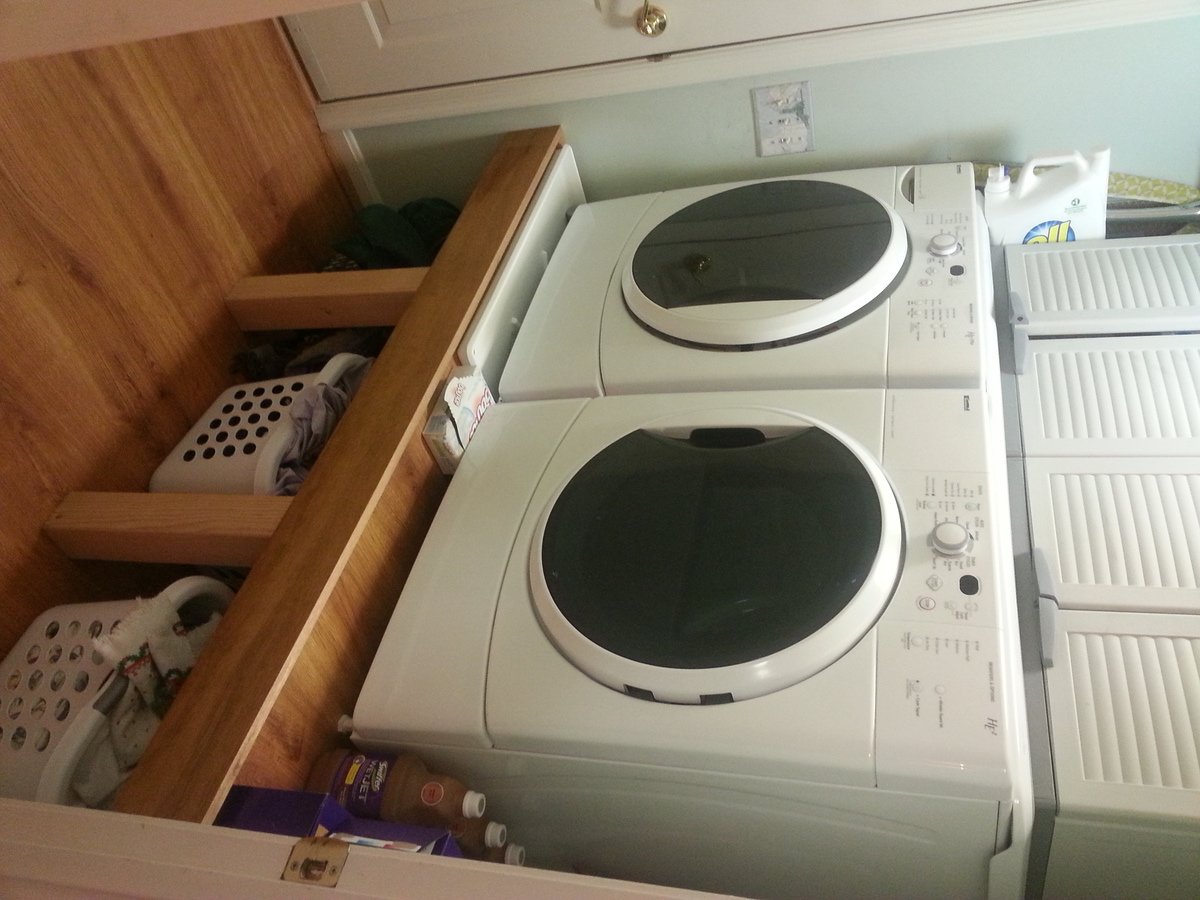
THE MOTIVATION
After a recent washer outage (that I was ultimately able to repair myself), my wife and I talked about eventually replacing our front-loading washer/dryer set. One of the bullets I hate biting is paying the exhorbitant prices for the matching pedestals for new washer/dryer sets.
Having just bought a good set of cordless powertools, and having watched my father when I was a kid build countless household fixtures, window dressings, furniture pieces, etc., I decided to try my hand and construct a permanent platform for our current washer/dryer set, thereby eliminating the need to ever buy manufacturer pedestals again.
The existing pedestals were a standard 15" high, with a storage drawer, which we felt was still not high enough for comfort. And, the washer pedestal drawer was entirely inaccessibl due to the 2" walls on the washer drain pan, so its drawer was totally useless, wasted space.
And, lastly, we really wanted more space for clothes baskets full of laundry, which we generally stacked (full and haphazardly) on top of the machines.
THE CHALLENGES
The largest challenges were mainly logistics, and gravity. The washer/dryer would have to be unavailable for at least 2-3 days while they sat disconnected in the next room waiting for their new home. So I coordinated with the family so they'd know when they needed to have their laundry done, or tough it out until I was done.
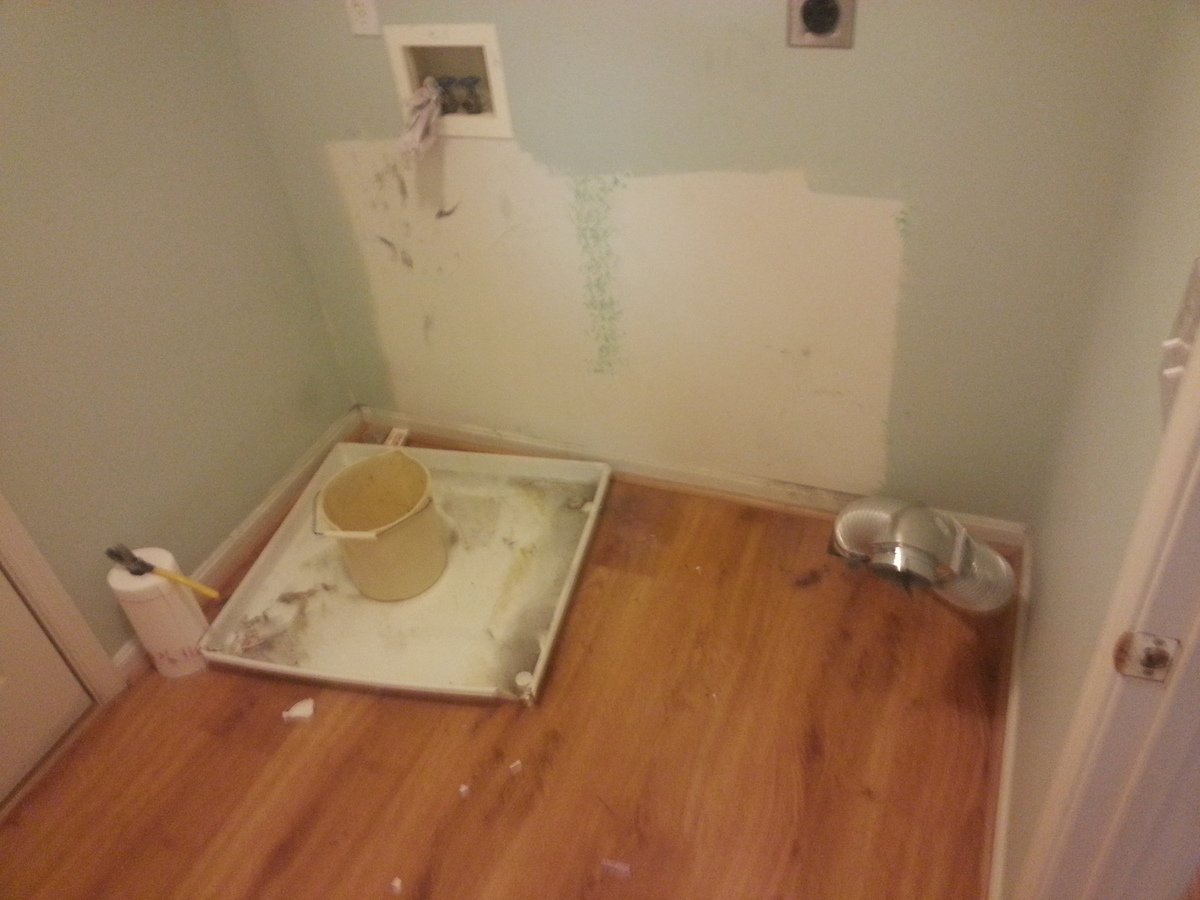
There was no way to know for sure what the drain connection for the washer pan looked like until I got the washer out. So it was a small gamble that I'd be able to get the parts needed to extend the drain pipe up to the new platform right when I was ready for them. Fortunately, this was no issue at all.
The biggest challenge turned out to be toward the end when it came time to lift our 230-lb. washer onto the new platform. I seriously considered disassembling the washer to the point that I could remove its molded concrete counter-weights, but instead (and arguably stupidly) elected to use a large hydraulic car jack to raise the washer. This ultimately worked, but I have to STRONGLY ADVISE AGAINST trying this.
THE SPACE
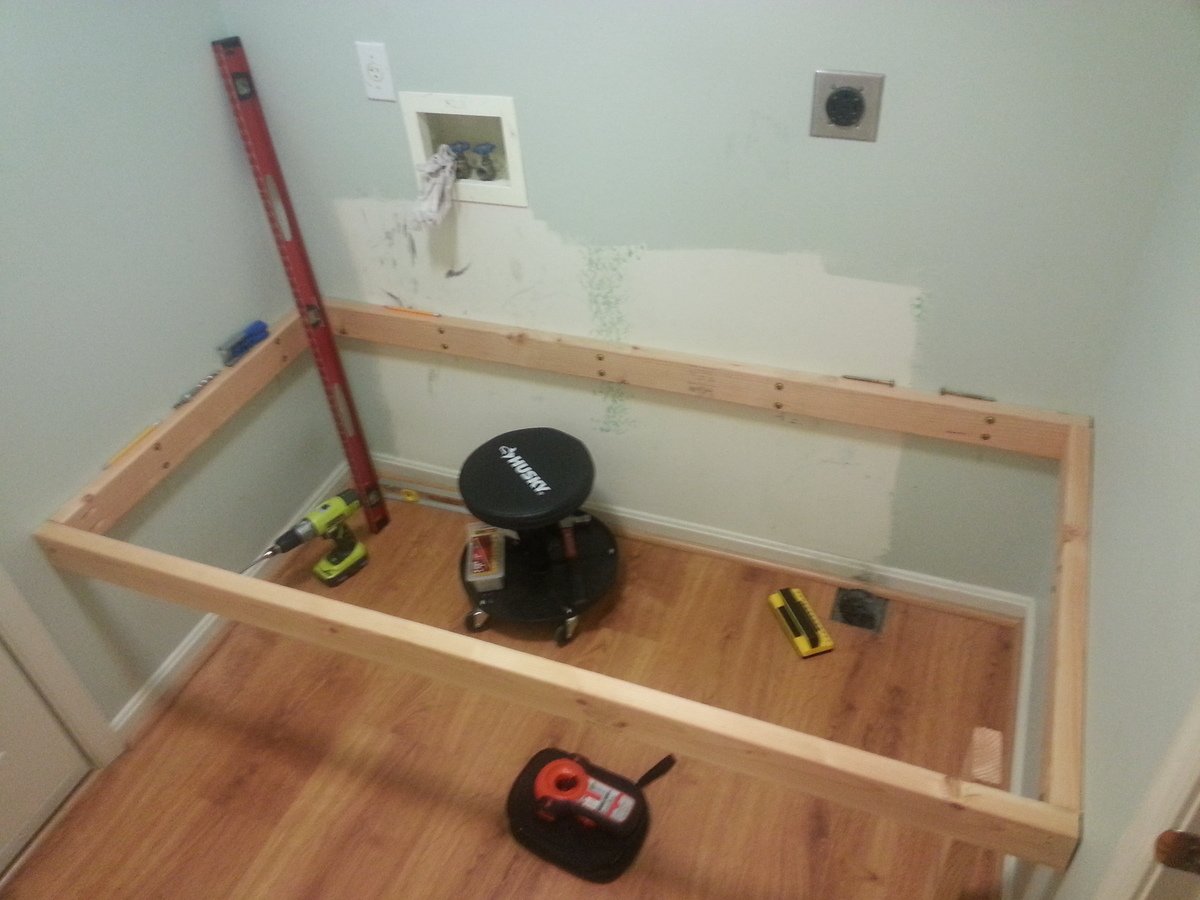
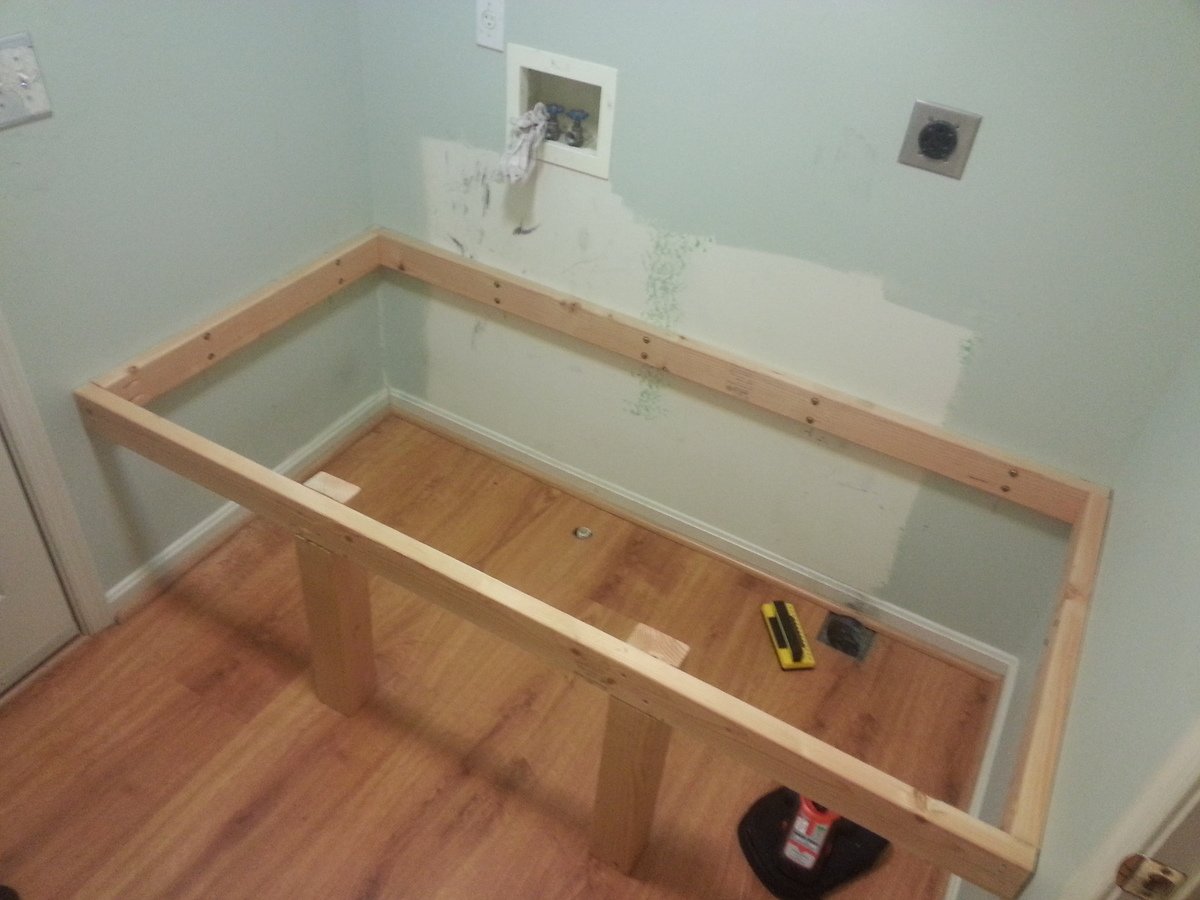
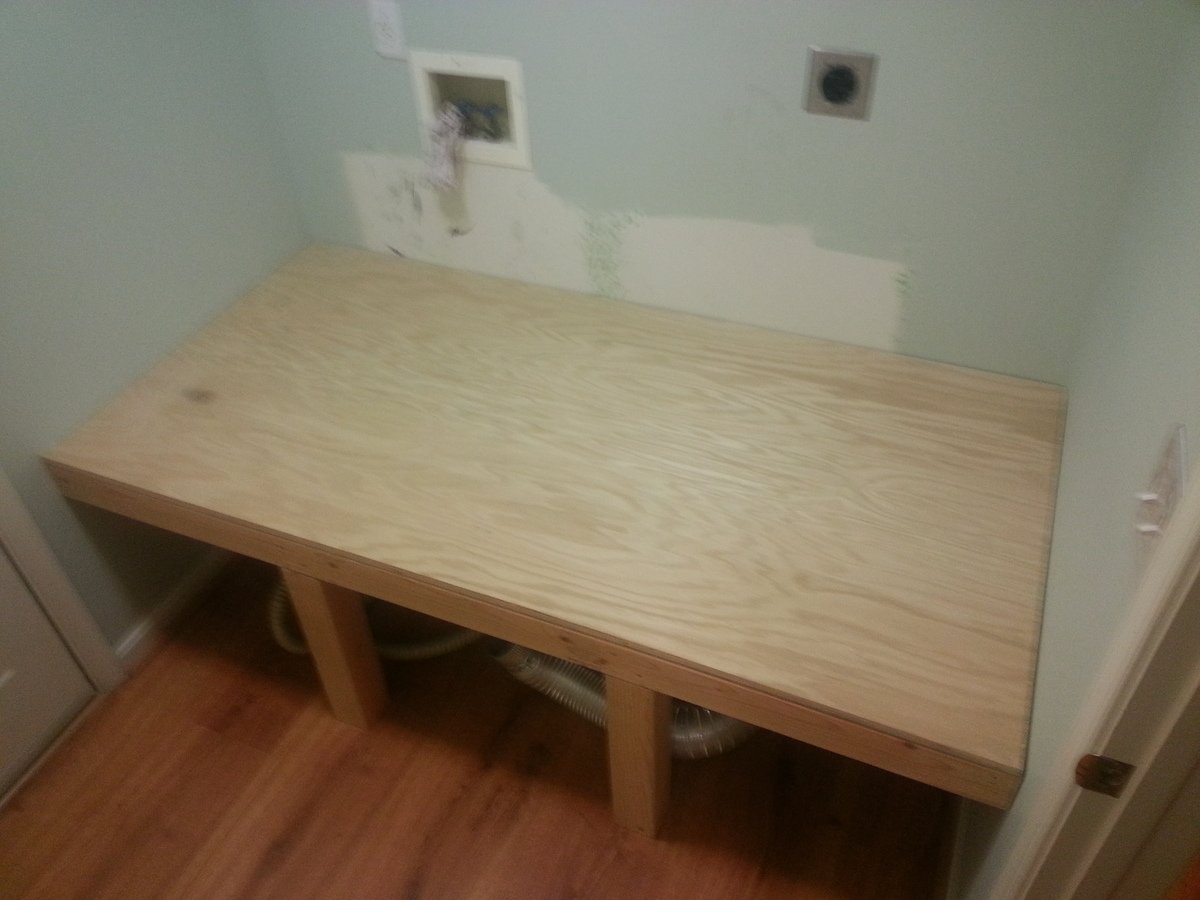
Our laundry room is also the "mud room" between our kitchen and the garage. It is only large enough for the two machines, and the walk way between the two doors--in total, about 70.5" square. Building the platform from wall-to-wall made the most sense, and minimized framing by fastening edge framing directly to the wall studs.
THE PLAN
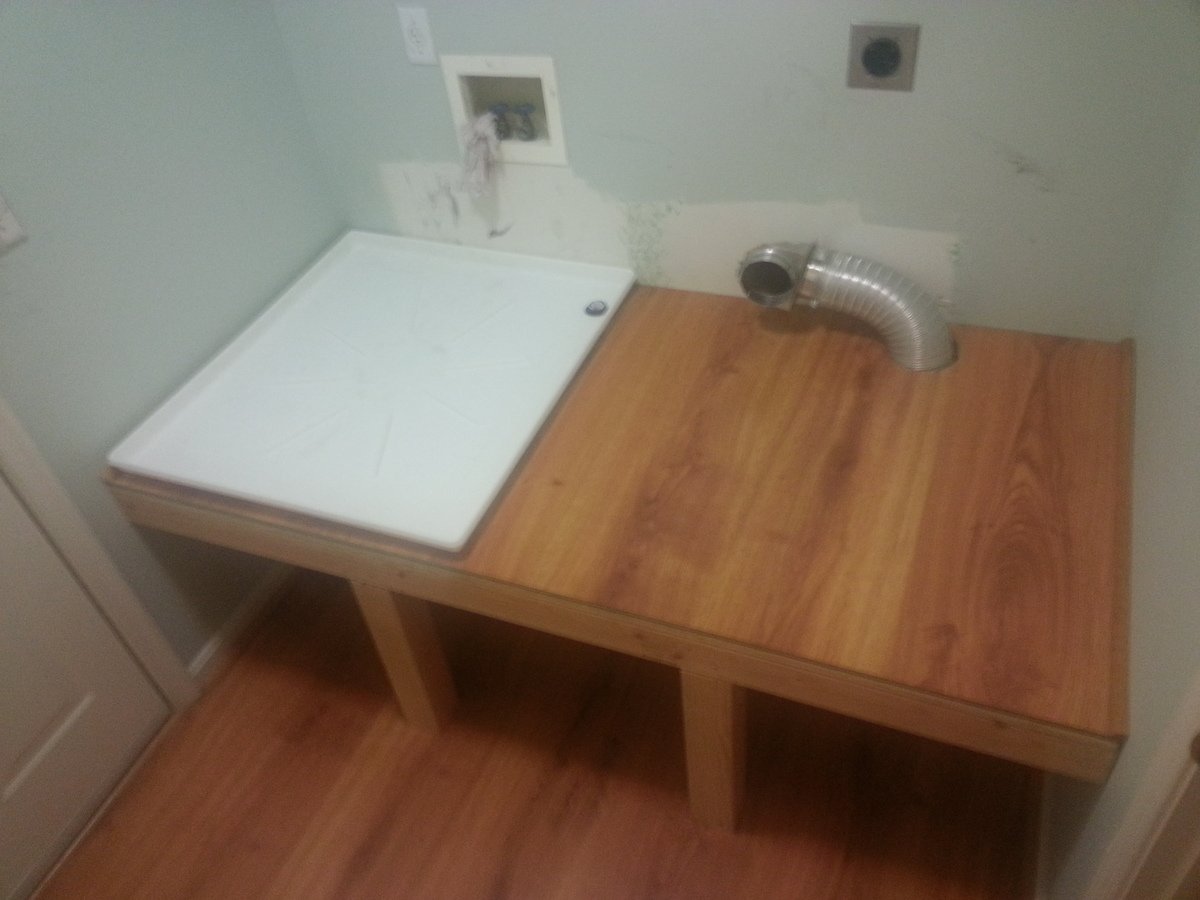
Pretty basic: 2x4's all around for the edge framing--back and sides fastened directly to the wall studs, and front 2x4 supported by two, notched 4x4 legs. 3/4" plywood for the subsurface, and 1/4" laminate faux-wood flooring on top (left over from reflooring, so it matches the floor below). Bore holes for the washer pan drain and the dryer vent. 1" quarter-round molding on the sides, and 5.5" face piece flush with the top of the molding across the front (spare lauan I had looks perfect). I also made a point of putting the machines on the platform before the face piece since it might have been in the way or damaged.
Anyone will tell you that it's best to at least sketch out what you want to do so you can minimize surprises, forgotten parts, etc. I, of course, did virtually none of that, and made several course changes and corrections along the way. For this project, I was lucky that I didn't need to backtrack at any point, and probably won't learn this lesson any time soon anyway. However, you SHOULD.
TAKE-AWAYS
The main mistake I made was while gathering the platform dimensions for cutting the plywood. It was only blind luck that kept me from having to do it more than once (and having to buy more than one 4x8 sheet). I know that it's actually very unlikely that two adjacent walls are perfectly square, so I made a point to measure the width between the walls at the back and at the front--and, sure enough, found a 1/8" difference--wider at the front. But when I measured and marked the plywood for cutting, I measured both distances from the precut edge, and then cut. By doing this, I inadvertently assumed that one of the back corners was perfectly square.
What I should have done was used a carpenter's square in each back corner to extend a square line from the back edge to the front, and then measured from the square lines to their respective side wall. This would have accounted for neither back corner being square.
Fortunately, my mistake wasn't big enough to keep the plywood from fitting, but it was very, VERY close.
GIDDY
I honestly couldn't be happier with the finished project (or more smug). We've raised the washer/dryer 9" higher than they were (24" off the floor), and we now have basket storage underneath all the way across. I placed two 24" plastic cabinets on top, which still leaves room for the detergent right over the soap inlet on the washer.
And, most importantly, I got to use every powertool I own. Kinda beats "the quick brown fox jumped over the lazy dog" thing, huh?
Fri, 04/17/2015 - 19:54
Thanks for sharing the ins and outs of your project! Looks great!
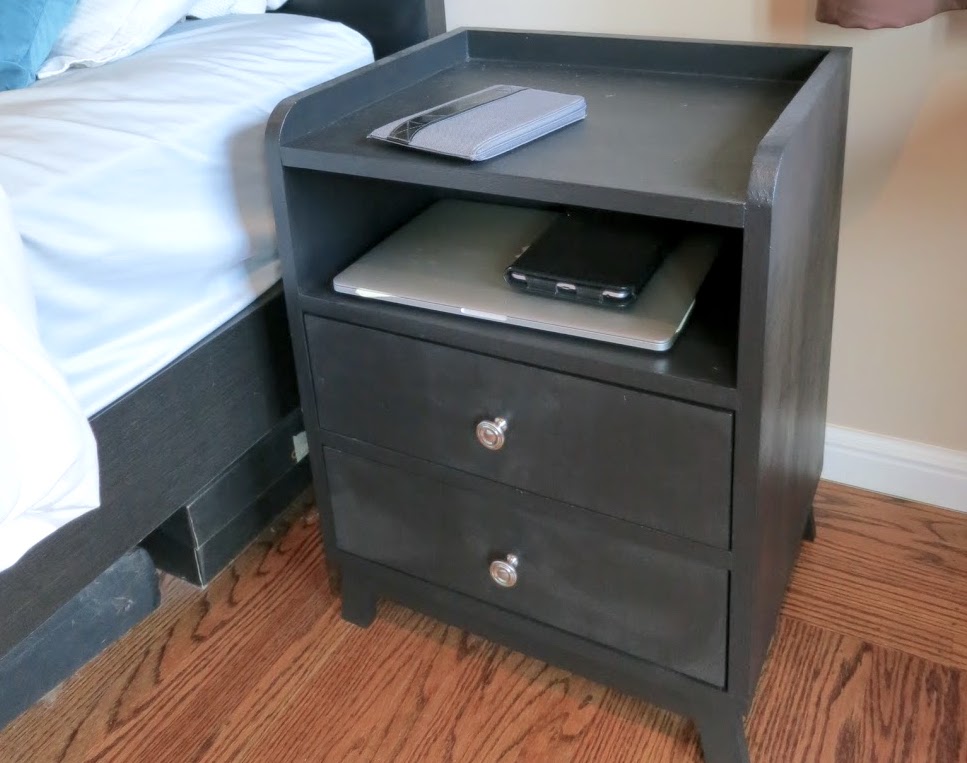
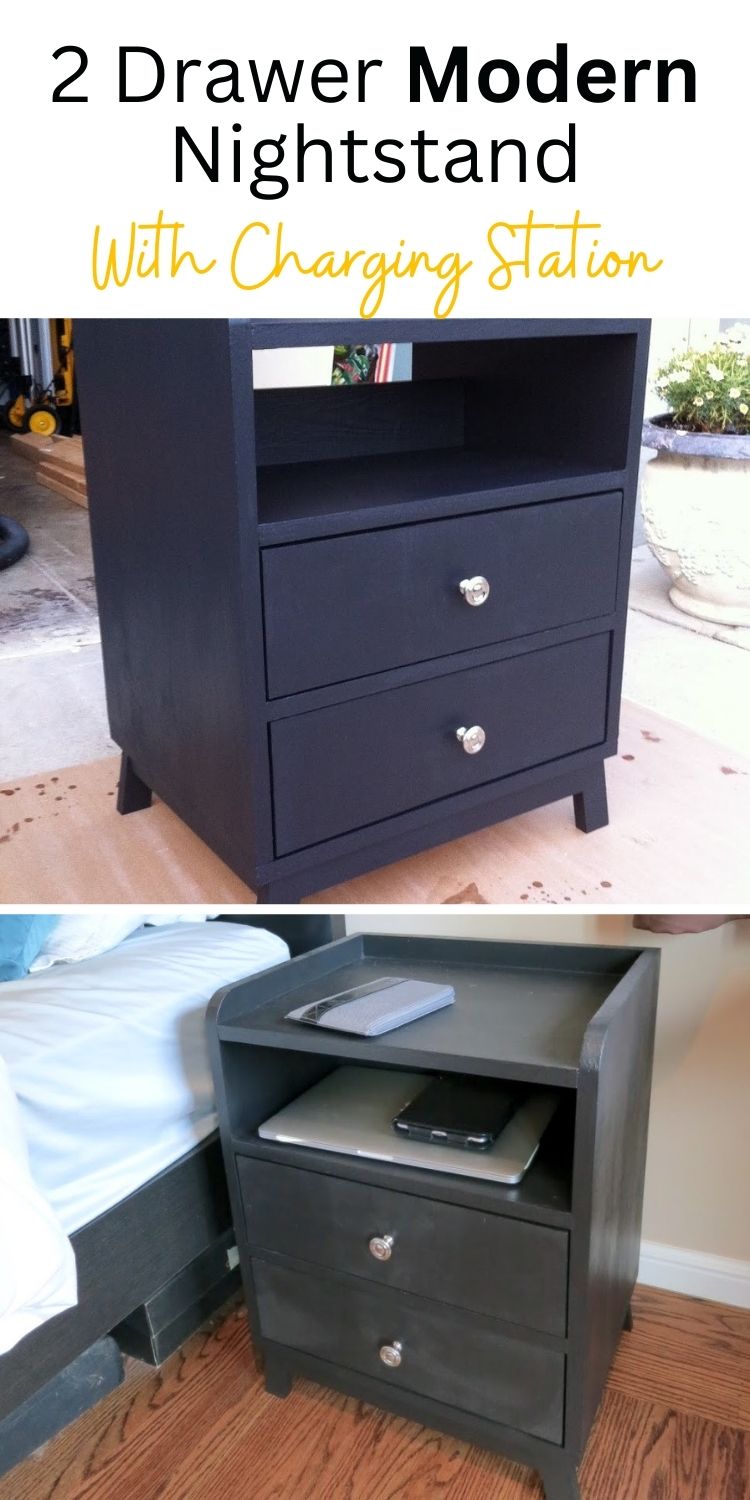
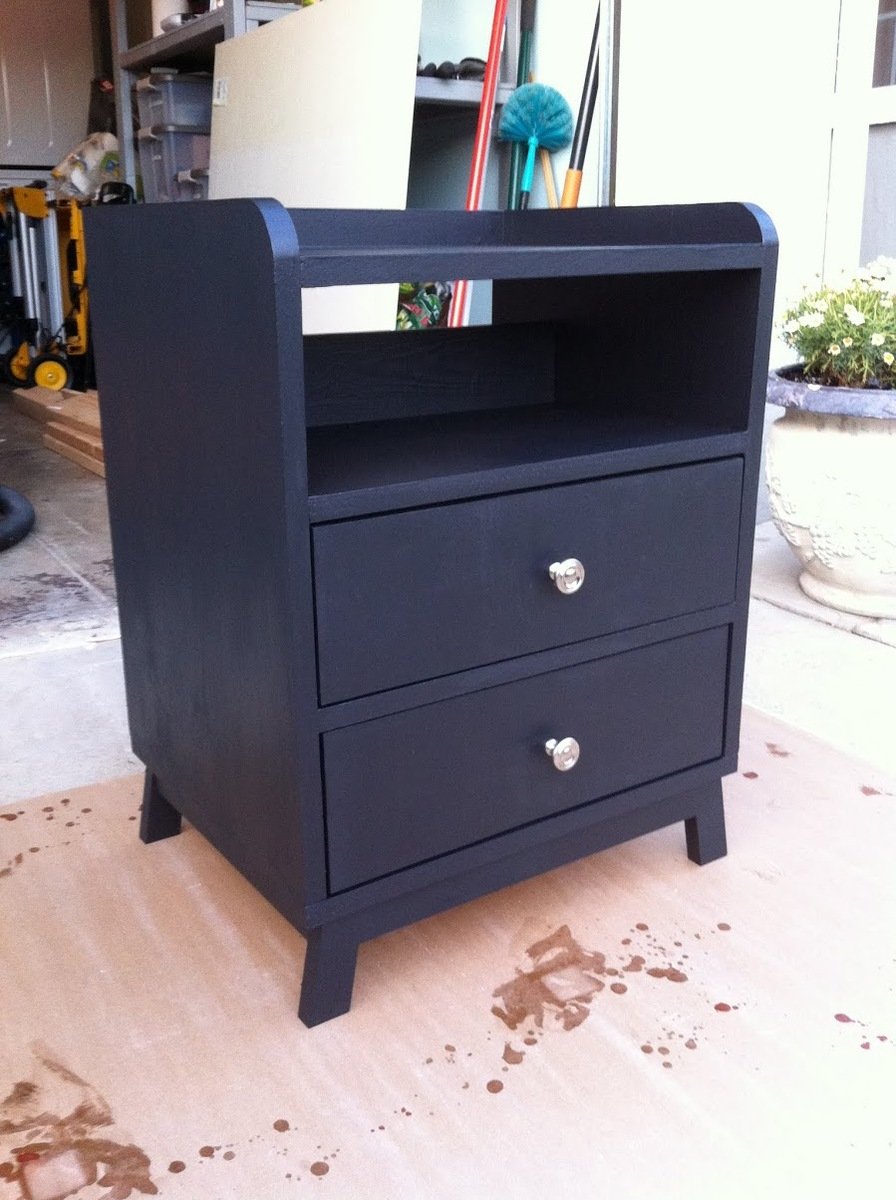
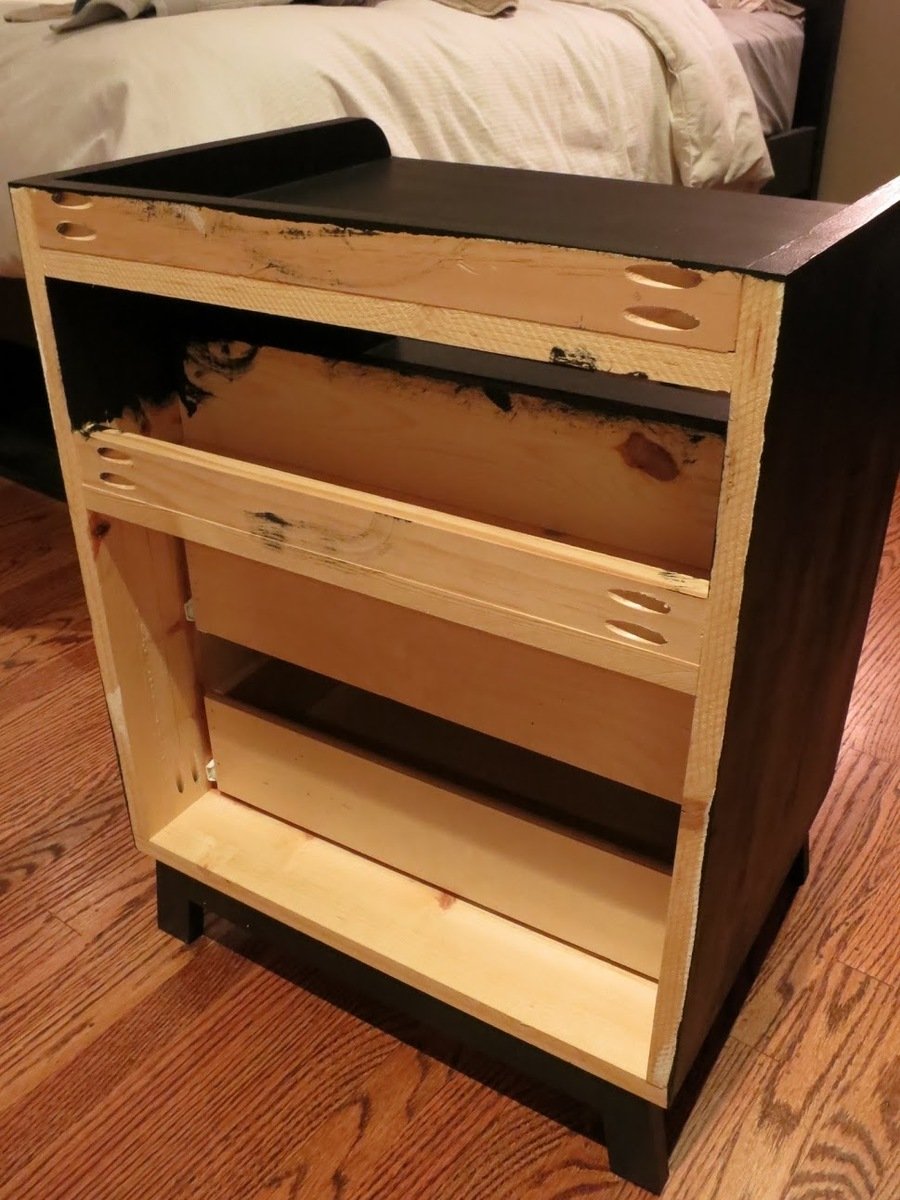
I really liked the look of the 2 Drawer Modern Nightstand but I wanted to add a twist to it. Since I can't live without my devices (laptop and phone), I decided to add an open slot to the middle shelf of the nightstand for power cables. It also has a space that I added in the back that can hold a power strip. Embarrassed that I did not paint the back of the nightstand but I was really done at that point after a long weekend's worth of work!

Modified plans to include game storage drawers, a flip open mantle for DVD player and hidden charging port, and hidden cupboards on both sides for DVD storage. I scoured the Internet for months before drawing this up to fit my space and tackling all on my own! I love it and all of my other Ana White inspired projects!
Casey O.


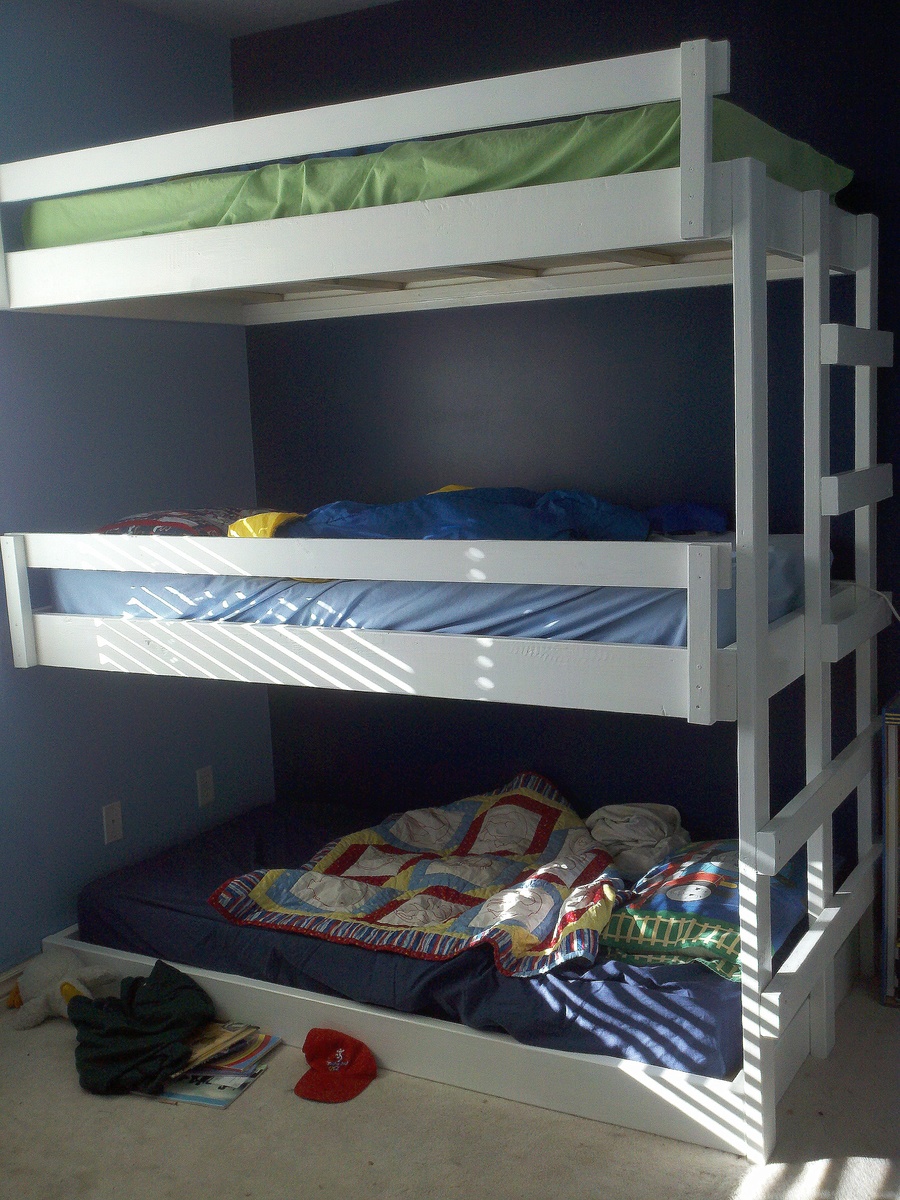
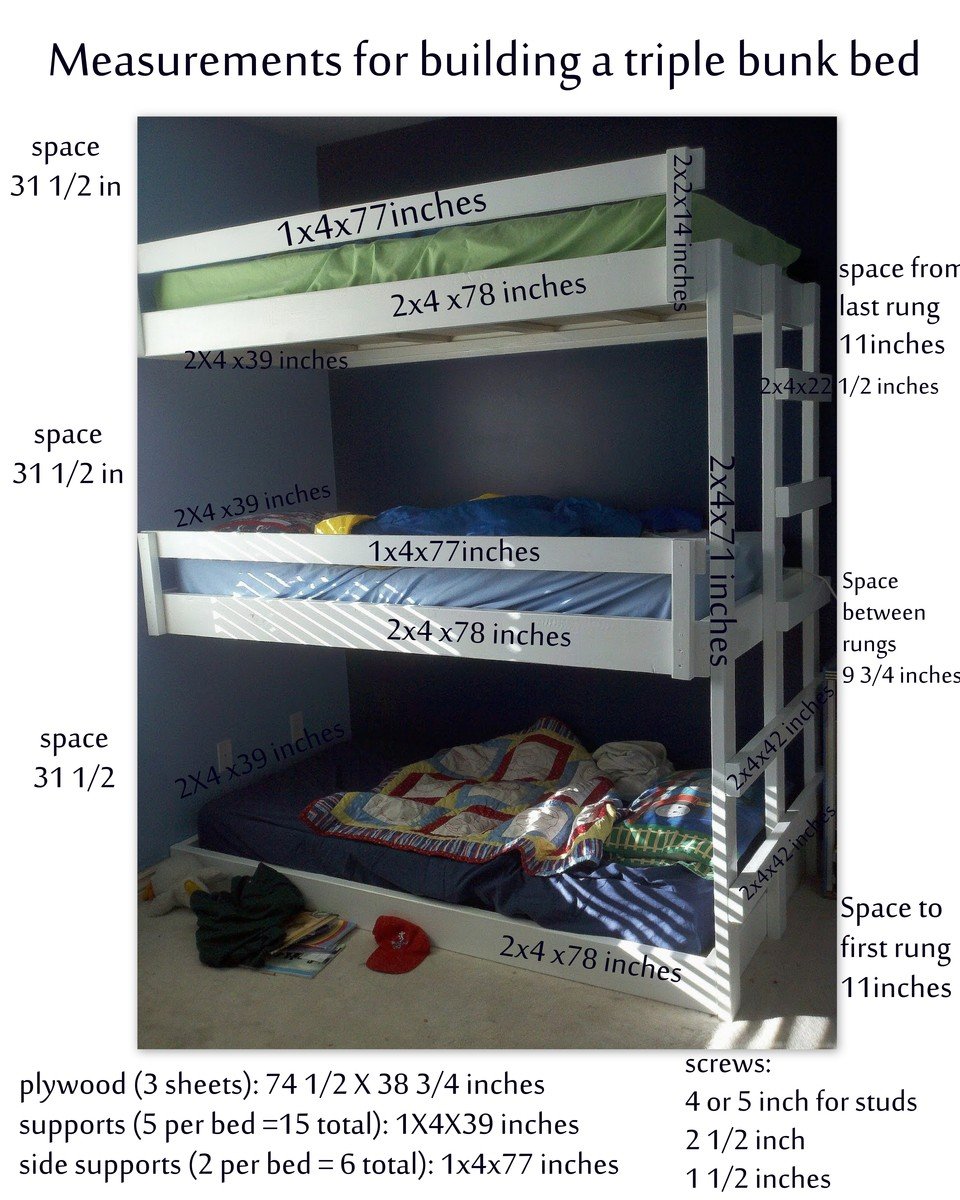
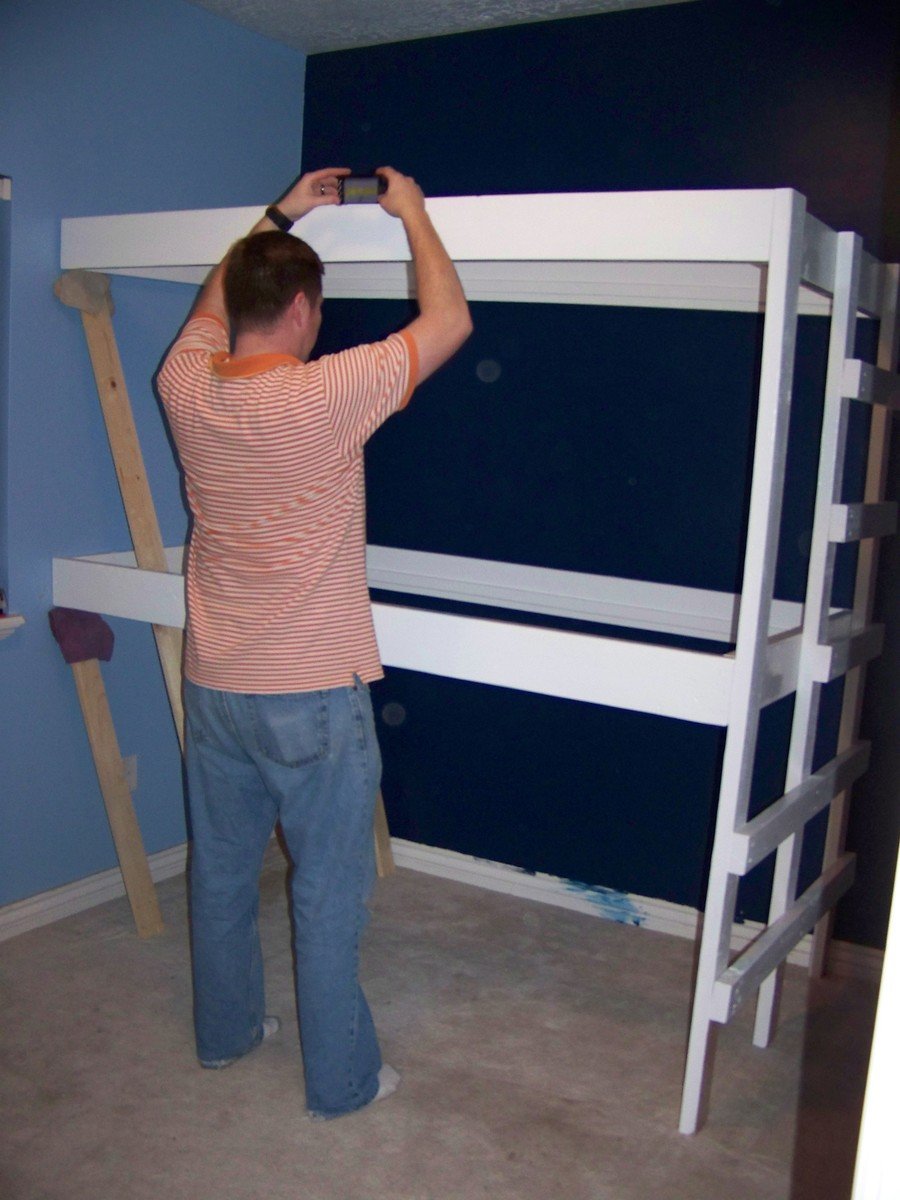
More info on these Triple Bunk Bed Plans on my blog: http://myhomedonemyway.blogspot.com/2013/03/triple-bunk-bed-finished.ht…)
1. Build the Bed Frames: (I will explain the process for one bed...do it three times if you want three beds)
2. Add Side Supports: ( Also do this step three times for three beds. We did it later but would be easier to do now)
3. Add Roll Guard: (do twice...once for each top bunk. We did this later but can be done now)
4. Build Ladder:
5. Paint desired color (you don't have to paint the sides that will be screwed into the wall).
6. Install into the wall in desired bedroom
7. Add Supports (do three times for three beds)
8. Add Plywood (do three times for three beds) 9. Finish
Mon, 04/28/2014 - 13:28
I hope you all enjoy these triple bunk bed plans. The instructions should be easy to follow to make your own!
In reply to Easy Built in Triple Bunk Bed Plans by myhomedonemyway
Sun, 01/22/2017 - 11:06
Thank you so much for sharing your plans! This is great, well built, but still easy to do!