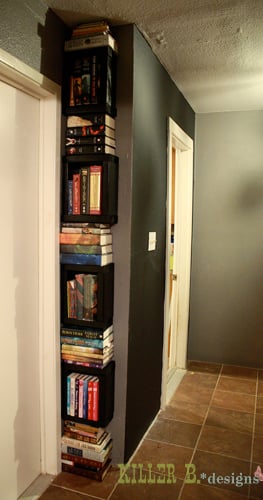
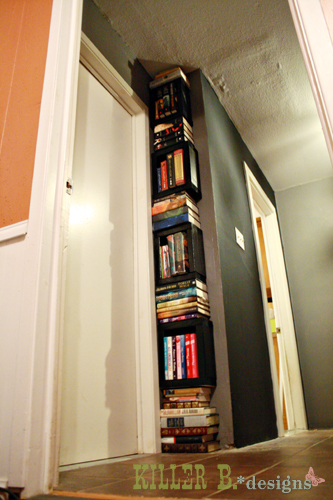
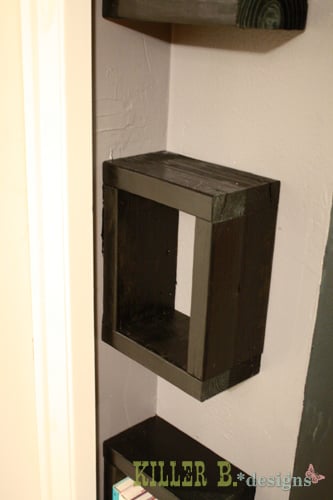
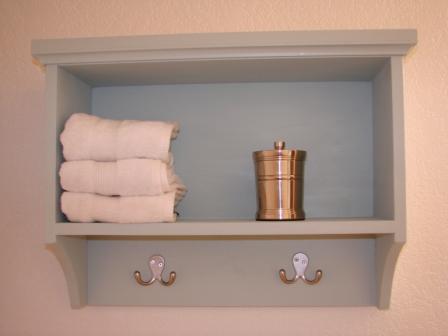
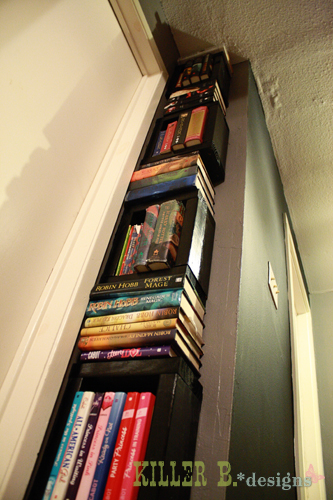
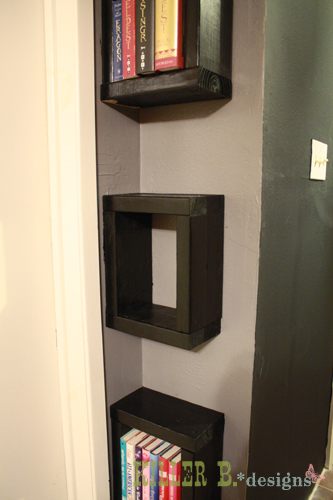
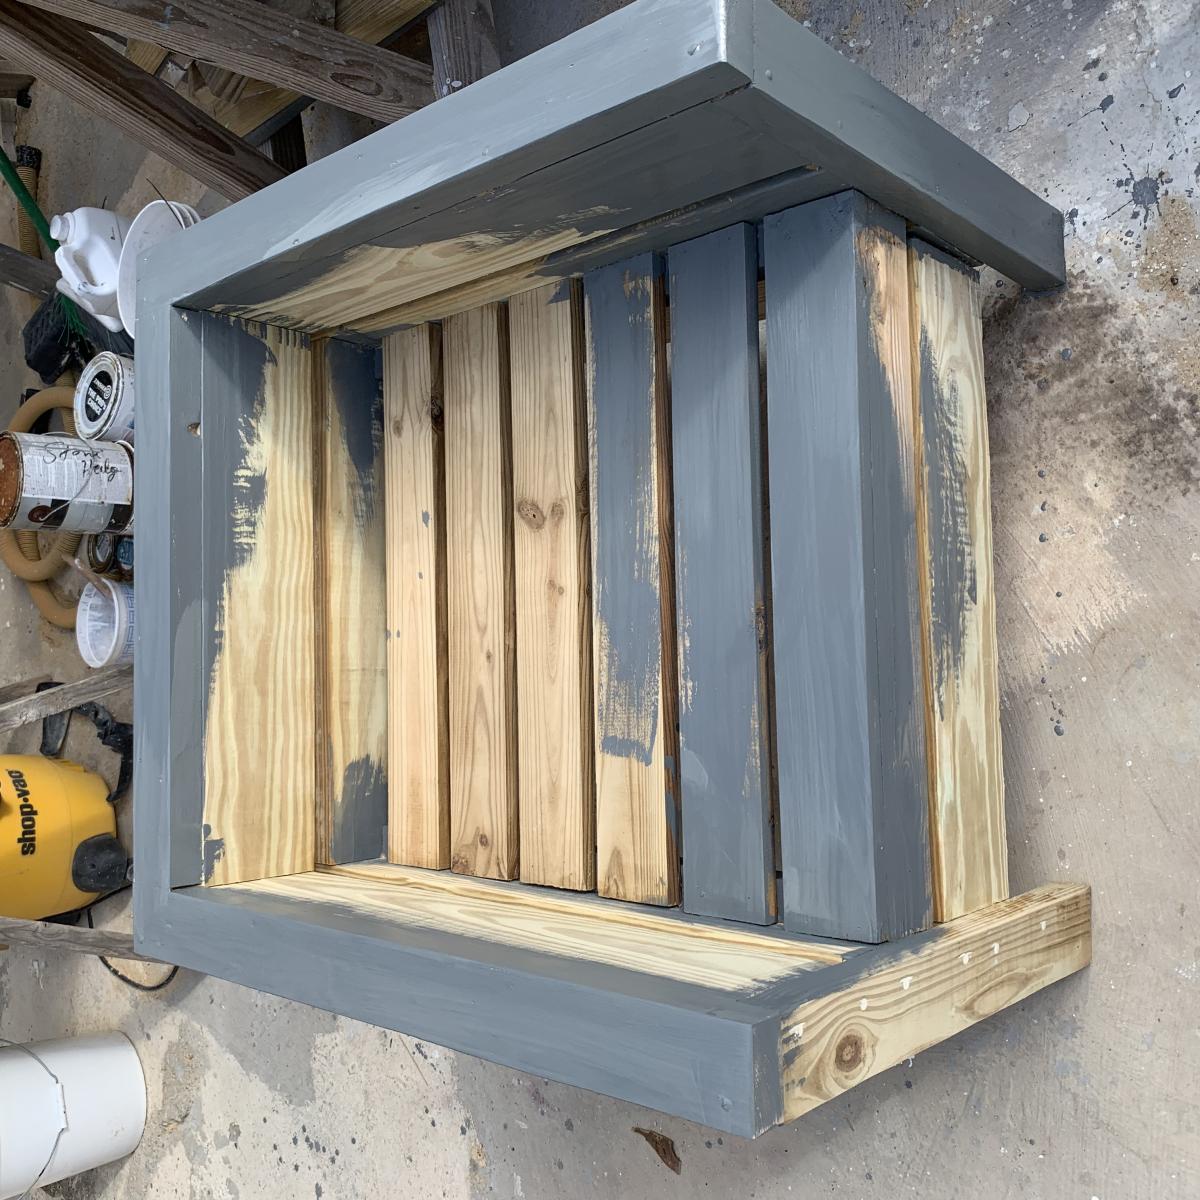
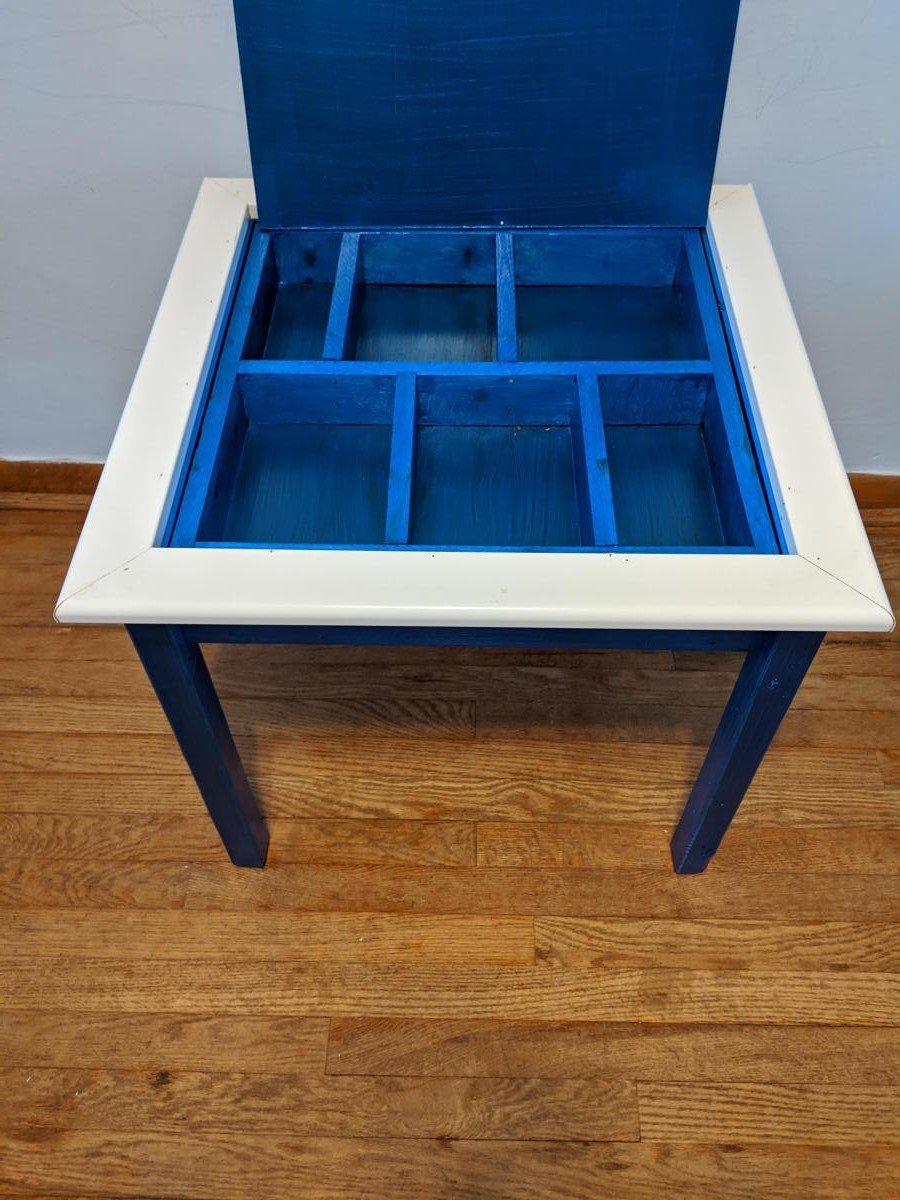
Work Bench
![](/sites/default/files/3154820434_1358348850.jpg)
This was my first project.
![](/sites/default/files/3154820435_1358348850.jpg)
This was my first project.
So happy with the way my Balin Console Table turned out. I altered Ana’s plan just a bit by adding 1x2’s to the sides at the top and bottom to recess the side panels and I added drawer slides for easy opening as well as trimming out the front of the drawers to recess the drawer fronts. Thank you Ana for great plans!
Modified plans for the modern patchwork dresser so part of the top opens for access to pet food storage bins.
Planked wood sideboard without drawers, used as a media console table.
My daughter is into everything Minnie Mouse right now so I figured, why not!
Tue, 04/28/2015 - 12:04
Is there any way to get the plans for the minnie mouse chair? Would love to make this. I can open the plans for the basic adirondack chair, but not the minnie mouse one.
Thanks!
Sun, 07/24/2016 - 18:30
I am not able to download the minnie mouse chair
plans, can someone please assist?
Built the top out of reclaimed wood reclaimed from buildings in/around Chicago. Stained top and insides shelves with minwax hickory gel stain. Outside painted in chalky finish Dutch boy antiquainted lace. Custom made rail and hangers for sliding apparatus.
We followed the instructions for the most part. However, we did add 6 inches in height and the center of the headboard was larger. We completed a tufted upholstered insert that we added. It only took us about three days and we are very please with the results.
Only recommendation: After you sand, fill holes and other dents/dings in the wood use wood putty. Sand again. Prime. After priming, more "flaws" can appear. Take the time do fill again with wood putty and a light sanding. It is hard to do when all you want to do is paint...but the time will be worth it in the long run.
This was my very first woodworking project. It came out great! My wife did the distressed corners. Amazing how easy it was. Pardon the puppy posing for his dad.
I really loved this plan of Ana's so I decided to build it for myself. I love the stain color on the one Mid Atlantic Rustic built and they were so kind to tell me the color and it turned out perfect! I will say if I ever built another I will make some adjustments with the doors and drawers and have them sitting on the outside of the facing. Those things were the devil for me!! I have only been building on my own for 6 months, so it was tricky for me. THE PIECE IS HUGE!!! I also added 2 2x4 supports under the bottom,
Happy Building
I paid $5.99 for this entire build... that was the lighted garland! All other materials I had leftover from previous projects. We have extended family for Christmas so 13 people/dogs are here each year. I made 14 'hooks' just in case any family are added, and these were old brushed nickel drawer pulls that I replaced on my kitchen cabinets. I couldn't be happier with the outcome and now I can simply store in the attic each year and not have to use command hangers all of over my walls and mantle. This turned out beautifully!
Quick note: I had to drill into the back for the drawer pulls (hooks) screws because the long screws I had in previous installs wouldn't go all the way through. I predrilled the smaller hole for the screws all the way through then countersank the hole with a bit the size of the screwhead so it would disappear into the 2x4 and come out far enough for the knob to attach.
Fri, 12/04/2020 - 10:11
Perfect way to use up what you had on hand and it looks beautiful! That's A LOT of stockings!:)
While browsing Pinterest I stumbled across this design and liked it. One of the links led me here, so I will contribute the photo to this site.
I used pine ands birch plywood instead of mdf to construct this. This was a pretty simple design, but I really like the way it turned out. I was looking for something that I can store some sad keys in to hide some kids toys that are in the living room from time to time and this will aid imaging it an easy cleanup at the end of the night.
This will take some time to build because see of multiple pieces, but is not a hard build. It is important to select better quality pine for the outside legs and edging so that it fits together easier (and looks nicer too)
Basically eliminated the bottom shelf to gain more space and built this as a "built-in". Fortunatley for us this room is the right size and we just screwed it into the wall studs.
Thu, 11/20/2014 - 09:18
Thanks for the money saving tip on the plywood!
I have upper cabinets in my laundry room too and was wondering how to get a storage pedestal in there. This is a great use of space. Looks great too. Thanks!
Fri, 11/21/2014 - 09:20
That's a great use of materials that may be discarded! Nice job!
Tue, 03/24/2015 - 10:34
Did you also fasten ledger boards to the side walls for side support? Or is the rear ledger board and front legs enough to support the front corners?
In reply to Side supports? by Dimarc67
Wed, 03/25/2015 - 12:11
Also, any gotchas to keep in mind when trying to avoid drilling into the plumbing in the back wall?
My first woodworking project.
The top is poplar and I had the local lumbar yard cut them to uniform thickness, planed and jointed. That made a nice close connection when it came time to glue and screw.
Also since it was not dimensional lumbar the boards are cut to actual size so mine is a few inches wider than the original plans.
I needed to modify the plans in order to make the top removable so I fashioned 4 blocks and attached them to the insides of the apron, and used a spade bit to drill out a 7/8" hole. Then attached 3/8" hanger bolts to the top and attached to the base with wingnuts and washers. Worked like a charm!
I wanted to keep all the interesting variance in the top so it's just natural with Minwax Satin Poly.
So fun! Directions were easy! Can also be used as Backpack hanger if you put a little bit longer feet on them. I bought the metal hooks from Walmart.
I loved the look of the Craft room Storage tower but modified to suit my wife's bathroom theme/decor. The inside back (MDF beadboard) is painted a milk coffee color to lighten it up. The door inserts are plexiglass, which was more expensive than glass but with 2 boys 6 and 2 it is well spent, and the MDF beadboard. Covered the plexiglass with self-adhesive film for glass on both sides to hide the towels inside. This project took me about 12 hours to complete but over a 3 month period, mostly spent on finishing the project with my boys underfoot or at 12-2am. YIKES!!! If i keep this up she will want to buy instead of letting me build.
Price List:
wood: $100
Stain/Paint: left over from house reno. would have been $15 stain $20 Varnish 30$ quart of paint
Handle: $7
Hinges: $4 basic style
I wanted to use Eurostyle hinges but opted to buy the Kreg system instead of Forstner drill bits.
Will be building another just different dimensions for laundry room makeover.
Sat, 01/26/2013 - 12:18
Thanks! It was my first furniture building project! I did a huge reno that i did on my house but that is construction and 1/8th in isnt as big of an issue as in furniture.
Mon, 01/28/2013 - 20:45
I've been wanting to build something similar for my bathroom! Yours turned out great. It inspires me to get to work!
I've been looking at all of these plans for awhile and finally decided to take the plunge. My son and I built the little Rhyan Console Table to use as a sideboard in my small-ish dining room. There's an 84" farm table, 8 chairs, and 2 corner cabinets. I hate to have to squeeze by people who are seated at the table, so I was looking for a narrow unit to use as a sideboard. We made the legs 4" taller than the plans called for to make it a better height for use as a sideboard. With Thanksgiving in just a few days, we put the hardware on today so it will be ready to put into service. We are already looking forward to our next project.
So, my skills have been as a cobbler, handy kind of guy for decades. Rough shelving for shop/garage basement storage etc... I've always done all my home maintenance and repairs so I'm familiar with a lot of stuff in and around the house. However I've never attempted a finished piece of furniture before. As always, I love the build and hate the finishing process.
My daughter had a pretty new mattress that she loved which was 13 inches thick and her celling is the standard 8 feet. Consider these kind of things before you build this design. We did and the plans were altered a little bit. We'll be building the bookcase later and either buying or building a desk as well. She can set up in bed with several inches above her head and there will be plenty of room over her head in a standard height office/computer chair underneath. All I basically did was; add a few inches to the height of the legs and uprights for the guard rail (4" I think), increased the head, foot, back and guard rail top planks from 1X4s to 1X6s. Which changed the dimensions of some of the spacers too. She isn't sure she wants the top rails on it but I think I'll put them on later.
We made our own bunkie board for firmer support, which also raised the thickness about 1/4" over just slats.
Details: Ladder fits tight between the leg and the guard rail. Glad I got those dimensions right. We'll be using Velcro to fasten the ladder to the bed (it's that tight, it'll be fine and she's 14yrs old). This way we can take it off easier to clean, move etc. Glue and screw everything you can except the long boards that will allow it to be broken down. Glue them and you'll never get it apart without breaking it. I used Titebond III on everything else with lots of clamps along the way.
On the front and back of the ladder treads I simply smeared some filler in the joints to smooth them out. You can see the result in the pictures. There is one closeup of the finish so you can see how it turned out doing it the way I did. If you want is smoother then a 220 sandpaper finish is what was called for on the clear finish, which I didn't do.
I also said it was a weekend project 10-20hrs. Had I bought better wood and did an easier finish it would have been. My learning experiences/errors made it longer than that for me.
Lessons Learned:
1. Buy better wood! If you want a better finish buy better wood. By the time I was finished filling, sanding, filling again, sanding some more... I used almost a whole quart of filler to make knotty pine smooth. Just buy smooth wood, I'm tellin ya! Hours of work and dry time. Again, if you want a good finish, then you need to shellac knotty pine so the resin from the knots doesn't bleed through. Better wood might have added 5-10% to the materials cost but saved several hours and would have looked even better that what I achieved. Better wood and you could cut the shellac ($15 per quart) if you didn't want the two tone distressing.
2. Check the actual board dimensions. For outer facing pieces I bought some better wood with no knots (radiata pine). These were for the outside pieces on the legs. They were just a bit wider than the common boards that were sandwiched between them... more sanding and filling to get a nice square smooth finish. It also made clamping and gluing them together harder before the filling and sanding could even begin. See number 1 above. lol
Anyhow, I'm not afraid of building furniture anymore and my daughter loves it. OH, yes now we have to repaint her room and accessorize for the ocean cabin look. More projects with my daughter. YAY!!!!
Thanks Ana
Mon, 12/14/2020 - 09:59
The bed looks amazing and I can see many more projects in your future, I appreciate your added tips!
we built this table for our new home when we couldn't find an existing table that we wanted for under $1000. we were hesitant to attempt building it ourselves since we haven't attempted anything similar before, but knew we could do it with a plan. there were a couple bumps in the road as we learned how to read the plan and understand the different techniques, but we LOVE the end result. Especially because it didn't cost us anything out of pocket! {we had a lowes giftcard:)} the total came to about $130 for all the supplies; including the paint and poly for the finishing.
read more about the process on my blog: http://www.carissamiss.com/2012/11/house-projects-completed.html
Since we needed some space to hide all of our not so midcentury technology gadgets I decided to try myself on this beautiful credenza.
Build was fairly straight forward. I cleaned the looks up a little with using my router and cutting some dados for the divider and rabbets for the box itself. Worked out really well. Also I found some really nice hardware online but wasn’t willing to pay 20$ a piece for them so I made them myself. I think this brings the build to another level. For a finish I used dark walnut stain and 5 coats of arm-r-seal. Love that stuff…..super easy to use! Also I finished the finish with a coat of paste wax! Makes it super slick and gives the grain a little more depth!
Comments
Jake
Wed, 01/16/2013 - 17:47
Great Work
Great work and result for your first project. Something as simple as this bench/table still results in a thing of beauty, especially if it is square and level when you are all done.