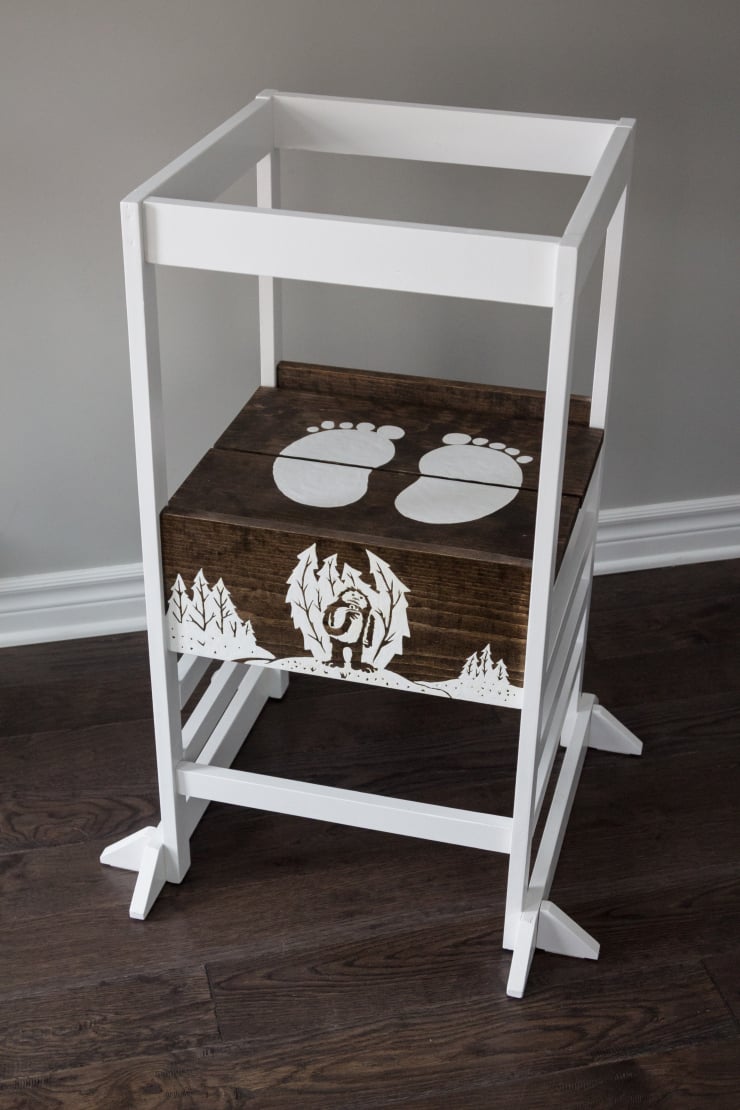
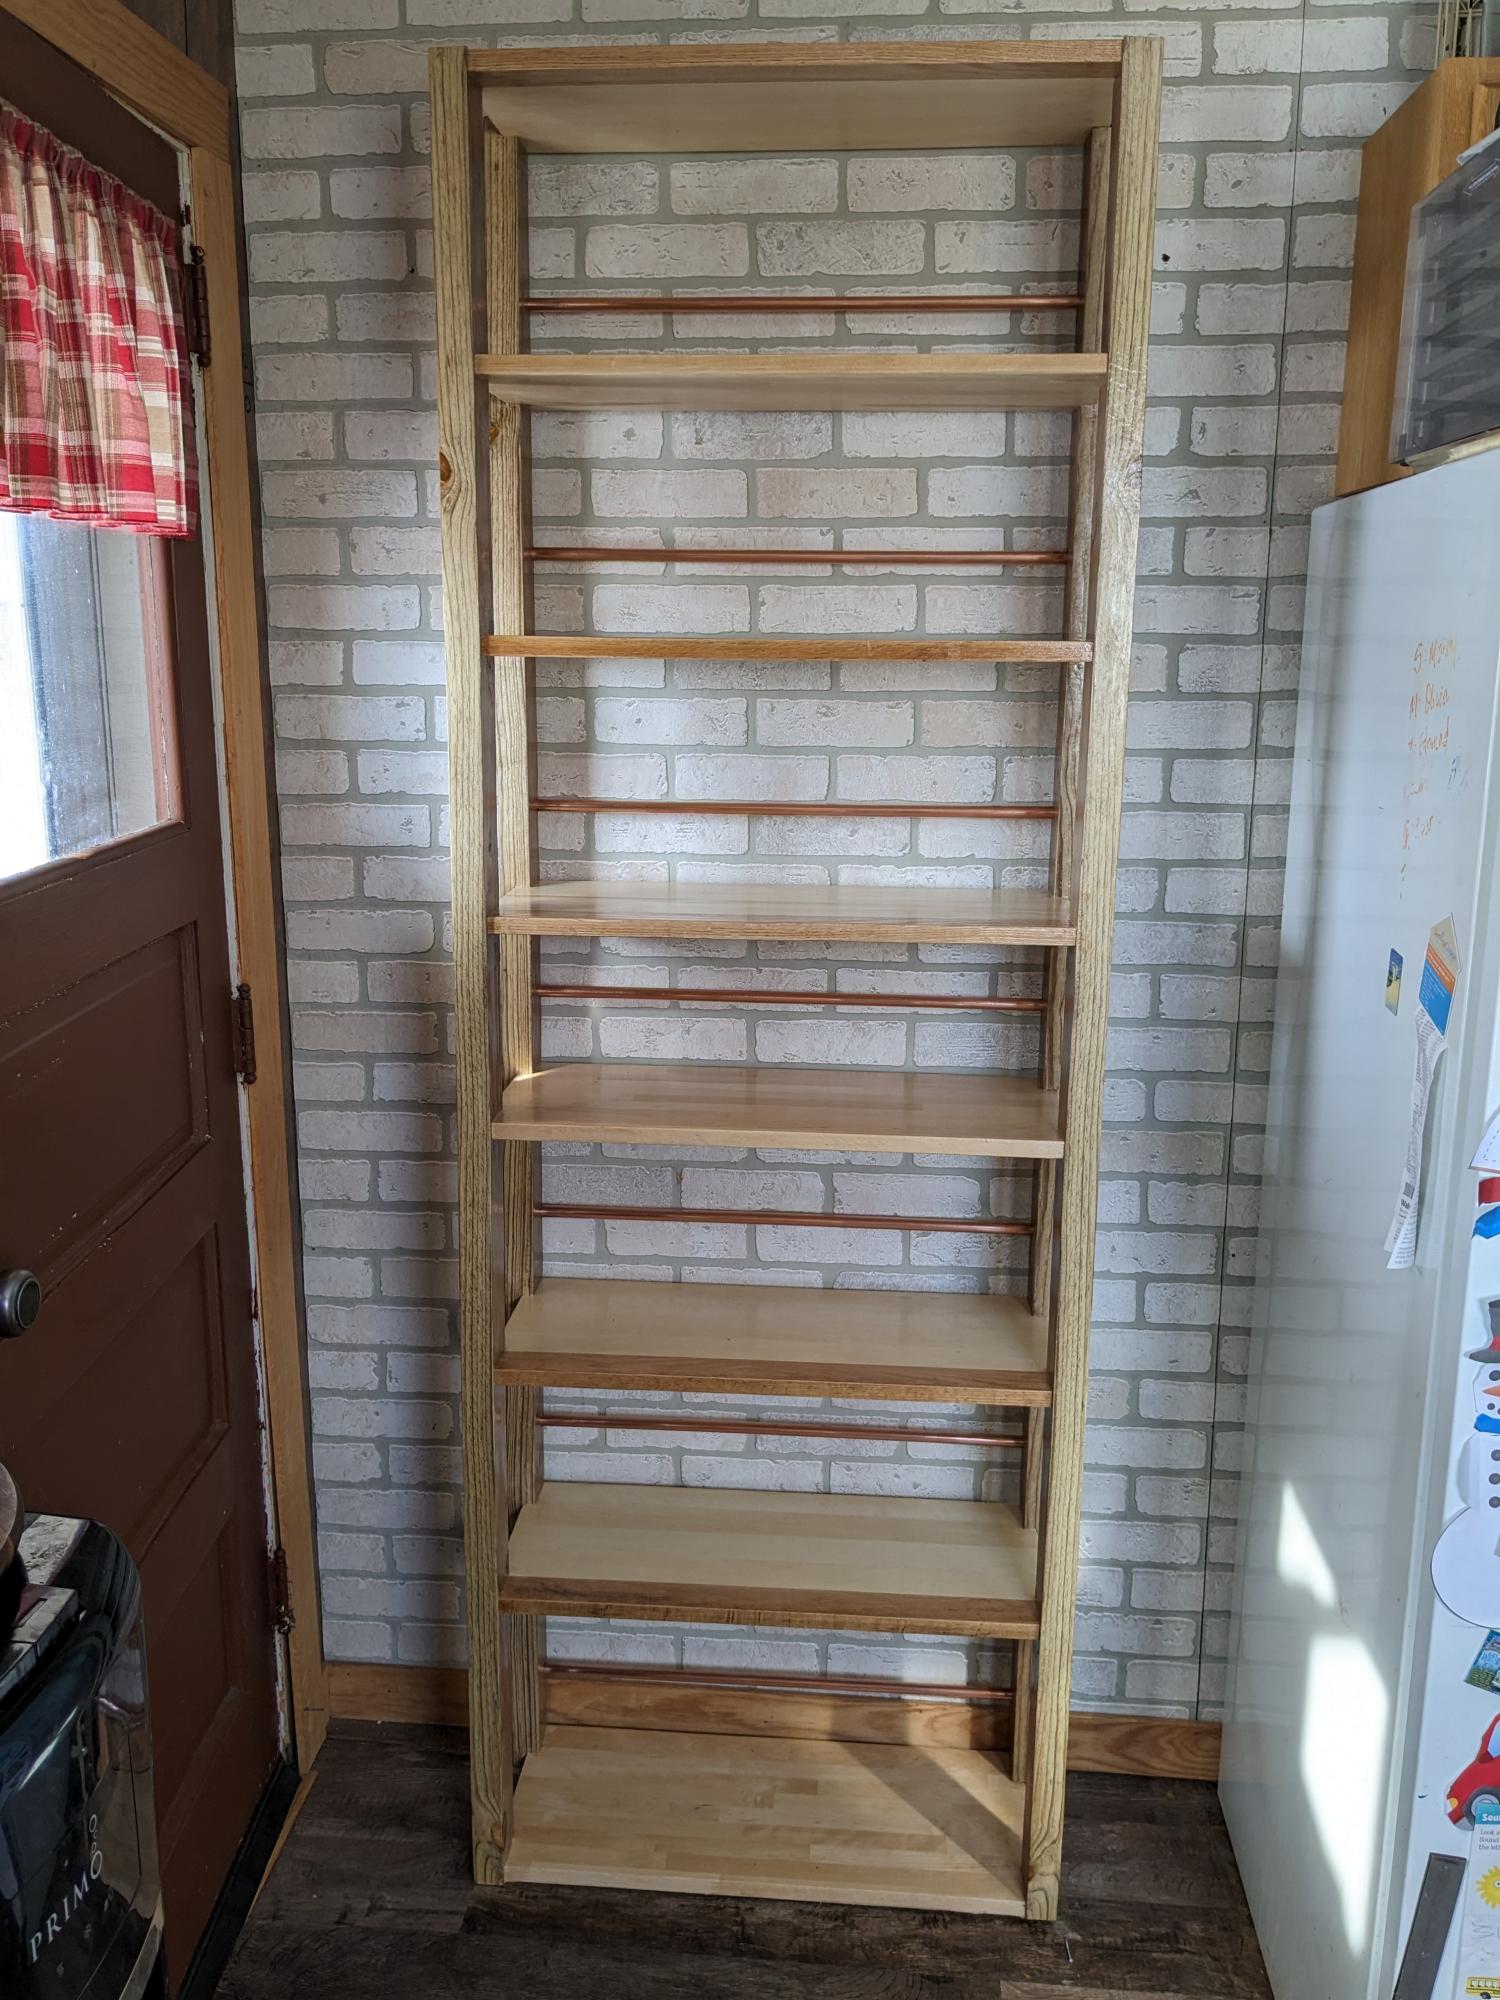
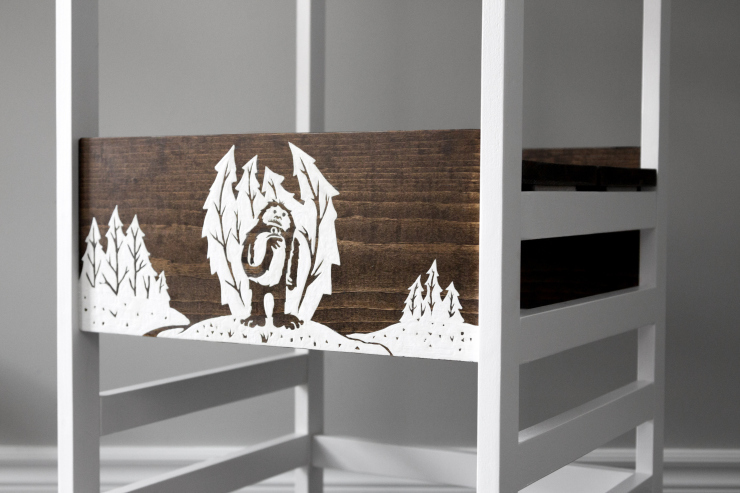
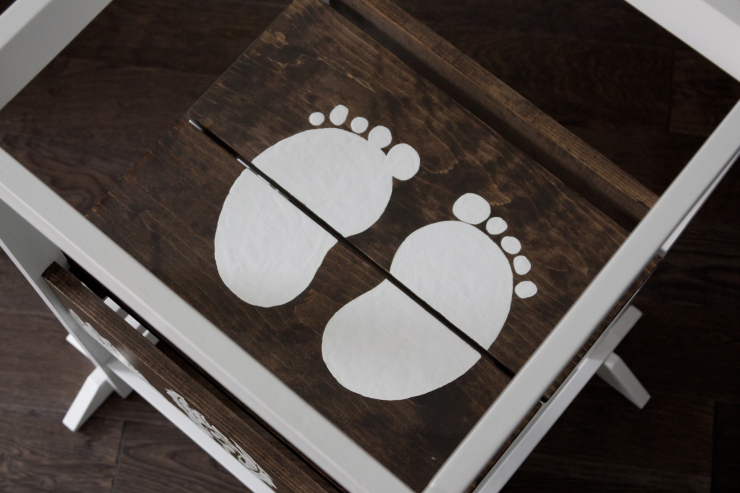
Community Brag Posts

Shanty Patriotic Square Planter

Submitted by Sue Hill on Sun, 05/20/2018 - 13:50

I loved the design of this planter and have been making wood quilts. This was a natural combination, incorporating a red, white & blue Americana quilt design into the front panel. The only modification I made was that the boards were 14" long instead of 15 3/4".  This way the 1x4 boards could create square sides. I also made the 2x2 corner posts 20" high.

Built from Plan(s)
Estimated Cost
$15.42 not including the paint.
Estimated Time Investment
Afternoon Project (3-6 Hours)
Finish Used
Rust-Oleum spray paint, I used painters tape to mark off the design for each color.
Recommended Skill Level
Beginner

Comments

Ana White

Tue, 06/05/2018 - 14:48

Love the paint on this planter!  Thanks so much for sharing a brag post, much appreciated! Ana

Seasonal And Holiday

Just one of many Honey to Do projects

Submitted by Anonymous (not verified) on Tue, 04/26/2022 - 04:53

My wife wanted a patio set and I initially made a set using pallets but I knew I could make a better one so after seeing one Ana made on Pinterest I went to work. I have now painted it white and my wife will be make the cushions for it as I made it a little wider than the actual plans called for.

Comments

Just what my little readers needed!

Submitted by hoffer5353 on Tue, 07/05/2011 - 21:44

This was the first project in many years and I was pleasantly surprised how easy it was. I am so happy with the results. It was a great starter project to get me excited to do more projects.
This book shelf can be done even cheaper had I left the base trim off. It would have looked fine without it as well.

Thanks for the great plans!

Built from Plan(s)
Estimated Cost
Less than $30.00
Estimated Time Investment
Afternoon Project (3-6 Hours)
Finish Used
Unfinished pine currently. I am hoping to use Minwax-Red Oak, Minwax-Polyurethane-Semi Gloss, to match the full size simple bed that I made for my son.
Recommended Skill Level
Beginner

Functional Mudroom with Tons of Storage

I was inspired by the Cutest Mudroom project. Our previous mudroom didn't work for us at all. There was wasted desk space and not enough storage. It was also a mis-match of cupboards, and without a window in the room, the wood and wall color made the room feel small and dark. We ripped out the previous shelving and desk and repainted a light blue color. I drew up plans based of the plans here to maximize our storage space. My husband and brother-in-law built the custom bookshelf towers on each side. We went all the way to the ceiling to maximize storage. I also decided to add cupboards across the top. We painted the entire thing white to keep things bright. We made the bench into a lift-top for storage of winter hats and mittens inside the bench. I upholstered the bench with fabric from Jo-Anns and found bright orange pillows at Linens and Things to give the room a pop of color. We put doors on the top and bottom cabinets and left the rest of the cubbies open and used fabric storage bins to keep everything organized. I love the touch of wainscoting in the middle and the hooks in the middle are for the kid's coats and backpacks. In the center of the whole unit is our family messaging and mail system.

Built from Plan(s)
Estimated Cost
500
Estimated Time Investment
Week Long Project (20 Hours or More)
Finish Used
Behr paint and primer in one from Home Depot, color: Frost
Recommended Skill Level
Intermediate

Morgan's Farmhouse Bed

Both of my children have moved into new homes within the past year.  So it looks like I will be busy building things they need for them.  Enjoy being able to do this for them!  Thanks, Ana for the inspirations!

Built from Plan(s)
Estimated Cost
$160 to $200 which includes the bed rail brackets used for side rails and middle support.
Estimated Time Investment
Weekend Project (10-20 Hours)
Finish Used
A gray stain then flat white paint distressed then Glossy clear Acrylic coat
Recommended Skill Level
Intermediate

Comments

Rustic DIY kitchen island 24 x 42

Submitted by Anonymous (not verified) on Mon, 05/02/2022 - 17:48

I built this for a friend so it will work for his kitchen….and he just loves it!

Comments

Play sink and stove (modified)

Love this site! My grandaughters were coming to stay and I was in the process of making a playroom/bedroom for them. I stumbled across this site just in time. I made the kitchen using the stove and sink plans from grace's kitchen except I combined them into one. So instead of having two seperate units, I just combined them together using one side panel for both, (making 3 20" long panels instead of 4) and placed one long countertop and backsplash. I used a candlestick holder (painted red) for the faucet, glued in a 1/2" in. threaded plastic nipple I had from the outdoor sprinkler system, and screwed on a hose for an icemaker for the refrigerator, (found at lowes in the plumbing department (cost 3.99)(I'm a widget girl!!) I love to look for things that could be used for something else. Then walaa, a faucet!!

Estimated Cost
20.00- I had wood leftover from the farmhouse daybed with trundle for the playroom (will upload later)
Estimated Time Investment
Week Long Project (20 Hours or More)
Finish Used
220 grit all/ valspar white primer/ then 220 grit again/ 2 or 3 coats Behr paint in semigloss-swiss coffee/ side panels, trim faucet and oven door, Rustoleum 2x coverage in red. (LOve this spray paint because it goes right where you spray it and covers beautifully!) Had a rough time with the hardware, use eurohinges and save yourself some grief!! I also would (please for the love of all mankind, heed my advice on this one) Cut the sinkhole first before painting and before placing the countertop. I waited until it was all finished and placed in the room before I cut the hole, thinking it would be so simple, made a huge mess and had to reputty with woodfiller and paint over mistakes AGHHH! Used a new dogbowl for sink.
Recommended Skill Level
Beginner

Comments

justagramma3

Fri, 07/08/2011 - 12:43

My color inspiration for this project came from the clabborgirl baking powder tin, (pictured). Just to let you know inspiration can come from just about anywhere!!

Keri Beth (not verified)

Wed, 08/01/2012 - 05:08

I was thinking of doing a combination sink and oven just like this! Yours looks great.

Easy Build Wood Headboard, Cal King

Submitted by carlynoel on Sun, 08/11/2013 - 18:05

This was my first project and I loved every second of it. I did the whole thing by myself (with the "help" of my two-year-old) and I'm 5 months pregnant! THAT is how easy it is.

Estimated Cost
80 bucks
Estimated Time Investment
Weekend Project (10-20 Hours)
Finish Used
I distressed it a little before staining so it didn't look too brand new. I filled a sock with bolts and screws and beat it up and scratched it with a steak knife to make fake cracks.I did one coat of Minwax Jacobean and it was really blotchy. I should've conditioned my wood, so I lightly sanded the whole thing and added a second coat and it evened out the blotchiness a lot, but it did turn out darker than I wanted. I added only one coat of Minwax Polycrylic Finish in satin because I wanted it to look rustic and not glossy. The cutting and assembly only took about 4-6 hours. The staining and sanding and distressing and finishing took a couple days.
Recommended Skill Level
Starter Project

Comments

yurra-bazain

Sun, 08/11/2013 - 20:41

How awesome is that? =D It looks gorgeous, and I applaud you for tackling it with your 2 year old and baby on the way. =D When I was pregnant, the only thing I considered doing was putting furniture together. Now that I've built furniture, I now realize how much harder it was to follow the assembly directions than it is to make your own assembly directions. Keep it up!

Easy Peasy Garage Shelves

Submitted by NickInHB on Mon, 09/07/2015 - 13:12

This was such an easy project to complete although it did take some time to measure and cut all the boards.  I could only transport 2x4s at 8' so after cutting the height to 6' for the braces I used the extra 2' for the shelf width.  The extra width really helped with some of my storage totes.  I made the first section at 5' in length to handle the heavier totes, and the second section I used the full 8' board with a brace in the middle.  I wish my garage was a little deeper to handle 16' of shelves as it would have saved me a good bit of time.  I'm also glad I have an extra ryobi battery to charge while I assemble.  Gotta love how fast those things charge.  Can't wait to try another one of your plans.

Estimated Cost
Around $130 from the Depot. 2x4 at 8' $2.73 a piece and two boxes of screws.
Estimated Time Investment
Day Project (6-9 Hours)
Finish Used
none
Recommended Skill Level
Beginner

Comments

alipettaway

Sun, 05/31/2020 - 22:32

Awesome job!! I’m wondering if plywood can be used for shelving instead of more 2x4s like on the non free standing garage shelves?

Pallet laundry bin

Submitted by LARMO on Fri, 07/20/2018 - 18:09

Built for our laundry room with pallets radiator cover  and casters attached to bottom all purchase from a local thrift store, with matching recycle bin.

Estimated Cost
$20
Finish Used
Natural
Recommended Skill Level
Beginner

My Craft Table

I used Ana's plan for the modern project table to create my craft table. I modified it just a bit by removing the "floating top" and covering the front to provide more hidden storage (a must for me). I used my brad nailer and gorilla glue to construct. I used all whitewood boards for the base and 3/4" mdf for the top. I love it! You can read more details at http://www.shanty-2-chic.com/2011/01/all-finished-yeah.html !

Built from Plan(s)
Estimated Time Investment
Weekend Project (10-20 Hours)
Finish Used
2 coats of Valspar Aquatic Edge and 1 coat of Polycrylic in Semi-gloss. I use 4" Whizz rollers on all my furniture painting.
Recommended Skill Level
Beginner

Toy Box for my son

Submitted by KWJ on Tue, 08/13/2013 - 17:57

I had a leftover sheet of 1/2" plywood, so I built this toy box. The pocket holes didn't work very well on the 1/2" plywood, so I added some angle brackets for security, but it's a great toy box, bigger than I had imagined! I had to add a sheet of plywood in the open side because the bottom was too low for my 2 year old--toys kept falling in and he couldn't reach them, but kept trying to climb in after them!

Built from Plan(s)
Estimated Cost
$30
Estimated Time Investment
Afternoon Project (3-6 Hours)
Finish Used
Interior Latex paint with a coat of polyurethane
Recommended Skill Level
Starter Project

iTable as a dining table!

Submitted by dels on Sat, 09/12/2015 - 08:12

I have decided to build the iTable as a dining table last weekend and I am very happy, this is becoming our new dining table! I used 6x6 for the legs and stained with ebony stain, and protected with 3 coats of polyurethane.

Built from Plan(s)
Estimated Cost
150$
Estimated Time Investment
Weekend Project (10-20 Hours)
Finish Used
Sprayed the stain, removed the excess after 2 minutes like the instruction said.

applied polyurethane with a brush.
Recommended Skill Level
Intermediate

Bedroom Dresser

First time using drawer slides, and what a learning curve it was! The color is Varathane Weathered Wood Accelerator. This piece is huge and heavy! Absolutely love it and rebuilding other bedroom pieces to match this color. I also built a matching dresser which is taller and much more narrow. It can be found here: http://www.ana-white.com/2018/08/DIY_furniture/tall-bedroom-dresser

Estimated Cost
$200-$250
Estimated Time Investment
Weekend Project (10-20 Hours)
Finish Used
Varathane Weathered Wood Accelerator, Varathane Poly
Recommended Skill Level
Advanced

Comments

Outdoor sofa next to the fire

Submitted by Anonymous (not verified) on Sun, 05/22/2022 - 00:53

My husband loves seating on this sofa while reading his scriptures or sometimes to take a nap. I got the cushions and pillows from Ikea. I can't wait to build another one or two, possibly with my sister-in-law. Thank you for the tutorial :-)

Built from Plan(s)

Comments

Mini Market, Fridge, Sink and Faucet

Submitted by canesa on Thu, 07/14/2011 - 22:33

The play kitchen is the favorite play area at our house! The girls and their friends play here for hours and that includes our 11 year old and her friends too! If you haven't built this set yet, it is a must! Give yourself plenty of time to finish it if you're going to give it as a gift because for me, the building was the easy part! It's the finish work that takes FOREVER!

Estimated Cost
$75 including wood, paint and vinyl
Estimated Time Investment
Week Long Project (20 Hours or More)
Finish Used
I painted everything in Sea Spray by Glidden in a flat base.

I also used these plans to make the wooden faucet on the sink. http://ana-white.com/2010/12/play-faucet.html
Recommended Skill Level
Intermediate

Comments

The RustBucket

Sun, 12/11/2011 - 19:43

I have been thinking about finding my li'l girl a kitchen for Christmas - and I think my searching has just ended...I love it! Thanks for posting

Making the wife happy

Submitted by egreska on Sat, 08/17/2013 - 09:51

Adapted the original Queen plans to a King with a bed height of 27". Thanks for the original plans. Here are the adapted cuts to match the labeled photo:

Squared2 Headboard – King Size Cutlist for bed height of 27”


A - 2” x 2” x 76 ½”               x2

B - 2” x 2” x 61 ½”               x2

C - 2” x 4” x 76 ½”               x1

D - 2” x 2” x 18 ½”               x2

E - 2” x 4” x 18 ½”               x1

F - 1” x 2” x 11 1/16”                      x4

G - 1” x 2” x 19 ½”               x4

H - 1” x 2” x 12 ¼”               x12

I - 1” x 2” x 5 ½”                   x6

J - 1” x 2” x 5 7/8”                x12

K - 1” x 2” x 5 1/8”              x18     K* - (May need to be trimmed to 5”)


Lumber needed

2” x 2” x 8’                             x4

2” x 4” x 8’                             x1

1” x 2” x 8’                             x5


1” x 2” board cuts

19 ½”

19 ½”

19 ½”

19 ½”

5 1/8”

5 ½”

5 ½”

11 1/16”

11 1/16”

11 1/16”

11 1/16”

12 ¼”

12 ¼”

12 ¼”

12 ¼”

12 ¼”

12 ¼”

12 ¼”

12 ¼”

5 1/8”

5 1/8”

5 7/8”

5 7/8”

5 7/8”

5 7/8”

5 7/8”

5 7/8”

12 ¼”

12 ¼”

12 ¼”

12 ¼”

5 1/8”

5 1/8”

5 7/8”

5 7/8”

5 7/8”

5 7/8”

5 7/8”

5 7/8”

5 1/8”

5 1/8”

5 1/8”

5 1/8”

5 1/8”

5 1/8”

5 1/8”

5 1/8”

5 1/8”

5 1/8”

5 1/8”

5 1/8”

5 1/8”

5 ½”

5 ½”

5 ½”

5 ½”


Estimated Cost
$40.00
Estimated Time Investment
Weekend Project (10-20 Hours)
Finish Used
Valspar satin finish - "Gray Frost"
Recommended Skill Level
Beginner

Comments

yurra-bazain

Sat, 08/17/2013 - 16:19

Phew, this pattern requires a lot of math, doesn't it? You did an excellent job of customizing the headboard to the size you need!

I'm working (today) on getting measurements right for a Squared2 Dining Table, so seeing your finished product is helpful. =D Thank you!

Wood Pumpkin for Halloween

Submitted by mtairymd on Mon, 09/14/2015 - 14:14

Build Instructions and additional pictures:
http://www.instructables.com/id/Rustic-Pumpkin-Lantern/

This triangular pumpkin lantern could be a nice addition to your Halloween décor. To give the lantern an aged timeworn look, the rustic finish uses multiple layers of paint, rough sanding and then an outer layer of oak stain. Since the pumpkin is made from wood, I would suggest using LED Tea lights for illumination

Estimated Cost
$10
Estimated Time Investment
Afternoon Project (3-6 Hours)
Finish Used
Paint and Stain
Recommended Skill Level
Beginner

Patio table from scraps

Submitted by Usmcmills on Wed, 08/29/2018 - 20:33

Daughters didnt want theyre bunkbed anymore that i build from this site.. So i took it apart and frankenstiened this patio table.

Super sturdy

Estimated Time Investment
Afternoon Project (3-6 Hours)
Recommended Skill Level
Beginner