Community Brag Posts

Paul's Kitchen Helper

Submitted by Anonymous (not verified) on Fri, 02/22/2019 - 07:24

This was constructed out of solid black walnut from a tree that grew in our homeowner's association area. A neighbor and I had the tree sawn into planks, which we air-dried for a year, and then divided up the wood. So this really is an "all natural" project.

Estimated Time Investment
Week Long Project (20 Hours or More)
Finish Used
Clear Polyurathane gloss
Recommended Skill Level
Intermediate

Doll Bunk Beds

Submitted by jmr977 on Tue, 10/04/2011 - 06:51

My daughter has really been getting into American Girl Dolls so I went on the official website to see if I could find some accessories for them for her birthday and YIKES - that stuff is expensive! So I went on Ana's site and found plans to make bunk beds. My daughter has four dolls so I figured we could build two sets at a fraction of the cost we could buy them at.

This was our first furniture project so we had to buy everything, which makes the project more expensive than if you have scraps laying around, but still totally worth it. My husband and I built two of these in about 3 hours. Sewing four of everything probably took another 2-3 hours.

I made the blankets reversable - flowers on one side, strips on the other so she could mix and match as she liked. I think I am going to make a reversable pillow for each bed with the blanket fabric, but I haven't gotten that far yet. I totally misunderstood how much fabric to buy - I thought it was 1/2 yard for mattress and then another 1/2 yard for the blanket, but it's not, it's 1/2 yard for both so needless to say I have a TON of fabric left over. Since this project went so well we are going to build a doll table and chairs for Christmas so I figure I can use the left overs for placemats, etc. and carry the theme through the set.

I love the way they turned out and I can't wait to give them to her for her birthday!!!

Estimated Cost
$20 per bunk bed (roughly)
Estimated Time Investment
Afternoon Project (3-6 Hours)
Finish Used
Primed with a sandable brown spray primer and finished with a high gloss spray brown.
Recommended Skill Level
Beginner

King Size Farm House Bed

Submitted by Pembat on Sun, 10/06/2013 - 20:29

After searching for several months for bed frames in stores and seeing the garbage that costs way too much, we found this site and built the King Farmhouse Bed.

Primered with Kilz paint. Finished with two coats of Behr White Linen. Then we distressed the edges with a palm sander, and knocked down some of the paint in areas, and applied a brown glaze. After we achieved the look we liked we did two coats of polycrylic.

Recommended Skill Level
Beginner

Comments

Pantry Storage Rack

Submitted by Anonymous (not verified) on Sun, 12/27/2015 - 16:16

I changed the original plan a little so it would hold bigger items in the bottom shelves

Built from Plan(s)
Estimated Time Investment
Afternoon Project (3-6 Hours)
Recommended Skill Level
Starter Project

PEM Kitchen Tower

Submitted by Anonymous (not verified) on Wed, 02/27/2019 - 12:37

Built from solid walnut milled from a tree that grew nearby.  Had tree cut into slabs, air dried the wood for a year, then planed into boards for use in the project.  Rabbitted the supports rather than depending only on screws.  Finished with tung oil and clear polyurathane.

Estimated Time Investment
Week Long Project (20 Hours or More)
Finish Used
Tung oil and clear gloss polyurethane. Diluted tung oil, paint thinner, and polyurethane and wiped on with lint free pad to eliminate drips and runs.
Recommended Skill Level
Intermediate

Farmhouse Bedside Table

Finished Ana White's farmhouse bedside table. I used antique drawer pulls from old furniture. I used table top clips to attached the top to give the wood room to breathe as seasons change. I also put in two blocks as drawer stoppers so the drawer didn't go too far in.

Built from Plan(s)
Estimated Cost
$16
Estimated Time Investment
Week Long Project (20 Hours or More)
Finish Used
Paint (Color Belle Grove..can't remember company), used Orange Beeswax on the sides of drawer and inside of table to make gliding easier. The stained wood is Minwax Provincial.
Recommended Skill Level
Beginner

Surprise Birthday Bunks

Submitted by bigguygonz on Tue, 10/08/2013 - 17:35

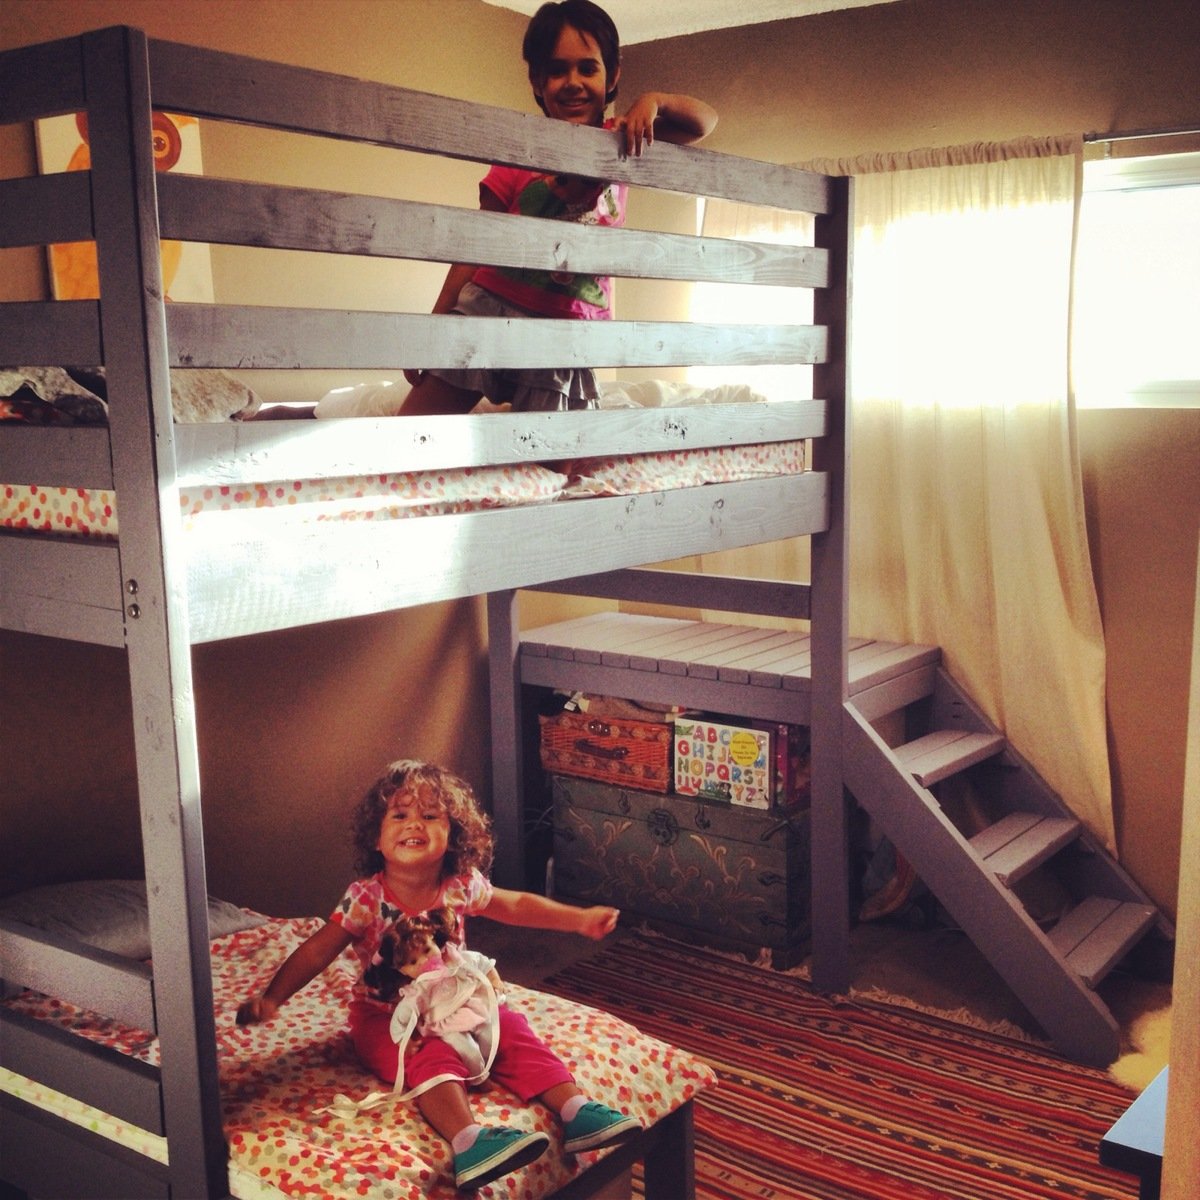
As our youngest daughter's 2nd birthday was fast approaching, we were looking for options to eliminate the crib + twin setup we had in the girls room. I had always been a fan of the L-Shaped Bunks Arnold and Willis shared in "Diff'rent Strokes." The problem was that all the comparable beds at furniture stores were pushing $1000 for that sort of set-up, we didn't really need a twin bed for the 2 year old, and were a little worried with the two year old on ladders and falling off the top bunk while playing/sleeping with her 7 year old sister.

And so in doing my search I came across the junior loft plan from this site. At first, I disregarded it, since I had never taken on a project like this before, plus with only one bed and short railings, it didn't fit our needs. I kept going back because i loved the design. Then I recalled my father and I doing something similar when I was a young teen building a loft bed around a bookshelf/desk combo that my uncle had made. I figured if he could do it, so could I.

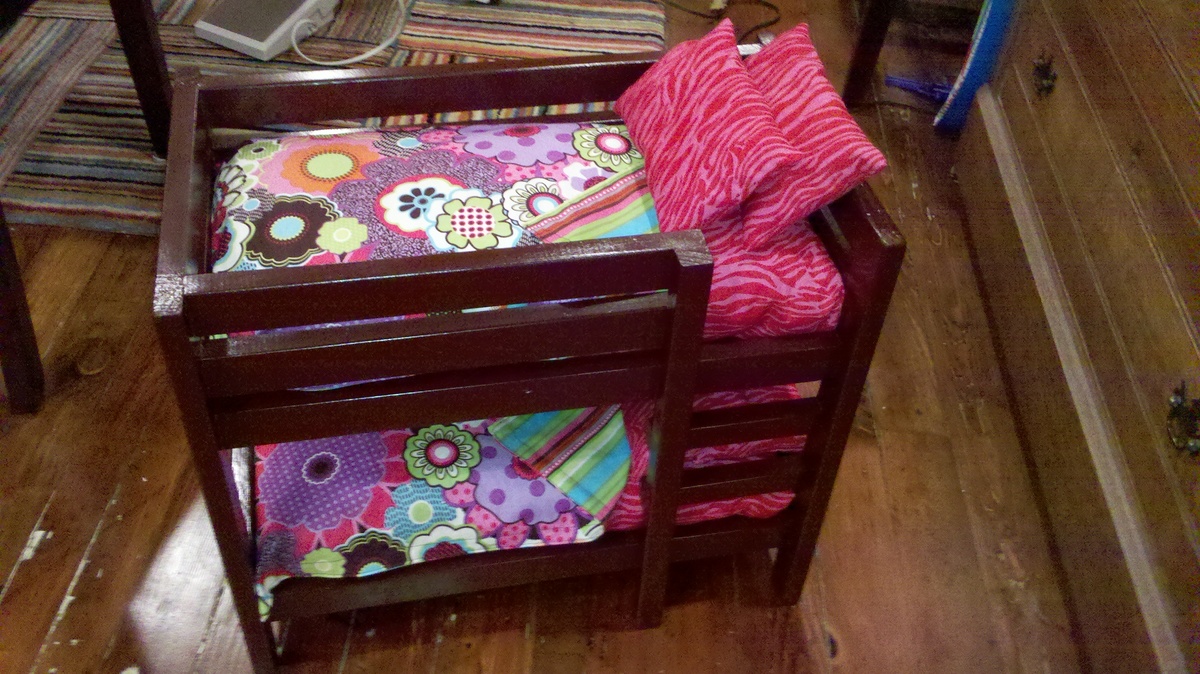
So I started tweaking with the plans. Flipping the stairs to the other side... easy. Increasing the rail height to double... no problem. Adding a toddler bed frame based on some mattress sizes I got off amazon... just some simple math...

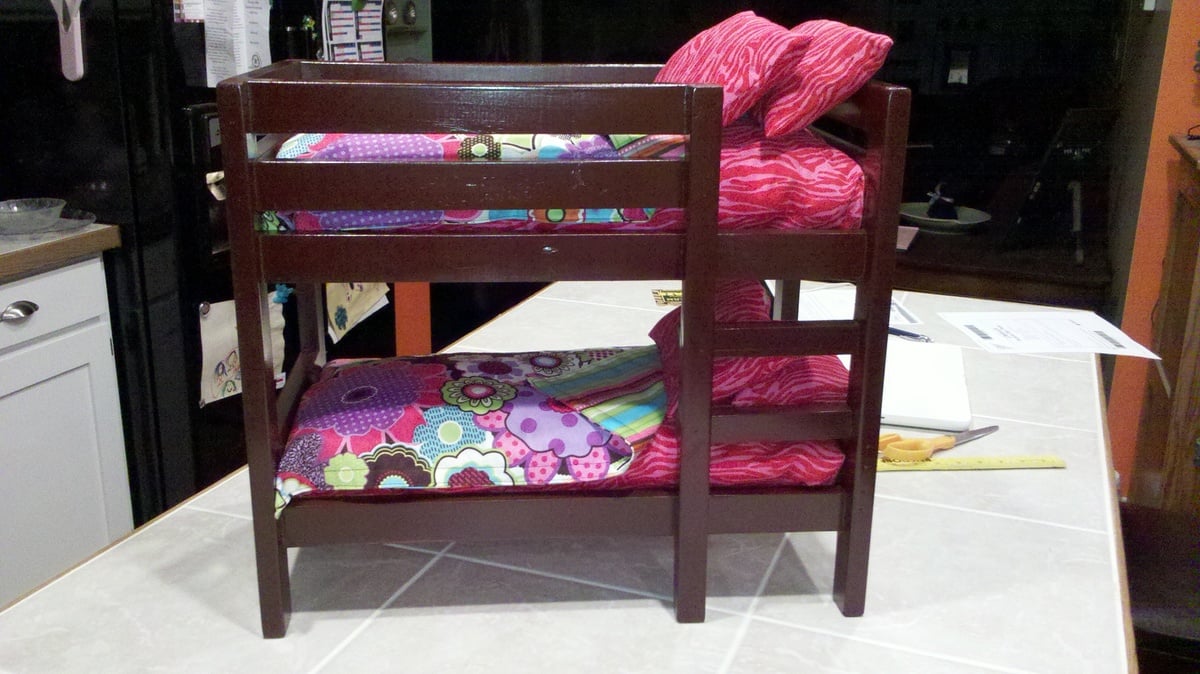
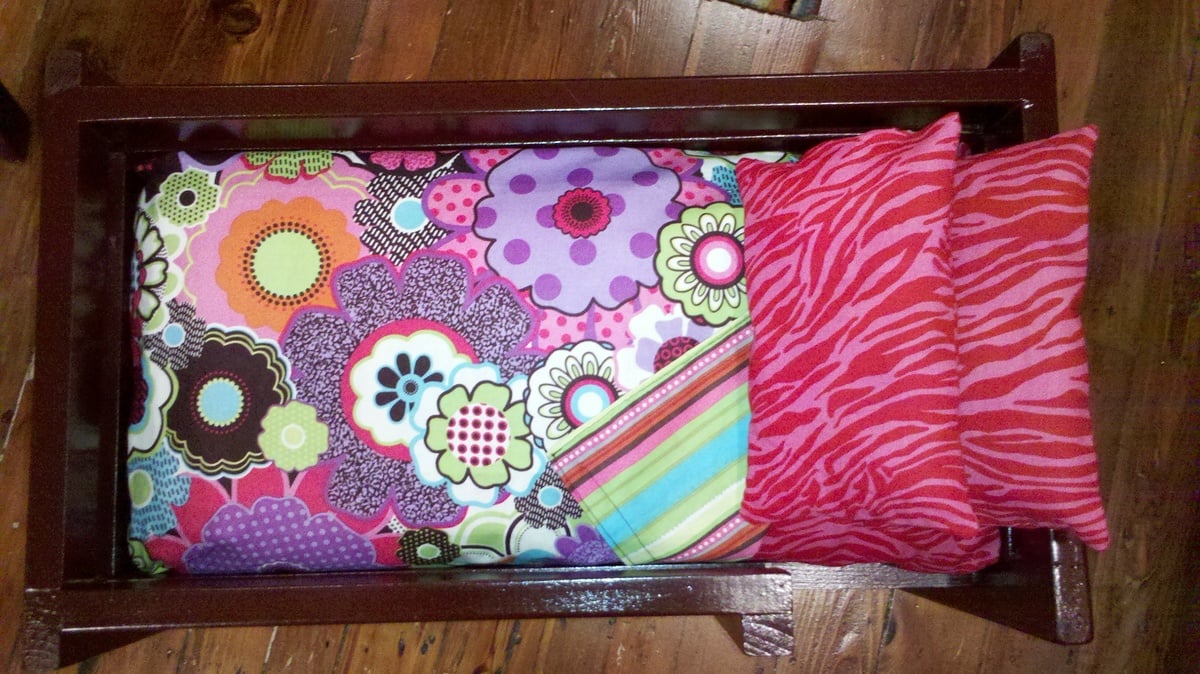
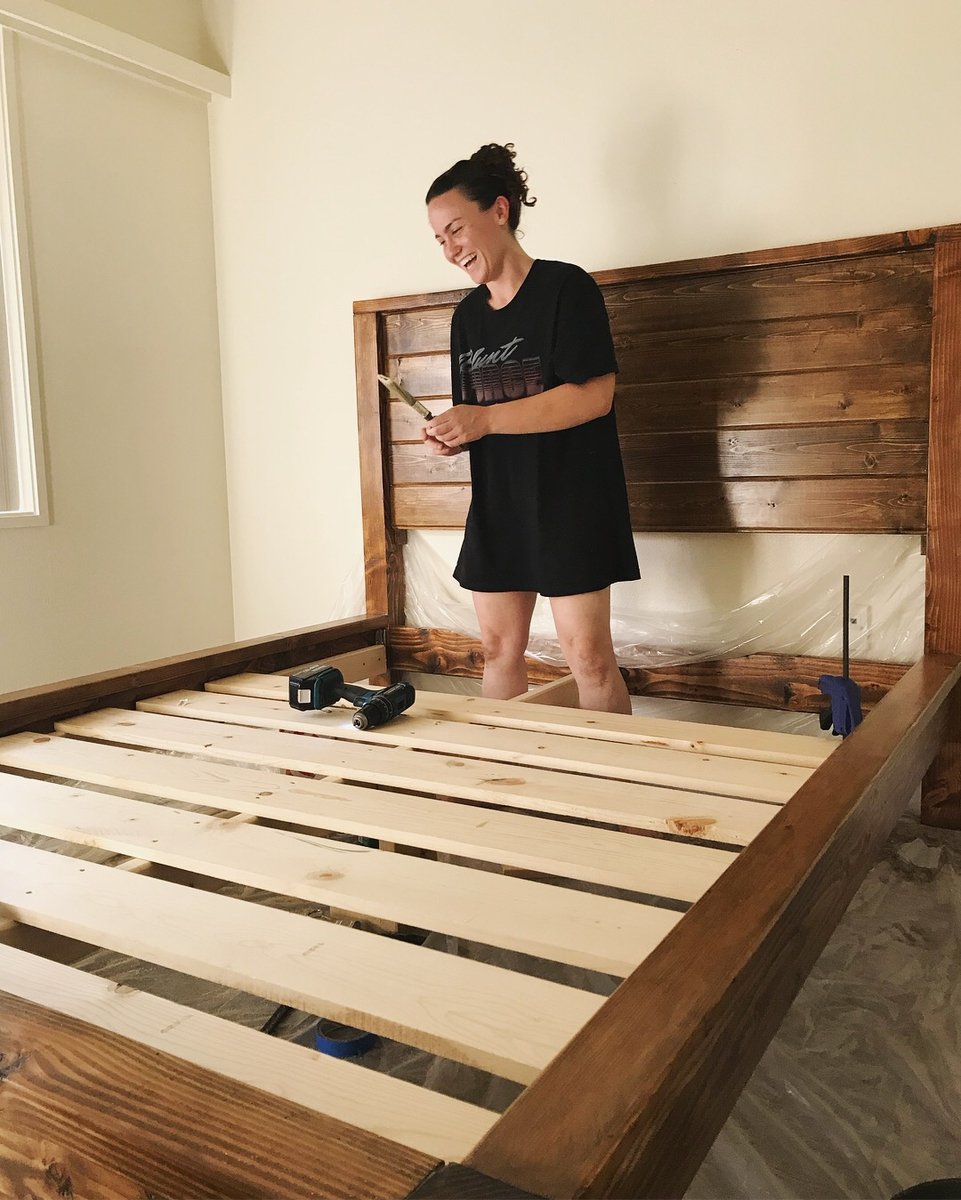
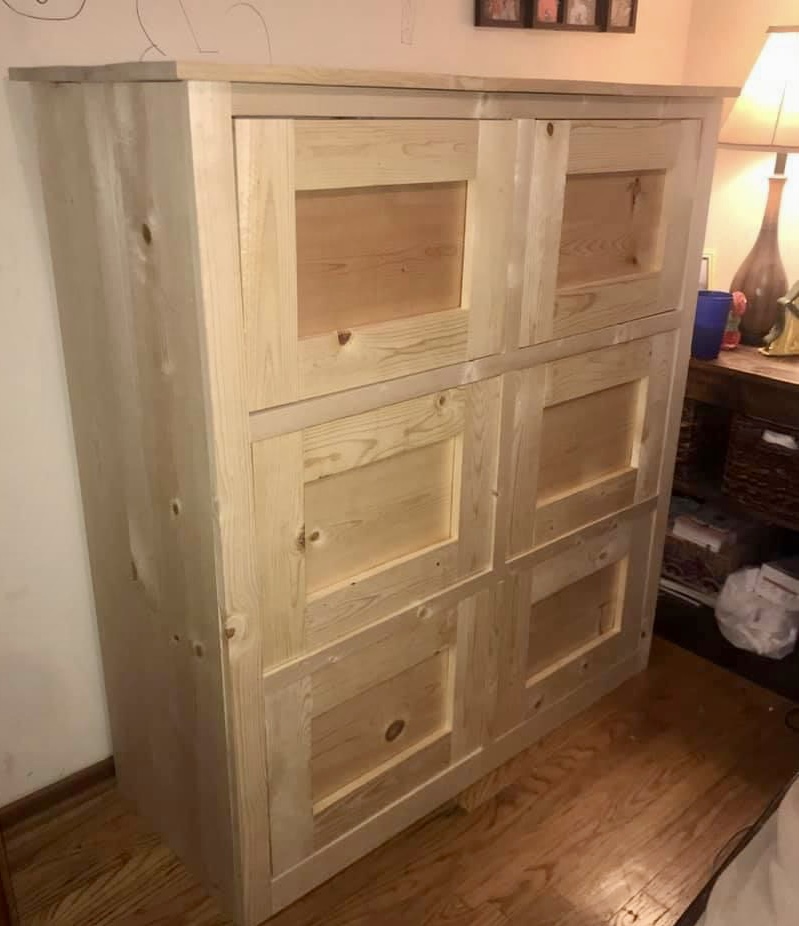
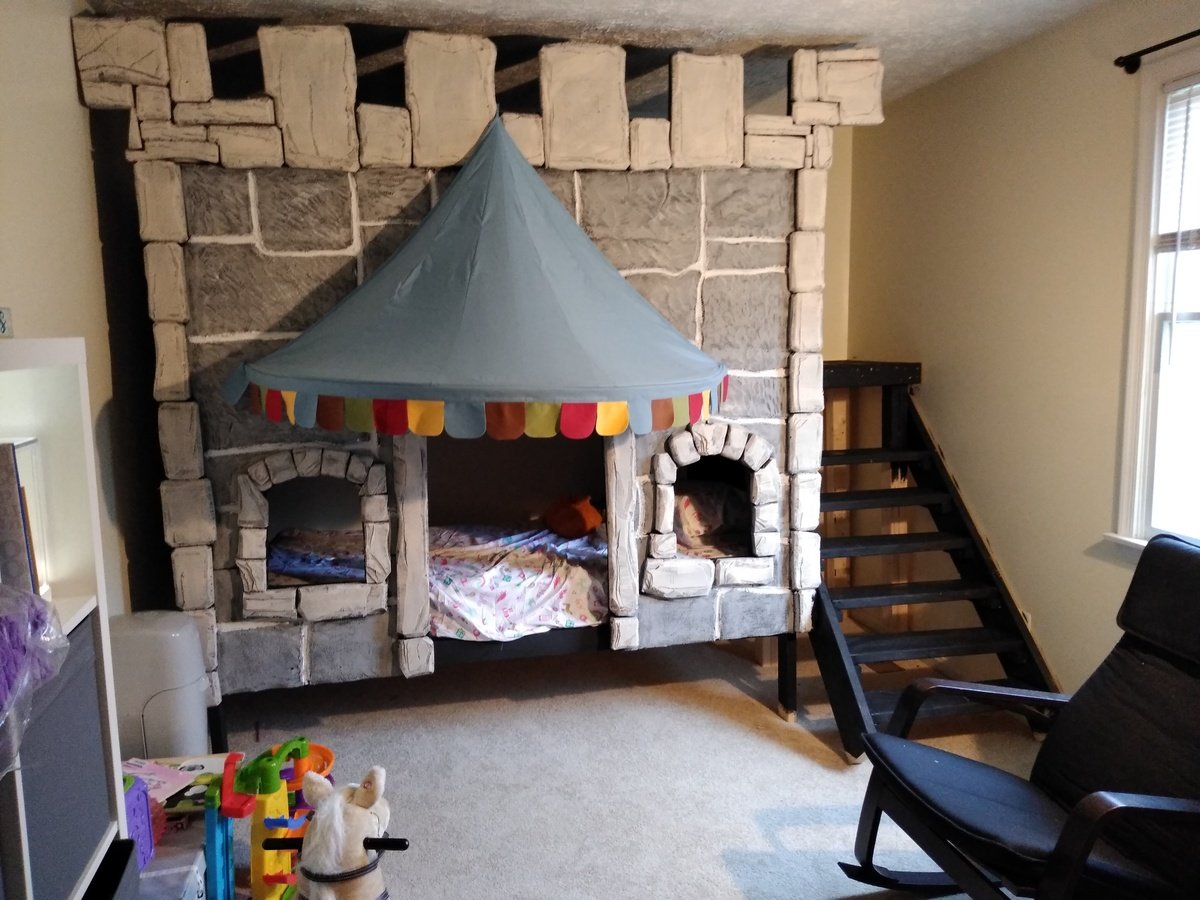
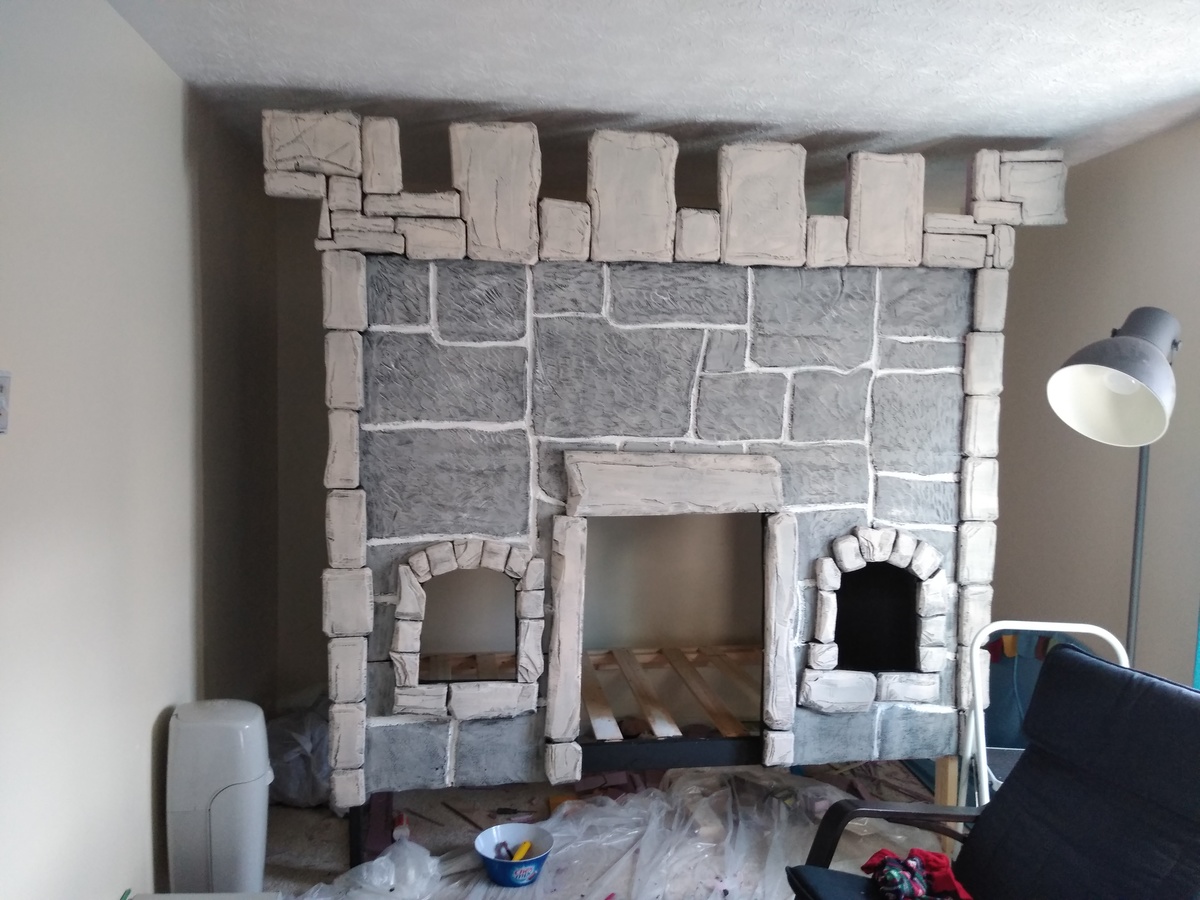
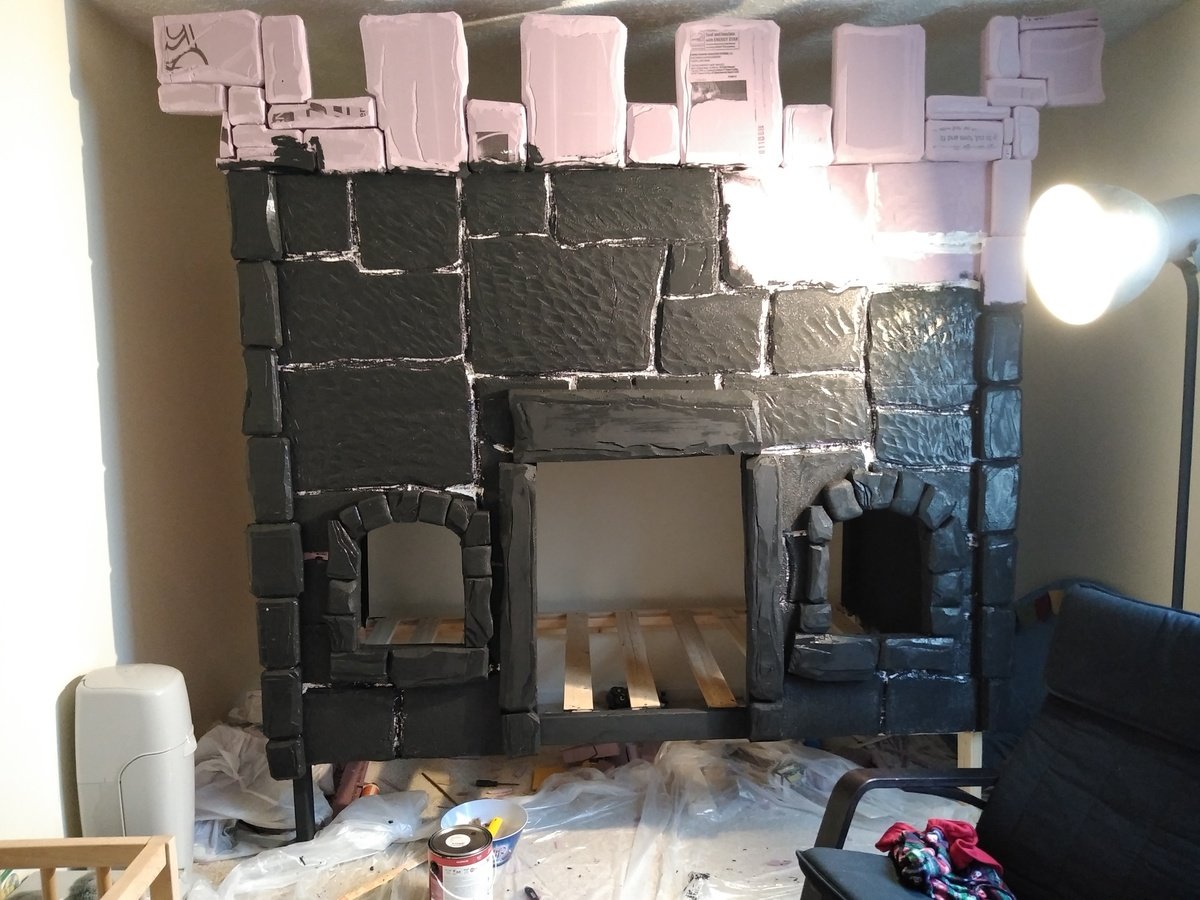
Then $150 in wood, fasteners, paint, etc. another investment of about $250 in tools, and I was good to go. Over the next 3 nights, I slaved in the garage by myself, measuring, cutting, measuring again, PH drilling, then started sanding and assembly on Sat. By Sunday, I was ready to move the pieces up to the room for final assembly and paint, and about 20 man hours later, we had this beautiful beast and just in time for her birthday.

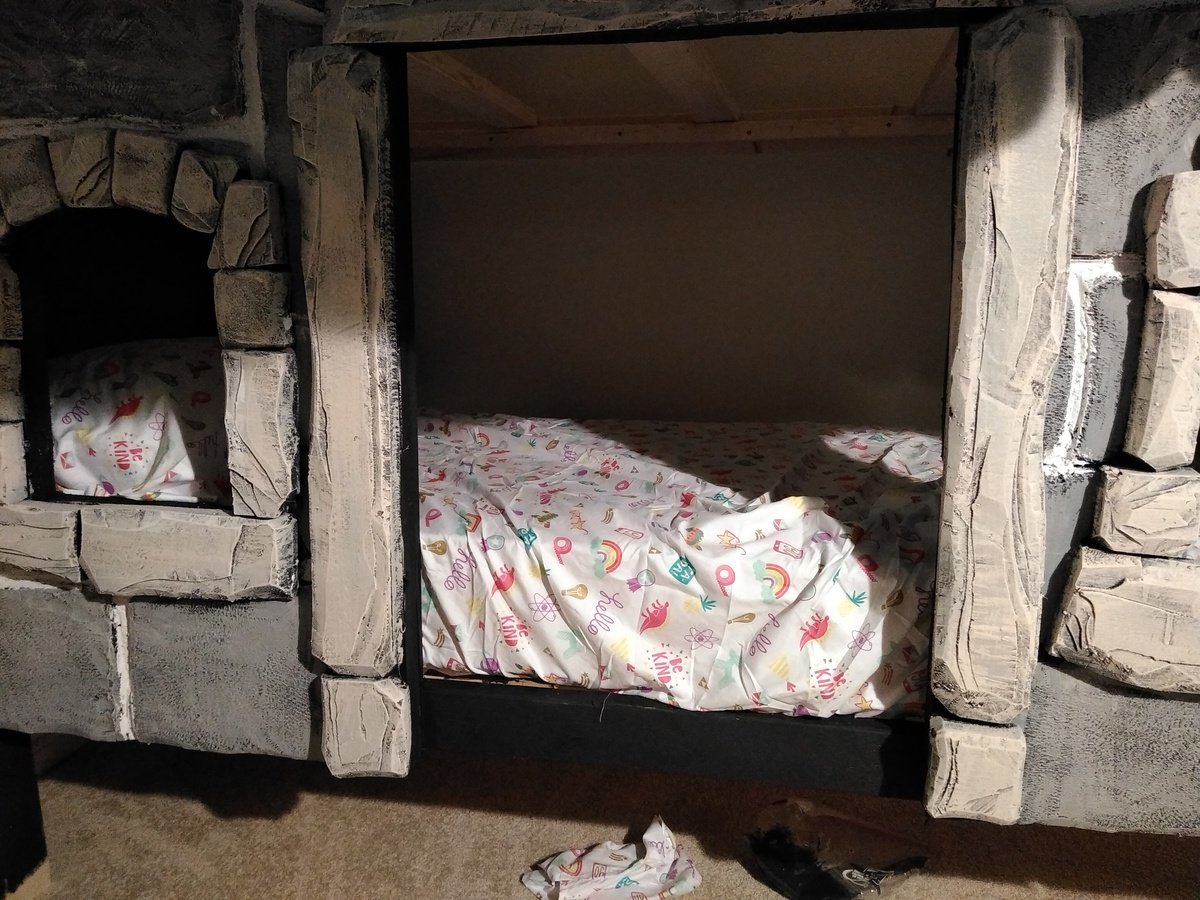
We had dropped our daughters off with their aunt for a few hours to get it set up, and when they came home the look on their face was priceless. Sure I could have spent less time and a little more money, but I have to tell you the feeling of accomplishment and our daughter's collective excitement made the whole thing worth it.

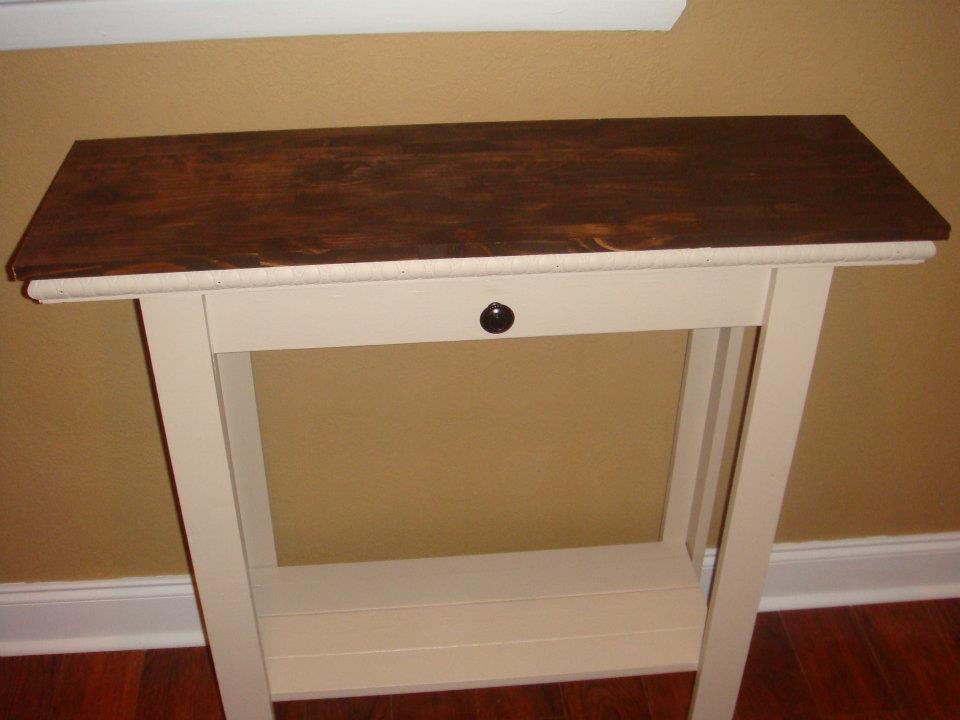
I'm super grateful to Ann White and her amazing site, and I'm looking forward to my next project, since my wife is now working on a list of stuff for me to make...

-JG

NOTE: The assembled bed came out incredibly sturdy with 2.5" PH screws & glue, however since it's carrying precious cargo, I added two 4" lag bolts (3/8) into each of the posts for a little added stability.

Estimated Cost
$150 in materials + $250 investment costs for tools
Estimated Time Investment
Weekend Project (10-20 Hours)
Finish Used
Behr Paint - Milestone Color
Recommended Skill Level
Beginner

Comments

Wood Dresser

Submitted by aerialc on Tue, 12/29/2015 - 09:37

I made this dresser for my daughter for Christmas. I followed the plans exactly except I made feet with 2x4 scraps instead of wheels.

Built from Plan(s)
Estimated Cost
$200
Estimated Time Investment
Weekend Project (10-20 Hours)
Finish Used
Glidden - Onyx Black Semi-Gloss Interior - two coats
Recommended Skill Level
Intermediate

7ft trestle leg table with matching bench and 5 chairs

Submitted by Anonymous (not verified) on Fri, 03/08/2019 - 10:56

This was a project I built about a year ago. It's a 7ft trestle leg table with a matching bench. The top is stained dark walnut and the bottom is white and distressed. Matching X back chairs were finished the same.

Estimated Cost
$350 in materials
Estimated Time Investment
Week Long Project (20 Hours or More)
Recommended Skill Level
Intermediate

Shiplap fireplace

Submitted by Medickep on Tue, 01/31/2023 - 05:42

My fiancée wanted to spice up our living room and we got this great idea from Ana, whose video made me realize I could do this! I was a little reluctant because a lot of these you see don’t have a lot of electronics and the TV is pretty high. I feel like we we able to balance this out by adding the shelf’s to the side for electronics!

Comments

My version of TAYLORS CONSOLE

Submitted by mis1246 on Thu, 10/10/2013 - 16:53

I love this table! It is perfect for a sectional sofa. I decided to antique it and leave off the wheels. I also added pulls to give it more of a finished look. Now time to decorate!

Estimated Time Investment
Afternoon Project (3-6 Hours)
Finish Used
off white paint, with dark walnut stain. Finished with a sealer
Recommended Skill Level
Intermediate

Pallet Frame

Submitted by Anonymous (not verified) on Thu, 12/31/2015 - 08:16

My son and I bulit this 8x10 frame from a pallet for a Christmas gift for my dad, who is standing in the center. 

Estimated Time Investment
Afternoon Project (3-6 Hours)
Finish Used
We used the wood's natural finish. We sanded it first with a 60 grain and then a 120 grain.
Recommended Skill Level
Starter Project

Modern Farmhouse Bed

Submitted by Anonymous (not verified) on Tue, 03/12/2019 - 08:19

This was my first BIG project. I worked on it for a few hours every day for a few weeks. The most tedious part was sanding, but that is because I wanted to go the cheap way and got my wood from HD. I also did this (mostly) by myself, but having a partner definitely would have made the process go faster (especially for attaching the side rails to the headboard/footboard). I used bed rail brackets to make things easy when I move. I also made the bed a little higher than Ana's plan because I wanted a lot of under-bed storage.

Have questions!? Just ask! This was such a rewarding project :) 

Built from Plan(s)
Estimated Cost
$300
Estimated Time Investment
Week Long Project (20 Hours or More)
Finish Used
Pre-stain wood conditioner, Two coats of Early American stain, Four coats of wipe-on poly
Recommended Skill Level
Intermediate

Chest of Drawers Build

Submitted by Anonymous (not verified) on Fri, 02/03/2023 - 13:15

I got the idea to build this chest of drawers after watching your mudroom bench tutorial. They turned out great! It’s very sturdy and holds a lot of clothes. Thanks again for the great videos and plans👍.

Leslie

Built from Plan(s)

Comments

Console Table

Submitted by amil04 on Tue, 10/18/2011 - 11:17

I followed the instructions Ana provided, but added a small crown molding to the front and sides and added a solid top that I stained. I also added the lower shelf with leftover pieces and a knob for decoration. I love this new table in my entryway!! I built it in about 3 hours and had it all painted and stained by the next day! Thanks Ana!

Estimated Time Investment
Afternoon Project (3-6 Hours)
Recommended Skill Level
Beginner

Reclaimed Wood-look Headboard

Submitted by mom of 4 on Mon, 10/14/2013 - 08:38

Pretty much followed the plans for the reclaimed wood-look headboard, but without legs. I built it of pine and topped it with a purchased piece of moulding. I hung it from screws into studs with D-rings on the back. Super easy to put together with the Kreg Jig!

Estimated Cost
$30-$50
Estimated Time Investment
Afternoon Project (3-6 Hours)
Finish Used
I sanded the bejeebers out of the rough 2X4's on the sides, top and bottom. Everything else got sanded before and after assembly. I punched down the nails on the trim and then filled the holes. Primed everything and then put on two coats of a dove-white trim and cabinet paint.
Recommended Skill Level
Beginner

My Uncle Tom made this dollhouse bookcase for my daughter, and it's beautiful. Thanks for the plans!

Submitted by Anonymous (not verified) on Sat, 01/02/2016 - 16:22

This dollhouse bookcase was made by my Uncle Tom for my daughter. We can't wait to get it painted and get some fun furniture for it. He said it was a pretty simple project, and was able to get the materials relatively cheaper.

Estimated Cost
$60
Estimated Time Investment
Weekend Project (10-20 Hours)
Recommended Skill Level
Intermediate

Sweet Pea Bunk Bed turned Castle Bunk Bed

Submitted by Anonymous (not verified) on Mon, 03/18/2019 - 17:40

Used the frame portion of the plans and the window/door layout, skinned in plywood, then skinned in insulating foam board, carved and sculpted to look like stone. Then painted with a combo of 5 different colors. My daughter loves it. 

Built from Plan(s)
Estimated Cost
$500
Estimated Time Investment
Week Long Project (20 Hours or More)
Finish Used
Dry brushed laytex paint on foam board
Recommended Skill Level
Advanced