Community Brag Posts
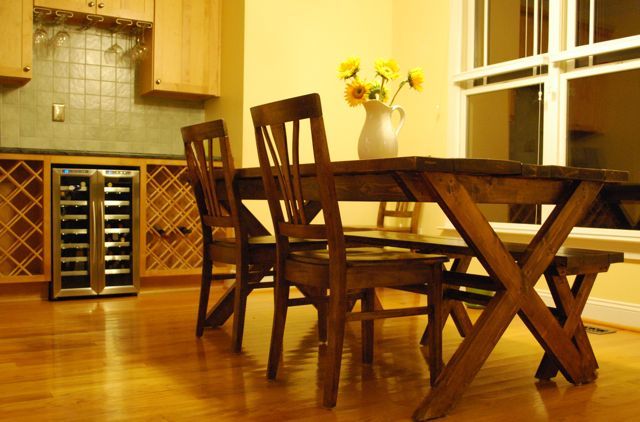
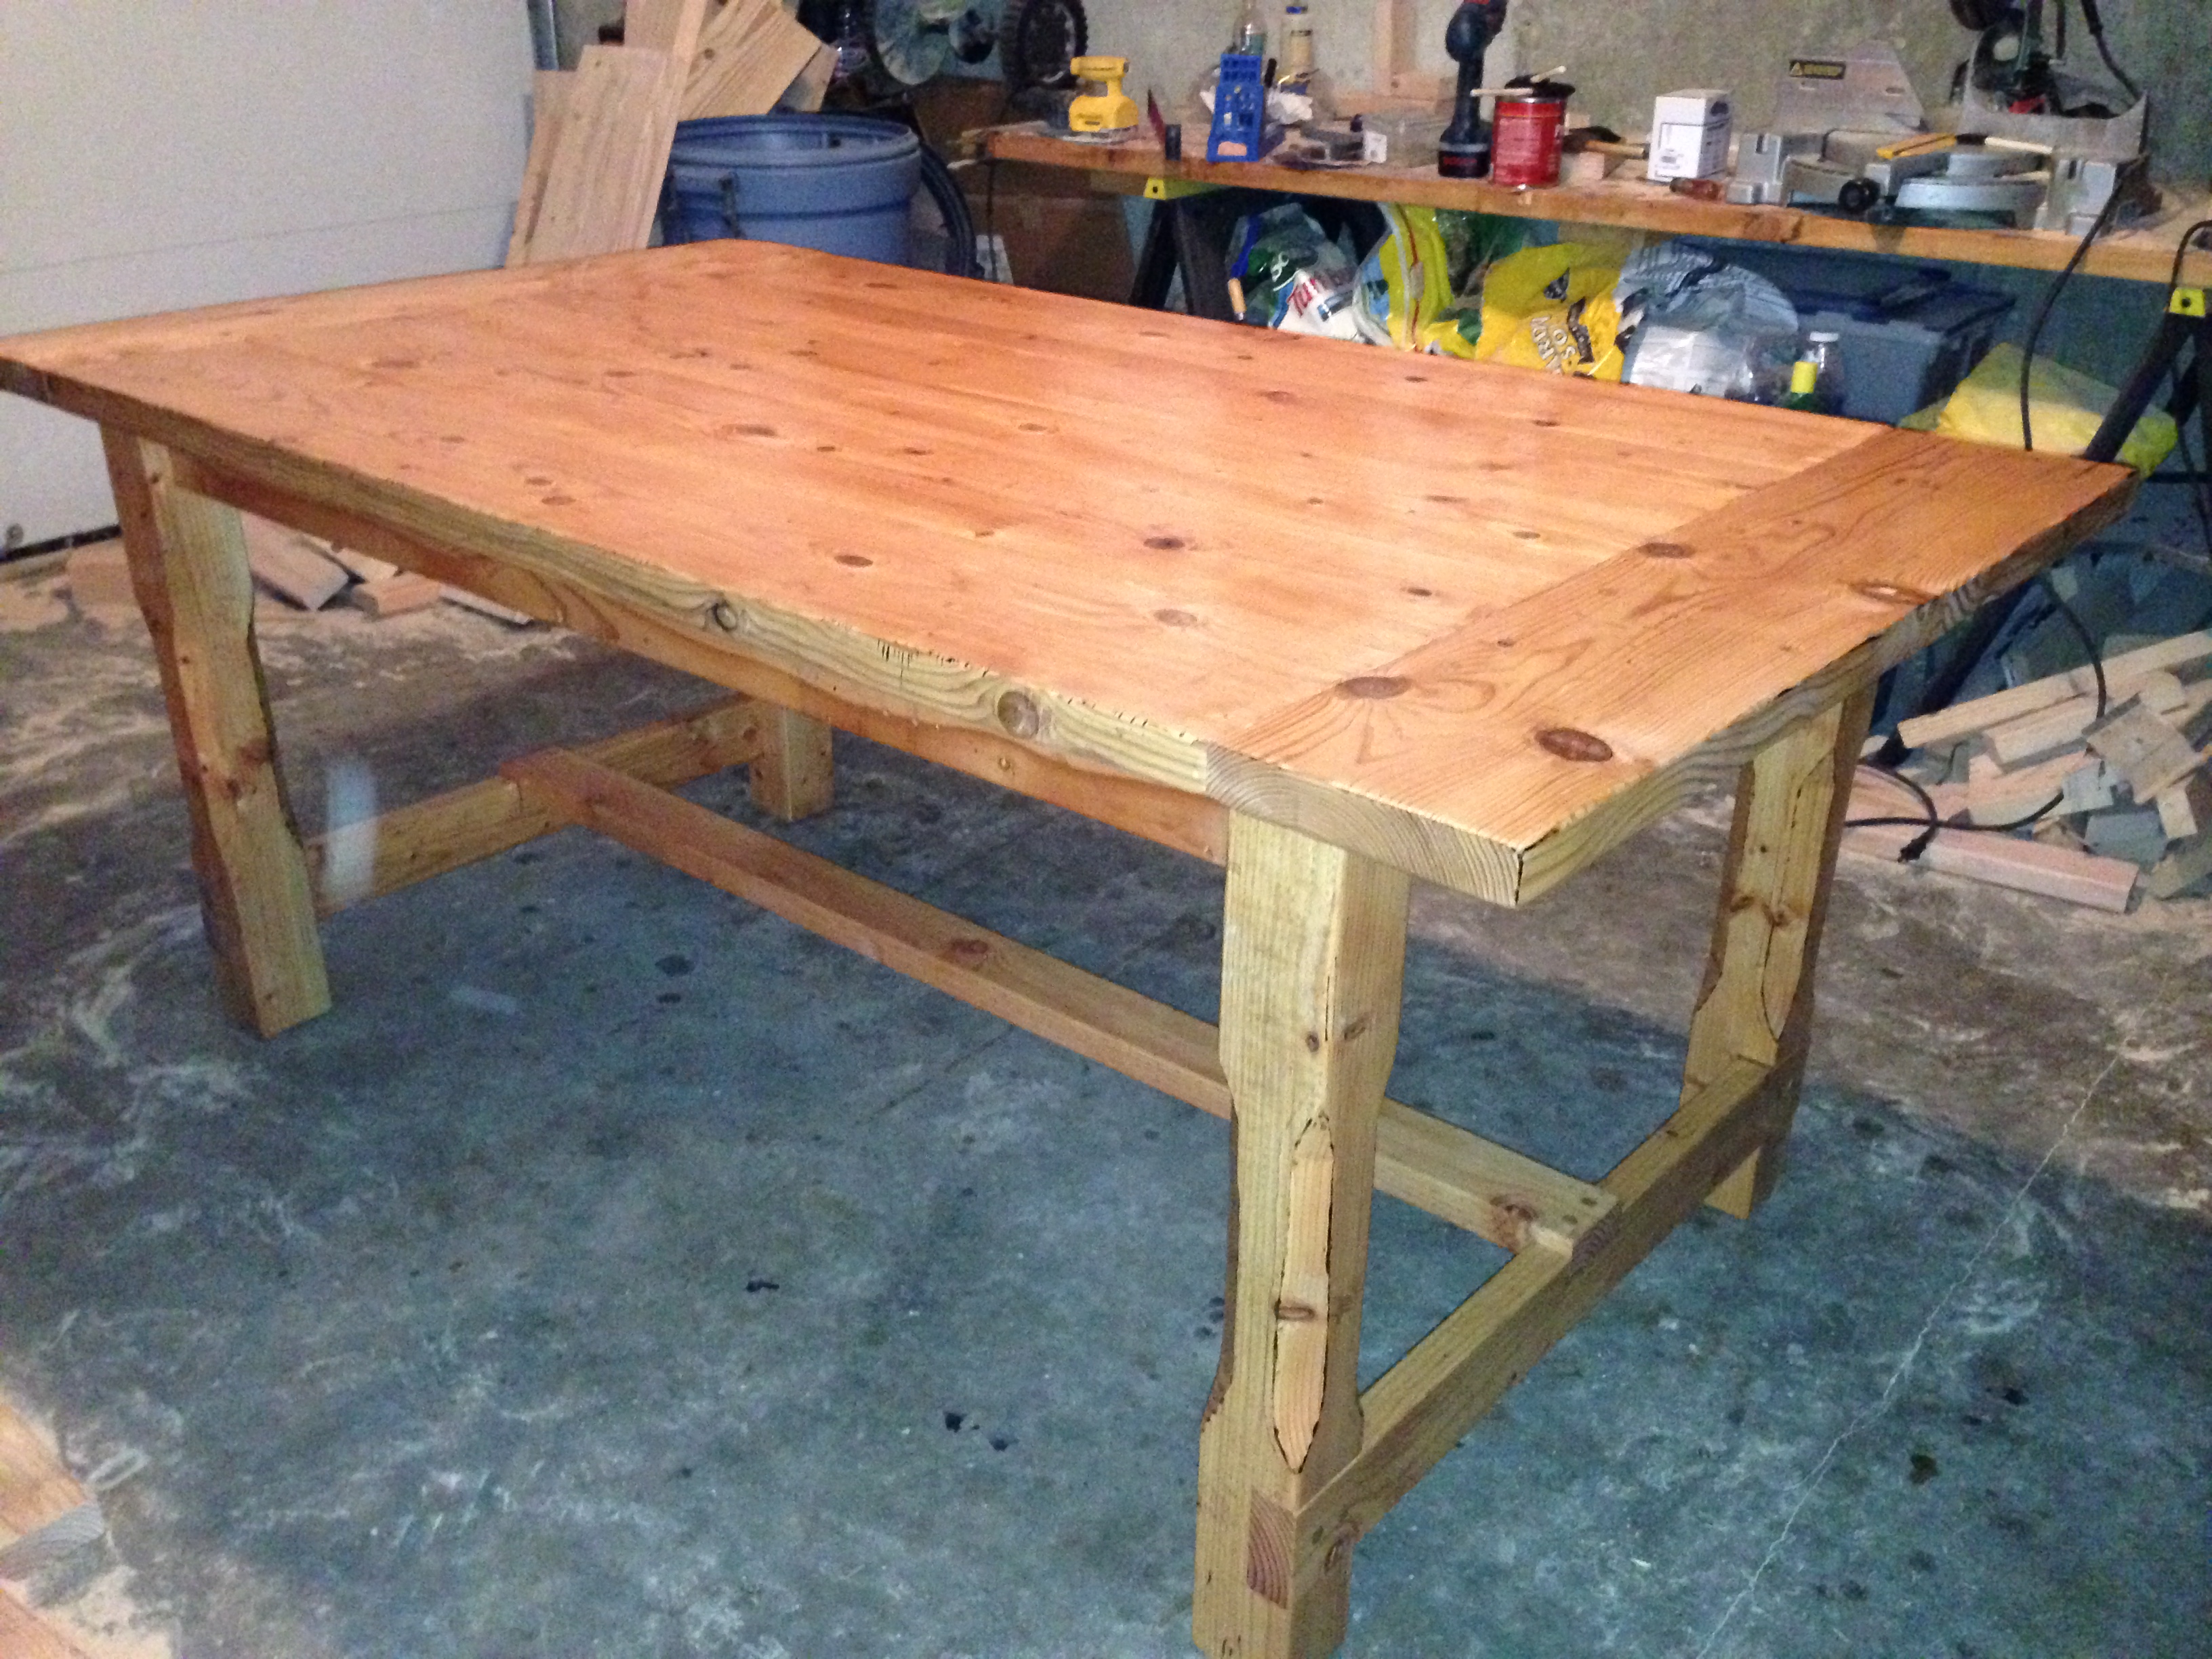
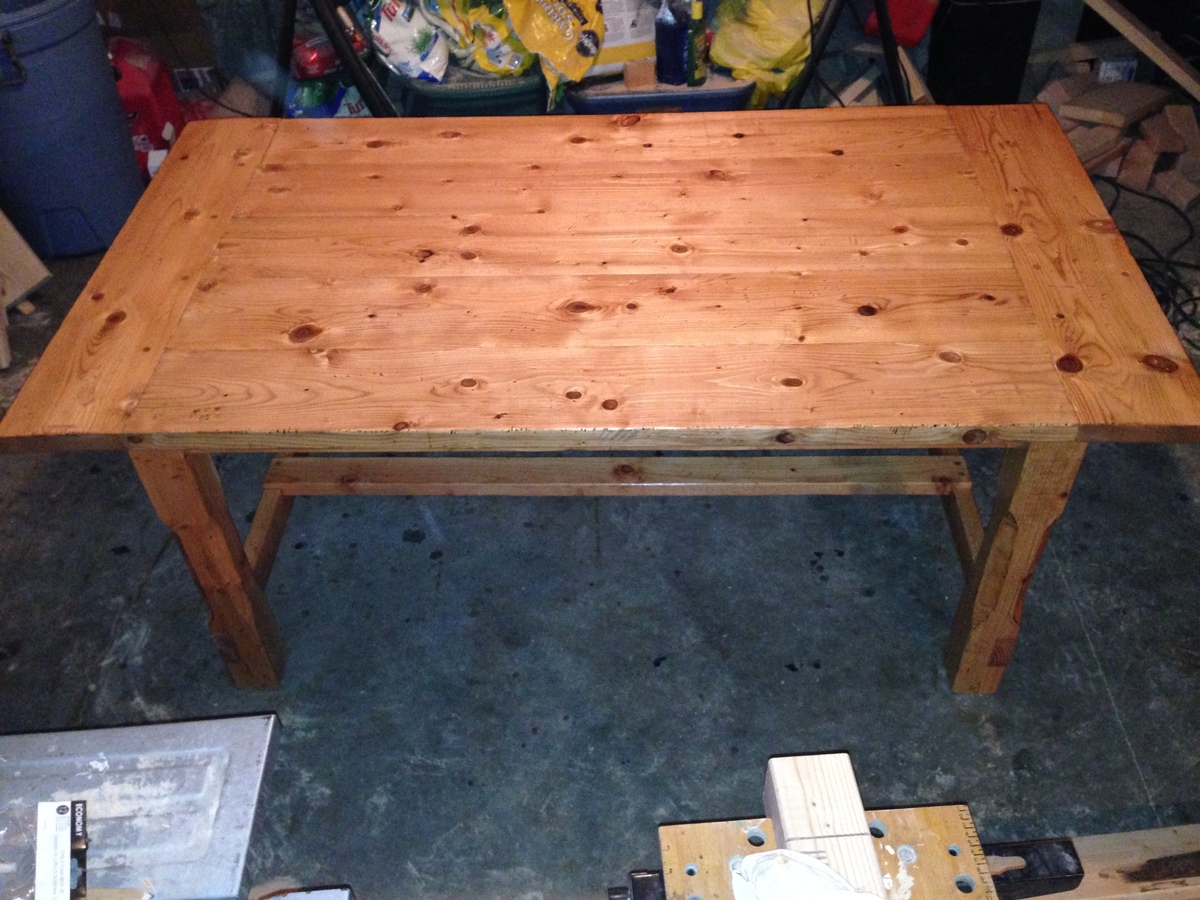
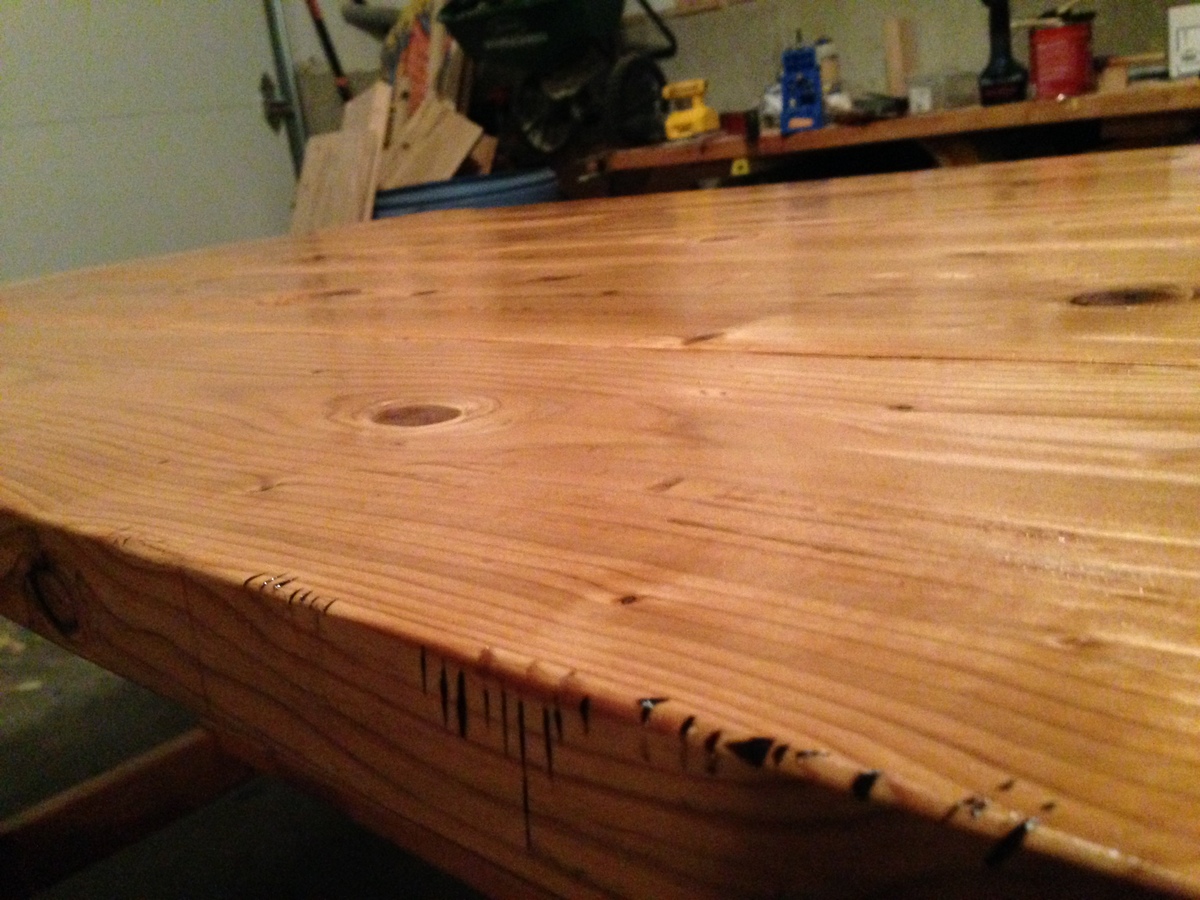
4x4 Truss Beam Table
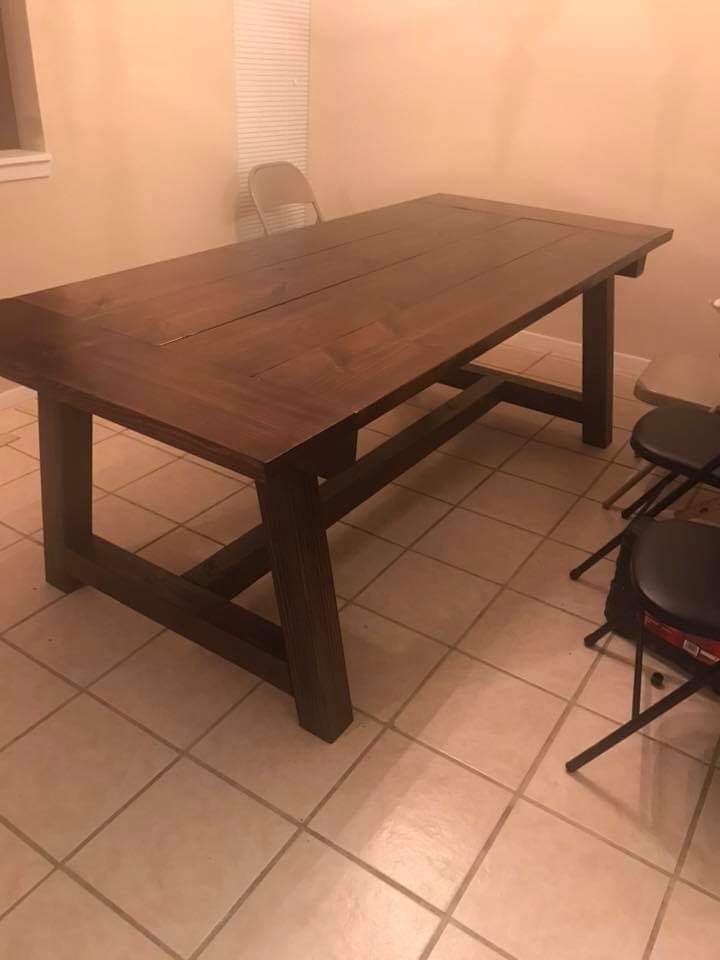
Used Kreg Jig HD screws and pocket holes with glue. Stained in Dark Walnut.

Built from Plan(s)
Estimated Cost
250
Estimated Time Investment
Weekend Project (10-20 Hours)
Finish Used
Dark Walnut Stain
Recommended Skill Level
Intermediate
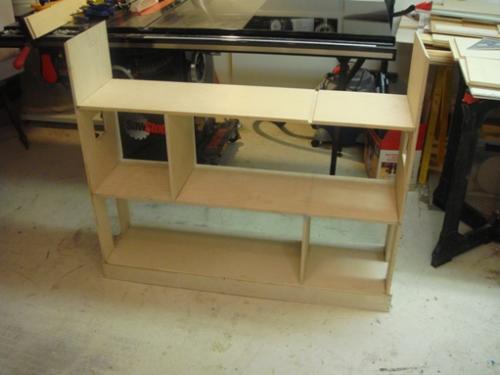
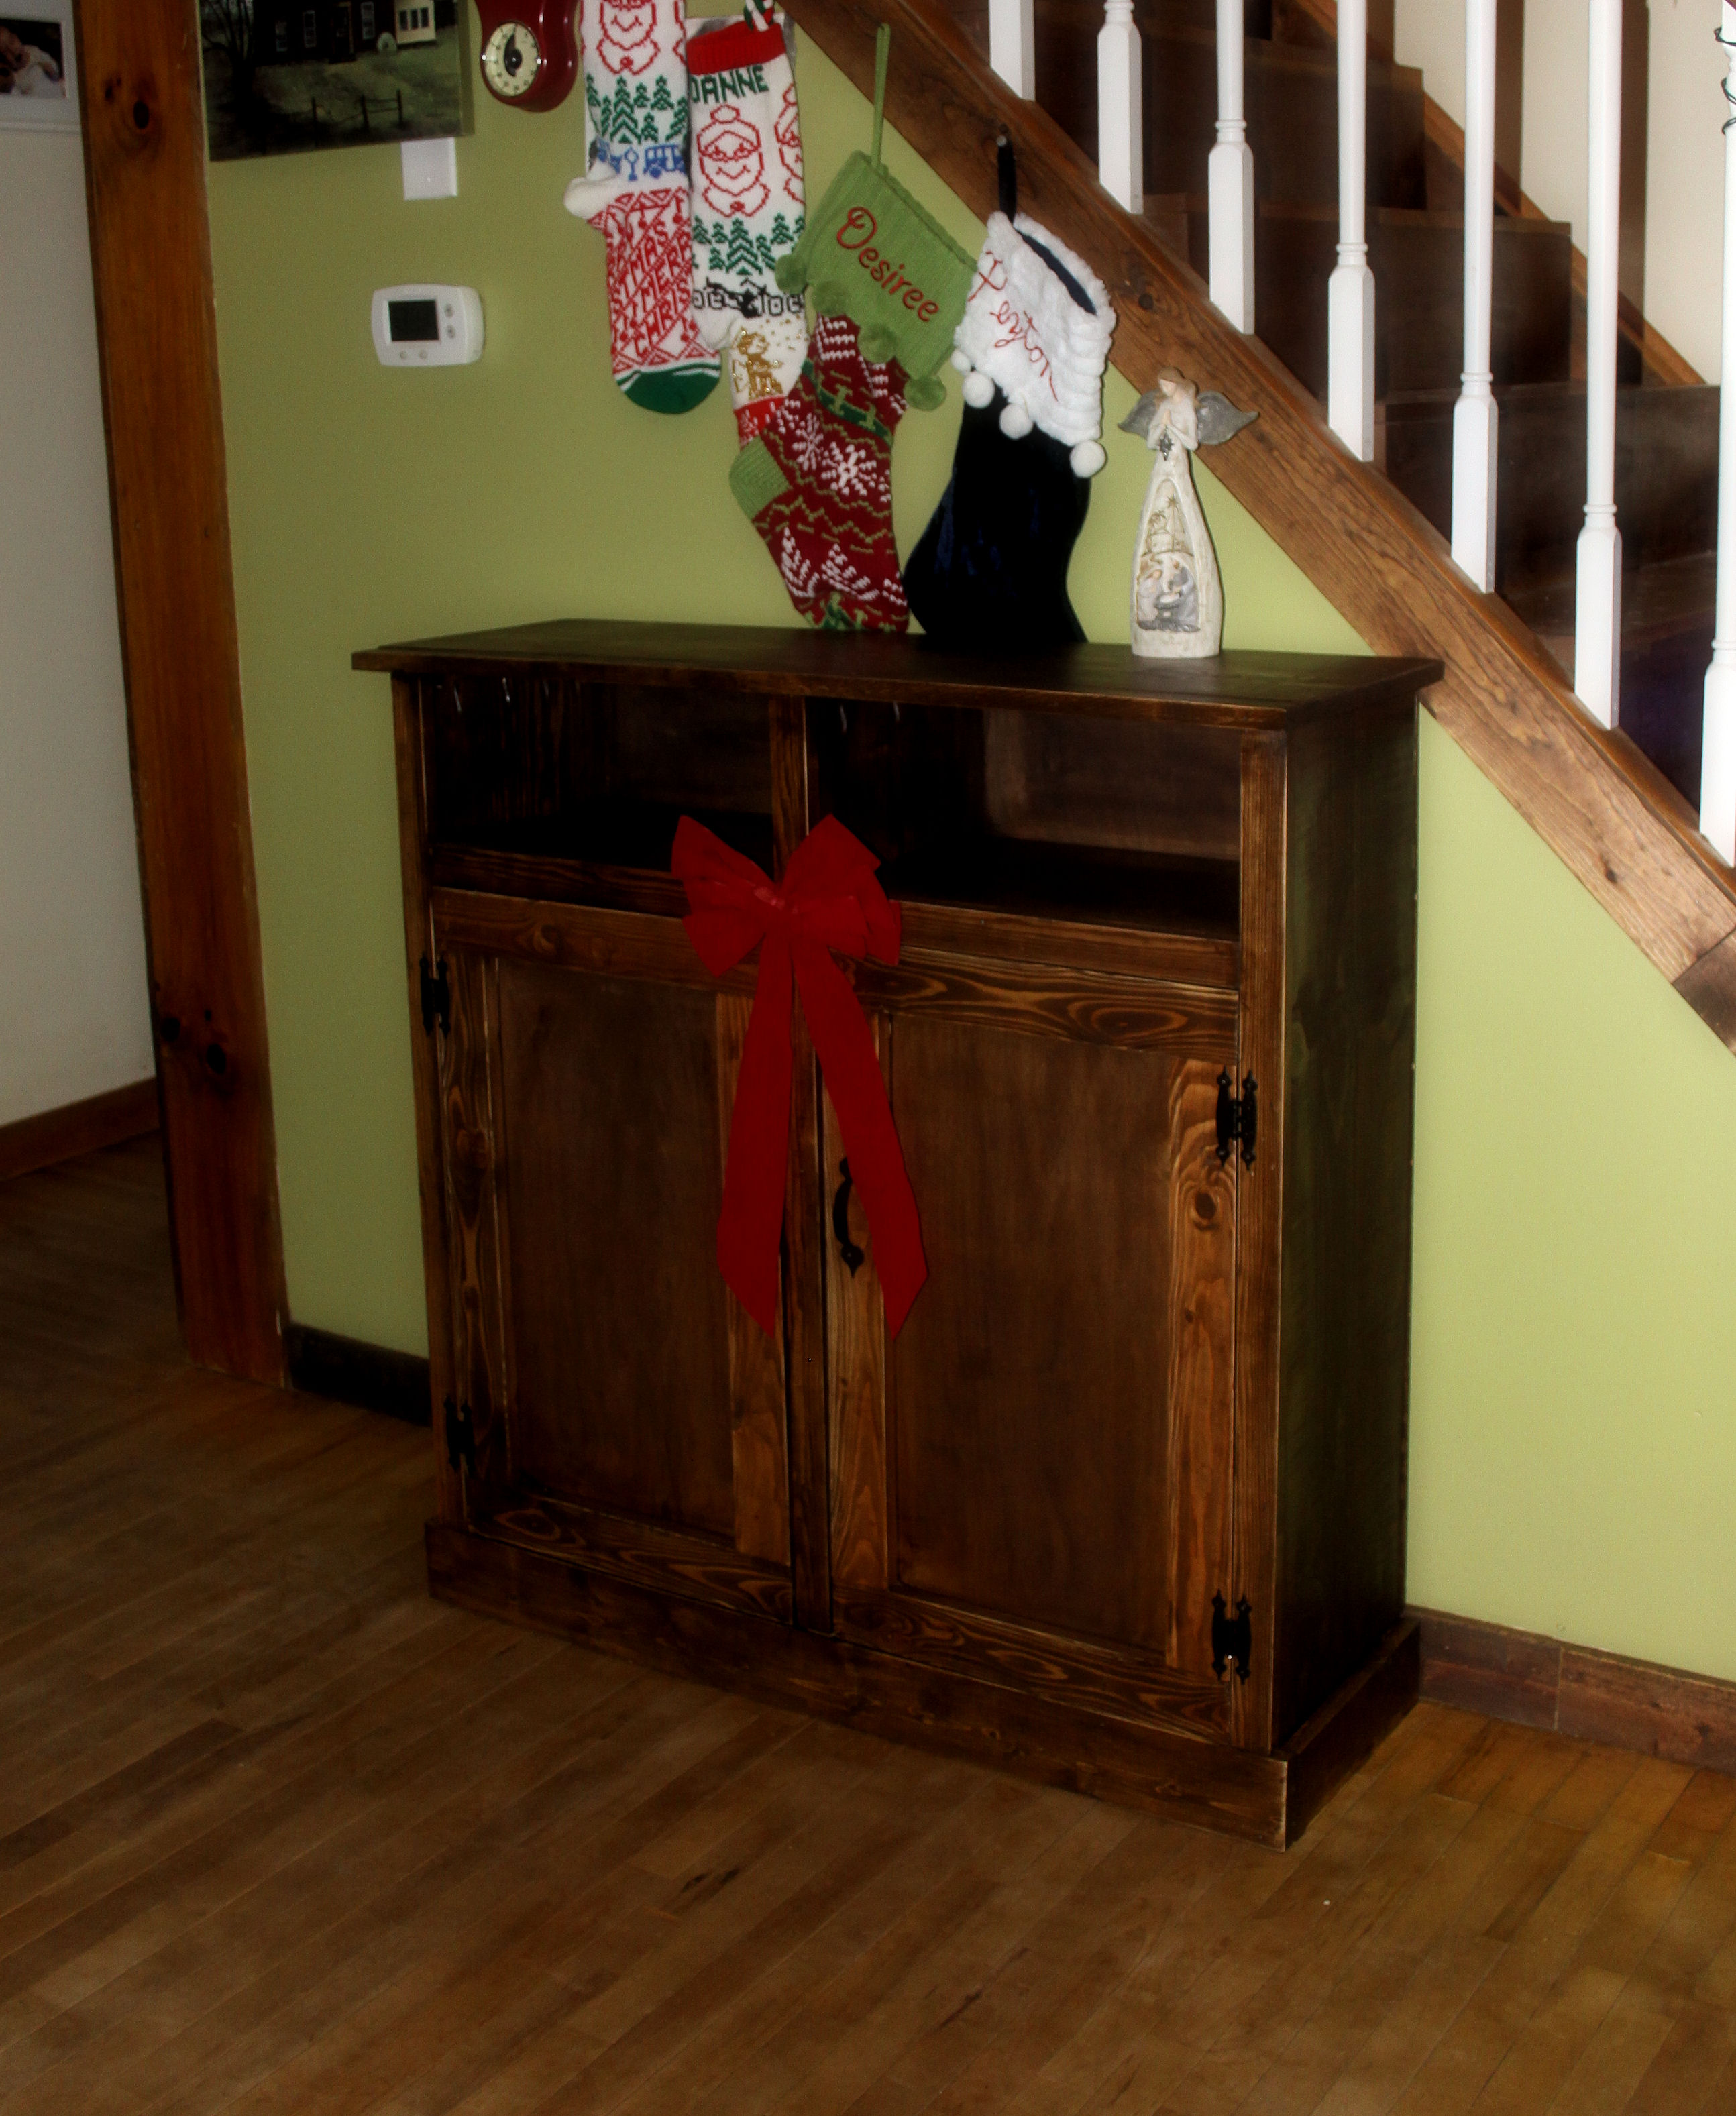
Sliding Door Console
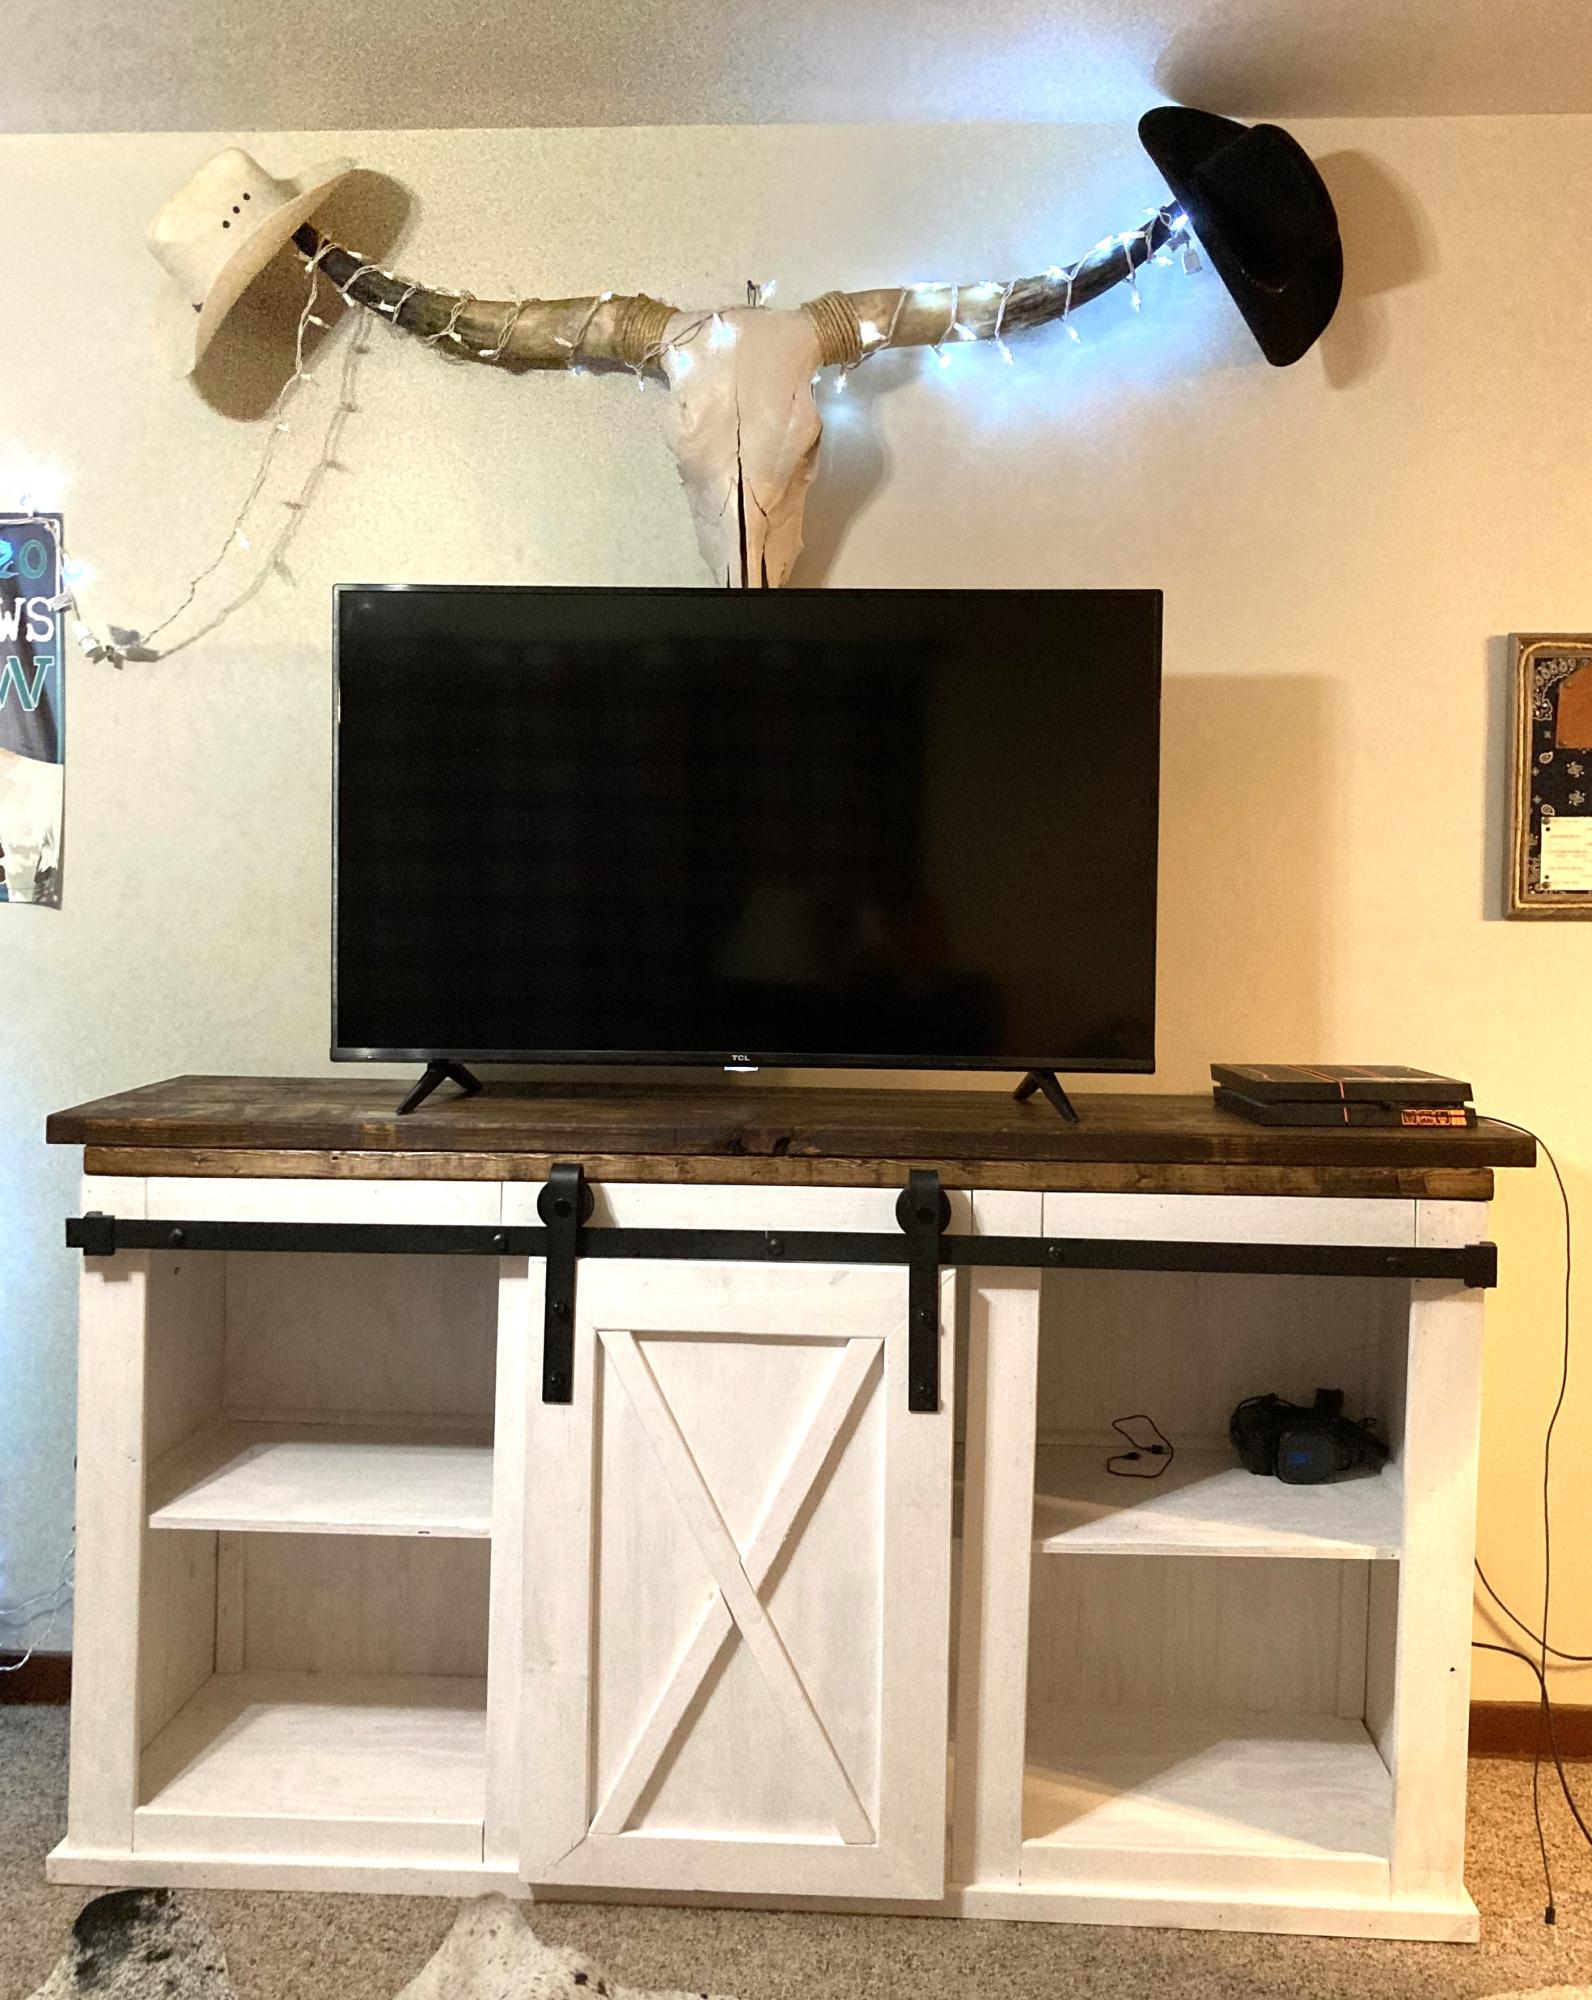
Easy entertainment center that I made for my son
Sue Herriott
Built from Plan(s)
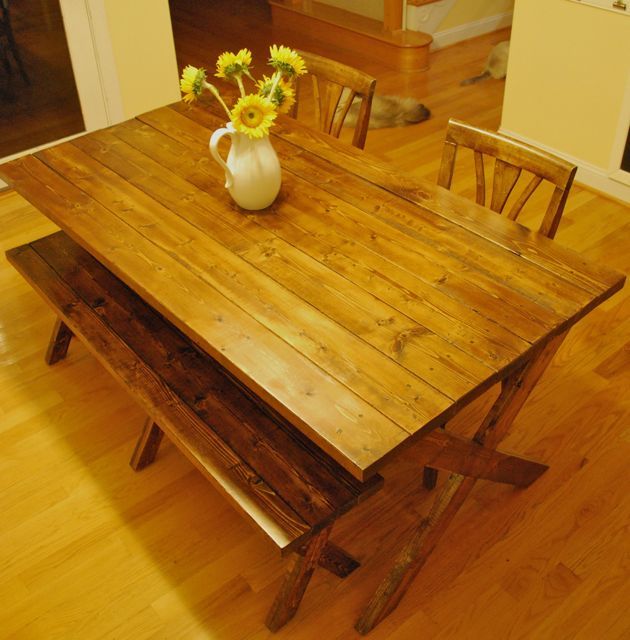
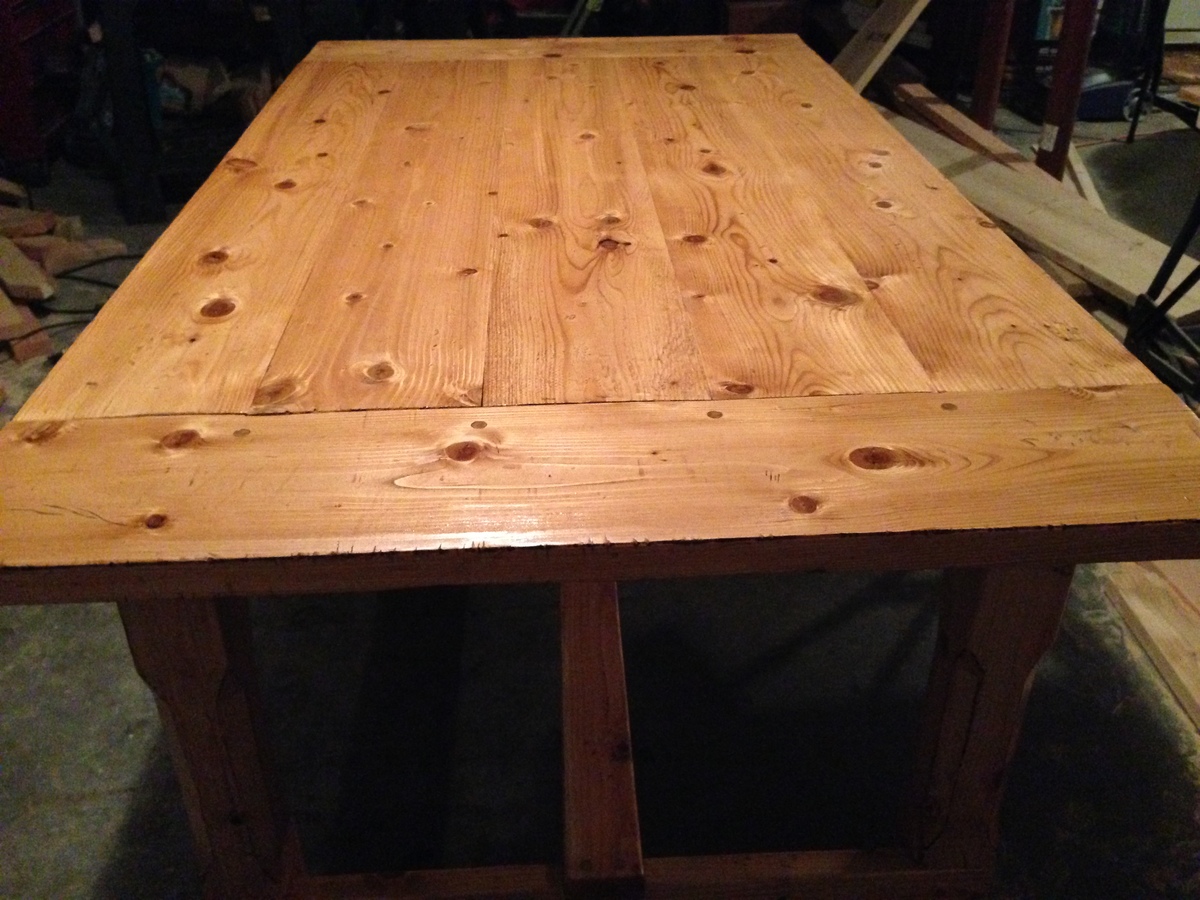
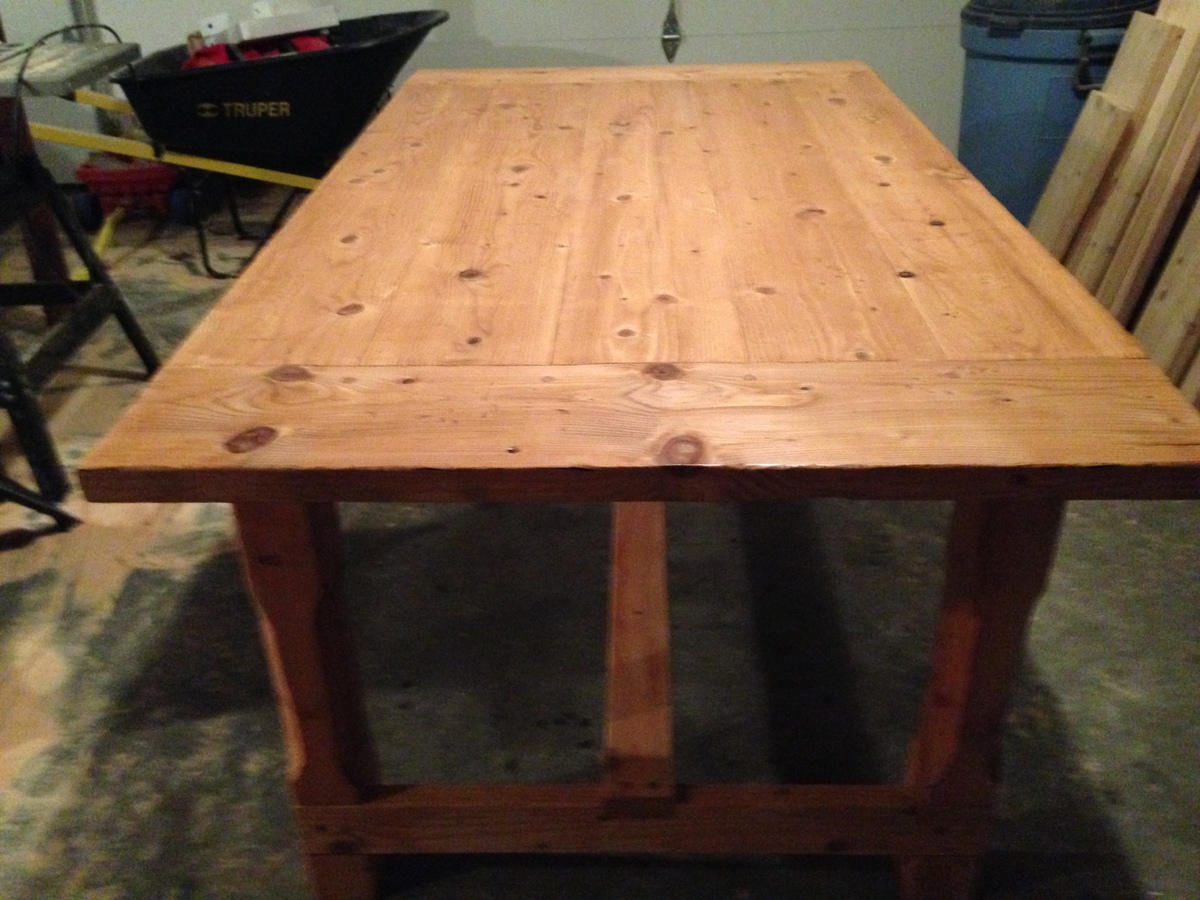
Our first project
I was looking for plans to build a table like this and found Ana's site.
Built from Plan(s)
Estimated Cost
100
Estimated Time Investment
Weekend Project (10-20 Hours)
Finish Used
Minwax Early American and Satin Poly
Recommended Skill Level
Starter Project
Comments
Wed, 02/15/2012 - 10:16
WOW! THAT'S BEAUTIFUL!!
I love this project. Well done! You have inspired me to do something similar for our breakfast room.

Fri, 02/17/2012 - 19:26
Good so far.
I would make the bench first if I could do it again--good practice. You can't fit a lot of people around it but it is good for a small space.
Mon, 04/30/2012 - 04:55
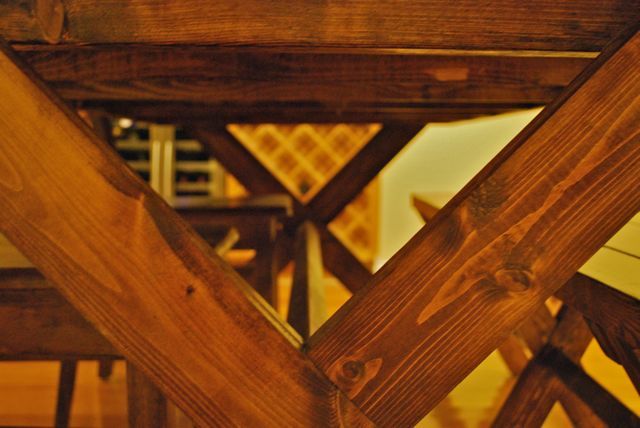
How did you fasten the
How did you fasten the tabletop to the base? Did you screw it from under and attach along every cross beam? Or screw from the top and fill the holes with putty? All the way across or just on the ends...this step in the directions is very vague...
Shanty Open Shelf Console
I had been eyeing this for awhile but, doors scare me. This is my daughters Christmas gift. It was a fairly easy quick build.
I am pleased with it.
Built from Plan(s)
Estimated Time Investment
Day Project (6-9 Hours)
Finish Used
Rustoleum Dark Walnut
Recommended Skill Level
Beginner
Comments

Tue, 12/24/2013 - 22:24
Shanty Open Shelf Console
Doors scare me too, but seeing what a great job you've done encourages me to give it a try. Looks beautiful. I like how the hardware ties in with your choice of stain. Nice work!
Val @ artsybuildinglady.blogspot.ca
Wed, 12/25/2013 - 10:21
Wasn't that bad
The measurements for each door is a bit different because I wasn't careful with the trim. I used shims on all sides of the door to keep it straight and spaced to attach the hinges. Big plus is they open and close :-)
Bench
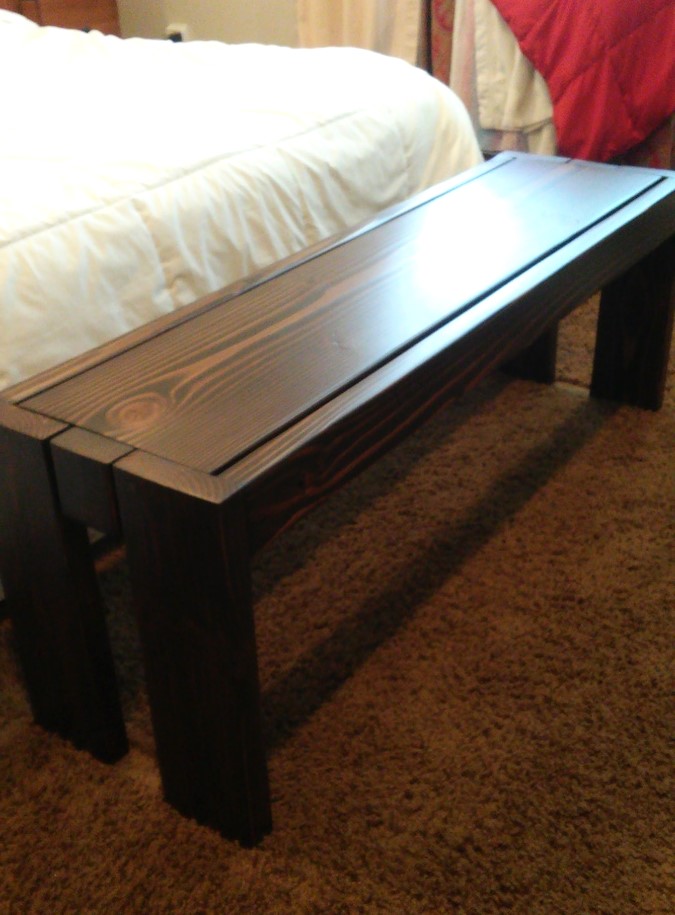
This is a first time project that my husband and 11 yr old on made.
Built from Plan(s)
Estimated Time Investment
Weekend Project (10-20 Hours)
Finish Used
Entryway or bedroom.
Recommended Skill Level
Starter Project
bird Feeder
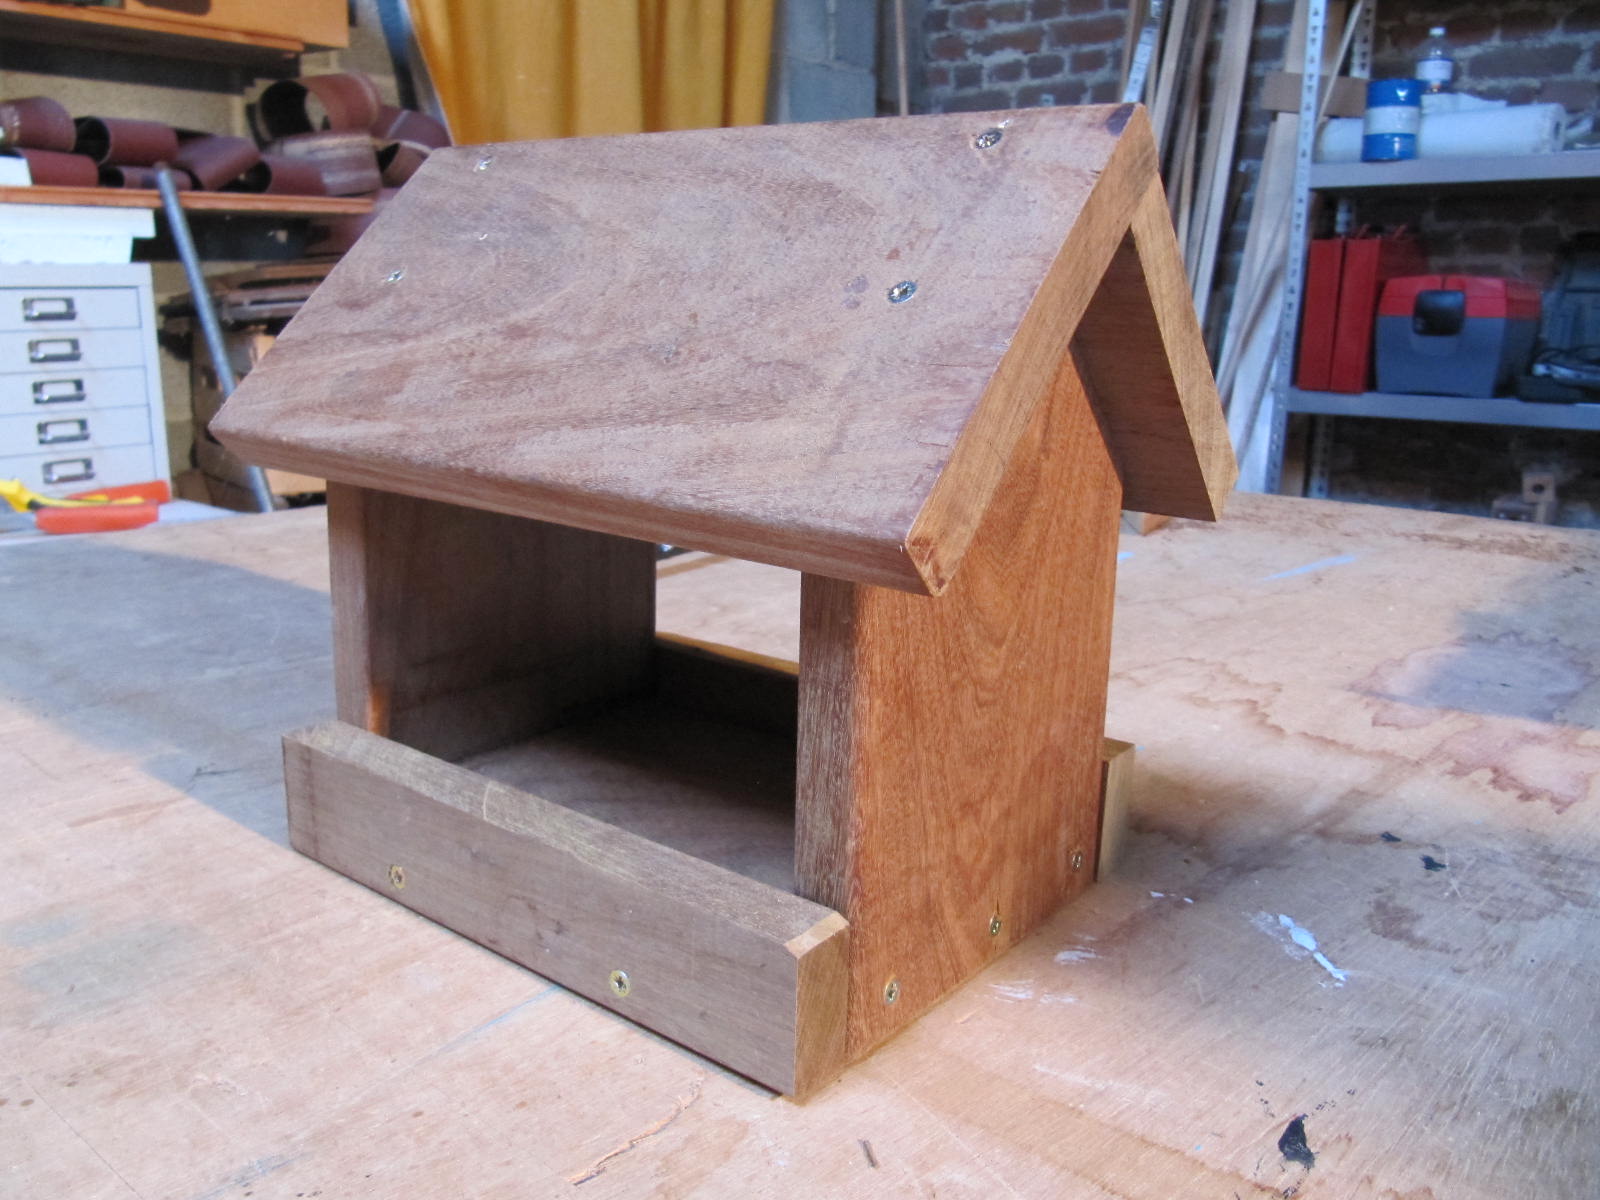
Bird feeder aksed by my mother. I used rest of IPE wood used for a deck. The thickness is a little big! 22mm but its strong and 30years waranty :) I changed a little bit the dimensions to convert in mm.
Estimated Cost
0
Estimated Time Investment
An Hour or Two (0-2 Hours)
Finish Used
not necessary this wood very smooth
Recommended Skill Level
Starter Project
Storage daybed with trundle drawers
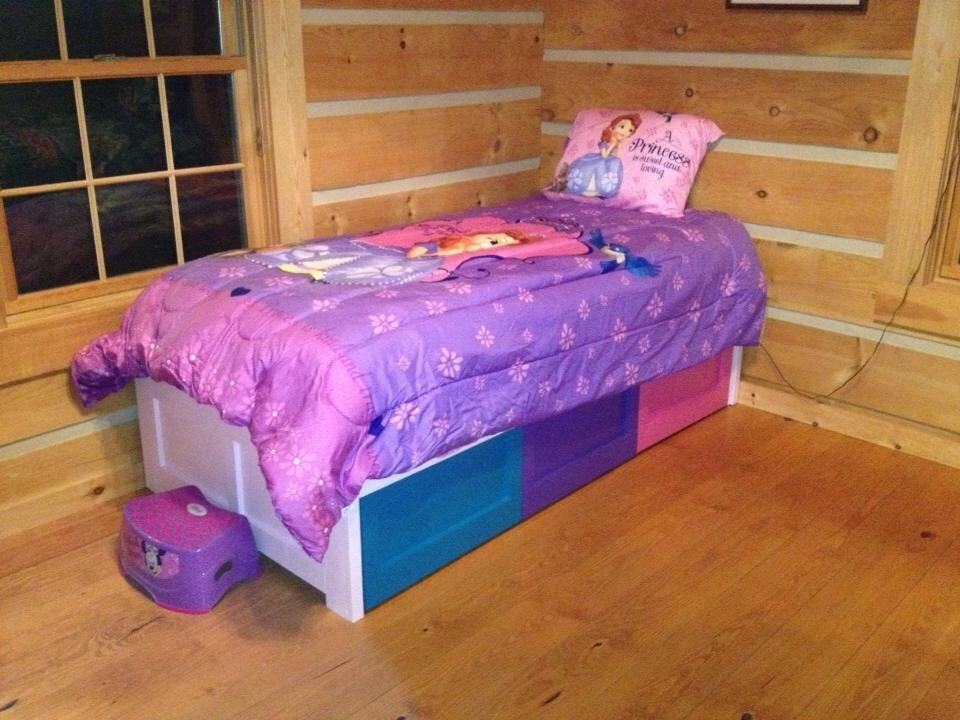
Thanks for the free plans! Our children loved their new beds for Christmas! The beds were pretty easy to make and we decided to paint the beds fun colors for the kids.
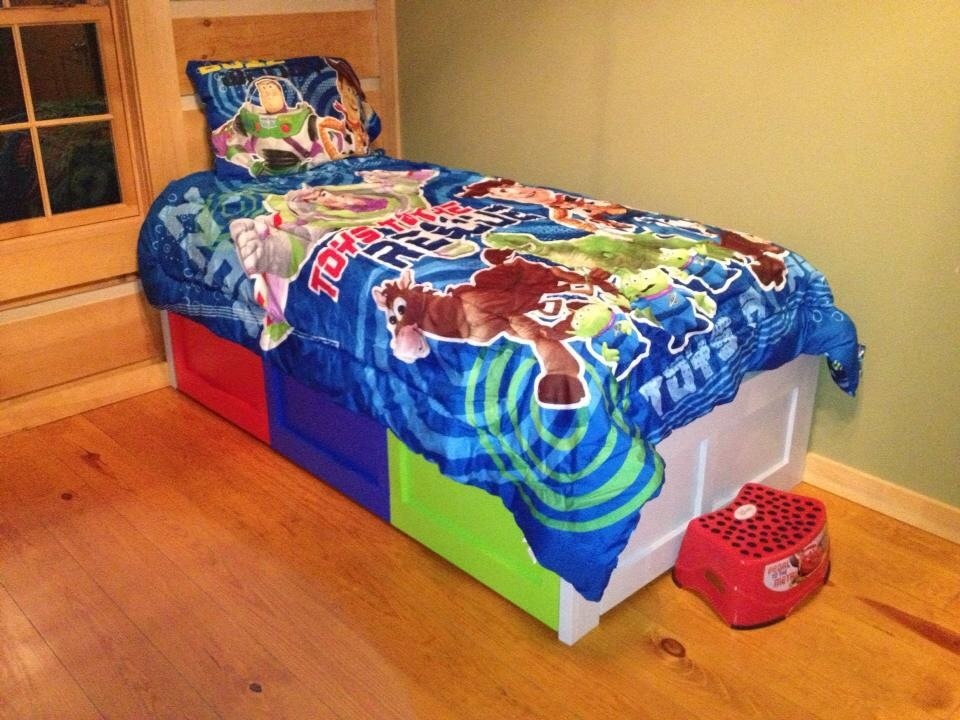
Built from Plan(s)
Estimated Time Investment
Week Long Project (20 Hours or More)
Finish Used
Satin paint
Recommended Skill Level
Intermediate
TCossins1
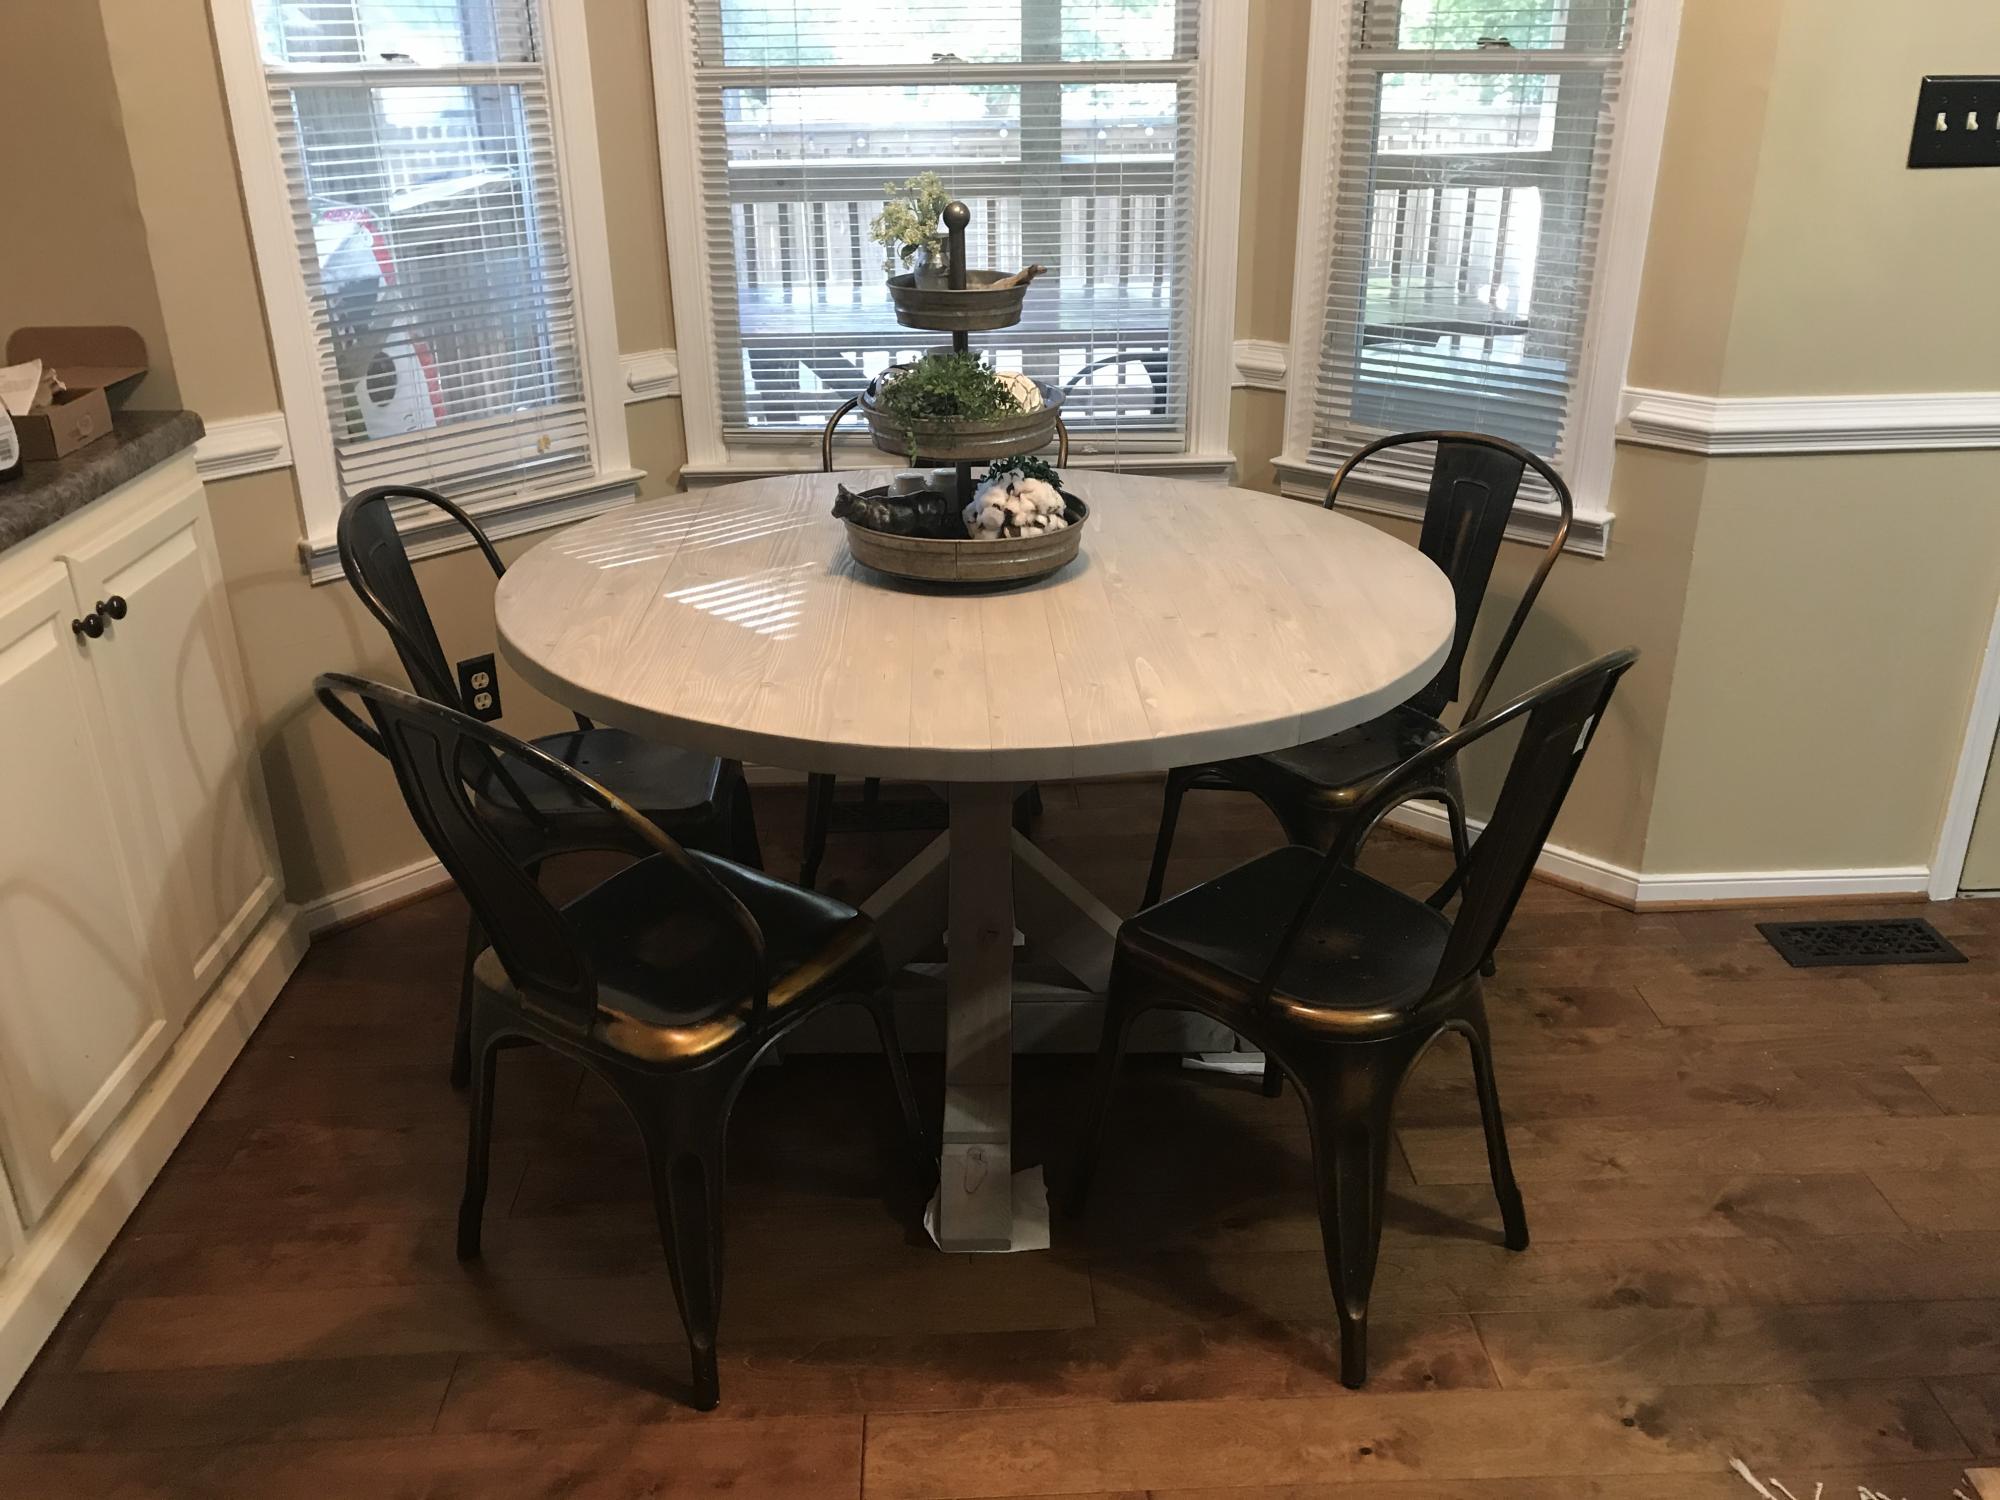
I used the 4x4 X Base Pedestal Dining Table with Planked Wood Top plans for the base but I decided to go with a round tabletop because it fits better in our kitchen. The tabletop is 16 2x4’s attached together using pocket holes and wood glue.
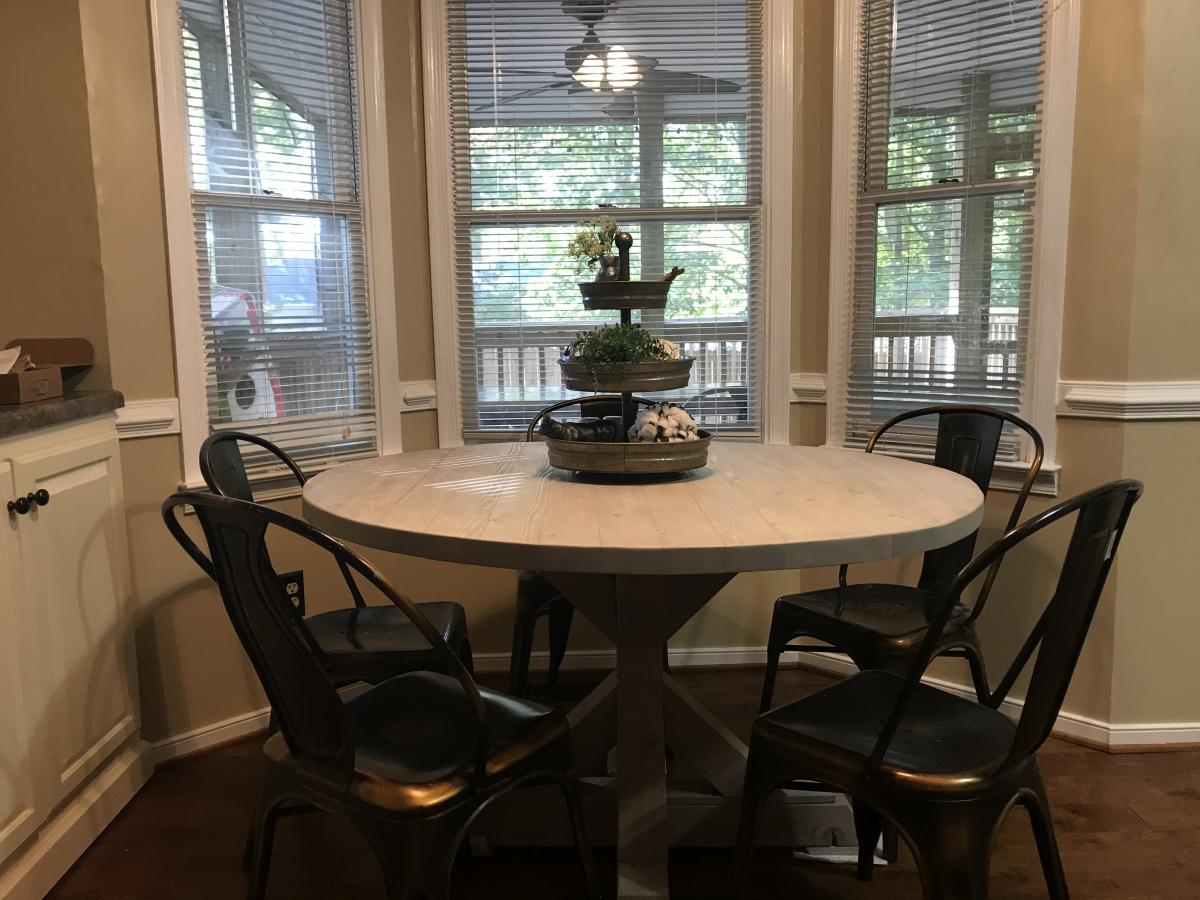
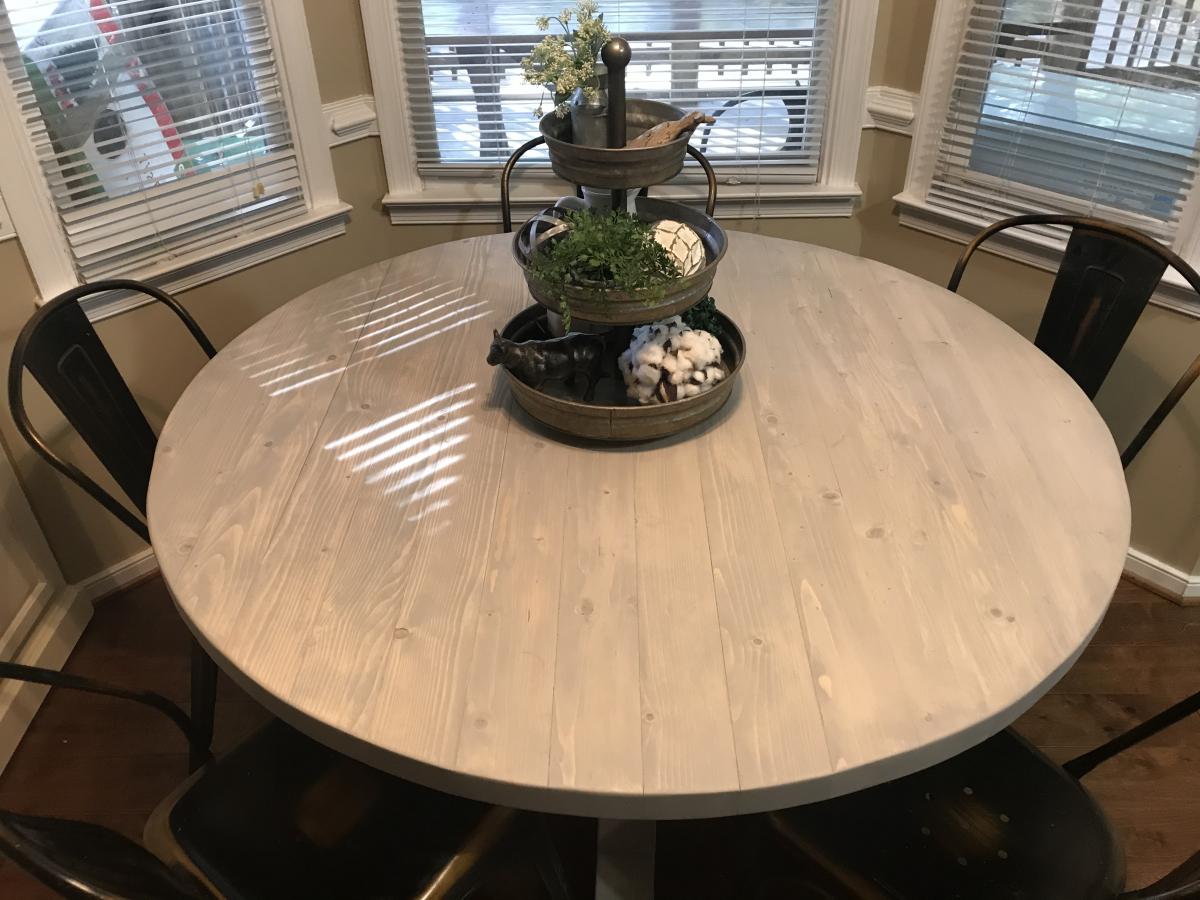
Built from Plan(s)
Estimated Cost
$150.00
Estimated Time Investment
Weekend Project (10-20 Hours)
Finish Used
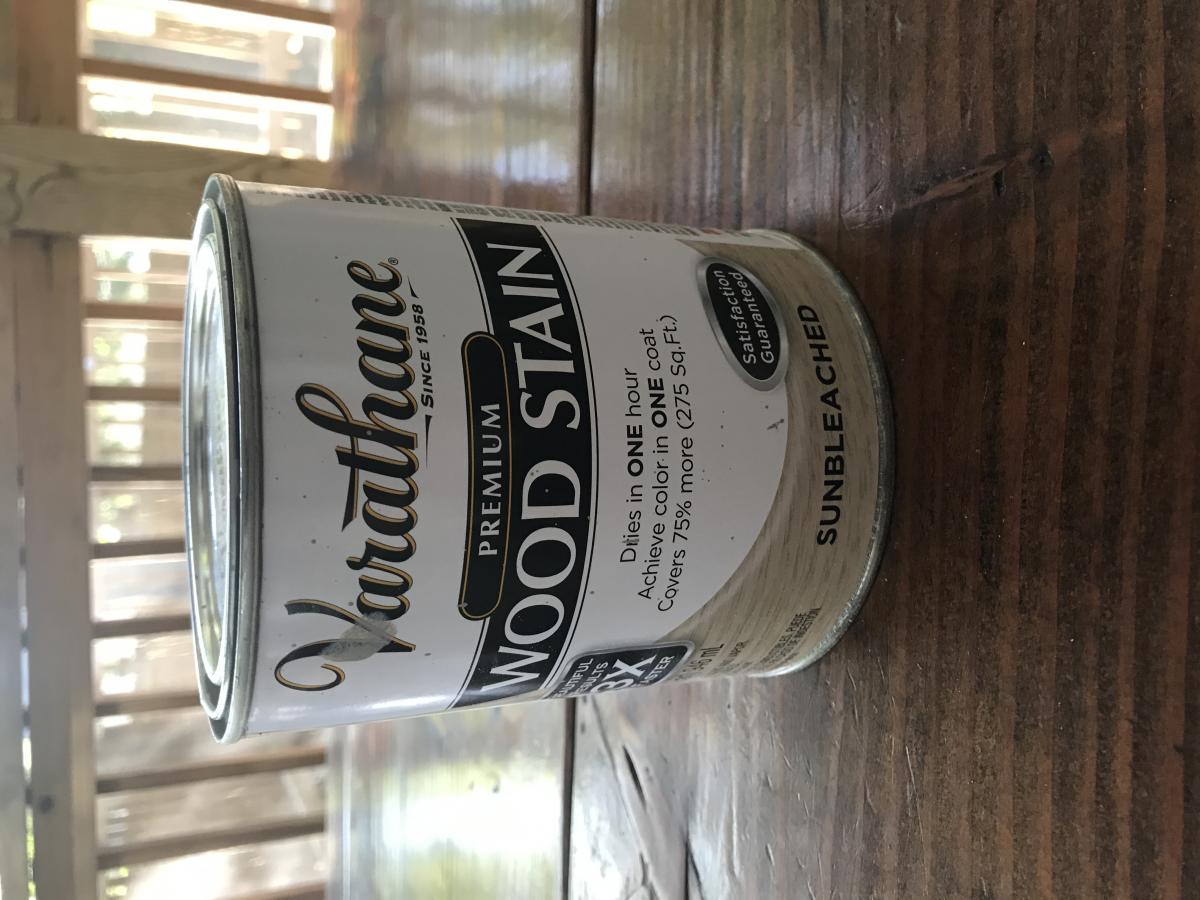
Varathane “sun bleached” brushed on with a cheap paintbrush and wiped off with a towel after about 1-2 minutes after application.
Recommended Skill Level
Intermediate
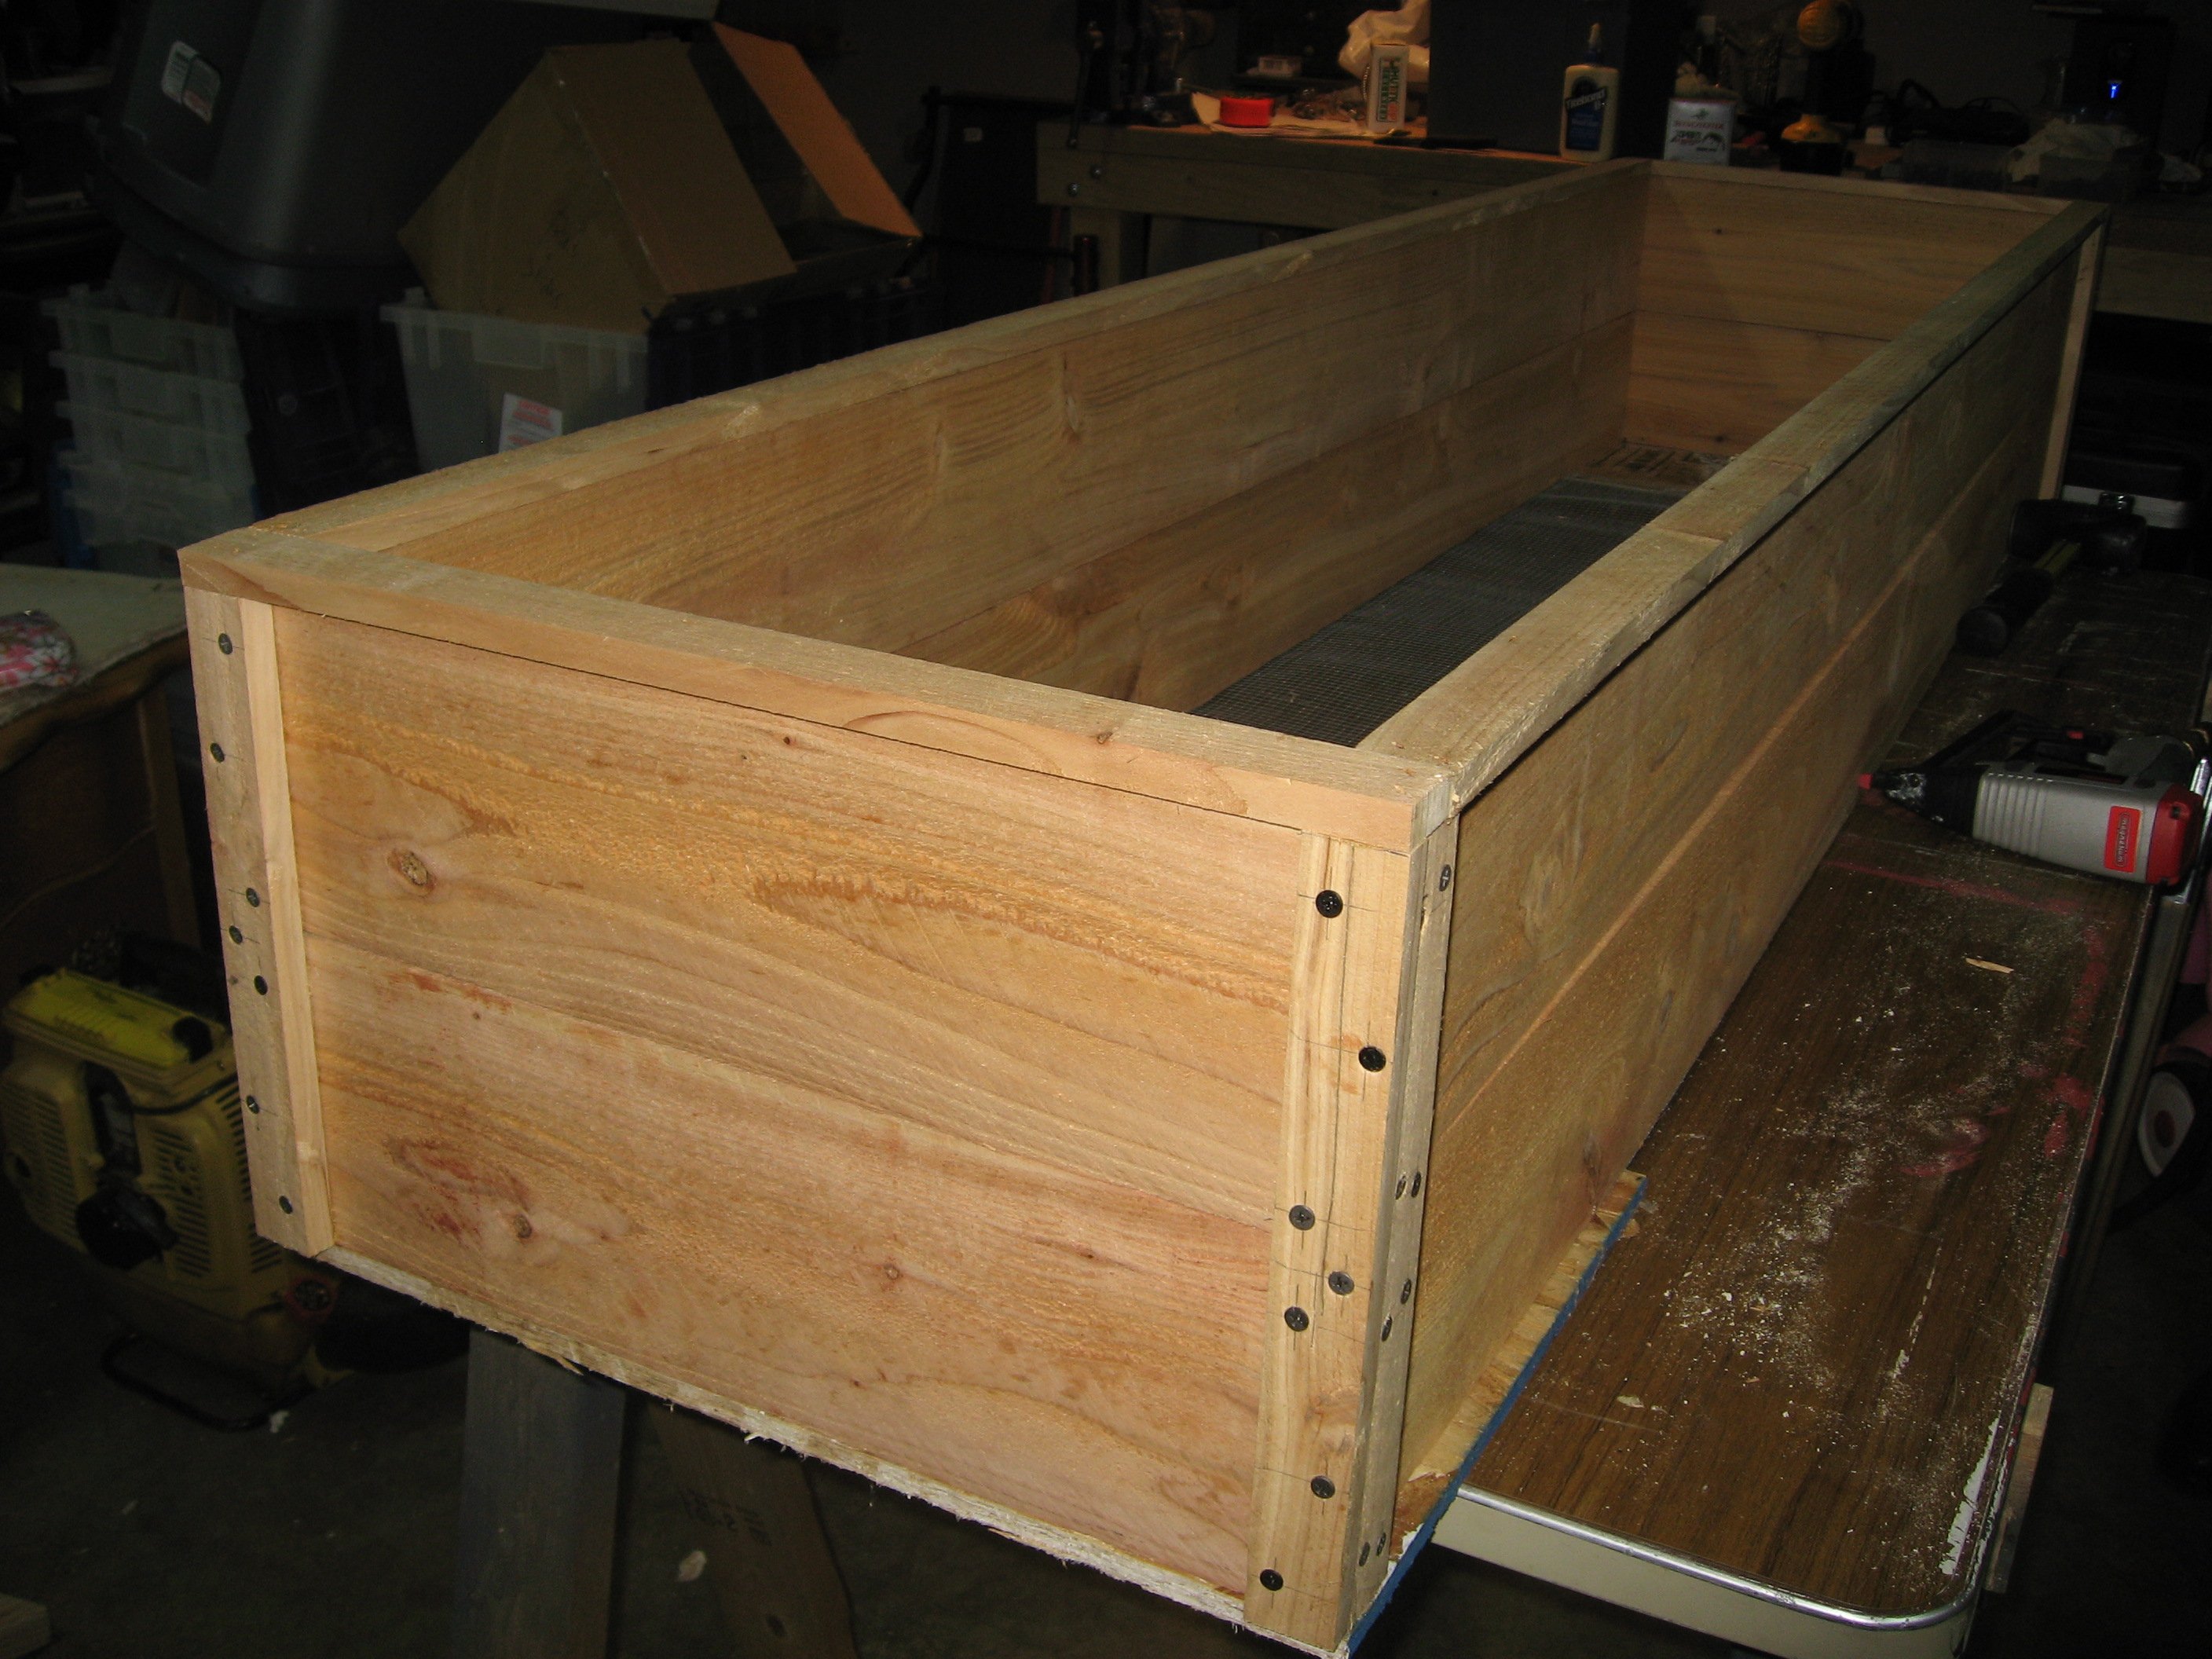
Outdoor Planter Steps
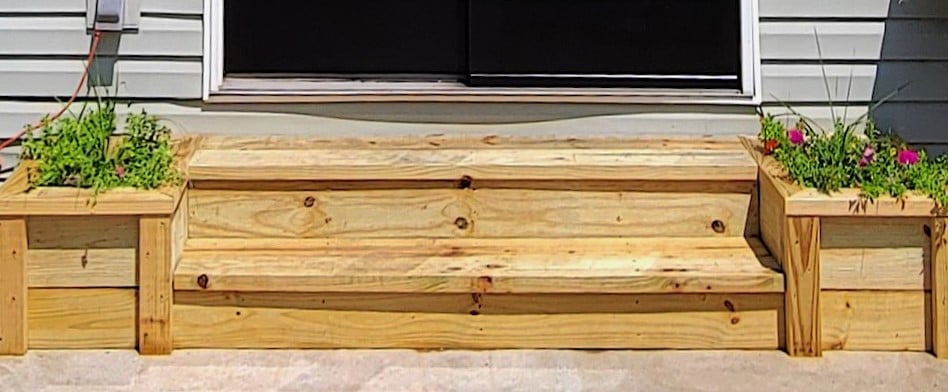
I had to modify the plans a little to make the steps 9ft long. I also used 2x6 on the bottom step, so the rise was the same.
Built from Plan(s)
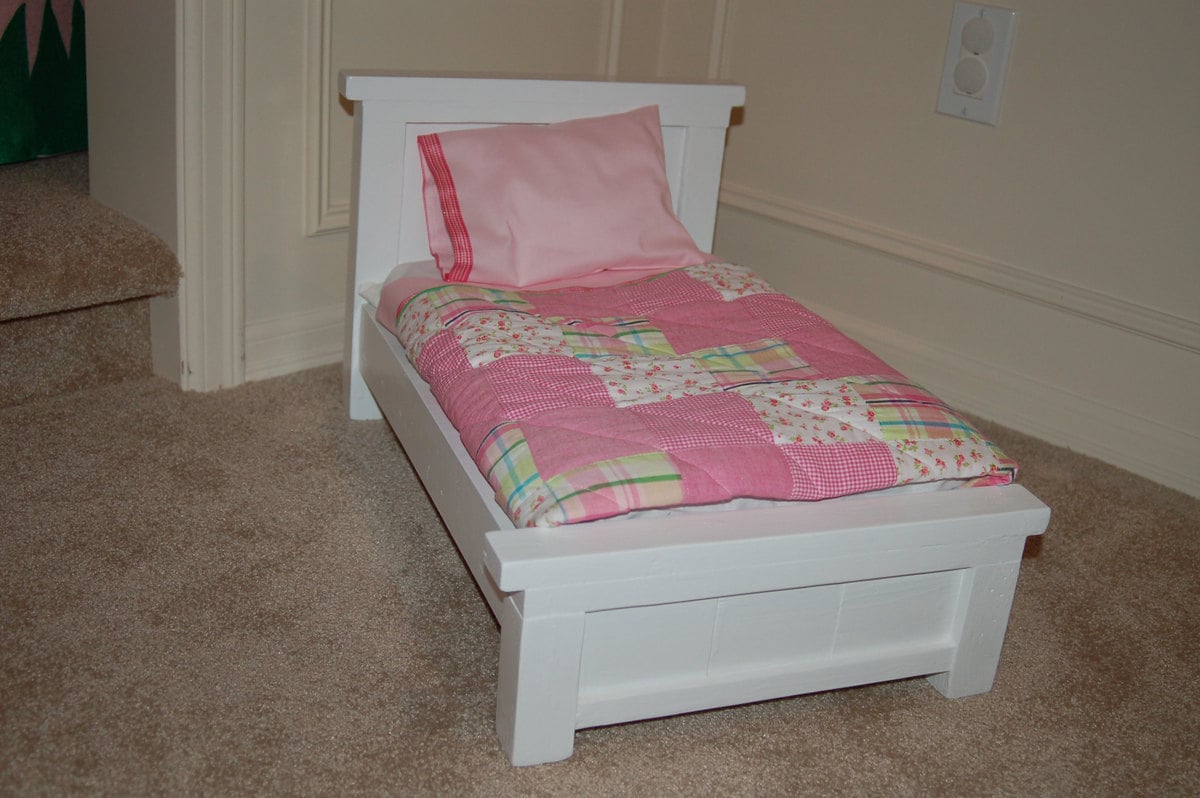
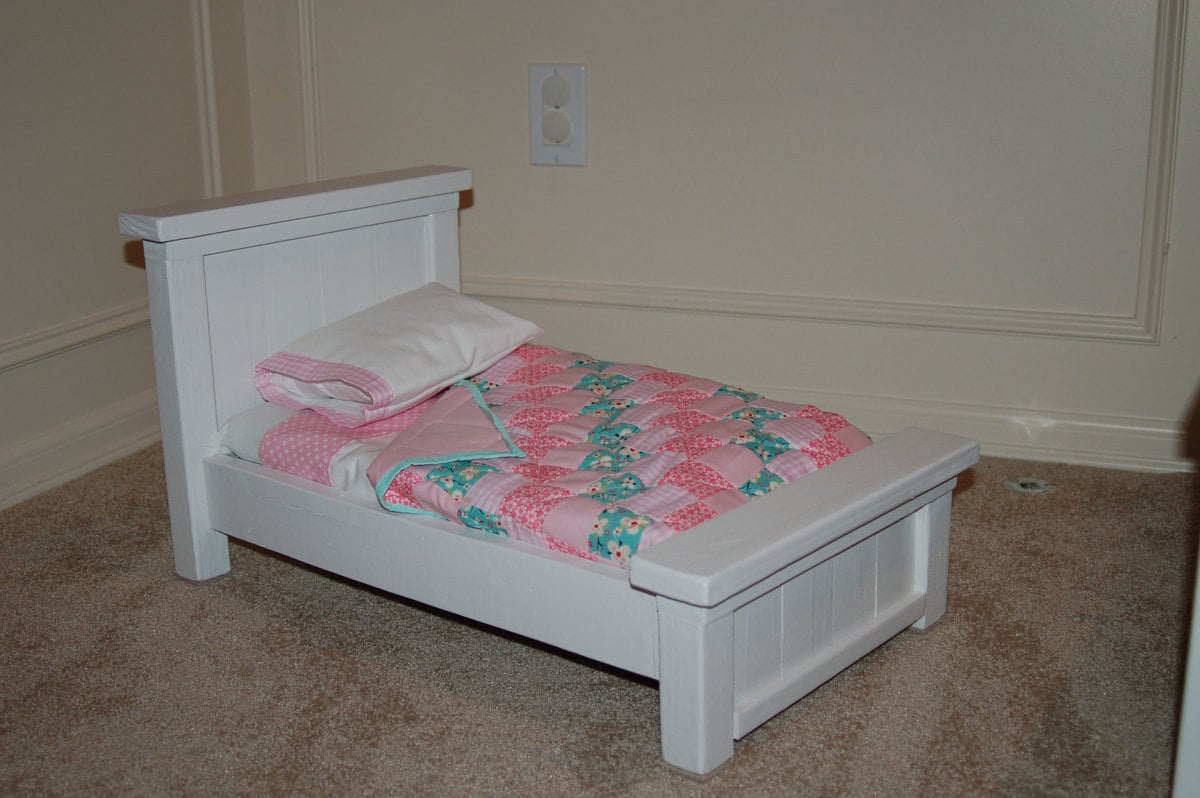
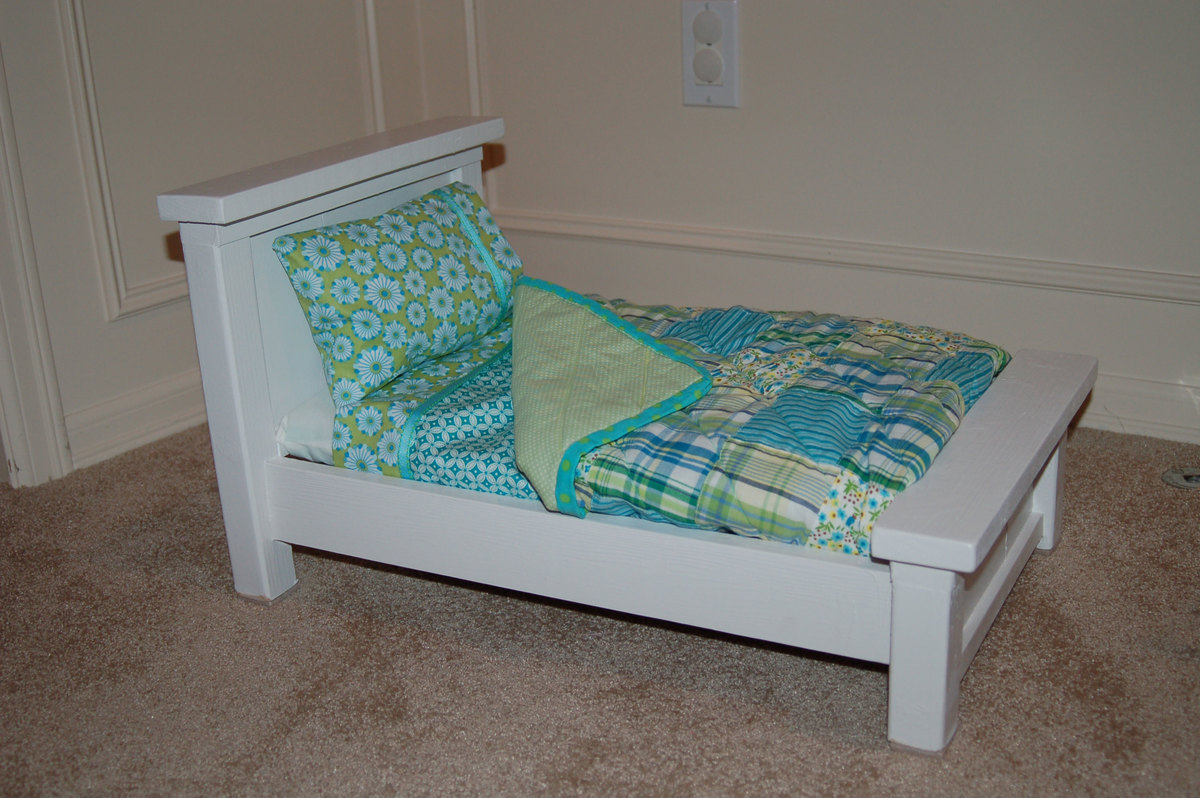
Farmhouse Doll Bed X 3
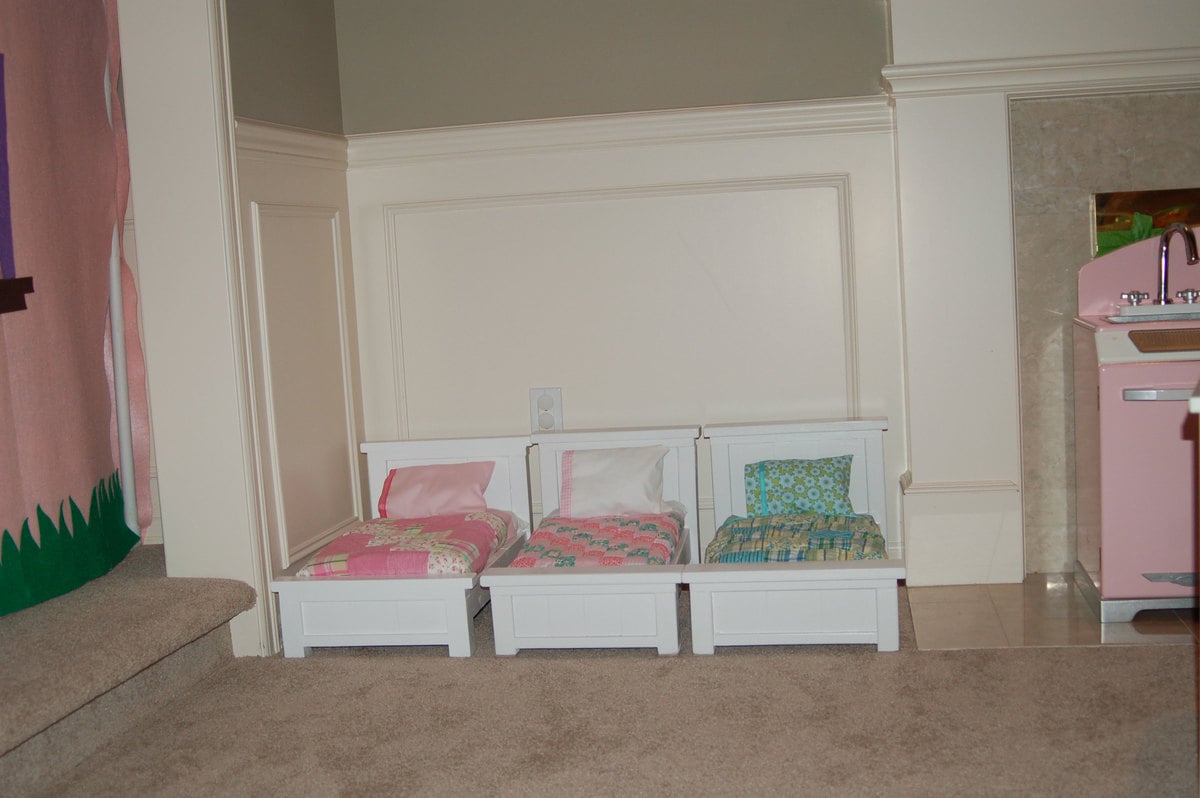
I made these three farmhouse doll beds for my daughters. Initially, I made two beds following the plan as written but started feeling like they would take up too much space. My girls are close in age (4 and 2 yo twins) so waiting for one to outgrow something and passing it on isn't an option.
I gave the first two regular sized beds away as gifts and made three narrow versions that I saw on another blog http://thatsmyletter.blogspot.com/2011/02/b-is-for-bed-5.html Her bedding is still the gold standard in my eyes. LOVE IT!
On two of my beds, I left off one 1x2 slat, and on the other I used 3-1x3's. The width of the 3 beds are slightly different. Heck, I think I am incapable of making two things exactly the same. lol The girls love them so that's all that matters. For the bed that used 3-1x3s, I didn't write down the width of the top boards. I measured and cut as I assembled.
I put an extra 1x2 mattress support in the middle because I knew they would sit on them and used masonite to hold the mattress. Seems strong enough so far.
Before painting, I used lots of wood filler and caulk to hide some flaws. By the way, I feel like painting the beds is the hardest part. So many little grooves, nooks, and crannies. I recently bought a Graco 3900 HVLP paint sprayer. Painted a half wall and 6 long pieces of trim in 30 minutes today---love it! If I make another bed (or anything for that matter), I'm totally going to spray it.
Oh and I have to confess that after the first two beds, I got too impatient to use just screws so I used the nailer, glue, and used a few screws at key points. It made things go so much quicker, and the beds still feel quite sturdy. If my kids manage to break them, I'll make them new ones. :-)
I used 1" foam and muslin for the mattress & cover and fabric that I obsessively buy and hoard for everything else. The middle quilt is an actual quilt. I cut the squares and all---first time for that too. The other two are made of pre-made patchwork fabric from Joann's.
Thank you to everyone for sharing your creations, and thank you, Ana, for the plans. I am so inspired!
Built from Plan(s)
Estimated Cost
$20 (best guess - for all three)
Estimated Time Investment
Afternoon Project (3-6 Hours)
Finish Used
Sherwin-Williams ProClassic Alkyd Interior Enamel in white and primed beforehand with the recommended primer. I had both on hand from another project.
Recommended Skill Level
Beginner
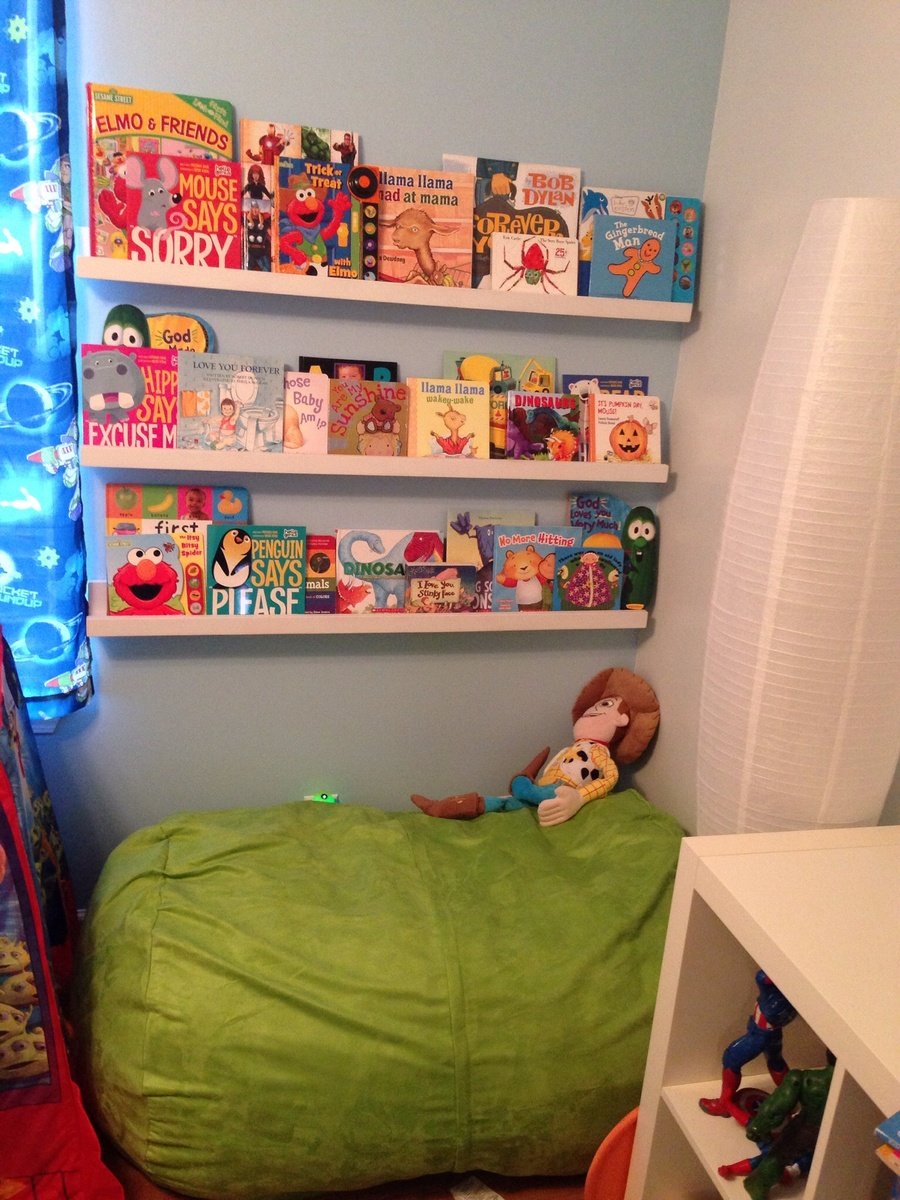
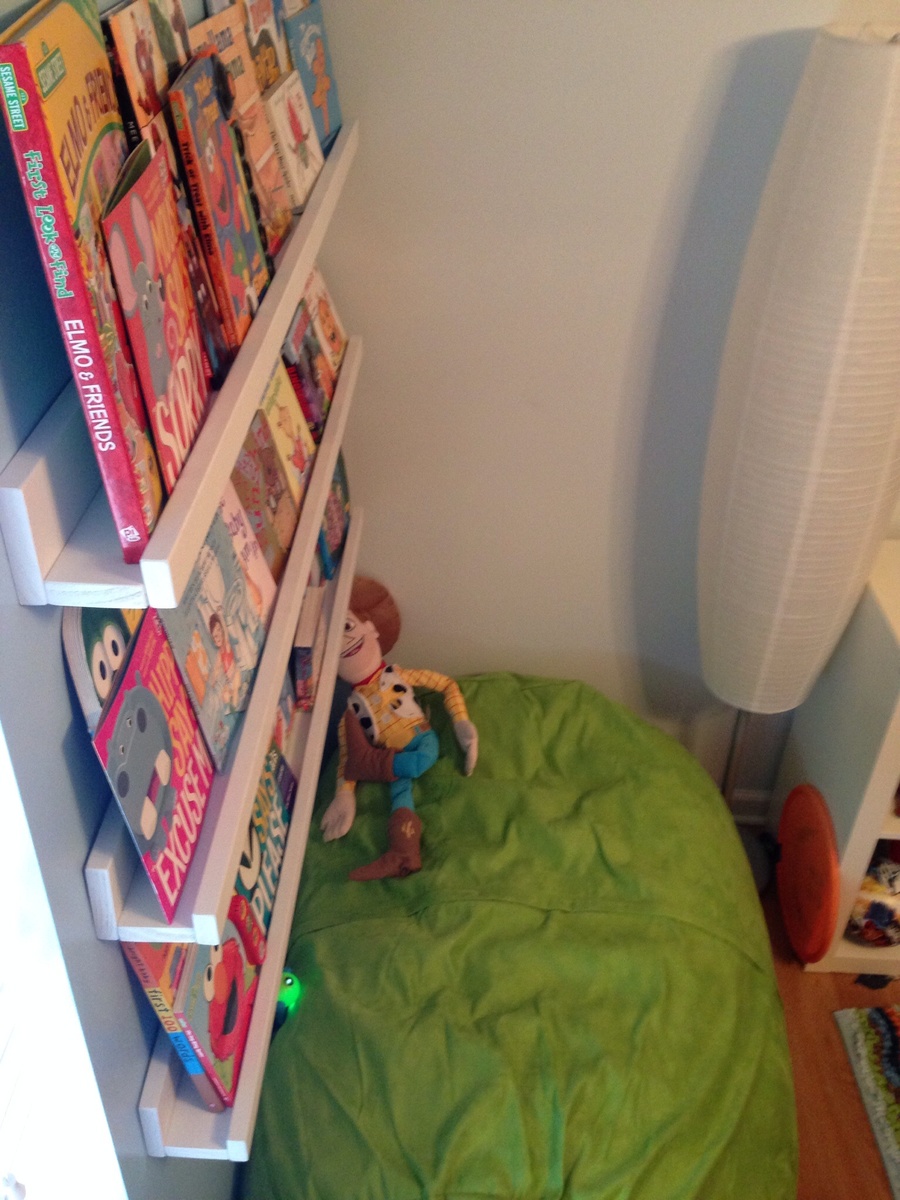
Dollhouse Bookcase

We built this dollhouse bookcase pretty much to plan. We did add "shingles" to the top.
View more on our blog: http://www.bearrabbitbear.com/2012/02/dollhouse-bookcase.html
Comments
Thu, 12/13/2012 - 06:21
My husband is about to start
My husband is about to start cutting the wood for this bookcase. He made the farmhouse doll bed last year! It turned out great! He is making the doll bed for a friend andthe doll bunkbeds for our daughter.
Yourbookcase is beautiful!:o)
Wed, 09/02/2015 - 06:27
Love this project
I made this for my daughter for her second birthday and she loved it too! 
Toddler bookshelves
This was mine and my husbands first build! Considering we had absolutely zero knowledge and experience with tools, I think they turned out ok. Definitely need to find better board next time, and we know a few things to better/differently for the next build! :)
Built from Plan(s)
Estimated Cost
$30
Estimated Time Investment
Afternoon Project (3-6 Hours)
Finish Used
Valspar primer and spray paint in flat white
Recommended Skill Level
Starter Project
Comments
Mon, 12/30/2013 - 17:41
Also forgot to mention we
Also forgot to mention we went with 1X3 instead of 1x4 for the base of the ledge so they wouldn't stick out from the wall quite as much.
Rustic Entryway Table
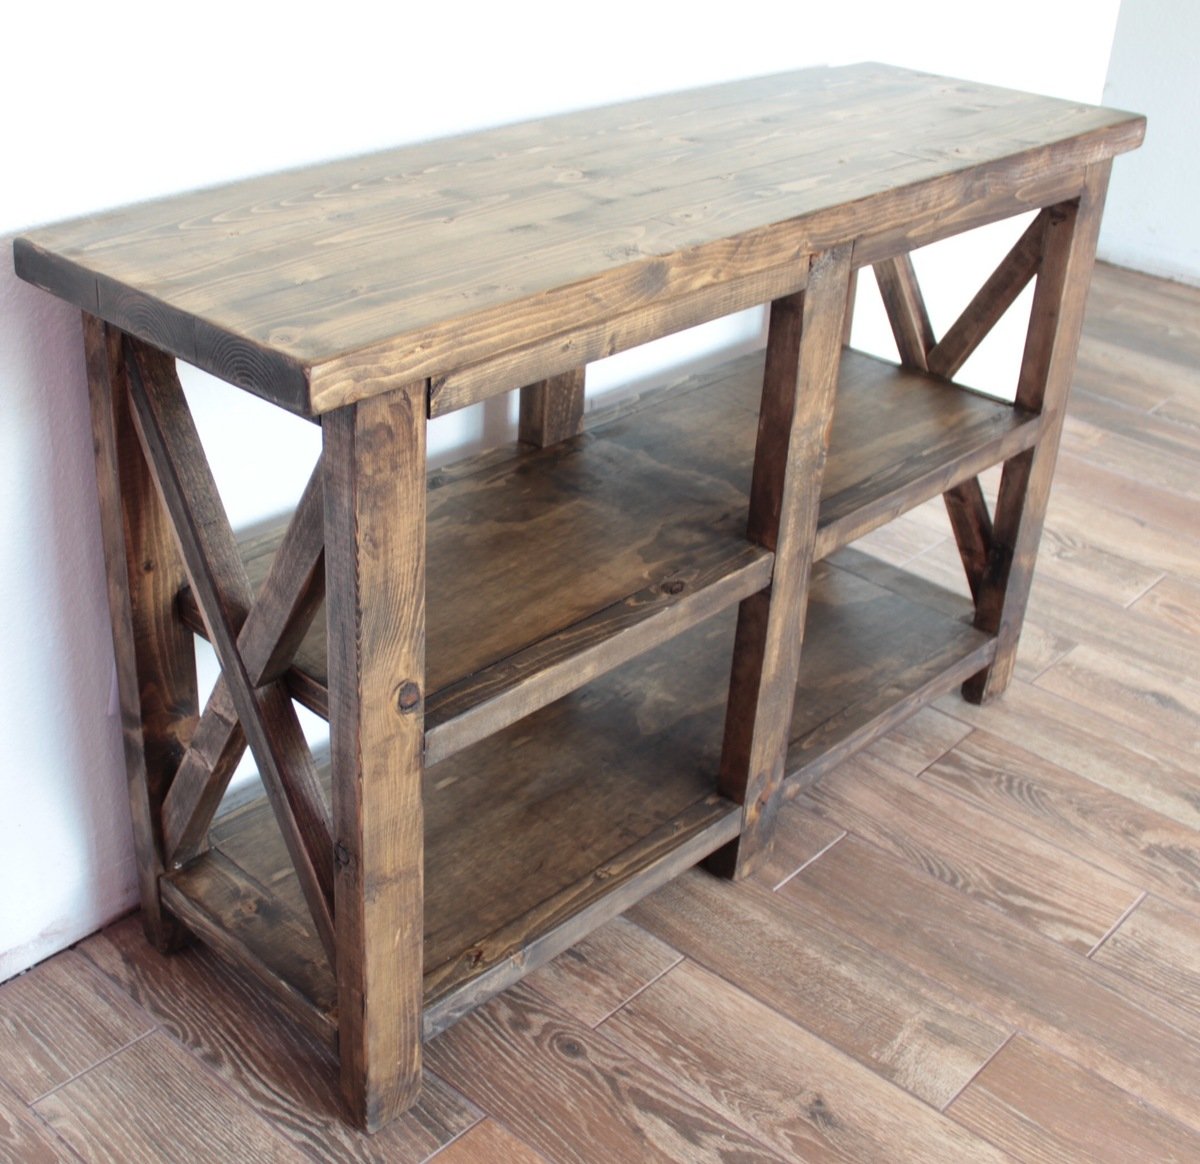
Made from Canadian white pine just made from 2x6s that where ripped down to the top,legs, sides and the X's. Sanded 3/4in plywood was used for both shelves instead of solid 1x12 pine board to cut down on cost of the build. 15in wide x 4ft long x 30in high
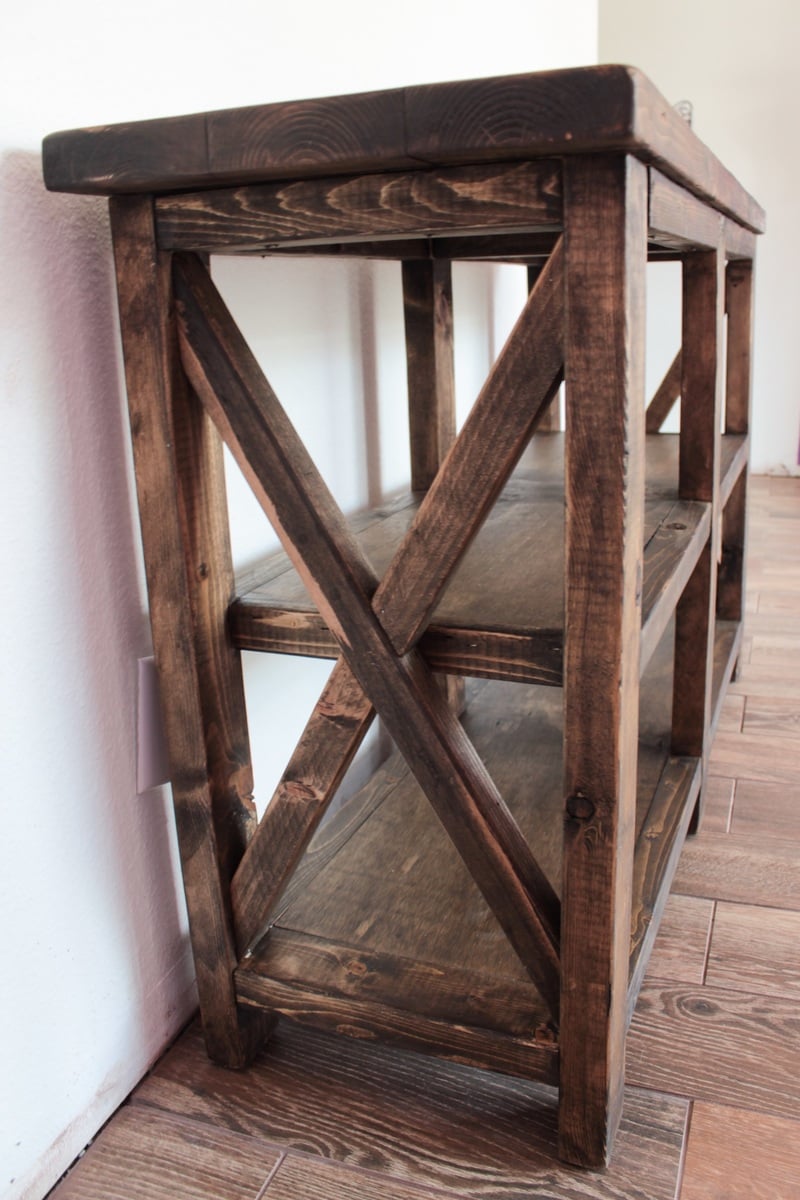
Estimated Cost
$50
Estimated Time Investment
Weekend Project (10-20 Hours)
Finish Used
Varathane Ash Stain
Varathane Polyurethane Satin
Varathane Polyurethane Satin
Recommended Skill Level
Intermediate
Comments
Entryway Bench with Deep Storage Drawers
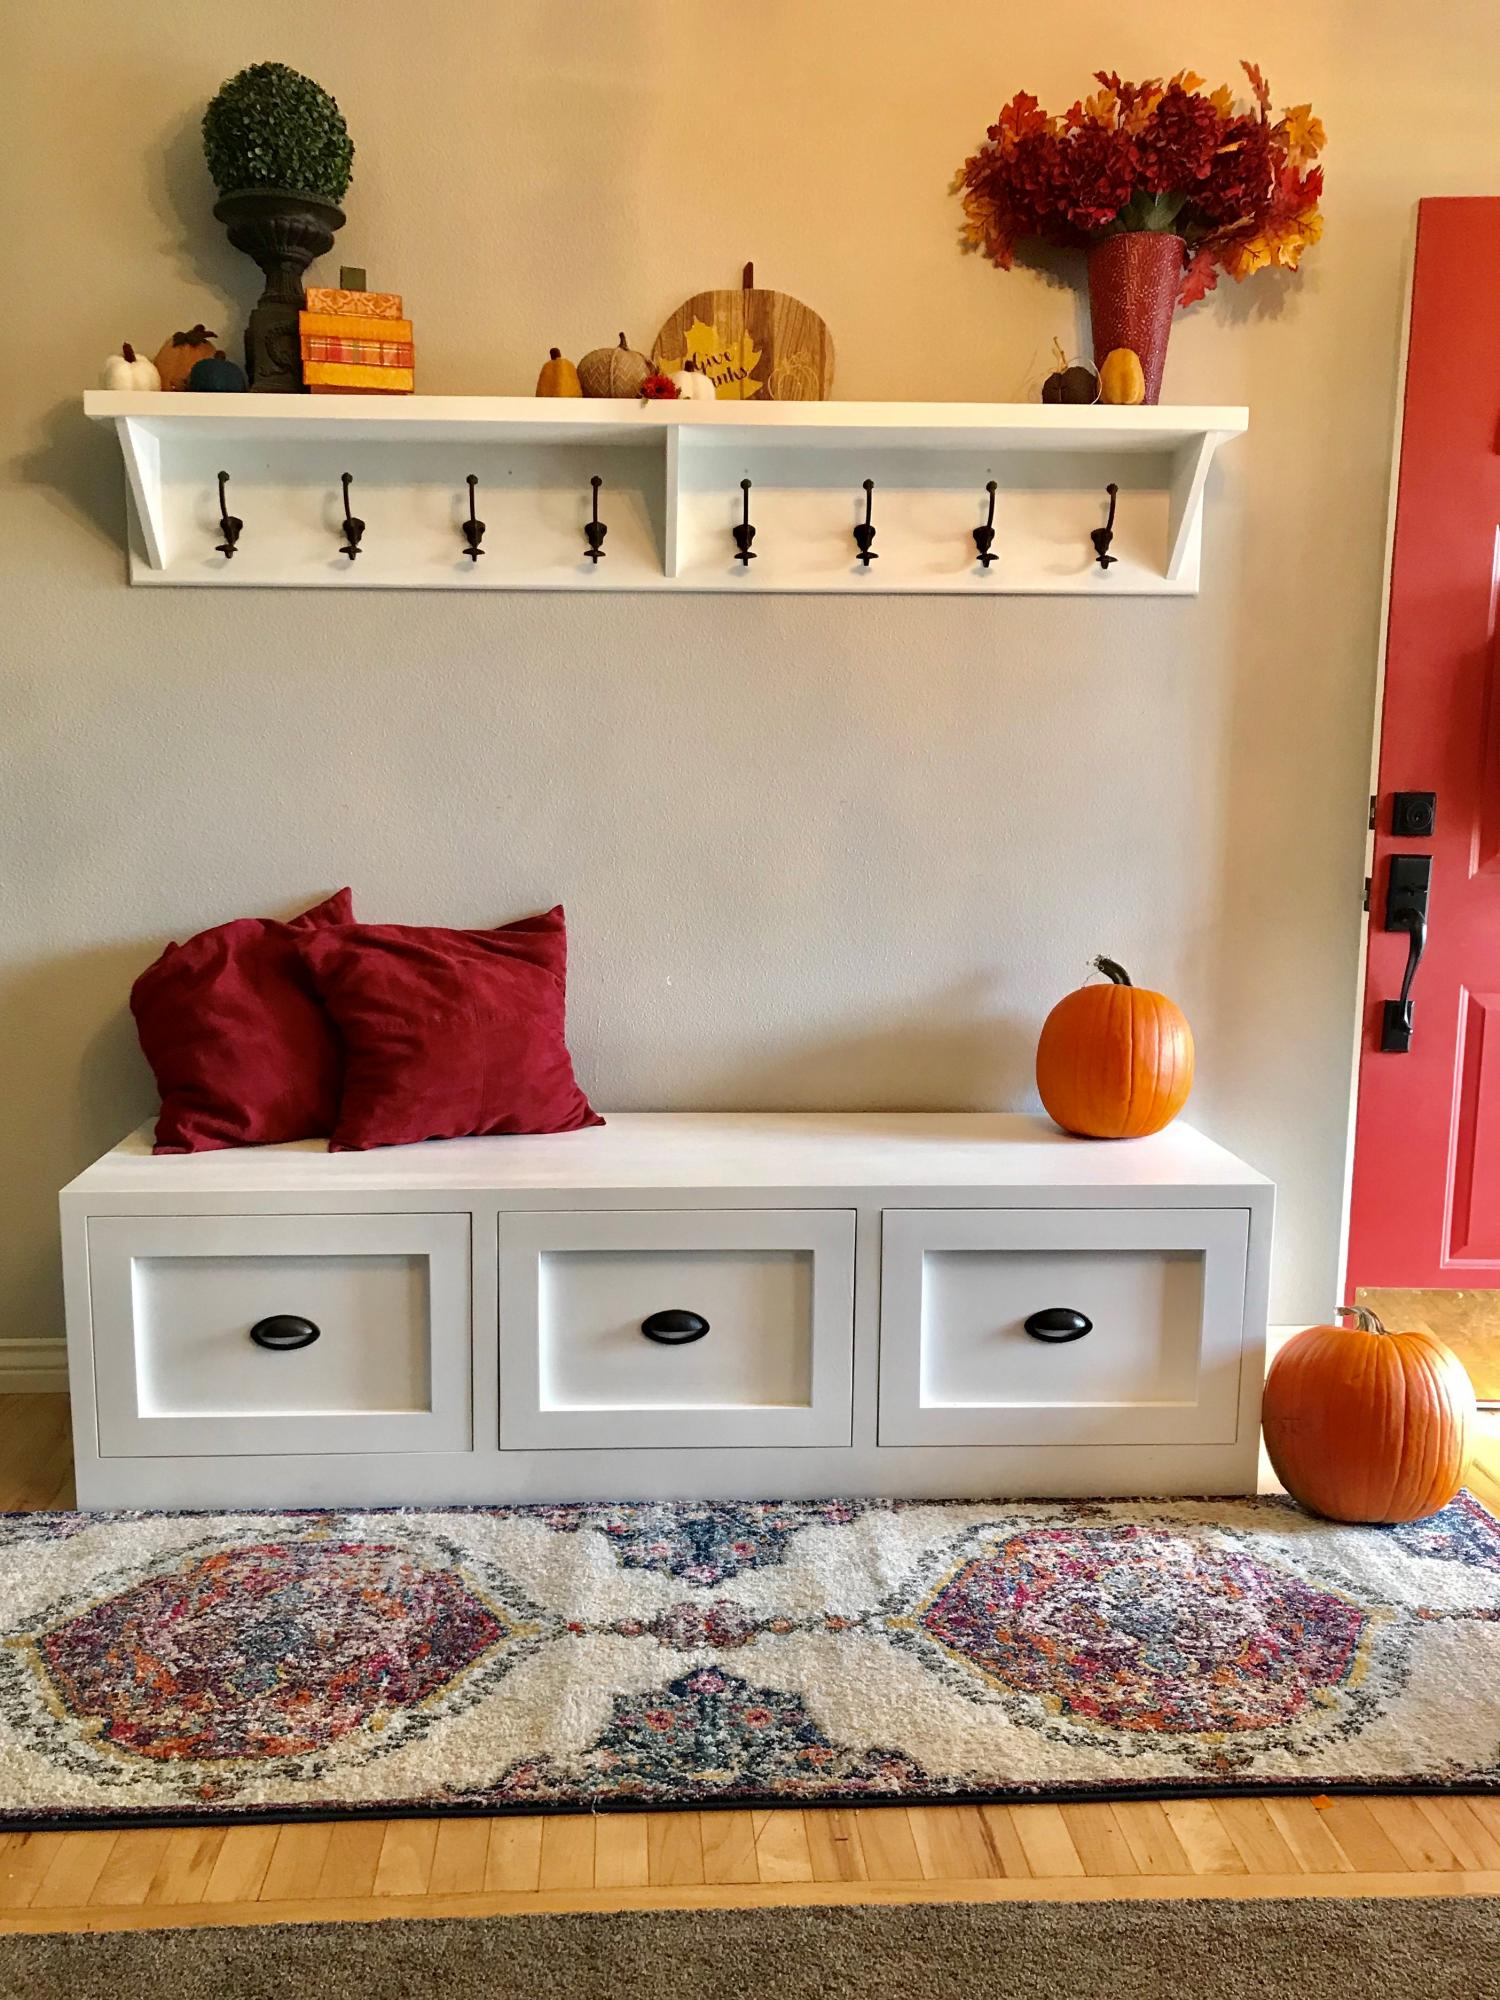
We needed a better solution for our entry way where kids tended to drop their backpacks and clutter the room. We used the "Mudroom Bench with easy drawers" plans and modified it to be just a little taller for our space. Adding a simply shelf above gave a space to hang up coats and backpacks while shoes and umbrellas can fit in the deep drawers.
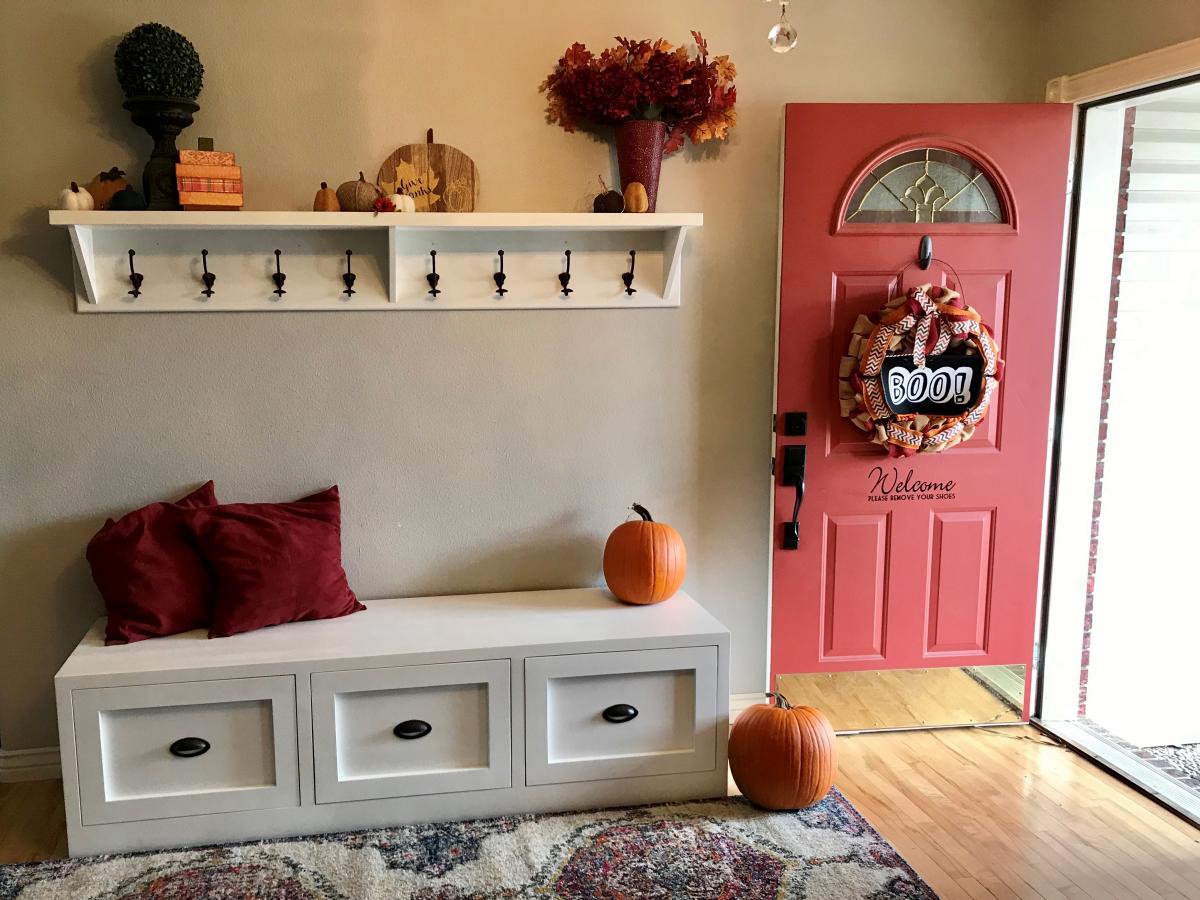
Built from Plan(s)
Estimated Cost
200
Estimated Time Investment
Weekend Project (10-20 Hours)
Finish Used
Sherwin Williams lacquer enamel pain in "Pure White" sprayed with a paint sprayer, sanding between coats.
Recommended Skill Level
Intermediate
Comments
Changing Table/ Storage Shelf Combo
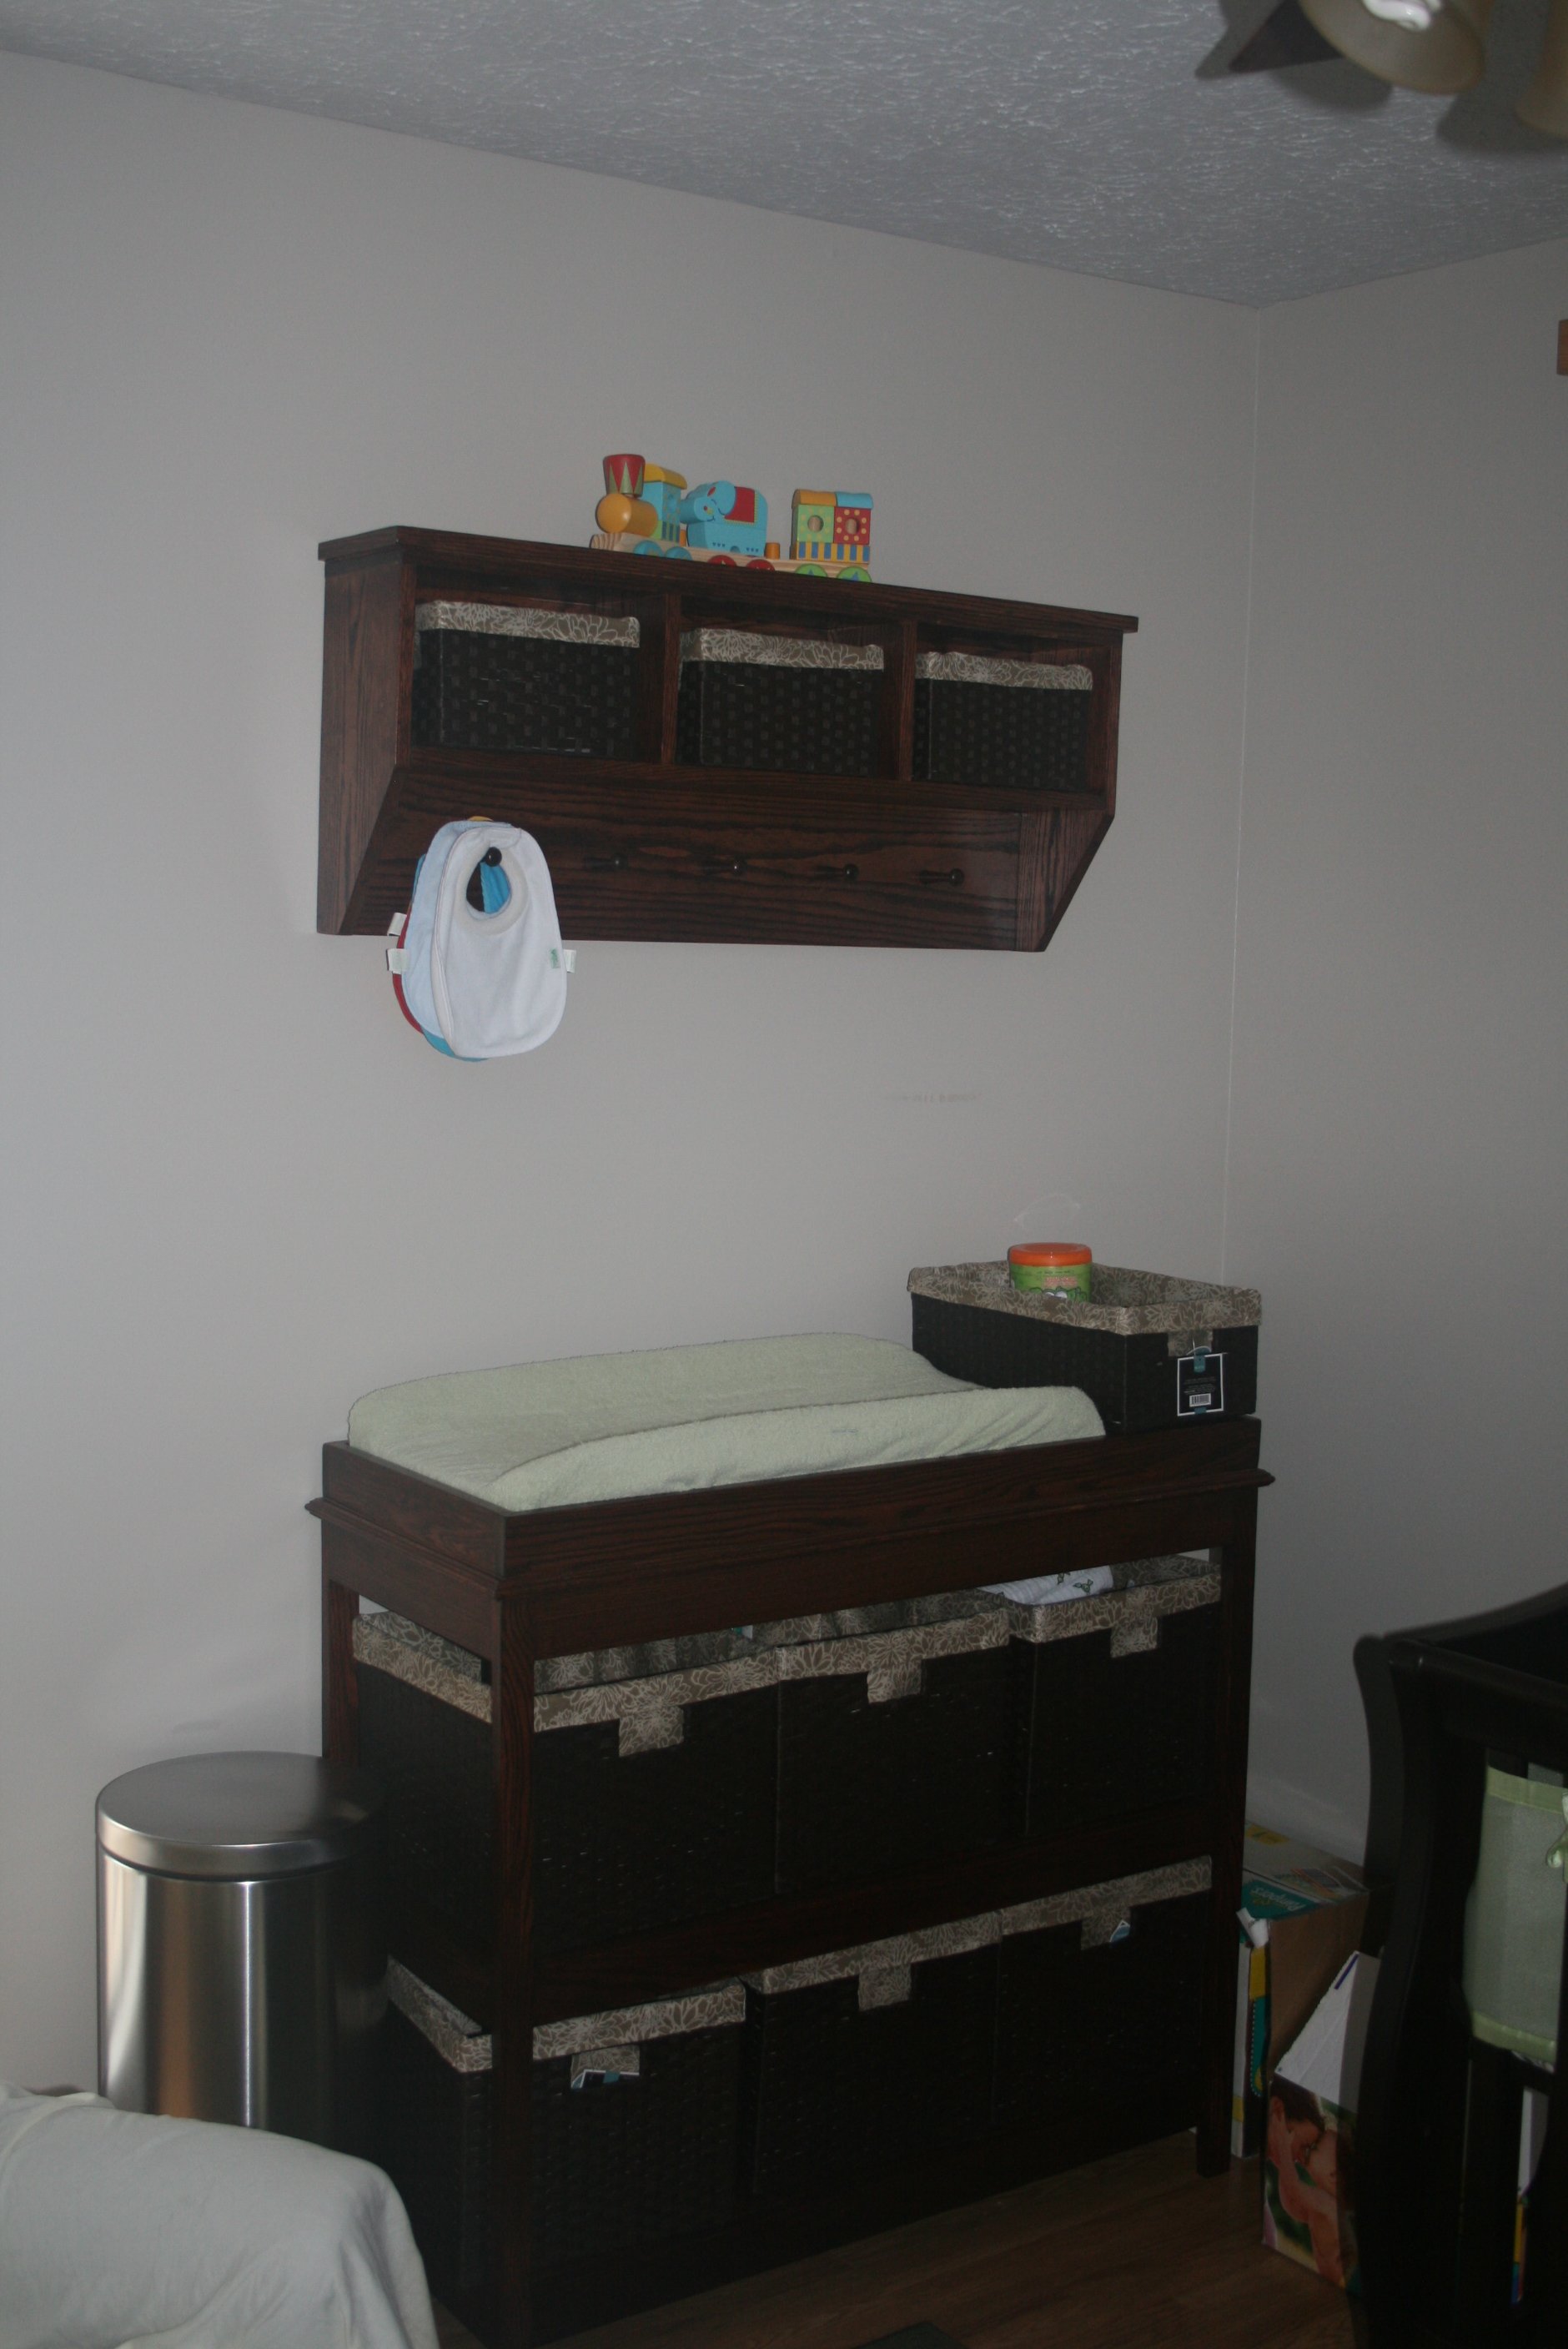
Combination of Entryway Bench and Storage Shelf with Hooks and simple changing table. I did make the table a little taller as my wife and i are pretty tall. I also had to add about an inch to the overall length of the table as well to fit the baskets. Mostly straight forward.
Built from Plan(s)
Estimated Cost
~$150
Estimated Time Investment
Weekend Project (10-20 Hours)
Finish Used
4 applications of Min-wax "Red Mahogany" stain, and 4 coats of satin polyurethane. Stain kind of hides the grain, but you do what your wife asks...
Recommended Skill Level
Intermediate
Comments
Farm Table
A farm table modified slightly from the Farmhouse Table plans. Six feet in length, pine wood, Ipswich Pine stain (minwax) with gloss polyurethane coating (3 coats). Woodburning tool used to distress tabletop and legs. Great plans made this build easy and fun, thanks Ana!!
Built from Plan(s)
Estimated Cost
125.00
Estimated Time Investment
Week Long Project (20 Hours or More)
Finish Used
Minwax Ipswich Pine
Recommended Skill Level
Beginner
2 Matching Farmhouse Bedside Tables
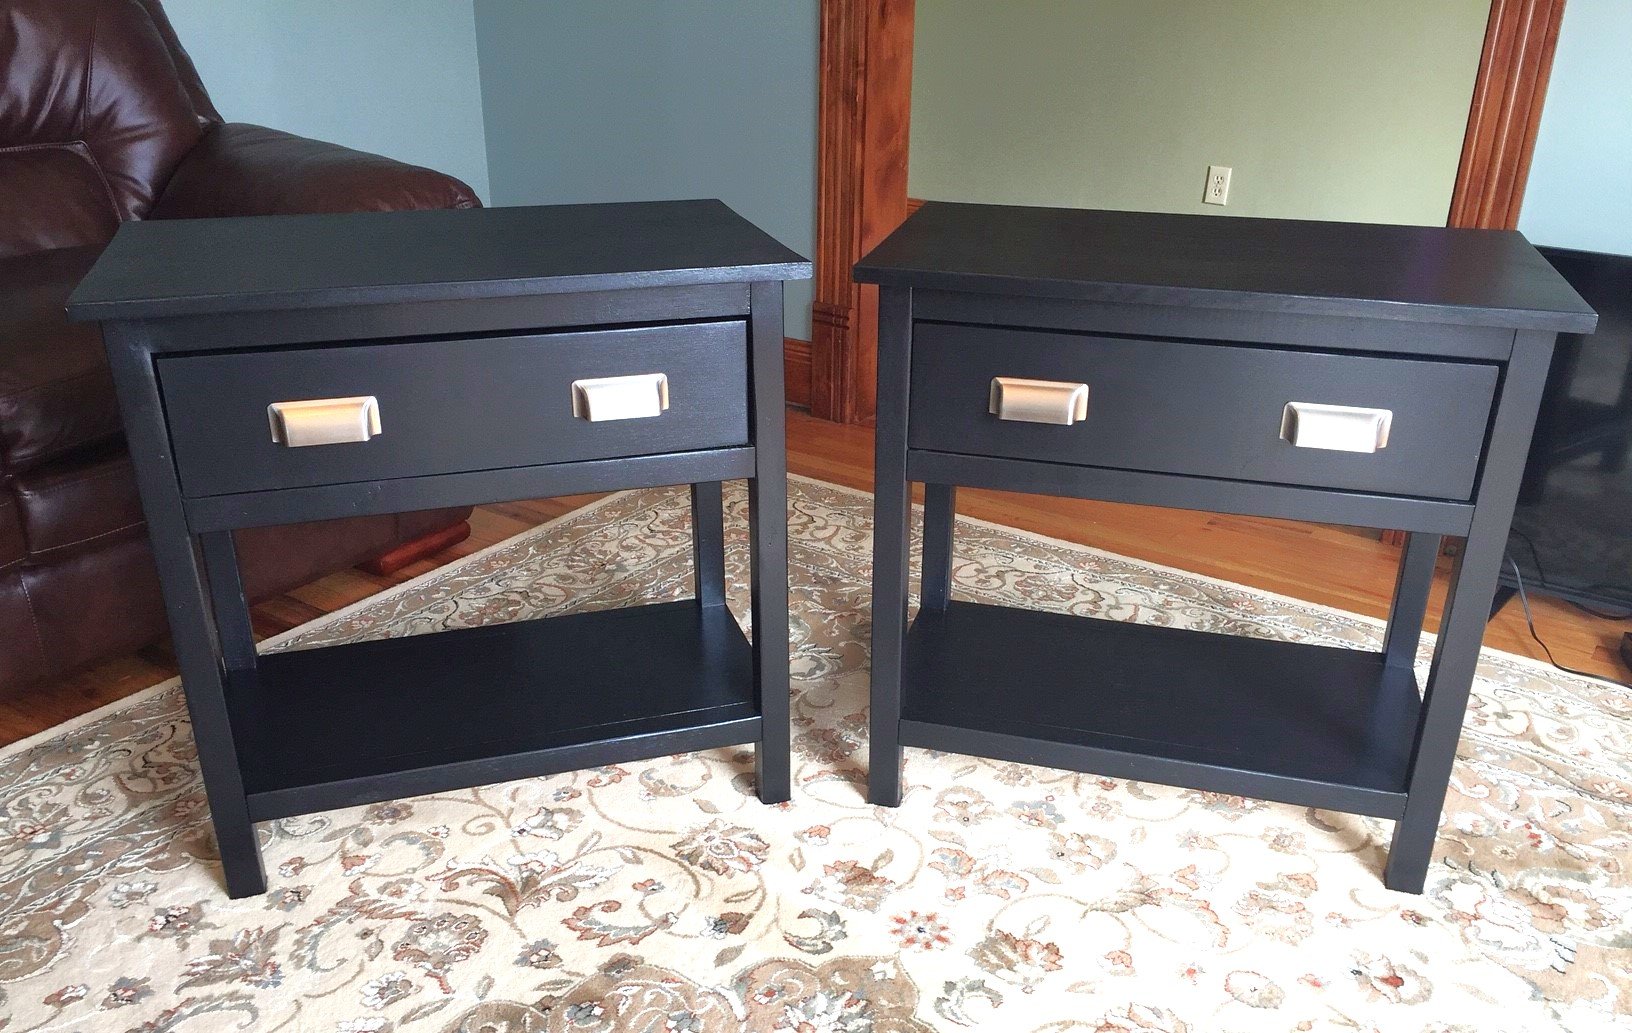
2 nightstands built from Farmhouse bedside table plans.
Built from Plan(s)
Estimated Time Investment
Weekend Project (10-20 Hours)
Finish Used
Sherwin Williams Enamel
Recommended Skill Level
Beginner
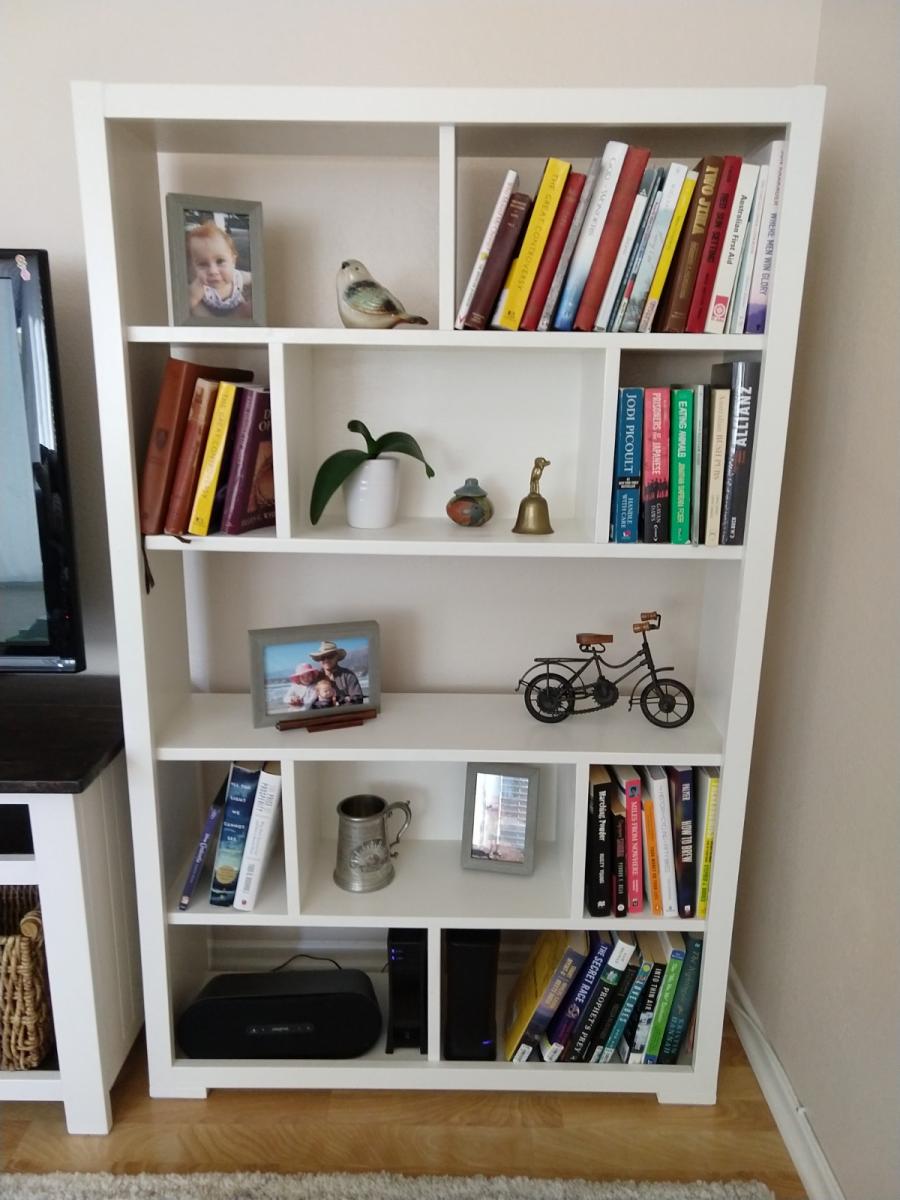
Subway Tile Bookshelf
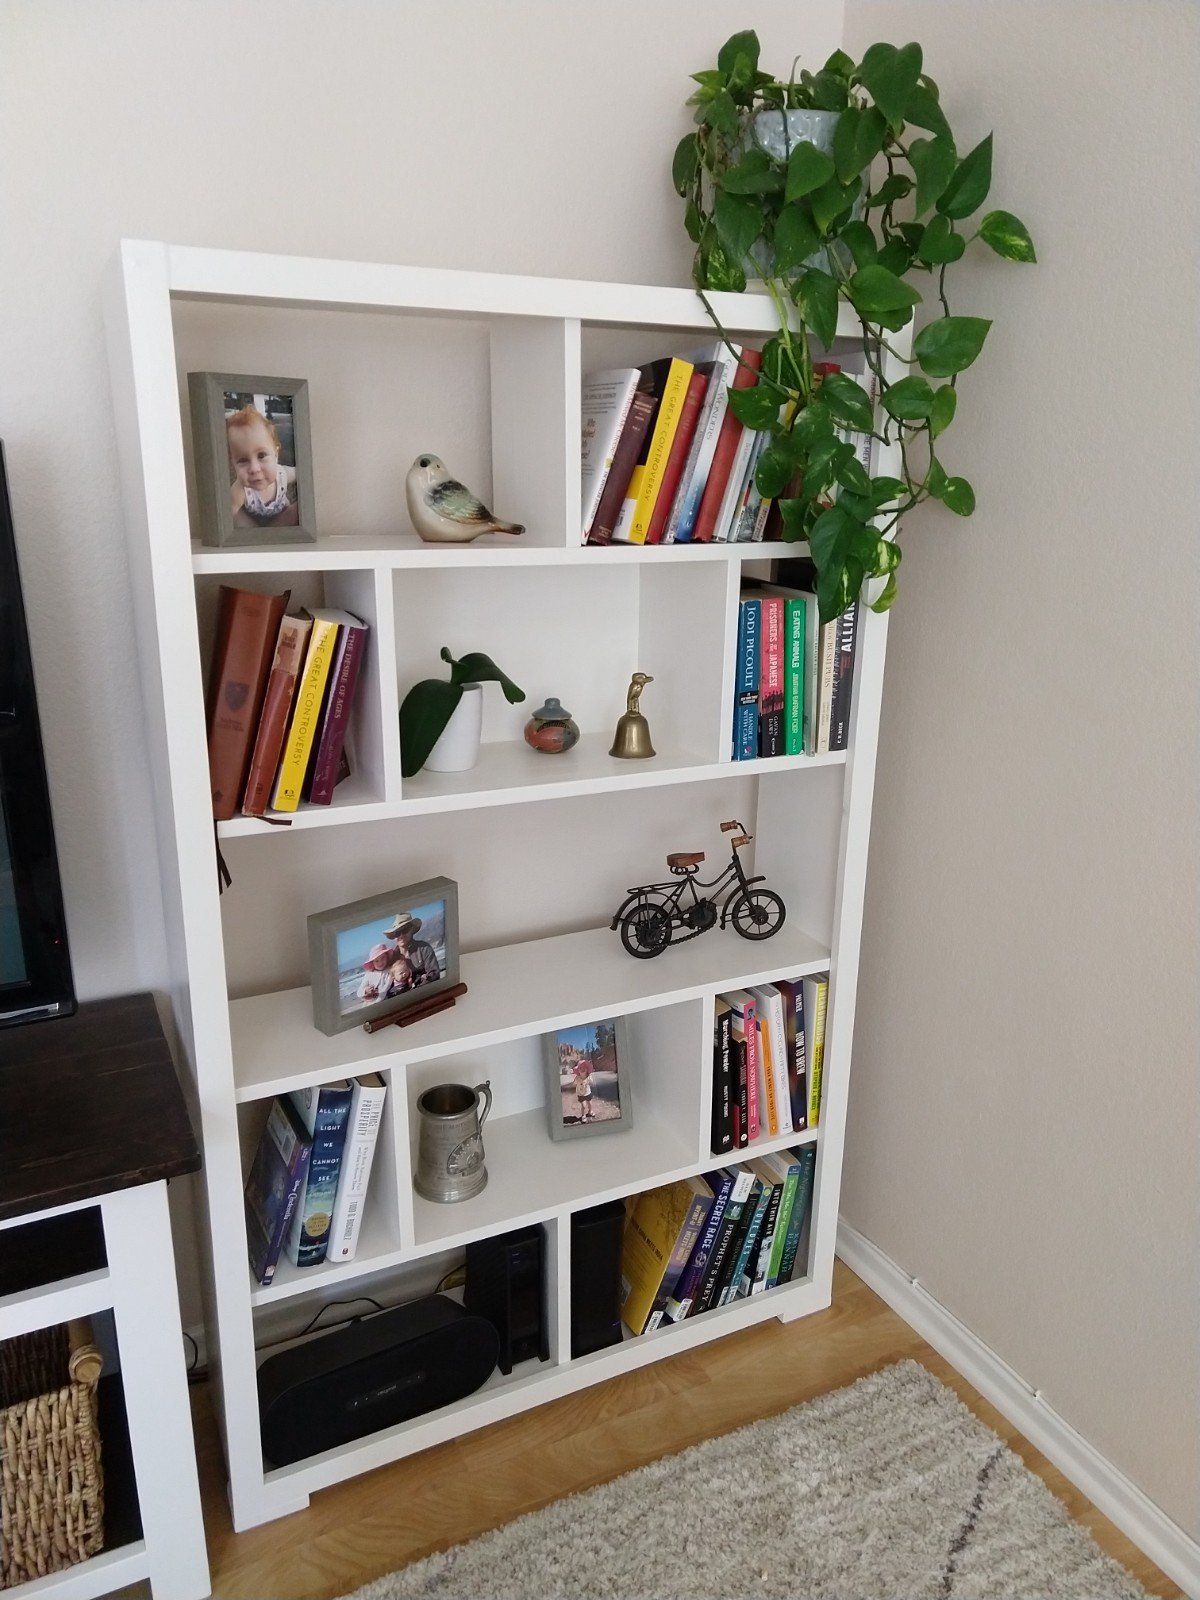
Followed Ana's plans pretty closely. I changed a few of the dimensions and did not include the middle shelf divider. I also added feet to the bottom rather than extend the sides to make those the feet.
I used 1x10s for the shelves, dividers, and exterior, 1x2s for the trim, and scrap 1x3s for the feet.
This was my first woodwork building project and while it took me a long time, I learned a lot in the process. I quickly realized the advantage of pocket holes as I was patching my countersink screws!
Built from Plan(s)
Estimated Cost
$60
Estimated Time Investment
Weekend Project (10-20 Hours)
Finish Used
white cabinet paint
Recommended Skill Level
Beginner
West Elm Bed Knockoff
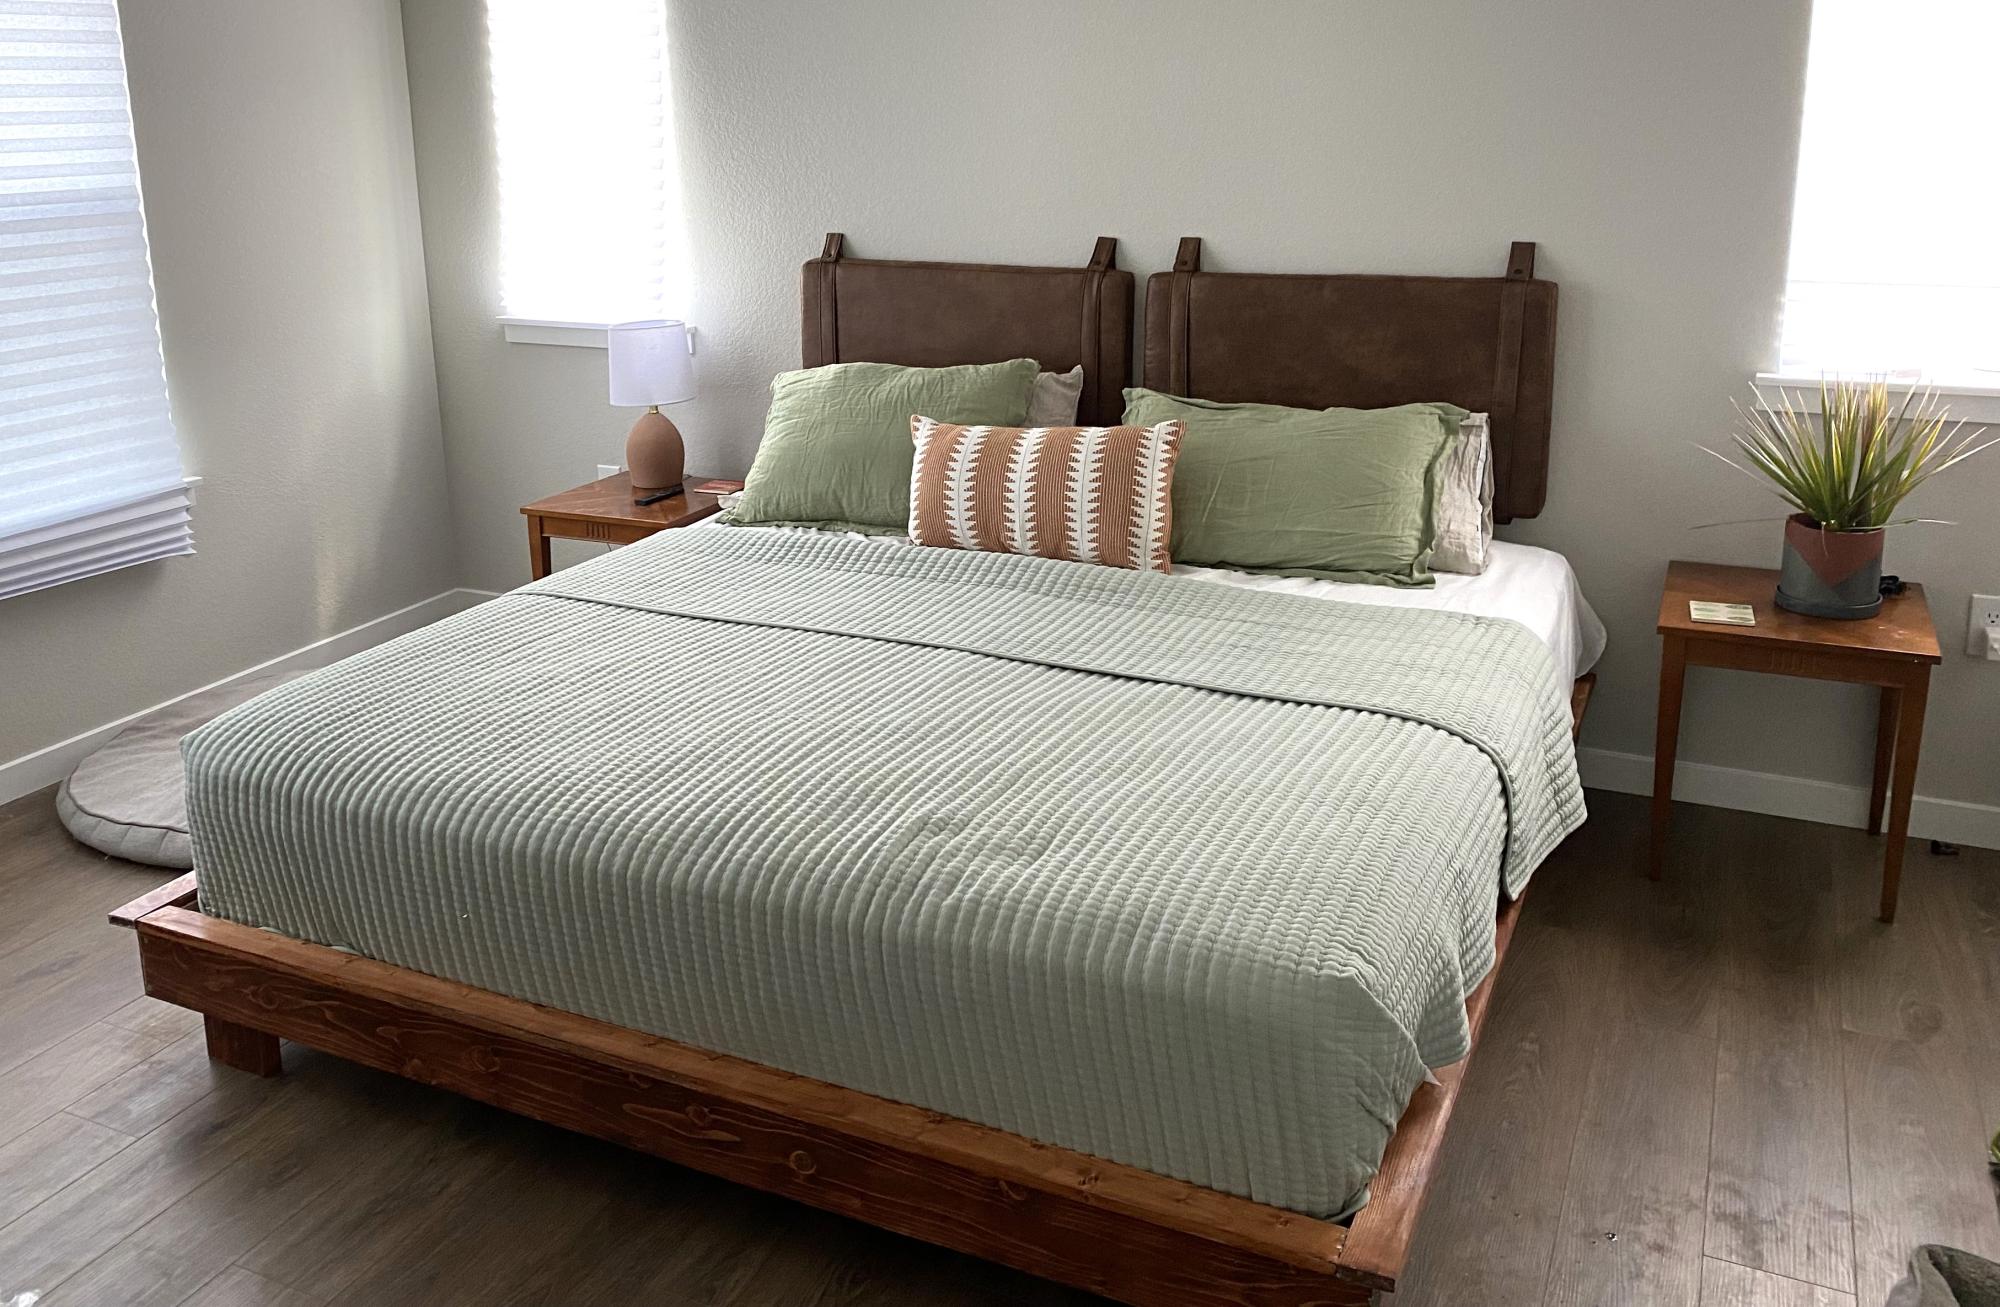
We paired this bed frame with Nathan James upholstered headboard to replicate our favorite Airbnb we stayed at in Telluride. That bed was a $1300 from West Elm. Minus the tools, this bed came in around $500 for everything (including bedding).
Wood: Douglas Fir
Stain: American Walnut
Built from Plan(s)
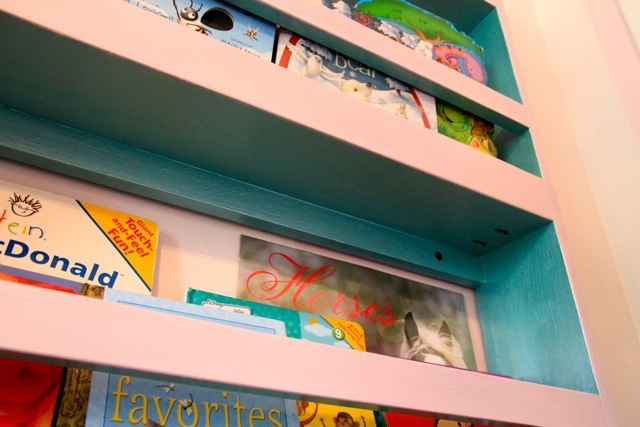
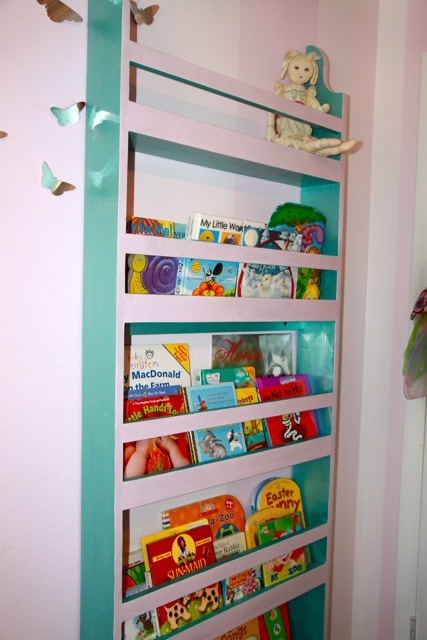
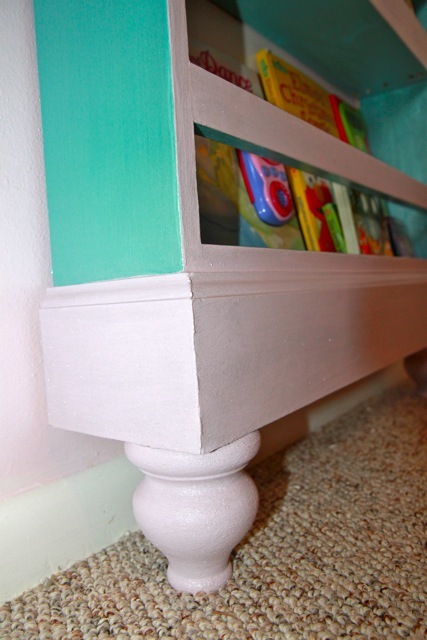
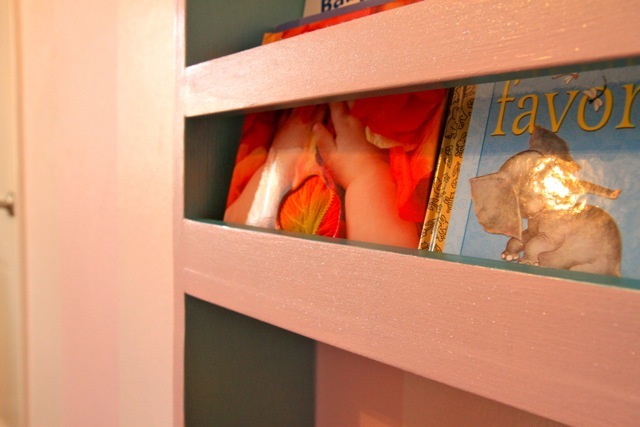
Girly Flat Wall Bookshelf

I built this bookshelf over the summer and finally decided on paint over the weekend. I LOVE how it turned out! I followed the plans for general directions, but my dimensions are taller and wider than the plans. I used 8' 1x6's for the sides and the shelves are about 14". I also added bun thingy's (or whatever they're called!) to the base so that the unit would fit completely flat against the wall. Otherwise you'd have to either cut out your existing wall trim or notch the shelf trim around your wall trim. This was my first time using the Kreg pocket hole jig. It took a little getting used to, so I'd suggest practicing with some scrap parts first to make sure you don't end up drilling the pocket hole completely through the board.
Built from Plan(s)
Estimated Time Investment
Afternoon Project (3-6 Hours)
Finish Used
Valspar Pink Glow and Valspar Brilliant Metals Grass Lake. For the 2nd coat of pink I mixed 3 packages of the Valspar glitter with about 1 1/2 cups of the paint. You can't see it very well from the picture, but the glitter is very visible and glistens in the sunlight!
Recommended Skill Level
Beginner