Community Brag Posts

Cottage Oars

Submitted by Anonymous (not verified) on Thu, 10/13/2016 - 11:52

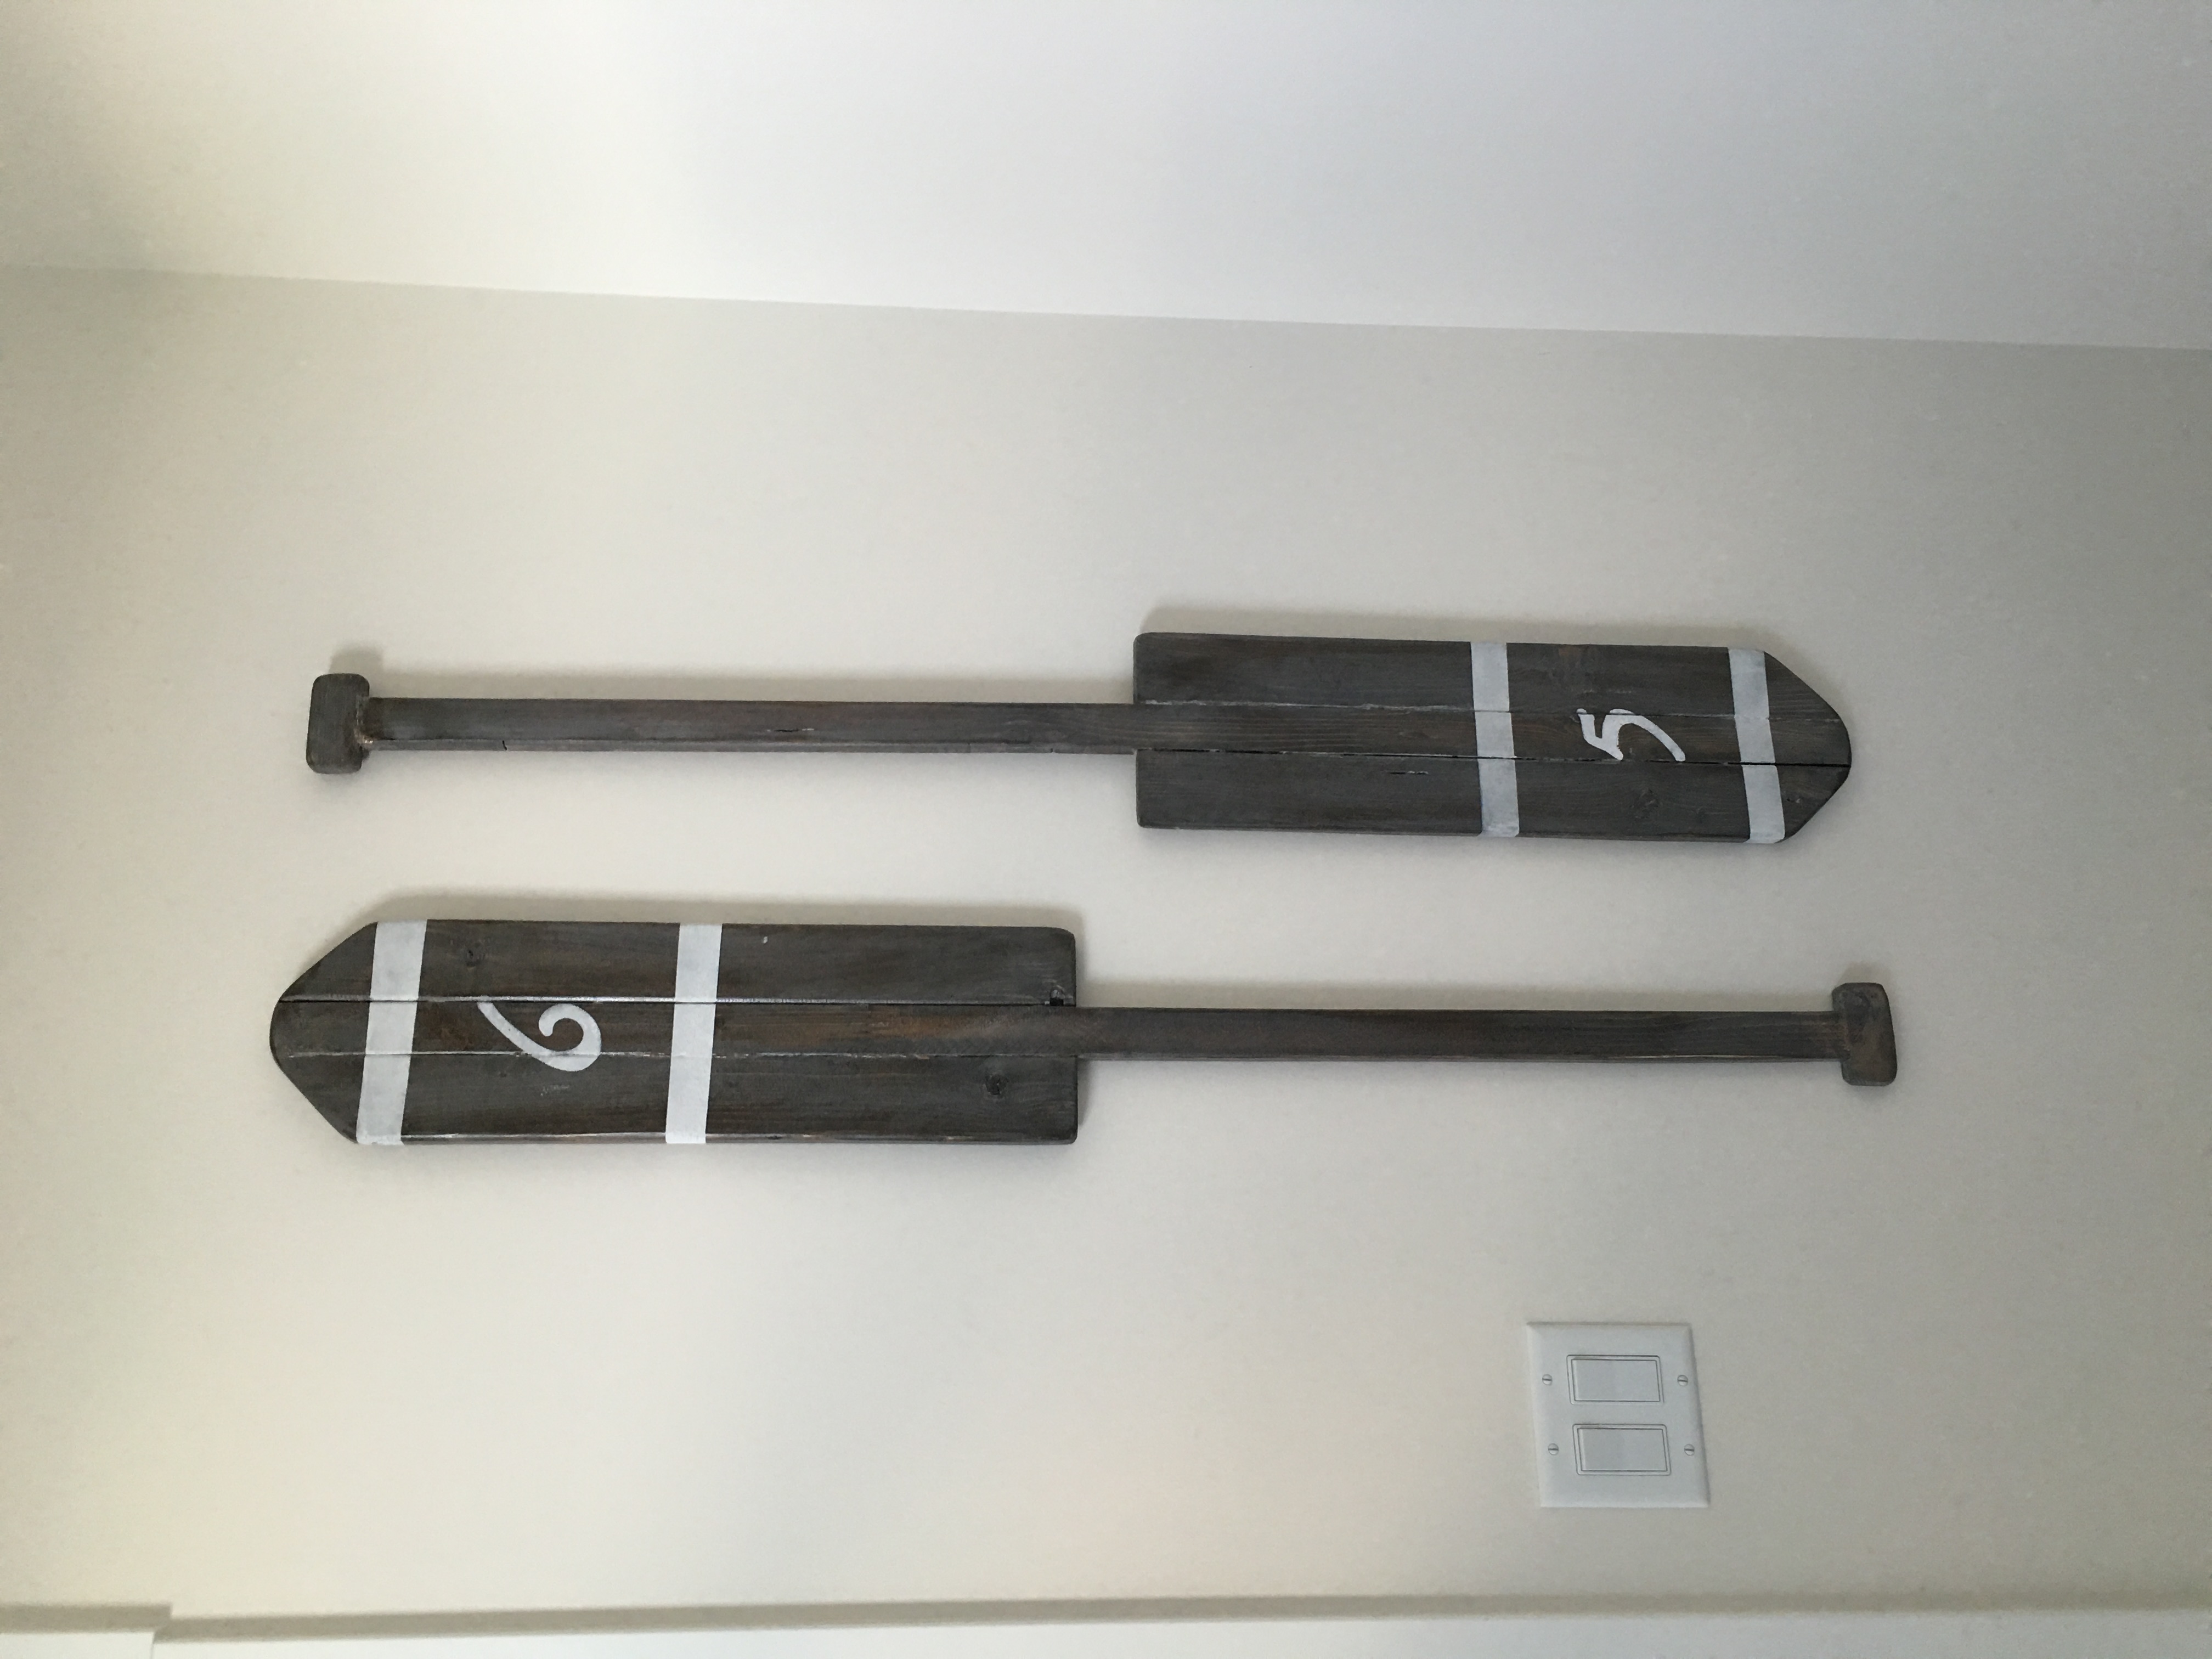
I actually made 2 sets of these oars as wall decor for our cottage.  This is the second set - I love them!  The kids chose the numbers which are completely random :)

Estimated Time Investment
An Hour or Two (0-2 Hours)
Finish Used
1st - stained with Minwax Dark Walnut
2nd - stained with Minwax Classic Grey
3rd - wiped on Minwax White wash pickling
4th - 1 Coat Minwax Water based oil modified polyurethane to seal
5th - Painters tape & stencil for the details with white acrylic craft paint from Michaels
Recommended Skill Level
Starter Project

Balustrade Coffee Table

Love this table! Created from Ana Whites Balustrade Coffee Table plans. Looks just like the table from RH.

Built from Plan(s)
Estimated Cost
$250.00
Estimated Time Investment
Weekend Project (10-20 Hours)
Finish Used
First coat SW New Ebony Stain
second coat Varathane Briarsmoke
Recommended Skill Level
Intermediate

Preston Nesting Tables

After building my new coffee table, I needed new end tables to match! I love that I can store the little tables underneath, or use them around the room during a party. After the coffee table, these were a lot simpler to build, though took longer due to the fact that there are four of them!

Built from Plan(s)
Estimated Cost
$100
Estimated Time Investment
Day Project (6-9 Hours)
Finish Used
Chestnut stain and Oil based Poly for tops, high gloss white paint for sides
Recommended Skill Level
Starter Project

Comments

Mud room bench

Submitted by TempoTours on Thu, 07/10/2014 - 13:00

My wife wanted a bench to put in the mudroom as a place to sit when you take off your boots in the winter. I came across this project on your website and decided to try to tackle it.

it turned out pretty good, in my opinion. Only a few small things learned. One, is that if you're changing the space of the gap from 1/4" to 1/8", the boards should be resized to accommodate the change. And/Or at the very least, put the boards on the outsides first and work your way in. Then, at the very least the sliver needed to fill in the gap would be in the middle. ☺

Estimated Time Investment
Afternoon Project (3-6 Hours)
Recommended Skill Level
Starter Project

Love it!

Submitted by mkscalf on Mon, 10/17/2016 - 18:14

We love the final product, but can't say this is a beginner project! The plans aren't detailed enough for that. For instance, the only instructions on the stairs was "they are easy! just 45 degree angles" but we had to work through some strategy with them. It also didn't say how to attach the cleats just "we also attached the cleats in this step". What size screws? how many? We learned our lesson when the cleats and bedding came crashing down b/c we used 1.5 inch screws. Problem solved with 2.5 inch screws... but we sure are glad it was a soft landing.... And now I can't say I fully trust the design after watching my husband and two kids break it. However, it is sturdy enough for our 3 year old for certain! I'm glad we made it and over-all it was worth it and a great project and learning experience. Just wish the plans were made with more detail for true beginners! 

Estimated Cost
wood $100 or so. Additional supplies (screws, sand paper, stain, poly, brushes, etc was another 60-75 for us)
Estimated Time Investment
Week Long Project (20 Hours or More)
Finish Used
We sanded, stained with Early American color... I don't know the brand. Finish with semi-gloss polyurethane
Recommended Skill Level
Intermediate

Patio couch

Submitted by Anonymous (not verified) on Tue, 07/14/2020 - 14:03

This was my first solo woodworking project since 7th grade shop class in 1997. This was so easy to put together! I added "slats" from left over lumber to keep my pillows from squishing out. Thanks Ana White for creating easy to follow instructions! I've now got the woodworking bug!

Built from Plan(s)
Estimated Cost
$50
Estimated Time Investment
Weekend Project (10-20 Hours)
Finish Used
Antique lace chalk paint and polyurethane seal
Recommended Skill Level
Beginner

Grandkid's playhouse

Grandma and I spent a couple months building this playhouse for our grandkids. The project took longer and cost more than we initially thought it might but we had a lot of fun doing it and it's a big hit with the kids.

We followed the plans on this blog pretty closely only changing a thing or two here and there. We used cedar for the deck and railing and we painted it (and roofed it) to match our house. We put in 1/4 inch tempered glass windows to keep the rain out in the winter. (The glass is easily removed for summer.)

Thank you Ana White for providing such a great little plan!

Estimated Cost
$1,500
Recommended Skill Level
Beginner

Comments

redhead_61

Sun, 09/16/2012 - 22:19

Oh My heavens this is AMAZING! What a special treat for your grand kids. You think I could get my mom and dad to pay for it if I build it for our cabin? HMM I will have to pitch it to them.

rhulshizer

Mon, 09/17/2012 - 18:40

What a lovely thing to build for your grandkids! I love the window flower boxes. Great job.

Whitney G (not verified)

Fri, 09/28/2012 - 05:52

This is just beautiful! The build, the landscaping, the paint. I am always stalking the brag posts to see if any new playhouses have been posted as we have been working on my daughter's since March:) I know! It has taken us forever. This is our first build and I work full time so we are a little slow. I just love what you've done with the place! Great job!

Cedar Benches

Submitted by SaraLodise on Sun, 07/13/2014 - 20:13

Made two 48" long cedar benches that could be carried down to the firepit in our yard. They're also nice for sitting on the deck and watching the dogs play. I had to use 3 - 2x6s for the seat instead of 2 - 2x8s since 2x6 was the largest I could get in cedar. Made it a little bit wider.

Built from Plan(s)
Estimated Cost
?
Estimated Time Investment
Weekend Project (10-20 Hours)
Finish Used
none
Recommended Skill Level
Intermediate

Storage Shelf with Coat Hooks

Submitted by kalabarge on Wed, 10/19/2016 - 14:01

Thought I posted this last year, but I guess it didn't take ... and now I can't remember all of the details!  But anyway, I do know that this was the first project I made from Ana's book (a smaller version of Project #1), and a year later, I am still really pleased with it.  The shelves and hooks come in so handy, and the top provides another little surface to decorate!  I also made some wooden boxes for the shelves out of scrap pieces, as Ana did in the photo in the book, and stained them the same color as our floors.  Added our initials, too.  The whole thing is nice and sturdy, and fits right in at our house -- like we've always had this on the wall.  Thanks for the ideas, Ana!

Estimated Time Investment
Weekend Project (10-20 Hours)
Finish Used
Spray paint and stain.
Recommended Skill Level
Beginner

Outdoor Playhouse

Submitted by Anonymous (not verified) on Mon, 06/03/2024 - 09:05

I had just retired and wanted to make a playhouse for my 2 year old grand-daughter. I always wanted one as a kid and wanted to build one for my kids but never found the time.
This was made mostly out of scrap wood that couldn’t be used to build a house and I was lucky enough to get permission to take whatever I needed. Learned a lot doing it. Thanks to my boyfriend for letting me borrow his nailer.

Cindy

Dream Dollhouse

Submitted by mercocet on Tue, 09/18/2012 - 15:44

We enlisted help from my brother-in-law to build the dollhouse for our daughter last Christmas. He also painted the floors, stairs, and roof. I spent many nights after the kids were in bed "wallpapering" the walls with various scrapbook paper.

I love this house and it's something that will last for many years. Even better, both of our daughters love it and so do their friends.

Estimated Cost
$150
Estimated Time Investment
Weekend Project (10-20 Hours)
Finish Used
Wood wax and paint and modge podge
Recommended Skill Level
Intermediate

Potting Bench for Father's Day

Submitted by GretchenM on Wed, 07/16/2014 - 09:49

I started with the potting bench by Between Naps. I made it longer and taller (for my dad). There is a tool holder along one side and I added a sink, for washing the veggies newly harvested from our garden. We ran the water from our house faucet and will blow out water for winter. All that's left is running a pipe from the drain to leach out across the perimeter of the garden. Most of the lumber was given to me (pressure treated even). And I bought the sink from a junk guy for $50. My dad was so impressed and I think it may be my best present project ever. I can't believe I made that! Oh yeah, the end caps have solar lights, nighttime gardening! Ya never know!

Estimated Cost
175
Estimated Time Investment
Day Project (6-9 Hours)
Finish Used
None. Get this where you want it before screwing shelf and counter boards or putting in sink; it's really heavy.
Recommended Skill Level
Intermediate

Comments

jvos

Thu, 07/17/2014 - 12:05

That is awesome! I want a sink for my garden (and a cooktop for outdoor canning) so I am very jealous. :)

Rustic Dining Table - In love with my table!

Submitted by Anonymous (not verified) on Sun, 10/23/2016 - 05:46

I had shown this plan earlier on to my bf, telling it I really like it and it would be so much cheaper to make our future rustic dining table on our own instead of buying it. He seemed reluctant.... And then, 2 months later, I come back from my parent's house in the evening to find that he has built me my rustic dining table just as I had wished! 

Estimated Time Investment
Week Long Project (20 Hours or More)
Finish Used
Saman Cognac and Sesame + Saman hybrid varnish in Satin
Recommended Skill Level
Intermediate

Comments

Our Modern Adirondacks

Submitted by Gail Ogden on Sun, 07/19/2020 - 16:06

This was our first project, hubby and I. We are thrilled with how they turned out. Thank you Anna!!!

Estimated Cost
$100 for both
Estimated Time Investment
Day Project (6-9 Hours)
Finish Used
Cocktail of equal parts polyurethane, linseed oil and mineral spirits.

My Tryde table

Submitted by mpgrote on Thu, 09/20/2012 - 06:48

My first carpentry effort; thanks Ana for the great plans!

Built from Plan(s)
Estimated Cost
$50
Estimated Time Investment
Weekend Project (10-20 Hours)
Finish Used
Minwax Dark Walnut
Recommended Skill Level
Starter Project

Modified Barnwood Frames

I modified Ana's plans to fit the triptych art I created. I used a combination of this plan and her Wall Frames plan from her book. She wan't kidding when she said these frames were versatile. I plan on applying the same concept to a leaning wall mirror.
For a step by step tutorial on the modifications to this plan as well as how to create the triptych art, visit the blog http://thepursuitofhandyness.com/diy-triptych-art-custom-frames/

Estimated Cost
$5 per frame
Estimated Time Investment
Afternoon Project (3-6 Hours)
Finish Used
Latex Paint & Oil Based Primer
Recommended Skill Level
Starter Project

Farm Style Table

Submitted by Anonymous (not verified) on Wed, 10/26/2016 - 07:14

My boyfriend and I made this farm style table based on plans from Ana's site. We LOVE it. We wanted it to appear rustic with natural woods tones so we used Special Walnut Stain, Poly, and Light Brown Briwax. Even though it looks raw, its silky smooth to the touch. 

Thanks for posting these plans! We already on to our next project. We have the wood purchased for the rustic coffee table and console table, and I have my eye on the farmhouse bed frame and a set of night stand tables. 

Kate

Estimated Cost
$100 for the wood. We had all the tools already.
Estimated Time Investment
Week Long Project (20 Hours or More)
Finish Used
Special Walnut, Poly Gloss, and Lt. Brown Briwax.
Recommended Skill Level
Beginner
Back