Nursery Book Ledges
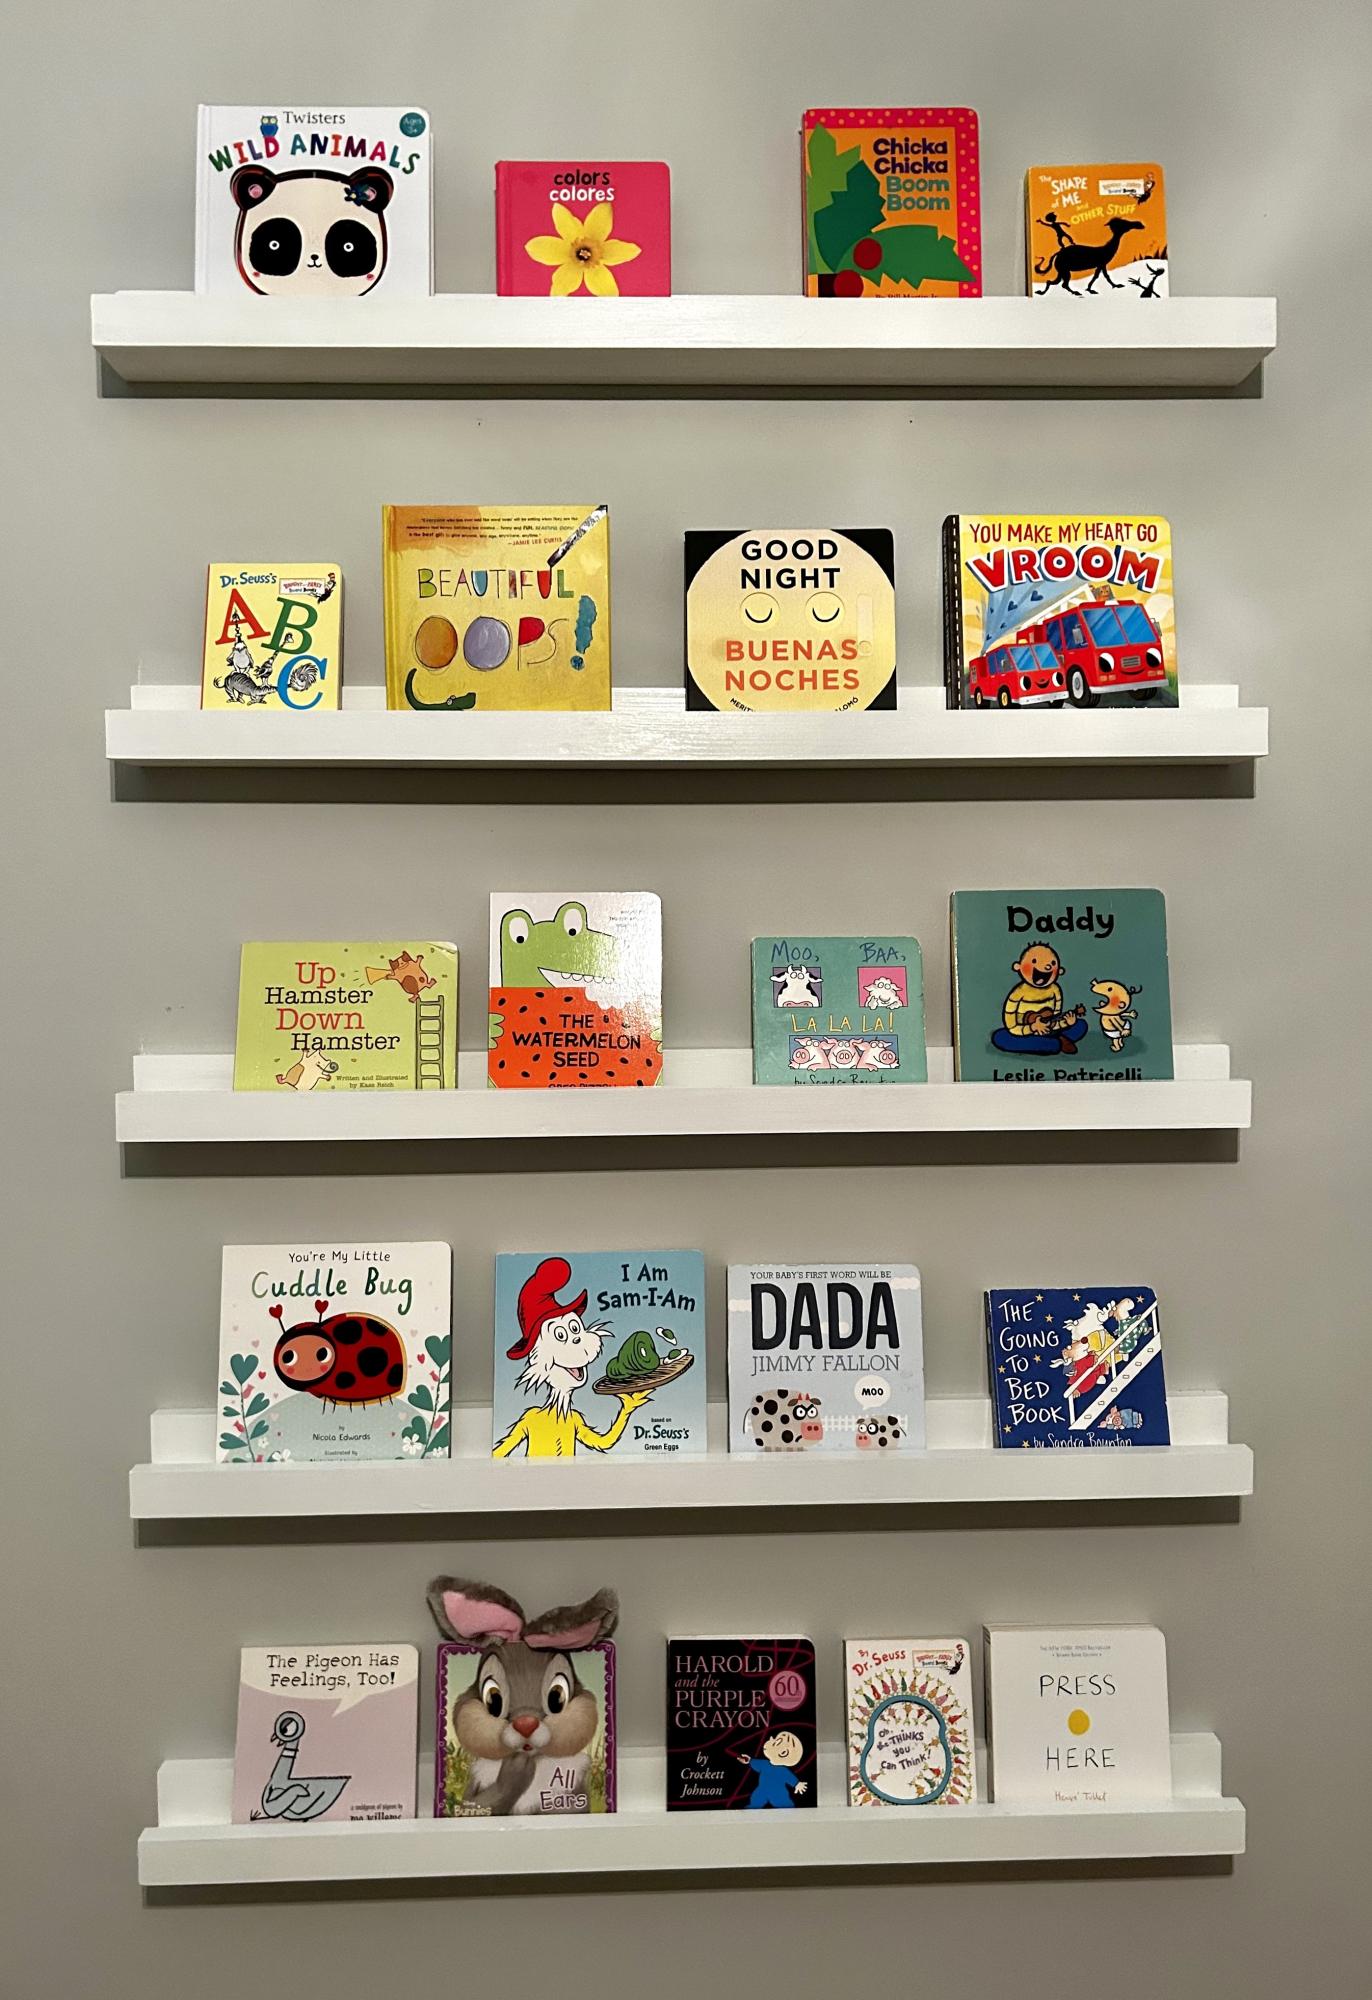
Nursery photo ledges. Shortened the shelf depth using a 1 x 2 instead of a 1 x 3.
Built from Plan(s)
Nursery photo ledges. Shortened the shelf depth using a 1 x 2 instead of a 1 x 3.

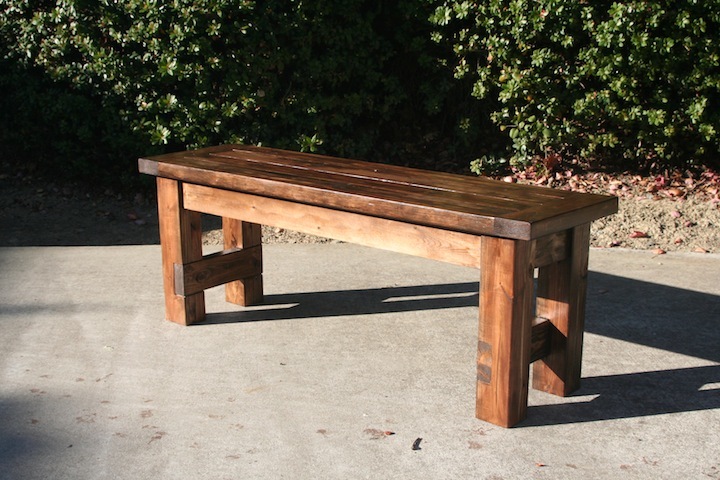
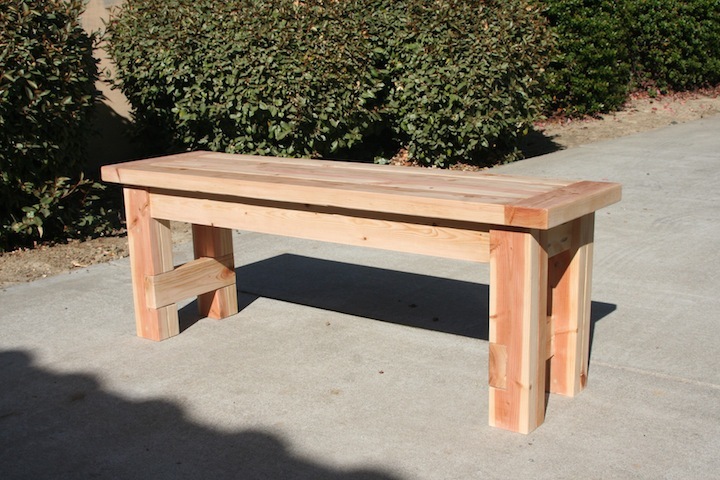
Super fun and easy project! I had to cut down the length of the table to 6 ft to fit the space in the house. I also did 2x8 tops on the bench for more surface area. I will def be building an ana white project again!
Great outdoor builds!
by Dennis
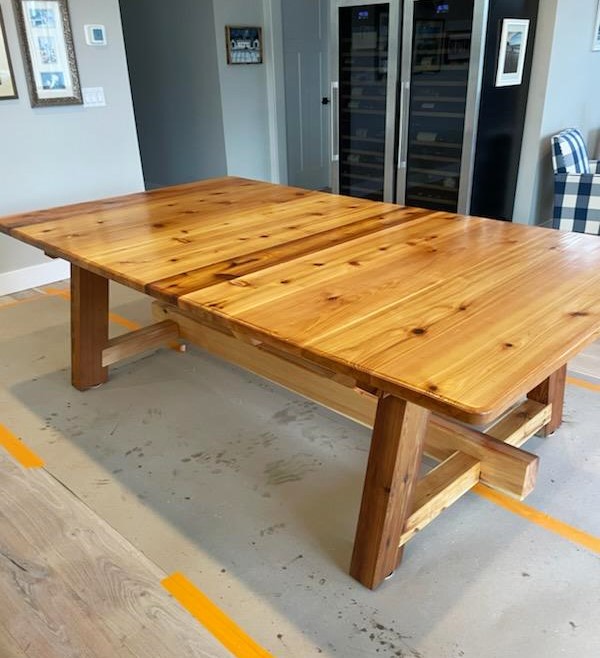
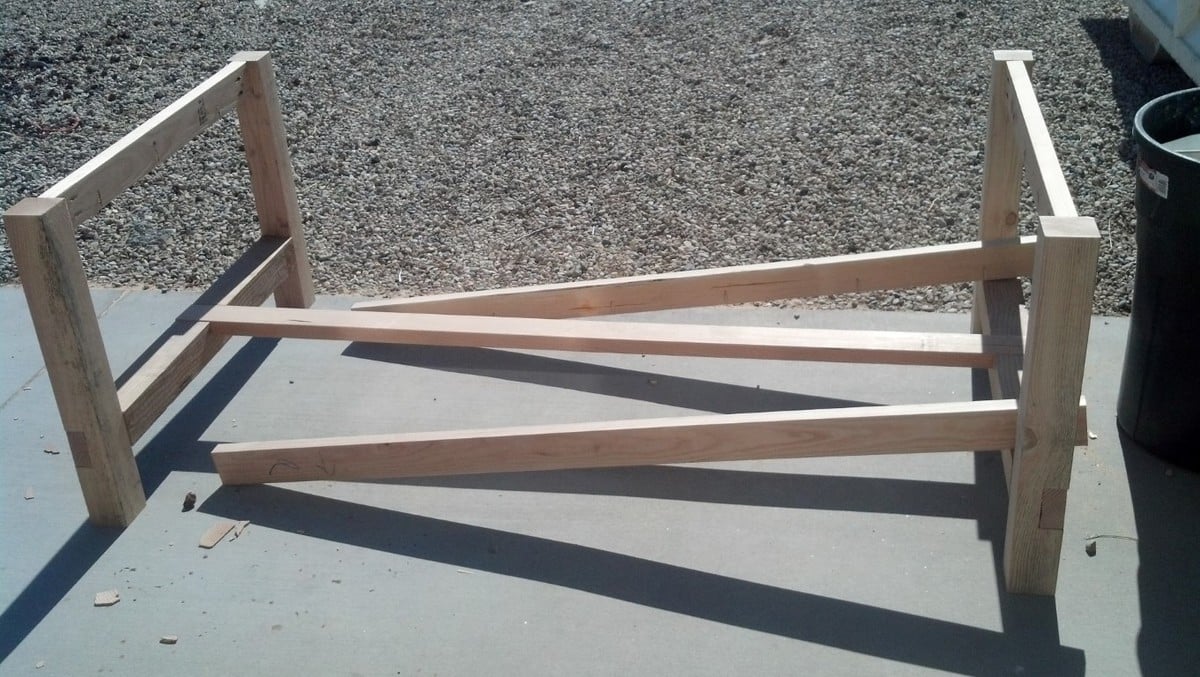
My wife wanted a table to seat 12 and she liked the looks of the 4x4 Truss Beam Table from Ana White.
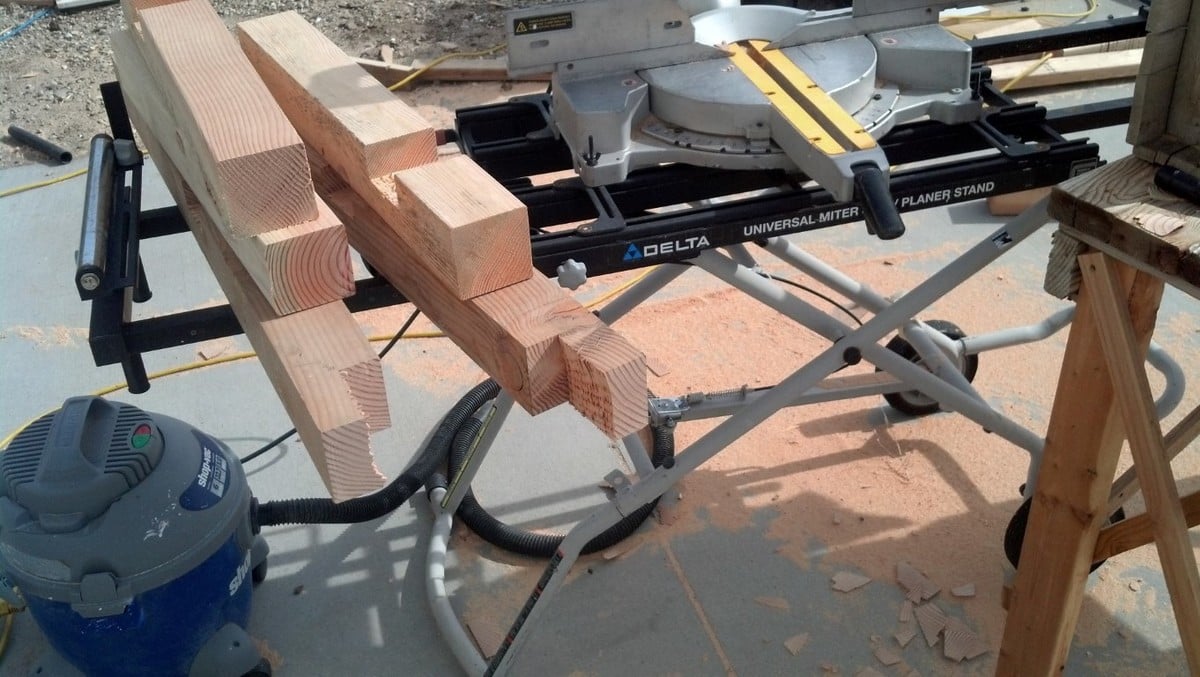
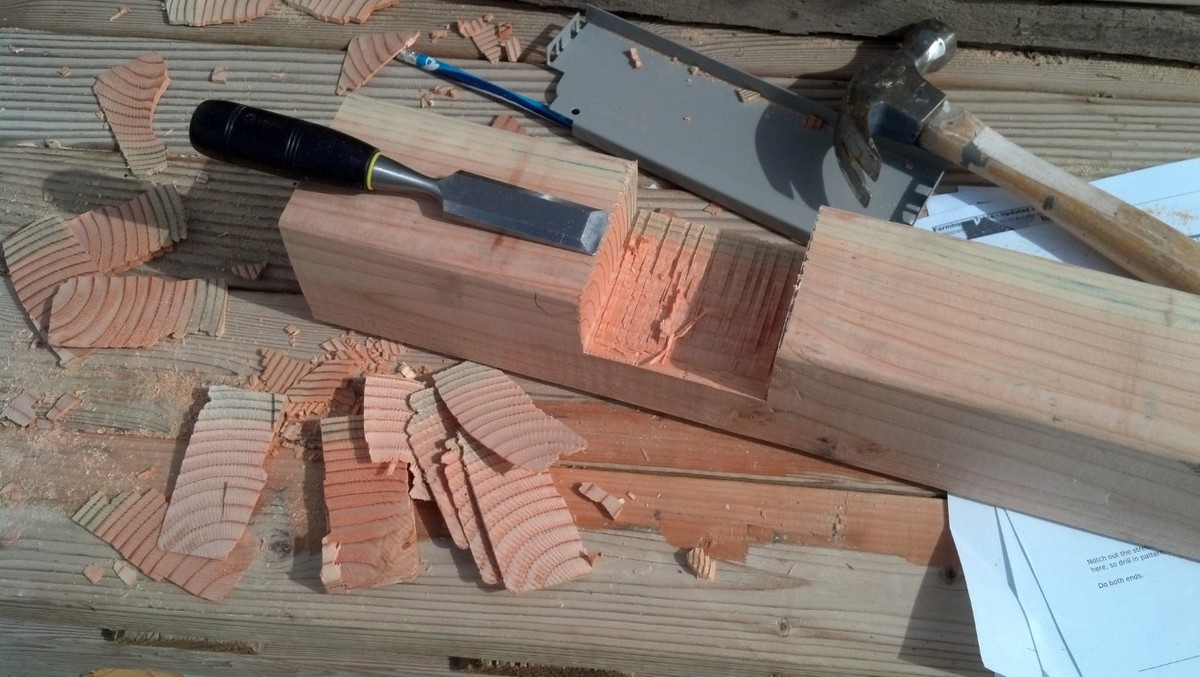
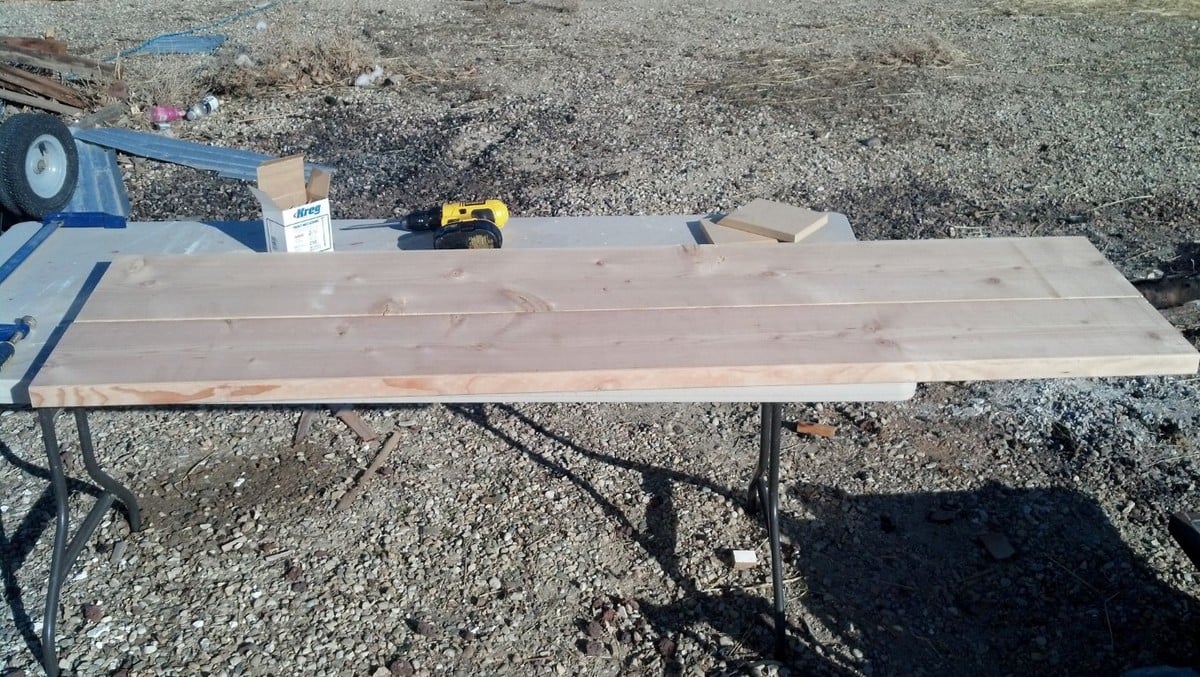
So we modified the plans, our table is 54 inches wide (not 37) and 98 inches long (instead of 87). The legs are 4x6 not 4x4. The lower center beam is 4x6. The plans call for 2x4 aprons ending at the legs, we used 4x4 aprons and extended them beyond the legs to within 3 inches of the end of the table. Finally, we laid the tabletop across the table with a combination of 2x8, 2x10, and 2x12 boards.
We built this all with cedar. The cost is a little over $1,100 for materials.
Dan Clark
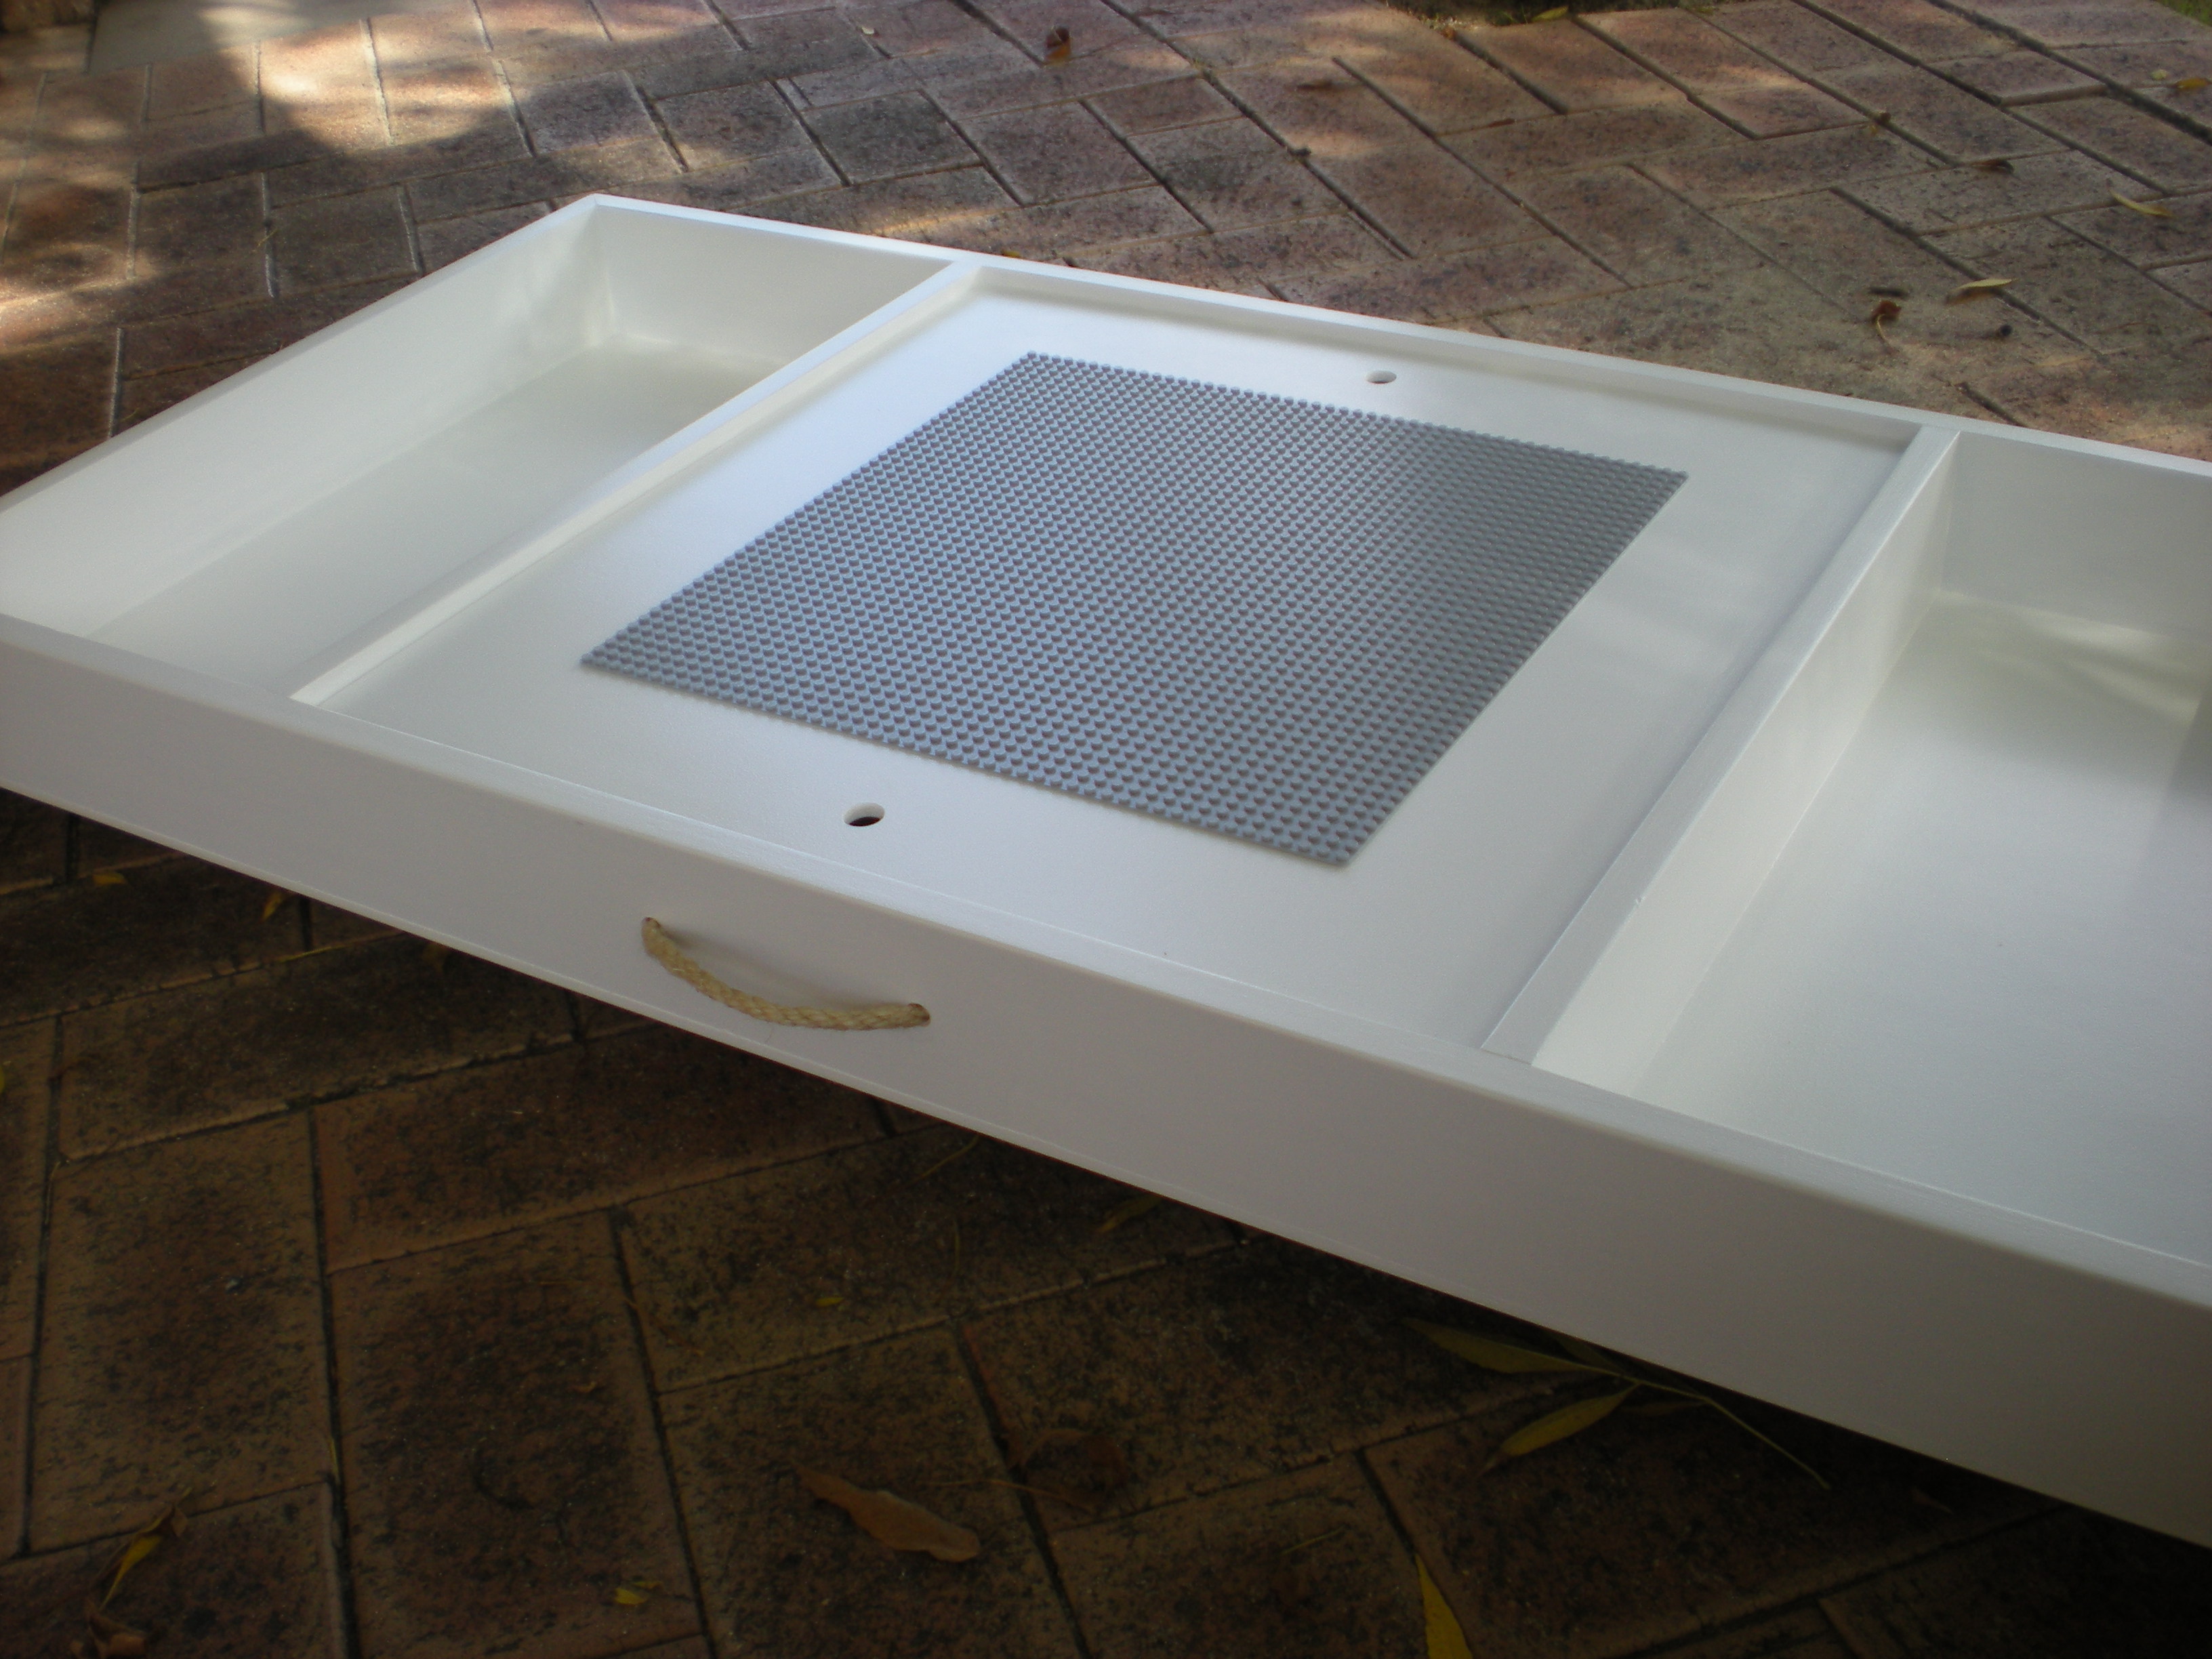
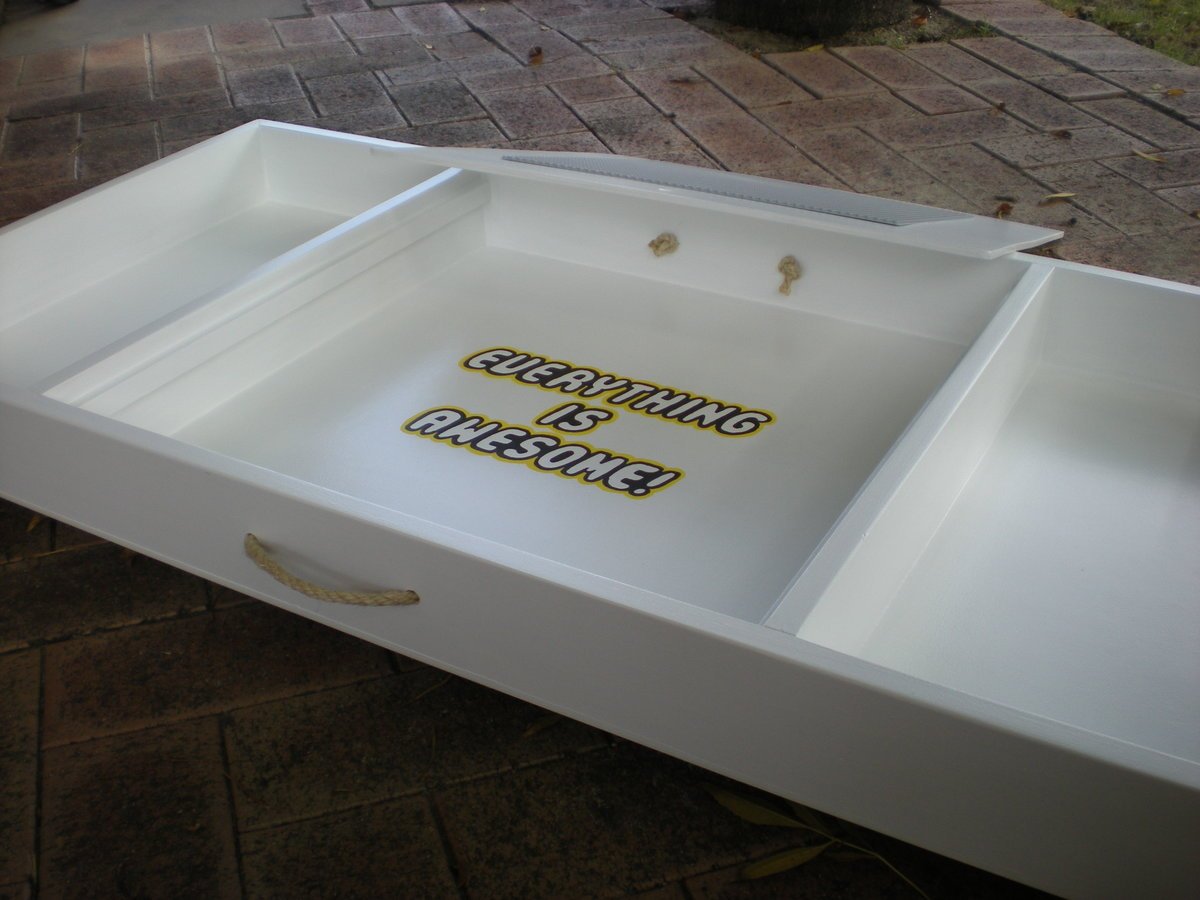
We were in desperate need of a lego storage solution for our son's small bedroom. I made this for his 7th birthday. I saw a photo of a similar one as a result of a google or pinterest search and decided to draw up some plans.
I recessed the top slightly so that pieces won't fall off. I just glued thin cleats to the inside of the box to hold the lid, (using spacers to get it at the height I wanted) Ideally the top would be reversible however I didn't quite get one of the dividers square so it only fits one way. I used Posca water-based markers to do the text. Make sure you wait until the text is really dry before you try to seal it (don't ask me how I know that...) Turns out that the markers don't react well with the brush on poly so I just left the text unsealed.
I was just going to have one handle on the front but then I made a stupid mistake and wrote the text so it would be upside down when pulled out (I know, dumb right!) So I added another handle on the other side. I used a water-based enamel for the whole box. Not sure if that was worth it of if I should have just used flat and given it a top coat of poly. I used a brush on the inside corners and found it really hard to get an even finish because I rolled the flat surfaces. Painting the pieces before assembly would probably fix this.
Added some castors so it can be pushed under the bed.


Sun, 02/05/2017 - 08:48
This is so awesome. Do you think you could share a more detailed account of build. Dimensions? Supplies? I am a newbie at this! I would greatly appreciate!

Darling Cabin Bed All Ready for the Holidays - Credit Unknown
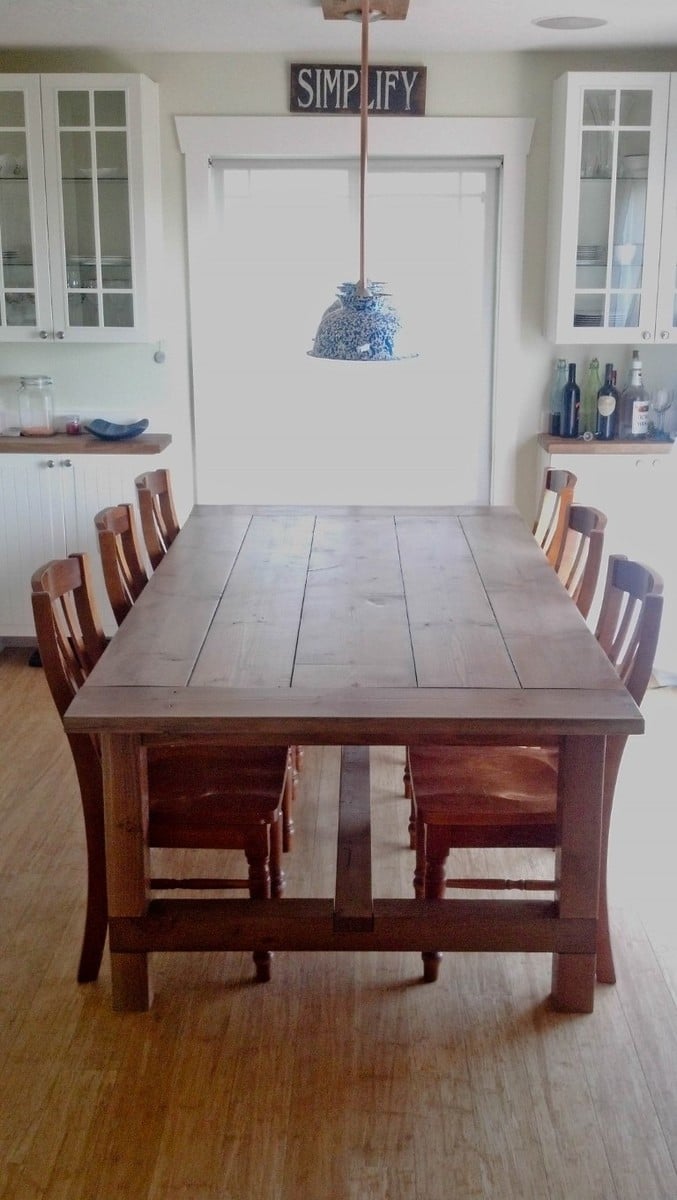
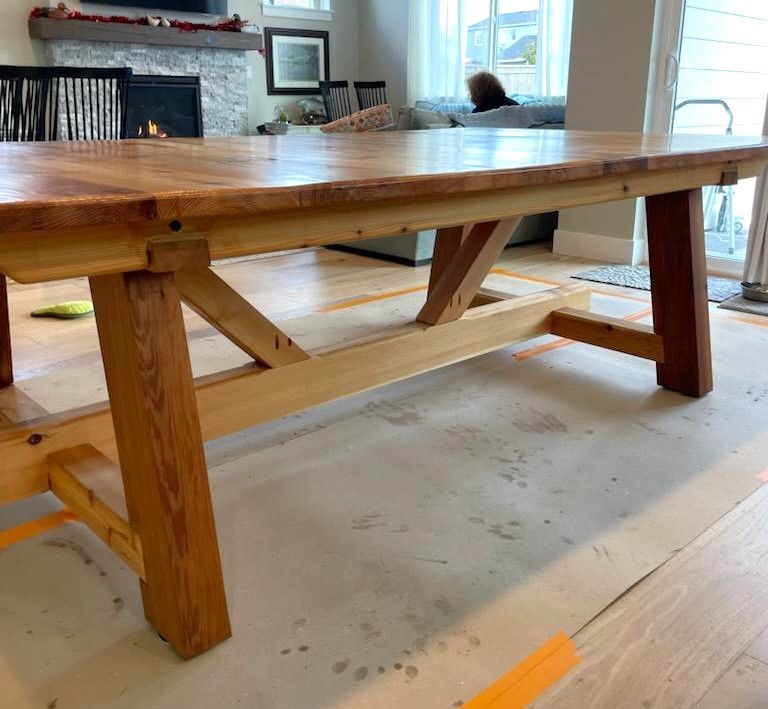
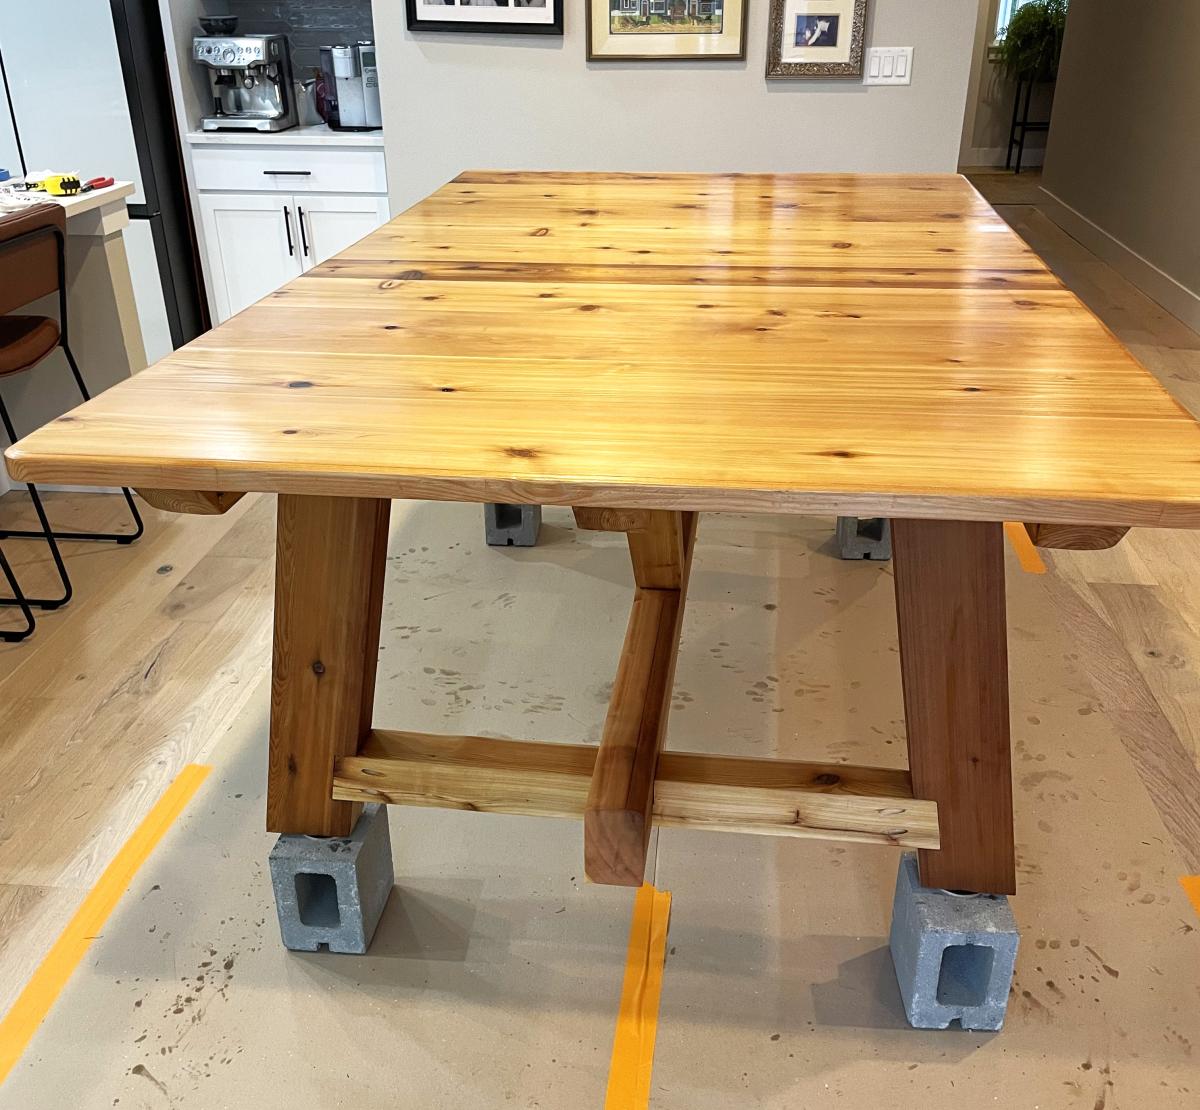
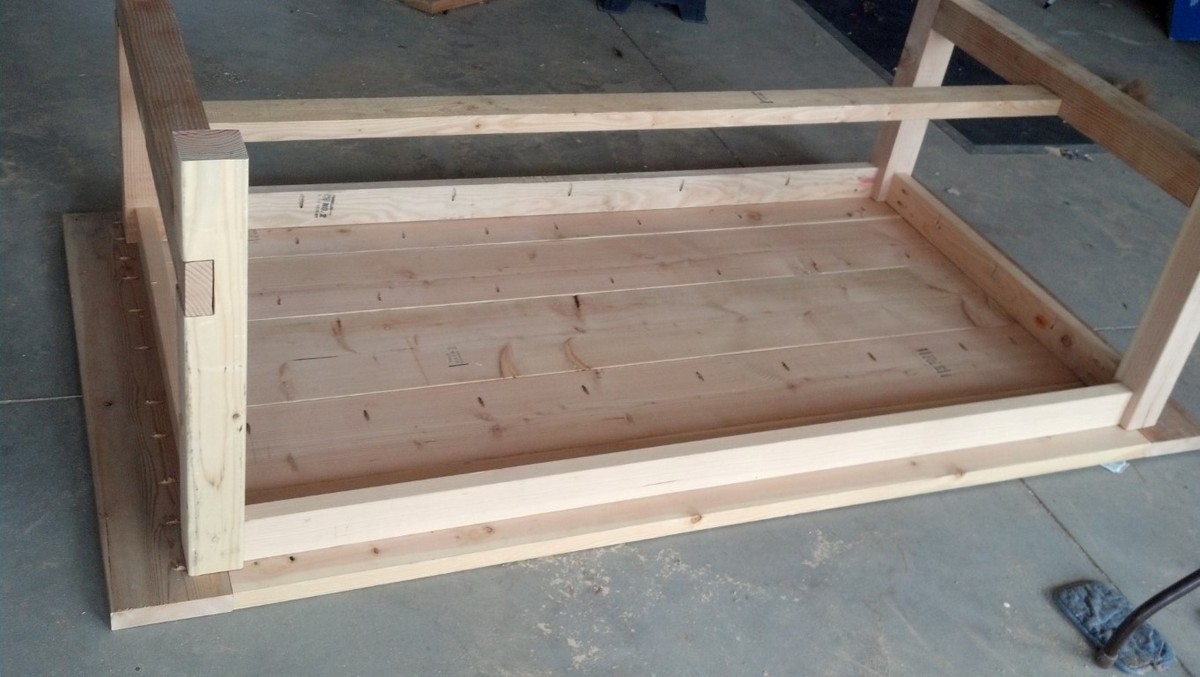
My wife and I really love the farmhouse look and feel. We saw one of these tables at a furniture store for $2000 with no chairs. I had already bought the Kreg Tool, something that I cannot believe I have done without for so long, when I went to build some $10 Shelves that Ana has on her site. My wife asked me how hard it would be to build the table and I told her I have never done anything like it. I also told her if she didn't like the end project, we could use it as a picnic table outside. It was fantastically easy with the plans and Kreg Jig. Thanks to Ana for all the helpful tips!
Now to the build. We decided that the table needed to be a bit wider and longer for our needs, so I adjusted the plans. It came out to 90"x48". The center board is a 2x12 with the other 4 being 2x10s. The end pieces are 2x8s that I had from building garden boxes. The benches that I also built were from scrap lumber, they are not pictured here as they need one more coat of stain and then three coats of polycrylic. They are 52" long and go on the ends where the kids can use the cross beam as a foot support.
Building this project was rather quicker than I thought. Of course, borrowing a radial arm saw helped out a bunch with the legs. Once it was all together, I sanded the table three times. I used 80, 150 then 220 grit. The palm sander got a real workout over the space of about a week and a half.
Finishing the project, I decided to follow the plans and went with Minwax Weathered Oak and topped that with Minwax Polycrylic. The legs and underside of the table received 2 coats of each, but the top I gave 3 coats of stain and 2 coats of the Poly with a very light sanding in between each coat.
The table then sat completed in the garage for 3 weeks as I had to find enough help to get it into the house. This is one heavy bugger. If we ever sell the place, it stays! There are ~150 screws and all but 12 of those had pocket holes.
Fantastic build and now I am going to build the farmhouse king size bed. And a murphy bed. And more shelves. And a shoe cubby with coat rack. And a wine rack. And a greenhouse... the list goes on and on...

Fri, 04/26/2013 - 12:50
thanks for posting some step by step pictures they were really helpful. Great table. Really suites your space.!
Fri, 04/26/2013 - 14:09
Could you have used heavy duty steel leg braces? These could slipped into saw kerfs on adjacent sides of the apron. Then used hanger bolts to fasten the legs. This would allow the legs to be removed if needed.
Fri, 04/26/2013 - 15:09
I thought about making the legs removable, but really, it was much easier this way and very sturdy. I had a lot of fun building this.
Fri, 04/26/2013 - 18:17
I looks amazing and you have been so detailed with your finishes, it is amazing ... Your wife is one lucky girl!!!
Sat, 04/27/2013 - 18:55
You have just joined the league of addict builders. You really did a great job on this table. Did you get the lumber from big orange or blue and have it jointed? The boards look really good and the fit is tight. Anyway I am sure we will see more of you in the future.
Wed, 05/01/2013 - 07:19
Hey everyone!
Thanks for your kind words. The chairs were from our previous table we bought some years ago. I was astounded to find that Ana's plans were the same height as our previous table. Great fit for the chairs.
As for the lumber, I got it from a local building supply company (one of the last, sad to say) and they were only a bit straighter. I got them tight by using clamps. Clamps and LOTS of pocket holes.
George
Thu, 08/08/2013 - 11:08
This table looks great and I've decided that its going to be my first project, I just have two questions.
1. What version of the Kreg Jig did you use for the pocket holes?
2. Did you use satin or semi-gloss for the Minwax Polycrylic?
Thanks
Wed, 08/26/2015 - 10:53
Hi! You did a wonderful job on this table. I would like to attempt it but am having trouble figuring out what type of wood to use. The only wood I could find in the 2x8 and 2x10 dimensions was contruction lumber fir. Is that right?
Thank you!
Fri, 01/01/2016 - 11:03
Sorry about not answering... my wife told me this has been pinned over 17k times on pintrist and that there are still some questions...
I used pine, but fir would be great too. The lumber dimentions for the top were 2x10s and a single 2x12 for the center piece. 2x8s for the ends. Really, though, any dimemtion works. Just keep going until you get the size you want.
George
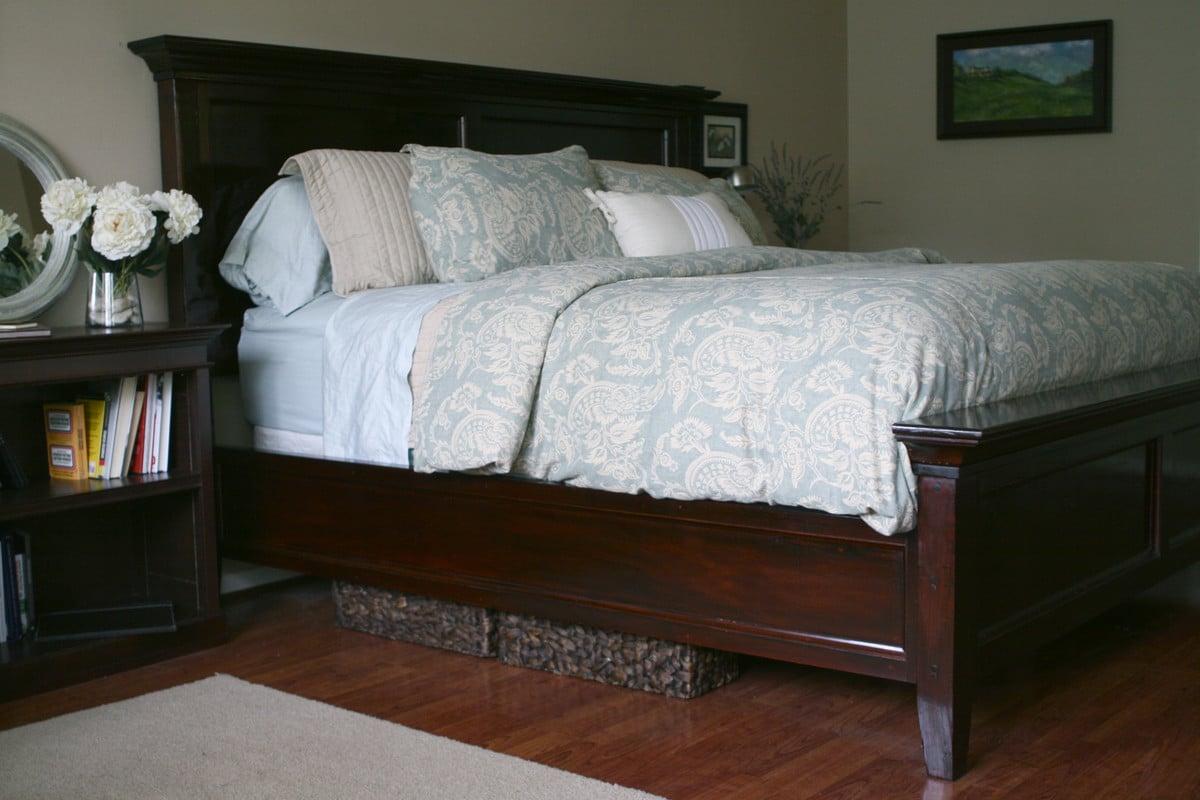
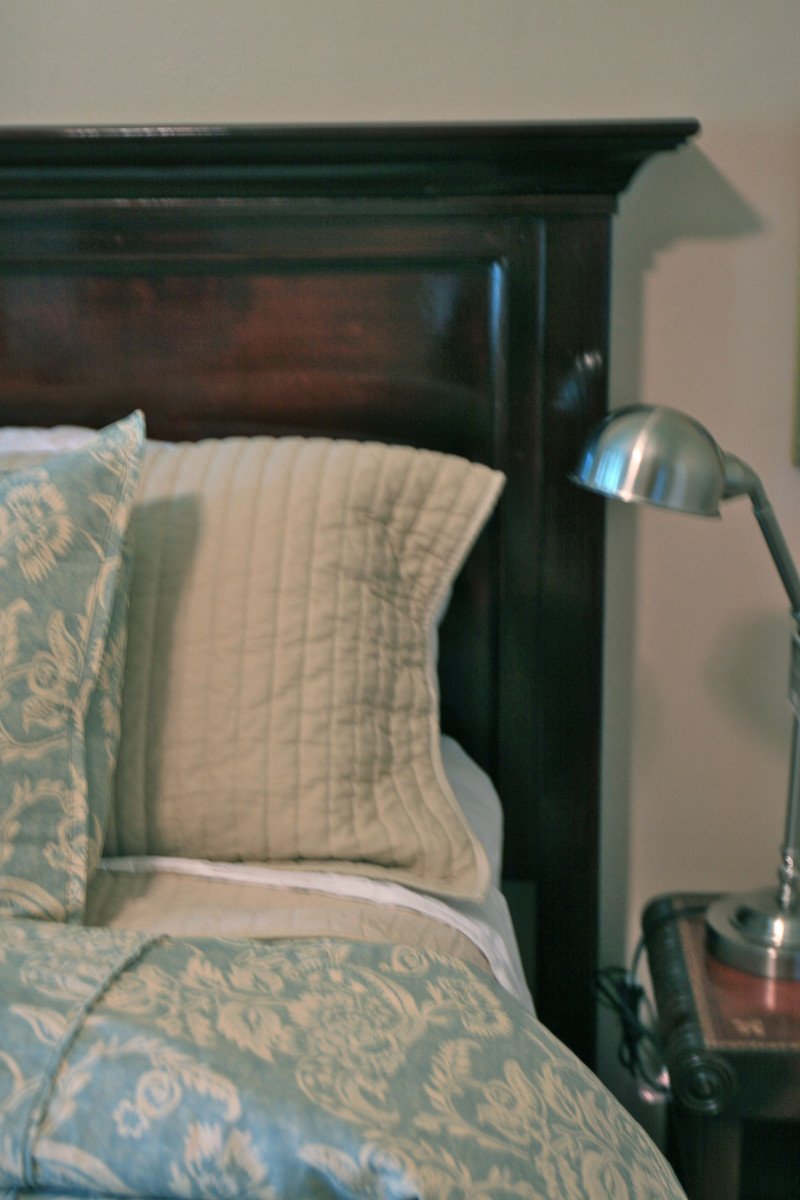
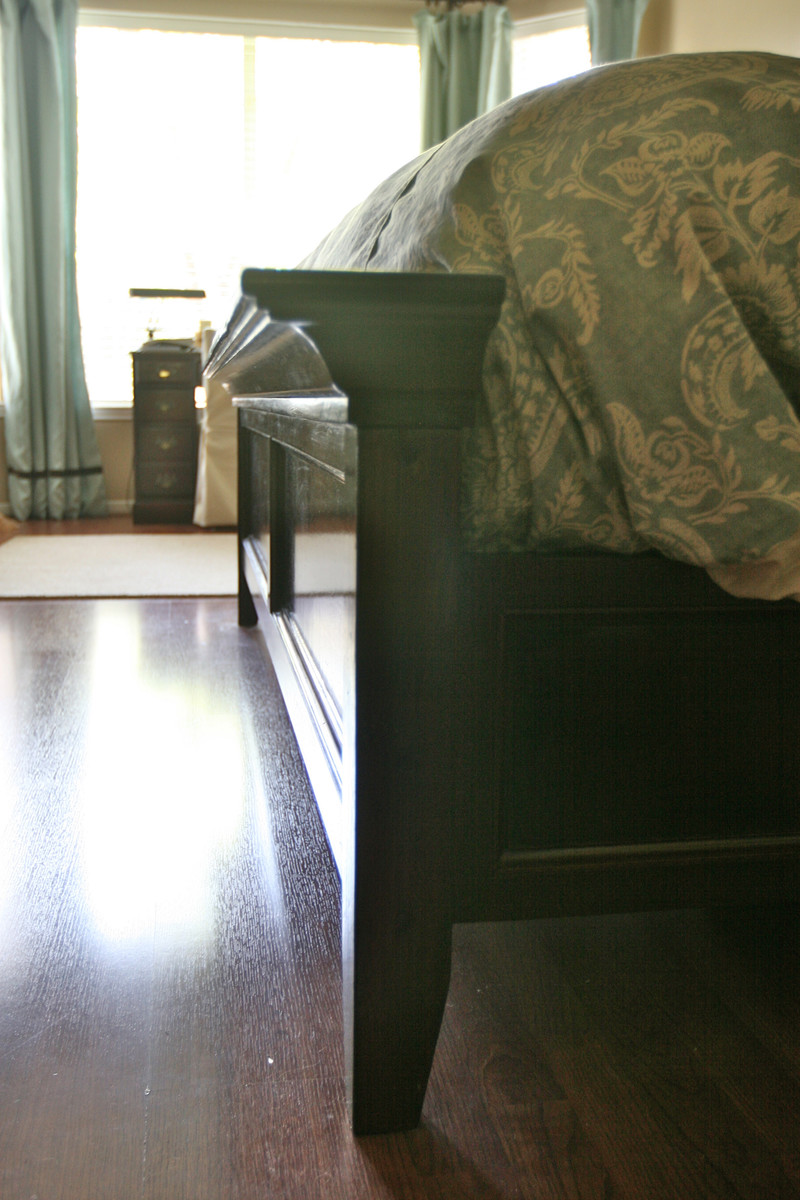
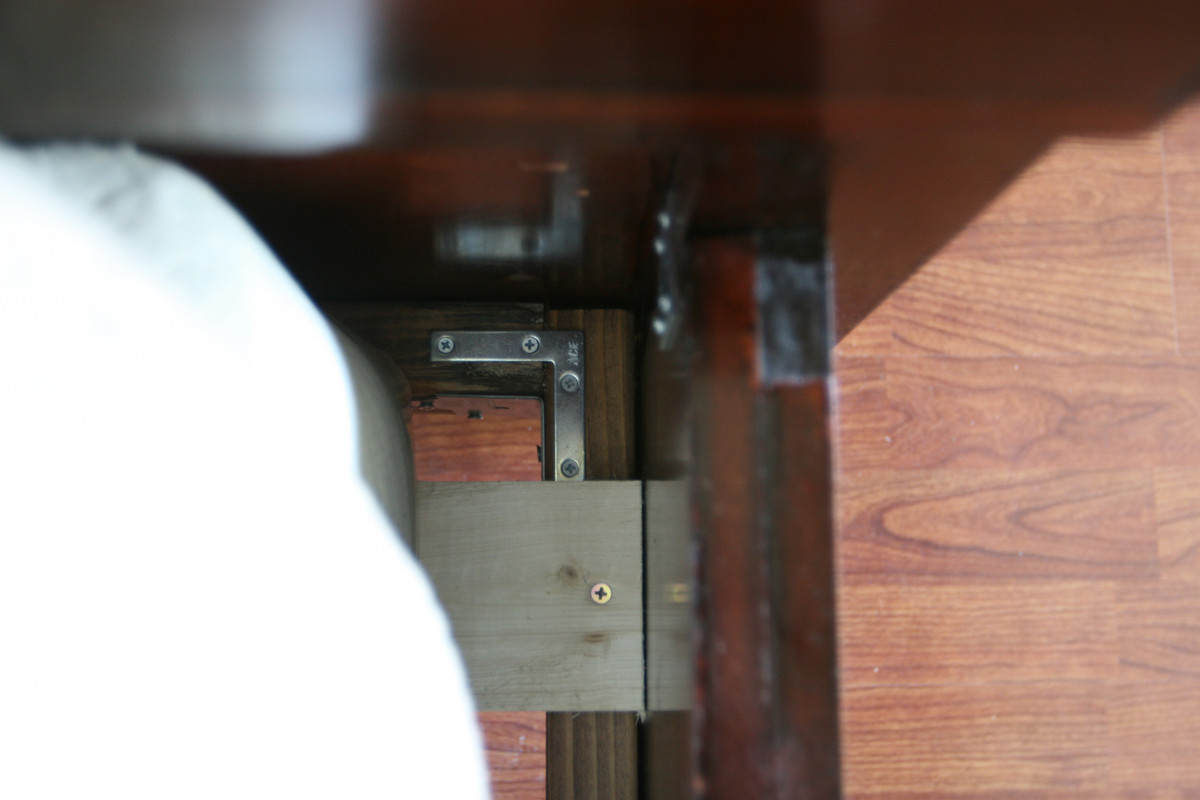
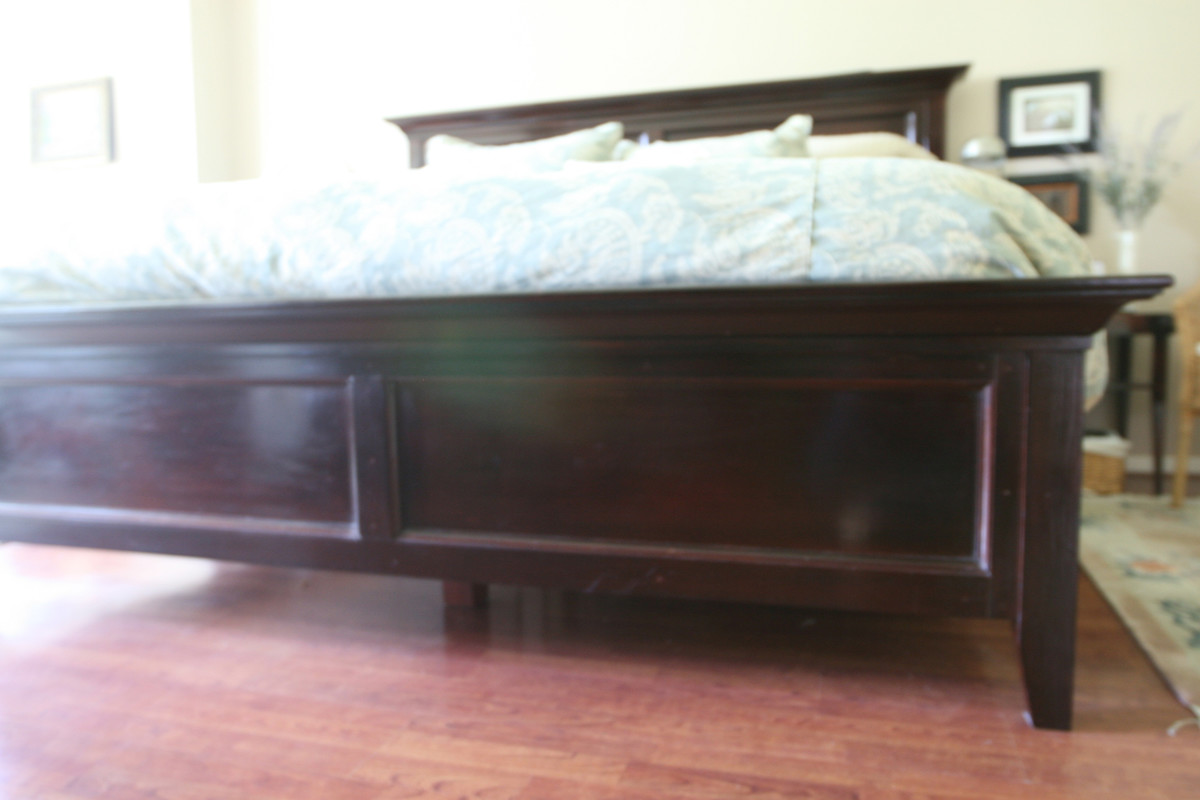
This was our first project. My husband and I took the Farmhouse bed plans and modified them to look more like the Hudson Bed from Pottery Barn. This is a King size bed with removable side rails and under bed supports so that it can easily be collapsed for moving.
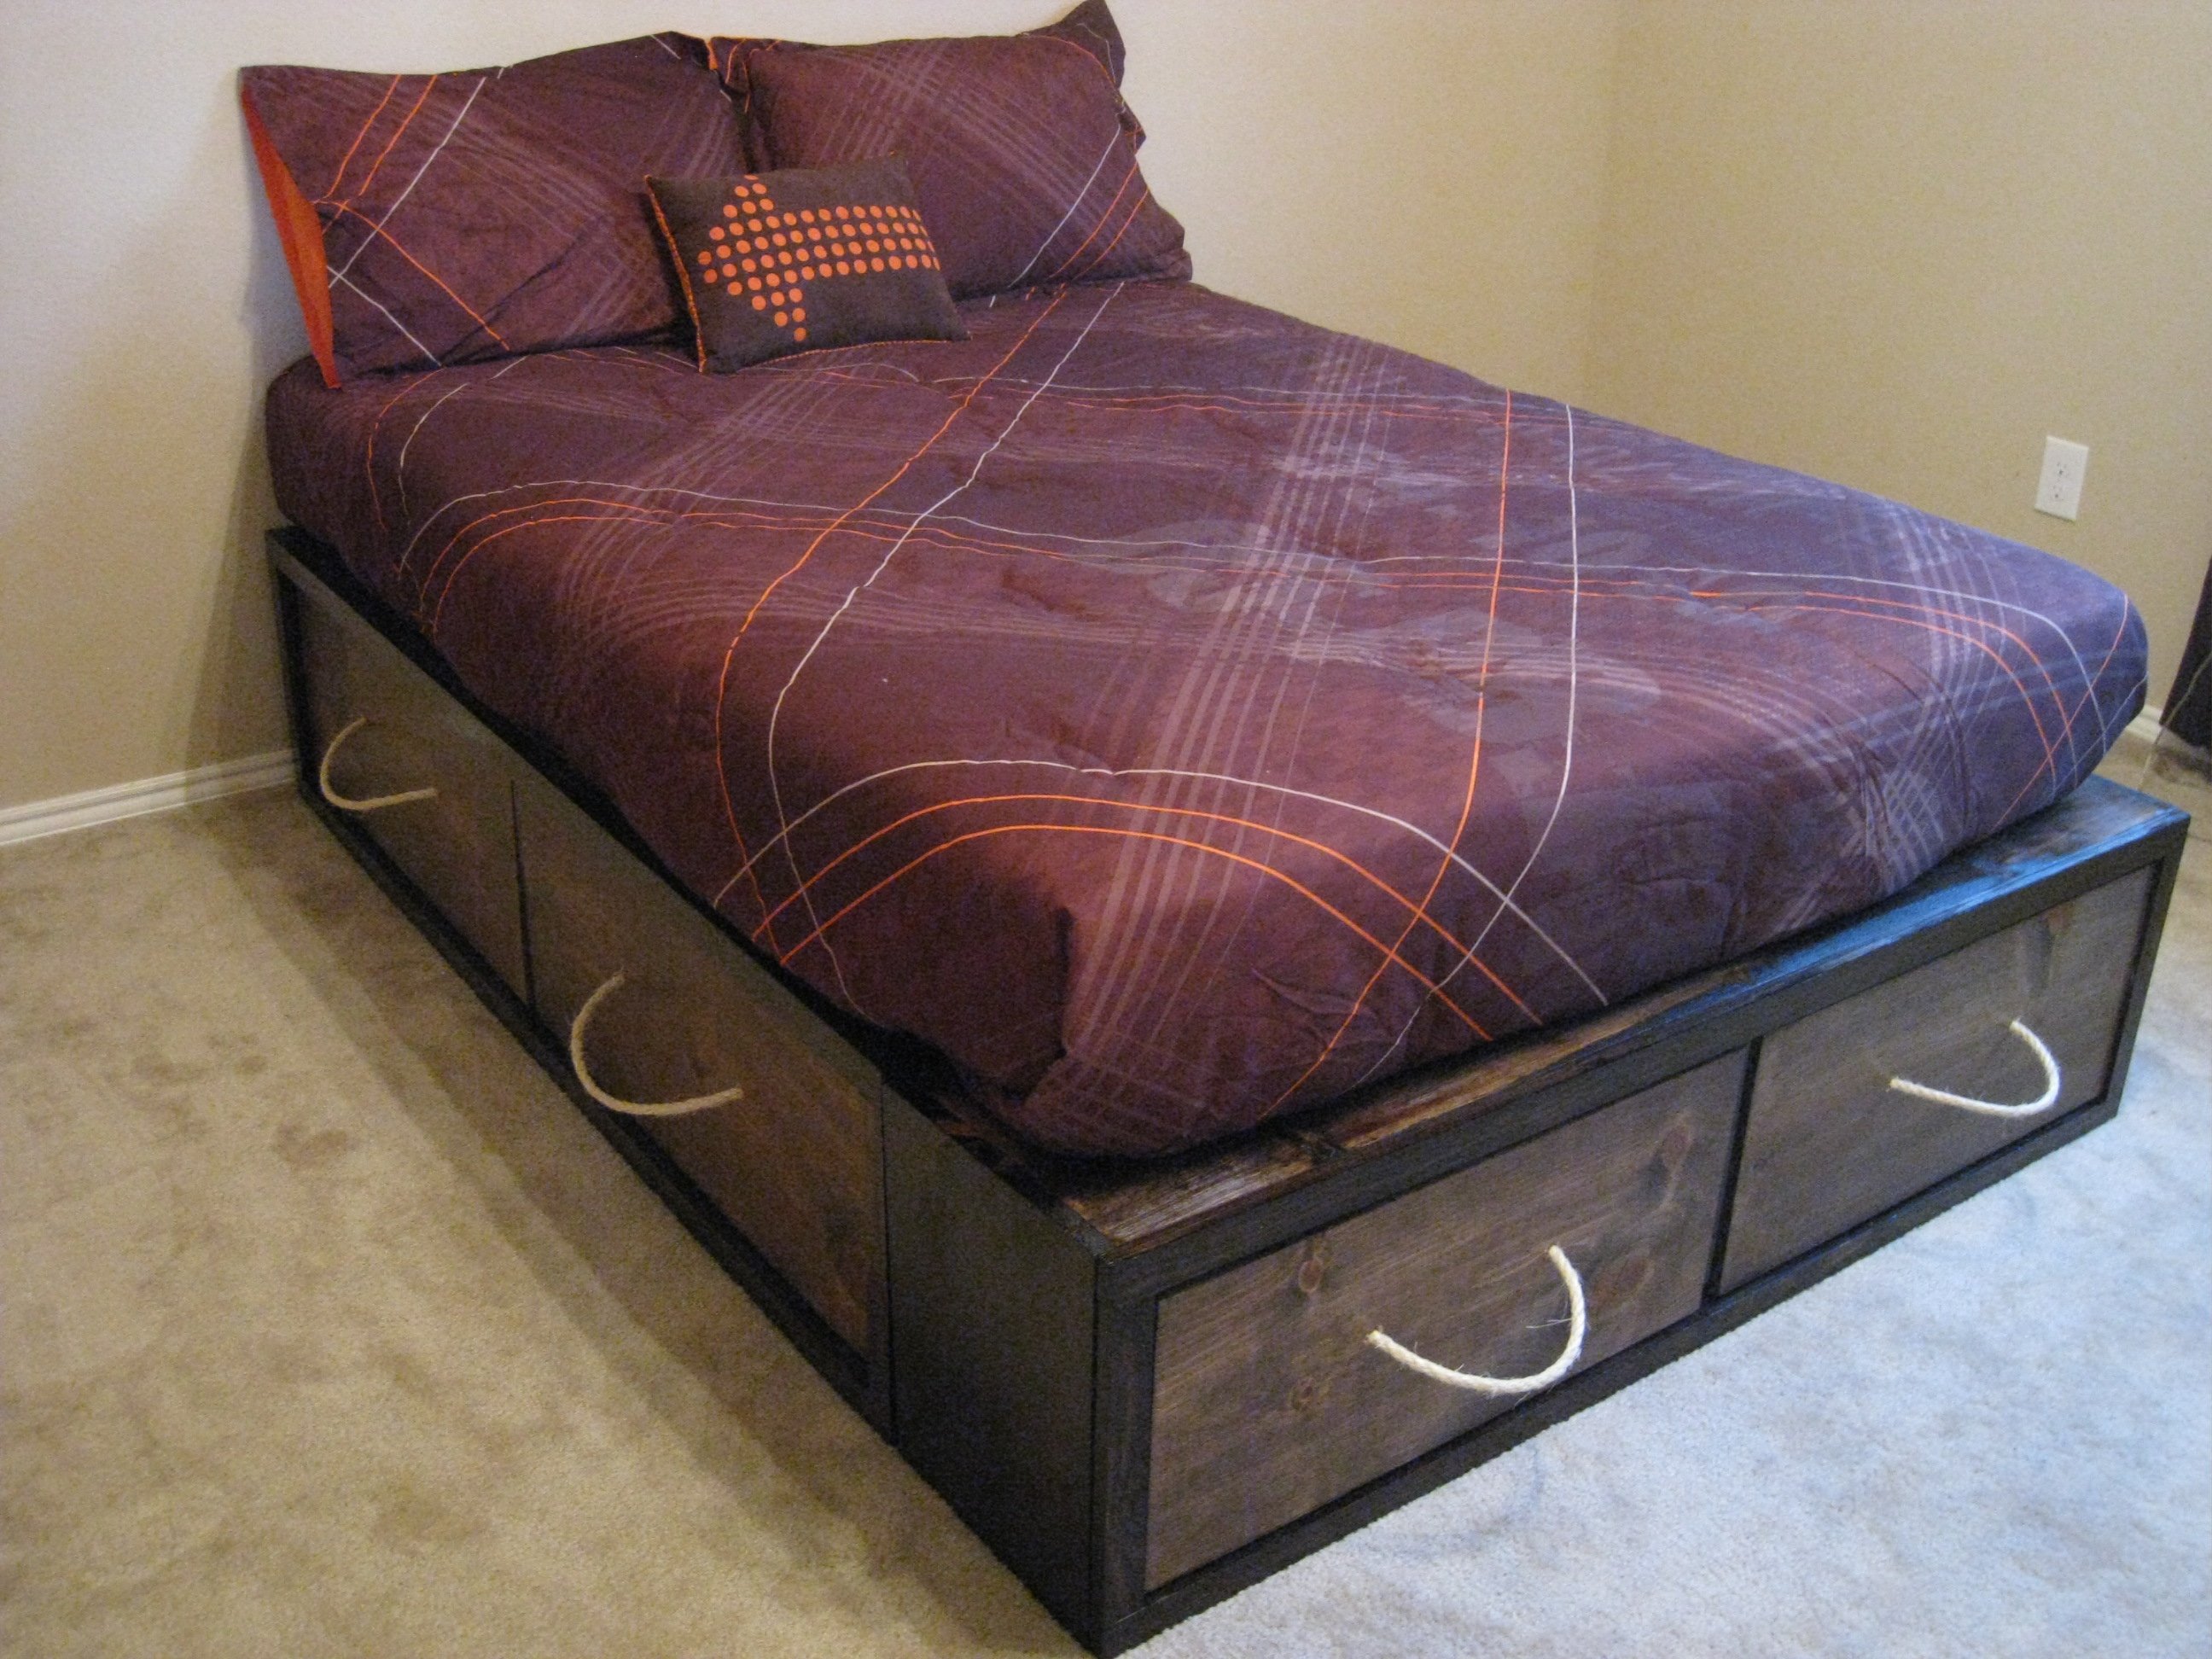
I built the Full Storage Bed using Ana's plans! It was very easy and I love the storage space! You can see it and my modifications at our blog http://www.shanty-2-chic.com/2011/03/crates-for-storage-bed.html
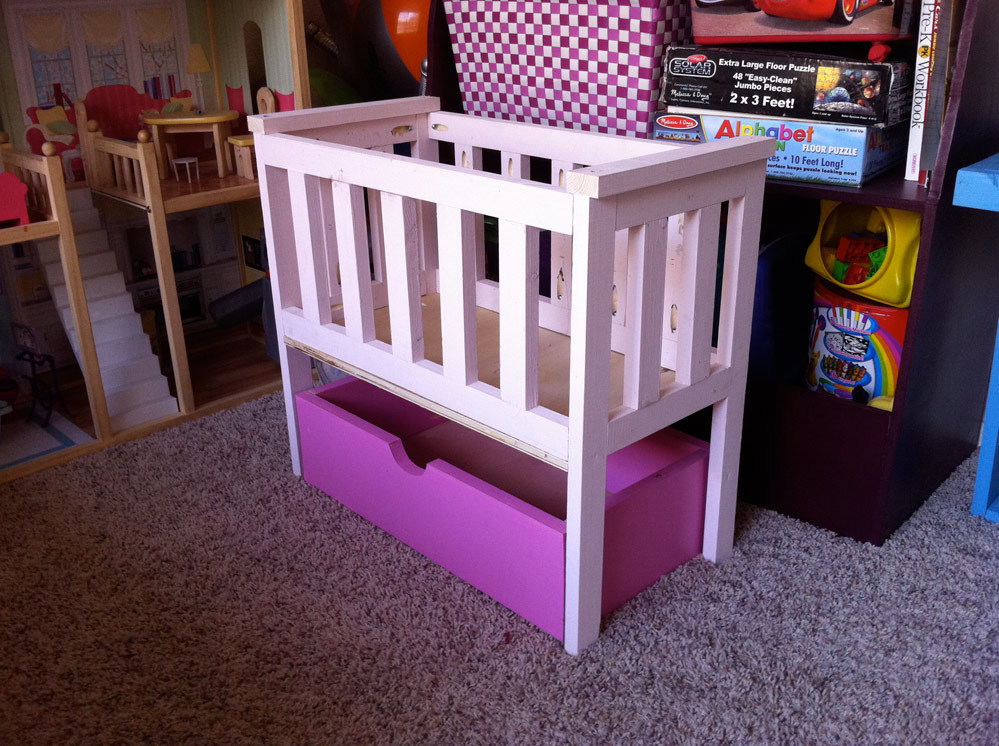
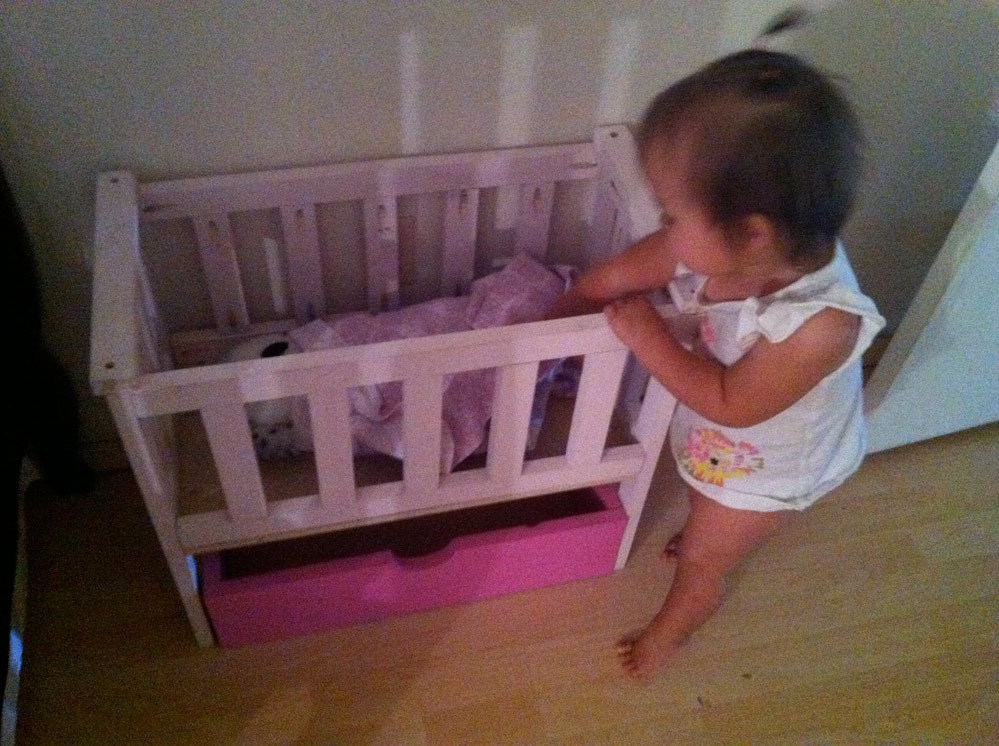
Well, this crib is STILL unfinished, and the date-stamp says I built it December 5th.... So... Uhh.. I should really get on that!
I had initially built this crib for a friend's daughter's birthday gift, but the baby (8 months old at the time) got REALLY sick, so I wasn't able to finish it in time (don't worry, we got her a Pillow Pet - she got a gift still!). It was just before Christmas, so instead of going out and spending more money that we were tight on, I just bought 3 1x2s and used scraps for the rest of it.
The crib's basically been sitting in the baby's room looking cute until about a month ago. That's when she decided that her stuffed owl (from Build-A-Bear) needed to be put to bed every night before I put HER to bed. It's become such a routine that I have no idea how she'd react if we couldn't put her owl to bed! So I'm scared to try to start filling all the holes and painting in fear that we'd have a mental breakdown if I didn't finish in time for bed! EEK!
As Ana mentioned in her video, this project could be made with scraps. That’s just what I used. I used a lot of scraps and cut offs for this project.
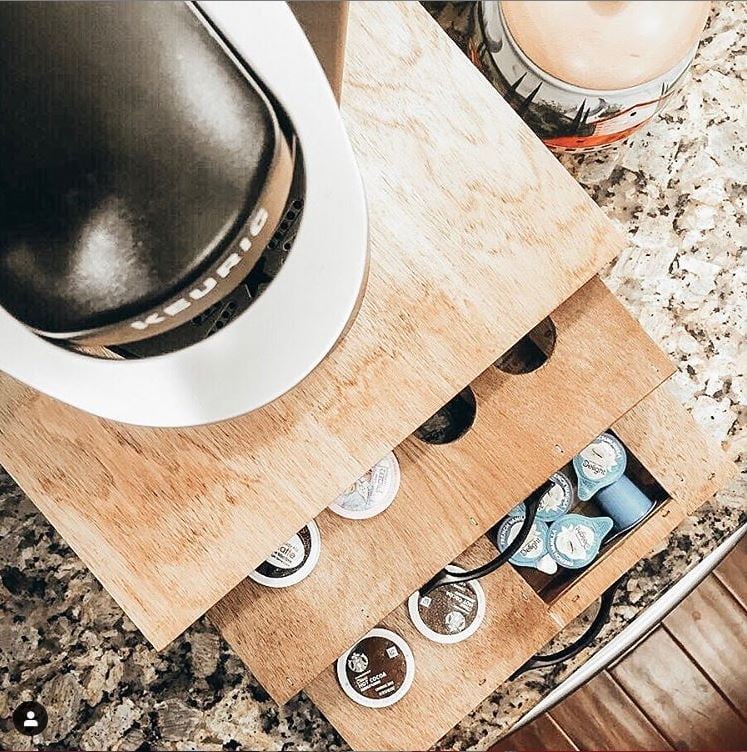
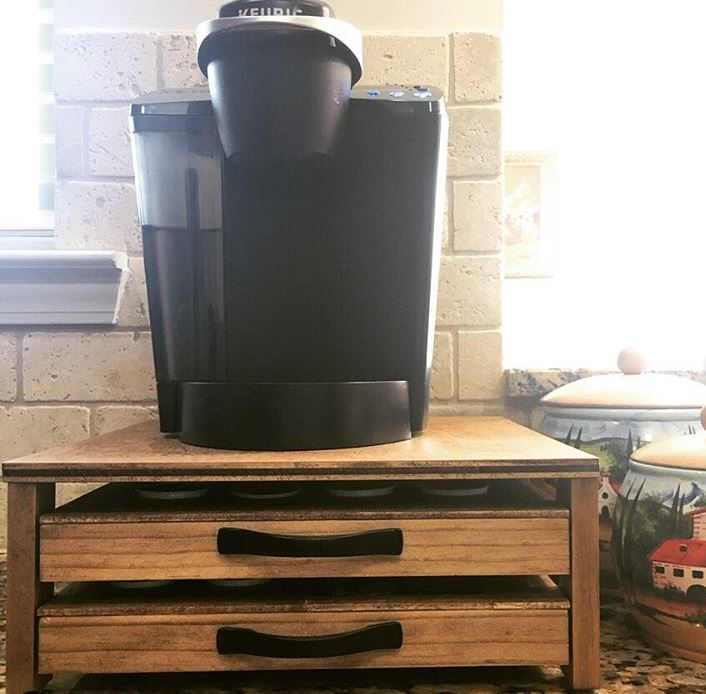
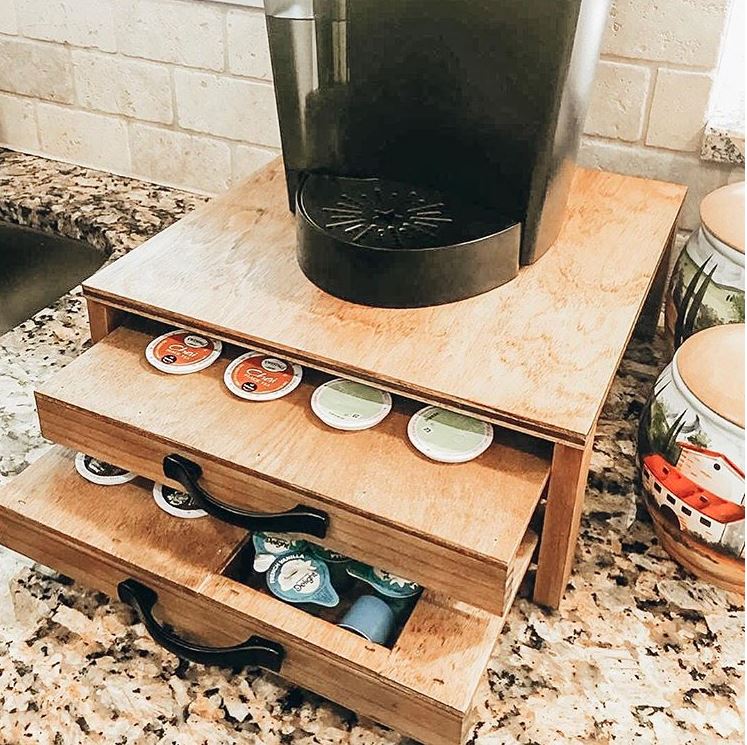
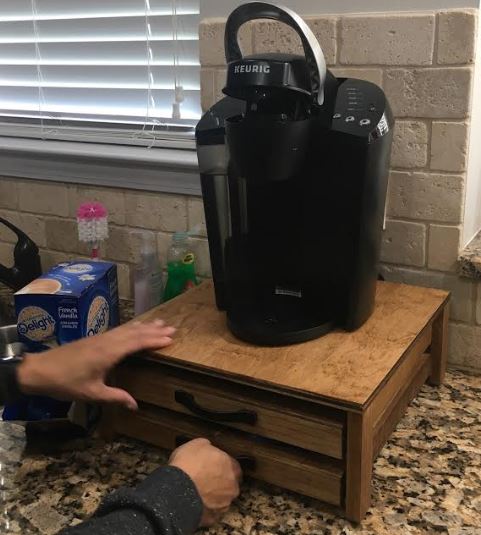
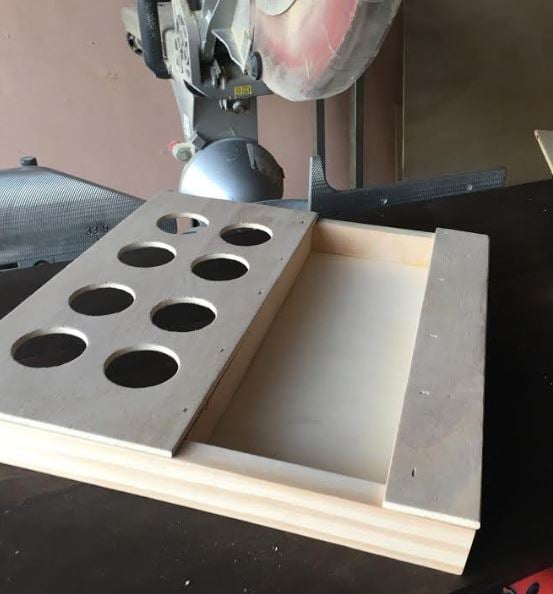
I needed to make a K cup holder but also space to hold tea in addition to other coffee "toppings" if you well. In the pictures you can see mini creamers.
This modification was made by adding a small drawer in addition to the holes that would hold the K cups. The small drawer was made with 1/2” plywood (even more scraps) ripped just shy of 1-1/2”. I did this to make sure we did not see the plys of the drawer as I planned to add 1/4” plywood to the top all around. I wanted this to make it all uniform with the K cup area.
I added little rubber feet’s to the bottom as this will be on a granite countertop which could results in slipping and sliding.
Thu, 06/25/2020 - 06:53
Made this for my mother in law. She loves it, thank you for the plans. I cant figure out how to add the pics of the one I did for her hit it was awesome and my very first wooden build EVER
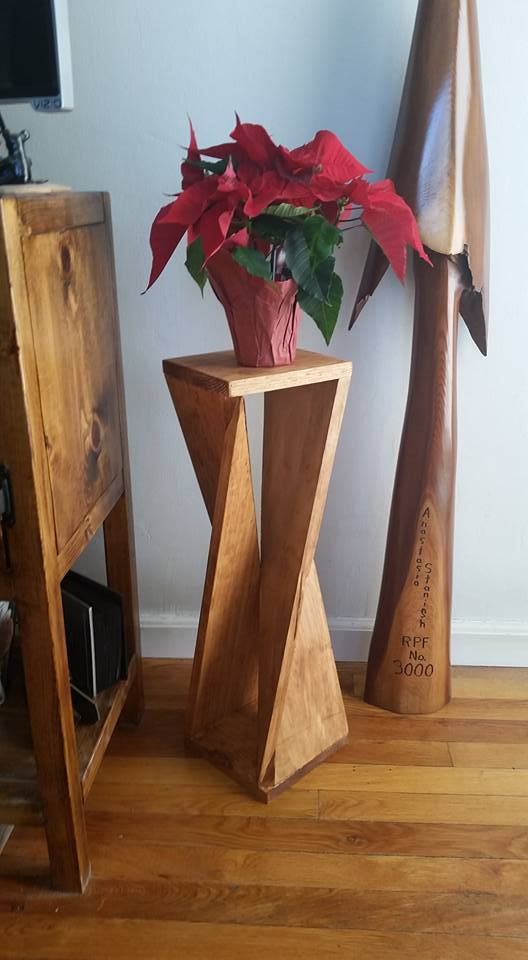
Saw this clever side table on Pinterest. It's made out of 1 1x8x8. I was able to figure out how to build a jig for the table saw to suit the project and then it was easy peasy lemon squeezy from there.
Mon, 12/21/2015 - 09:41
This is so clever and would make an inexpensive yet first-rate gift! I love it...thanks for sharing.
Fri, 10/28/2016 - 08:40
I would love to build this unique table, but can't seem to find some actual plans with dimensions and jigs
Fri, 10/28/2016 - 08:45
Would you please email me the plans for this table. Thanks so much
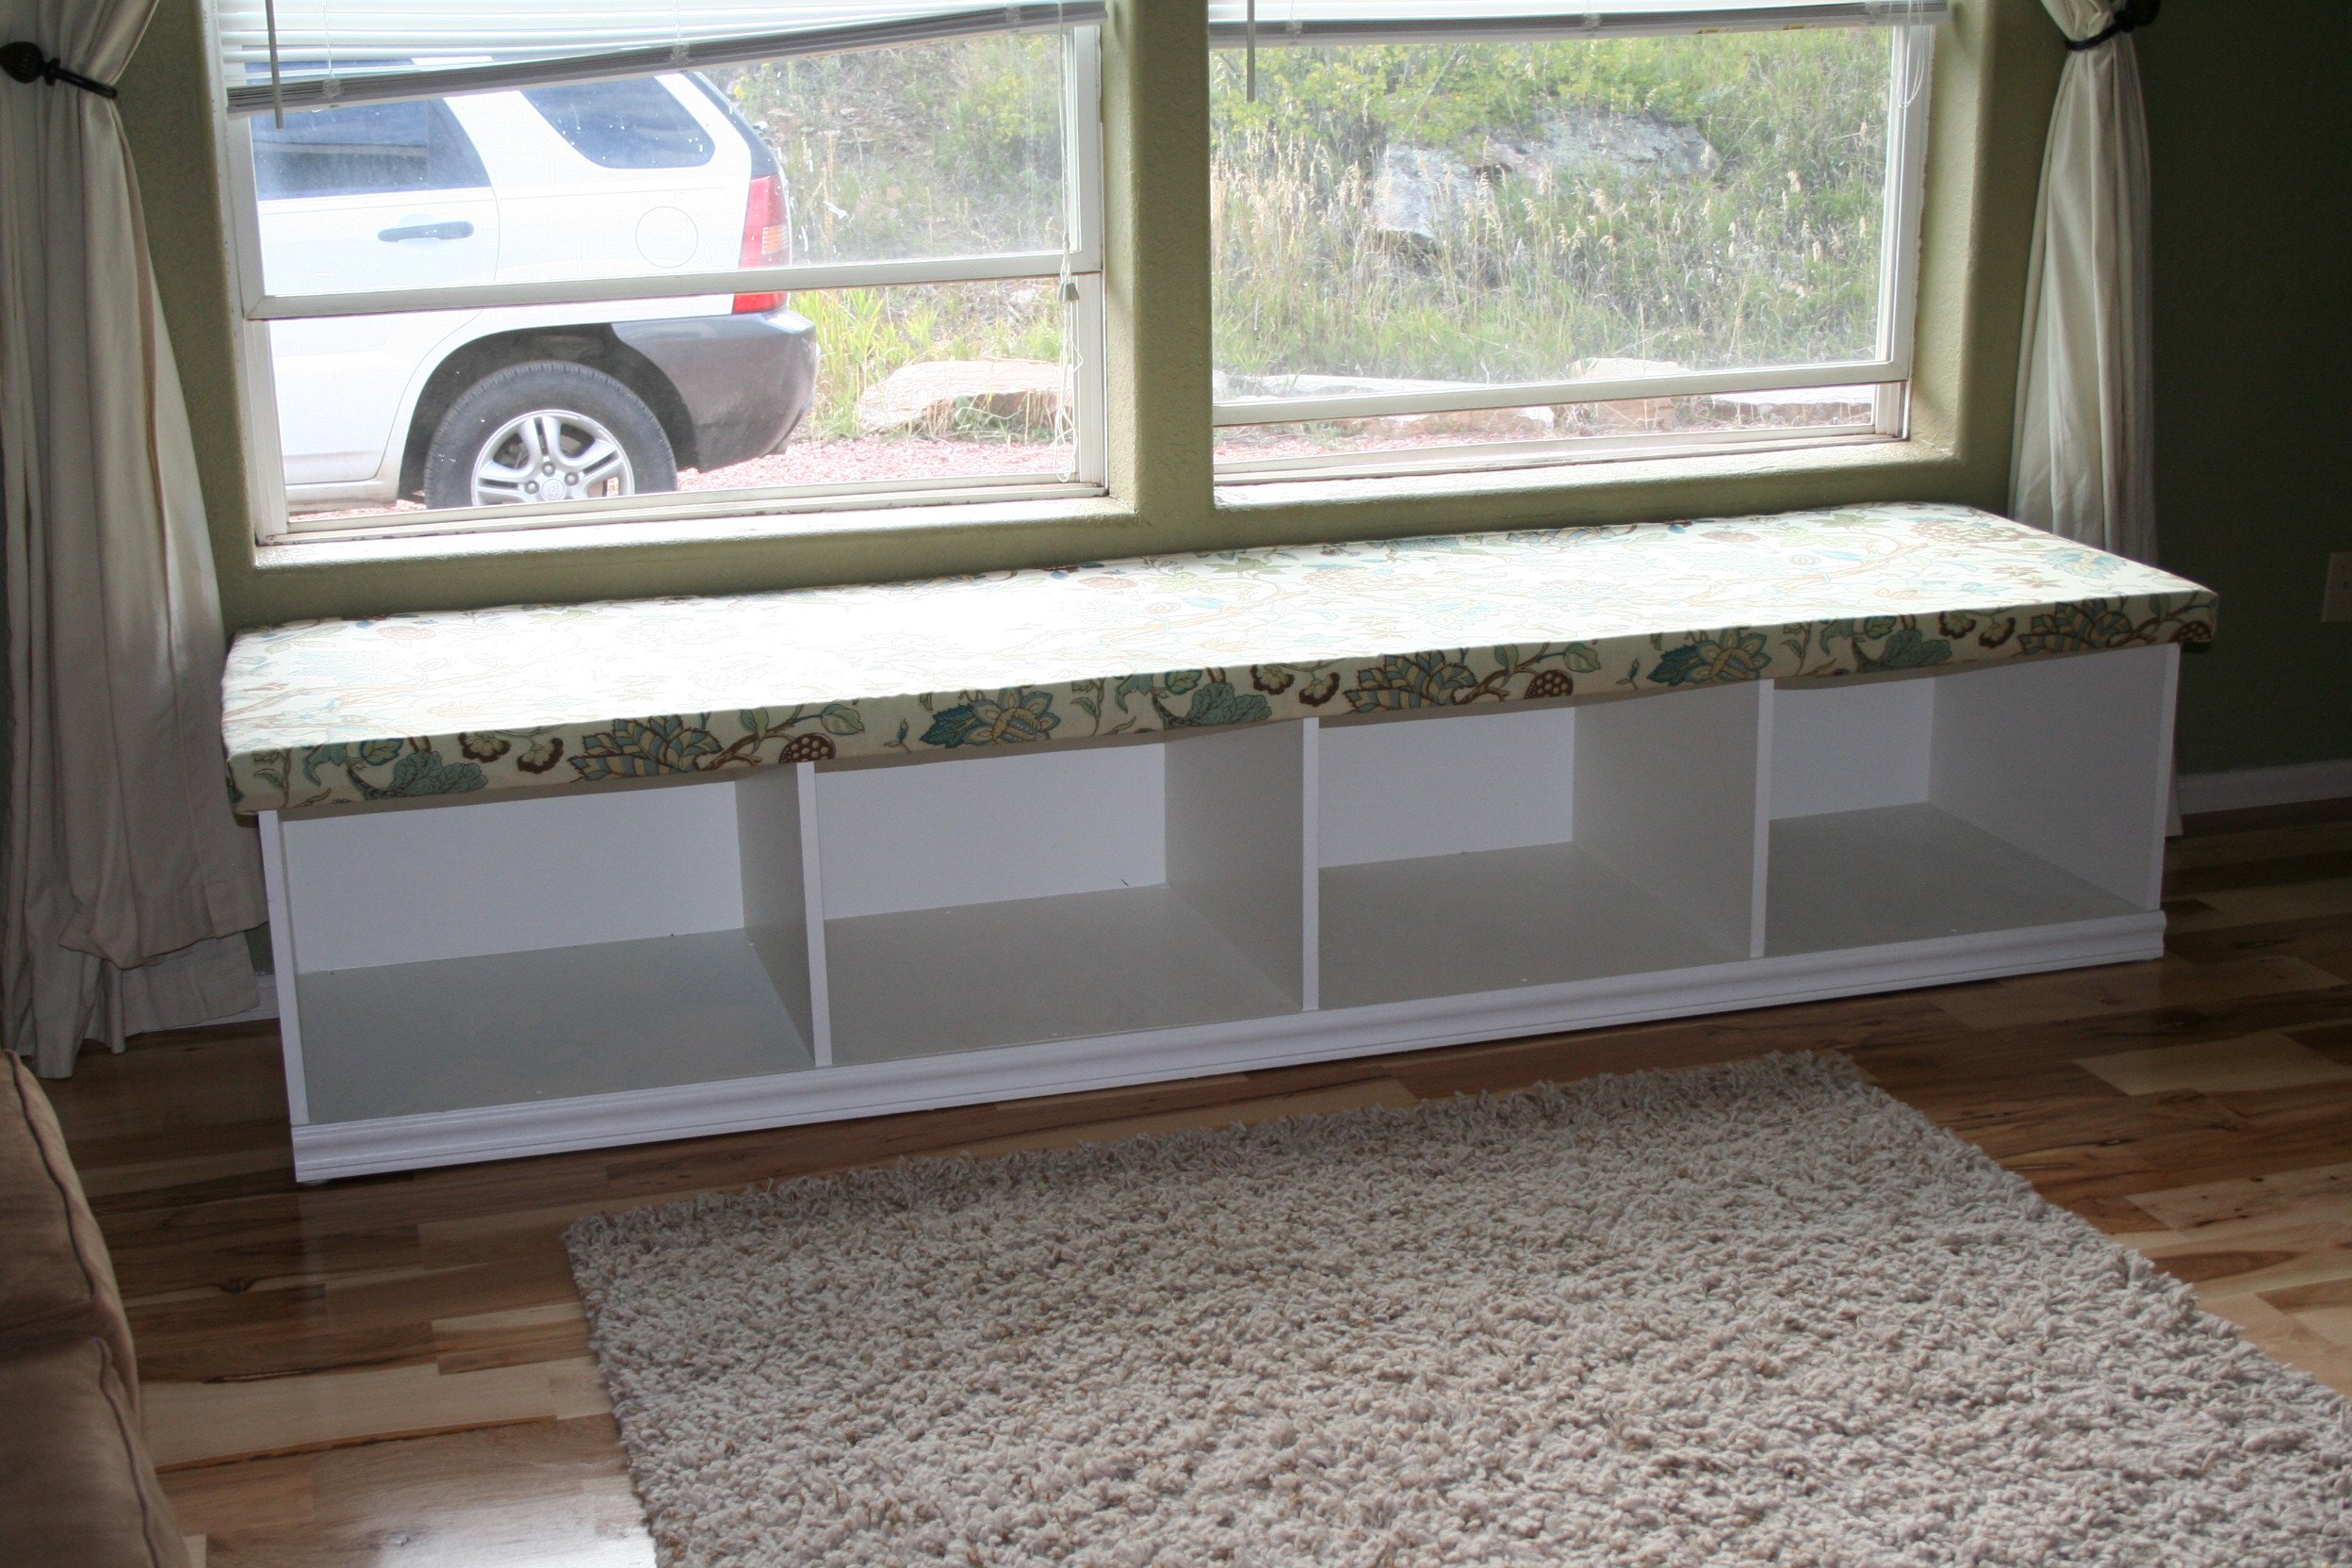
I wanted a window seat that would fit my window. There was no way I could afford to buy anything. Ana's site inspired me to modify her plans to create what I wanted. My husband and I worked on this during the weekends and between my son's nap. The piece is so large that 2 people were needed just to pick up the wood. The finished piece is 8' long, 2' deep and 18" tall. If we ever move, it might have to stay with the house.

Mon, 01/23/2012 - 16:47
Working on a plan for my own window seat ... attached to a book shelf to hug my big window. This is inspiring.
Dona
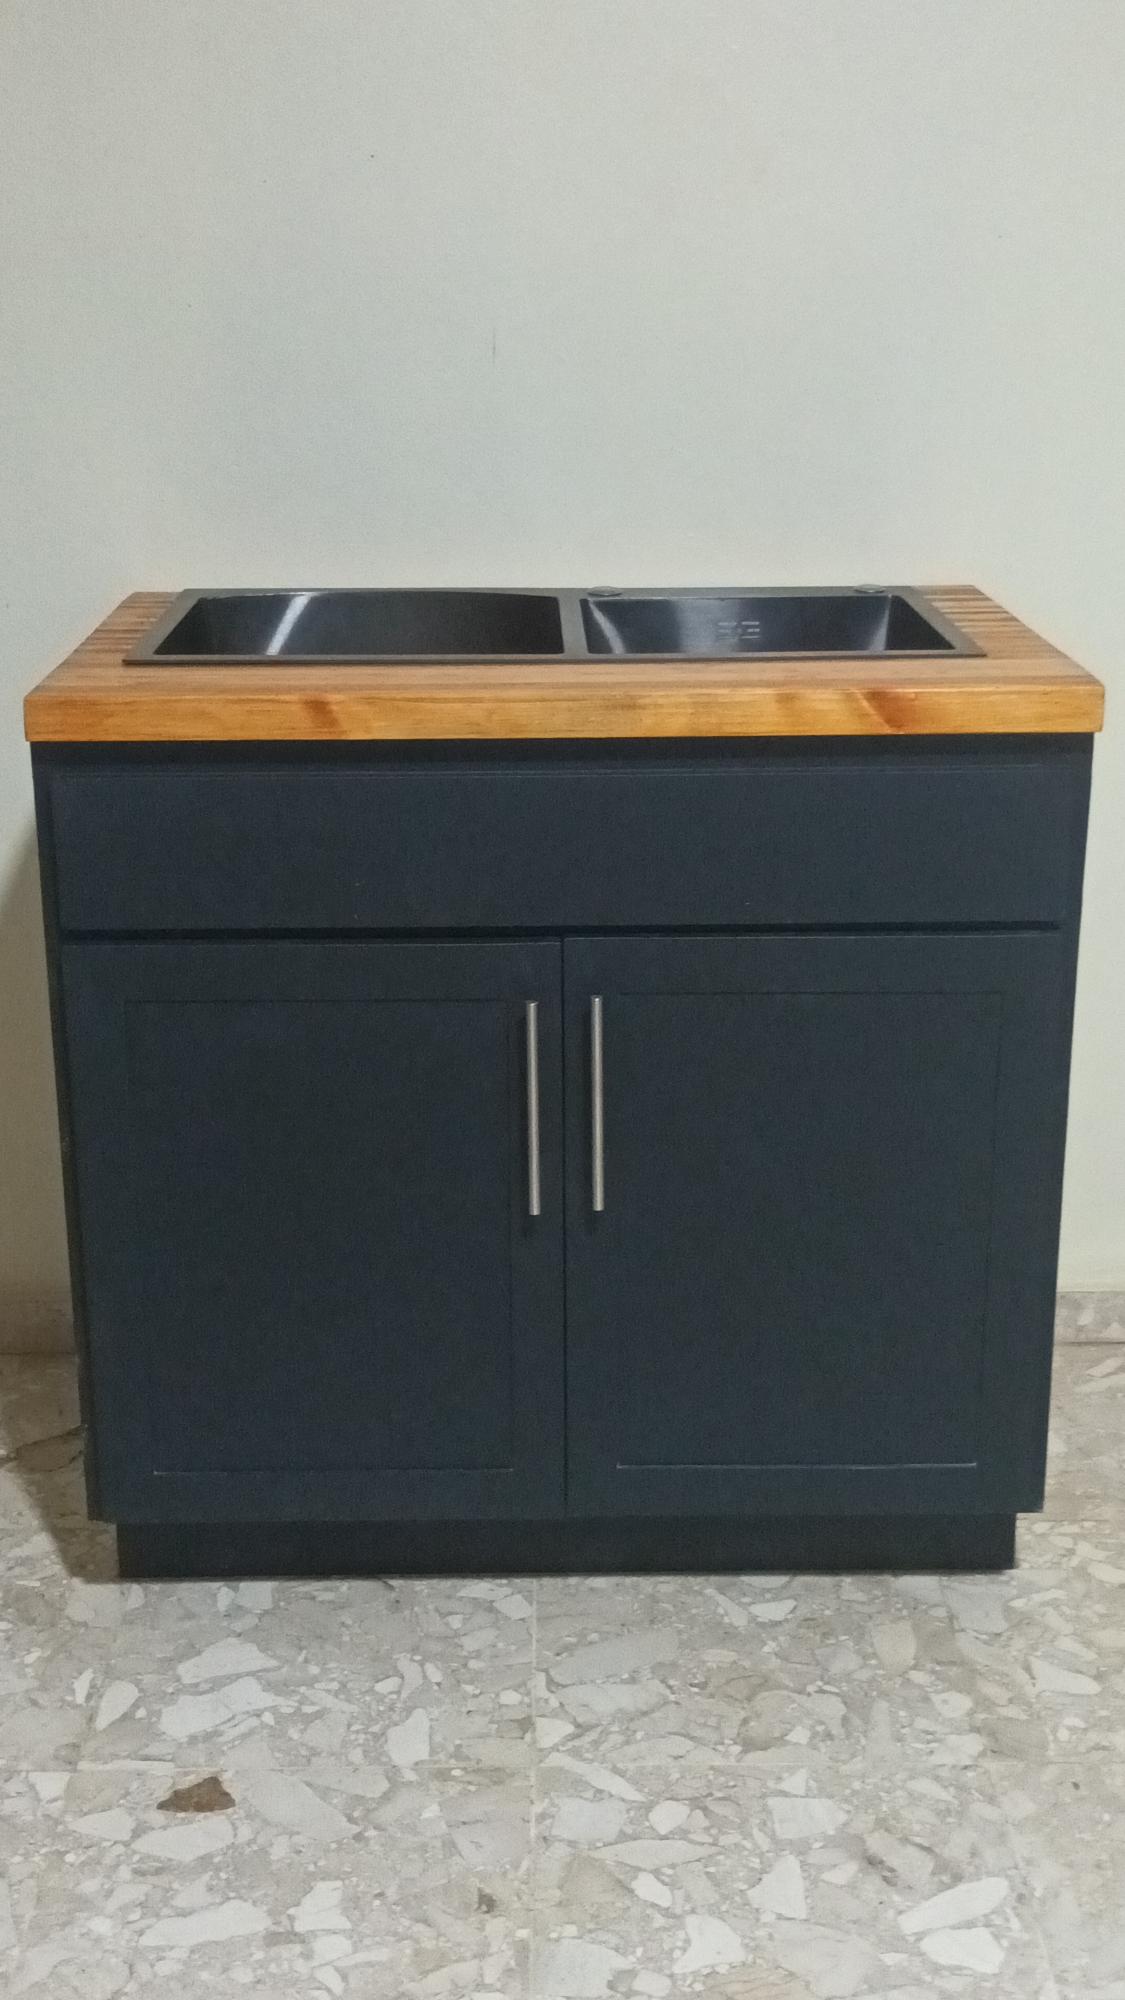
This was a build to convince my wife that I should do the cabinets in our new house...now I have to do them all. I should have just said, Sure, go to Ikea!"
Mon, 02/20/2023 - 10:36
Looks amazing, fantastic work! Thank you for sharing and happy building!
First time building furniture. This turned out much better than I thought. After this I probably could've build the farmhouse table myself instead of paying way too much for my wood dining table. Only if I have found Ana's site sooner. :)
Having a Kreg jig also made the whole process much easier.
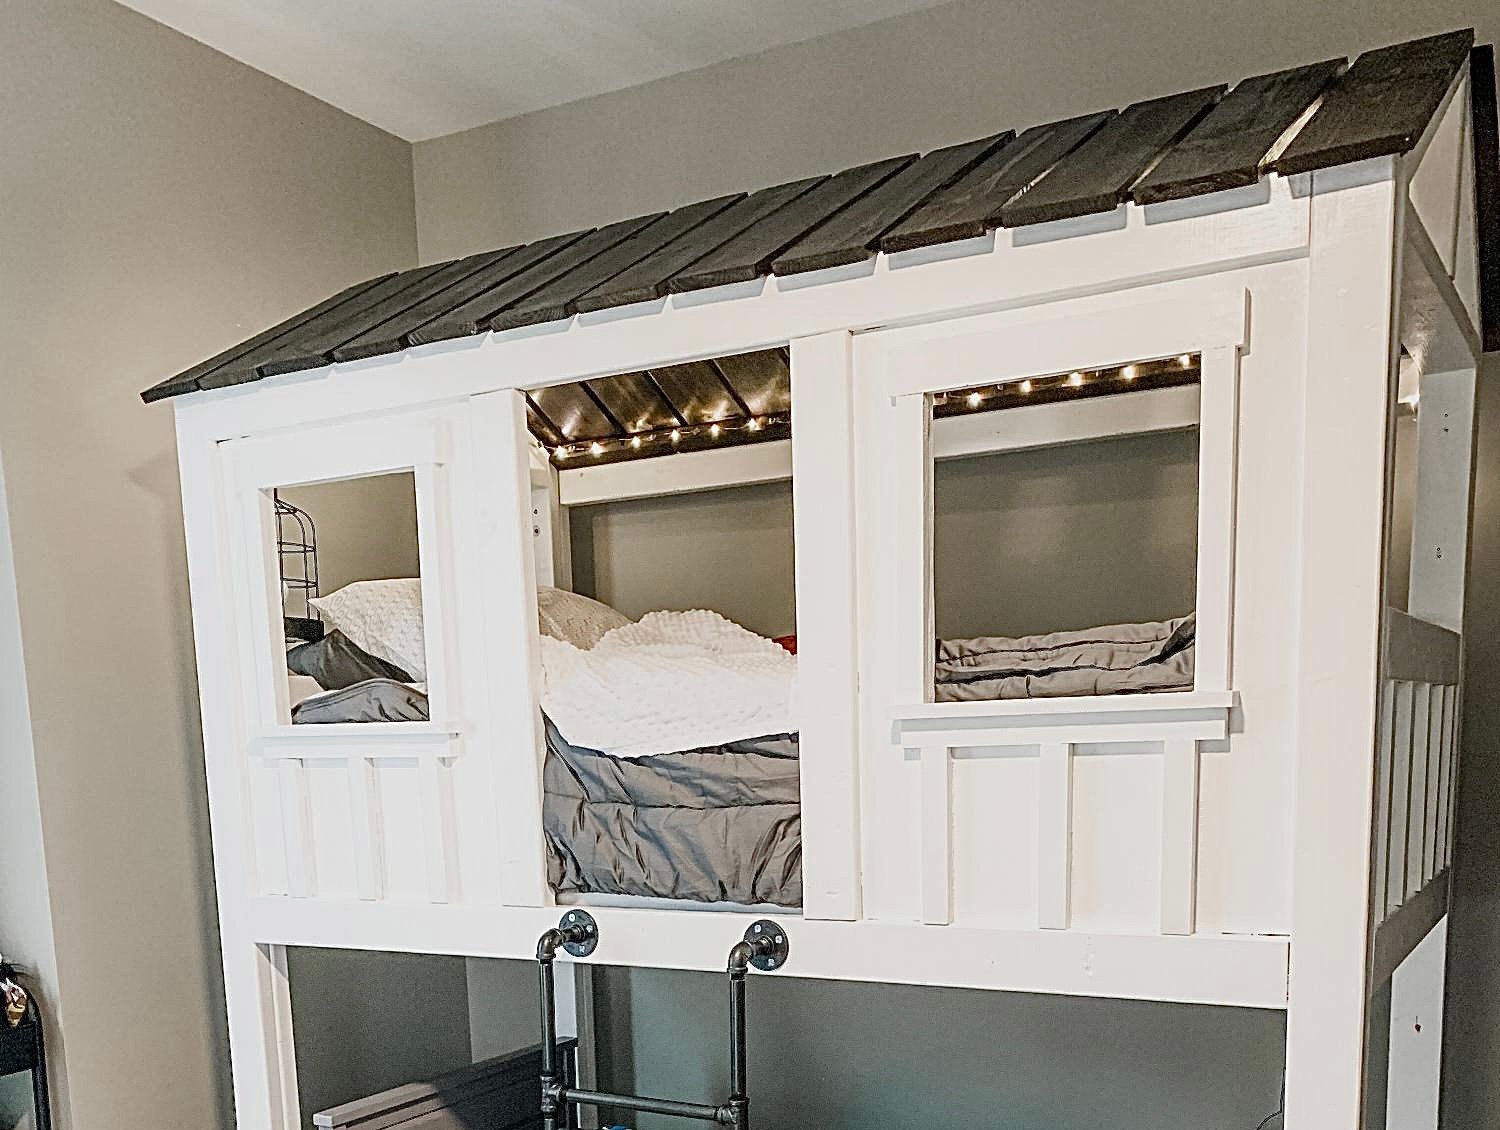
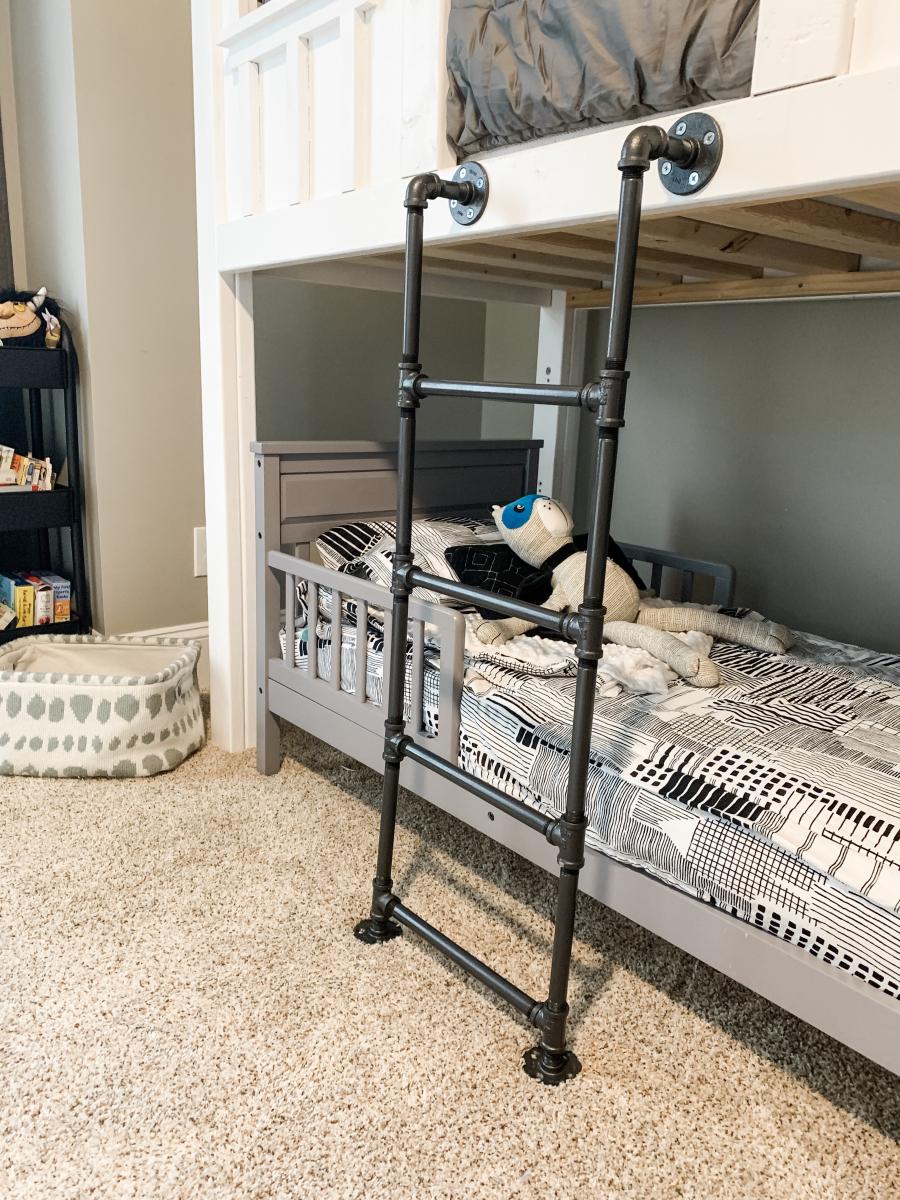
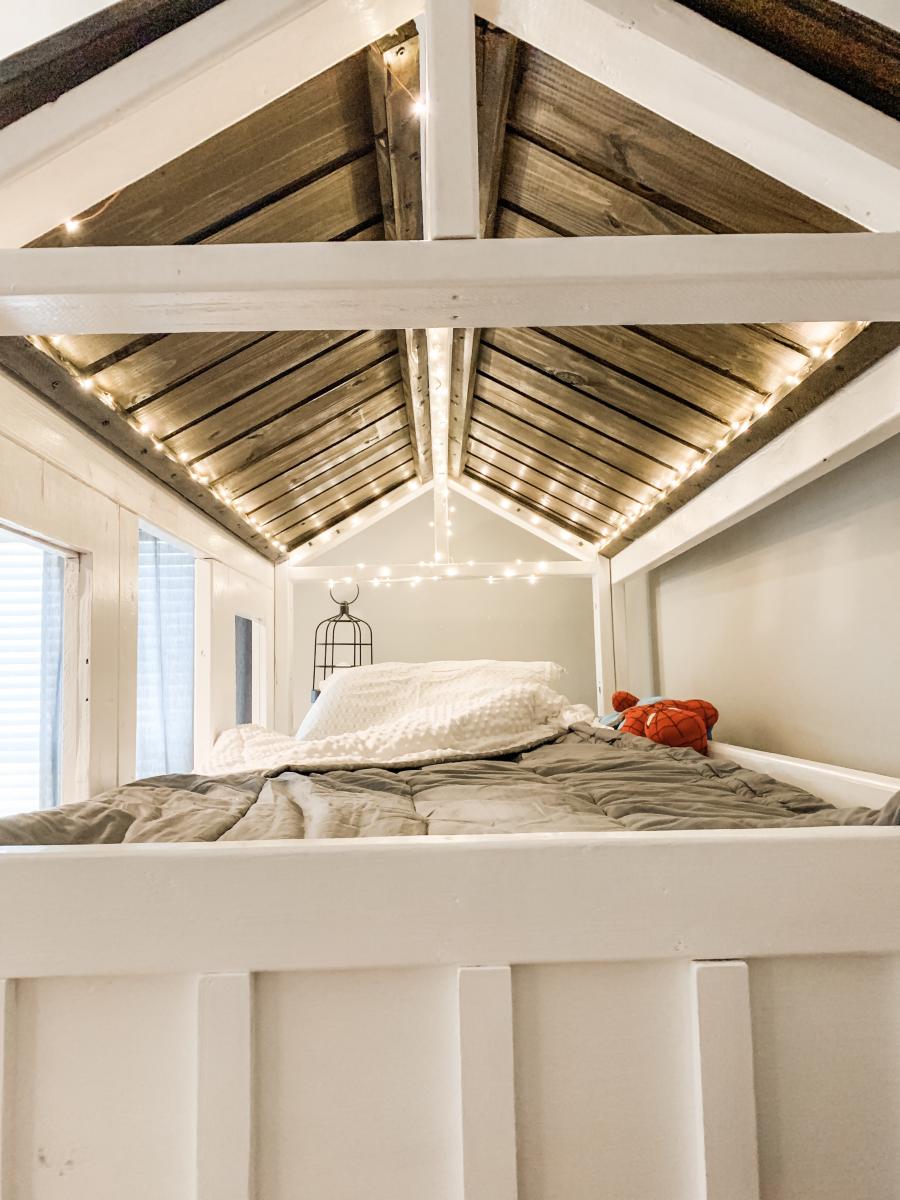
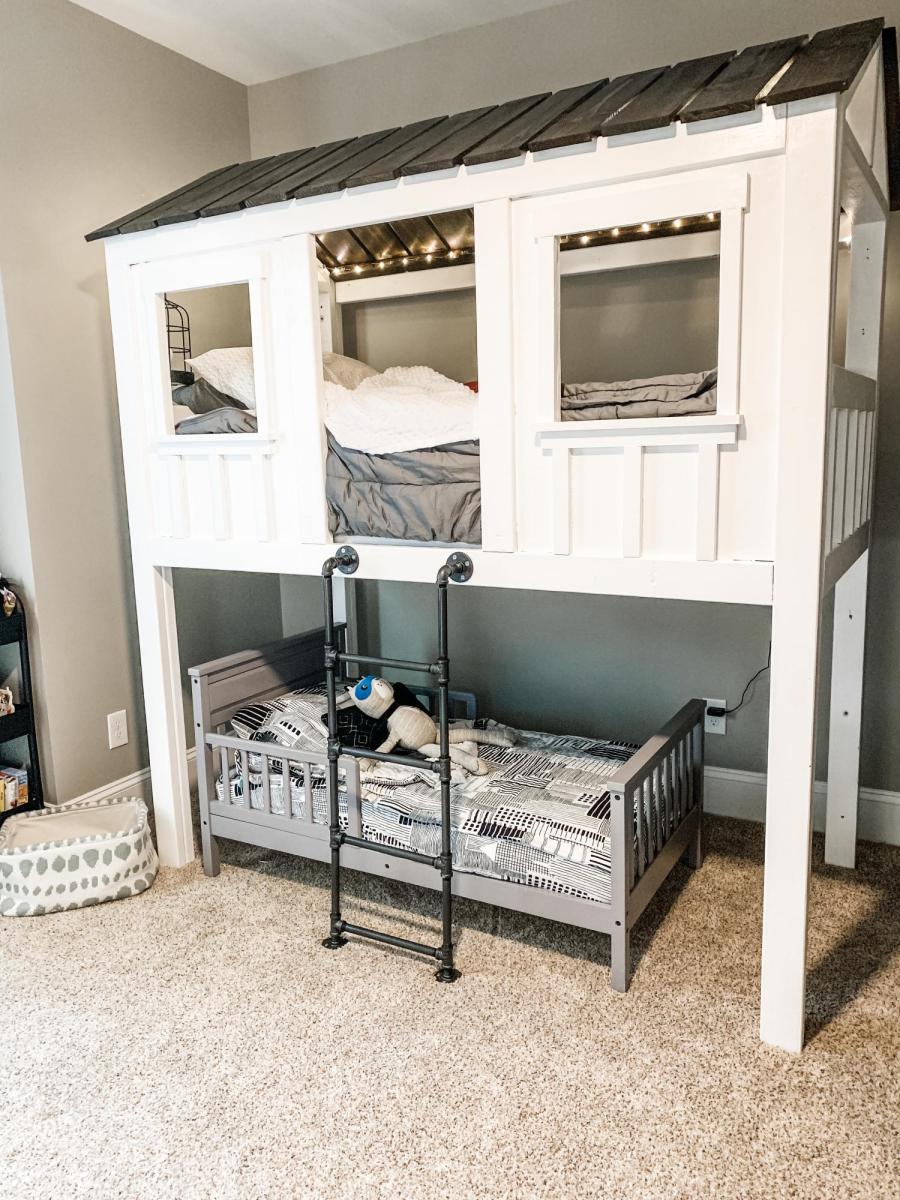
Elevated loft bed for my two boys! Easy build with the plans from Ana White! I modified this version and elevated it so I could fit my youngest underneath. It was my first time using a Kreg Jig and I’m obsessed now. I would recommend buying top quality wood and increasing all numbers by 2-3 inches to make getting the mattress in easier. I would also recommend a lower profile mattress than I used. Happy Building!
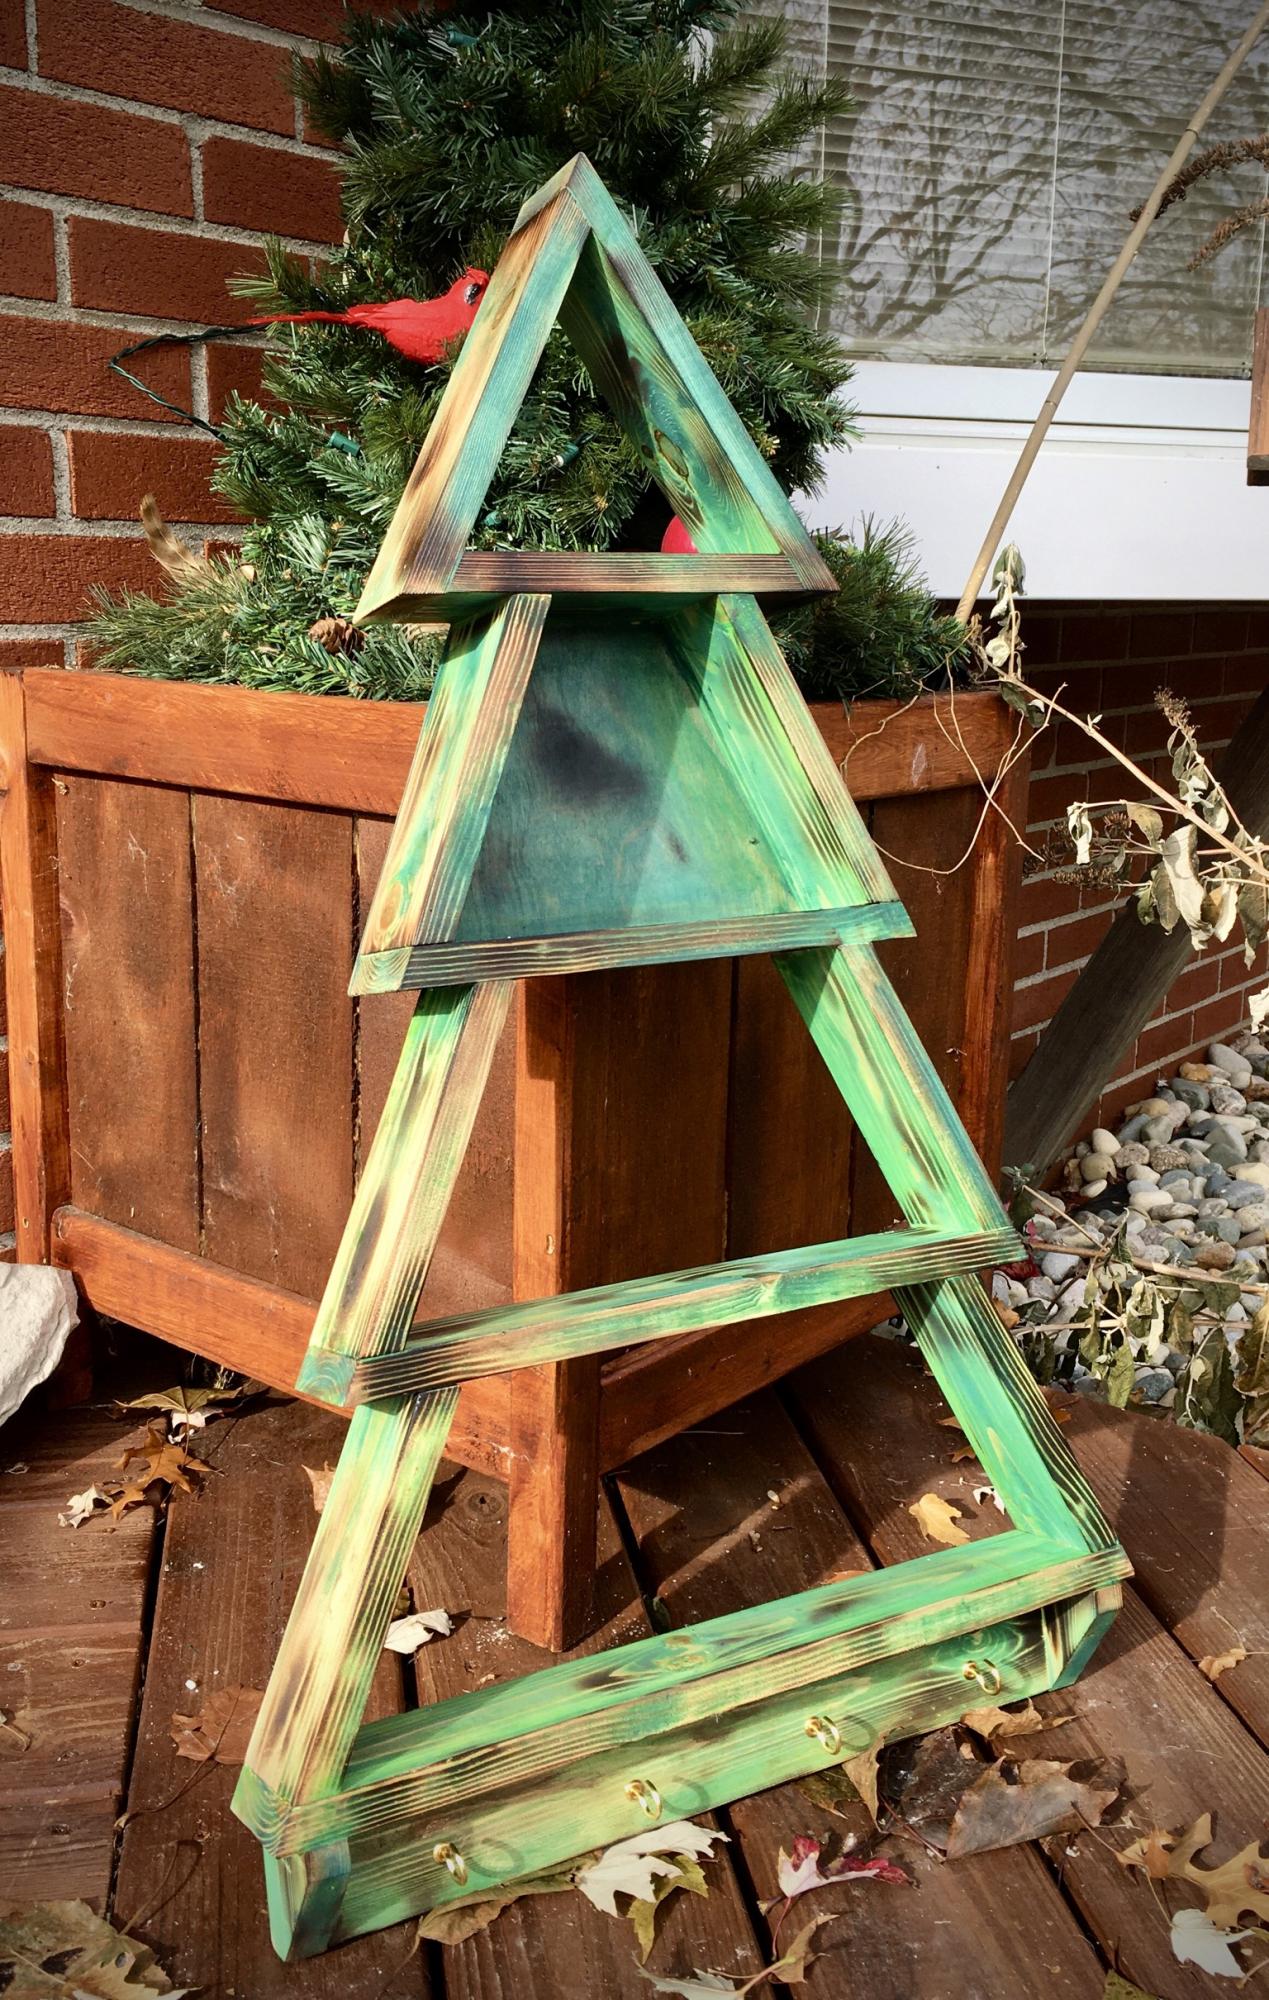
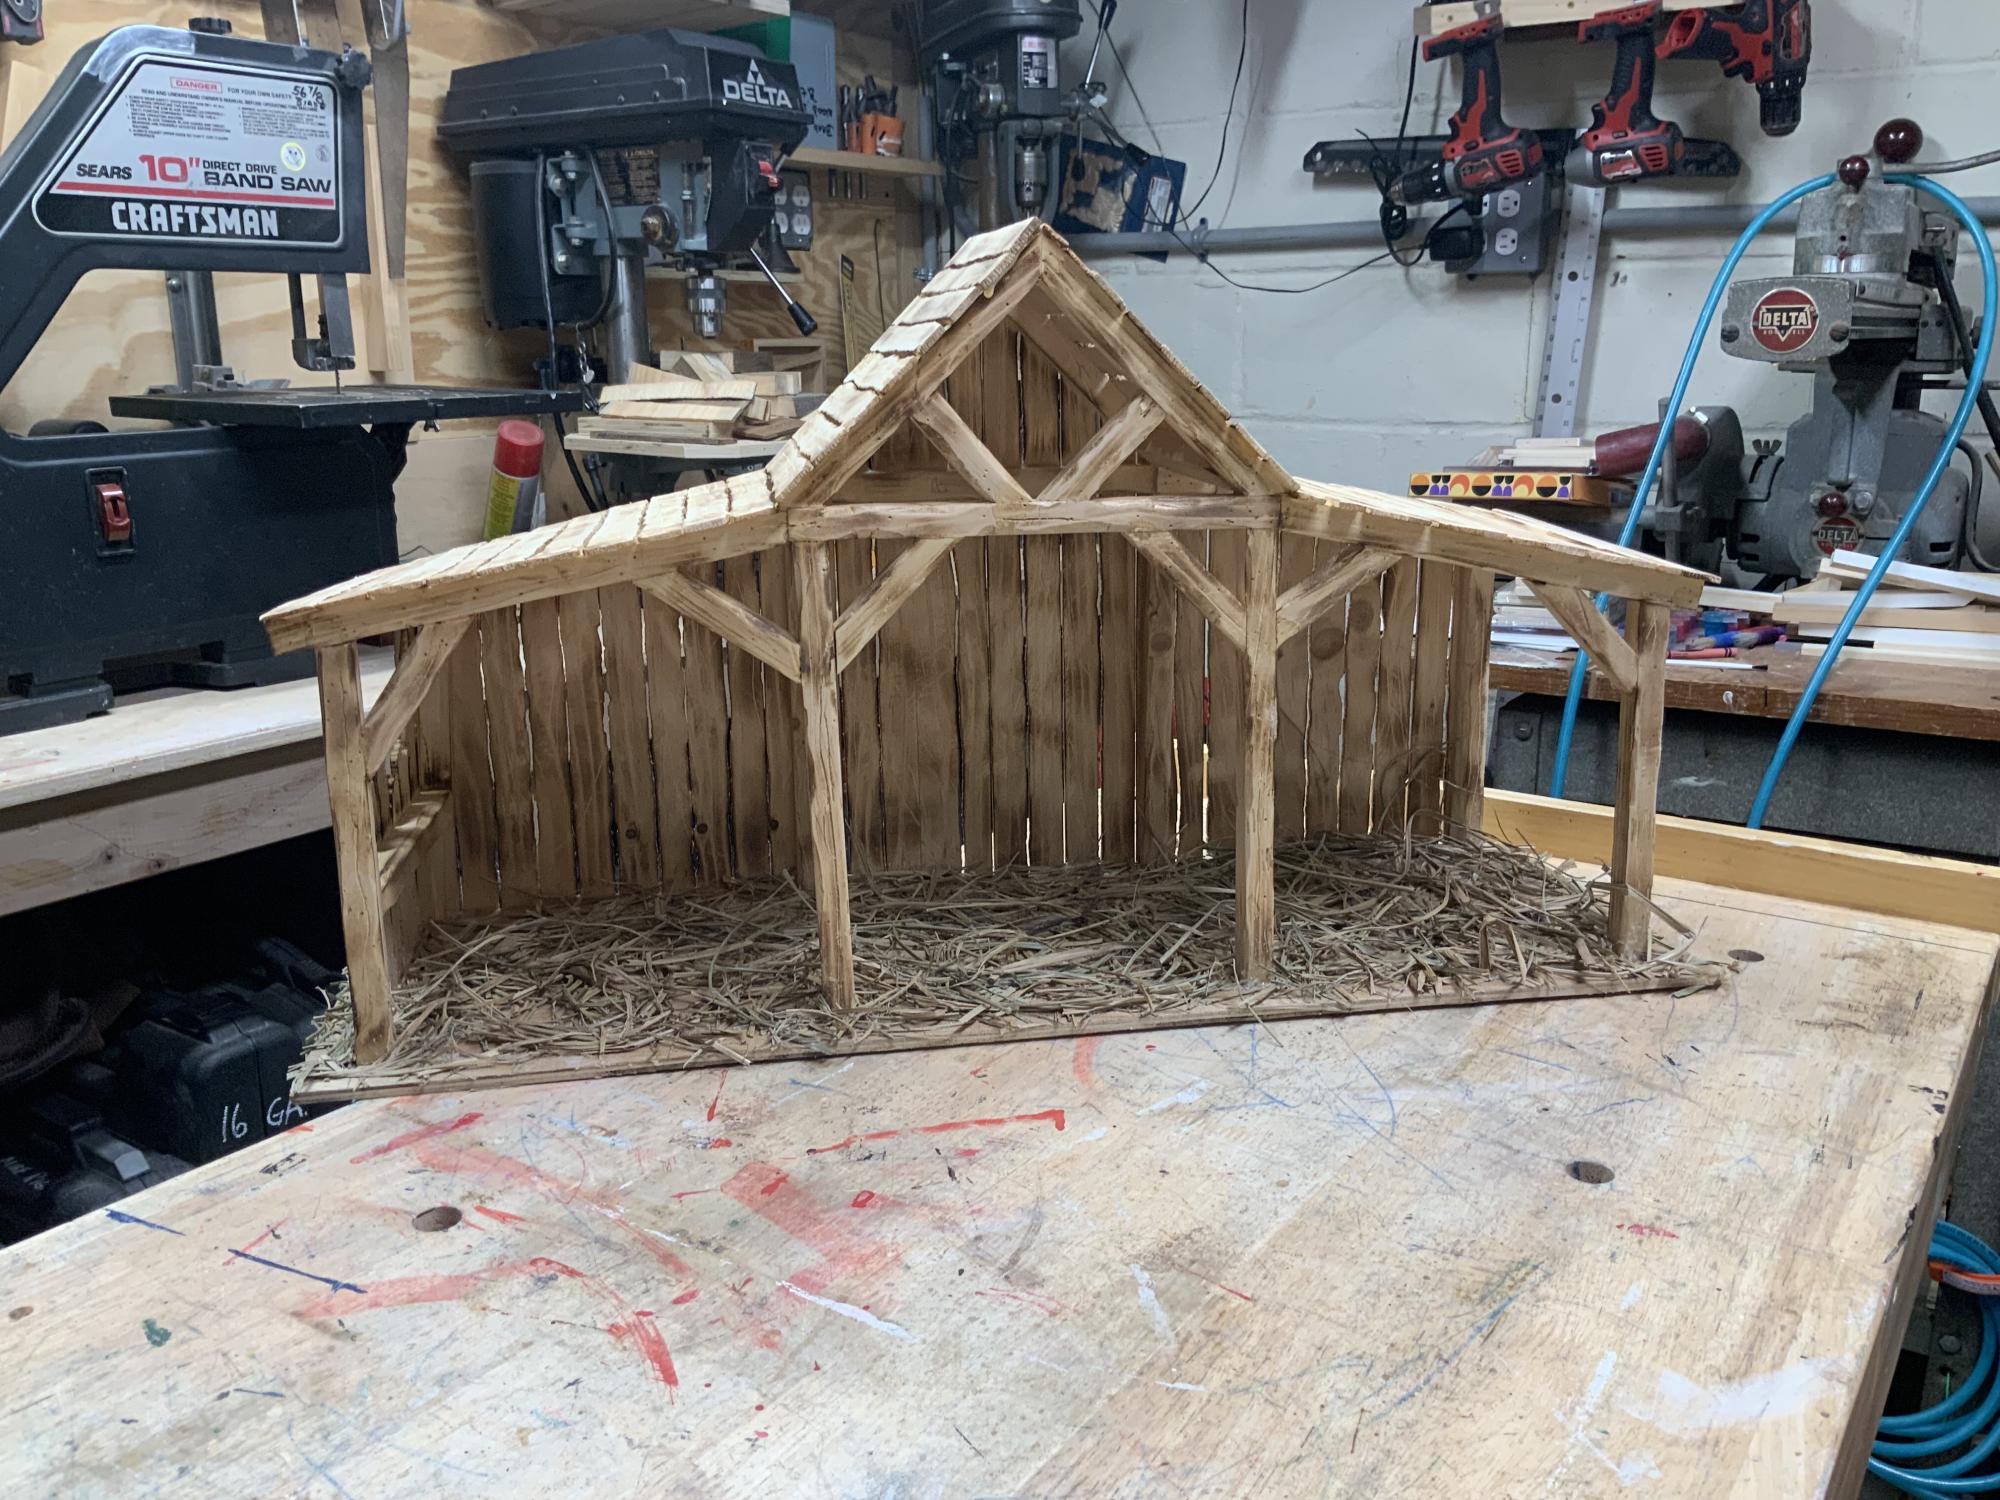
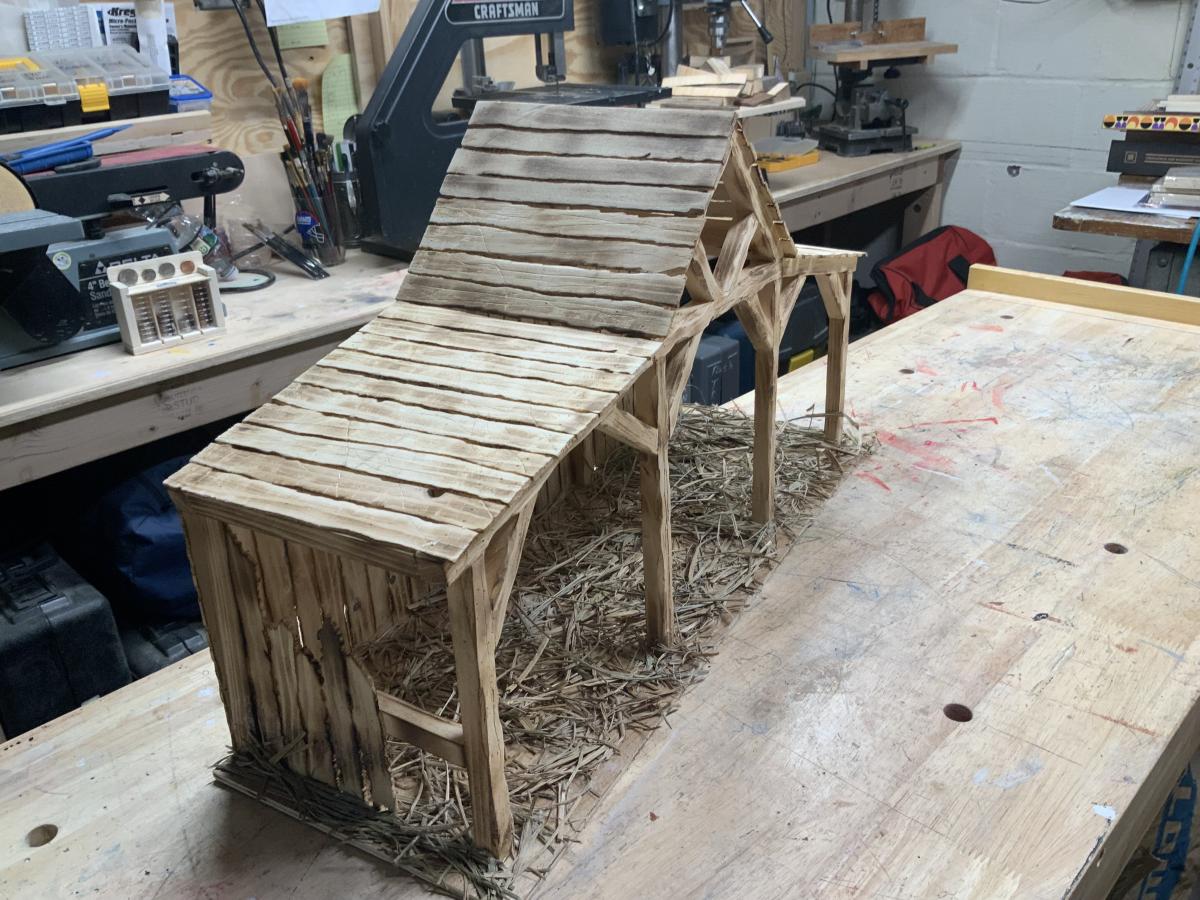
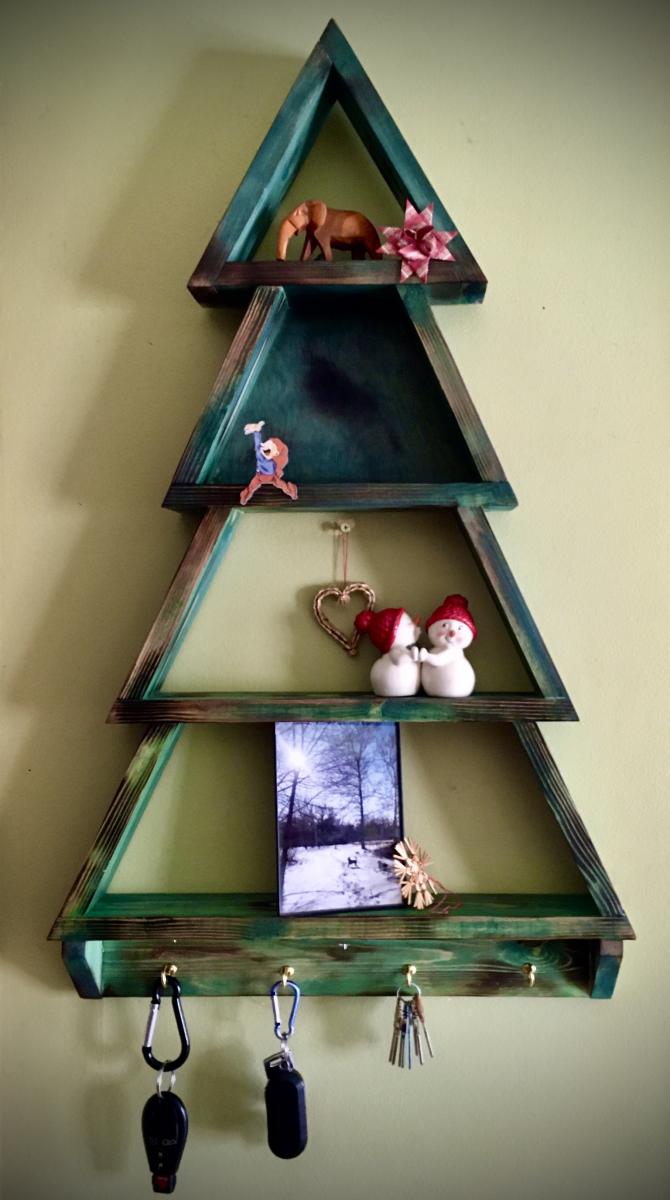
Modified the plans slightly to make each shelf taller. Stained and used a heat torch for the burnished effect. I like it!
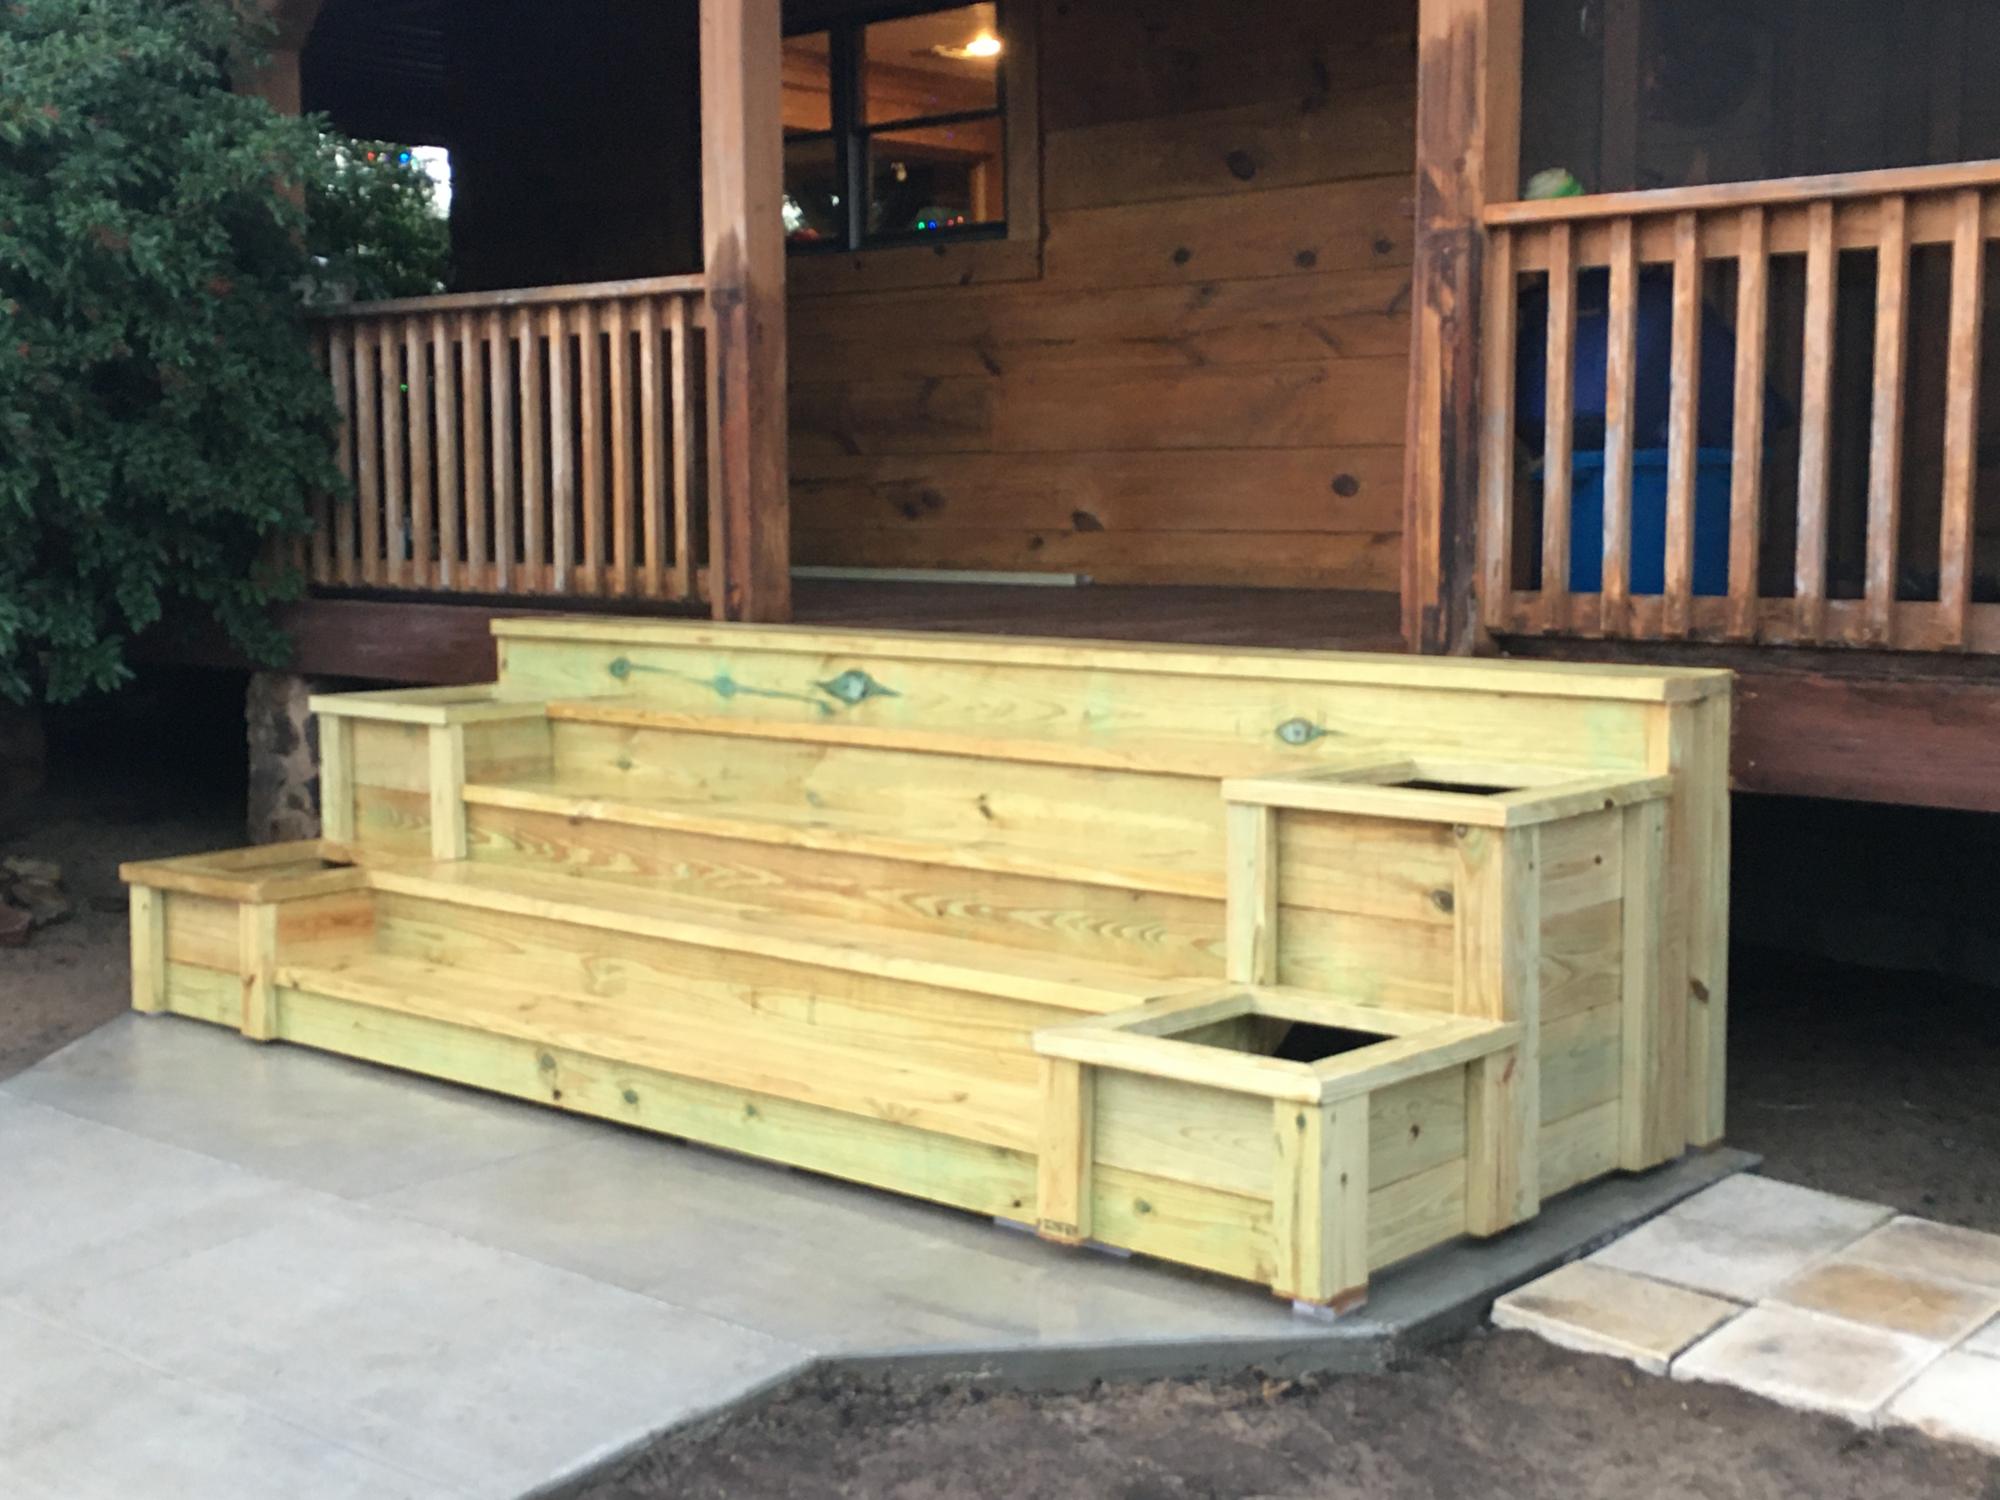
Plan modified to be built on stringers due to hight.
Fri, 07/07/2023 - 15:22
Do you have an illustration or instructions on the exact modifications you used for this project?
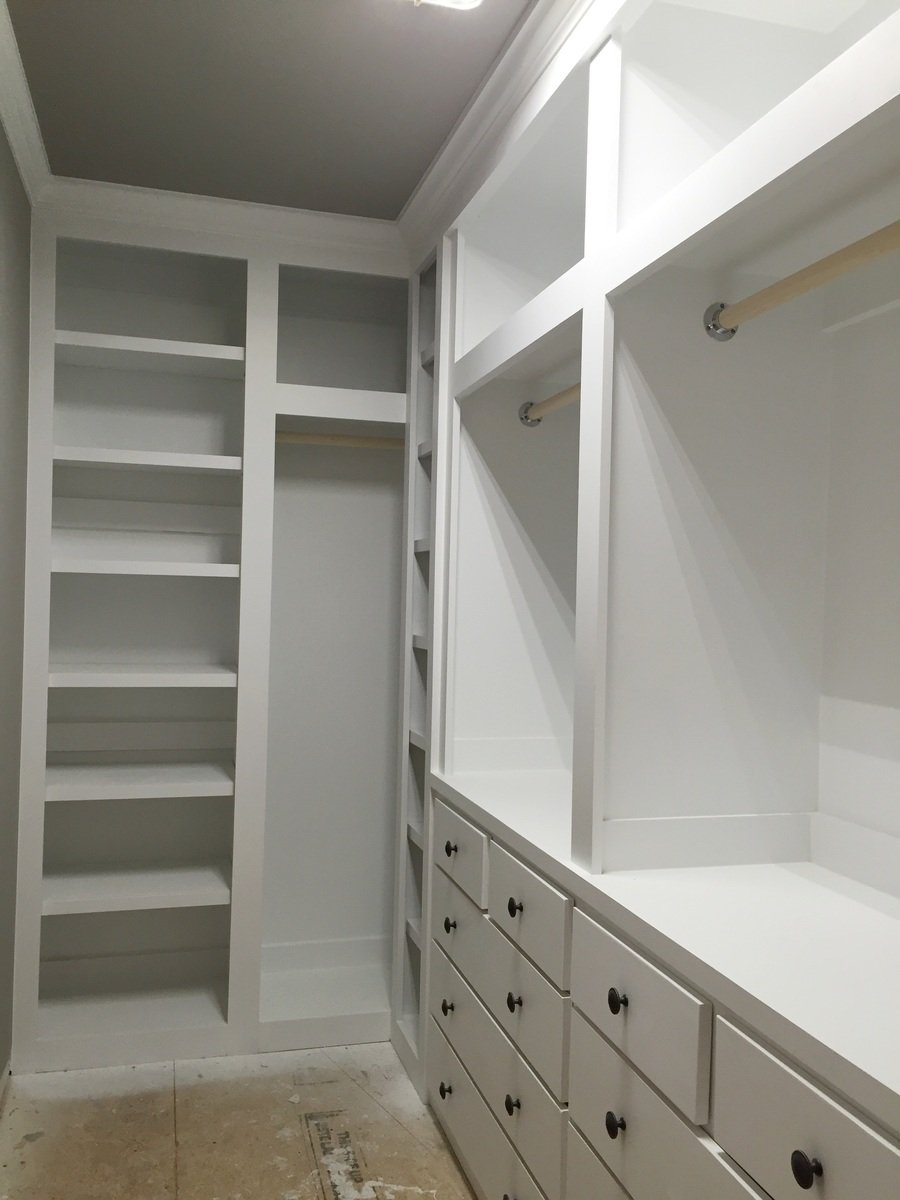
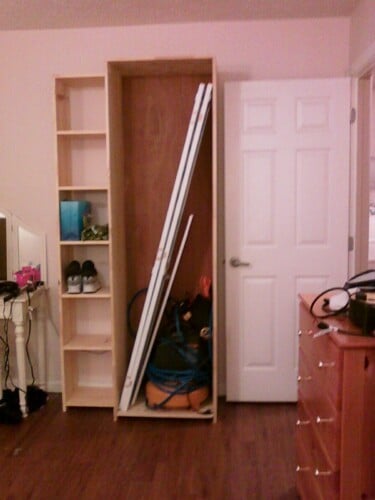
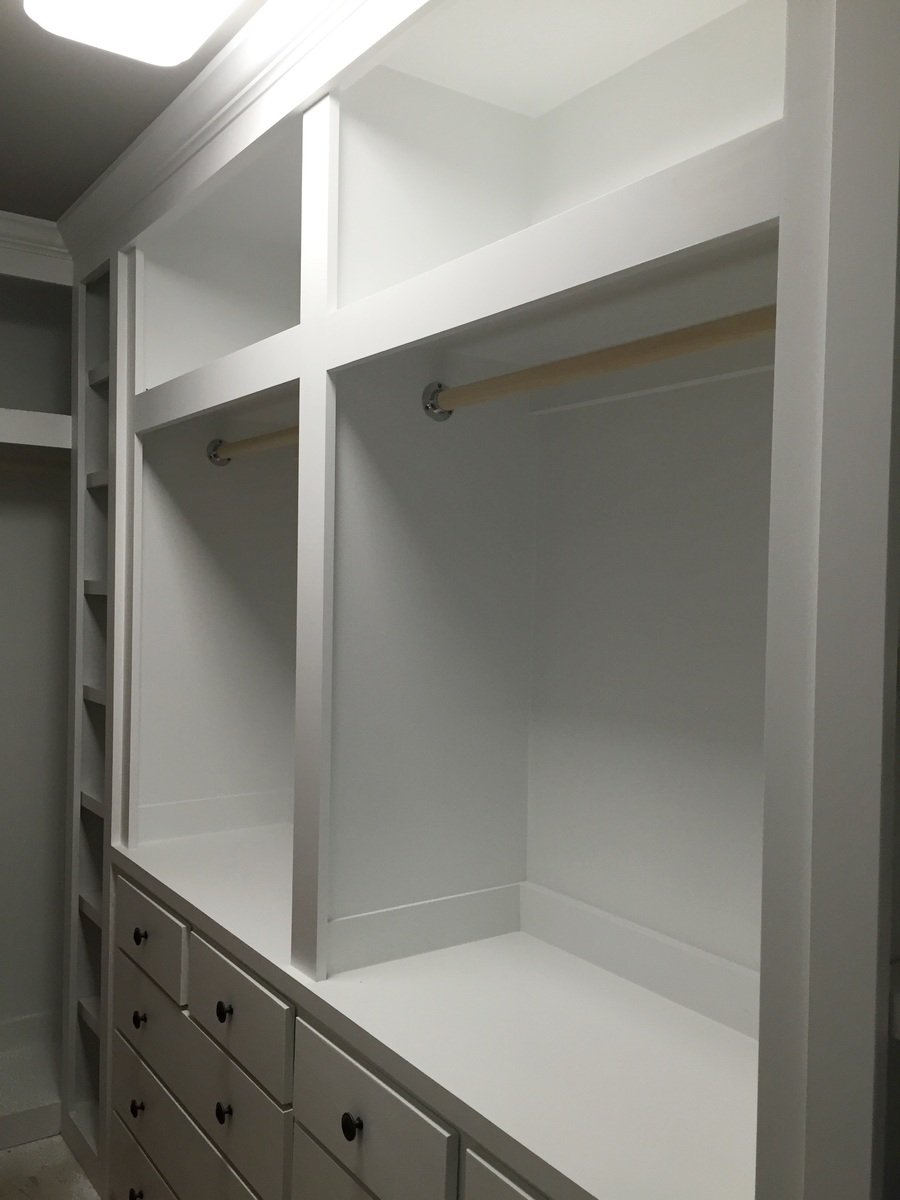
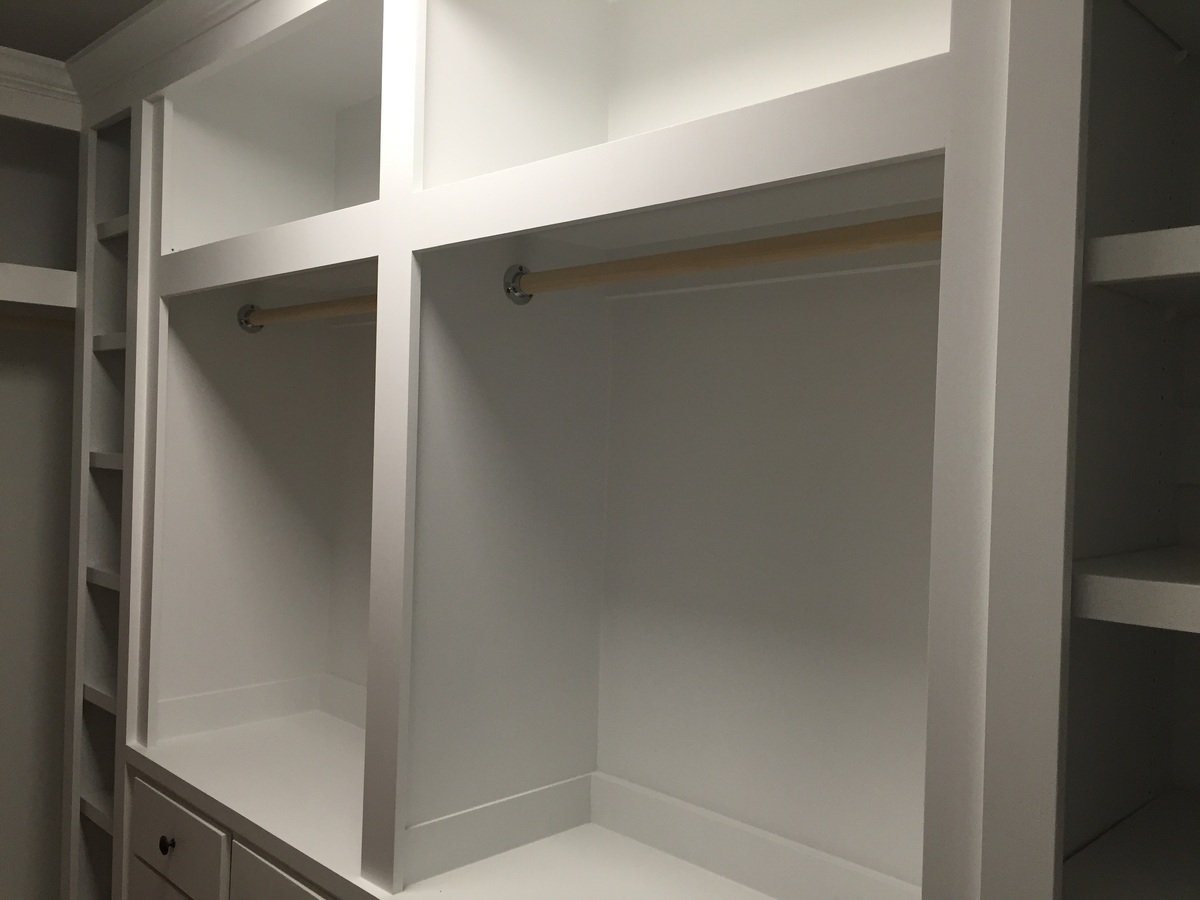
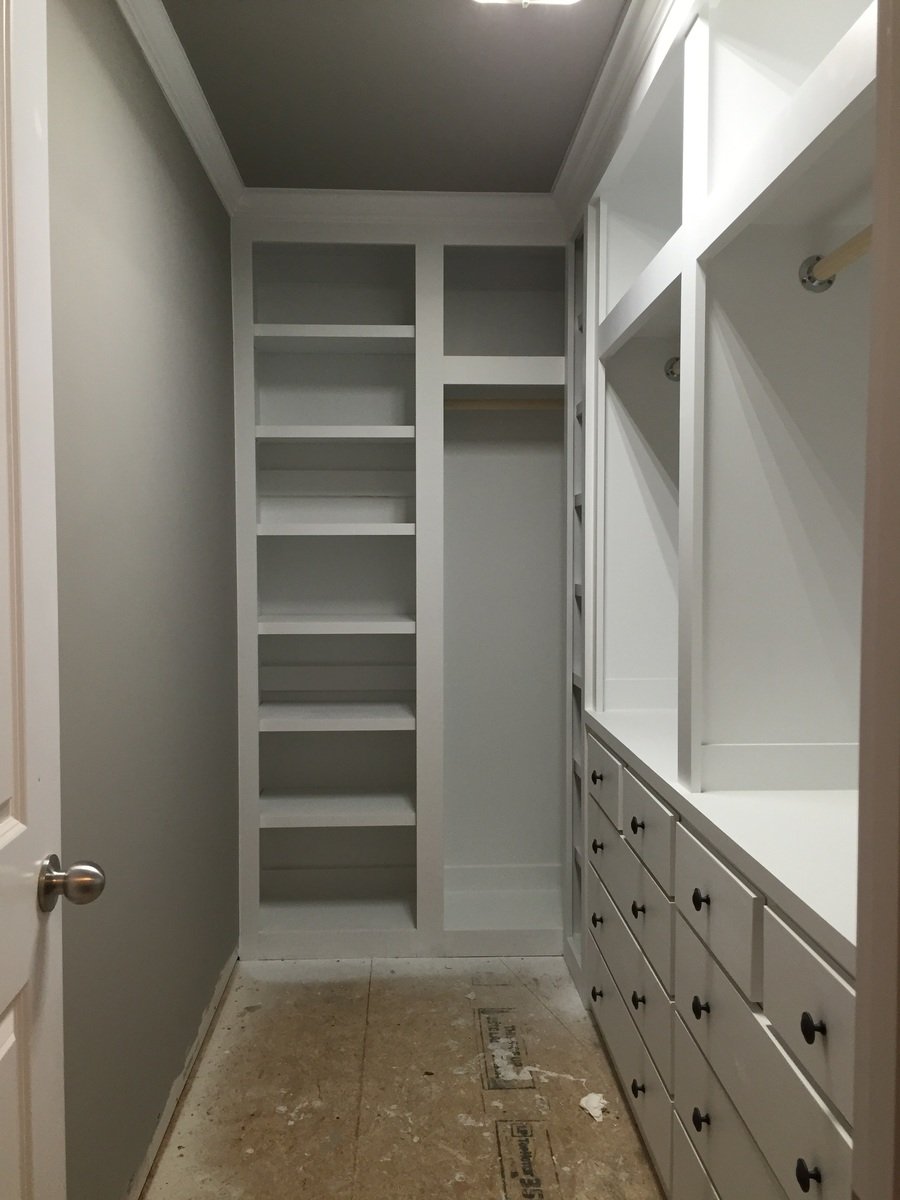
Built in closet to replace builder grade wire wracking. Closet is approximately 11 feet by 5 feet. consists of two shoe racks with 7 shelves each. 6 large drawers and 4 small drawers. Two hanger sections with storage above them. End wall has hanger for longer items and storage above and a cabinet with shelves.
Yet to finish the floor.

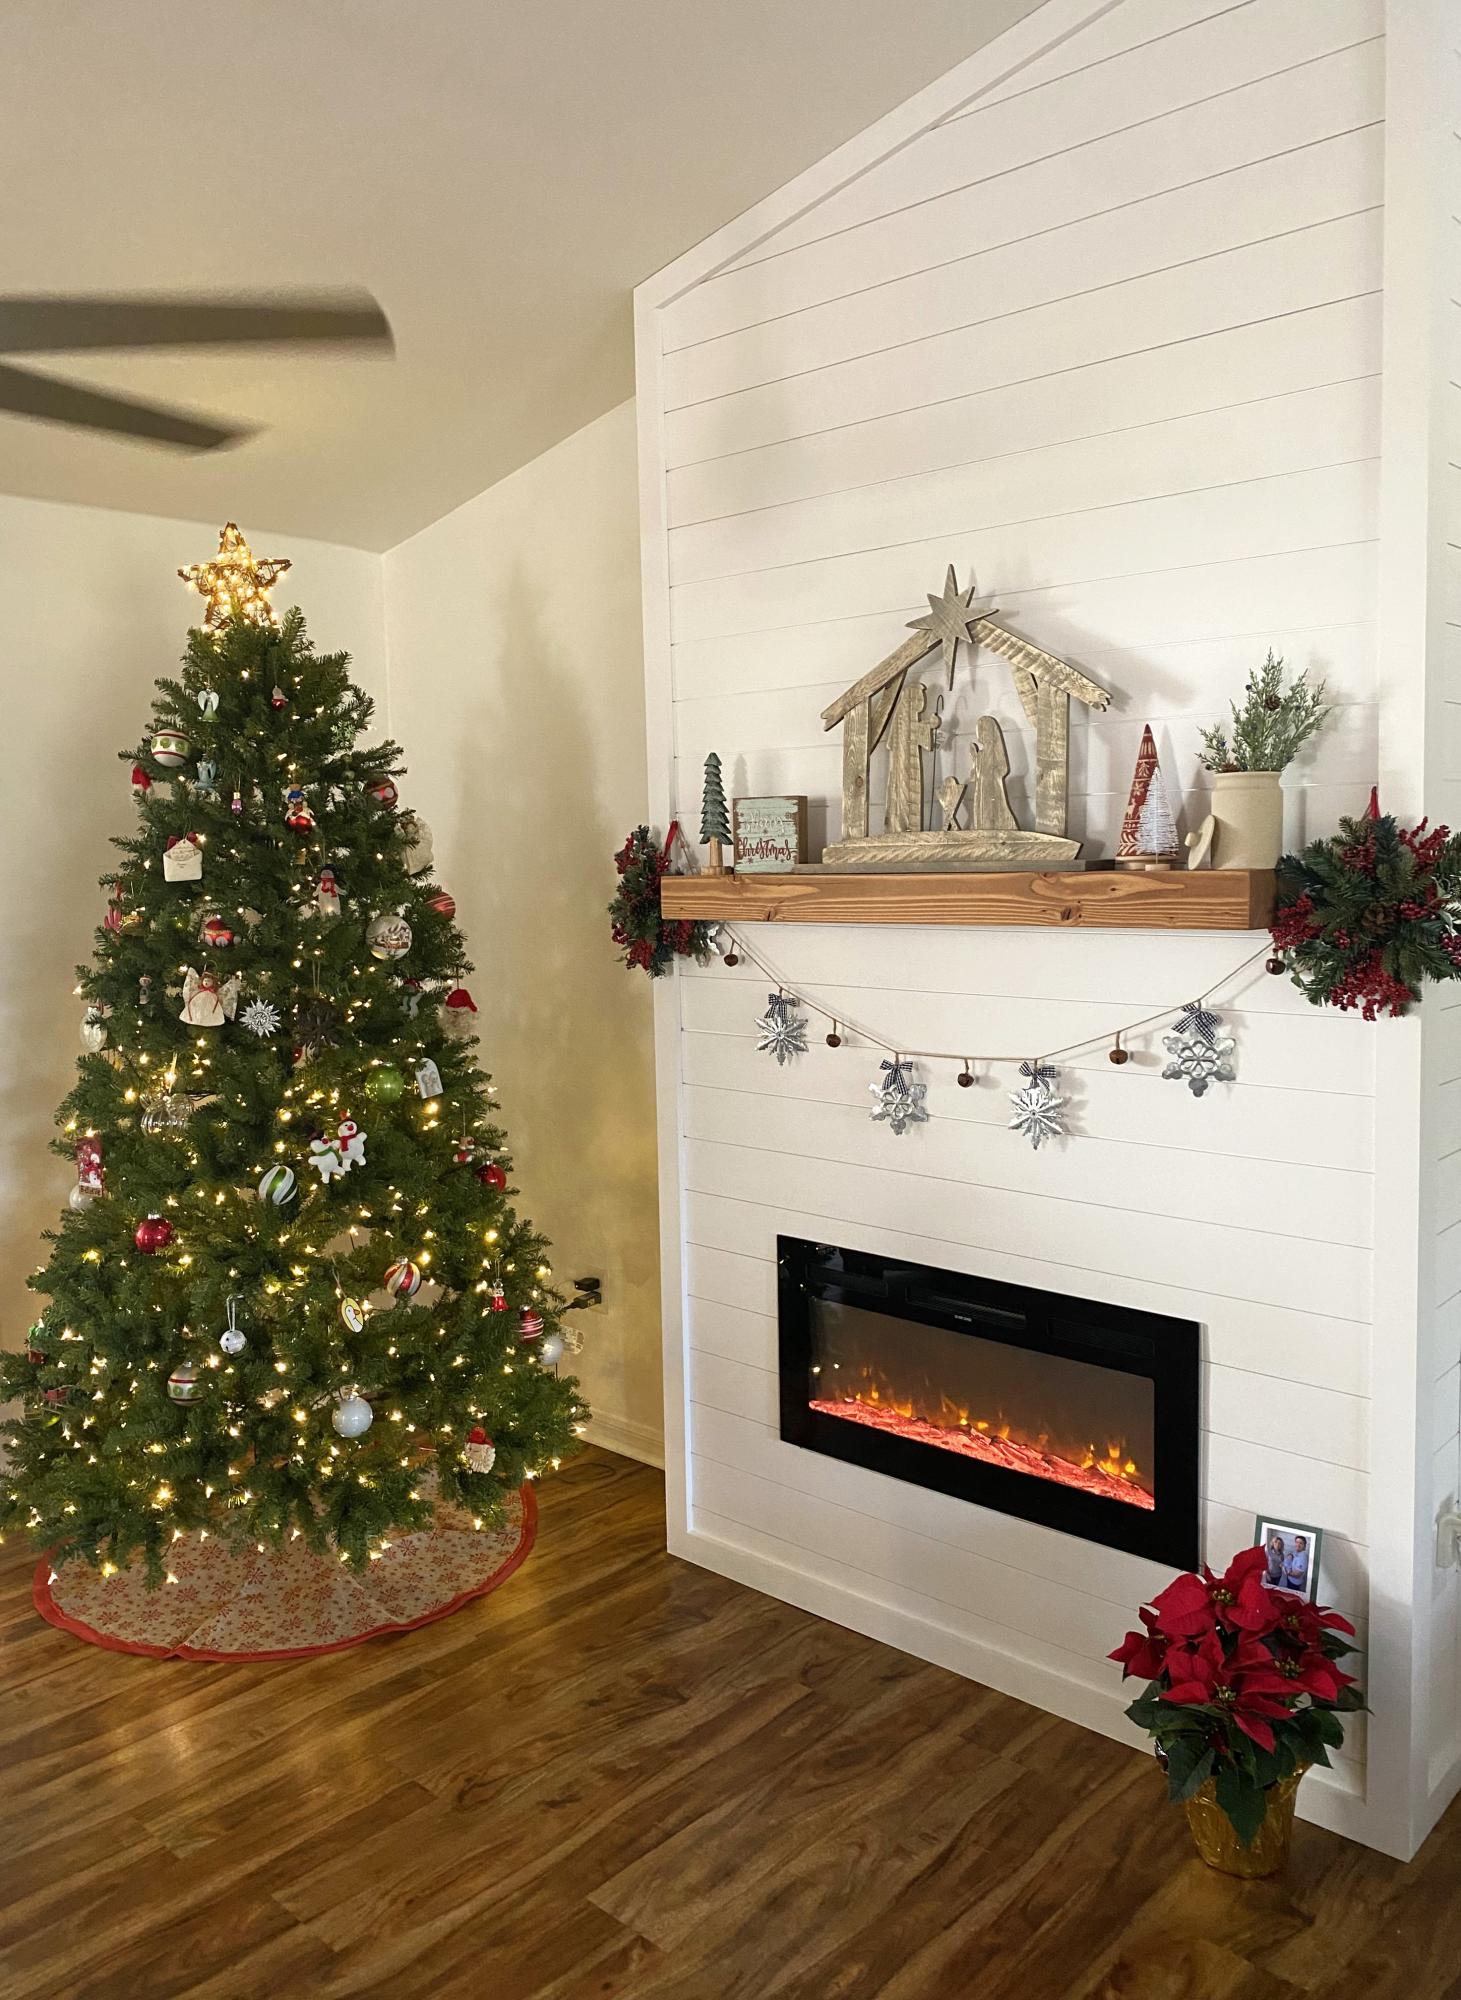
My wife wanted a fire place in our new home. Ana’s plans were perfect. Challenged a bit by the vaulted ceiling, but with Ana’s plans, it was very doable. My wife loves her Christmas gift.
Angel