Community Brag Posts

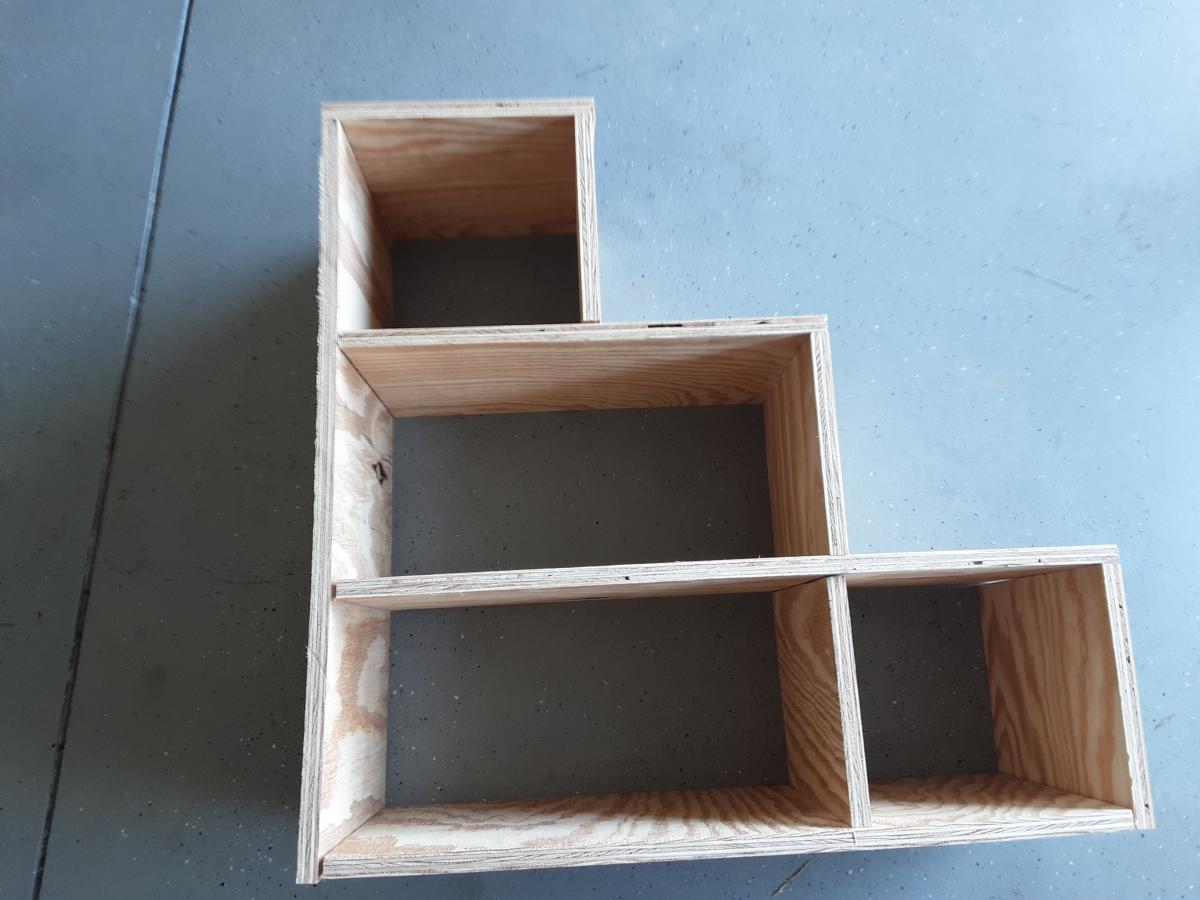
Step Dresser
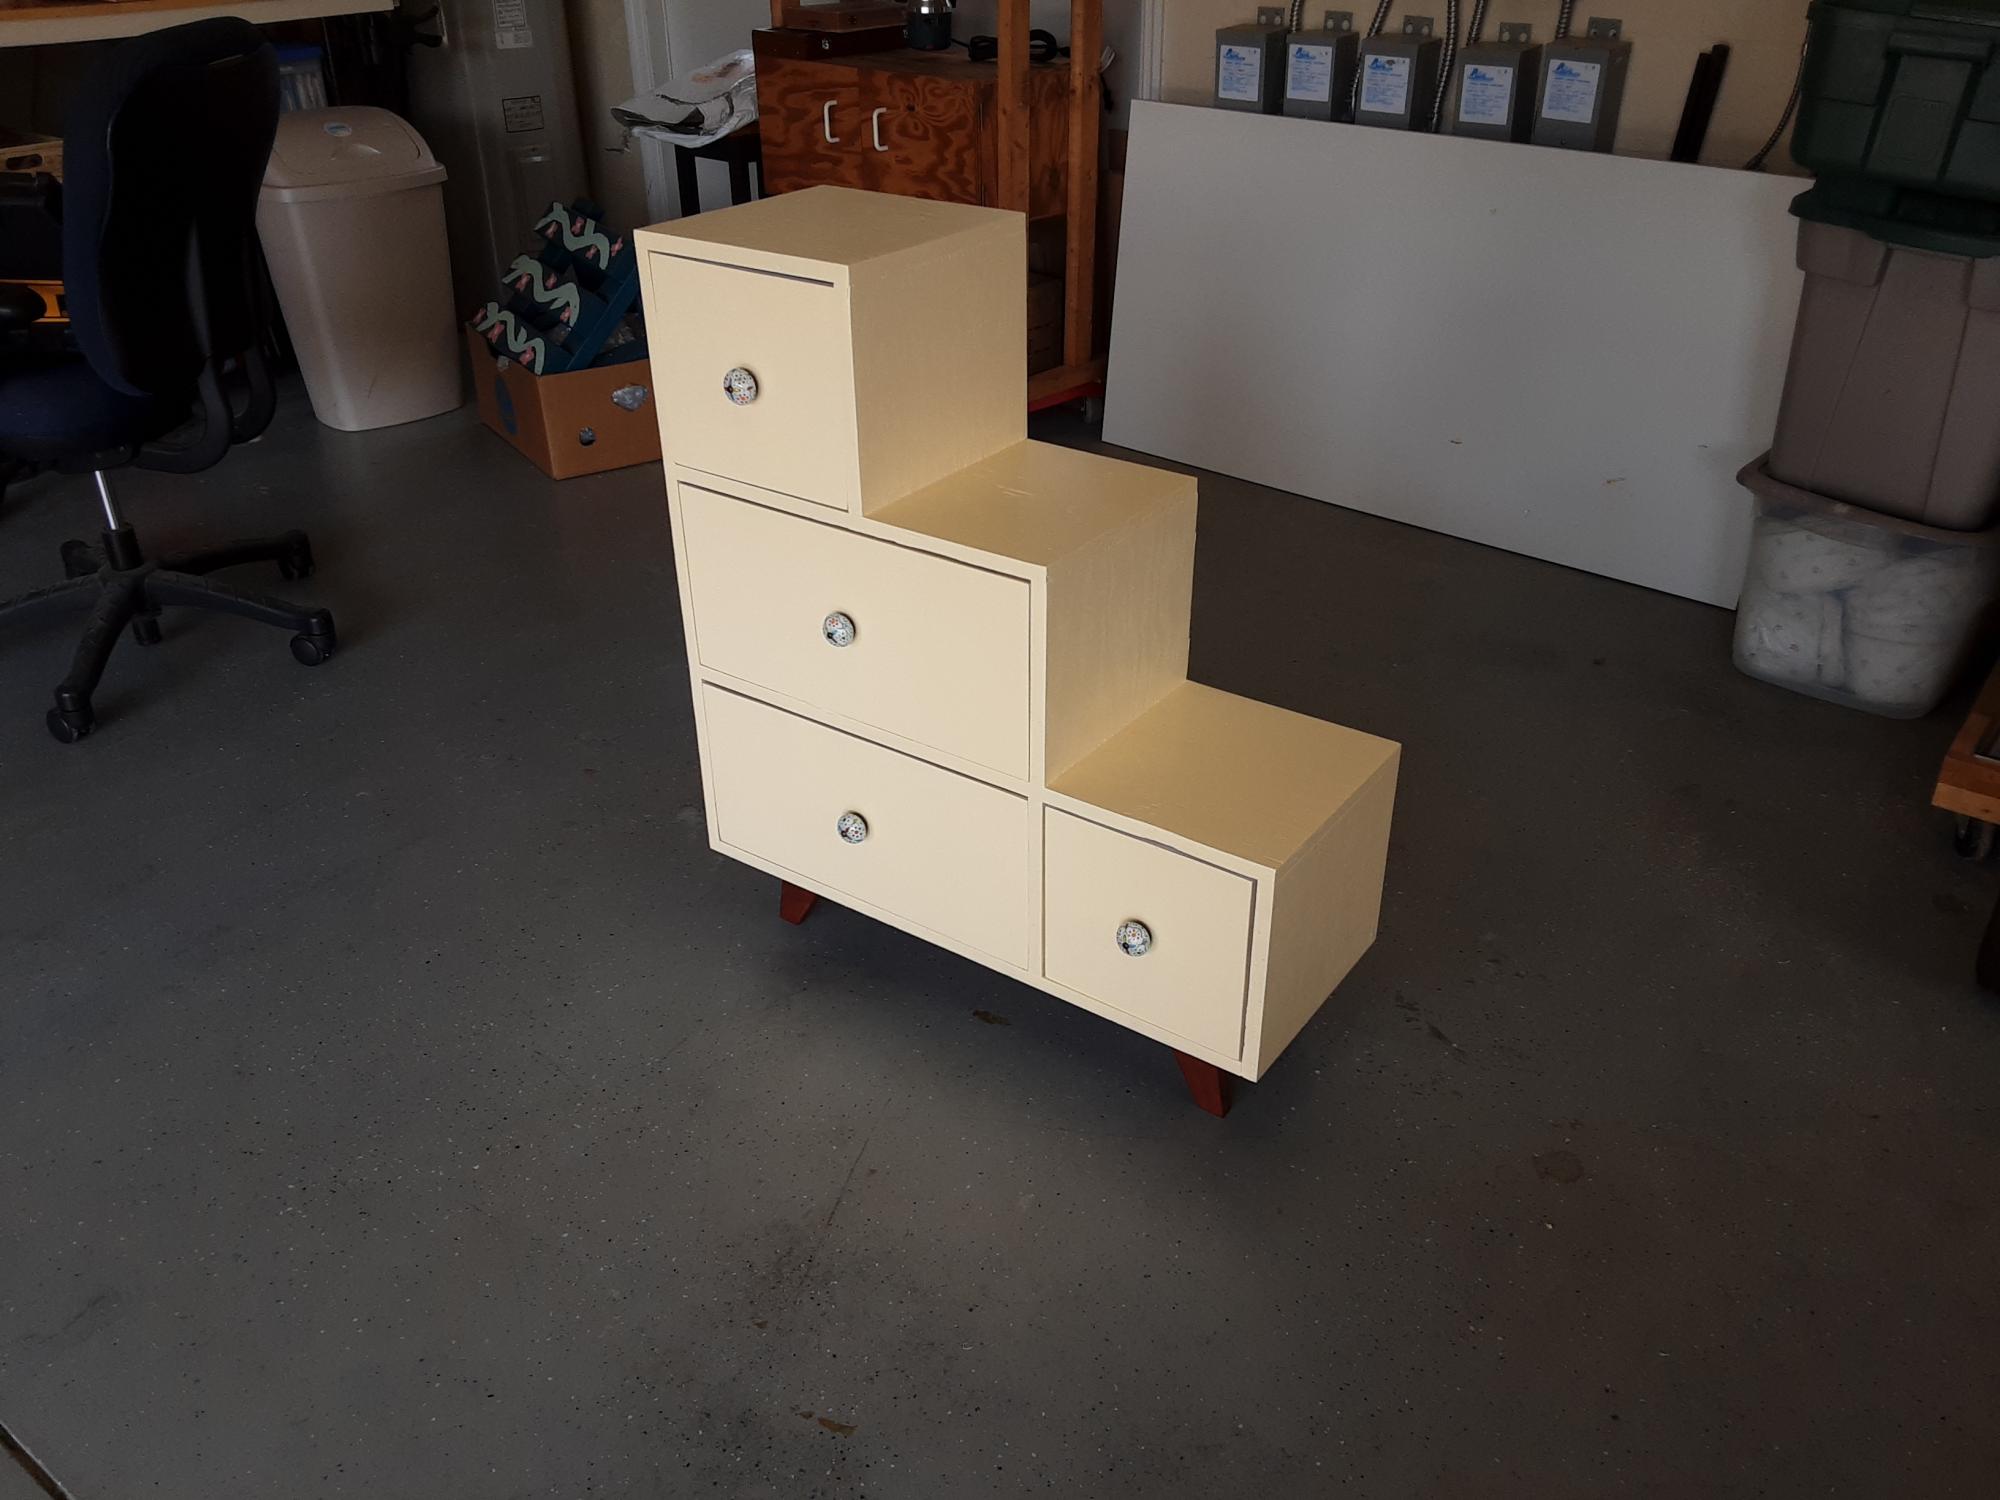
Step dresser inspired by a similar design from a boutique furniture store. We actually made three dressers using various dimensions from large, median and even small versions.
Built from Plan(s)
Comments
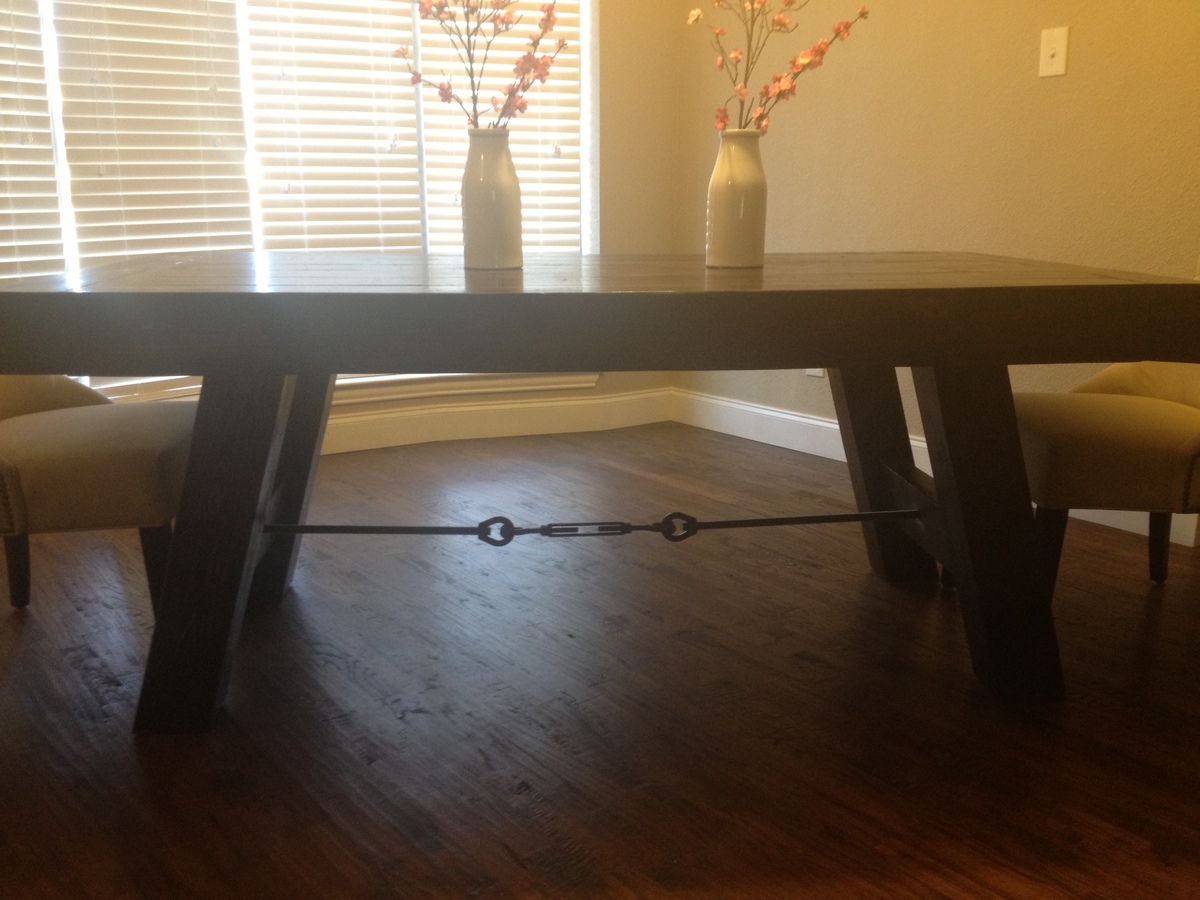
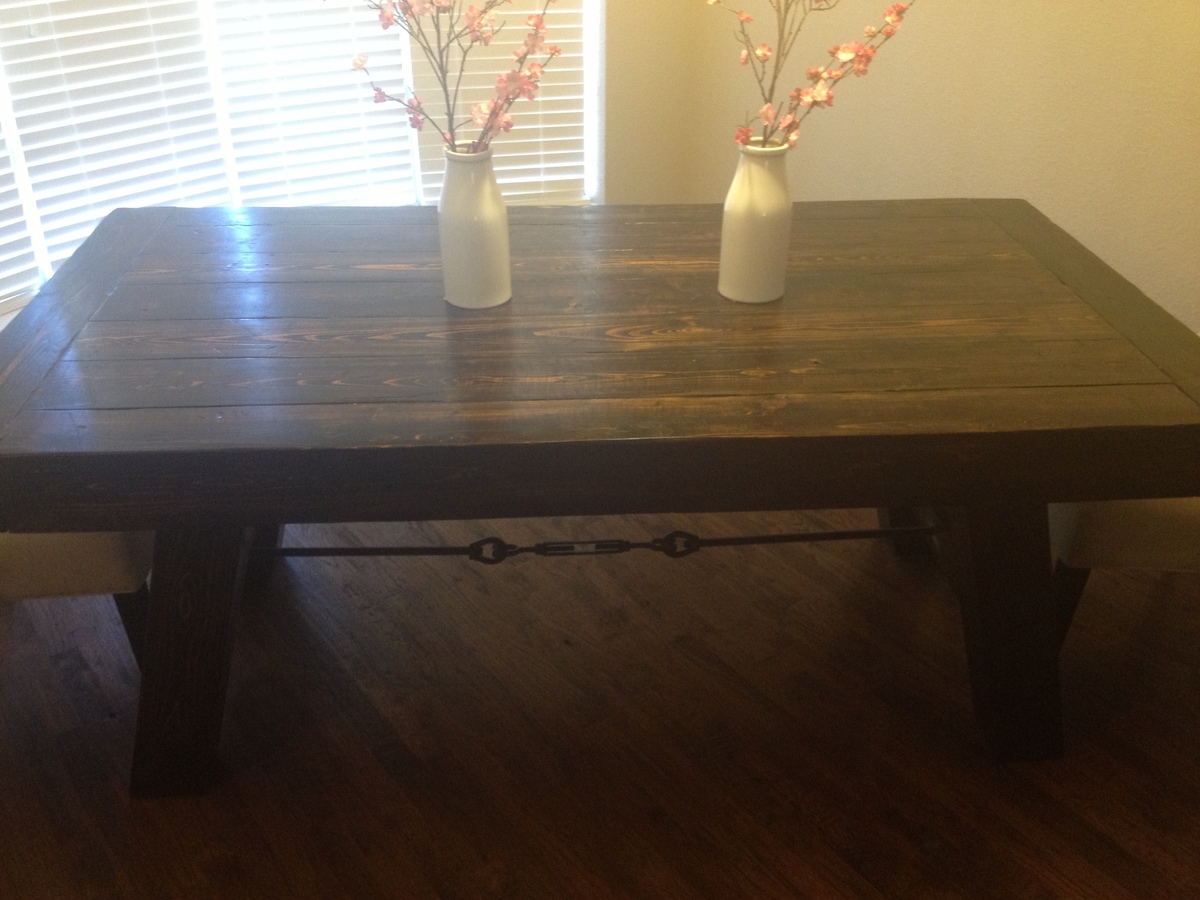
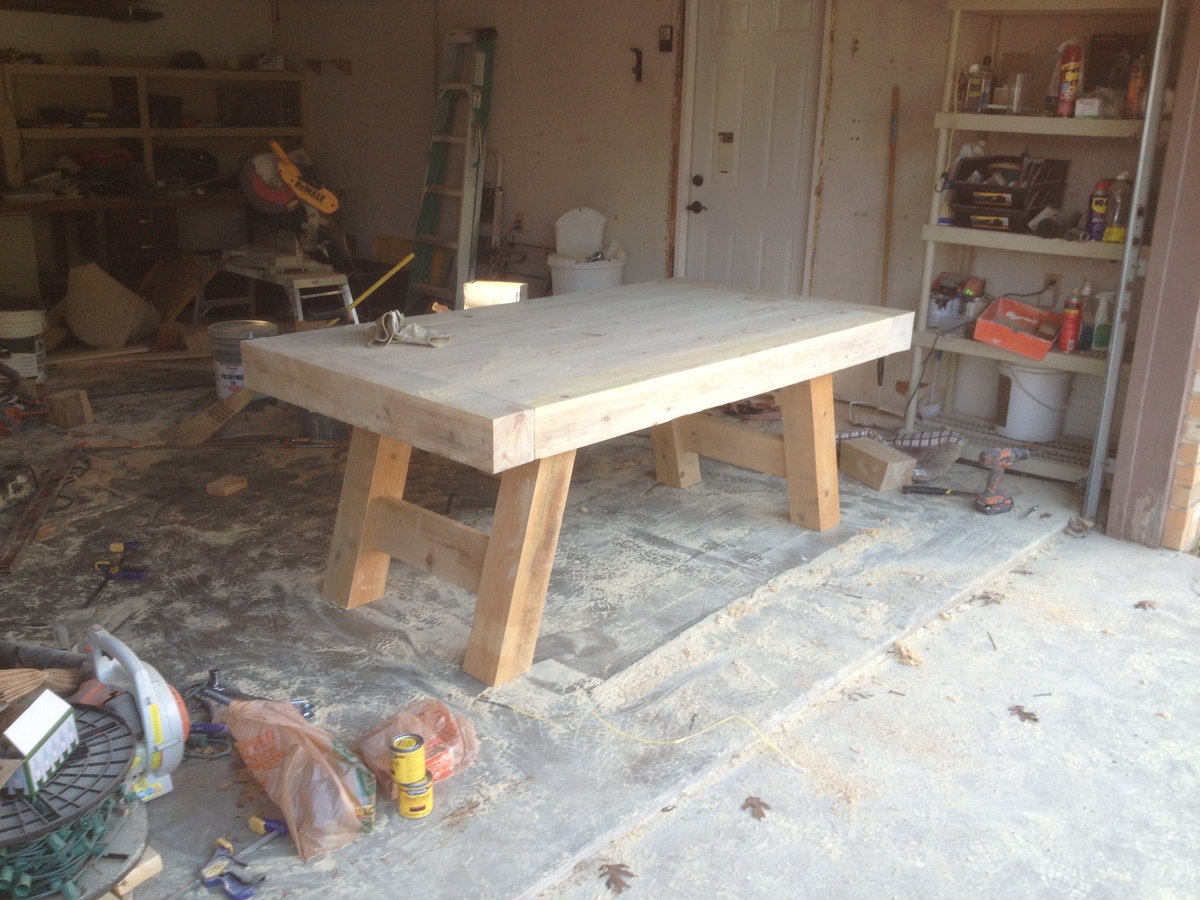
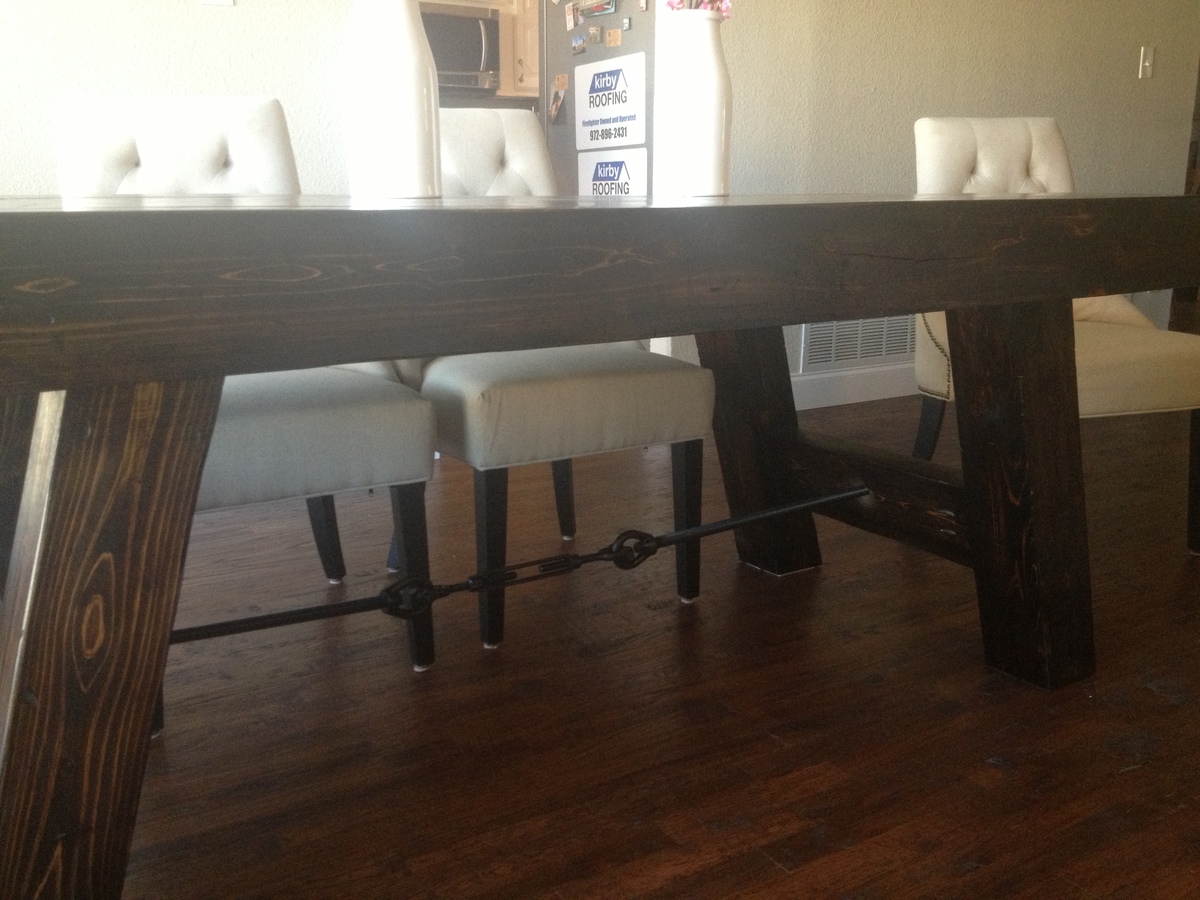
Benchwright Table
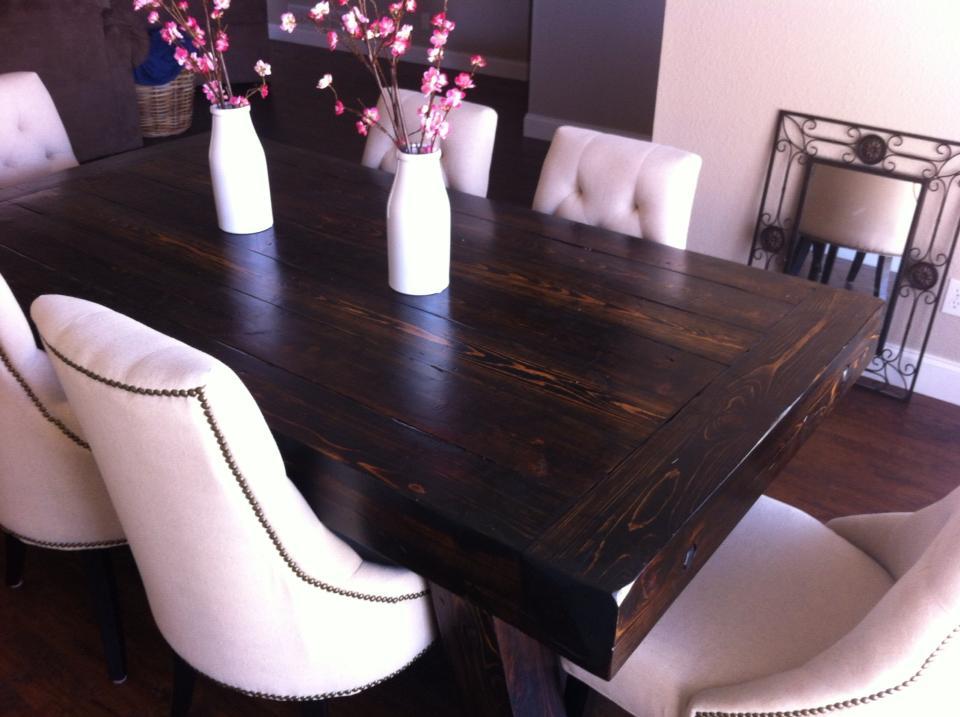
My wife loved the Benchwright table at pottery barn, and I did not love the price. Got a lot of ideas from this site and tried to make it my own. The outside and legs are made from 5"x5" Cypress, purchased from a local saw mill. I used a kreg jig on the entire thing along with lag bolts and glue. It is very heavy and I can jump up and down on it. Bought the hardware from Fastenal. Fun project, took about 16 hours total.

Built from Plan(s)
Estimated Cost
$400
Estimated Time Investment
Weekend Project (10-20 Hours)
Finish Used
Minwax Poly - 3 Coats
Recommended Skill Level
Advanced
Comments
Sat, 03/02/2013 - 18:30
I'm in love.
It's absolutely gorgeous. This is stunning. I'm incredibly jealous of this.

Sat, 03/02/2013 - 20:21
Holy Amazing!
This is by far my favorite table I've seen on here. Wow...its all I can say. I wish it was not in the $400 range.
BTW, that is some serious saw dust. haha
In reply to Holy Amazing! by jbayer80
Sun, 03/03/2013 - 05:50
Cost
Thank you,
I helped a buddy make on shortly after I made mine. He used 4x4 pine, it looks a little smaller and the pine did not stain as dark, but it is still a very nice looking table. He made it for under $150, so that might be a good option.
Sun, 03/03/2013 - 07:37
Great option
That is a great option. Hopefully when its time for a table like this I can afford the 5X5's.
What a statement that table has!

Tue, 07/30/2013 - 18:43
Wood for the top
You posted you used 5x5's for the outside and legs. What did you use for the rest of the top?
My Rustic Console Table

This is build 2 and I was really happy with how well it came together. I used Douglas Fir again as it takes the vinegar and steel wool mixture really well. This piece was hand waxed for a different look than my corner table. I love the tight grain in the top and how the variations in the grain caused some of the wood to appear almost white while the rest of the top is very grey.

Built from Plan(s)
Estimated Cost
$210.00
Estimated Time Investment
Weekend Project (10-20 Hours)
Finish Used
Steel wool and vinegar mix with minwax finishing paste hand applied.
Recommended Skill Level
Beginner
Comments

In reply to Bravo! by TwoCuteKids
Thu, 01/08/2015 - 08:42
Thanks for the very kind
Thanks for the very kind words. I was picky when I selected the boards for the top. I loved how tight the graining was. It was interesting to see how the one board went almost white. I used minwax's paste finishing wax on this particular project. I rubbed it on by hand and then used a orbital buffer to bring out the shine.
Thu, 01/08/2015 - 06:48
Clark's Hardwood Lumber
Clark's Hardwood Lumber Company in the Heights. It's awesome place with every wood imaginable. 700 East 5th 1/2 Street, Houston, TX 77007
Thu, 12/03/2015 - 17:06
X's
Thank you so much for the comment you added about scribing the angles for the X's. After a lot of frustration; purchasing a carpenter's square, a sliding t-bevel, and a protractor; and ending up with cuts I just wasn't satisfied with ... I'm so glad I took the time to page through all the comments and found yours. I wouldn't have been able to finish without it. :) THANK YOU!!!
Fri, 12/04/2015 - 16:01
to kernsbk
I've looked through pages of comments from the original plan and still haven't found the comment you are referring to. Do you recall what page it was on? I have two x's that I am ok with but next project I'd prefer a better cut.
Corner Hutch

I made this from Anna White's plans. Thanks for your idea and the plans. It is made from Mahogany, Pine, and I used 1/4 aspen plywood for the back. I made the face frame (rails and stiles) with the Mahogany, and did mortise and tennon joinery and then attached to the shelving. I made the raised panel doors out of Mahogany also and made the crown moulding as the trim piece out of the same species. The shelving and back board is from pine and capped with mahogany trim on the shelf edge. The door knobs are not yet on in the picture, but I used solid wood round knobs and stained the same colour and located the knobs up near the top of the door stiles.
Stained in Dark Walnut Minwax Water based and finished in Varathane Semi Gloss water based.


Estimated Cost
Cost was about $200 in material.
Estimated Time Investment
Week Long Project (20 Hours or More)
Finish Used
Minwax Dark Walnut water based. Finish is Varathane Semi Gloss water based. 3 coats of finish with light 320 sanding in between coats.
Recommended Skill Level
Intermediate
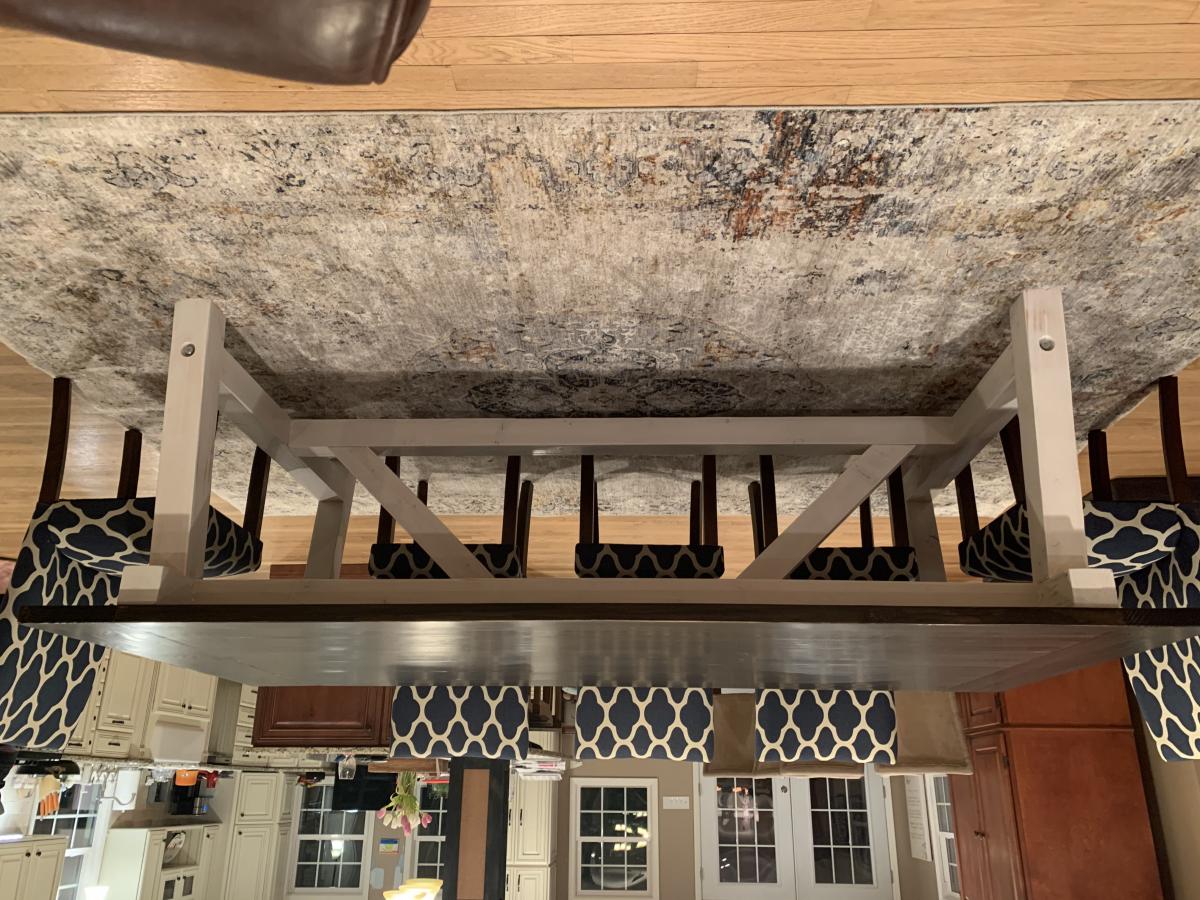
Truss Beam Dining Table
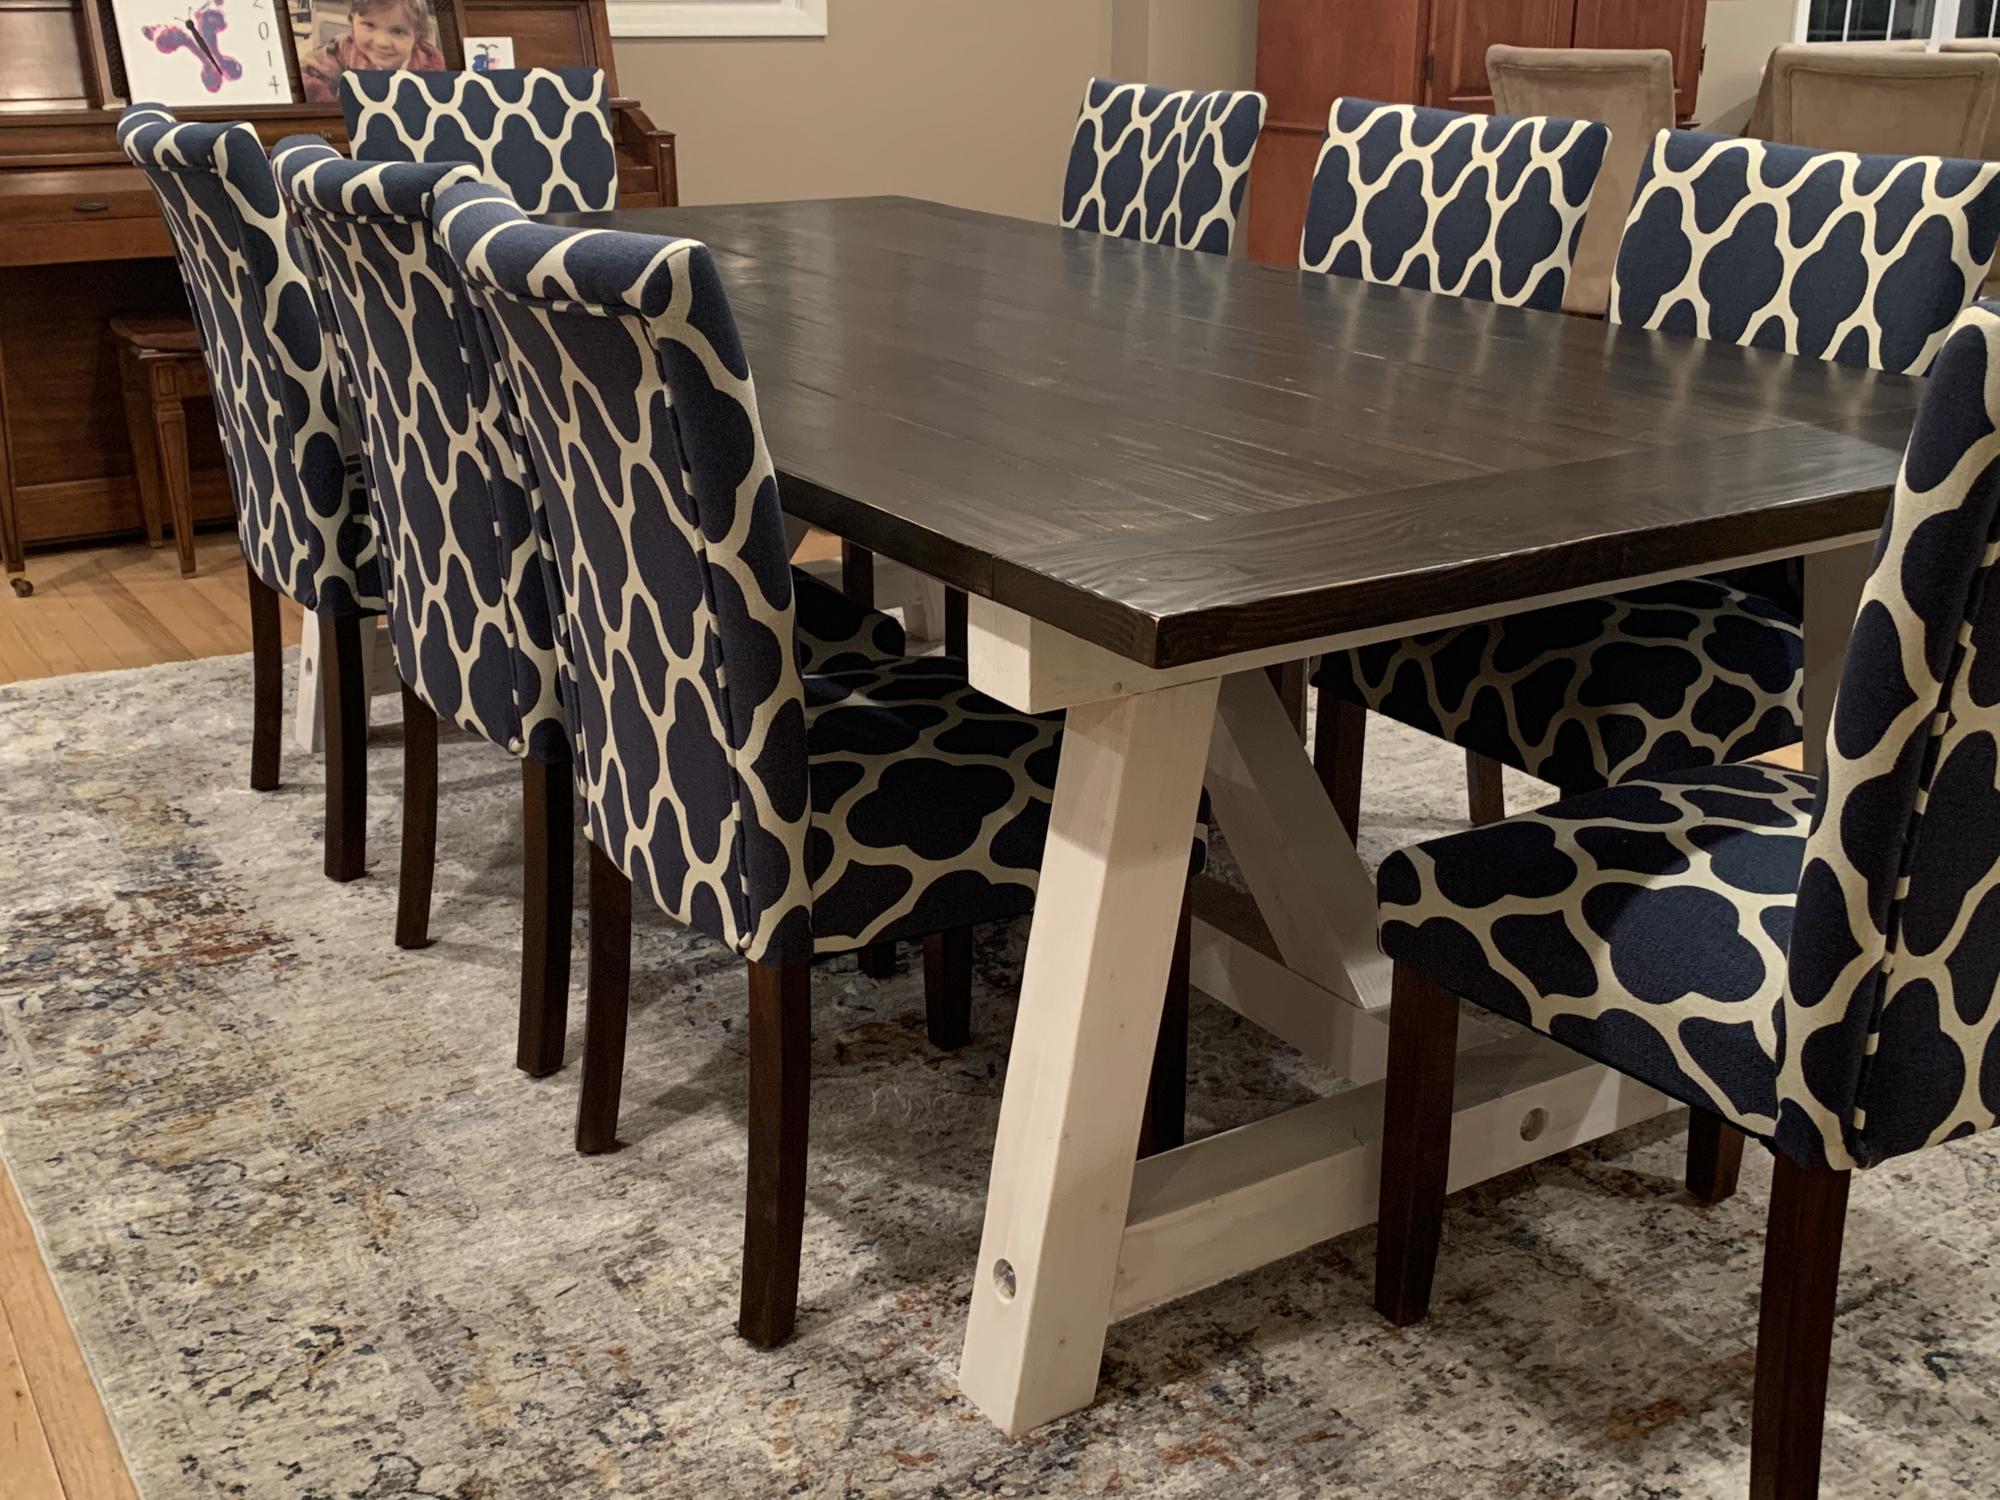
Modified plan dimensions to accommodate 8' long by 4' wide top. Also, added 4" lag screws (just for appearance) to secure beams at base of the legs and center support

Built from Plan(s)
Estimated Cost
$550
Estimated Time Investment
Week Long Project (20 Hours or More)
Finish Used
Top:
Varathane Jacobean Stain + Poly
Polyurethane\Mineral Spirit 50/50 mix (see PMK Woodworking)
Base:
Varathane Antique White Stain + Poly
Varathane Jacobean Stain + Poly
Polyurethane\Mineral Spirit 50/50 mix (see PMK Woodworking)
Base:
Varathane Antique White Stain + Poly
Recommended Skill Level
Intermediate
Comments
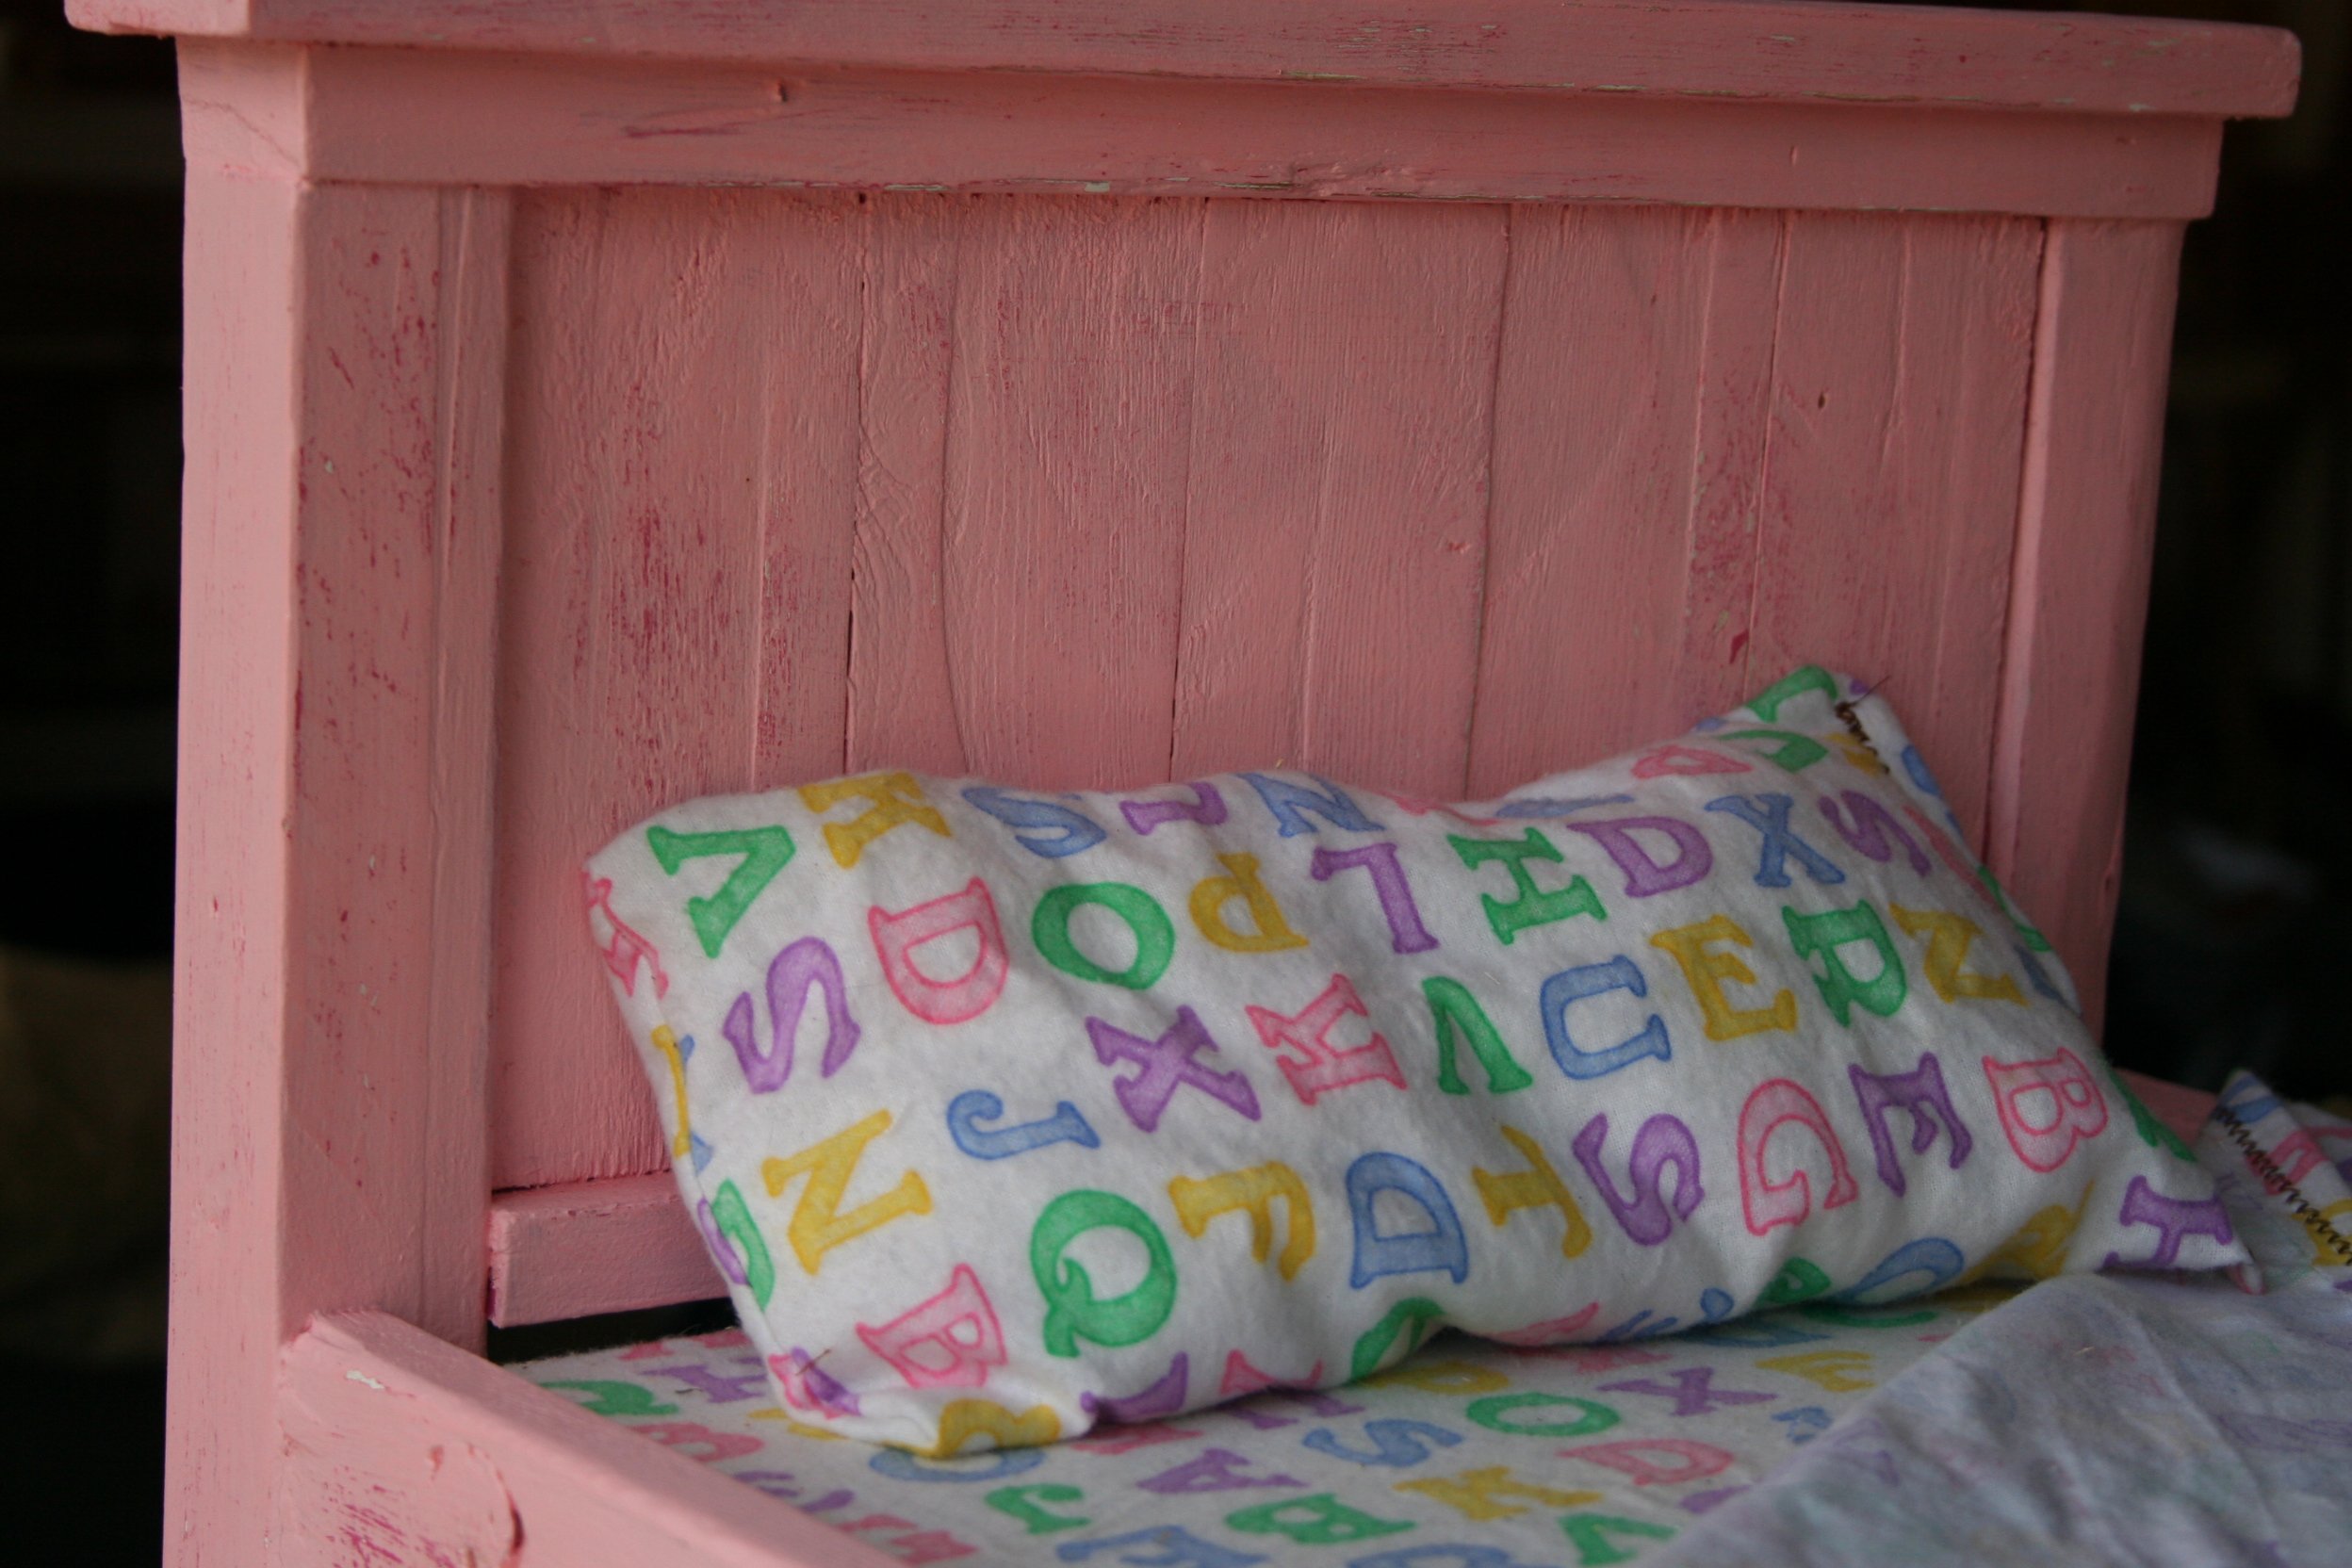
Ellery's loft bed

My 7 year old daughter LOVES her new loft bed!!! It was a fun build. Plans were very accurate and simple to follow. Took a weekend to build and about 5 nights to paint.
Next I plan on building a desk and some shelves under the bed. More pics to come!
Built from Plan(s)
Estimated Cost
about $300
Estimated Time Investment
Week Long Project (20 Hours or More)
Finish Used
Behr Premium Plus
Recommended Skill Level
Beginner
Comments

Fri, 03/08/2013 - 19:35
Thanks so much for this post!
Thanks so much for this post! I hope your daughter loves this bed as much as I do! Love the wall color, by the way!
Window Pane-style Collage

I've been seeing a lot of window panes turned photo frame and really liked the look. We didn't have any extra panes around but I did have a bunch of scrap pieces of 3/4 inch plywood so I decided to make my own!


Estimated Cost
Wood was free, scraps I had laying around.
Estimated Time Investment
Afternoon Project (3-6 Hours)
Finish Used
I used Minwax's Early American stain first. Then I blotched on some Vaseline to help with with distressing later. I followed up with 2 coats of an Antique White paint I had leftover from another project. After the paint dried I hit it with 220 grit sandpaper.
Recommended Skill Level
Beginner
Comments
Sun, 01/11/2015 - 01:50
This is great! I love the
This is great! I love the vintage look and the black and whites!
X-Bar Coffee table

We built our coffee table to match our farmhouse entry table! I love the tutorials from Ana White! We made changes to the bottom shelf and used 2x2 slats instead of the 1x12 pieces. Also changed the dimensions so it measures about 56x34 (kept the height the same). It complements our living room perfectly! I can't wait to built end tables next!

Estimated Cost
$87
Estimated Time Investment
Day Project (6-9 Hours)
Finish Used
Annie Sloan old white for base. Top and "x" white wash, then stained with Briarsmoke. Clear wax coat after then finished with a coat of matte polyurethane.
Recommended Skill Level
Beginner
Rustic X Desk- T-shaped
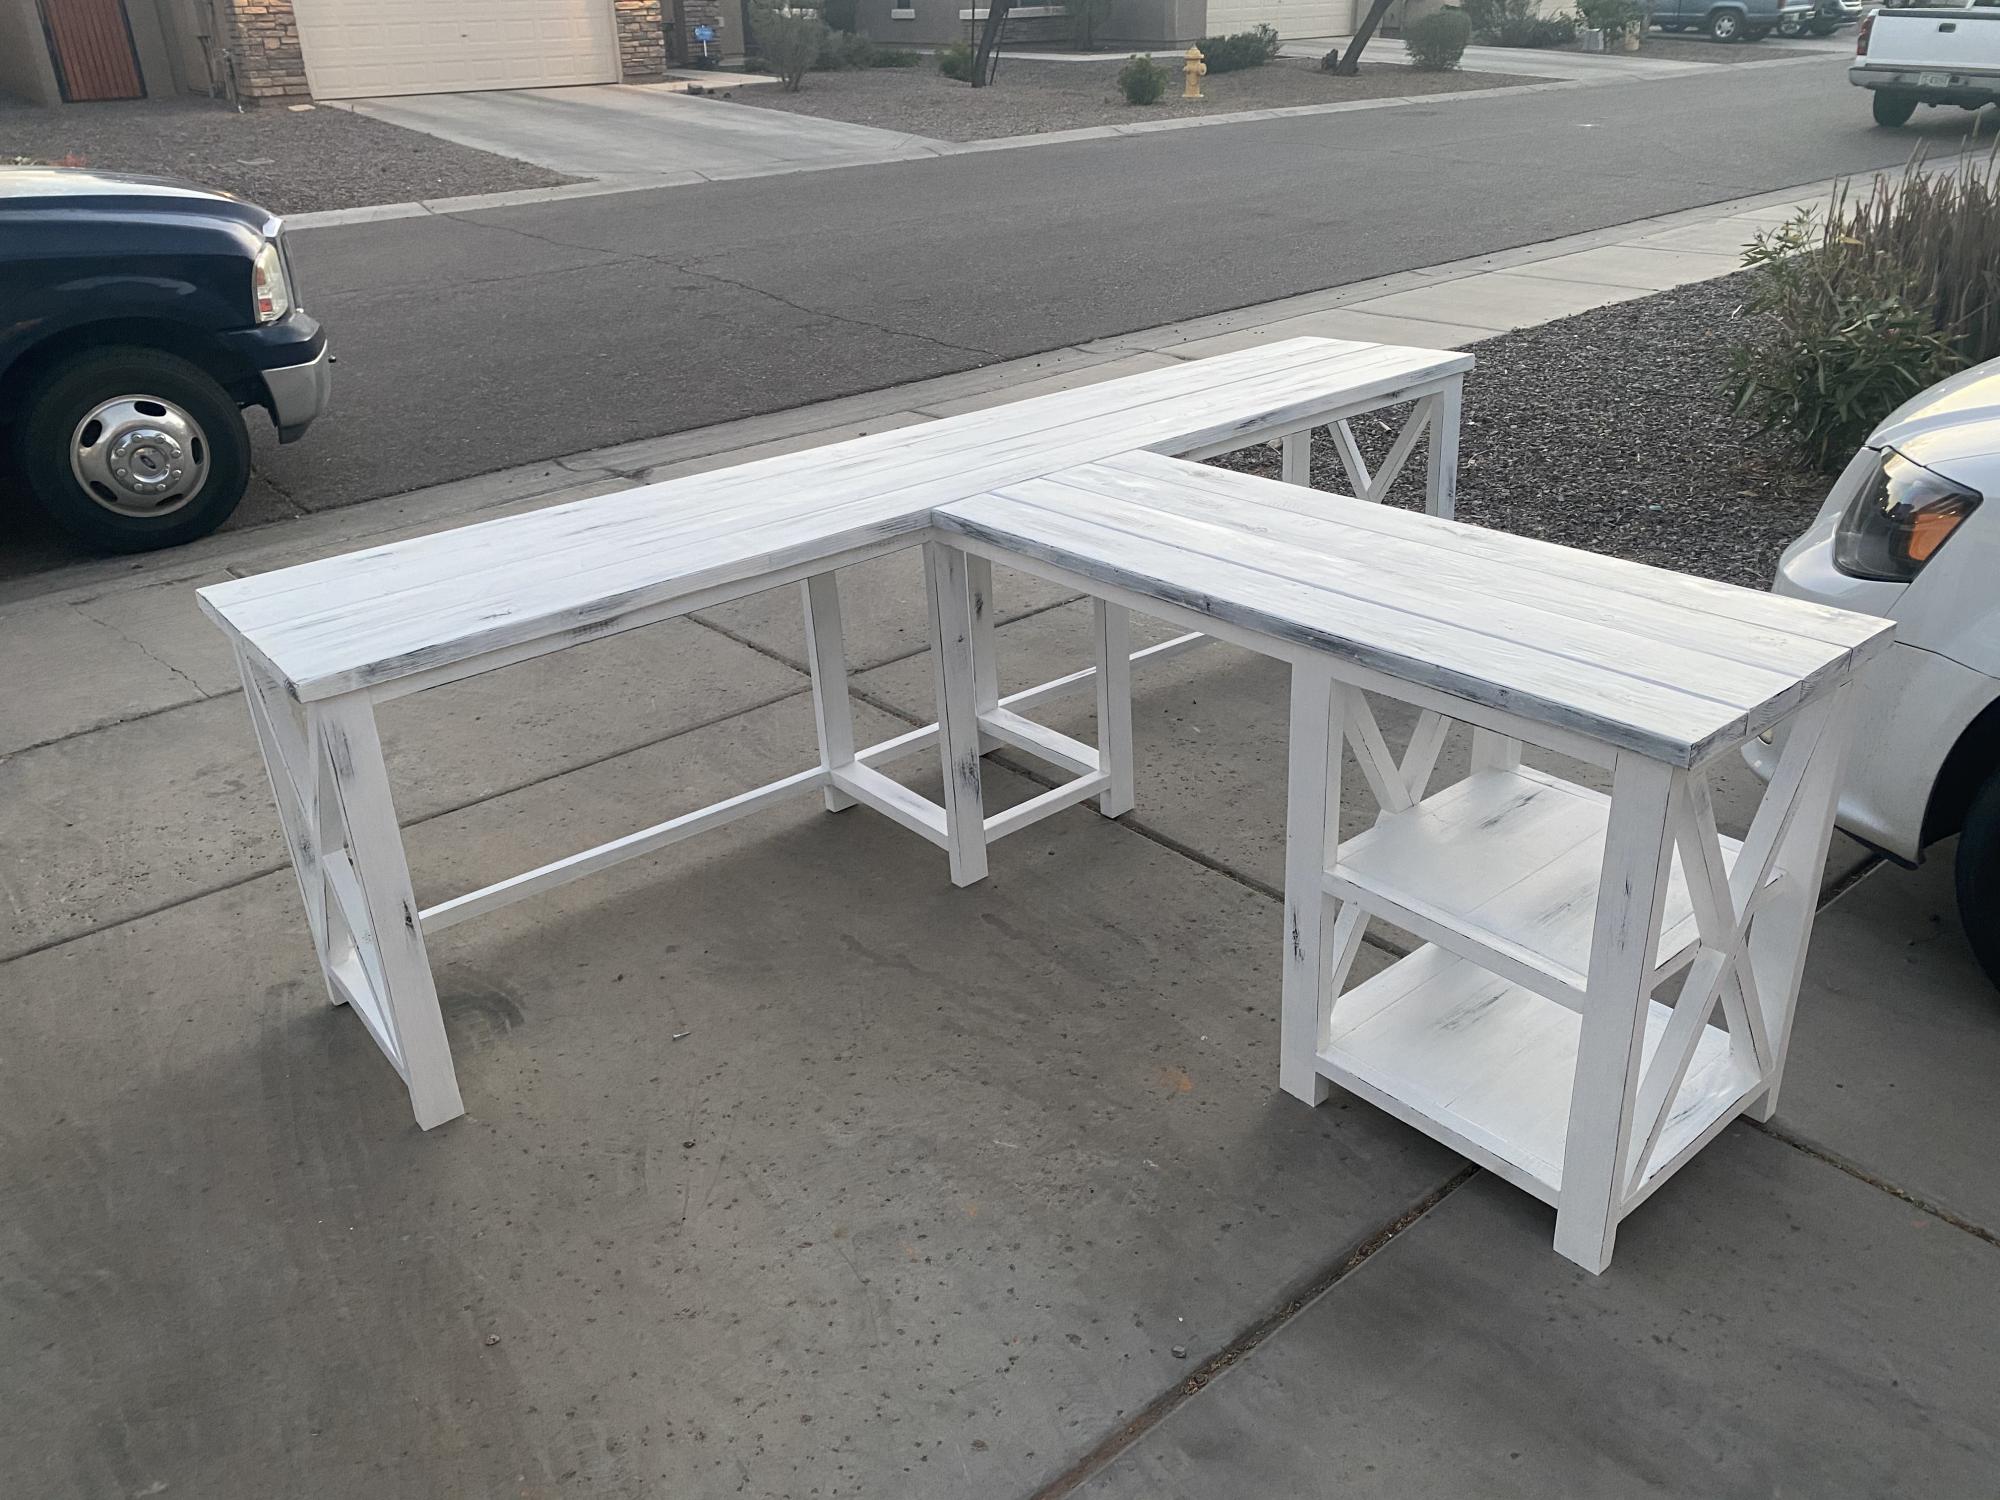
A friend wanted a T-shaped desk, but I couldn’t find plans for it, so I was inspired by these plans to build this!
Built from Plan(s)
Estimated Cost
$150
Estimated Time Investment
Week Long Project (20 Hours or More)
Finish Used
Ebony stain as a base, white paint over it, and then sanded lightly in certain areas for a distressed white look.
Recommended Skill Level
Intermediate
Comments
Tue, 12/28/2021 - 14:22
Do you have plans for this…
Do you have plans for this desk? I want to make the t shaped desk and I have been looking for something like this. I love how you modified it
Standard Kids Table Design + Lego Top

I used the Clara Table design then decided to make the table top into a lego table. I bought (4) Lego Plates from Target at $15 each. Then super glued the Lego Plates onto the tabletop.
*** Note- Make sure that the spacing between Lego Plates is correct. I used different Lego's to connect the different plates to make sure that the spacing was correct.
Thanks for the ideas Ana!
Estimated Time Investment
Week Long Project (20 Hours or More)
Recommended Skill Level
Beginner
head and footboards from 140 year old doors ''queen''
i was able to rescue a few doors out of a roughly 140 year old house. so the idea of a head and footboard came to mind. the headboard is oak was the front door, and the footboard is pine from bedroom. these were not taken apart just sanded cut to length and finished. now everyone around me wants a pair.

Built from Plan(s)
Estimated Cost
i already had sand paper and polyurethane so i would estimate if buying those supplies $30
Estimated Time Investment
Day Project (6-9 Hours)
Finish Used
polyurethane
Recommended Skill Level
Beginner
Don't forget the food

I really didn't want to need to feed/water the chickens too much, but at the same time only having four didn't really necessitate a massive system. I found this video for a feeder (https://youtu.be/pzW4YytXYaQ ), and then bought some sideways chicken nipples off of amazon and <~$20 later it was done. I've since gone in and made the street elbows for the feeder a little longer than he recommends, which has made them truly zero waste.
Also, a couple of good wheels from Tractor Supply (https://www.tractorsupply.com/tsc/product/titan-casters-4-in-rigid-poly…) on the one side and some handles on the other and boom, chicken tractor.
Finally, I noticed one person that had extended the rungs on the ramp out... my chickens love that and are on them almost all the time. Lastly, I put a quick 1x2 at the top of the ramp to keep the chips from spilling when I move it, but they really like roosting there, now.
Estimated Time Investment
Weekend Project (10-20 Hours)
Recommended Skill Level
Intermediate
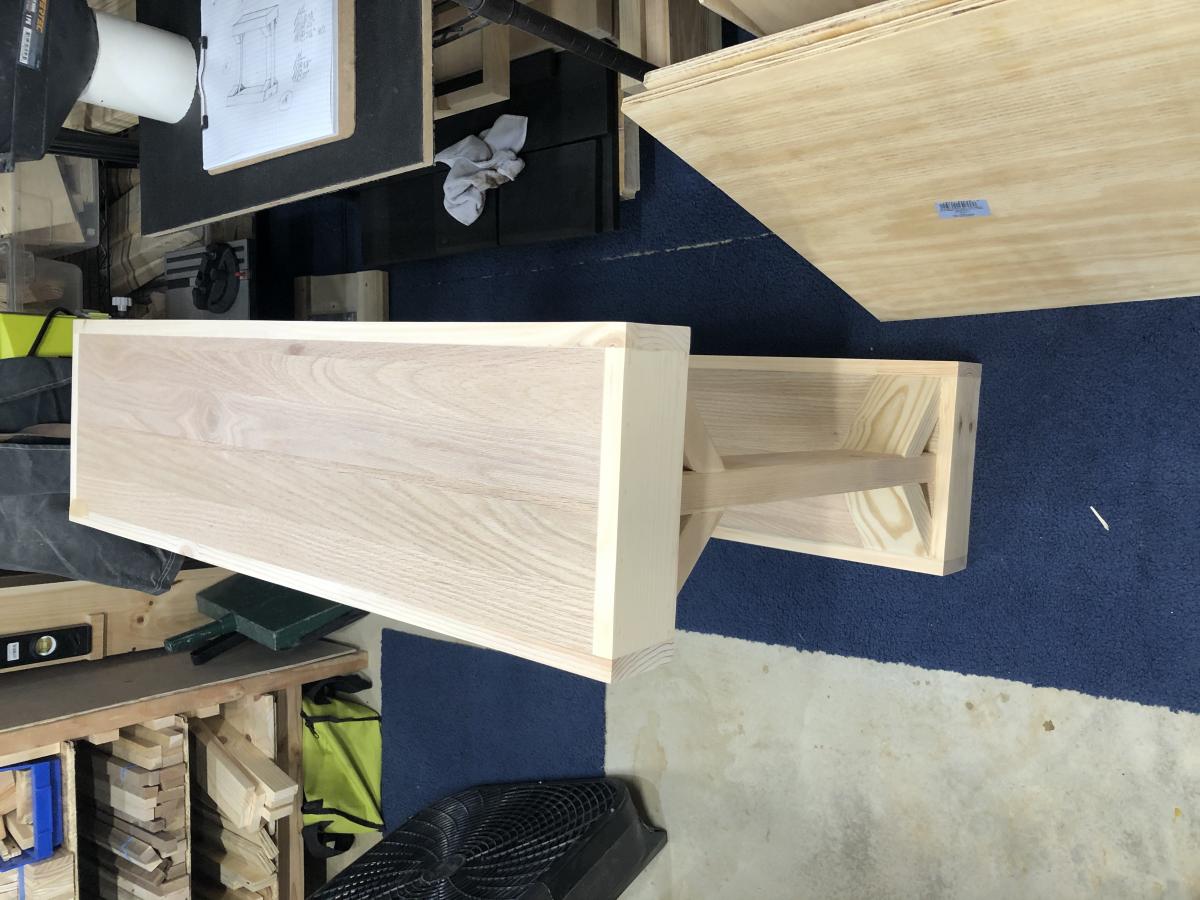
Narrow Console Table
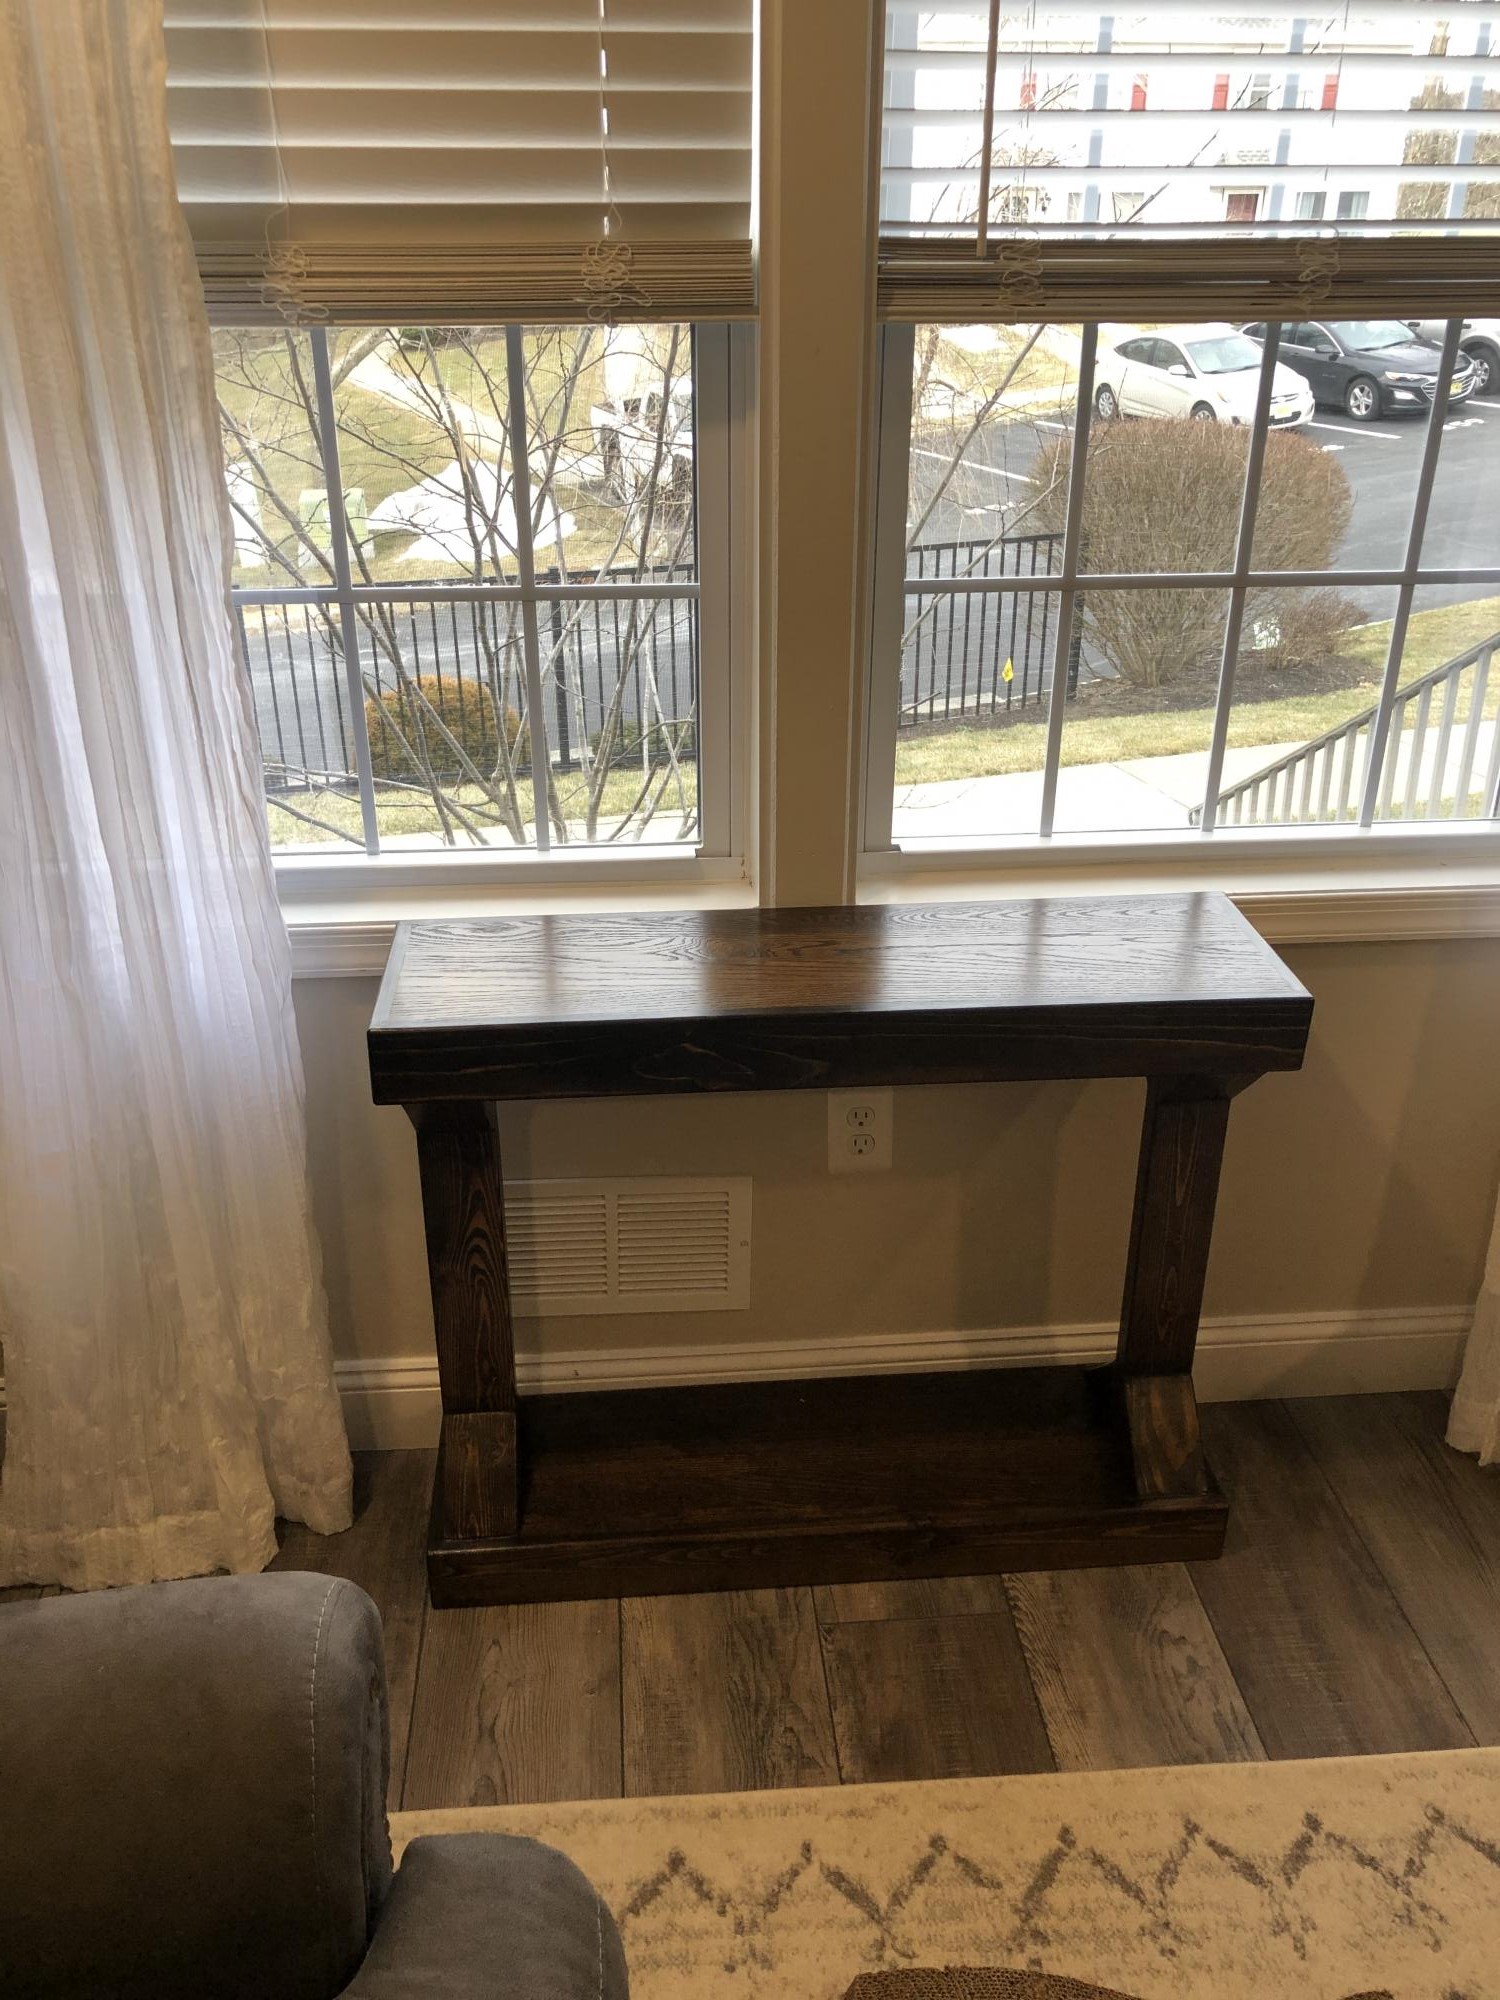
This table was very easy to build and a lot of credit has to be given to how in depth the plans were! So much detail.
I wish my 2x4’s weren’t twisted because now I have to shim one side so it doesn’t rock but that’s all on me lol.
Great plans and I plan on making more of these! Thanks!

Built from Plan(s)
Estimated Cost
$15
Estimated Time Investment
Weekend Project (10-20 Hours)
Finish Used
Minwax Dark Walnut
Minwax Poly
Minwax Poly
Recommended Skill Level
Beginner
Comments
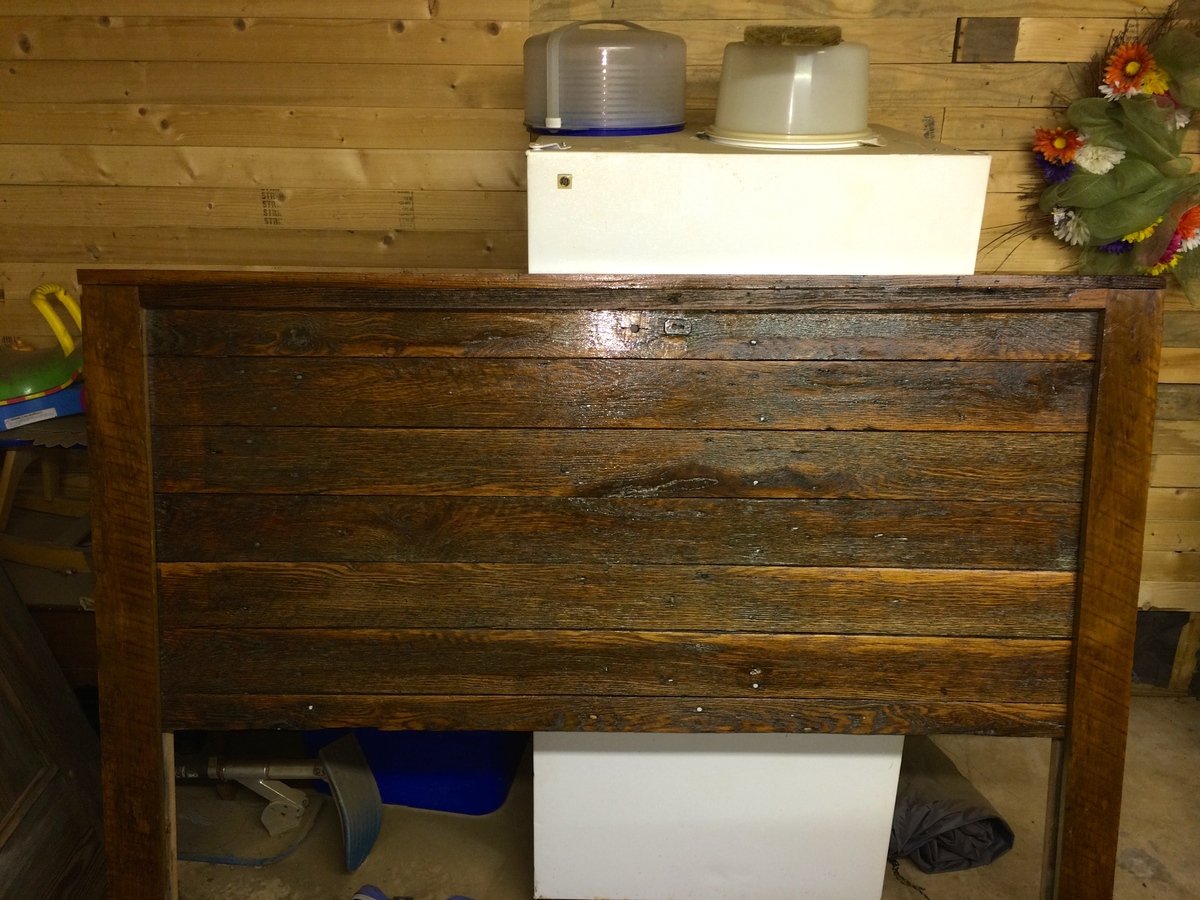
Reclaimed wood full size headboard

I really enjoyed building this headboard. I had all of the wood cut at Home Depot saving some time. Putting the headboard together was pretty simple. First I applied wood conditioner then I used an expresso stain. I then sanded everything and used Rustoleum satin fossil colored spray paint. After the paint dried, I sanded again and applied Minwax express color in walnut. That was it! I love how this turned out.

Estimated Cost
$40
Estimated Time Investment
Afternoon Project (3-6 Hours)
Recommended Skill Level
Beginner
Comments
Mon, 07/15/2019 - 18:43
This is gorgeous! I wanted…
This is gorgeous! I wanted to ask if you used pocket hole screws or not? The product list calls for them, but never saw them mentioned in the actual plans. Thank you!
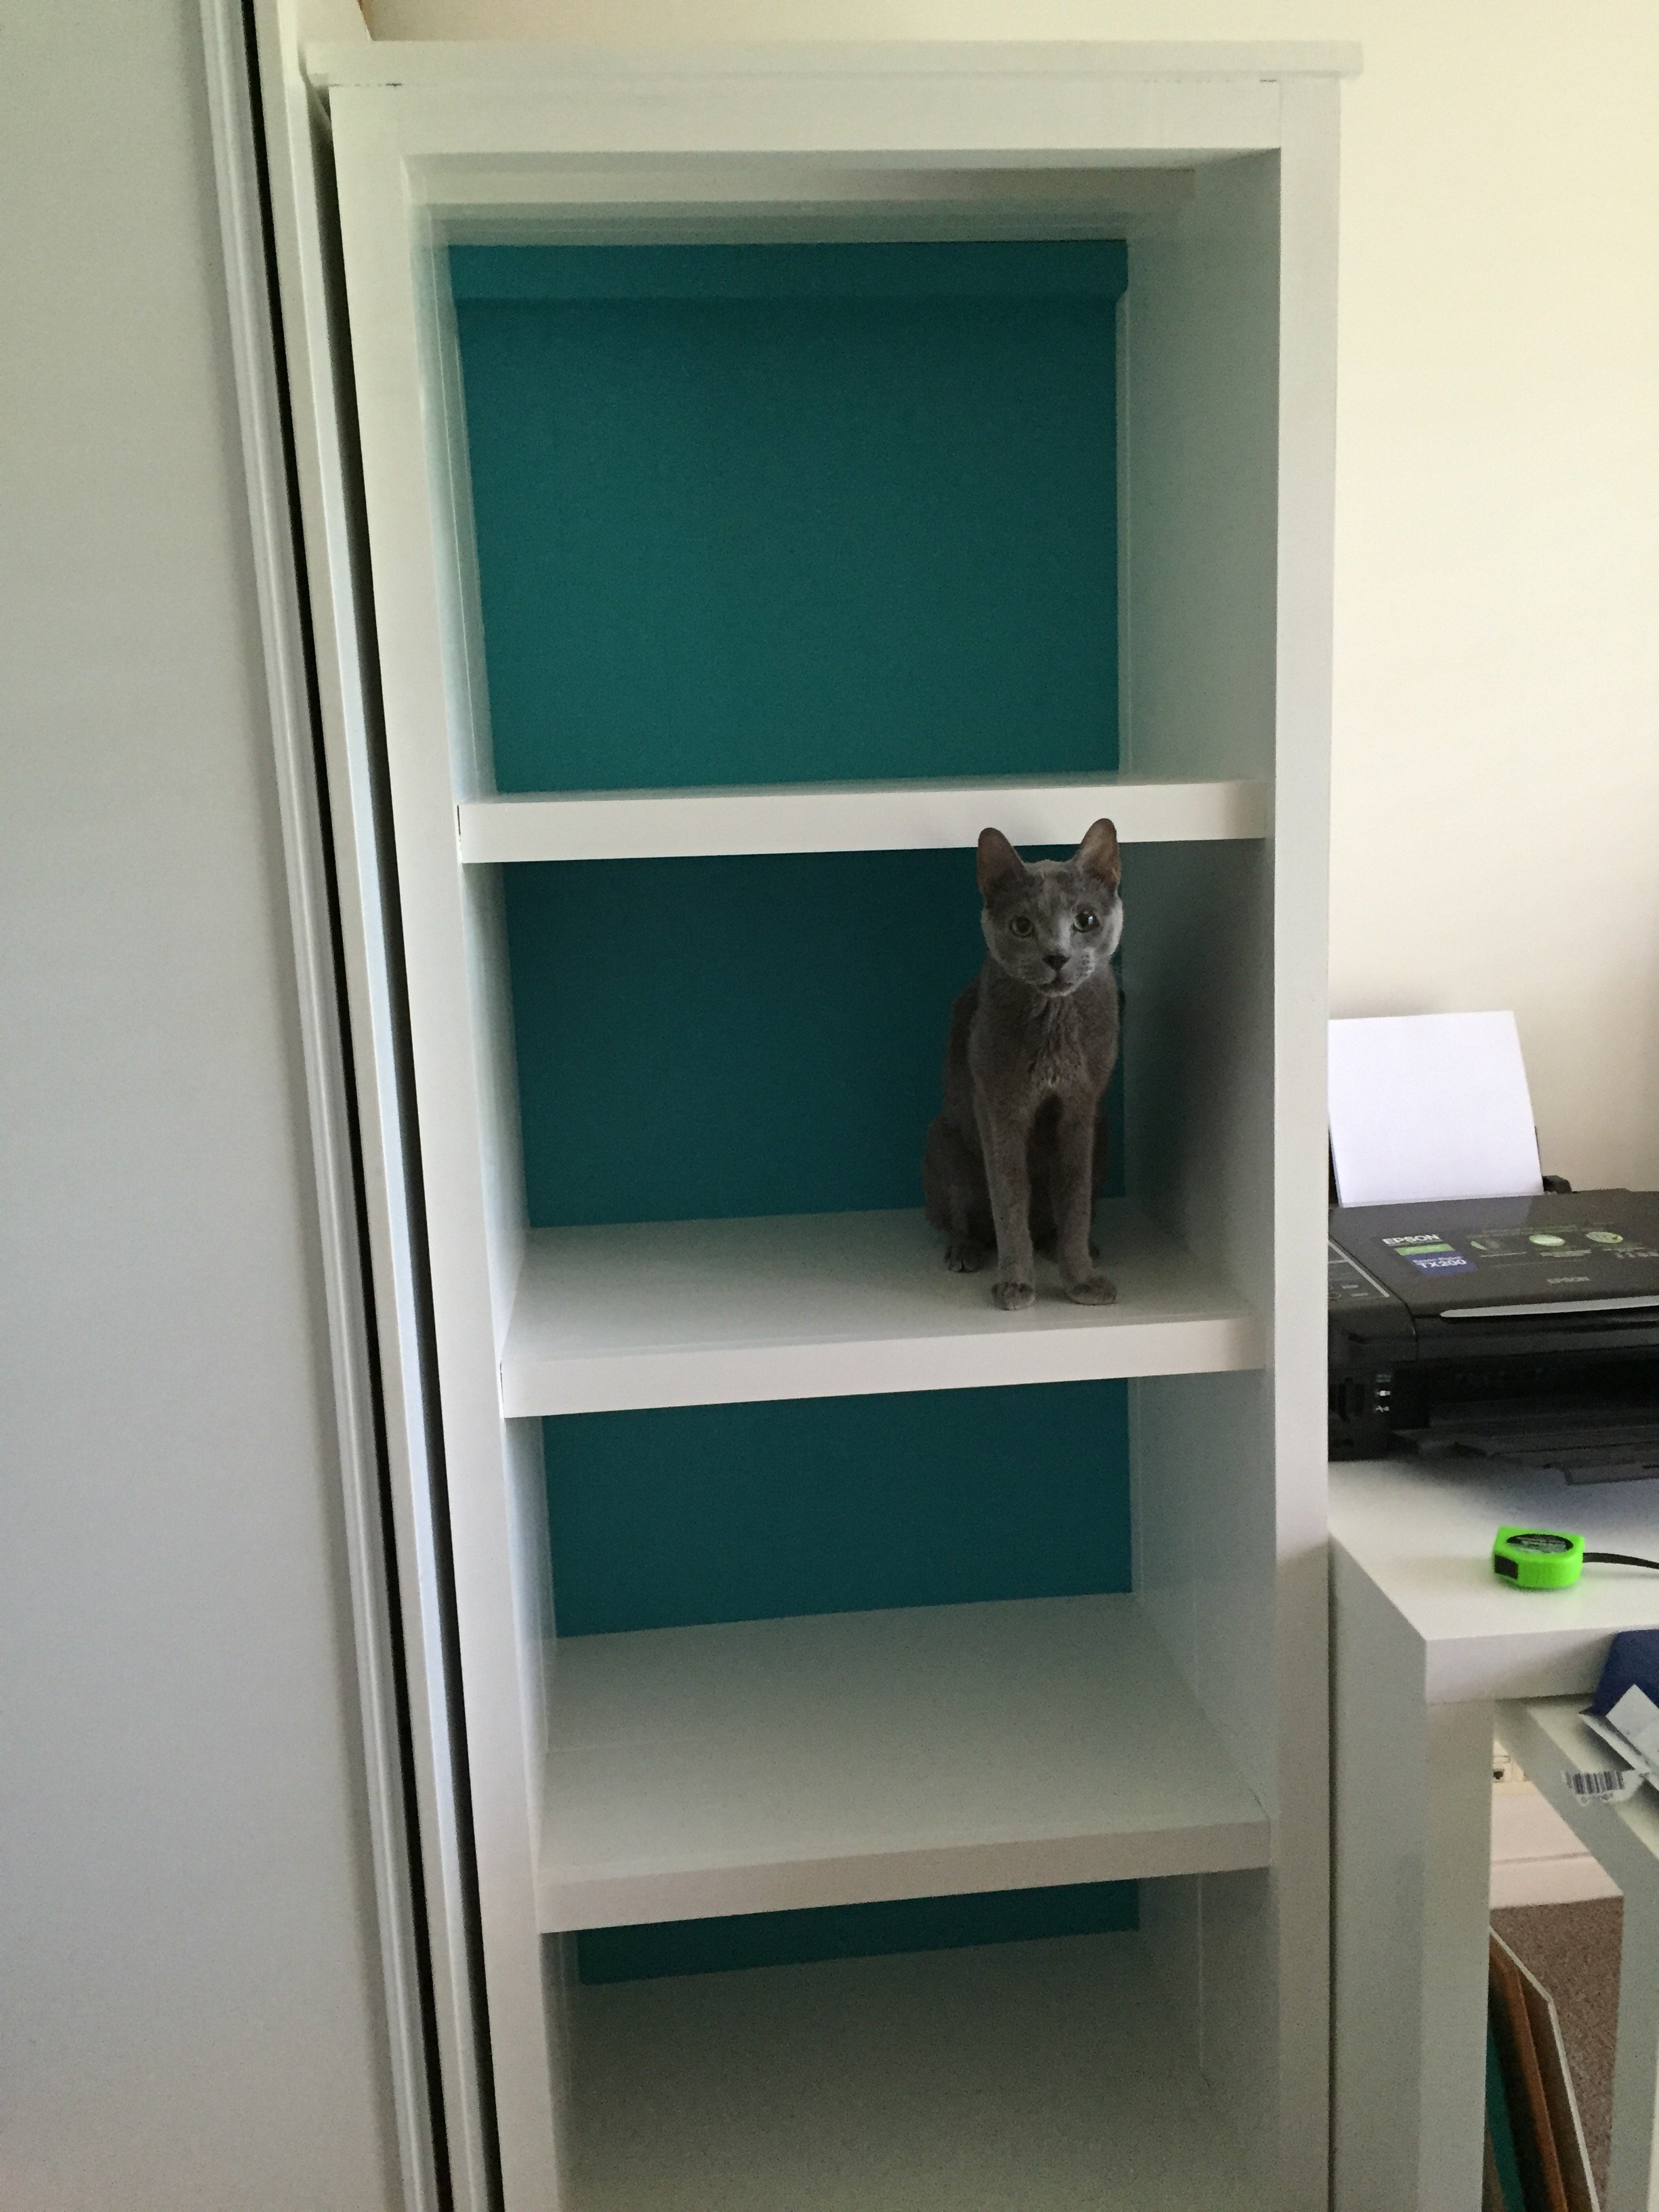
Kentwood Bookcase
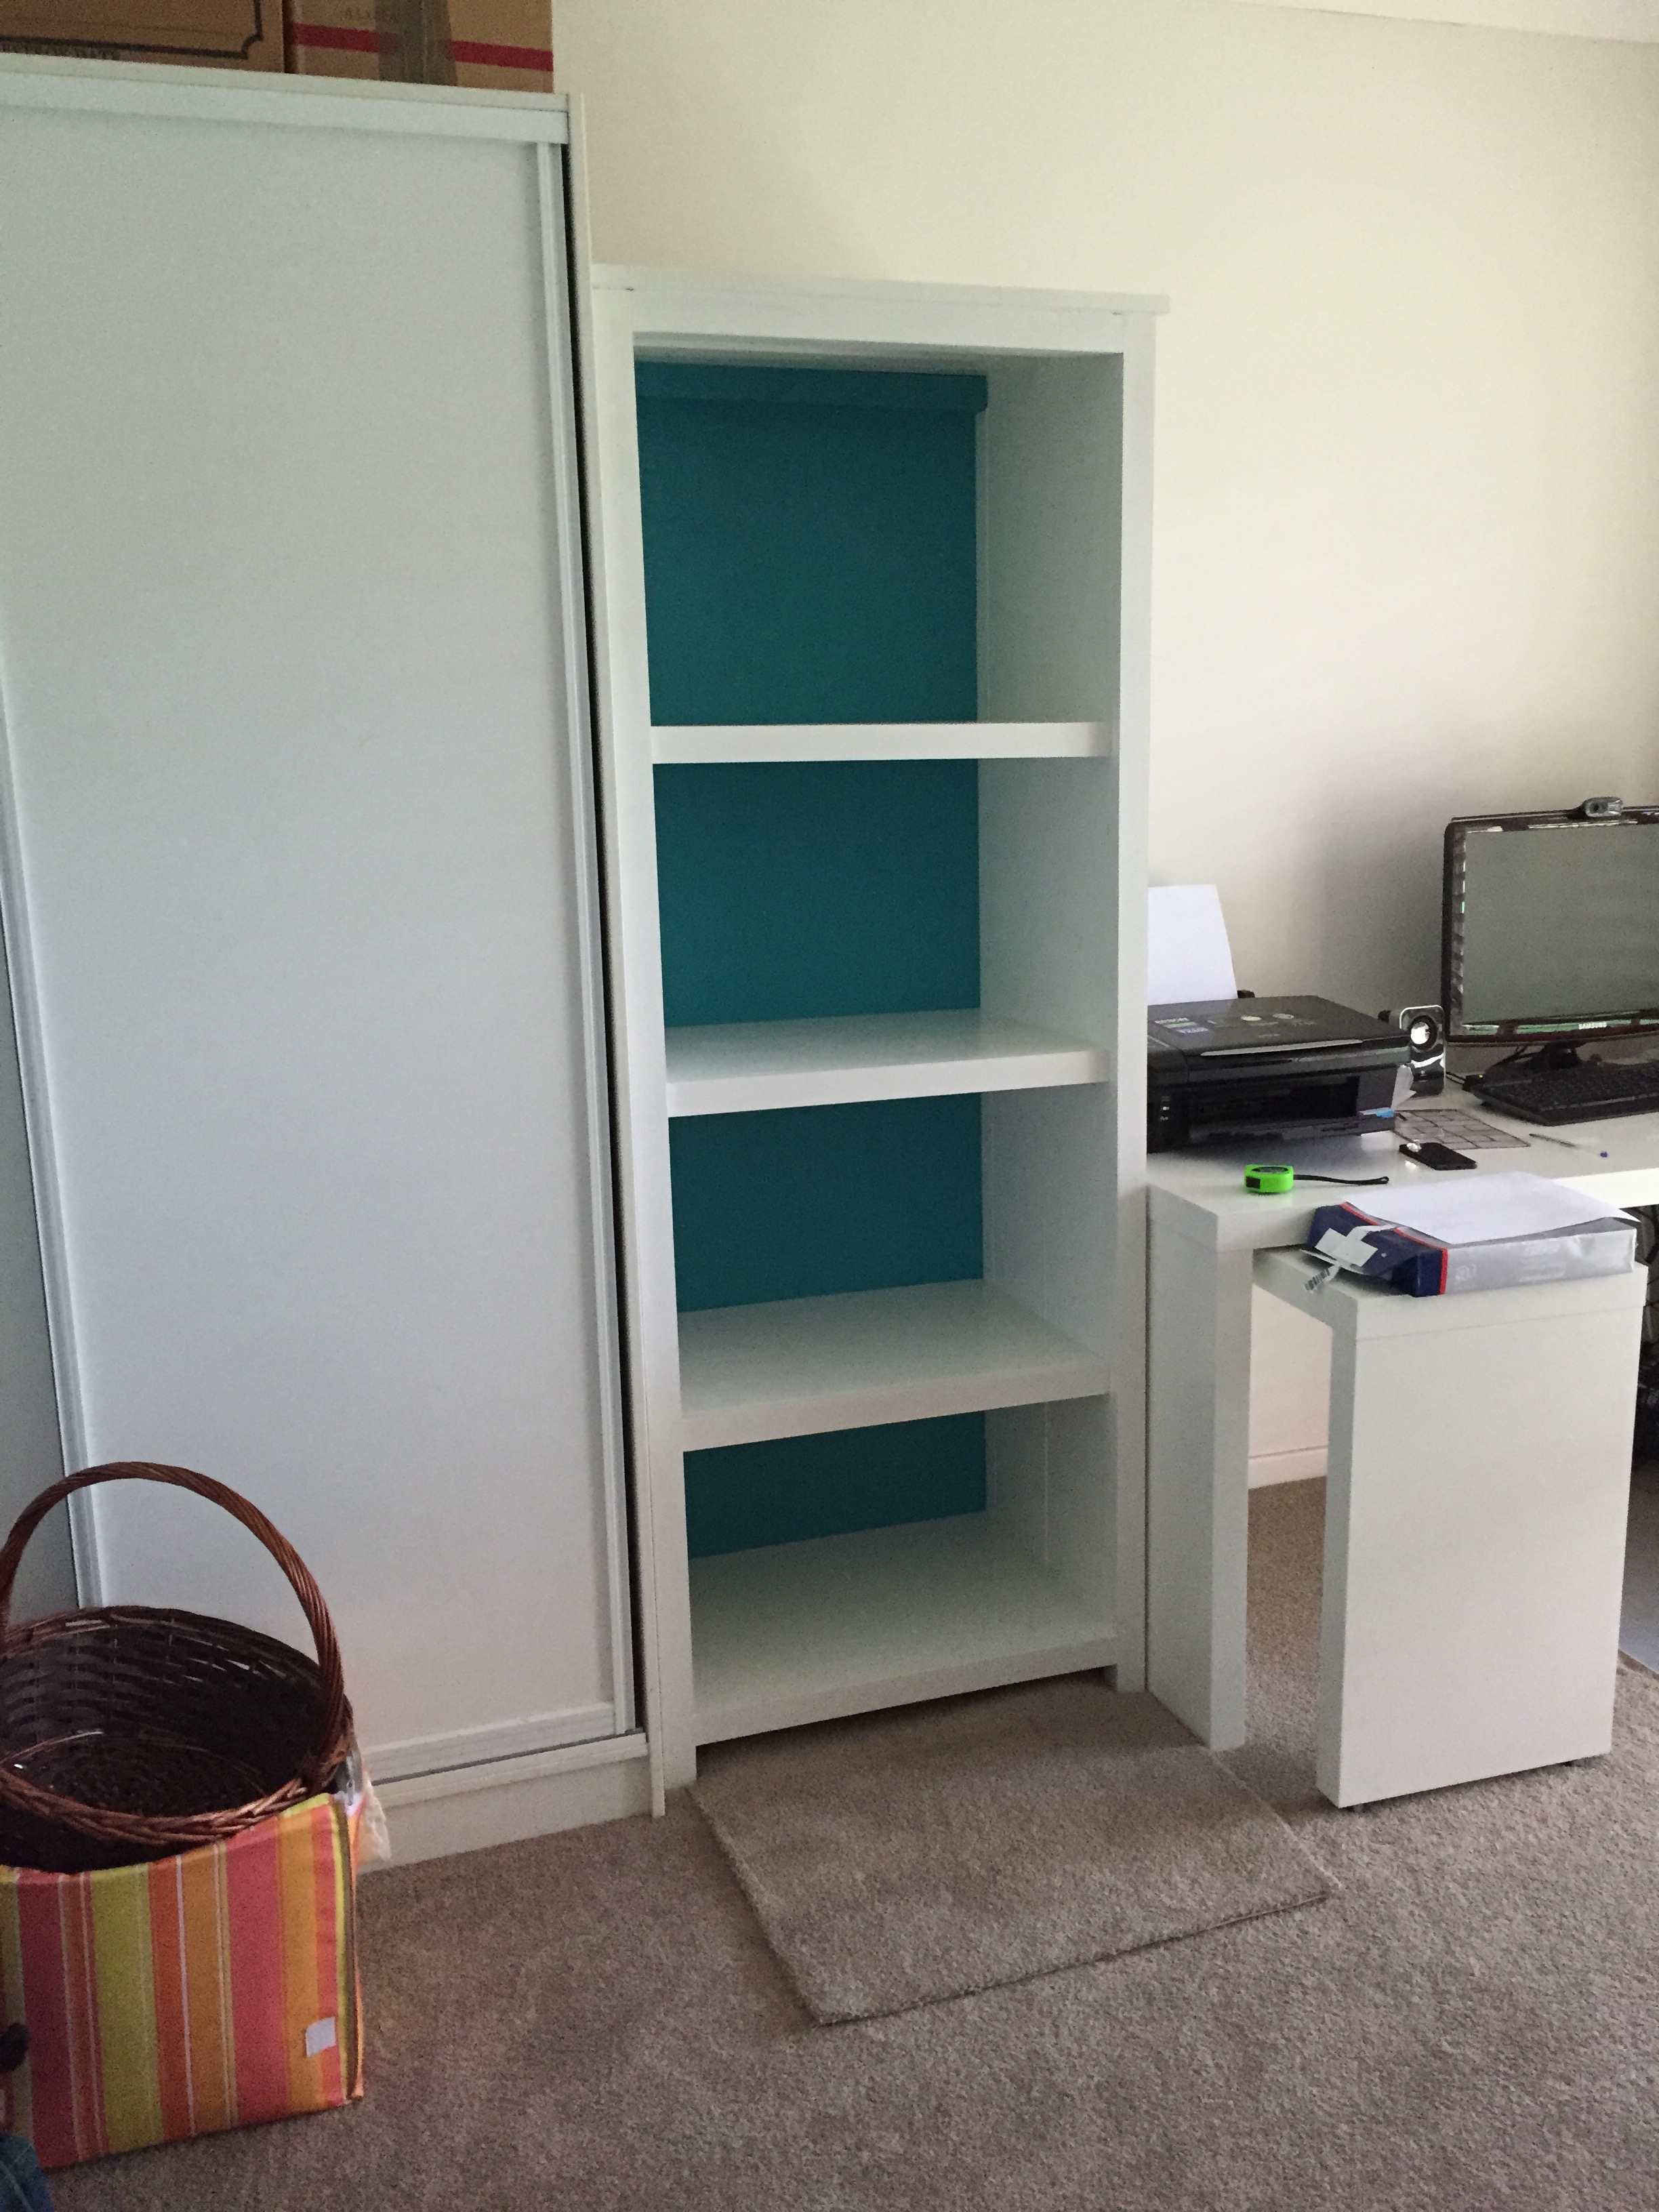
A great plan that was so easy to follow! My hubby and I had a great time building this, even though it took us about a year from start to finish, actual work time on this project was not huge. The Kreg jig was brilliant and made everything so easy.
Built from Plan(s)
Estimated Cost
I would put the estimated cost at around $400 AUD. Looking back at the project I'm sure we could have cut costs by buying recycled timber.
Estimated Time Investment
Weekend Project (10-20 Hours)
Finish Used
Dulux Whisper White Semi-Gloss
Dulux Colour matched Turqoise Low Sheen
Dulux Colour matched Turqoise Low Sheen
Recommended Skill Level
Beginner
Comments
Tue, 01/20/2015 - 13:43
This is beautiful! I love the
This is beautiful! I love the picture of your cat. :)
Farm Table
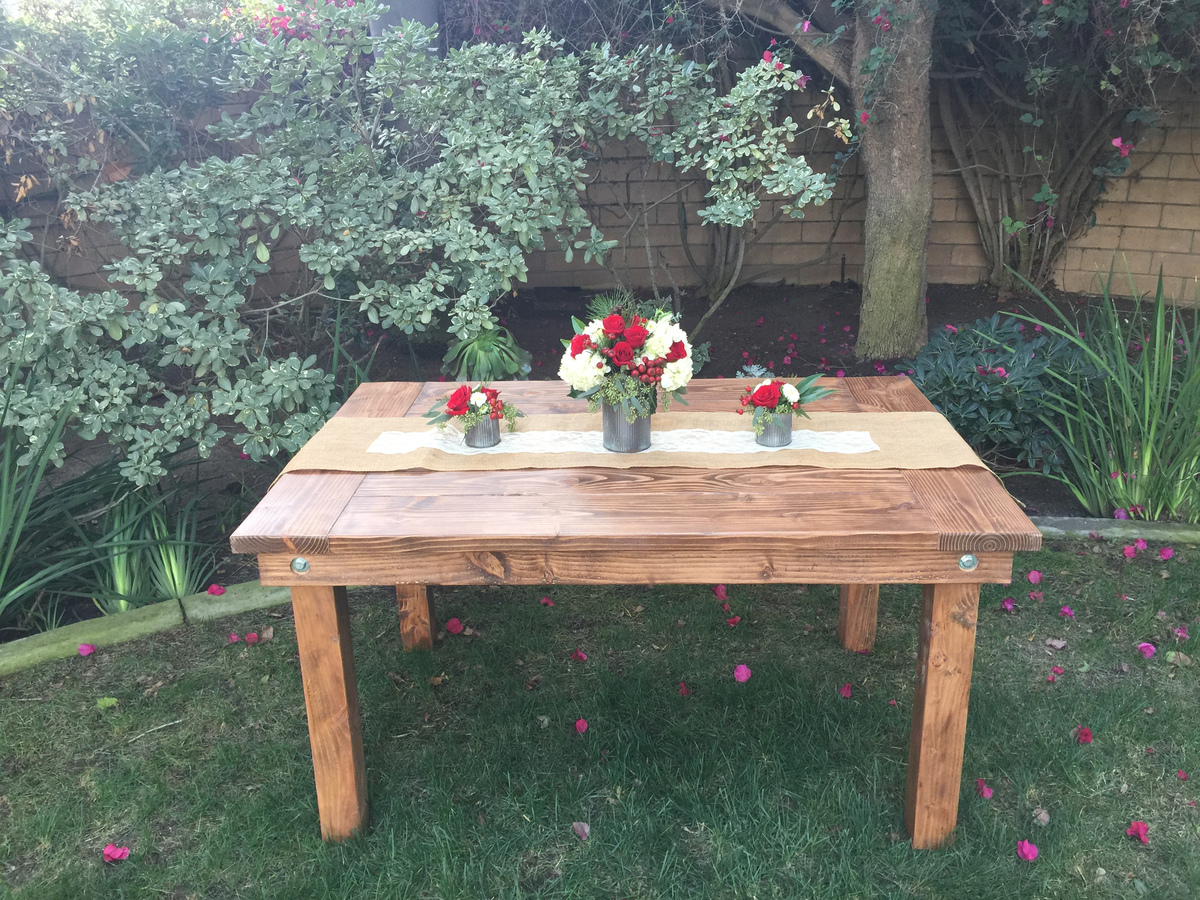
We started building farm tables just recently and used the great plans from the Ana White site along with all the helpful other brag posts. The main construction of the table was based on the plans from here: www.ana-white.com/2012/11/plans/farmhouse-table-updated-pocket-hole-plans along with some other modifications made along the way. The table turned out great and just wanted to give thanks for the plans and this community.
We built more than just the picture uploaded if you want to see more versions/sizez you can check them out here: http://backyardcedarsevents.com/gallery/
Thanks for the great DIY website - the projects and plans here are great for everything!

Built from Plan(s)
Estimated Time Investment
Weekend Project (10-20 Hours)
Finish Used
Minwax Special Oak
Recommended Skill Level
Intermediate
Adirondack chair
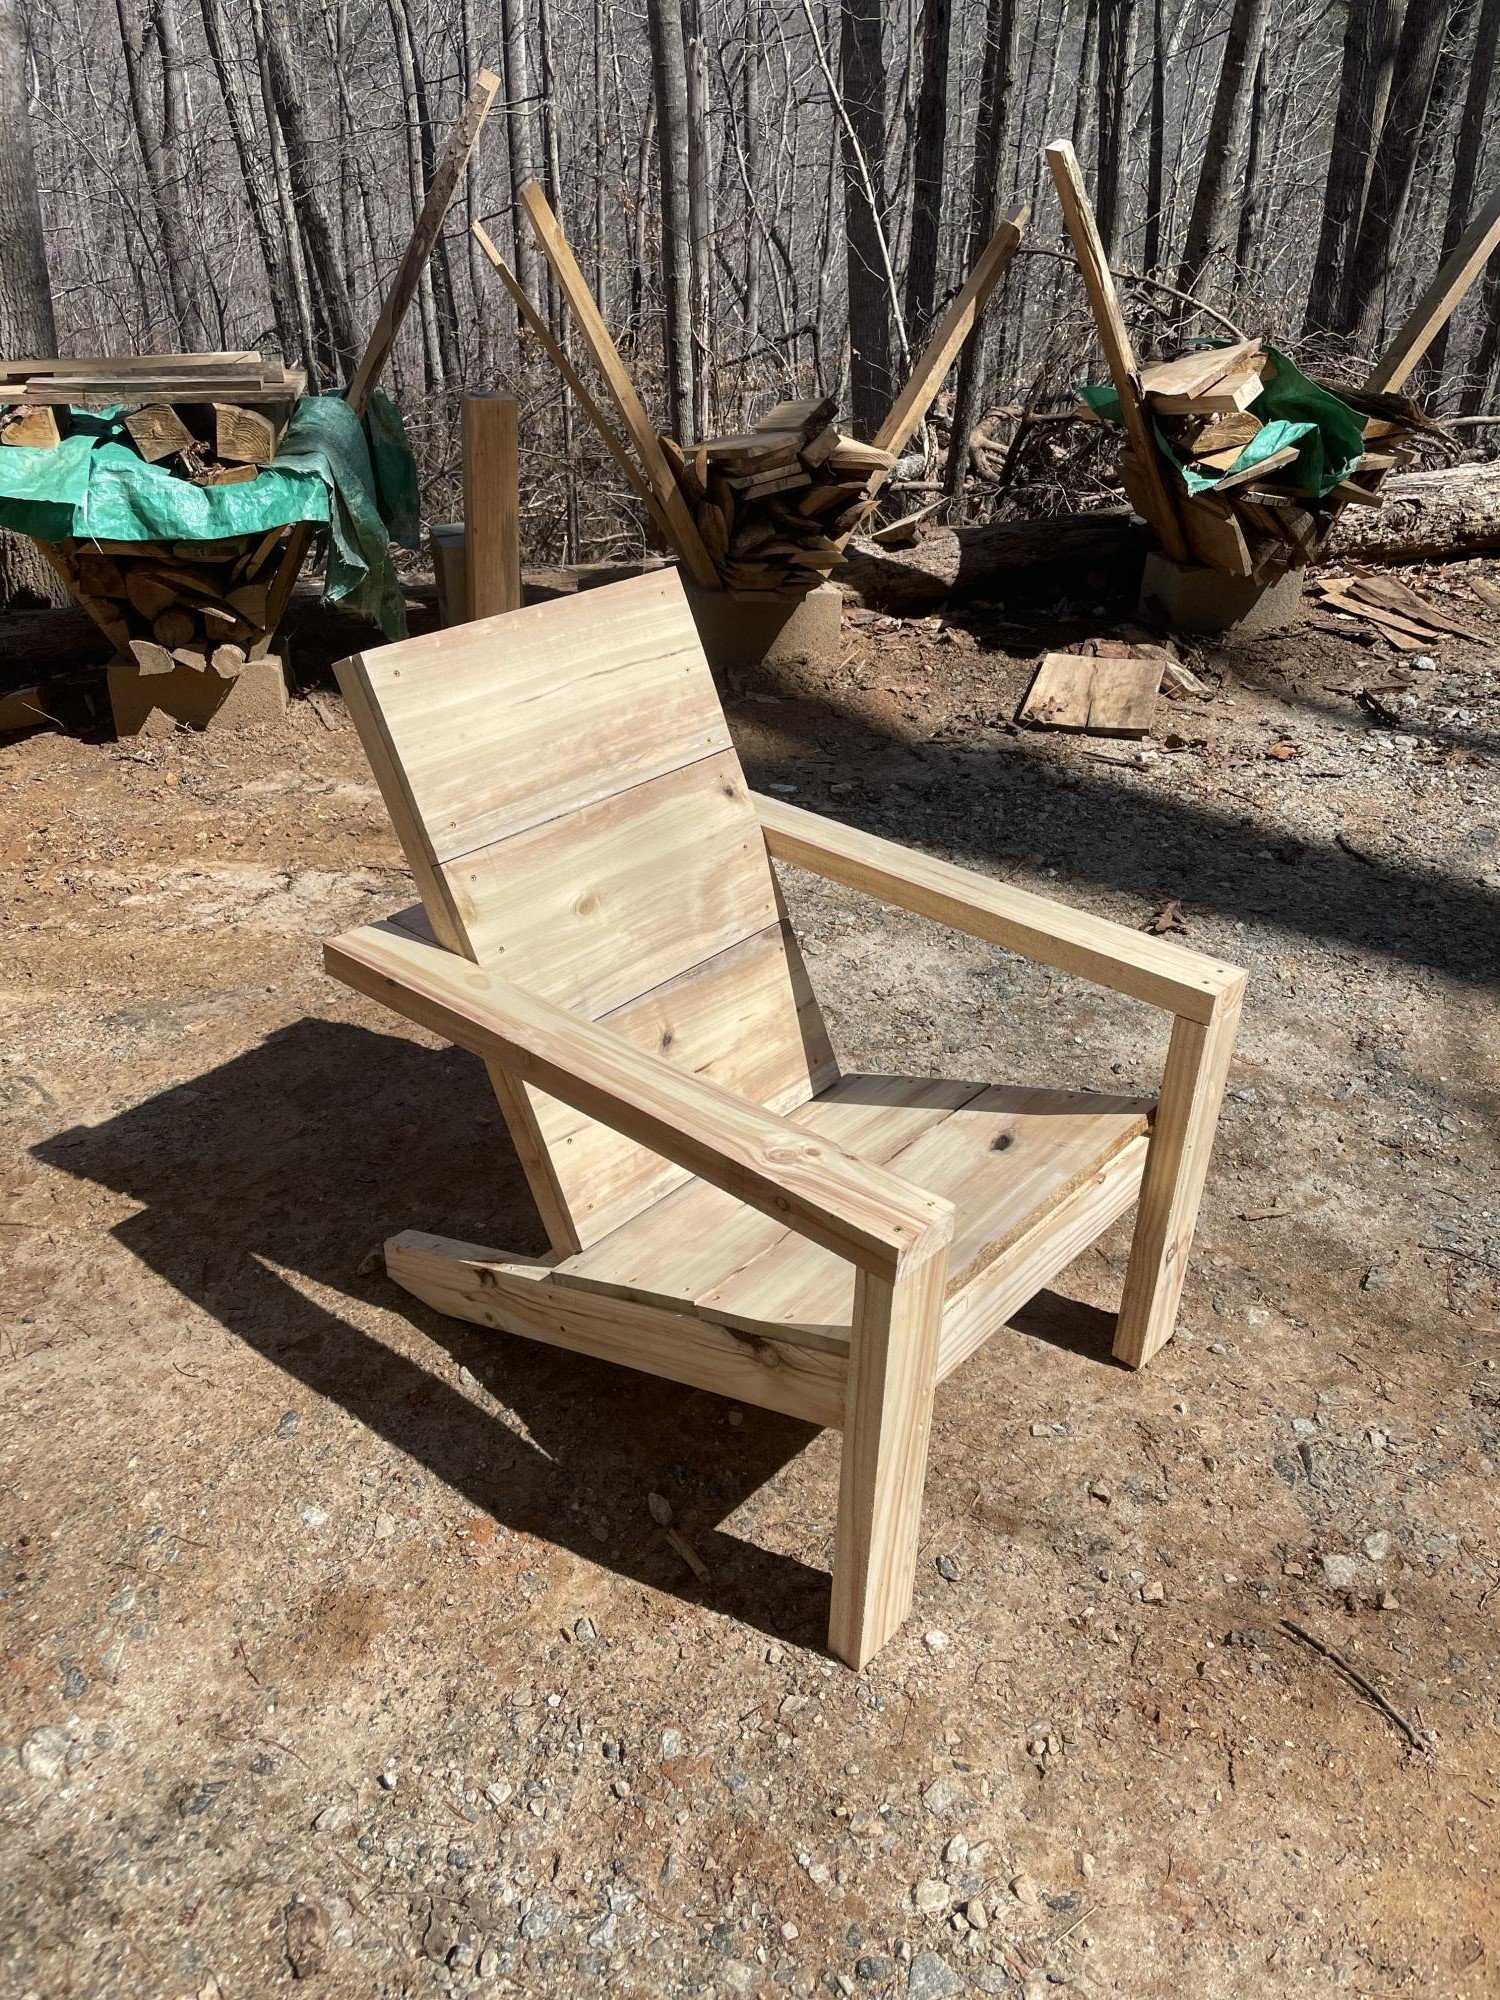
Our first build, all of the lumber was sourced from our land, milers on our sawmill and planed here. White pine frame, poplar seating. Great plans Ana! It was so nice to have success on our first furniture piece!!
Built from Plan(s)
Estimated Cost
$20
Estimated Time Investment
Day Project (6-9 Hours)
Finish Used
None yet
Recommended Skill Level
Beginner

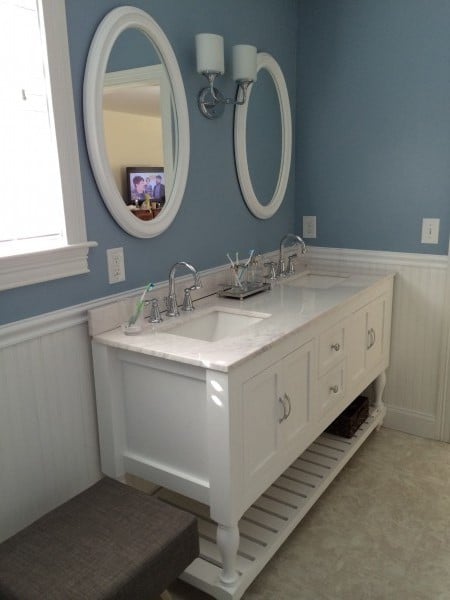
62" Turned Leg Vanity
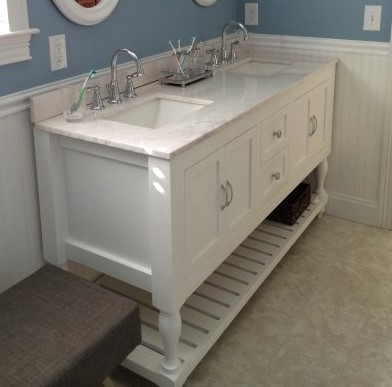
First time visitor. I recently built this modified 48" Turned Leg Vanity for my wife.
We expanded it to a 62" double sink with drawers in the middle and opening below the sinks.
Thanks for the great site Anna.
Built from Plan(s)
Estimated Time Investment
Week Long Project (20 Hours or More)
Finish Used
Paint
Recommended Skill Level
Intermediate
Comments


Wed, 01/21/2015 - 13:51
Beyond beautiful!
Great job! Such a beautiful bathroom, I bet you can't stop smiling!
Wed, 06/10/2015 - 09:35
Plans
This looks great! I am going to work on one very similar and use this sink http://www.us.kohler.com/us/Ceramic-Impressions™-61-rectangular-double-bowl-vanity-top-bathroom-sink,-single-faucet-hole/productDetail/Styles-of-Bathroom-Sinks/1006992.htm?categoryId=651428&skuId=1006846&hash=id%3Dfilters%26chk-183%3D183%26startIndex%3D20%26scrollTop%3D411
Did you save your plans for this size vanity?
Fri, 10/23/2015 - 09:55
Plans for this?
Gwphoto, do you have plans for this project that you would share? Have been wanting to modify this 48" vanity just as you did. Thanks so much!
Mon, 03/14/2016 - 07:47
Hi Schuzog, looks like I can
Hi Schuzog, looks like I can't find the plans on my computer. Sorry.
Greg
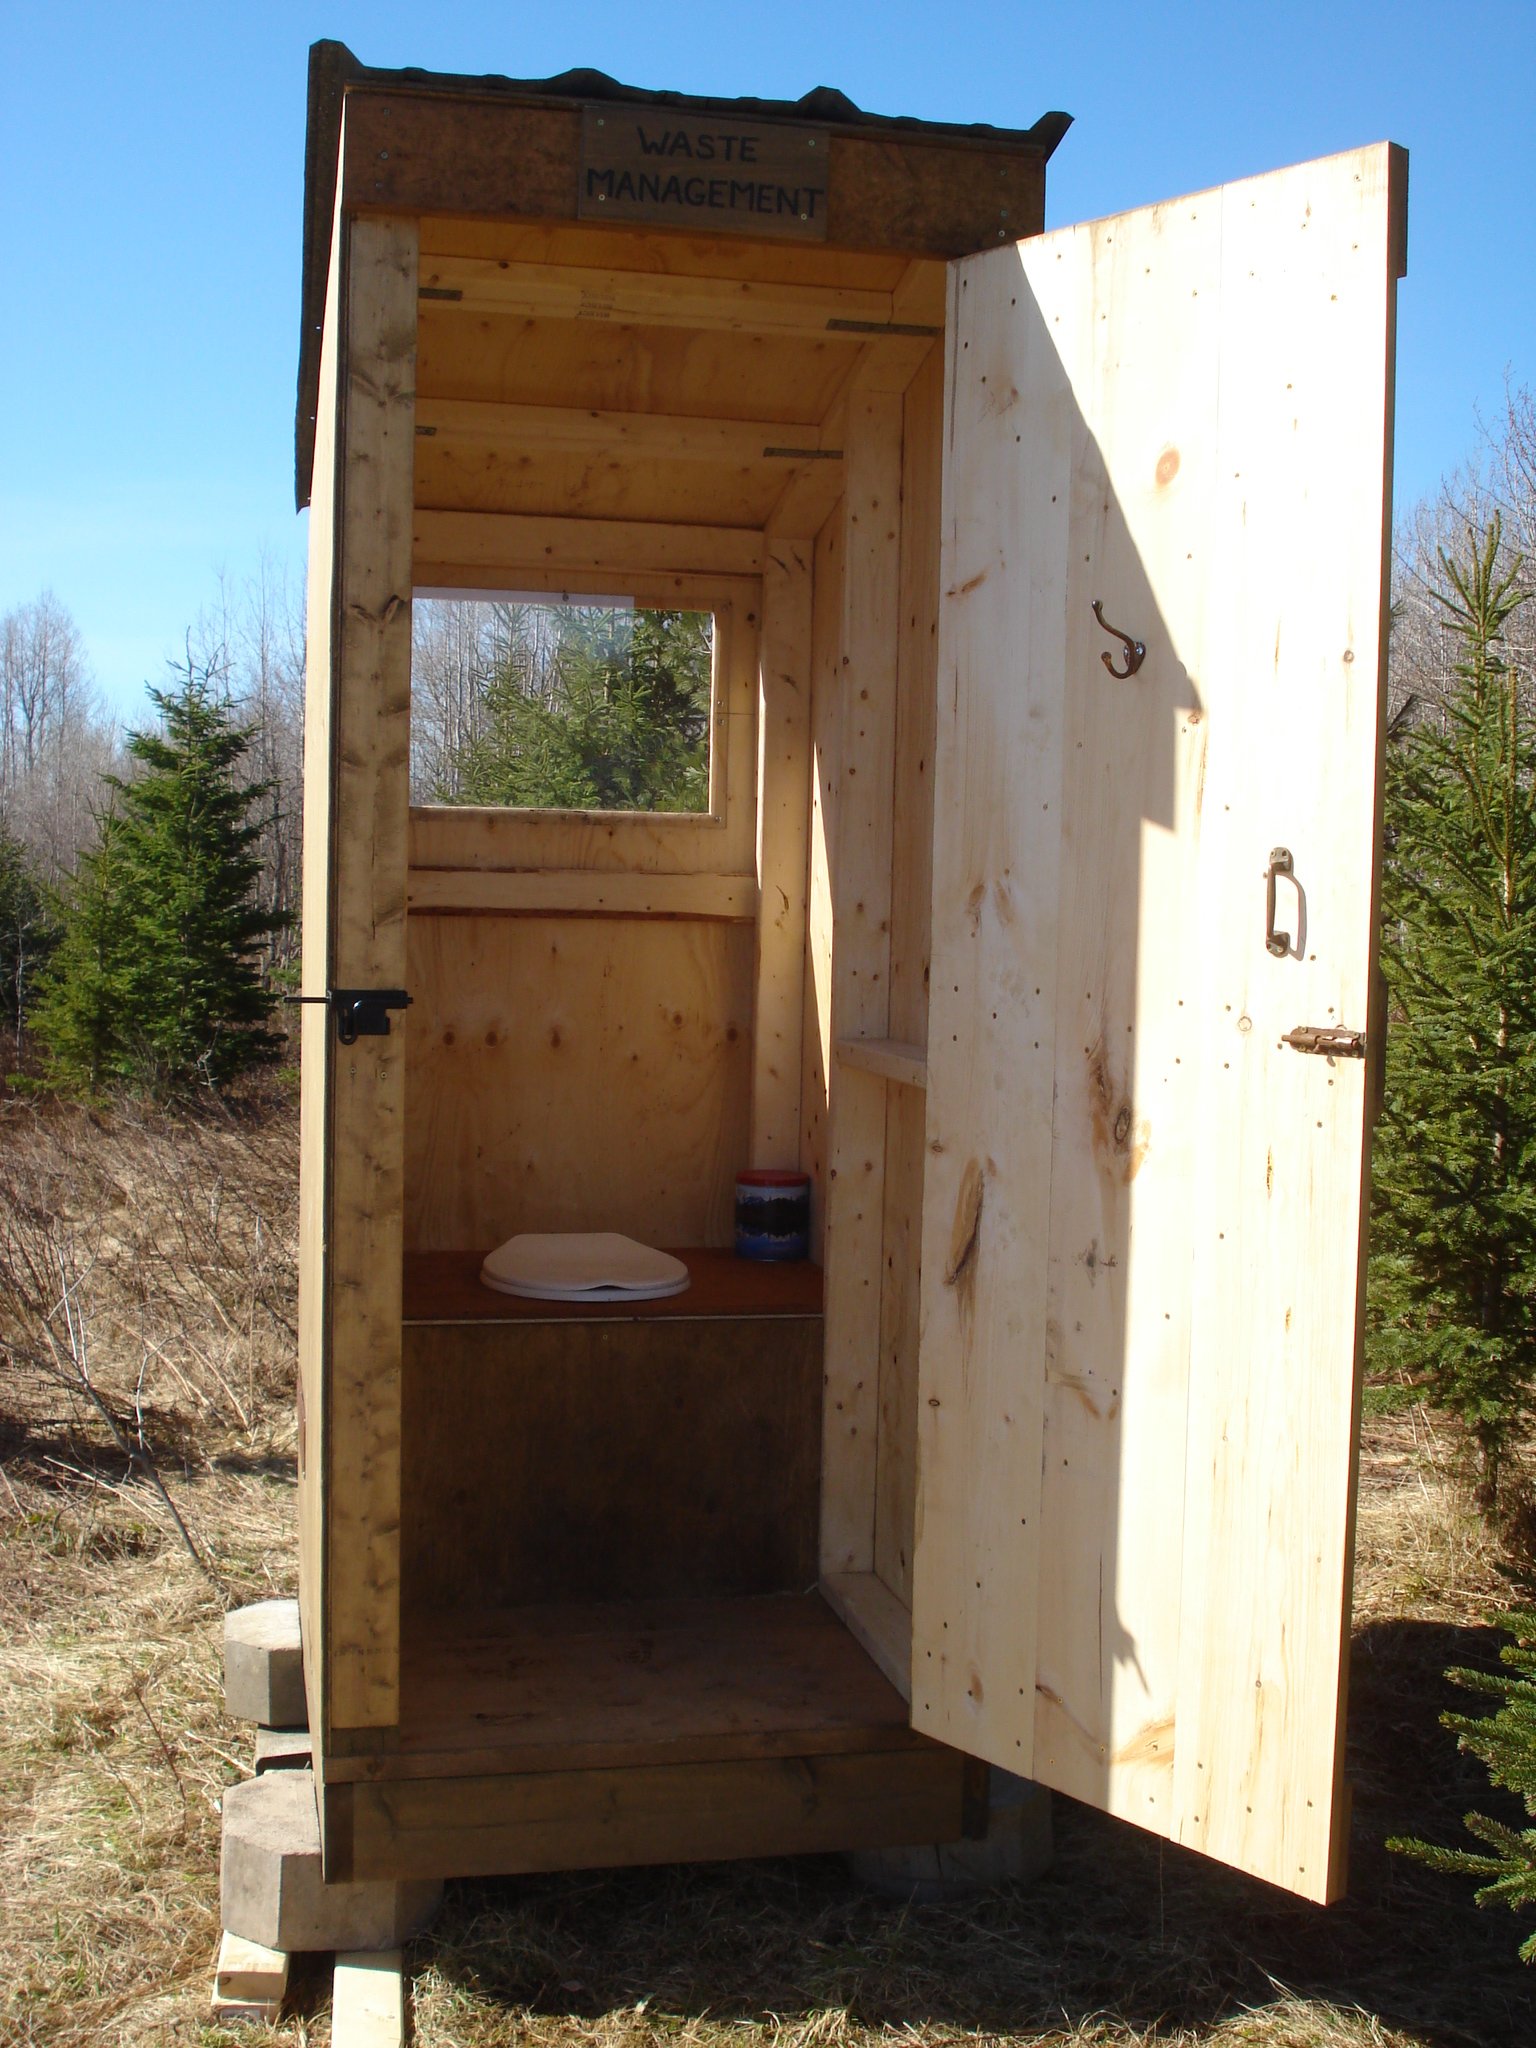
Simple Outhouse
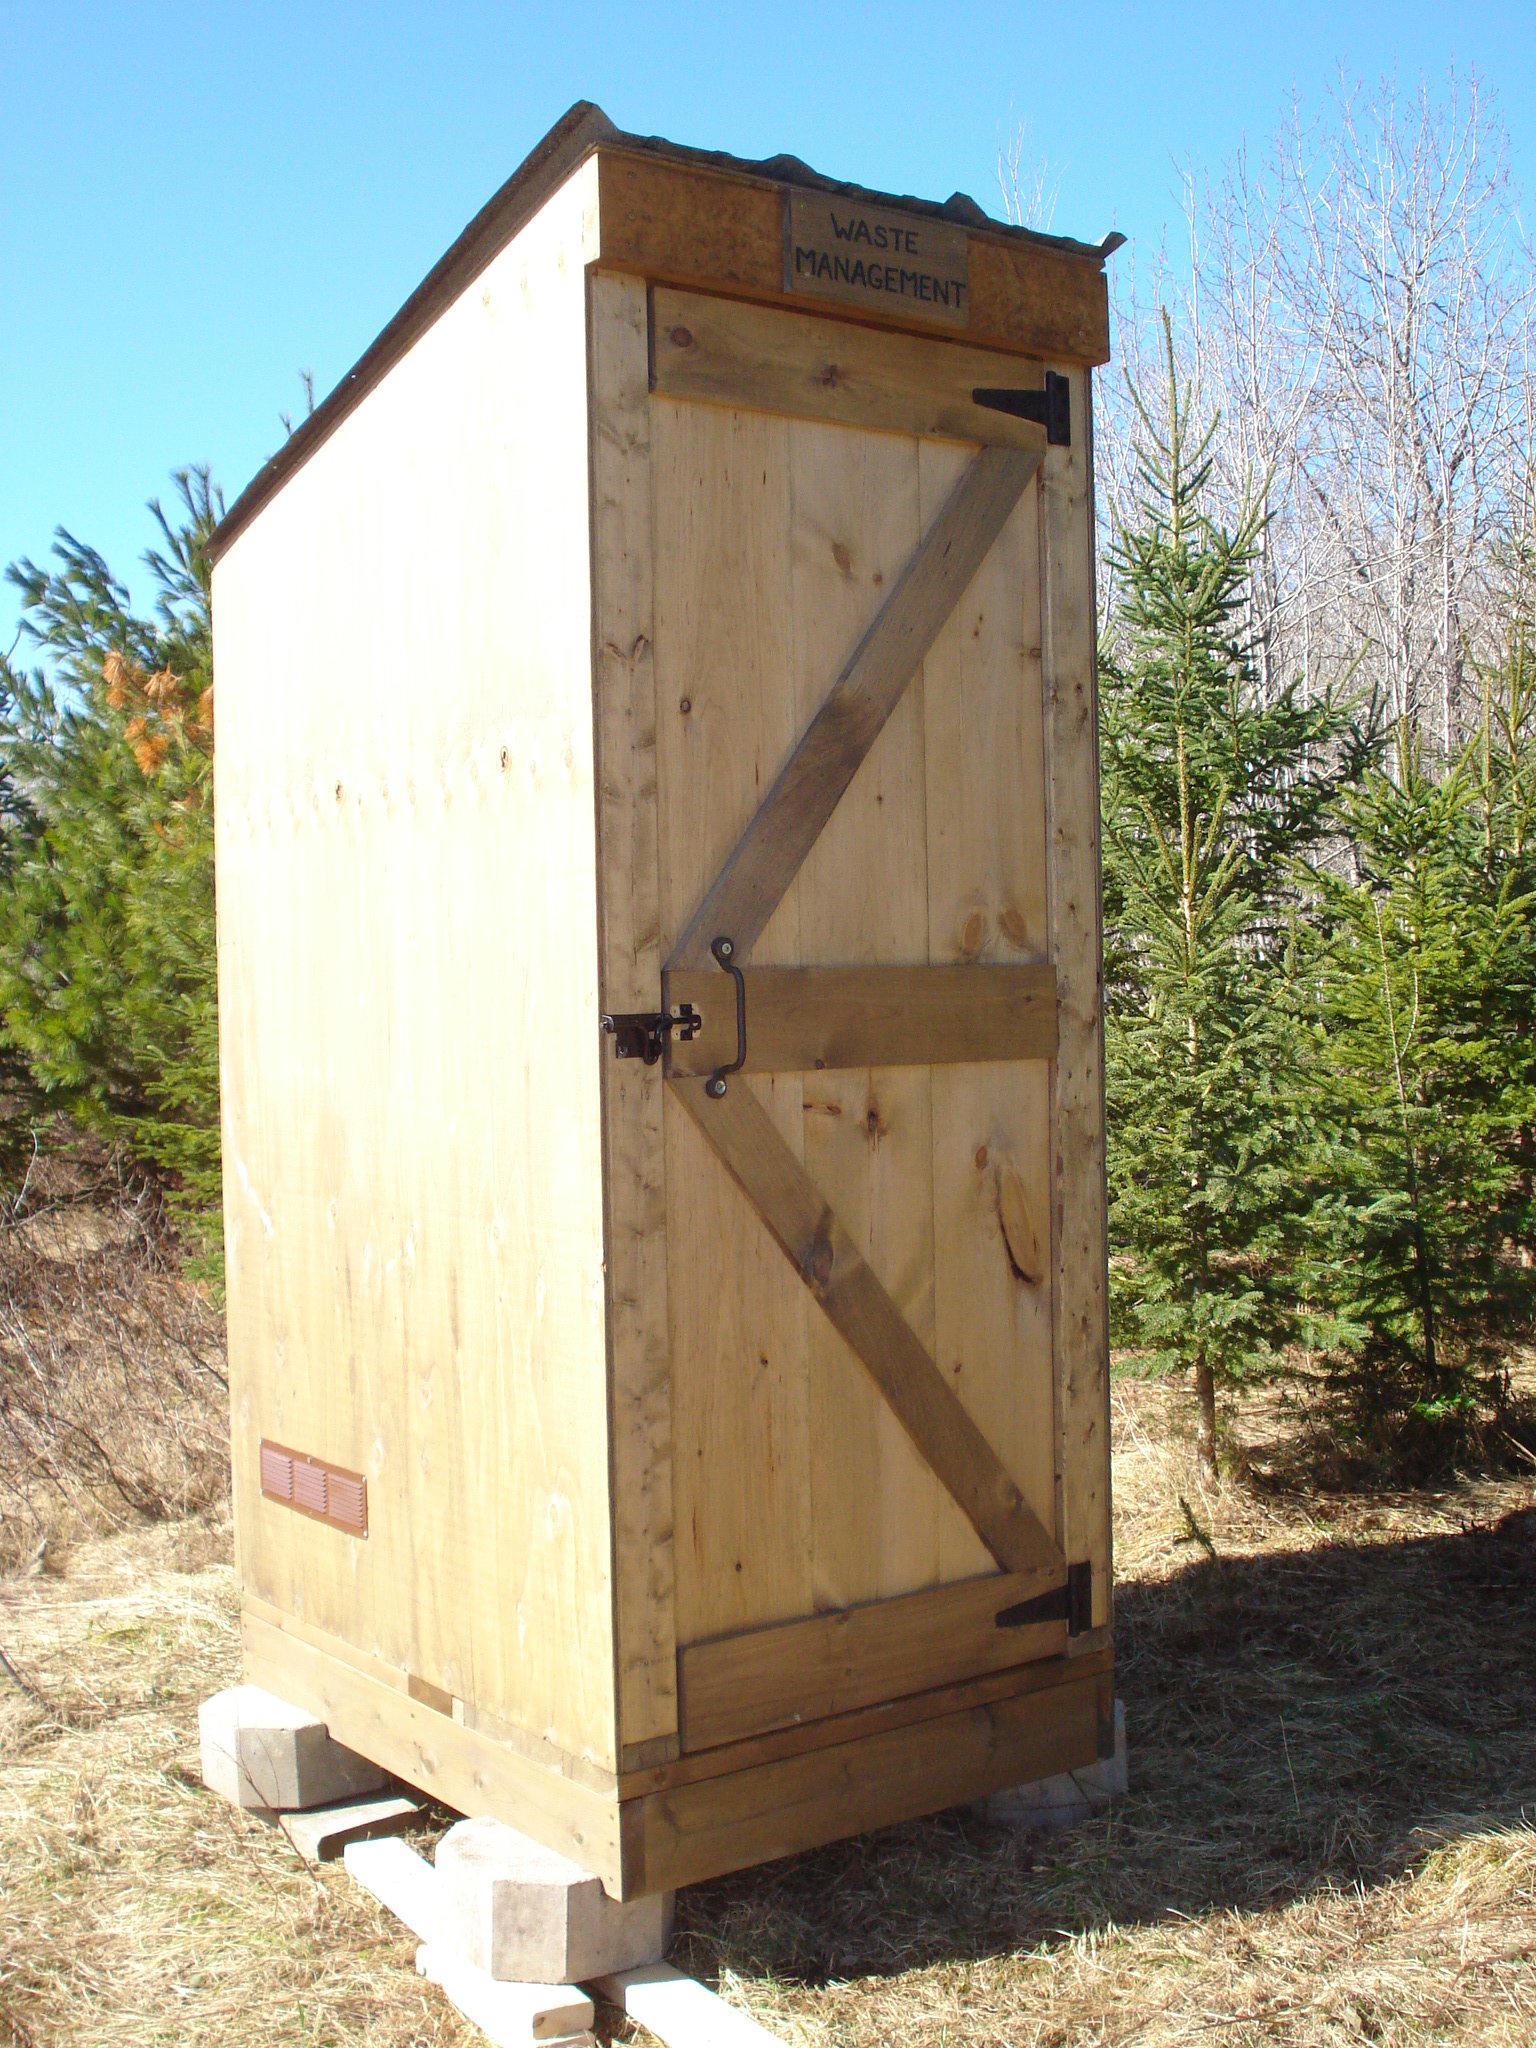
I had my nephew build this outhouse for our new 70 acre lot - no neighbours in sight so I had him put in an acrylic window (with a view). I left off the deck and had him put the boards tight together so 'critters' didn't get in as easily. I made a sign for above the door - 'Waste Management' for a touch of humour. The plans were easy to follow and I love it. Thanks, Ana.
Built from Plan(s)
Estimated Cost
Approx. $300 for material and $250 for my nephew's labour.
Estimated Time Investment
Weekend Project (10-20 Hours)
Finish Used
sealer
Recommended Skill Level
Beginner
Comments
Thu, 04/20/2017 - 16:45
So excited to see this one
So excited to see this one built! Your nephew did a great job, love the window in the back!