Child Size Beach Chair
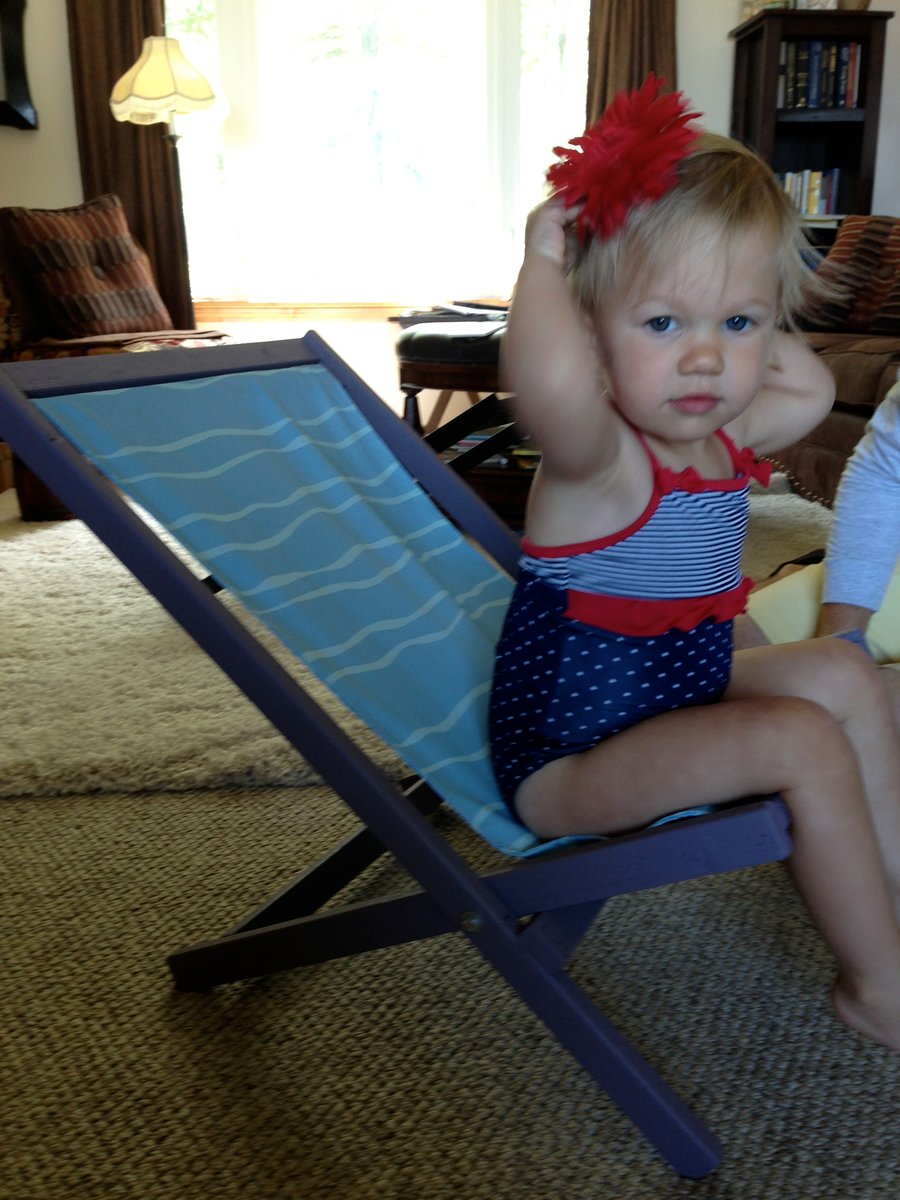
This project goes together very easily. Had my adult son come by and make it for his daughter.
Did make one adjustment ... the supporting bar on the small frame ... the one that determines the opening angle ... at 6" the chair was too open ... at 6 1/2" it was more comfortable for the little ones. We used glue and air-gun brads for joining ... once dry I was able to sit in the chair without collapse!
Estimated Cost
$10
Estimated Time Investment
An Hour or Two (0-2 Hours)
Finish Used
ace hardware, clark & kensington, pale purple
Recommended Skill Level
Starter Project