Community Brag Posts
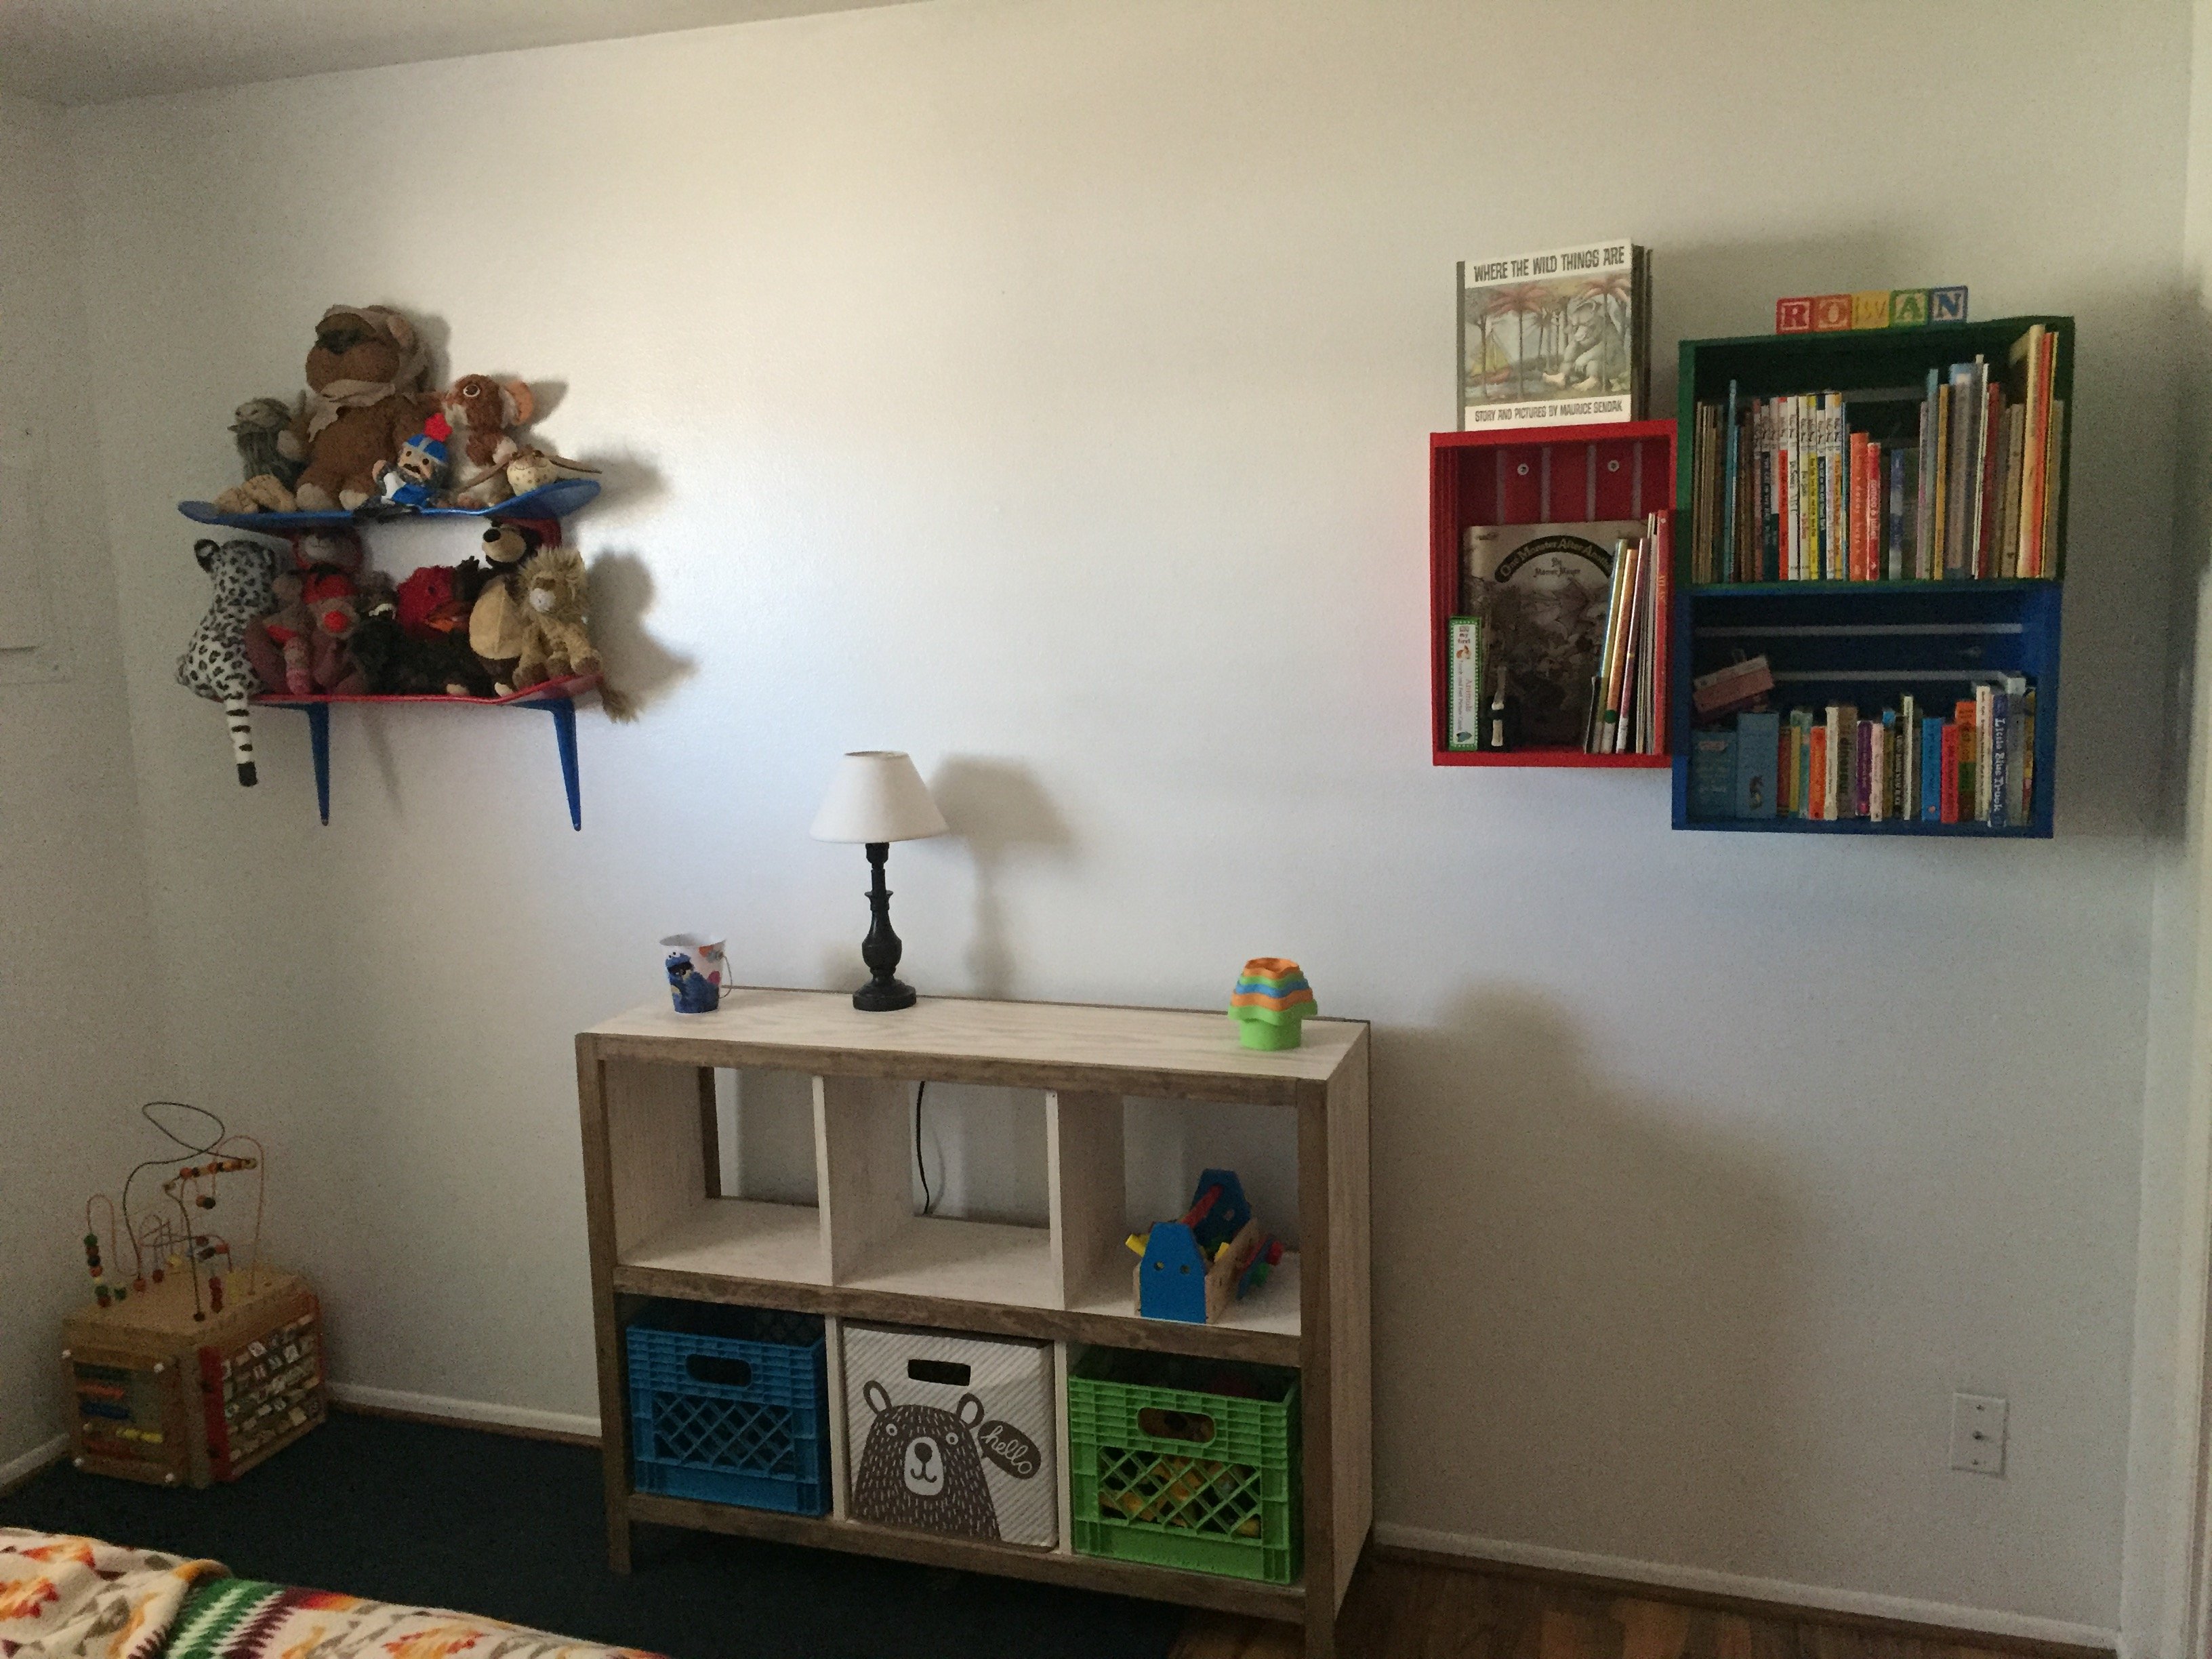
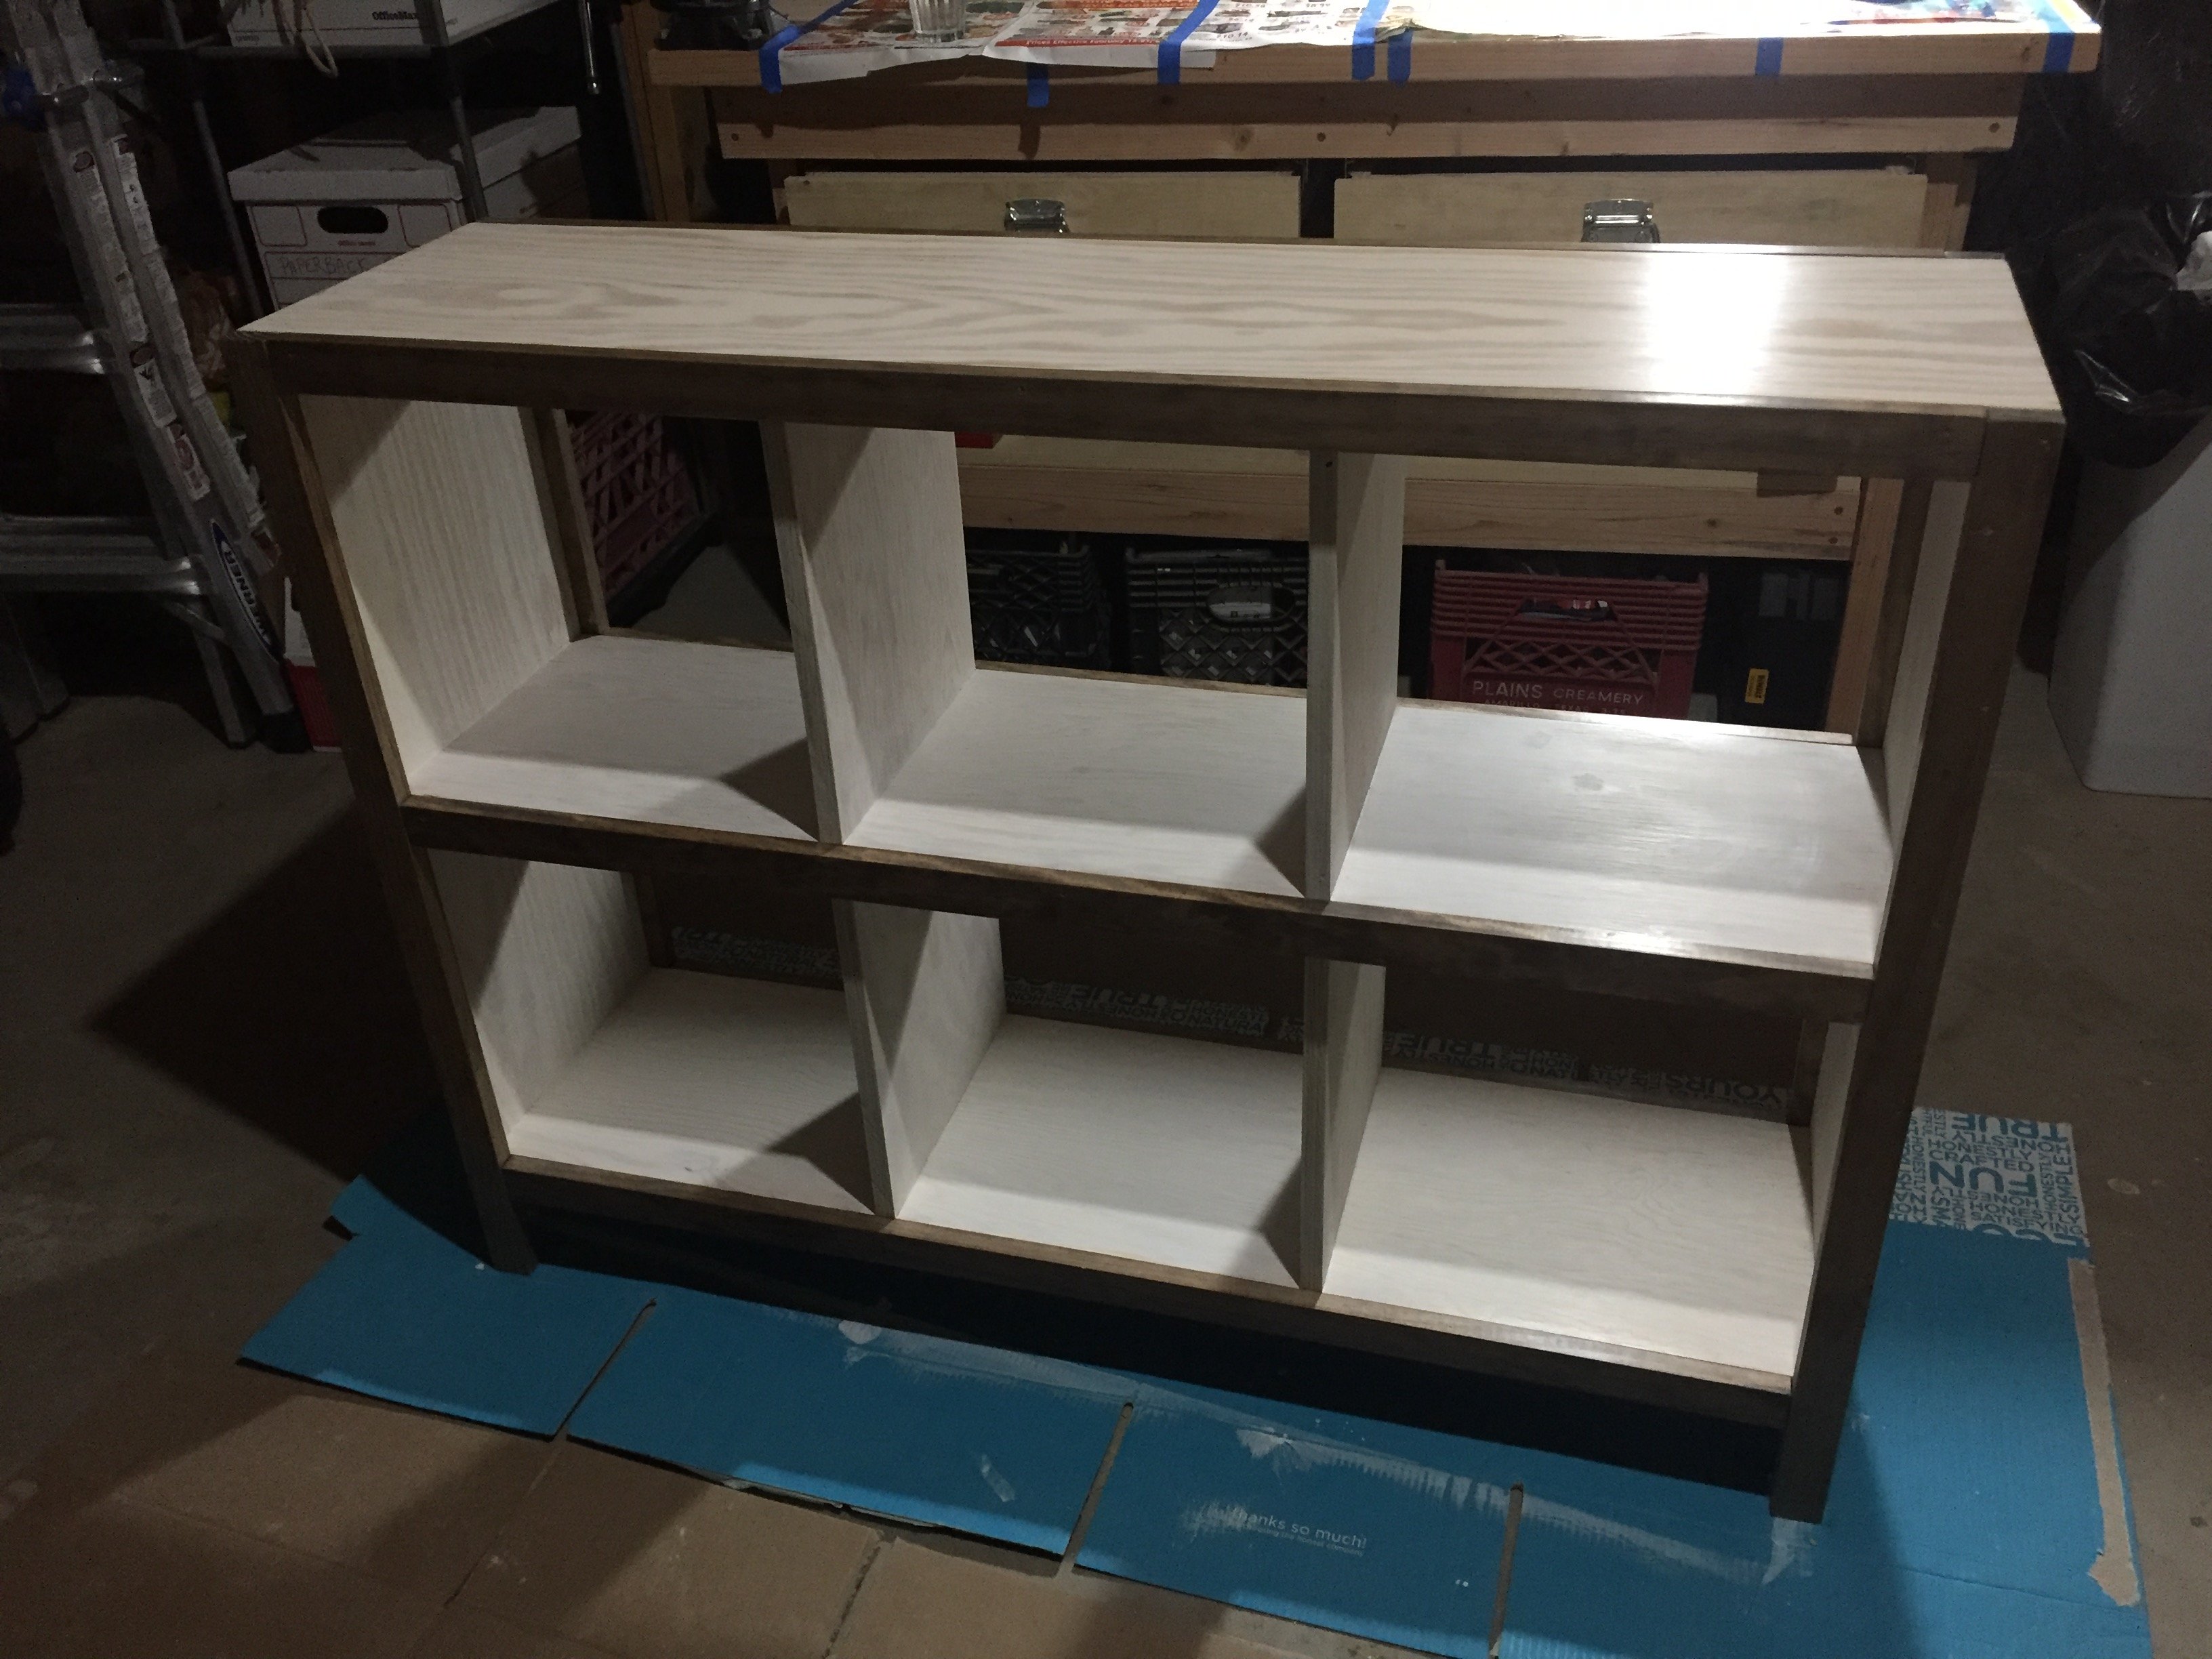
Two-tone Large Cube Shelf
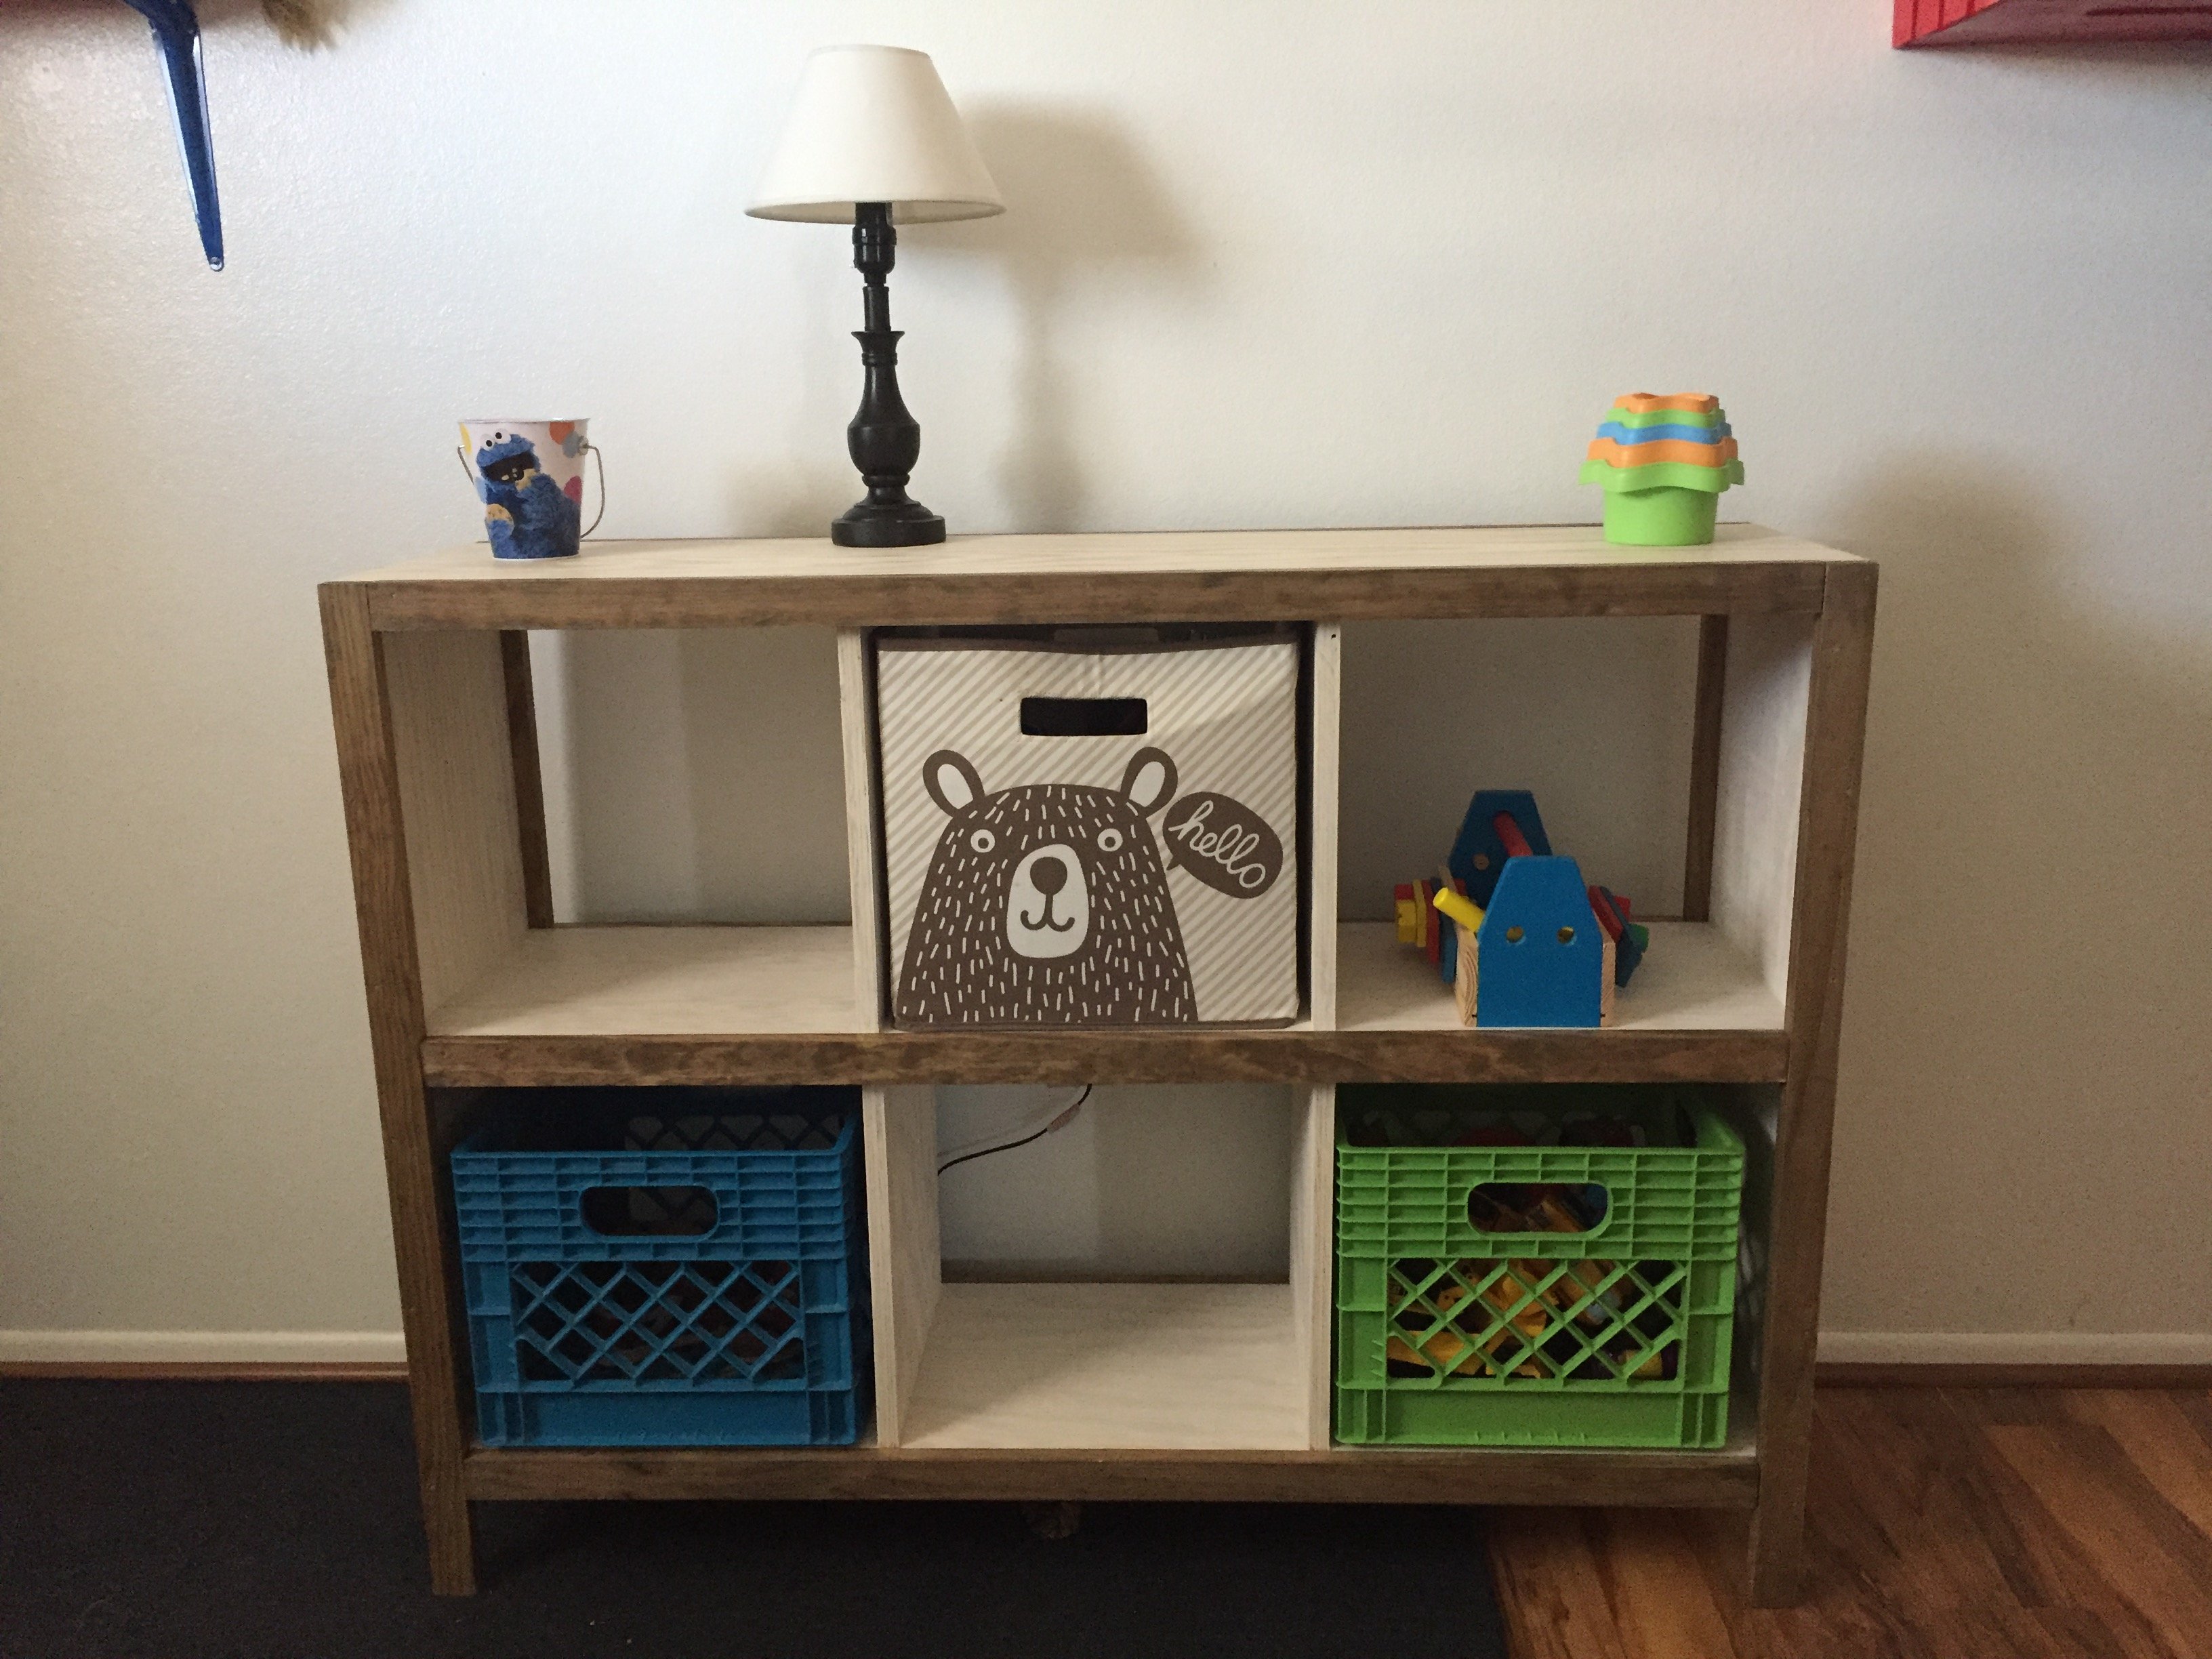
Large cube shelf made to fit 13" cubes or milk crates, for my two and a half year old son. For the larger cubes, I added 2" to the measurements for each cube, so 6" to the horizontal and 4" to the vertical measurements. Total shelf measures 46.5" wide by 35" high by 13.5" deep.
Built from Plan(s)
Estimated Cost
$75
Estimated Time Investment
Day Project (6-9 Hours)
Finish Used
Body: white latex primer, two parts paint to one part water.
Trim: special walnut stain
Everything: Minwax Paste Wax
Trim: special walnut stain
Everything: Minwax Paste Wax
Recommended Skill Level
Intermediate
Adirondack chairs
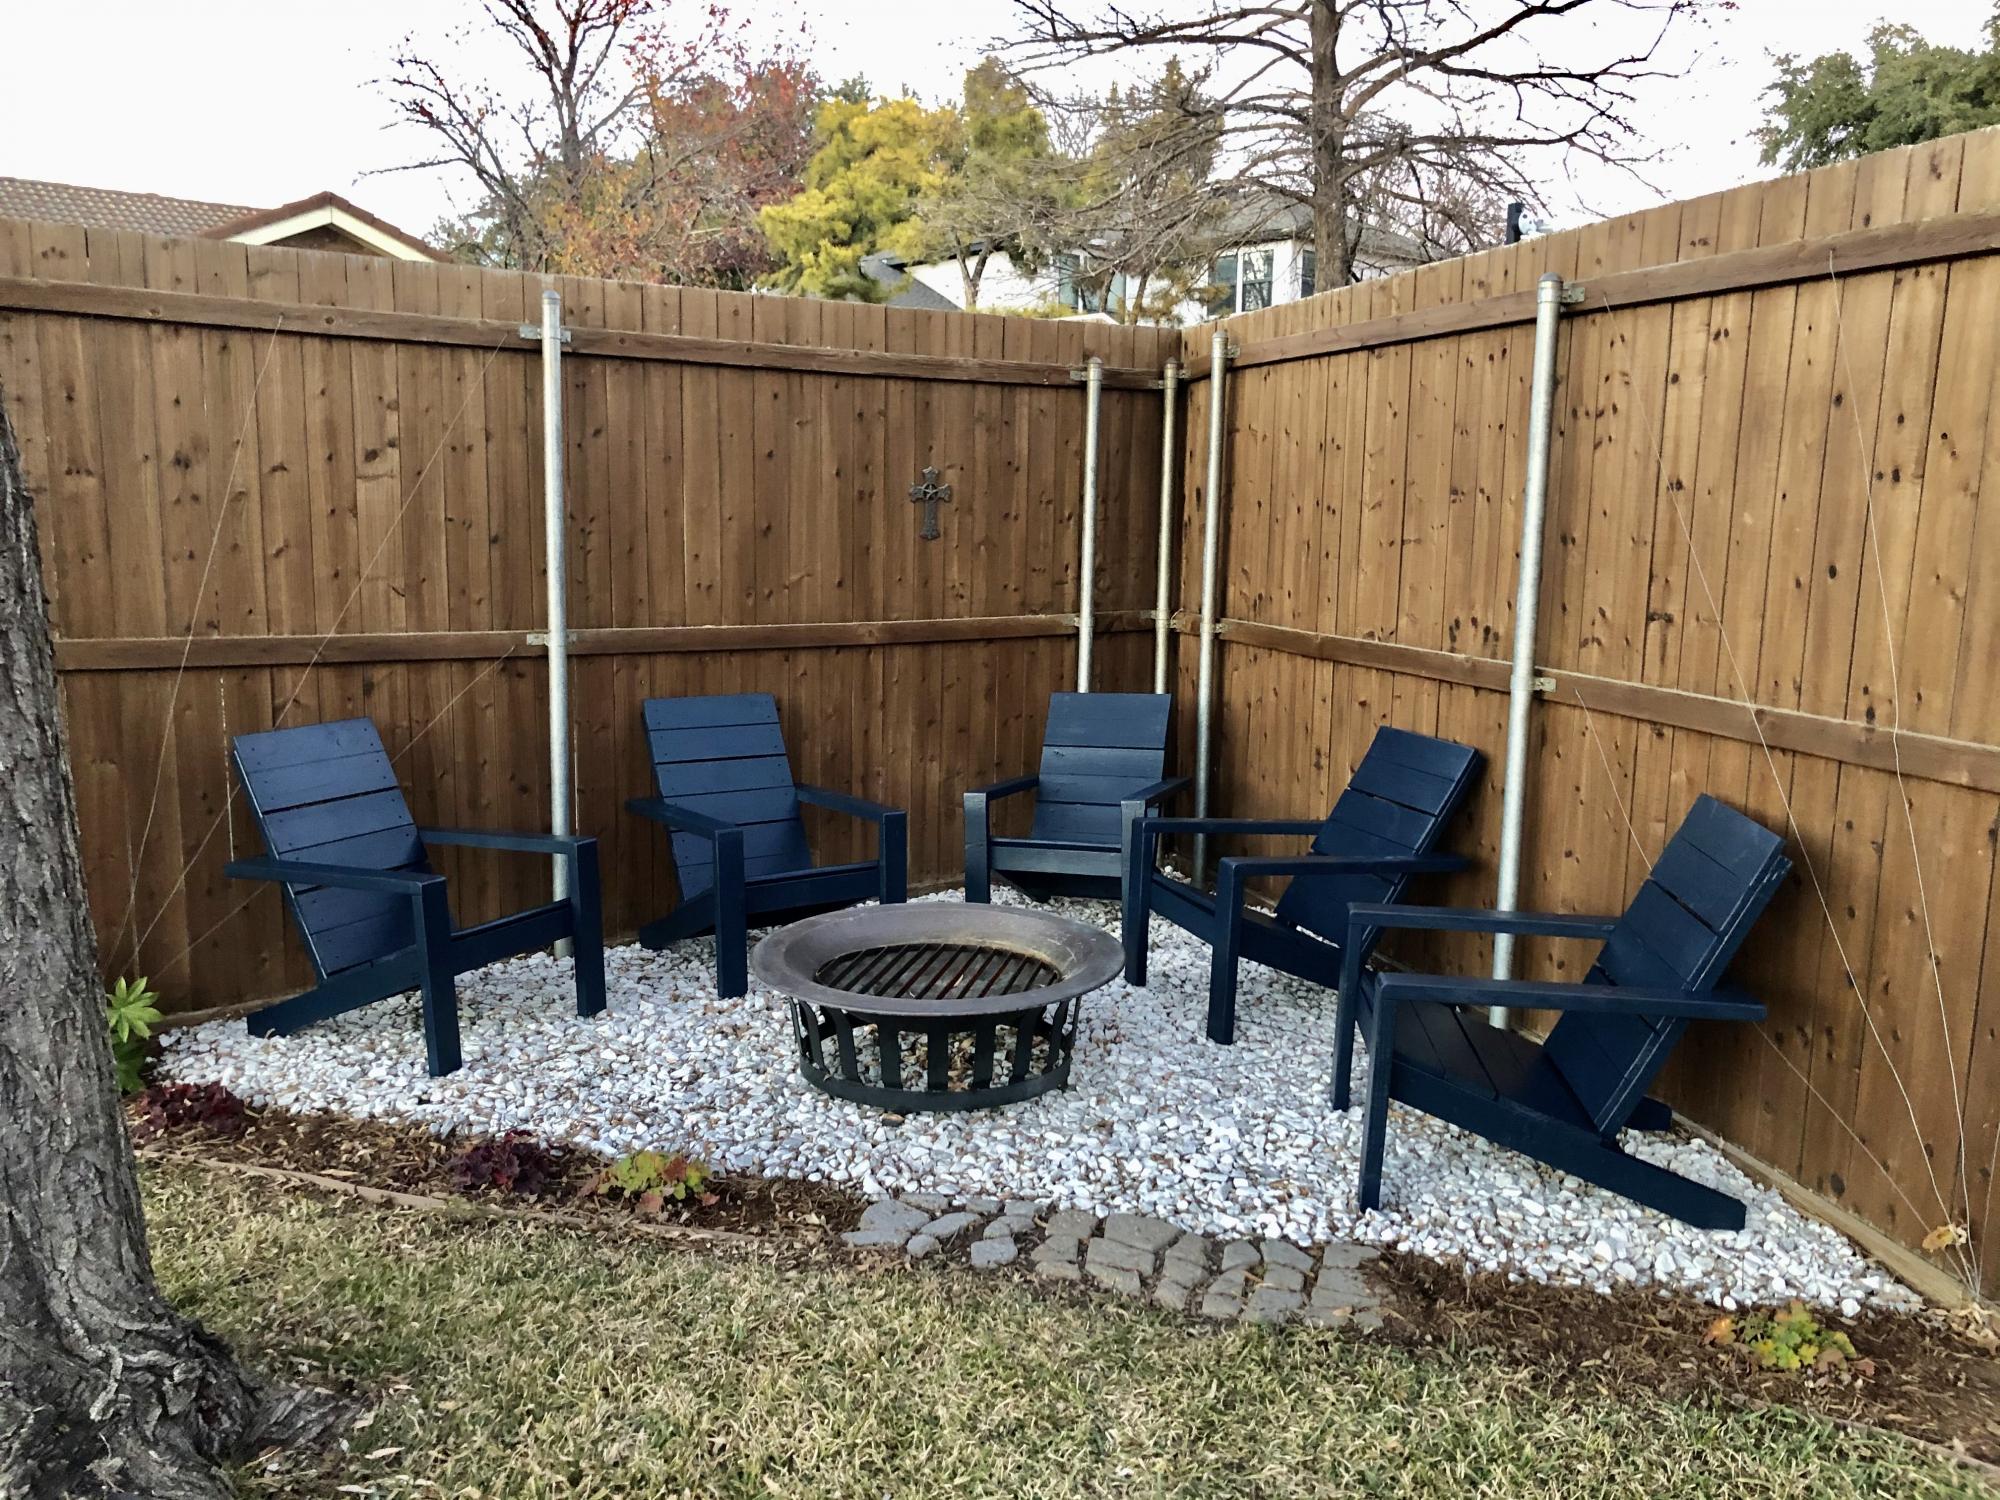
Thanks for the awesome plans Anna! God bless.
Eddie Jimenez
Built from Plan(s)
Comments
Outdoor 2x4 Sofas
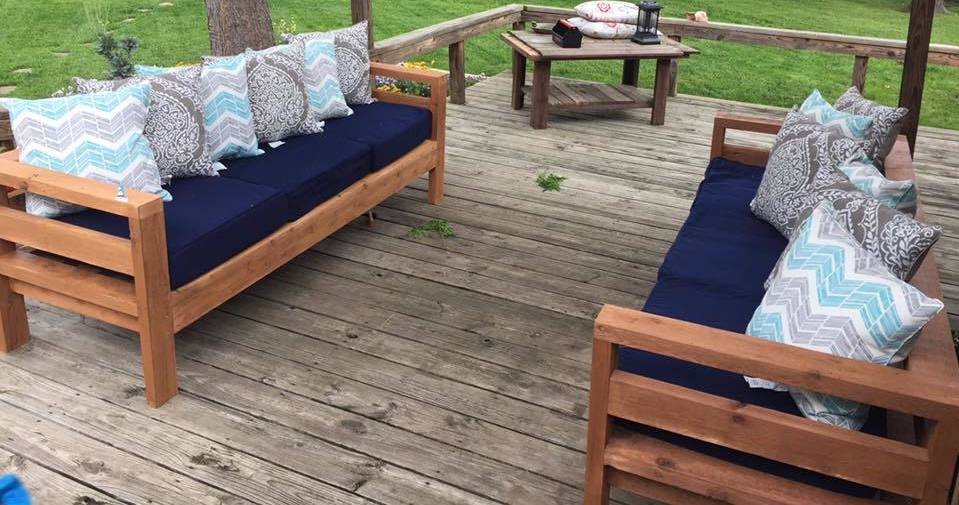
Super simple build! Thanks for the plans!

Built from Plan(s)
Estimated Cost
$120 for wood (per sofa), $12 for screws, $25 for water seal, $150 for cushions (per sofa)
Estimated Time Investment
Day Project (6-9 Hours)
Finish Used
Sanded with 120-grit sandpaper, two coats of Thompson's Water Seal (transparent).
Recommended Skill Level
Beginner
Comments
Wed, 06/05/2019 - 08:39
Hi this looks beautiful! I…
Hi this looks beautiful! I was wondering where you bought your cushions?
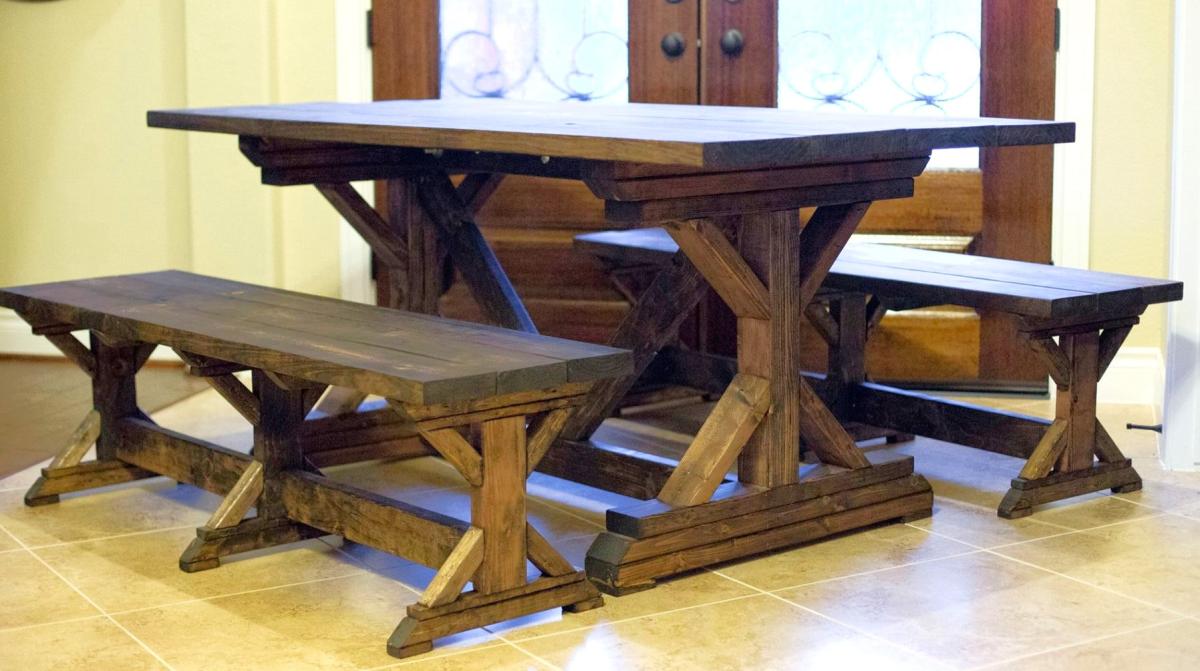
Farmhouse Dining Set
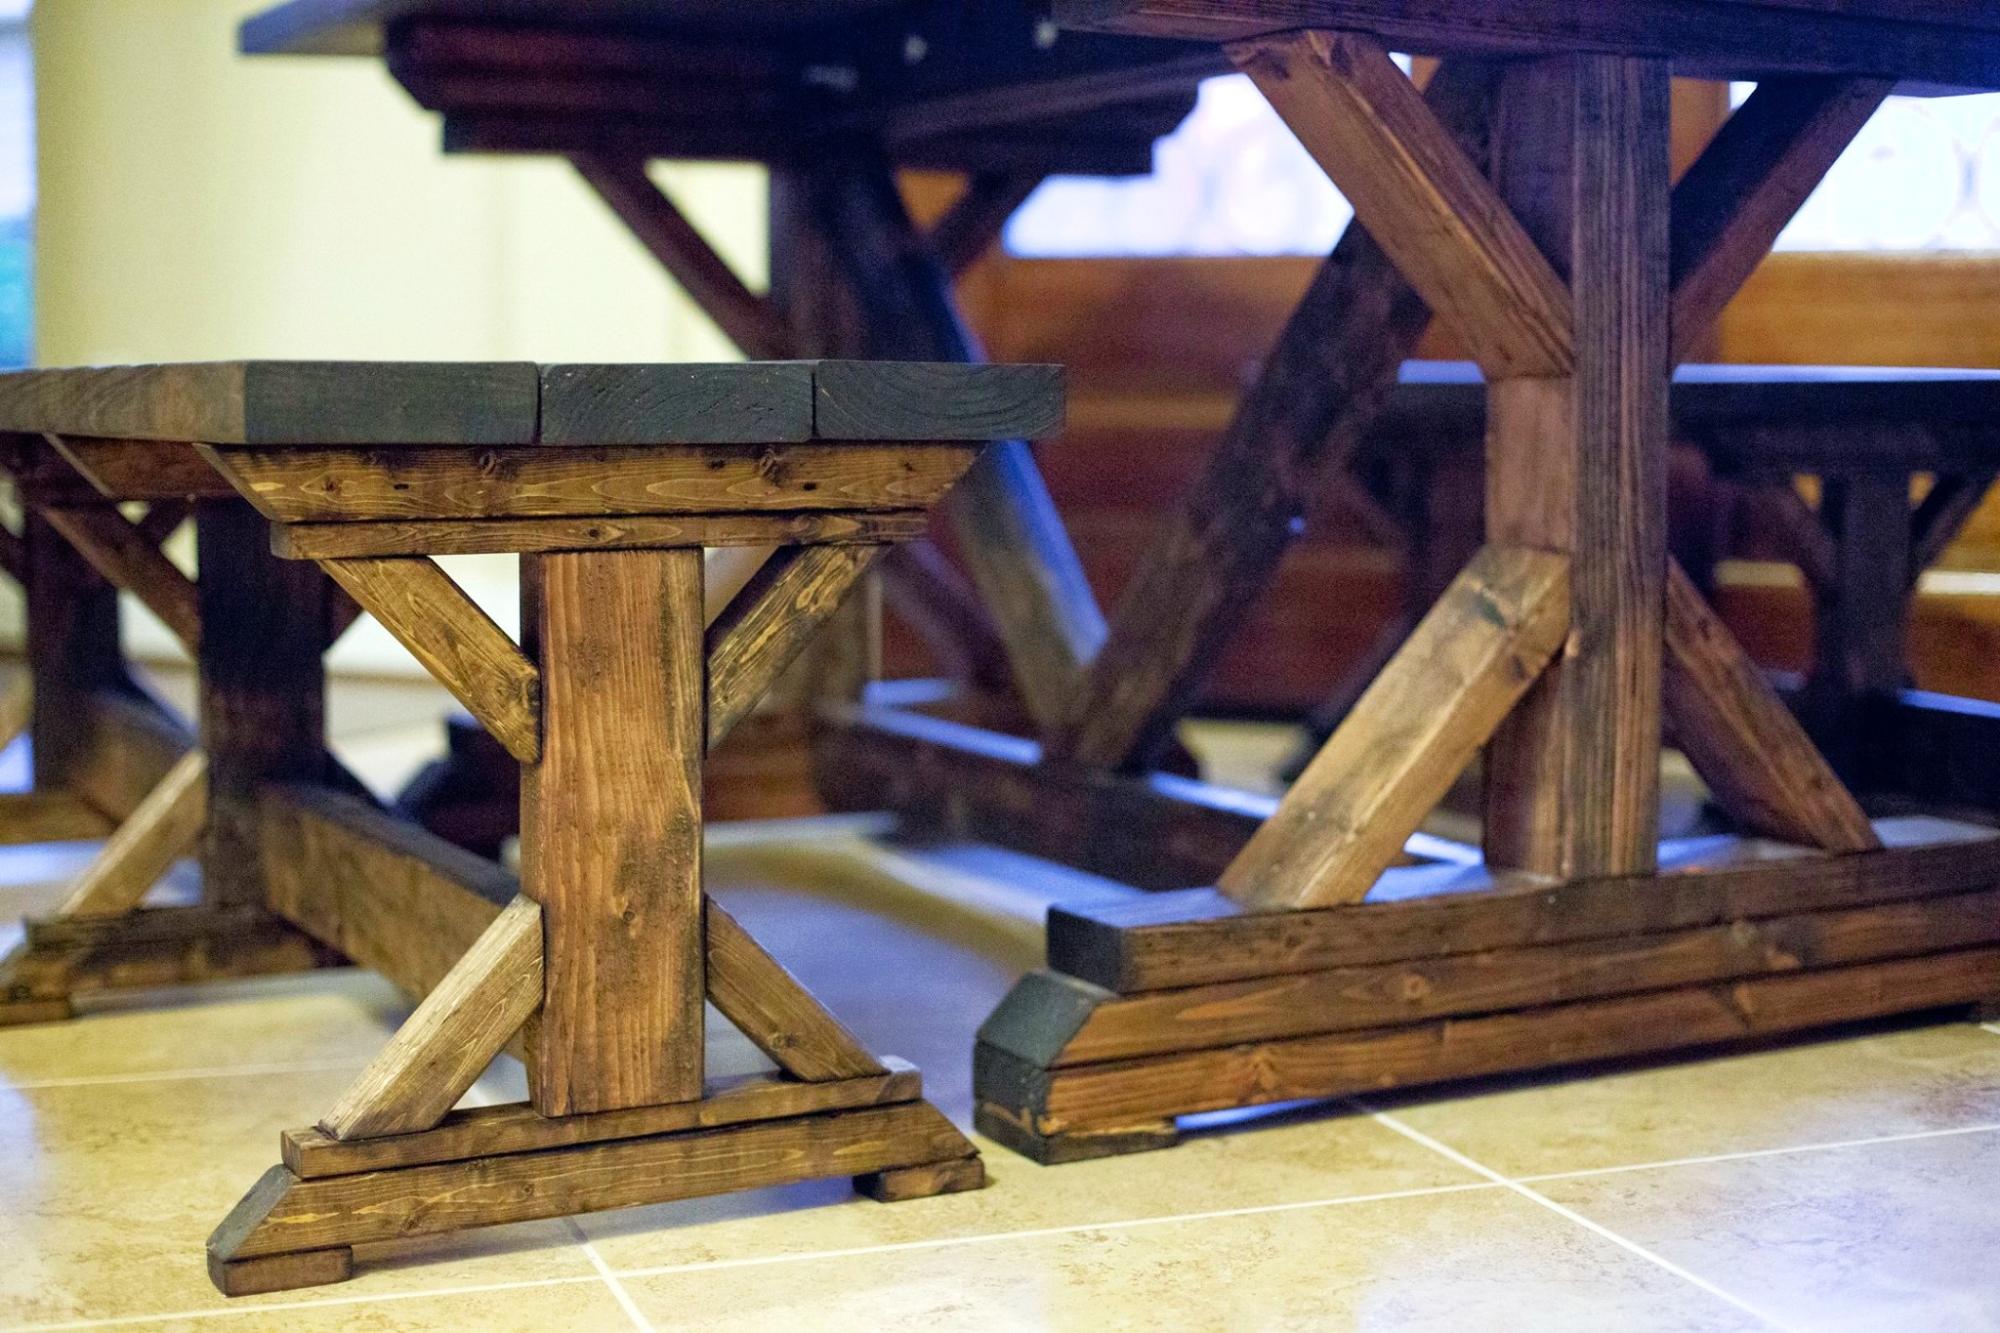
This was a bit more work than I anticipated but I think it turned out great. The quoted buy list was a little off so I had to make an additional trip to the hardware store.
I used the Fancy X Table plan and the Fancy X Bench plan to make this set. Since I wanted it only 6' long I had to do some modification to the plan but not much.
I also designed the table top into two pieces that fastened together through the center piece so I could take it apart easily and fit it though a standard door.
Built from Plan(s)
Estimated Cost
$120 (since there were two benches and the table). I found the wood in my area to be a little more expensive than quoted on the plan. Particularly the 2x10's.
Estimated Time Investment
Week Long Project (20 Hours or More)
Finish Used
MinWax - Dark Walnut. To get the finish even I had to invest ALOT of time into sanding. I had to use 60 grit in some spots to even out the factory cuts but most of it I was able to go over with just 220 grit. DON'T FORGET TO SAND THE ENDS!
Recommended Skill Level
Intermediate
Comments

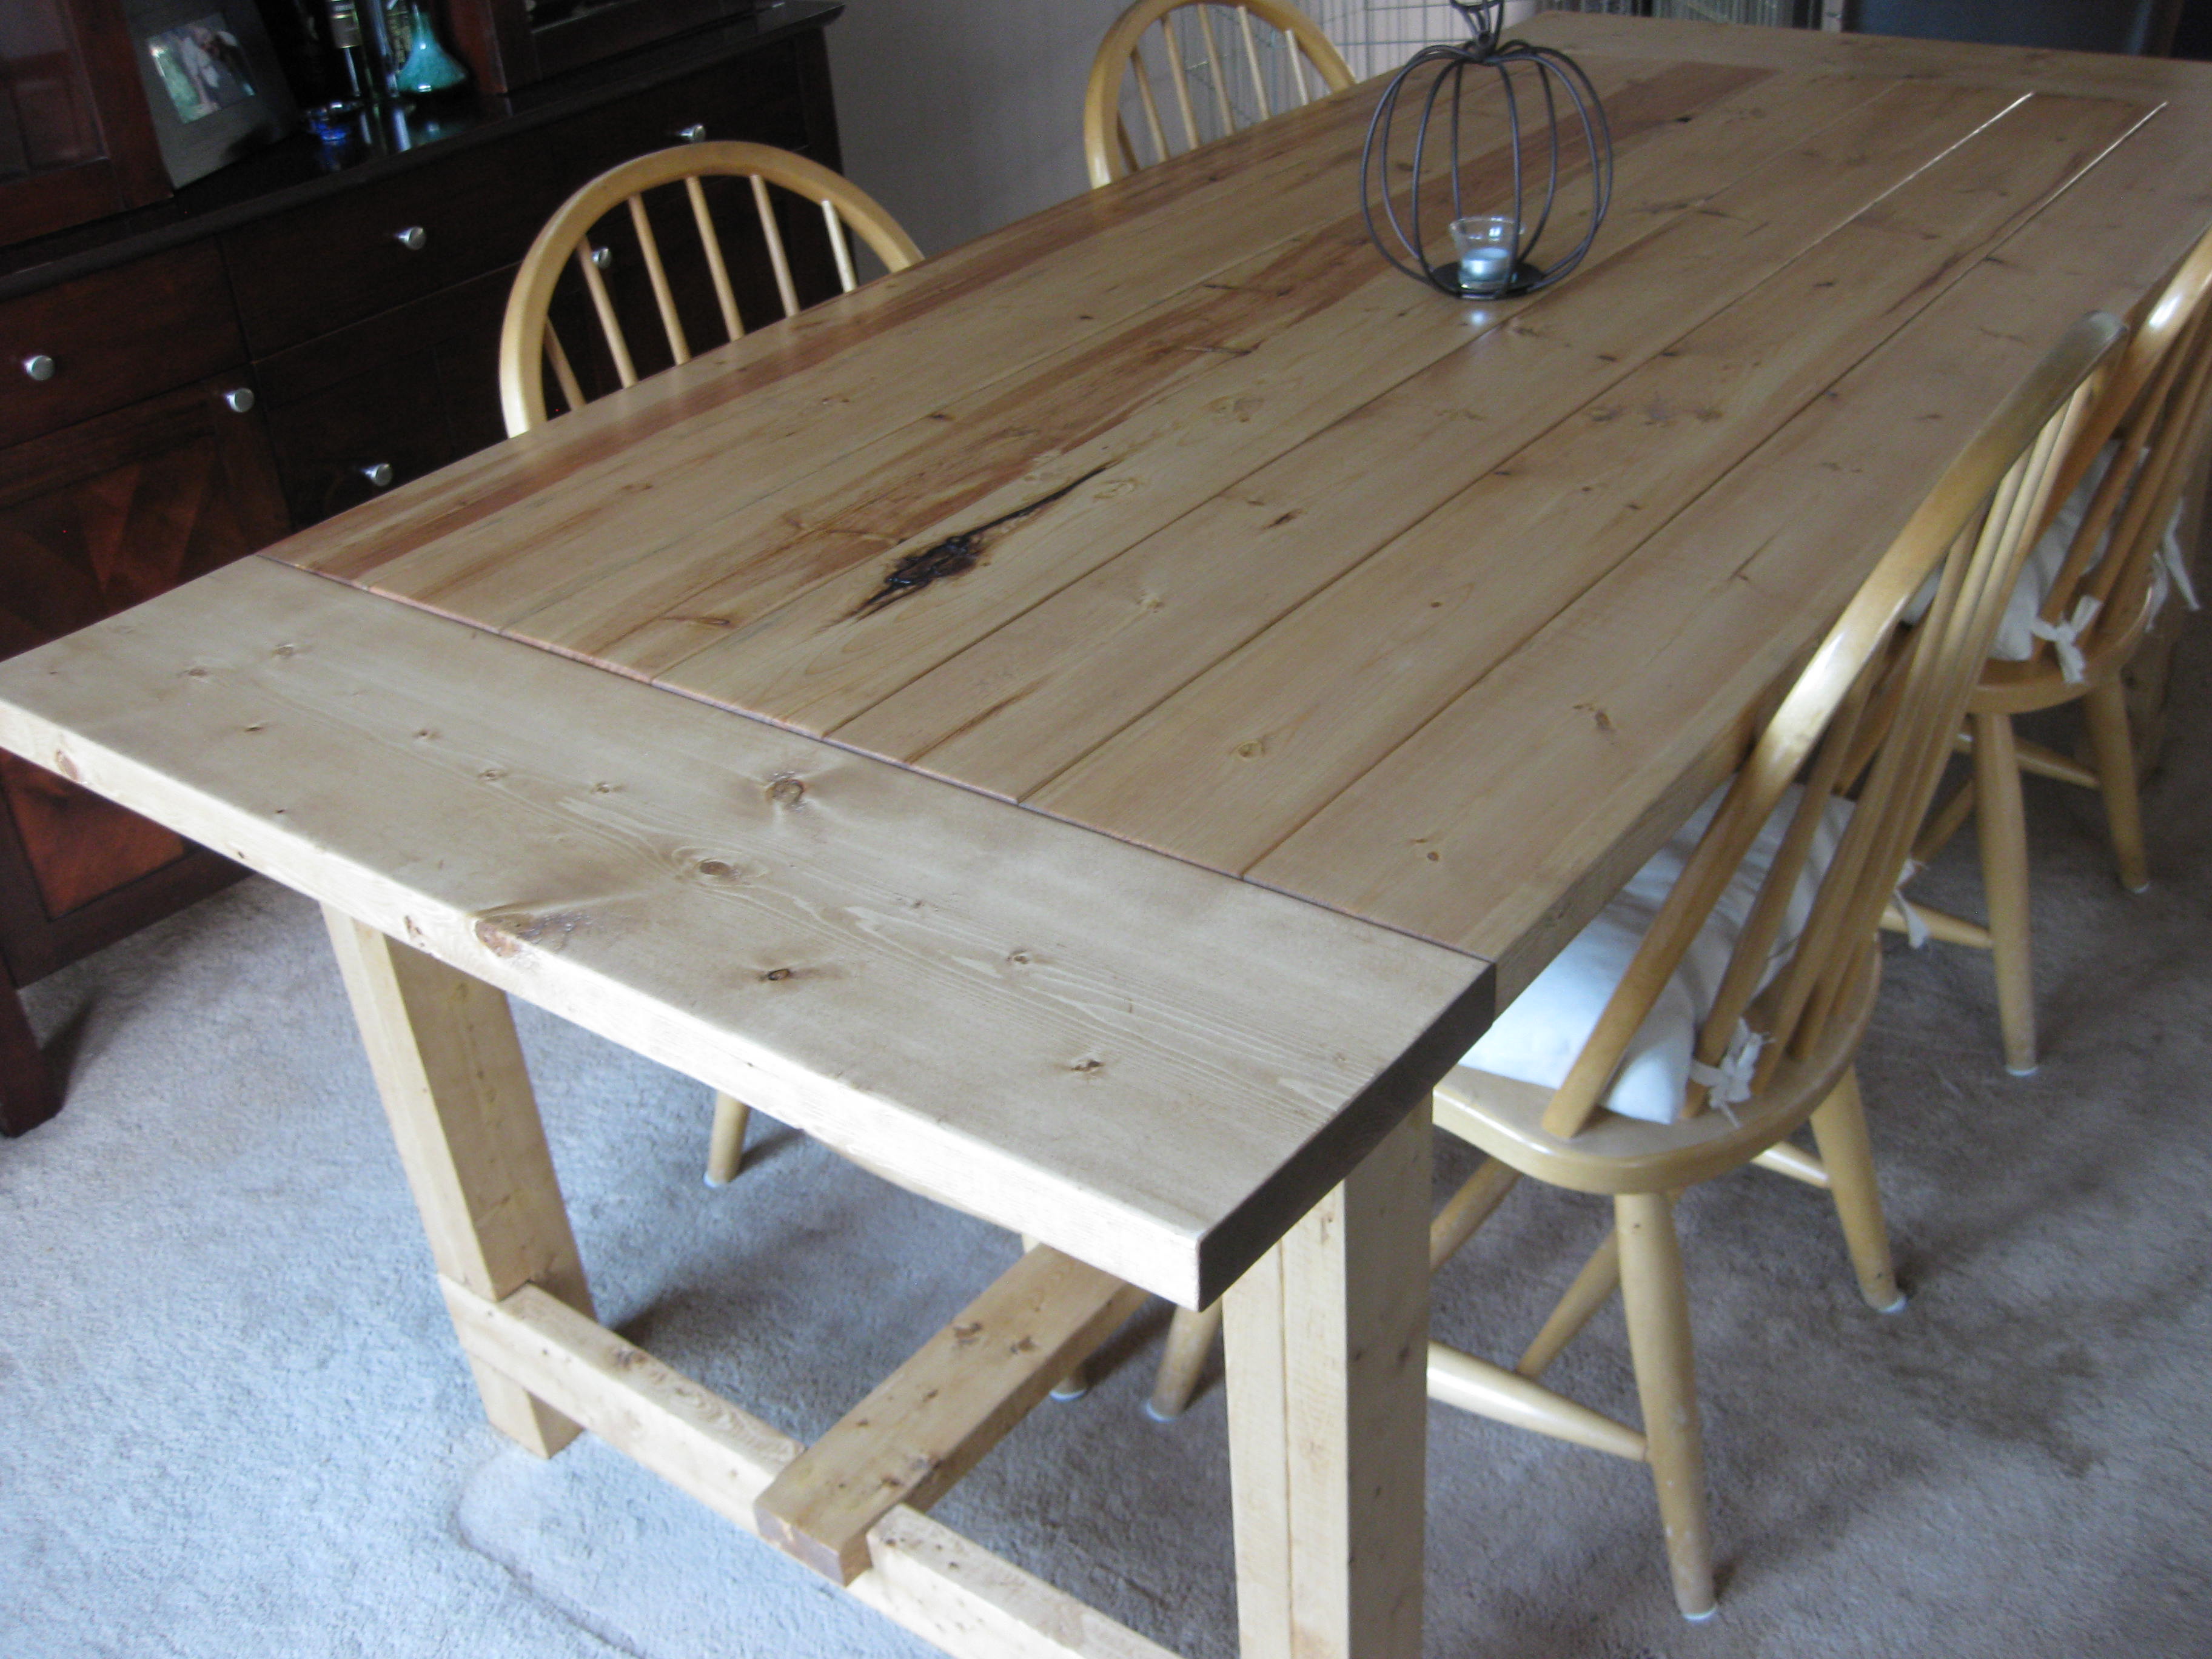
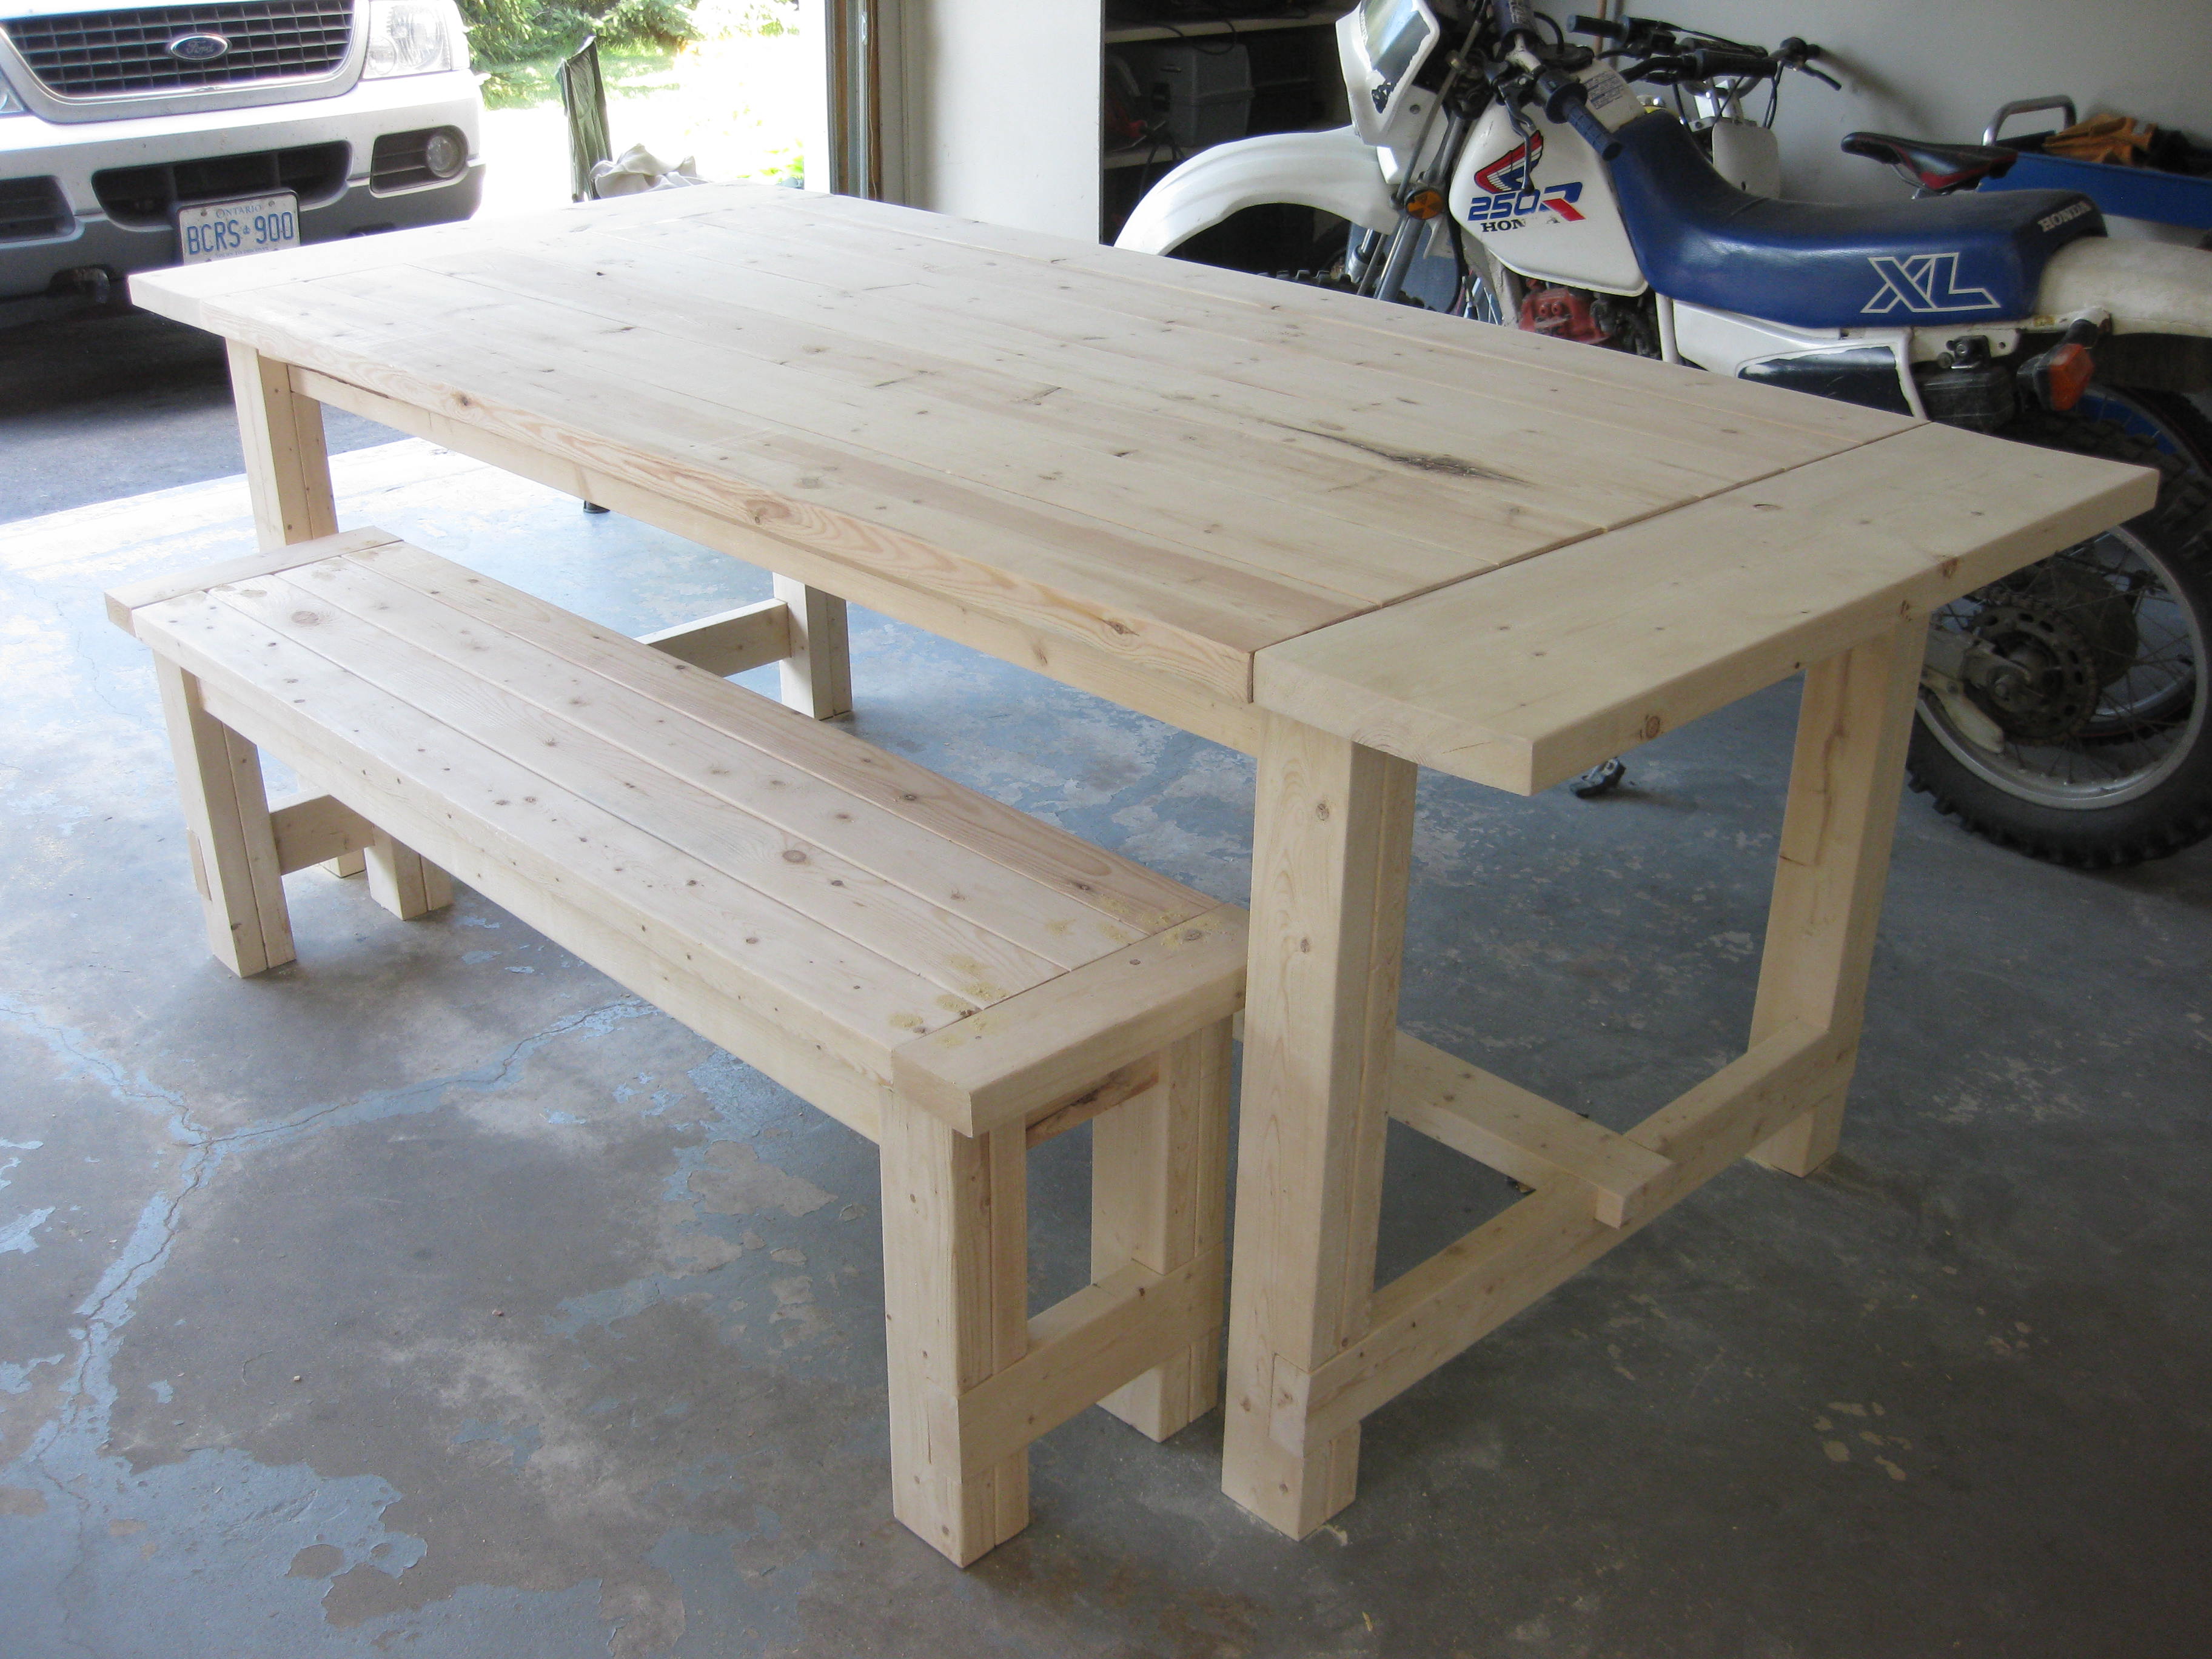
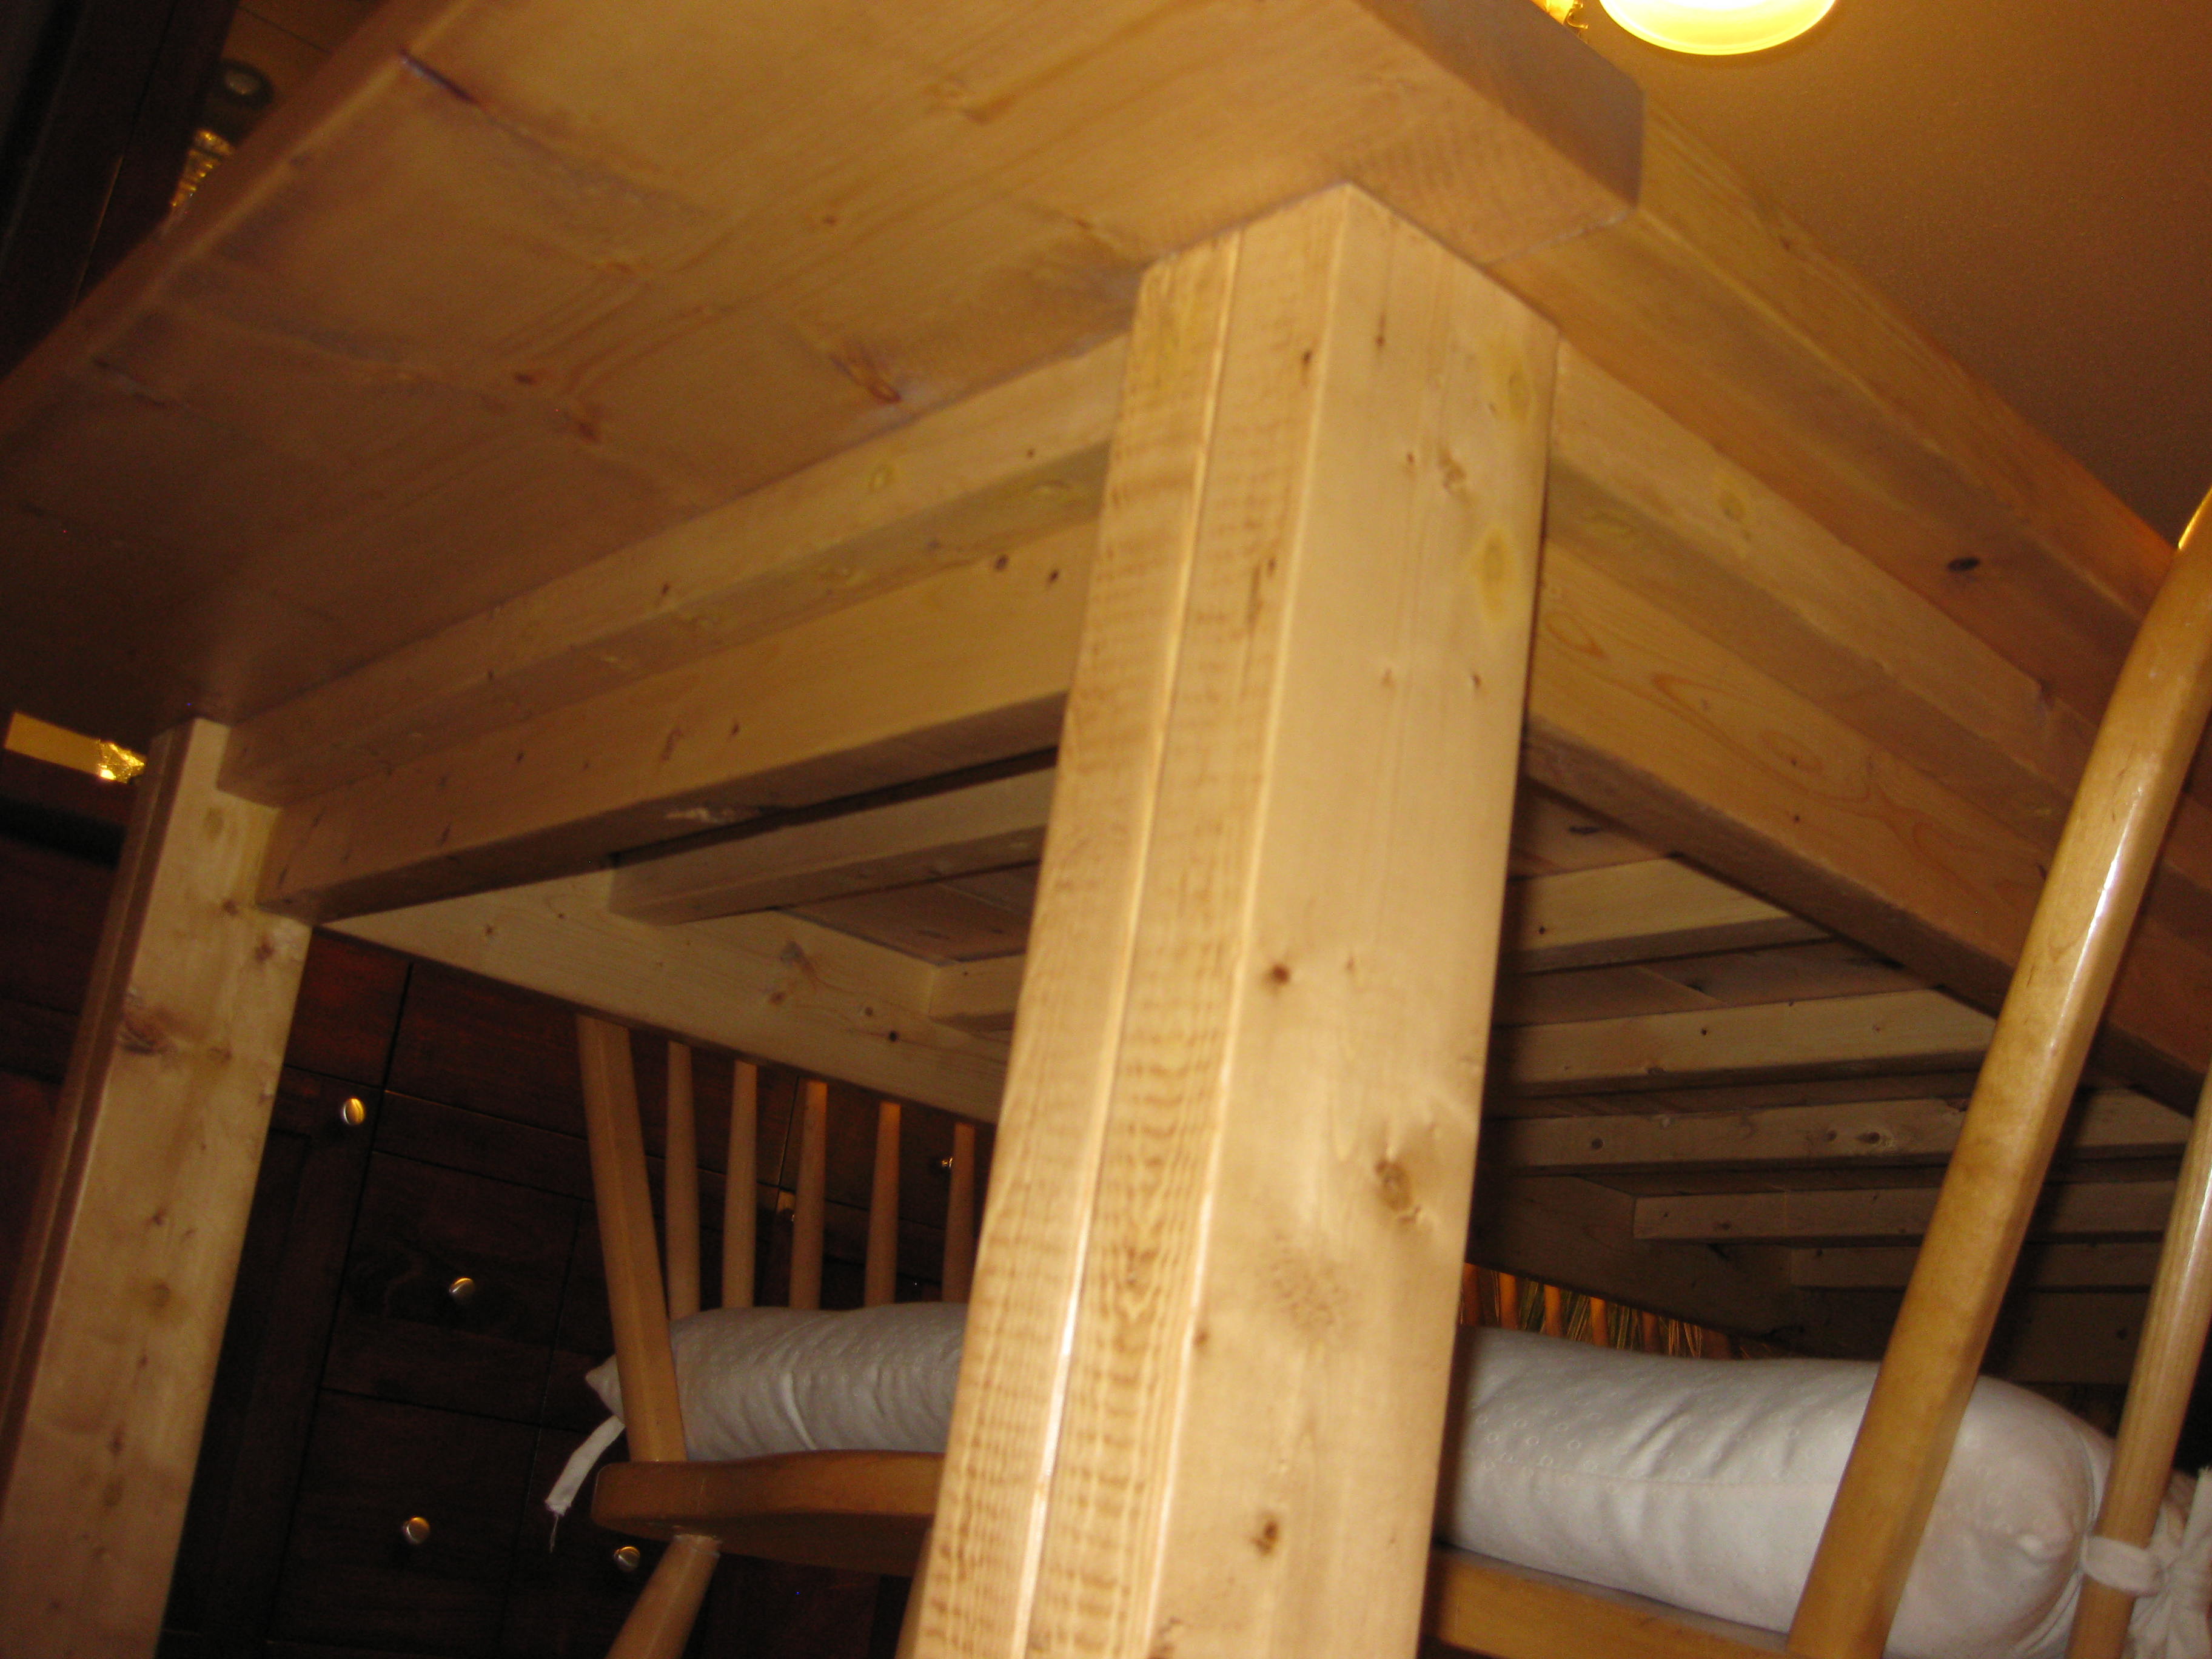
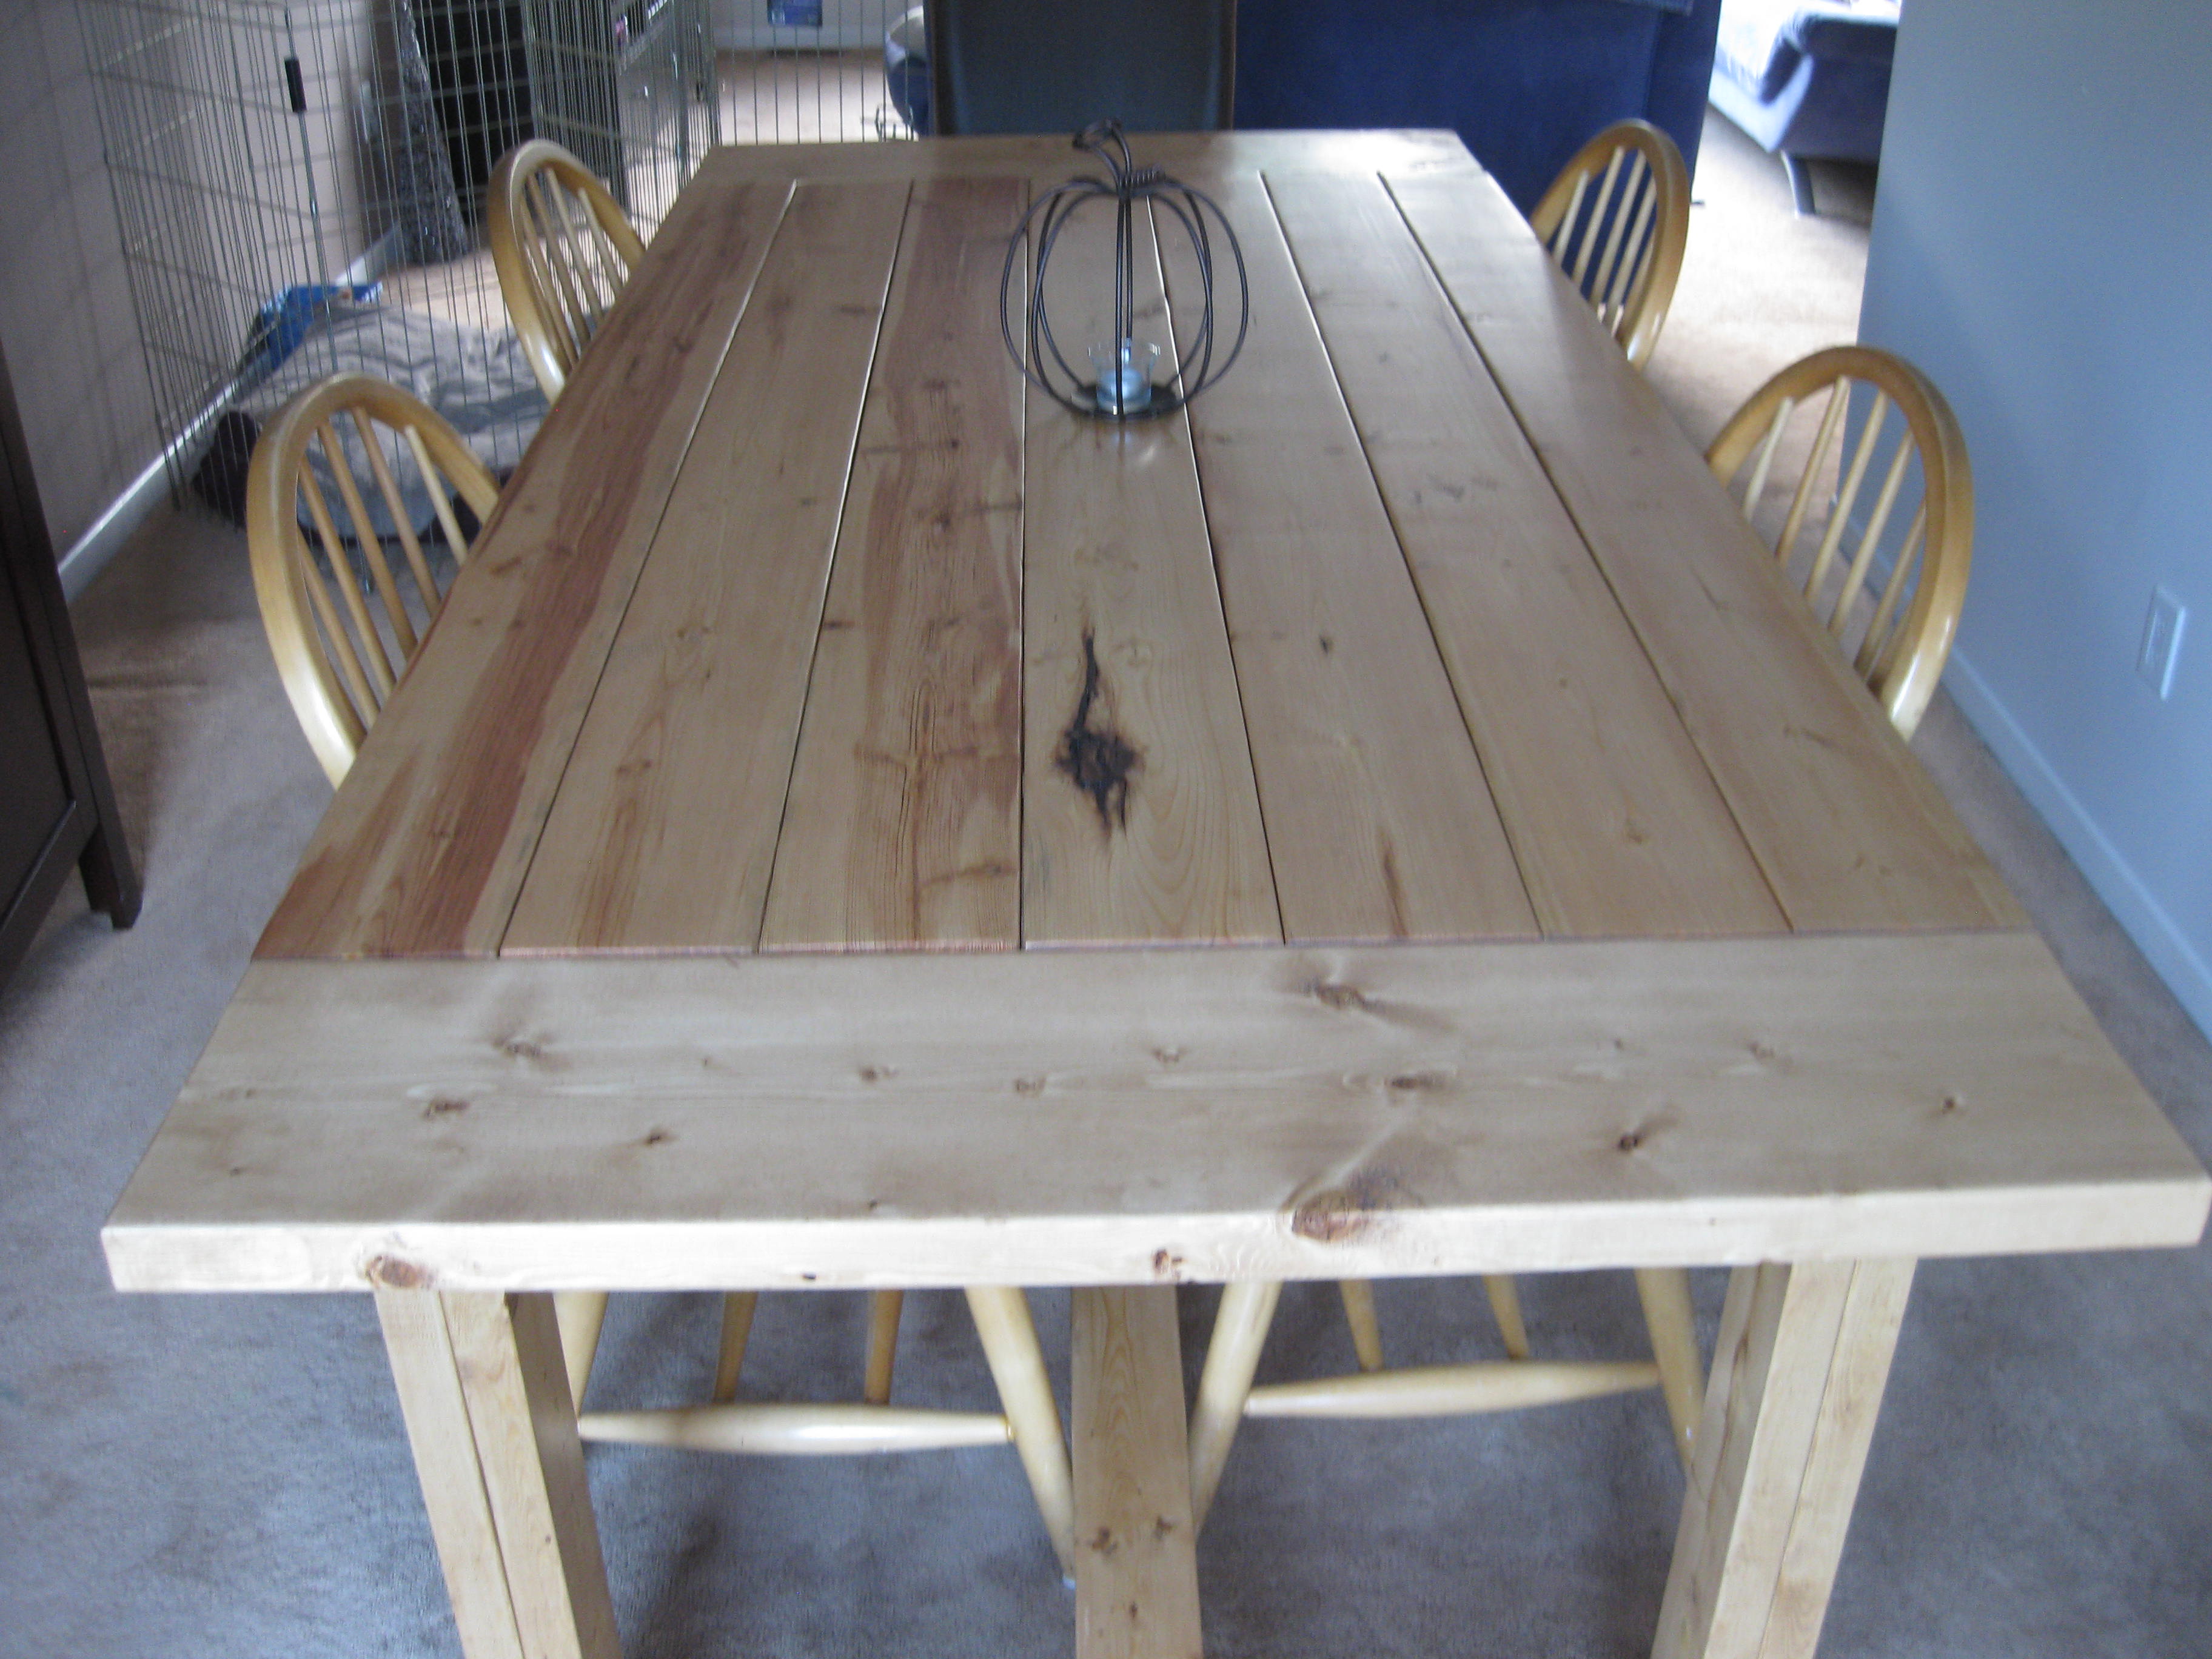
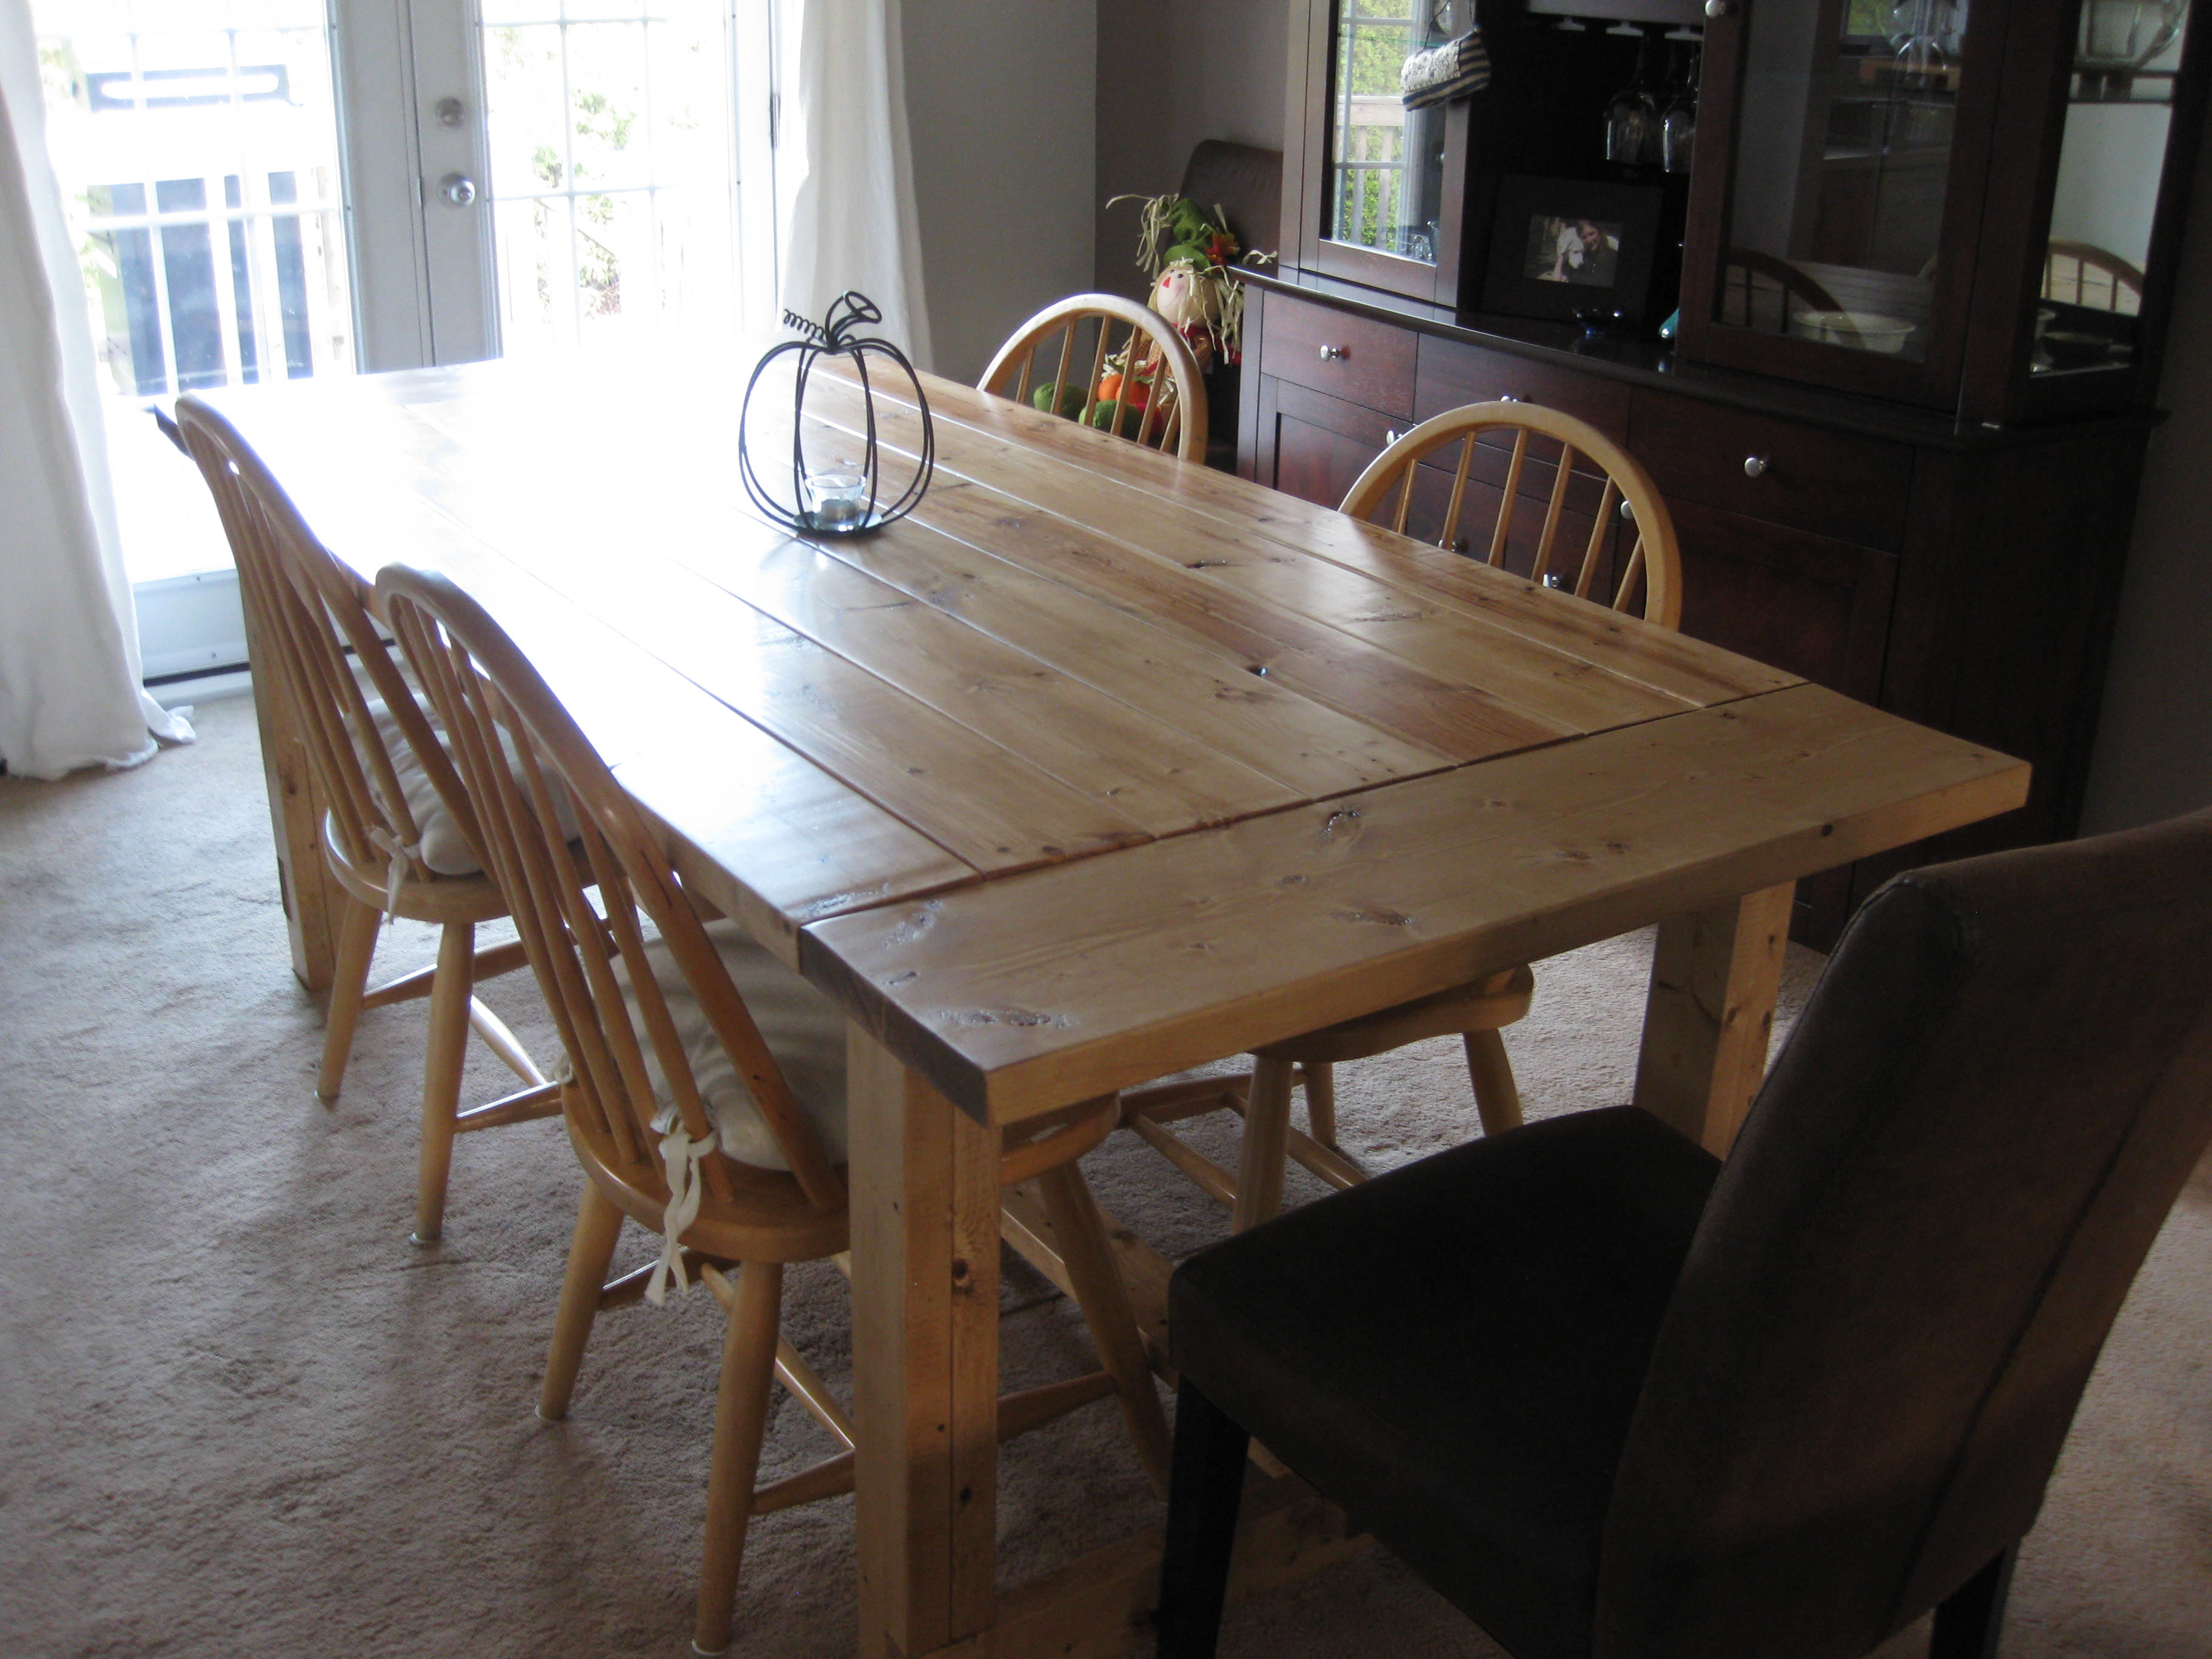
Foldable Farmhouse Rustic Dining Table

My wife wanted a portable farmhouse style rustic dining table that she could take to photoshoots and other events. I started with a top made with 2x6s and make the legs with 4x4s and the rest with 2x4s. Stain is dark walnut with a clear coat on top.
The legs are attached with door hinges and can fold into the top for more portable use. There is also a board that can be inserted in the bottom slots so that when in use the legs can not fold in.
So far the rustic dining table is working out great, although this table is VERY HEAVY and needs 2-3 strong people to carry it around. I have also made a lighter version using 1x6 tops and all 2x4 frame and legs.
Photos courtesy of Jennifer Blair Photography Designed by Amber Veatch Designs


Built from Plan(s)
Estimated Cost
150.00
Estimated Time Investment
Weekend Project (10-20 Hours)
Finish Used
Miniwax Dark Walnut
Recommended Skill Level
Intermediate
Comments
Wed, 06/12/2013 - 04:15
oh plans pleeease
Oh I really hope that you are able to put these modified plans up!!! A foldable farmhouse table.... what will they think of next!

Sat, 10/22/2016 - 12:25
Stunningly beautiful! Thank
Stunningly beautiful! Thank you for sharing and inspiring!
Sat, 10/22/2016 - 17:21
Toe kick drawers
I cannot find the plans for the tiny house drawers any where. Can someone please point me in the right direction. Thank you!
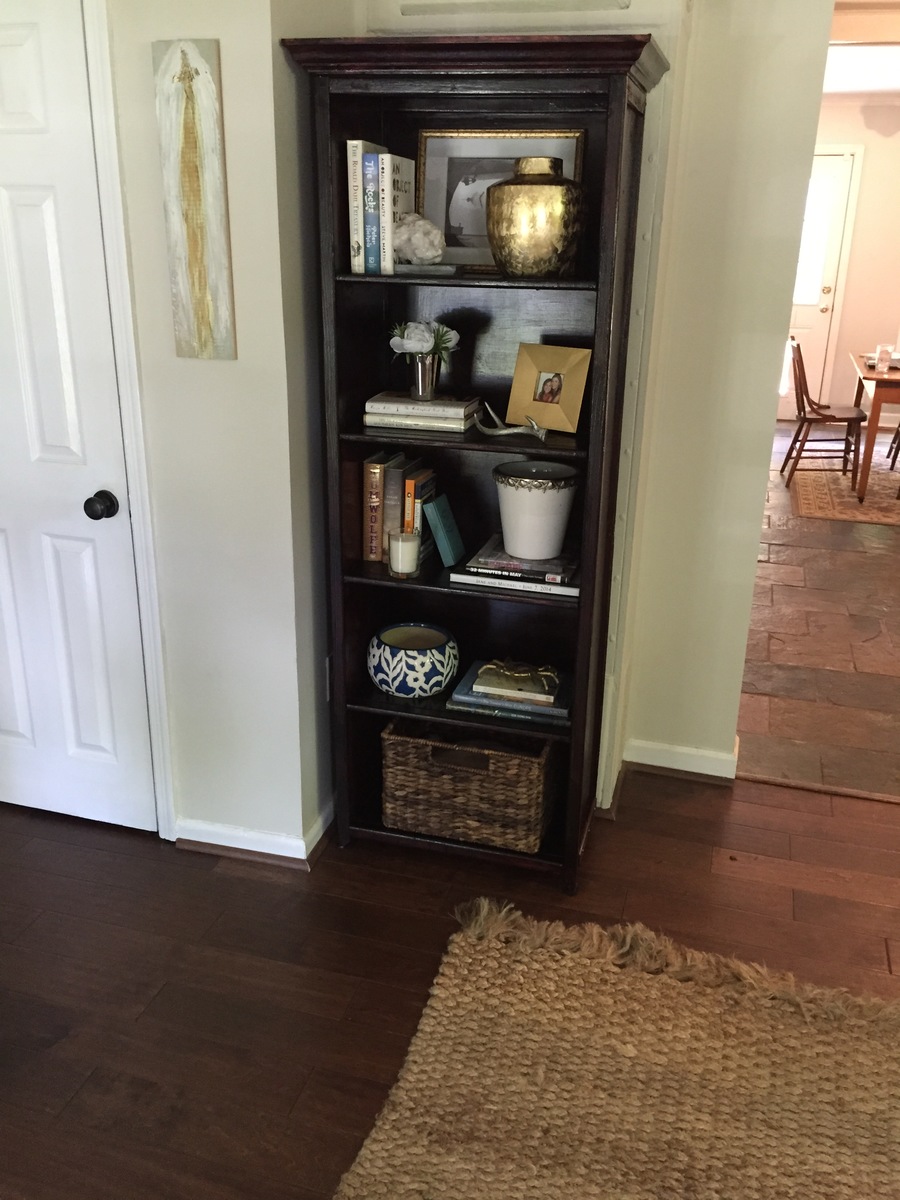
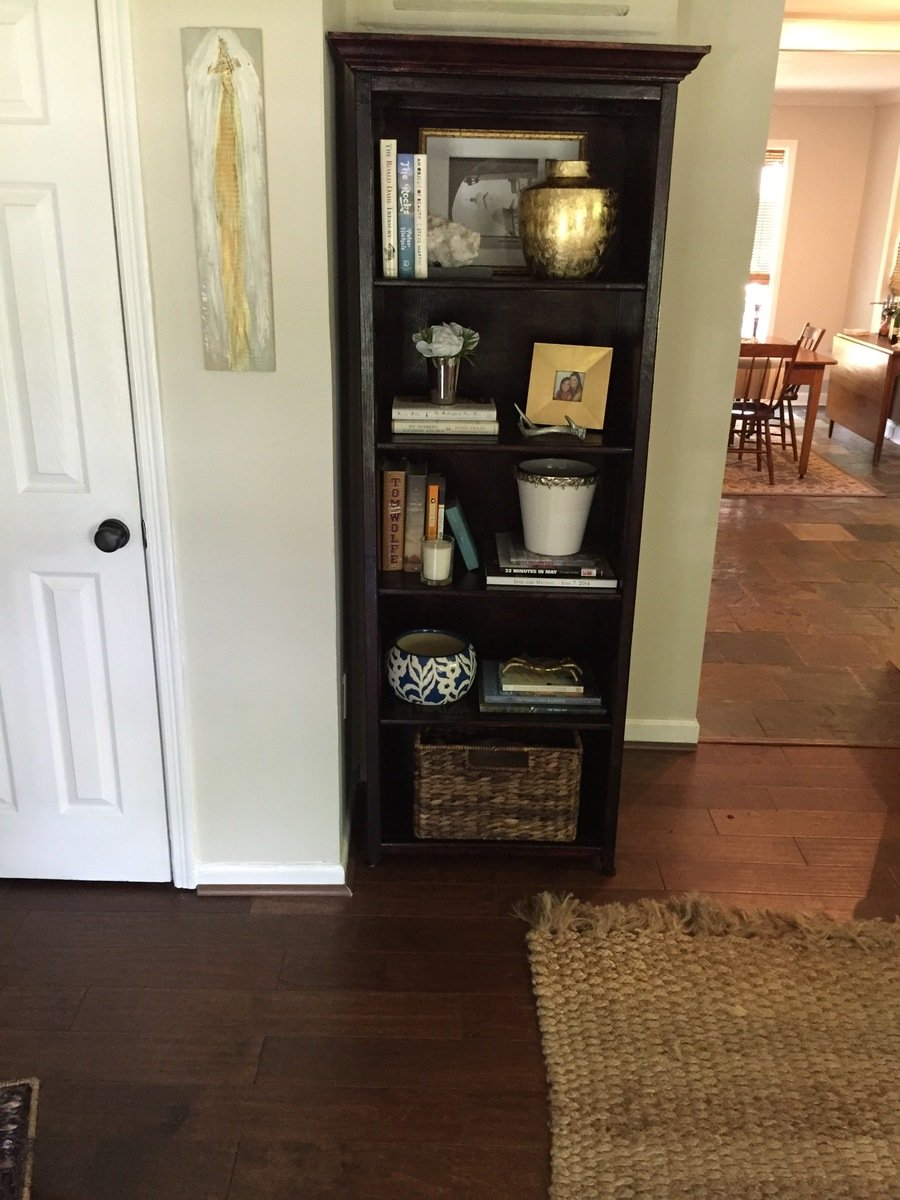
Channing Bookcase
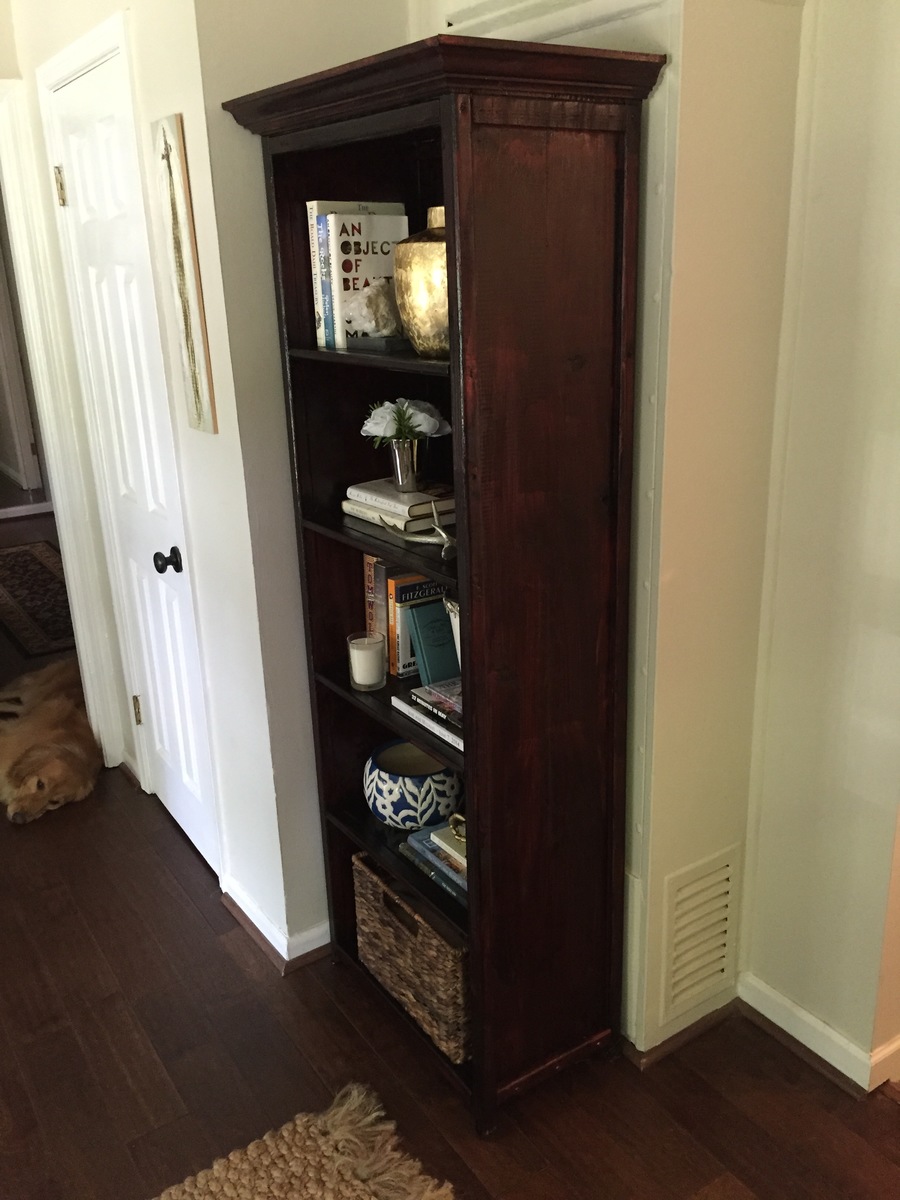
We needed a bookcase to fill a void in our living room and this was it. I altered the dimensions to increase the height to 72.5". I also added crown molding to the top which turned out nice. I used the same Bombay mahogany stain suggested by a previous post.
Built from Plan(s)
Estimated Cost
$150
Estimated Time Investment
Weekend Project (10-20 Hours)
Recommended Skill Level
Beginner
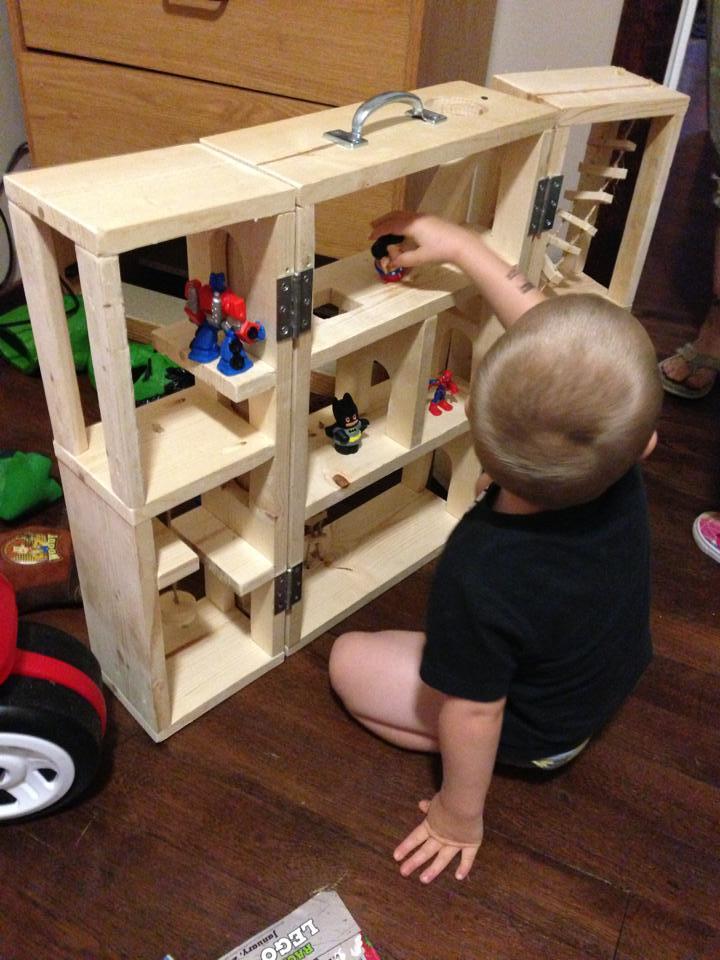
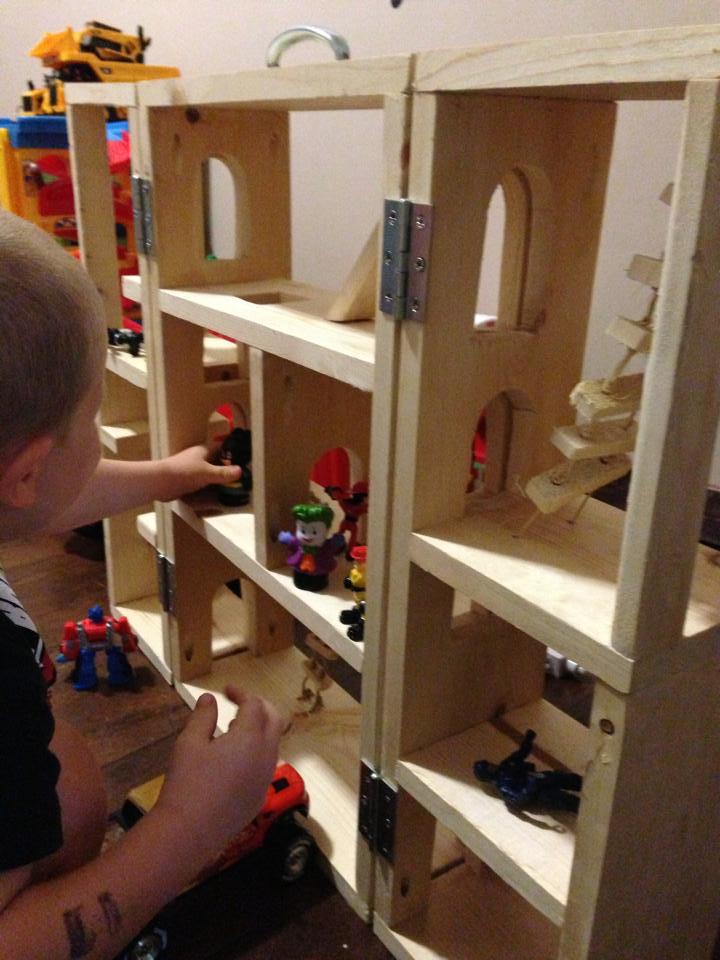
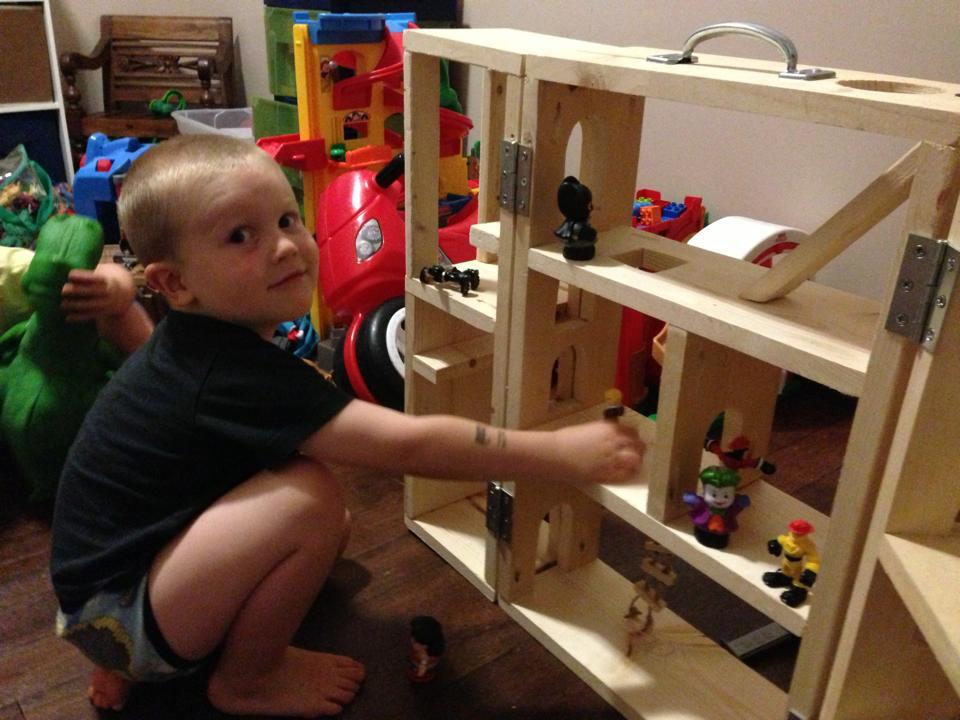
Super Hero House
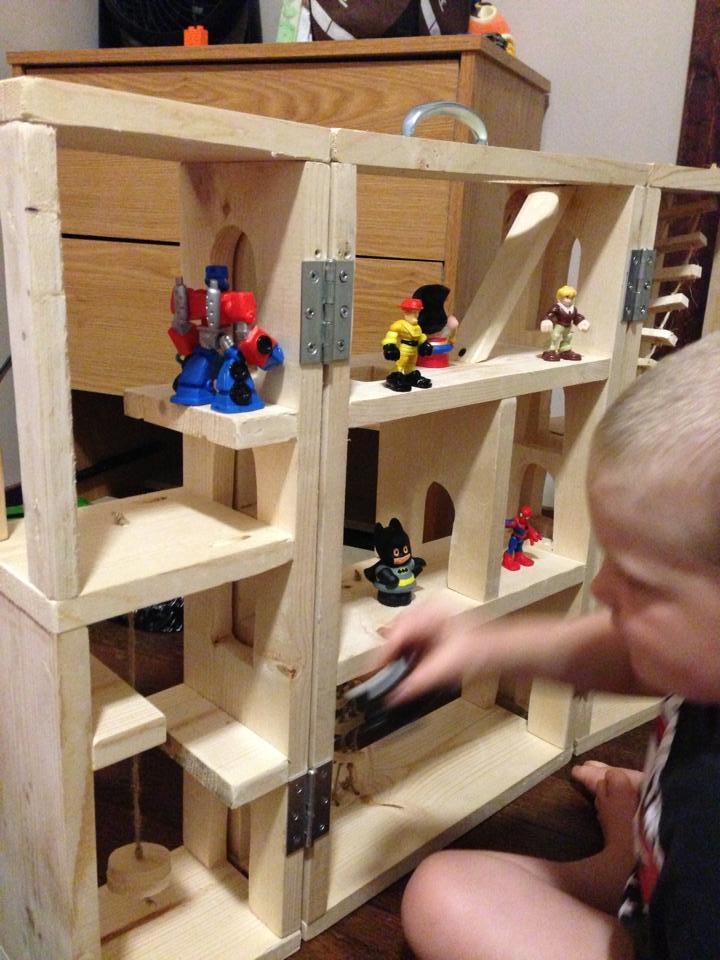
This was hard for me because I am horrible at using the jigsaw. If I do another one I'll probably not do as many door openings.
It took longer than expected due to filling in all the pocket holes an waiting for the wood filler to dry.
My grandson loves it, he didn't care about my mistakes on it.
Built from Plan(s)
Estimated Time Investment
Weekend Project (10-20 Hours)
Finish Used
None
Recommended Skill Level
Beginner
Wine Cabinet

I took what was a single cabinet and doubled it.

Built from Plan(s)
Estimated Cost
500+
Estimated Time Investment
Week Long Project (20 Hours or More)
Finish Used
Destressed
Recommended Skill Level
Intermediate
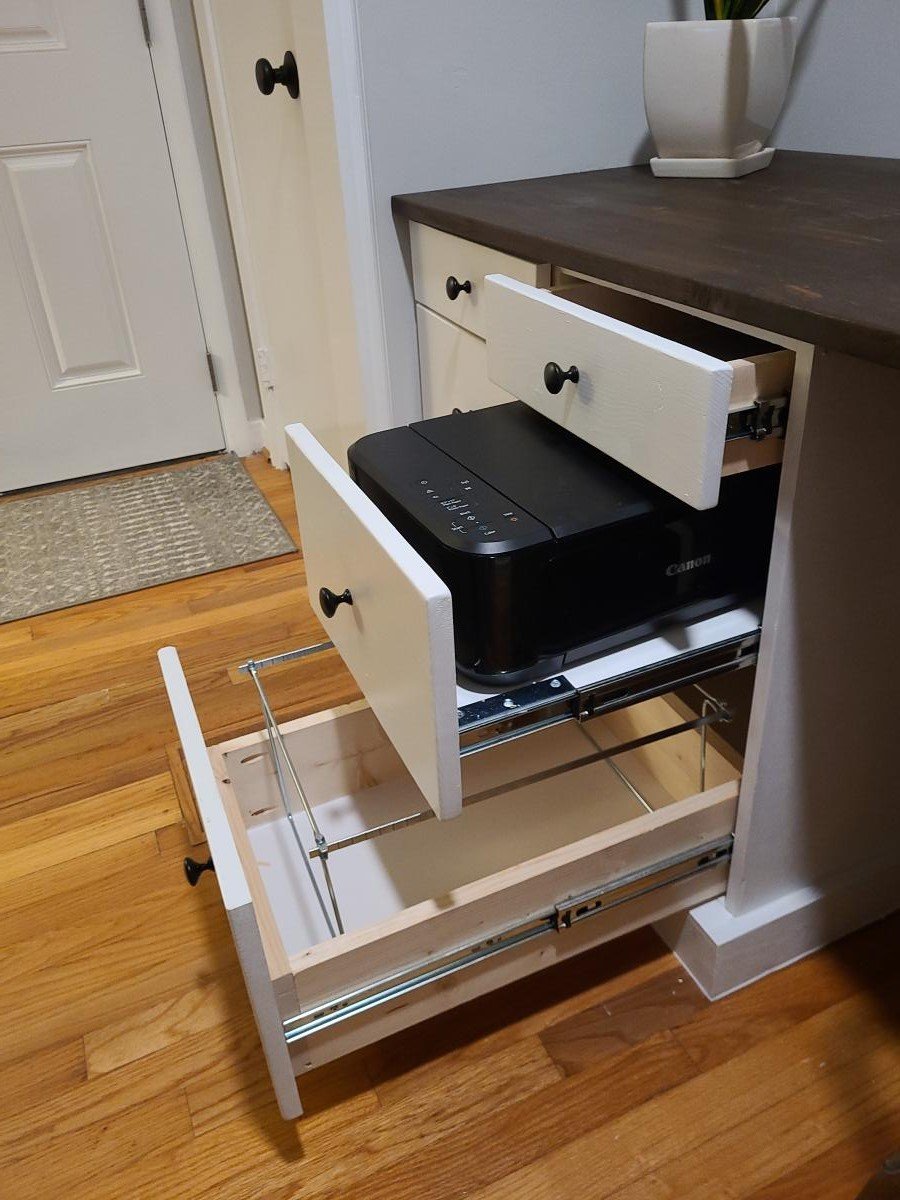
Built-in Desk with Dog Kennel
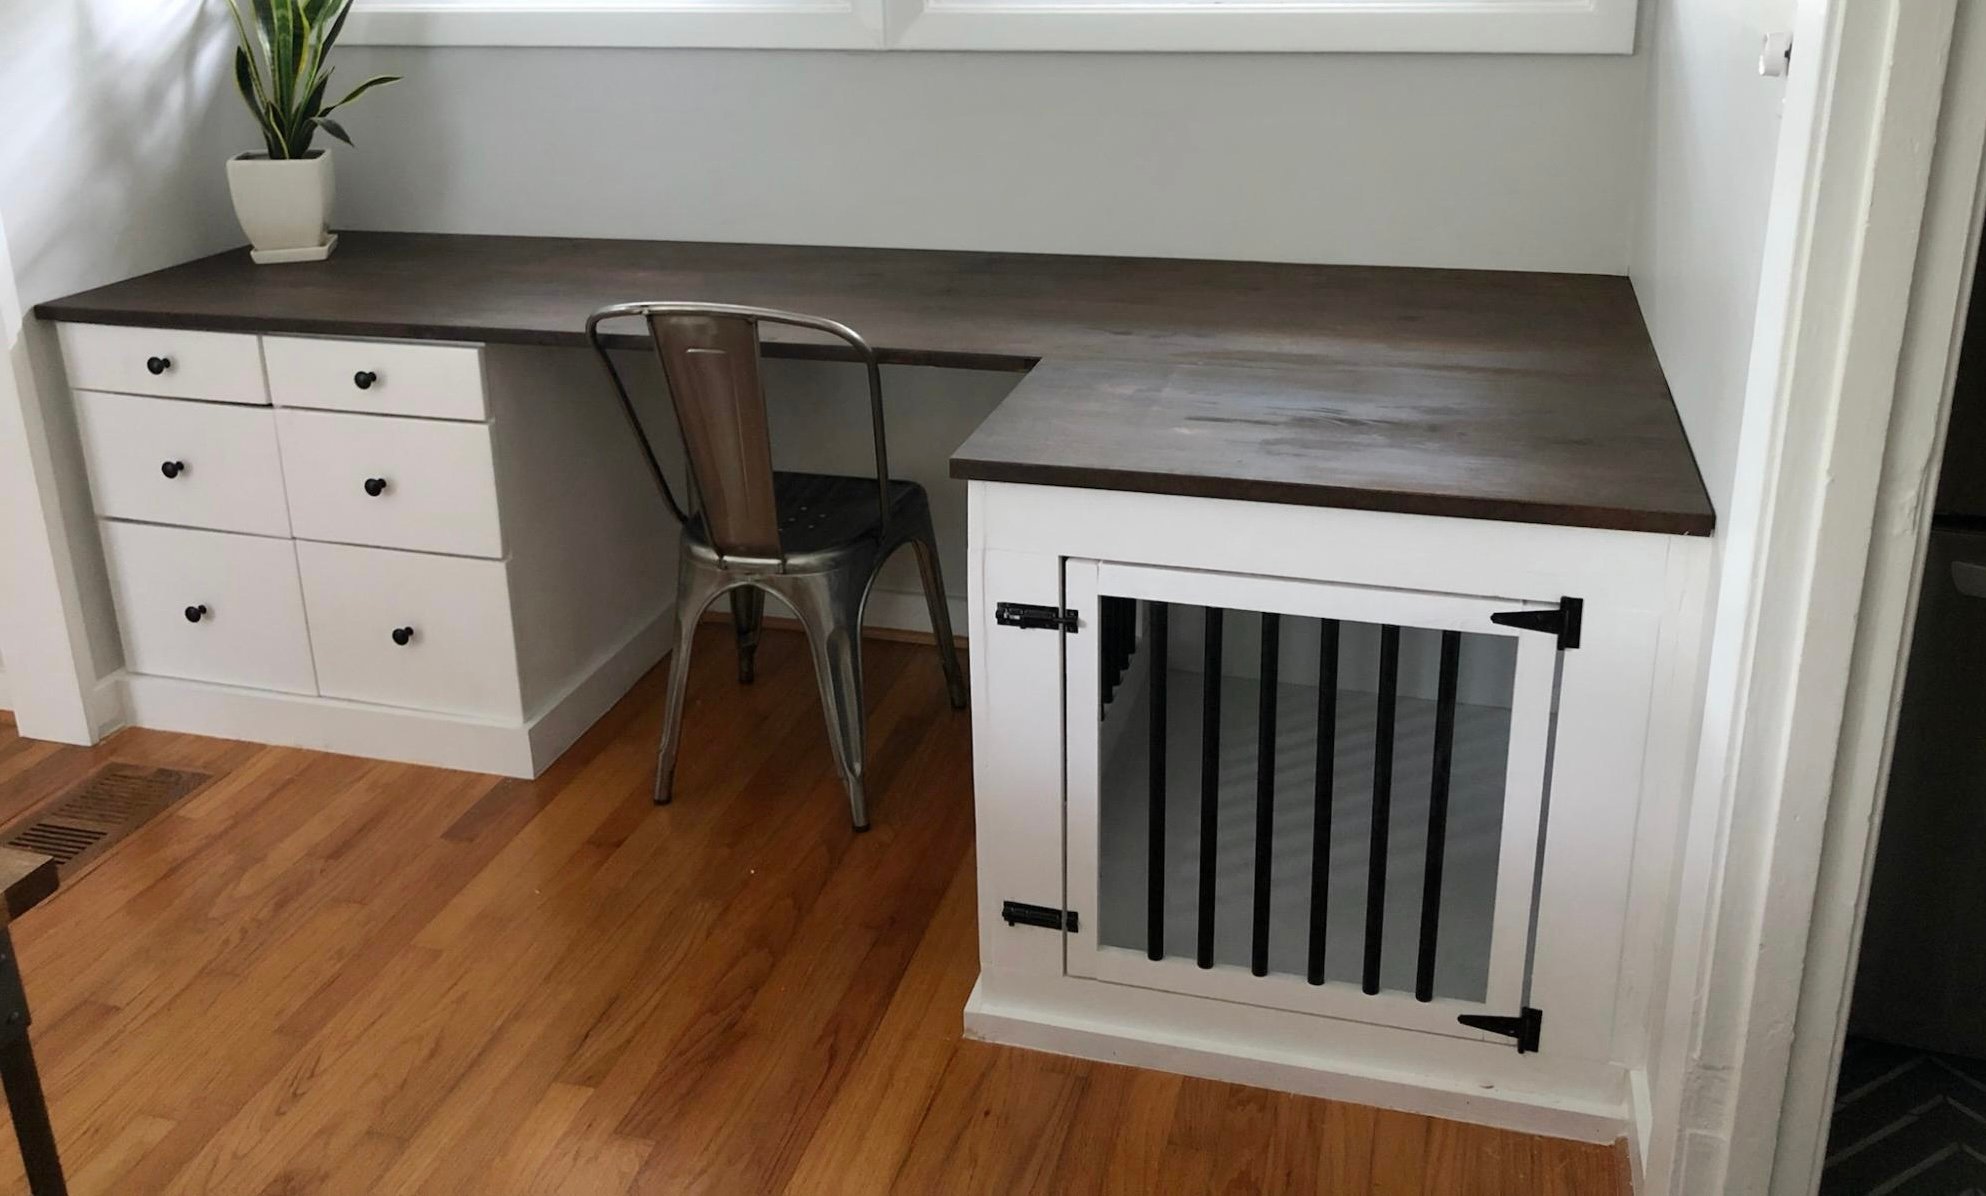
Built in desk with dog kennel complete with slide out printer drawer!
by Lisa
Built from Plan(s)
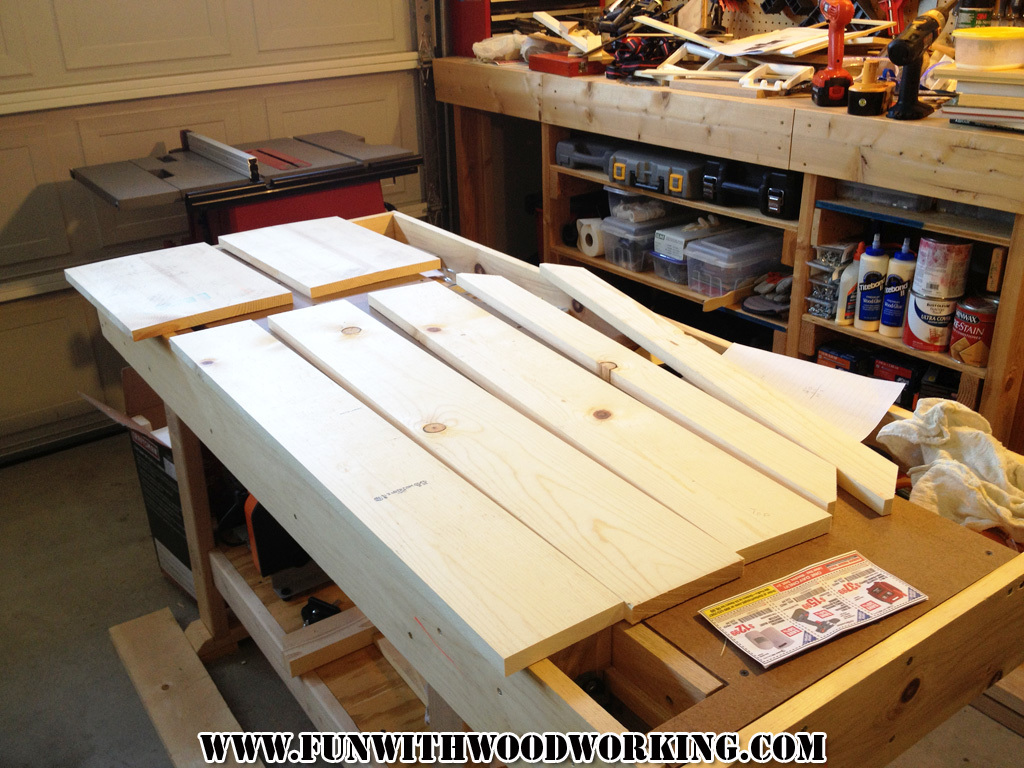
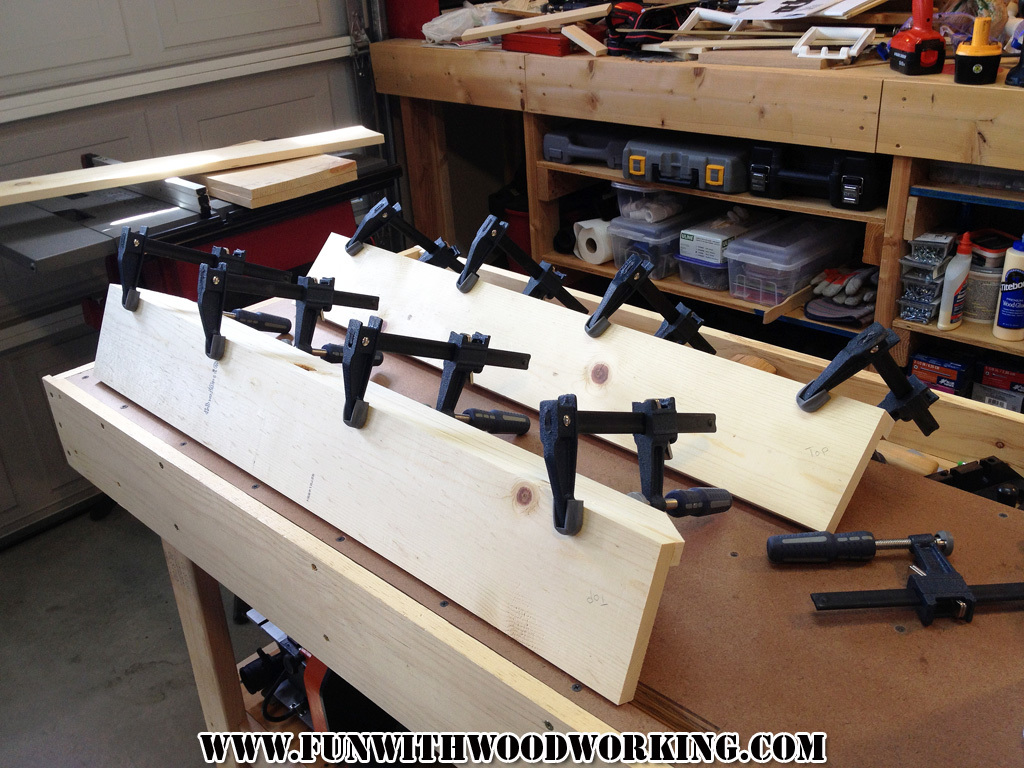
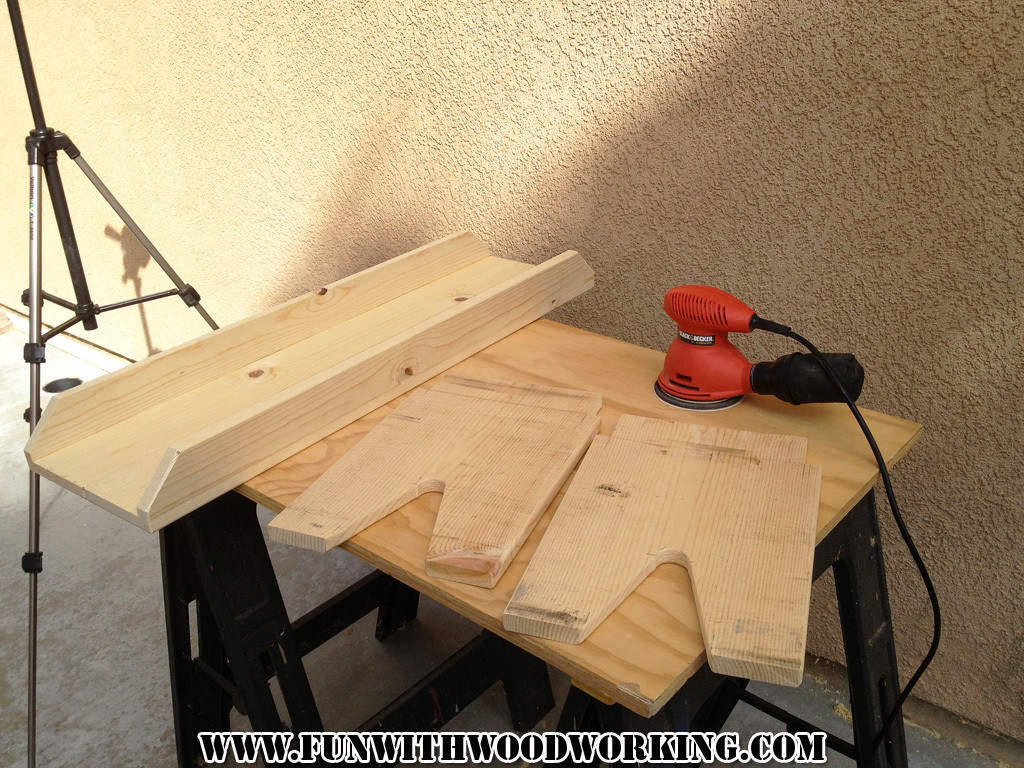
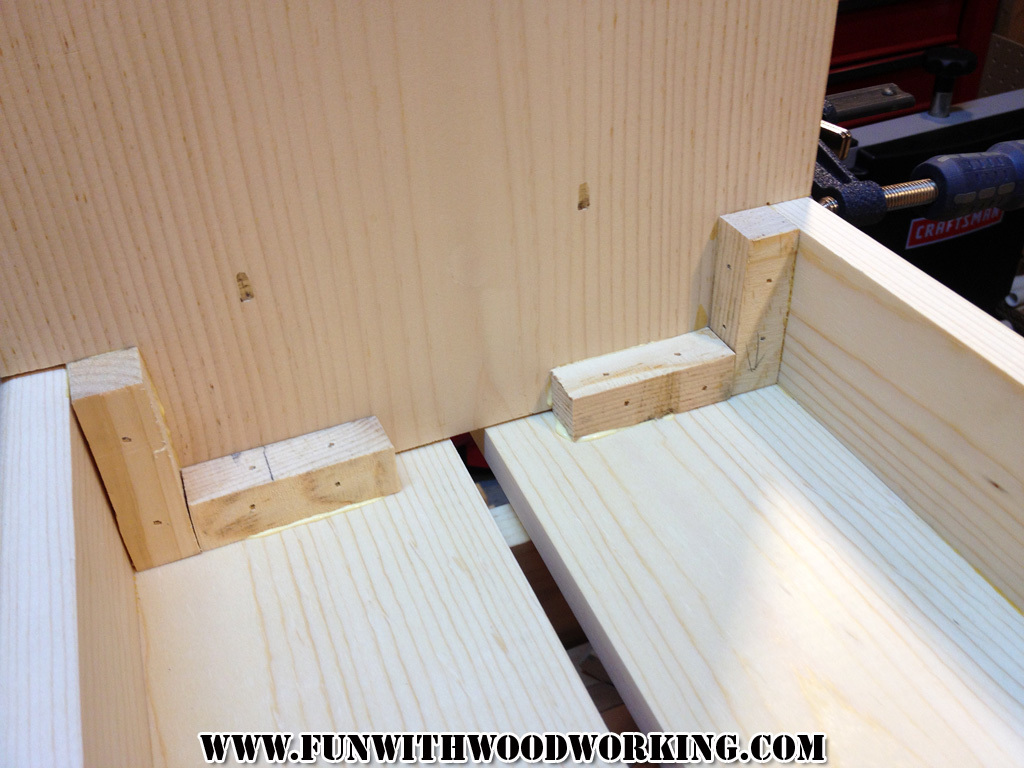
5 Board Bench
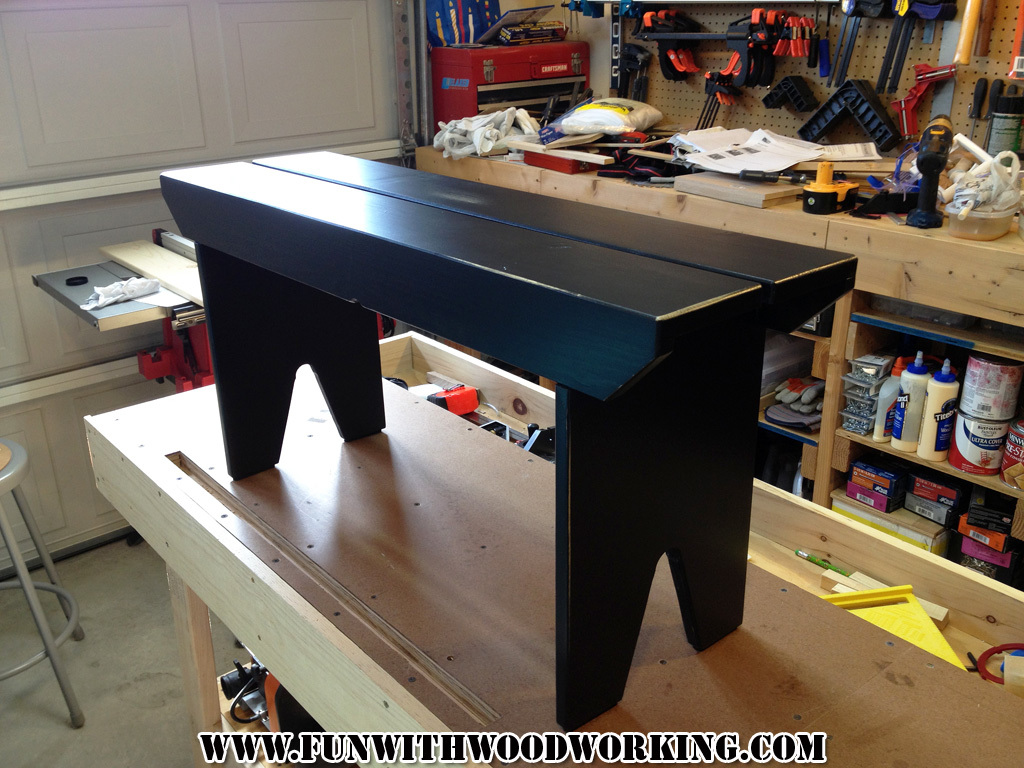
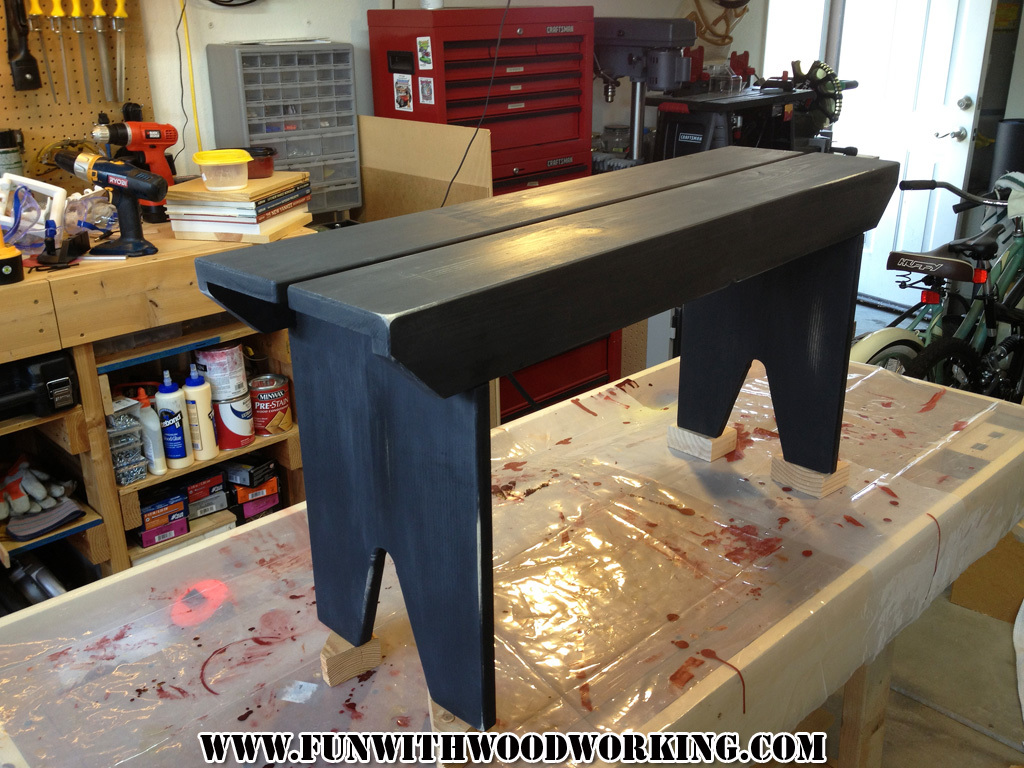
I was looking for a plan for a 5 board bench so naturally I came to your site. I made your basic design but made it a little bit smaller in all dimensions and I put a half inch split down the middle of the top. I built it out of pine and painted it flat black. I gave the legs and underneath 3 coats of satin polyurethane and the top and sides received 5.
You can follow the build on my blog at :
http://funwithwoodworkingtoo.blogspot.com/2013/09/project-how-to-build-…
You can also watch a video of the build on my YouTube page at:
http://youtu.be/1_hz2n7v9ss
Thanks for the free plans!
Estimated Time Investment
Day Project (6-9 Hours)
Finish Used
MINWAX water based satin polyurethane
Recommended Skill Level
Beginner
Kids table and chairs
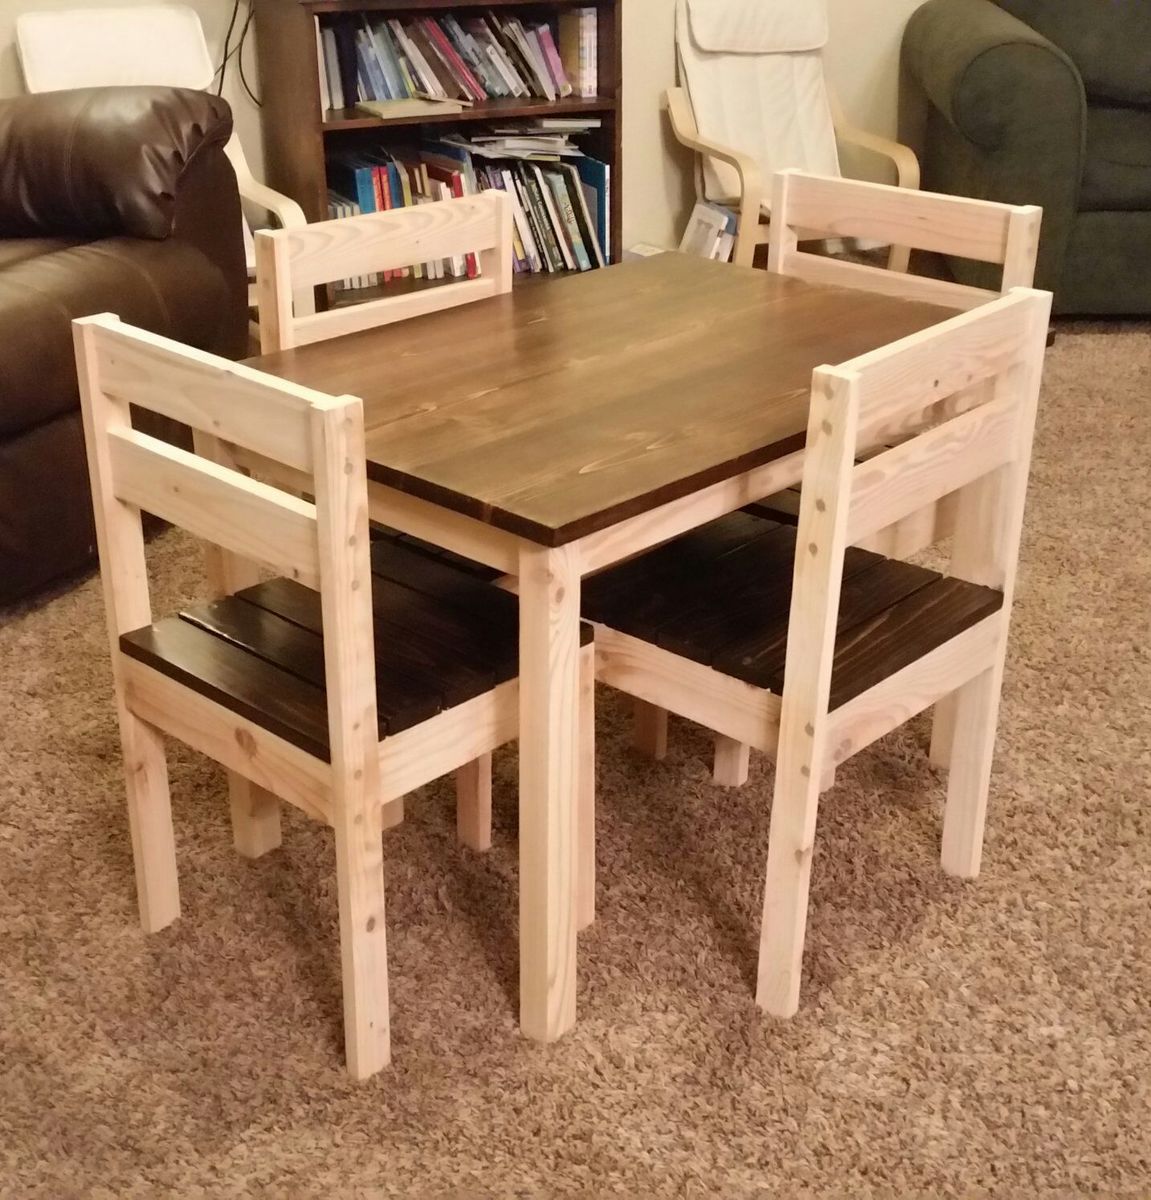
Great little project. Finished just in time for Thanksgiving.
Andy
Built from Plan(s)
Estimated Cost
50
Estimated Time Investment
Day Project (6-9 Hours)
Finish Used
Mirrowax, polyurethane semi gloss
Recommended Skill Level
Beginner
Comments
Built in bookcase with lights

Built in bookcase with lighting and power outlets in cupboards for audio and DVD equipment to feed to the wall mounted tv (to the left).
The photo with the lights is when it was unfinished and I also decided that I didn't like the inset doors and so made new overlay ones. Now I have four doors I need to use on another project...


Estimated Cost
$1000
Estimated Time Investment
Week Long Project (20 Hours or More)
Finish Used
Sherwin Williams Pro Classic Extra White Satin.
Recommended Skill Level
Intermediate
Comments
Farmhouse Table - Thanks Ana!!
I tackled the Farmhouse Table over a long weekend while my boyfriend was away - he was surprised needless to say!
I have not attempted any woodwork projects since grade 8, but this was alot of fun - I did not find it very difficult and loove using power tools :)
I made the matching bench, however I guess I did not stir the bottom of the can well enough and my bench is now red :/ soo I am going to either stain it dark or paint it white and use it as a mudroom seat!
*I also made mine shorter - 7ft long to fit in our dining room and adjusted the bench to fit.
Built from Plan(s)
Estimated Cost
$160 for table & bench inc. wood, screws, stain, sand paper
Estimated Time Investment
Weekend Project (10-20 Hours)
Finish Used
I sanded it until I was pretty sure the risk of splinters was eliminated. After pre-stain conditioner, it got a coat of Minwax 'Ipswitch Pine'. The result was perfect on the table (two coats), however I must not have stirred the can well enough as my bench turned out dark red :/ I wanted it to look like it's 100 years old.
Recommended Skill Level
Beginner
Comments
Fri, 10/07/2011 - 17:15
Thanks Ana!
Thank you so much Ana! We are in the process of renovating our house and your website has inspired me to take on so many more projects now!! :)
Wed, 11/02/2011 - 04:52
Cracks
I built a similar table and I am having problems with my kids getting food in between the pieces of wood. Do you have this same problem, is anyone having this same problem? Does anyone have any suggestion as to how to fix it, how to keep food and other particles from getting trapped between the cracks? Thanks! You did a great job!!
Wed, 11/23/2011 - 15:00
Thoughts on the crack issue
I am building this table as we speak. The thought occurred to me as well concerning the cracks attracting crumbs. I believe using clamps to make the fit as tight as possible will help. Also some poly finishes may be appropriate with children which may even seal the cracks... if sanded and clamped well.
Wed, 11/23/2011 - 15:11
Cracks
I did try my best to clamp the wood together as tight as possible - due to the pieces of wood not being completely straight, they are there.
I haven't had this problem yet. I do use place mats when eating at the table, that generally stops any crumbs etc.That's probably the easiest way to avoid it :)
Thank you for your comments!
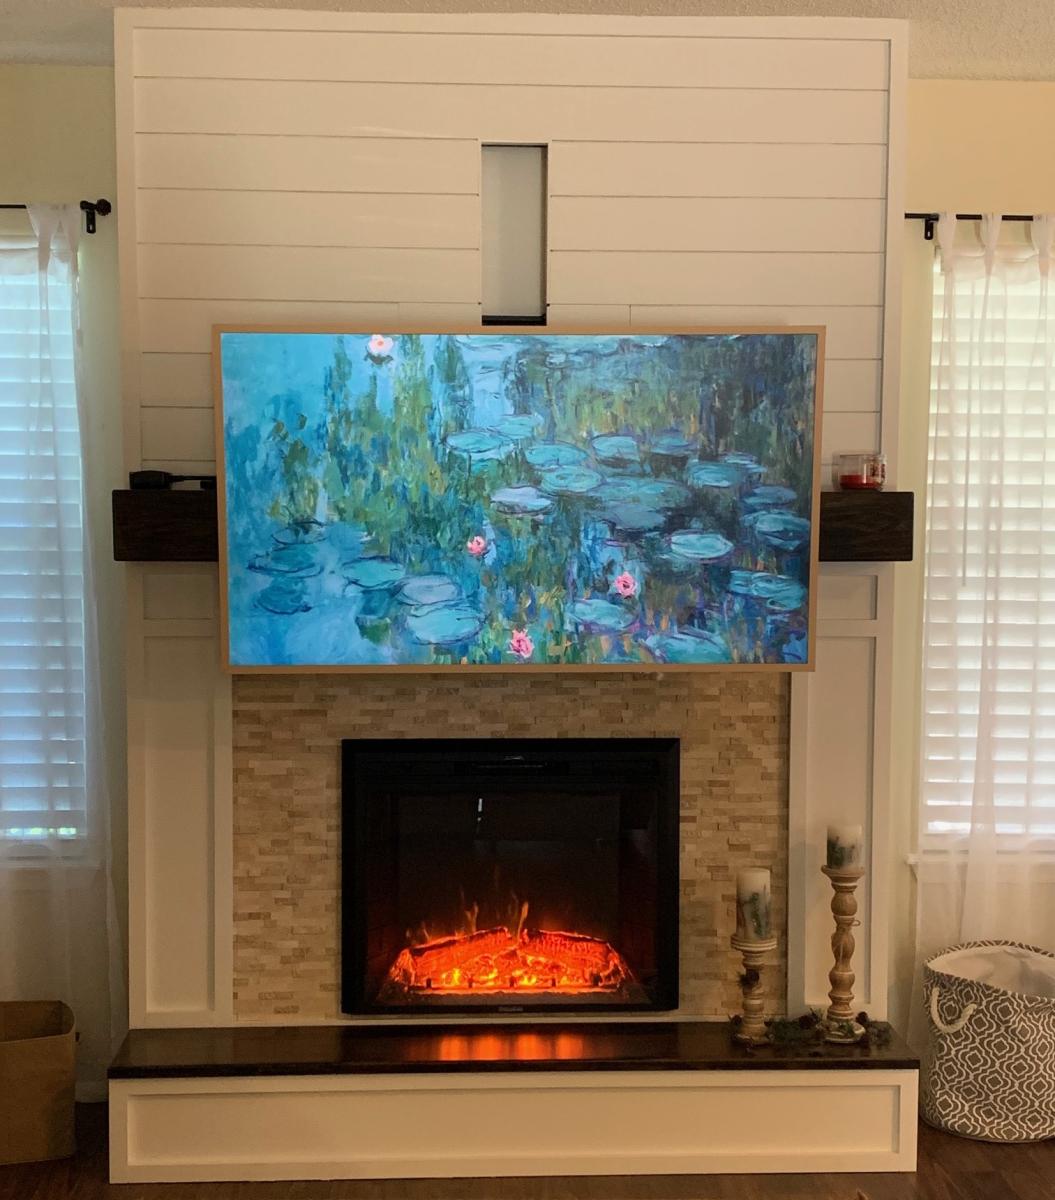
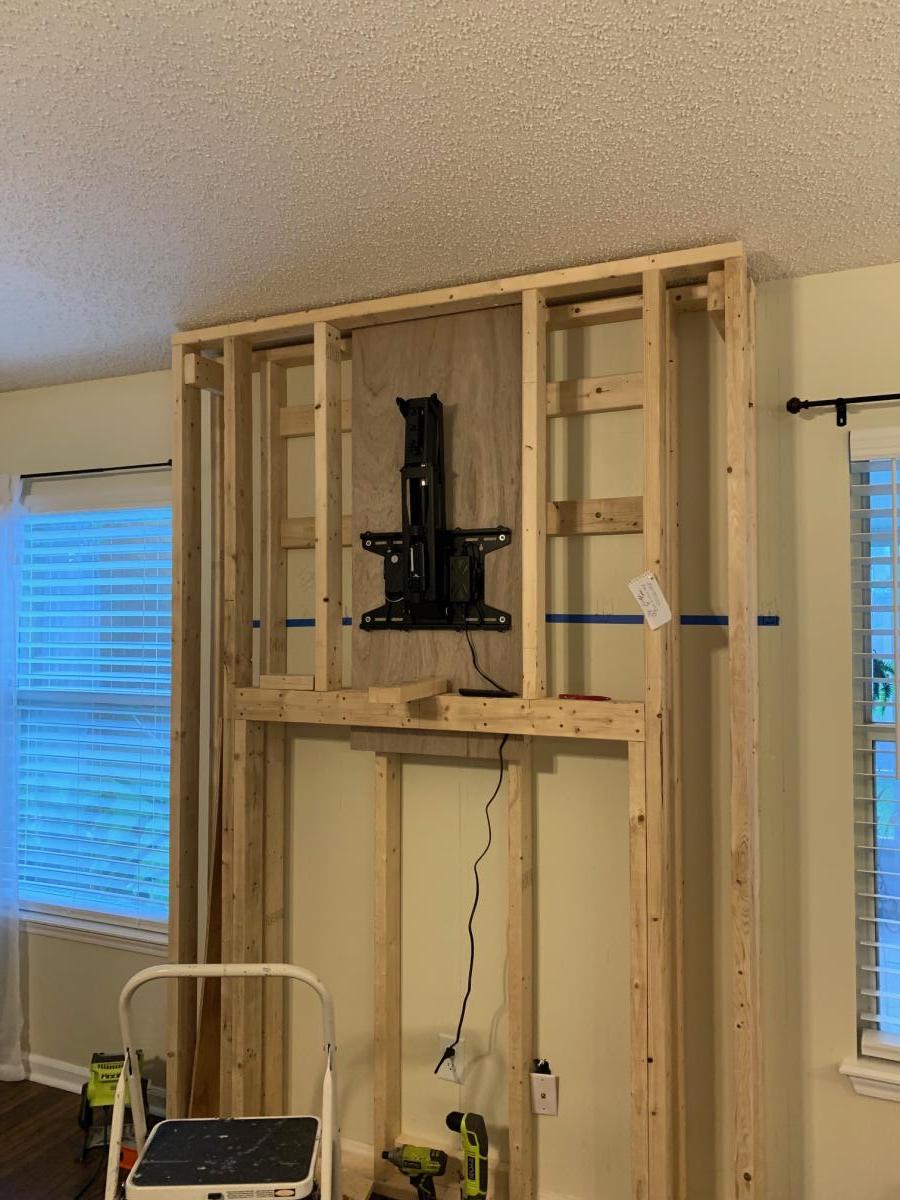
Fireplace with recessed TV mount
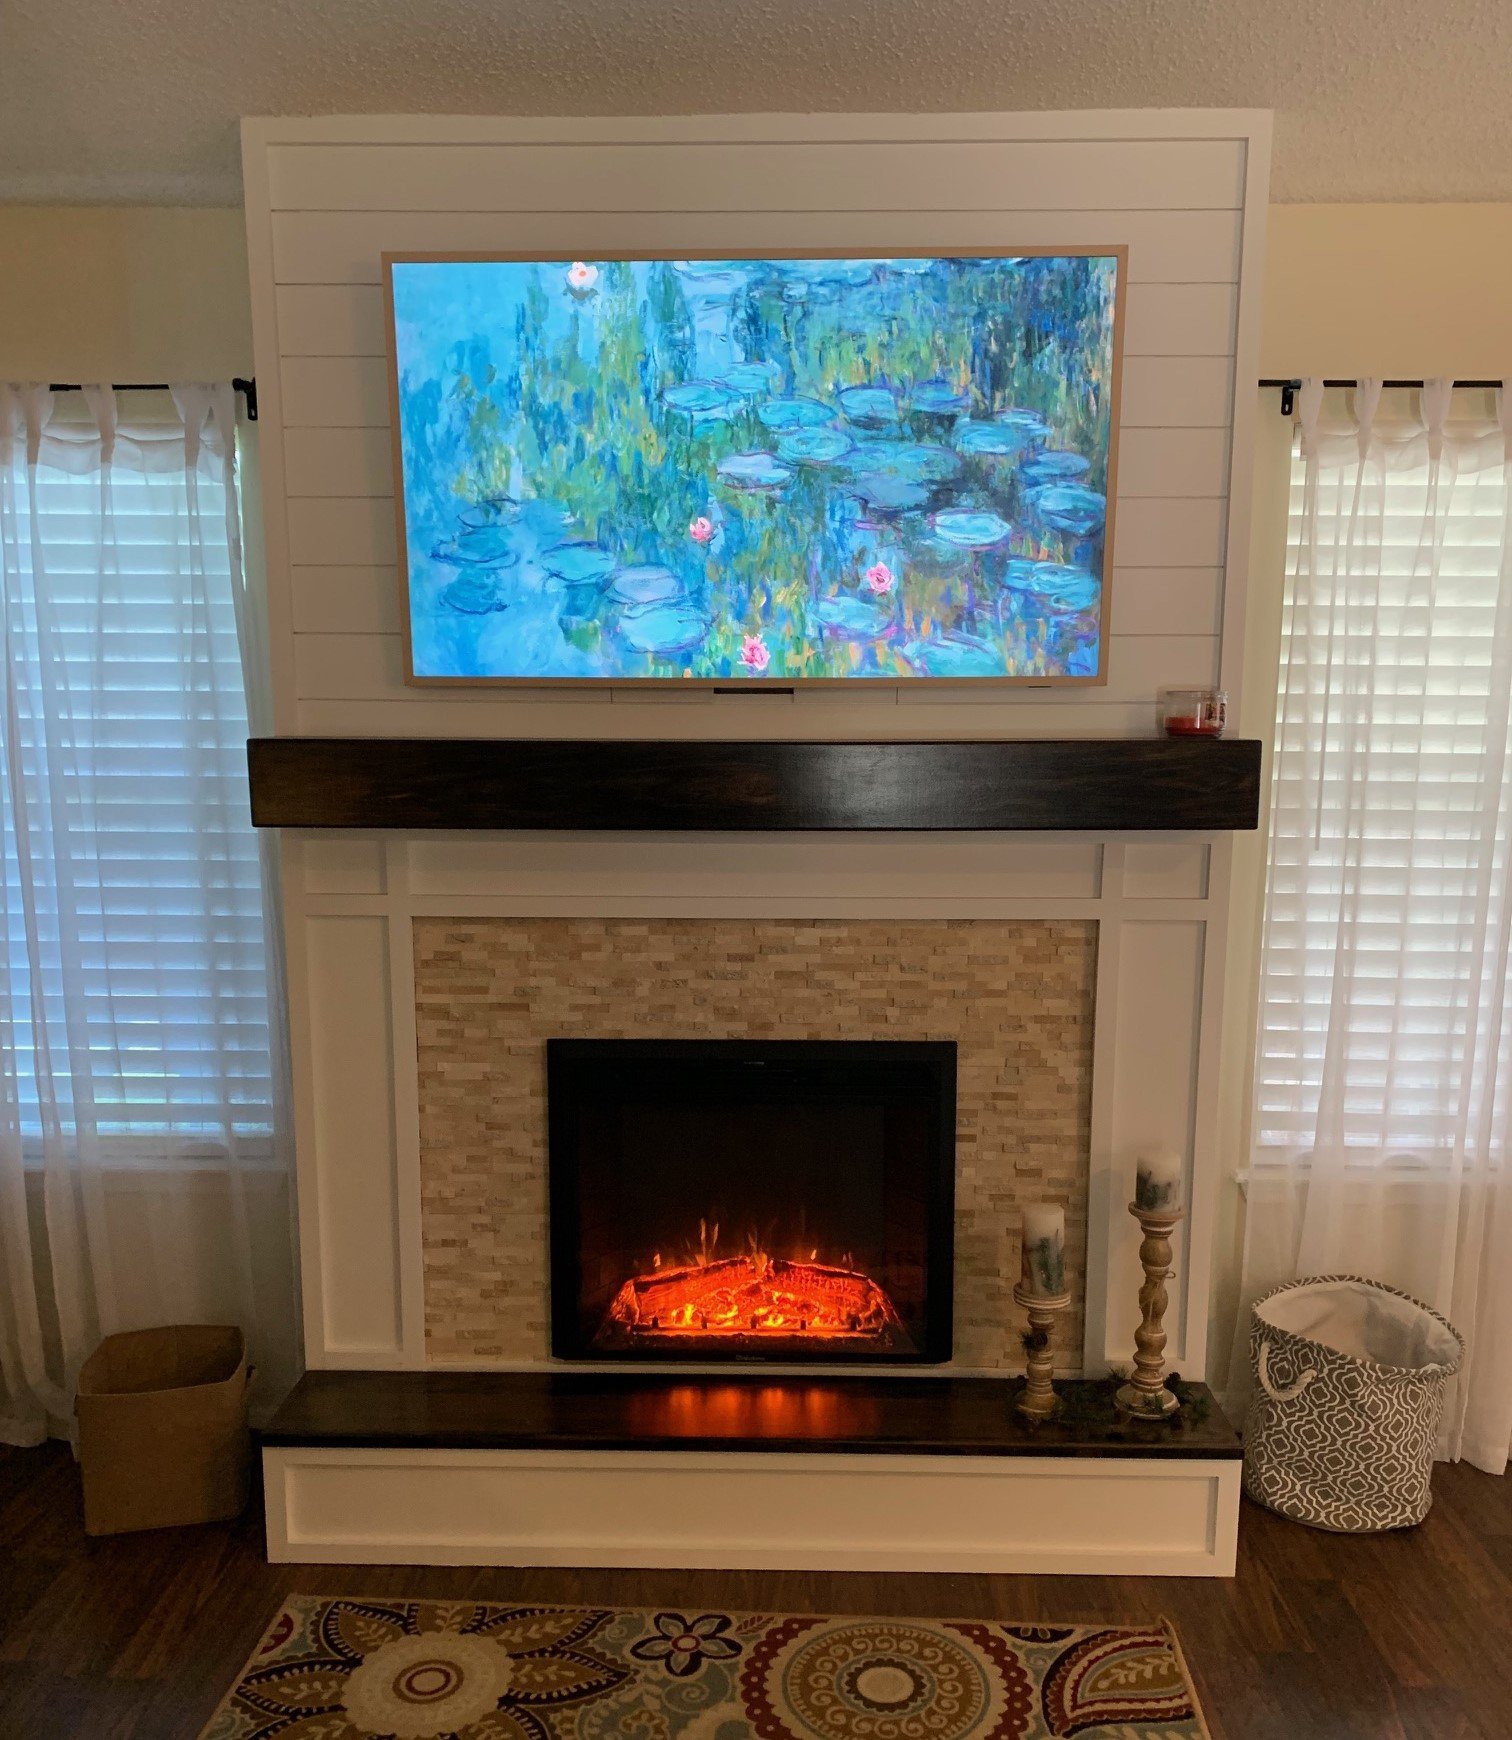
This is a very custom fireplace that I built for my wife as a 40th wedding anniversary gift. It is built around a Samsung 55” Frame TV and a Vivo motorized mount. The motorized mount allows the TV to be lowered to a better viewing height than the standard above mantle position which is usually too high for comfortable viewing.
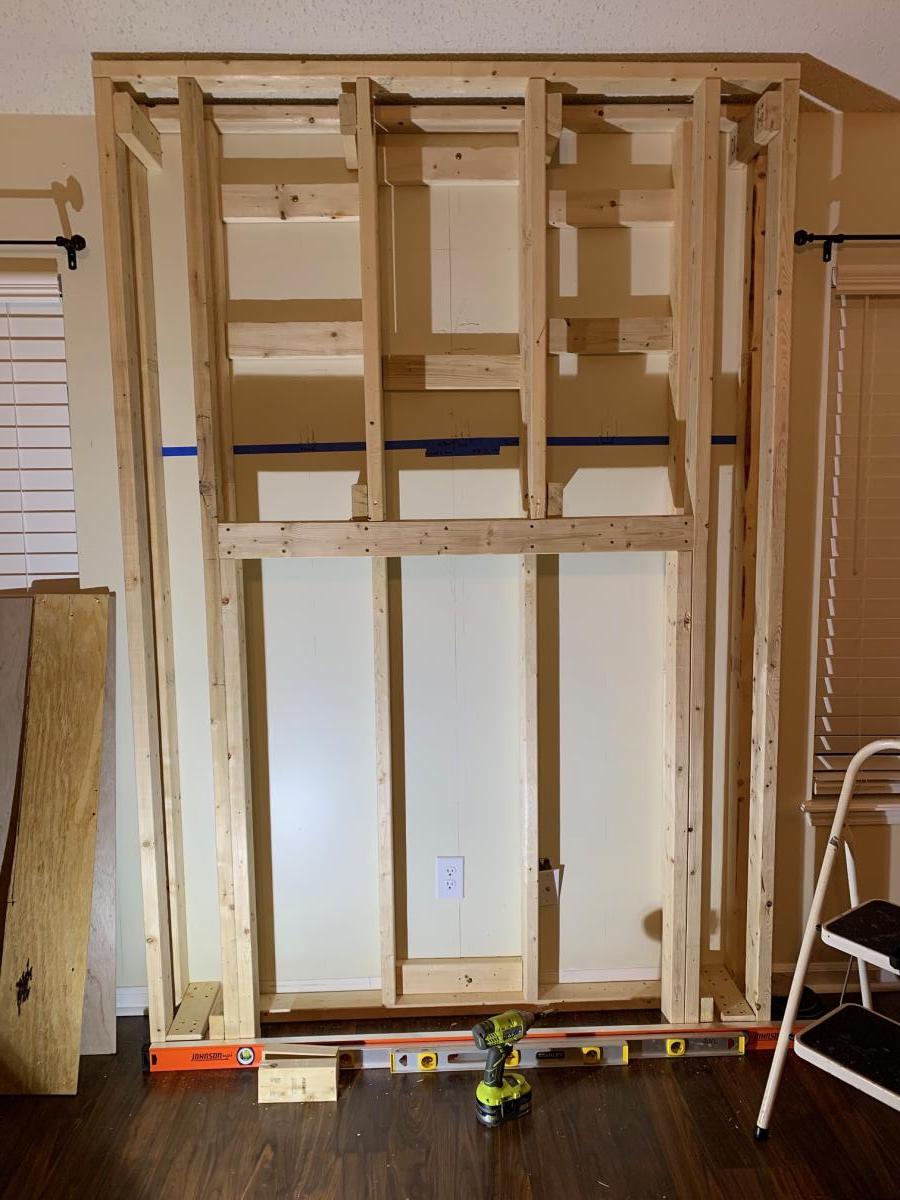
In order to maintain the flush mount effect with the TV in art mode, I recessed the mount into the fireplace. That required building a “back” frame for the TV mount then the outer frame for the surround. I covered the outer frame with ½” OSB then ship lap. The mantle and hearth is made from Poplar with walnut stain and Polyurethane satin top coat. The hearth opens for storage.
This was sourced from several different plan sets with a lot of customization and input from the Technical Support Staff at Vizo-US.
Built from Plan(s)
Comments
Thu, 02/16/2023 - 09:46
Happy Anniversary! This is a…
Happy Anniversary!
This is a beautiful, well thought out project.
I was hoping someone would do the recessed mount, and you nailed it! It's so much better with the tv flush like yours.
Also love the motorized mount.
Thank you very much for sharing photos.
Ana
2x4 Sectional , table, and chairs
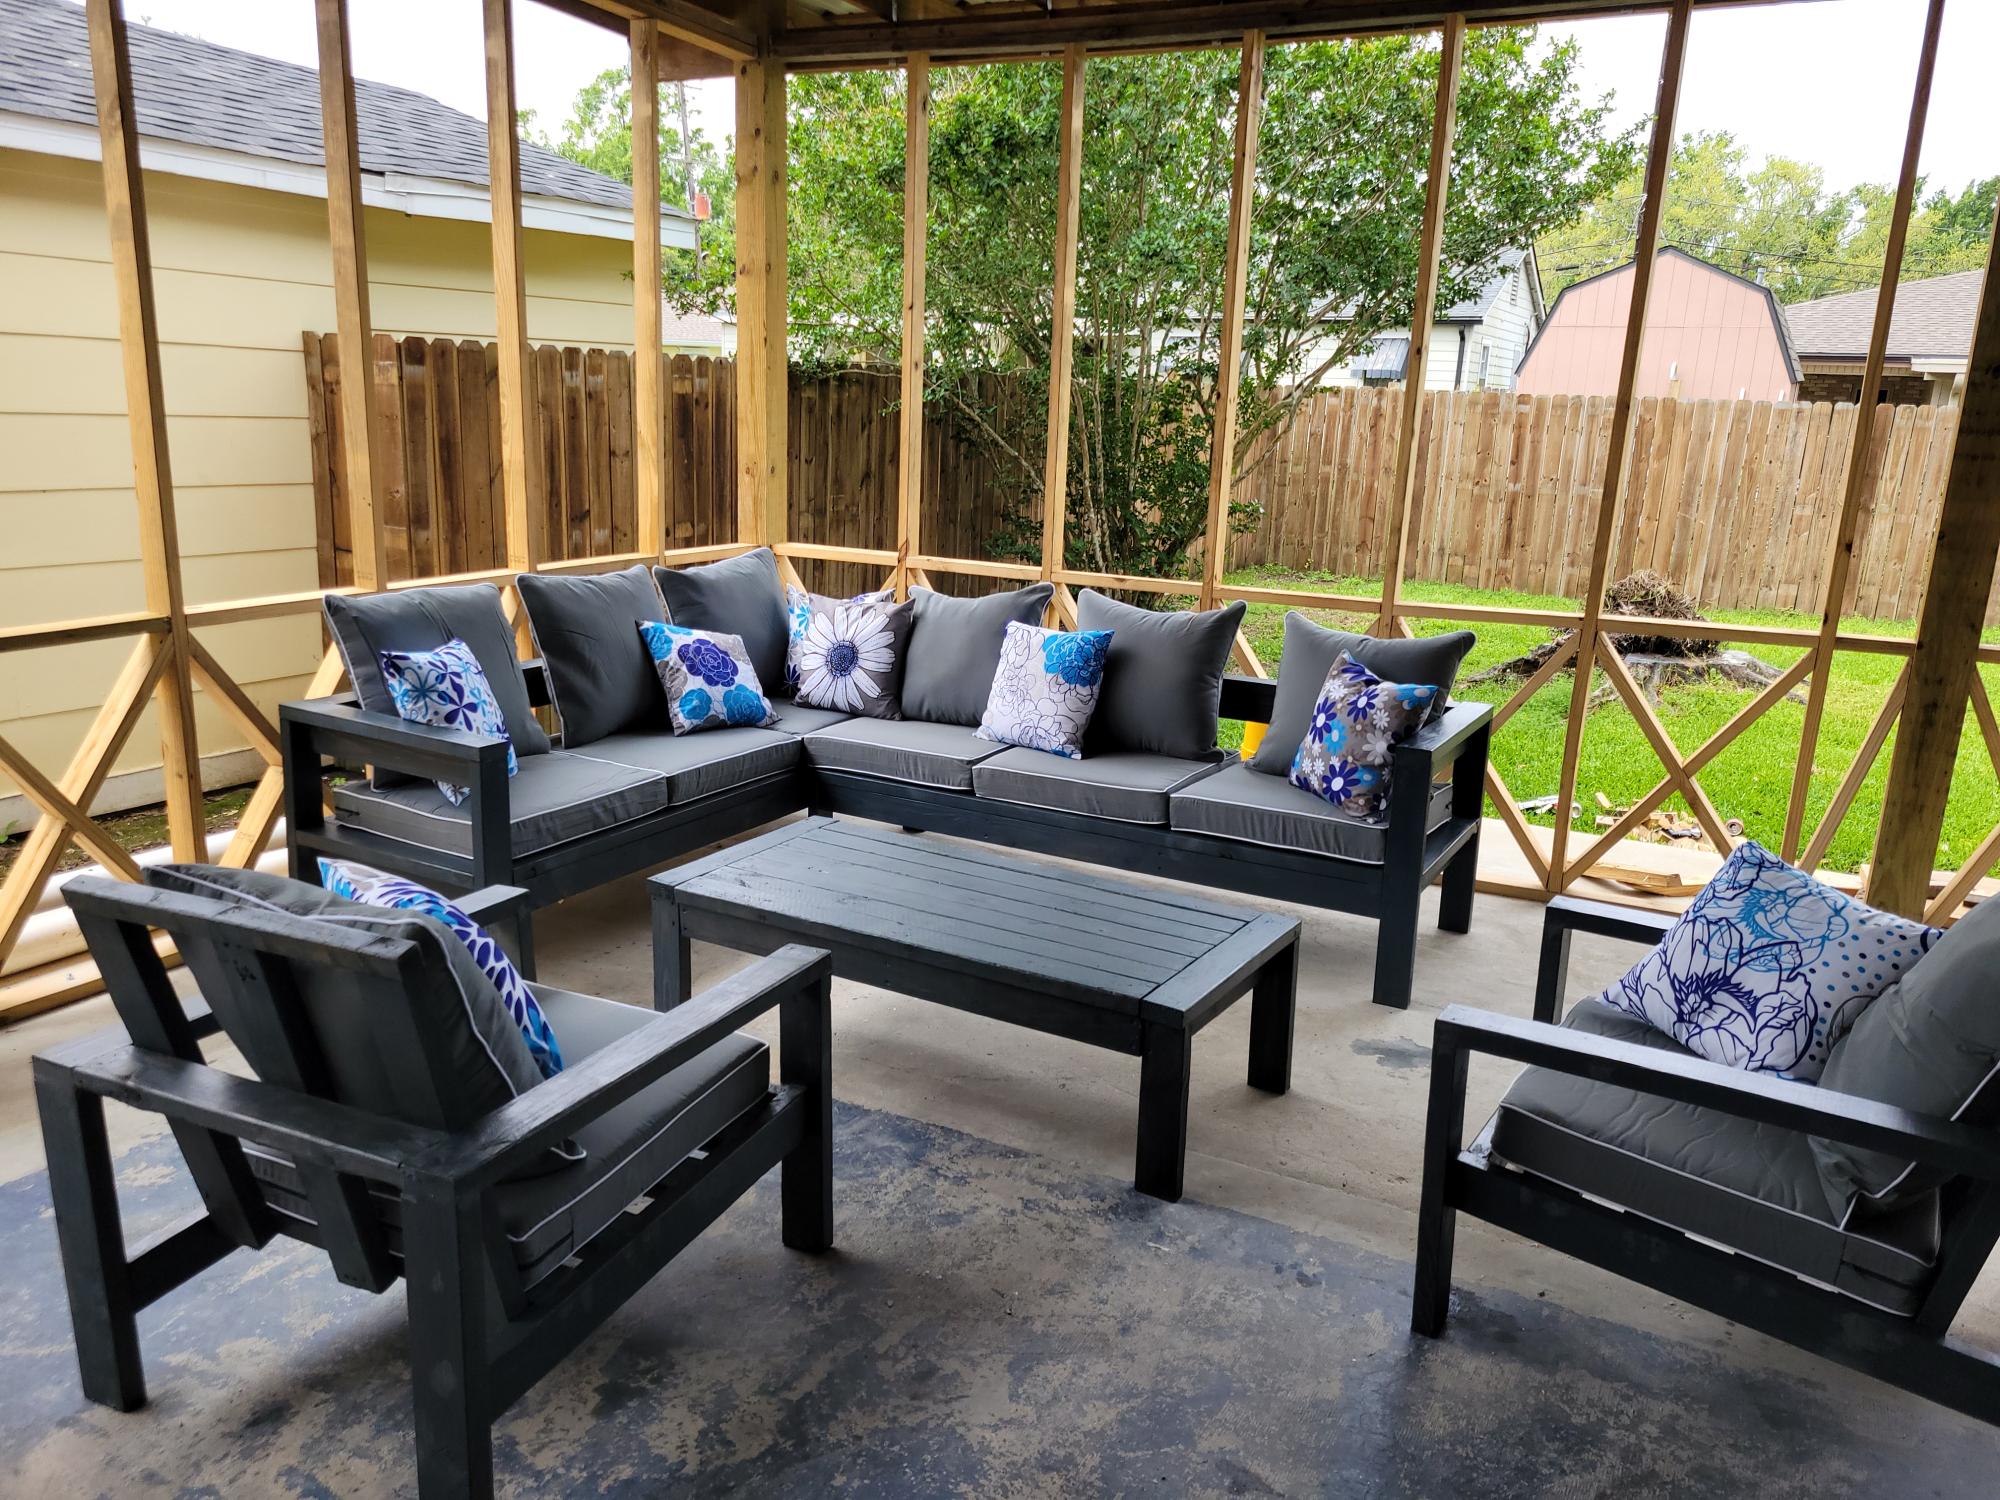
Your easy to follow 2x4 proje ts turned out amazing. My outdoor set is complete. The chairs, also, came from your plans. I built all of it by myself in one weekend. Thank you

Comments
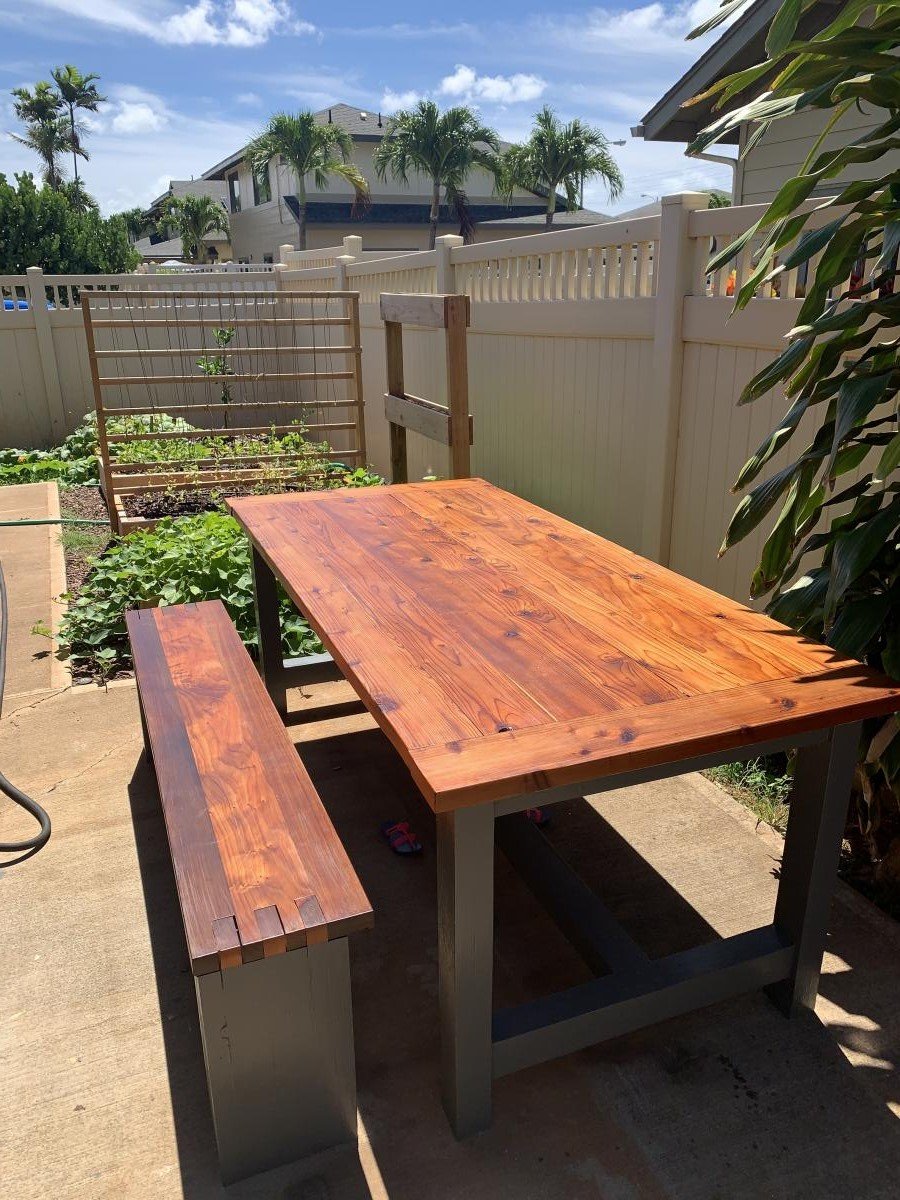
Redwood Farmhouse Table and Bench
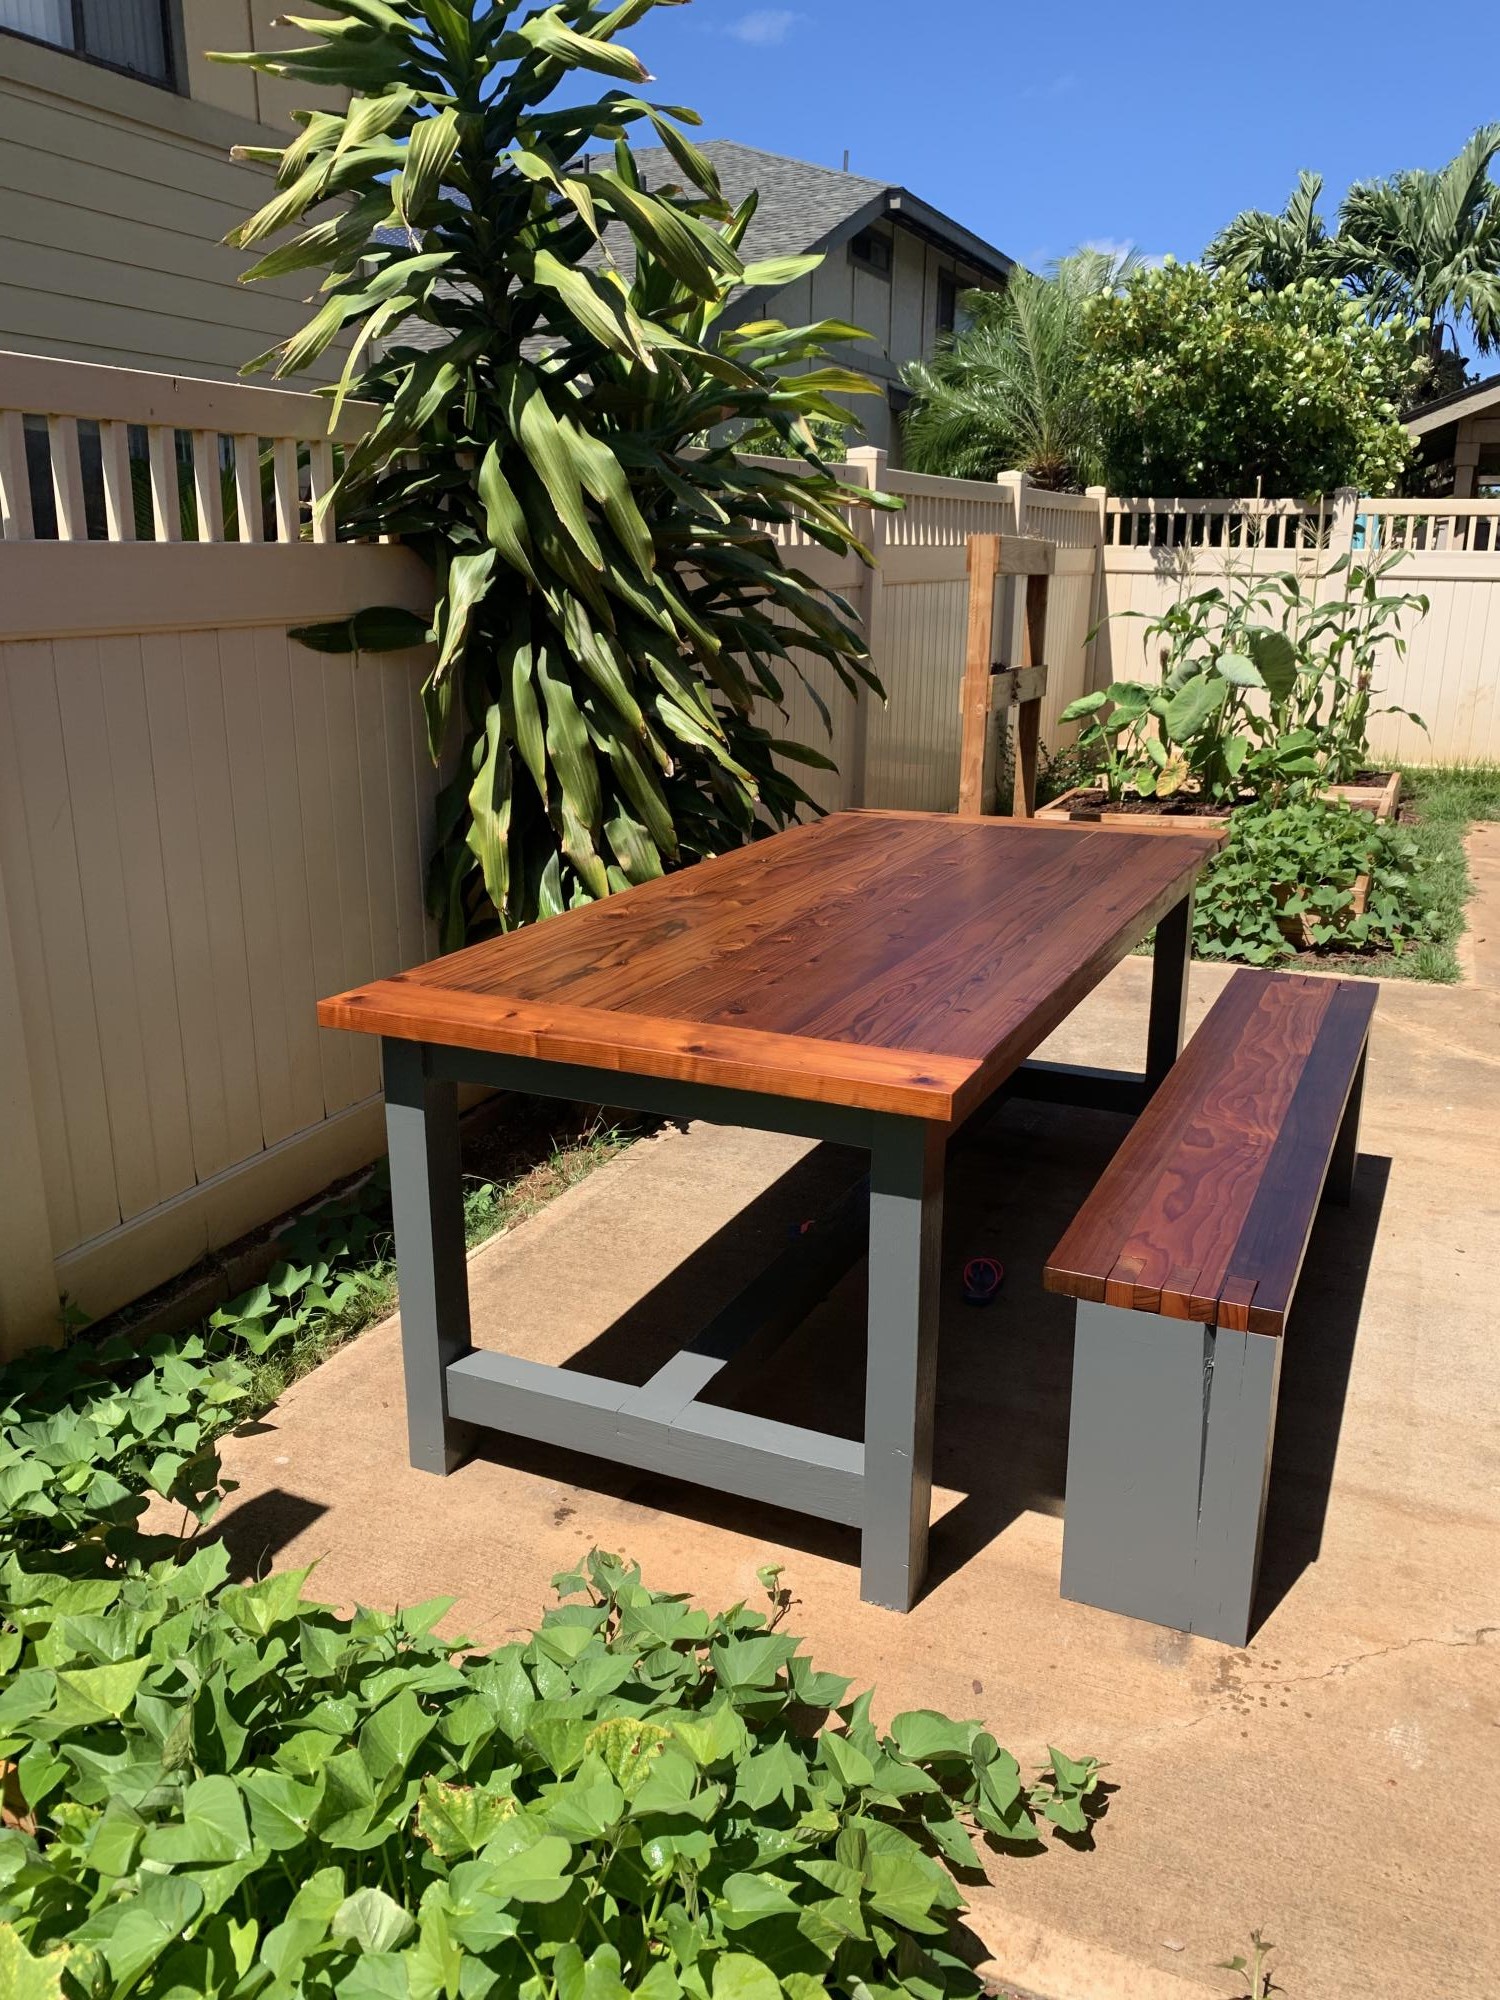
Farmhouse Table and Bench. Made from all redwood. Table is all new wood, and half the bench was from reclaimed redwood. Used Danish Oil and Spar Urethane to finish the tops, and paint to finish the legs.
Built from Plan(s)
Estimated Cost
Not sure, but redwood cost a lot more than pine. Maybe $400 or so.
Estimated Time Investment
Week Long Project (20 Hours or More)
Recommended Skill Level
Beginner
Comments
Mon, 07/22/2019 - 11:14
What a gorgeous table and…
What a gorgeous table and chairs. the top is done very nicely! Love it!
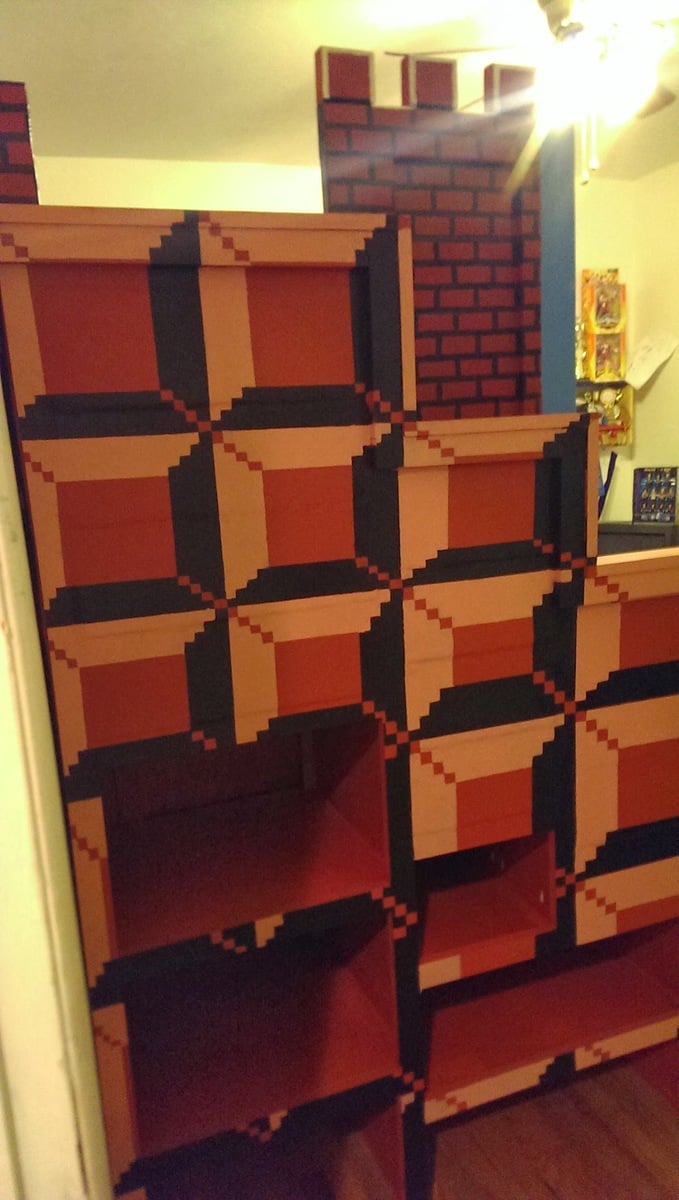
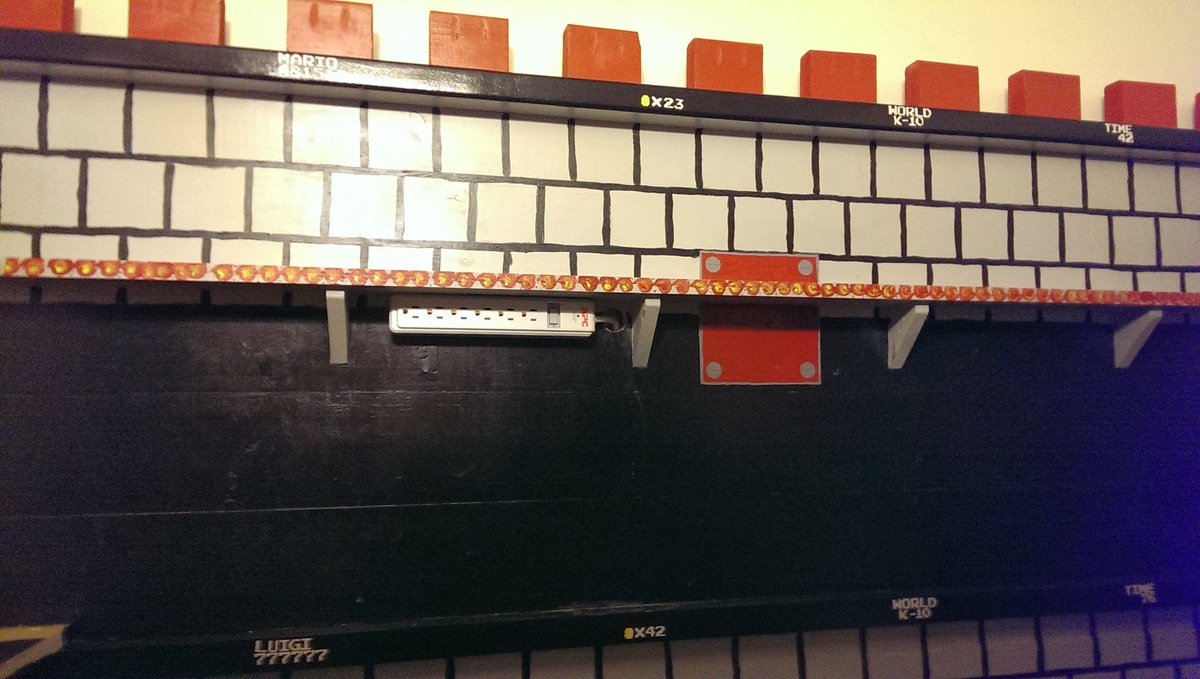
Mario Castle Bunk
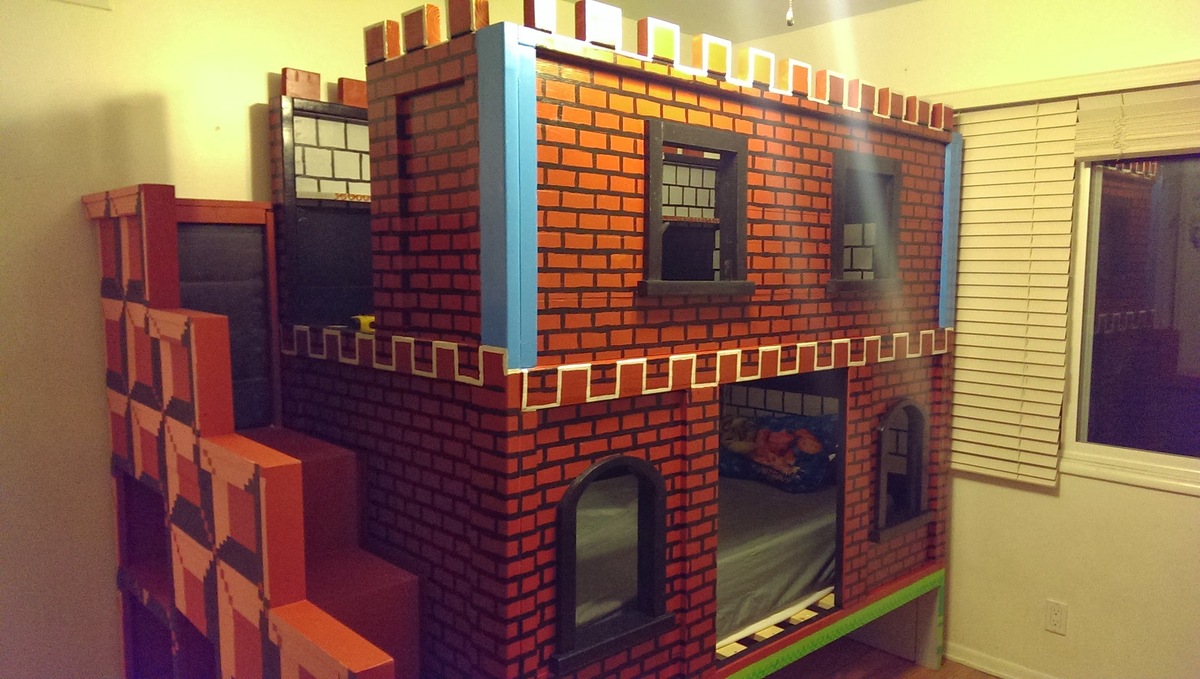
So my son needed a bunk bed and we came upon the sweet pea bed. It was too girly for him so we decided to go with a theme that would be timeless, something he wouldn't mind having when he is 18 (or older, he is 10 now). What is better than Mario! (We are a house full of gamers, my 17 year old is super jealous of this bed lol). The build was fairly easy and the plans were straight forward enough, the time consuming part was the painting (without all the painting we could have probably build this in a long weekend). We changed a few things, like not arching the top windows, adding the 4 inch 2x4 squares to the top to give the castle look and stairs are made to look like stairs from the side so we stepped out the banister instead of angling it.

Built from Plan(s)
Estimated Cost
500
Estimated Time Investment
Week Long Project (20 Hours or More)
Finish Used
Paint colors were all Behr paint+ primer (mostly eggshell or flat):
New Brick, Black, Polar Bear White, Green Crush, Green Acres, Lemon Zest, Windjammer, and French Silver. Some of the colors (like pinkish tone on the stairs) we created on our own mixing the New Brick and the Polar Bear.
Polyurethane. I mixed regular oil based polyurethane (gloss) with mineral spirits (50/50) and wiped it on. It was remarkably simple and gave it a nice seal/finish. Last coat I used Satin Polyurethane because I didn't want the gloss finish. I opted not to sand between coats because this is a kids bed and I wasn't looking for that "perfect" finish, just wanted some added protection.
Recommended Skill Level
Intermediate
Comments
Wed, 01/01/2014 - 06:11
This is the coolest bed I
This is the coolest bed I have ever seen! I wish I could make this for my youngest. I could probably build it, but I 'm pretty sure it would go downhill when I started painting it. You did an amazing job and your son is a very lucky boy!
Wed, 01/01/2014 - 16:10
Painting...
You can totally do it! I am a horrible painter (I'm too impatient) and you can't tell with this because of how forgiving the design ends up being. There is so much going on it's hard to pinpoint the mistakes. :)

Wed, 01/01/2014 - 06:31
Awesome bed!
Super creative. I can't think of a word to say just how cool this is! Wow!
Wed, 01/01/2014 - 06:58
Holy Mother of God
That is the most spectacular bed I've ever seen. I have a 5 year old son. :) You are a genius.
Wed, 01/01/2014 - 16:07
Thanks!
Thanks so much! This was the first thing we ever built (although my husband did a lot of building stuff in his youth we have never done anything together and I was a total beginner) so we are very happy with it. :D I appreciate all the kind words.

Wed, 01/01/2014 - 18:27
Wow! I'm super impressed,
Wow! I'm super impressed, your version is awesome! The stairs are very cool- well done!

Tue, 08/08/2017 - 05:14
This looks amazing! :o The
This looks amazing! :o The kid version of myself would adore this. (haha no the adult version would too)
Fri, 05/03/2019 - 22:00
Full size conversion
We are super excited to build this for our 9 year old son. To make this a Full size bed am I correct in thinking that I only need to alter the side panels by adding 15inches? I am paranoid about building it and the mattress not fitting. Thanks so much!
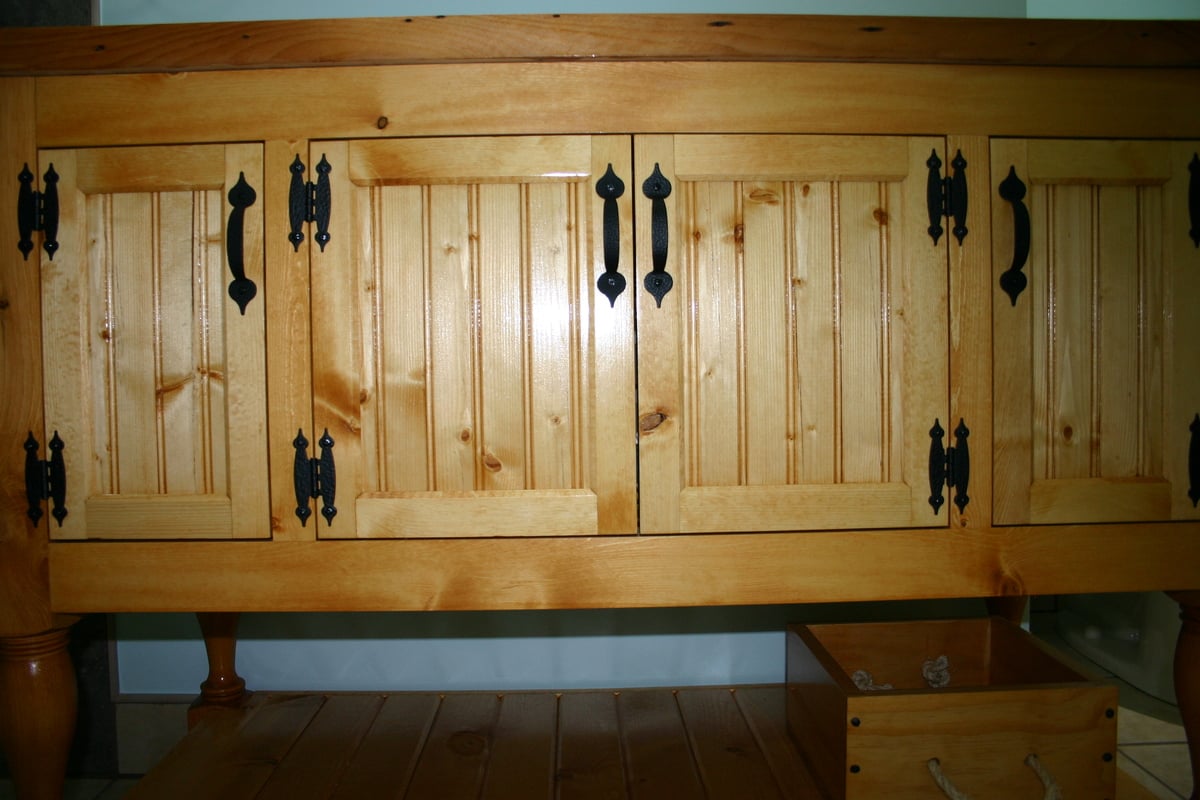
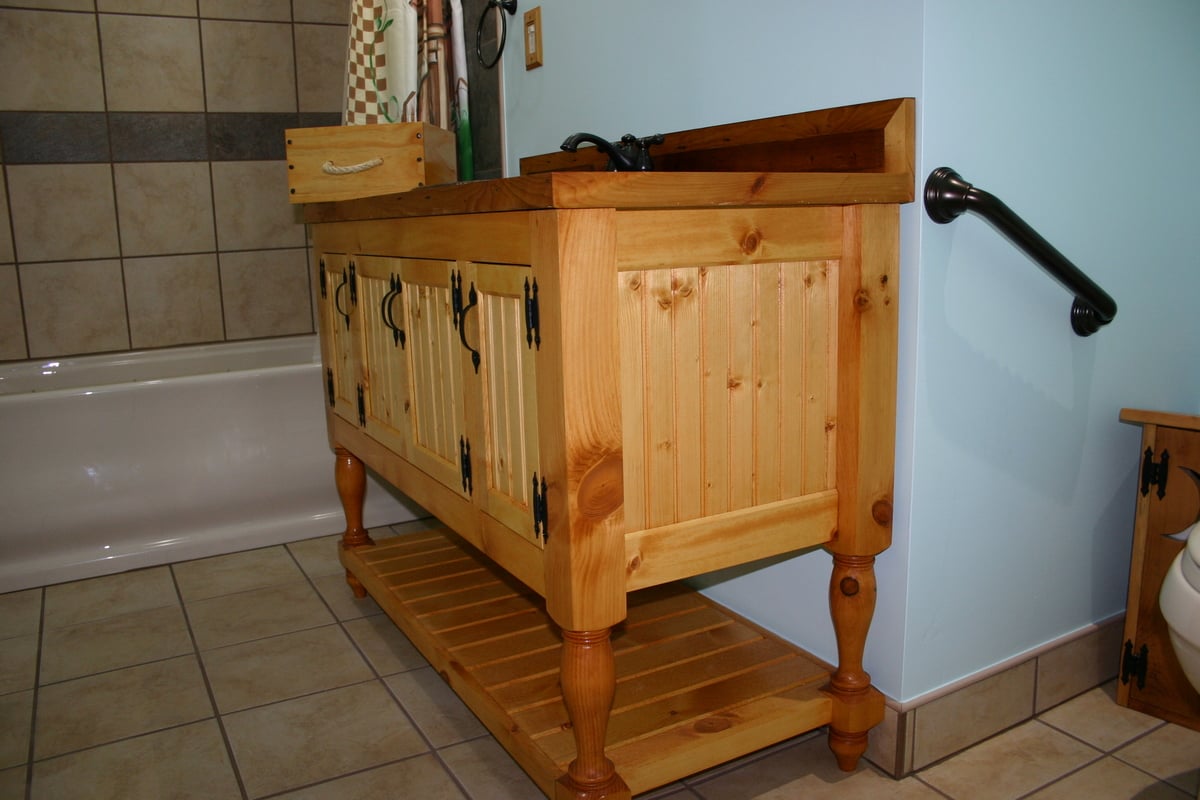
Bathroom Vanity I did for my mom Based on the Momplex vanity
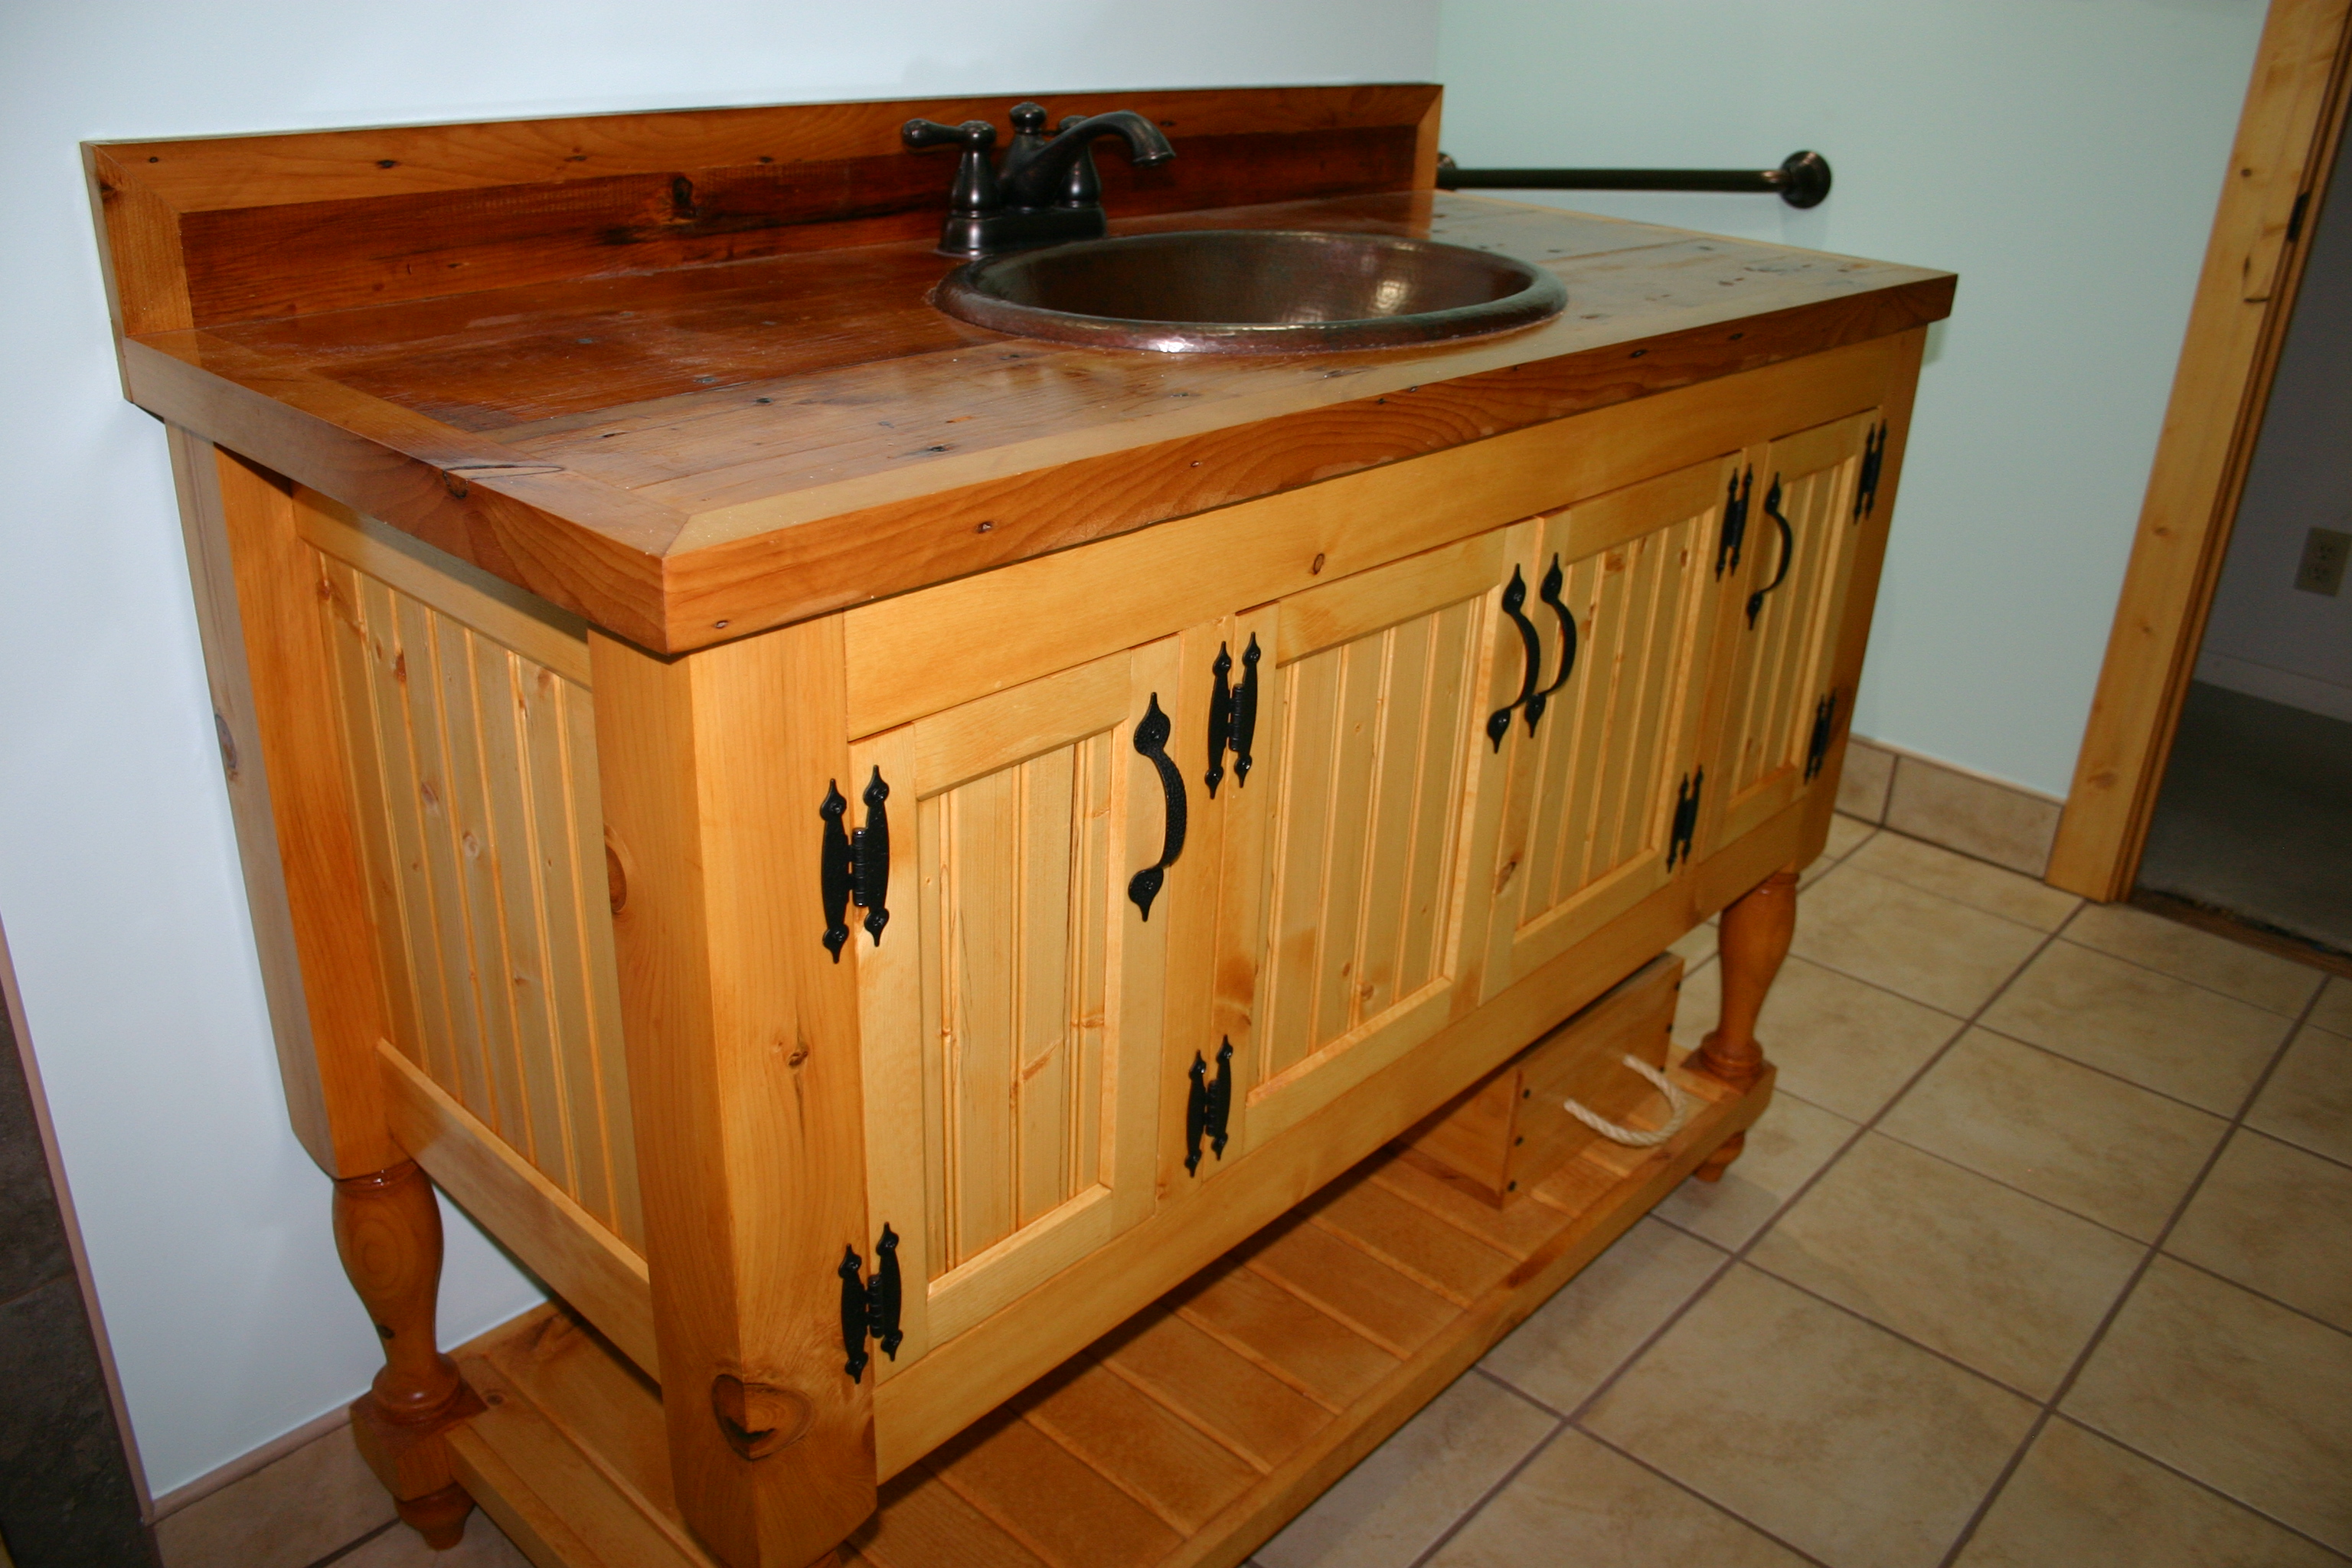
I remodeled the main floor bathroom for my parents. My mom had seen a vanity she like at a home center. Then she thought about doing an open vanity. Then I showed her the one Ana did for the Momplex (48" Turned Leg Vanity). and she loved it. This is what we came up with.
It has bead board panels on the ends and the doors. V-grove planks for the bottom shelf.
The top is made from 100 year old ship lap siding from my brother house. The sink is hand hammered copper with a venetian bronze faucet.
Built from Plan(s)
Estimated Time Investment
Week Long Project (20 Hours or More)
Finish Used
The vanity was finished using Rust-o-leum Ultimate wood stain in summer oak with several coats of a marine varnish to protect it in the bathroom. The top was only finished in the marine varnish.
Recommended Skill Level
Intermediate
Comments
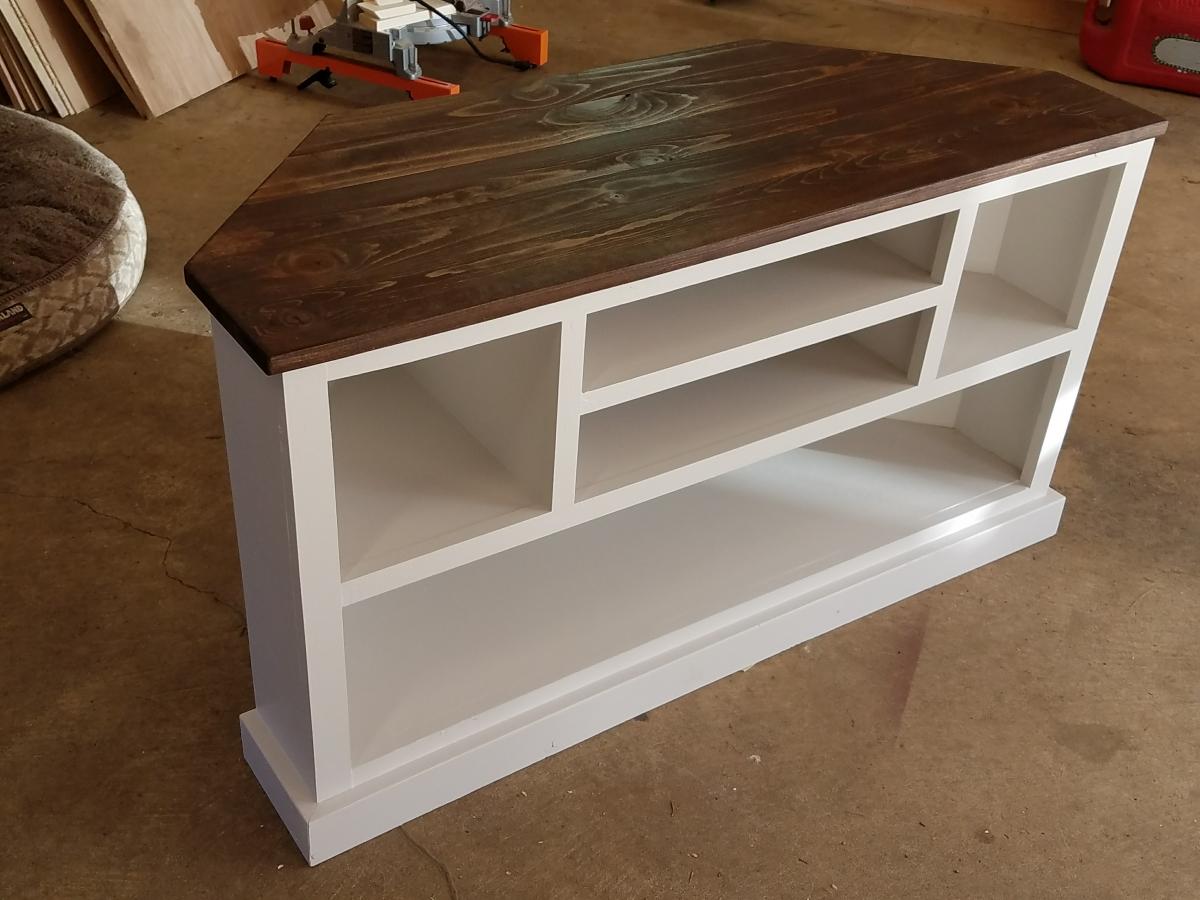
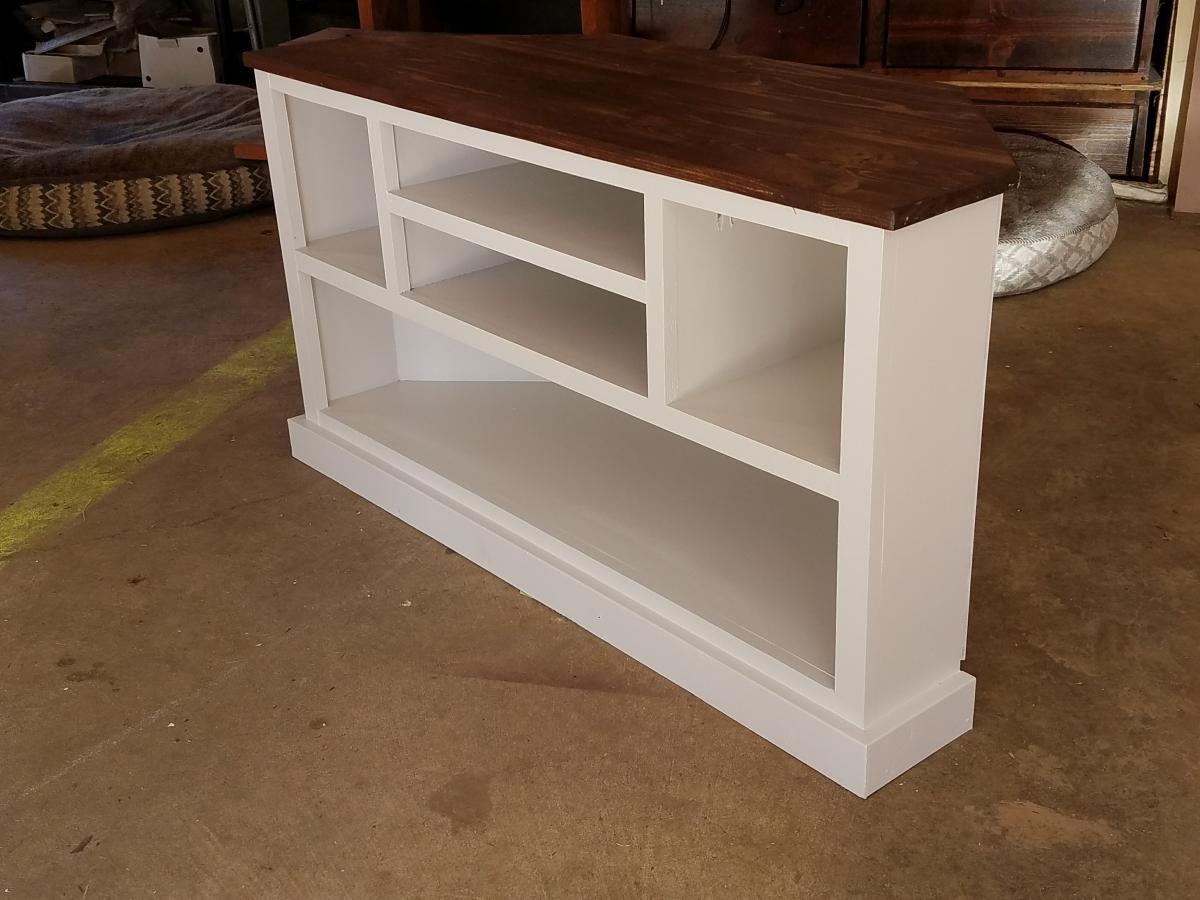
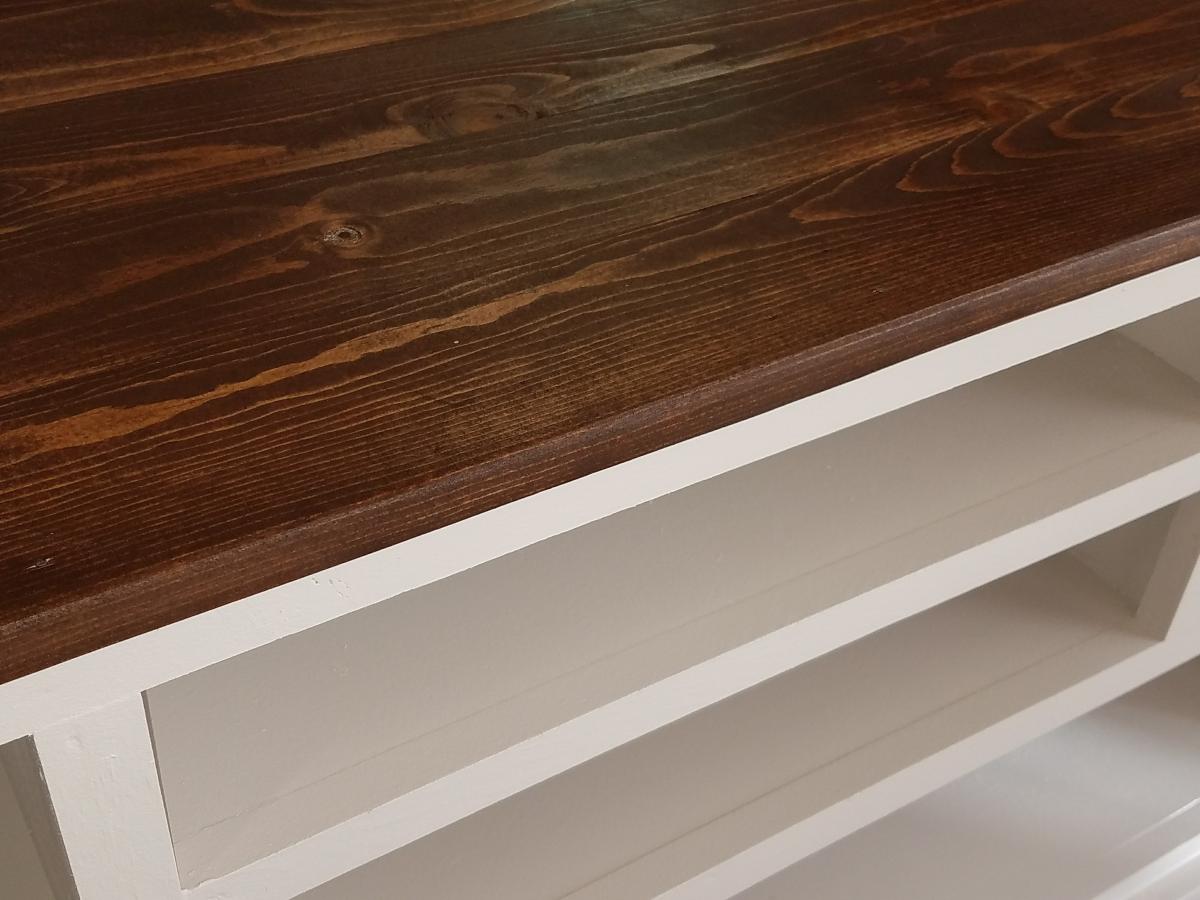
Corner Media Console
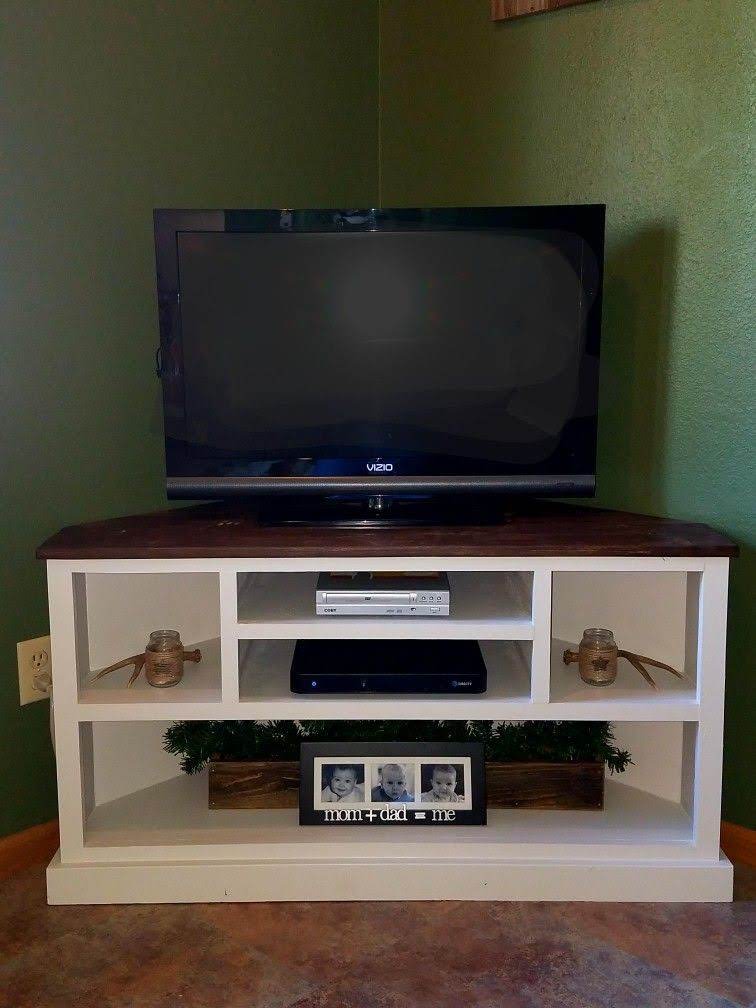
We had just moved into our new house and were using an end table for our TV stand I just didn't like it. I found this and modified it so it's shorter and fits in our room better. I also opted to not put doors on it and use it to display items instead. This was a relatively easy build and I'm learning new things with every build I make. It took about 2 days to complete not including filling holes/paint/stain. I love it, it looks so great in our room and I am planning on building end tables to match as well as replacing our buffet with movies in it to match also. Thanks for the easy-to-follow plans!
Built from Plan(s)
Estimated Cost
$45
Estimated Time Investment
Weekend Project (10-20 Hours)
Finish Used
Whatever white paint I had on hand (haha) and Varathane Kona with a satin poly for the top.
Recommended Skill Level
Beginner
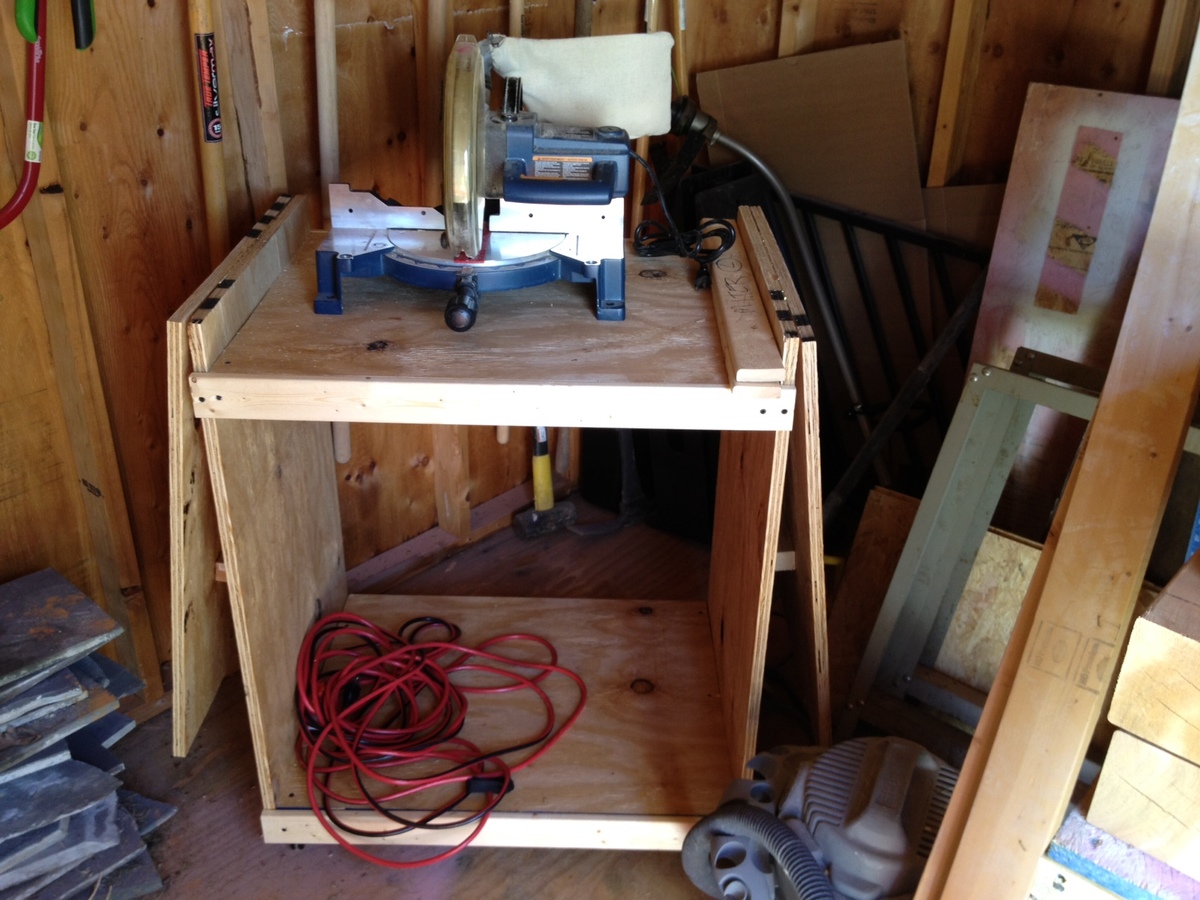
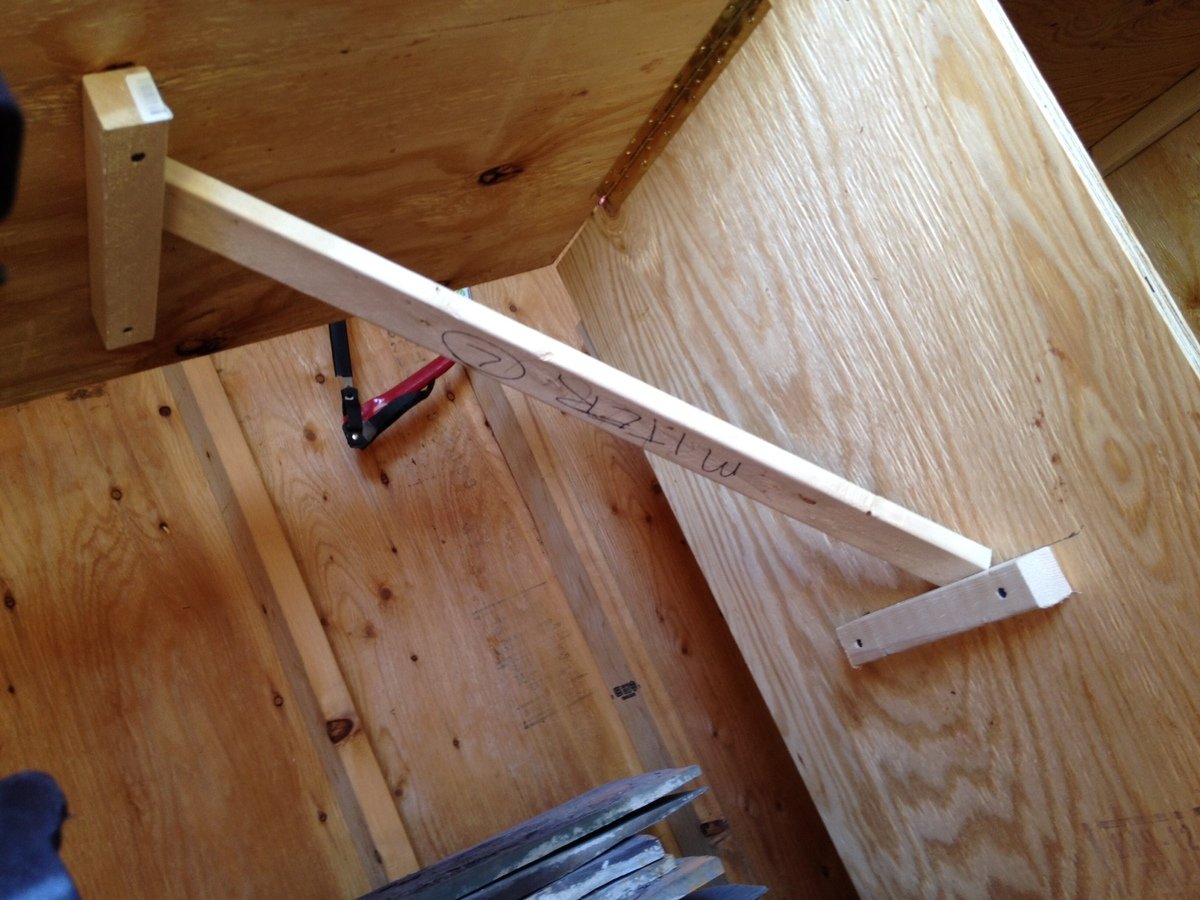
Miter Saw Cart
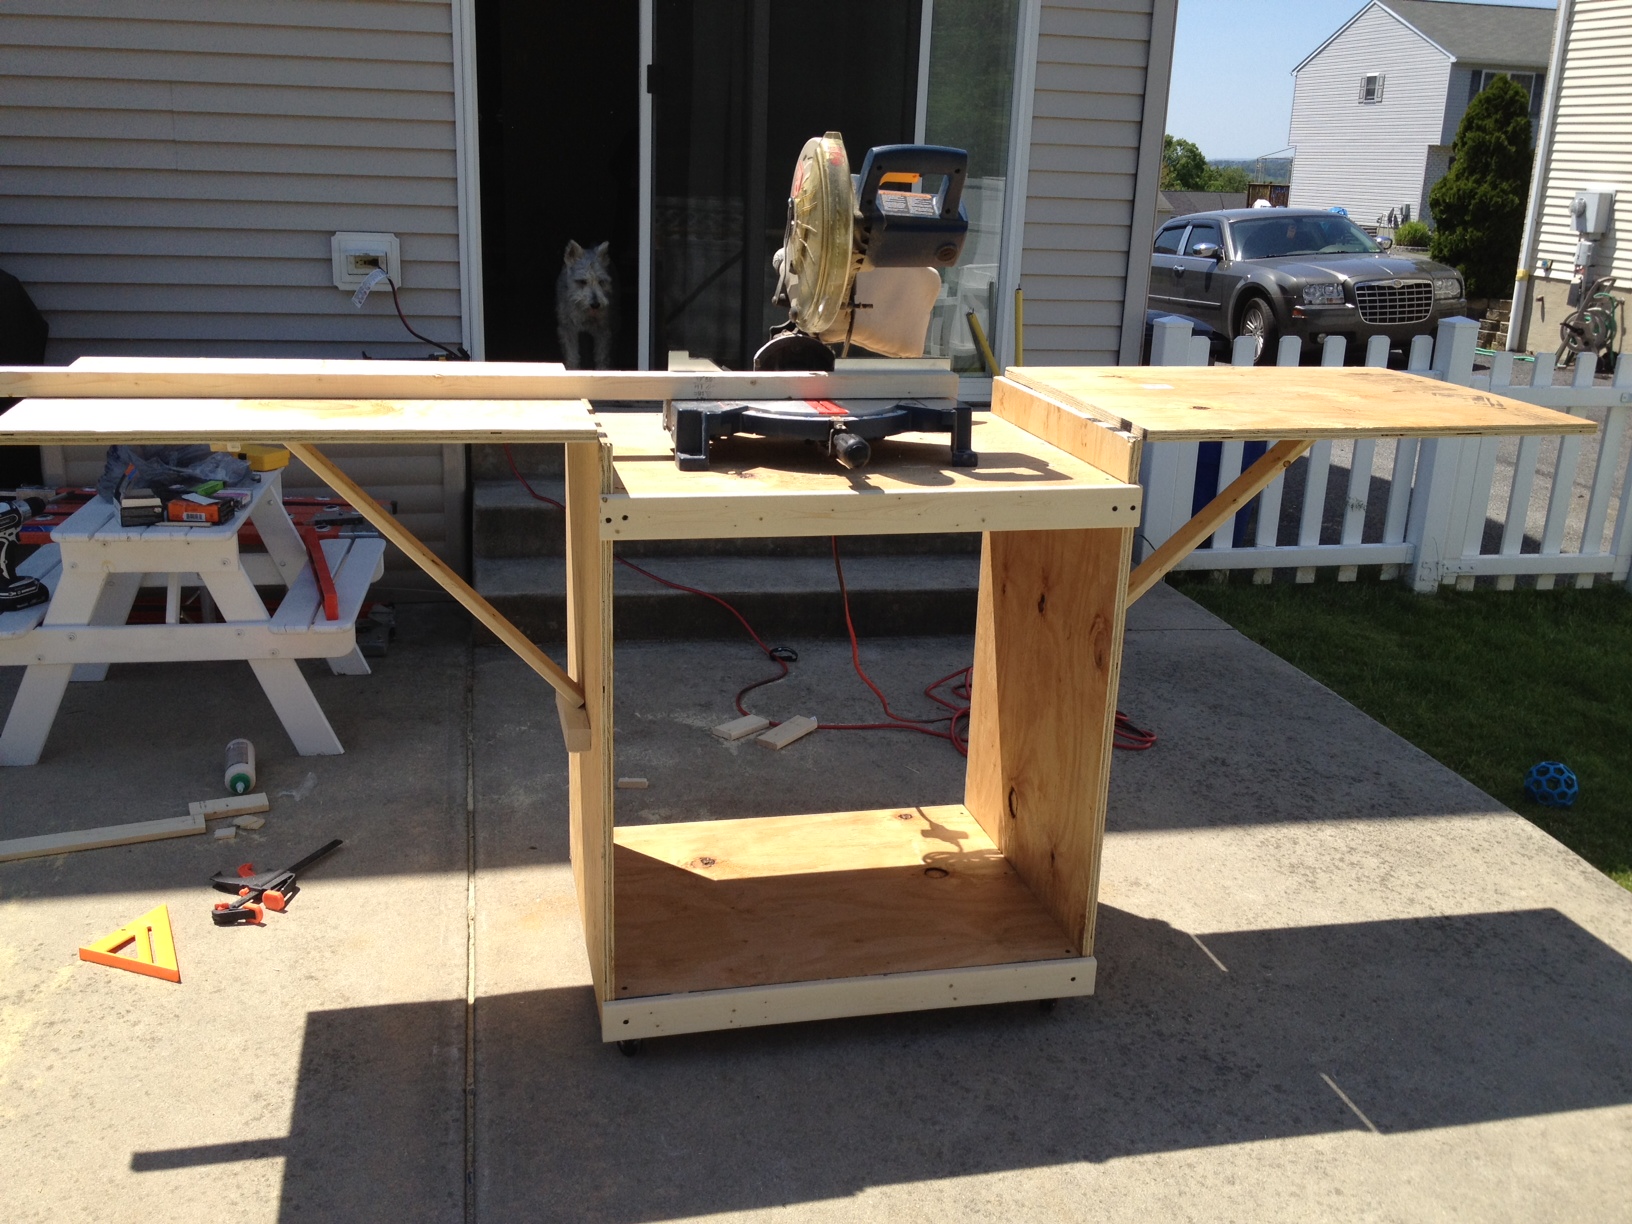
Coped the design almost to the "T." I loved this design because I only have a small shed to work out of and this stand for my miter saw was much needed.
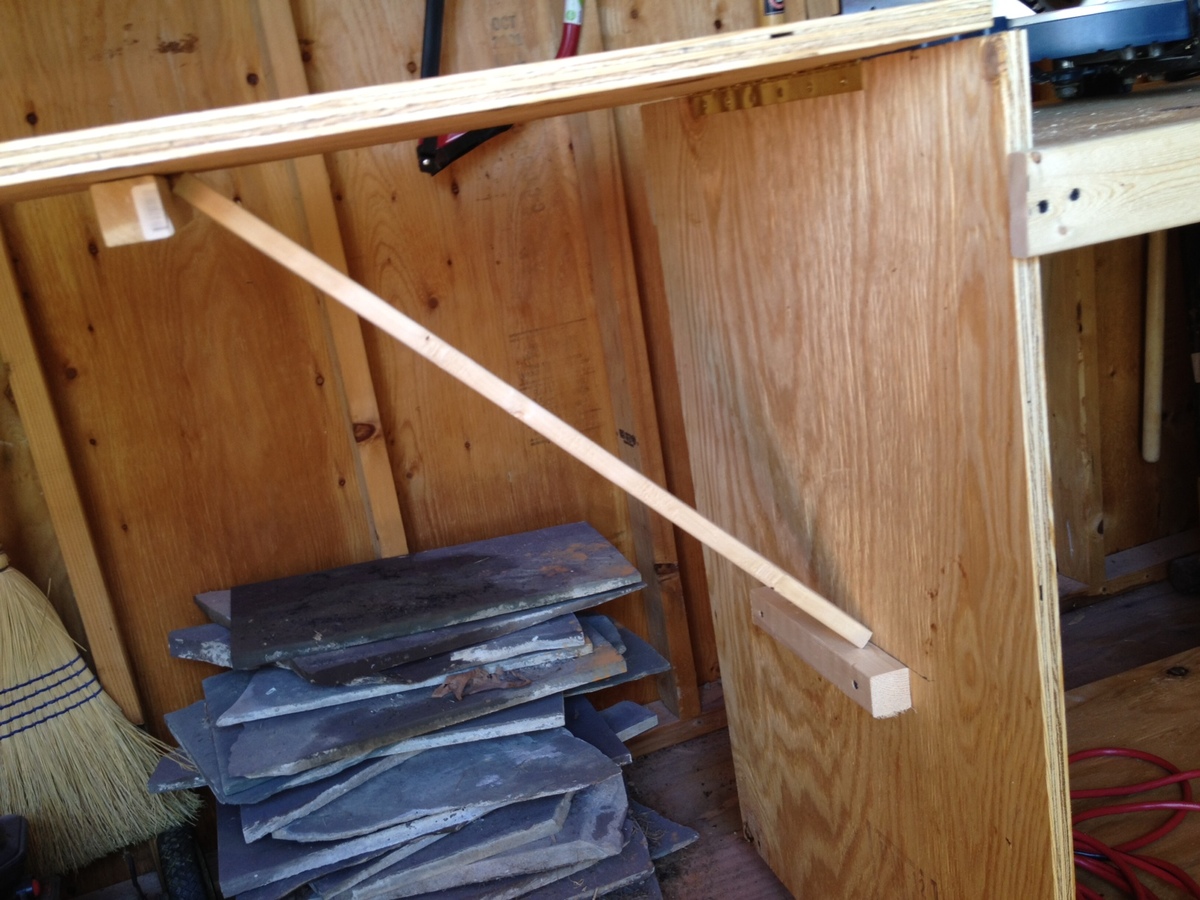
The major difference between the original and my design are the folding arms. I was working within a very small budget and couldn't afford the fancy folding arms so I was able to do a little creative thinking and decided to go with a removable piece of 1x3 that is wedged under the arms with a block installed on the "leaf" and the main table. I used the old pythagorean theorem to figure out how to make it a level 45 degrees. With a little playing around I have both arms completely level and the stand is perfect!! I am excited to get some other projects on the way now that I have somewhere other than the ground to work with my miter saw.
I didn't use any pocket holes, but am picking up a Kreg jig set from someone this upcoming week and am looking forward to putting that into some use on my next projects!
Built from Plan(s)
Estimated Cost
30 bucks or so
Estimated Time Investment
Afternoon Project (3-6 Hours)
Finish Used
None
Recommended Skill Level
Beginner
Comments
Fri, 05/18/2012 - 18:26
Nice modification!
What a great way to save some money! If you have time, could you add a close up pic of how the 1x3 fits on the folding arm to hold it? Cute dog!
In reply to Nice modification! by Crystal @ 29 R… (not verified)
Sun, 05/20/2012 - 11:25
Added a few pics, let me know
Added a few pics, let me know if you want any others!!
Fri, 05/18/2012 - 19:04
I would like to see a close
I would like to see a close up too if possible. I am wanting to make the saw cart plus two more carts with the middle flush with the top so I can push the two together to use for a workbench. How much weight do you think your sides can hold the way you set them up?
In reply to I would like to see a close by stephanier (not verified)
Sun, 05/20/2012 - 11:28
I honestly am not too sure
I honestly am not too sure how much weight it would hold. I havent seen any bowing or pushing yet. I have used this so far to cut a piece of 4x4 12ft long made of cedar for my next project and didnt have any problems. I think if I need more weight holding strength, I think I would just change out the 1x3 and maybe use a 2x4 in there. I am also not a 100% sure how much weight the hinge can hold, maybe someone else reading these posts can be a little more helpful as far as that goes.