Community Brag Posts

Adirondack Chairs

Submitted by JoanneS on Thu, 04/25/2013 - 18:12

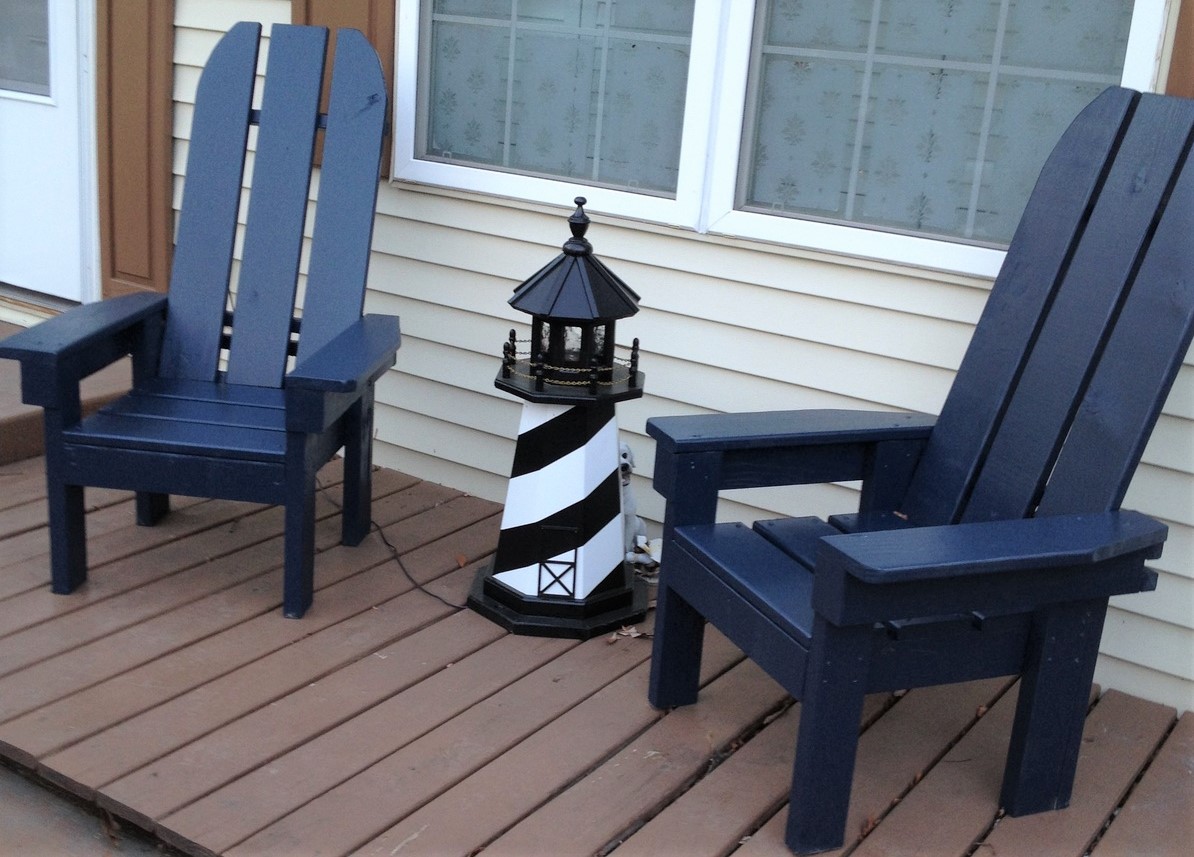
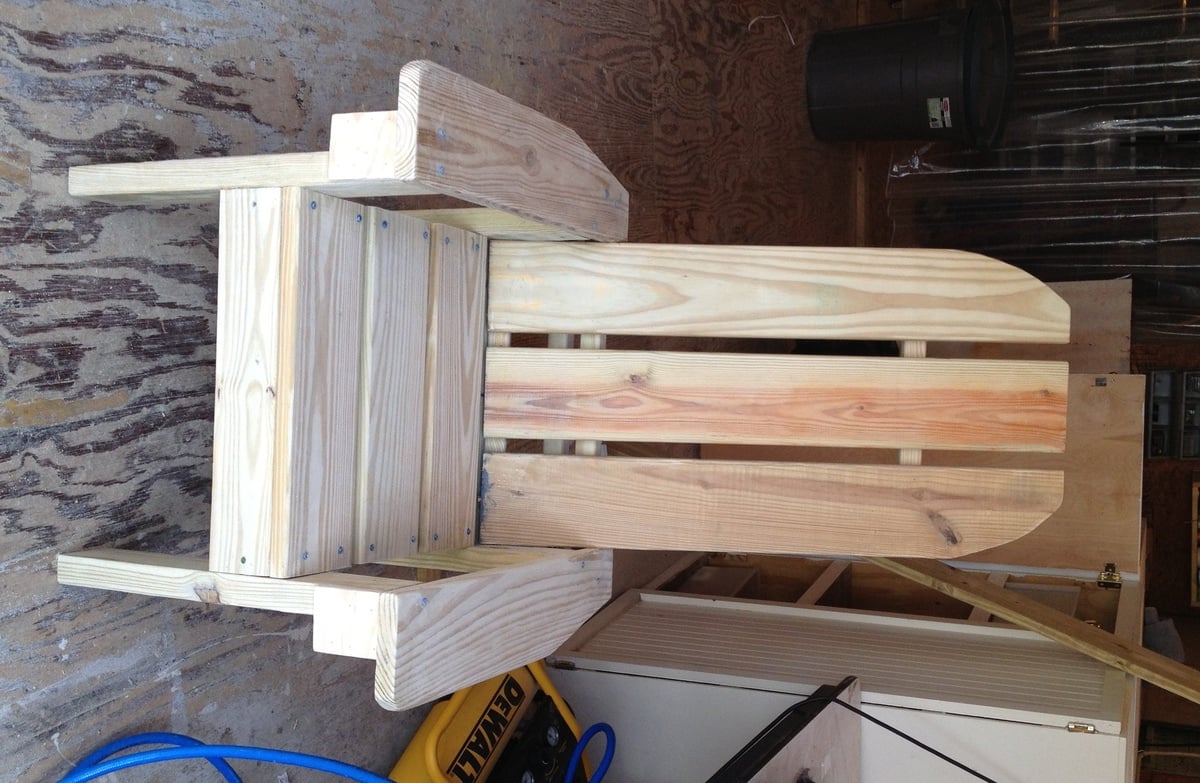
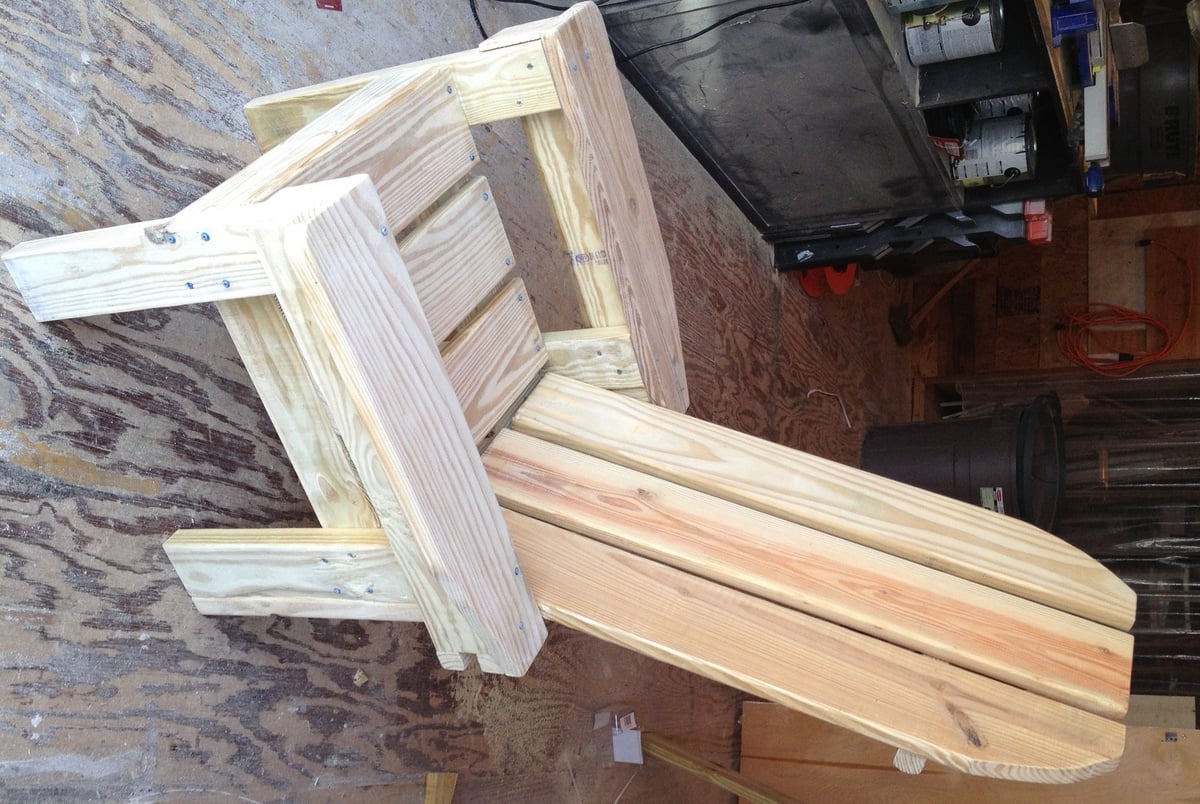
These sturdy chairs are a wonderful replacement for plastic deck chairs! They are nice and heavy, and won't blow over in a storm! This project is a mix of Ana's Adirondack Chairs and the Simple Outdoor Lounge Chair. I combined ideas from the two plans to use the extra lumber we had left over from an outside project from last year. Left-over lumber included some 2x4 for the bottom frames, some 5/4 decking board for the seat, back, and arms, and a few balusters at the back. Most of the lumber was left over, so I only had to spend $20 for 2 boxes of Kreg screws and 2 pc 5/4 x 8 decking board. Finished with some left over exterior latex semi gloss paint. This was a fun weekend project - built the chairs on one day, and finished the sanding and painting the next day. My next project is a little outdoor table to go with them, and I have a few scraps left over to use for that. These chairs have received lots of compliments, and we've given Ana's web site name to several admirers. Ana, thank you for your wonderful plans!
Estimated Cost
$20
Estimated Time Investment
Weekend Project (10-20 Hours)
Finish Used
Ace Royal exterior semi-gloss paint in navy blue (left over paint from about 5 years ago, was color-matched, so it doesn't have a name).
Recommended Skill Level
Beginner

Comments

mepaganjr

Sun, 09/28/2014 - 10:46

I don't see any plans for this chair.  Is it possible to get them?

JoanneS

Sun, 09/28/2014 - 18:15

Hi Mepaganjr,

I used the plan for the Simple Outdoor Lounge Chair

http://ana-white.com/2010/05/plans/simple-outdoor-lounge-chair

as my guide for the seat part, and the slant of the back,

and used Ana's Adirondack Chair

http://ana-white.com/2010/05/furniture-plans-adirondack-chair-ana.html

as the inspiration for the tall chair back and front legs.  I did several adjustments to fit the mixture of sizes of 2x and 5/4 scrap wood that I had available.   I traced a paint can lid to make the curve on the top of the chair backs.

A great plan that has a similar seat and legs is the Adult Adirondack Chair, which is in Ana's book, The Handbuilt Home, on page 174.  That's a great plan because it only uses six 1x4's an one 1x2.  If I hadn't been using up the mixed scrap lumber, I would have used the Adult Adirondack Chair plan.  

Happy building!  :)  Joanne

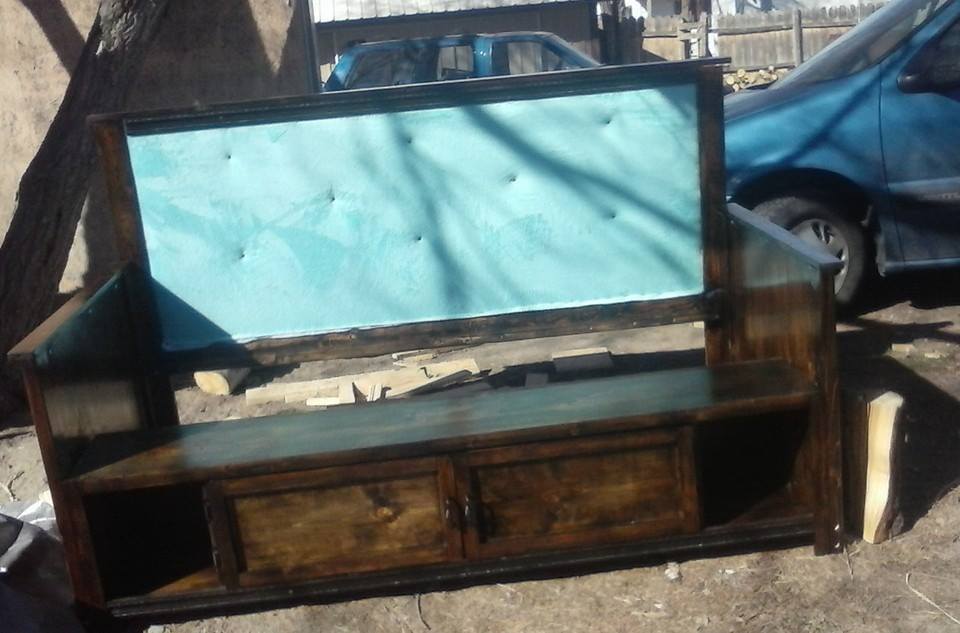
Day Bed with stuffed backing

Built with most plans from the day bed but grooved the 2x4 a 1/2" and used a 1/4 plywood on back and stuffed it and wraped in fabric then used tack to make a tuck pattern.  Still need to install slats but is mostly done here.  Was stained with a jacobean stain.

Estimated Time Investment
Weekend Project (10-20 Hours)
Finish Used
Jacobean from minwax.
Recommended Skill Level
Intermediate

Comments

Our Table

Submitted by Anonymous (not verified) on Wed, 06/14/2017 - 09:36

My first wood project and I think it turned out good. Didn't want to bring out small old table into the house we bought so i built this. Fits my family of 6 and guests perfect! 


Josh

Recommended Skill Level
Beginner

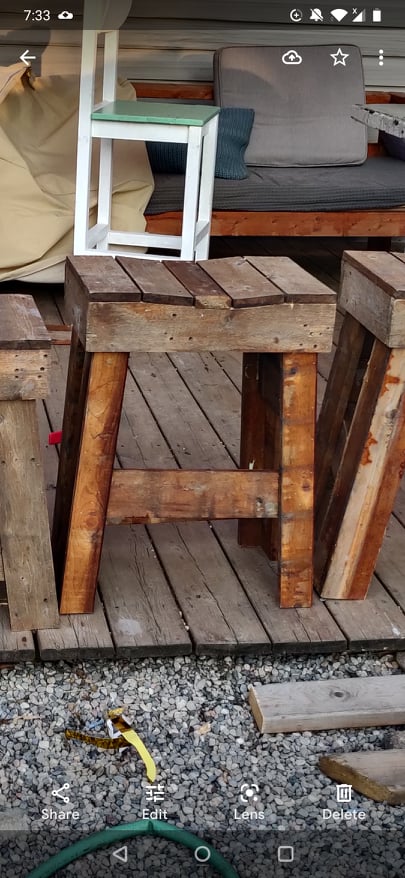
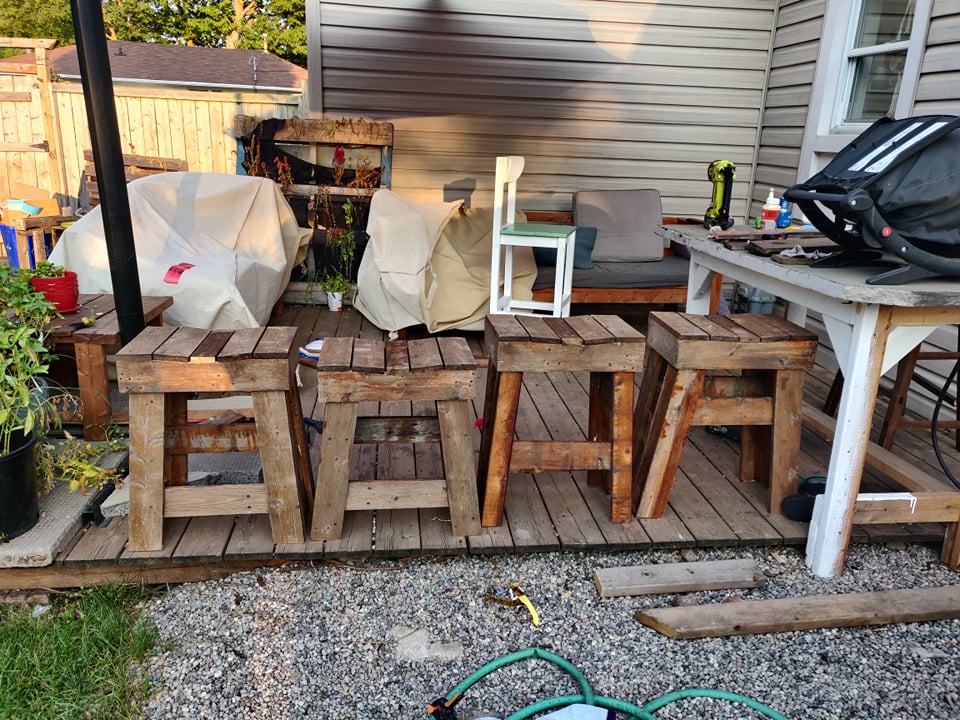
Cedar Outdoor Stools from bench

Submitted by sylvialh on Fri, 08/27/2021 - 05:21

one of my first ana white plans was a cedar outdoor table and chairs that I was never 100% happy with but never the less lasted ten years before yesterday when I decided to undo all the screws (I didn't use glue on this one and it wasn't a kreg project - probably why I wasn't happy with it!).

I transformed those simple benches and table into four stools (varying heights for various members of the family) as well as a cedar planter. So the wood was 100% from the previous project so there is a lot of variance in the stain.

I sort of merged the adirondack stool and the farmhouse counter stool patterns as I didn't do both a bevel and a mitre cut I just a 5 degree mitre for the legs.

I used 1x3 and 1x4 for the legs and joined them together to make an L (I saw this on another brag post on the site) because I wanted to reuse the wood that I had leftover from the bench.

I put together the entire project using glues and brad nails but I will be adding some extra screws for longevity.

for the top, I took a 1x4 and traced a slight angle out of the top based on that of another stool I had and cut it out with a jig saw, to make the seat a bit more comfortable than the flat seat on the farmhouse stools. They are very comfortable and this was such an easy mod!

Comments

Saw Horse writing desk

Submitted by Anders on Sun, 04/28/2013 - 14:42

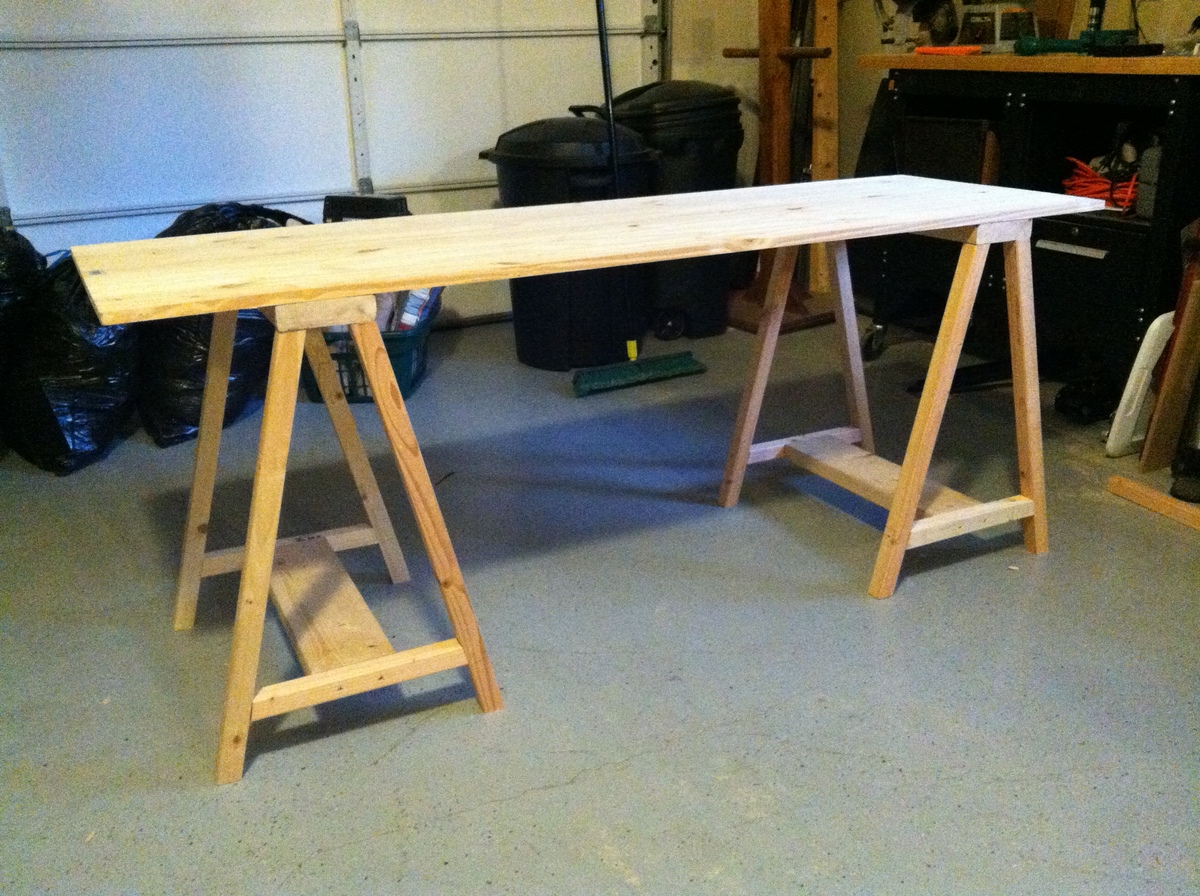
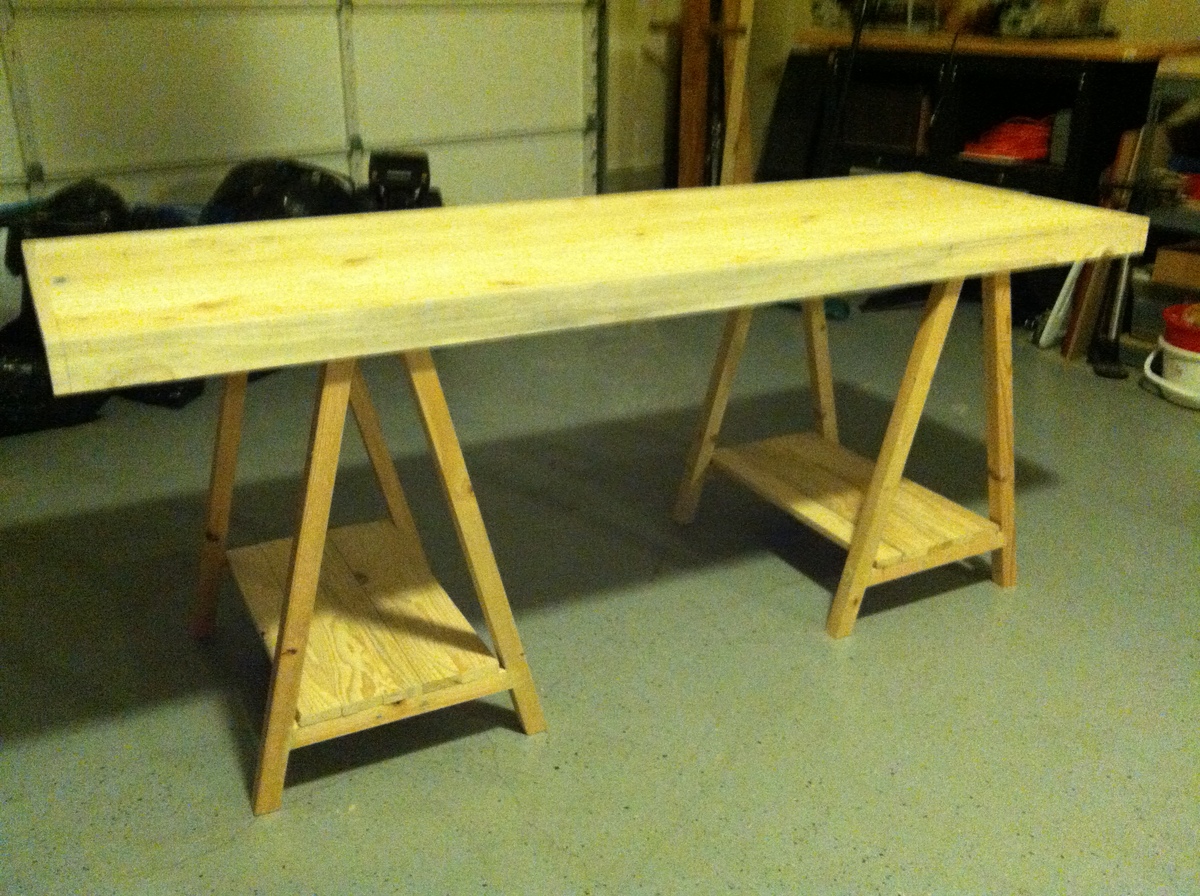
I enjoyed building this project for my wife. The plans are easy to follow. I decided to trim the desk by adding 1x3 boards along the sides, and widened the shelves on the bottom with additional 1x3 boards. I also found an old chair and stained it to match the desk.

Estimated Cost
$80
Estimated Time Investment
Weekend Project (10-20 Hours)
Recommended Skill Level
Beginner

Lighted Bar Sign

Submitted by tedgray86 on Wed, 03/18/2015 - 21:56

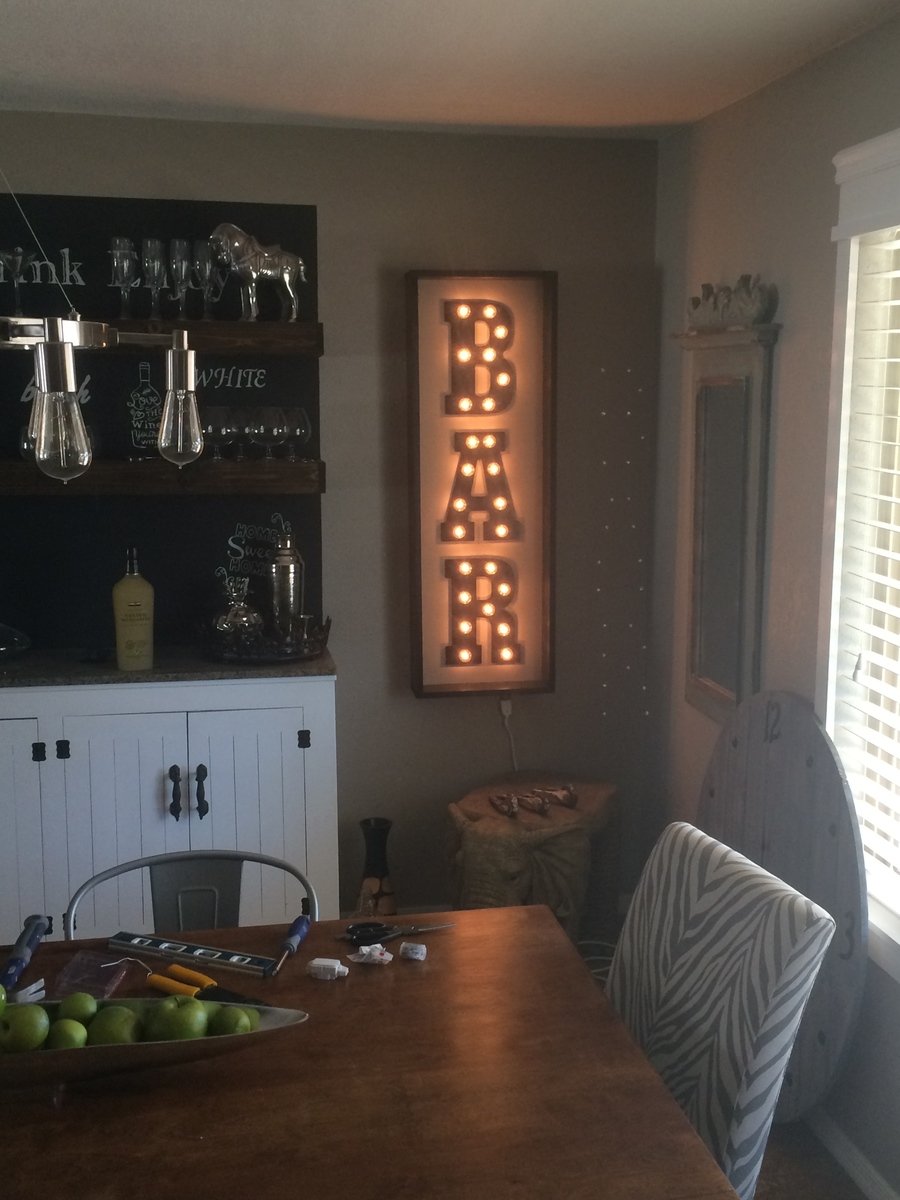
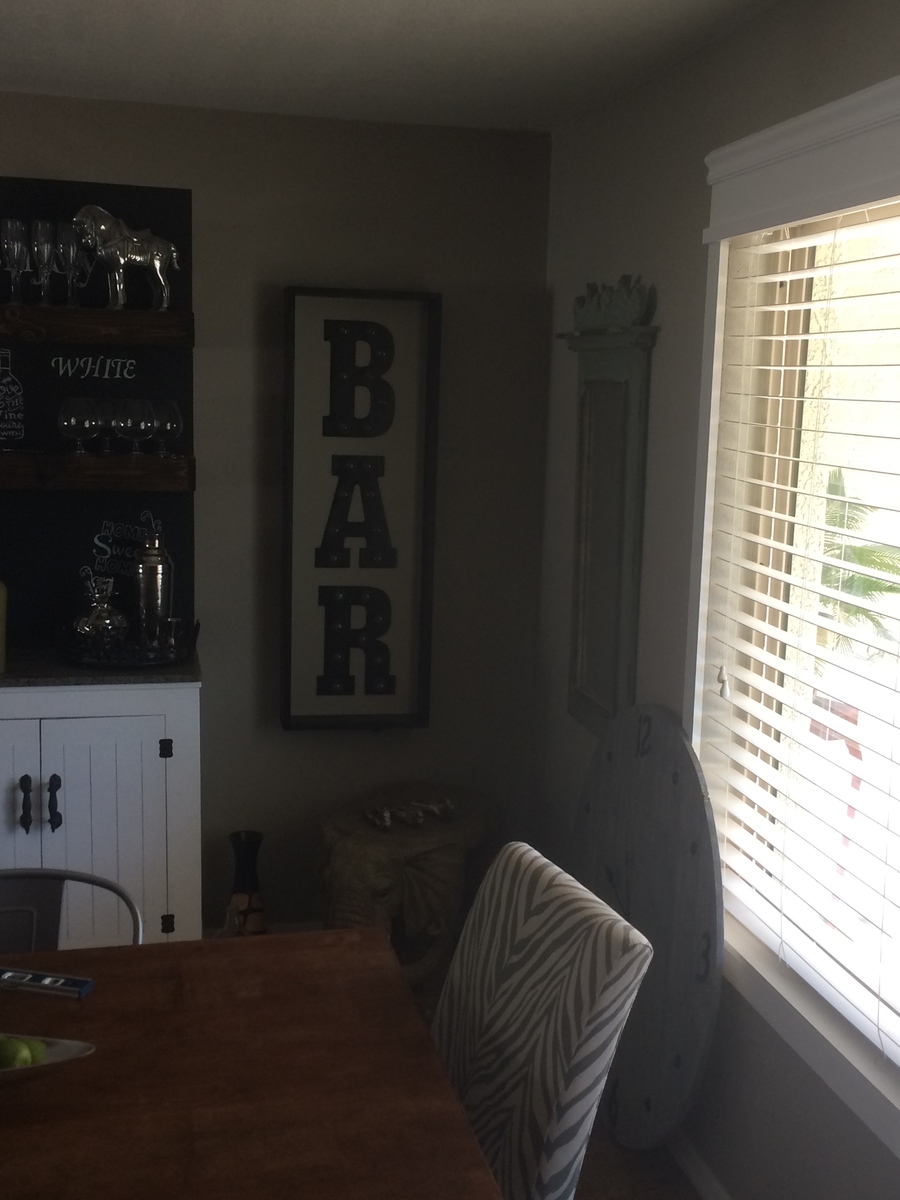
Inspired from a sign we saw at Home Goods however it was half the size and twice the price!  Ask for a how to.

Estimated Time Investment
Day Project (6-9 Hours)
Recommended Skill Level
Intermediate

Comments

Craft table with Oak Plywood and Chalk Paint

Submitted by Anonymous (not verified) on Sun, 06/18/2017 - 09:29

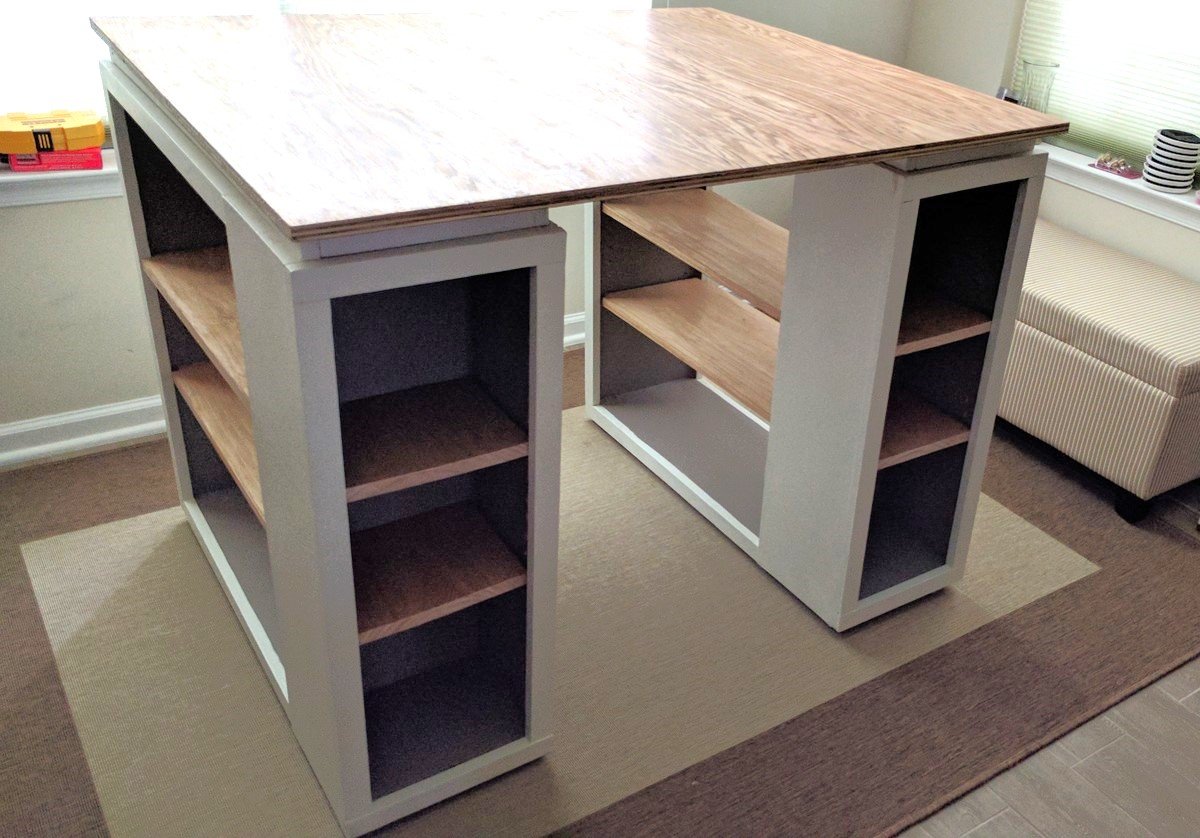
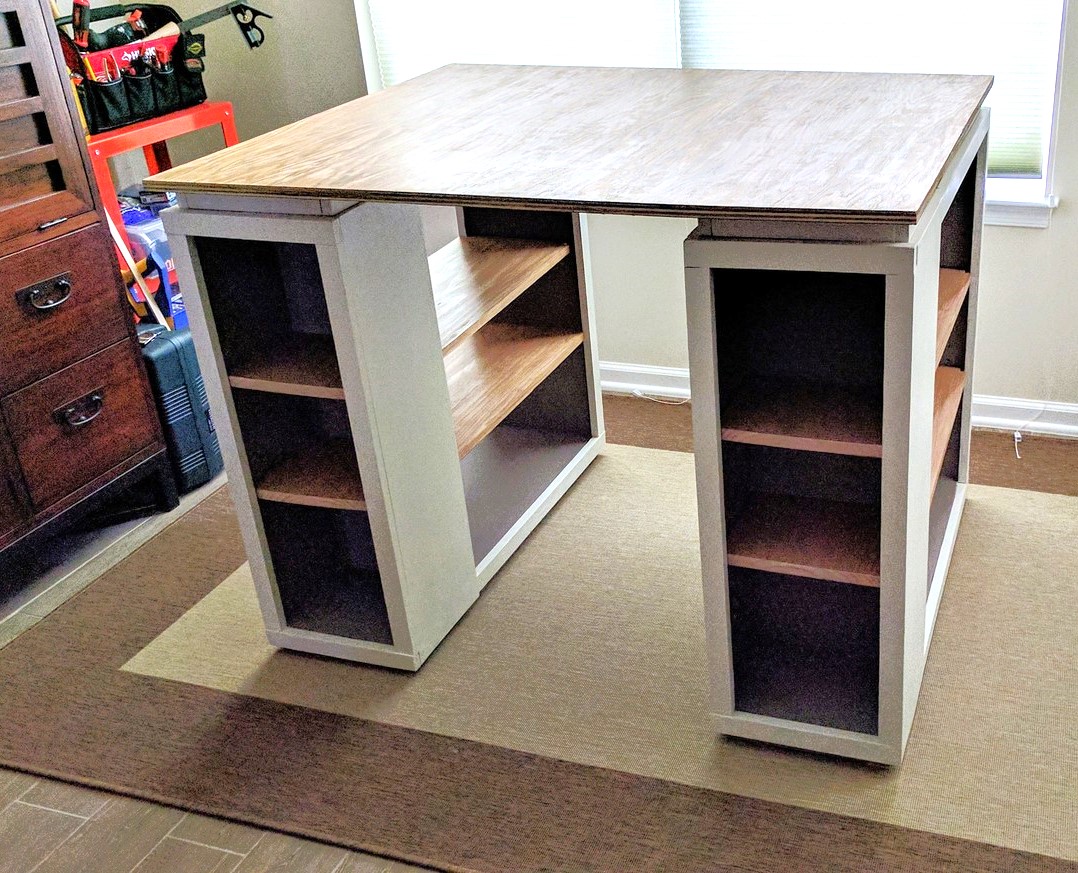
As a solo and novice woodworker, it took me a while to get used to the pocket hole jig and longer to cut the wood myself but eventually it all came together.   To ensure I could get it out of the house if I move, I used circle 8 desktop fasteners to fasten the plywood top to the risers.  I am proud I finished and love to use the table now for both craft work and breakfast on the weekends.

Built from Plan(s)
Estimated Time Investment
Week Long Project (20 Hours or More)
Finish Used
Top is oak plywood finished with Danish oil.
Shelves are pine with Minwax oak stain
Paint is Valspar chalk paint: Kid Gloves for the outside and Bonnet Ribbon for the interior, all finished with Satin finishing wax.  
Recommended Skill Level
Beginner

The Greenhouse Gets a Custom Door Window!

Submitted by Anonymous (not verified) on Sun, 09/05/2021 - 06:00

I knew I wanted an unusual window in our new greenhouse door. It took a lot of looking, but finally found what I was looking for!

Built from Plan(s)

Comments

Customized Farmhouse Table

Submitted by hhoward on Mon, 04/29/2013 - 23:06

I found this website while trying to find DIY plans for a bookcase for my sons room. After I saw all the plans, the bookcase project got bumped down the list. My husband was a little skeptical when I said I wanted to build a kitchen table, but he still handed over the keys to his truck and off I went to the hardware store.

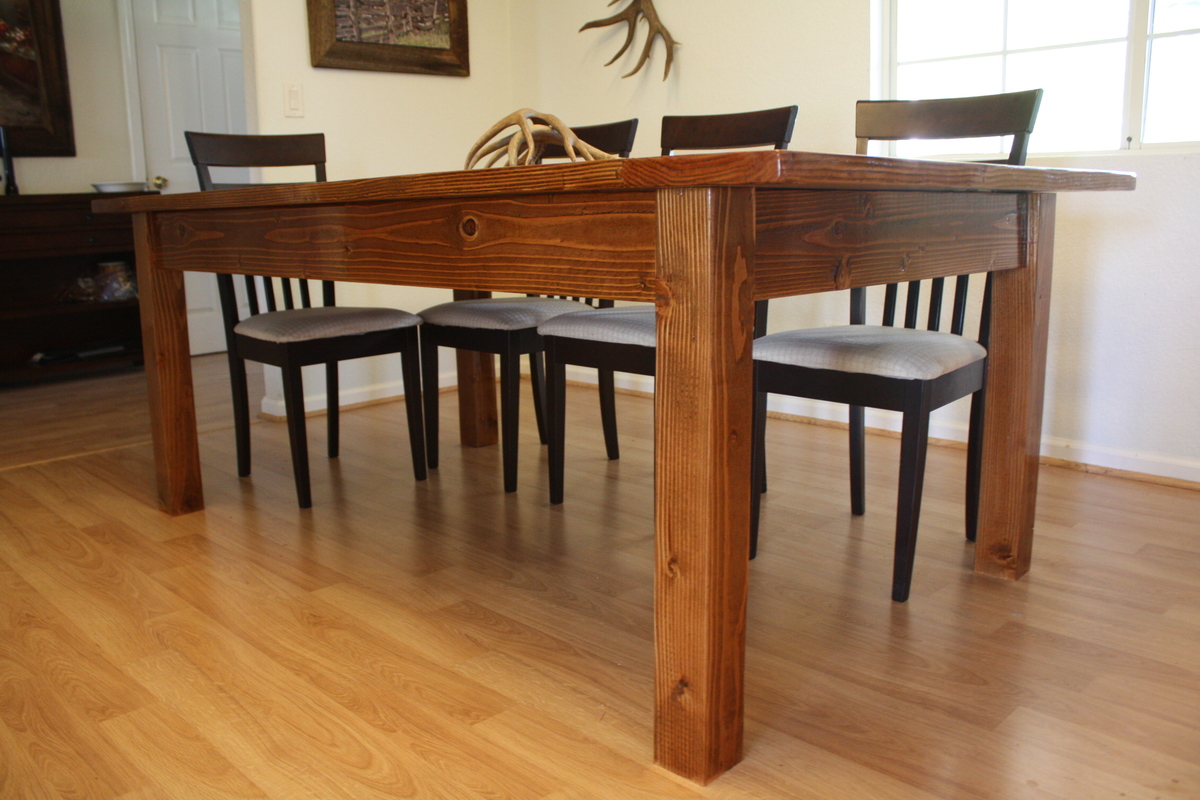
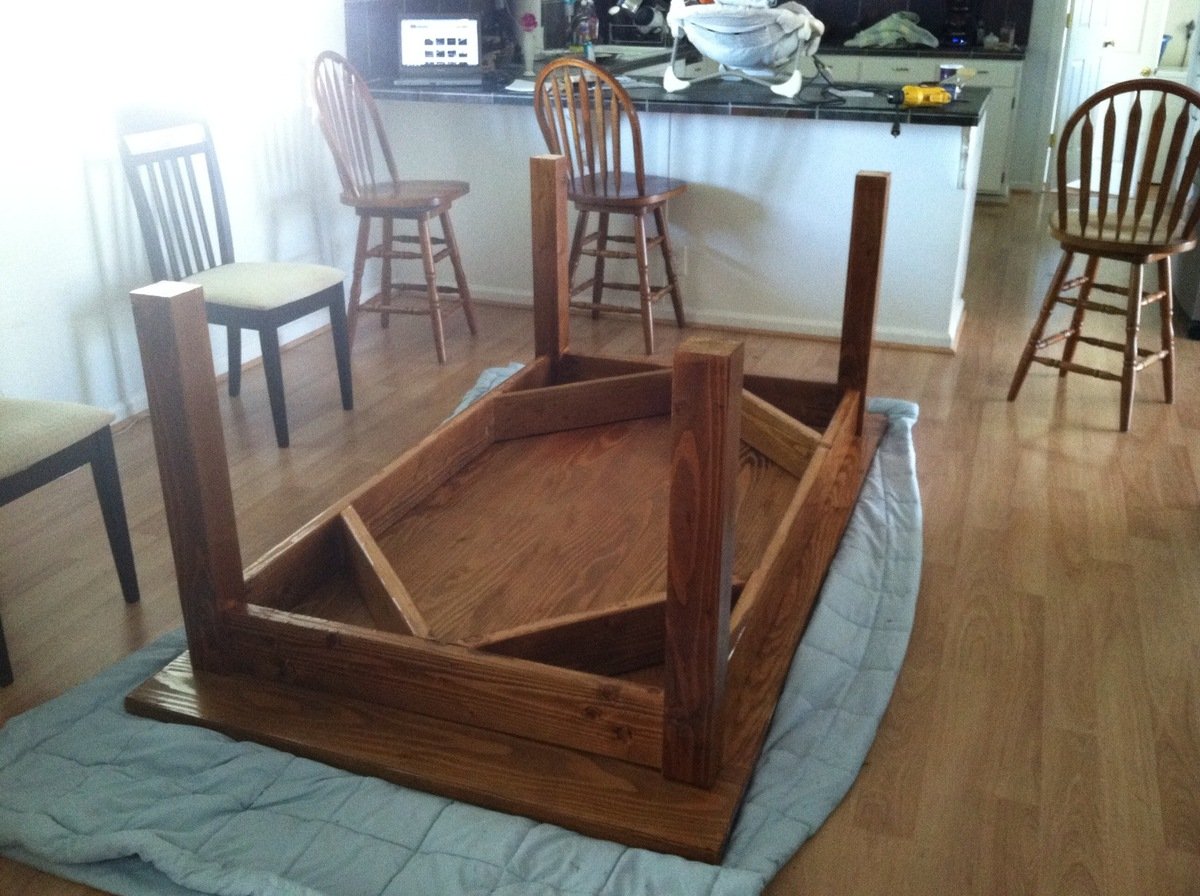
I built this during the night after my 4 month old son went down for the night, so usually around 7:30pm. I tried to be finished with anything loud (sanding) by 9pm. I changed the dimensions to be shorter and wider than the plans and I removed the stretchers since I wanted the option to put chairs on the ends. To keep the table sturdy and square I substituted 2 x 6 for the side boards instead of 2 x 4 and also added corner supports underneath. Because I had 2 x 6 as the side boards I also needed to make the table slightly higher to still give adequate leg room. The table is 31" high instead of the normal 30". The top is 2 x 10 tongue and groove clear Doug Fir left over from a flooring project.

I sanded the entire table starting with 80 grit, 120, 220 and then used 320 in between polyurethane coats. I also sanded down all corners and edges since in no time my son will be learning to walk and I want to avoid serious injuries by running into sharp corners.

.

Estimated Cost
$150
Estimated Time Investment
Weekend Project (10-20 Hours)
Finish Used
First coat was Watco Danish Oil Medium Walnut (brought more red out of the wood than I was anticipating) followed by two coats of Watco Danish Oil Dark Walnut. Applied 3 coats of Minwax Fast Drying Clear Gloss Polyurethane.
Recommended Skill Level
Beginner

Comments

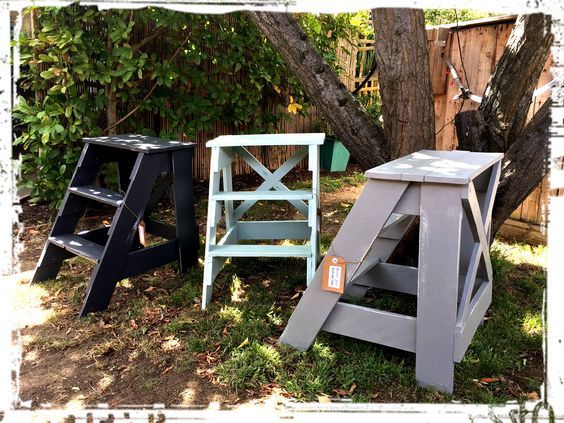
Vintage X Back Step Stool End Table

Submitted by naomi on Fri, 06/23/2017 - 06:04

This project is one of my favourites. I loved it so much that I made 6 of them. 

They are extremely easy to make. The plans are super easy to follow.


Estimated Cost
$0 This project cost nothing because I used free pallet wood and paint that I already had.
Estimated Time Investment
An Hour or Two (0-2 Hours)
Finish Used
Chalk Paint
Recommended Skill Level
Beginner

Comments

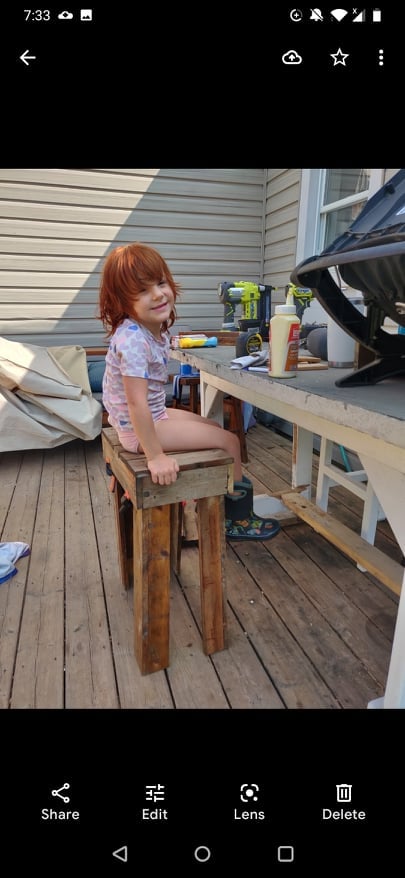
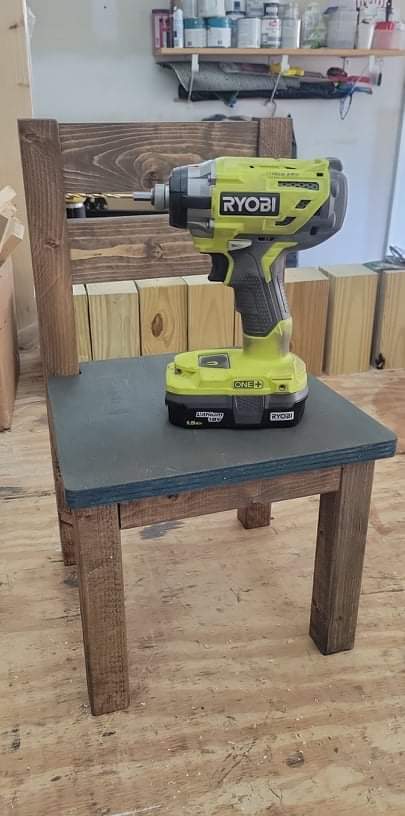
Kids chair

Submitted by Lukilla on Tue, 09/14/2021 - 18:18

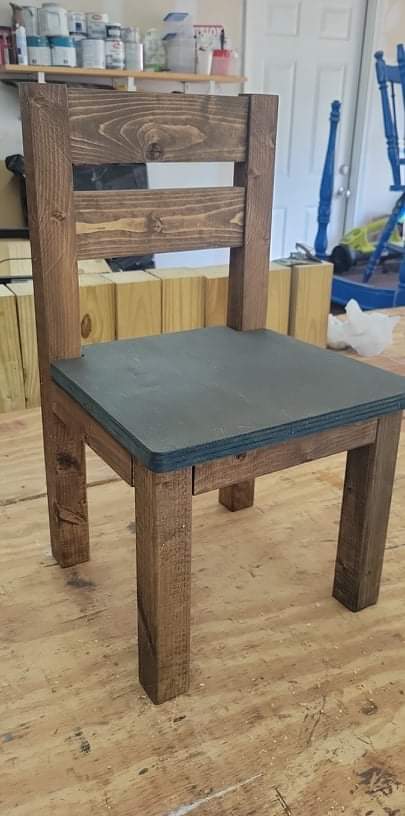
With a lot of children doing their work from home due to the pandemic we have had a lot of folks ask of we make children's tables/desks and chairs. Yes, we make tables, but no, we didn't make chairs....

Until now, thanks to Ana White! These are super cute amd fun to make.

It's a little difficult to tell exactly how small they are, so I modeled my drill for reference.

Happy building

Built from Plan(s)

Comments

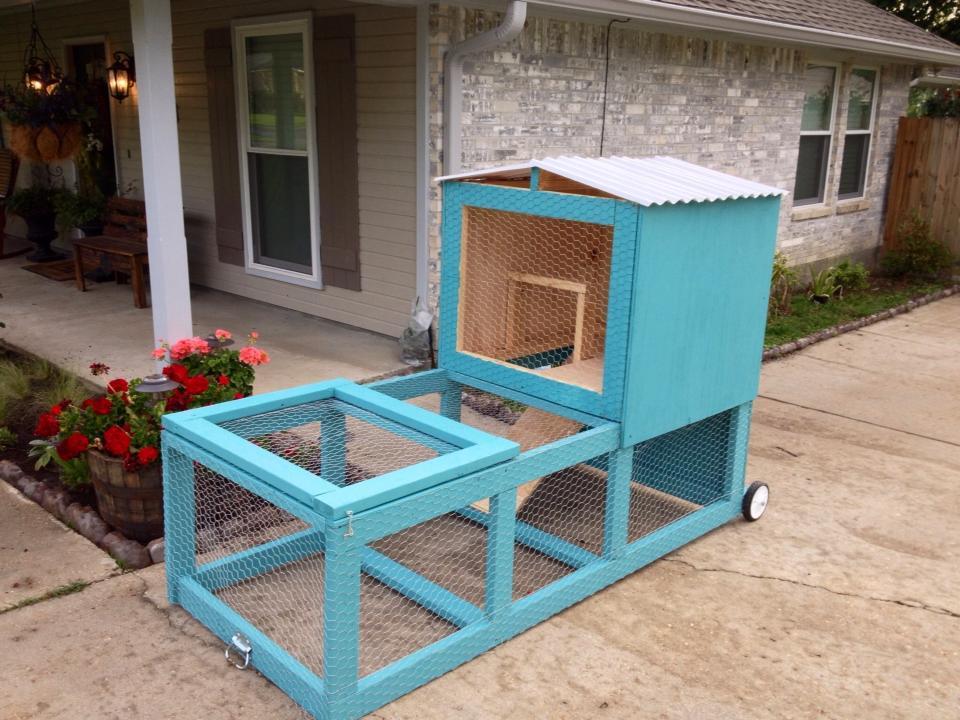
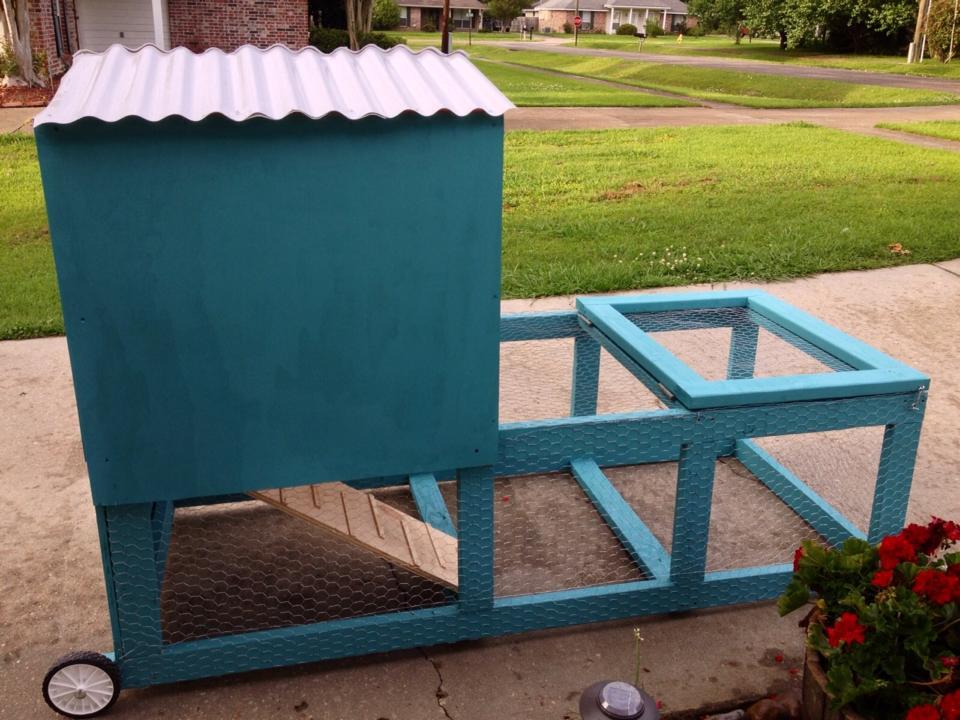
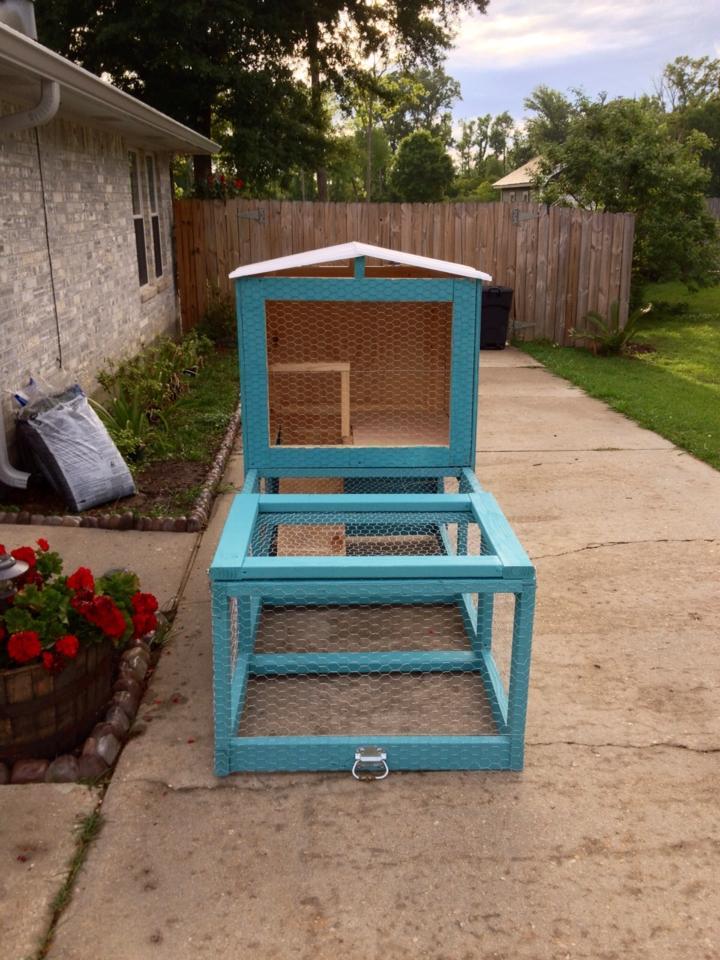
Chicken Tractor

Submitted by Cliffhorn on Thu, 05/02/2013 - 07:26

A friend of mine got two baby chicks and needed something for them to live in. She also wanted to be able to move it around the yard so they could have freah grass to be on. It uses 2x4s, 3/4 plywood, chicken wire, and plastic roofing. It was a fun build.

Estimated Time Investment
Day Project (6-9 Hours)
Recommended Skill Level
Starter Project

Comments

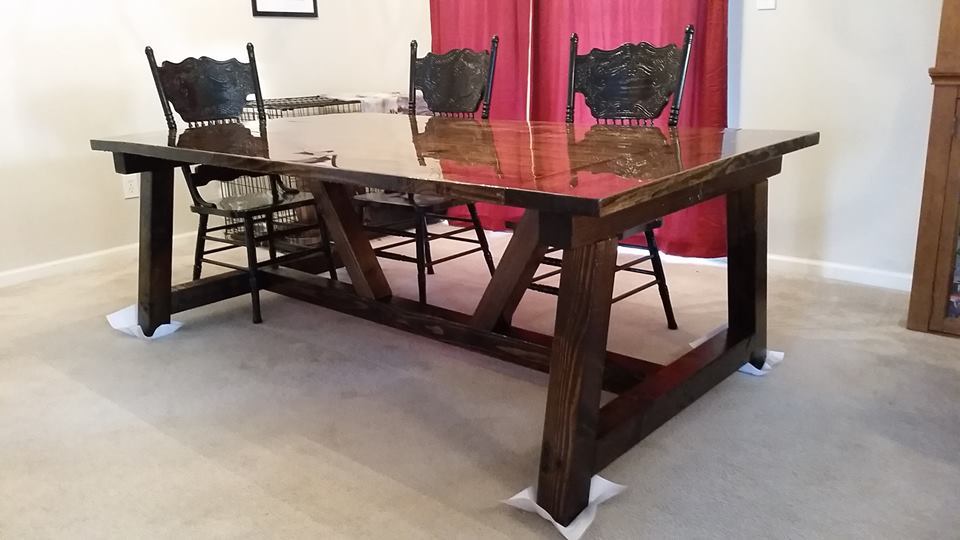
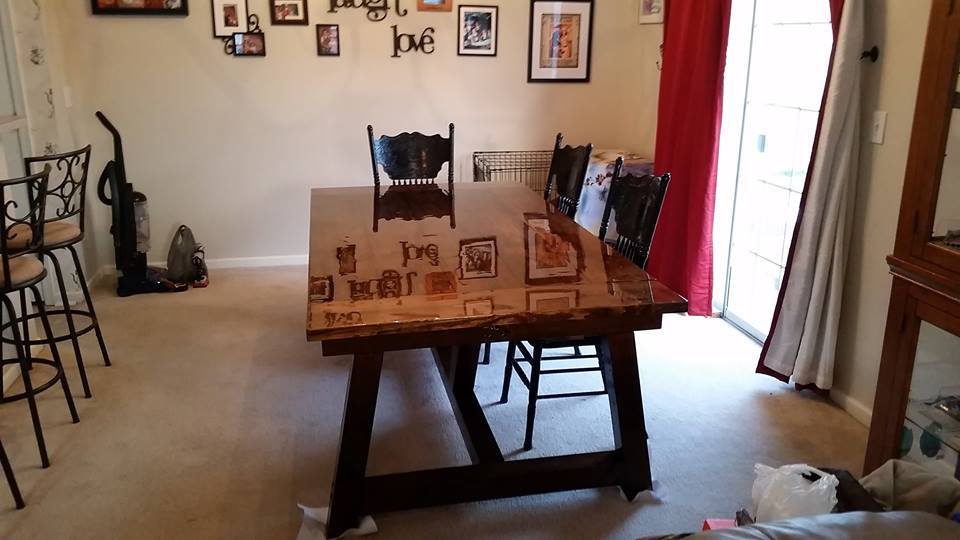
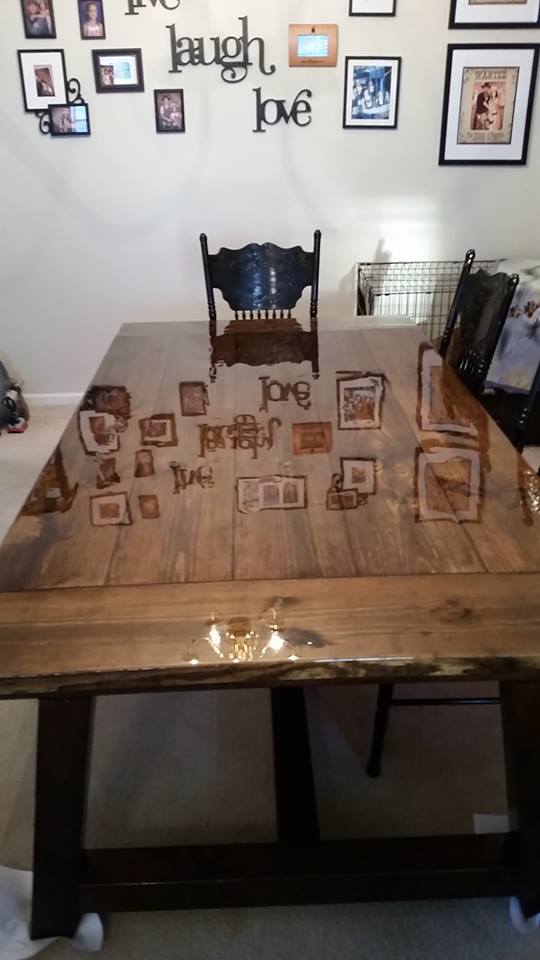
Truss Beam Table

Submitted by firebug on Sun, 03/22/2015 - 22:08

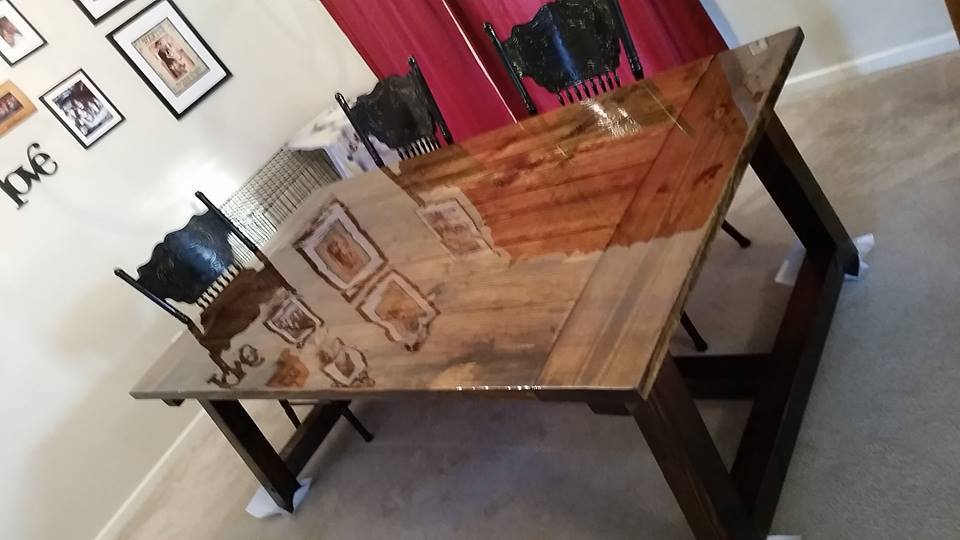
I built this farmhouse table from your plans. It turned out great, I had to modify the plans and make it bigger to fit my needs. But we love the outcome and it was well worth it to do this project.

Built from Plan(s)
Estimated Cost
$300
Estimated Time Investment
Weekend Project (10-20 Hours)
Finish Used
Stain: Dark Walnut. Table Top Finish: Famowood Kit 1 Gal Size Glaze Coat Gloss Polyurethane.
Bottom and Benches Finish: Glossy Polyurethane.
Recommended Skill Level
Beginner

Comments

wy2ak

Mon, 03/23/2015 - 19:27

Outstanding finish! After seeing this, I might have to try it. Thanks for the inspiration!

Storage Bench/Daybed

Submitted by Anonymous (not verified) on Fri, 06/23/2017 - 20:49

This was my 2nd woodworking project, so I was very pleased with the results. I wanted more seating and storage for my office area. I liked the look of the Farmhouse Storage Bed, so I decided to modify the plans and turn it into a bench. I made the seating area 30" wide and 68" long. Instead of headboard and footboard, I made 2 sides that were about 40" tall (36" 4x4 plus the 2x4 and 2x6). I made 3 24" deep drawers and left the back side open so that I can store electronics that need to be charged in them with the cords hanging out the back of the drawers. It was a lot of fun to make, and I know that my family will enjoy it!

Estimated Cost
$350 for wood and hardware, then paint and cushions
Estimated Time Investment
Week Long Project (20 Hours or More)
Finish Used
Flat black oil-based enamel paint, then finished by lightly rubbing with fine grit sandpaper
Recommended Skill Level
Intermediate

Closet redo

Submitted by dnitajns on Sun, 10/03/2021 - 20:07

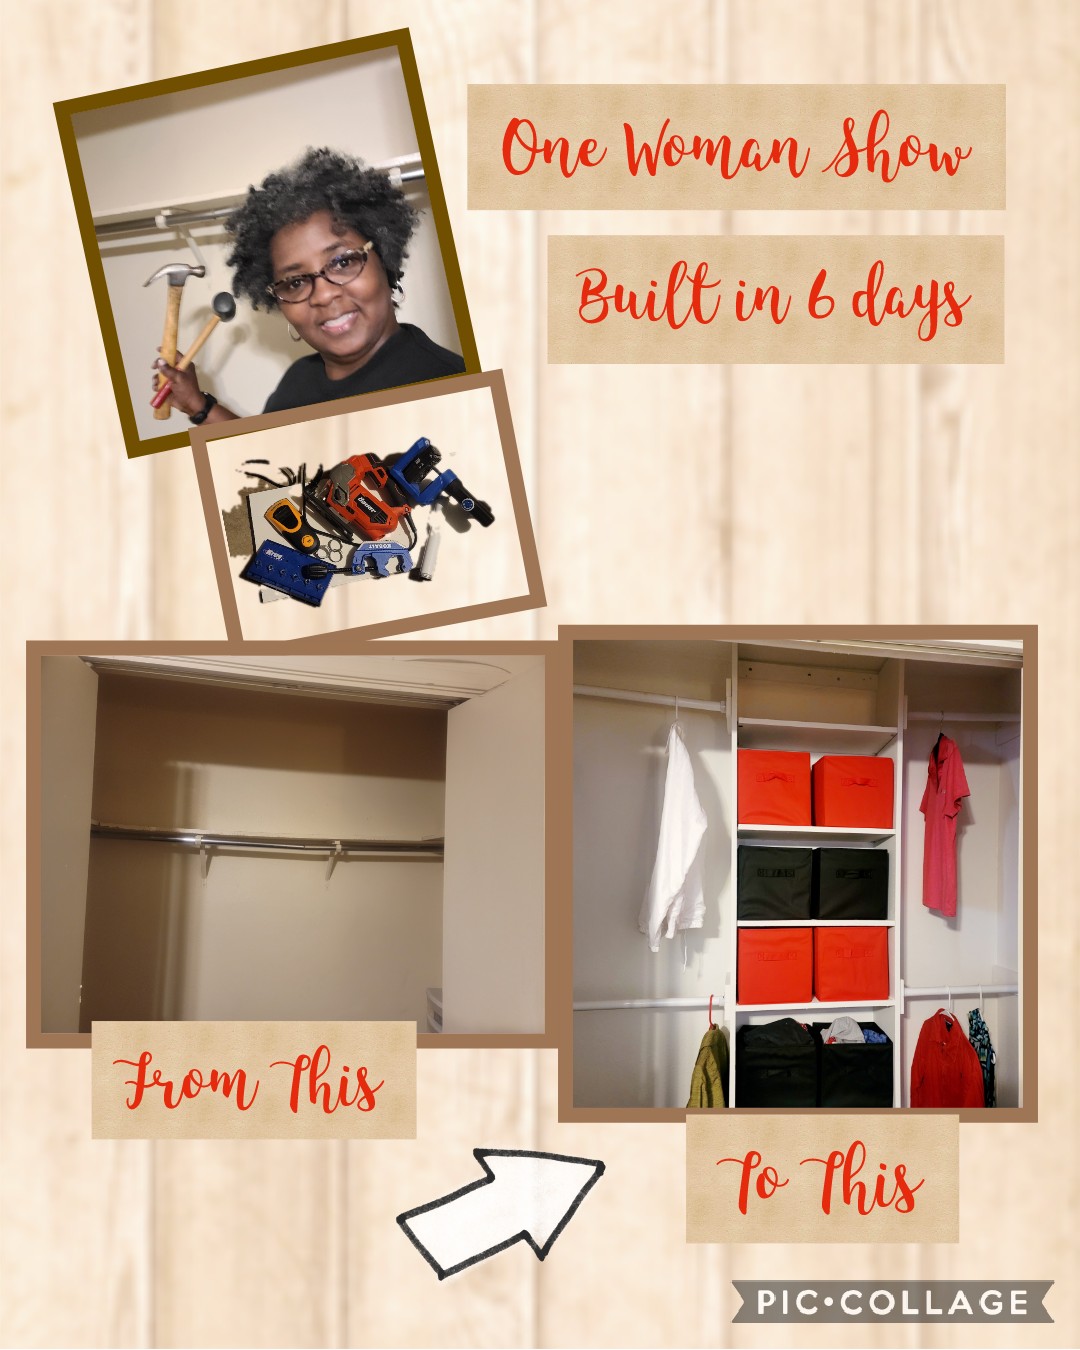
Need more room in my closet, and when I came across Ana White and saw this closet, I said I can do this. I planned how I was going to do it and bought all the necessary supplies prior . It tool me 6 days to complete. Only had help nailing shelf to wall. First time using power tools.

Comments

Very first build...Rustic Media Center

Submitted by tcoche on Sun, 05/05/2013 - 19:14

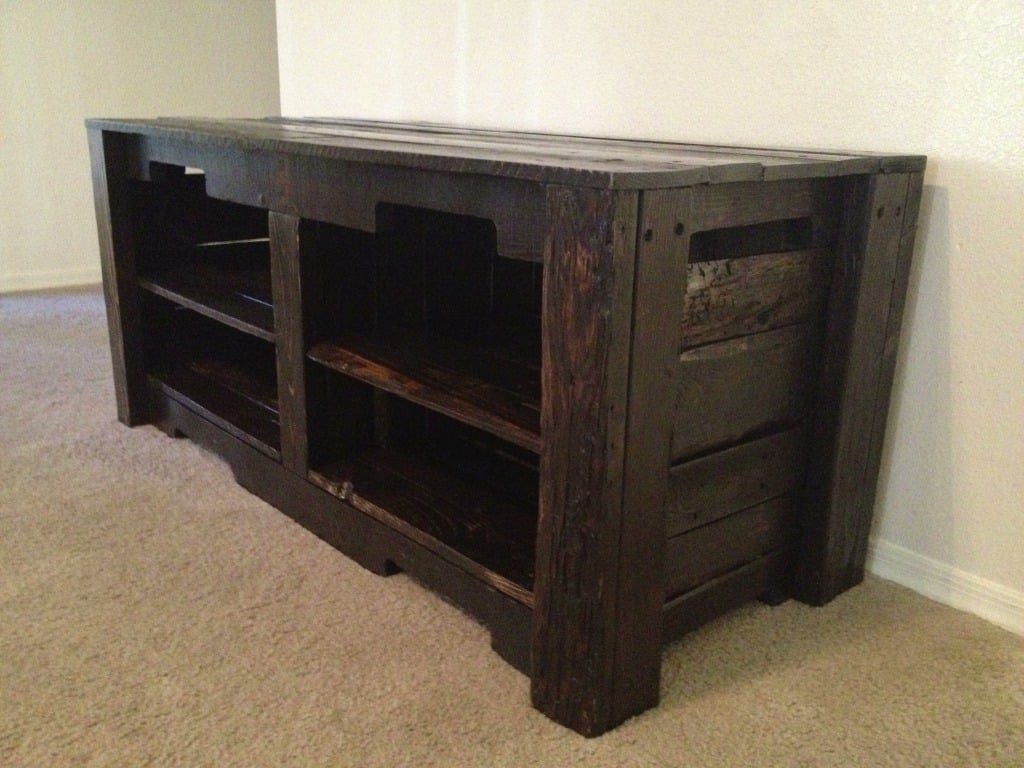
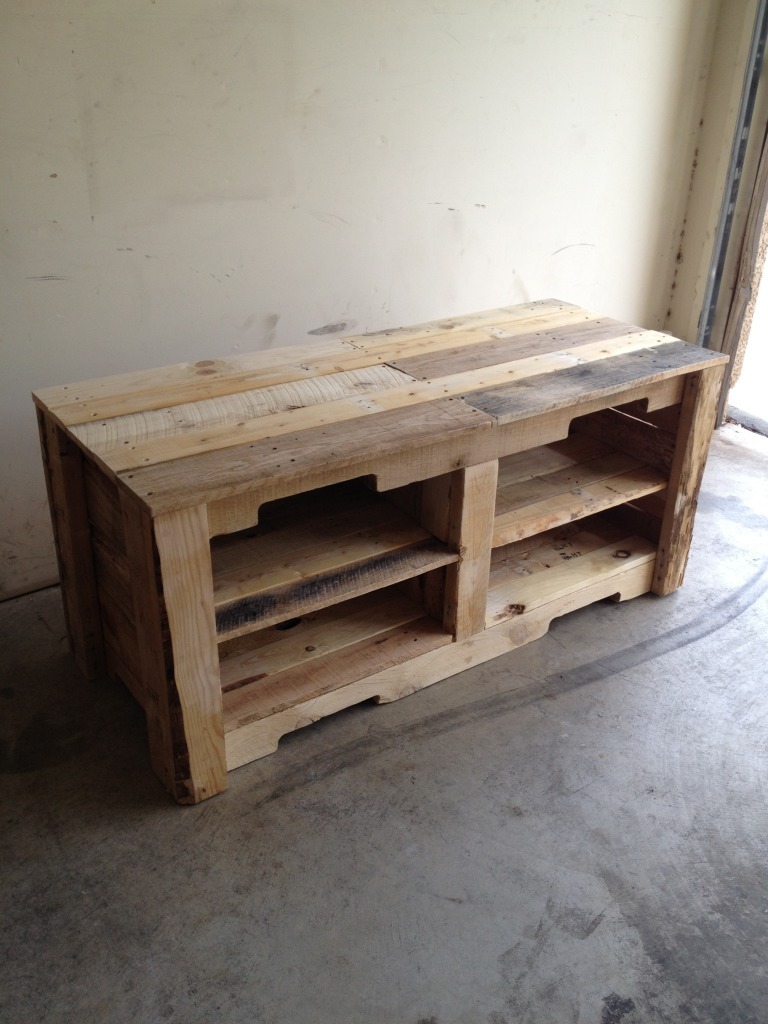
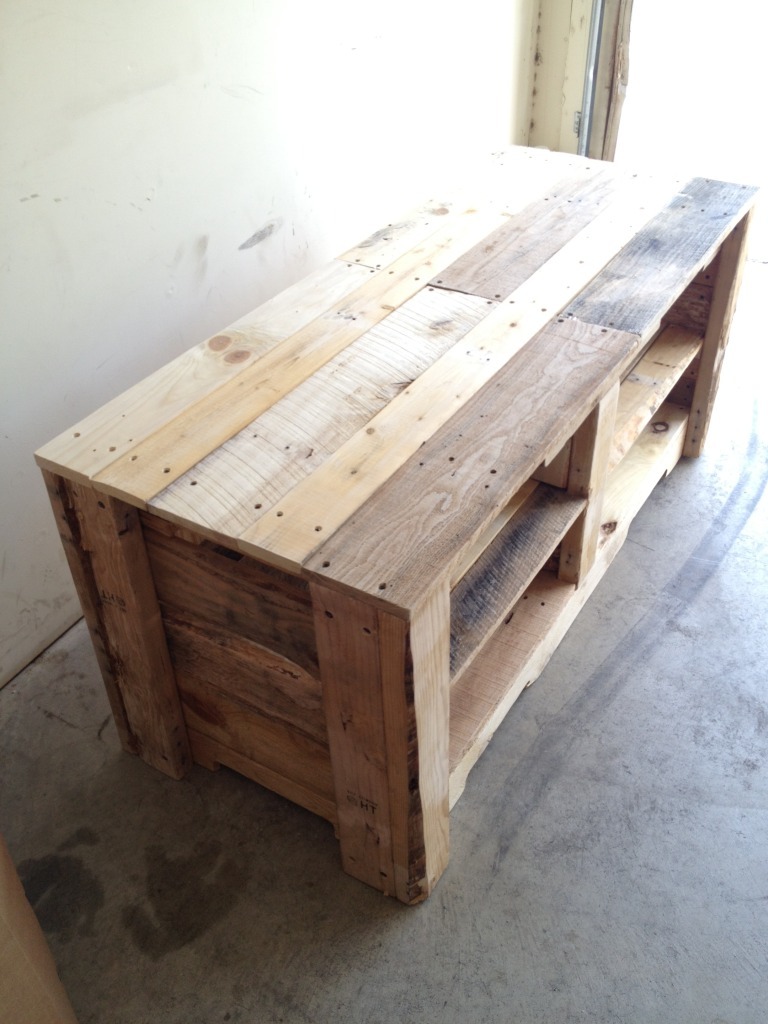
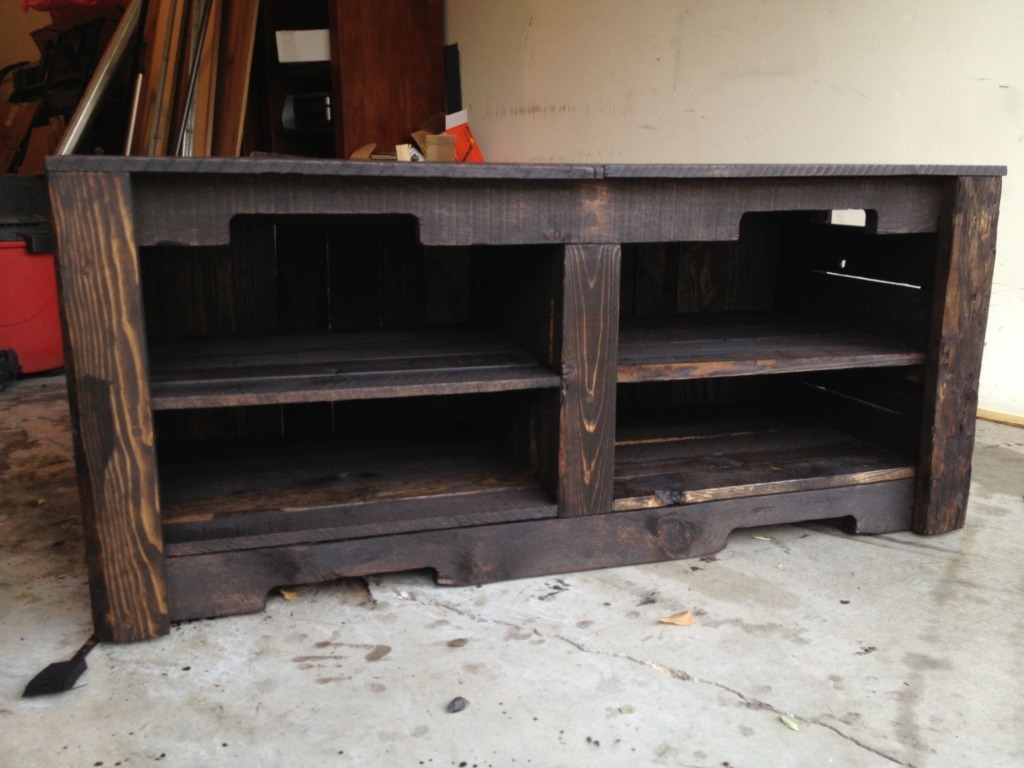
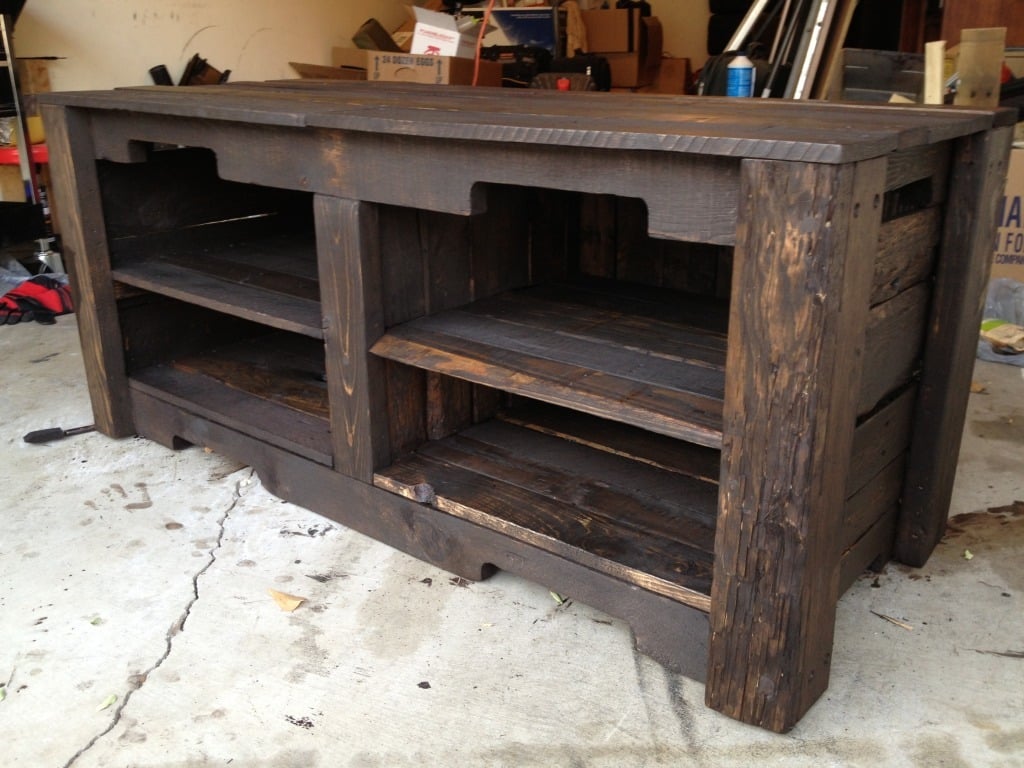
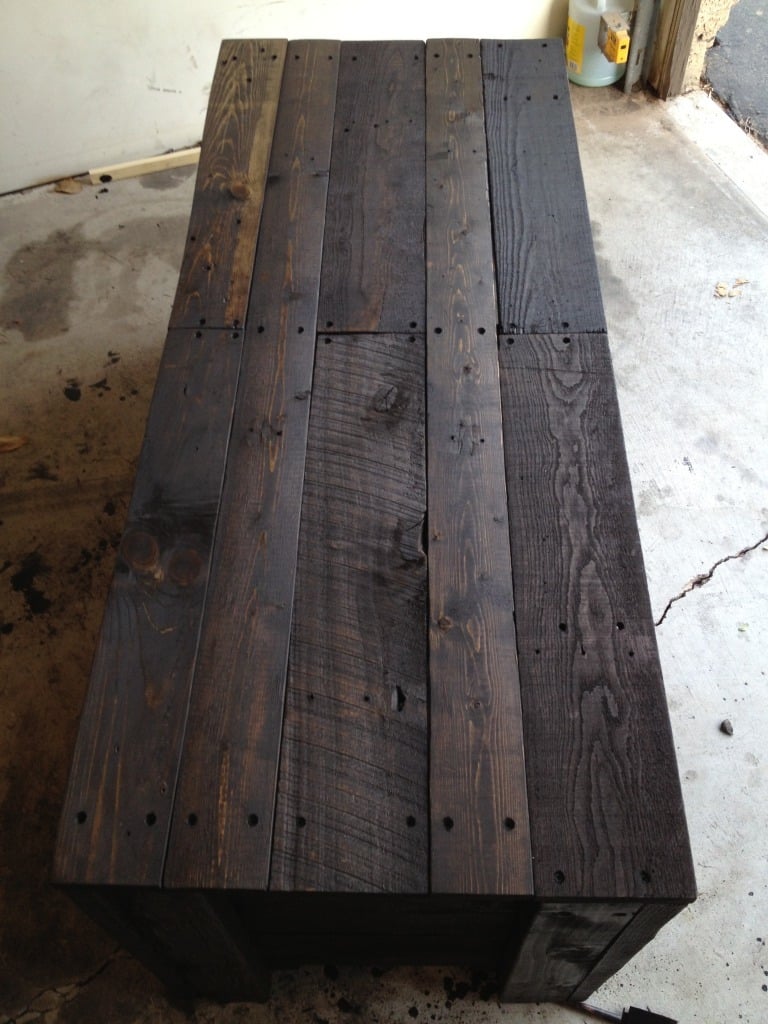
I really dont have any plans for this build. I wanted to purchase a nice rustic media center for my living. I am mounting my flat screen on the wall and wanted a cool media center to sit below it. So I came up with this project. I still plan on lightly sanding it some to bring out the grain and have that look of streaks. I also still need to add polycrylic, clear gloss. I literally just got done staining it. The pictures really dont do it any justice. It looks wayy better in person. Being that this is my first project it took me 1 week to build, sand and stain. Still have some work to put it to it, just a coat of polycrylic and light sanding. I probably have over 30 hours in to this build and around 40 bucks for screws, sandpaper, stain, glue and countersink bits. I think that is it, if you have any questions or comments please let me know! :)

Estimated Time Investment
Week Long Project (20 Hours or More)
Finish Used
Kona stain and soon to be minwax polycrylic
Recommended Skill Level
Starter Project

Comments

tcoche

Tue, 05/07/2013 - 19:09

Thank you!! I appreciate it. While I was staining it in my garage, with the garage door open. I had a few couples that walked by stop to talk and ask questions about the piece. Made me feel good that your hard work is appreciated. Thanks again!

Ninja turtle loft bed

Submitted by Kam428 on Wed, 03/25/2015 - 18:49

Made this bed using the Fire truck bed plane.. Thanks to the simple easy plan from you, made this build sure easy. About 9 hours tine to build and paint. Appox. Cost was about $280.

Estimated Cost
$280
Estimated Time Investment
Day Project (6-9 Hours)
Recommended Skill Level
Intermediate

Comments

Grill cart

Submitted by Anonymous (not verified) on Mon, 06/26/2017 - 12:40

This was a very easy build and I love the way it turned out - Tim

Estimated Cost
$100
Estimated Time Investment
Afternoon Project (3-6 Hours)
Recommended Skill Level
Beginner

Farmhouse table

Submitted by Anonymous (not verified) on Mon, 10/04/2021 - 12:33

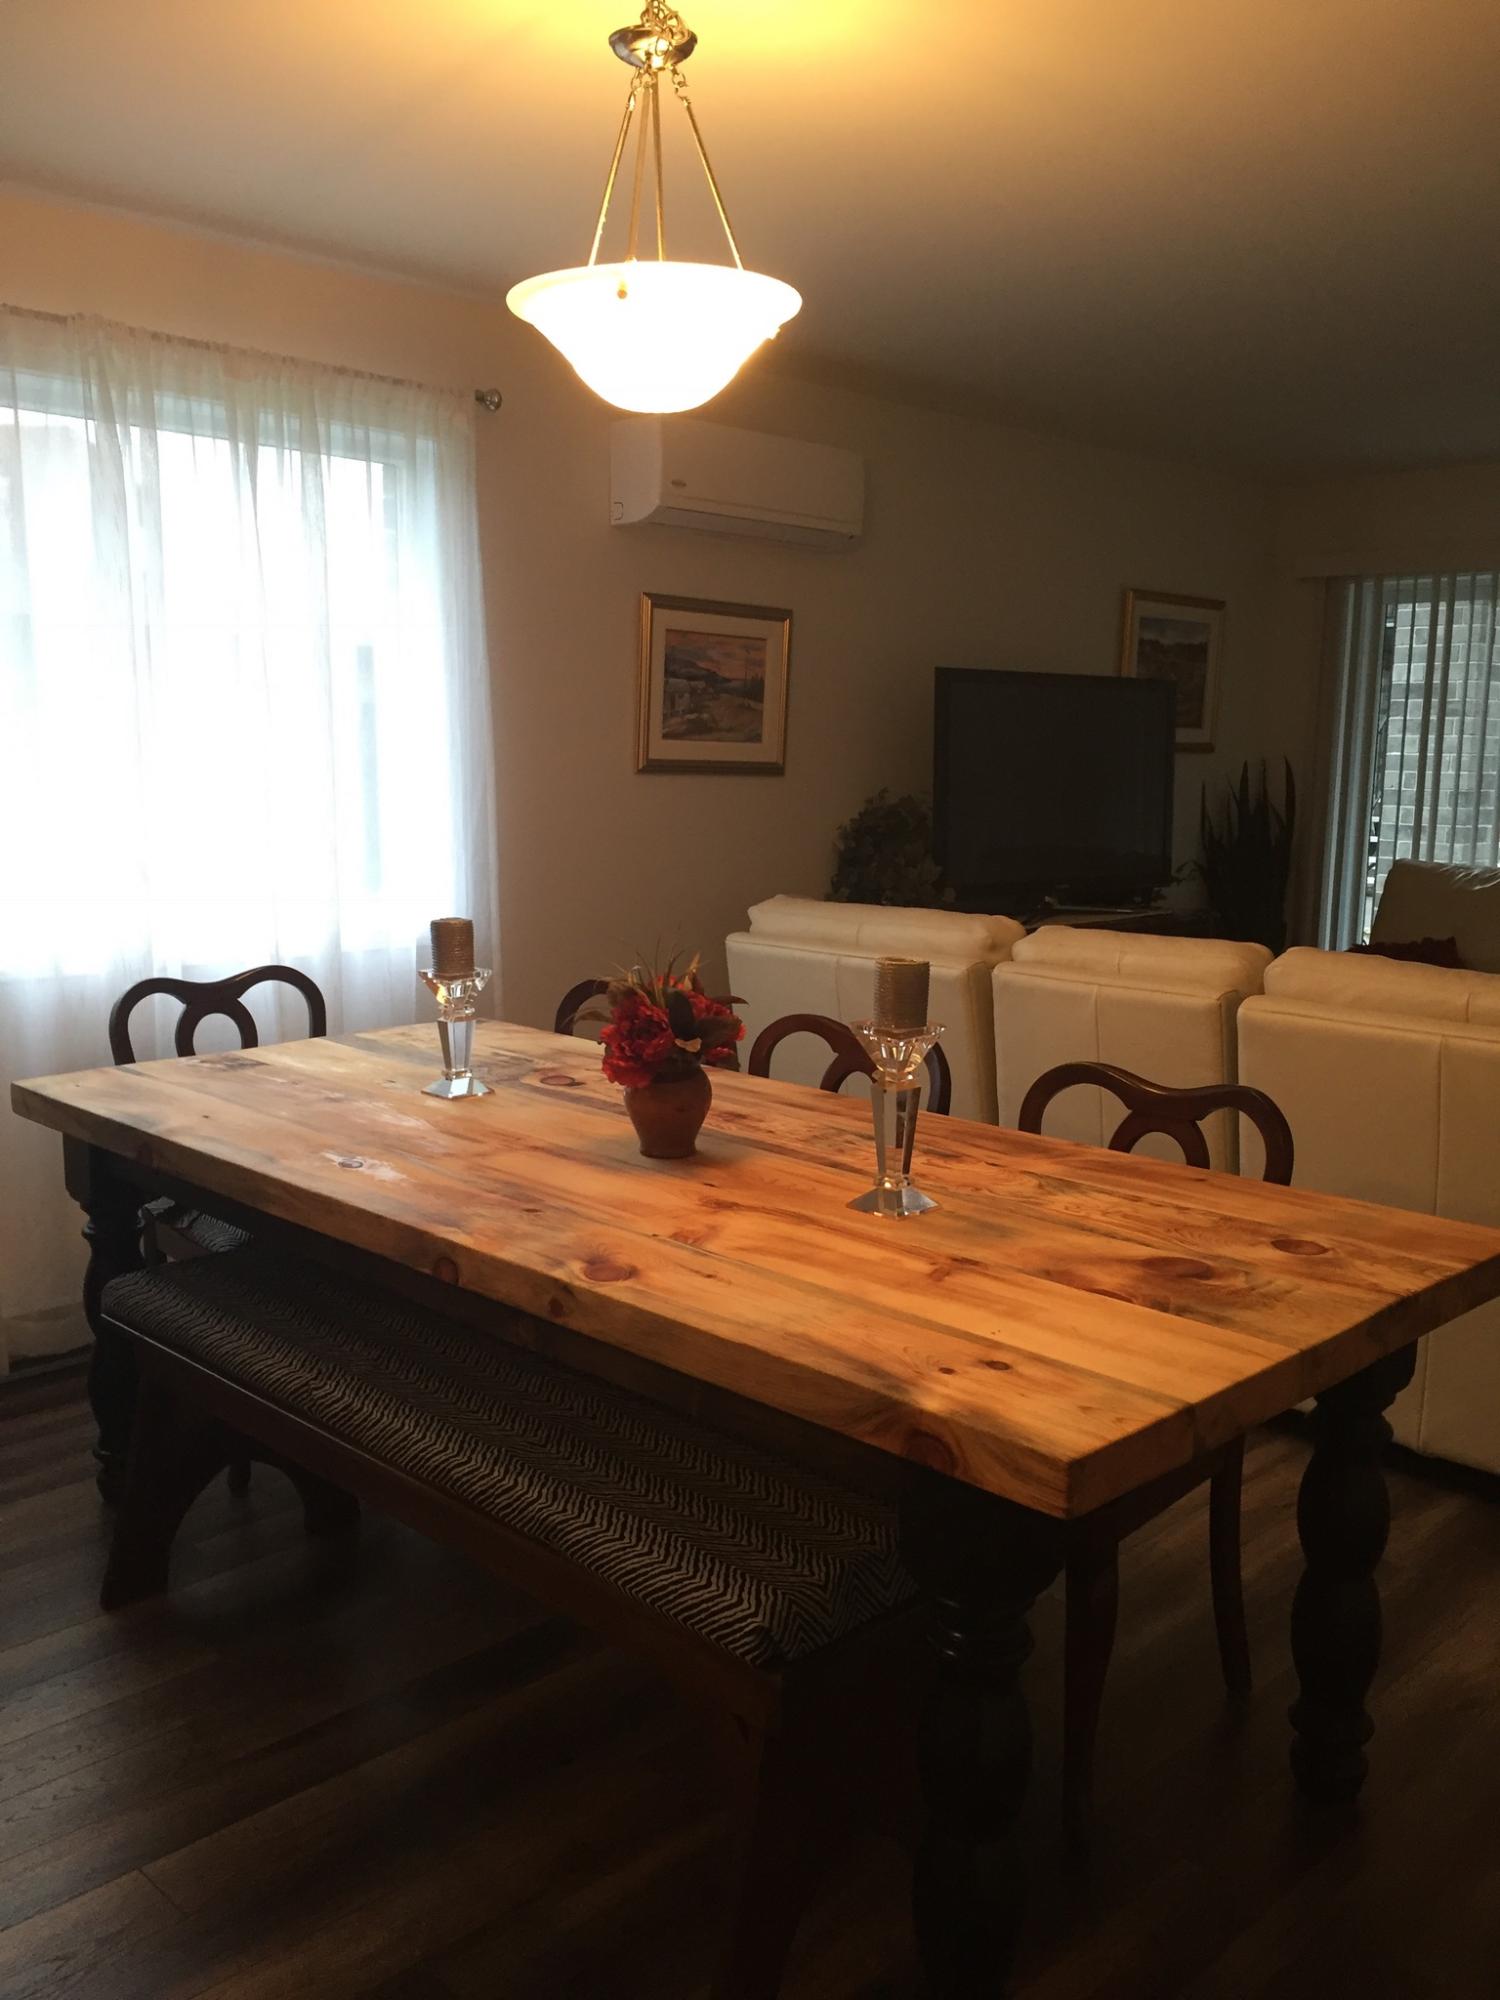
A pine tree at the cottage was diseased and needed to be cut down. We had a portable saw mill come to slice the tree into 2.5 inch planks which became a couple of tables after about 5 years of drying the wood.

Built from Plan(s)

Comments

DIY Backyard Climbing Gym

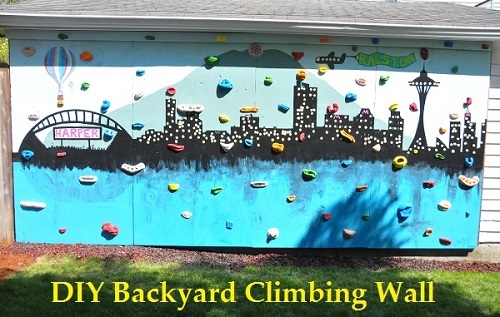
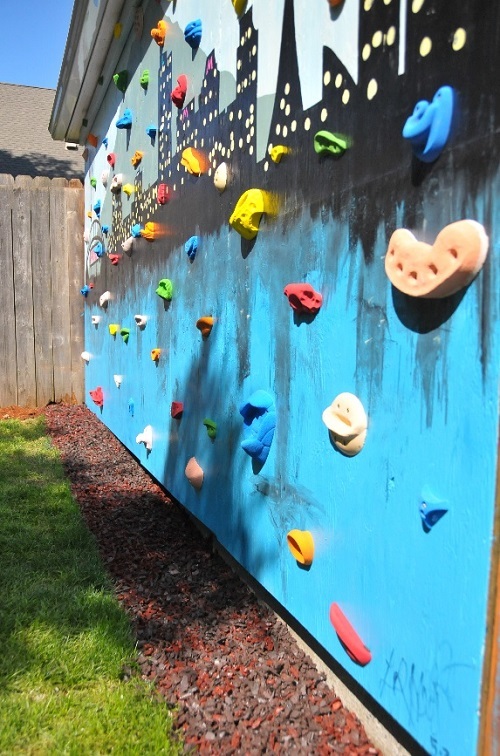
My very first woodworking project was Ana-White's farm house bed! I've made so many projects now, I decided to start fancy'ing up my backyard!. We took all pressure treated wood to make the wall foundation, painted it, sealed it, then used Screw on Holds to make the climbing portion.

I have a full tutorial listed here http://www.impatientlycrafty.com/2013/05/07/diy-backyard-climbing-wall/

Thanks Ana for helping inspire me to create more wood stuff!!!

Estimated Cost
$500
Estimated Time Investment
Weekend Project (10-20 Hours)
Finish Used
I painted with latex paint, and acrylic paint, then sealed it with rustoleum clear coat (4-5 coats)

we simply sketched out the design from ideas online..
Recommended Skill Level
Beginner