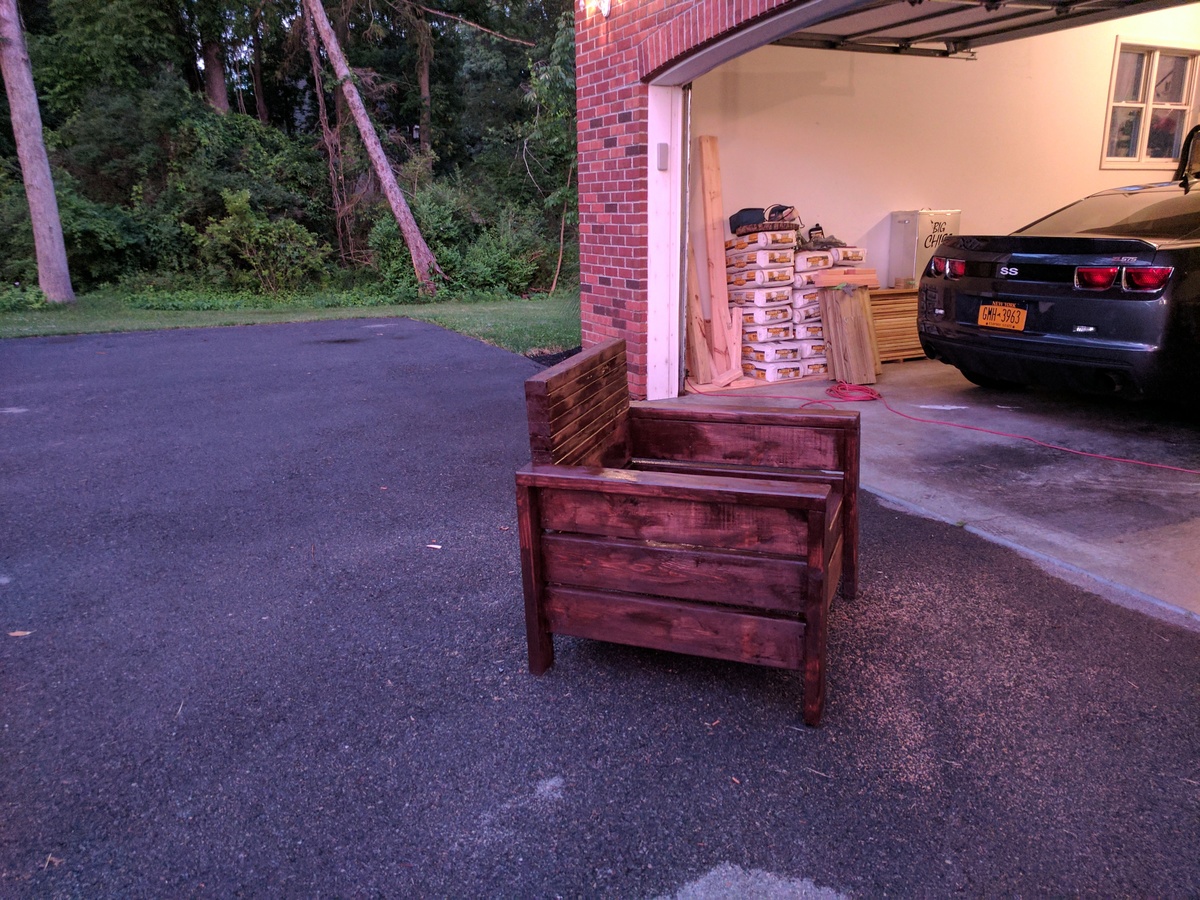
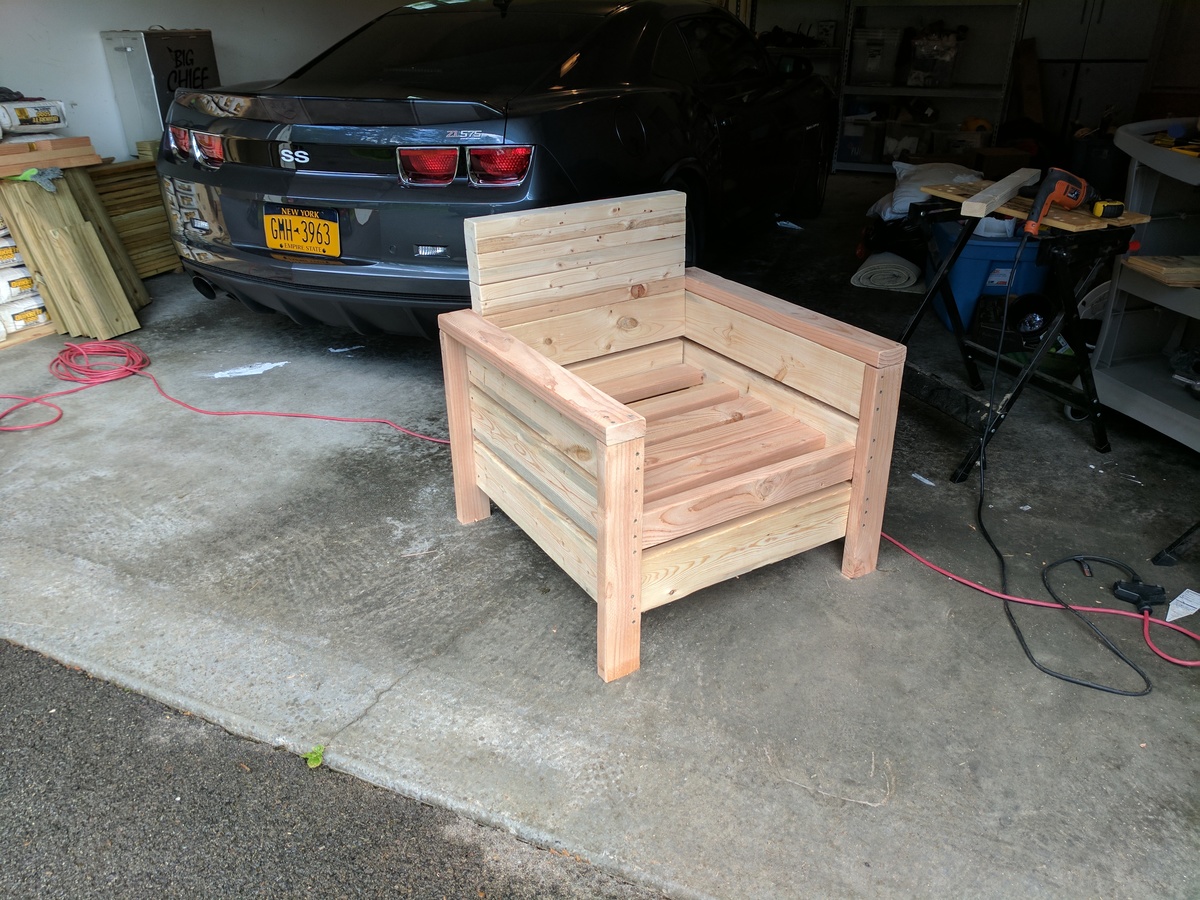
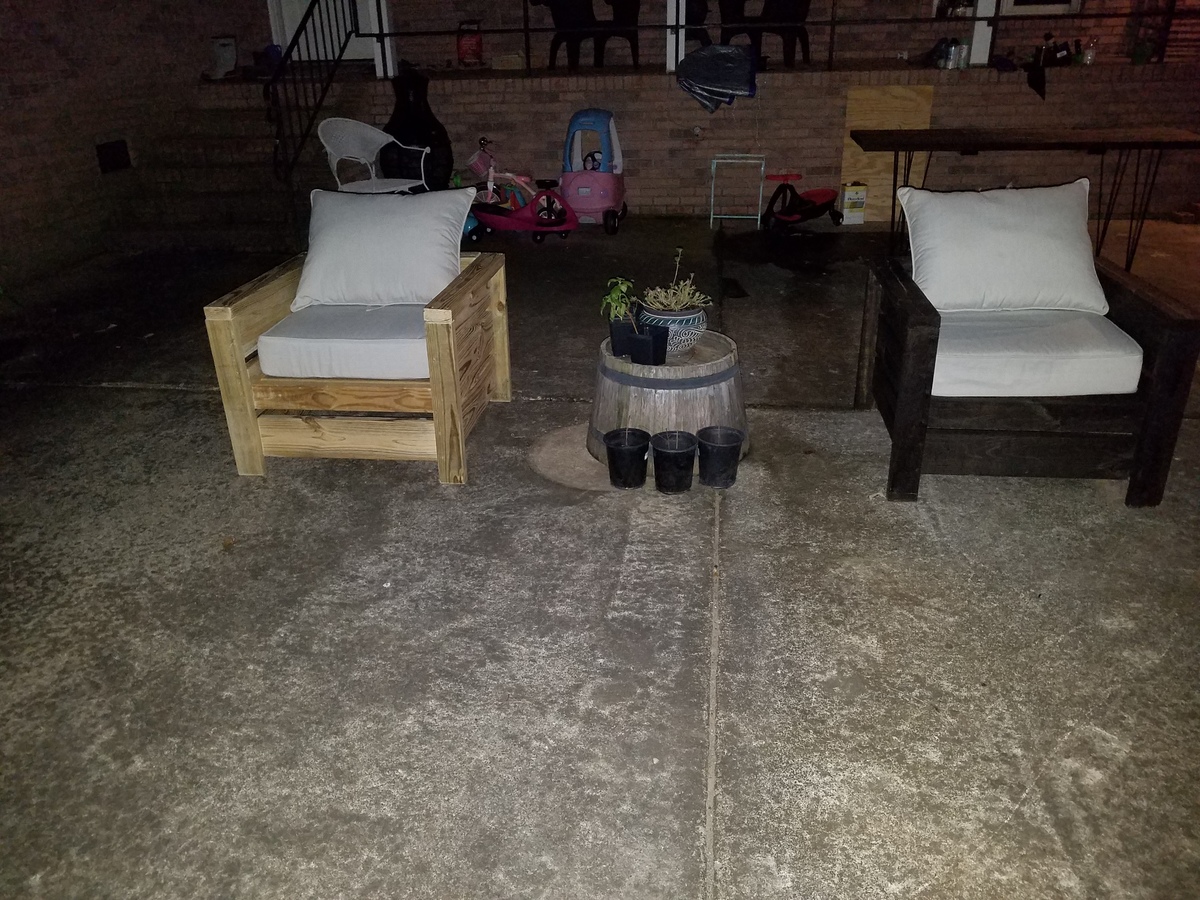
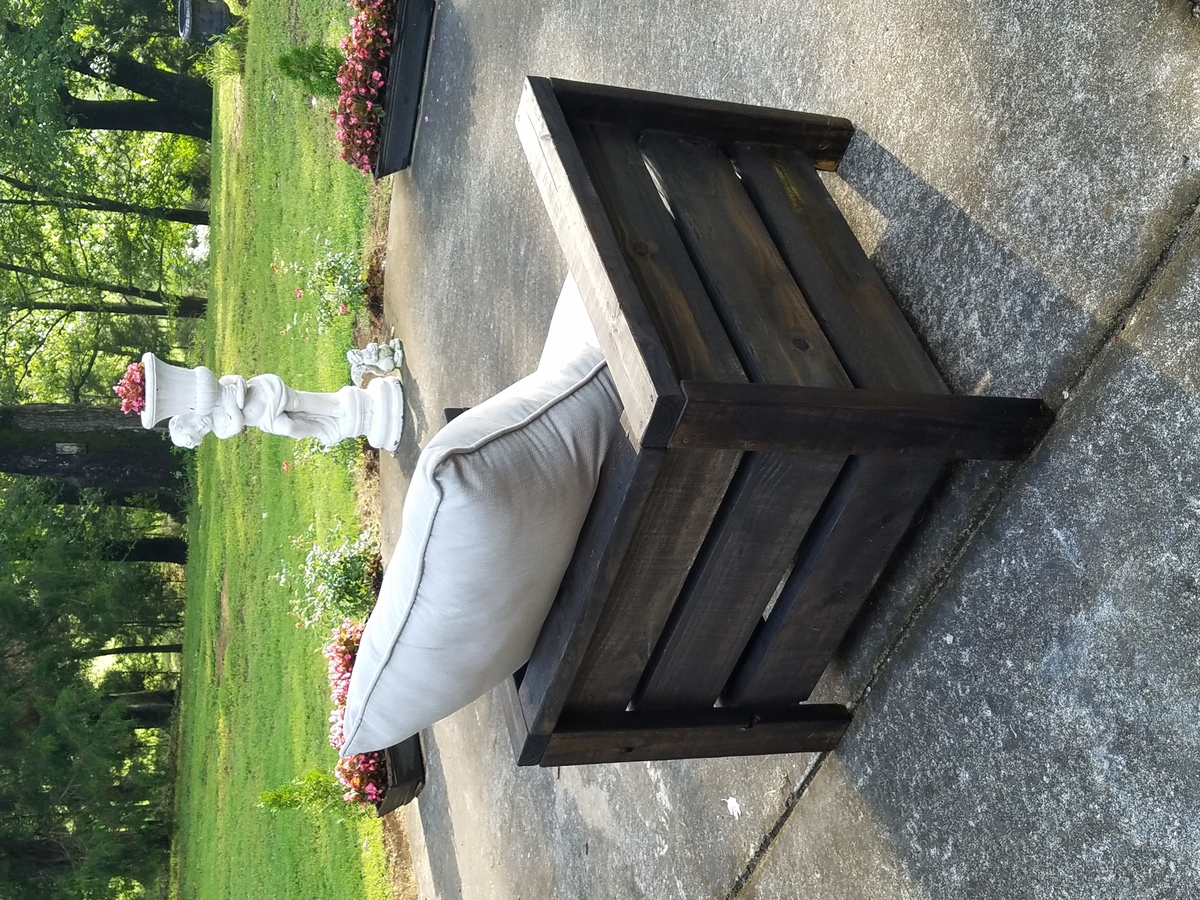
2x4 Adirondack Chairs
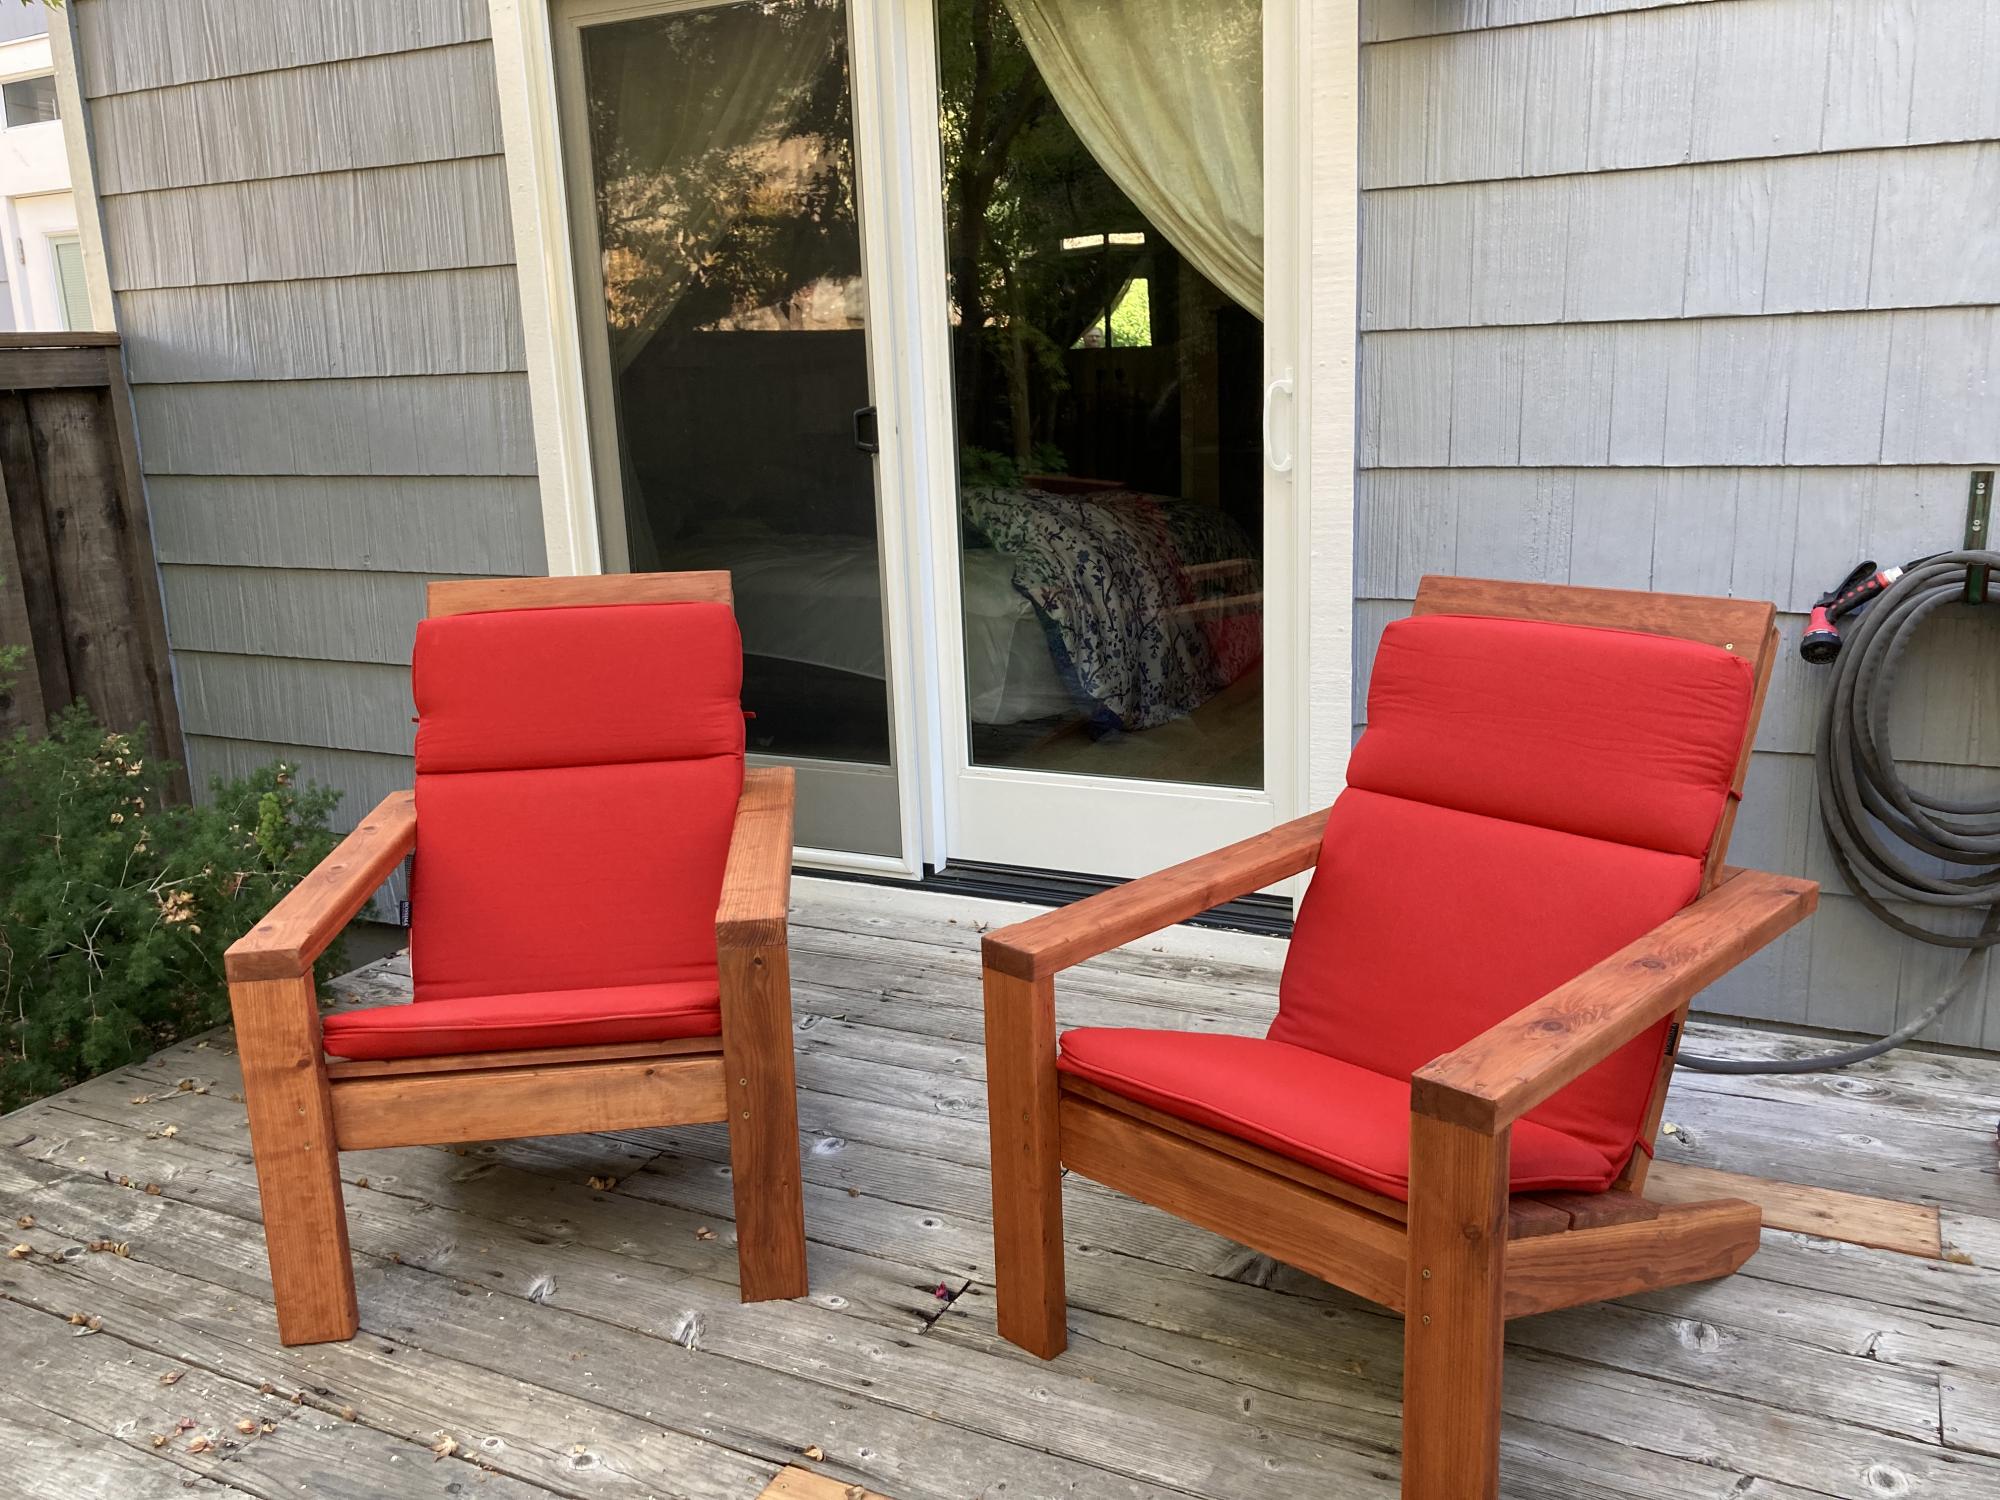
My first “Ana White plans” project. Great plans and easy to follow. Very comfortable chairs.

Built from Plan(s)
My first “Ana White plans” project. Great plans and easy to follow. Very comfortable chairs.
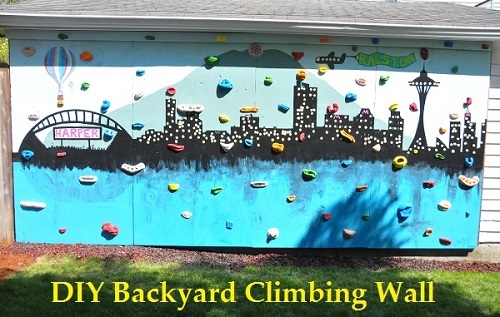
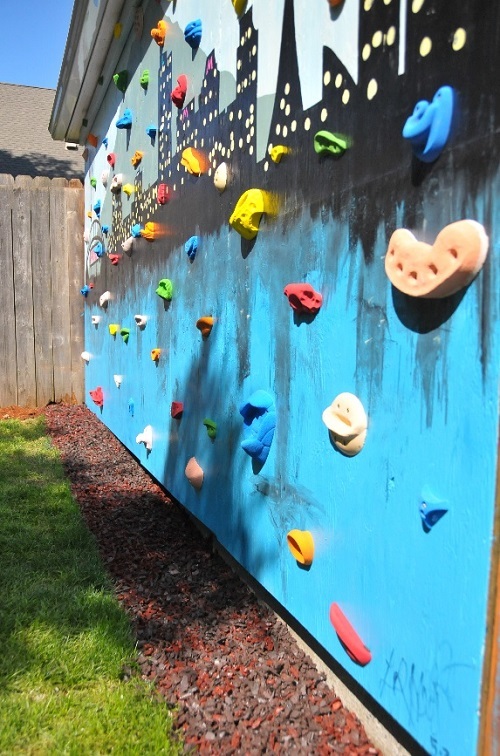
My very first woodworking project was Ana-White's farm house bed! I've made so many projects now, I decided to start fancy'ing up my backyard!. We took all pressure treated wood to make the wall foundation, painted it, sealed it, then used Screw on Holds to make the climbing portion.
I have a full tutorial listed here http://www.impatientlycrafty.com/2013/05/07/diy-backyard-climbing-wall/
Thanks Ana for helping inspire me to create more wood stuff!!!
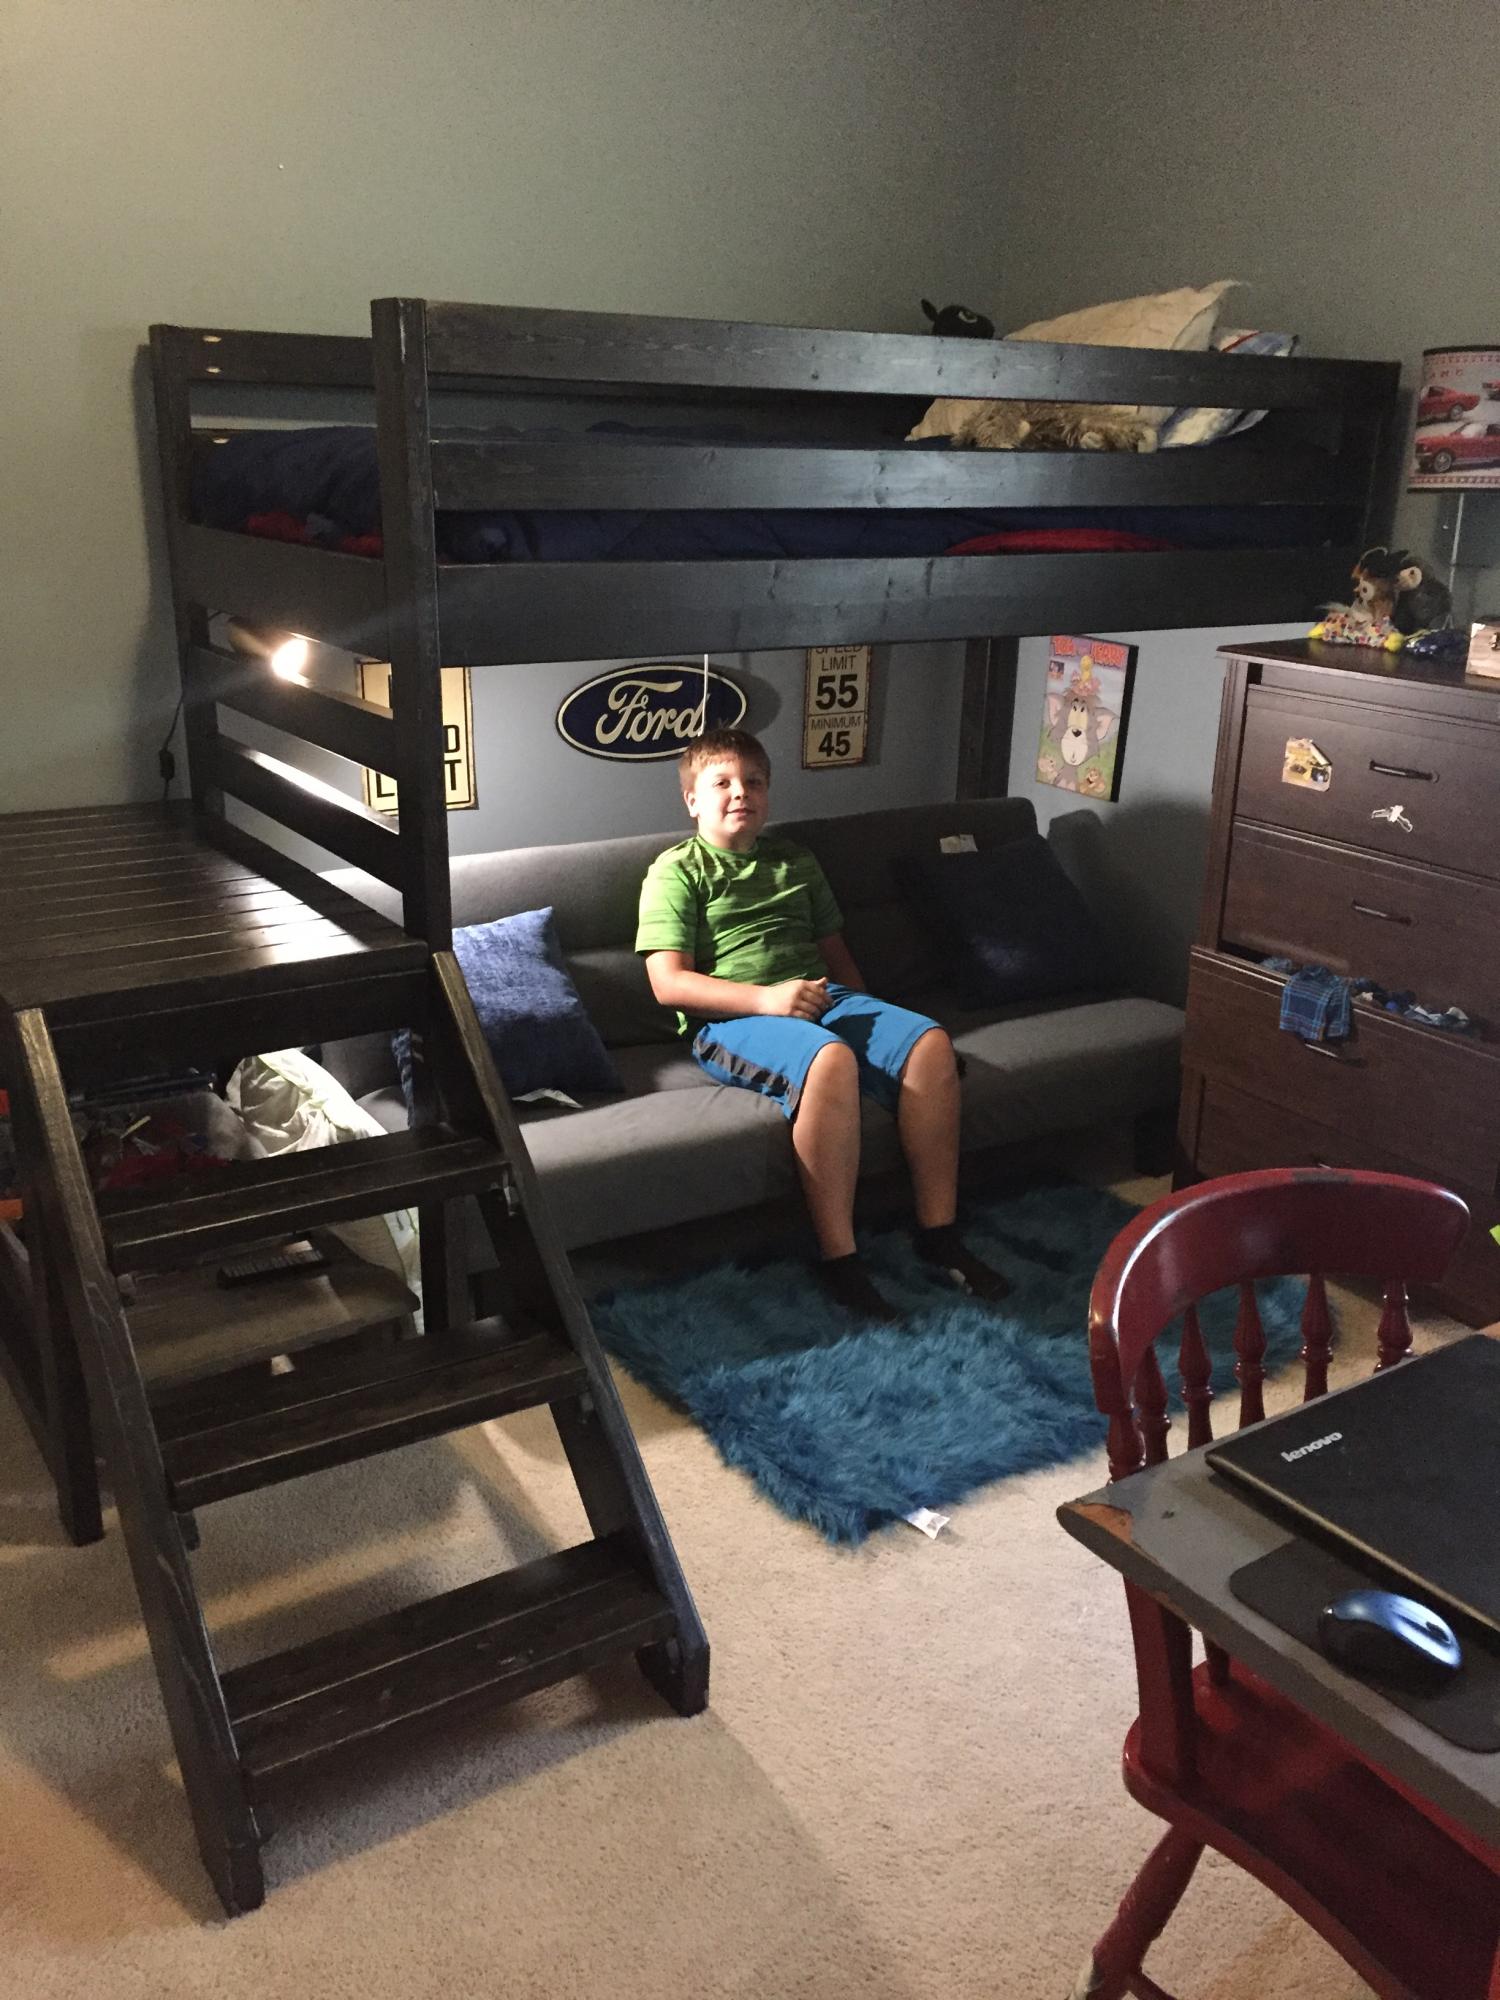
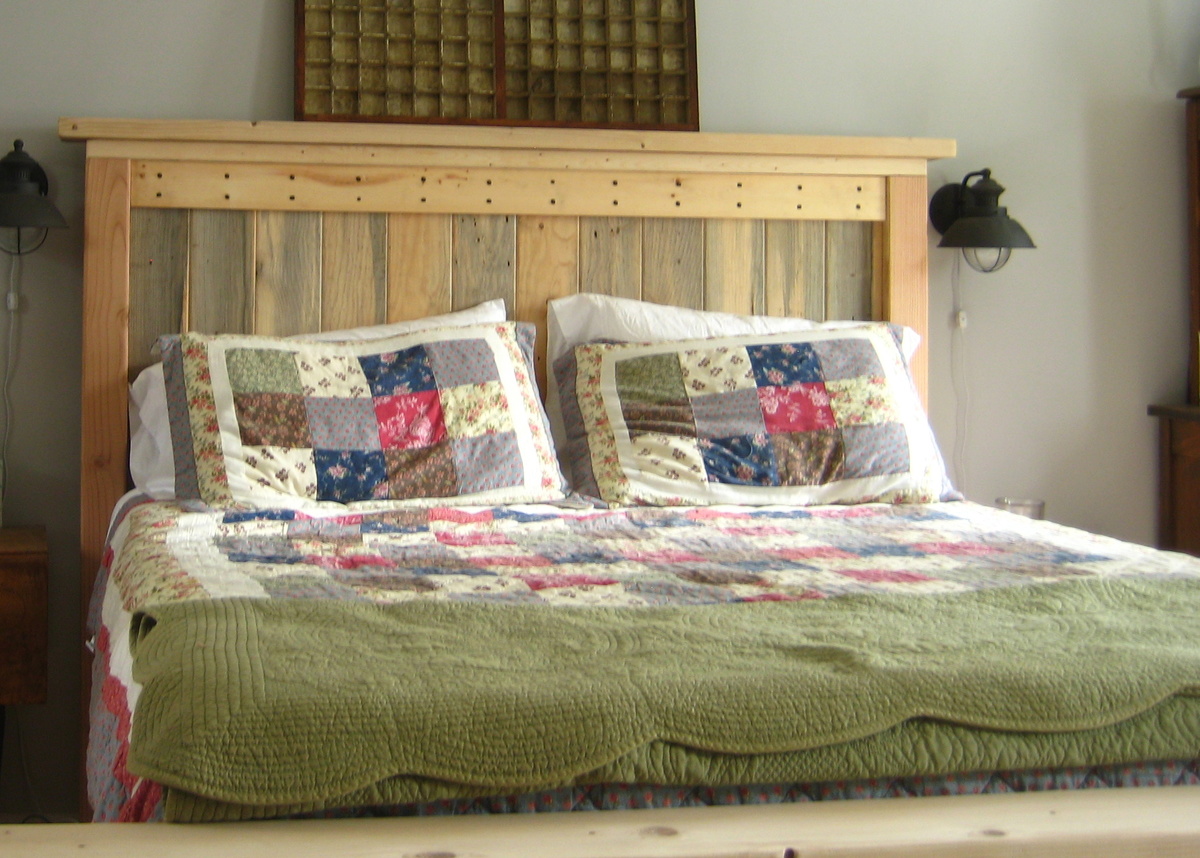
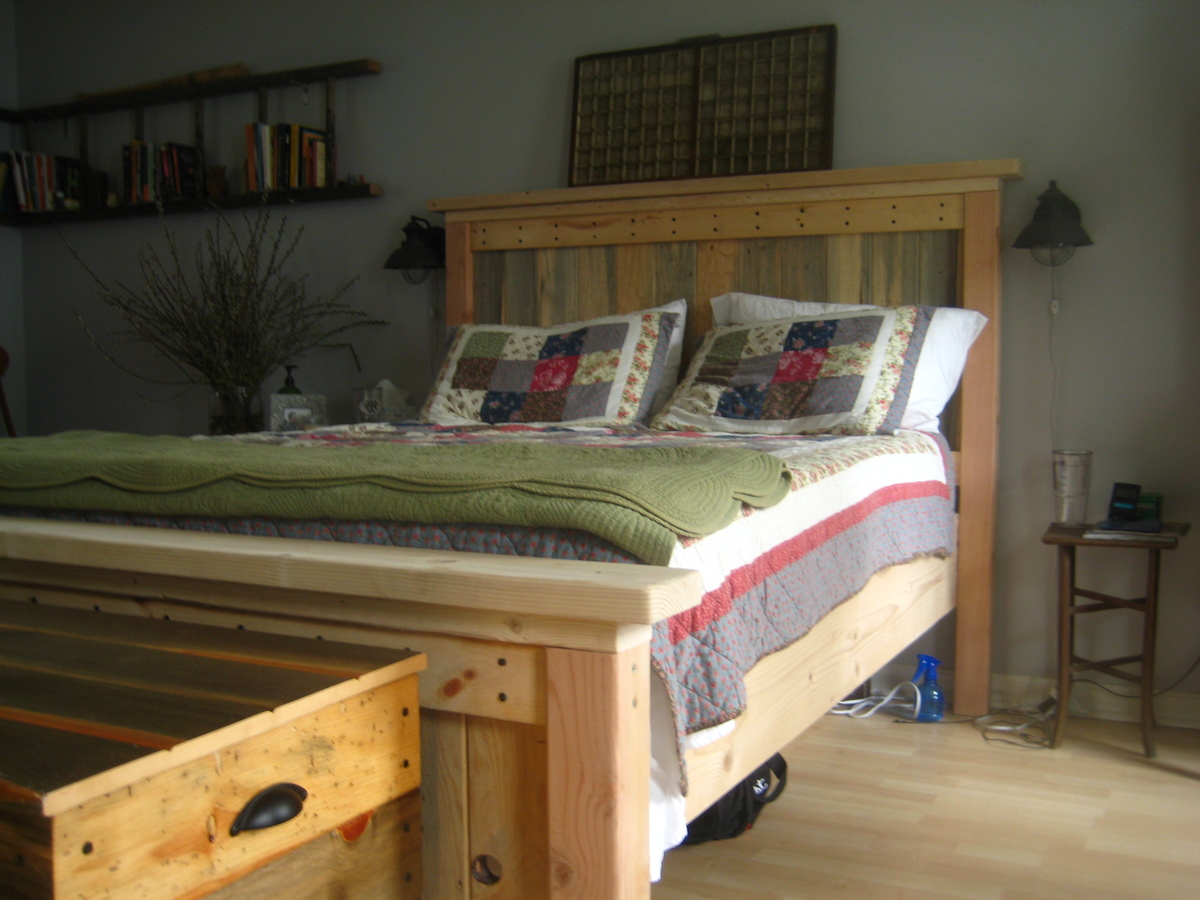
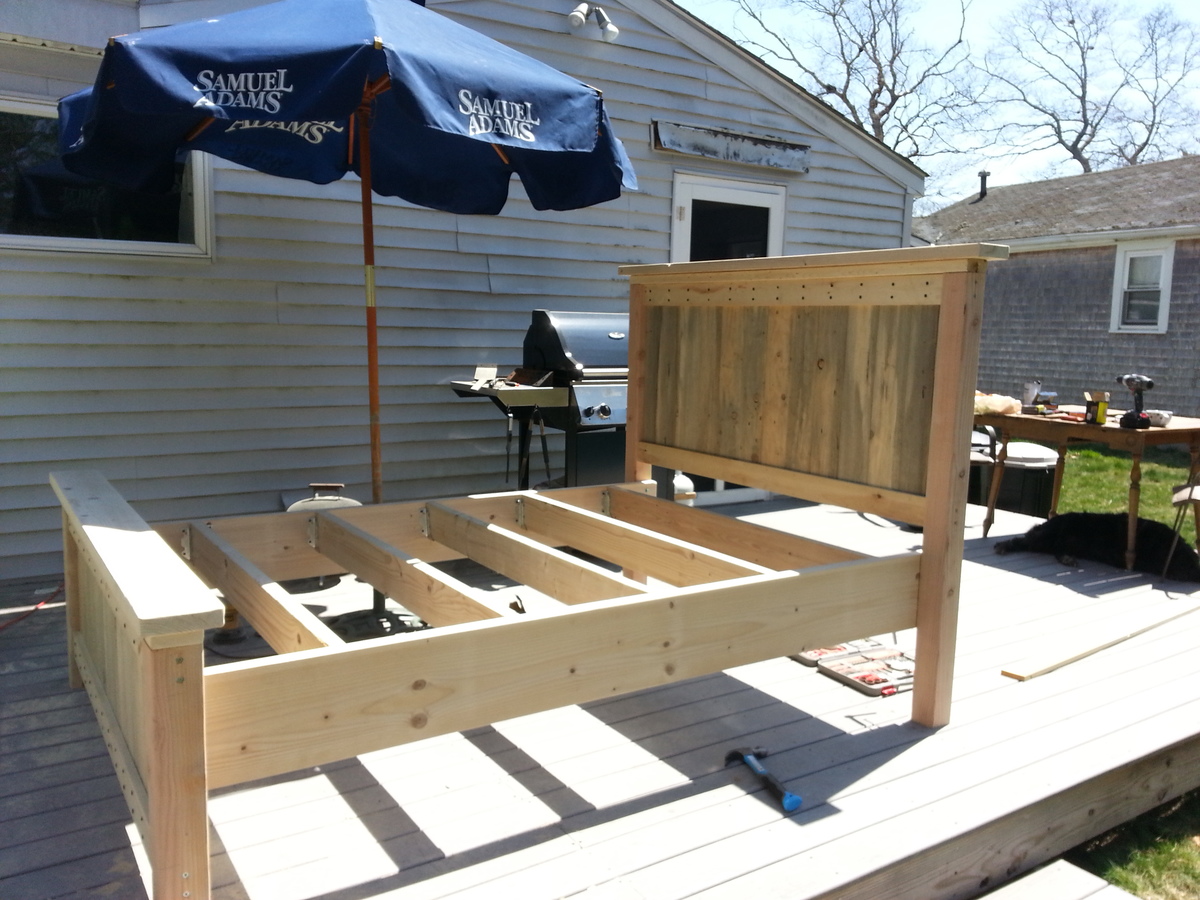
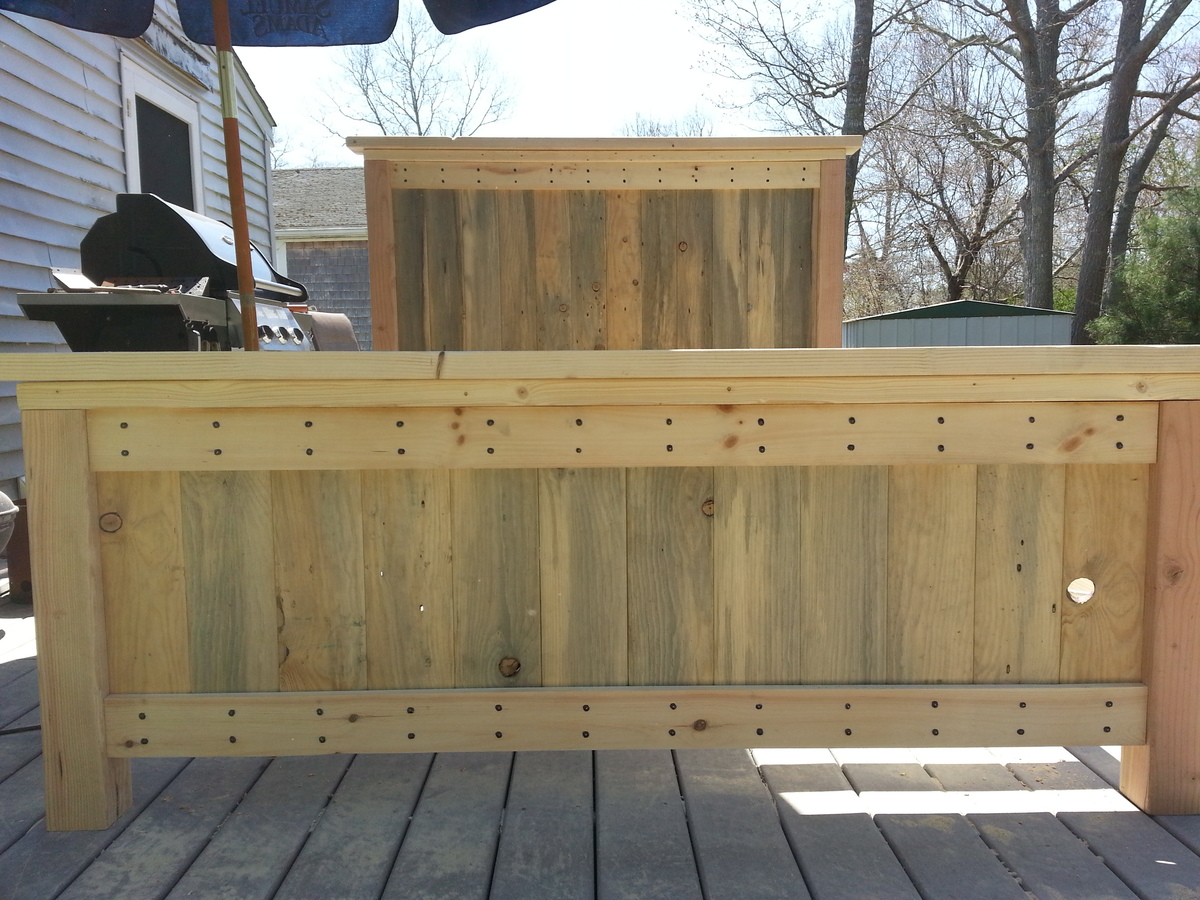
We finally built the #1 Project on my to do list. Took about 3 Days total with finishing and all. Love it so much, defintately my fave project to date! Have to do nightstands next!
My very first furniture build! Took me about 5 days, but as a beginner I found it very easy to follow the plans. I did buy a Kreg jog for this project, highly recommend it! Other tools used were a miter saw, circular saw, and drill.
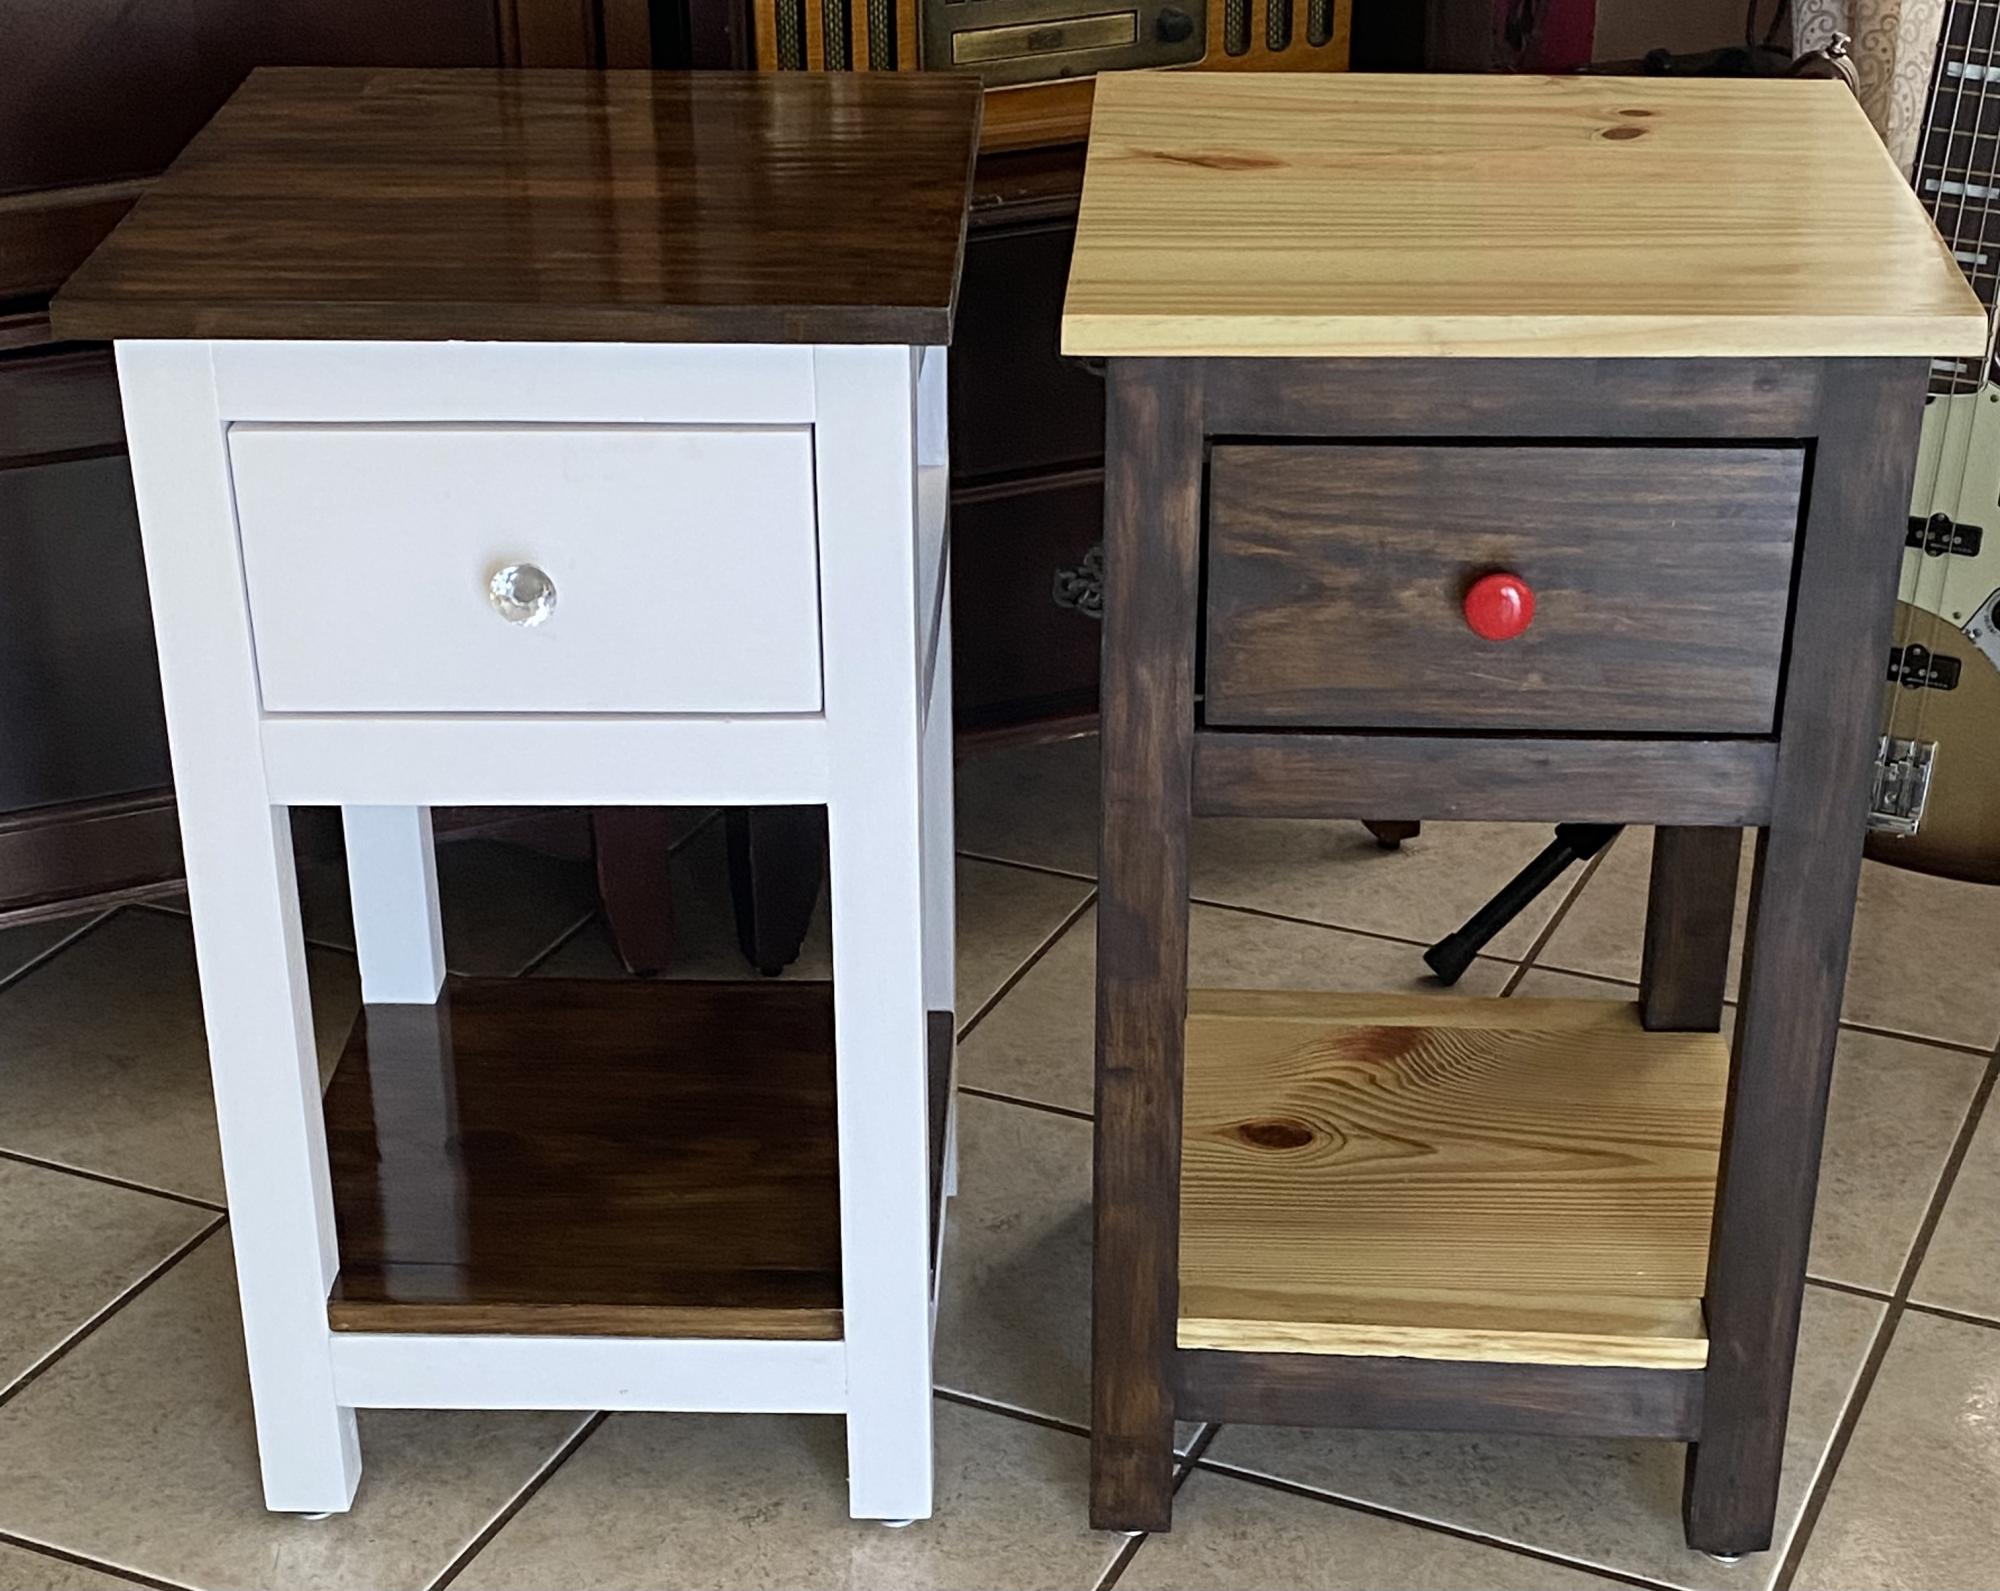
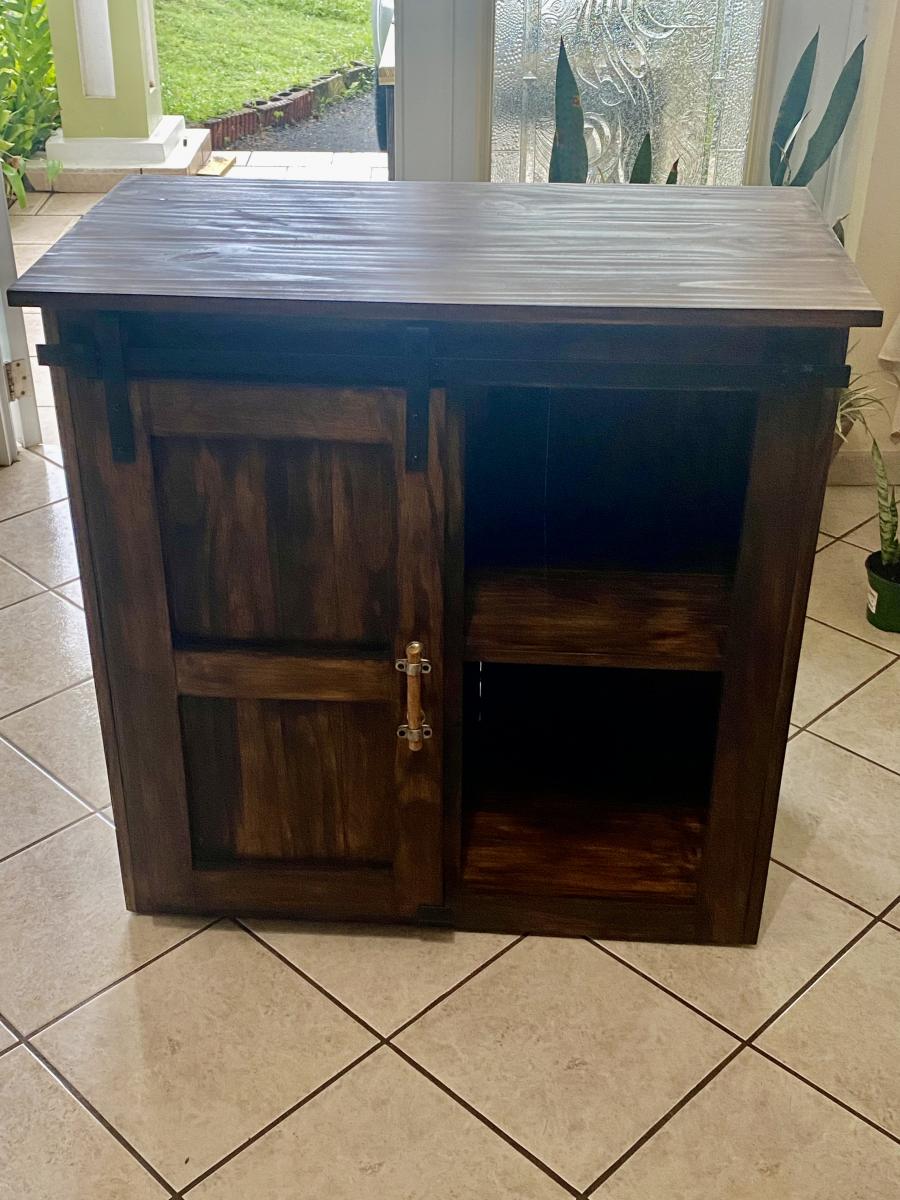
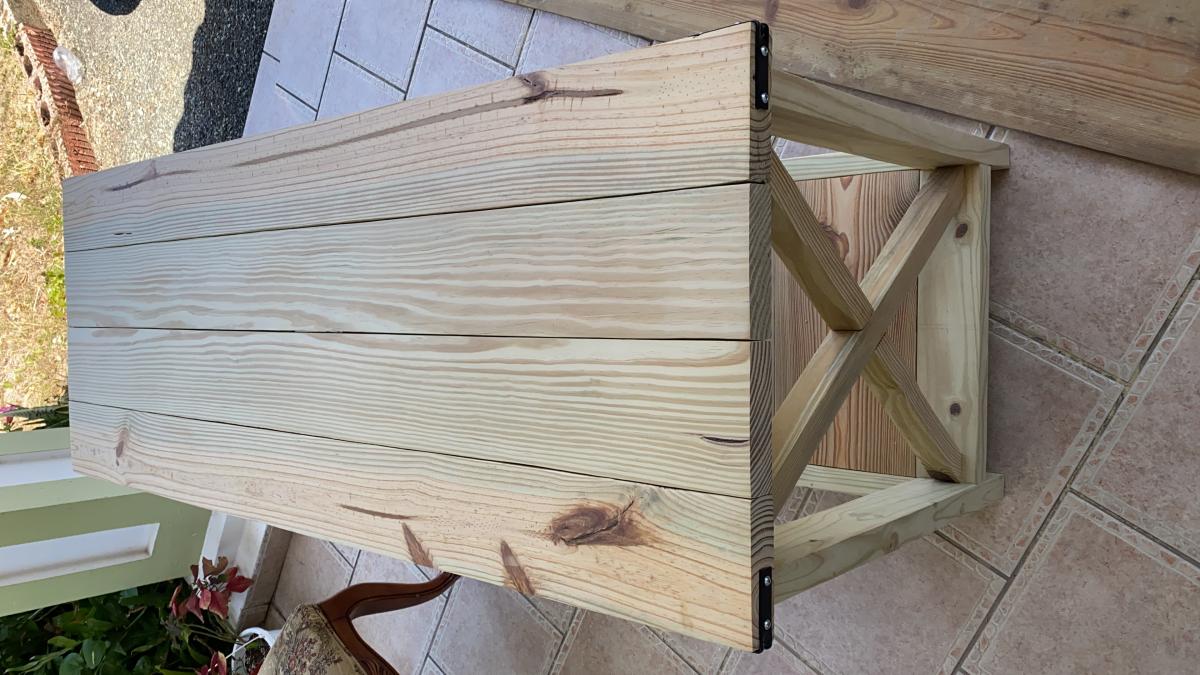
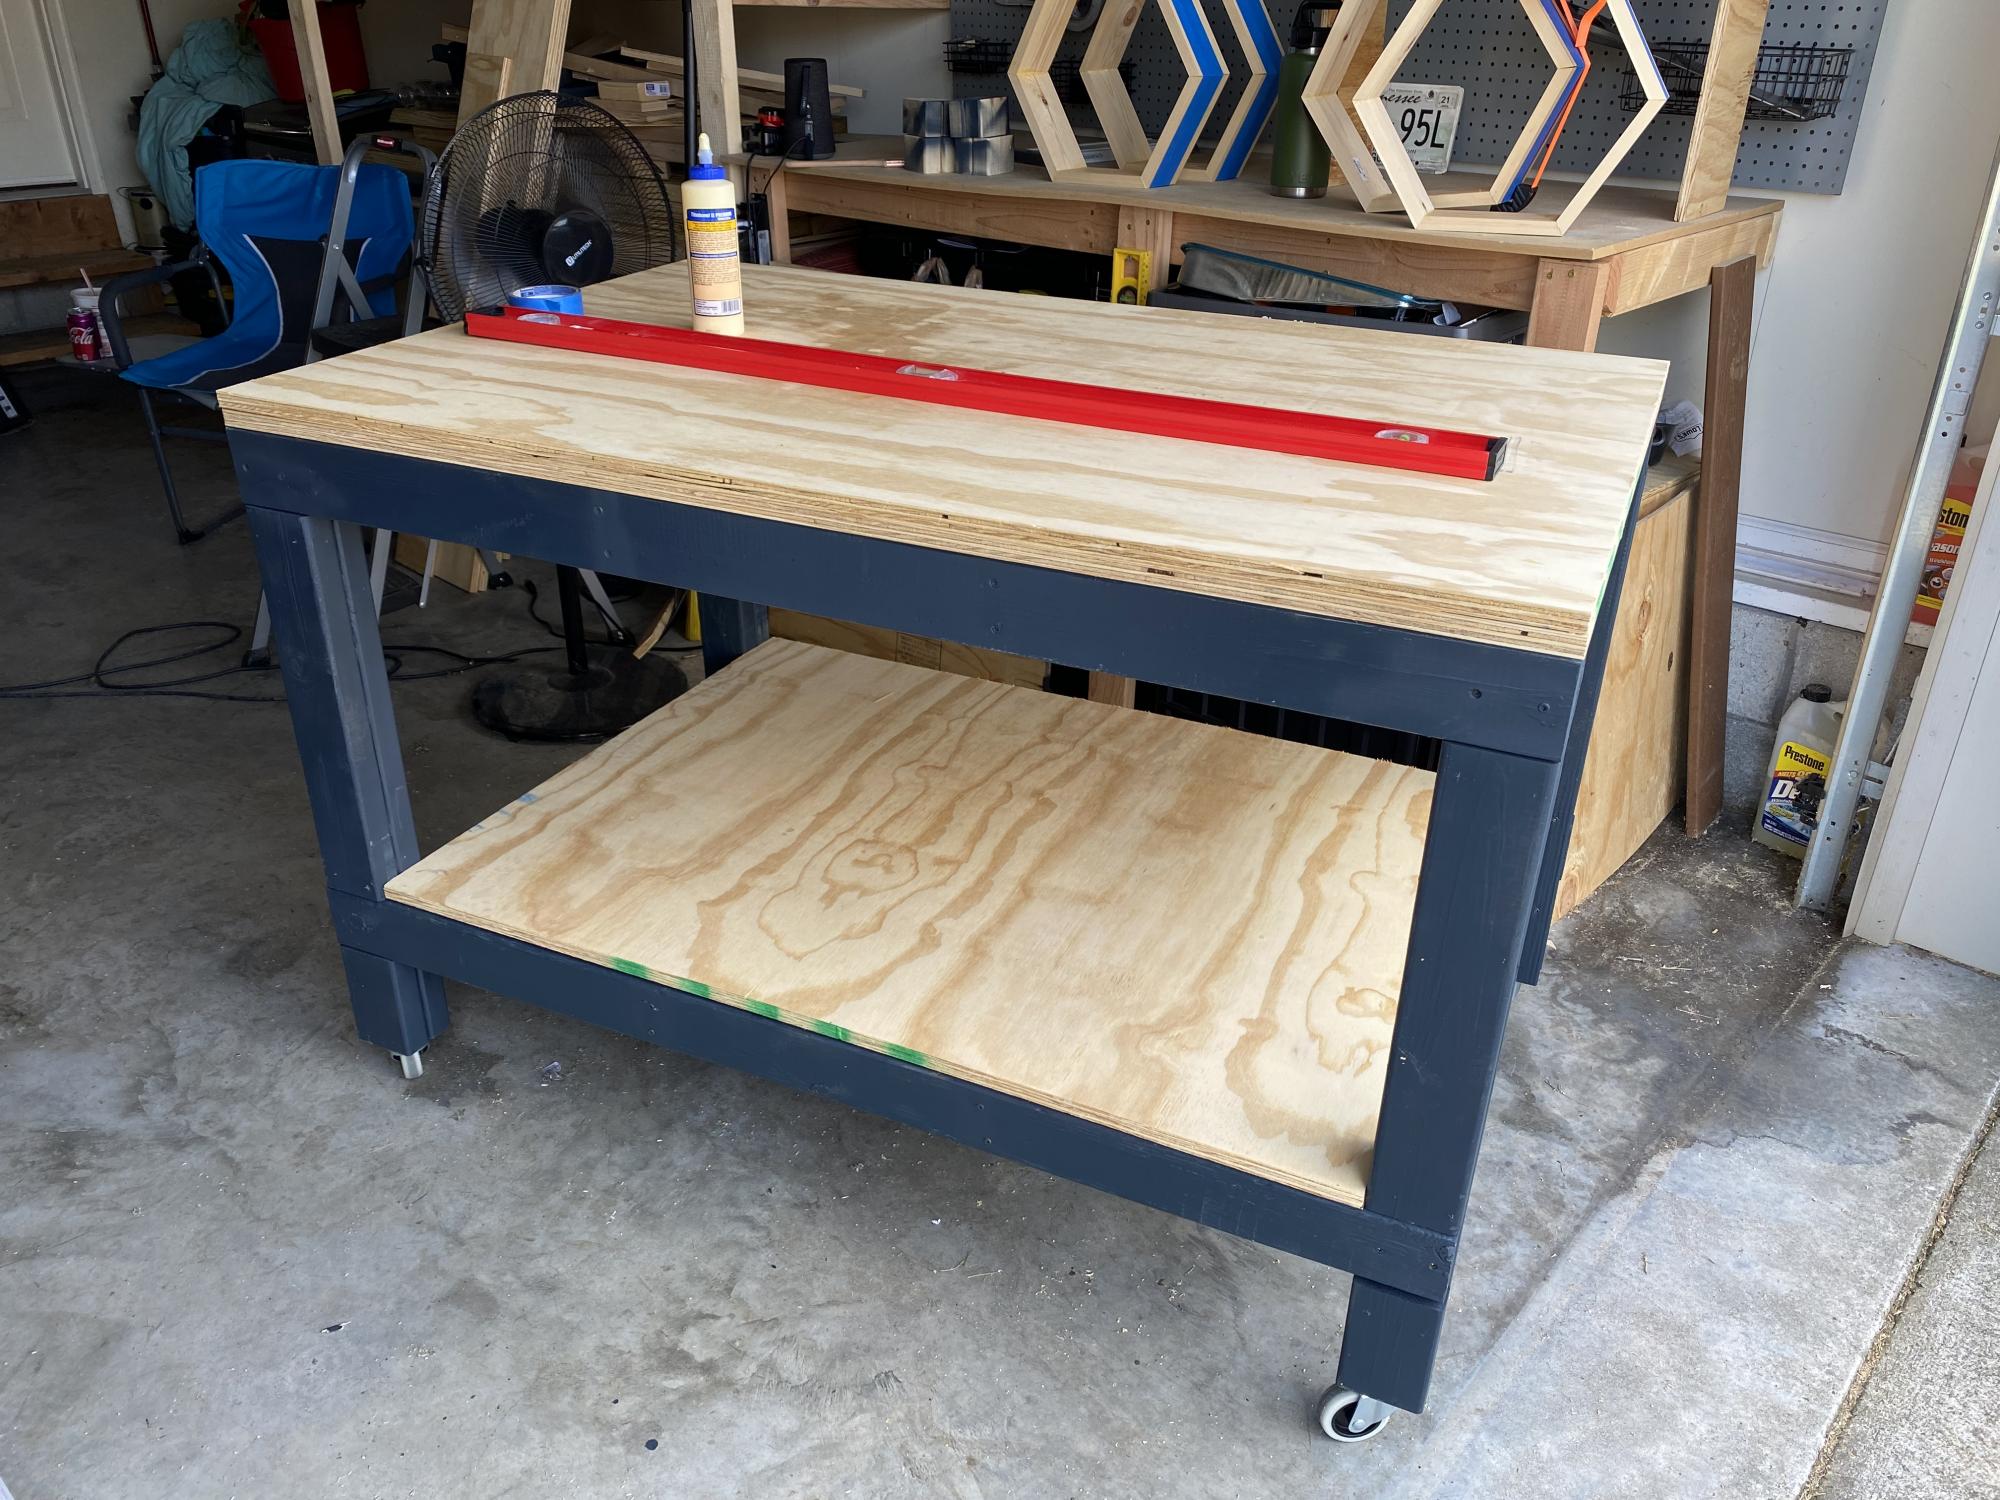
I have built various projects. A work table, a barn door cabinet and couple of Farmhouse nightstands for my grandson and granddaughter. It was fun!!
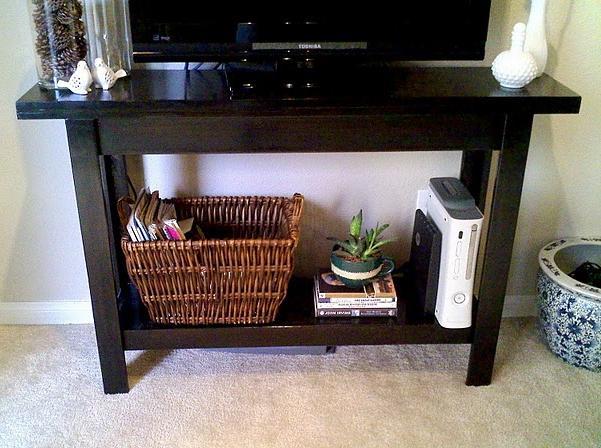
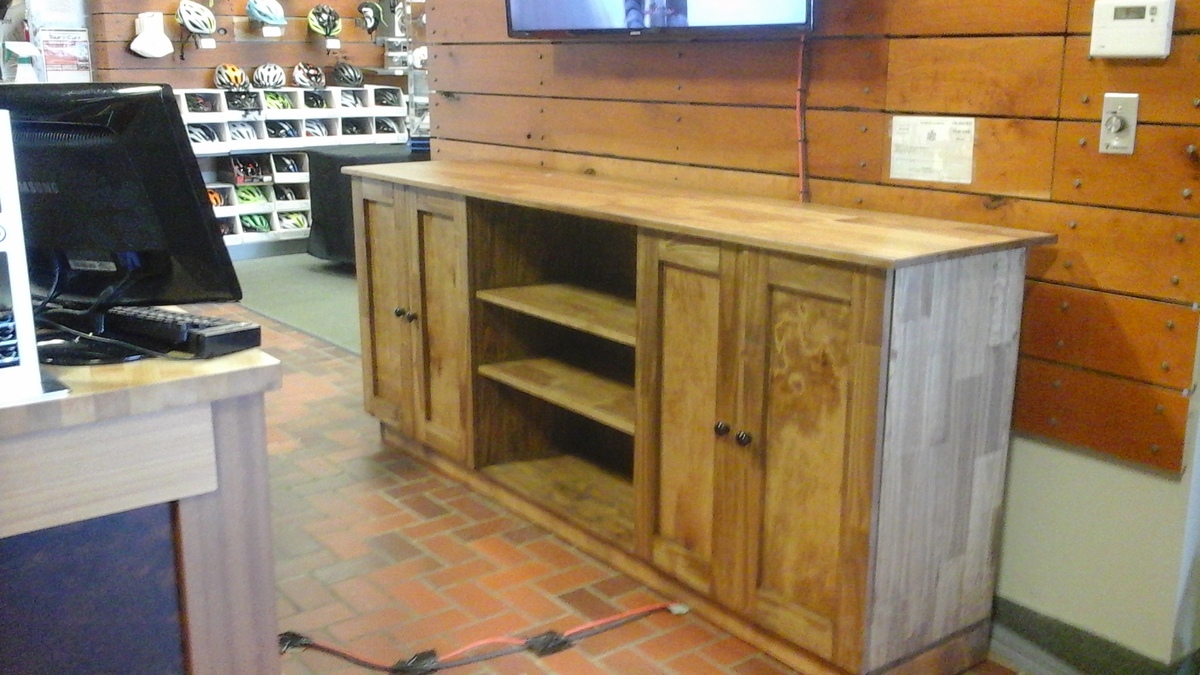
I just wanted to send in some photos of the simple, cheap, and easy console table that my father and I made a couple weeks ago. It only took us 3 1/2 hours to build, and your plans made it incredibly easy for beginning carpenters like us! We modified the plans slightly by adding a fully functionable shelf to the bottom, and used the Minwax stain in Ebony for a sleek Pottery Barn meets Cost Plus look. The total cost for this project was less than $50, and we still have leftover wood for future projects! Your tutorials are great, they make carpentry not-so-scary for beginners like us!! Thank you, thank you, thank you!! For more pictures, feel free to drop by my blog http://www.jamesandkelsey.com/ Thanks again!

Gave the plans to my father-in-law who built it for our daughter. Turned out great with no real issues with the plans! I love having the lid/seats built into the design.

Thu, 05/09/2013 - 13:06
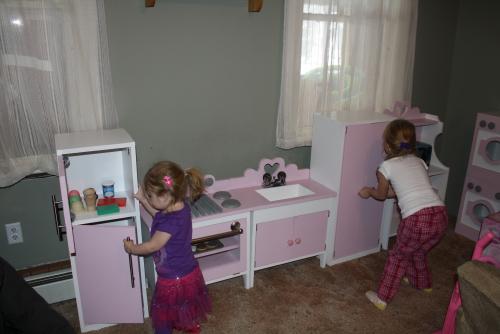
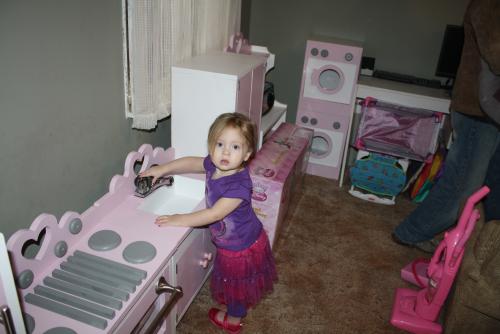
I love seeing all the toys in there. There's no denyin' that's gettin' some good use!

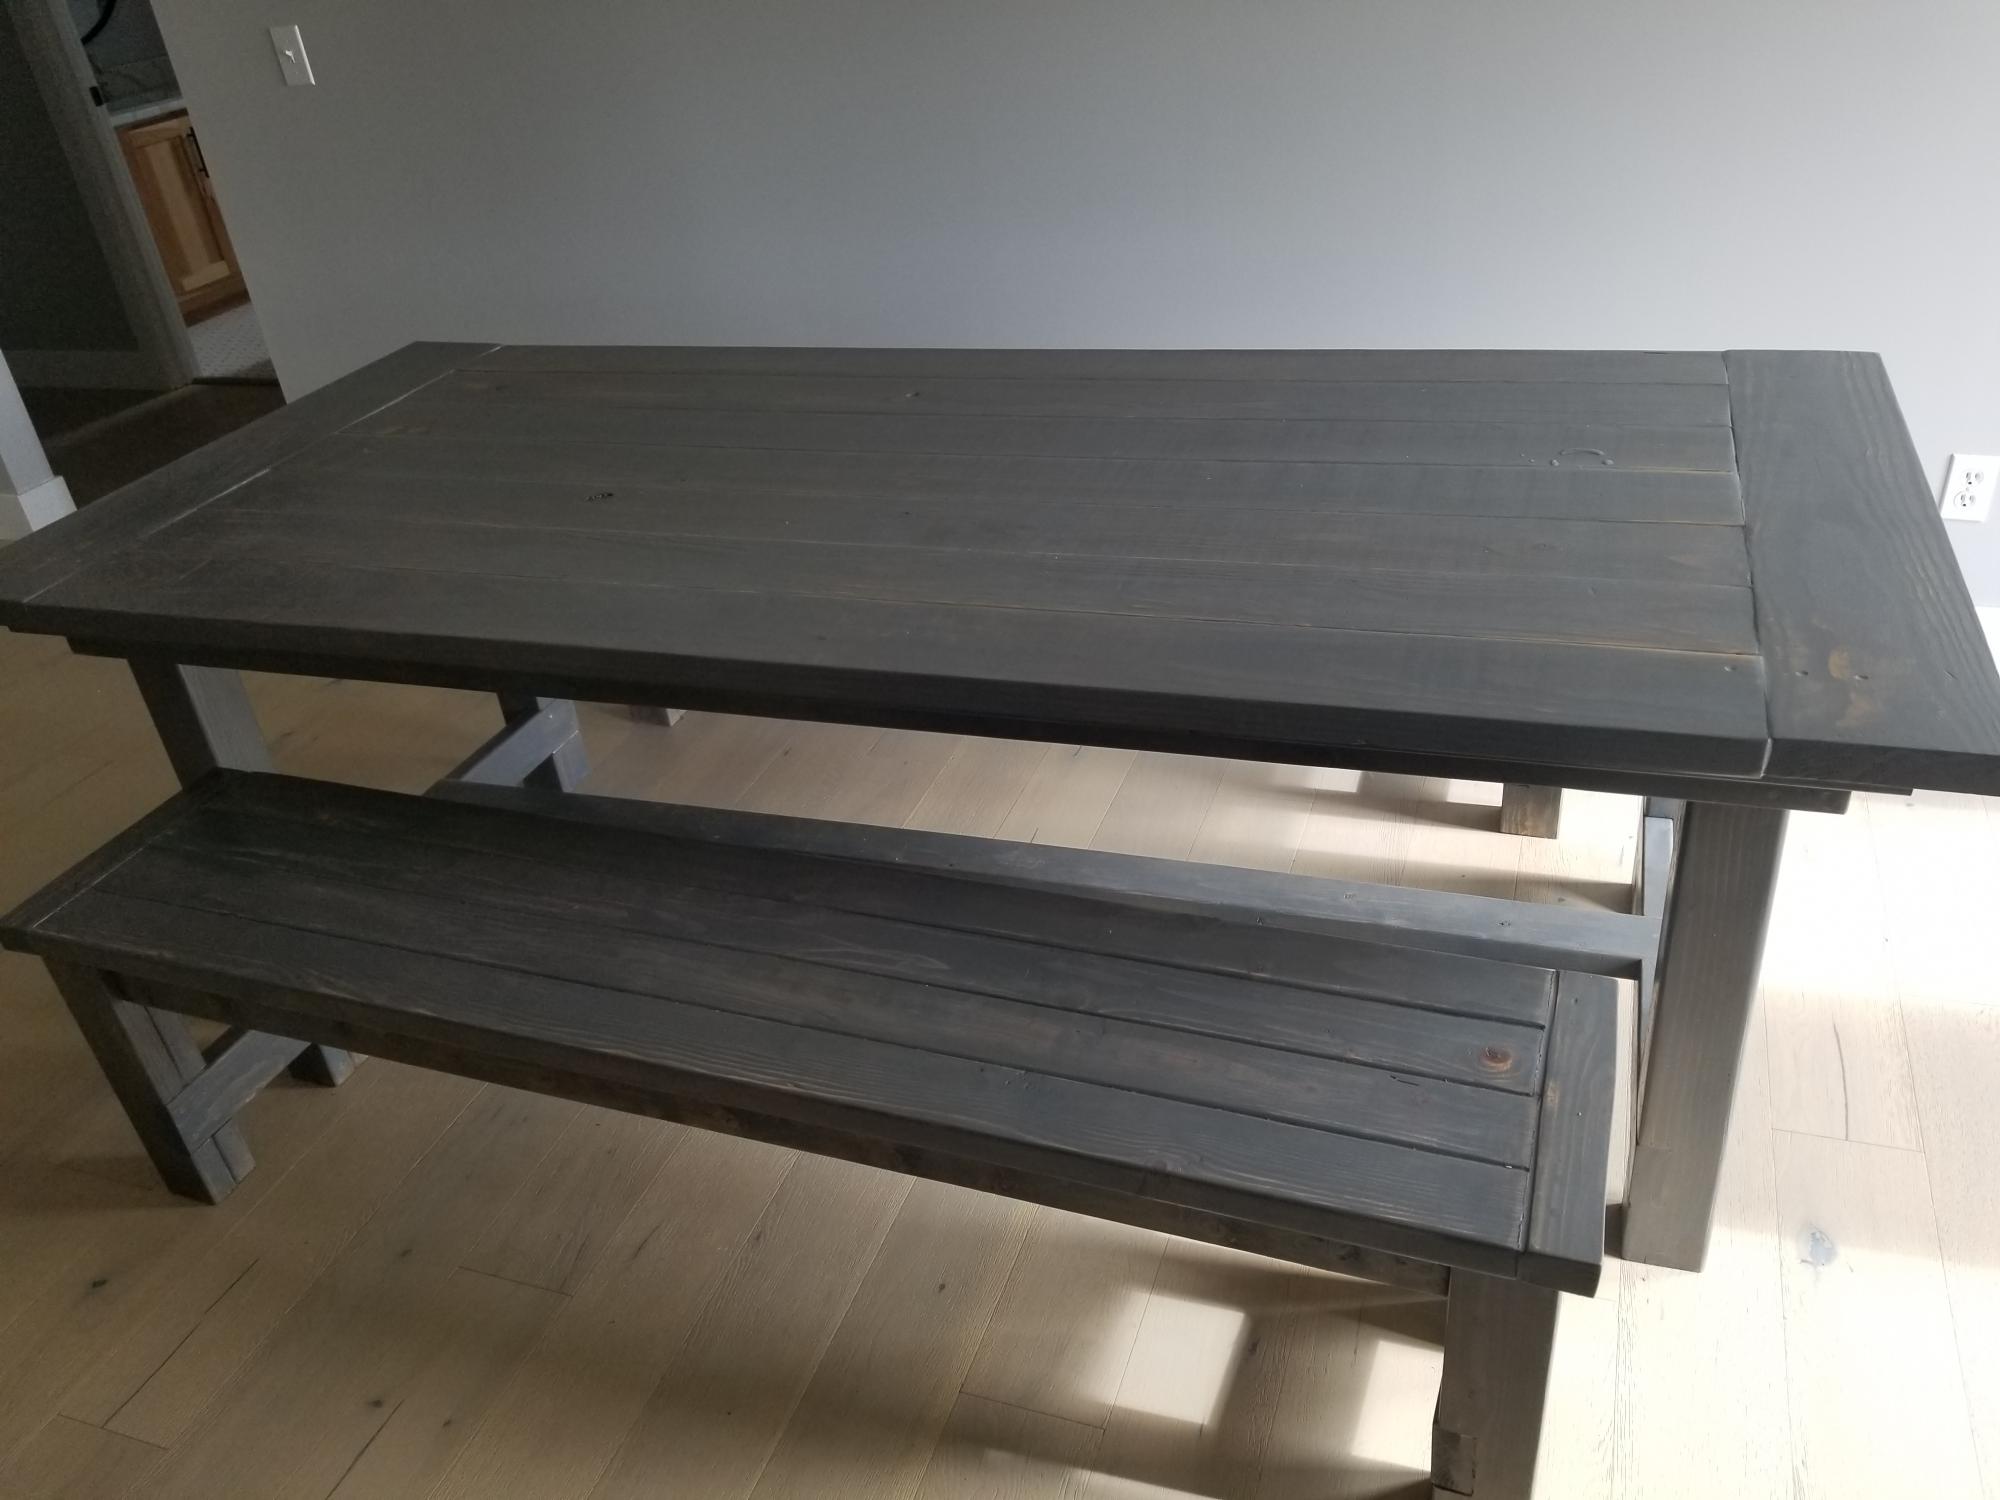
My husband built this table from the Farmhouse table plans. Just changed up the top somewhat. It's beautiful!
I'm making this for my wife, I added a little Riser on the back because it won't be leaning up against the house and I didn't feel back was high enough.
If you find yourself in the 6-foot range I would recommend increasing the leg height and adding a 4th 2x6 or even a 5th to increase the bsckrest.
My daughter found this plan on the Ana White website and now, we have made 3 tables total. Pictured is the 2nd one we built together and is currently in her house now.
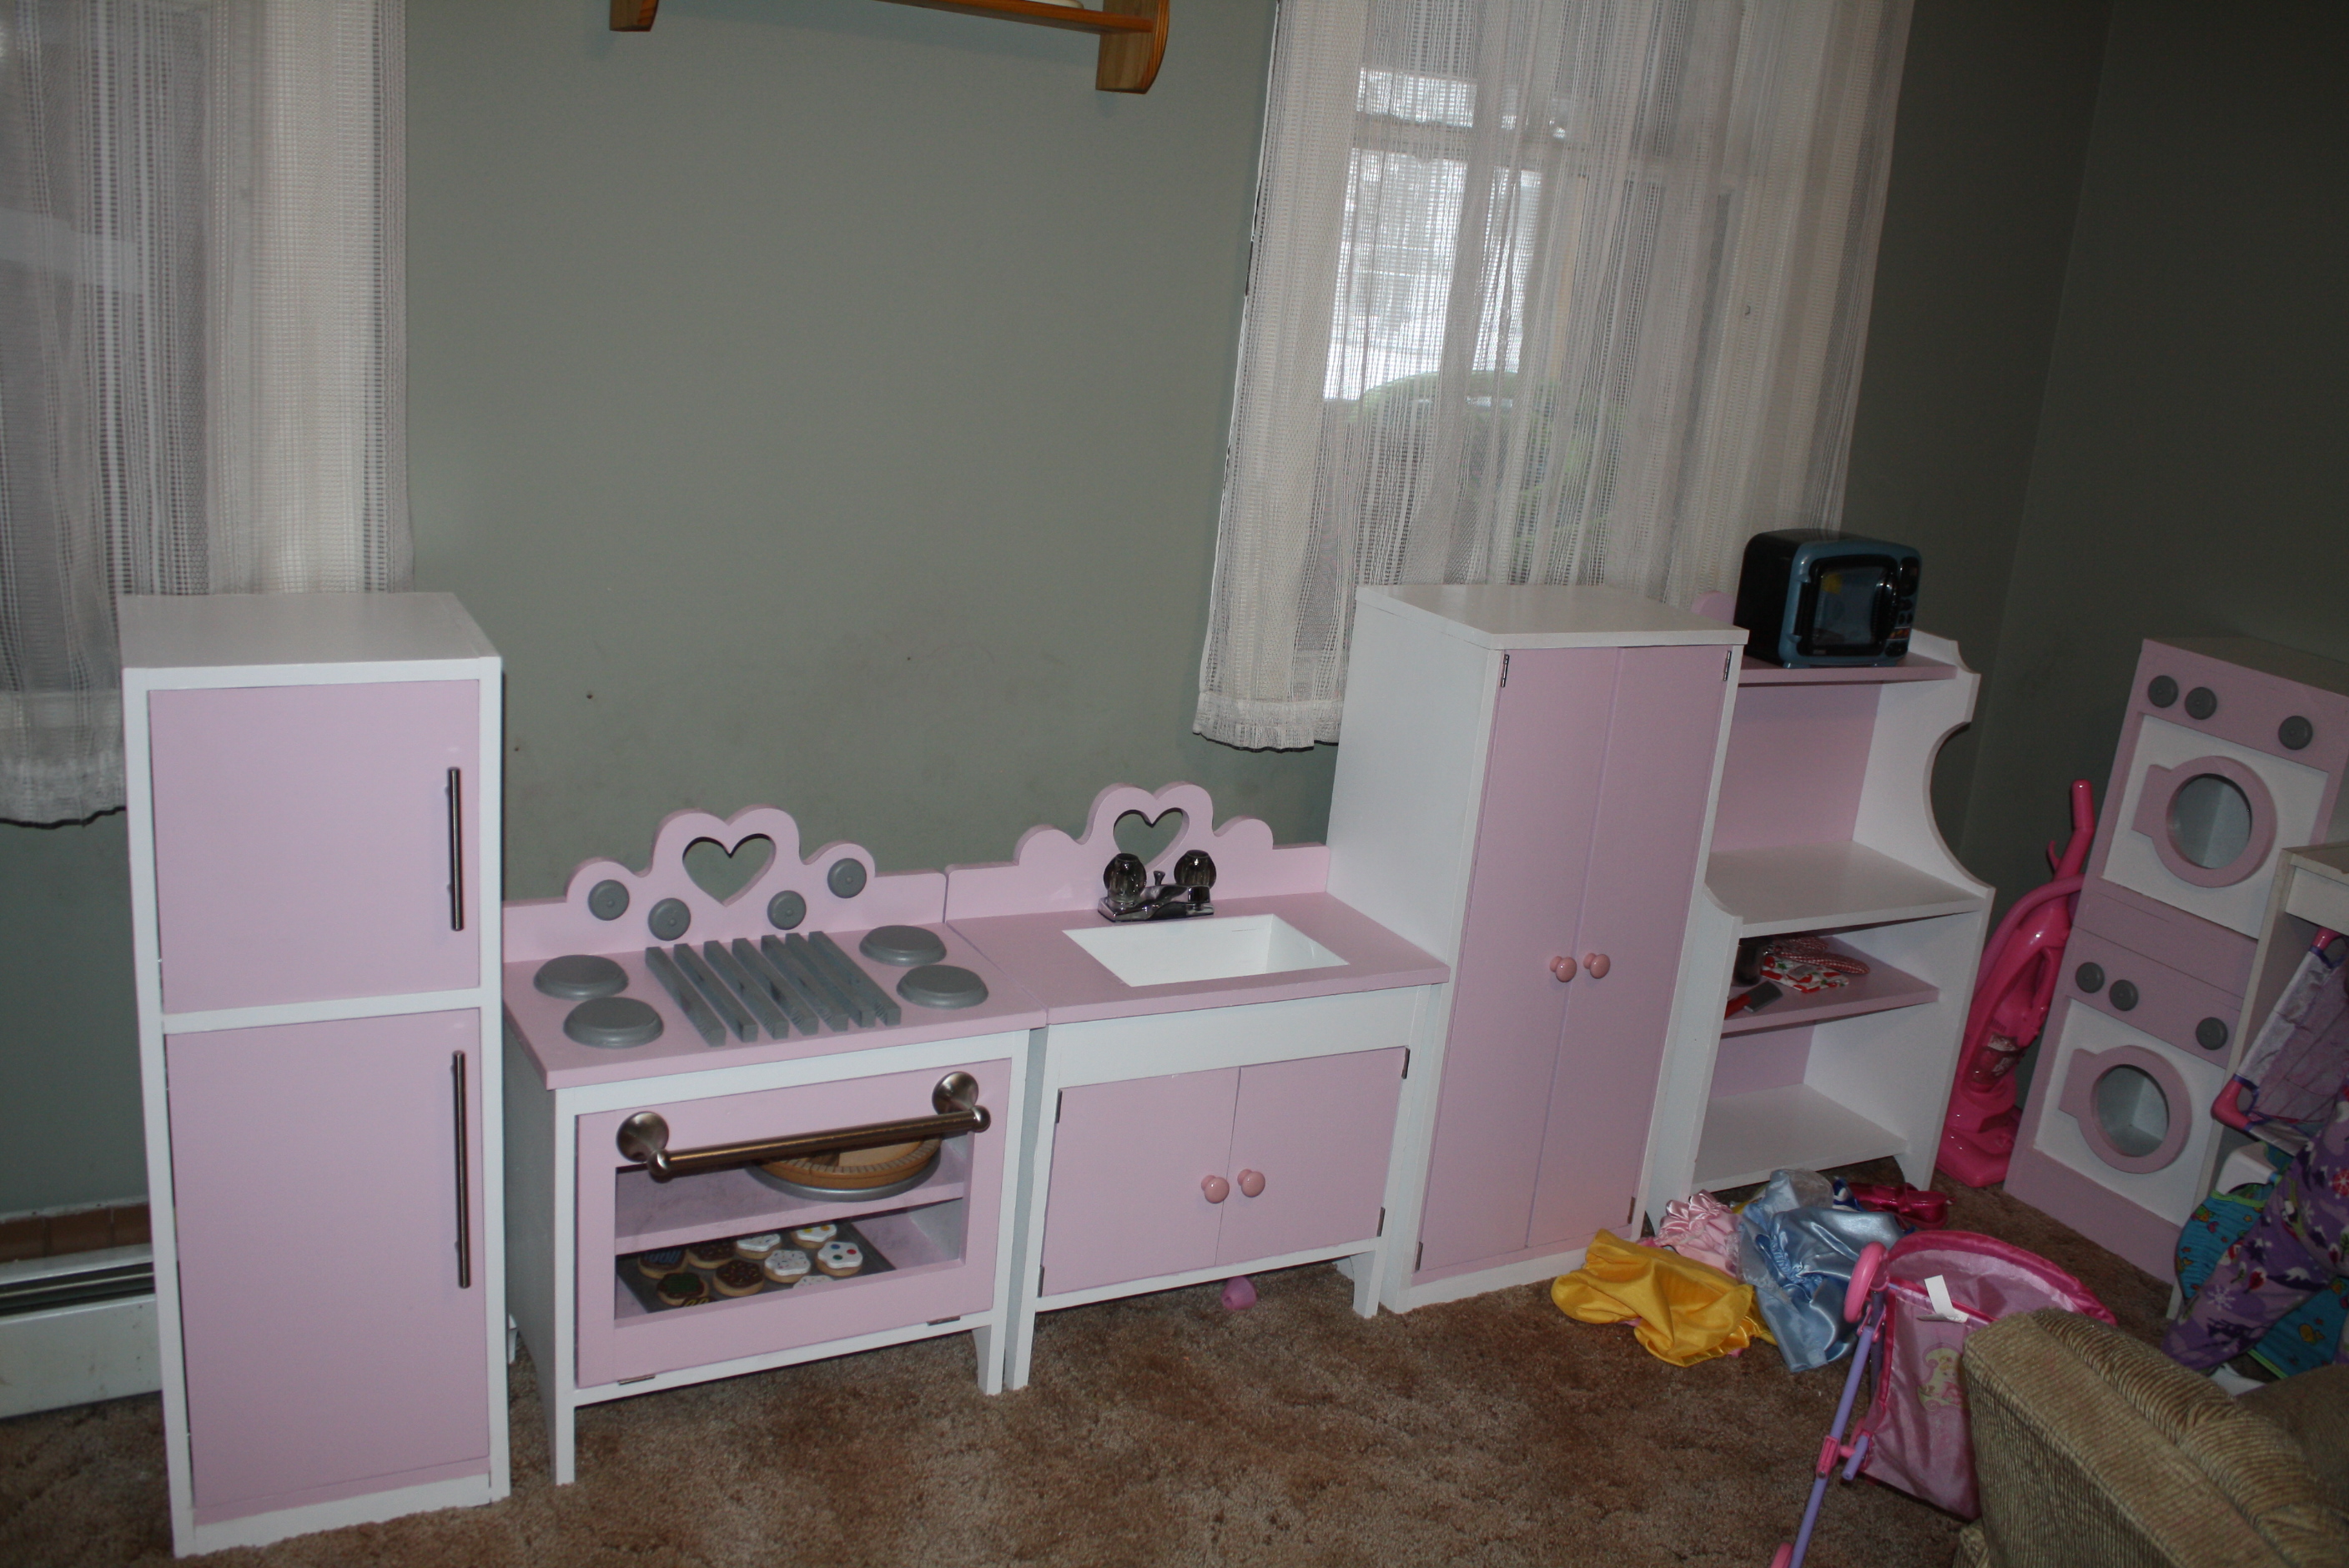
My husband I built this kitchen set for my daughter's 2nd birthday. She just loves it. For the sink I used the same plans as the stove and changed them a little. There is not enough room below but we used the Cute Play Pie Hutch plan too. The double door fridge we use as a pantry. I can't find the plans for the fridge but we used Ana's plans for that too.
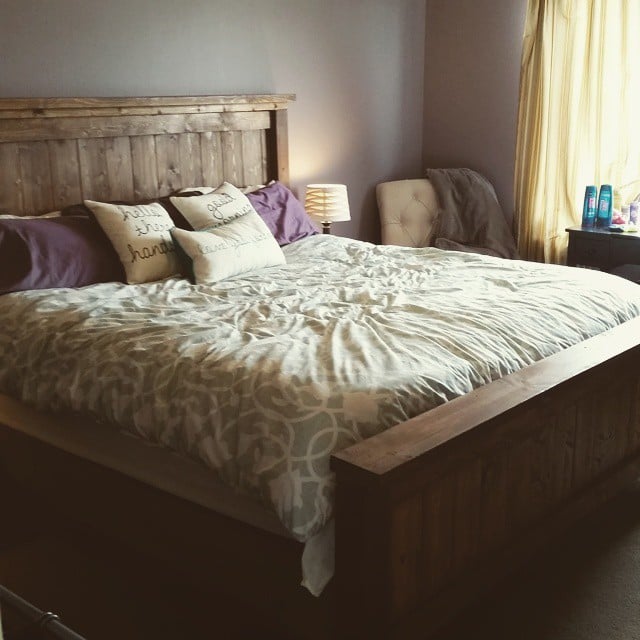
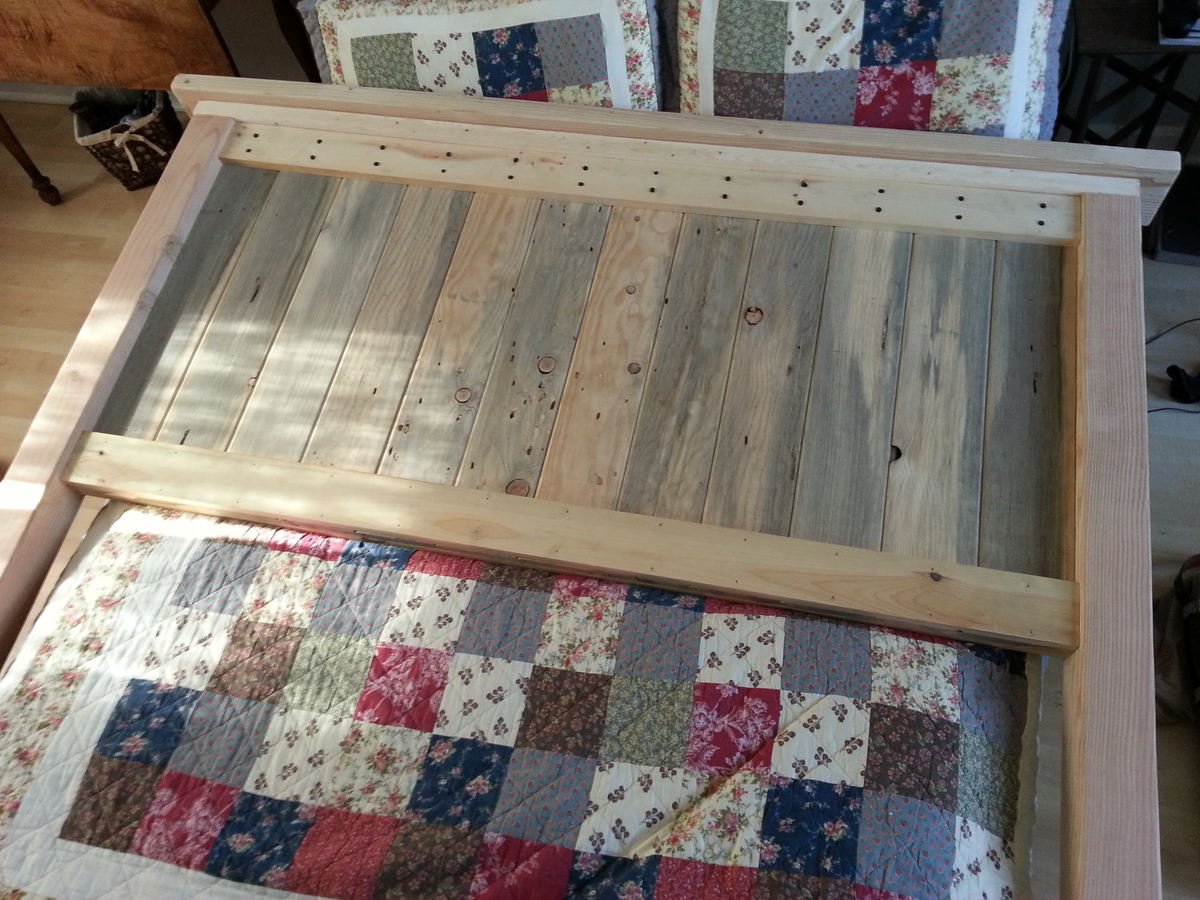
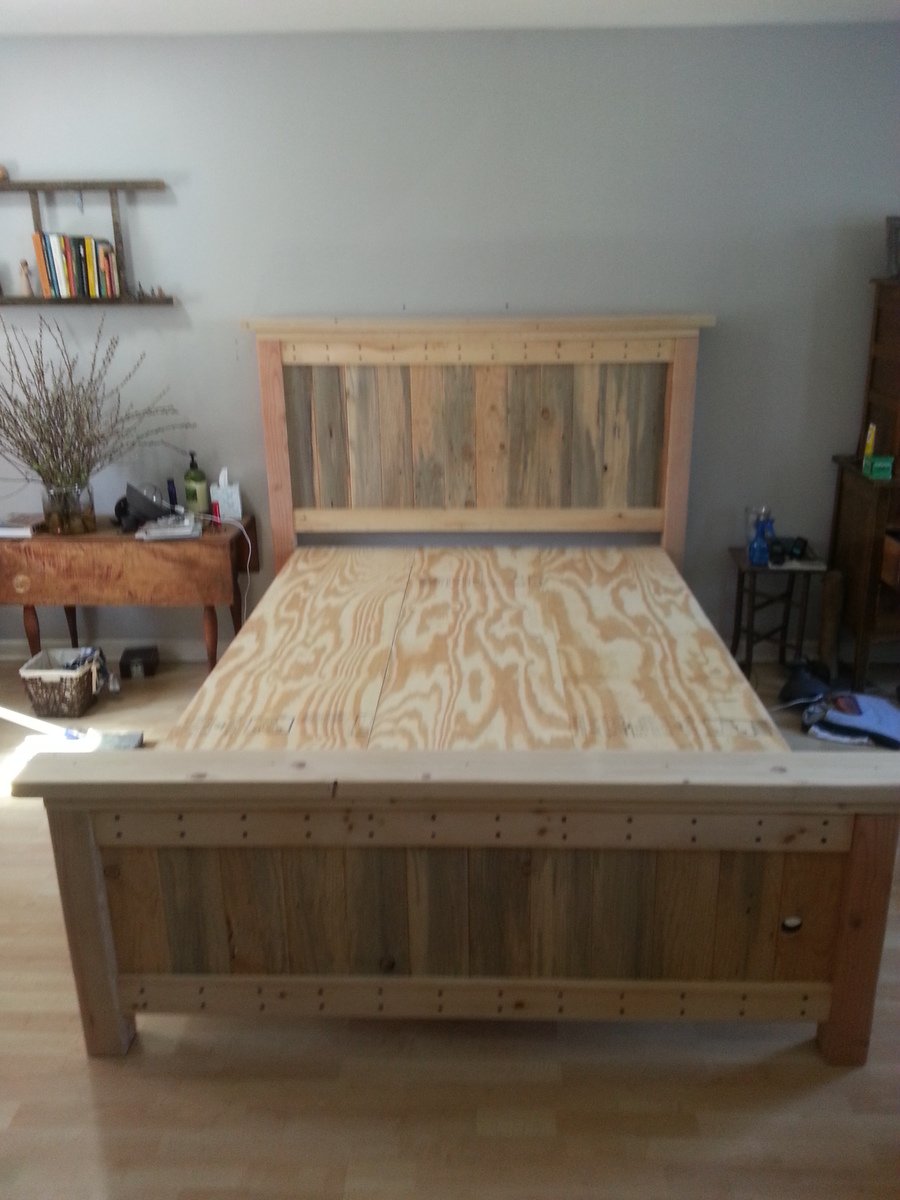
I admired this project the first time I saw it, I thought about building it for a few months and got the opportunity when my Fiance left town. I completed this project in a weekend with a had from my friend (more just to hold the pieces where I needed them). I had previously built her a hope chest out of a Rare and Beautiful tongue and groove pine, I used the same wood for the head and foot board so they would match. Overall these plans were great, I changed a few things to make it a little more what I wanted. I made the foot board 24" in height with a total of 20" of tongue and groove. I also used some wrought head nails to give a little more character to the piece as well, you can find them here, http://www.rockler.com/product.cfm?page=1152 . I wont do too much to the piece, more than likely just add a couple coats of shellac to match the previously mentioned hope chest. I hope you all enjoy this project as much as I did.
Wed, 07/03/2013 - 08:44
Did you need to pre-drill the nail holes? I am worried the wood will split with these types of nails. Thanks
Thu, 07/11/2013 - 12:36
Yes you do, I made a jig so I knew all the nails would line up with my wood and be in the same place. The bit was half the size of the nail, they are really just for a decorative look. Good luck with everything.
In reply to Yes you do, I made a jig so I by capecodfarm
Thu, 07/11/2013 - 12:51
I figured out my biggest mistake was not lining up the nails with the grain of the wood. Once i had the nails lined up in the right direction they went in mostly without a hitch. One of the panel boards did split but was hidden by the 1x4 face board. Thanks again for the idea and i'll post pics when completed.
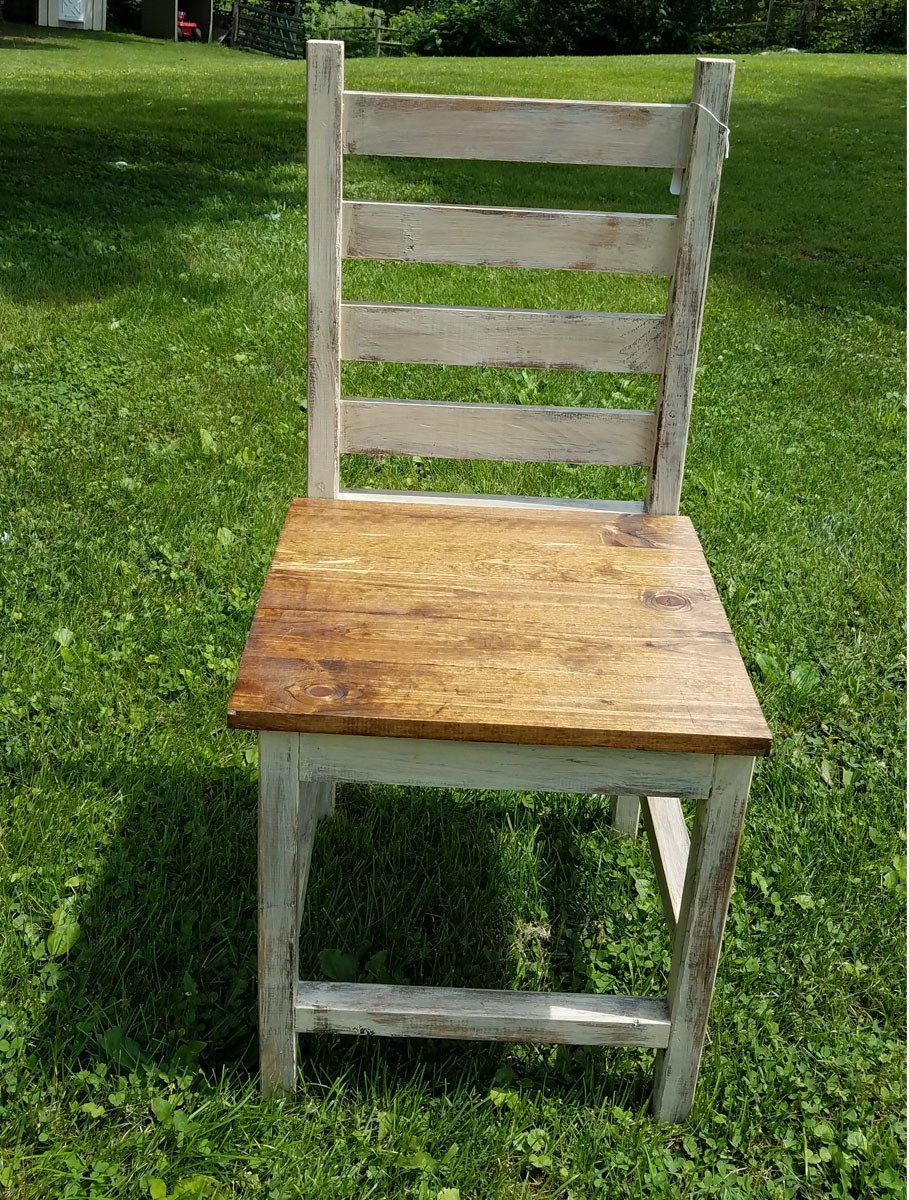
I adjusted the plans to make this a chair that would fit under a regular table. The front legs are 19" and the back legs are 40". Then I followed the plans as written.
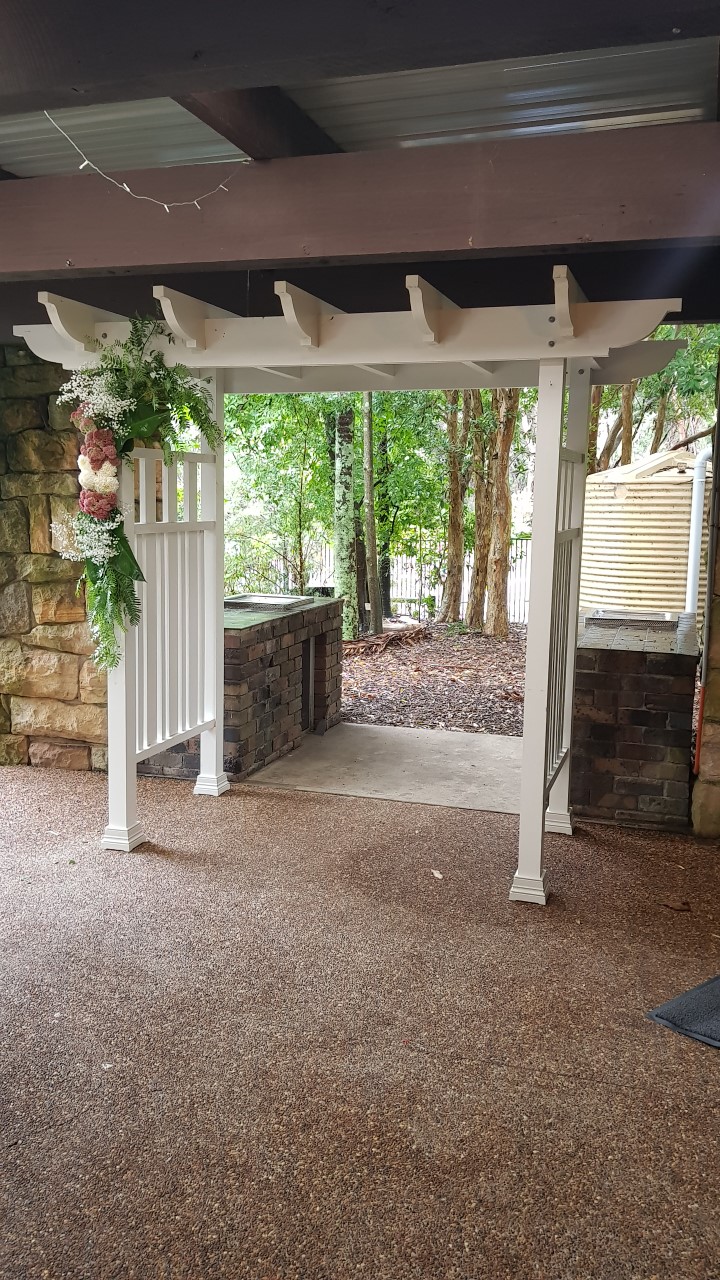
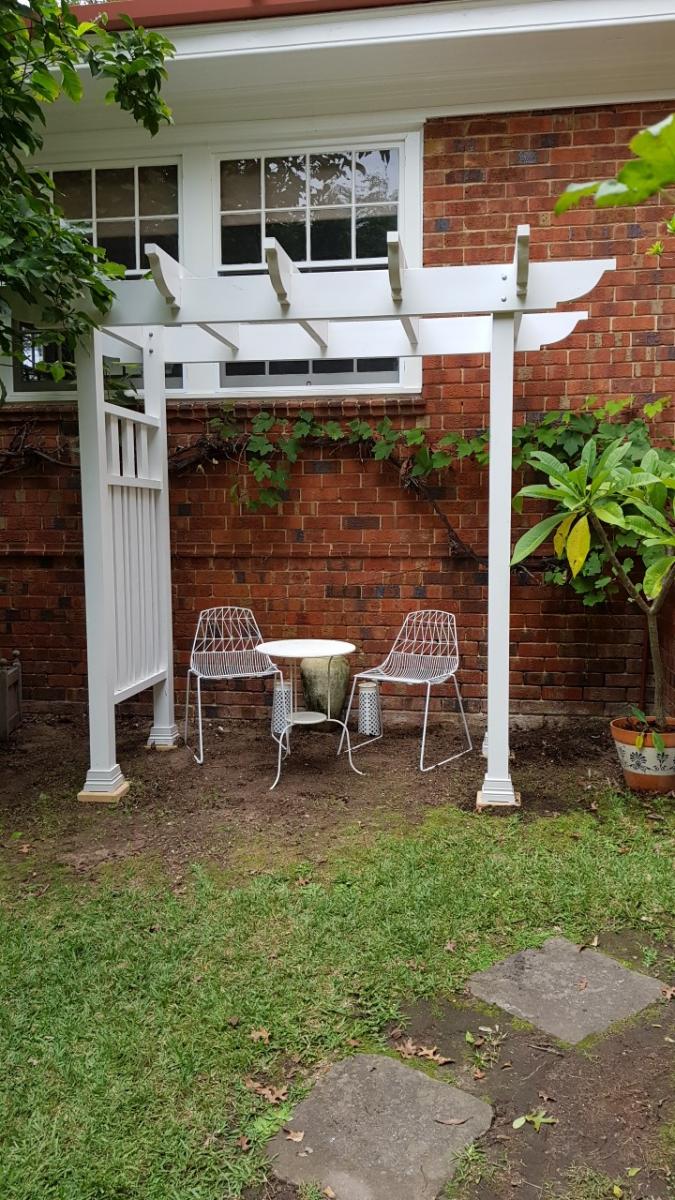
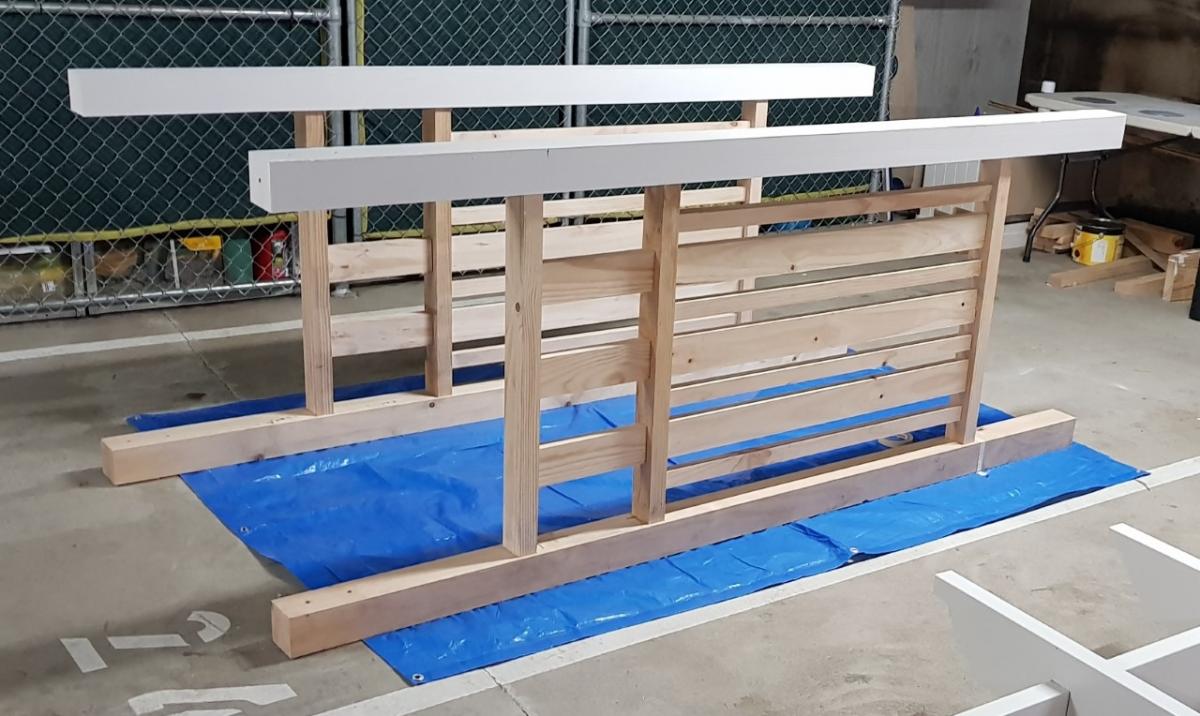
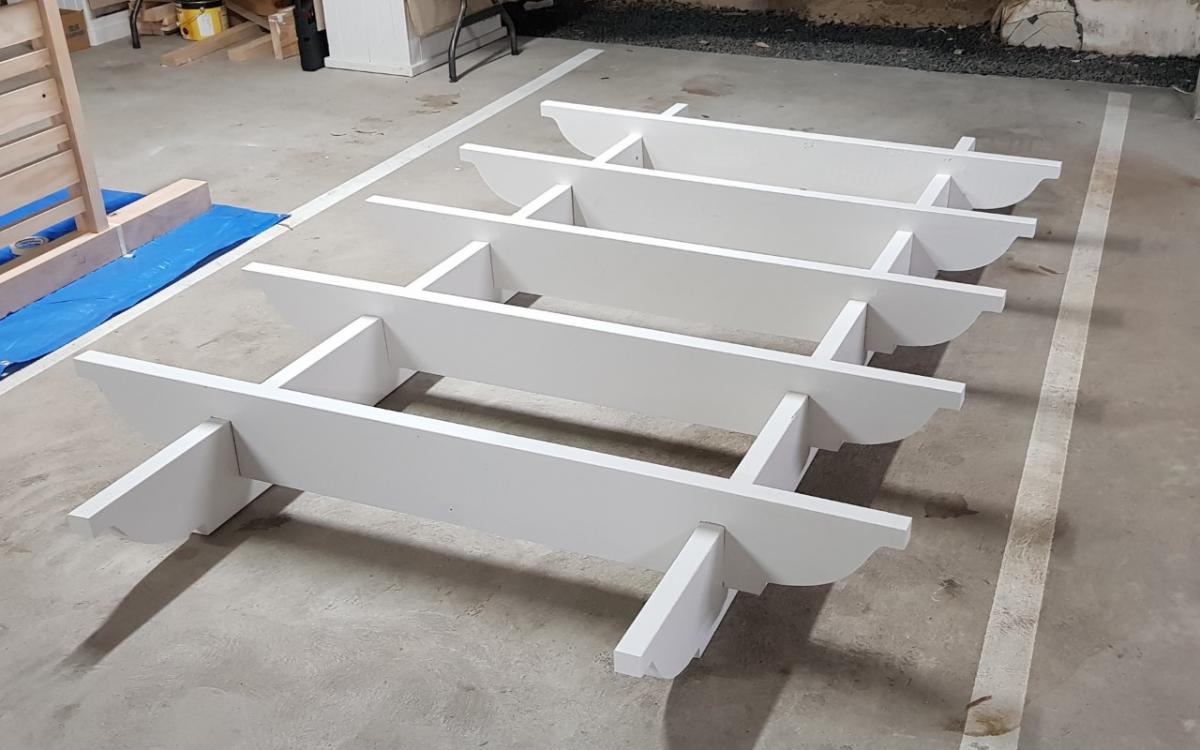
Hi, I built this wedding Arbour for my daughters wedding a while ago and unfortunately, I have no plans as I built from my head. It now sits in pride of place within thier garden as arch for thier garden.
I built this with a drop saw, hand saw, router, drill and hammer only.
I follow Ana's plans every release and save her plans for when I retire in two years to build for our house as well as try to run a small business from my shed.
Thank you Ana for you continued plans and wonderful advice.

Tue, 10/05/2021 - 10:40
WOW, such a sweet gift and reminder of their special day! Thanks for sharing:)
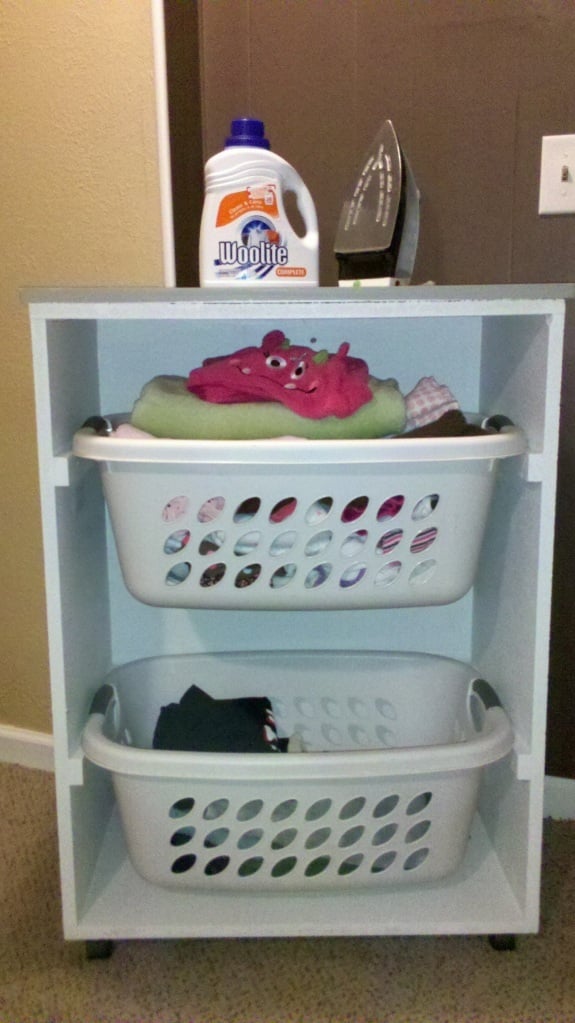
I built this entire project out of the scraps from the closet organizer and a 1×2 that I had. You could use the metal brackets Ana suggests, but the 1x2s are working great for me. The wheels are from an old rolling Target TV stand.
We used two tracks, instead of three, because I do huge loads of laundry in my front loaders. If you want to do the closet organize and this, do the closet first.This will be a free project. That's right, $0 out of pocket! Oh, and the top is scrap wood, just glued, and screwed (counter sunk).It made for a more finished “island” look. This step is completely optional. It's just for looks. I would love to add a towel bar to the side of this and a bracket to hold my iron too. The mini ironing board does fit on top!

I made these for my Mother's Day present to myself. I painted them the color of Carrots and Lettuce. Working on the third one titled "tomatoes today." Easy to build, fun and quick....
Sun, 05/19/2013 - 18:38
Love the colors! What a good idea! They look wonderful!
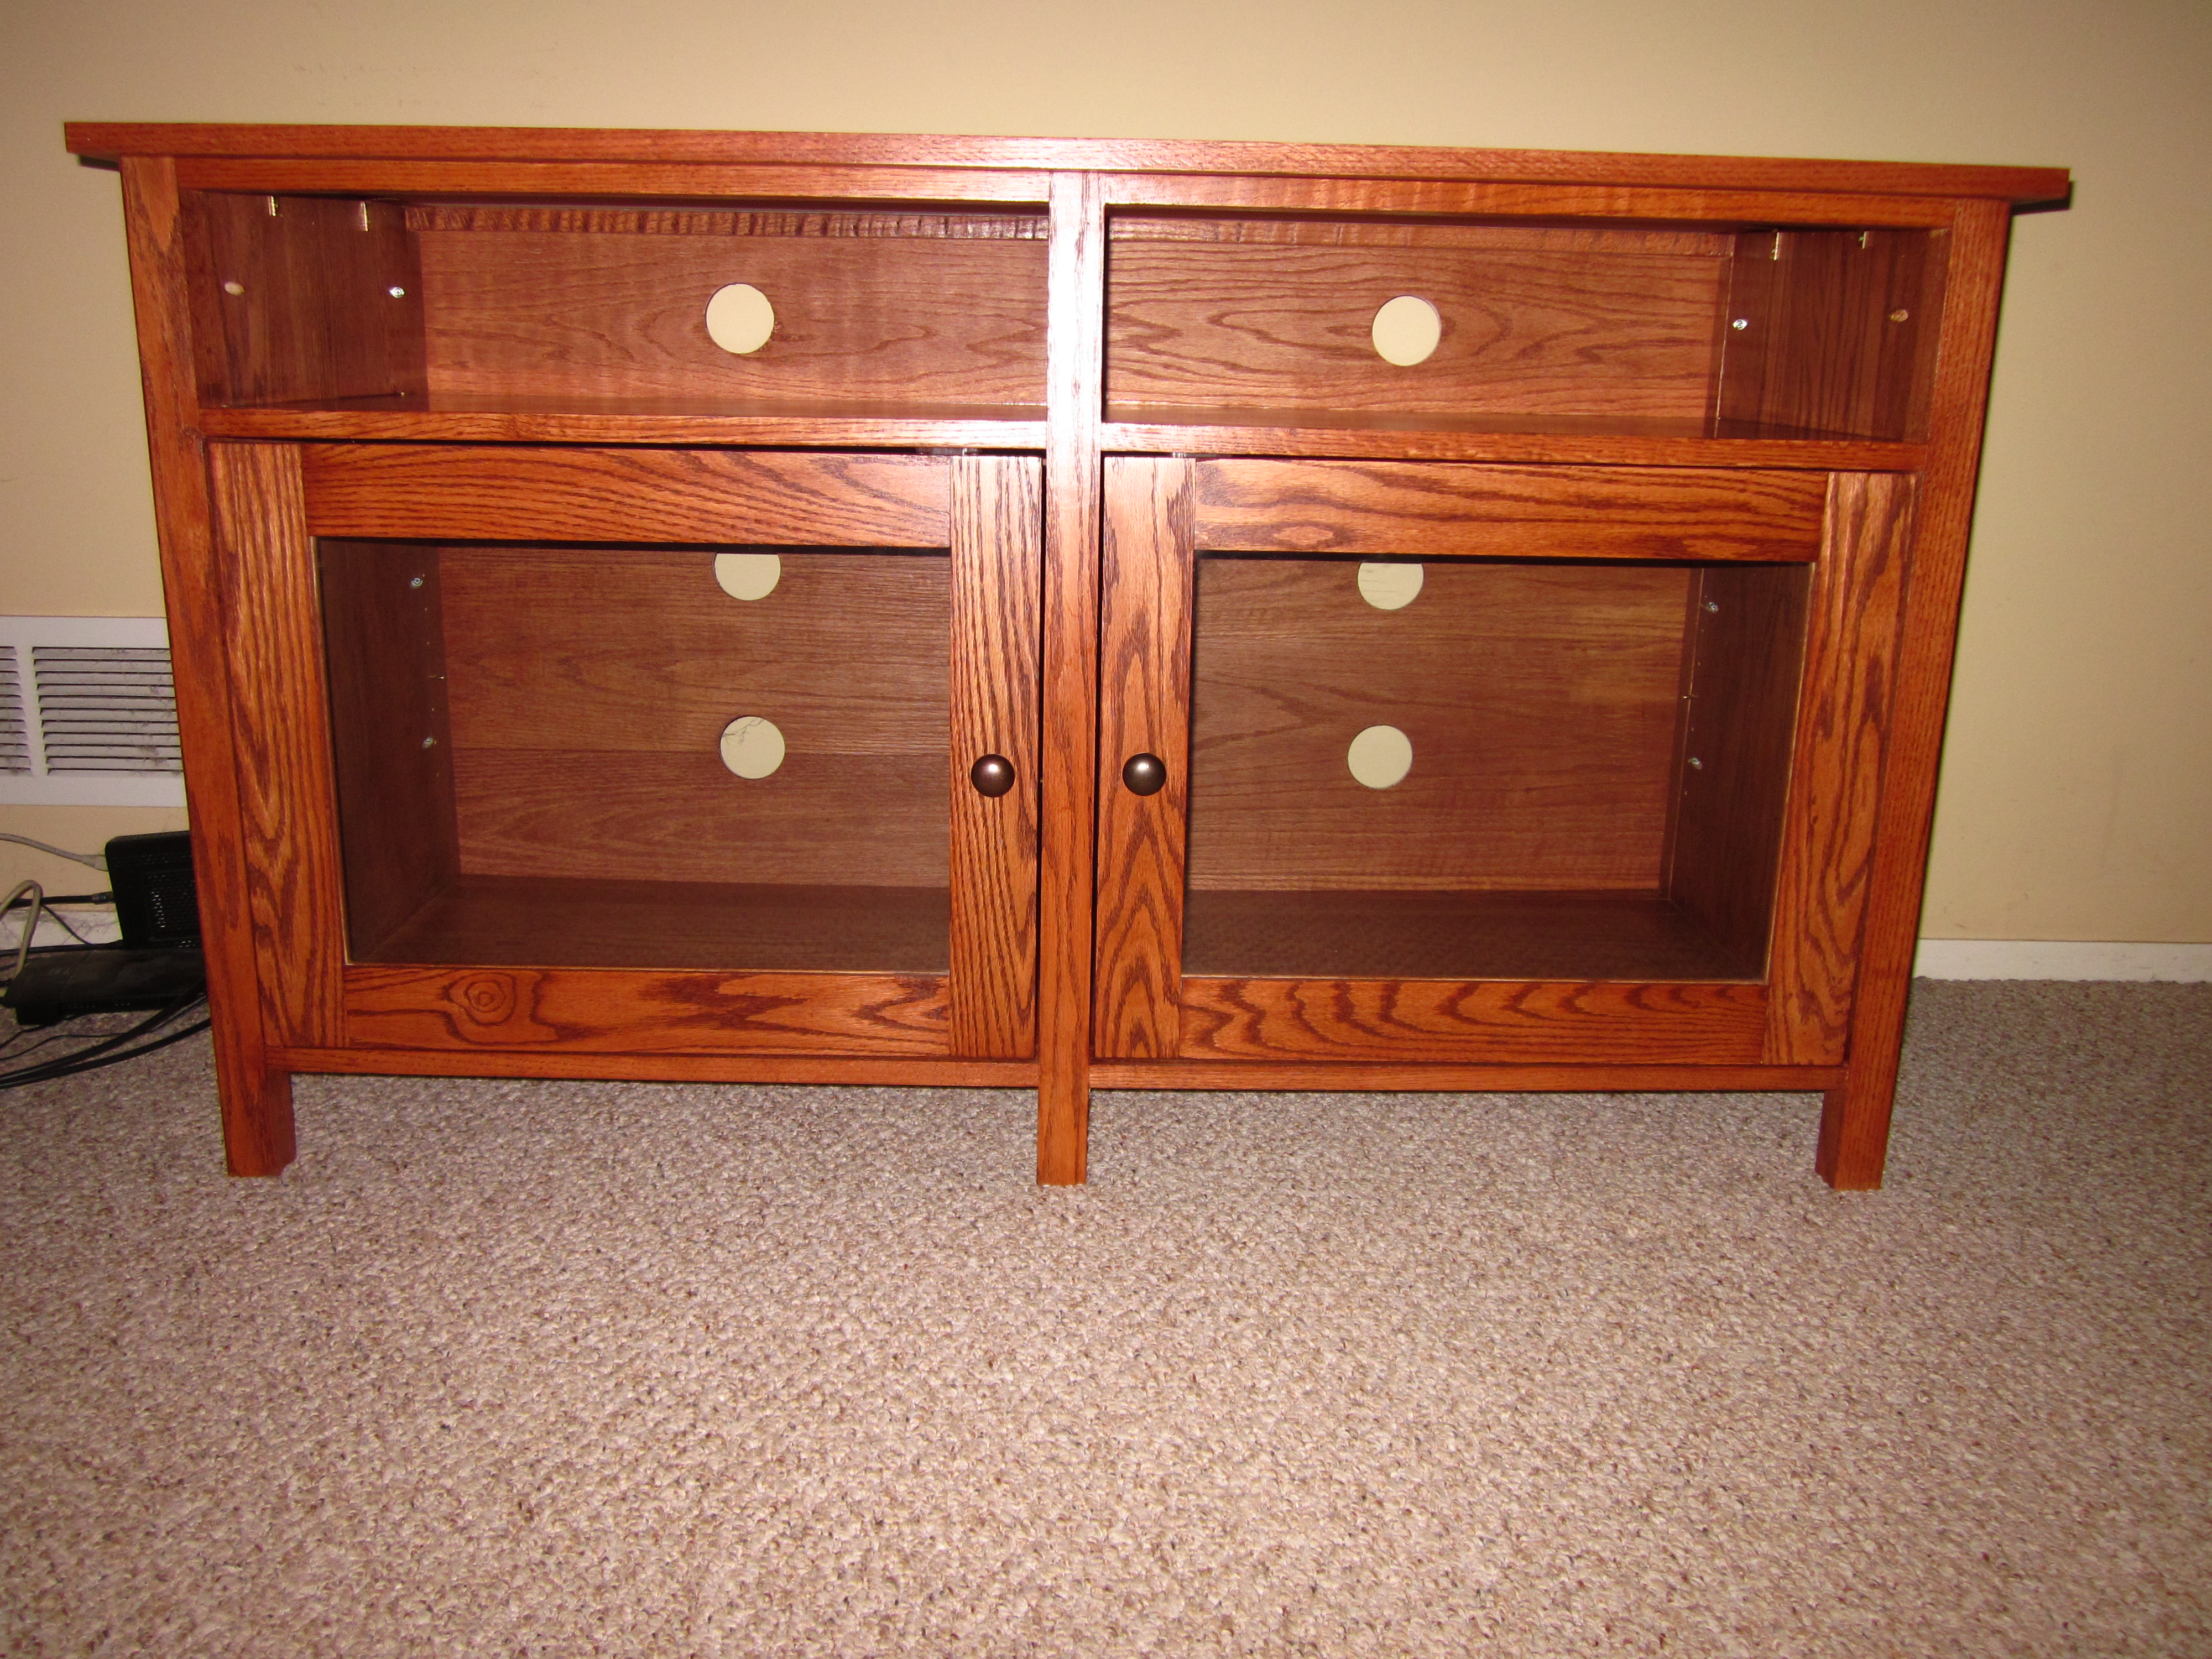
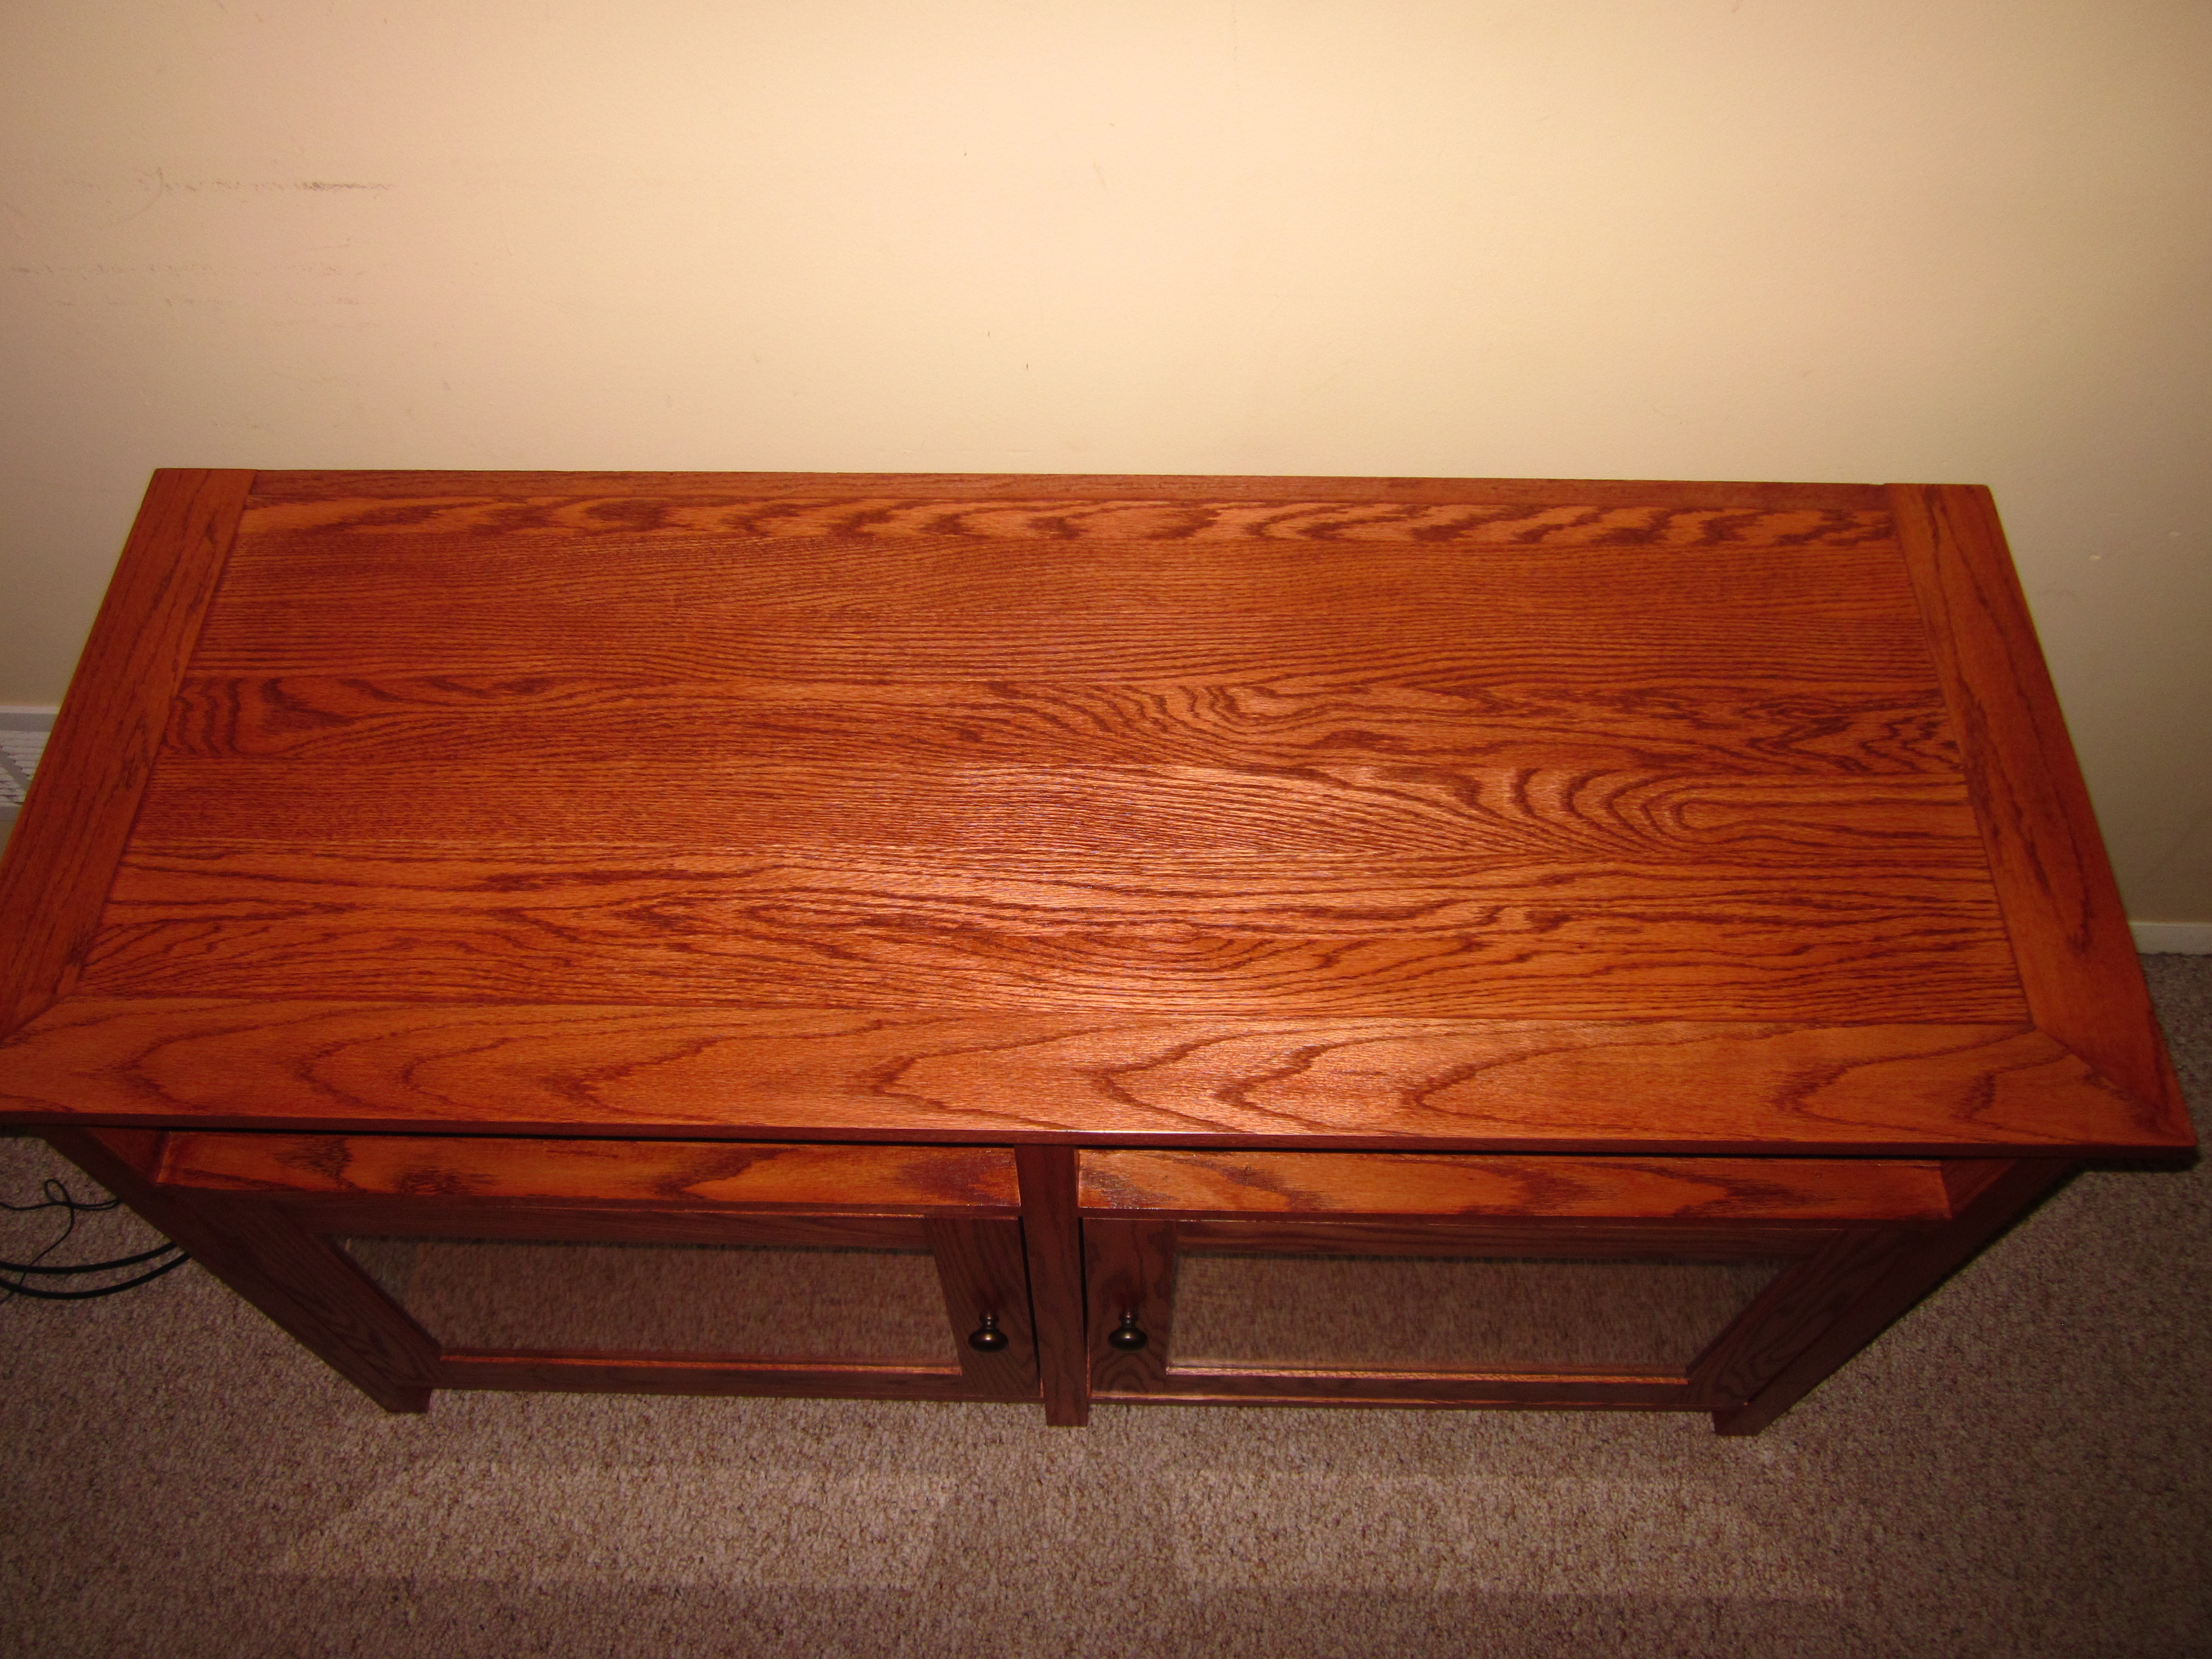
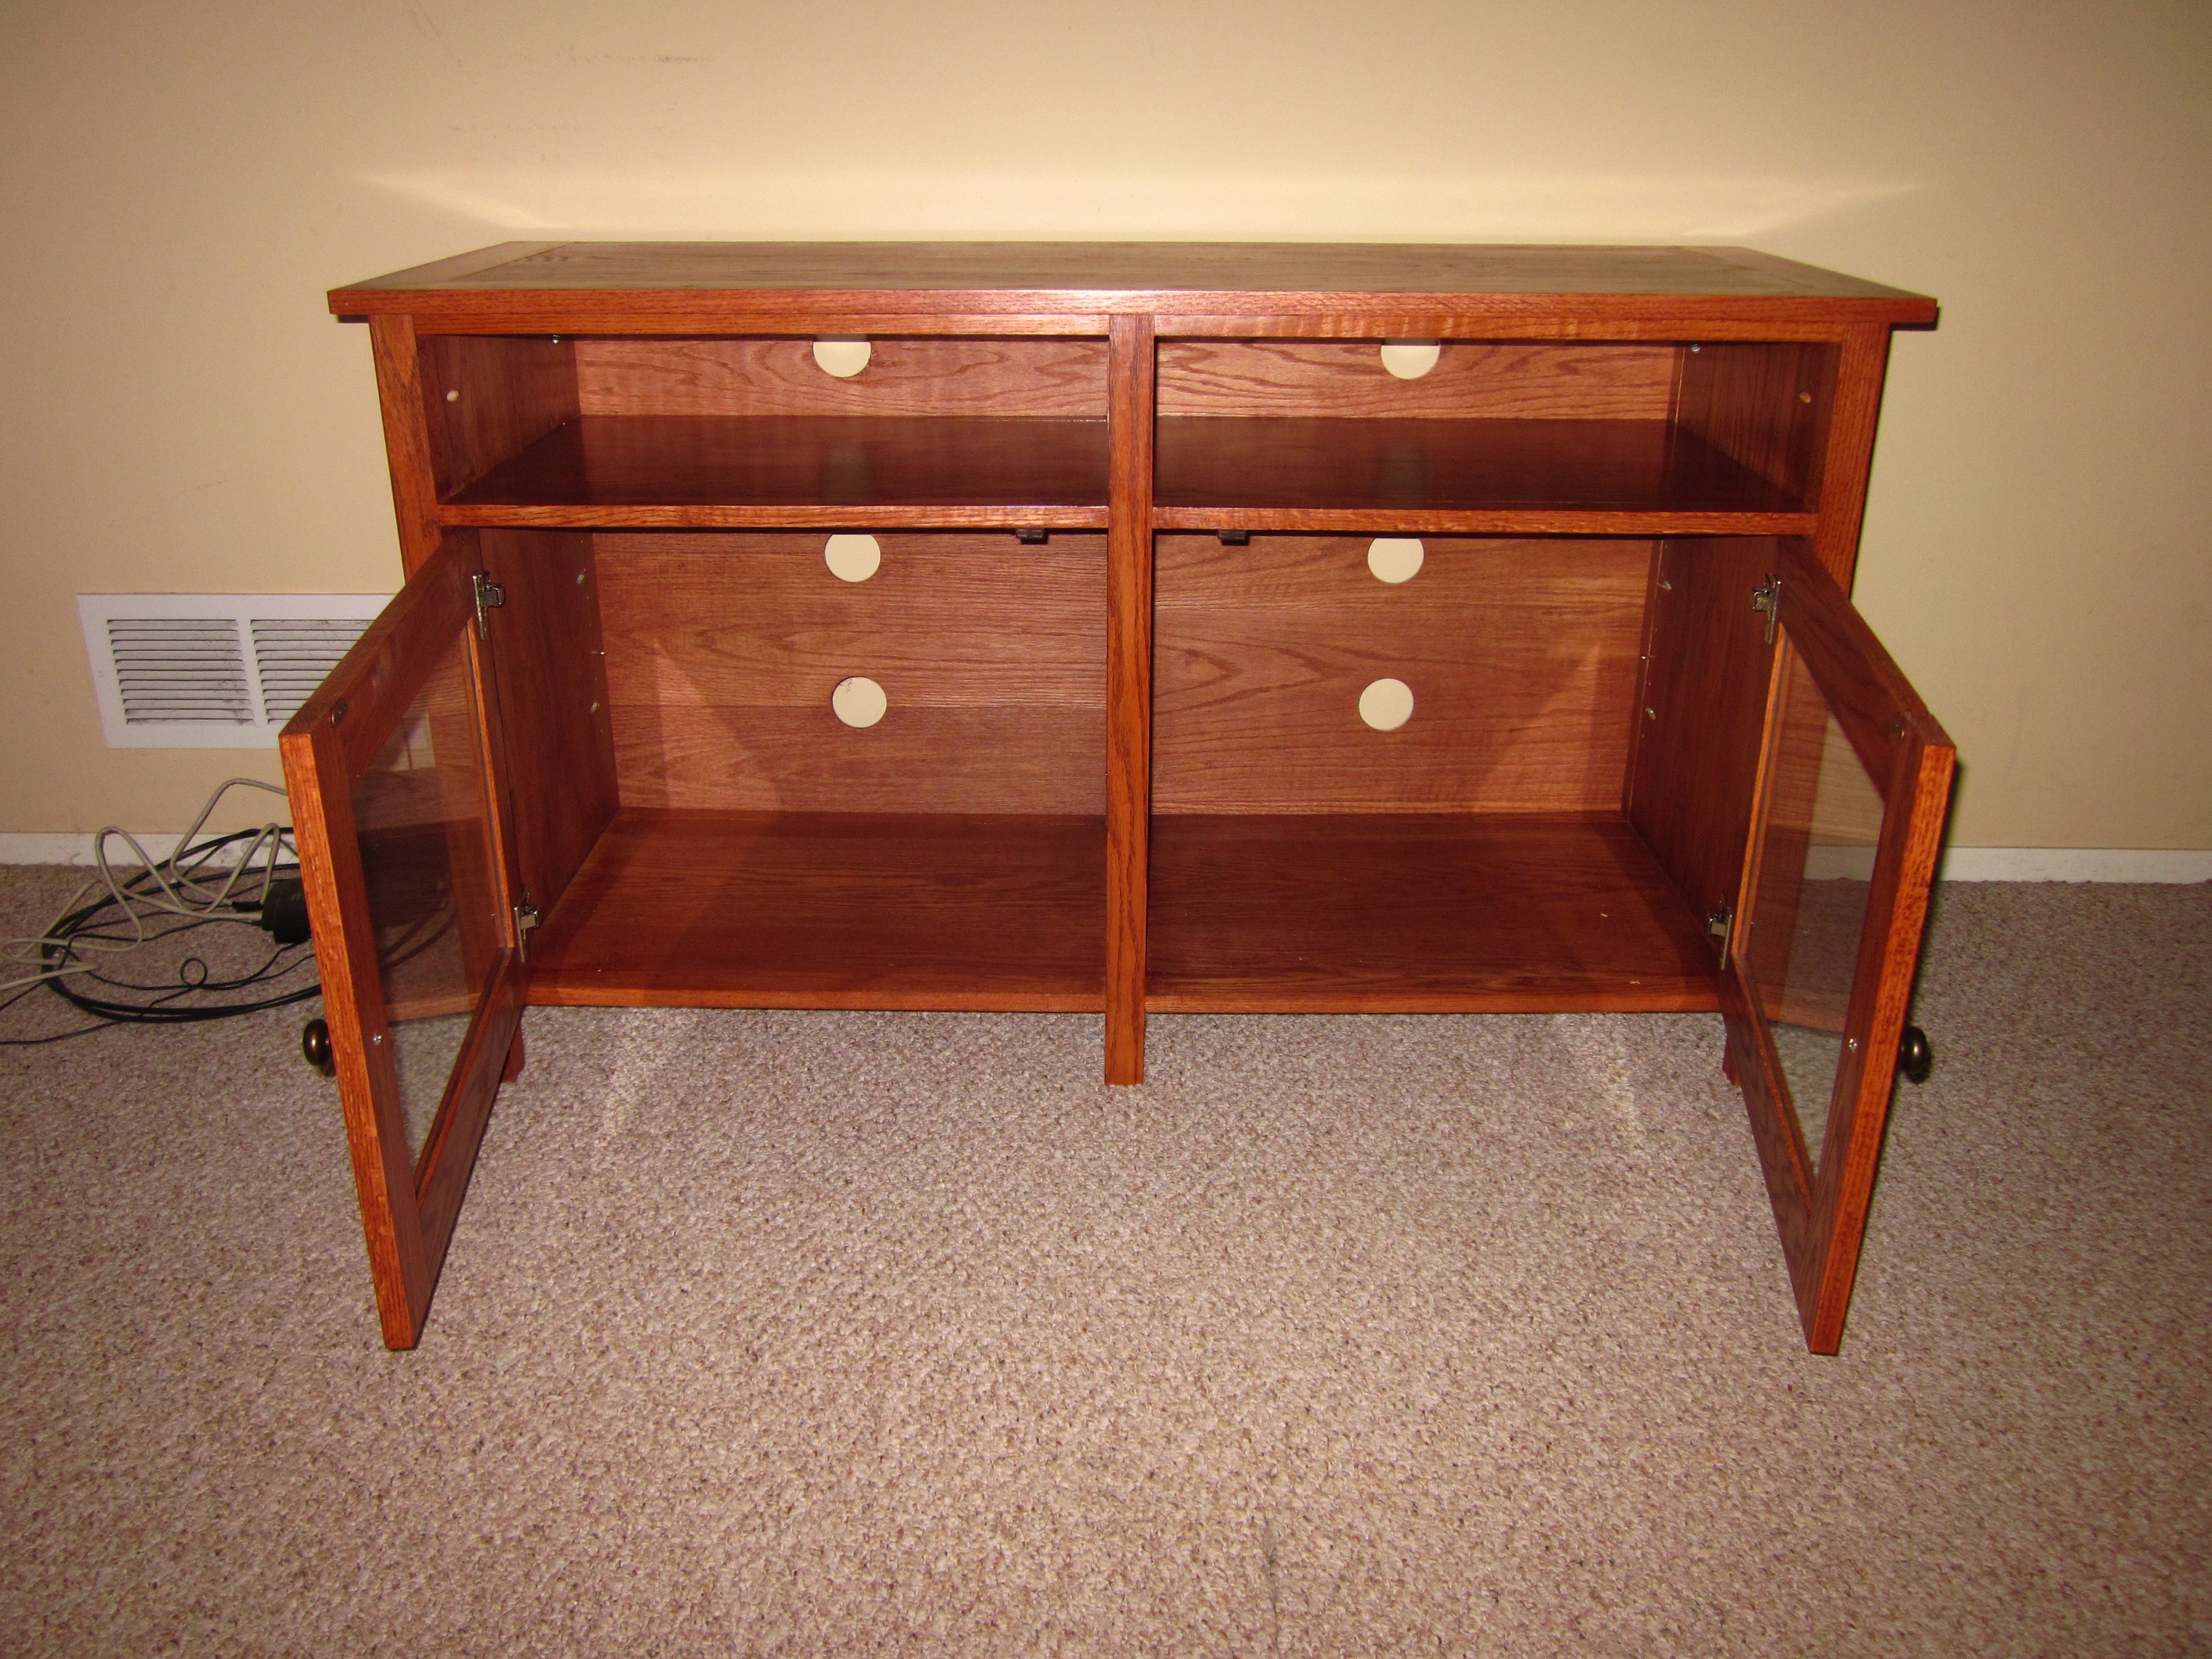
I modified the dimensions slightly and opted to not mount the fold down doors as I figured they would always be open anyway. I built this mostly from solid red oak save for the bottom panel and the middle panel, which are plywood. I crafted the top out of 5 pieces tongue and grooved with mitred corners on the front. I also tongue and grooved the doors with glass insets. I finished it in Minwax red cedar under poly.
Ana I’m new to wood working and I really love your plans. They are so much easier to follow than a lot of other plans that I’ve seen. It makes me feel like I can build almost anything. Thank you.
Brandy
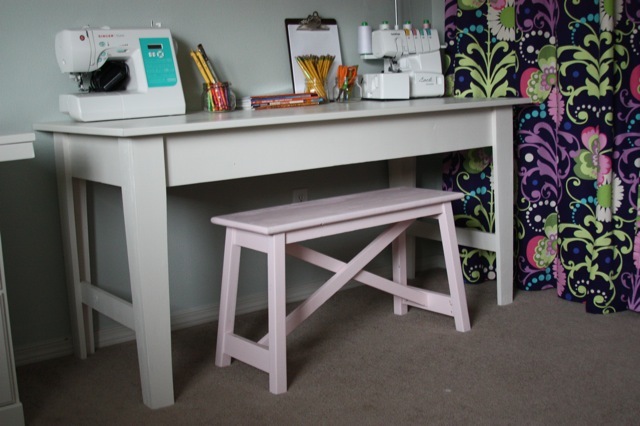
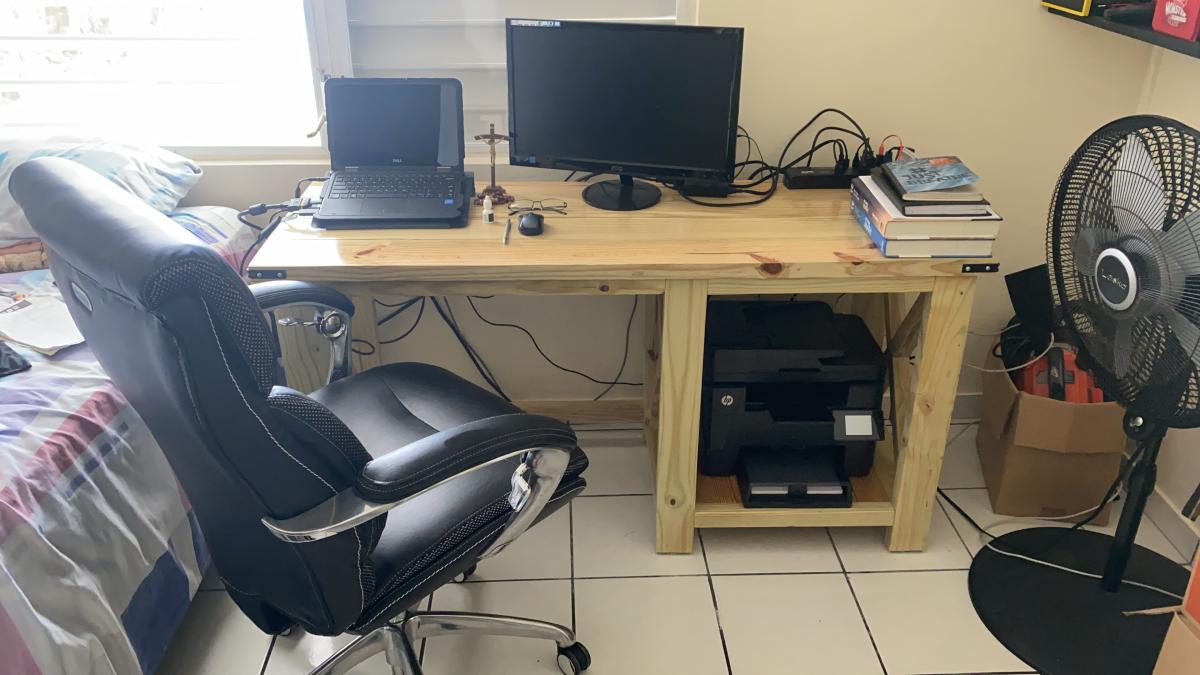
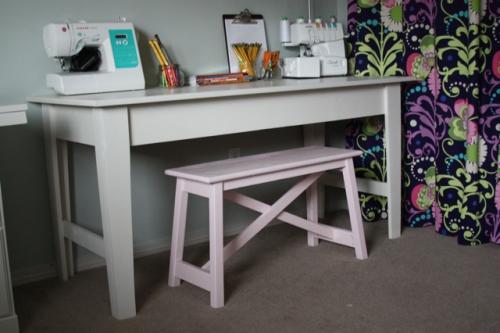
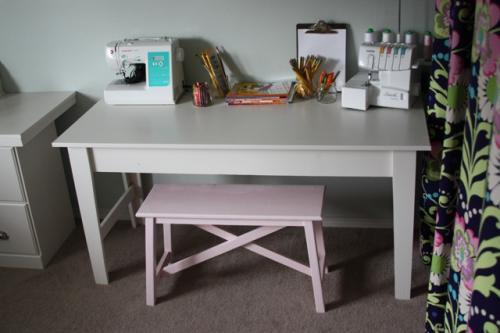
I really wanted a sewing table/desk for my office but wanted something that could be repurposed in a few years when we move. I chose the Narrow farmhouse table plan because it was a really sturdy plan that was easy to modify for our needs and was a timeless enough style that I can use it in another room if need be. I especially loved the look of the legs.
We made our table smaller to fit our space and also made it about 1 or 2 inches shorter because I’m really short and wanted a comfortable place to sew and craft. The top of our table is 58″ by 24″. We used MDF for the top instead of slats because my kids use this as a craft/coloring table when I’m not sewing. I didn’t want their pencils to poke through their papers if they got caught on the slats. We used thin molding for the edge of the MDF to give it a nice finished look.

Comments
Ana White Admin
Tue, 10/05/2021 - 11:41
Great added cushions!
Those look amazing and super comfy!