Community Brag Posts
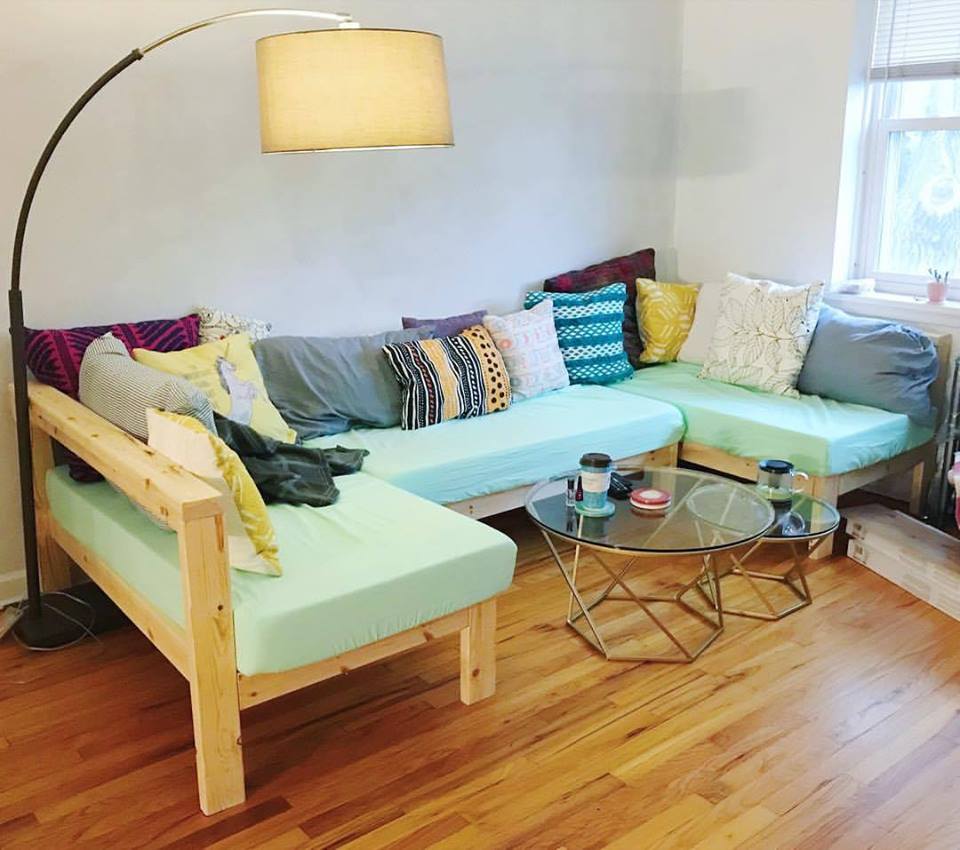
Outdoor Sofa
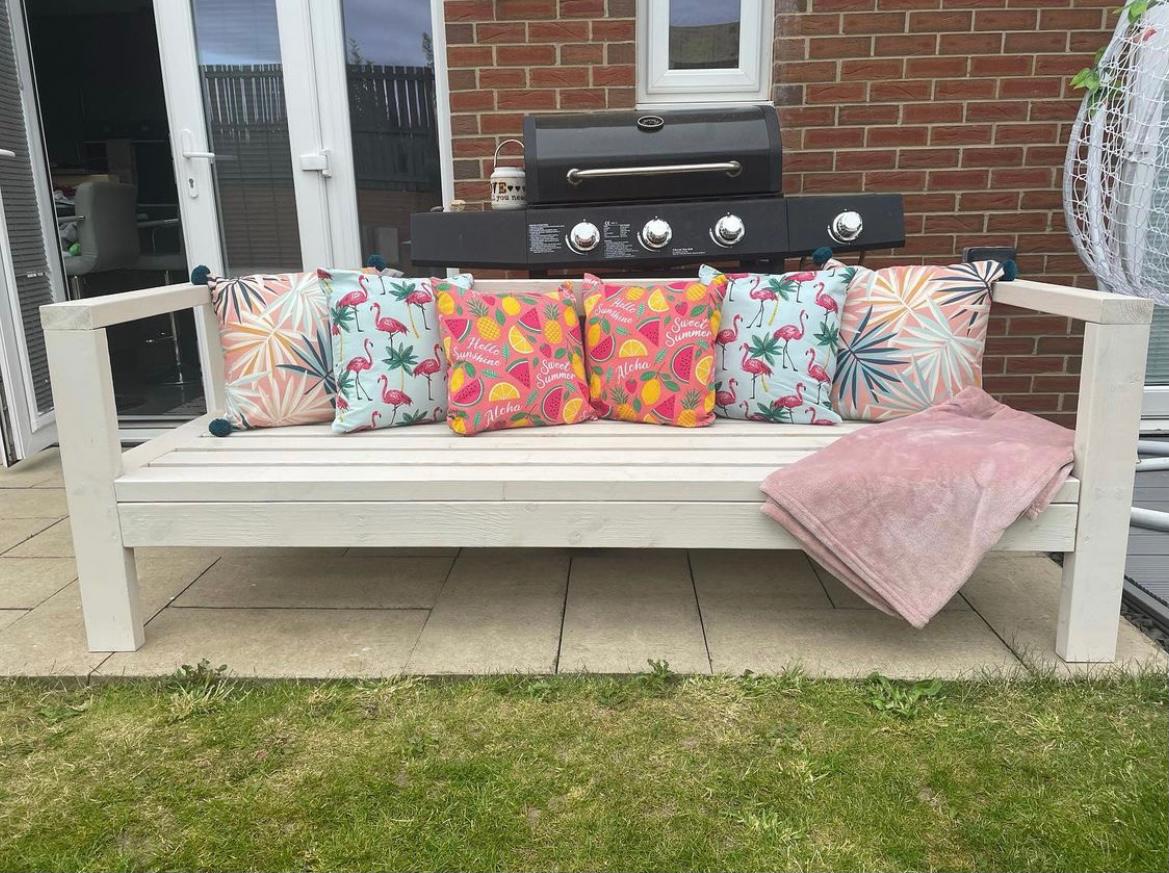
Perfect seating for our new summerhouse, loved how easy it was to build. Thanks so much for the free plans and making the easy to follow videos
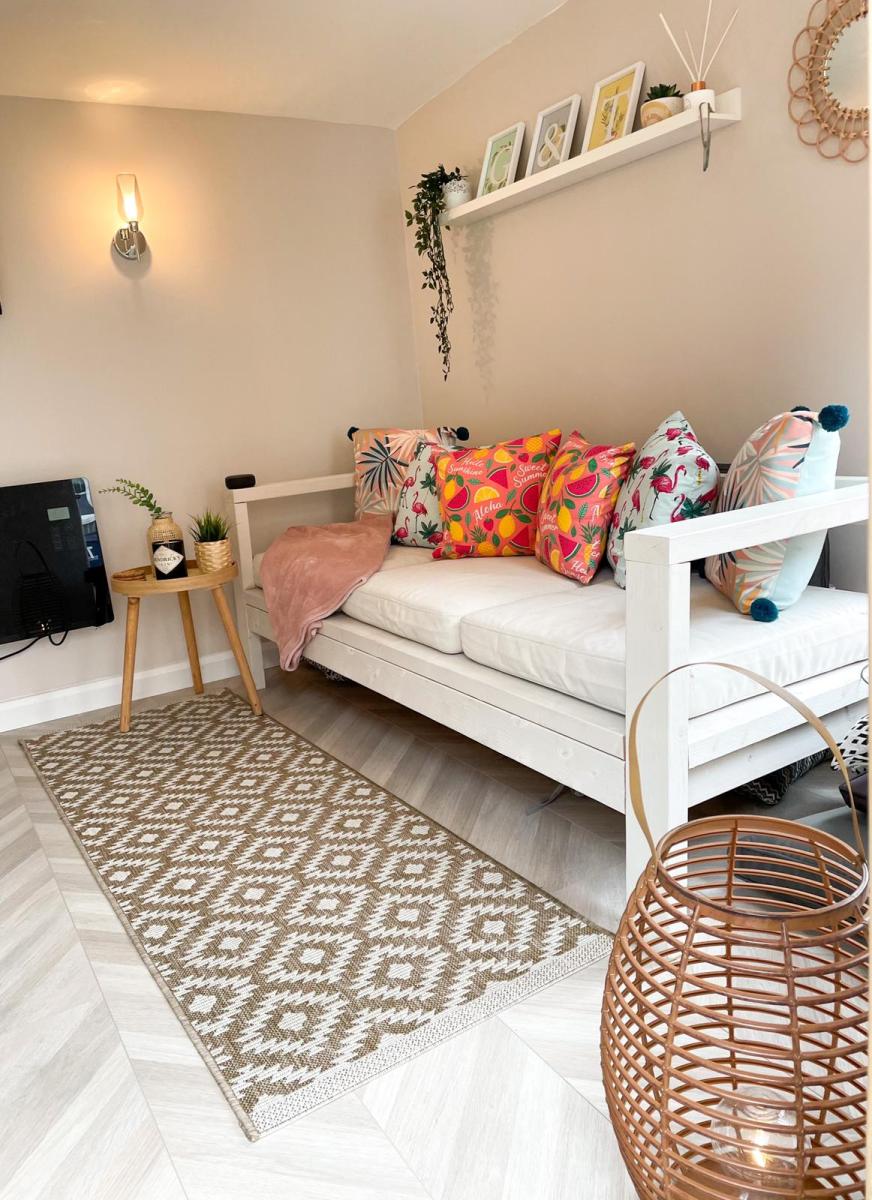
Built from Plan(s)
Comments
Cubby Storage System
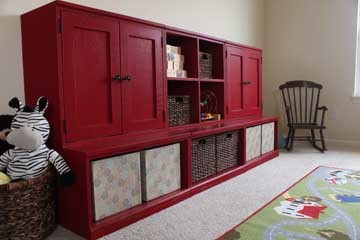
This was my first building project ever! Even though it took longer than I expected to complete (I have four tiny kids and snagged an hour here and there during nap time over the course of many months), it was absolutely worth the time investment (and wait)! Hanging the doors was tricky (my awesome husband tackled that part), but other than that it was easy to put together. Finishing it was the hardest part by far. If I were to do it again, I'd probably do some preliminary sanding of the boards before putting them together and I would most certainly not use oak (I was talked into it by the HD guys) especially since I ended up painting it. I think it would have turned out just as great if I'd used a cheaper wood or MDF. Thanks for the plans Ana!
Built from Plan(s)
Estimated Time Investment
Week Long Project (20 Hours or More)
Finish Used
Started with two coats of Behr Ultra Interior Satin (paint w/primer) color matched to Martha Stewart Barn Red (sanded between coats). After one final (light) sanding to distress, I finished with one coat of Ralph Lauren Glaze in Tobacco that I had on hand (brush on one side of surface and then quickly wipe away excess with an old rag--moving the rag in the direction of the wood grain). The glaze brought out the wood grain more and helped tone down the exposed wood.
Recommended Skill Level
Beginner
Fancy X Farmhouse Table
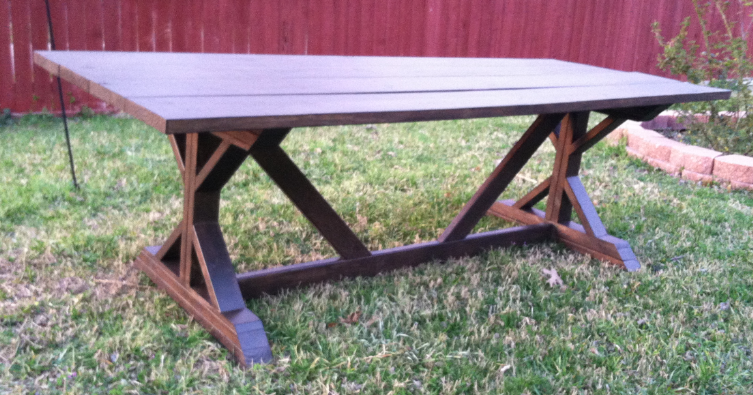
This was my husband and mine's first DIY project! We started off using a miter box, and quickly caved and bought a miter saw. We also had trouble getting the X's to fit correctly, so we redid them and made it in a different order than Ana--we lined them up on the boards they would be attaching to and drilled in there. So we didn't make X's and then attach, but rather did it all at once. This made sure everything fit together!
Also, we didn't stain the top pieces of wood before we assembled, and it was hard to get in-between the boards, definitely recommend at least one coat of stain before attaching the top!
Had a great time making this bench, and love it!! Everyone that sees it is so impressed!! We made this one for outdoors, but we are thinking of making another in nicer wood for our indoor dining room table....
Built from Plan(s)
Estimated Time Investment
Week Long Project (20 Hours or More)
Recommended Skill Level
Starter Project
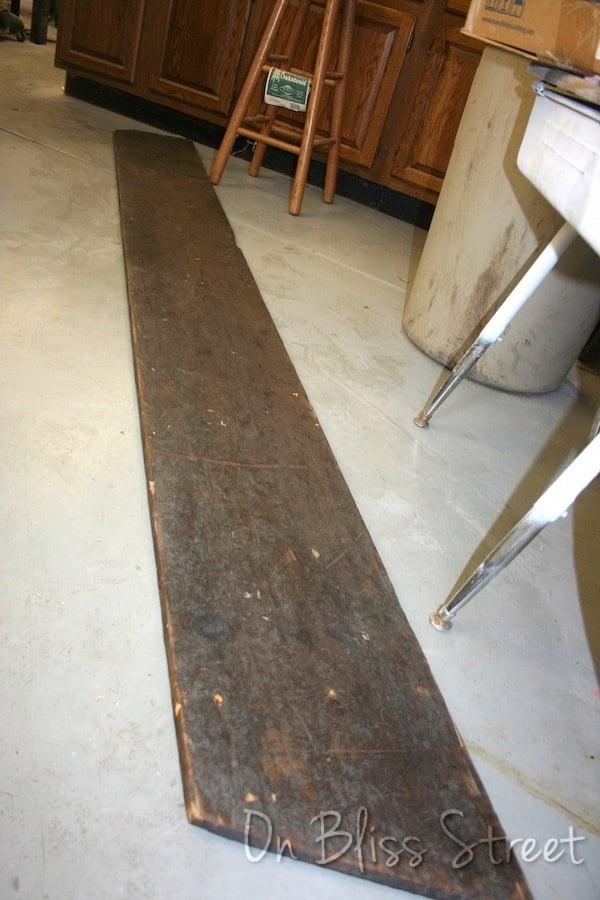
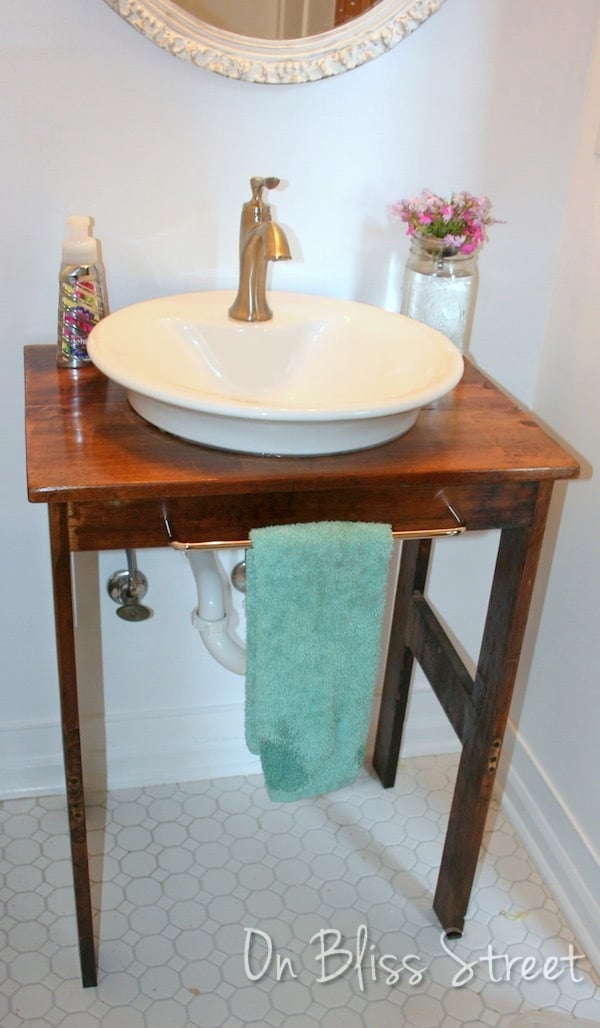
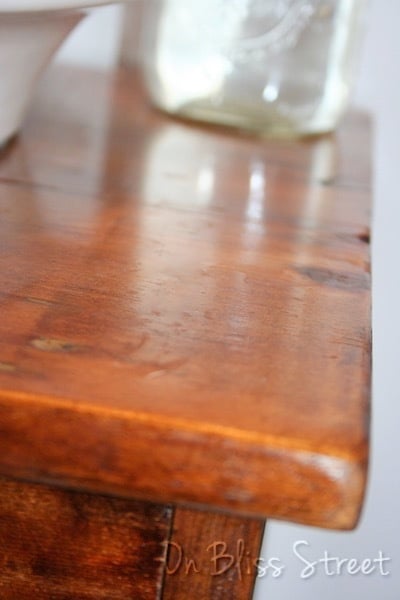
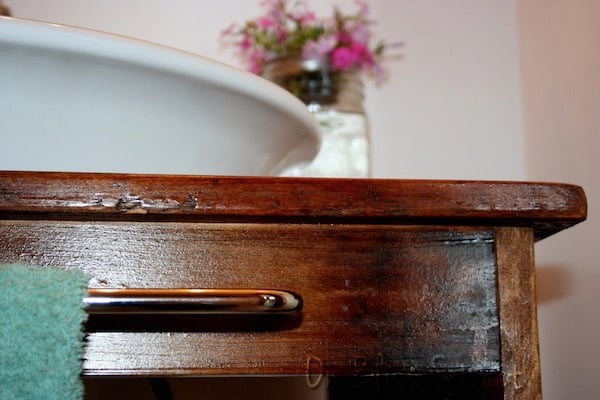
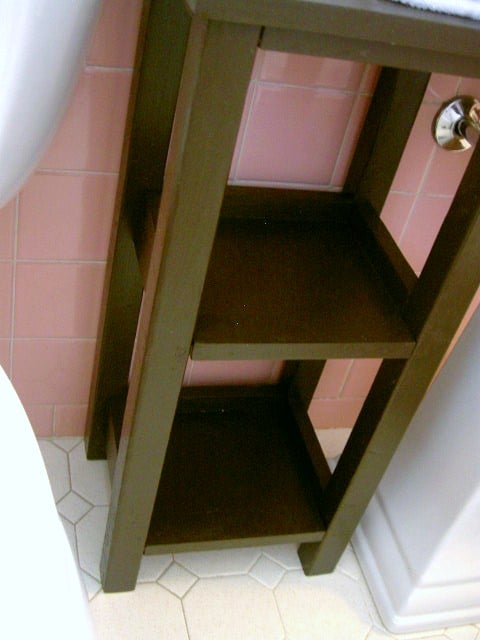
Vanity Made From a Rescued Trash Board.
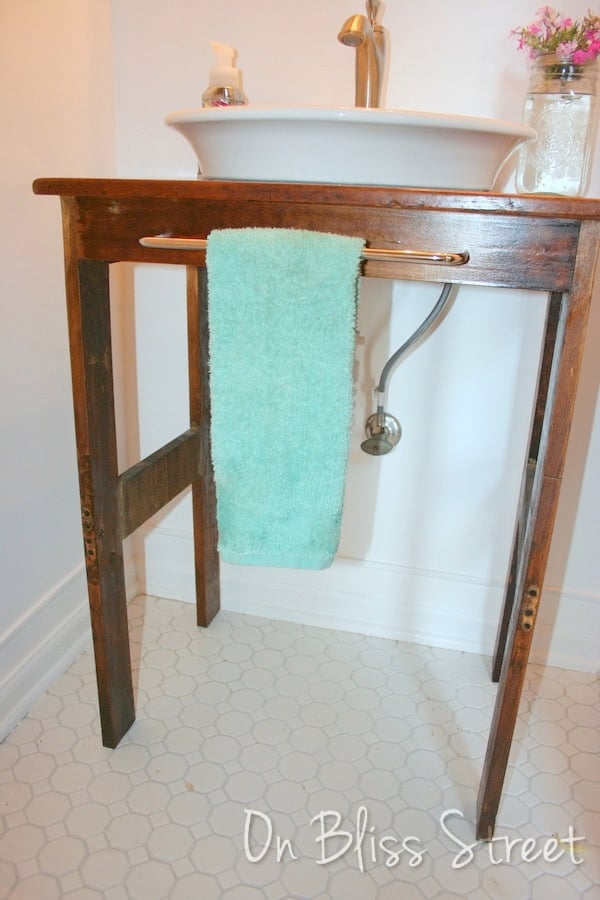
With the remodel budget for my powder room only being $300, I needed to get creative with the vanity. The room is tiny, so the vanity needed to fit well in the space and allow us to still move around. I had rescued this board from the dumpster at church when it was being remodeled and kept it in my garage until inspiration struck.
I'm not a carpenter, I try and I'm learning as I go, but the vanity turned out great for me. I made it to fit the $15 Craigslist vessel sink and the little nook in the bathroom. The towel bar was $1 at my local restore. It's nice and sturdy attached to the studs with "L" brackets.
For the tutorial on how I built it using one board, visit my blog.
Estimated Cost
The vanity was free to build except for a few screws and glue.
Estimated Time Investment
Day Project (6-9 Hours)
Finish Used
Sanding, a coat of Minwax Provincial Stain, 3-4 coats of Minwax Wipe-on Polyurethane.
Recommended Skill Level
Beginner
Crib Mattress Wood Sectional
Submitted by Abigail Marolt on Facebook -
I made a your crib mattress sectional with an extra armless couch to make one large U-shaped design! It was my first project with a kreg jig and a circular saw, but it certainly won't be my last. We love using this couch every day!
Built from Plan(s)
Recommended Skill Level
Starter Project
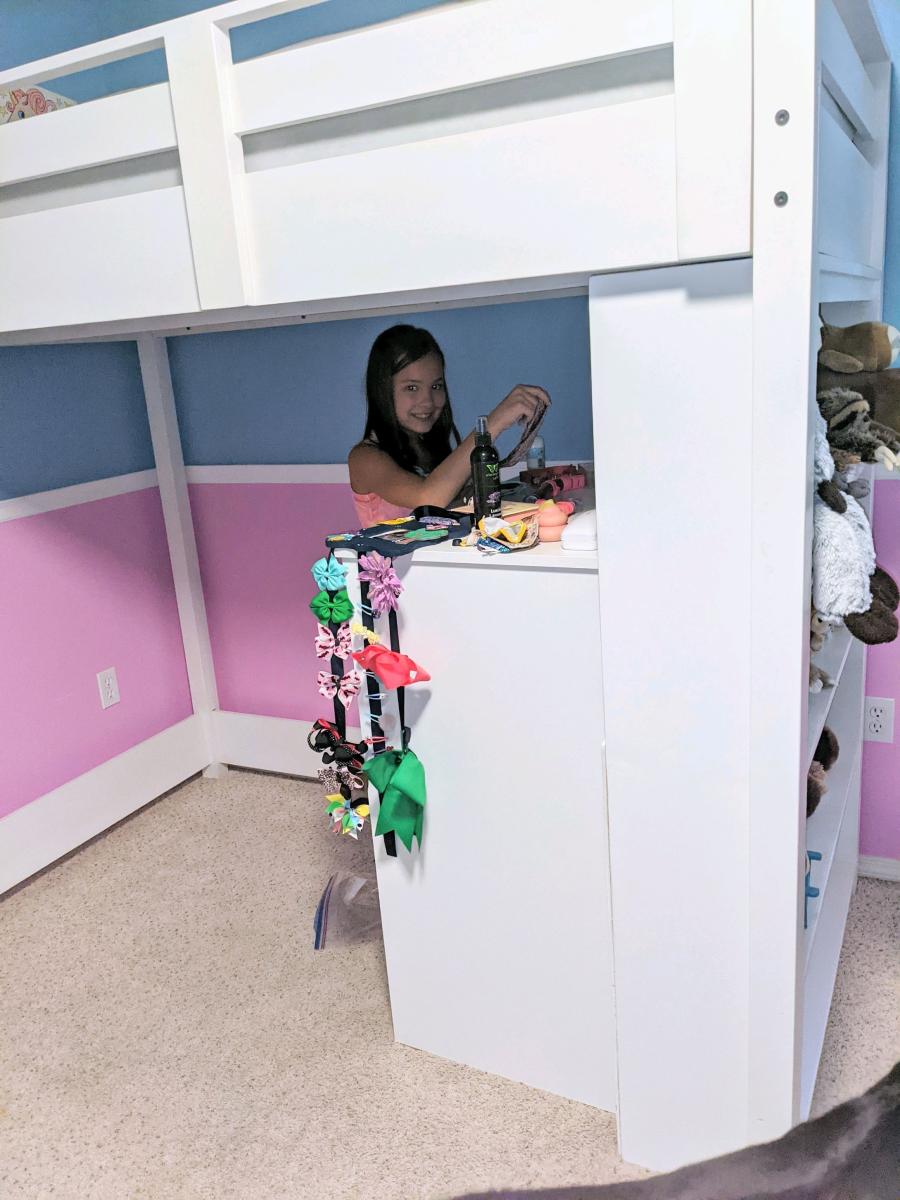
Granddaughter's Loft Bed
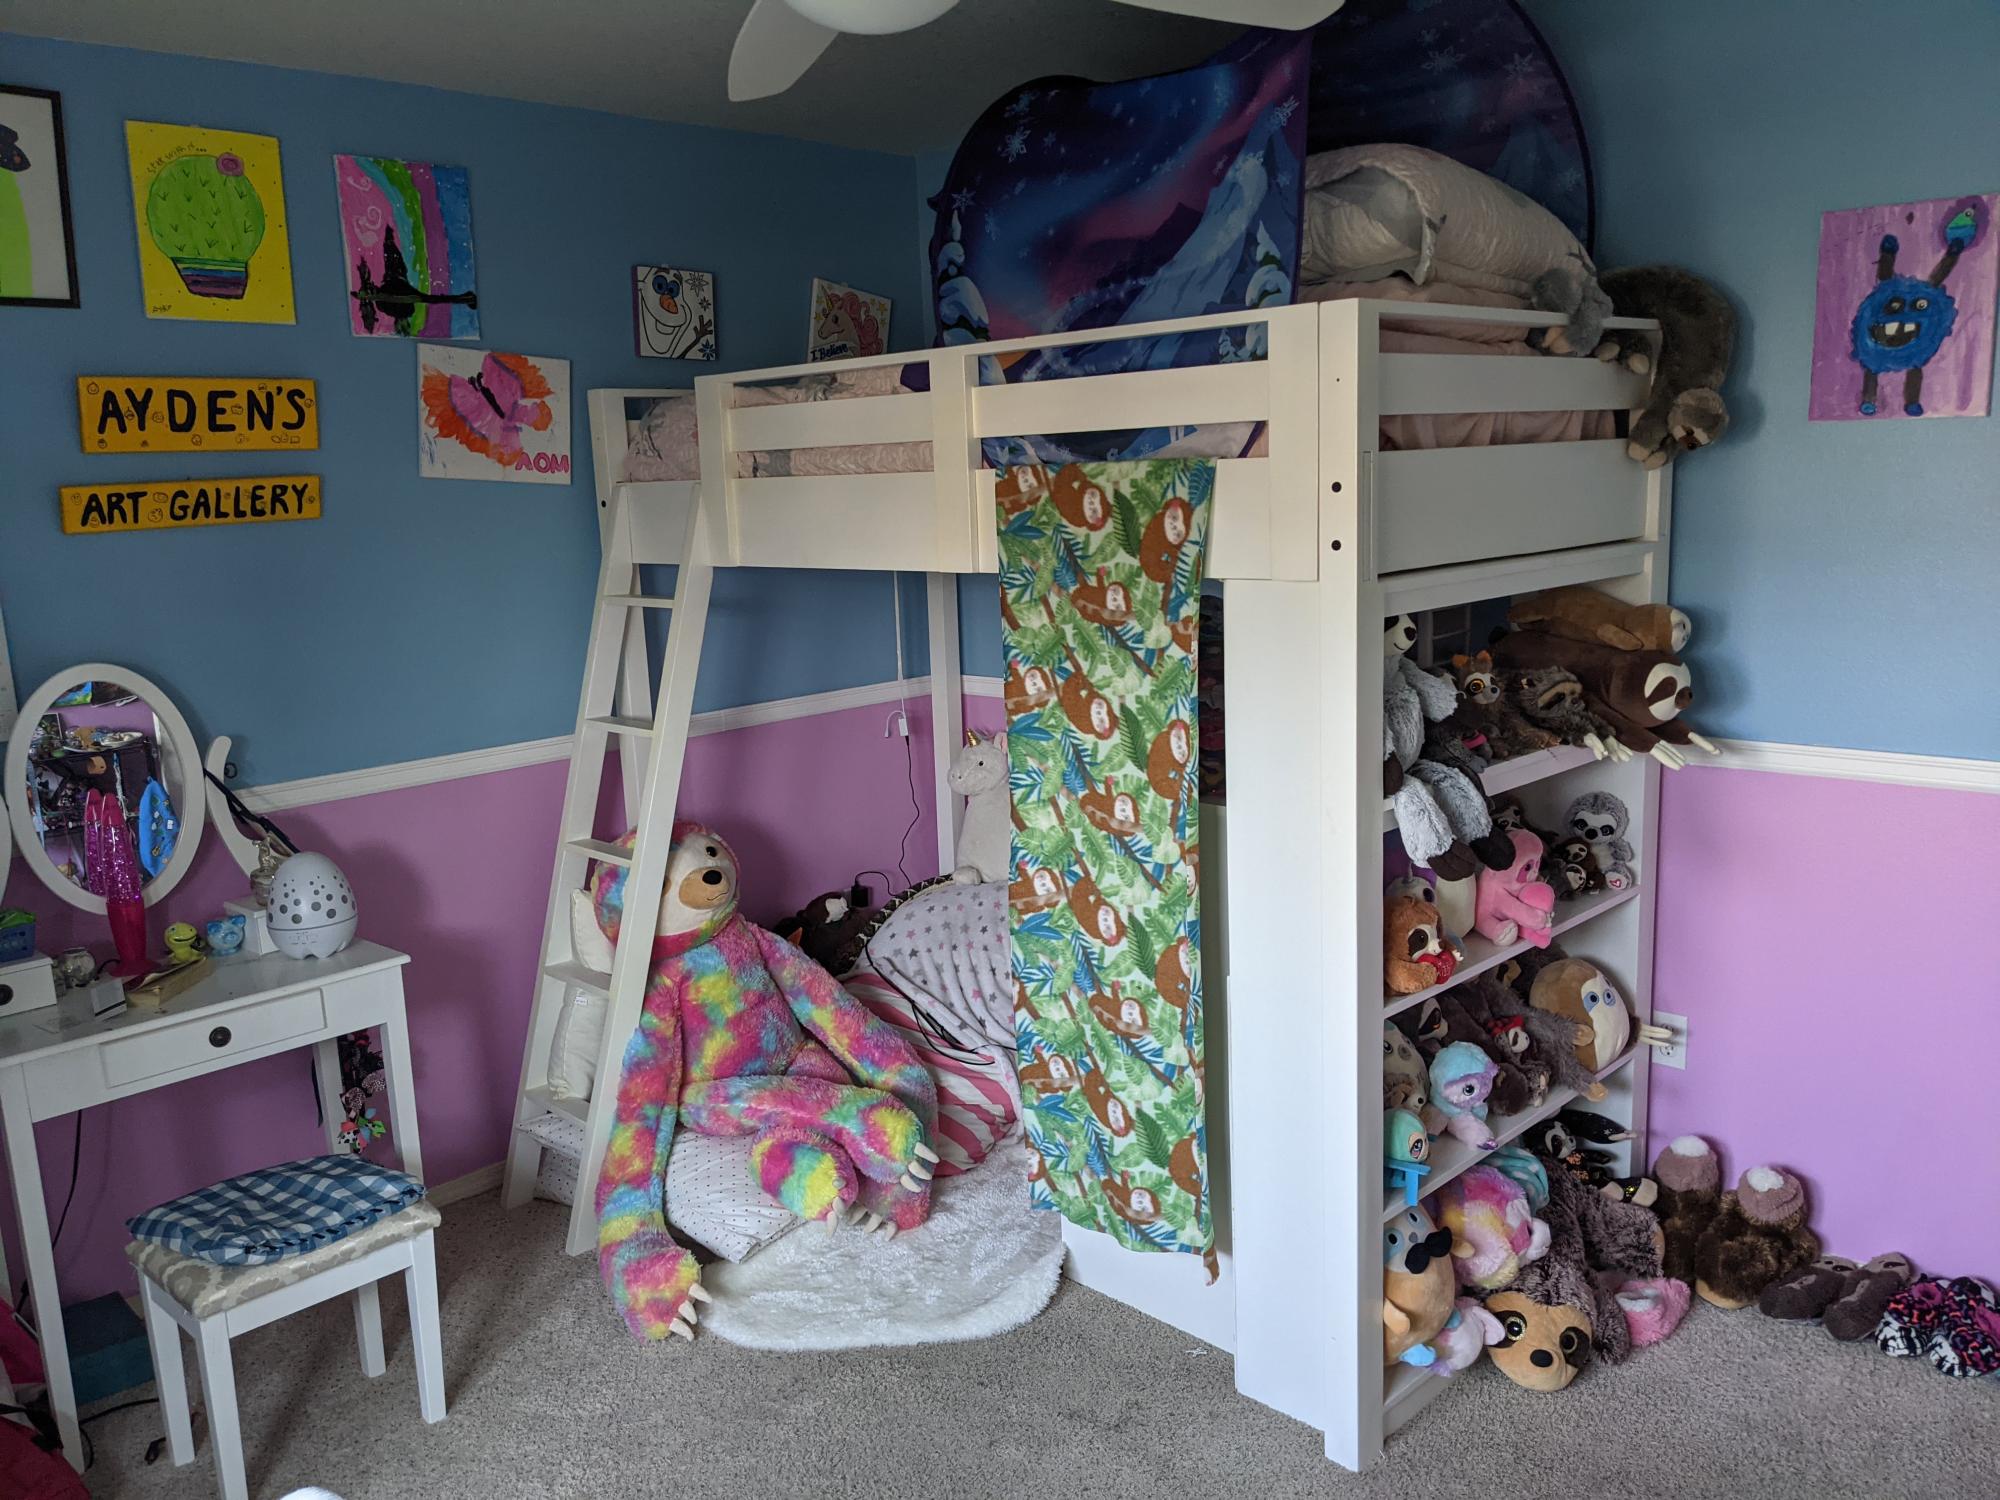
This was a present for my granddaughter's 10th birthday. I had to modify the plans so it could be disassembled then reassembles in her bedroom. That required the screws in the side boards, and vertical pegs at the ends of the top rails that could be popped up. I also added a vertical support between the back sideboard and top rail.
Built from Plan(s)
Comments
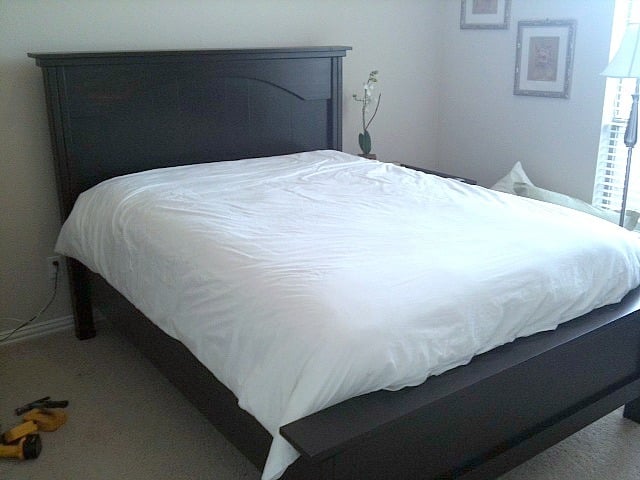
Queen Farmhouse Bed with Arch

It has taken longer than I care to admit to finish this project, but life tends to get in the way sometimes. But it turned out great, there were little to no hickups during the process, and of course I had a lot of fun building this bed!
Thanks Anna for the plans!
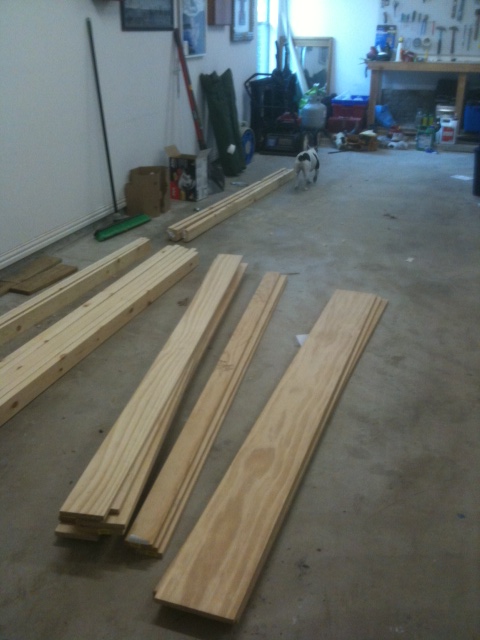
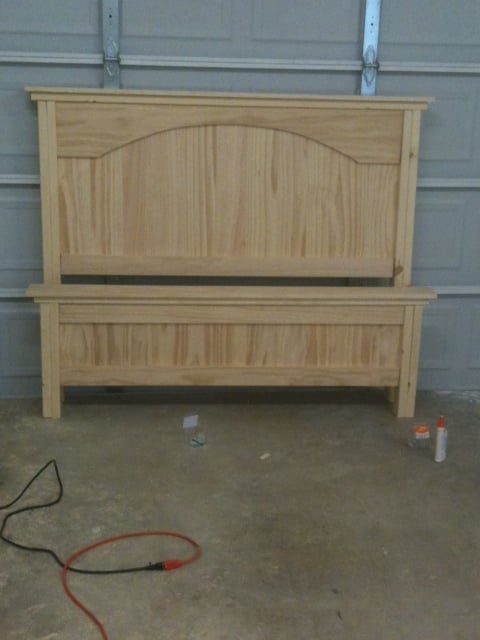
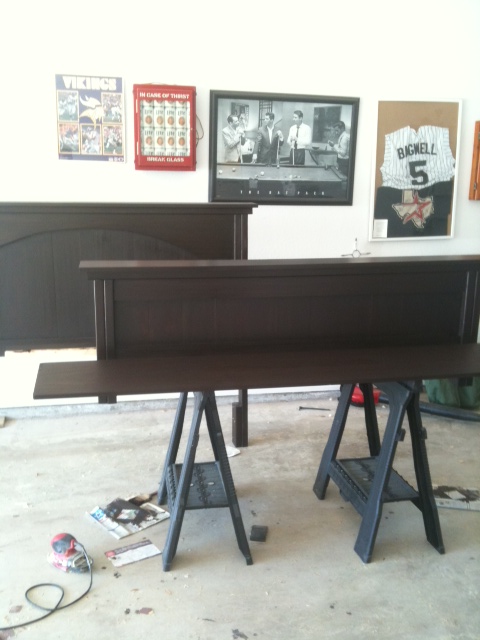
I have posted pics of the process below.
Pic 1: All the wood. Nothing smells better than a garage full of lumber! Oh, and please excuse my bulldog mooning you. She doesn't mean anything by it.
Pic 2: Headboard and Footboard finished and leaning up against the garage.
Pic 3: Just making sure everything would fit right. I used the cross-beam from the original bed frame as a guide.
Pic 4: staining in progress.
Pic 5: Finished and installed!

Built from Plan(s)
Estimated Cost
$350 - Since I was staining, I used select Pine (no knots) which is much more expensive.
Estimated Time Investment
Week Long Project (20 Hours or More)
Finish Used
Sanded well, increasing the grit from 120 - 150 - 180 - 220.
Used wood pre-treater to prevent blotchiness.
General Finishes Java Gel Stain - 2 coats.
General Finishes Gel Poly (Satin) 4 coats lightly sanding in between with 320 grit for the first two and 400 grit in between coat 3 and 4. For the final coat, I painted it on with a foam brush to make sure there were no marks from rubbing it on.
Recommended Skill Level
Beginner
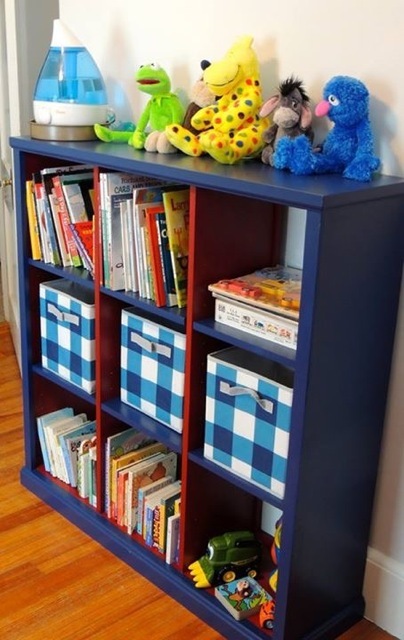
Large Cubby Bookshelf for nursery
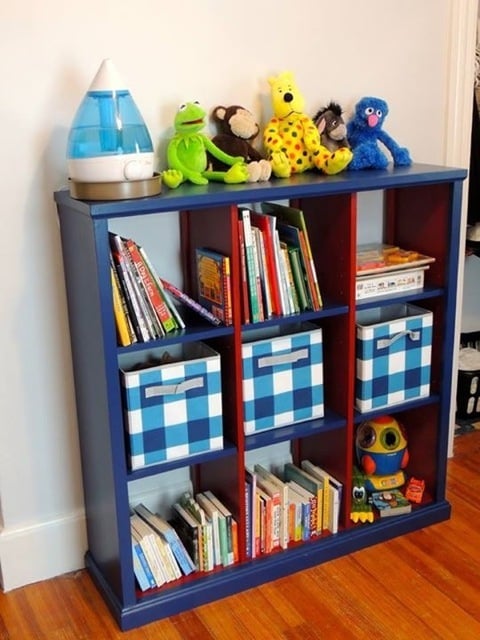
I wanted a bookcase for my son's room that would add some color and be a functional storage unit for his books and toys. I did not buy the highest grade of pine because it would have doubled the project cost and I knew I was going to paint it. The only trouble I had was that the boards were a little cupped so the shelves don't have an invisible fit. I used stock moulding and cut down the base trim to fit. In hind sight, I would have not done the adjustable shelves. I like the symmetrical look of this and can't see myself moving them. I did make a cleat to attach it securely to the wall so that a busy climbing boy wouldn't pull it down on himself.
Built from Plan(s)
Estimated Cost
This probably cost me $100 because I bought two paint colors.
Estimated Time Investment
Day Project (6-9 Hours)
Finish Used
Interior paintd
Recommended Skill Level
Beginner

Modern Adirondack chair
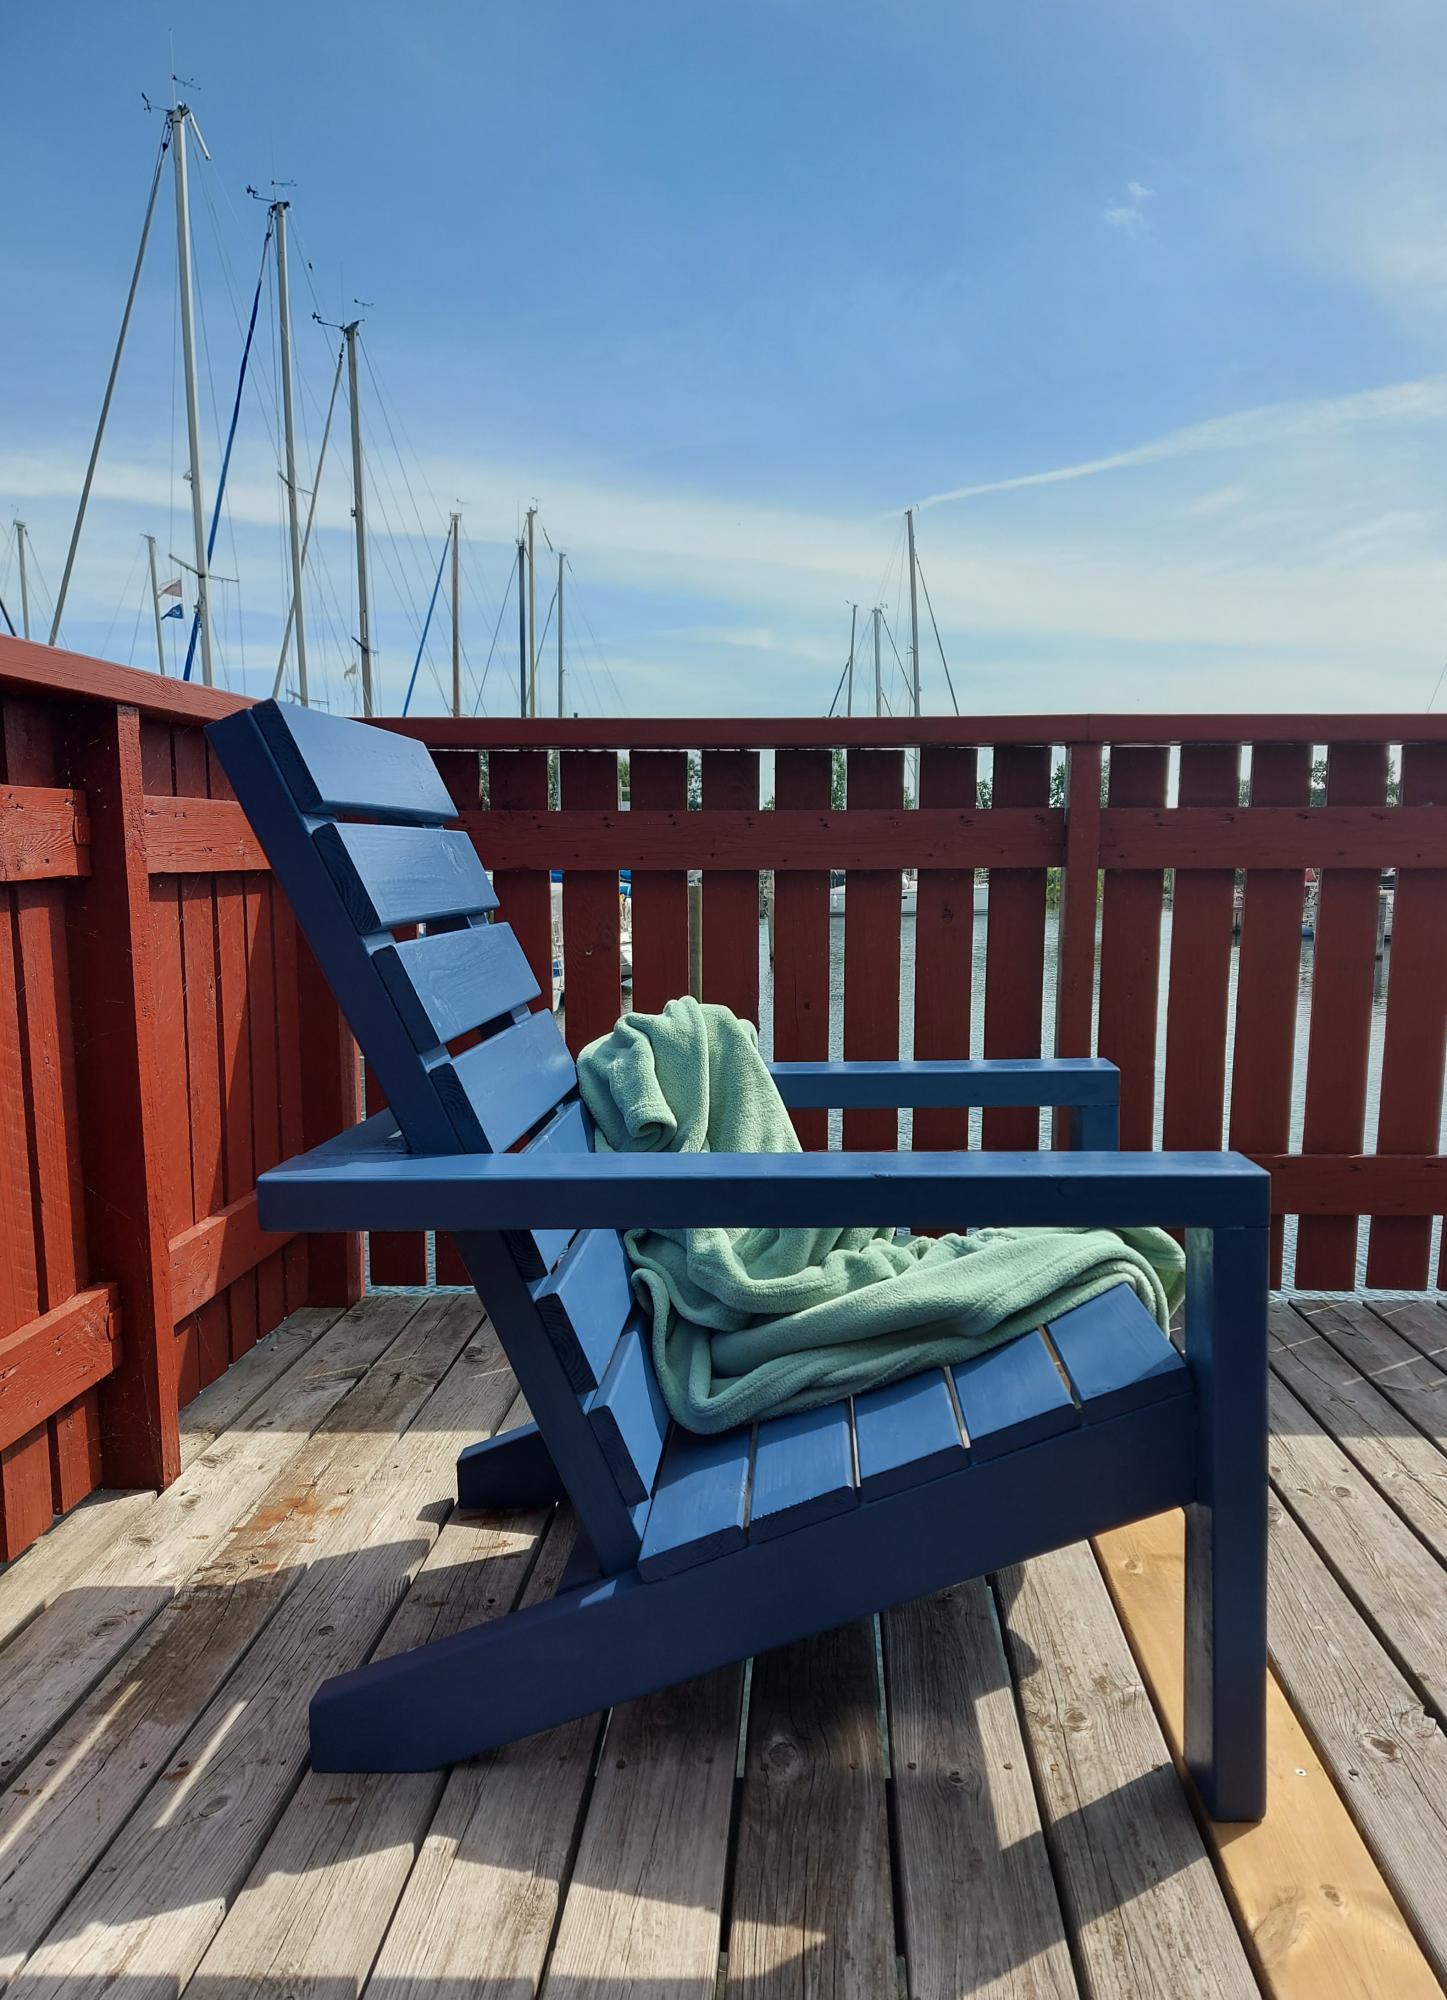
A slightly modified version of the Modern Adirondack chair. A neighbor walked by and commented that it was a cool new chair. I replied that it had been surprisingly easy to build. He was clearly surprised and asked, "YOU built it?" He's a carpenter and I'm a psychologist, so he obviously did not expect me to be able to build anything that looked even half decent. When he recovered from his surprise, he pointed out all the imperfections and offered advice on how I could do a better job next time... :-D
Built from Plan(s)
Comments
Mon, 11/22/2021 - 09:27
LOL, love it!
Great job, love the story behind it too! Thanks for sharing and great finish choice~
tower

Teeny bathroom storage tower. Modified size to 12"w x 26"h x 10"d.

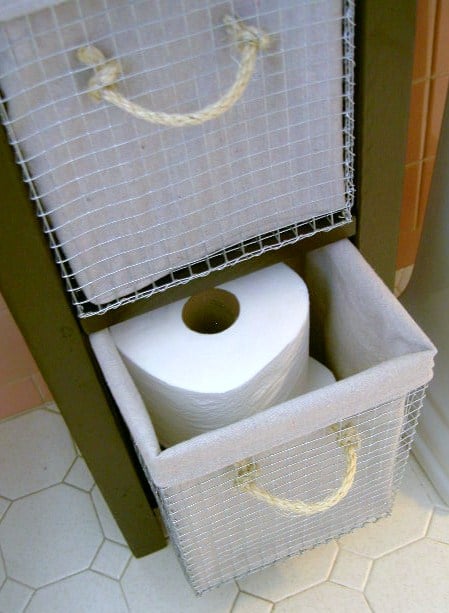
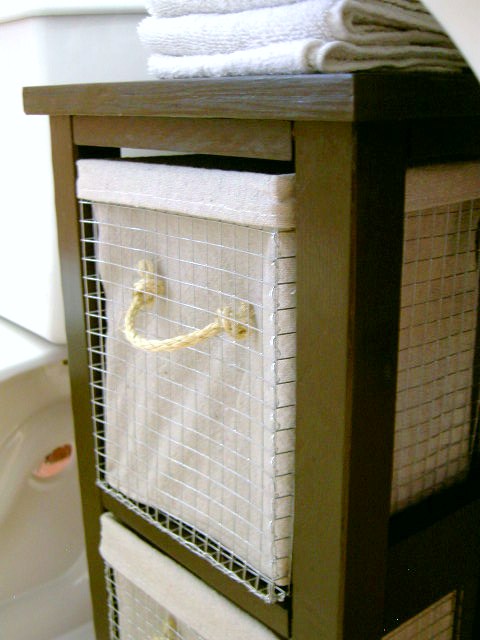
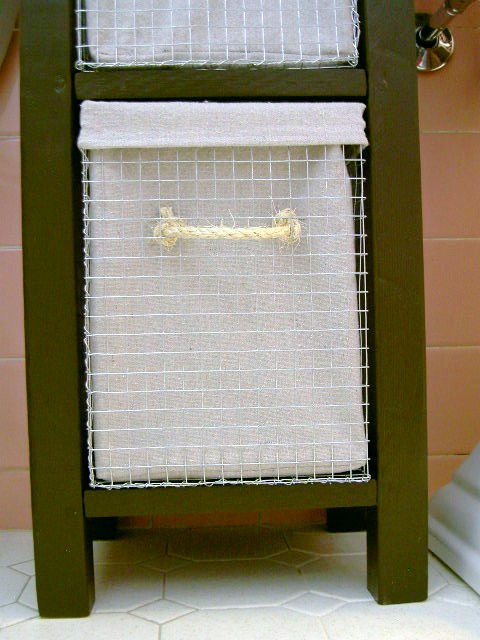
Built from Plan(s)
Estimated Cost
$10.00
Estimated Time Investment
Afternoon Project (3-6 Hours)
Finish Used
1. Two coats Behr French Roast paint and primer in one
Recommended Skill Level
Beginner
child Adirondack

Hello, I was looking for a unique gift for a baptism baby.I started this chair with great enthusiasm. Gradually after my job, I made one mois.Du cutting the pallet until making coussins.J 'I used paint 0% solvent. I am very happy for the first time. I will now make a model adult.Conseil: Paint before because after the assembly is much more diffcile.Faire just after retouching at the screws. Start you! Thank you Ana. PS: Excus me for my English , Im french


Estimated Time Investment
Week Long Project (20 Hours or More)
Recommended Skill Level
Starter Project
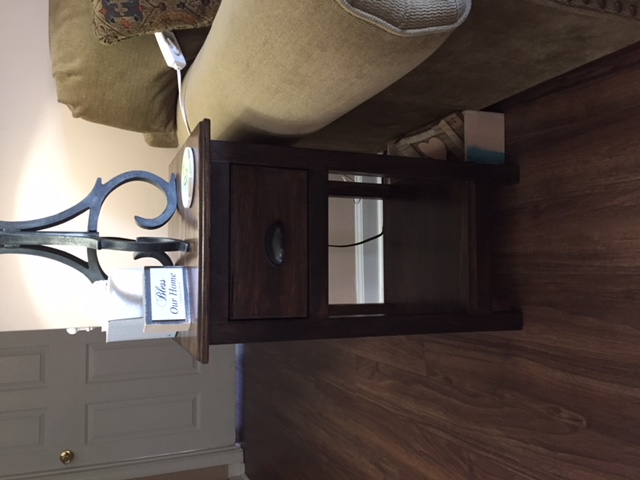
Modified Reclaimed Wood Console Table

I needed a console table that would fit in a fairly small spot and knew as soon as I saw this plan that I wanted to create something very similar in a scaled down version. Made a few modifications to the original other than size, like using a solid piece of wood for both the top and bottom panels.
The building plans are easy to follow and it all went together easily. I included the modified cuts on my blog if anyone else out there needs a little table like this one.


Built from Plan(s)
Estimated Cost
$30 (but I used wood from other projects which kept the cost down)
Estimated Time Investment
Weekend Project (10-20 Hours)
Finish Used
Behr Latex Paint for the body and a mix of Special Walnut and Dark Walnut stain from Minwax for the drawers and bottom panel.
Recommended Skill Level
Intermediate
Outdoor Sofa Finished!
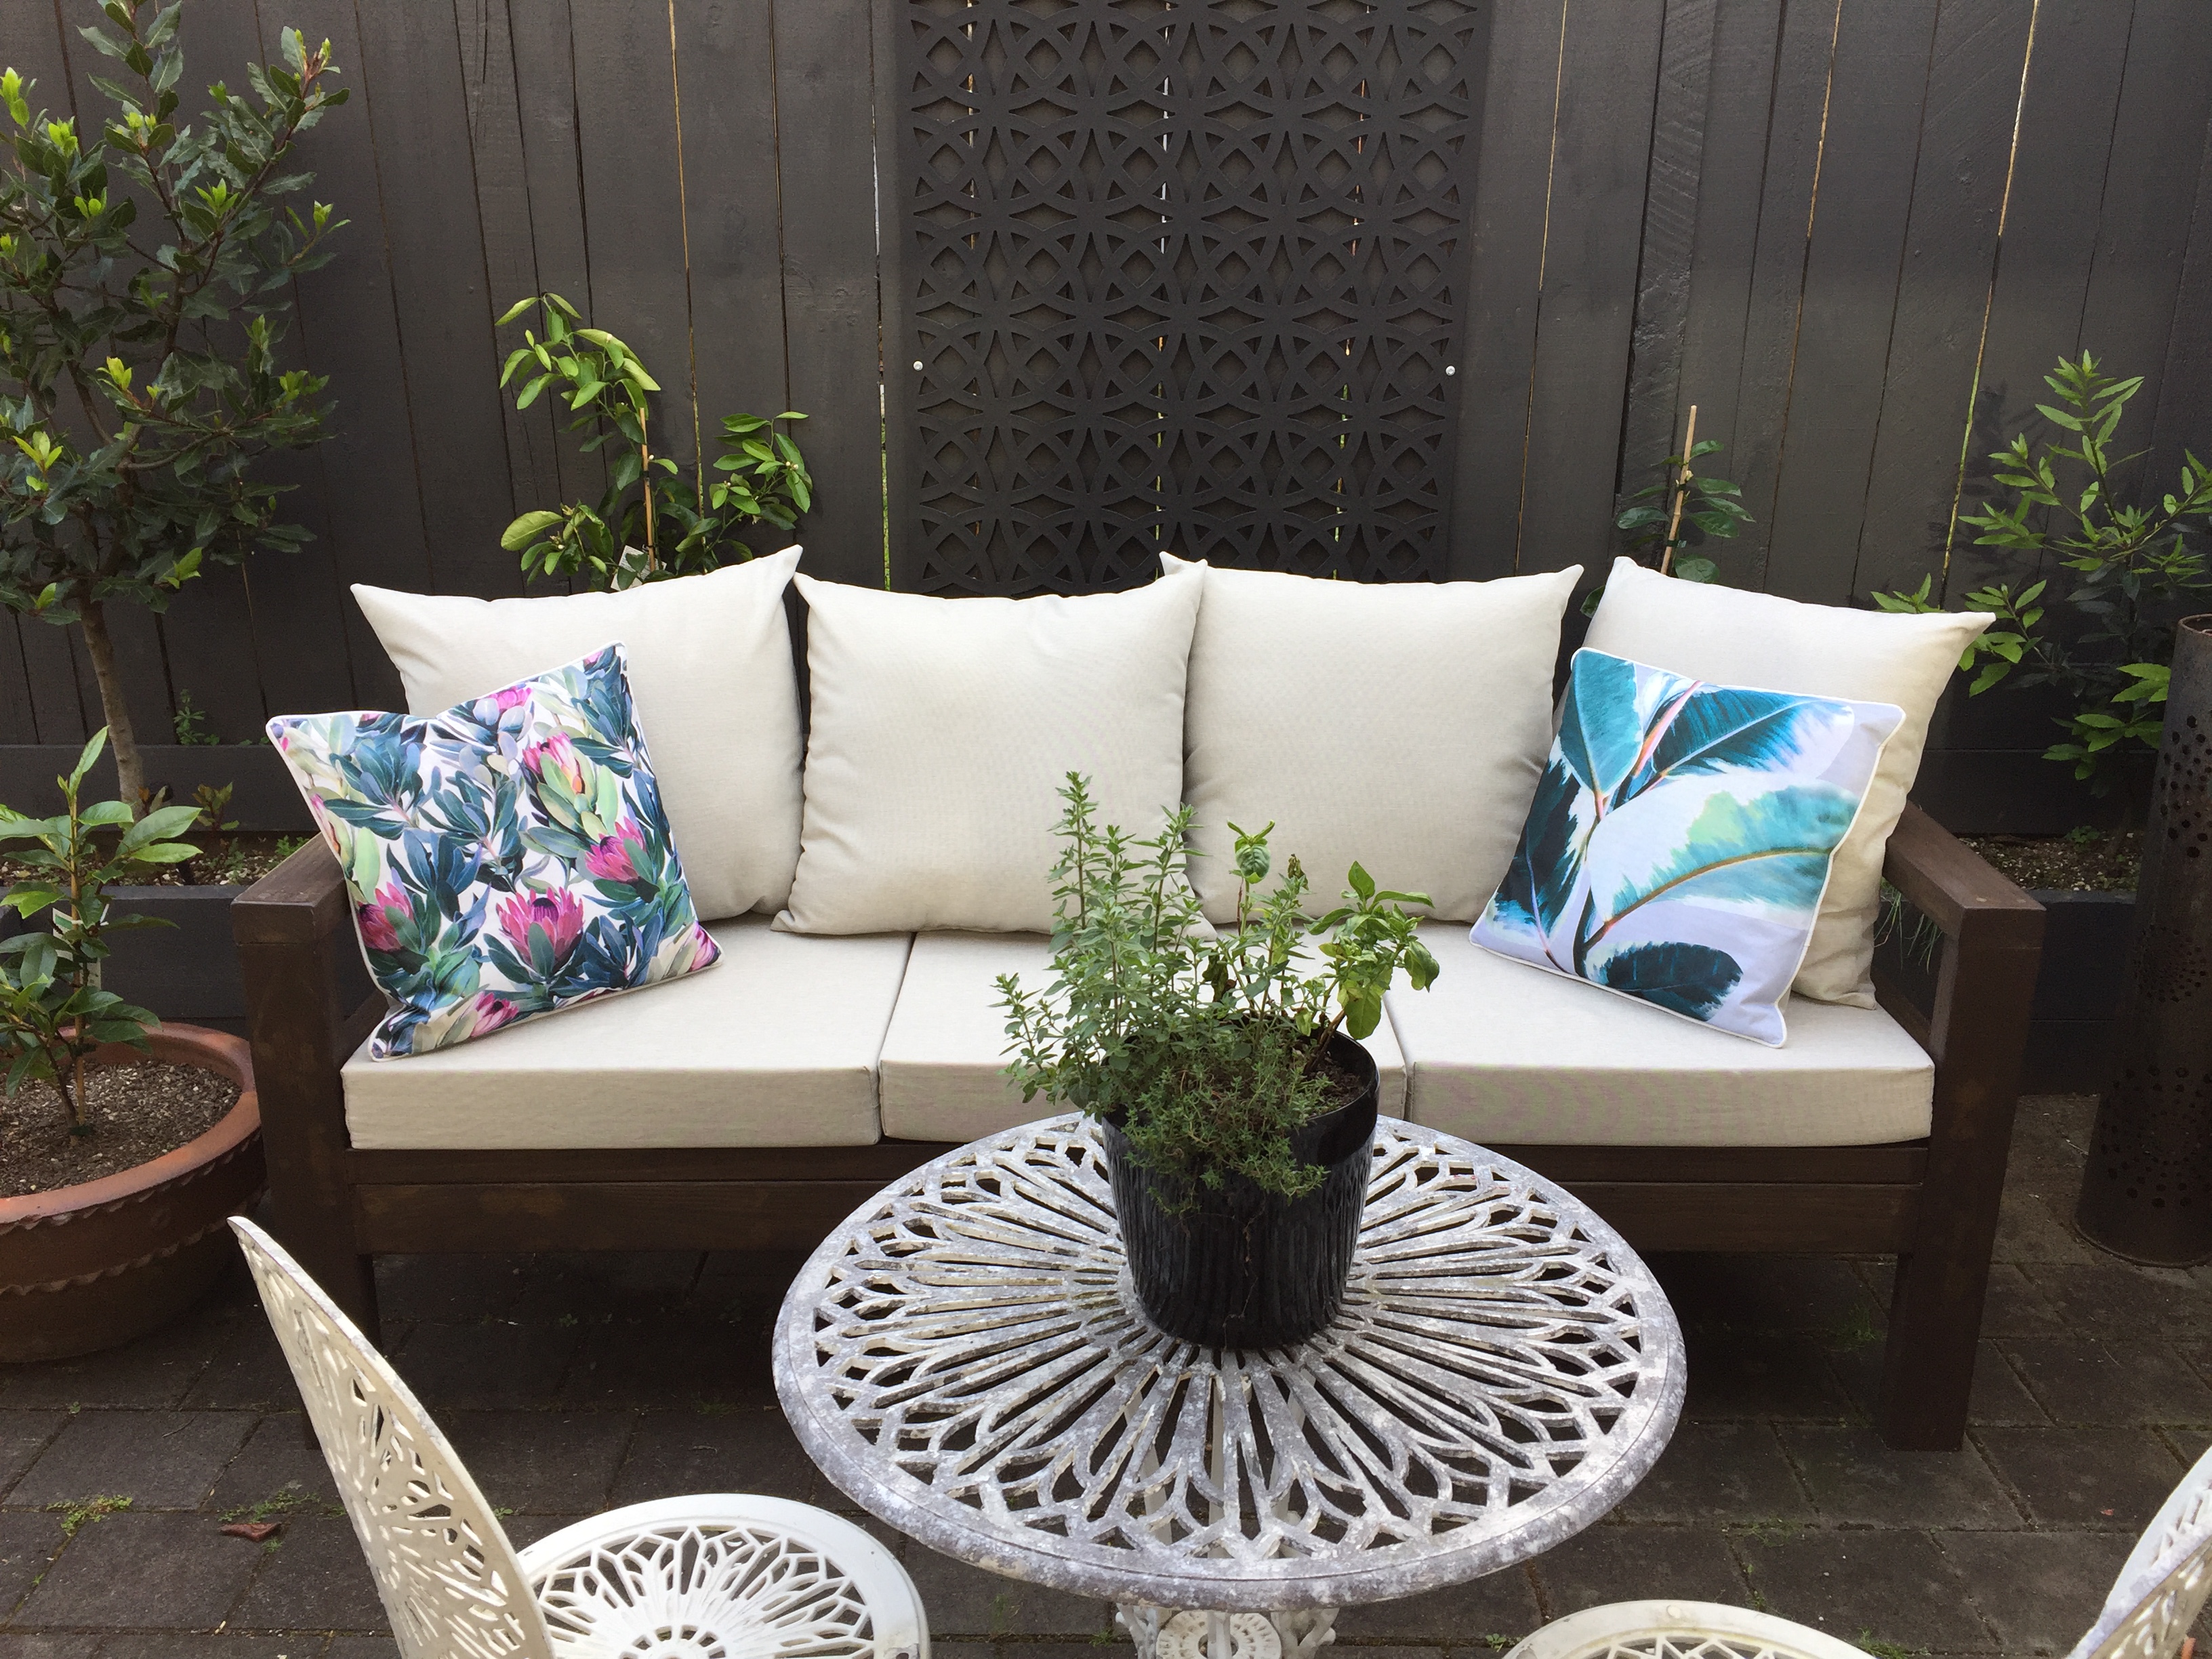
My first furniture building project!
Built from Plan(s)
Estimated Cost
$800NZ (including cushions)
Estimated Time Investment
Weekend Project (10-20 Hours)
Finish Used
Stain
Recommended Skill Level
Starter Project
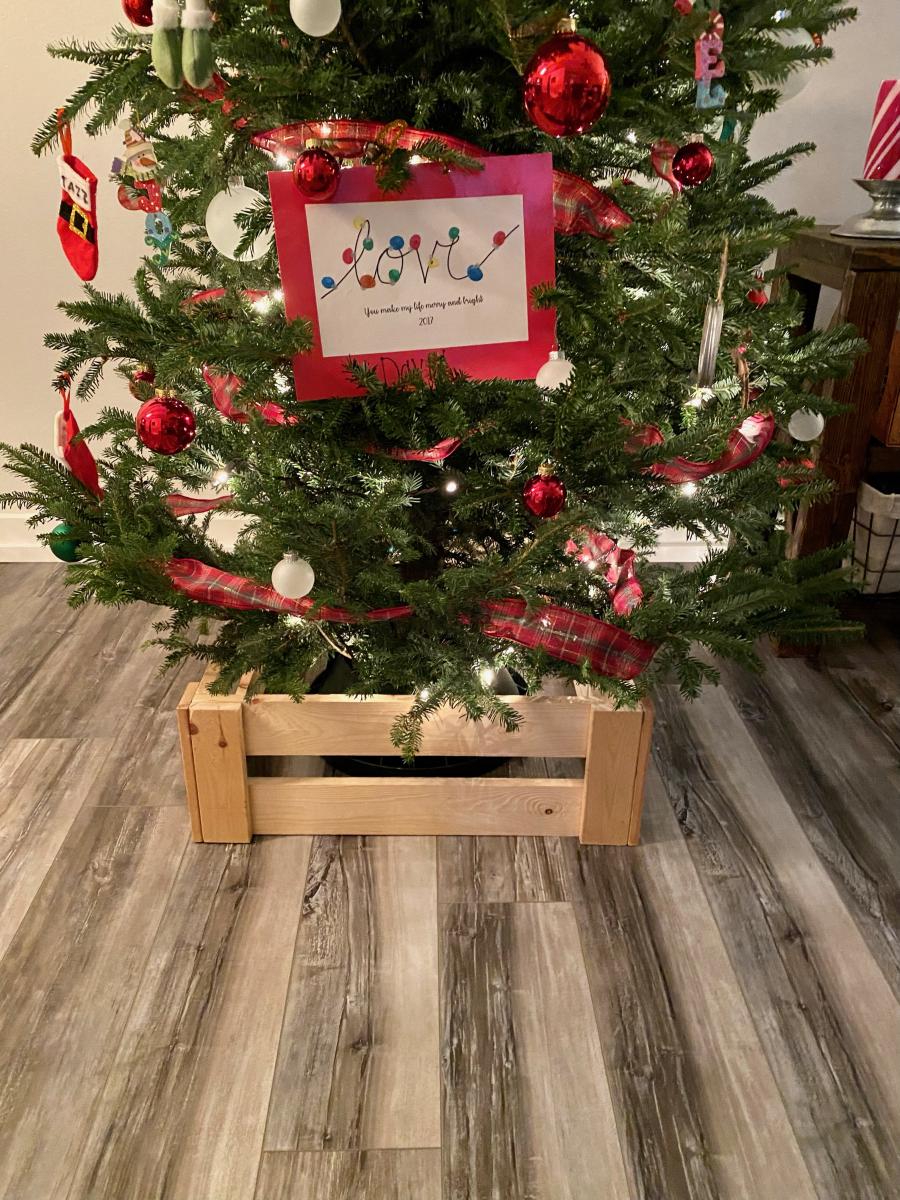
Christmas Tree Crate
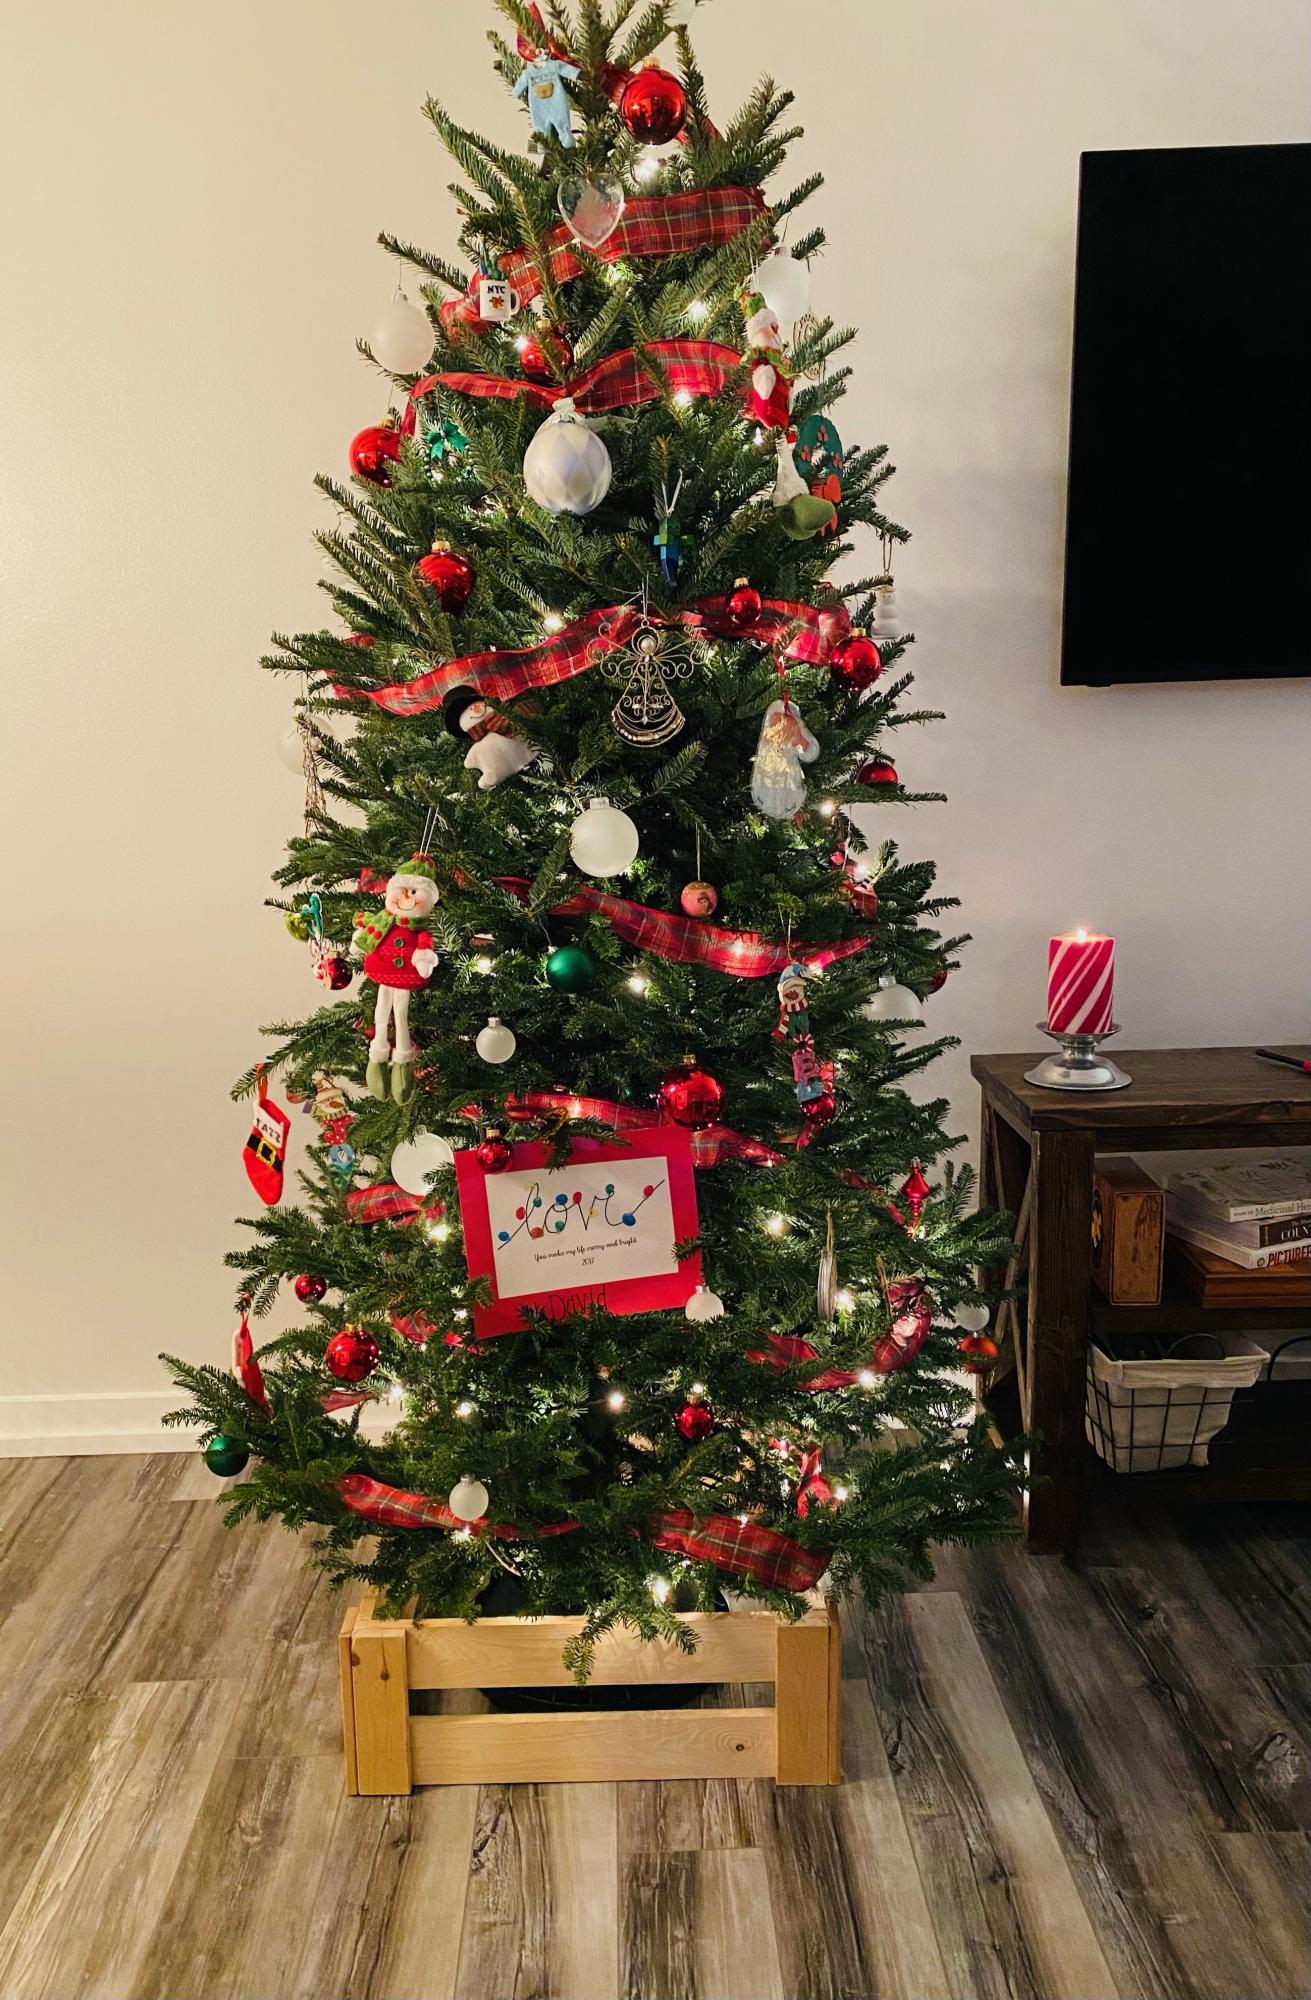
Ana, thanks for sharing this project.
I saw this crate and I decided to build it this year.
I changed it up a bit to accommodate my tree size. Mine measures 24".
I left it natural wood color, I think it brings up rustic look that I was going for. :)
It is very easy to build and it looks fantastic!
Thanks,
Merry Christmas!
Built from Plan(s)
Comments
Little Helper Tower
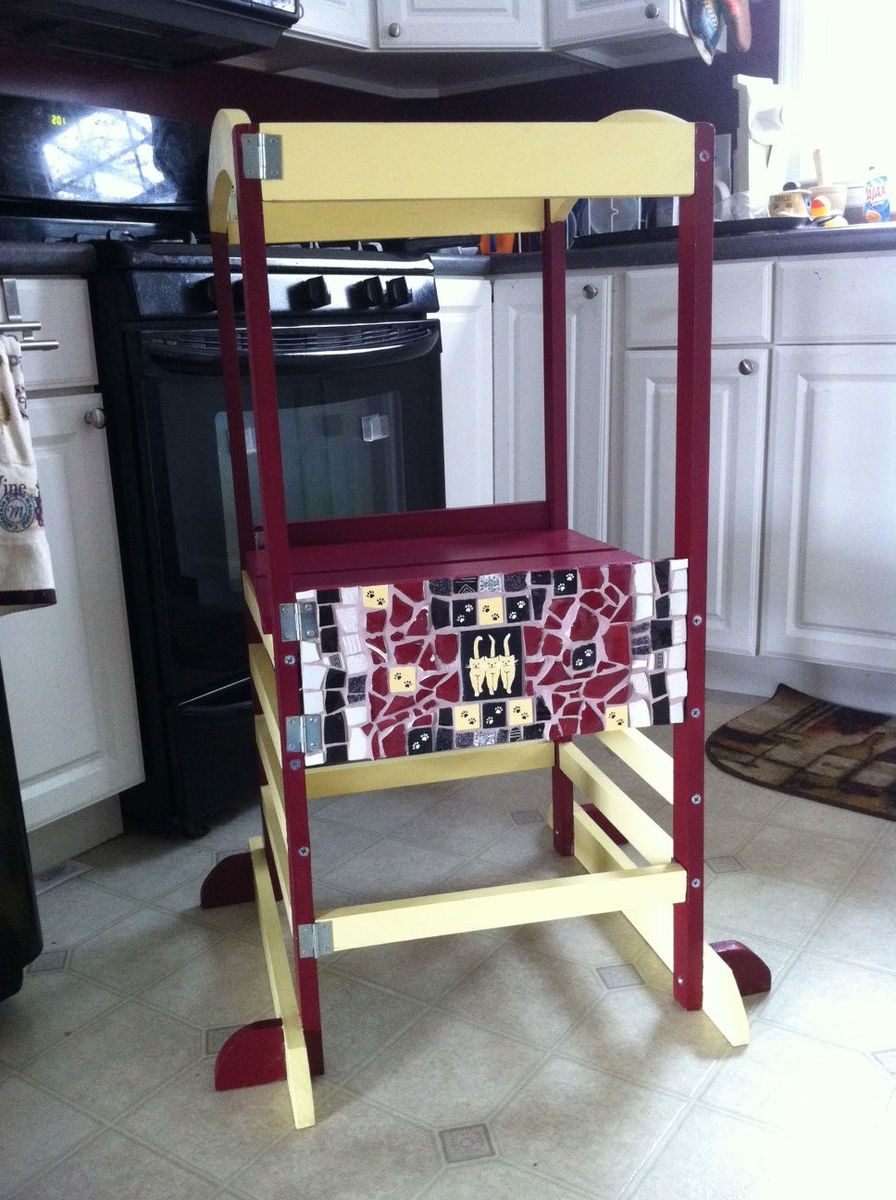
Built this helper tower for my munchkin so she has a safer place to stand when she wants to help us in the kitchen. Put a mosaic on the front and painted it to match the mosaic and the red color on some of the walls in our kitchen (hard to see in the photo). I am thinking of velcroing some ribbon to the sides to cover the screws and hinges. If I use velcro, then I can take it off easily to tighten the screws in the hinges if needed.
Built from Plan(s)
Estimated Time Investment
Weekend Project (10-20 Hours)
Finish Used
Paint
Recommended Skill Level
Intermediate
Step Stool
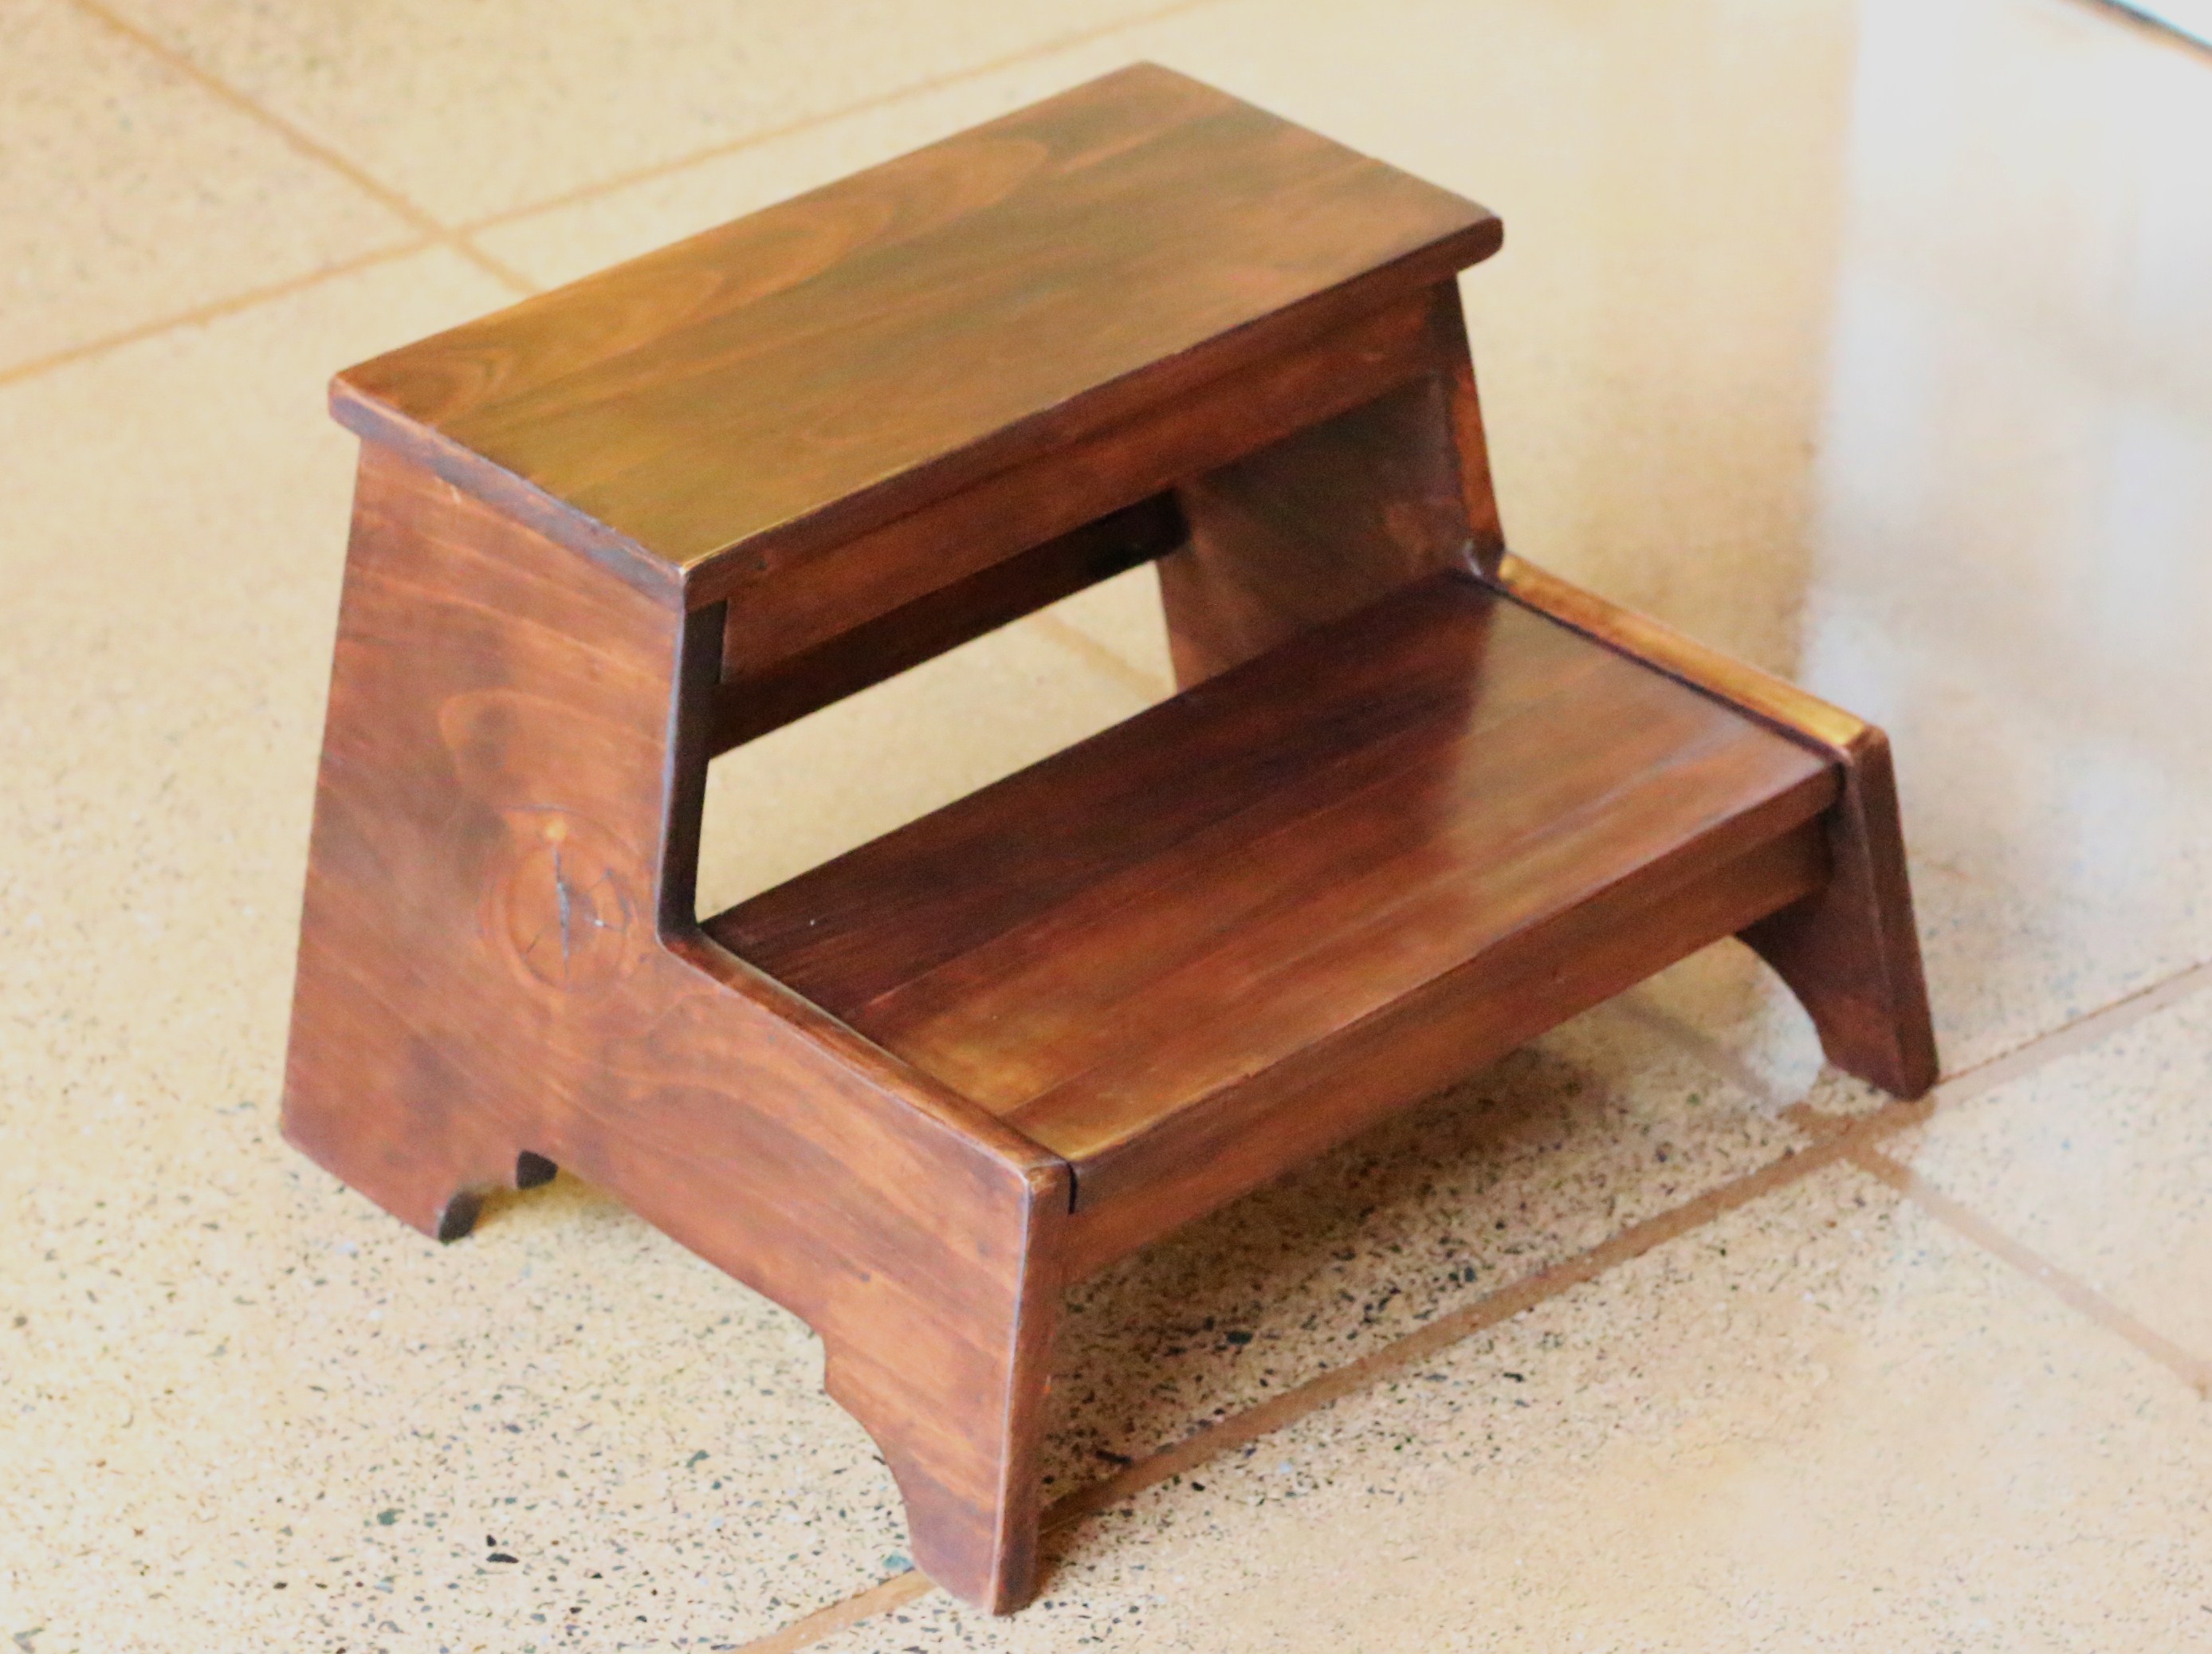
This cute step stool is my first build from Ana's book.
It is made of macrocarpa, and finished with "teak" water-based stain by Resene, danish oil, and clear furniture wax.
Estimated Time Investment
Afternoon Project (3-6 Hours)
Finish Used
This piece is finished with "teak" water-based stain by Resene, danish oil, and clear furniture wax.
Recommended Skill Level
Intermediate
Y Truss Round Table
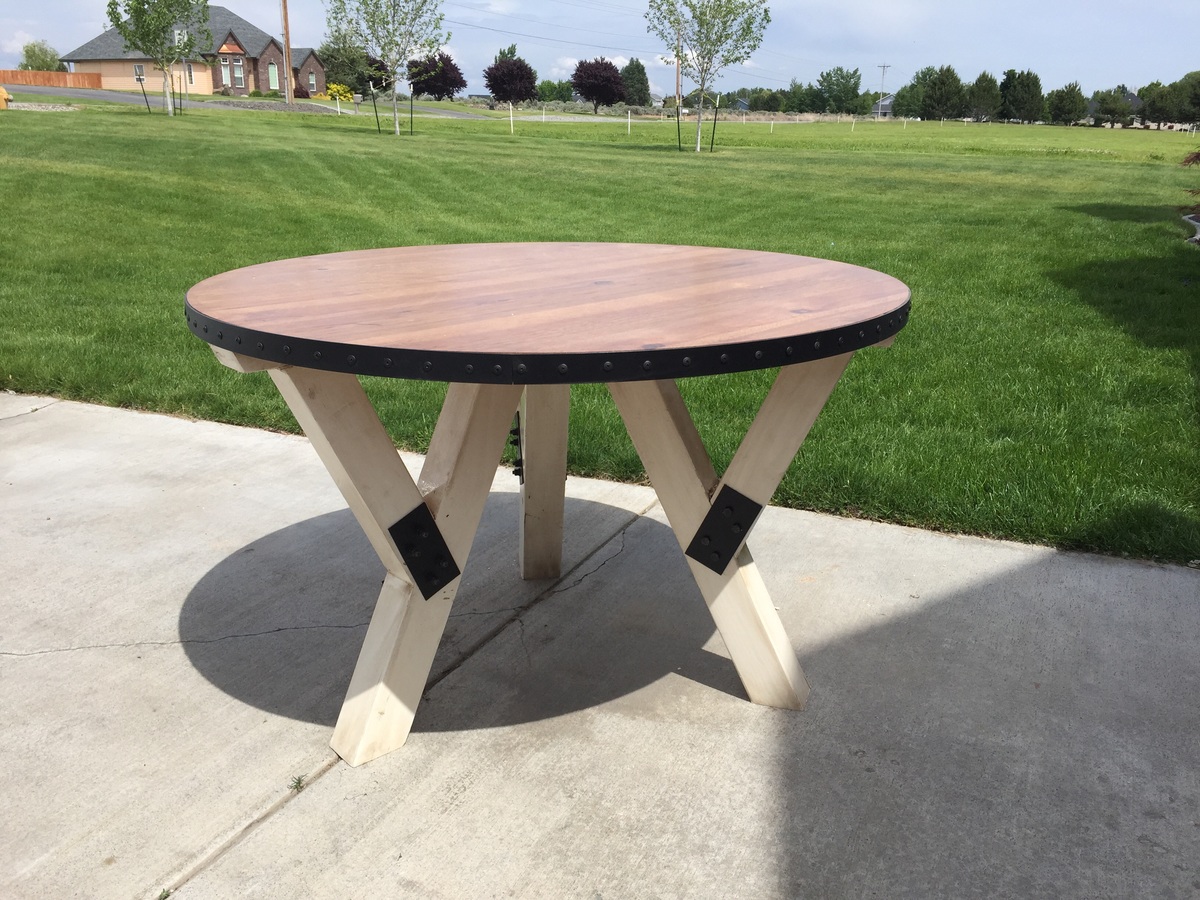
Using the "Y Truss Round Table" plans, I created a 48" table with metal accents.
Built from Plan(s)
Estimated Time Investment
Weekend Project (10-20 Hours)
Recommended Skill Level
Intermediate
Comments

Sun, 05/31/2015 - 01:31
Hi gcomfort I am in love with
Hi gcomfort I am in love with the top of your table! it is beautiful!! what wood did you use for to create the smooth surface?
Fri, 06/05/2015 - 08:11
Thanks
The table top is 1.5 inches thick made up of 2 layers of 3/4 inch think plywood. The top layer of the table top is hickory plywood (the top and bottom layers of the plywood are hickory). The base layer of the table top is 3/4 inch general plywood from Home Depot.
Thanks, again.
Sat, 08/29/2015 - 08:49
What is the metal accent?
I love this!!! Where did you buy the metal accent that goes around the perimeter of the table top? What is it?
Sat, 09/05/2015 - 07:30
Thanks! I bought it from
Thanks! I bought it from Lowes. It's just 1.5in Wide aluminum painted black and connected with a bunch of black, flat headed screws.
Sat, 09/05/2015 - 07:30
Thanks! I bought it from
Thanks! I bought it from Lowes. It's just 1.5in Wide aluminum painted black and connected with a bunch of black, flat headed screws.
Sat, 09/19/2015 - 11:18
Another Question
I actually looked at the hardware stores for something similar before you answered by comment. I wasn't able to find anything that I thought would work. Do you remember what the aluminum is used for in other jobs? Or what area you found it in?
A family member suggested using the metal stips that hold down the end of carpet, but it's not long enough for the table.
Thank you!
Tree Wall Shelf with lights
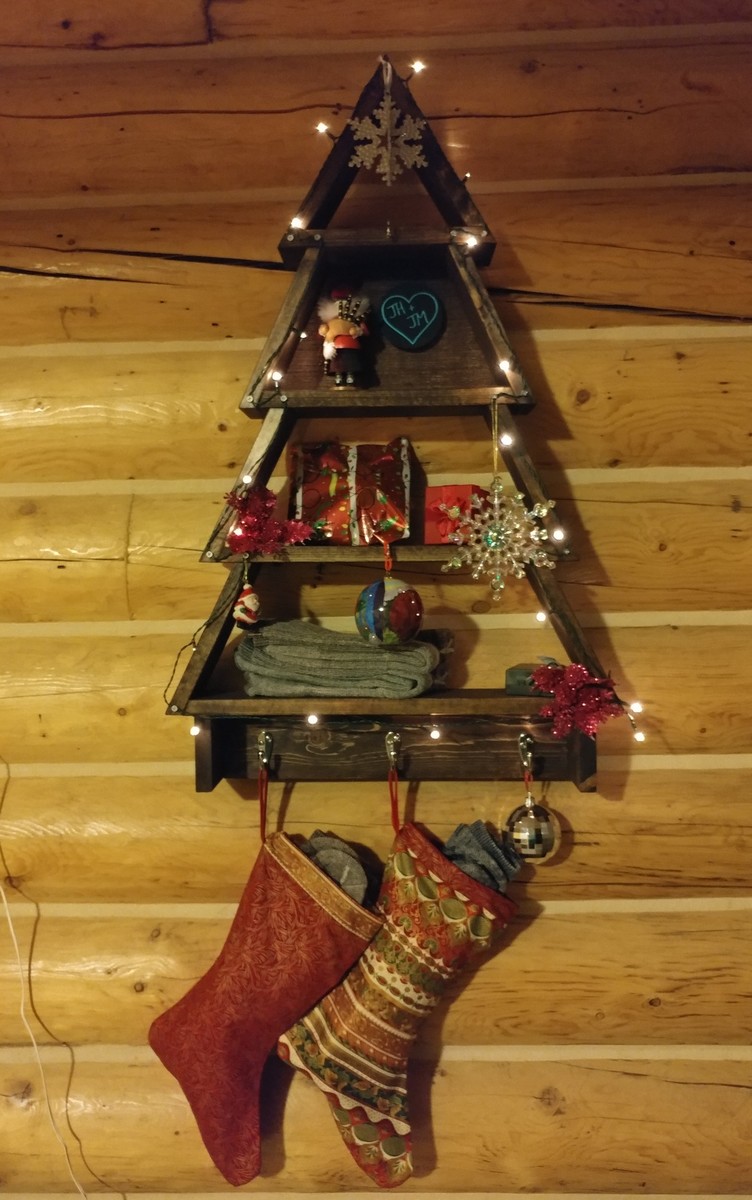
Quick, easy and inexpensive build... I opted not to do the rounded corners at the base of the tree as I was in a hurry.
Built from Plan(s)
Estimated Cost
$25
Estimated Time Investment
An Hour or Two (0-2 Hours)
Finish Used
Minwax espresso
Recommended Skill Level
Beginner
Workbench

I have two little girls and two nieces...so I do not get to build boy stuff very often.
This was the second workbench I built as a birthday gift. I painted the first one white and did not round off the edges. There was some confusion as to what it was supposed to be. So, I painted the second one black and found a cardboard circular saw blade at Hobby Lobby that I painted metalic silver.
Built from Plan(s)
Estimated Cost
$15-20
Estimated Time Investment
An Hour or Two (0-2 Hours)
Recommended Skill Level
Starter Project