Bucket Stand Storage
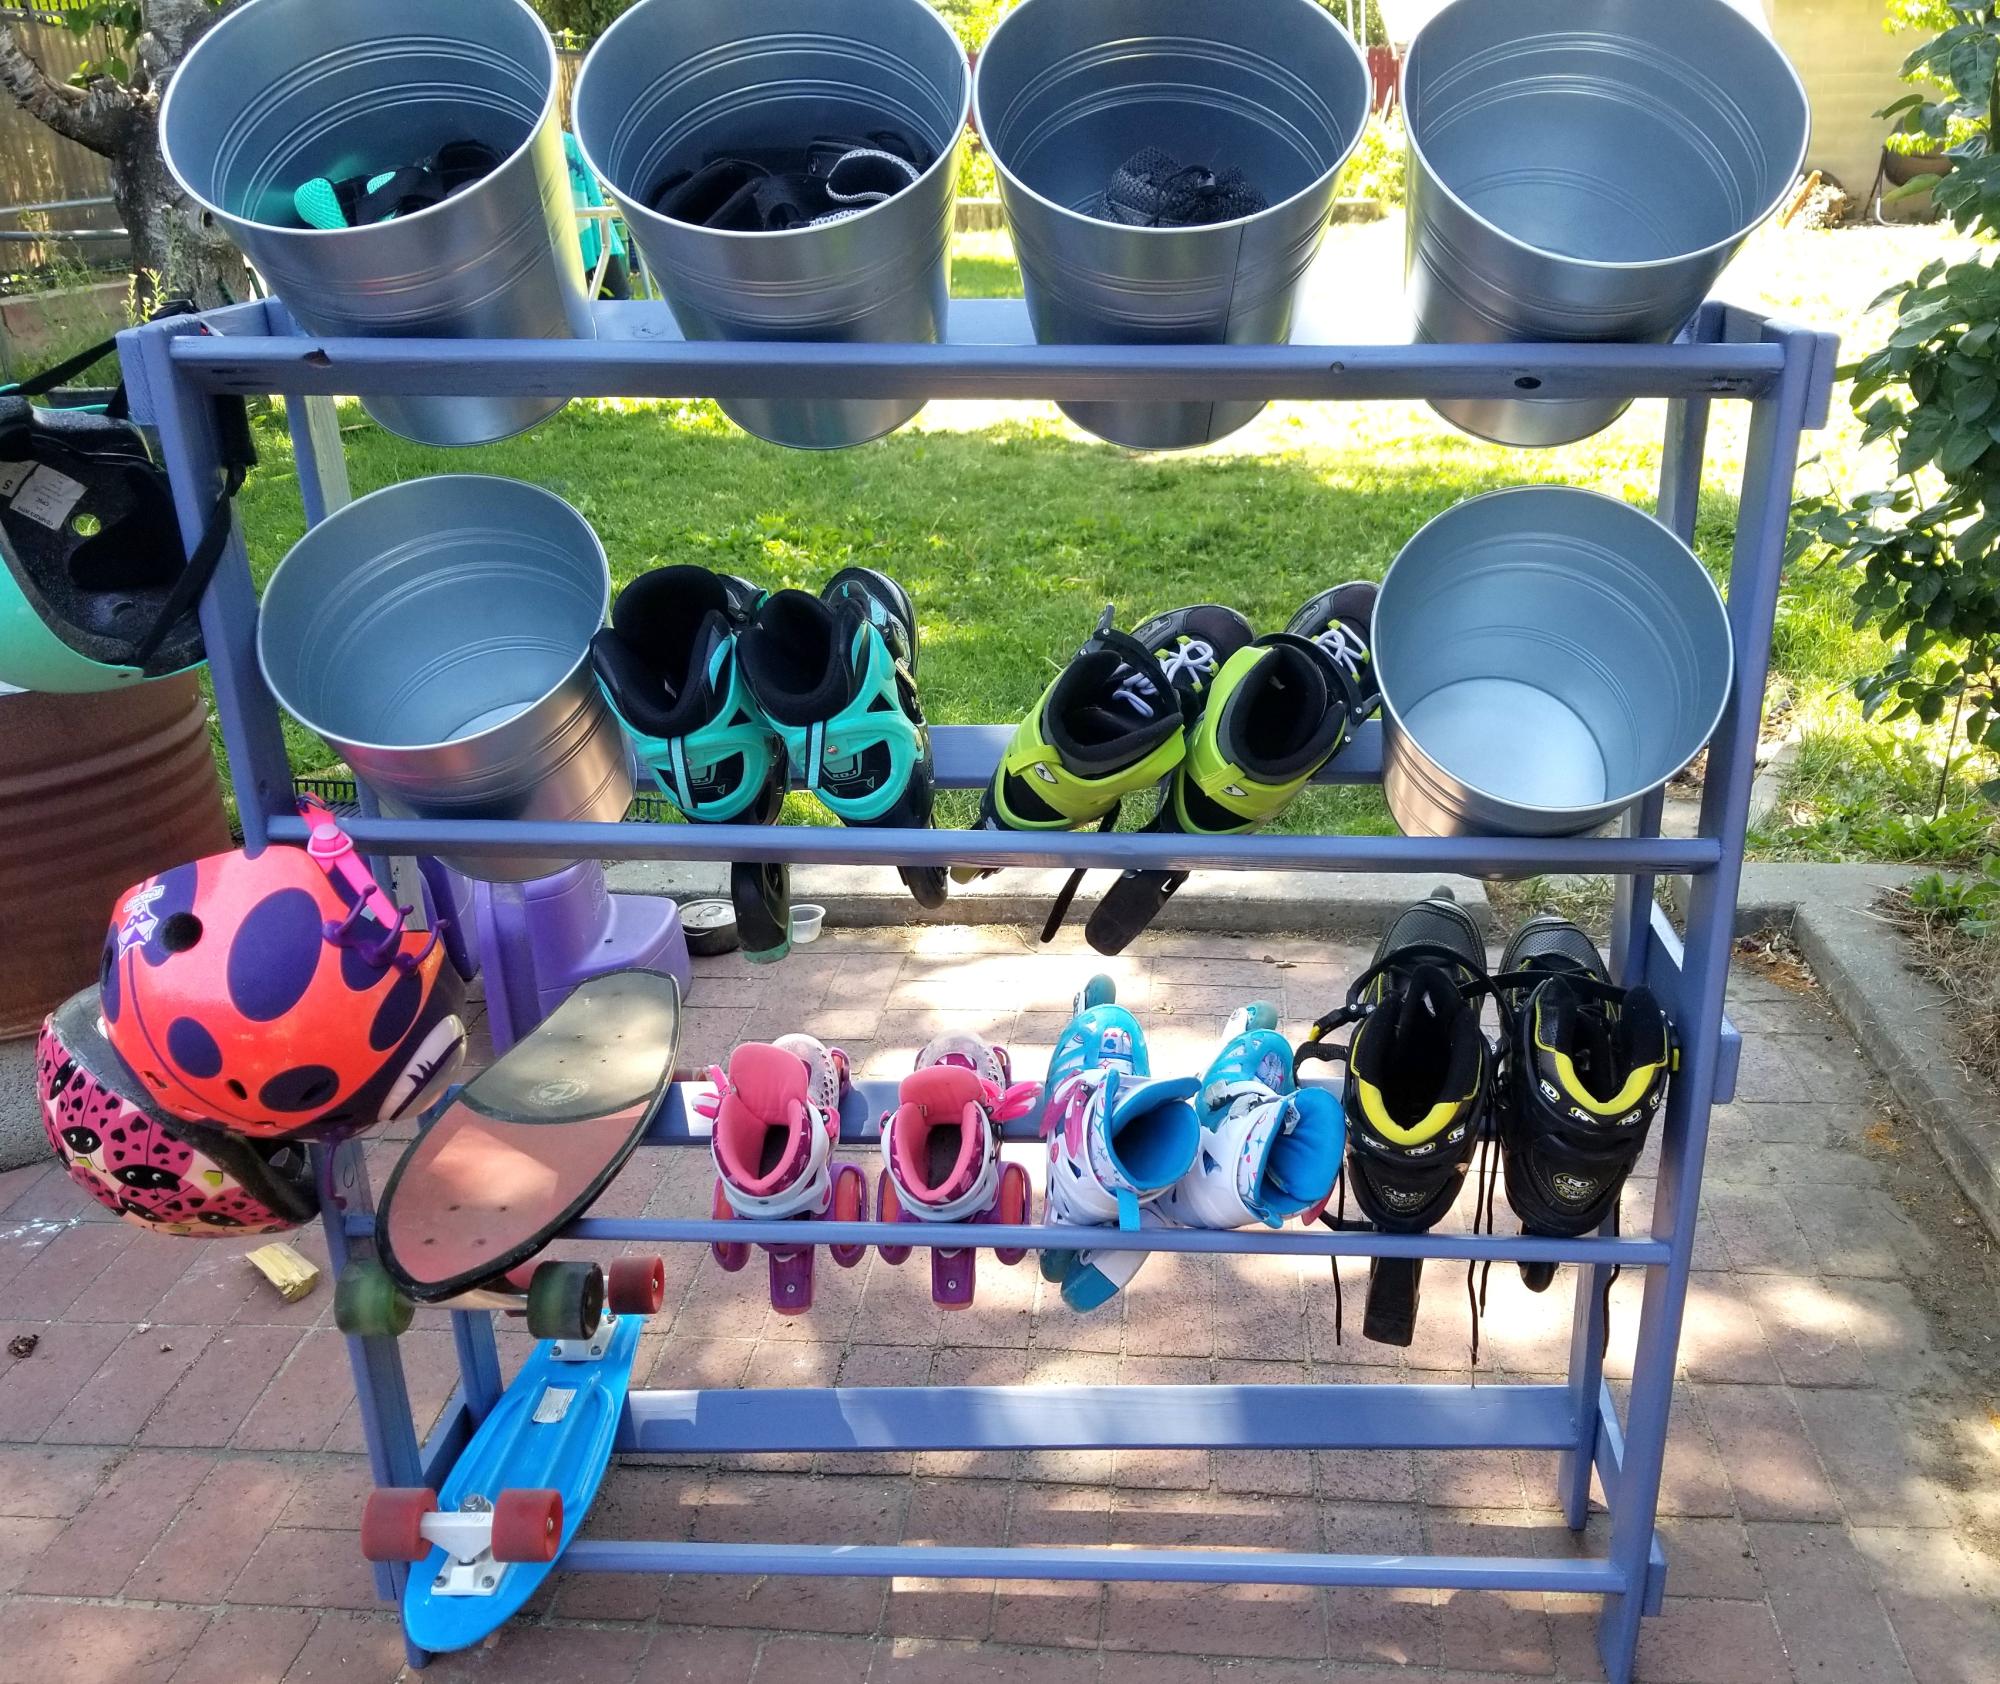
I changed dimension to make sure the rollerblades did not fall through and made it wider for holding our whole families set. I may add wheels for easier mobility.
Kristy
Built from Plan(s)
I changed dimension to make sure the rollerblades did not fall through and made it wider for holding our whole families set. I may add wheels for easier mobility.
Kristy

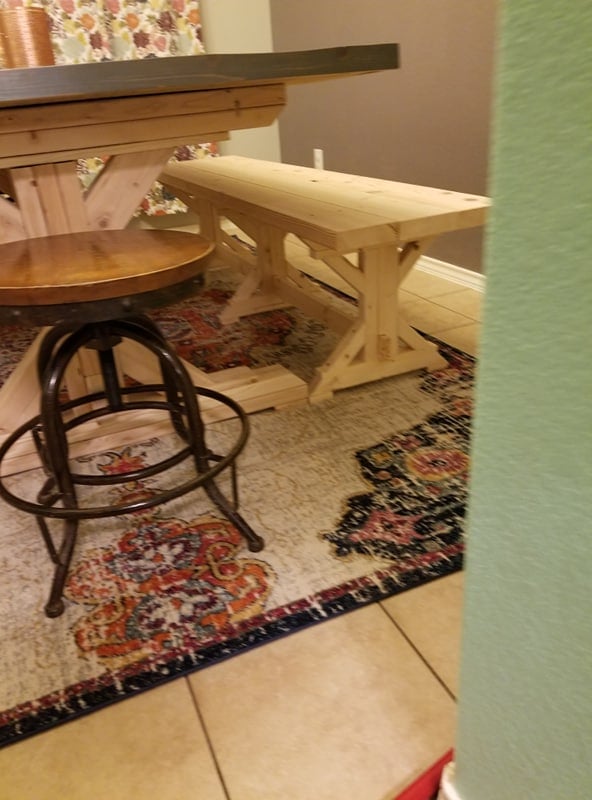
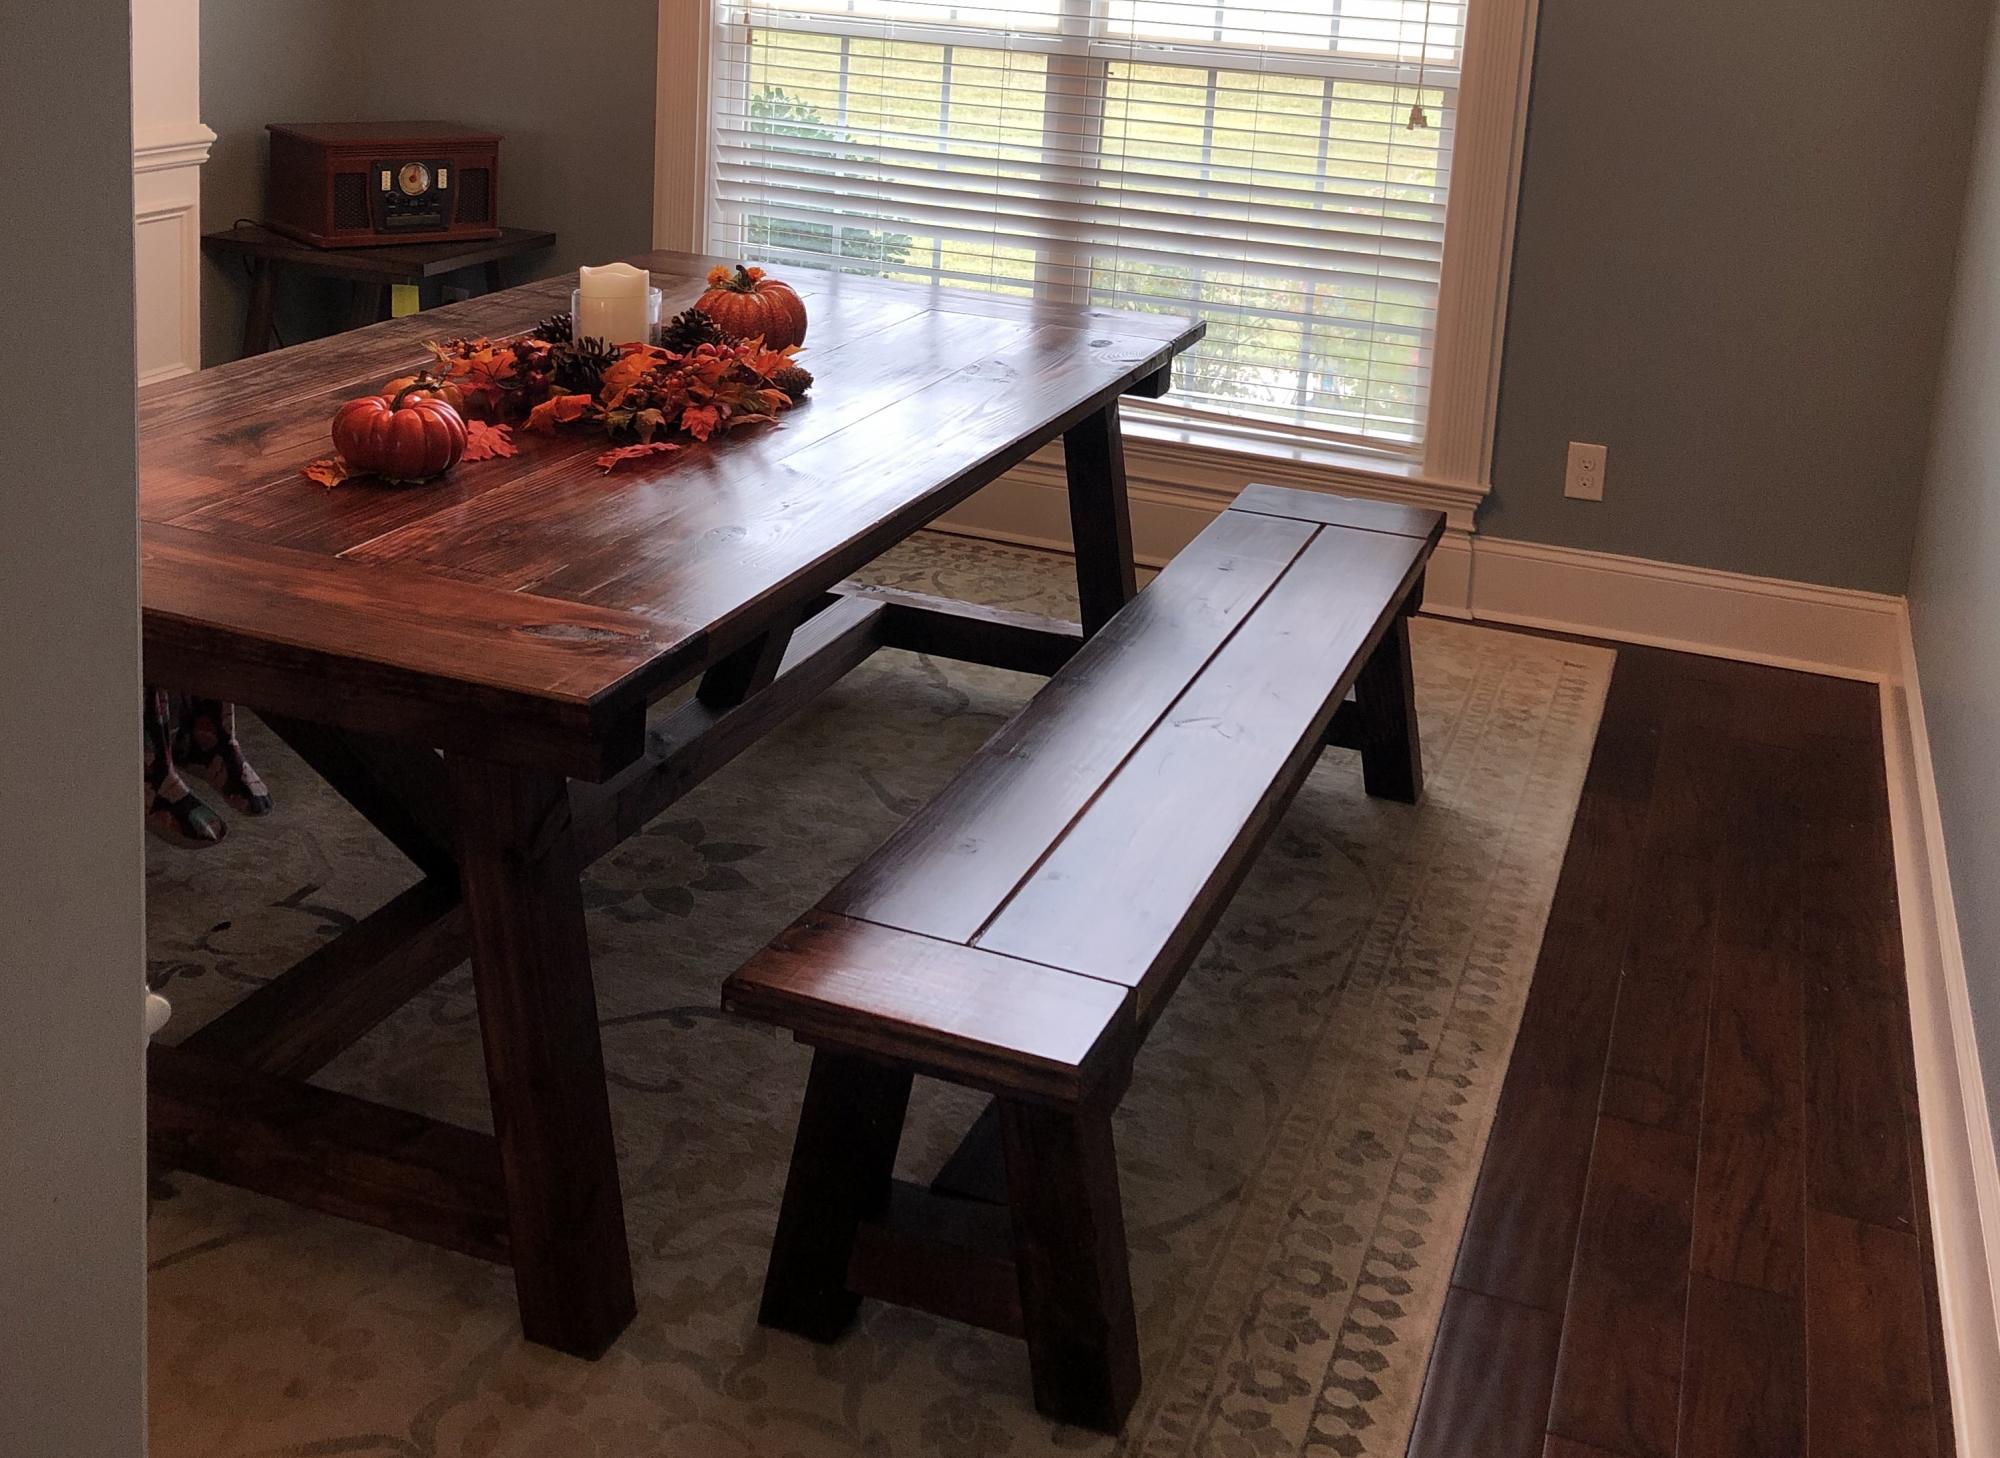
I built a farm house dining room table last week and wanted to add more seating to it. I found this bench on here and decided to add my own touch to it. Was going to be a cheap project but 2 inch foam is a lot more then I thought.


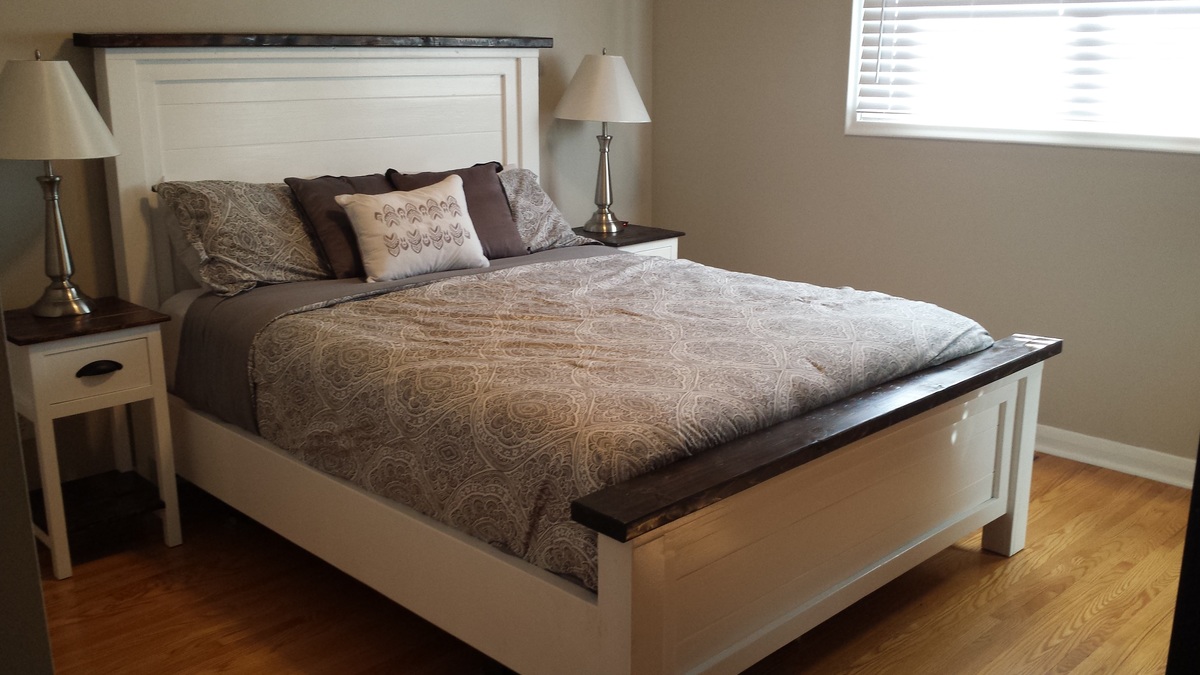
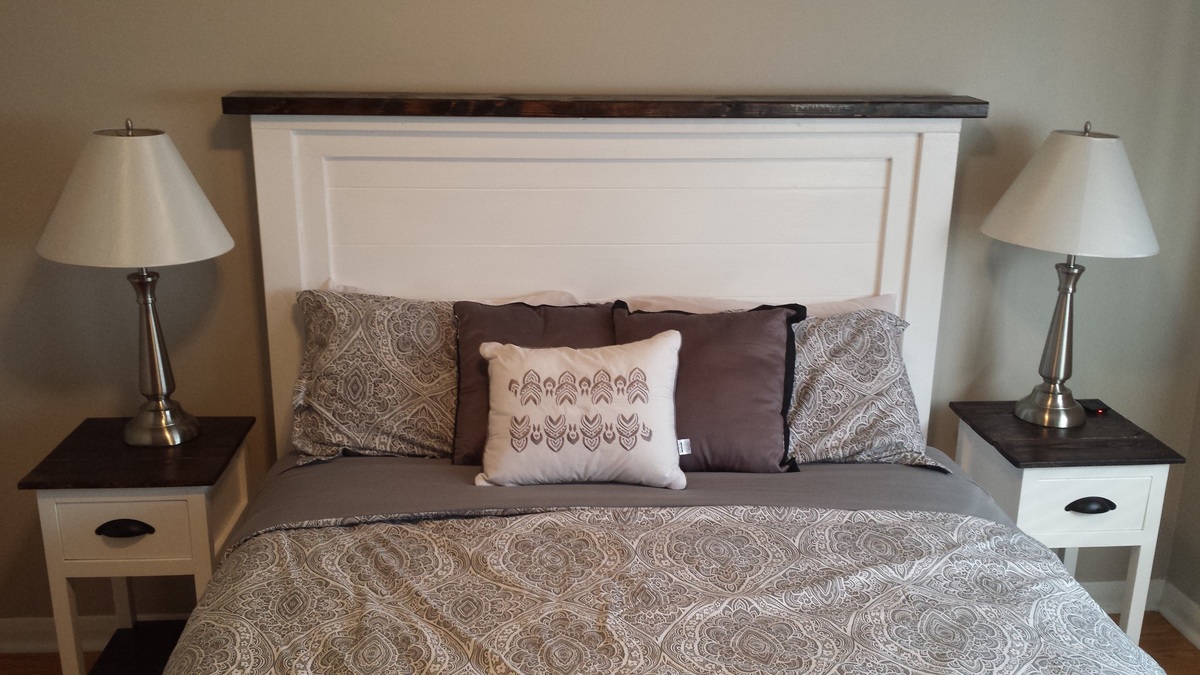
I just finished setting up my bedroom, not a lot of cash for the furniture and look I wanted so I decided to tackle your farmhouse designs and do it myself. I found these scrolled wood panels at homegoods (homesense here in Canada). I used two panels, each had 5 sectioned scrolled squares so I cut one section off of each panel to use on each of the side tables. I still have to finish the bed's footboard and side rails with the last 4 sectioned panel piece that I have left.
I was surprised how these turned out. I got the old world look at a very good price...for a total cost under $300. I think I got a pretty nice deal.
I think I might try and do some more projects maybe the buffet next.


Tue, 01/07/2014 - 16:53
What a great look! Wonder if our HomeGoods has anything like that...
I have Starting loveing these little projects! however i am slowing finding out i need more tools! Anyway This bed is a slight variation from the plans mentioned. Instead of Verticle Slats for the head board and foot board i chose to do them horizontally. For 1 Reason only, to save some money. IT did not same much maybe $30 but for someone who is ona really tight budget it worked out great. I also added in a full frame around the middle slats. I started with the side tables and that turned into makin a matching bed Frame. The side table were striaght forward and i had left over pull handles from buliting my Printers Console Cabinet. Over all the project was straight forawrd simple and fun! I amlost could wait to get it in the house! it was like watchin paint dry hahaha. Anyway i had fun with this one and i think it turned out great!
I but this for an old high school friend. She needed somewhere to put her cd collection (yea I know, CDs?) And her record player and records. The drawers hold 400 compact discs. I used pine lumber, pocket holes, weathered oak stain and a lot of swear words.
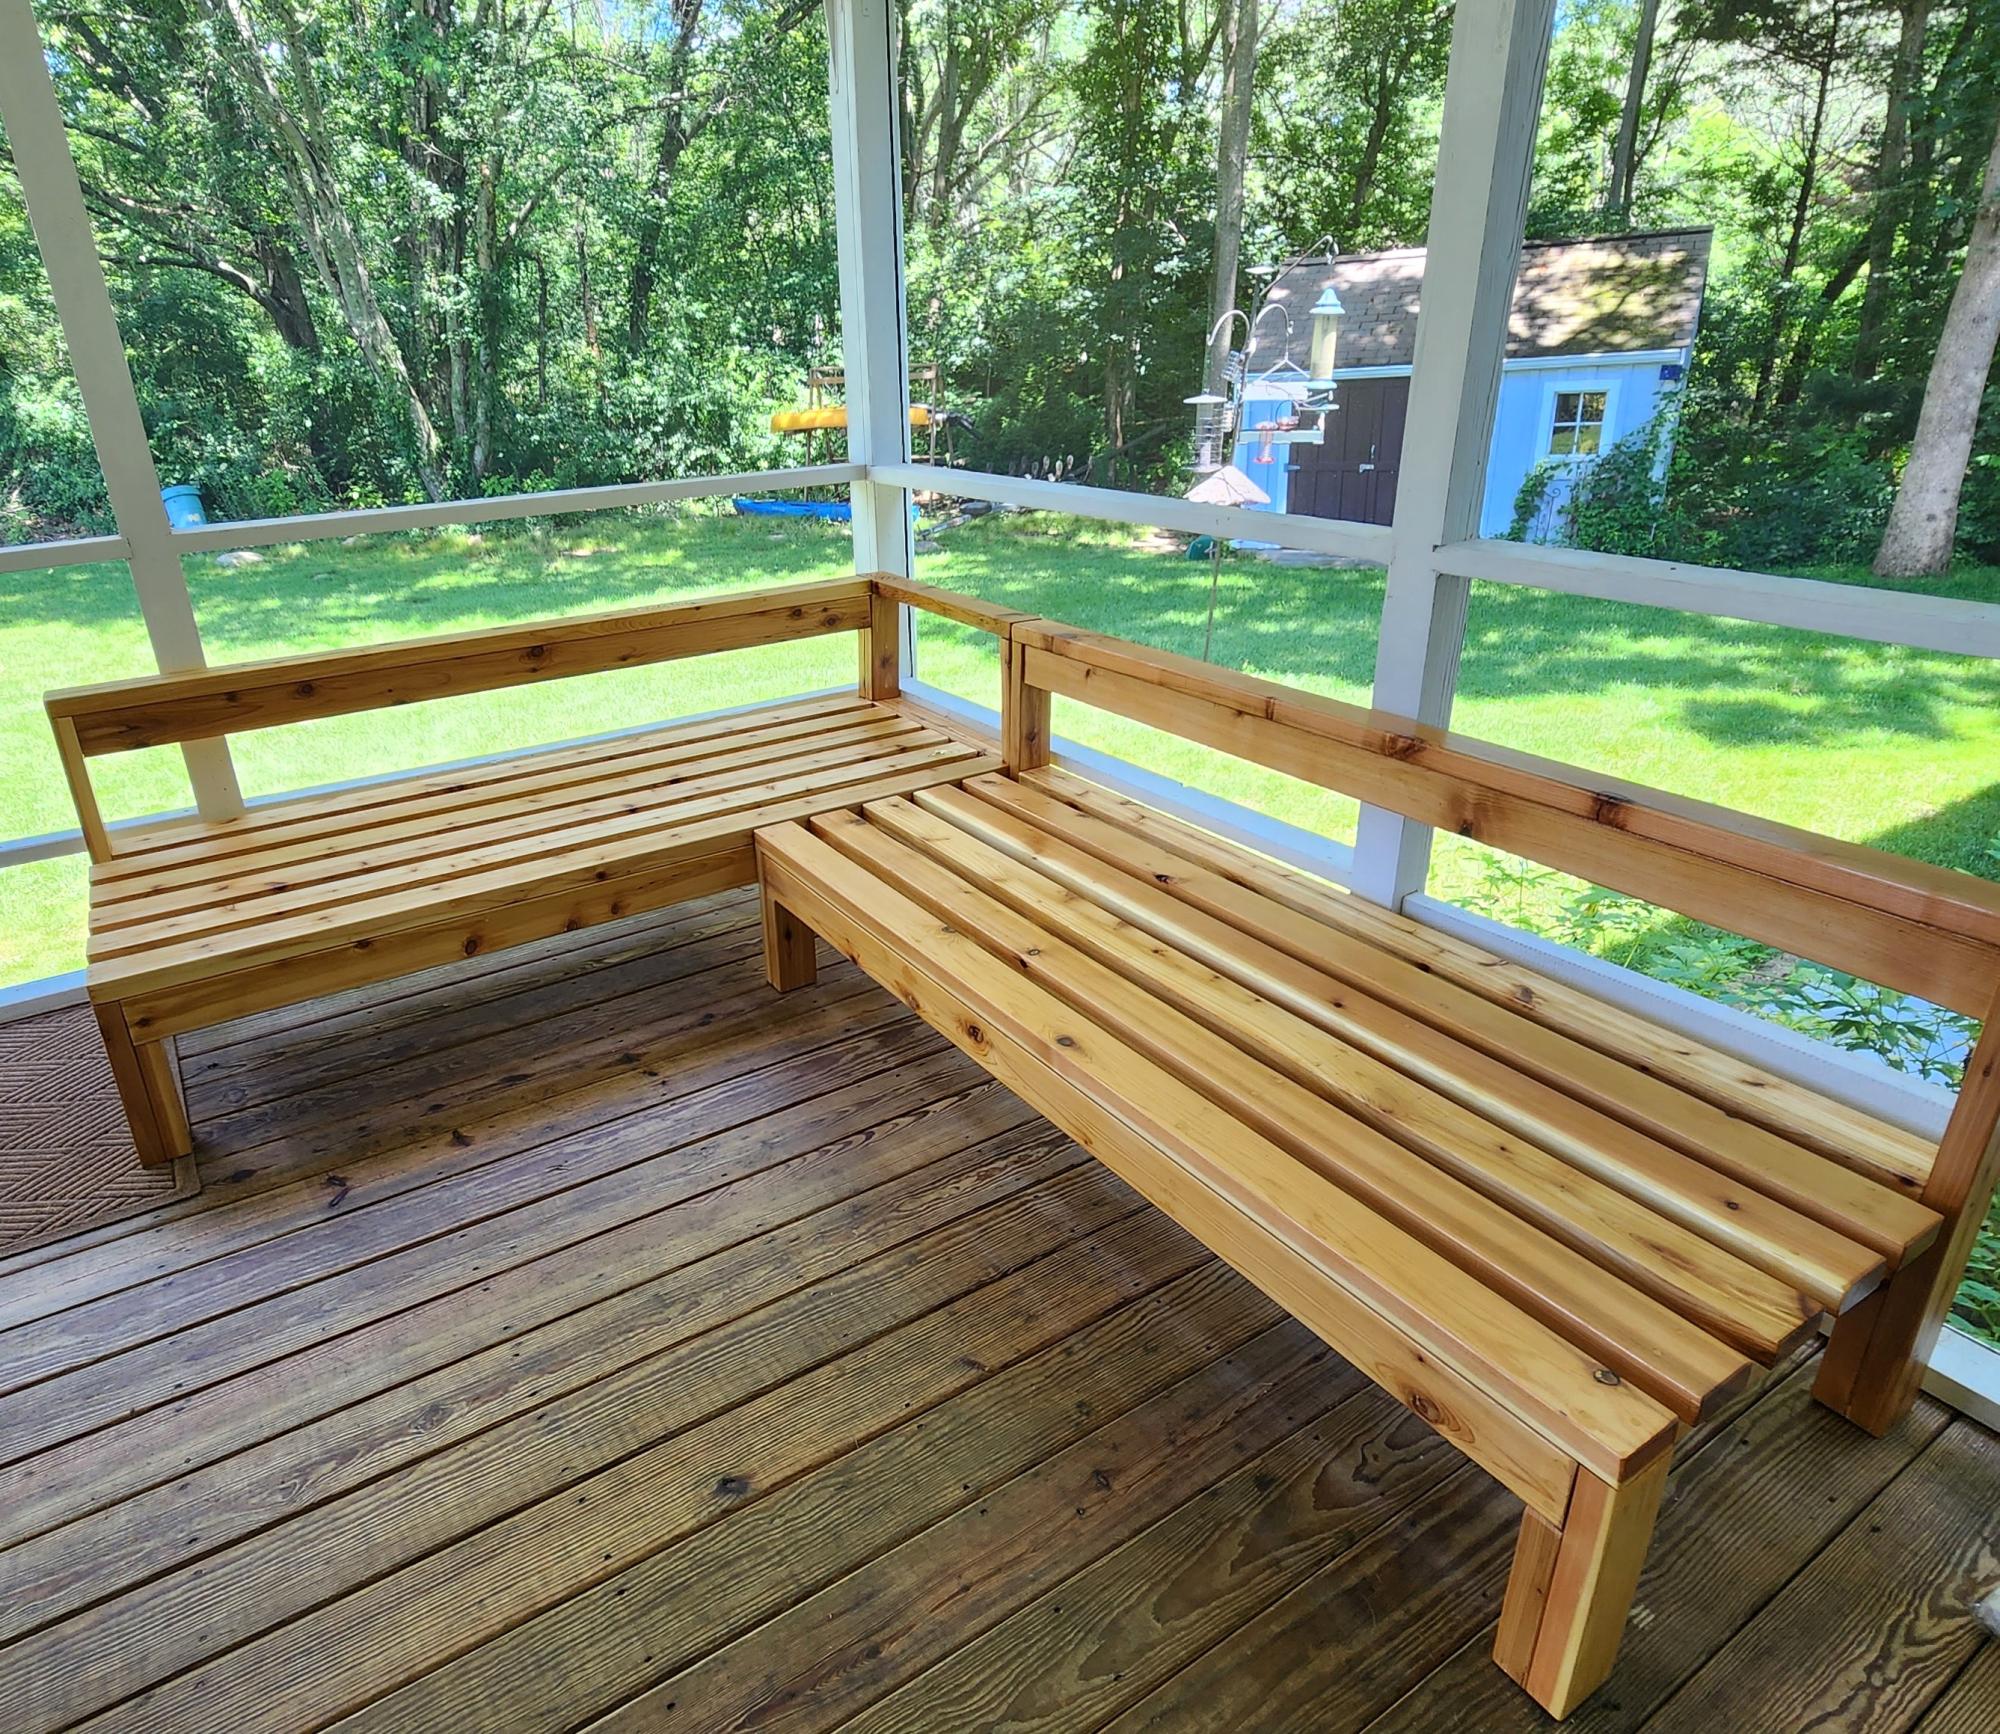
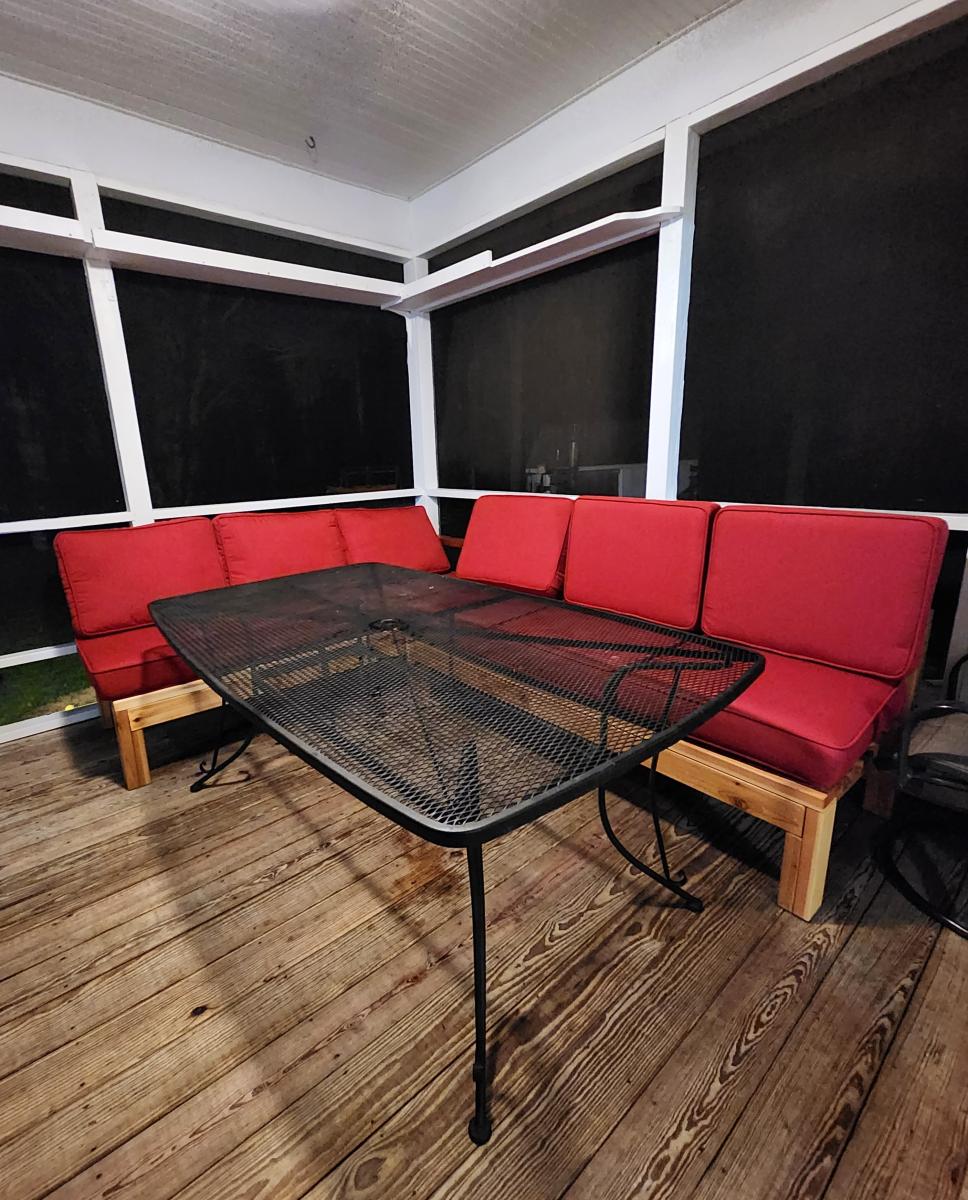
A 6' armless sofa & a 6' one arm sofa made of decking cedar and finished with outdoor urethane. Perfect seating for large group for dinner in a screened in porch! This is my first project using Ana White plans and it came out perfectly!! Thank you.
Michele V.

While both massively pregnant, my friend enlisted me to help her baby-proof the house by replacing her metal/glass coffee table with the flip-top wooden version. She was 7 months and I was 8, and we got quite a few sideways looks at Lowe's! Needless to say we had a lot of help loading up the truck ;) It only took an afternoon to build, sand and stain. Now her little boy is appreciating the much more baby-friendly table!

Fri, 04/27/2012 - 15:41
If you built and stained this project in one afternoon you must live in Northern Norway during the winter when the sun never sets. You did a great job. I am building the same but I figure it will take me at least two days. Painting and sanding do add a lot of time, but also my stupid mistakes added time. It is really great. Once I can figure out how to add a Brag I will show you my bench.

Fri, 04/27/2012 - 15:58
But it was Texas in the summer so the sun doesn't set until 9 ;) Plus there were two of us, so staining took half the time! We used a gel stain that you just wipe on.
Tue, 01/07/2014 - 09:51
I'm also interested in finding out what hinges you used. Was it something like this:
http://selbyhardware.thomasnet.com/item/no-bore-concealed-hinges/90-ope…?
I'm concerned about keeping the top flush, but allowing a 90 degree opening.
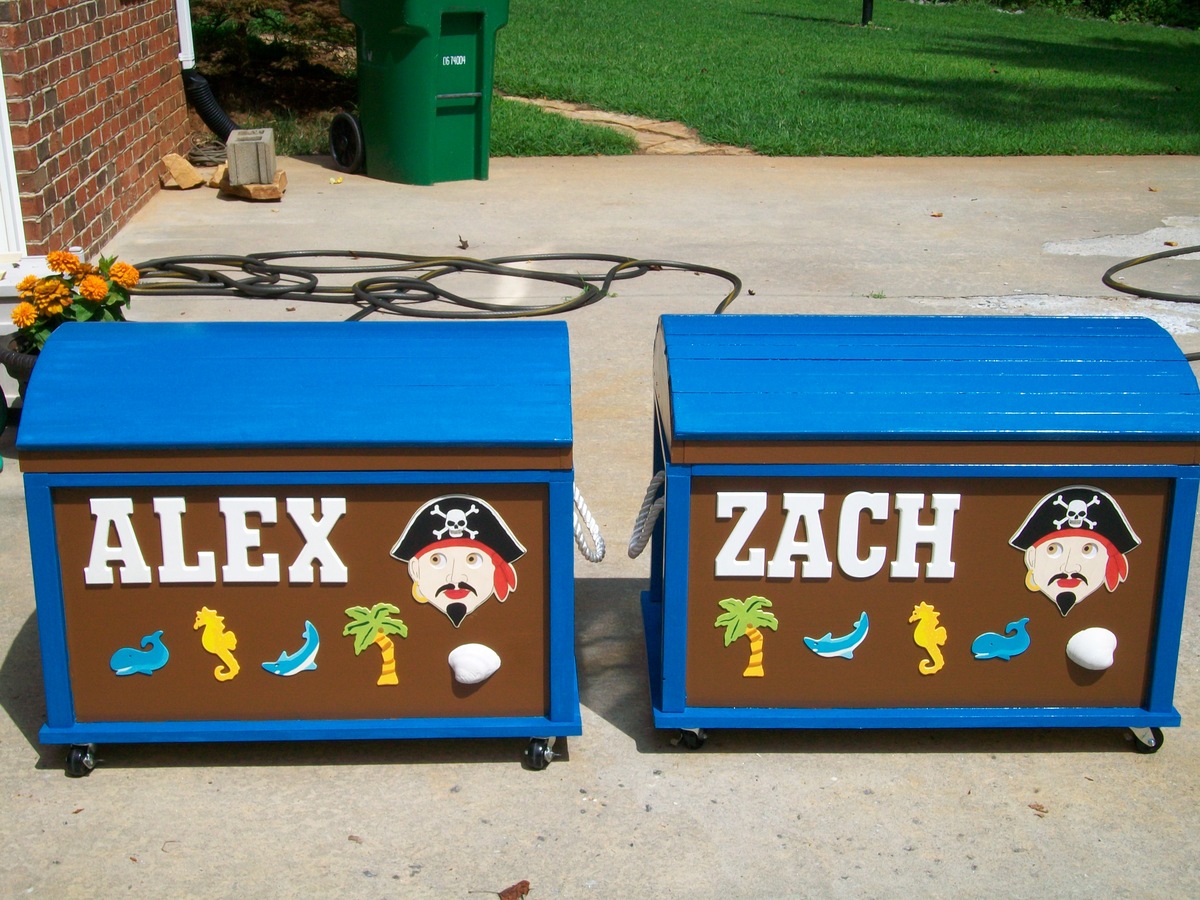
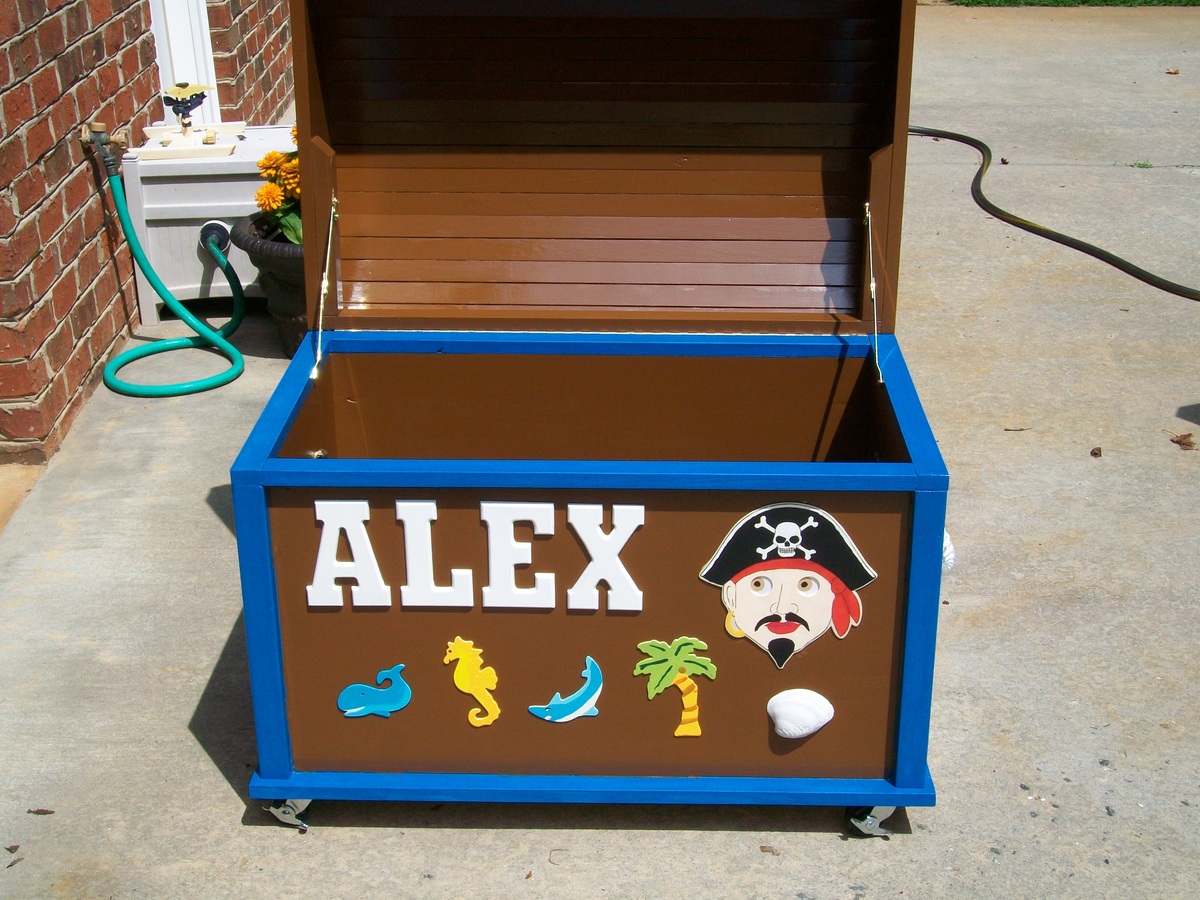
After my Daughter had twin boys in December 2012, I decided I would expand on my woodworking experience by making them this Pirate Chest toy box. Since there were two of them, my 'work' was doubled.
I DID learn some new things with this project. I had never used Pocket Hole joinery before and I was a little timid about doing it. I found that it's really pretty easy.
I also learned that when cutting on the table saw, I could NOT cut on the line drawn on the wood. As a result, some of the cuts were a bit short (but wood filler helped there).
My biggest problem was cutting the radius on the box tops since I don't have a band saw. It was difficult cutting the curve with a Jig Saw, so the Rasp, Plane and sandpaper came in handy.
The other problem I had was getting the slats on the top to meet up tightly. I found I had to cut a slight bevel on each edge so that the top of the slat would meet the next one.
I presented the boxes to the Boys at their First Birthday party just after Christmas and received a number of compliments. There was one woman that may want me to make one for her son. Needless to say I was a bit proud of myself.

Thu, 11/05/2015 - 10:14
I believe these are the plans: http://ana-white.com/2012/04/plans/pirate-toy-chest
Looks like this build just added casters.
Made these from Ana's plans to match other similar pieces. Trying my hand at an Etsy shop. https://www.etsy.com/listing/286553075/end-table?ref=listing-shop-heade…
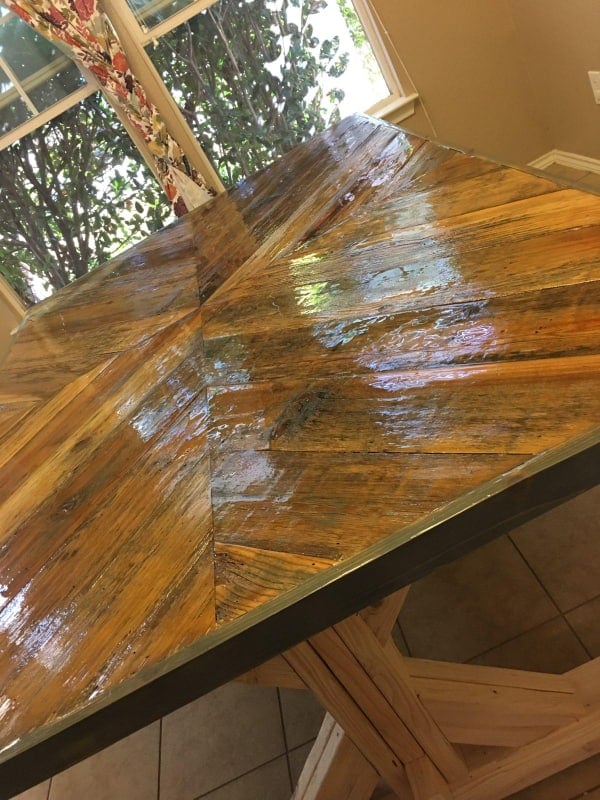
Dining room table, top made from old fence pickets.

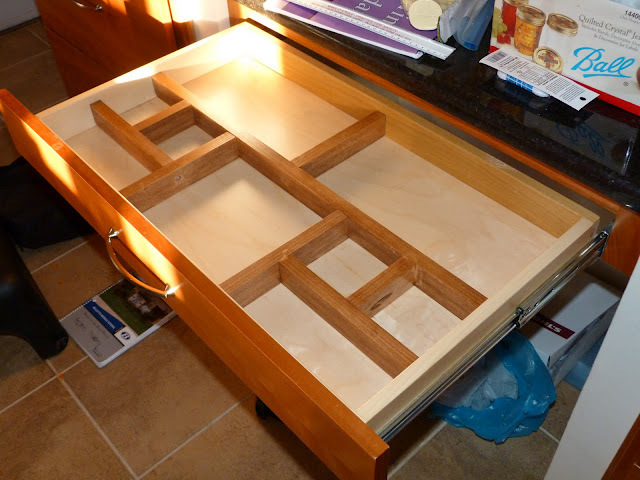
The plastic desk drawer divider we had in this drawer got broken, so I made one from poplar 1x2. I made the pencil boxes large enough to hold an unsharpened pencil. The center box is big enough to put a screwdriver on the drawer pull screws, if they become loose. The divider is friction fit, with its bottom edges sanded smooth to make installation easier. Used screws to pull it together, since brad nails tended to drive pieces apart.
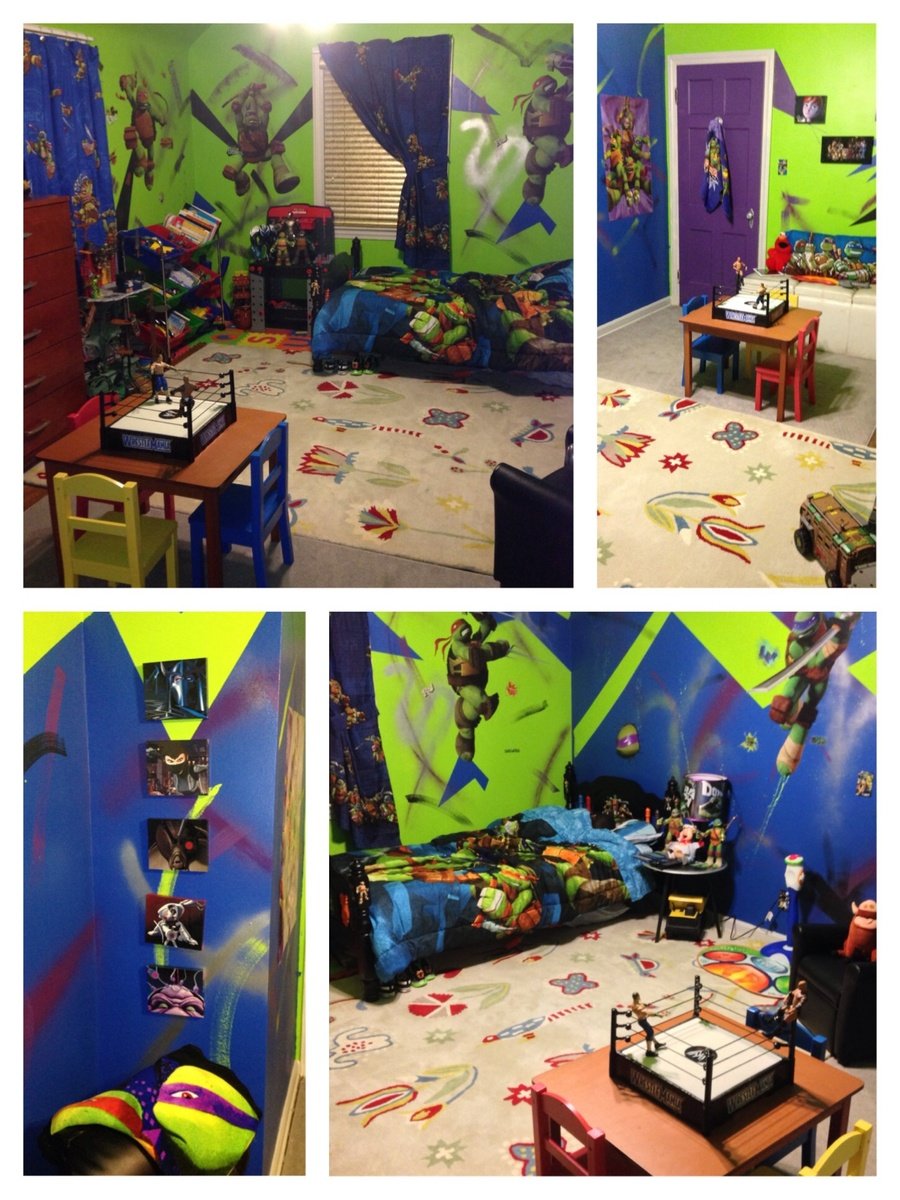
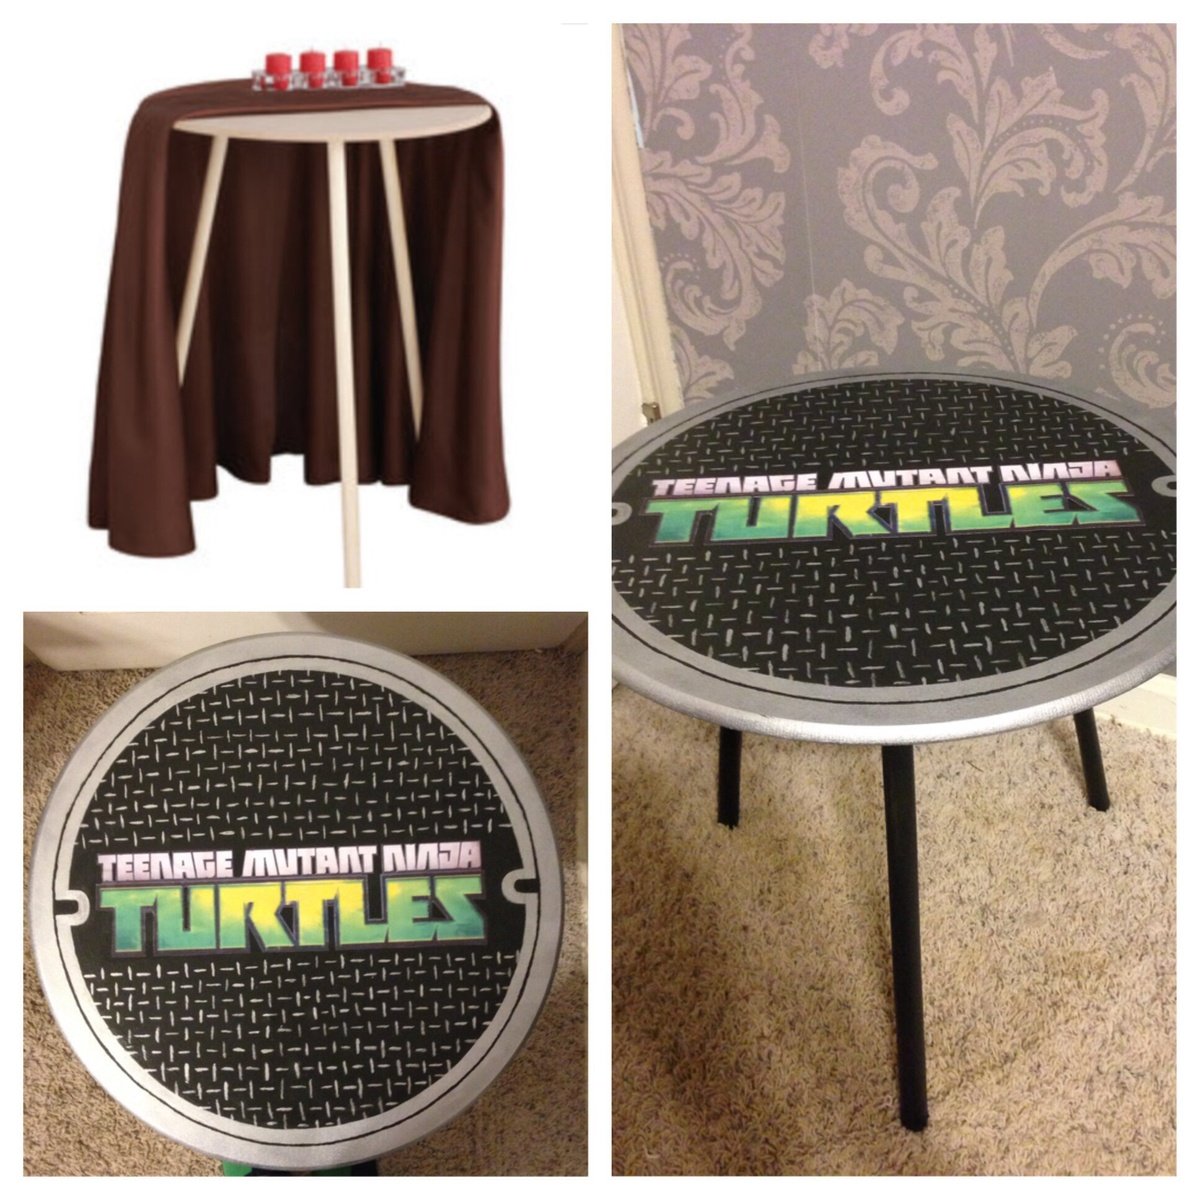
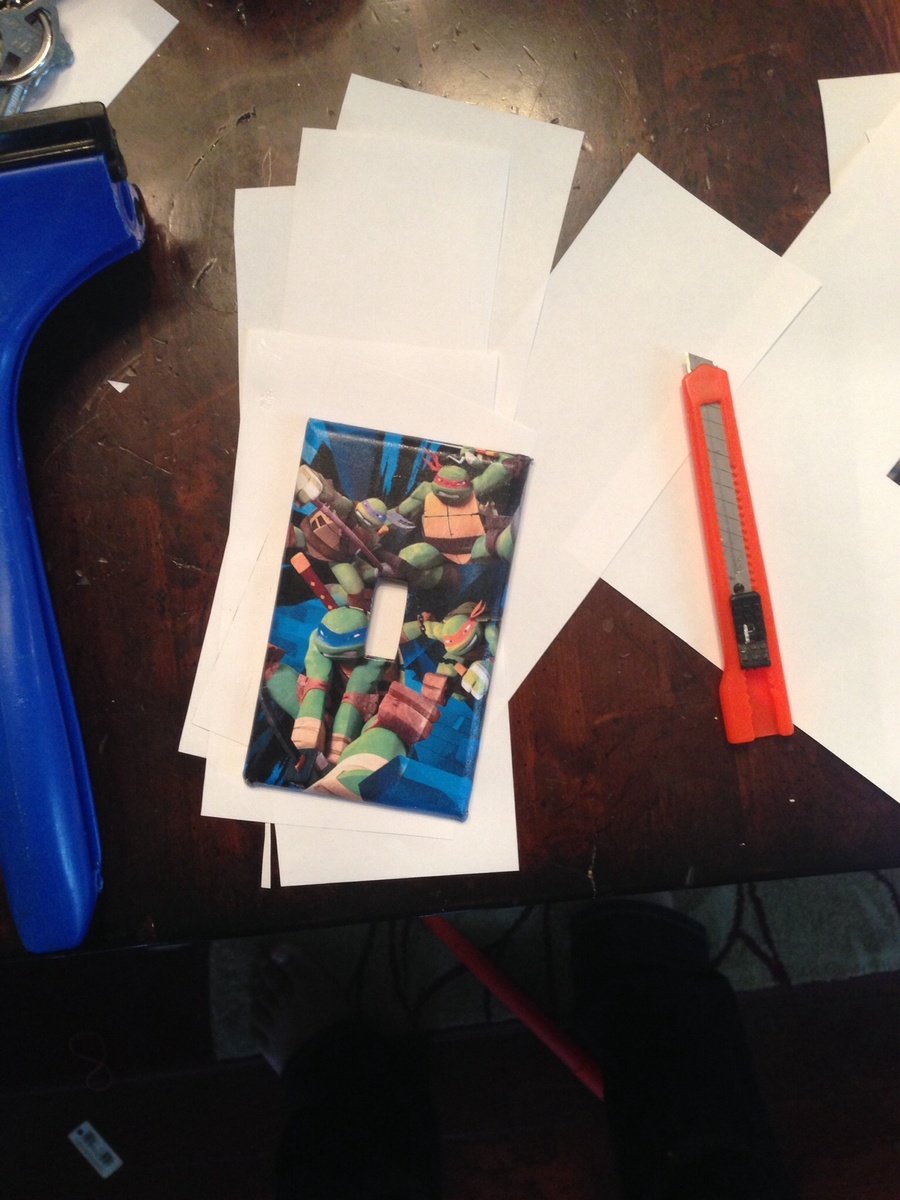
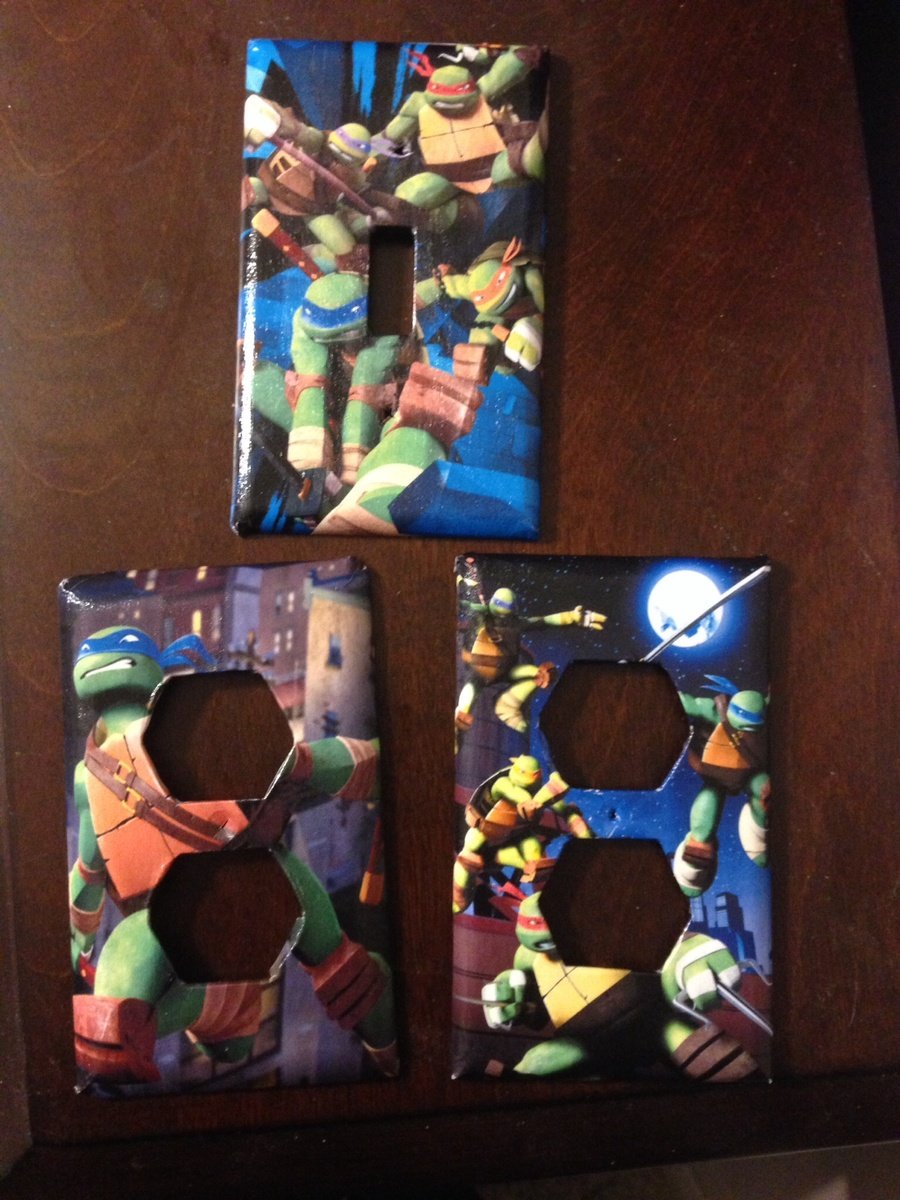
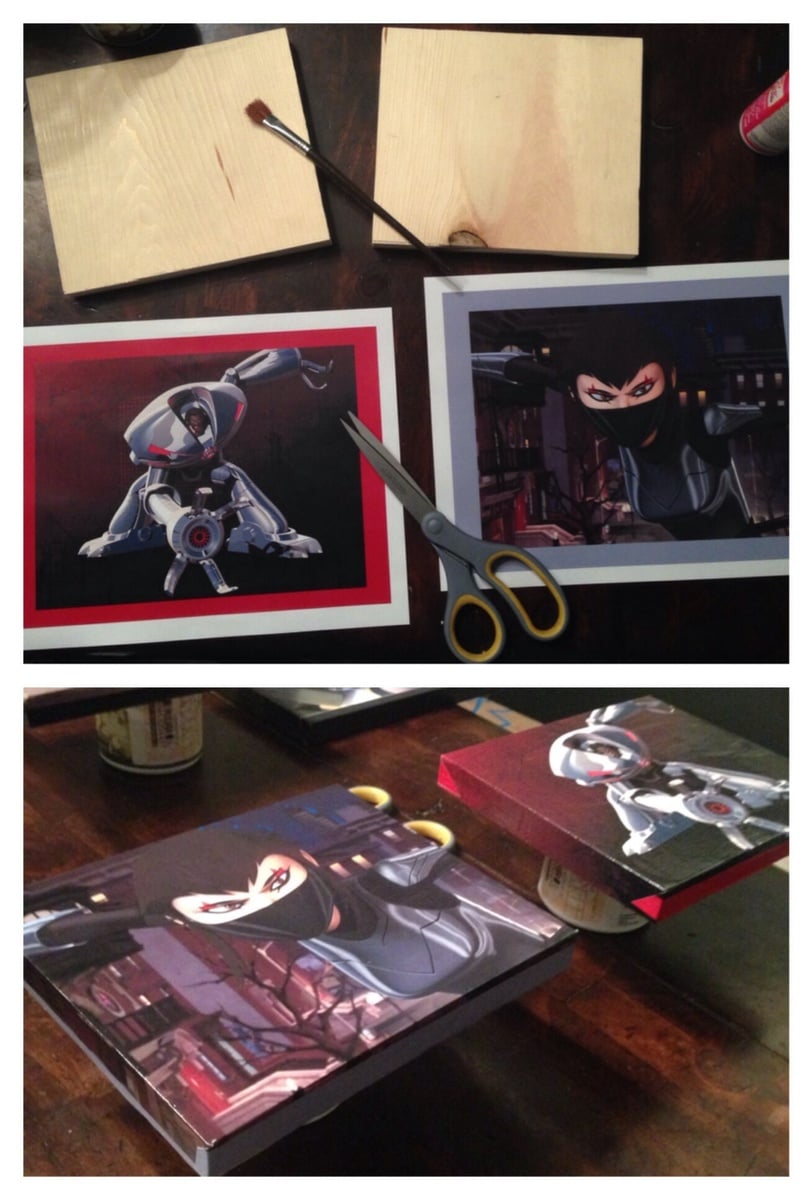
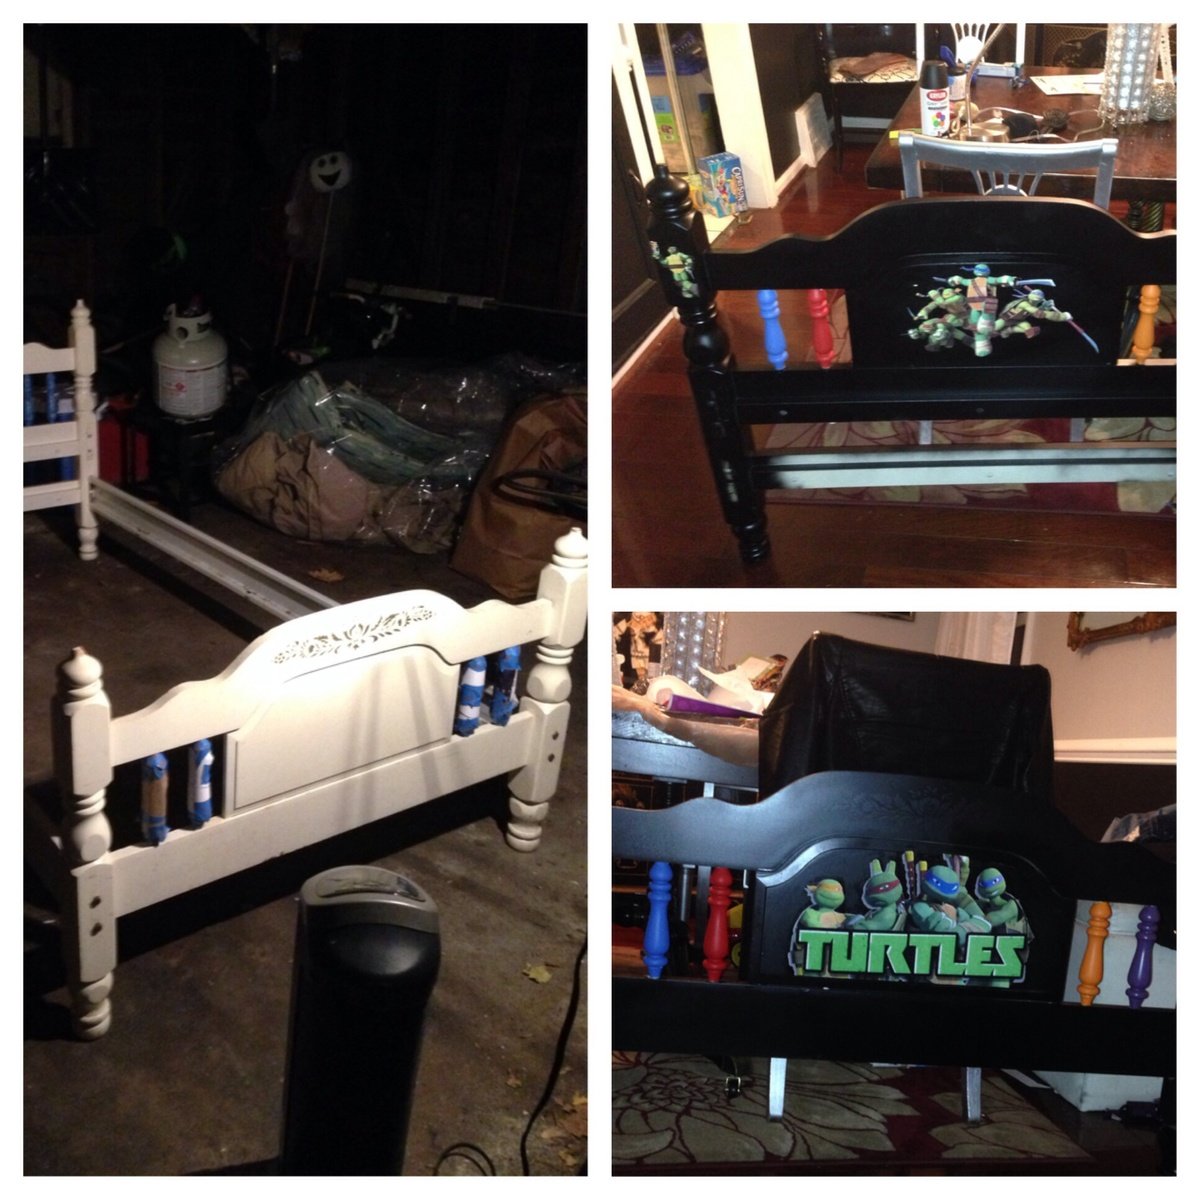
I turned my son's room into the TMNT Secret Sewer Lair. I created artwork using a 1x8 piece of lumber and printed images on laser paper I found online. Cost $6.99
I created the outlets by printing on laser paper and decoupaging them onto the coverings. The cost for decoupage glue at Wal-Mart was $3.00 for 4oz, called Mod Podge. Which was more than enough since I used the same technique on my 20yr old bunk bed and nightstand and had some to spare. However you must use a x-acto knife to cut away white space so that print looks apart of the furniture. The individual Turtle characters I purchased from eBay because it was free shipping they were $17.99 each. The round table I turned into nightstand was $9.00 at Wal-mart and I hand painted it along with decoupaging the logo on to it. Any questions feel free to email! I hope this helps with ideas. I was lost do to lack of ideas online.
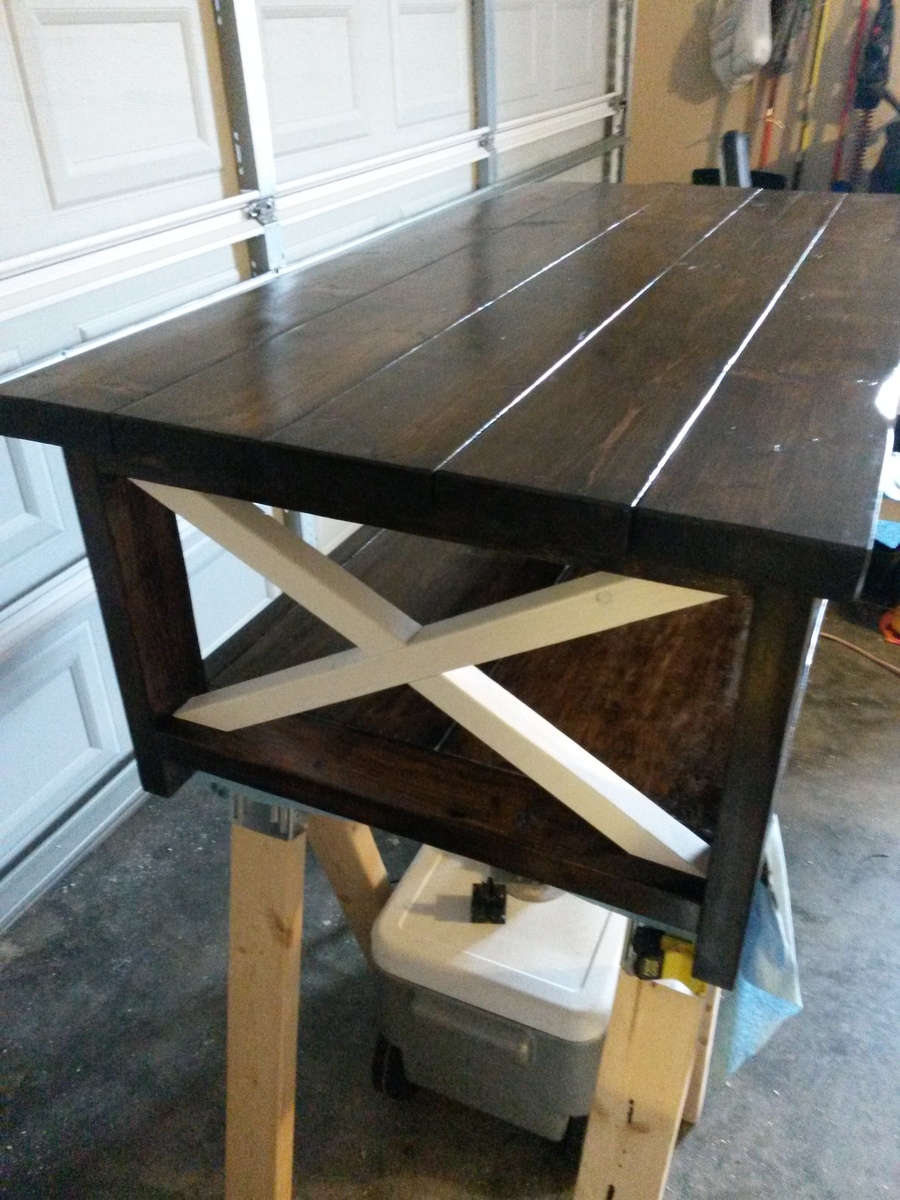
We loved the dark finish from the Min-wax Espresso stain/sealant, but decided to use white in the X's so we can see the table in low light easier to save our shins. Came out great and we will do matching end tables, dining table, and a bench outside to draw the five pieces together.
This took me considerably longer than the plans called for, but I have never built any furniture before so I underestimated the sanding required.
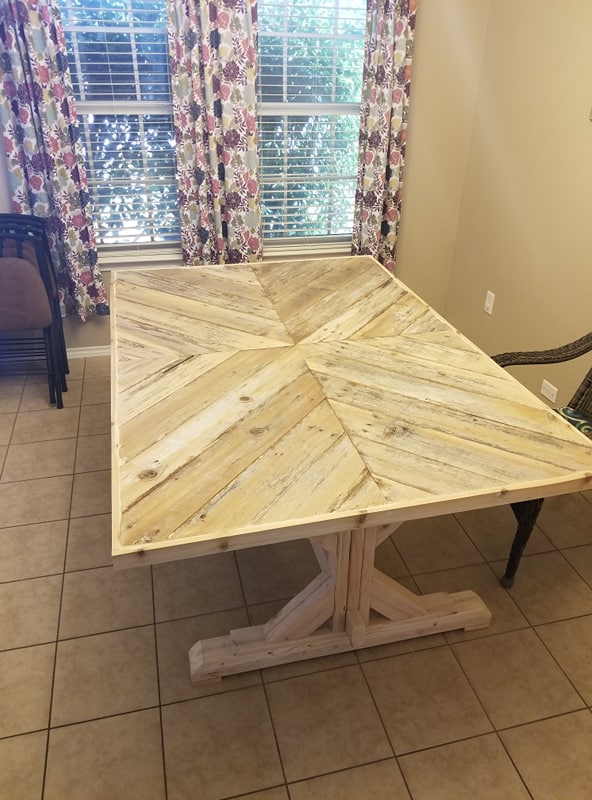
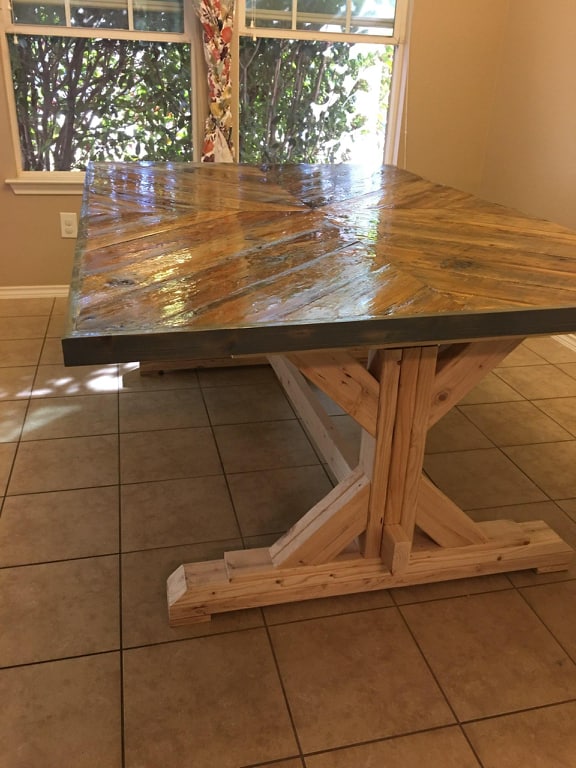
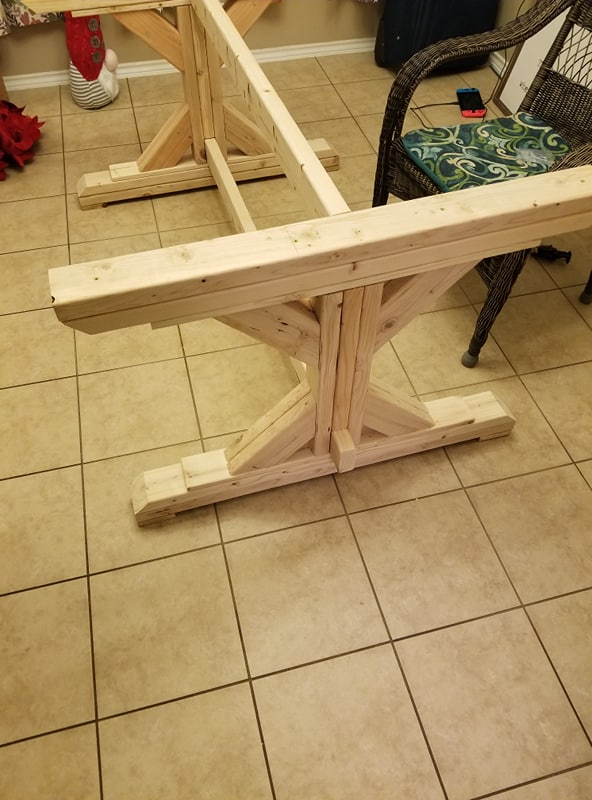
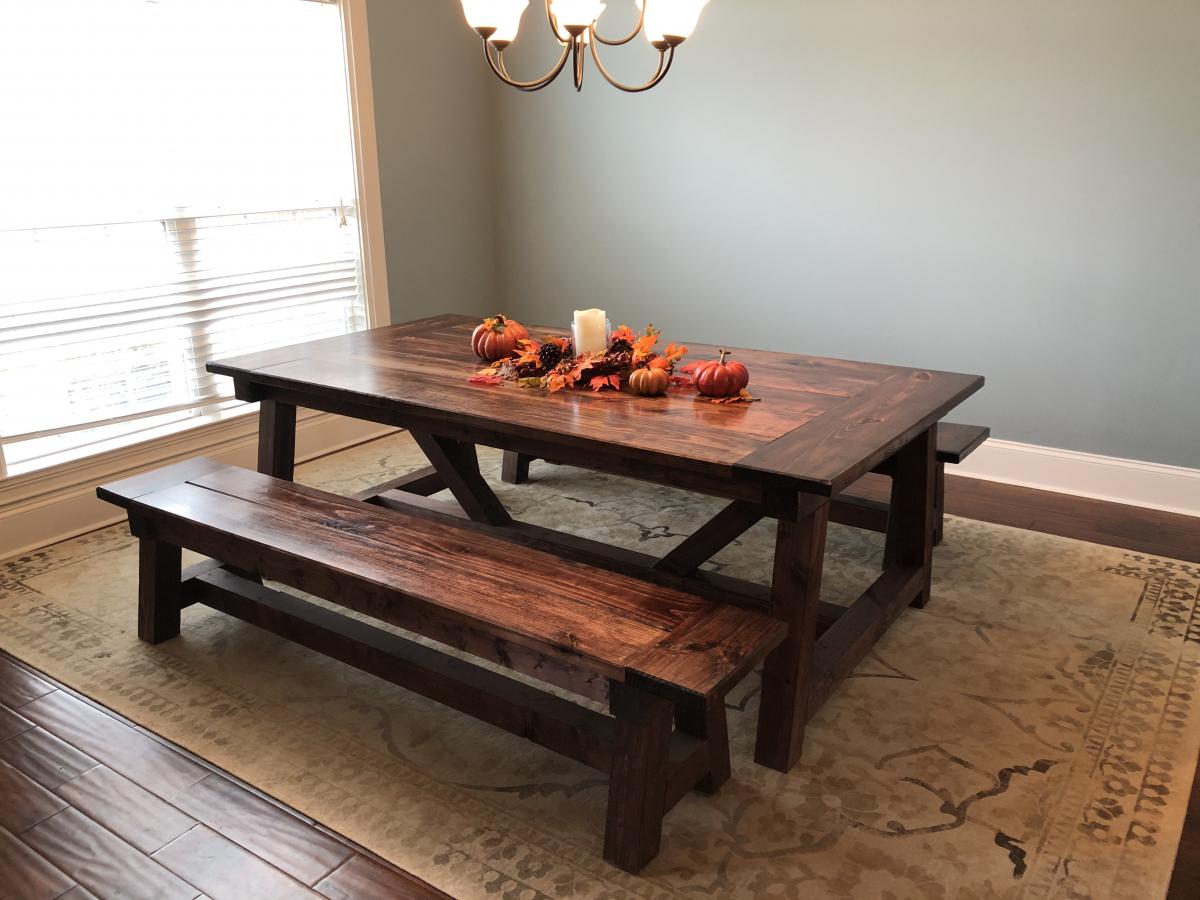
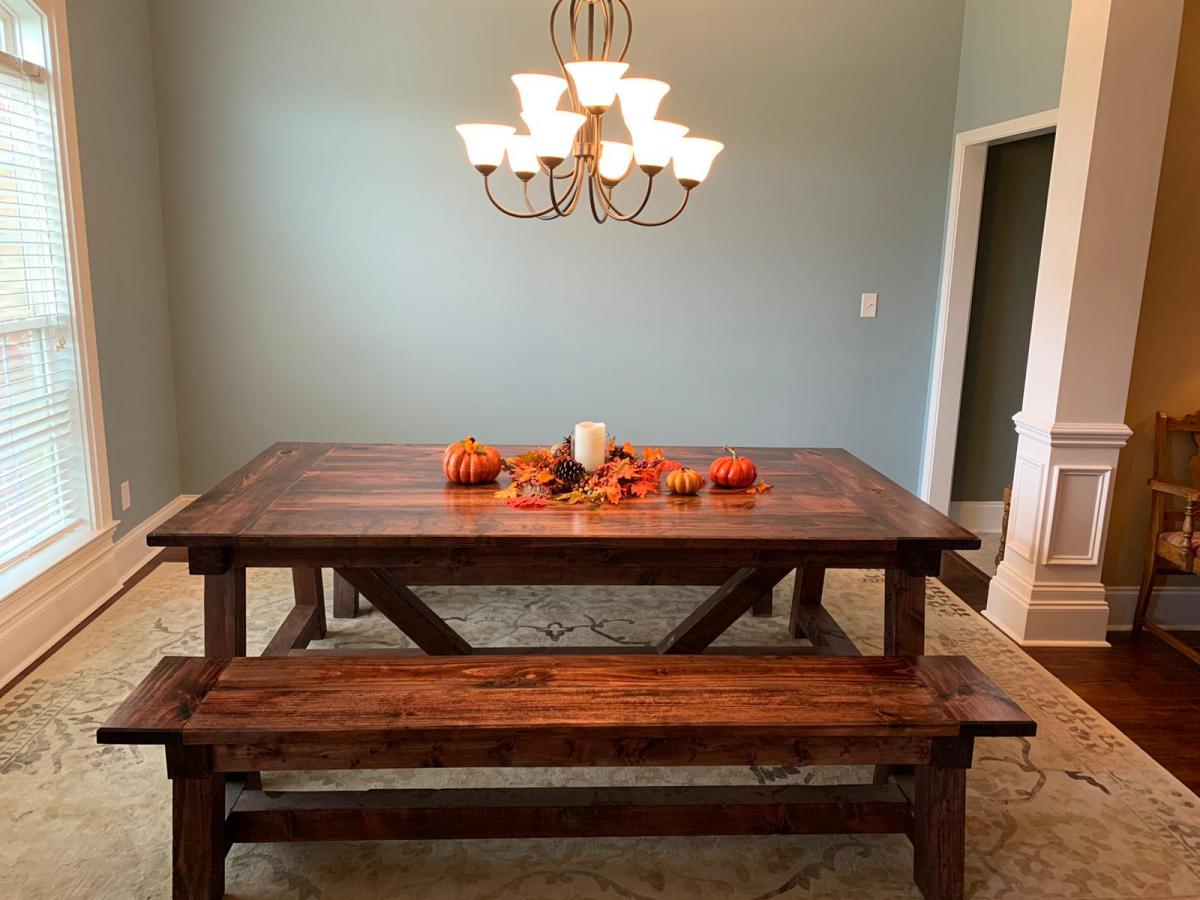
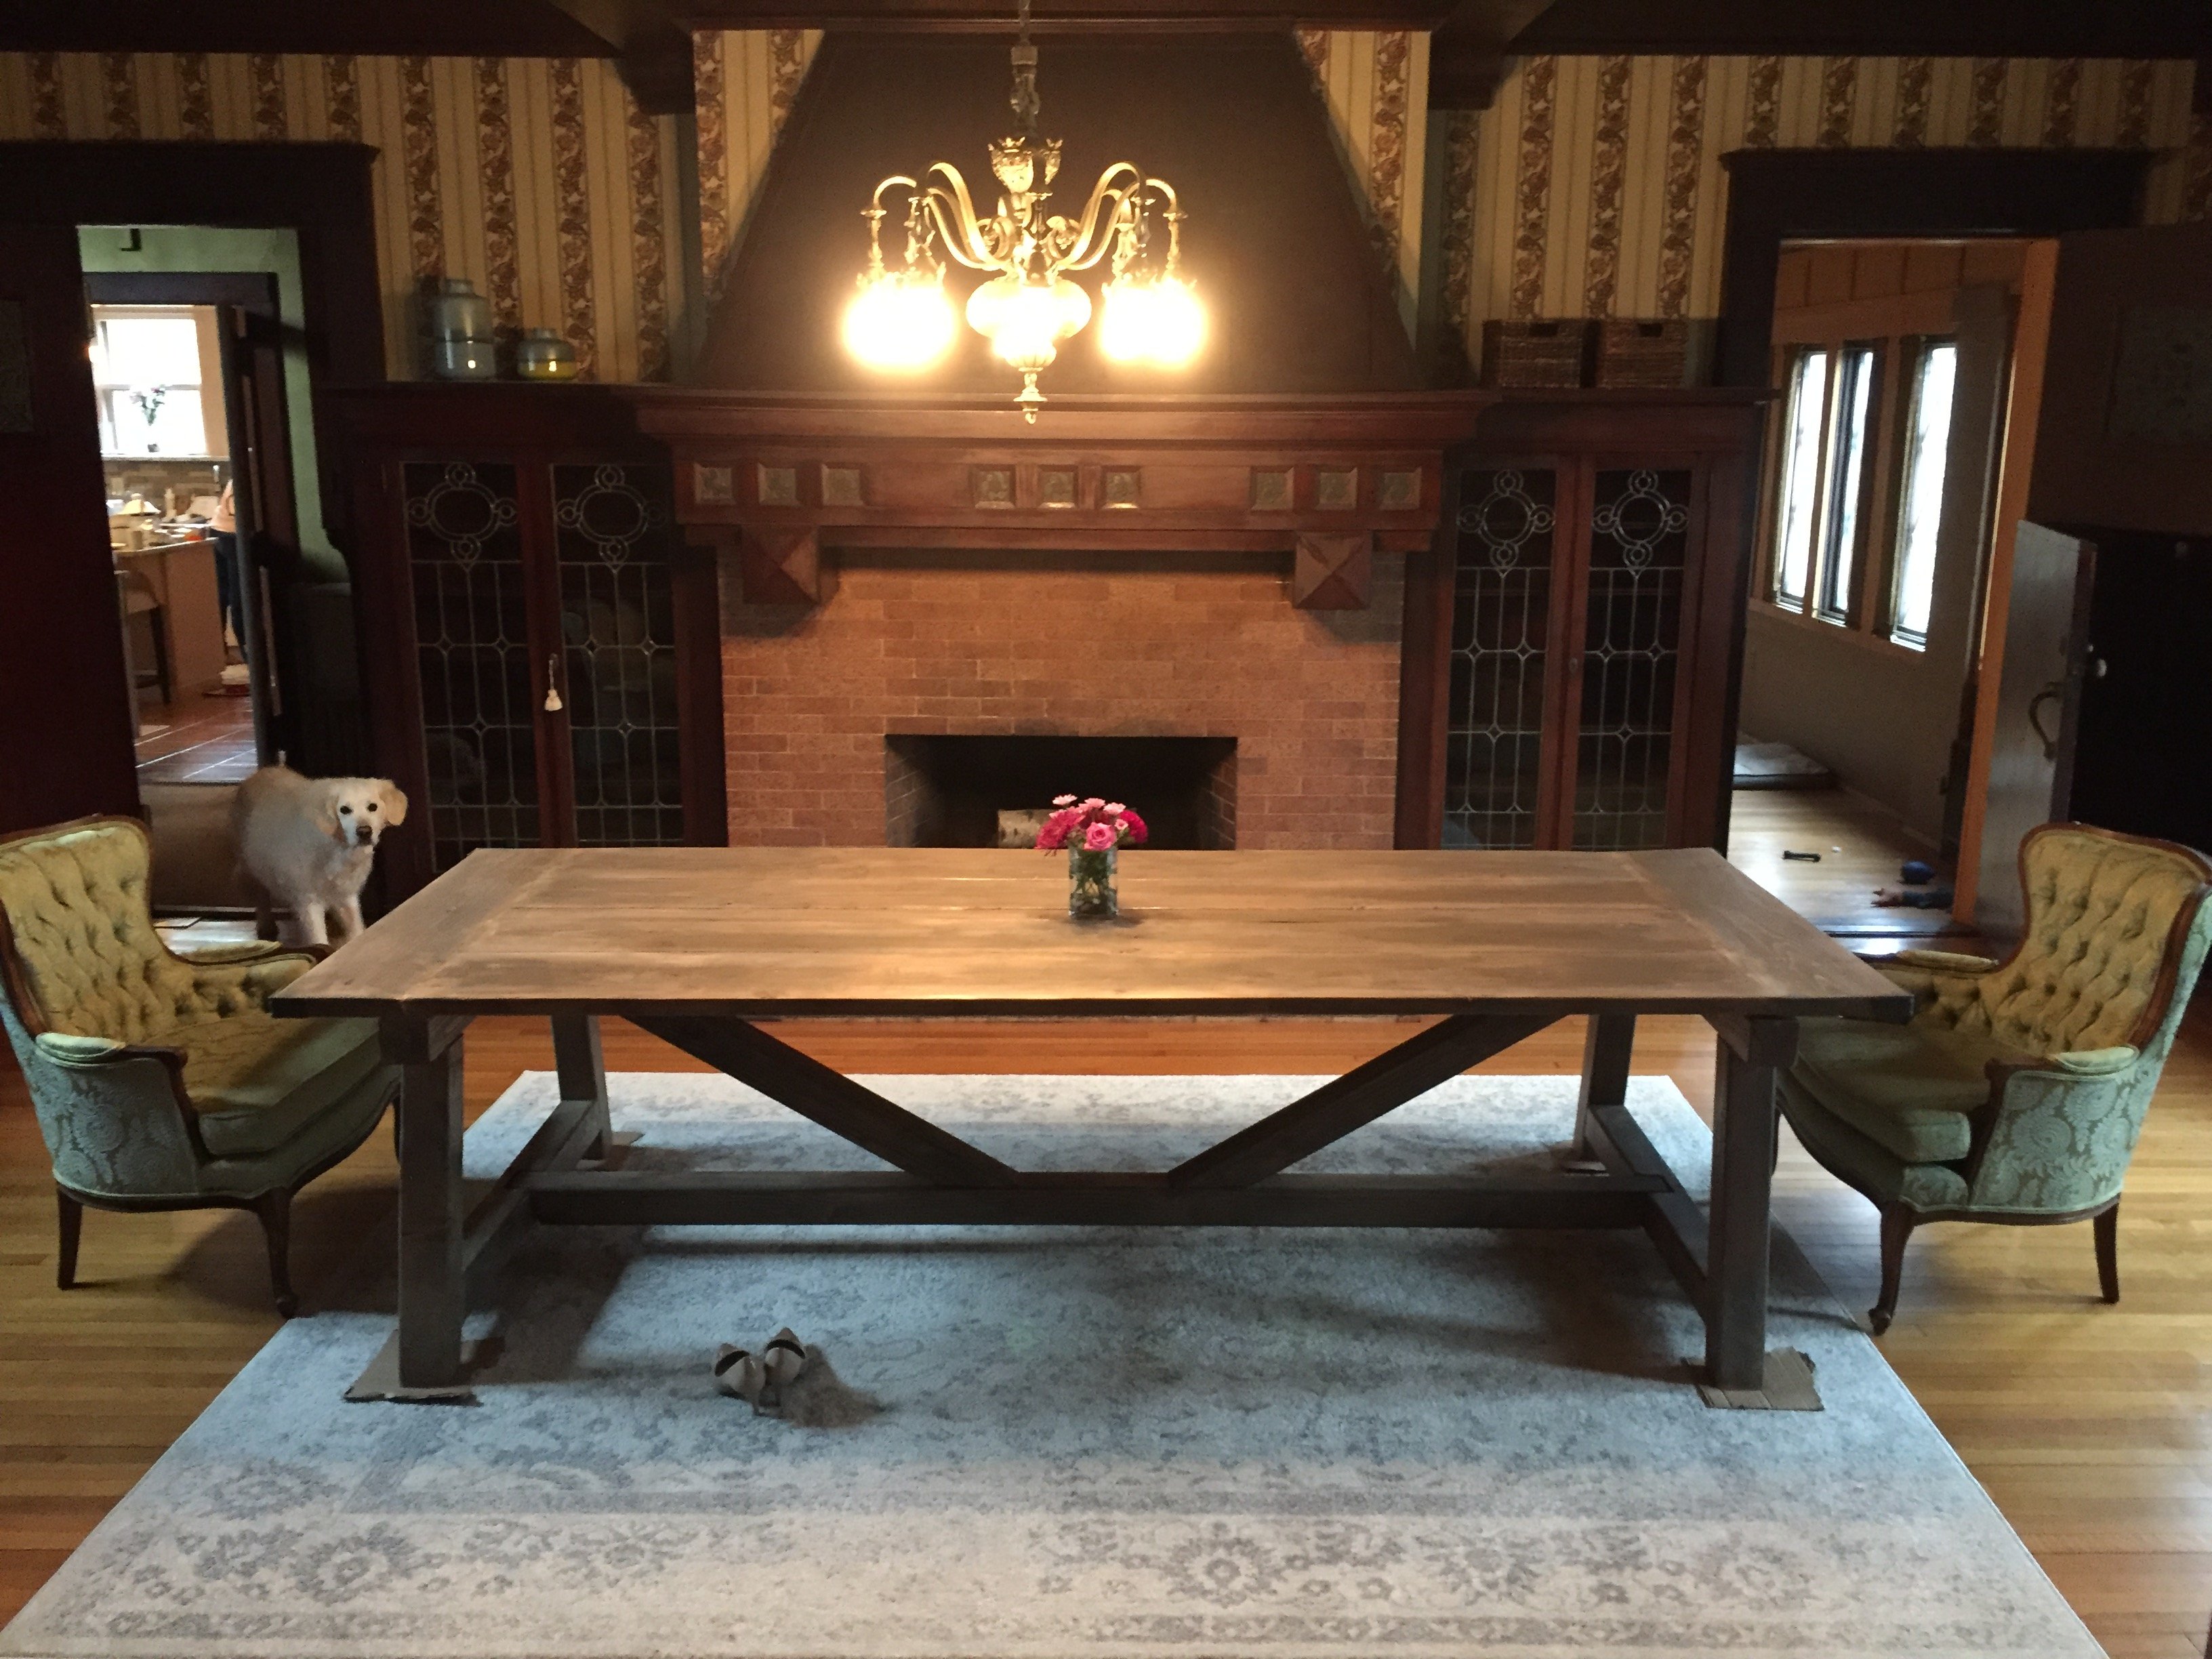
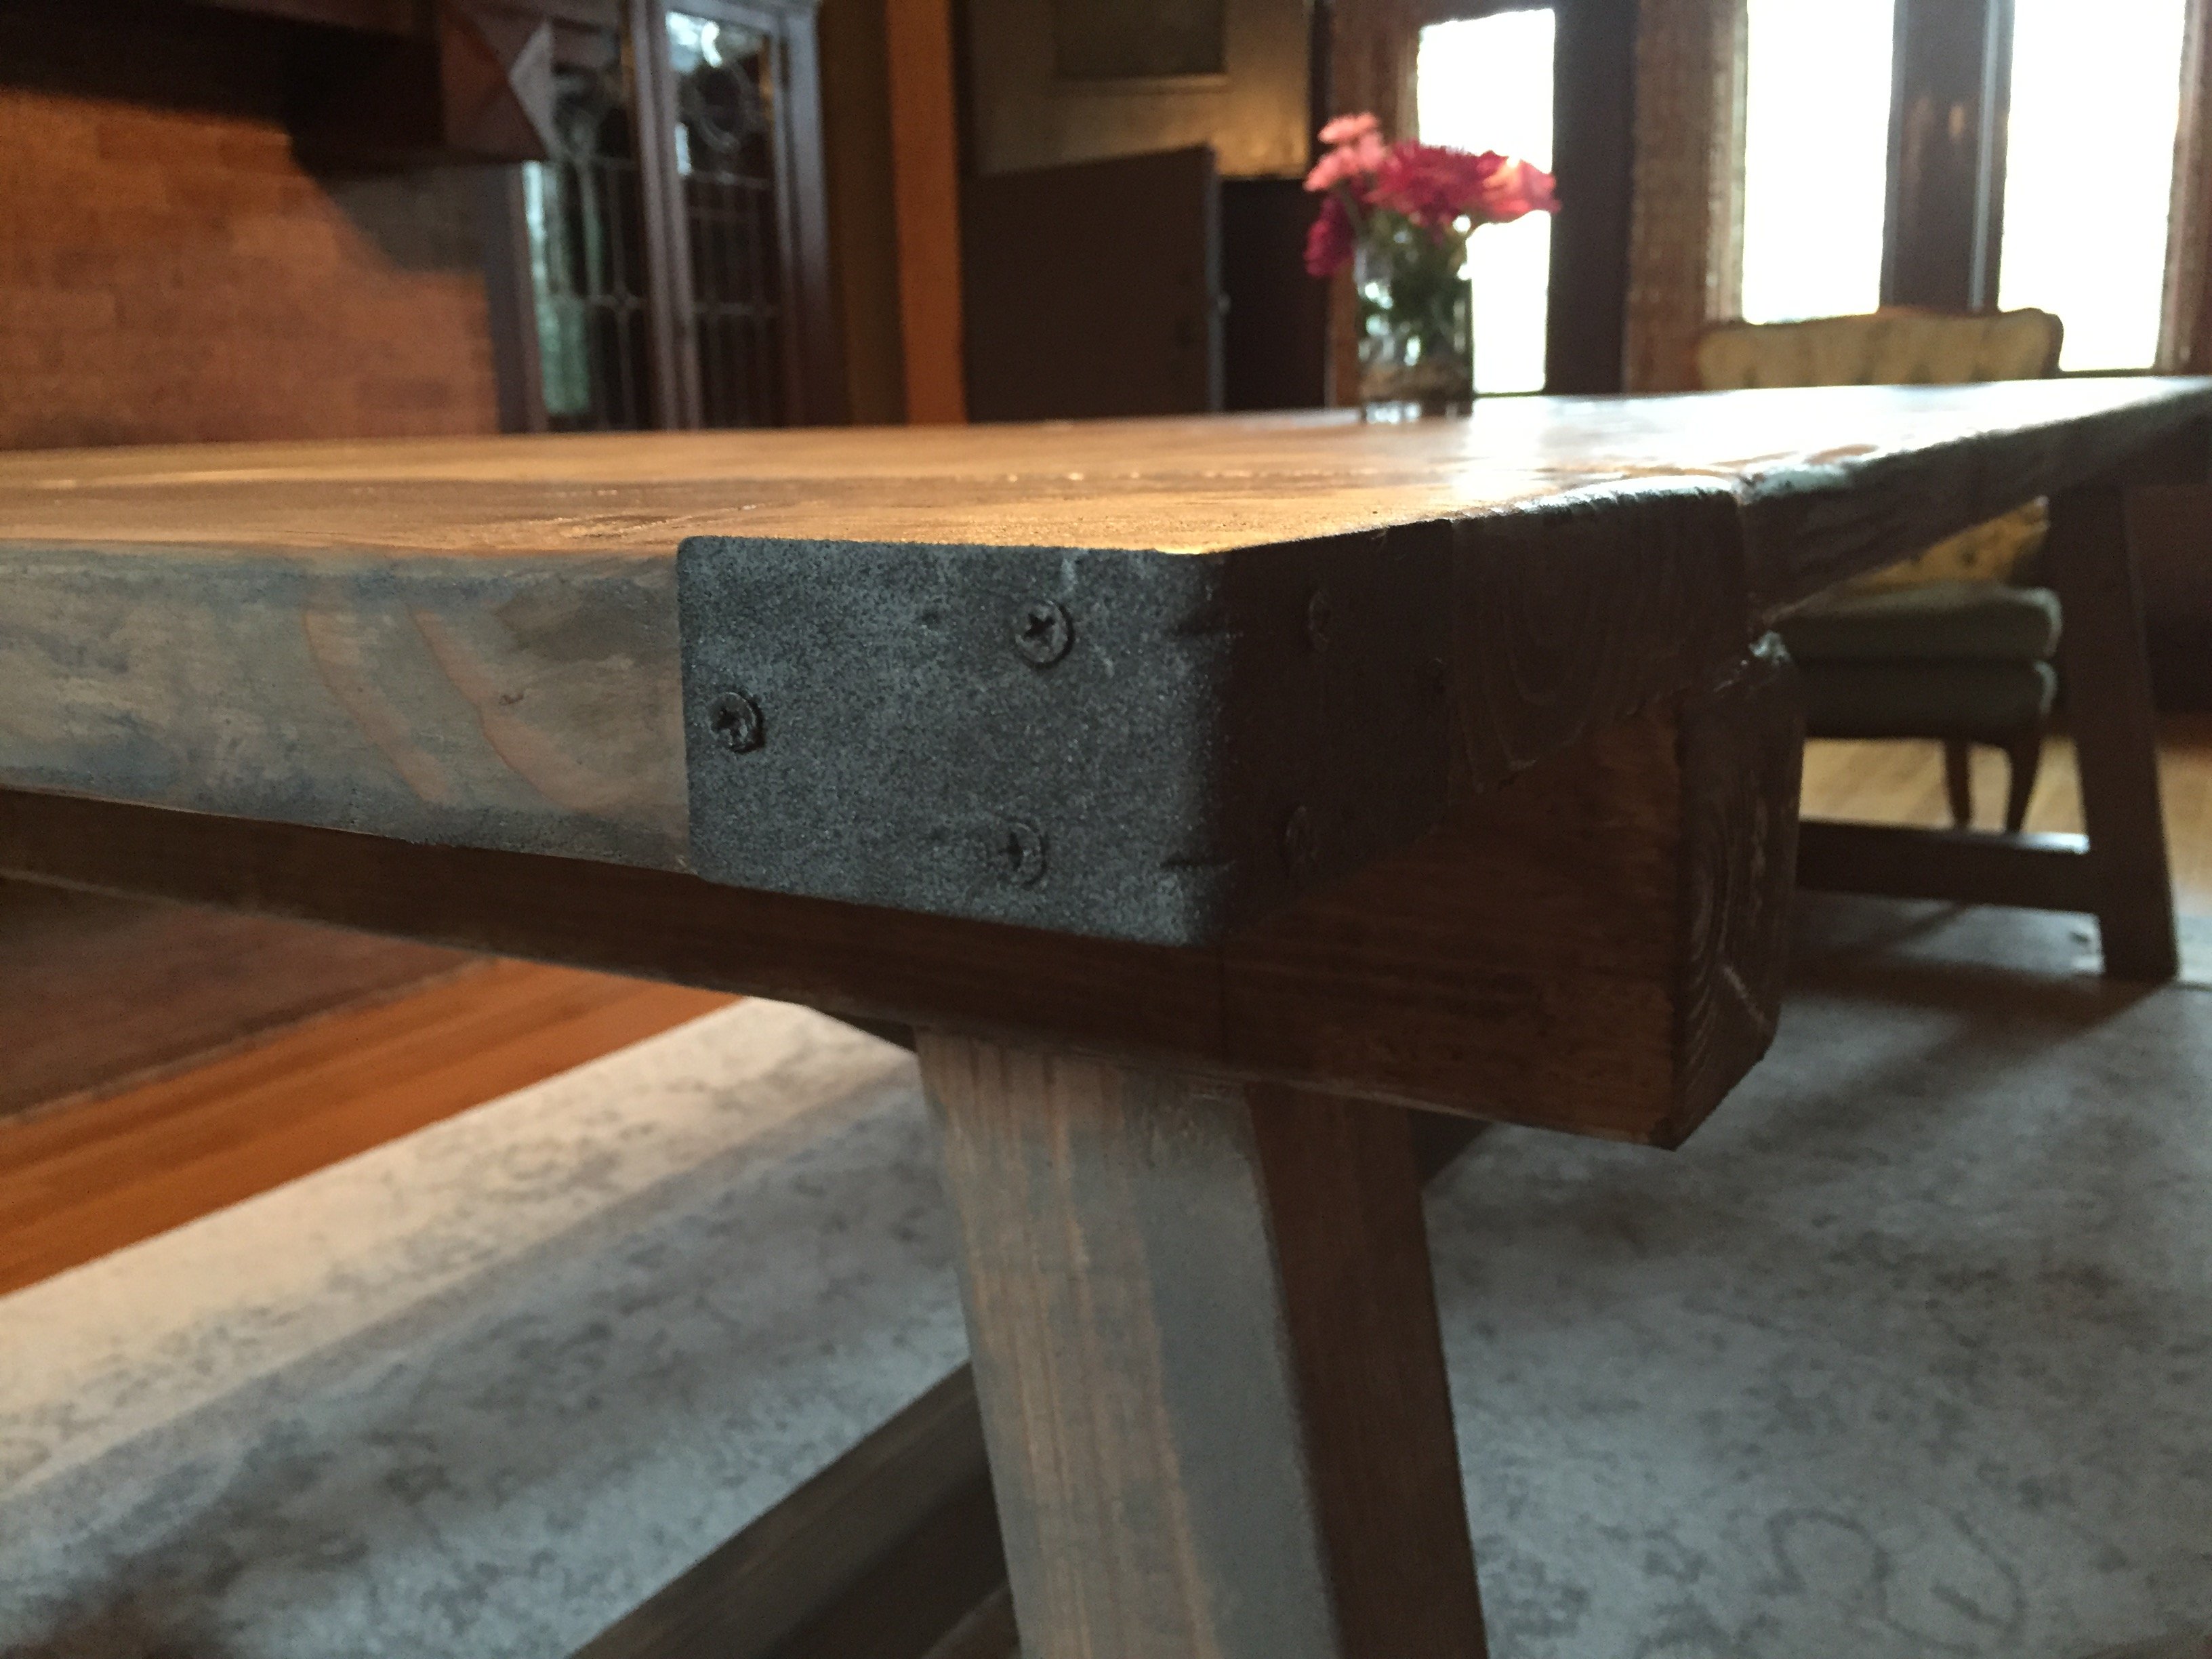
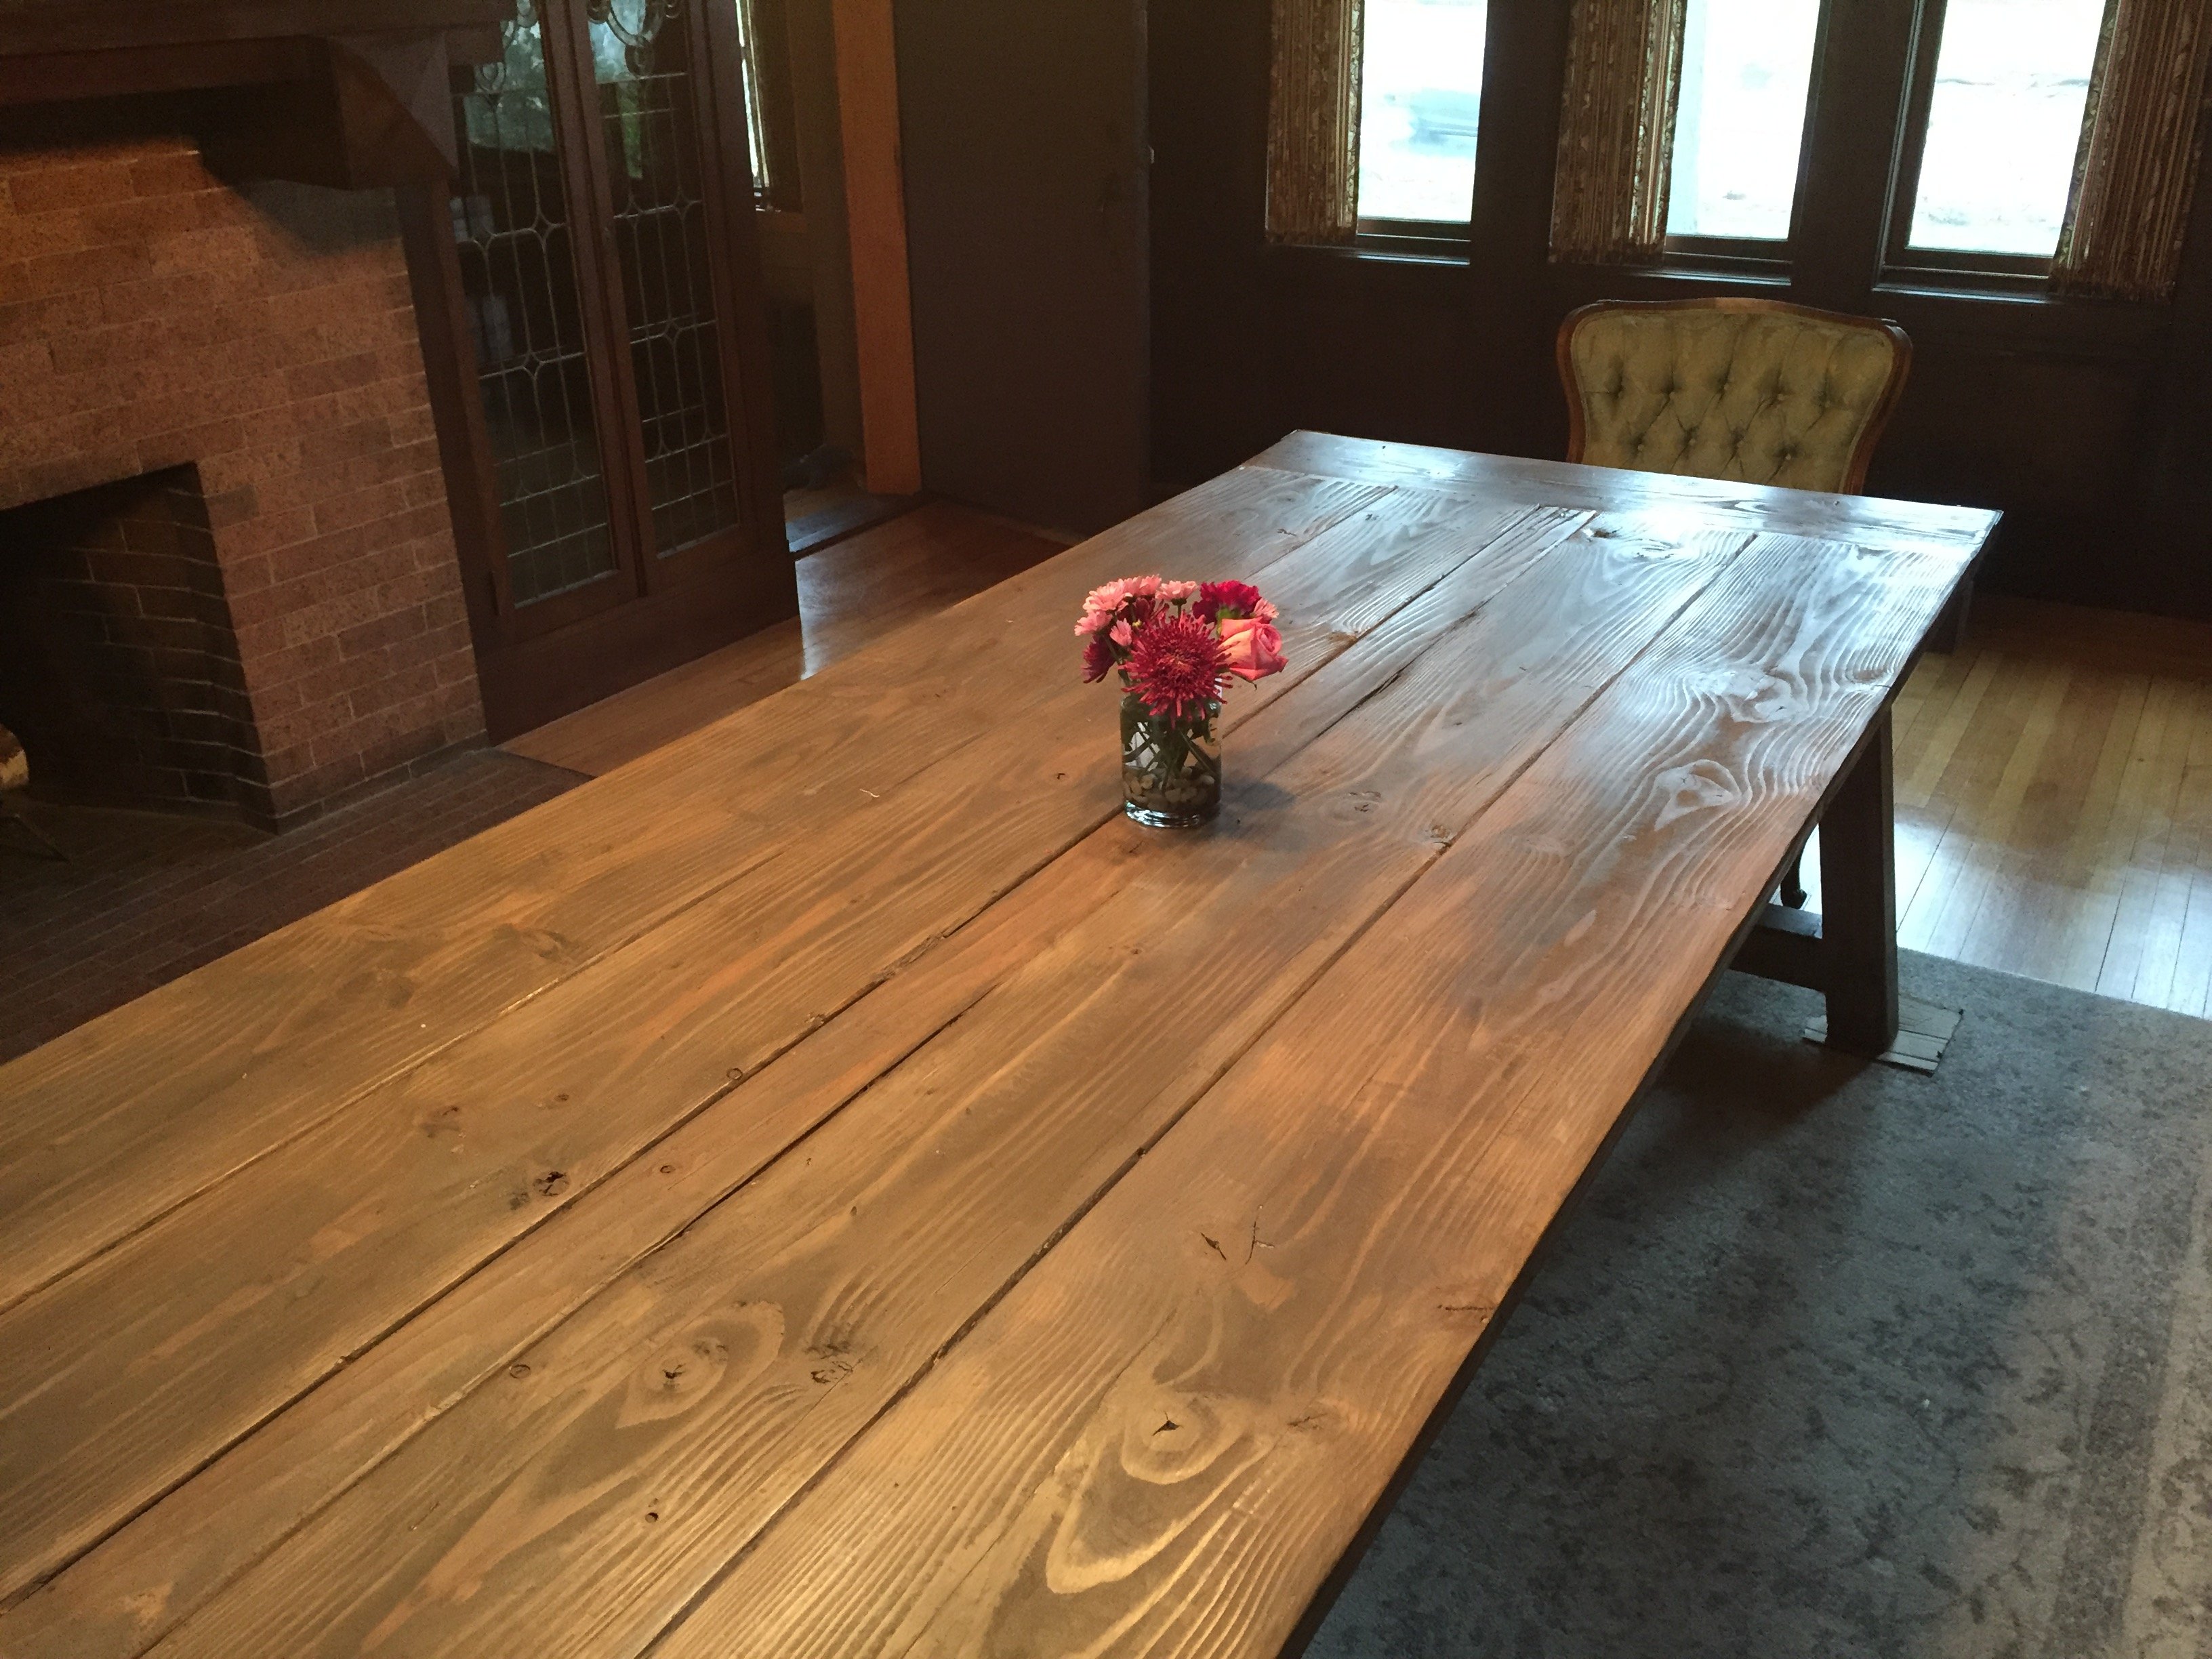
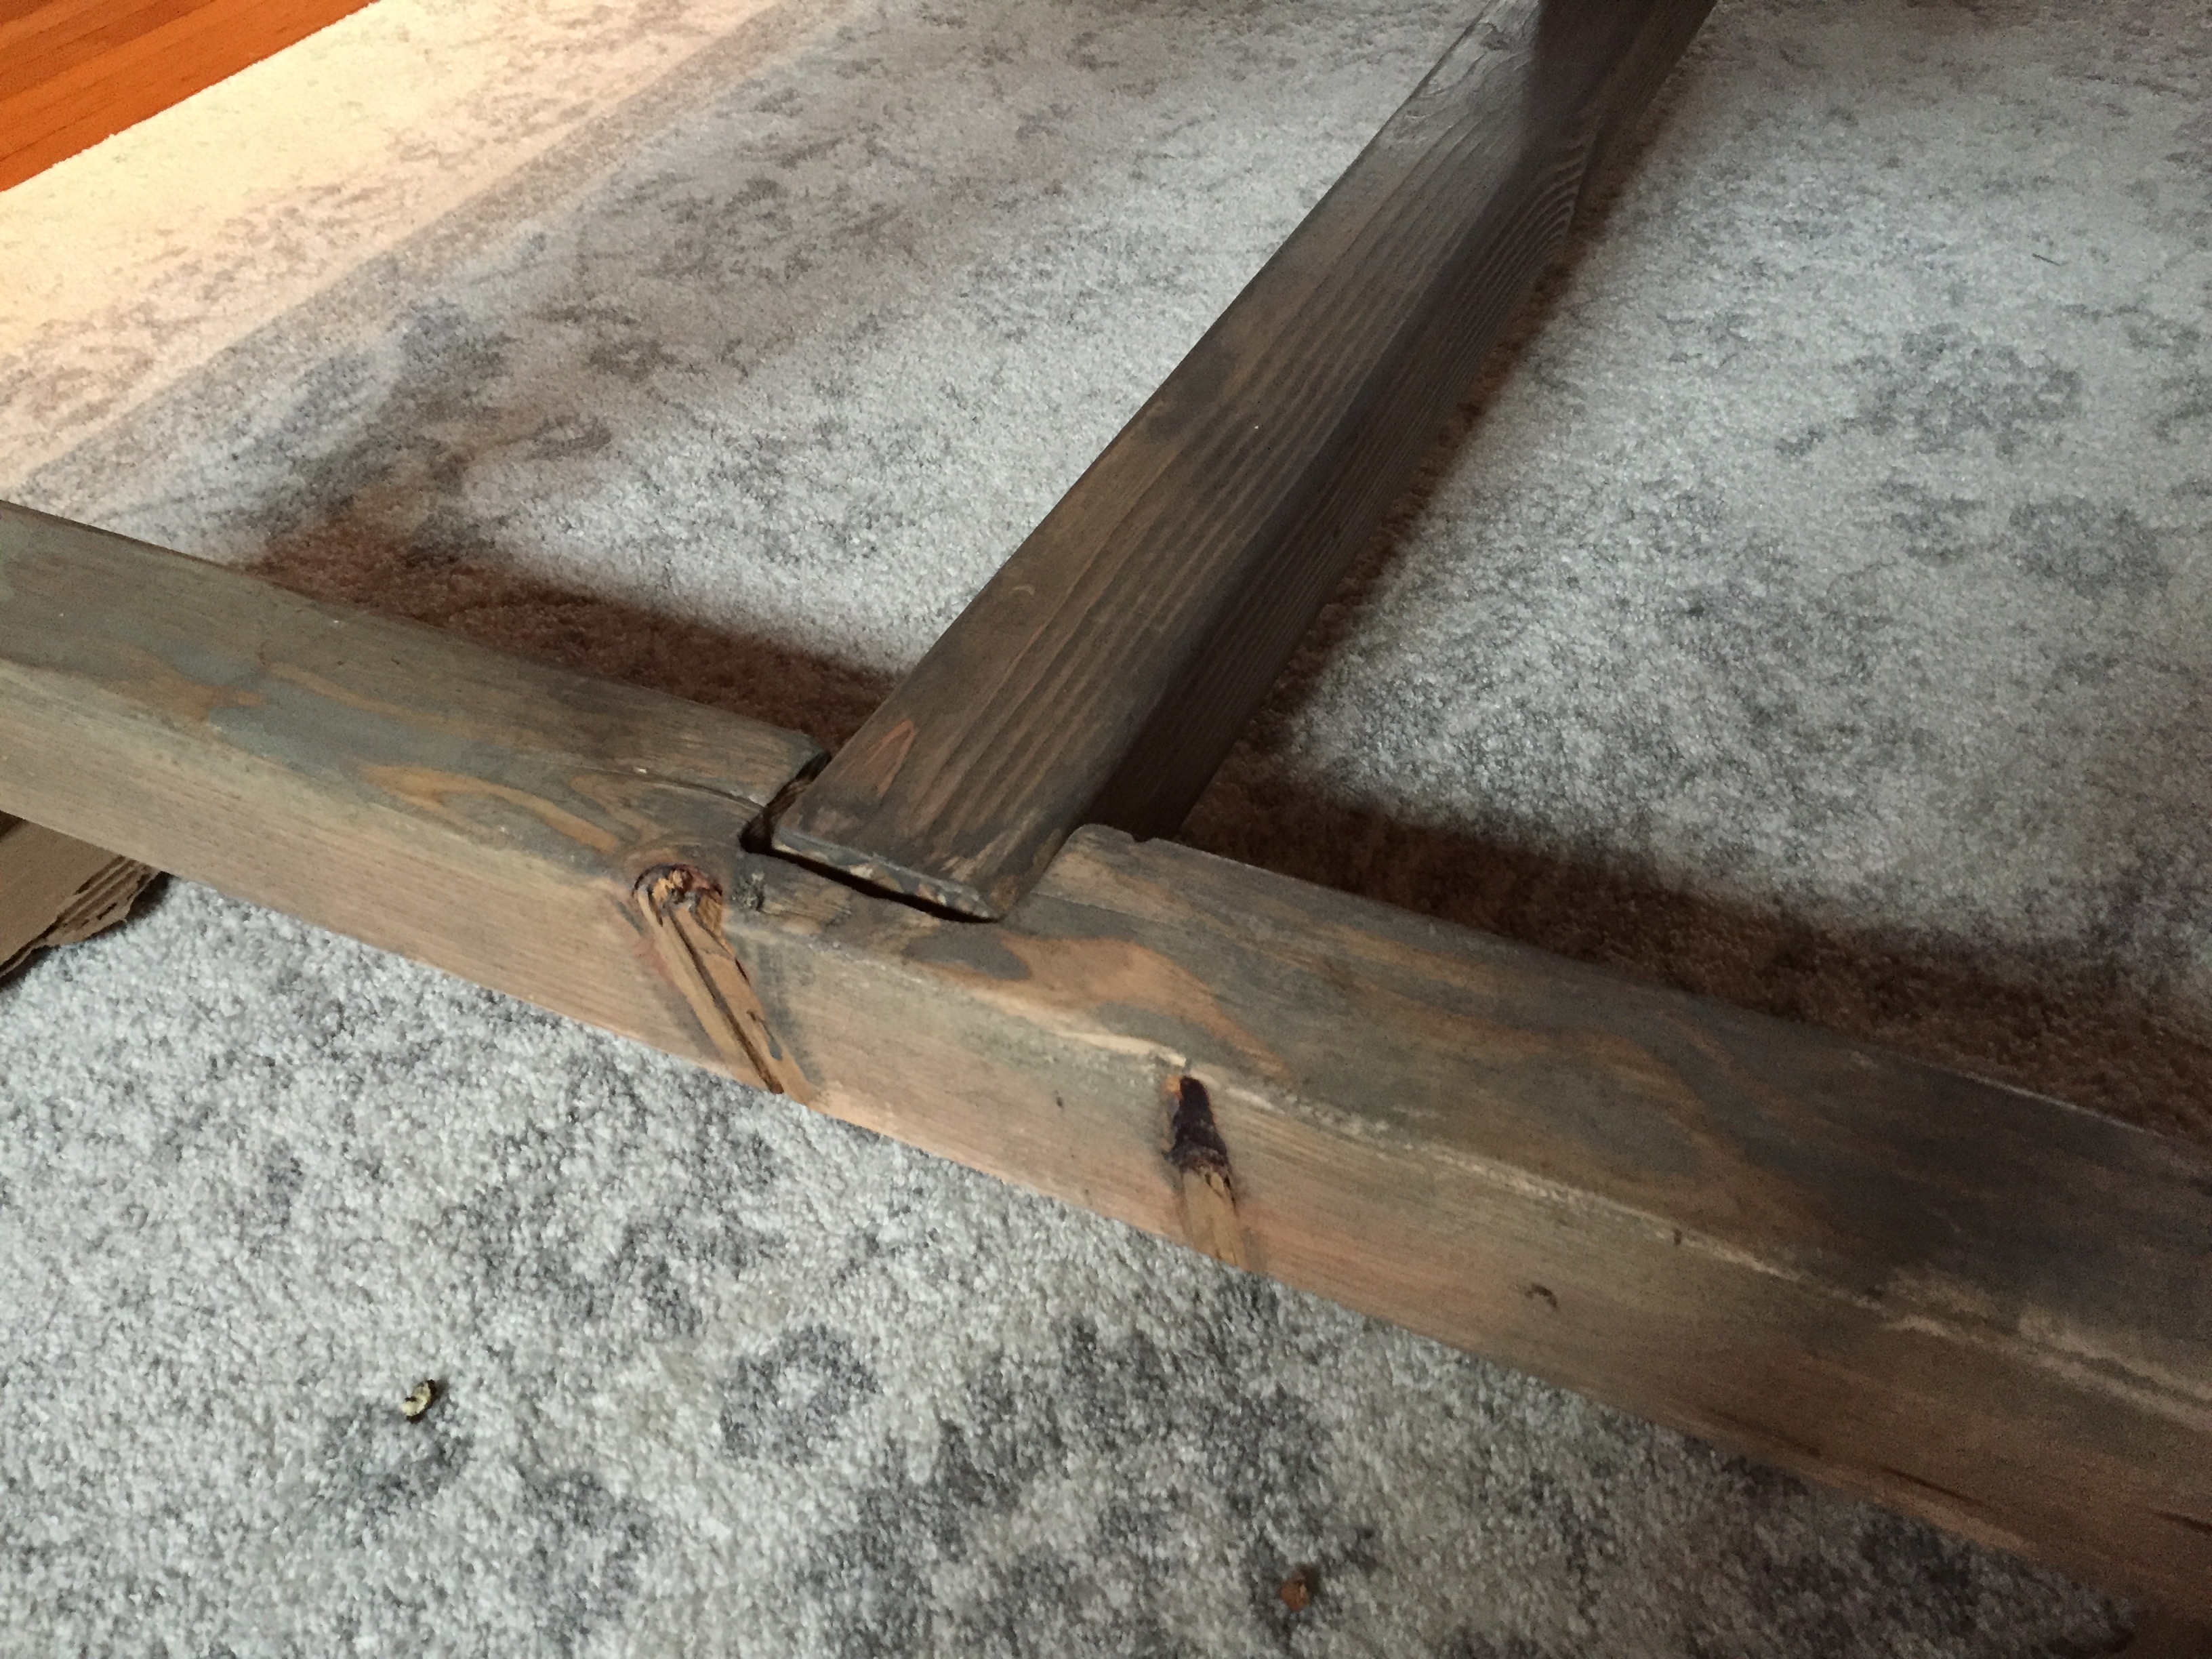
This is the third time I've used Ana White's plans--and while each has been solid and doable, I think I'm getting better. This project was based on Ana's amazing 4x4 Truss Table, and enlarged according to DIY Pete's 2x10 version. The final tabletop dimension is 87"x46" using 5-wide 2x10s. I added cross struts centered under the tabletop so that boards 2 and 4 are screwed to their neighbors as well as braced from beneath.
Pocket screws throughout, except the diagonal braces which are held together with 1/4"x6" countersunk wood screws.
Solid, tasteful, and built to last--my family wants to spend time around the table in ways they did not before. Ana's awesome!


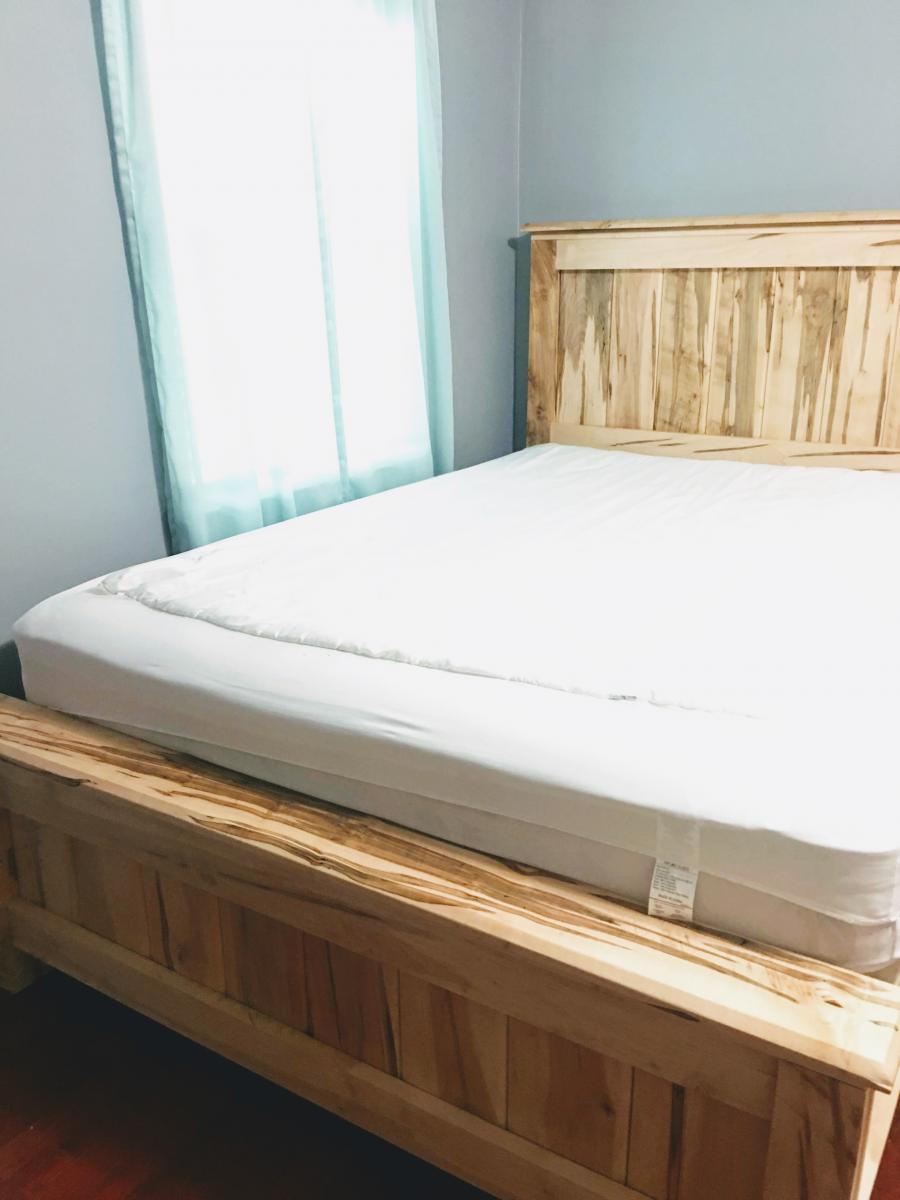
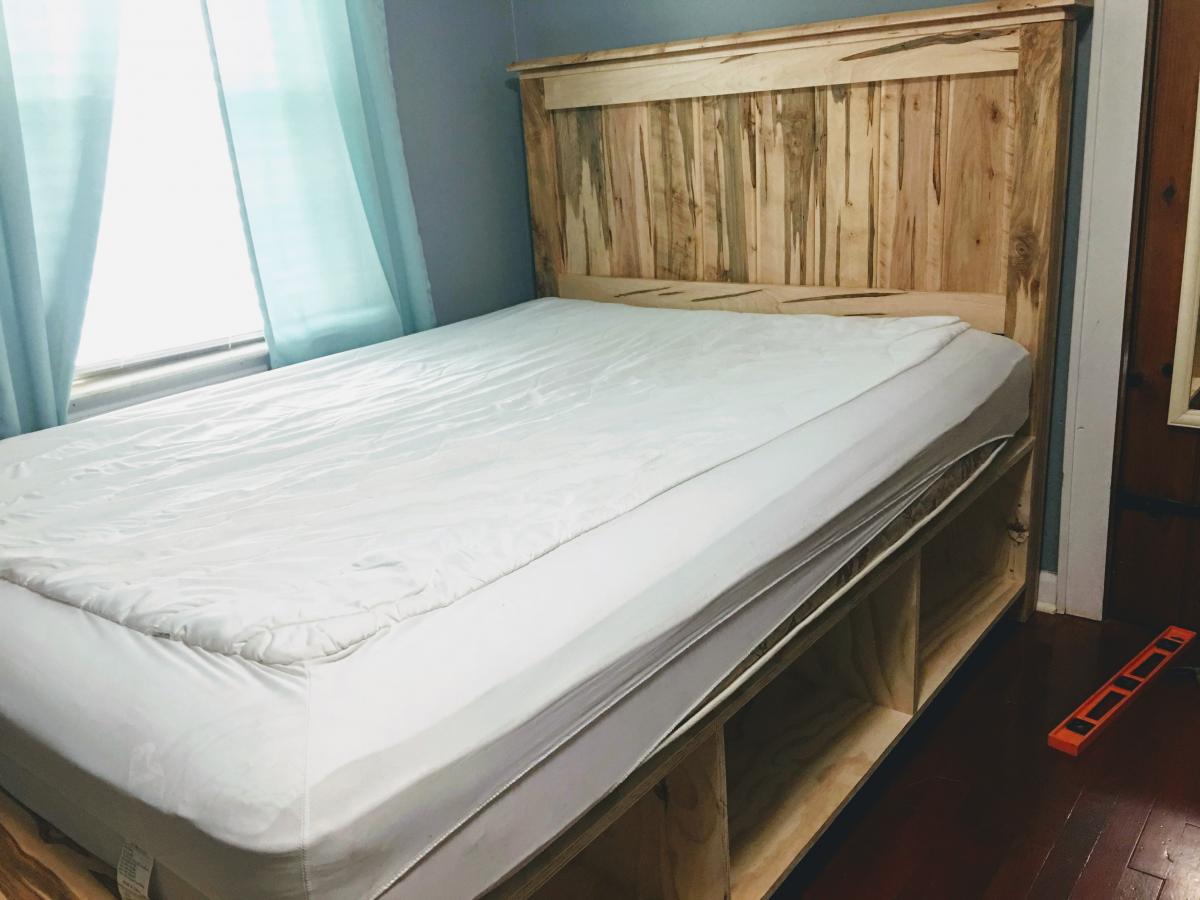
Ana's King Farmhouse Bed inspired me. I built this and added some decorative molding and tin tiles I purchased from Wayfair. I am very happy with the way it turned out. Thank you Ana White
Cathy B
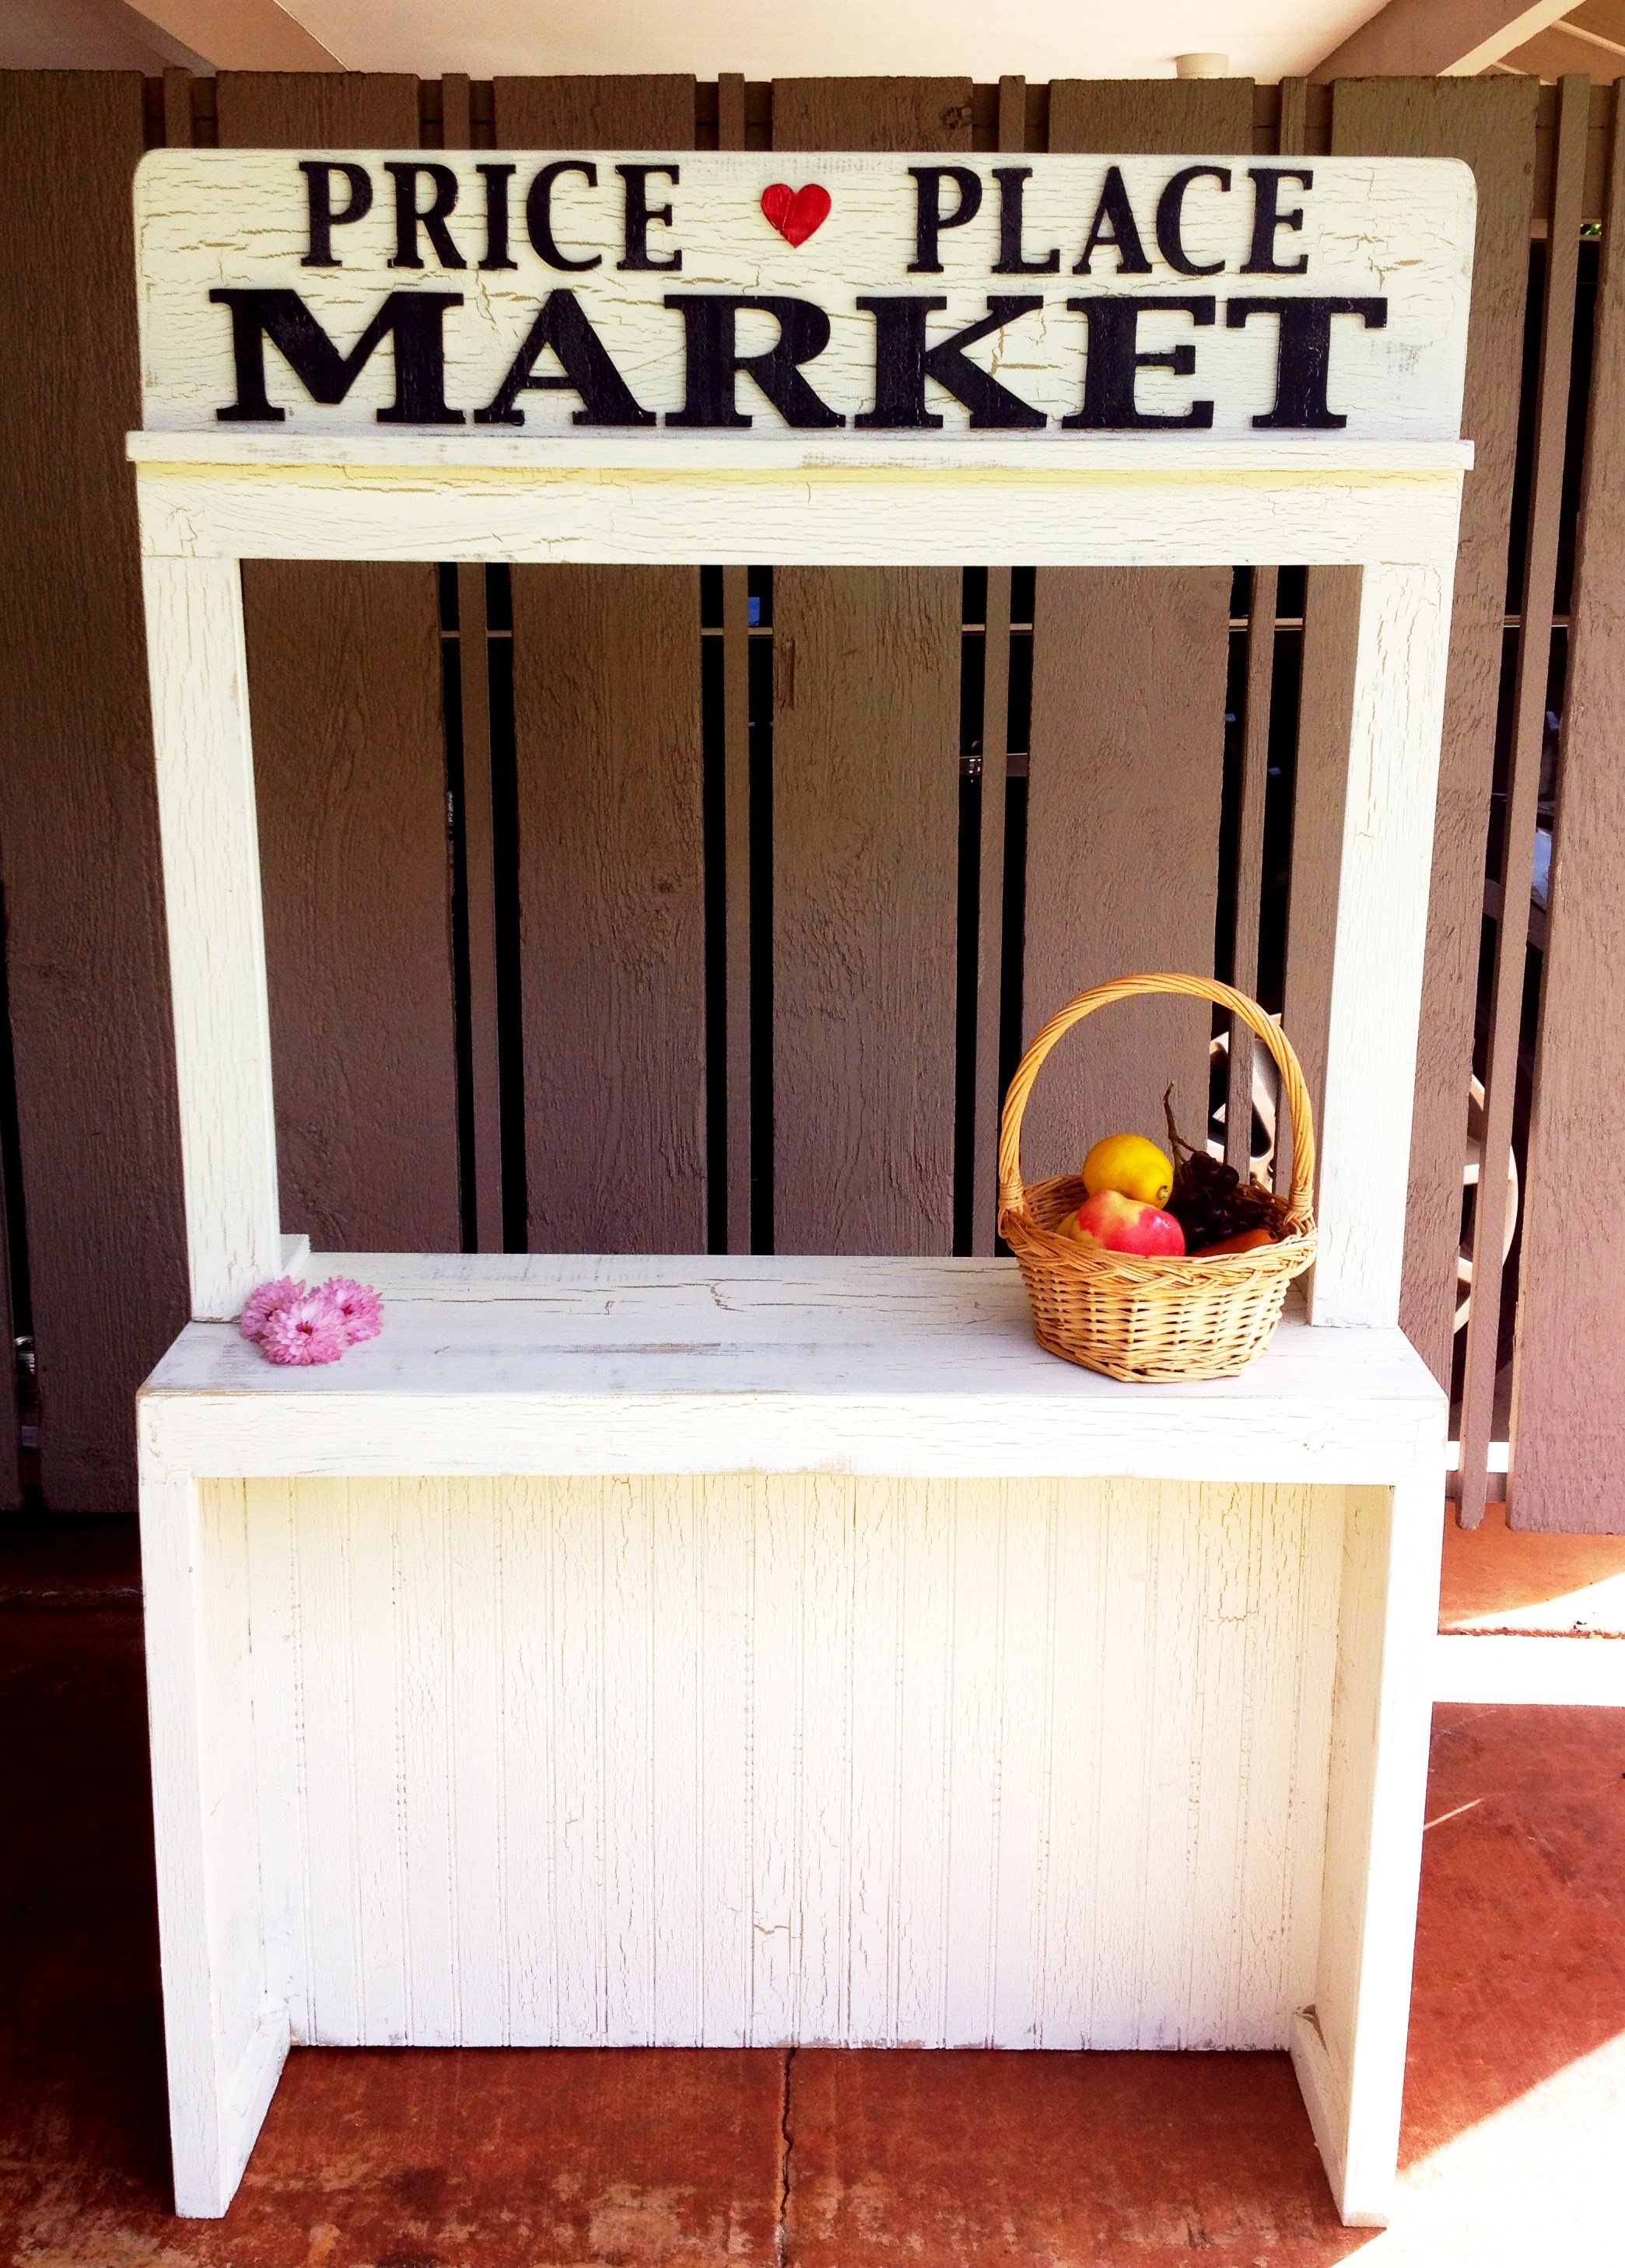
Built a "lemonade stand" for the kiddos, but wanted it to be more versatile so we named it Price Place Market (think Seattle's Pike Place...haha) All letters are cut out from a 1/4" plywood on a scroll saw. We used bead board instead of plain old plywood for the insert and finished it with a antique crackle. Marshmallow white over green tea. Can't wait for this weekend! Watch out people, the kids are irresistible as well as the lemonade stand! Get your wallets out!

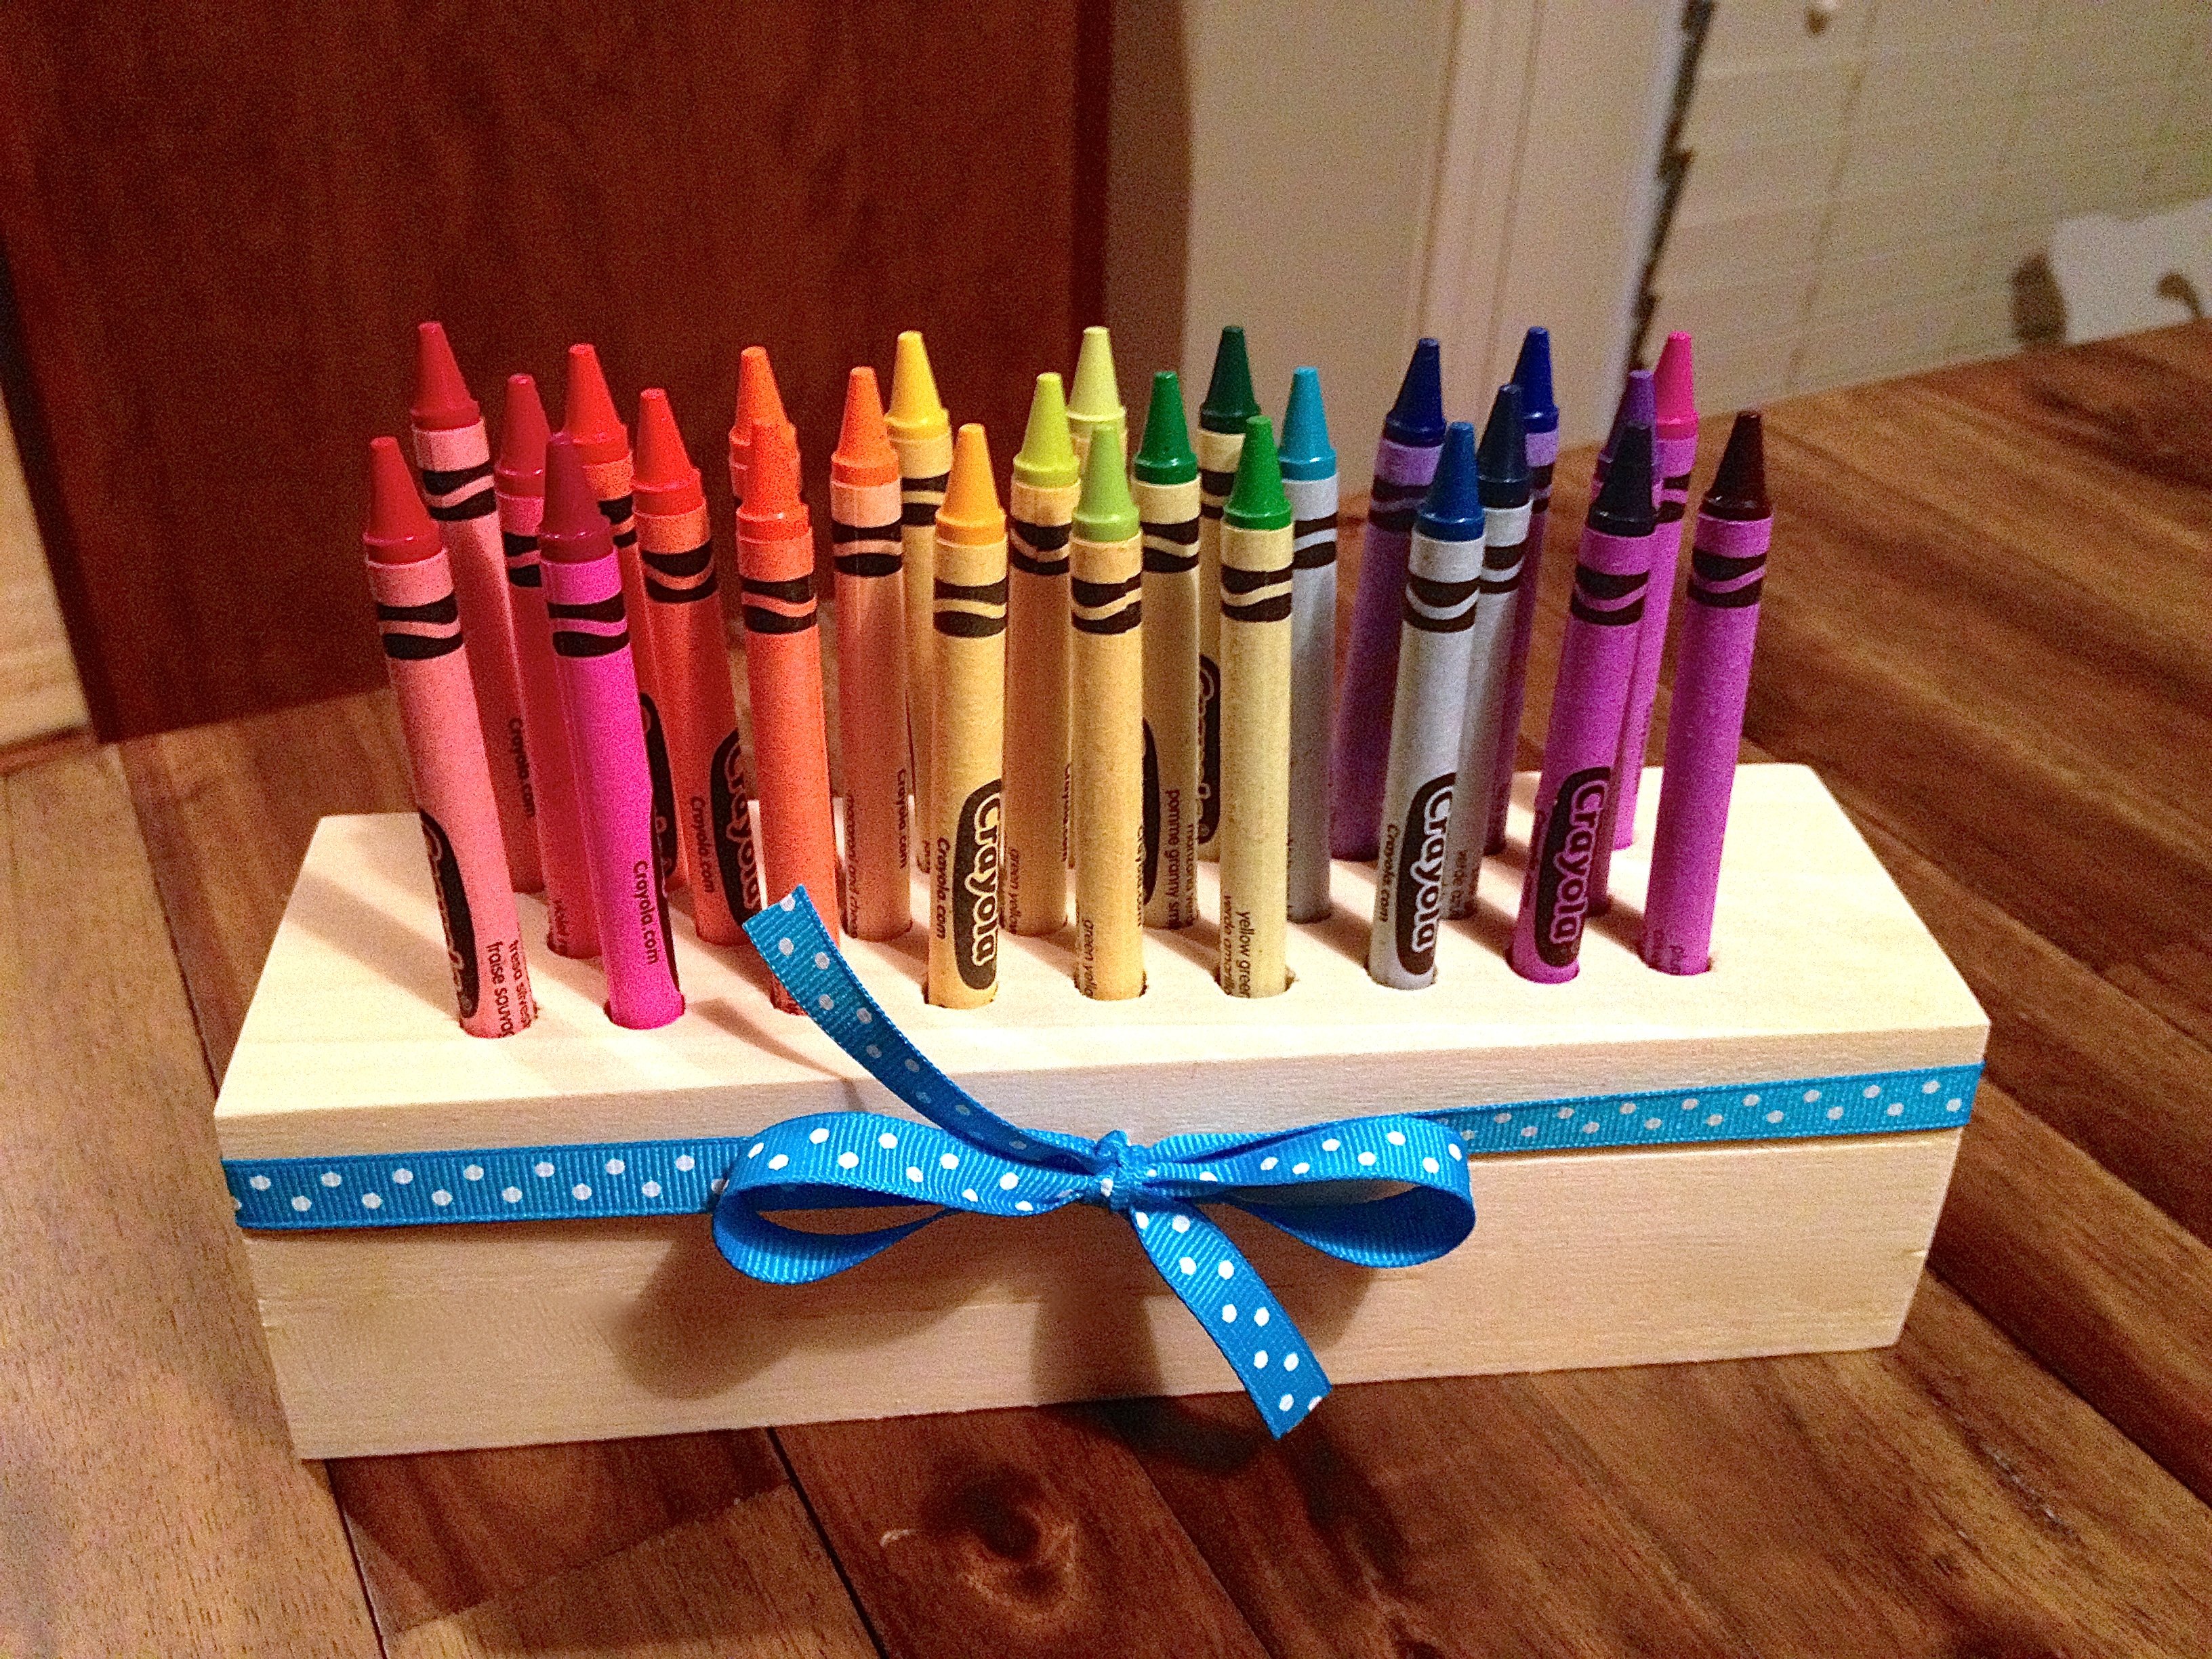
I made two of these, one to keep and one for a birthday gift. No more crayons rolling off the table and breaking on the floor. As someone new to wood working, I split two boards on the very last holes before I finally got it right by using brad-point drill bit. This produced the cleanest holes as well. I scaled down the number of holes too, just a personal choice. They both turned out so cute!
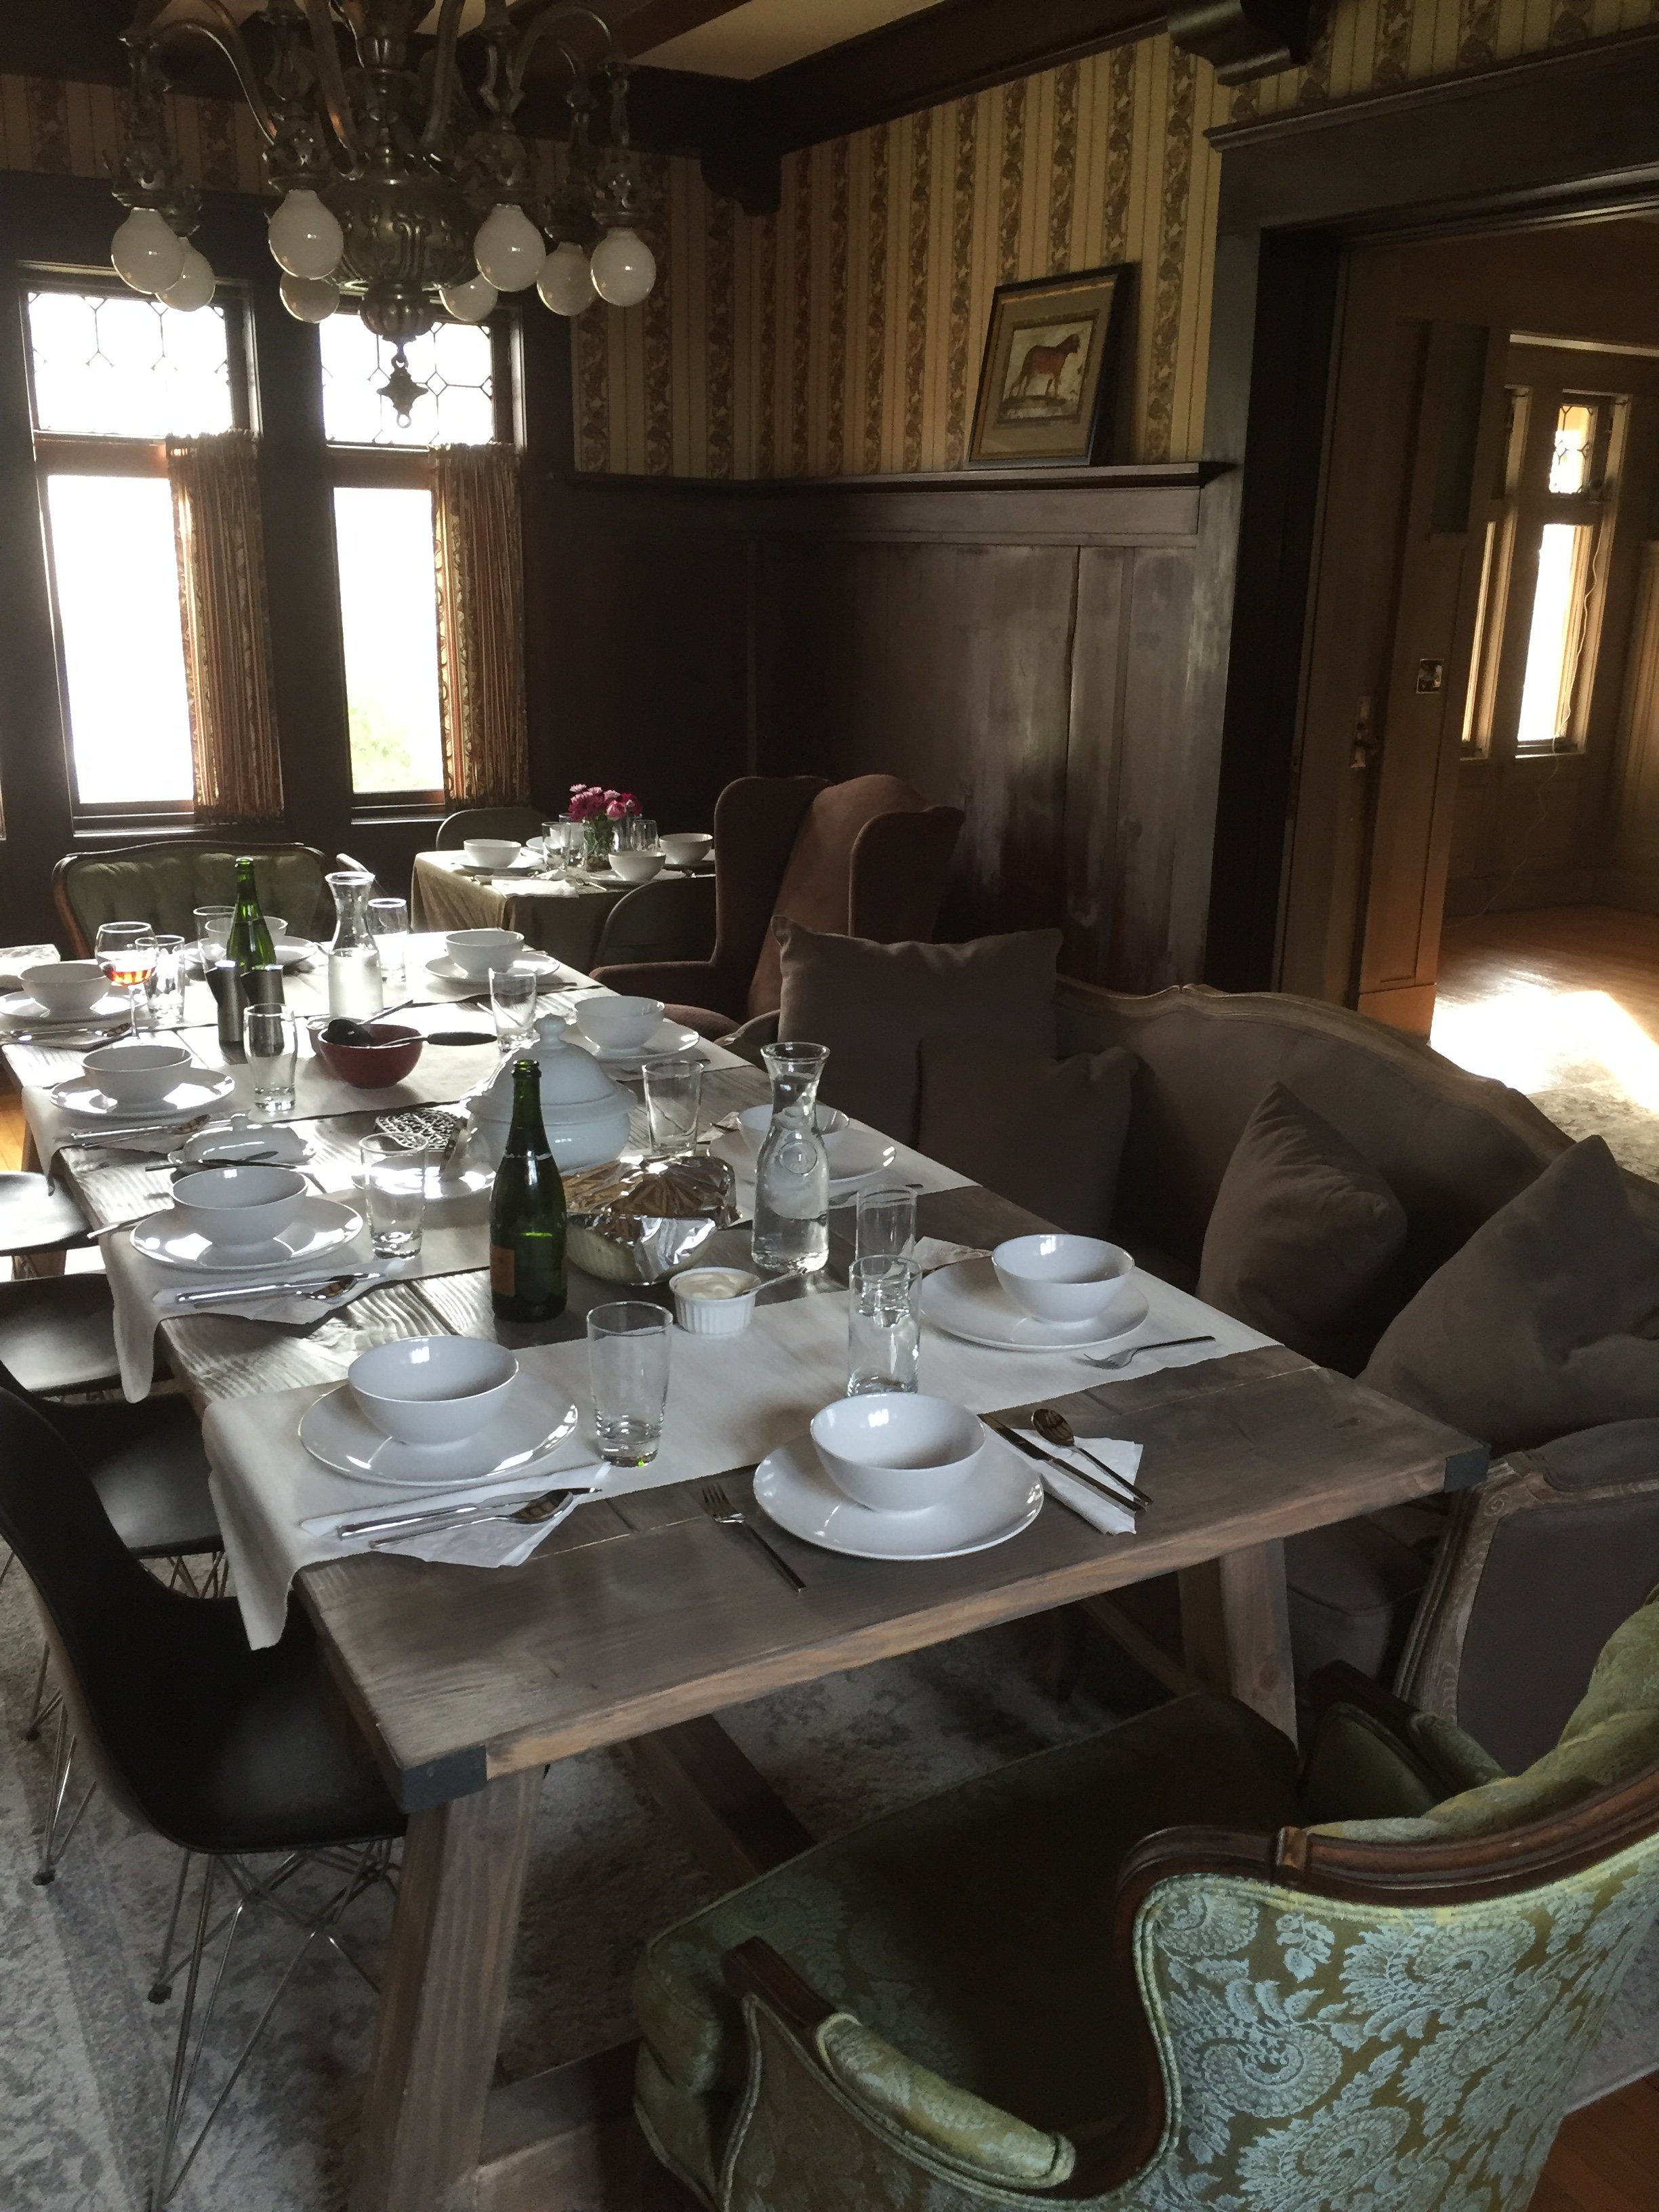
For our first Easter, my wife wanted to bring both our families together to celebrate in our new home. I've never done any woodworking before but the plans from Ana and Shanty2Chic allowed me to stretch my creativity. I got some awesome power tools from my father and started cutting away. 2 weeks later we were eating, drinking, and laughing over a 106" farmhouse style dining table. The materials were from the local home store and it was untreated lumber. Because of my inexperience I bought Prime Douglas Fir. The table took 4 of us to move from the detached garage to the living room. Who knew that wood was so heavy!!! Thanks to Ana and the girls at Shanty2Chic for some great tips. I relied on the pocket holes to attach the top boards but added a 4x4 in the middle for a feature piece to the table. The table top support beams are through tenon and mortise (I researched this on YouTube) but shimmed a bit since I didn't make them 100% perfect. The bottom 4x4 support is laid into the 4x4 on the leg support. Such fun, and am definitely looking to start more (perhaps with a lighter wood) projects soon. I'll continue to post any/all future projects.
Sat, 04/02/2016 - 16:18
...because these "first build" posts are amazing!! Great job!! Goes beautifully with your gorgeous home!
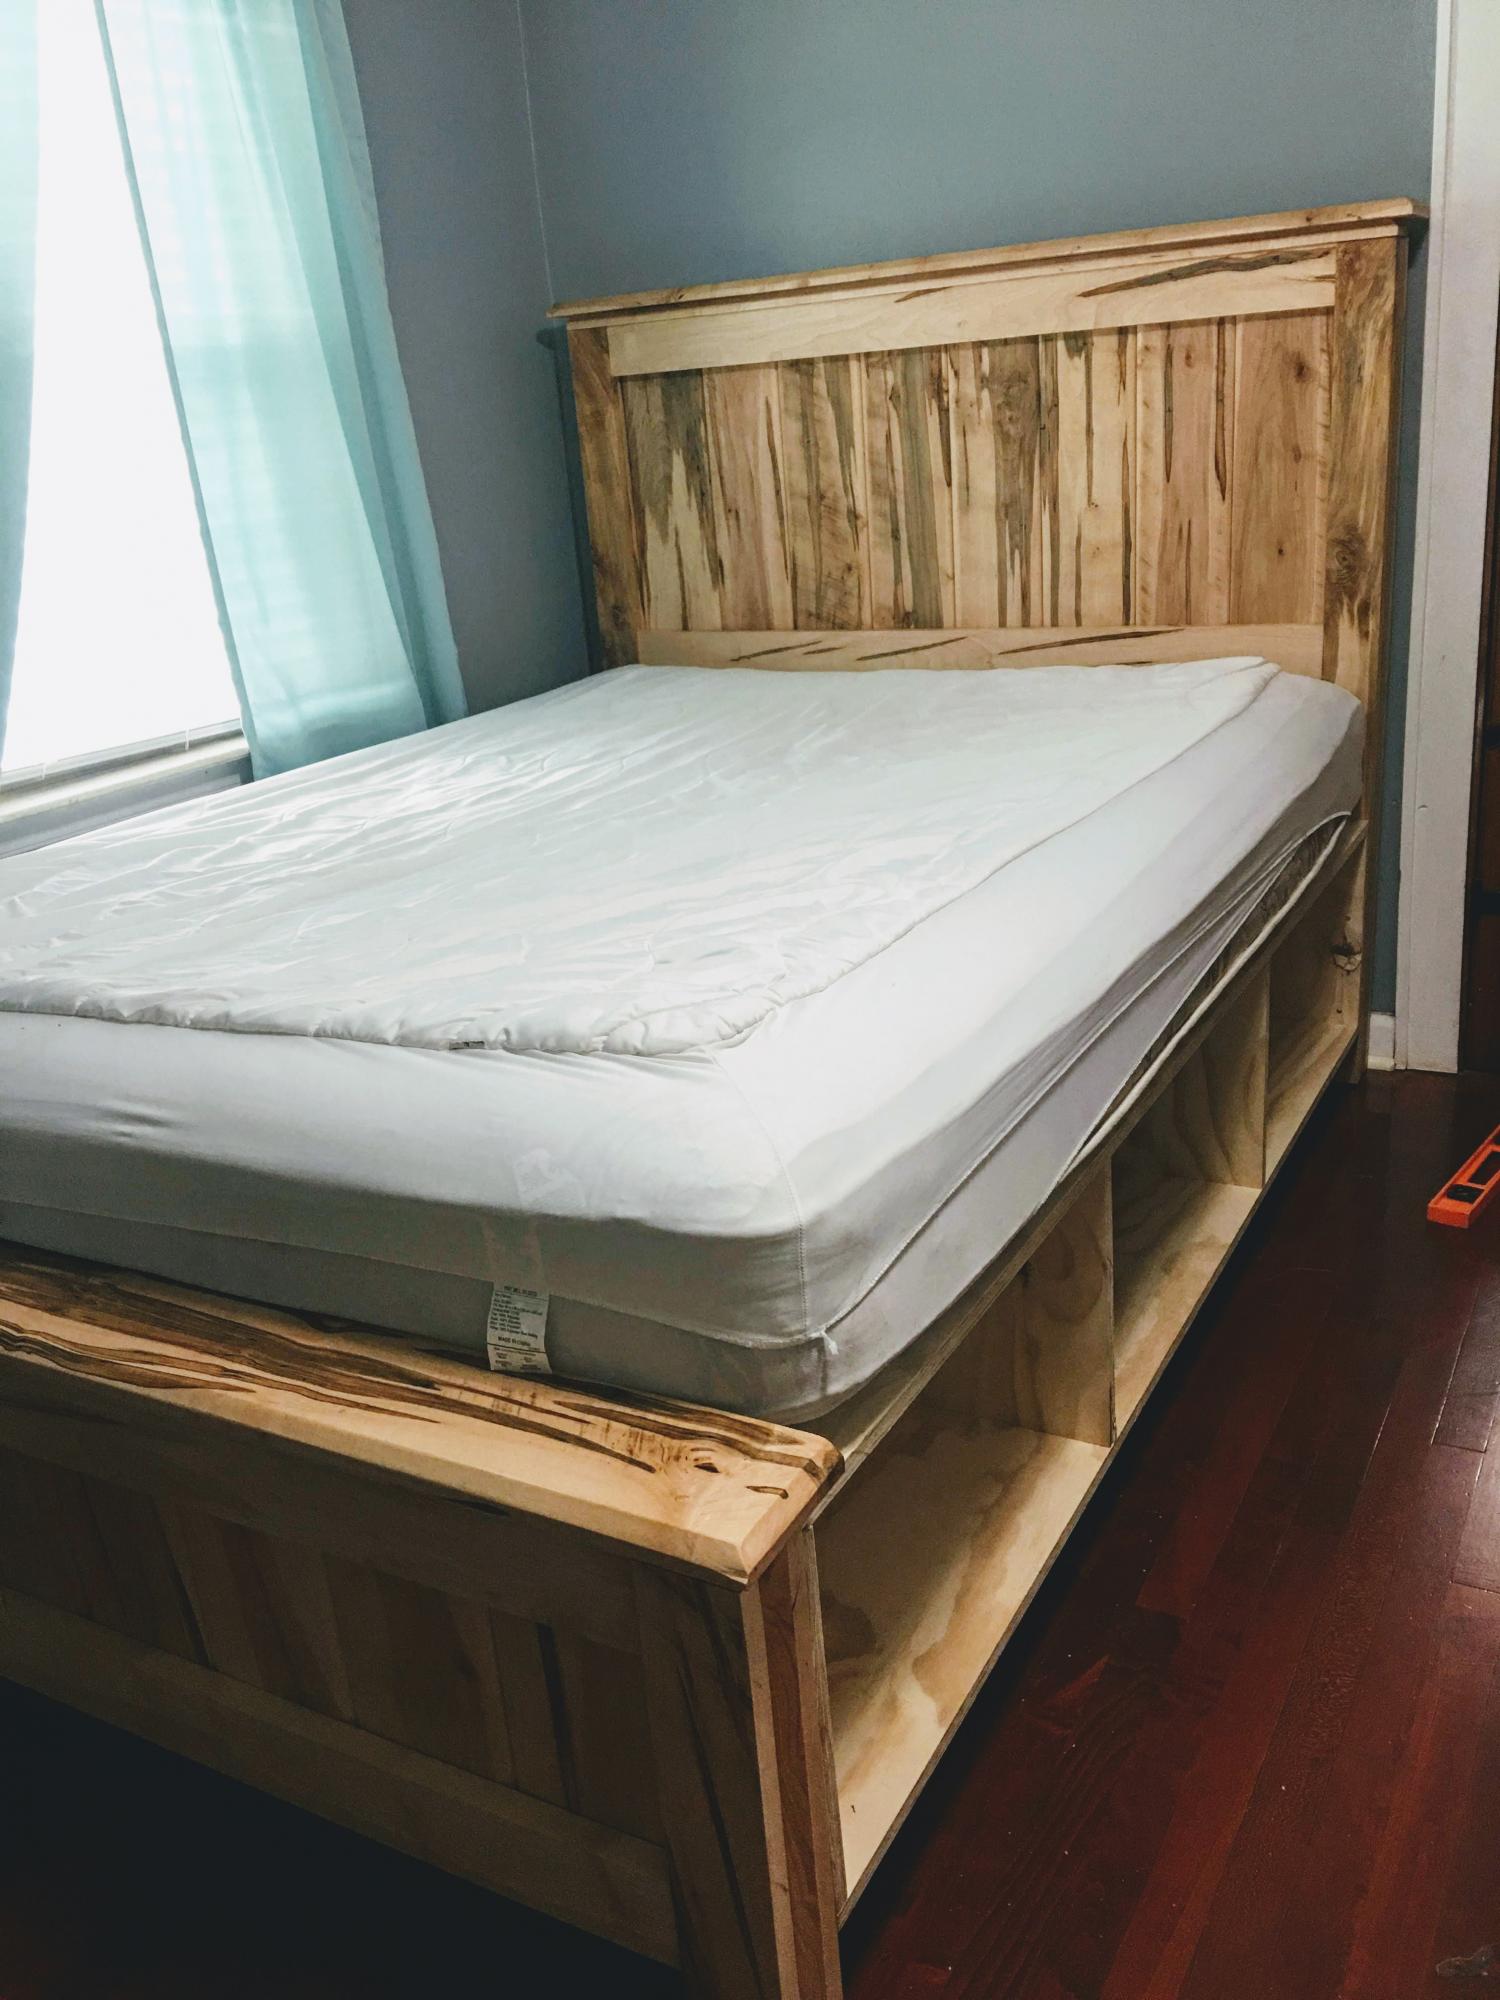
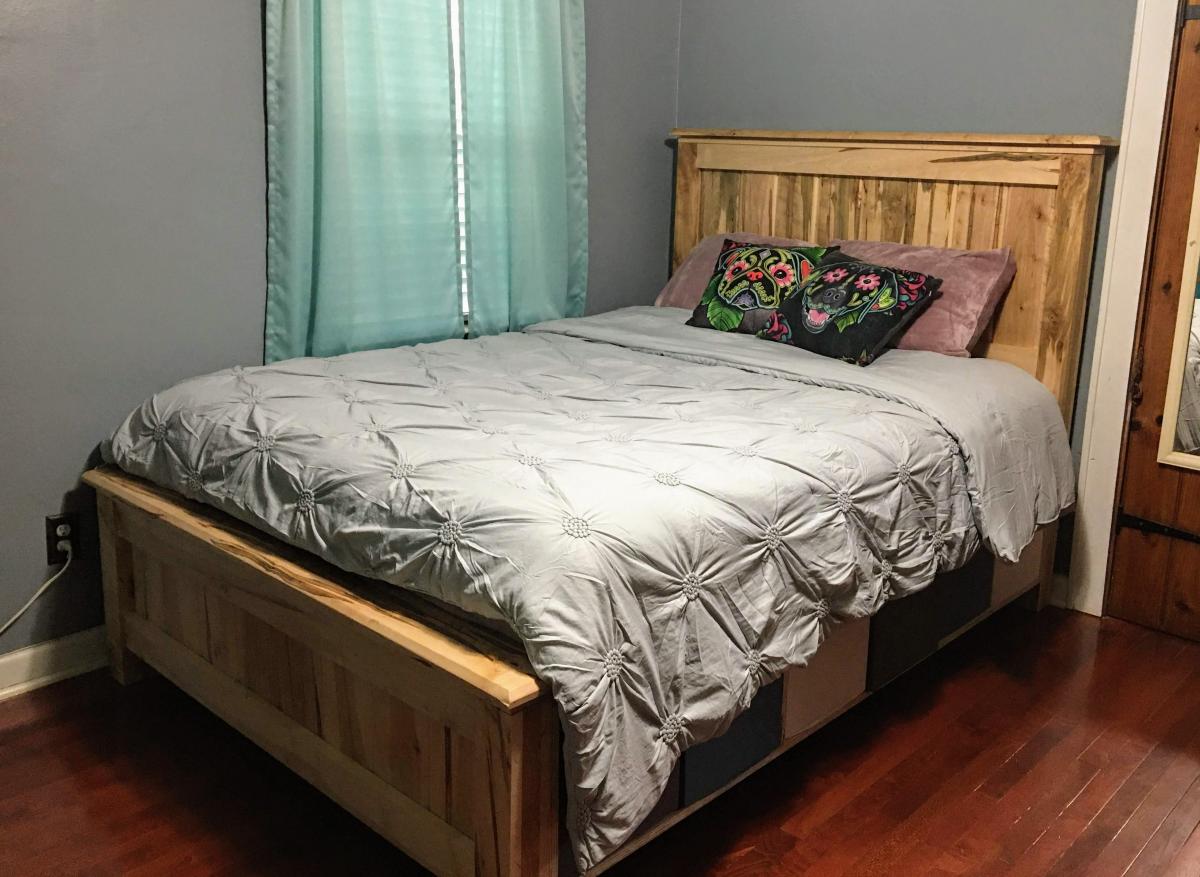
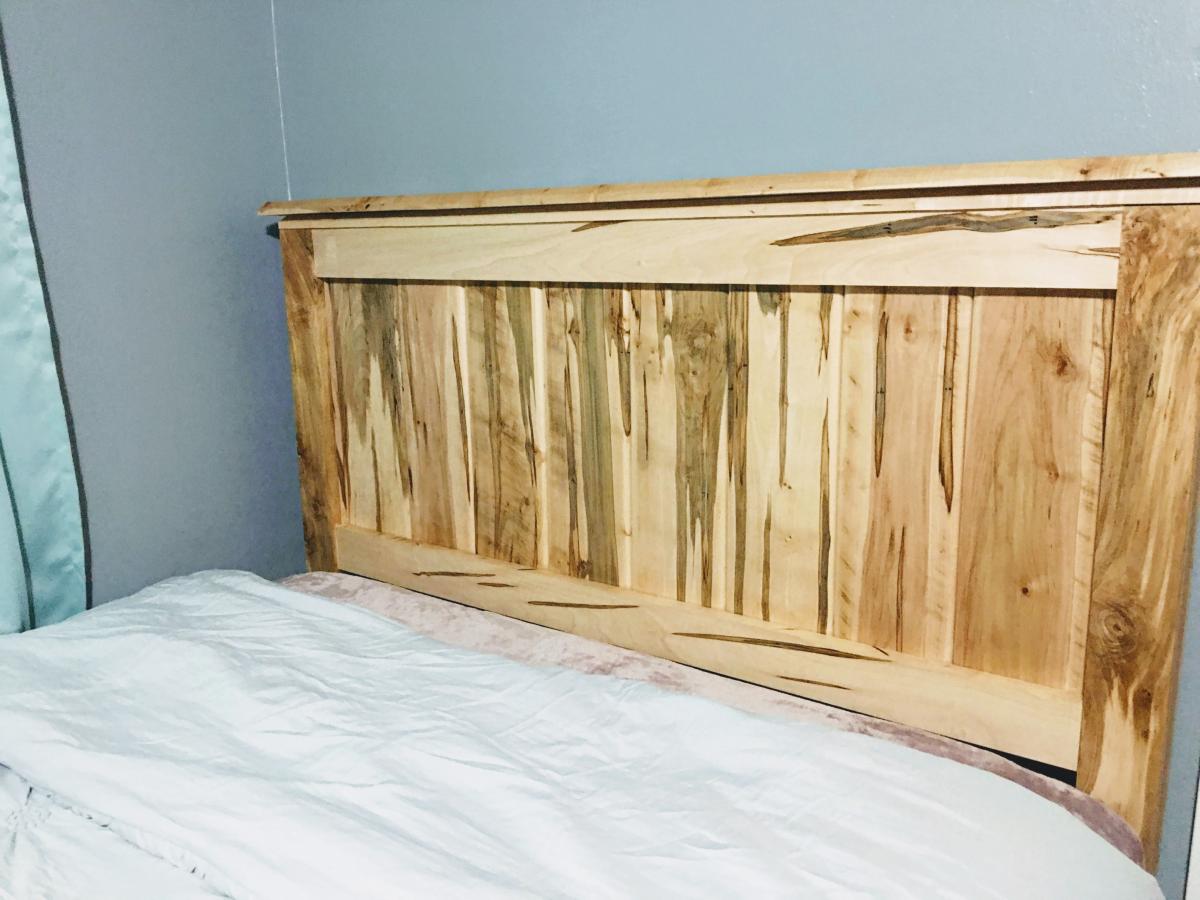
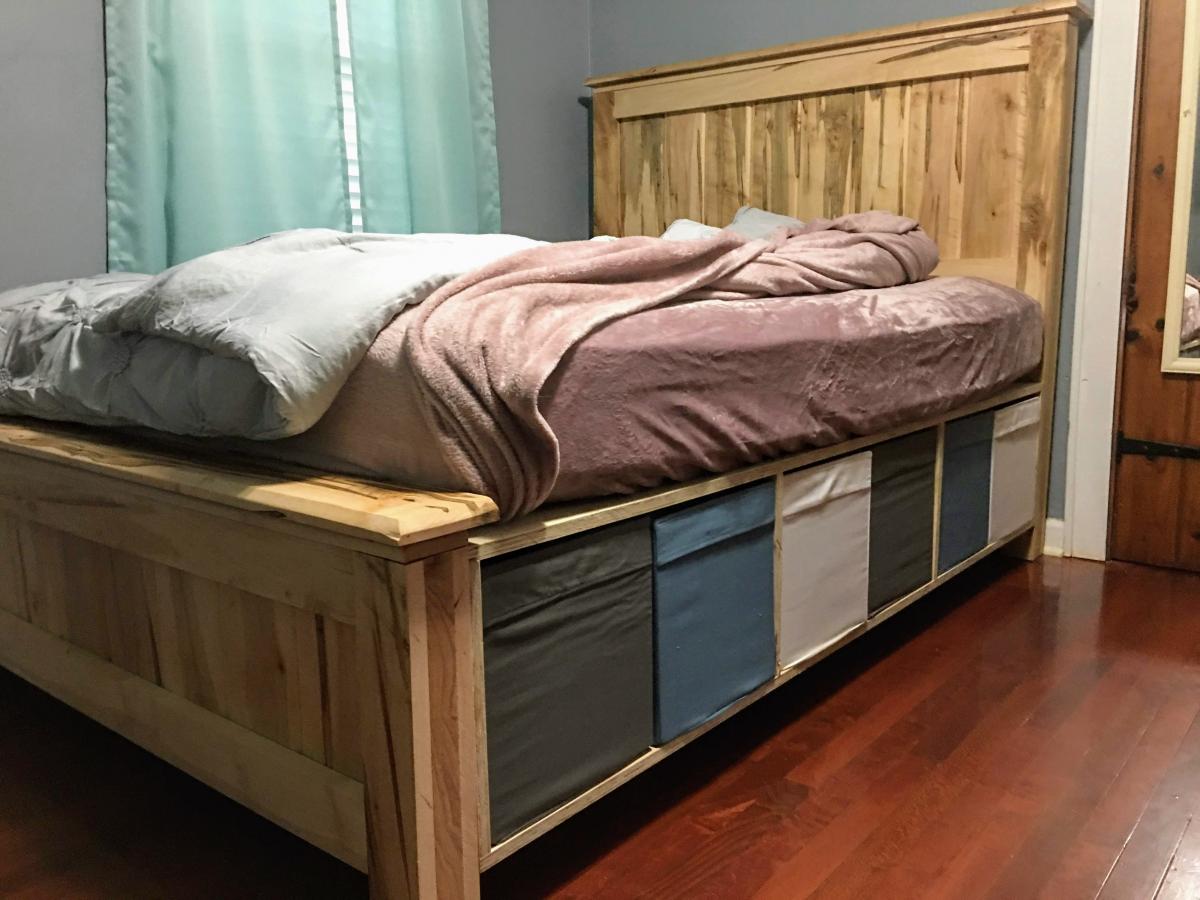
Beautiful showcase of maple wood. Love the storage
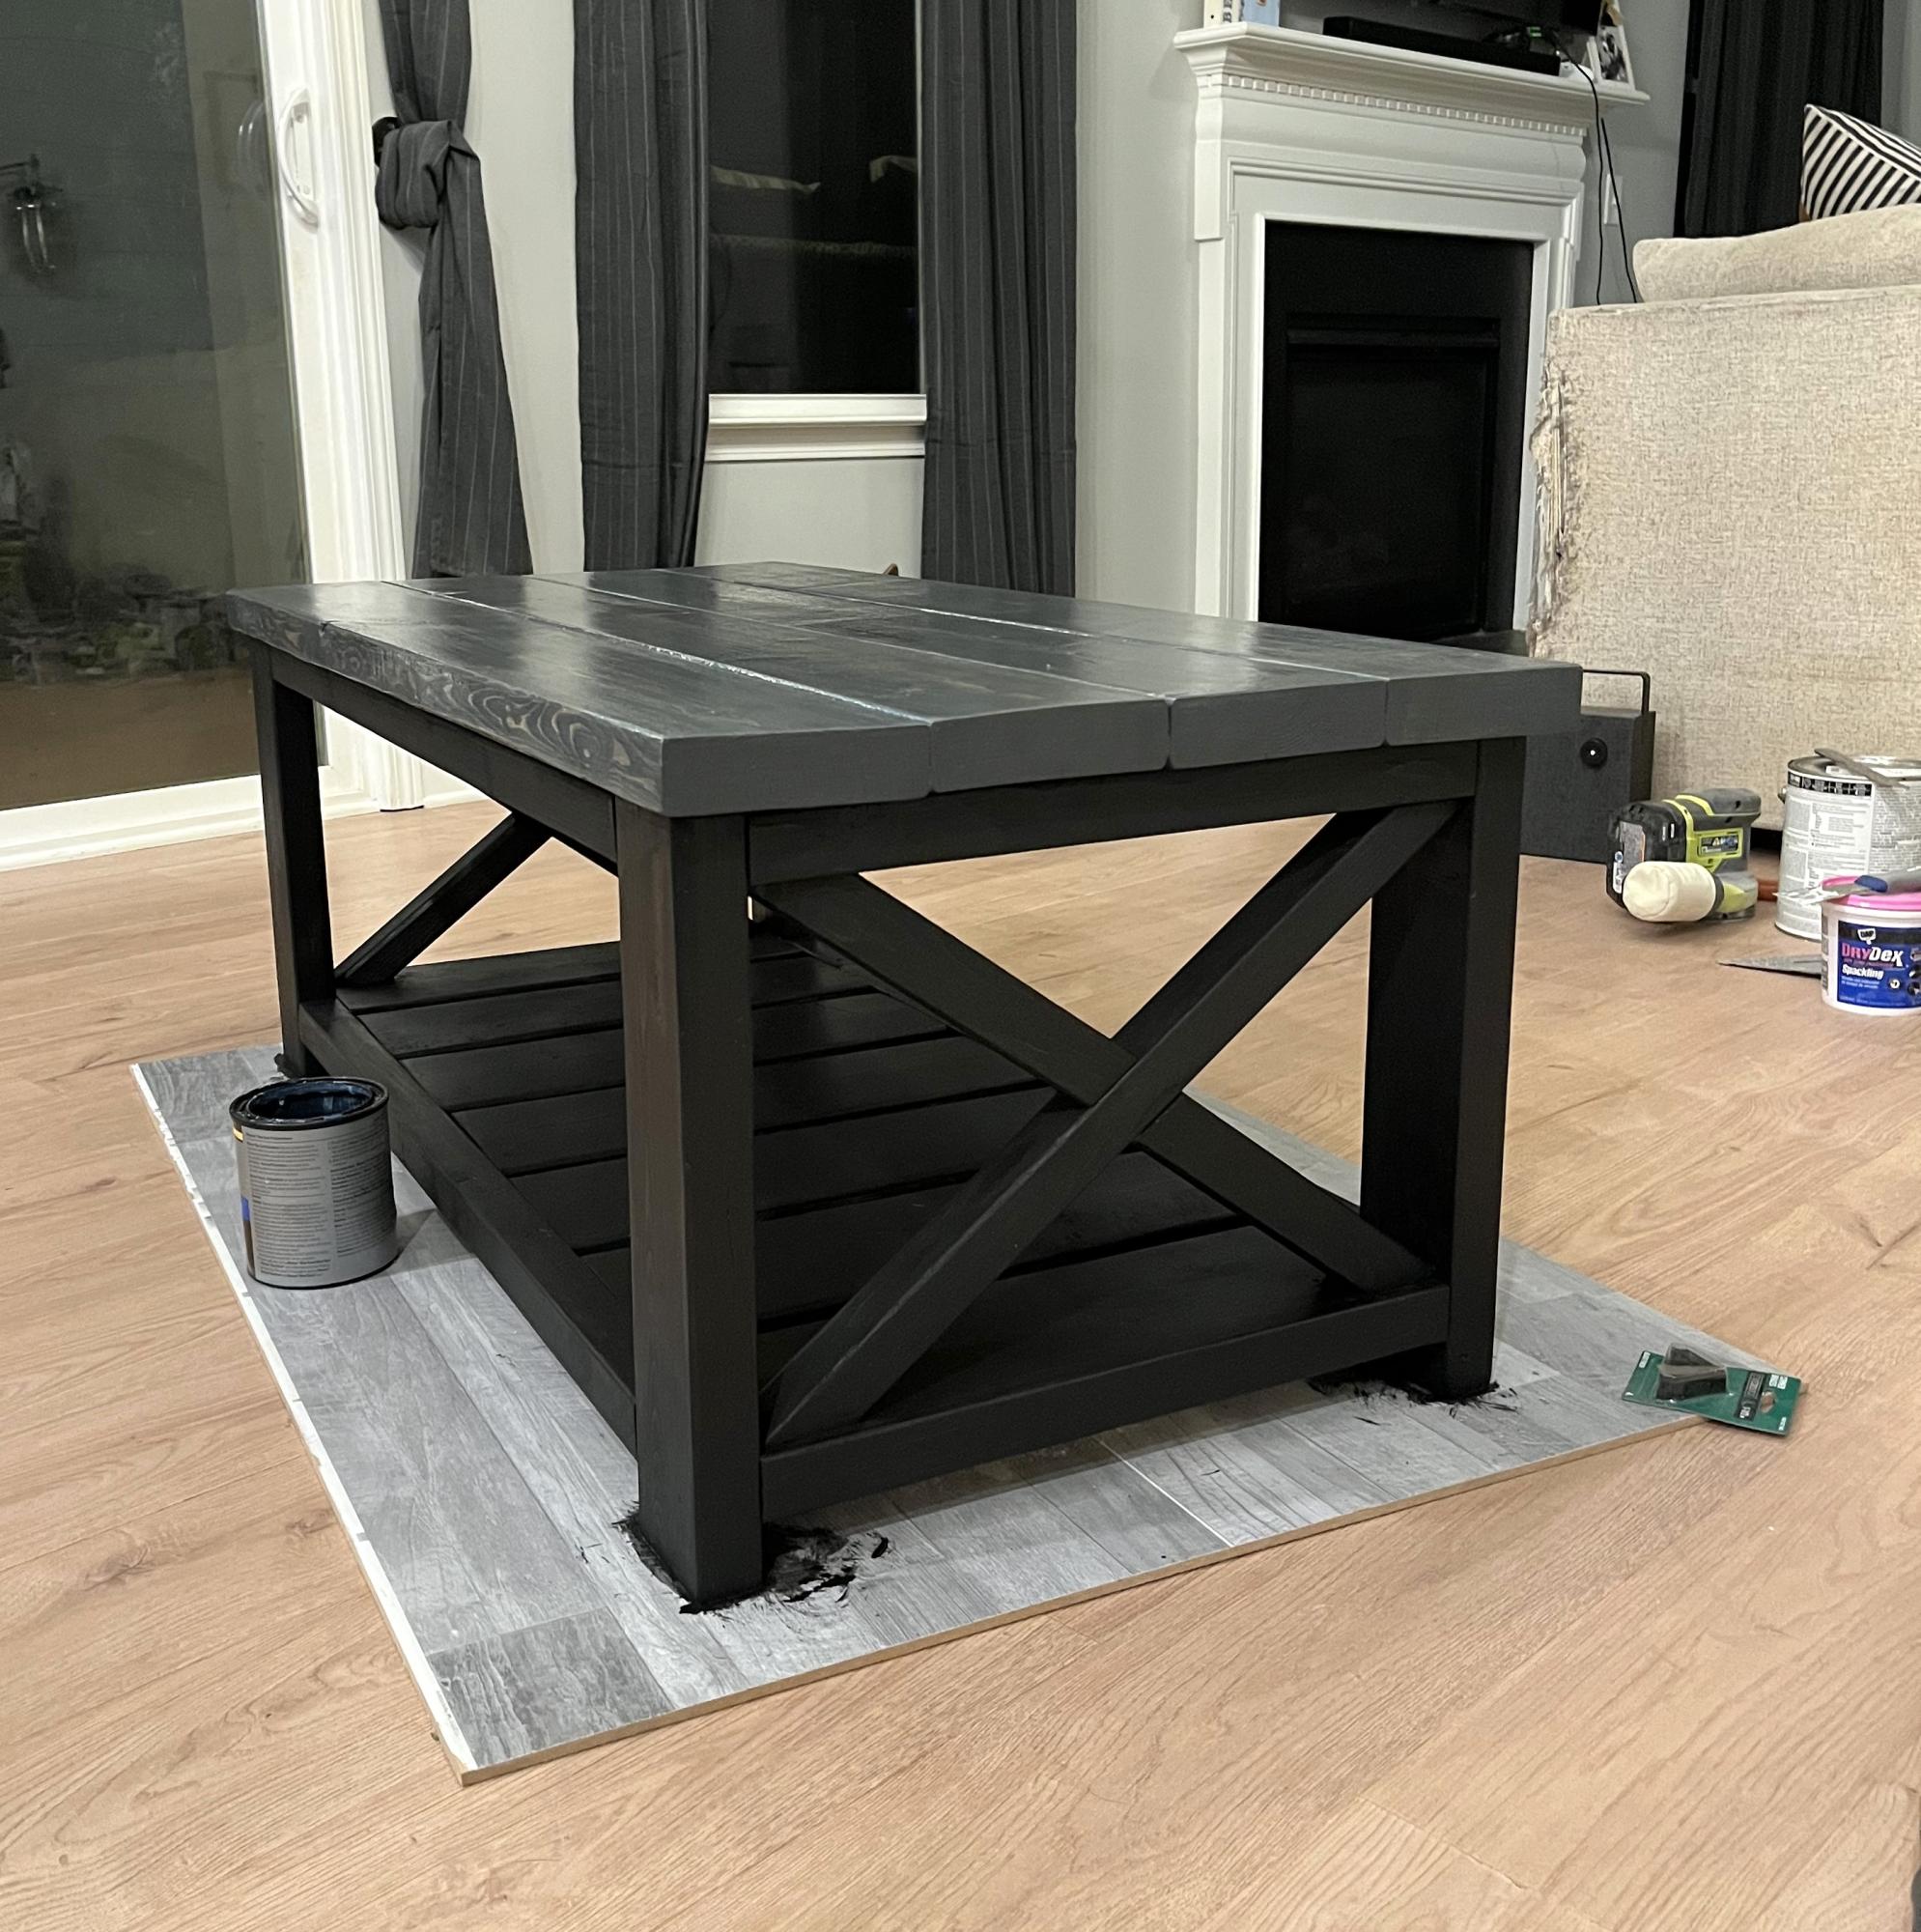
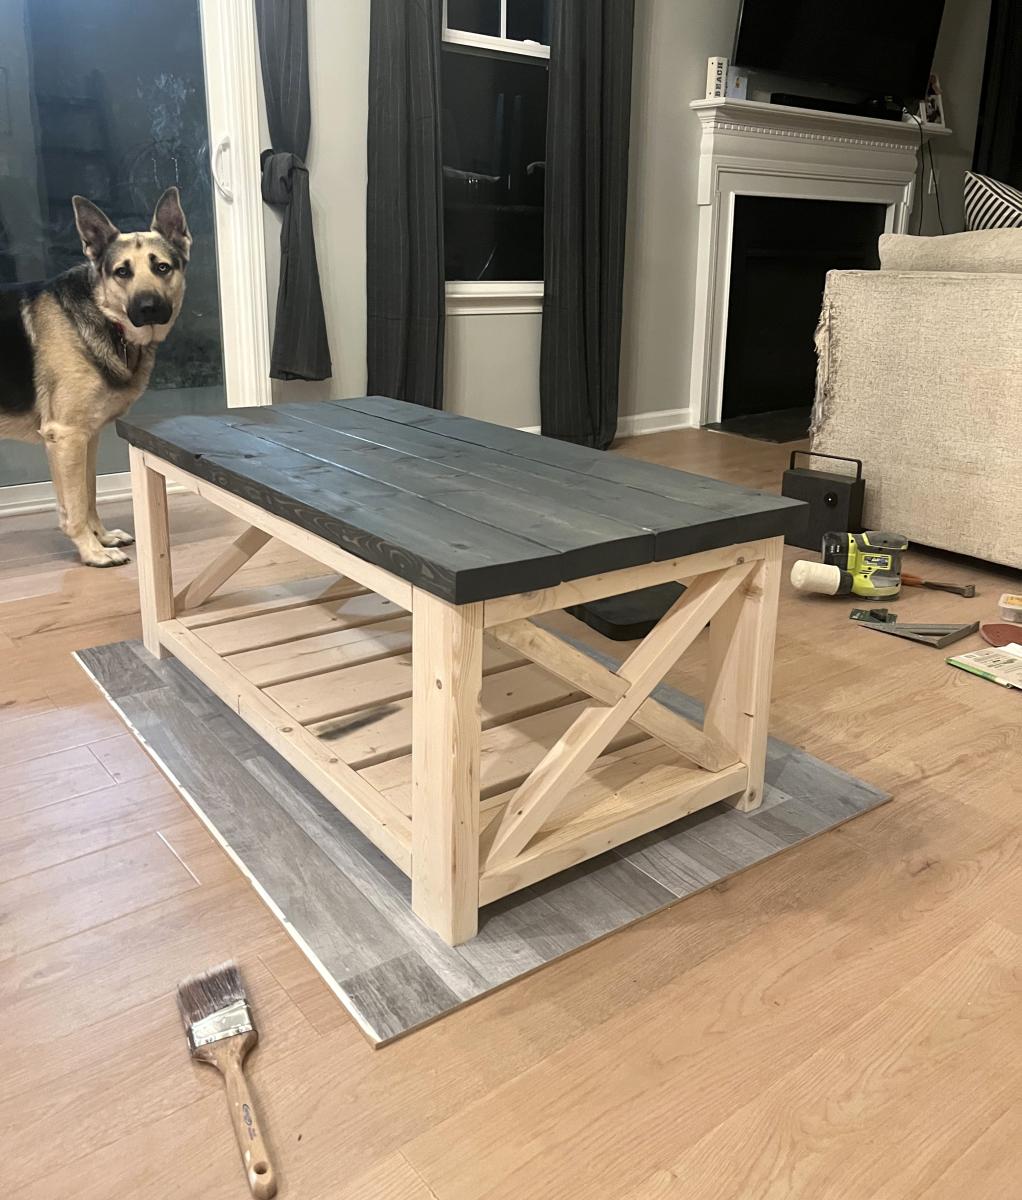
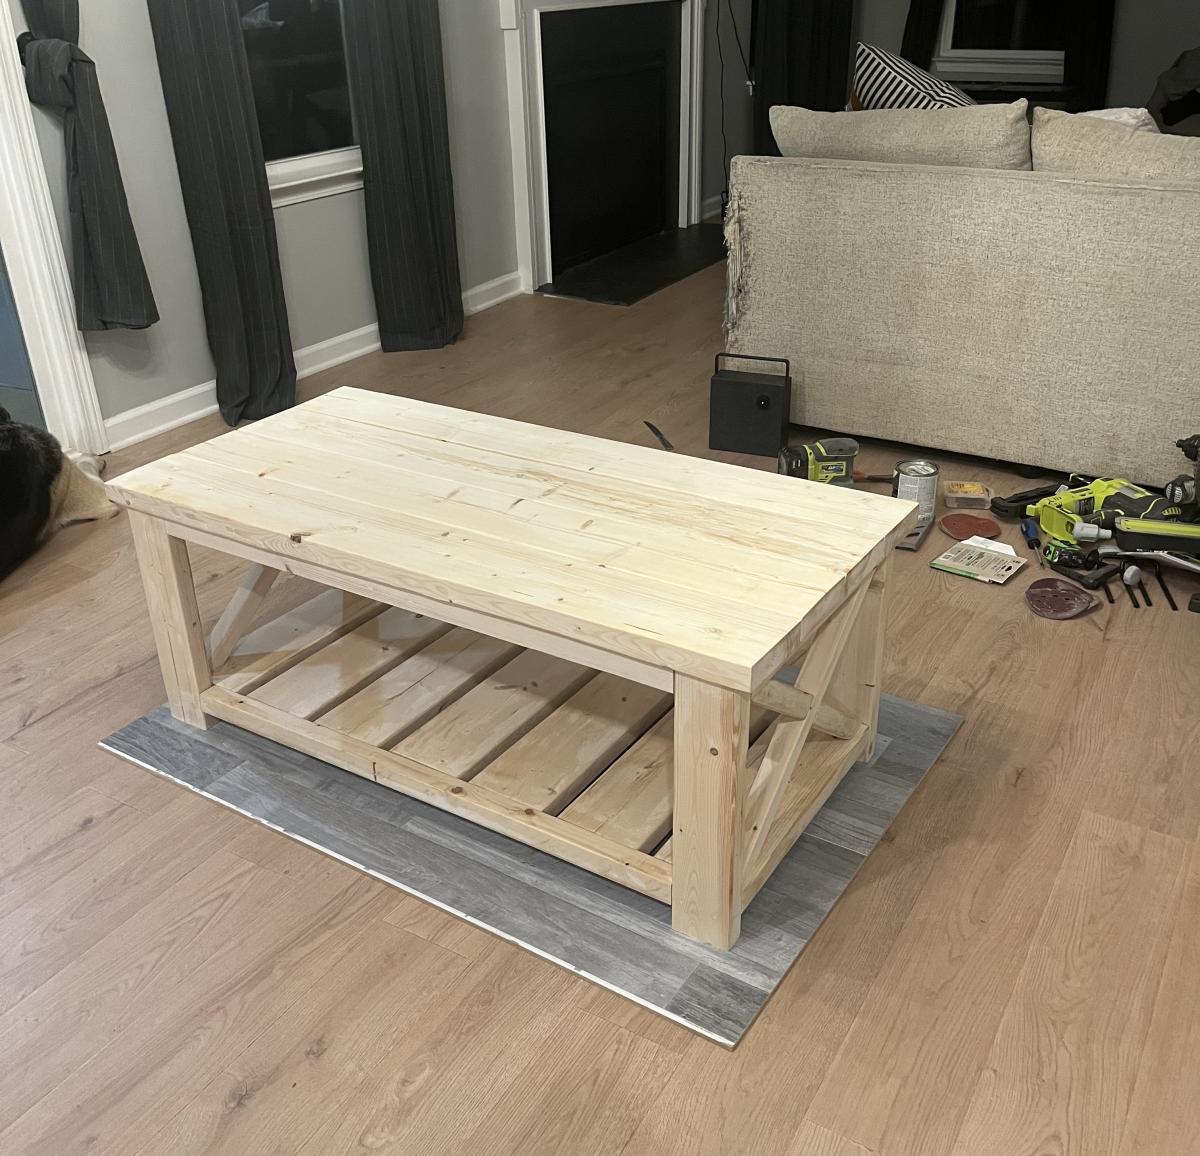
Farm house coffee table. I painted the bottom black and stained the top a dark gray color. I don’t ask happily surprised on how easy it was to build this table and how strong and sturdy it is! From start to finish it took me 9 hours, paint and all. Highly recommend this plan.
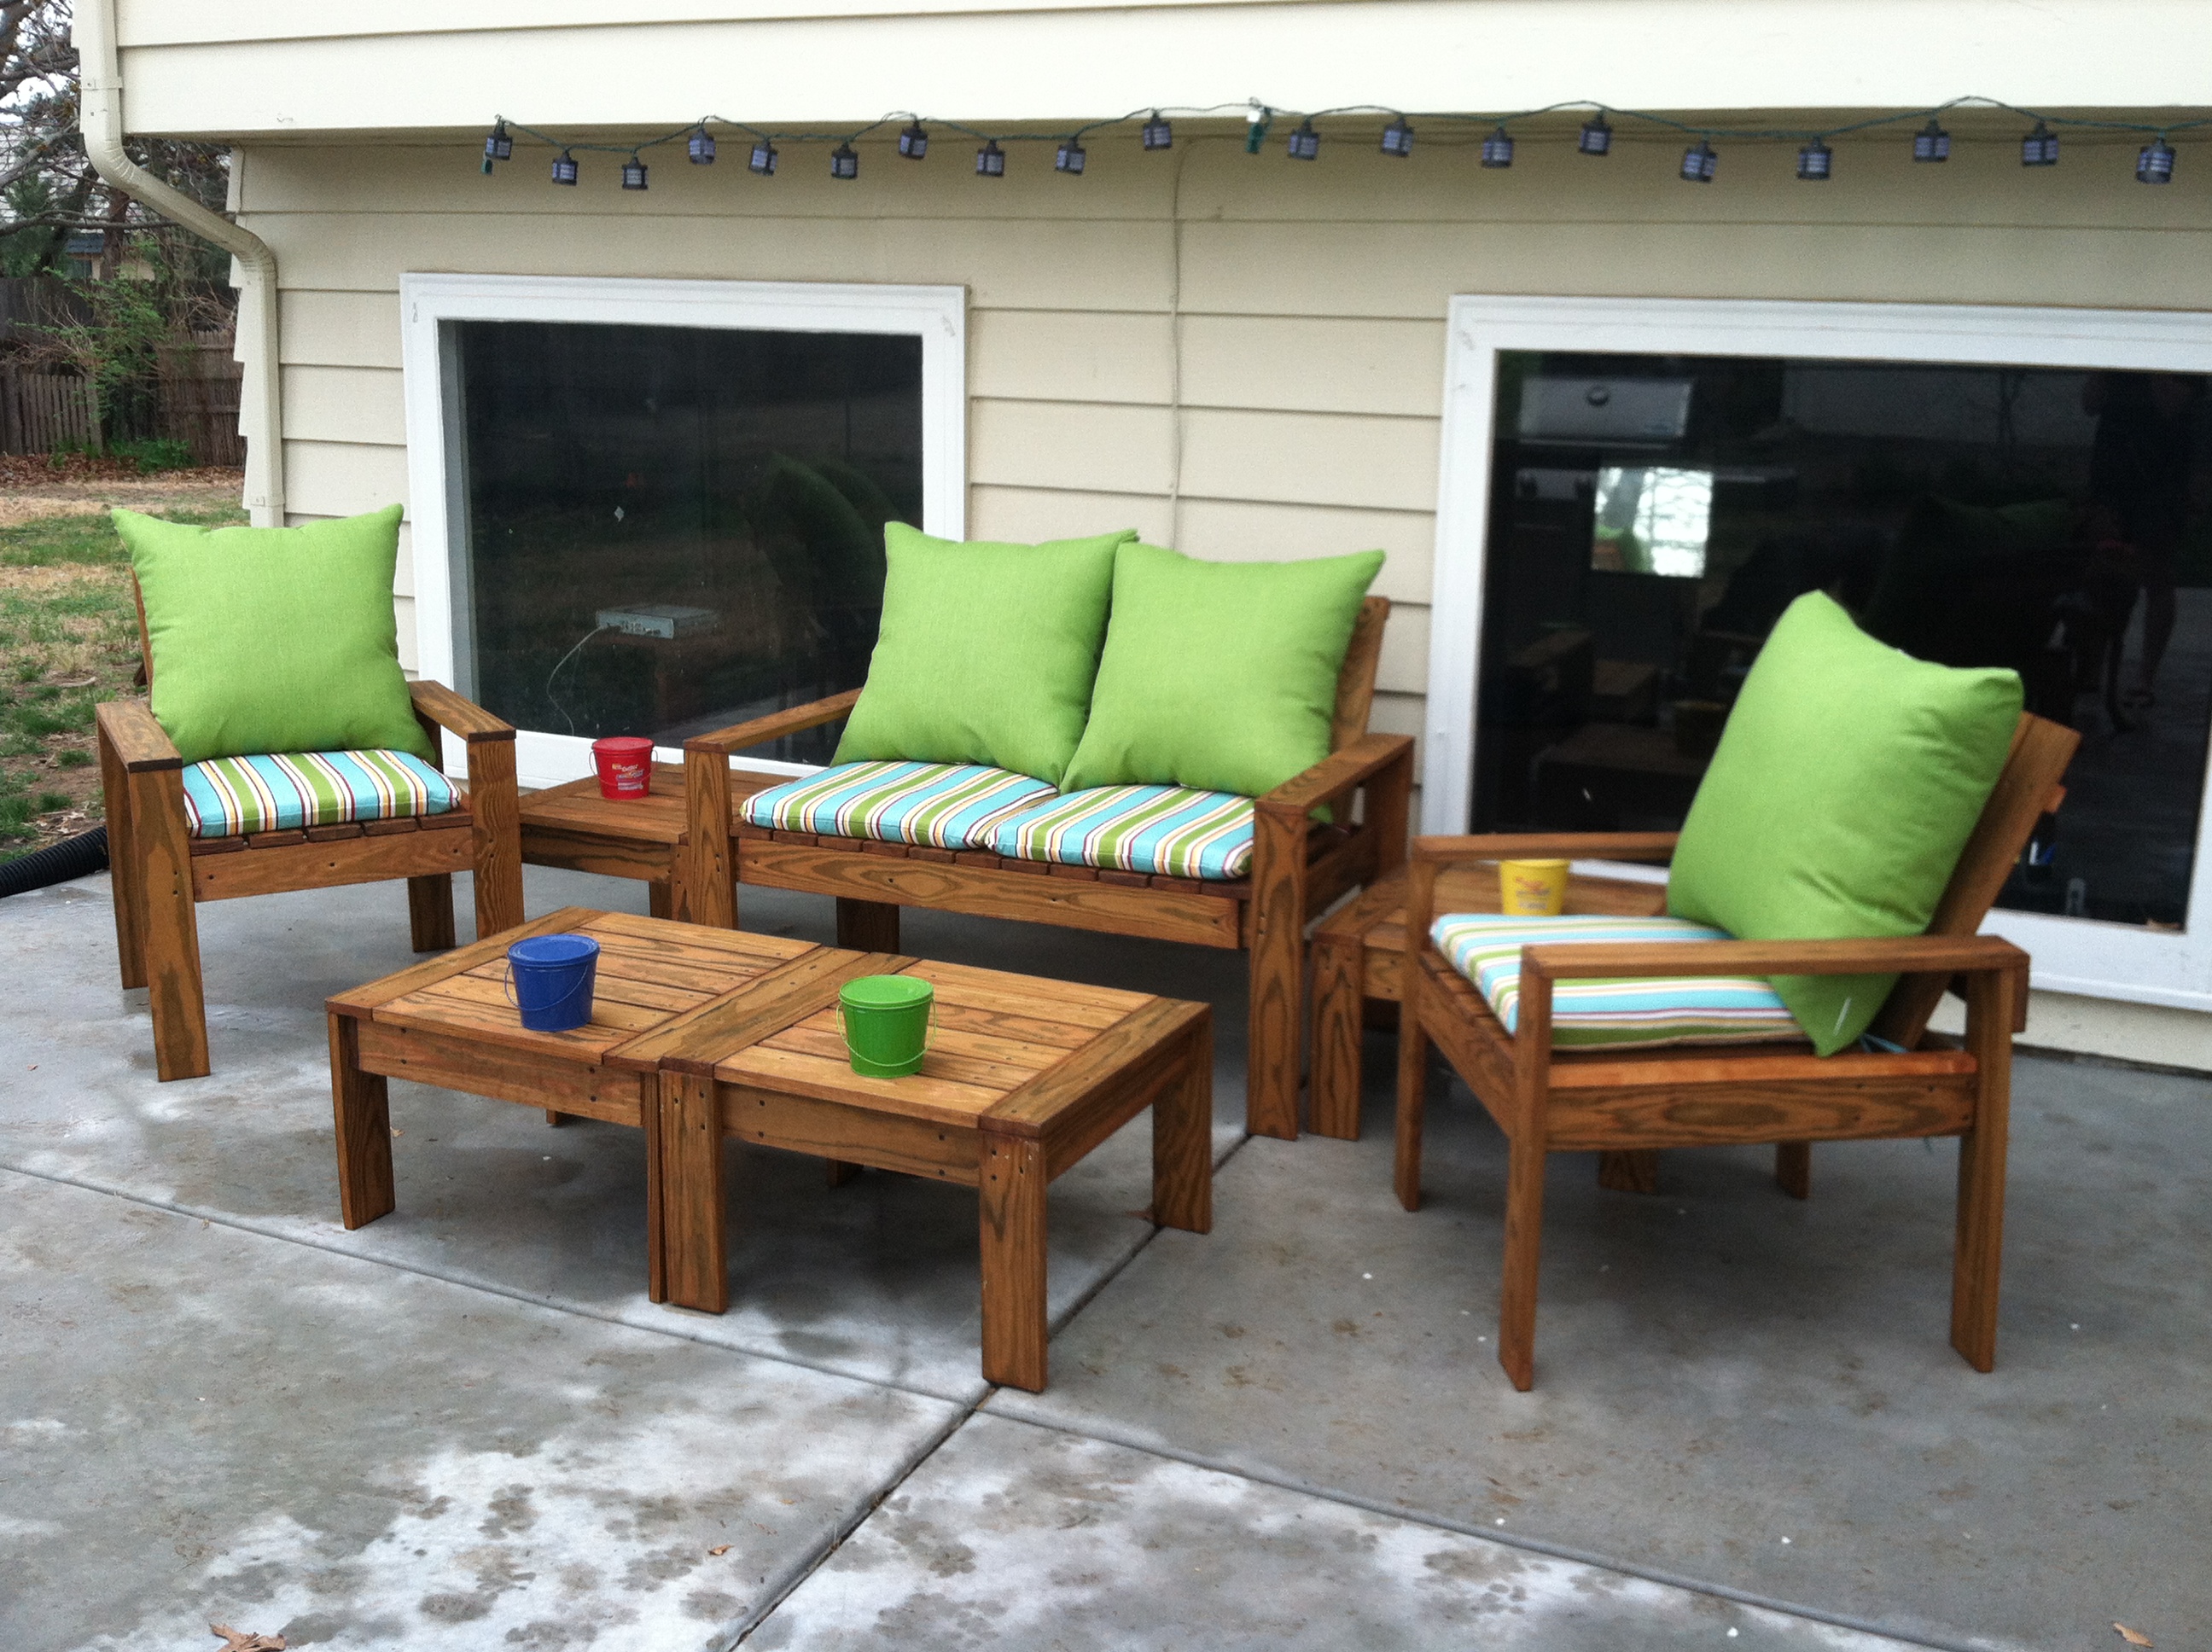
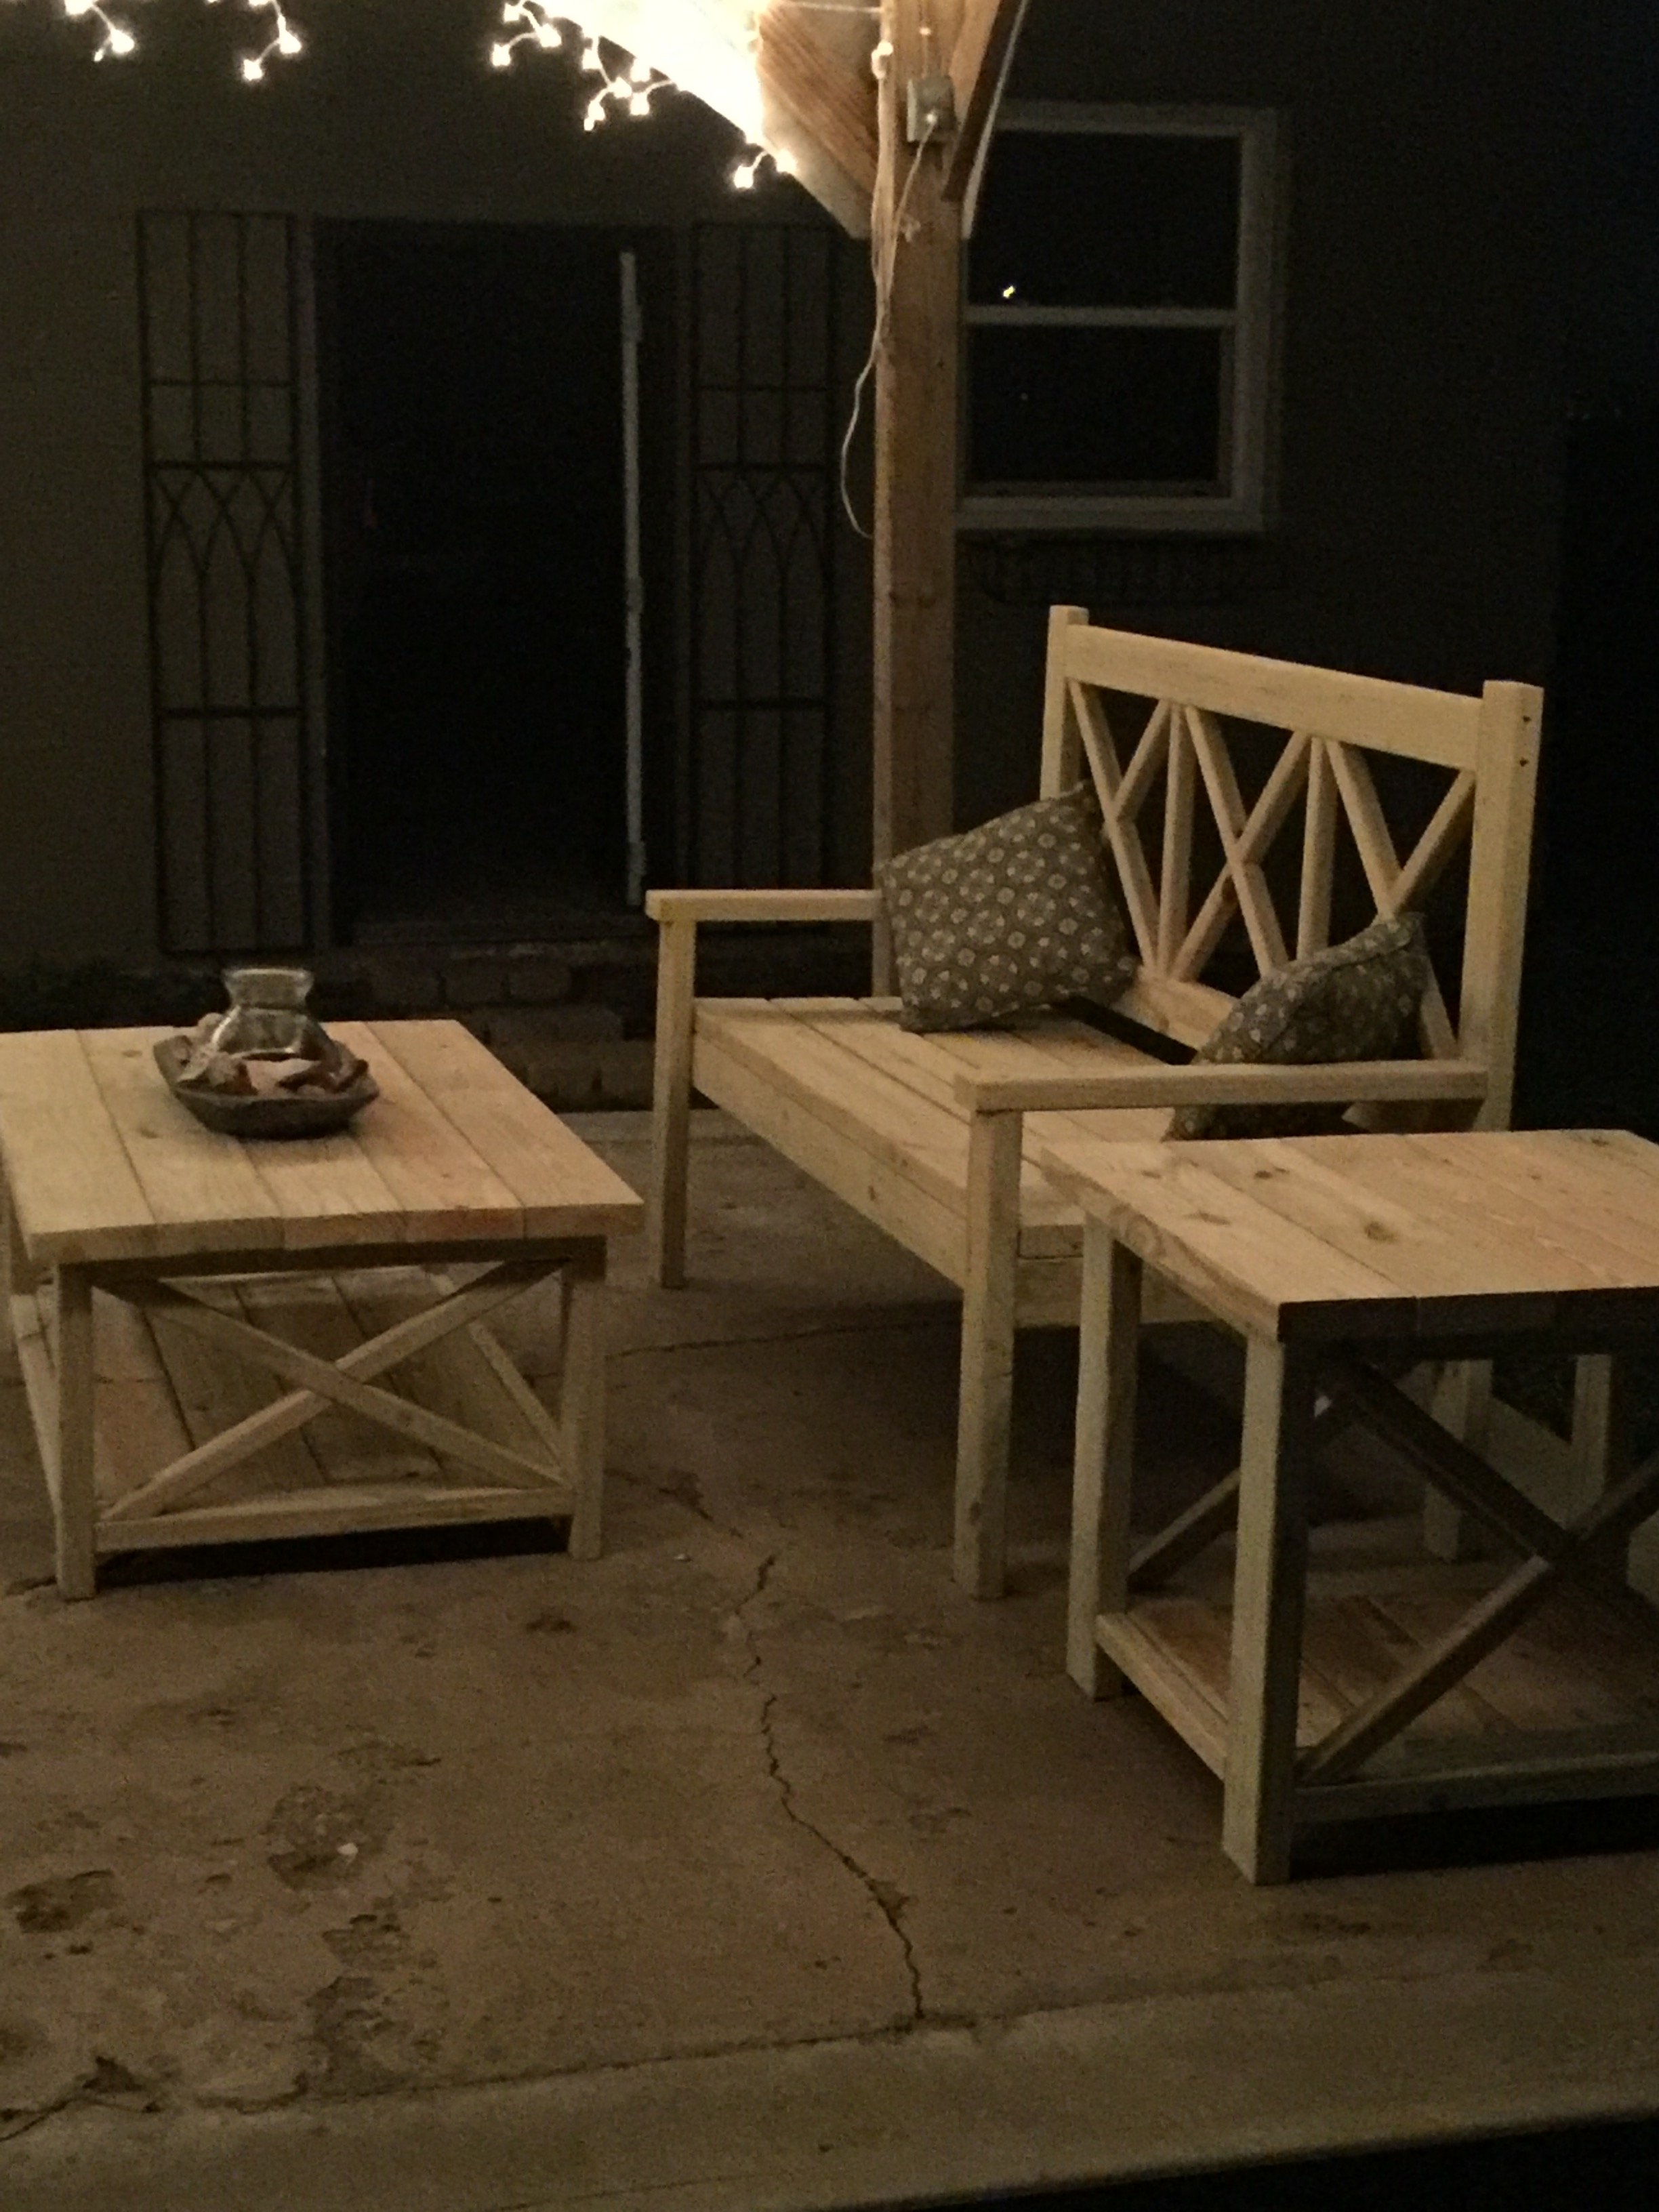
Spring is around the corner and I had no outdoor furniture. My boyfriend had just talked me into a new weber grill, which did not leave much budget for new outdoor furniture. That's when I came across this web site and thought 'I can do that'. So I talked me boyfriend into helping build this Simple Outdoor Conversation Set. We used plans for the Simple Outdoor Lounge Chair and Simple Outdoor Ottoman and then followed the alterations by post for 'My Modern Outdoor Patio Collection' to make the loveseat.
The whole project came together over 5 days.
Day 1: Cut all boards (5 hrs)
Day 2: Sand all boards (5 hrs)
Day 3: Stain all boards (6 hrs)
Day 4 & 5: Assemble furniture (9 - 10 hrs)
The total project took about 25 hrs and cost about $350. Here's the breakdown wood and supplies $204 from Lowe's for pretreated wood. $145 on cushions (NOT ON SALE); $60 for the seat cushions from Home Depot and $80 for the back cushions from Wal-Mart. We were originally planning on only having the seat cushions, but the seats were long when you set in them with your back against the bear wood (I was setting so far back, my feet couldn't reach the floor) so we opted for thick back cushions to make it more comfortable. The project finished up just in time for our first BBQ party! (March 2012)

Sun, 03/18/2012 - 13:16
Oh I love this!!! Love the cushions and the colors too!

