Farmhouse Storage Bed
Beautiful showcase of maple wood. Love the storage
Farm house coffee table. I painted the bottom black and stained the top a dark gray color. I don’t ask happily surprised on how easy it was to build this table and how strong and sturdy it is! From start to finish it took me 9 hours, paint and all. Highly recommend this plan.
Spring is around the corner and I had no outdoor furniture. My boyfriend had just talked me into a new weber grill, which did not leave much budget for new outdoor furniture. That's when I came across this web site and thought 'I can do that'. So I talked me boyfriend into helping build this Simple Outdoor Conversation Set. We used plans for the Simple Outdoor Lounge Chair and Simple Outdoor Ottoman and then followed the alterations by post for 'My Modern Outdoor Patio Collection' to make the loveseat.
The whole project came together over 5 days.
Day 1: Cut all boards (5 hrs)
Day 2: Sand all boards (5 hrs)
Day 3: Stain all boards (6 hrs)
Day 4 & 5: Assemble furniture (9 - 10 hrs)
The total project took about 25 hrs and cost about $350. Here's the breakdown wood and supplies $204 from Lowe's for pretreated wood. $145 on cushions (NOT ON SALE); $60 for the seat cushions from Home Depot and $80 for the back cushions from Wal-Mart. We were originally planning on only having the seat cushions, but the seats were long when you set in them with your back against the bear wood (I was setting so far back, my feet couldn't reach the floor) so we opted for thick back cushions to make it more comfortable. The project finished up just in time for our first BBQ party! (March 2012)
Sun, 03/18/2012 - 13:16
Oh I love this!!! Love the cushions and the colors too!
This was my first project from this site and it came out beautifully!!!
I was lucky and got all my cuts at Home Depot for FREE so I only had to buy minimum hardware. Total cost came in under $200 and I highly recommend the Miniwax Gray.
The plan is great, I followed the instructions exactly. Then altered the plan to build a second rack that would fit the bottom of the door, with foil, saran and bag storage at the bottom. Consequently it was heavy and I was very skeptical of the hollow core door anchors, but I installed 3 at the top and 2 at the bottom of both pieces. It's very solid and secure....would probably have worked fine with even less. This door is only 32" wide but has plenty of room for this project. Thank you, looking forward to trying more of your plans.
My daughter loves her new couch! This was such an easy project and a great way to reuse an outgrown crib mattress.
This is based on Ana's Lemonade Stand project- I made it taller and wider, added casters. It was a hit with the birthday girl and the customers!
Amy of The Navy House Goods Co. @thenavyhousegoodsco
Sun, 07/30/2023 - 15:47
Love your mods and the outcome is fantastic, thanks so much for sharing!
This was my second build and am very proud of myself. Never would I have imagined I would be able to build a piece of furniture!! It took me a little while to finish as I slowly bought the wood and worked on it here and there.
Philadelphia Phillies Outdoor Wood Cooler, I used a 48qt cooler and enclosed with pressured treated wood. I also ran plumbing from the spout and attached a brass faucet so it can be emptied when you want to. Three handles were also attached one each side to carry it and one on the lid so it can be opened.
First time wood working project!
This was made for a friend. I looked up Ana's original plan and modified it a little. The end result was something she was very happy with.
Mon, 07/09/2012 - 20:39
I love your modifications.. Think I'll take it bit further and add another pullout on the other side of the shelf. This way I can put one hamper in each, and my whites and darks will already be separate.
Fri, 11/02/2012 - 05:54
What were the completed dimensions for the tilt out trash bin with side shelves
I was in love with the plans, but I knew it needed to be wider to fit my space and be usable. Plus, I didn't want to have the space in the back for stools. I wanted something that had a good amount of storage so I extended the box that was the shelf area and did away with the back board and side boards. I also extended the drawers to the back of the piece.
This was our first attempt at making furniture and even though the difficulty rating was ‘intermediate’, the detailed instructions made the process less complicated. Our version of Anna White Essential Entryway Bench turned out better than we expected! Once it was built, I stained it grey, painted it white, then distressed it to make it look antique. I added a custom made foam cushion to the top and, voila!
TammyA
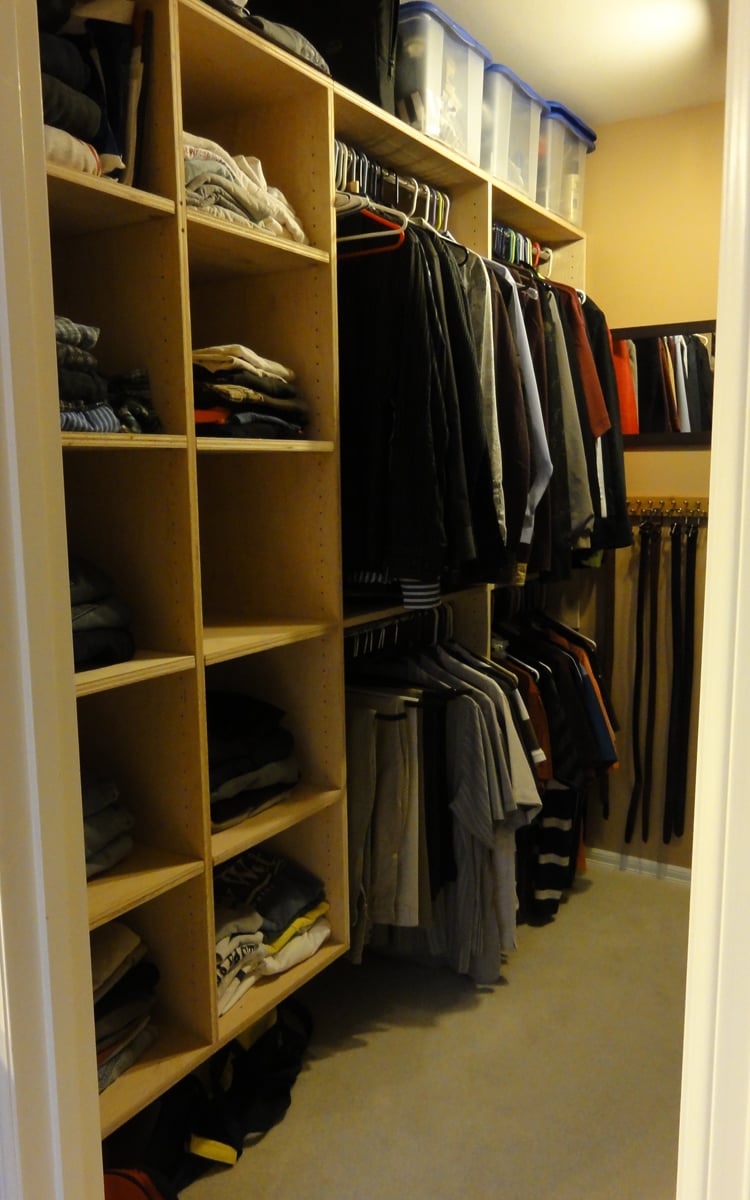
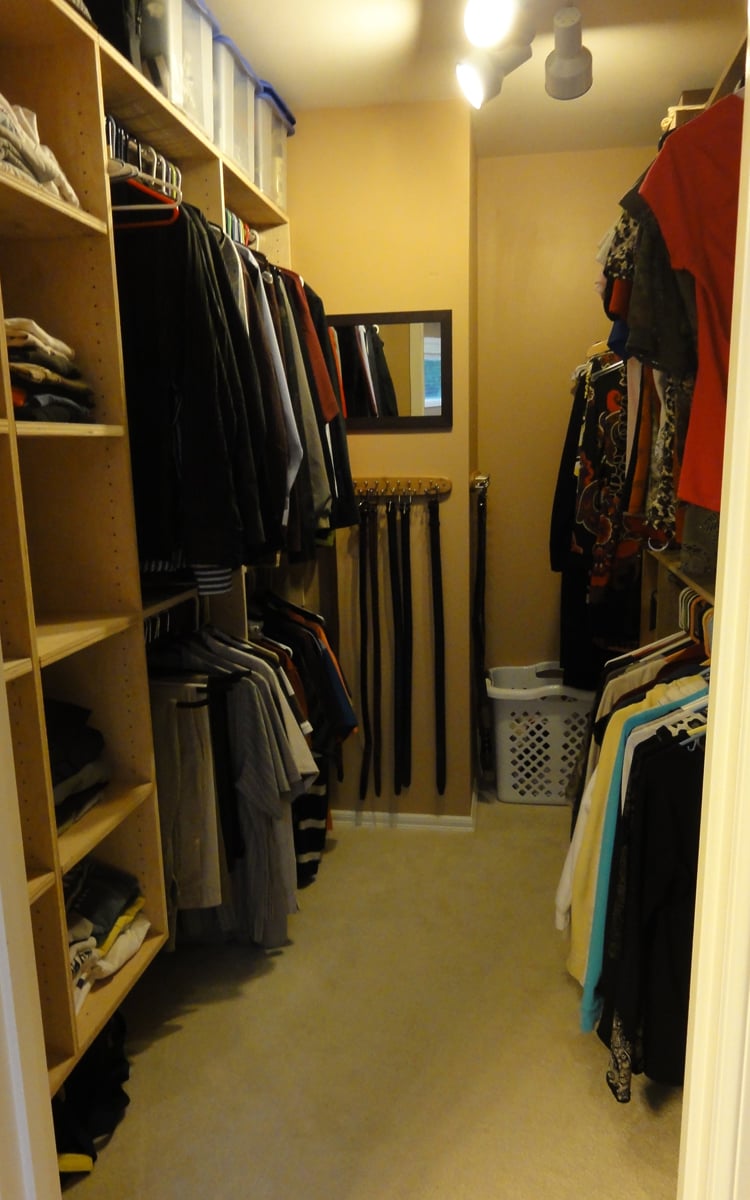
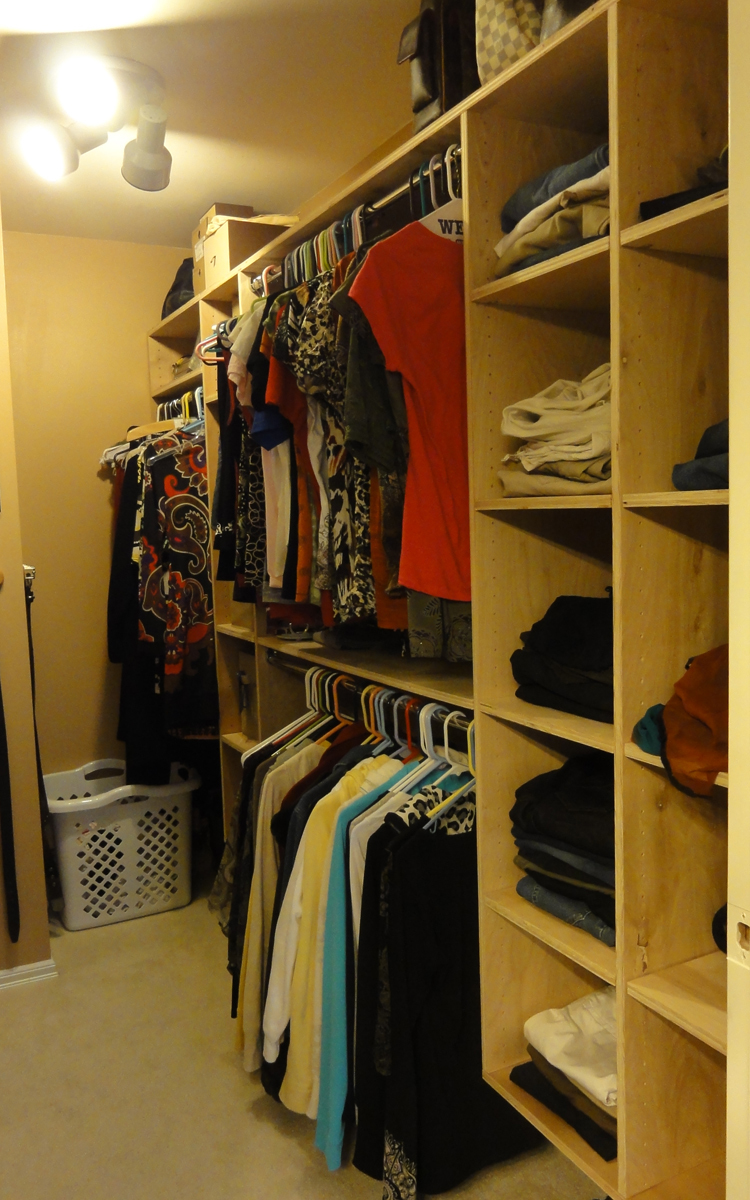
After over a year of other projects, I finally had the chance to completely redesign our master closet! I used EasyClosets.com to come up with the design again. :) I still have a few more tweaks here and there, but I absolutely love it! I surprised my husband for his birthday by doing this project while he was on a business trip. :)
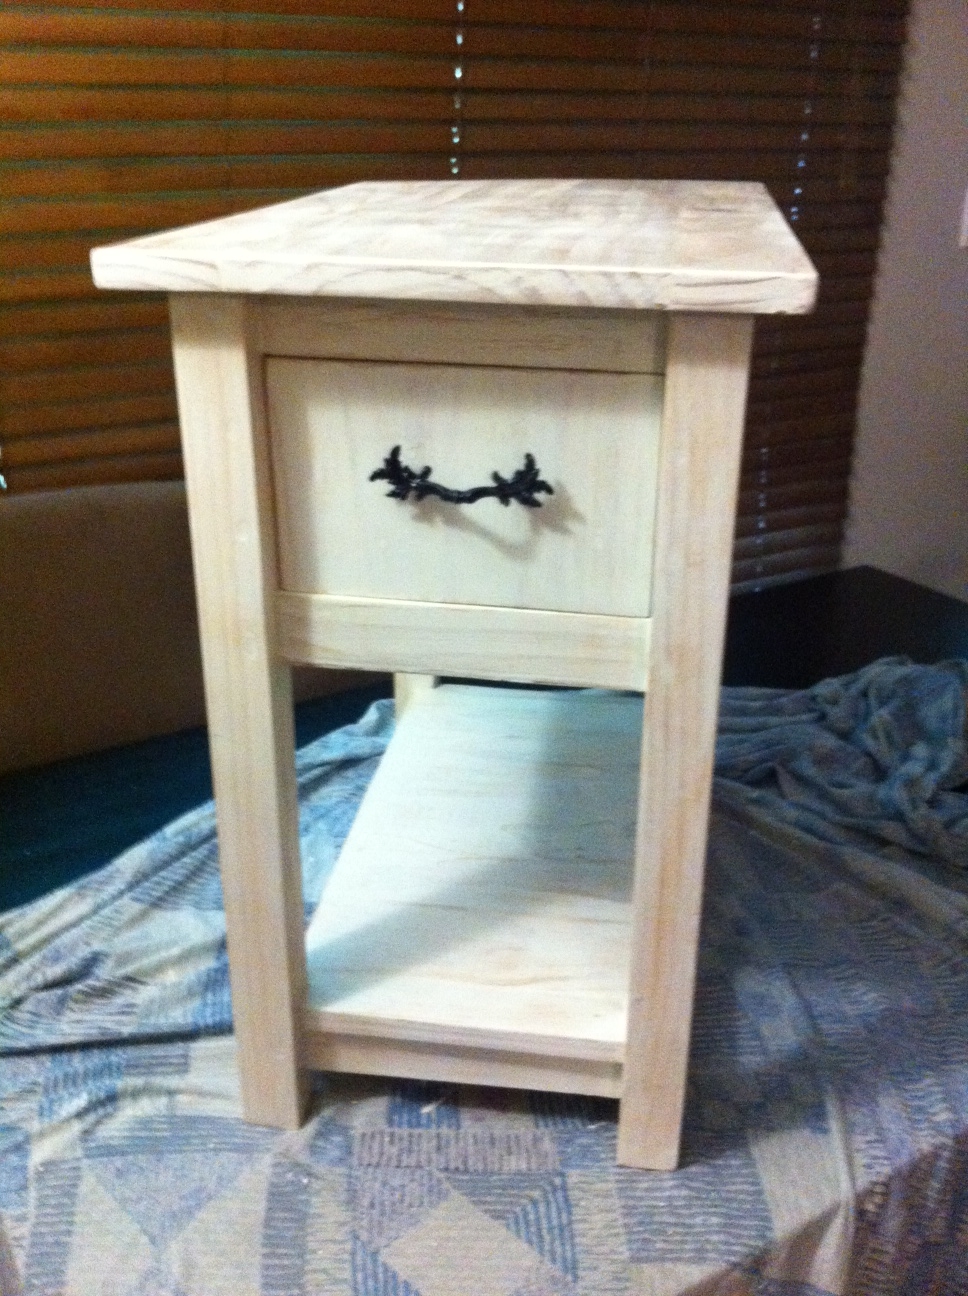
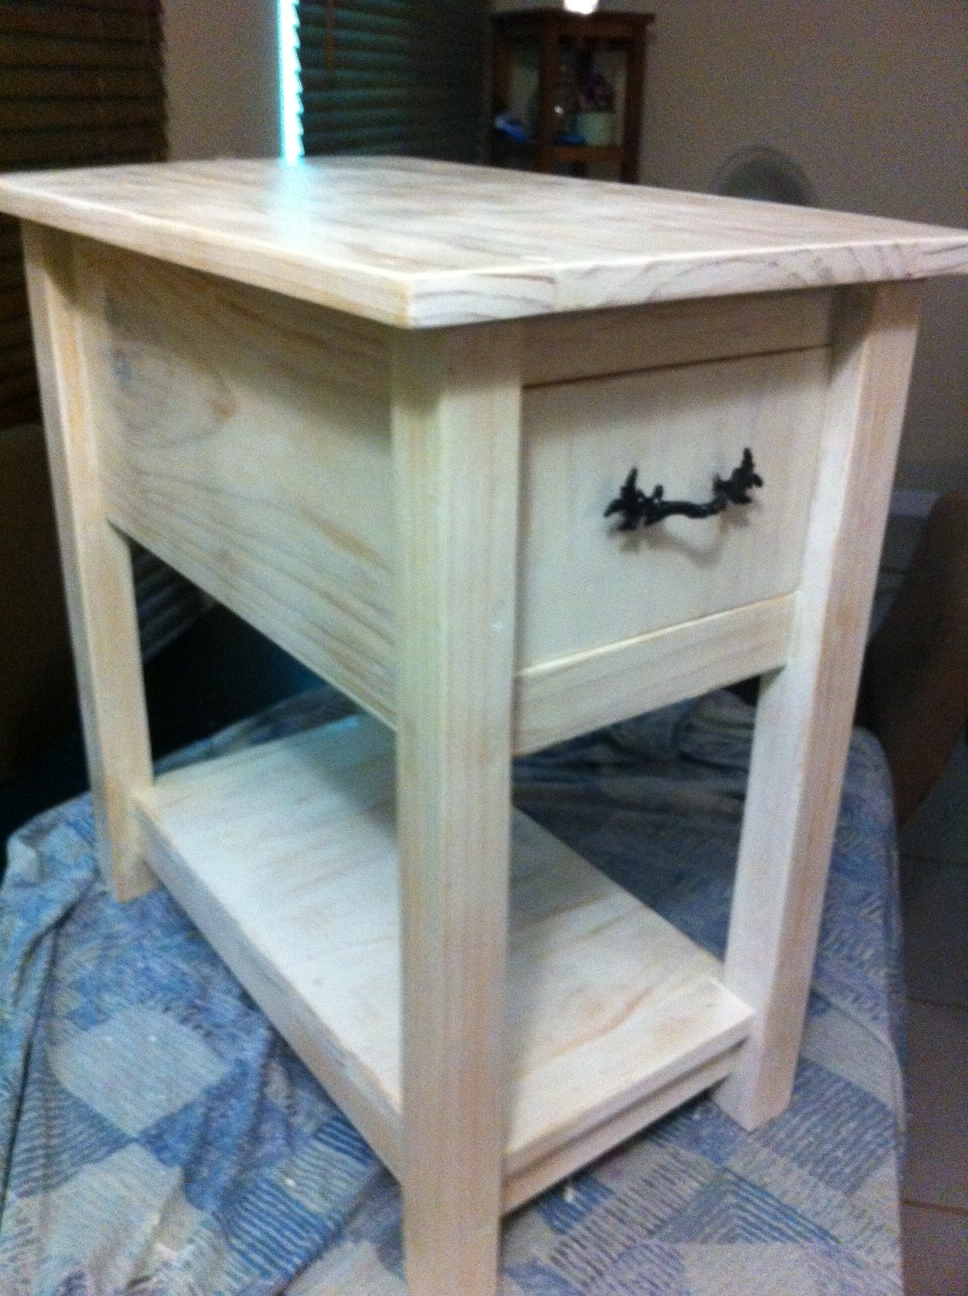
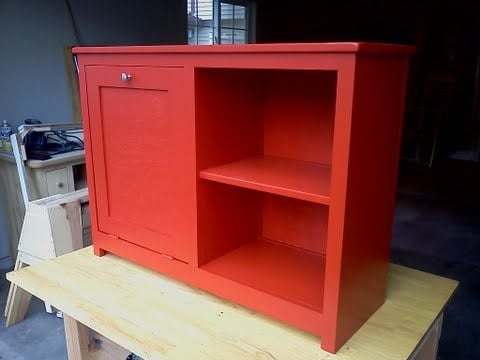
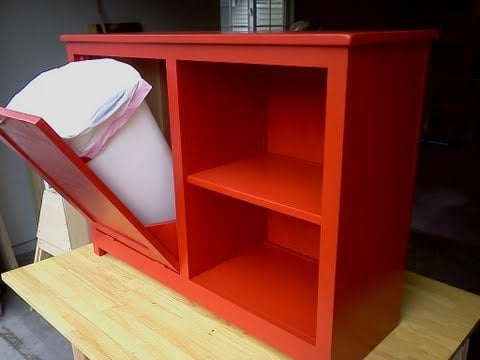
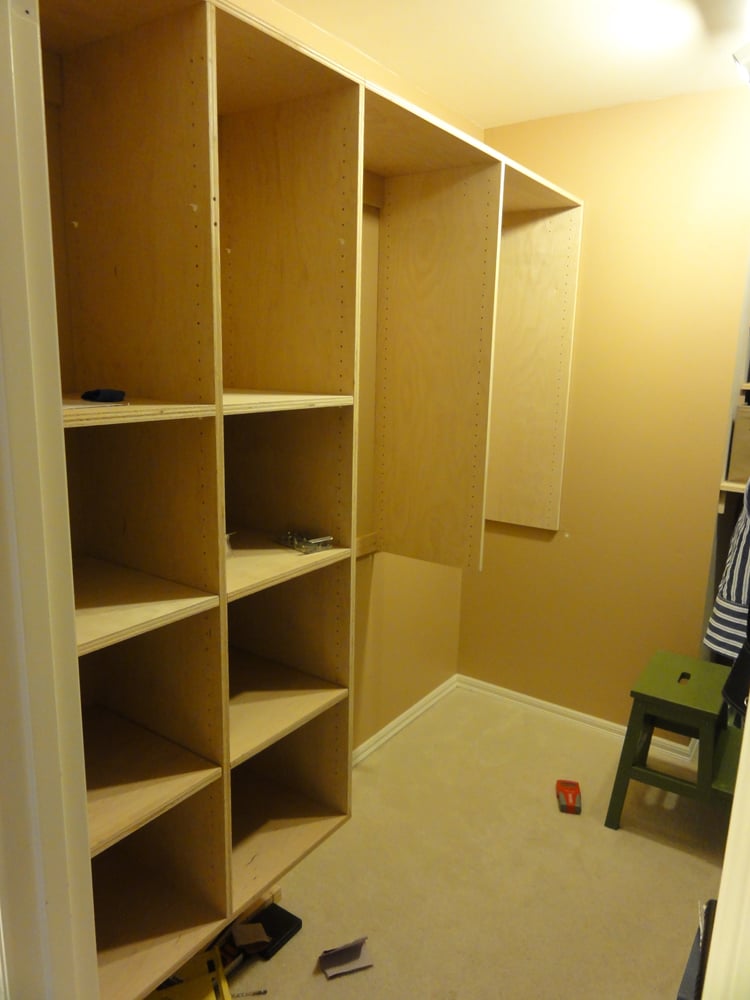
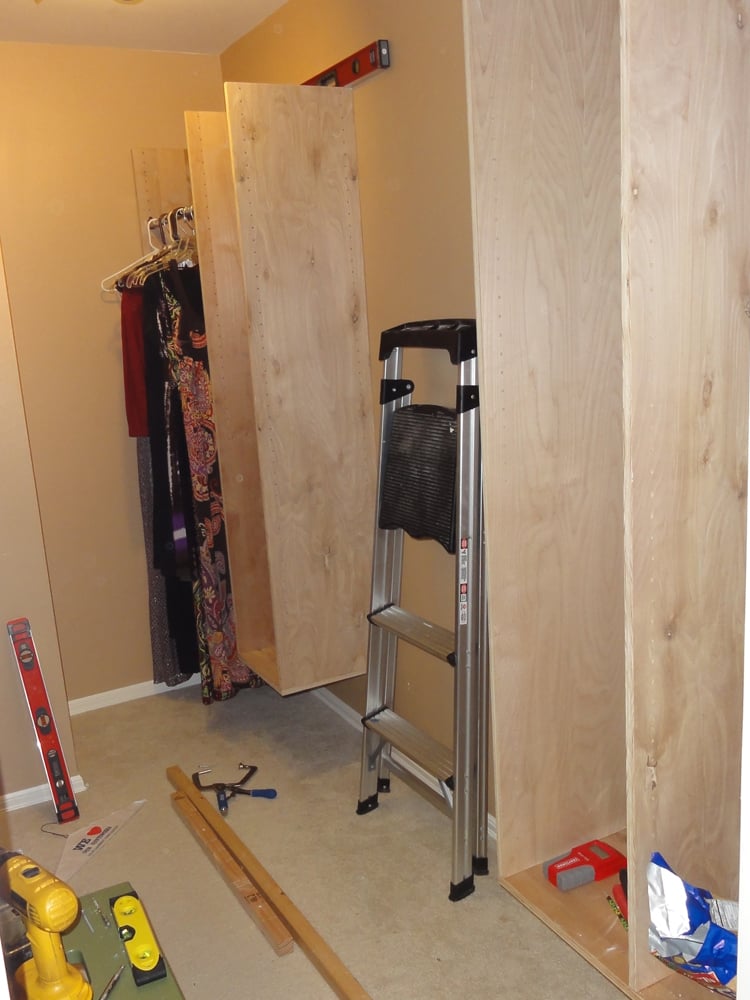
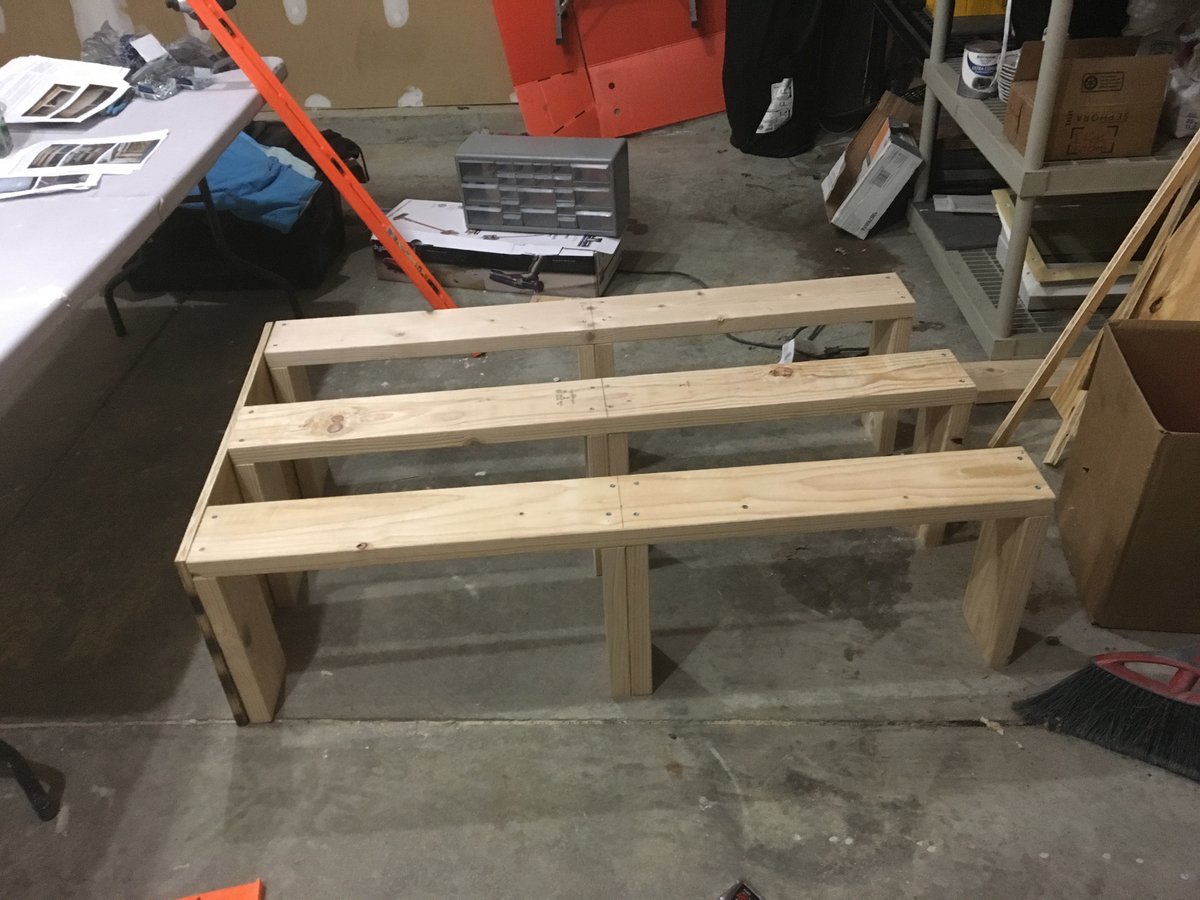
Other than mounting these boxes to the studs, this project was built exclusively with my Kreg Jig. I drilled all of the adjustable shelving holes with a nifty Rockler Jig-It shelving jig - wish it had been the Kreg shelving jig, but I bought mine before Kreg came out with theirs. The Rockler one works great - I just love Kreg's stuff so I'm sure theirs is awesome too. ;)
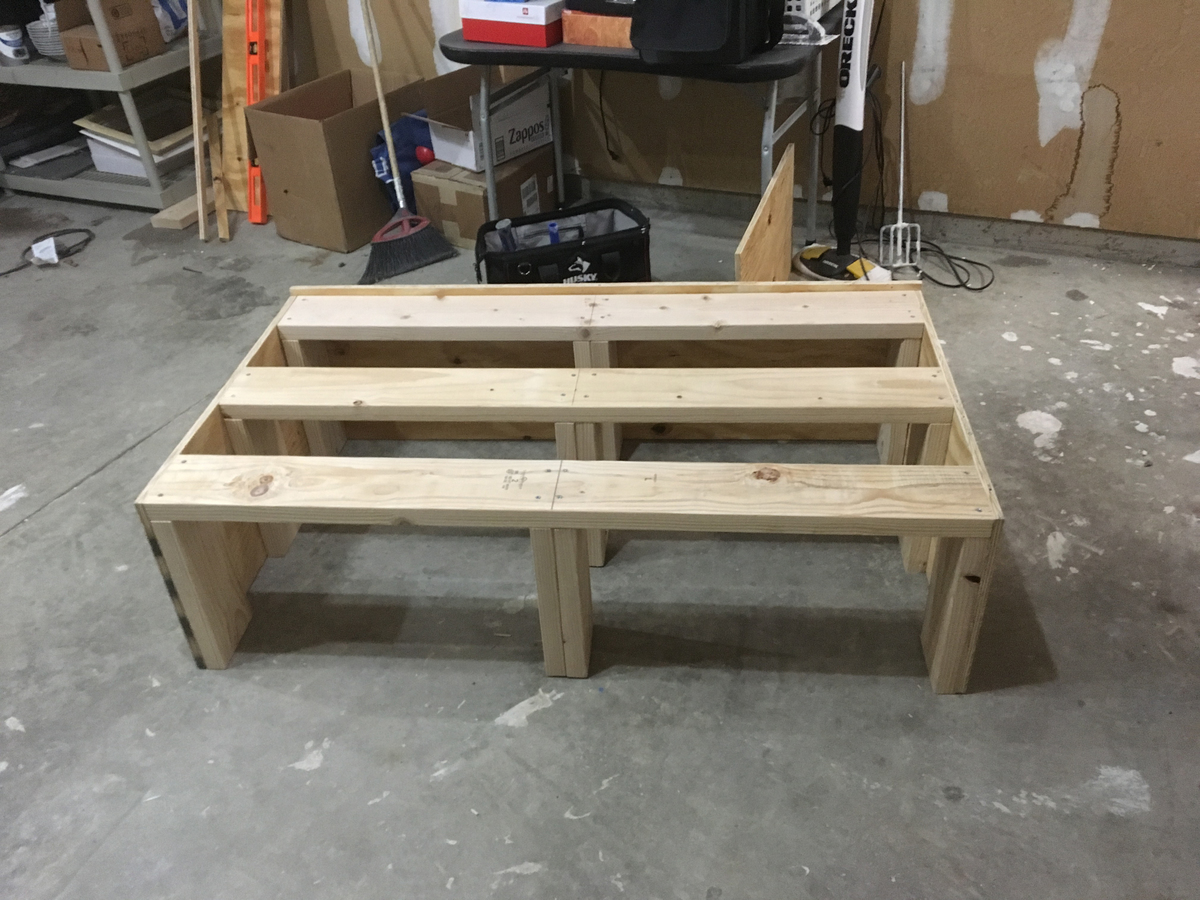
I begged Kreg to let me buy their new circular saw rip cut product early for this project, but they said no. :-( Bummer because I saw Ana using hers and was so jealous! I had to rip all of my plywood the old fashioned way on the floor with my circular saw and lots of clamps. Yuck!
This time around, I used birch plywood. I used white pre-drilled melamine for both of my daughters closets (brag post here), but I didn't like working with that stuff. Too sharp, slippery and HEAVY. I did our spare bedroom closet with pine 1x12 boards a few months back. I think I liked working with the pine best..
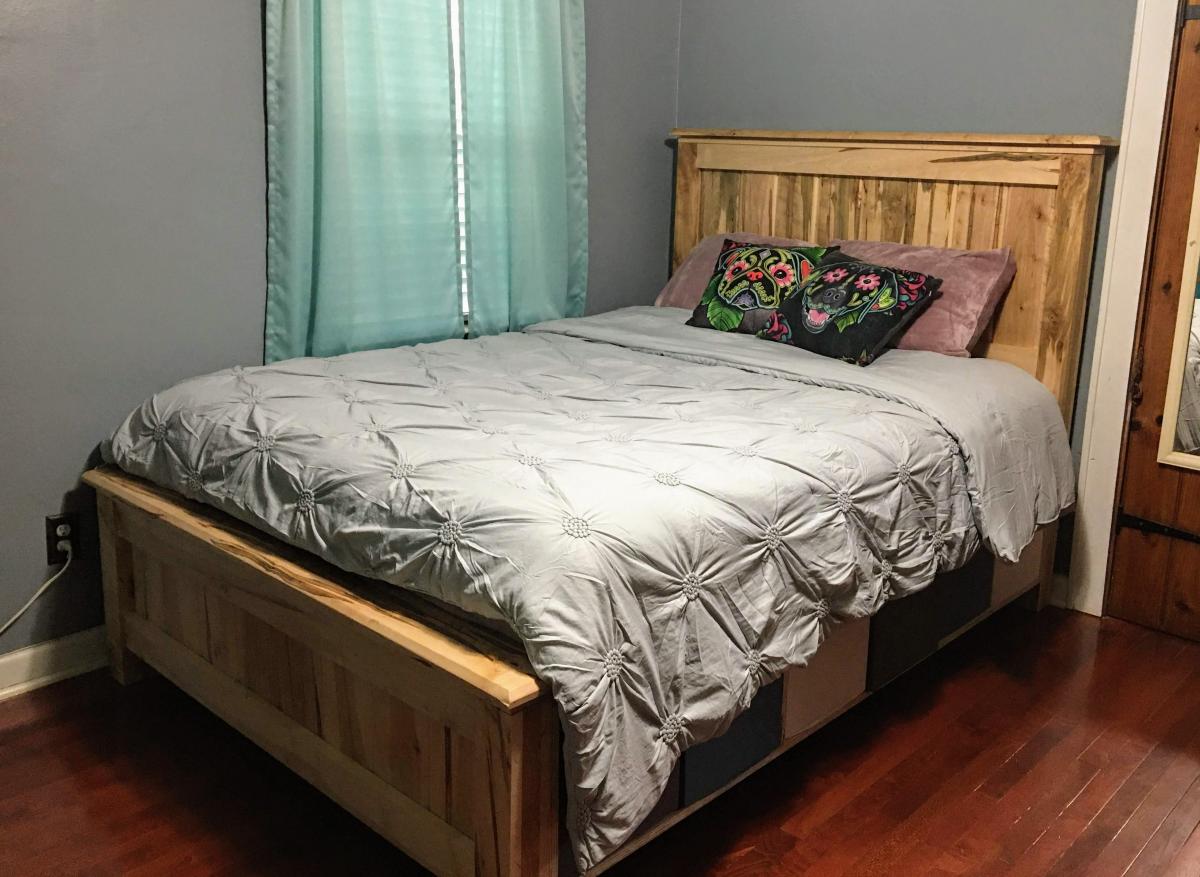
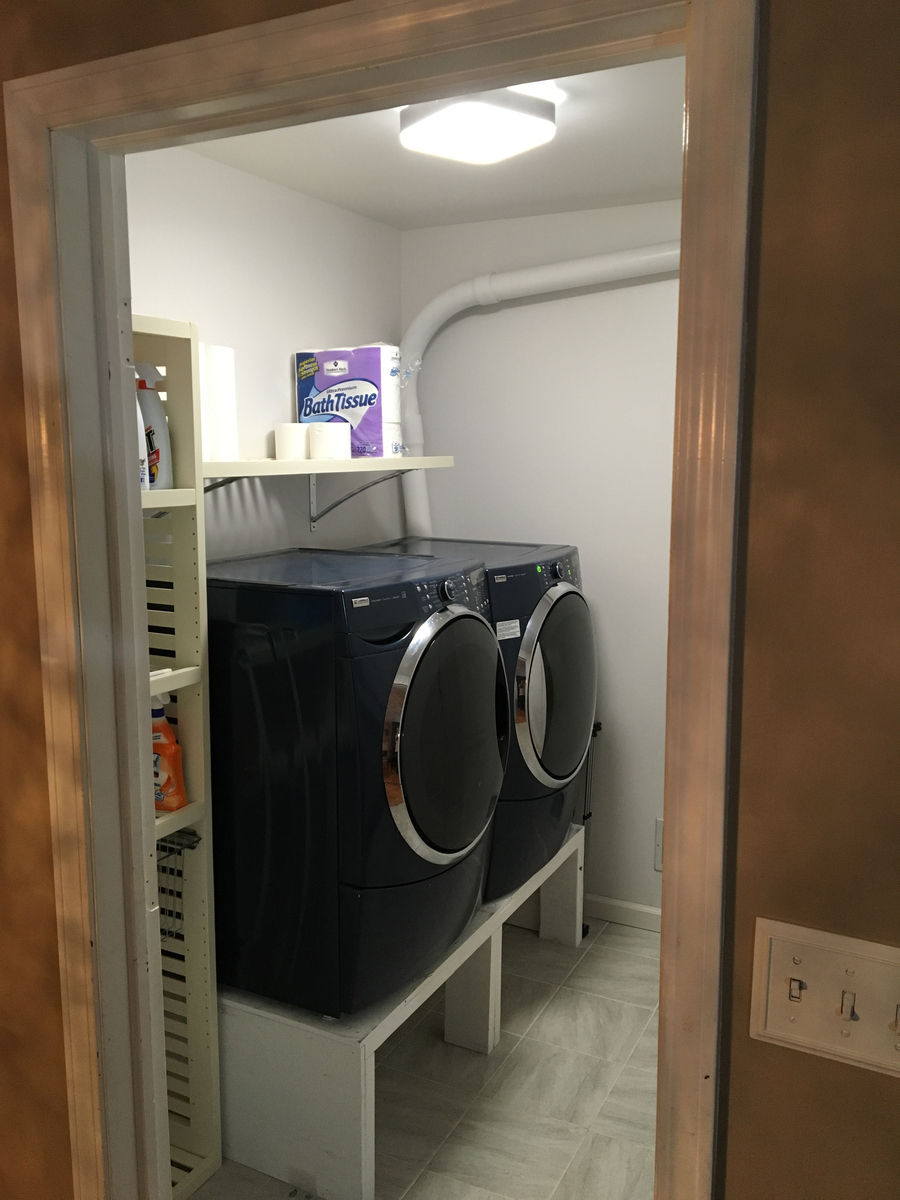
After a few months, I purchased a bunch of Closetmaid Fabric Bins/Drawers and they look so good!
Mon, 03/26/2012 - 15:20
Amazing! What depth are your boxes, and where did you find your rods?
Mon, 03/26/2012 - 18:00
My husband has more room on his side of the closet so his boxes are 16.5" deep. I think that's a bit too deep, but I was trying to use existing wood that had already been cut for shelving on that side. Heavy to hang though. :)
On my side of the closet, the depth is 14.5" deep.
The rods are awesome! Super cheap at The Container Store. You buy them in 2-foot, 3-foot or 4-foot lengths and they cut them on site for you. I posted hyperlinks to the rods and the rod hanging hardware on one of my other brag posts. Love them!
Mon, 03/26/2012 - 18:13
Jennifer, the closet is AMAZING!!!! But then again, you do make the best closets!
Thu, 05/16/2013 - 15:00
The closet is amazing. Yesterday I finally took off the builder installed shelf and dowel. Took a while, still need to patch up the drywall. I am now research to get the closet renovation started. I have tons of questions.
I understand that the shelves itself were attached by kreg jig holes. How do I hang the shelves on the wall?
Tue, 11/19/2013 - 06:47
Yours closets are awesome. Can you please advice as i am a newbee.
White closets: For the white closets we buy the regular plywood from Home depot and then do primer and paint. Can you please advice on the primer and the paint I should use to make it white color.
Wood closets: I like the wood color closets. Do we need to do any polish. What sheets should we buy in home depot to make wood color closets. What are our options for wood color closets
Thank you
Thu, 11/21/2013 - 11:16
Rhea, take a look at Ana's kitchen cabinet plans and look at how she braces them along the back. That's what you screw through into the studs. To make it easier, I screwed in a scrap 2x2 into the studs at JUST below where I wanted the closet shelves to go (sort of like a temporary shelf). Then I carefully set the closet box on my temporary shelf and screwed it into the studs.
Also, if you click on my username, I explain how I hang them in a bit more detail in one of my daughter's closet makeovers. :)
Thu, 11/21/2013 - 11:24
Hi jyothianil,
I have done both actually. I did both of my daughter's closets using pre-peg-hole-drilled white melamine from HD. You can get it in two widths and it saves you a ton of time not having to drill all of those holes. A few things to consider... Melamine is HEAVY and a total pain to work with. The edges are sharp after being cut and it slips everywhere when trying to kreg-jig it together. But it's DONE once it's put together...
On two other closets, I just used ripped sheets of birch plywood or 1x12 sheets of pine. I didn't finish mine, but I probably should have. It doesn't snag the clothes, but it does create dust. If I had at least put one coat of poly on, it would have eliminated a lot of the dust that collects on the clothes.
If you want to paint them white, I would just use some sort of primer and any white paint. It's all personal preference, but I would get semi-gloss or gloss white paint because it won't show fingerprints and clothes will slide on and off the shelves easier.
Thu, 11/21/2013 - 11:26
Here is my other post. I explain a bit more about how I hung them on the wall. If you look at the main photo at the top, you can see one of the "hidden" boards I used to screw it into the studs. I painted it the same color as the wall so it would be less noticeable. http://ana-white.com/2011/03/closet-organized
Love this bed! Fell in love after seeing it here and on That's My Letter, so my dad and I built the beds according to the plans (did add a center support under the mattress) and I made all the bedding. My daughters' dolls love their new bedroom set!
Thank you dmccoy!! Washer & Dryer Pedestal / Platform with Drawer
Followed your plan and these came out sturdy and solid.
I adjusted it to 55 inches to fit my smaller space and decided to not build the drawers.
So simple to put together and saved over $400
Customers wanted bunk beds for their grandchildren. Everything was custom and change orders galore lol.