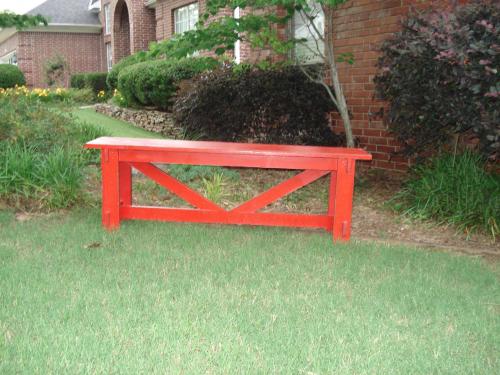
Large Porch Bench
This wonderful addition to my front porch was a delight to build.

Built from Plan(s)
Recommended Skill Level
Intermediate
This wonderful addition to my front porch was a delight to build.

Client wanted some to sell cookies out on her porch. So I added a blackboard at her request so she could put prices and e-transfer info. Top shelf will also house an honor box for cash. Papa & Grammy Creations.


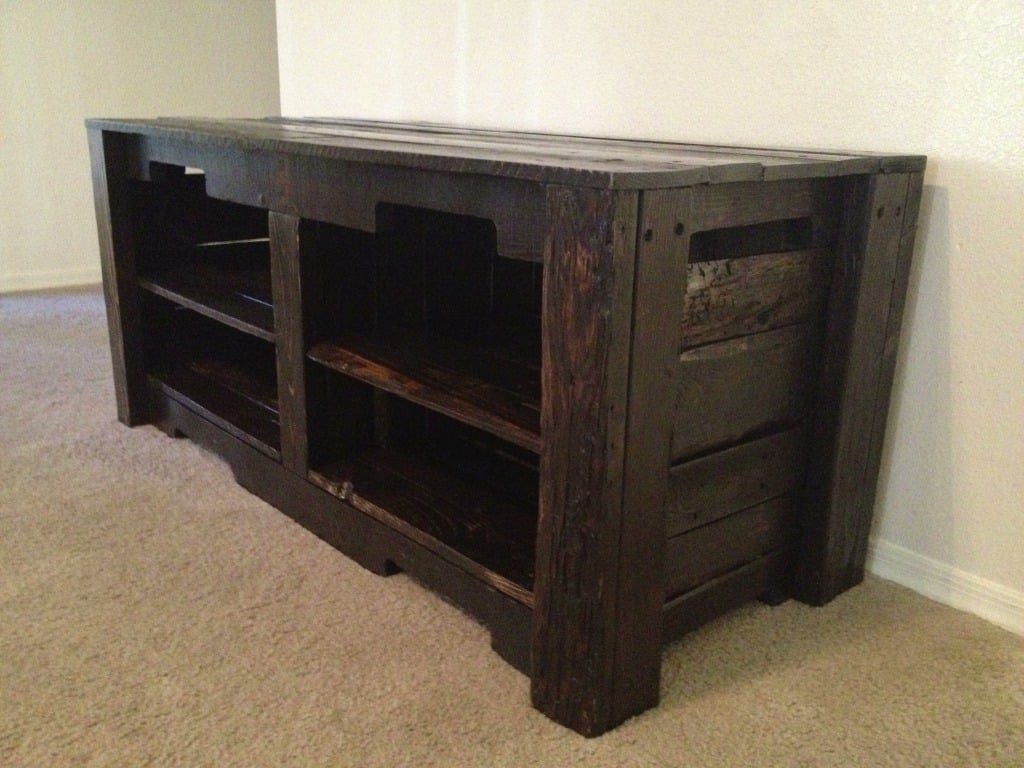
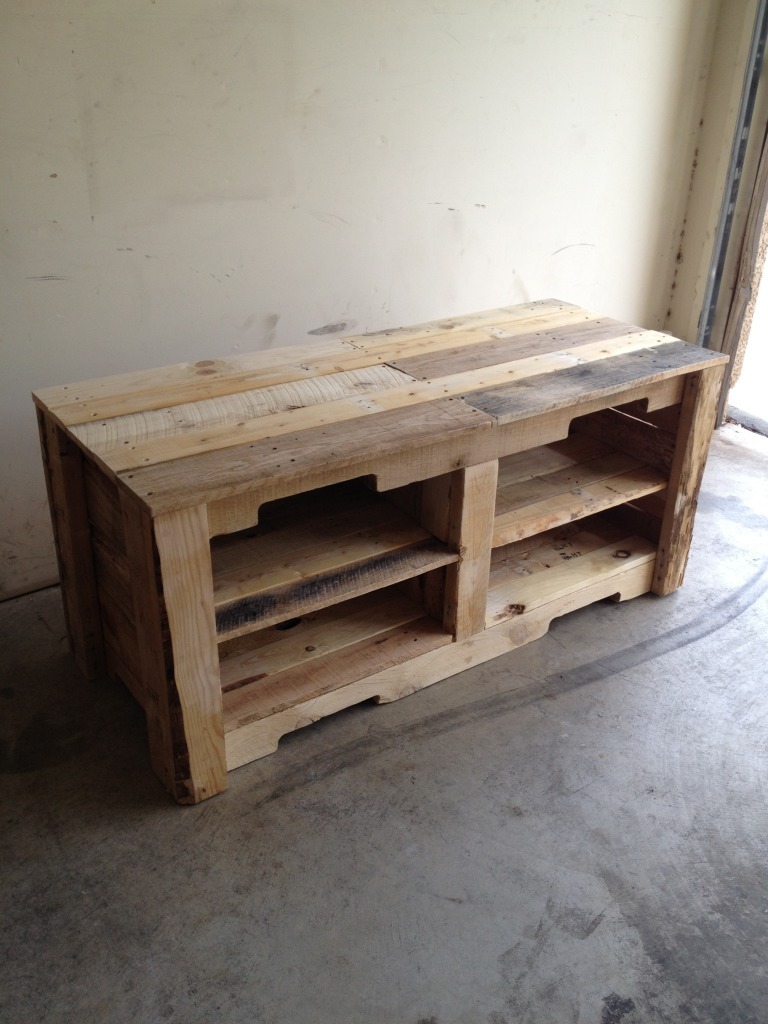
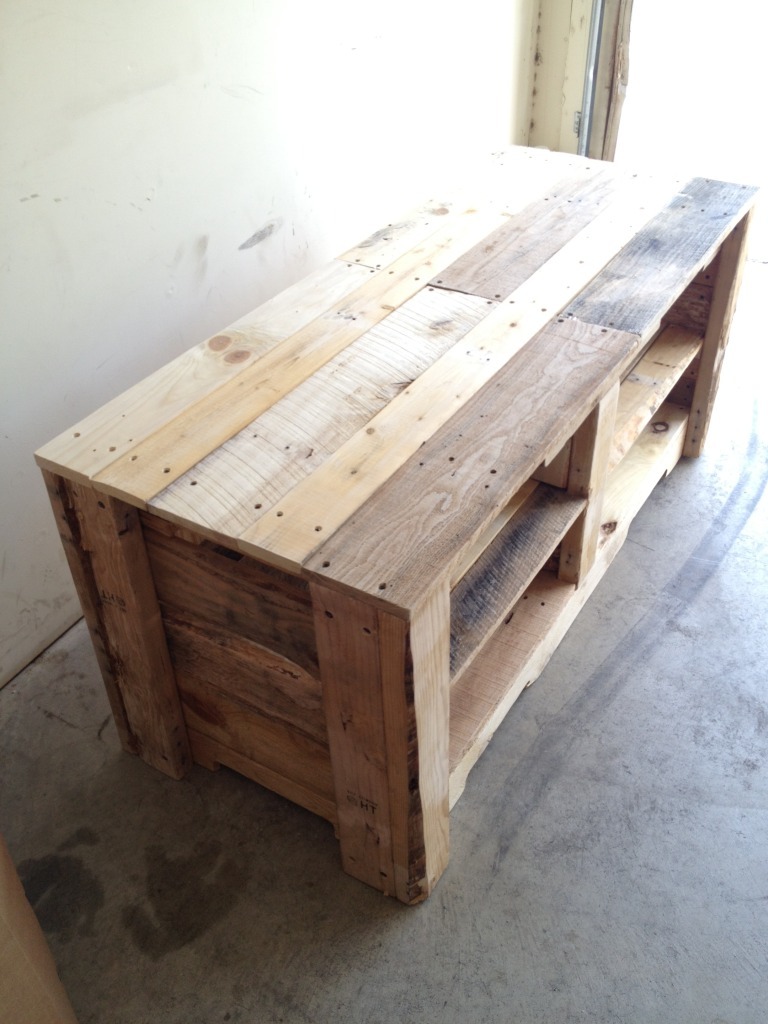
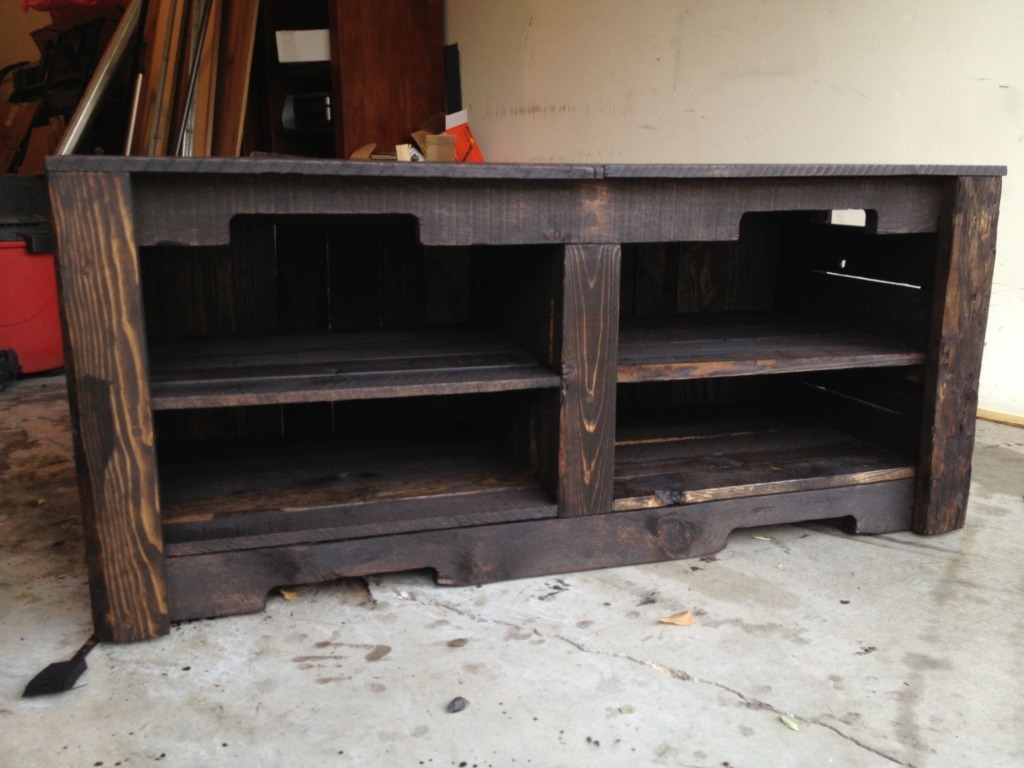
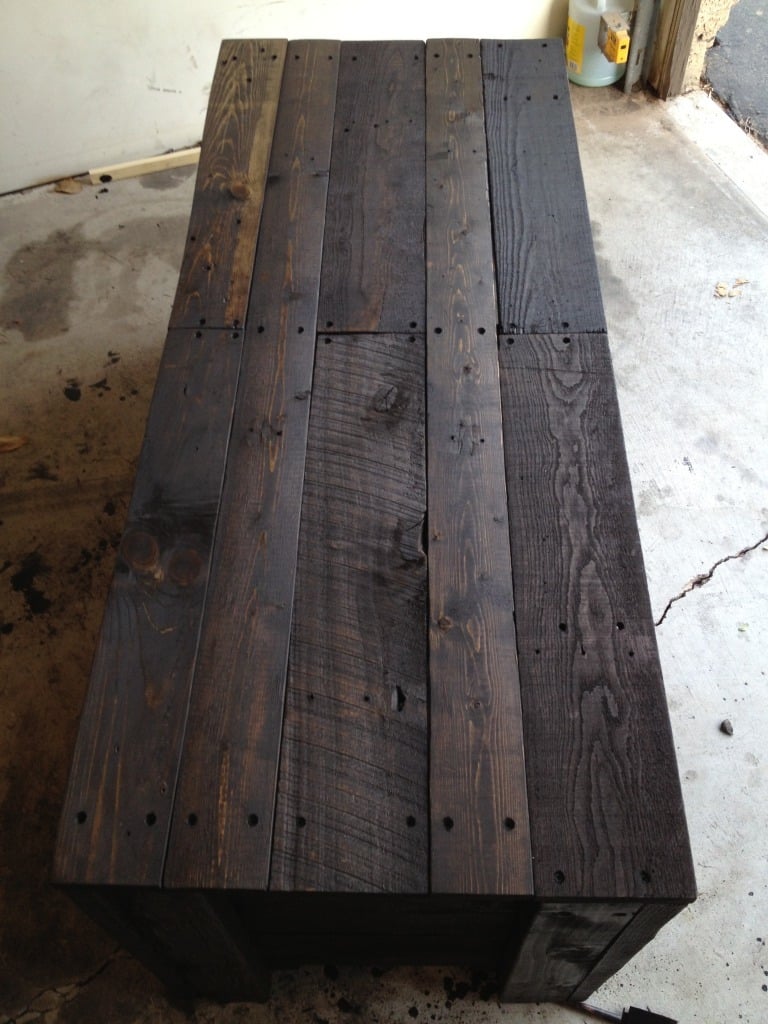
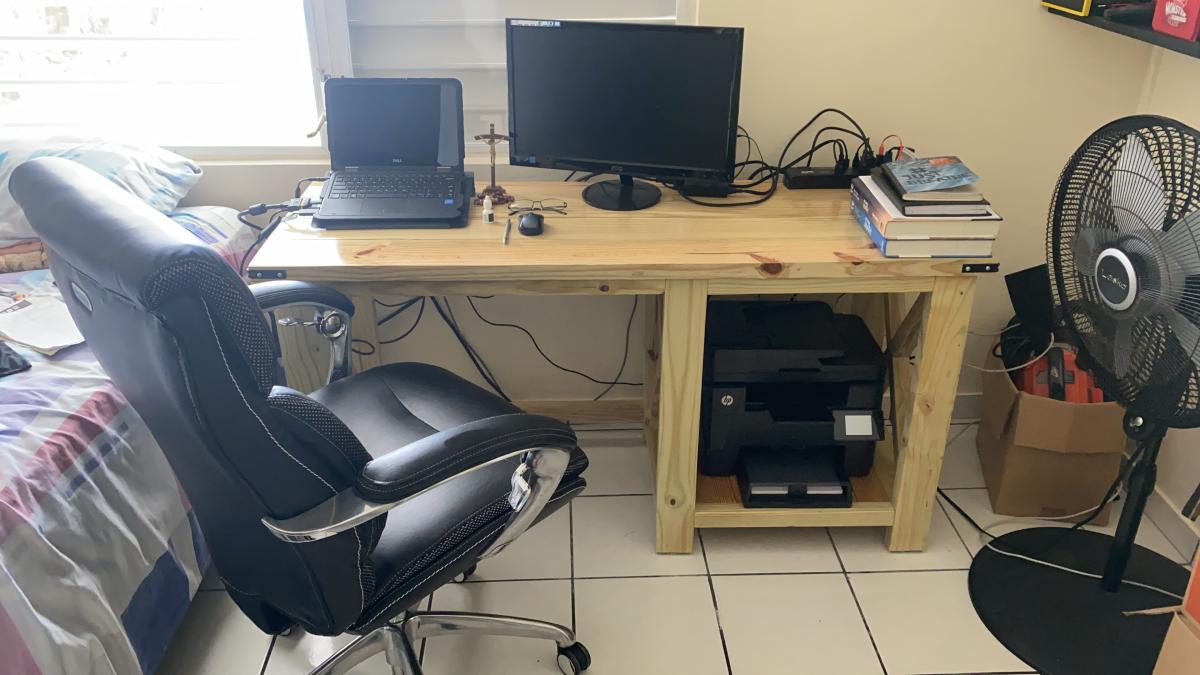
I really dont have any plans for this build. I wanted to purchase a nice rustic media center for my living. I am mounting my flat screen on the wall and wanted a cool media center to sit below it. So I came up with this project. I still plan on lightly sanding it some to bring out the grain and have that look of streaks. I also still need to add polycrylic, clear gloss. I literally just got done staining it. The pictures really dont do it any justice. It looks wayy better in person. Being that this is my first project it took me 1 week to build, sand and stain. Still have some work to put it to it, just a coat of polycrylic and light sanding. I probably have over 30 hours in to this build and around 40 bucks for screws, sandpaper, stain, glue and countersink bits. I think that is it, if you have any questions or comments please let me know! :)


Sun, 05/05/2013 - 22:38
Wow, looks pretty incredible! Nice job with the stain, too.
Tue, 05/07/2013 - 19:09
Thank you!! I appreciate it. While I was staining it in my garage, with the garage door open. I had a few couples that walked by stop to talk and ask questions about the piece. Made me feel good that your hard work is appreciated. Thanks again!
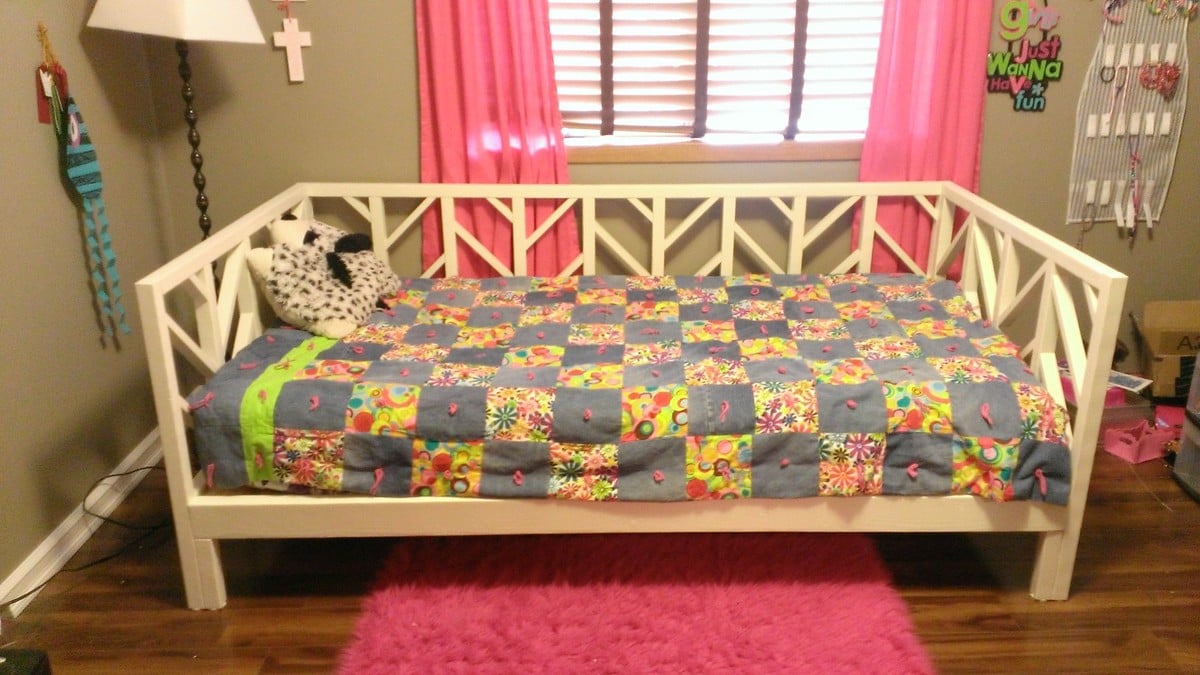
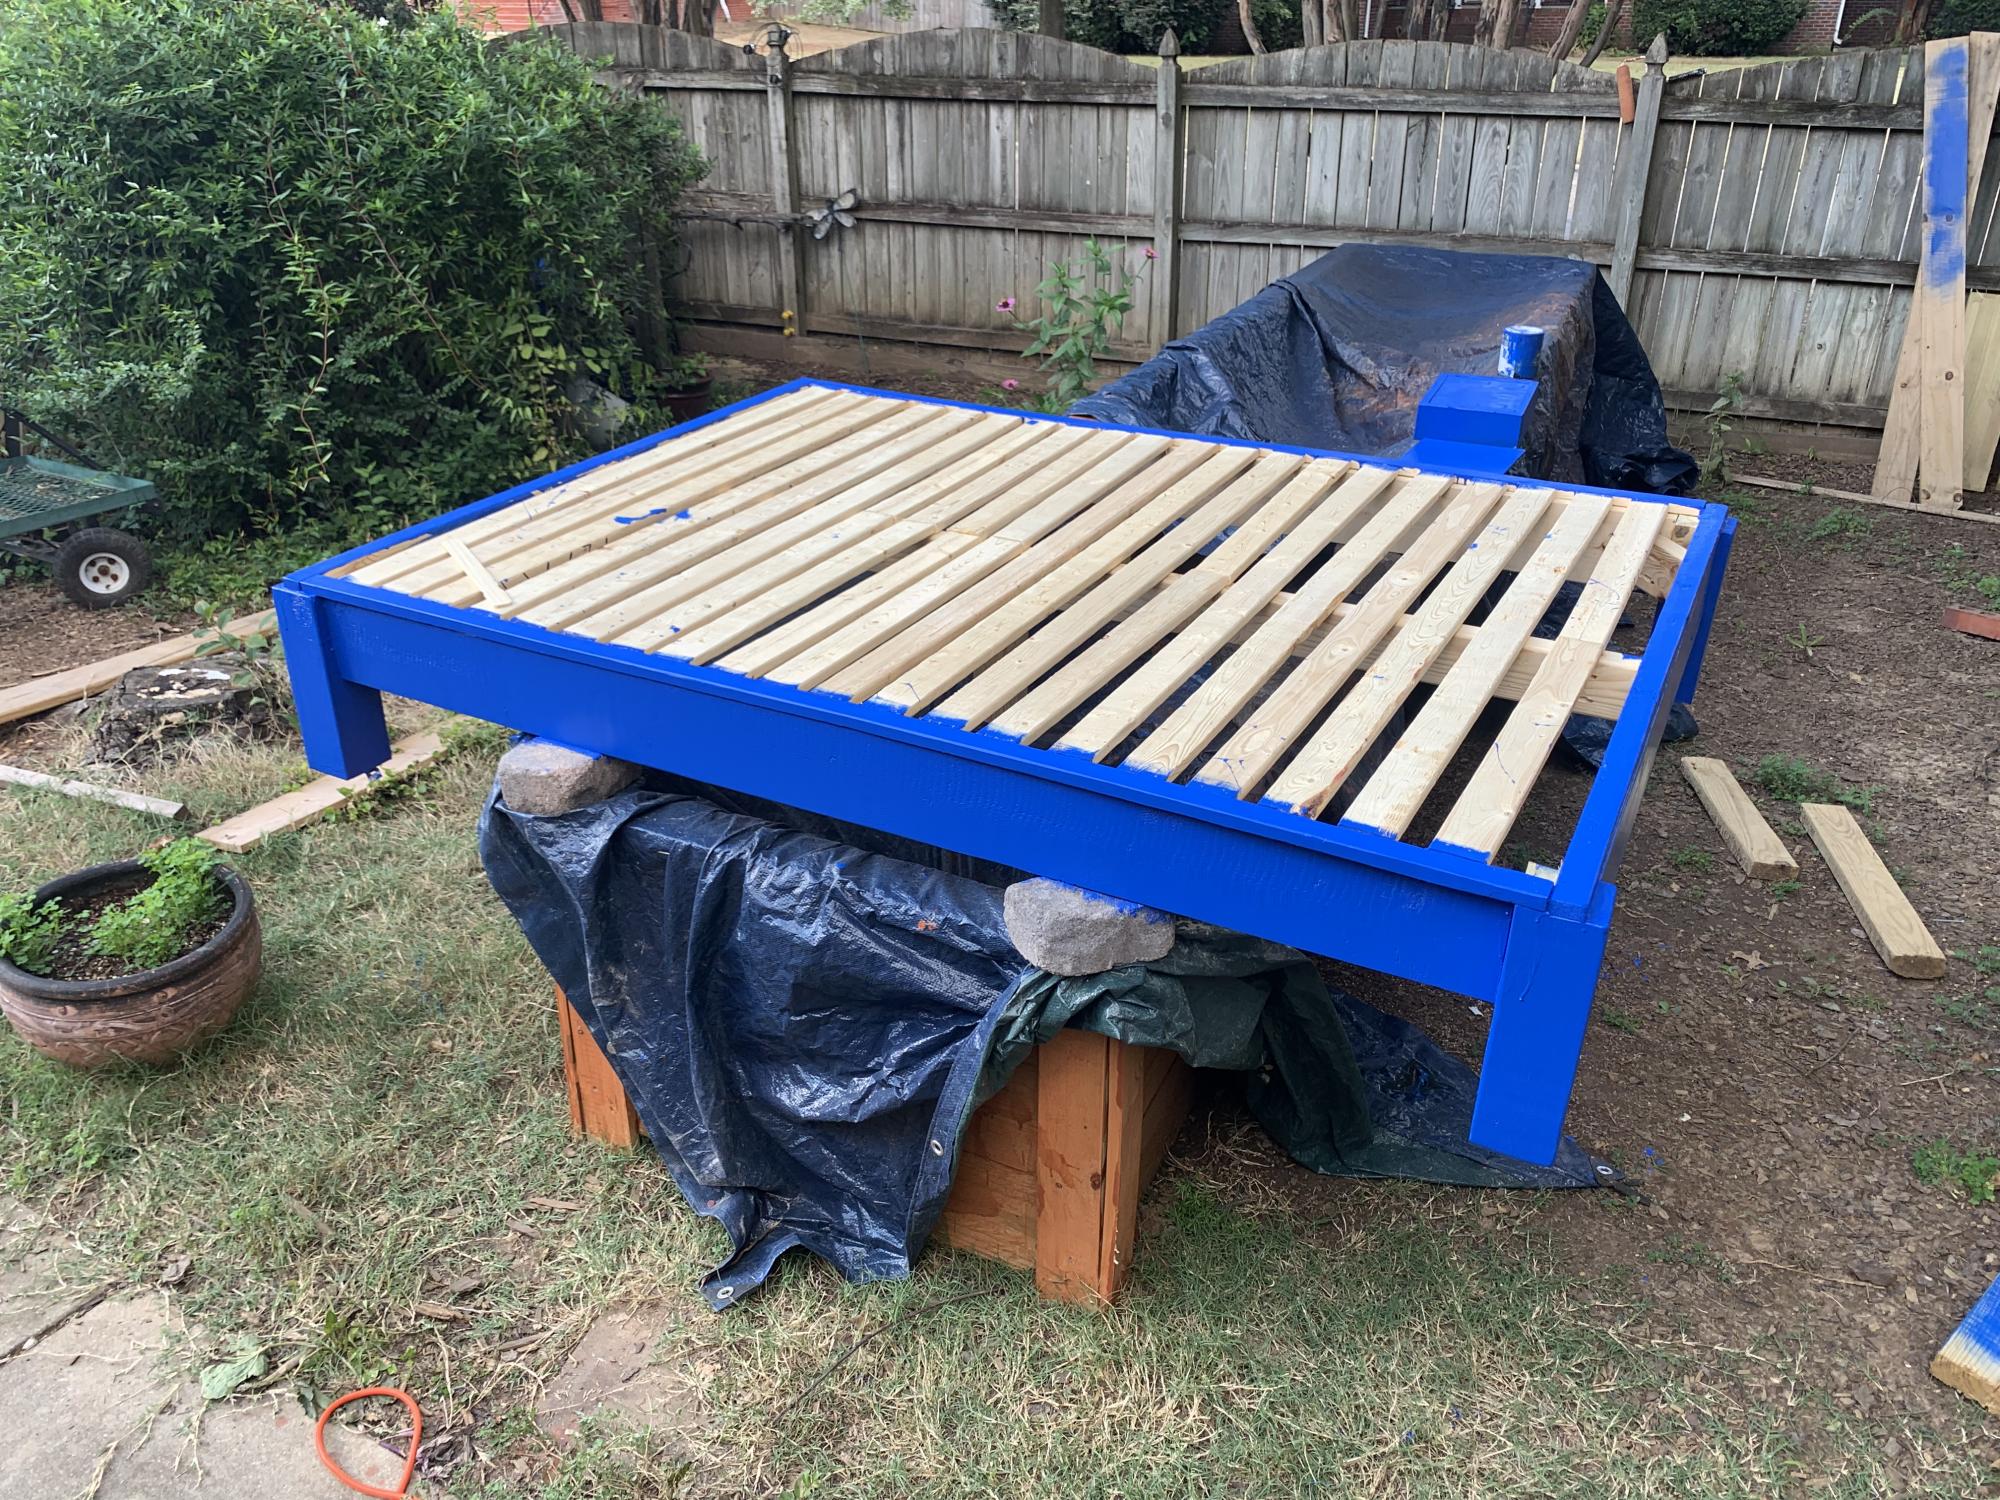
My daughter needed a new bed and I needed a project, so we headed to ana-white.com to find a plan that filled both of our needs. We settled on the Stacy Daybed and got to work.
I followed the plans pretty much on par, but made a few minor changes to make it easier to take apart and put back together. You can also see that I added width to the legs in front, allowing the weight of the sleeper to set on the legs instead of being supported solely by the furniture bolts and metal thread inserts I used to hold it together. I duplicated this in back to keep the design balanced.
This project was fun and challenging and the plans were very easy to follow as well as modify to my needs.

Father and son project. Took less than half a day. Already have three offers to build for friends. Couldn't find 10' Cedar so had to use 8' Using scrap pieces of cedar to make a coffee table. Great plans!
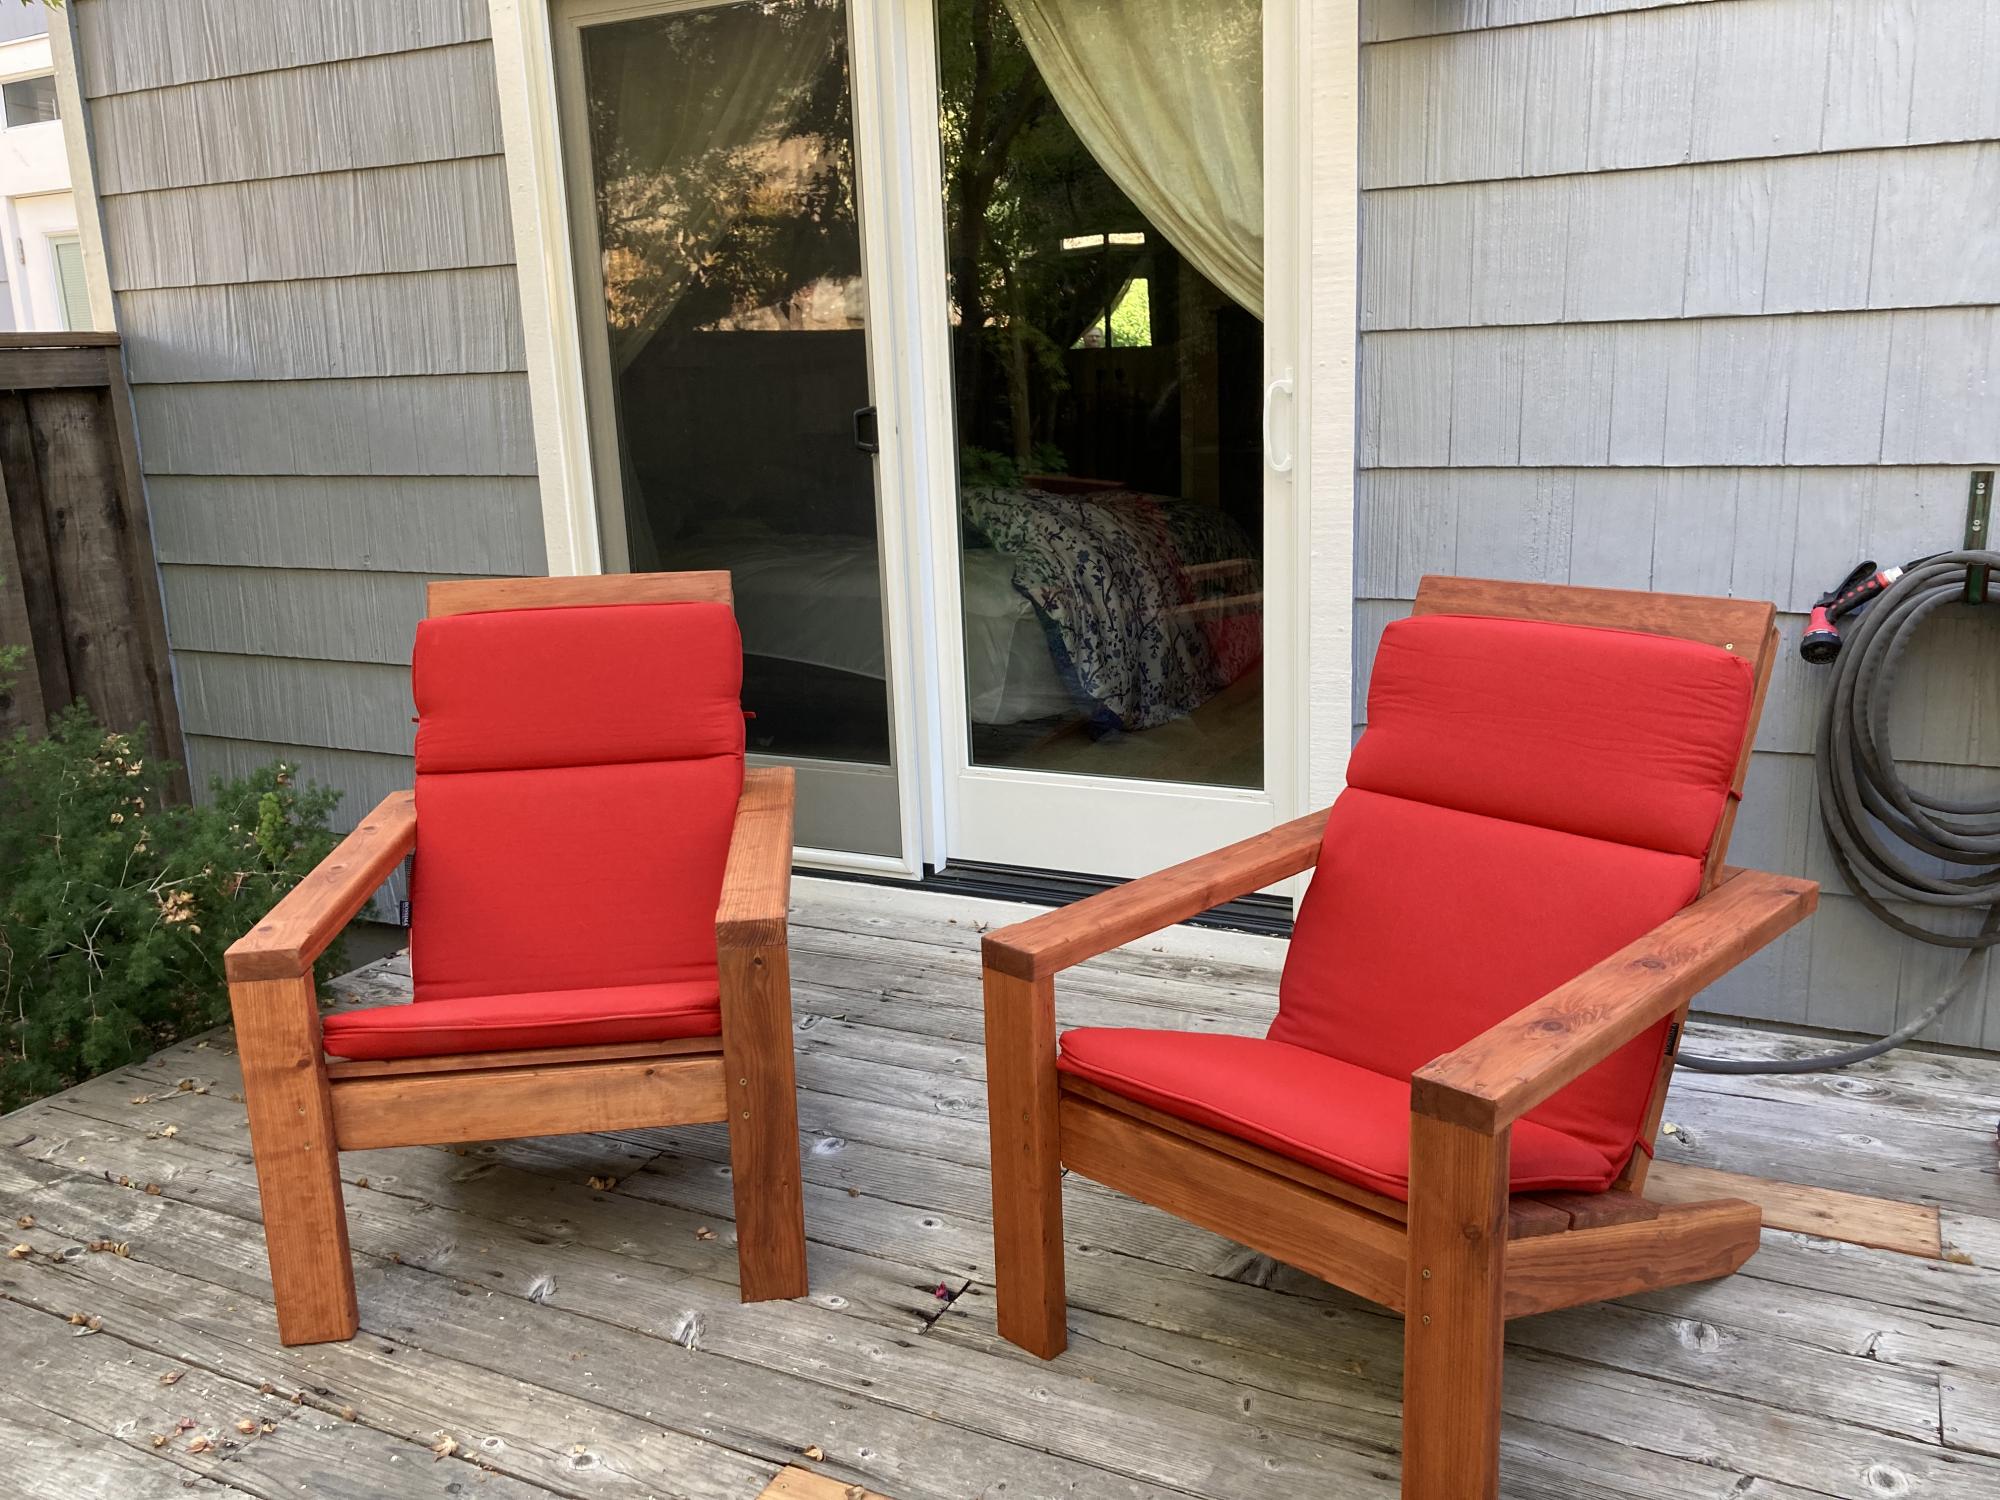
My first “Ana White plans” project. Great plans and easy to follow. Very comfortable chairs.

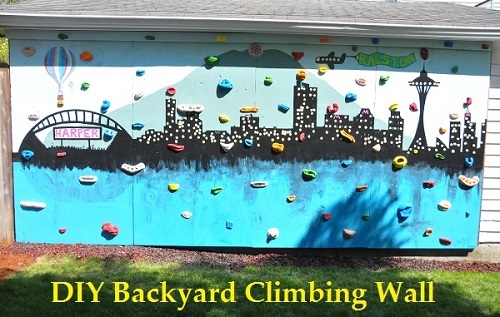
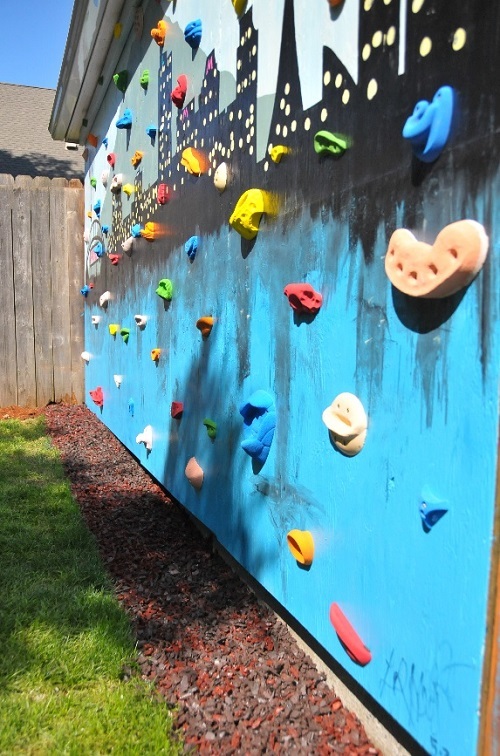
My very first woodworking project was Ana-White's farm house bed! I've made so many projects now, I decided to start fancy'ing up my backyard!. We took all pressure treated wood to make the wall foundation, painted it, sealed it, then used Screw on Holds to make the climbing portion.
I have a full tutorial listed here http://www.impatientlycrafty.com/2013/05/07/diy-backyard-climbing-wall/
Thanks Ana for helping inspire me to create more wood stuff!!!
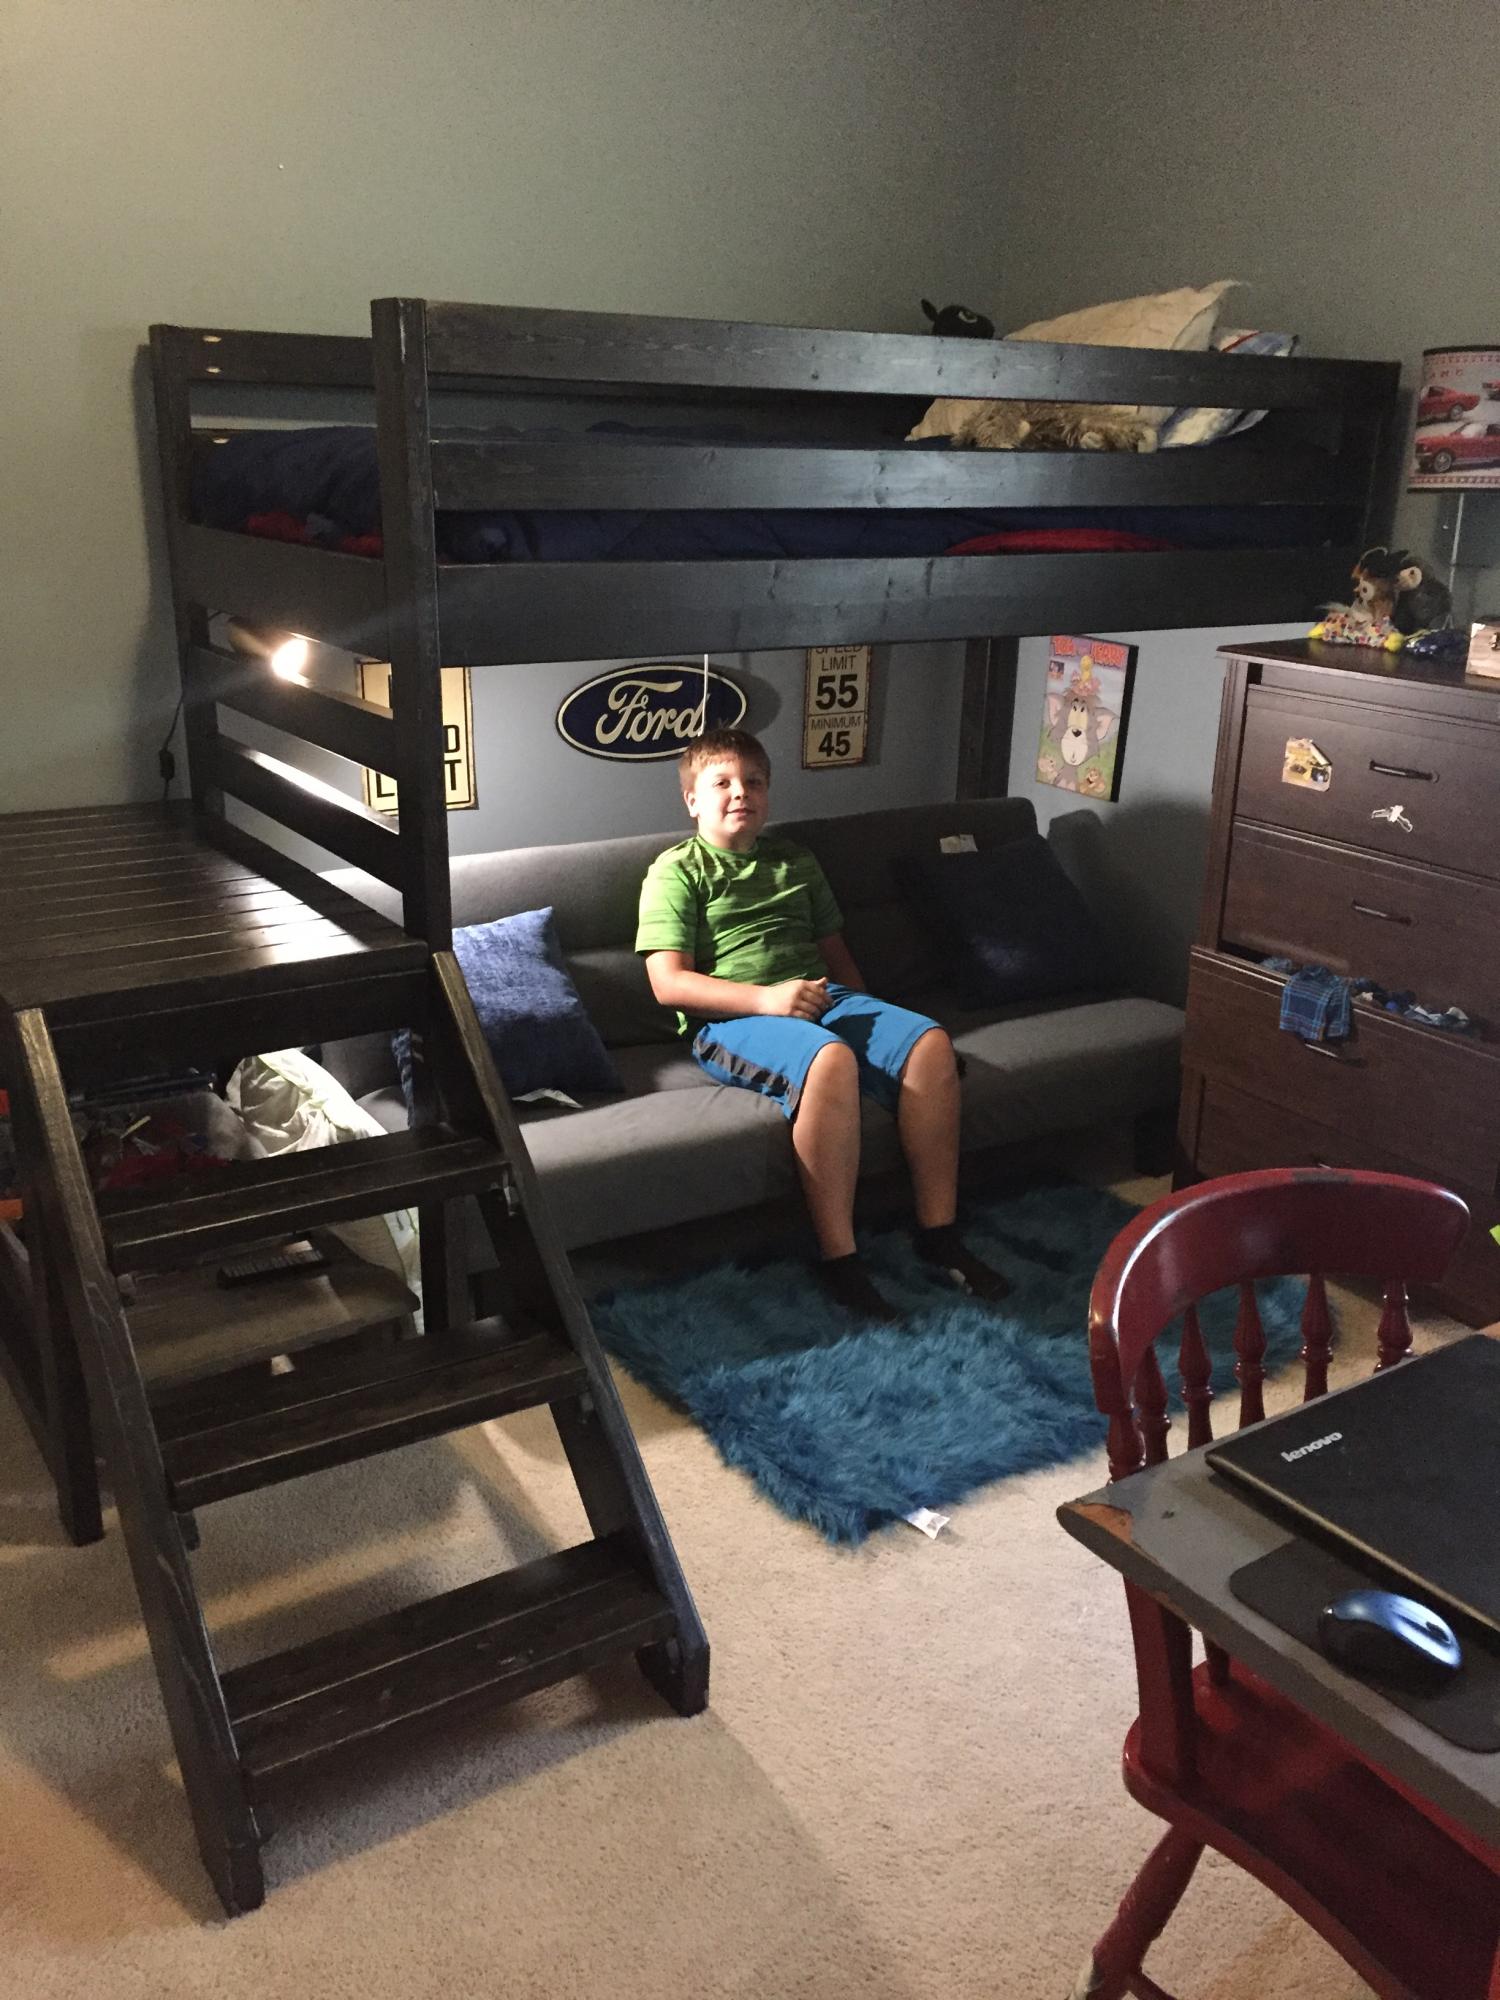
We finally built the #1 Project on my to do list. Took about 3 Days total with finishing and all. Love it so much, defintately my fave project to date! Have to do nightstands next!
My very first furniture build! Took me about 5 days, but as a beginner I found it very easy to follow the plans. I did buy a Kreg jog for this project, highly recommend it! Other tools used were a miter saw, circular saw, and drill.
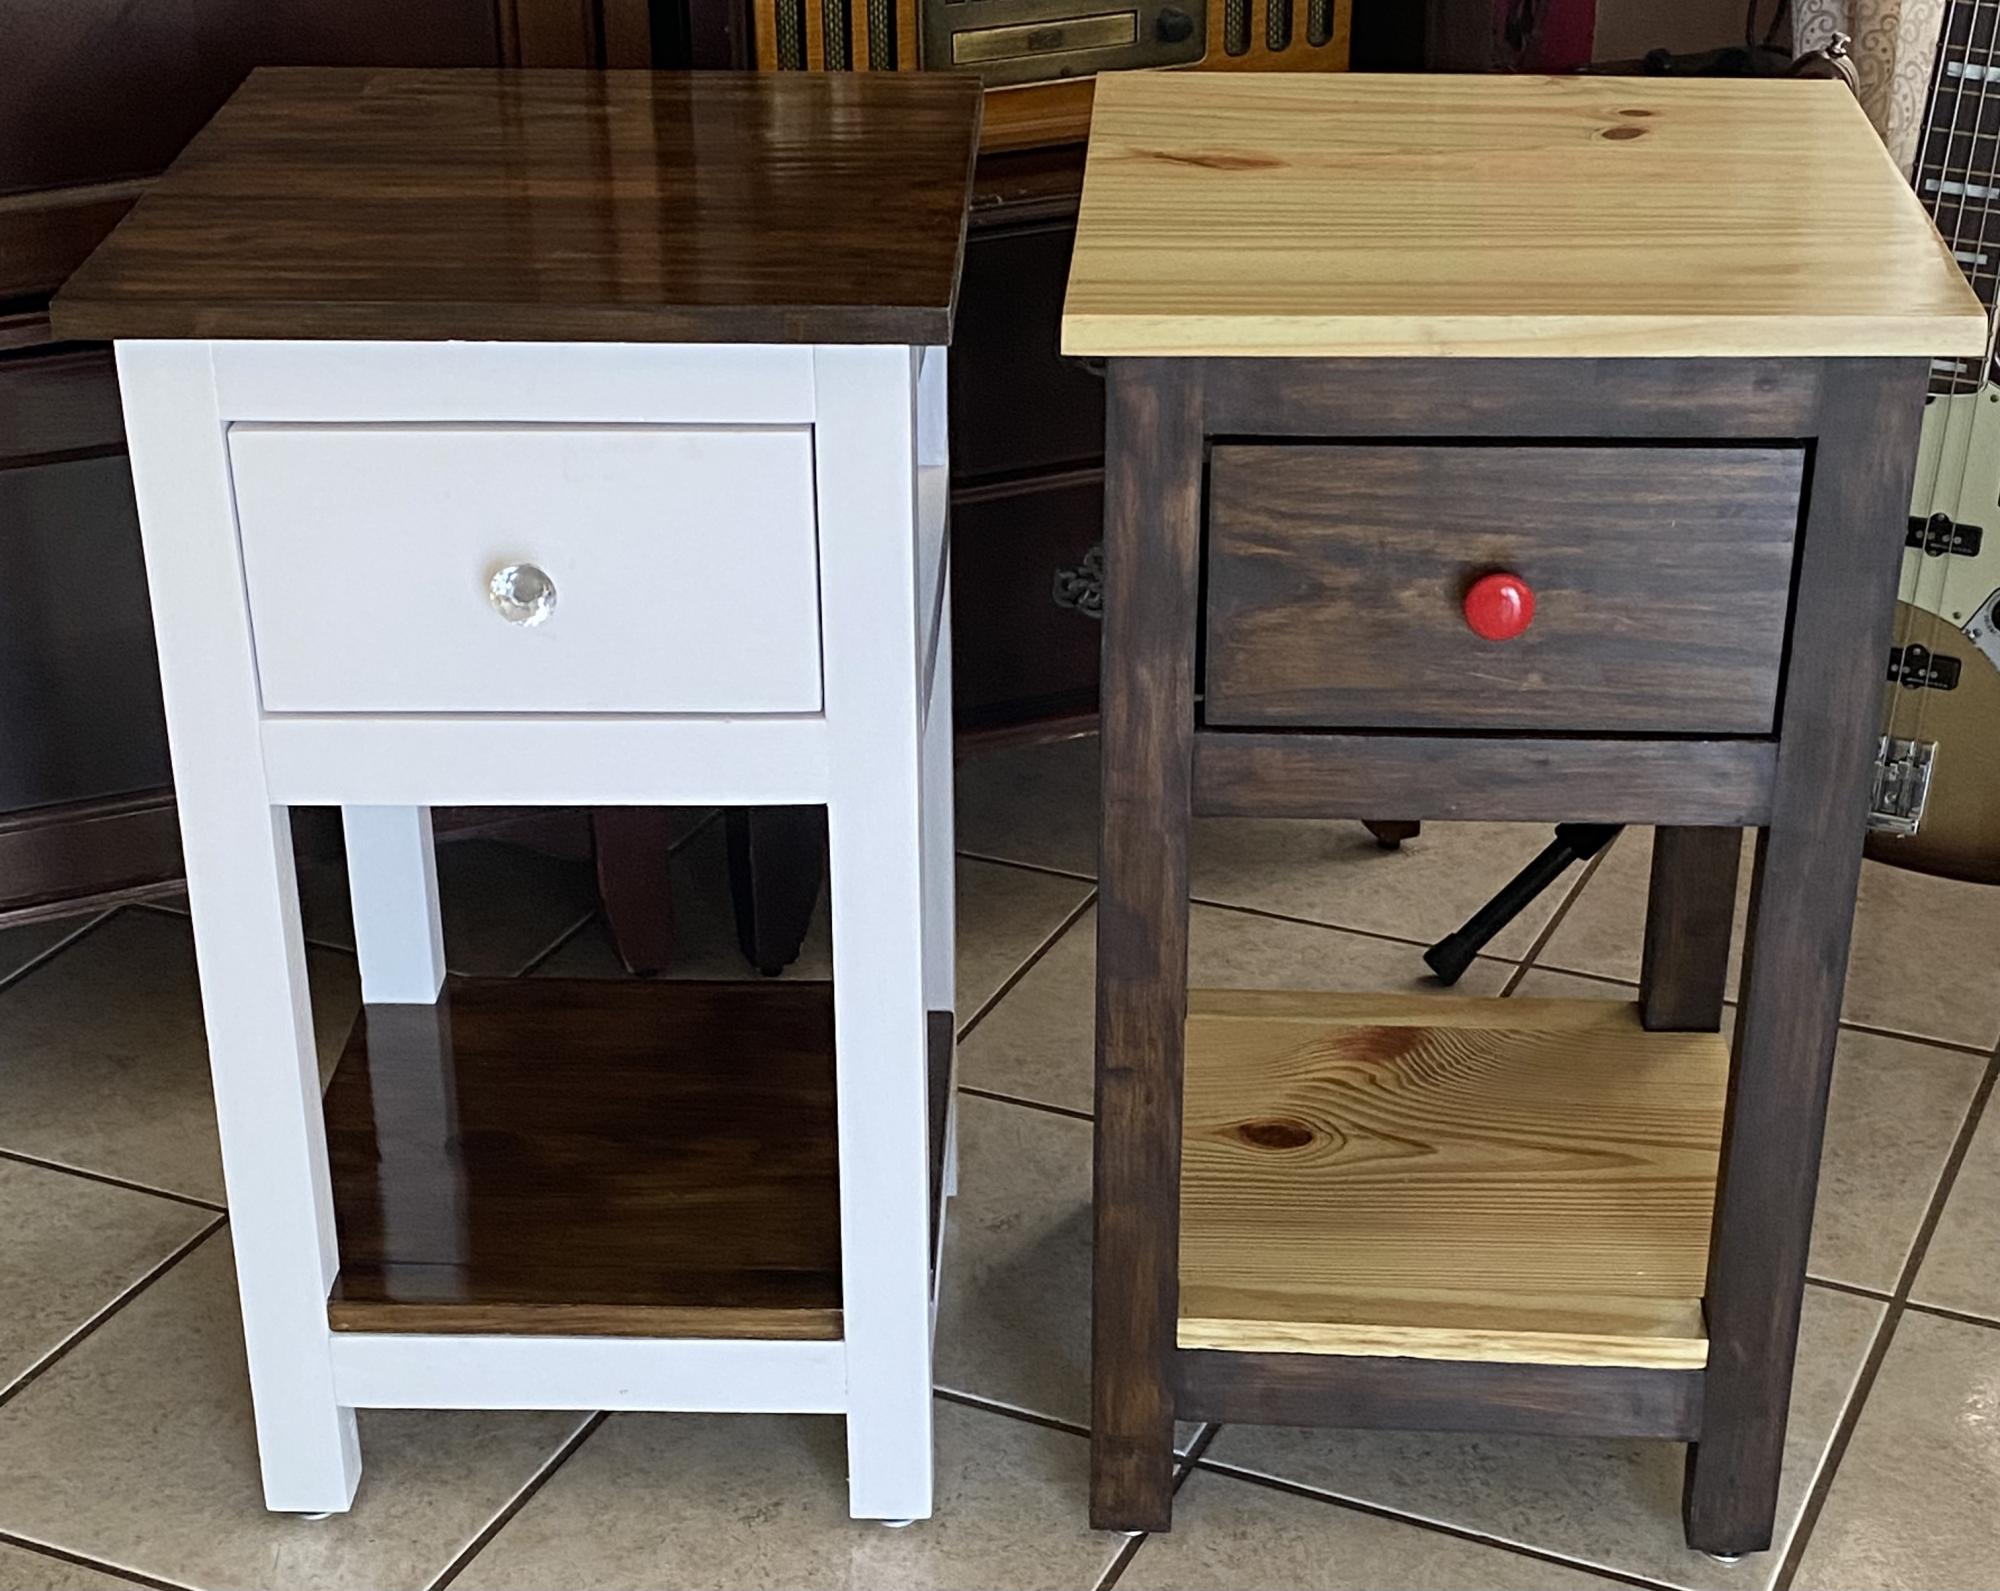
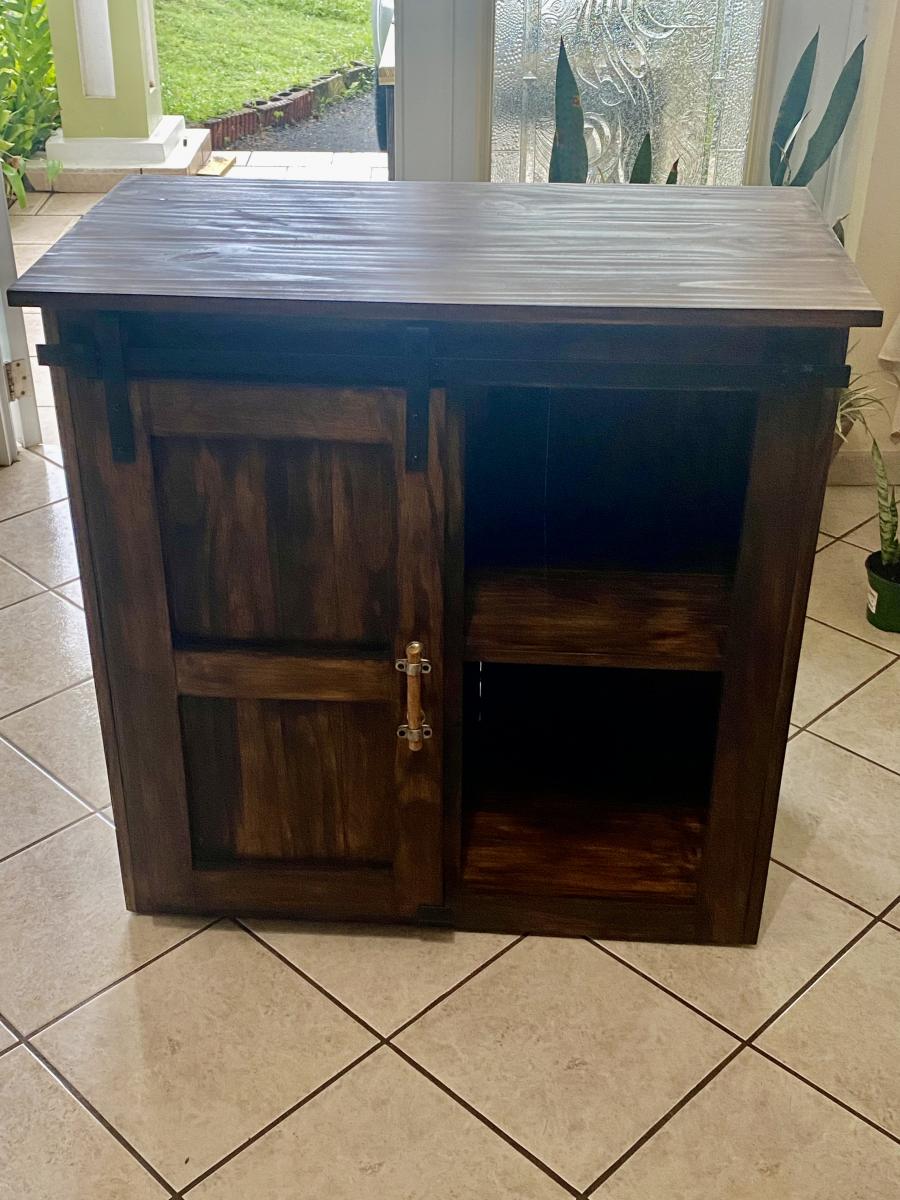
I have built various projects. A work table, a barn door cabinet and couple of Farmhouse nightstands for my grandson and granddaughter. It was fun!!
My husband is an aeronautical engineer and reads plans all day as a part of his job–even he thought your plans were fantastic. Great job! He did the building and I did the painting of the shelves. I did request that he add a back onto the shelves, so he left the trim off the backs of the shelves and fit in a piece of 3/4 MDF. It worked beautifully! We spent $75 on these two shelves–it would have been more like $50, except the additional MDF (for the shelf backs) added to the cost. Our only suggestion after doing this project is to go to a lumber yard for the pine. Ours is from one of the big box stores and, even though my husband went through a lot of wood, all of the choices were pretty bad. We went ahead and used this subpar wood, but I think our end result would be even better with better quality wood.
Thank you SO much for designing these plans for us. We’ve been planning on bookcases for quite awhile, but my husband hadn’t had time to come up with plans. When I found these plans on your site, I informed him that this was our weekend project! Soon he’ll be building a bed and trundle for our little boy–using your plans, of course!
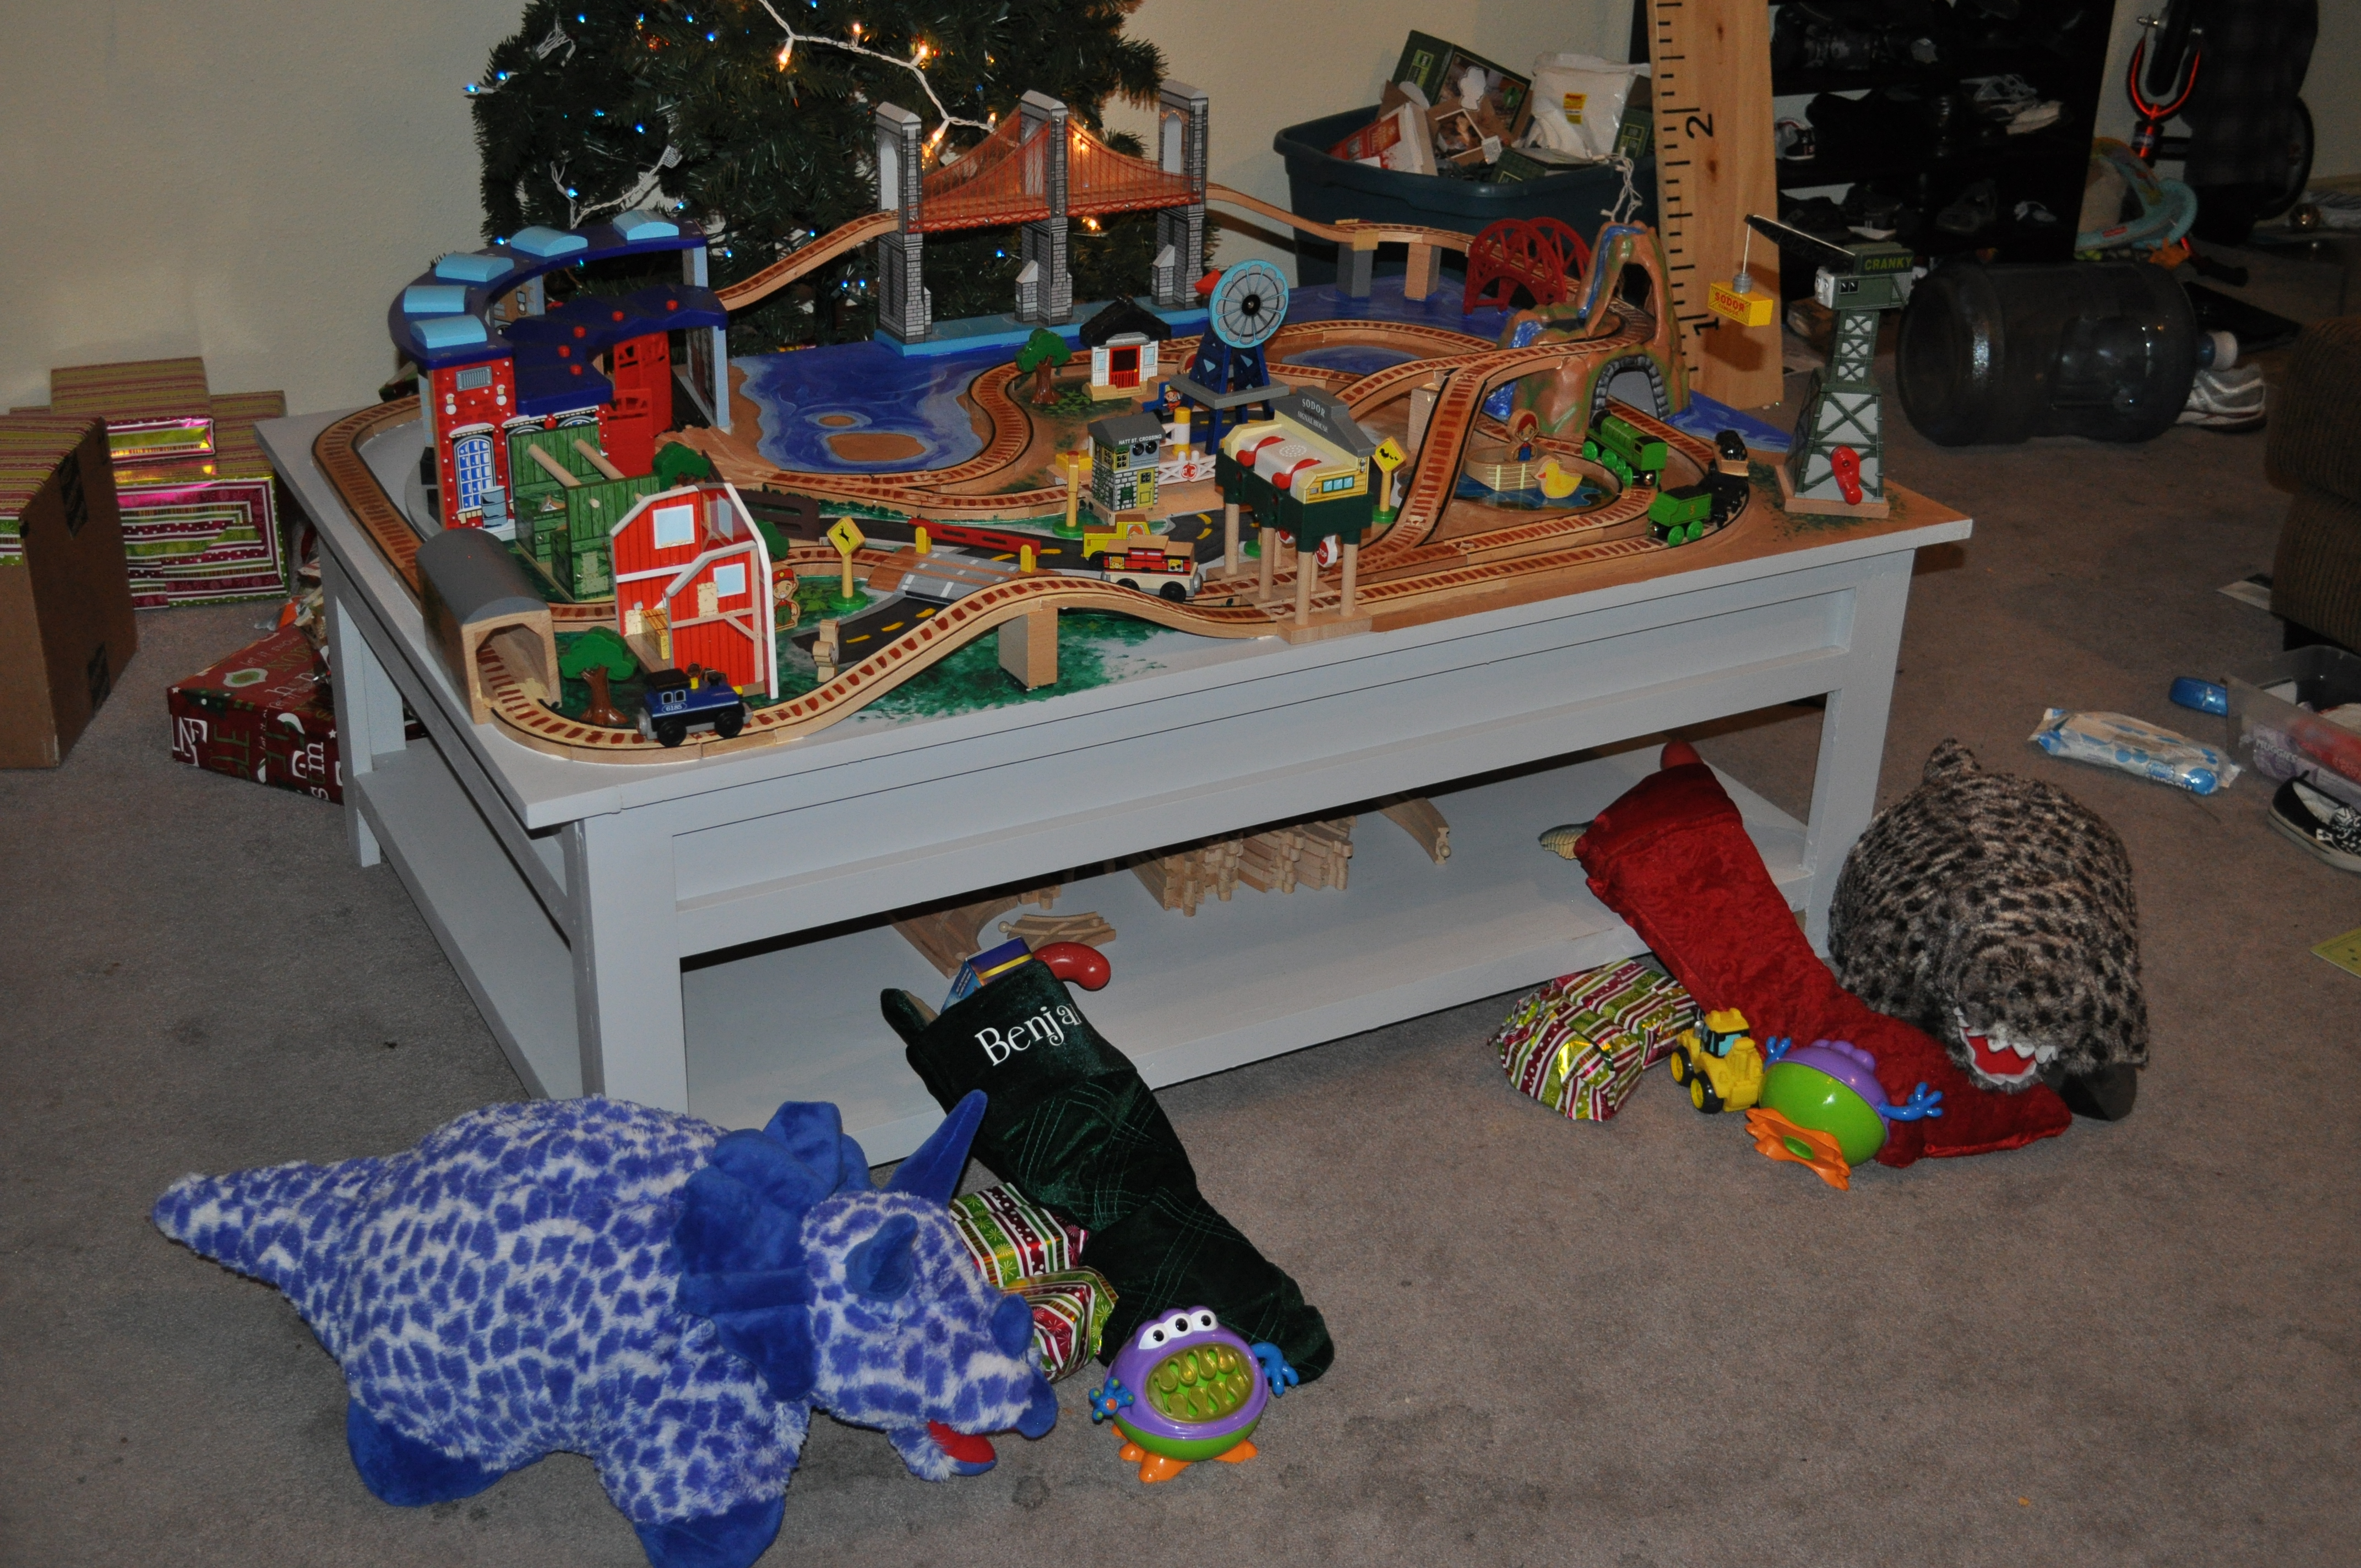
Santa decided to get come to Ana this year for some help with a train table instead of getting one from (insert big box toy store here). It ended up being pretty easy and a lot of fun, and our boys loved it! Santa decided he needed as much room on top as possible to put train and didn't need it to hide away so we skipped the cutting the top piece of plywood in half and left out the middle peice. We then added a track set and a few extras and painted the top. Thanks for the plans Ana! -(Santa)

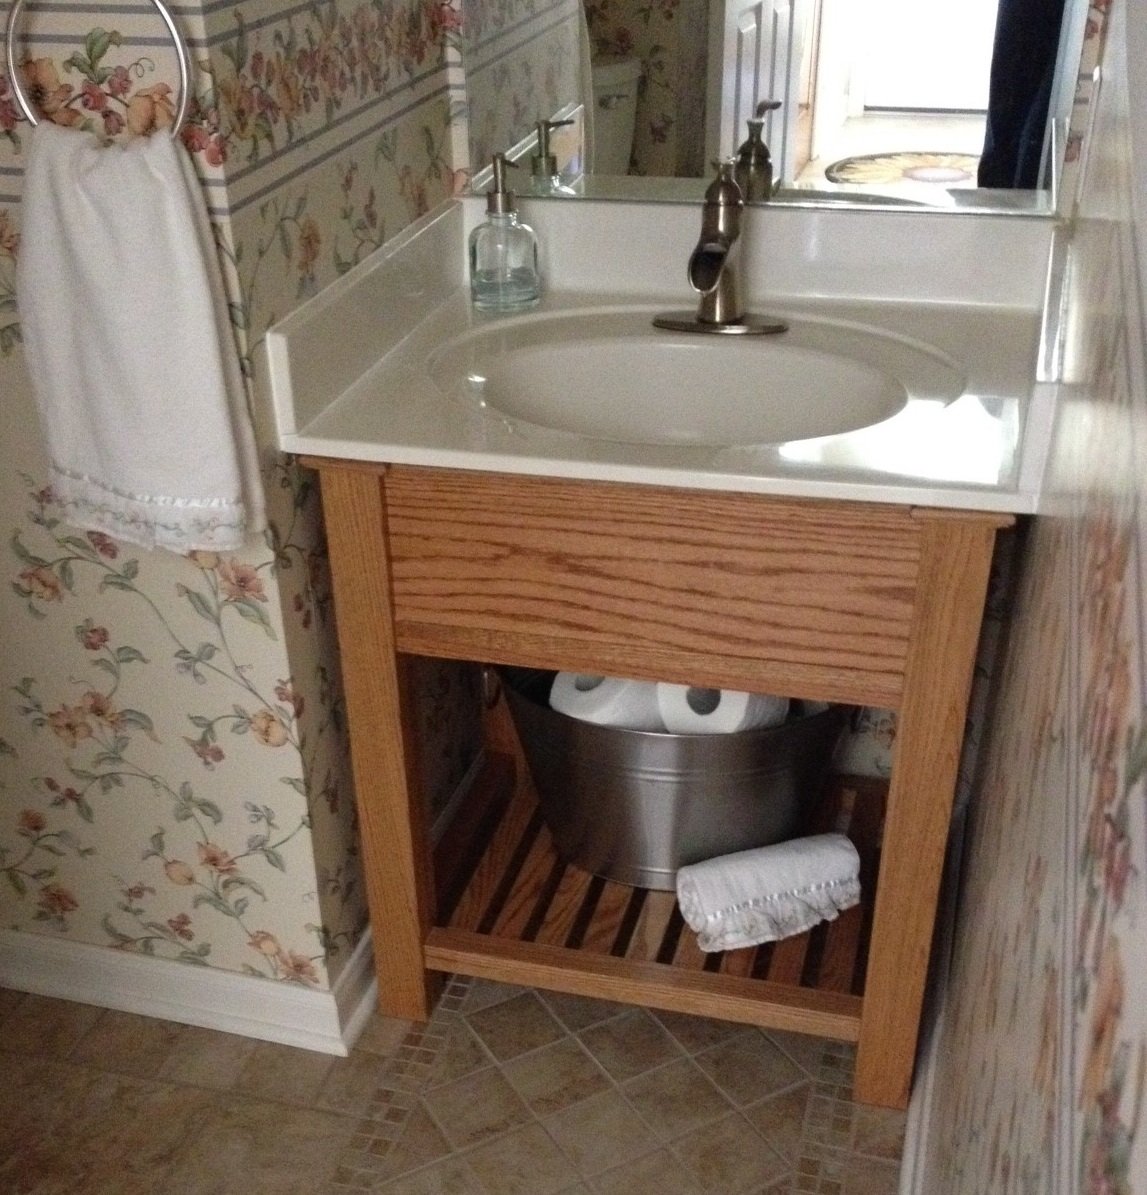
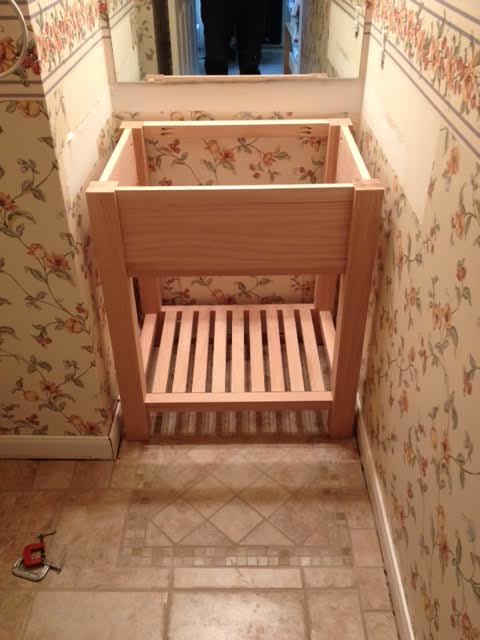
I changed the height of the Connor Side Table to that of a bathroom vanity and added an apron to hide the underside of the sink. I carefully built the vanity to be level, then discovered that the underside of the sink surround is wavy (apparently they are made by being poured into an upside down mold, hence the wavy surface). I added trim at the top of the vanity to hide the shims stabilizing the sink top. Thx to Rogue Engineer for the well-written plans, and thx to Ana White for your Kreg pocket hole jig video. It made me feel confident I could pull this off!
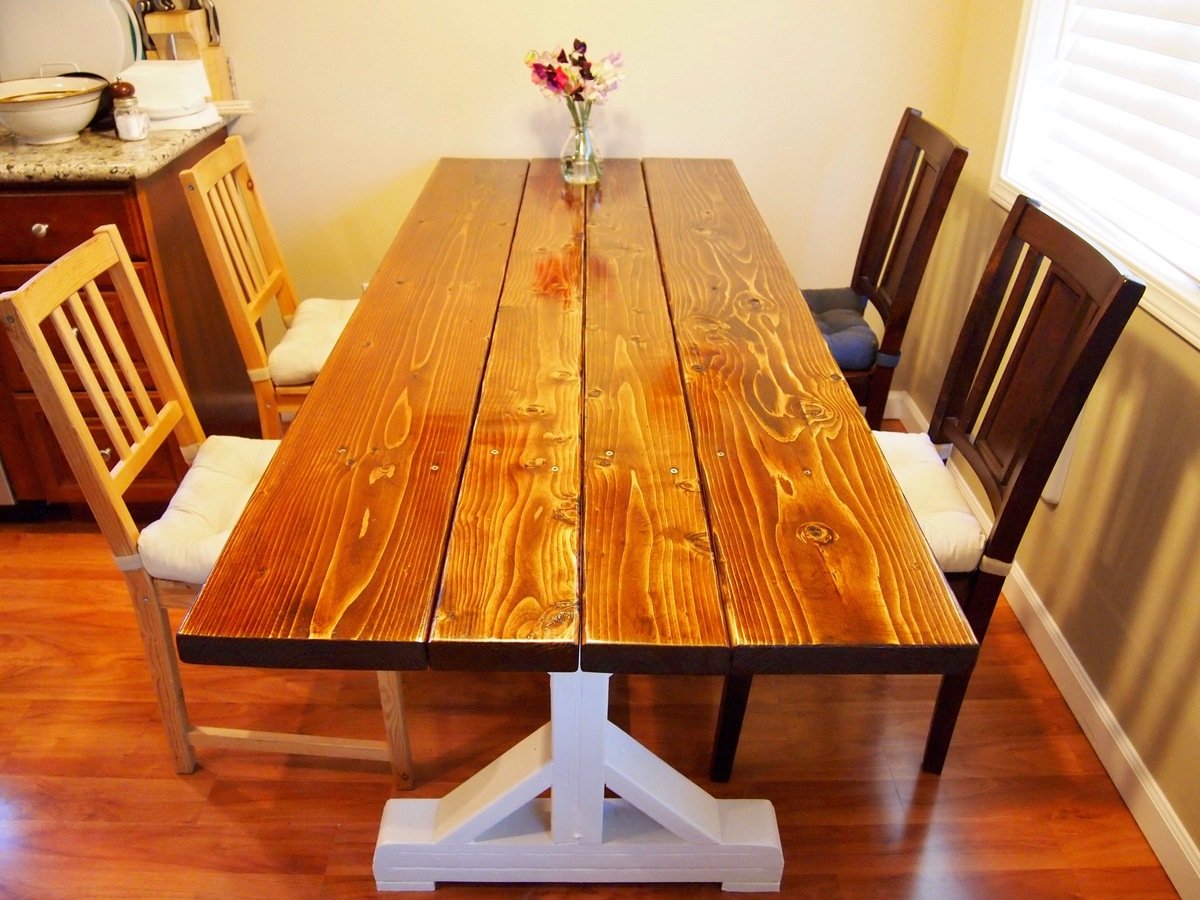
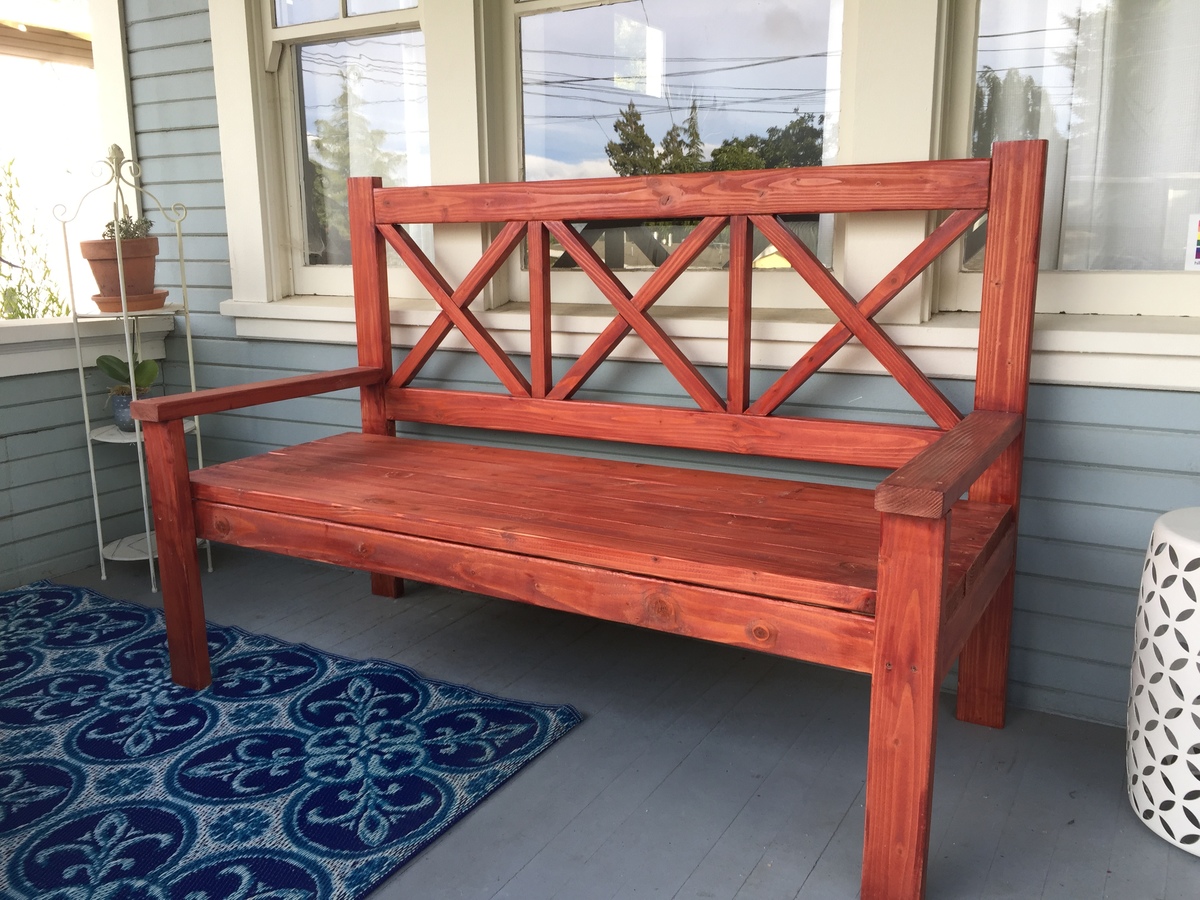
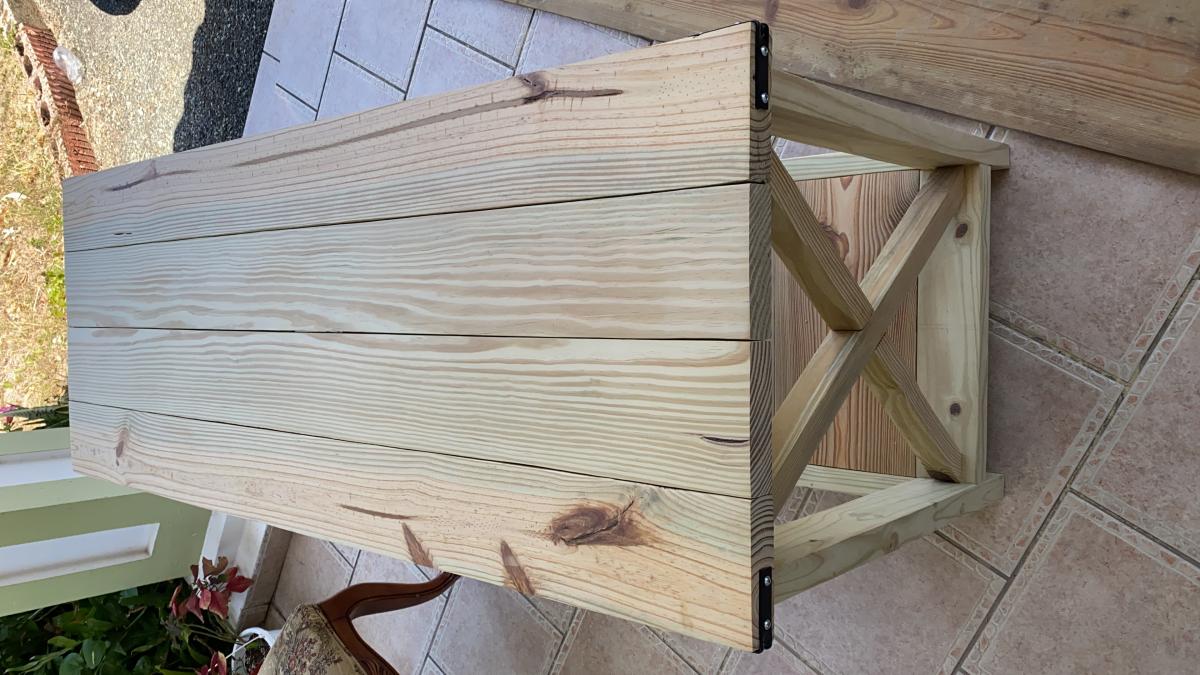
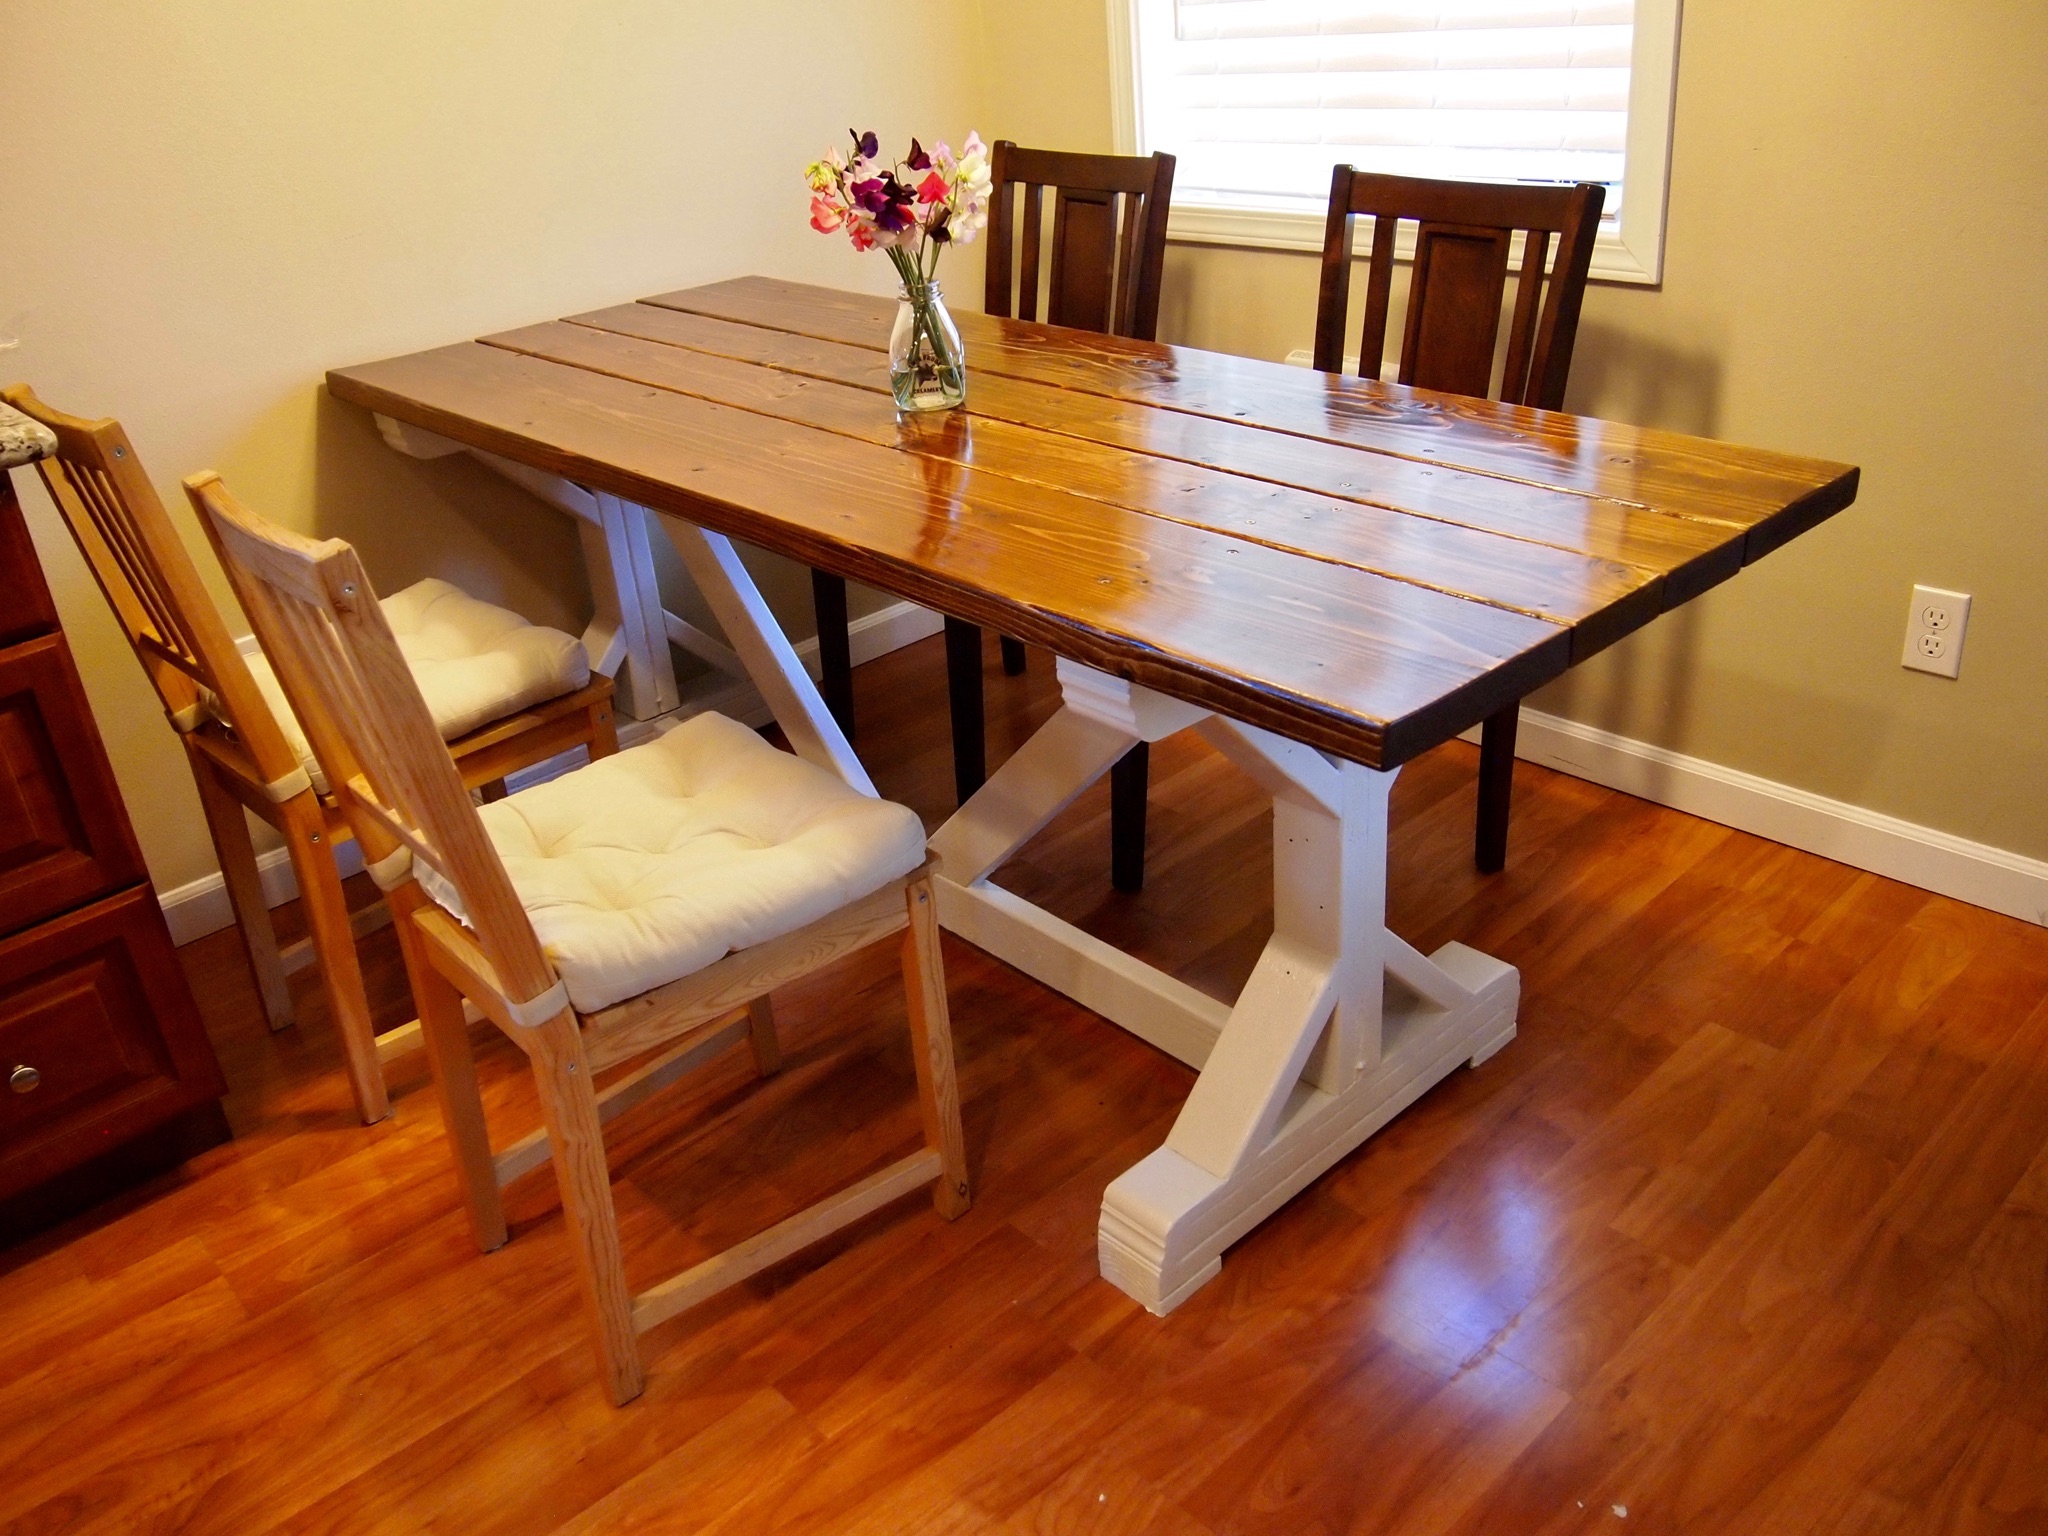
I've very happy with the results of my "Fancy X Farmhouse Table" project. I modified the dimensions to fit our space; this meant making the table thinner and re-sizing the "X's" proportionally. Also, for trimming the edges of the "X's", I came up with a combination of base board pieces at the end of the 2x4's. I hadn't used wood stain in over 20 years because I had gotten such blotchy results. This project reintroduced me to stain and I'm glad it did. Turns out, the secret is proper sanding AND the use of a "pre-stain" product that sets up the wood for good(even) absorption. Polyurethane was used as a sealant, while the base frame got white semi-gloss. Cheers, good luck on all your projects!
-Robert
Bellingham, WA
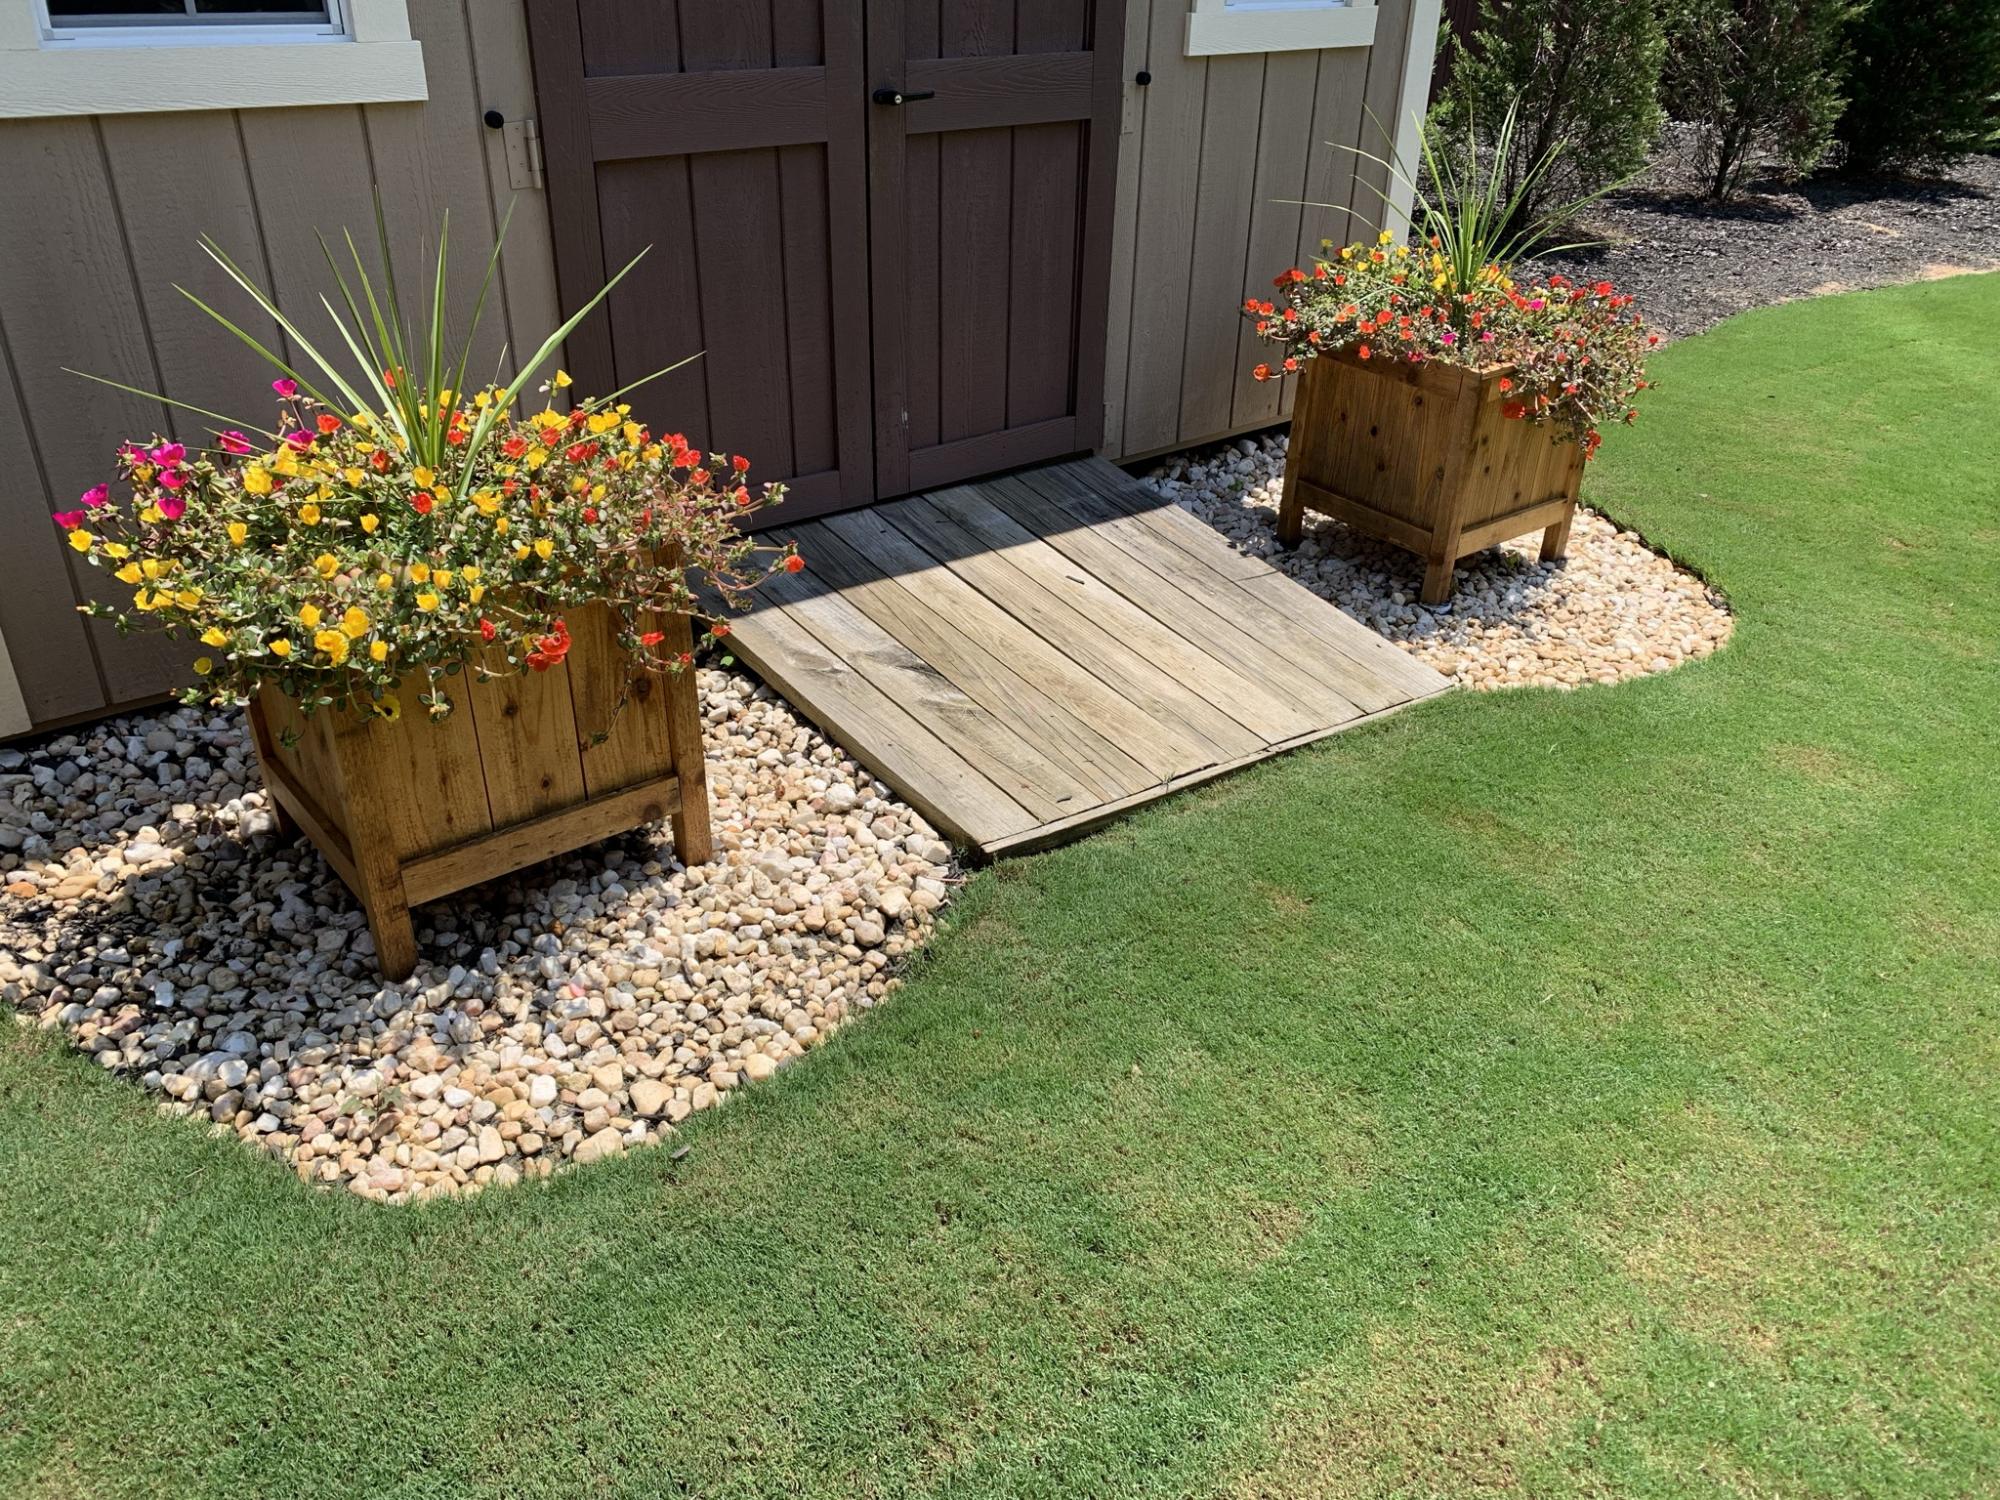
Cedar planter boxes made largely from fence pickets.
Tue, 10/05/2021 - 11:09
Wonderful way to dress up the yard, those look amazing, thank you for sharing!
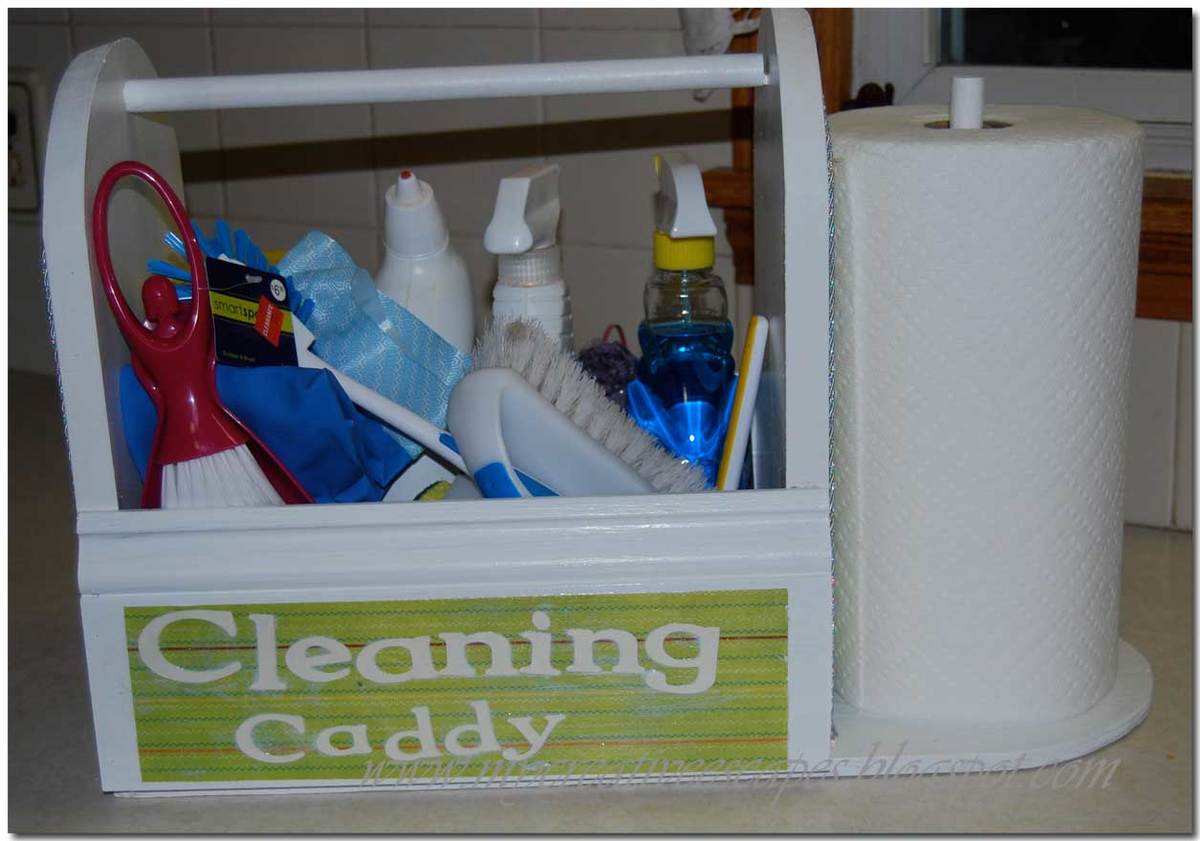
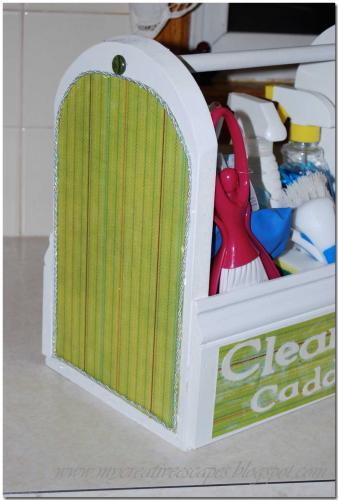
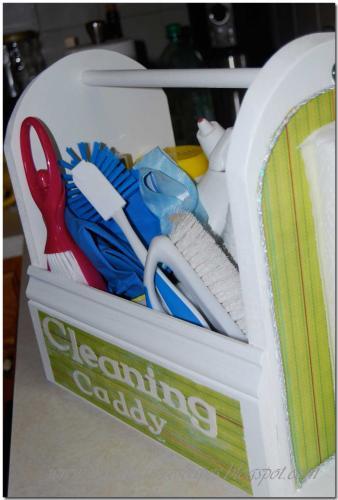
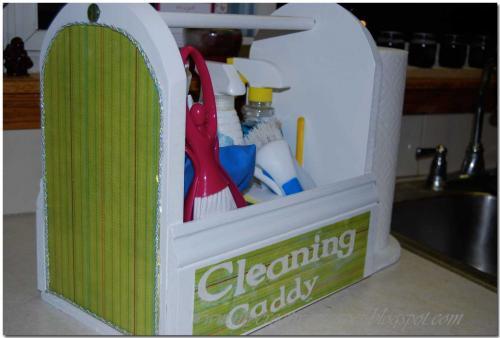
I wanted to build a cleaning caddy. Normally when I go to clean – I want to do it all at once. We have a bigger house – so I’ll be upstairs in the kids room – and realize I left the Windex downstairs – get upstairs – I left the paper towels downstairs….SERIOUSLY. So – hopefully this will stop that from happening!!!
So – here we have my Cleaning Caddy!! It was actually pretty easy to build. I had everything on hand. I had the dowels from another project – so that is how I based everything.
I took two left over pieces of MDF and made a design, cut it out with a Jig Saw. I wanted to make sure it was tall enough for the cleaning bottles.
Then I screwed the dowel to each side of the MDF sides.
I then measure the length I needed for the sides – I used scrap base molding we had laying around – I don’t even know where it came from!
Then came the bottom – I measured out the sides – and then I wanted it long enough to hold a roll of paper towels.
Glued and nailed everything in with the nailer (always use glue too – this thing is kind of heavy with all the cleaning supplies)
I screwed the dowel in from the bottom for the paper towels.
I painted it many times with white trim paint – used many different types of wood so I wanted it to look uniform.
Then for the finishing touches – I went to my abundant scrapbook paper collection – Mod Podged it all up. Love that stuff!!! On the front – I cut out “Cleaning Caddy” with my Cricut. And on the sides I trimmed it out with cording I had on hand, just used hot glue and did about a 6 inch section at a time. I hot glued buttons where my screws were on the outside tops. My counter sink bit was the wrong size, so they stuck out a little. Now it’s a nice decorative element.


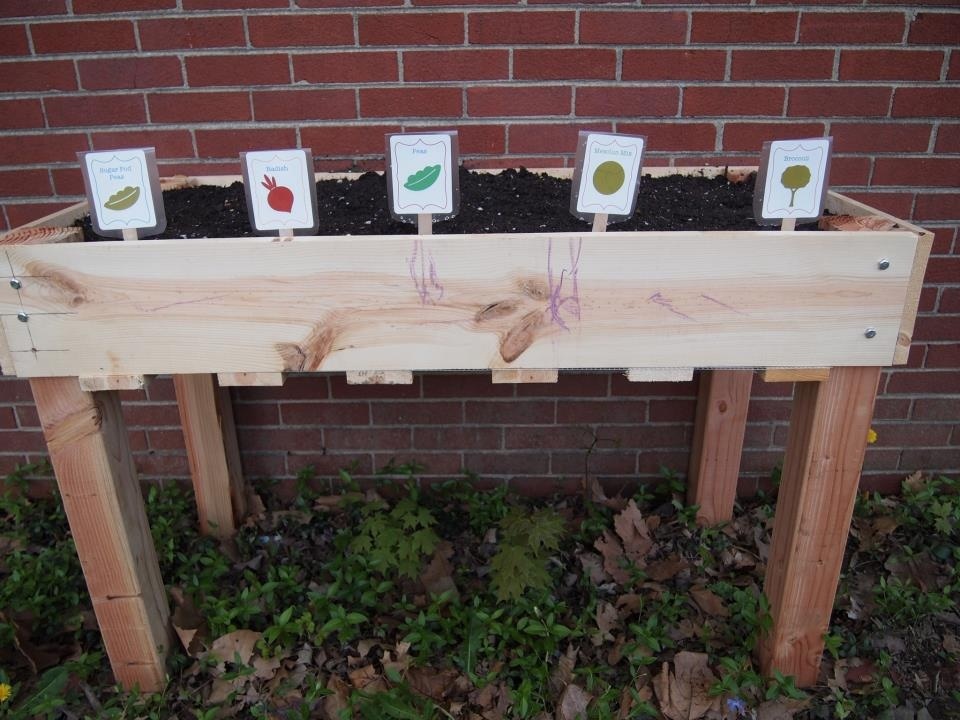
We needed extra garden space this year and I thought adding one of these planters would be a great addition. So far it has. It allows me to easily weed, which is my most despised gardening job. Added bonus that the dog can't dig it up, and bunnies can't nibble on my plants. It also makes a great art canvas for my son's chalk drawings.
Wed, 04/20/2016 - 12:55
Hi I live in north Dakota we get about 10 ft of snow every January, I am planning on making the counter height garden boxes, but how do I keep the snow in winter from crushing them. Patty
Wed, 04/20/2016 - 12:55
Hi I live in north Dakota we get about 10 ft of snow every January, I am planning on making the counter height garden boxes, but how do I keep the snow in winter from crushing them. Patty
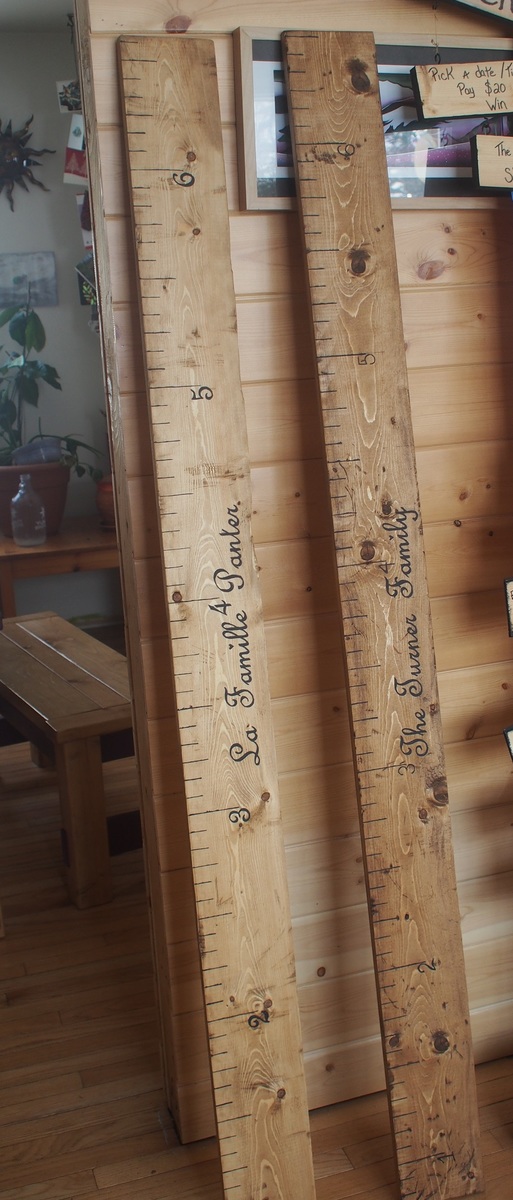
My friends are all having kids these days, and I had a lot of scrap 1x6 kicking around.
After applying a stain on the boards, I printed the letters and numbers as large as I wanted them. I used ''French Script MT'', size of font 185 and I cut them out to make a template.
I happened to have some chalk board paint, which gives it a nice mat color.
I recommend to leave enough space for baseboards, in my case Ive started numbering the charts at 8'' high. A picture hook is set in the back to hang it on the wall, you could also simply screw it on the wall.
Its quick to make and doesnt require a lot of cutting!


Wed, 04/01/2015 - 22:04
very nice :) I think growth charts like these are a wonderful gift!

This was an easy project. It turned out great. I made my own hardware from using the video on Shanty 2 Chic website. That's for posting the plans.
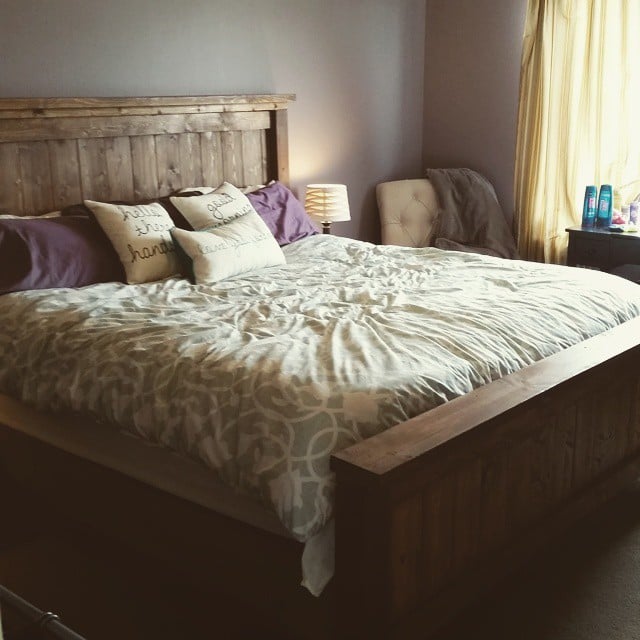
Loved your plans for building a bed frame- easy to follow.
This was my very first project I tackled from Ana's site. I wanted to see if I could do it, so started with something easy. I think it turned out great and looks great in our flower bed in front of our house.