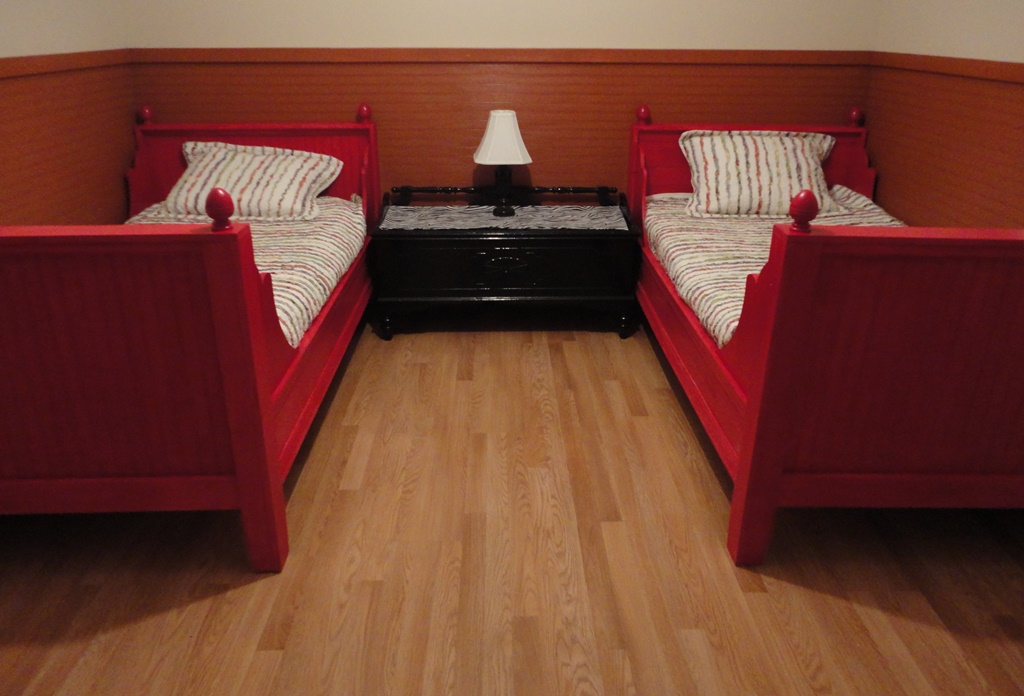
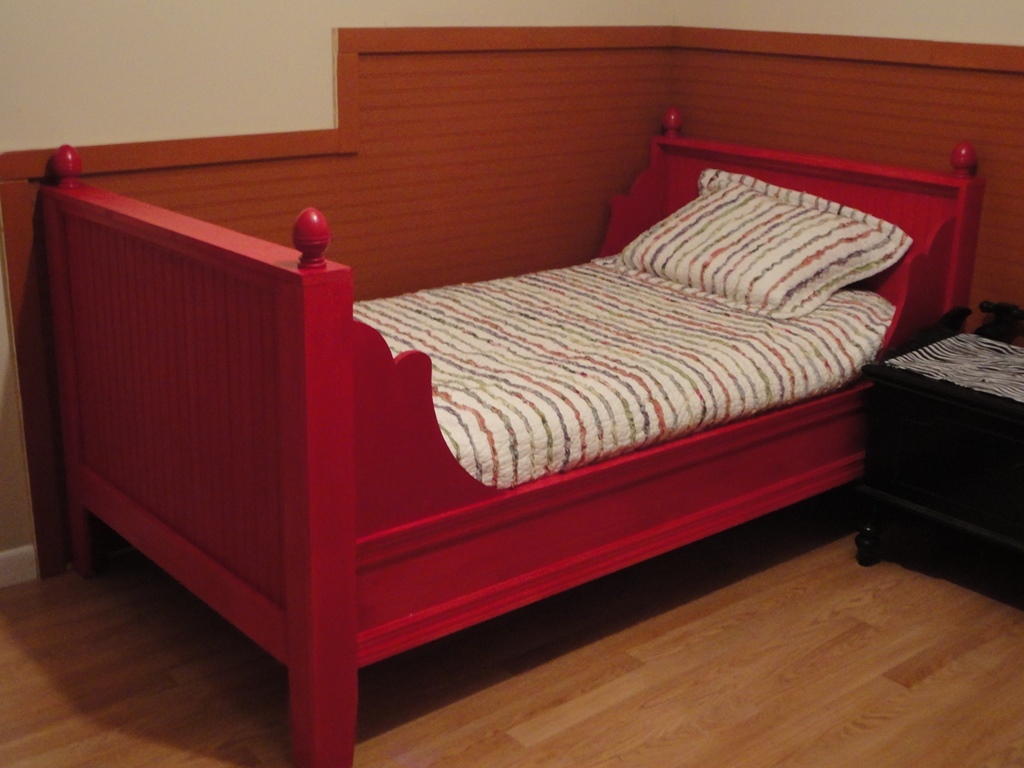
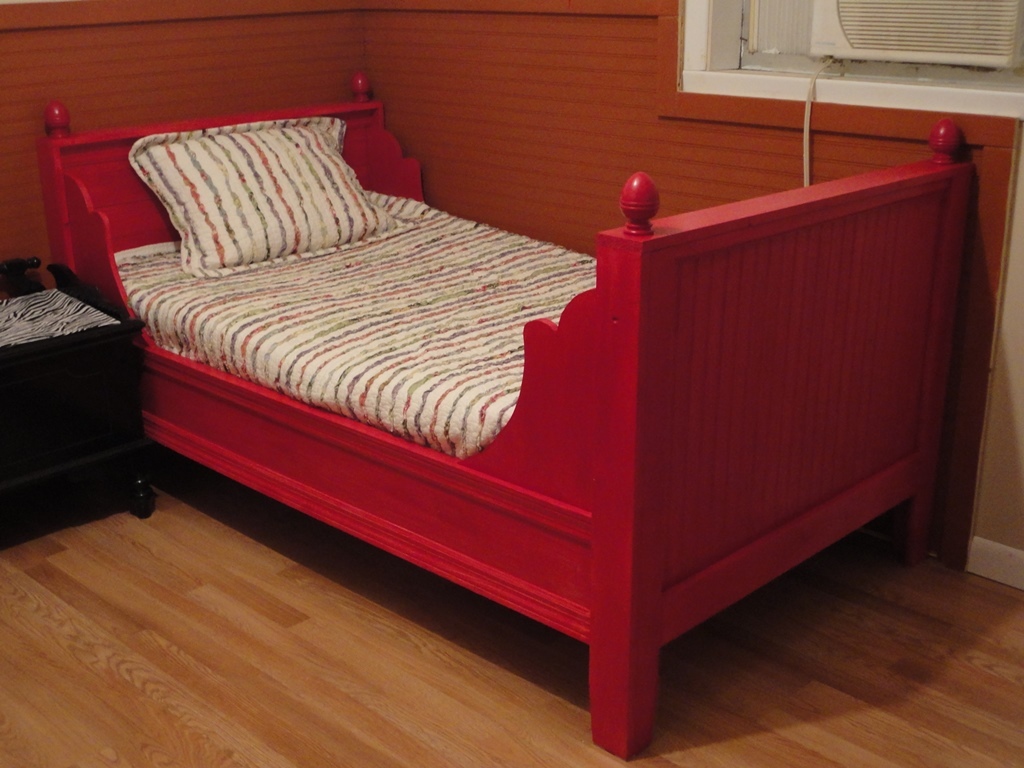
Three story doll house
I built this American girl doll house for my daughter. I wanted to give her something to keep her youth alive!
I designed and built this sectional for some friends, and then wrote a how-to about the process! There are free plans for it, and a time-lapse video of it being built at http://www.iliketomakestuff.com/outdoor-sectional/
My husband has some cherished knick knacks and I am hoping to give our little home a little charm.
The most difficult part of this project was lining up the dowel holes for the shelf.
2-1x6's cut to the length of the window
2-1x6's cut to 6-1/4" for the sides
1-1x6 cut to 4-3/4" for the center support
Fostner (sp?) Bit at 1" for the dowels, I centered them and put them 2" down on each side and the on each side of the center support
Then I sanded, sanded and then sanded some more.. .
I used the 1/2" fostner bit and spaced the holes 3 3/4" apart on center for the rail and the top.
I cut a 1/2" dowel into 2" pcs.
The rail is a 2x2 that I trimmed down on the table saw, it finished out at 7/8"x1-1/16"
Lots of glue, more sanding and it was complete
Added 3 hillman heavy duty hangers to it and hung it over the living room window.
pine jelly cabinet
First time really building anything out of wood. Getting a kreg jig was probably the best decision I made on this project. I made the legs slightly taller (7") for a bit of underbed storage and used a 2x4 brace instead of 2x6, so I could sit the slats down a bit lower but still keep a gap above the legs. The mattress sits 3" below the edge of the bed. I put a few legs under the center support, but they probably weren't necessary for the queen size bed. I spent about $150 for the lumber ($50 just for the bigger slats for my memory foam mattress), and about $50 for the kreg jig jr. and screws. I did not use any glue so I can take it apart later, and so far it seems pretty sturdy with no creaks. Thanks so much for the plan Ana!!! On to a headboard and bedside tables...
Sat, 10/08/2011 - 13:11
This looks awesome for a first timer! Good job and I agree about the Kreg...it is a wonderful investment for any future projects. I have memory foam too so will probably do the same with having wider slats.
Built these two adirondack chairs from pallet wood that I had at home. Made the perfect seating area for my fire pit. Can't wait to enjoy the fall evenings in my $0 chairs!
What I really liked about this plan is its versatility. Relatively easy with pocket hole joinery and inexpensive materials, I used paint to match existing furniture and solid wood tops and drawer fronts to add just a touch of elegance.
We had to change to a slightly different size wood as the sizing of the original plan would have been very expensive in the UK.
We also had to adjust to a different mattress size (90x190cm).
We also had to work around a radiator. We left no gaps on the platform.
Huge hit and very pleased with the result.
Absolutely love this desk. We changed the shelf heights just a bit and made the center ladder more to my height needs. We burned the wood before staining.
My fiance and I built 2 of these chairs. He took one to his house and one is at my house...for now. Picked up 2 cushions at Walmart on Clearance. I sit in it quite often. Great plans!
This is my favorite build so far! My two younger daughters share a room with an inevitable shortage of floor space. What they do have is a fairly large closet for 1 and 3 year old. I removed the crumby sliding doors and filled the bottom third of the space with the dresser, leaving plenty of room for kids clothes to hang above. I combined two separate plans and adjusted the measurements to fit the space. What I ended up with is a monstrous 6 drawer dresser that I would never have room for in the bedroom otherwise. The drawers are enormous (a must for a house with three little girls. They have more clothes than their mother and father combined).
I took the frame concept from the Shanty2Chic rustic rolling dresser and the drawer concept from the Madison dresser from Old Paint Design. (Thanks Ladies!) It took me some significant math adjustments (I'm not a math guy) in order to alter the drawers for wood slides, alter the frame to fit that, and alter both to fit the 70 3/4" x 24" space.
The finish took the most time with a bizarre mixing of Rustoleum Dark Walnut and Rustoleum Classic Cherry. I love the color now. Clearly I have not fixed the wall paint yet :)
The wood is big box pine as I am still working up the confidence to work with more expensive wood. The top is 1x12's and 1x2's. The sides (hidden) are 3/4" plywood. The hardware is from Lowes.
My daughters were nice enough to decorate the dresser during the build with crayon requiring a 40 grit sanding Grrrr.
Sat, 09/21/2013 - 09:53
Thank you so much... I have instantly fallen in love with building.
Sun, 09/22/2013 - 12:40
Built-in closet dresser - genius! I am already thinking about how I can make this work for my daughter's room. Looks great, too. Good job!
In reply to This is a great idea! by JW
Sun, 09/22/2013 - 14:09
Thank you. We have a fairly small house and every little bit of space helps. This site has been incredibly inspirational for that especially.
Loved building this table. This was my first time building anything! I have a lot to learn but I think it turned out great!
We took the original plans and made them work for our 5’6” x 11’ closet. We added a ft to the top because we have tall ceilings. We made 5 towers to create a u shape with shelving on the top. I also left one small bar long to hang dresses and the rest we double hung. We adjusted cubbies and drawers based on where we needed them. We were able to save by using old drawer slides from a falling apart ikea dresser. (We cut them down with a grinder). We had an overflowing closet mess and now we have a beautiful closet. I wish the directions had a little bit more detail like average clothes hanging heights and bar distance from the wall. There was also no link to the suggested drawers or cubbies but we found them with a simple search.
Easy build, turned out great. Our first project like this. We built 4!
My take on the farmhouse bedside table. I found it difficult to get this square, and I think it suffers because of that. Also, I found that the drawer is much harder than I thought it would be; with that being said, it looks great and is sturdy; I enjoyed the challenge of this project.
Sat, 09/03/2011 - 10:01
Turned out just gorgeous! Really rich, deep wood finish!
Sun, 09/04/2011 - 10:36
Thanks :) It was harder to put to together than I thought it would be!
We just moved to Texas three weeks ago and really needed some poolside furniture to help us enjoy the last bit of summer. We immediately jumped into Ana's projects. It took us about two weeks on-and-off, probably entire project completed in about six days (two days for each piece of furniture). We caught a sale at Lowe's and BBB and finished the project with the cushions and umbrella respectively. Now we can start enjoying the pool to its fullest!
As the days have gotten shorter and the nights have grown colder I’ve found myself breaking out the winter coats and boots. The problem is, I didn’t have any place to store my coats or shoes. My house doesn’t have a coat closet. And in the past I’ve had a problem with scarves, shoes and winter gear clogging my front entryway. So I set out to come up with a solution. I needed inspiration. I needed guidance. My entry closet needed to be aesthetically pleasing because it would be near the front door and visible from the great room. So I went to Pinterest to search for a solution. I found these plans for an Industrial Style Wood Slat Closet System with Galvanized Pipes by Ana White.
I began the project by ripping 6” strips of sanded pine plywood. I attached those to the walls using brad nails and wood glue. Filled the holes with glaziers putty and sanded lightly once dry. Primed and painted to finish.
I then had a local mill rough cut the lumber for the shelves. I stripped the bark (except one which I loved so I left it on) and sanded at 120, 180 and 220. I drilled 1 1/4” holes to fit the pipe through and finished the wood with 4 coats of Varathane Diamond Finish clear coat.
I used Varsol and some elbow grease to remove the black coating on all the gas pipe.
Finally i pieced it all together!
For my first 'Ana White' project I built two Lydia daybeds for the guest room. I added beadboard for a cozy feel. I LOVE them and so does everyone else.
Thank you Ana, for these easy to follow plans. I have discovered a wonderful new interest and I BUILT THEM ALL BY MYSELF!
This took about 7 hours over the week after work.
Comments
Ana White
Sun, 01/06/2019 - 16:43
What an amazing Christmas
What an amazing Christmas gift! Super dad! Thanks so much for sharing a photo and building! Ana
Tessa2009
Sun, 01/06/2019 - 21:46
Thanks Ana! This is her momma
Thanks Ana! This is her momma that built it for her. I wanted to tackle something on my own and challenge myself. Your plans were amazing to work with. Thanks for taking the time to make these plans so easy to understand and follow. She is very happy with the doll house! Happy New Year! -Abbey