Community Brag Posts
Ladder Back Chair
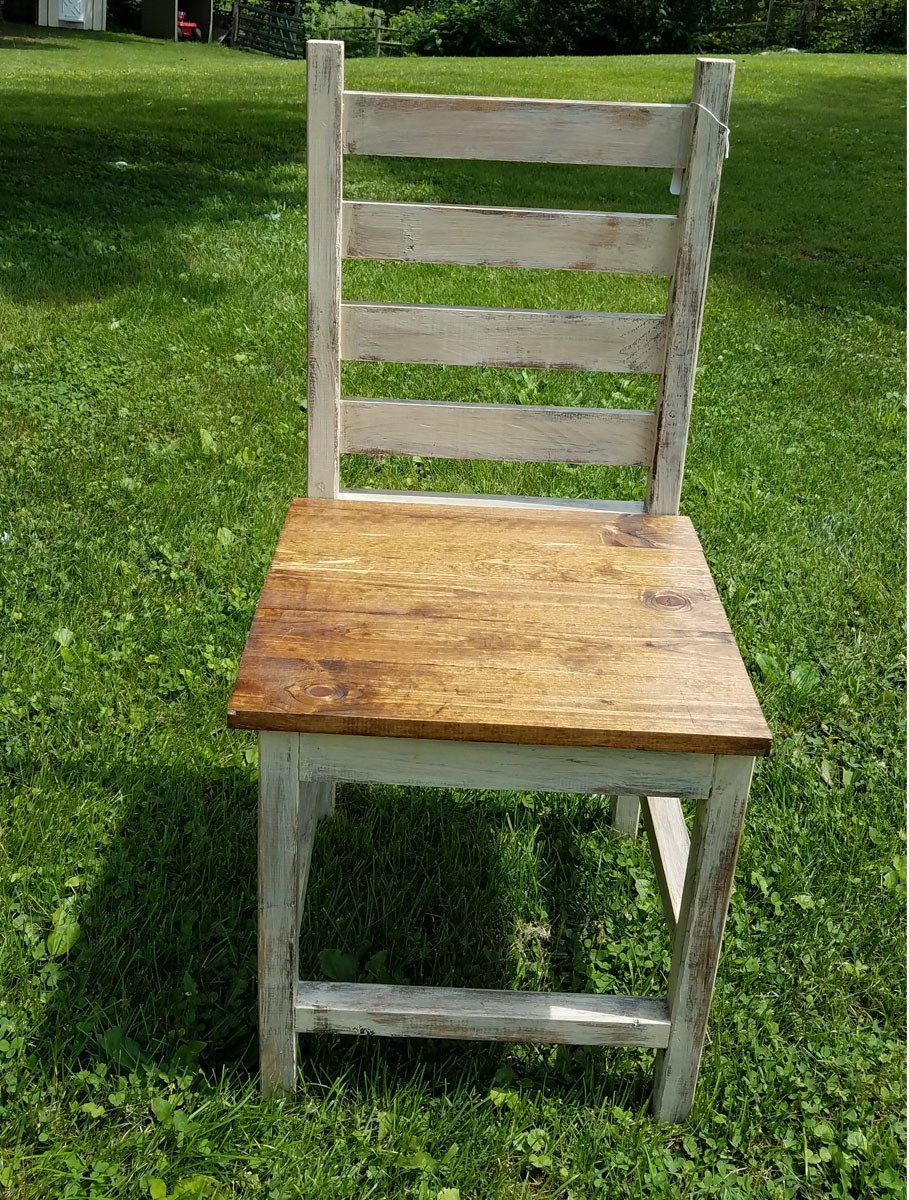
I adjusted the plans to make this a chair that would fit under a regular table. The front legs are 19" and the back legs are 40". Then I followed the plans as written.
Built from Plan(s)
Estimated Time Investment
Weekend Project (10-20 Hours)
Finish Used
Stained chair with Mini Wax Wood Finish Stain in Provincial #211. Then dry painted Americana Decor Chalky Finish in Timeless. After paint dried I rubbed Steel Wool over the whole chair to give a distressed look. I applied a coat of Mini Wax Polyurethane Clear Satin to finish.
Recommended Skill Level
Intermediate
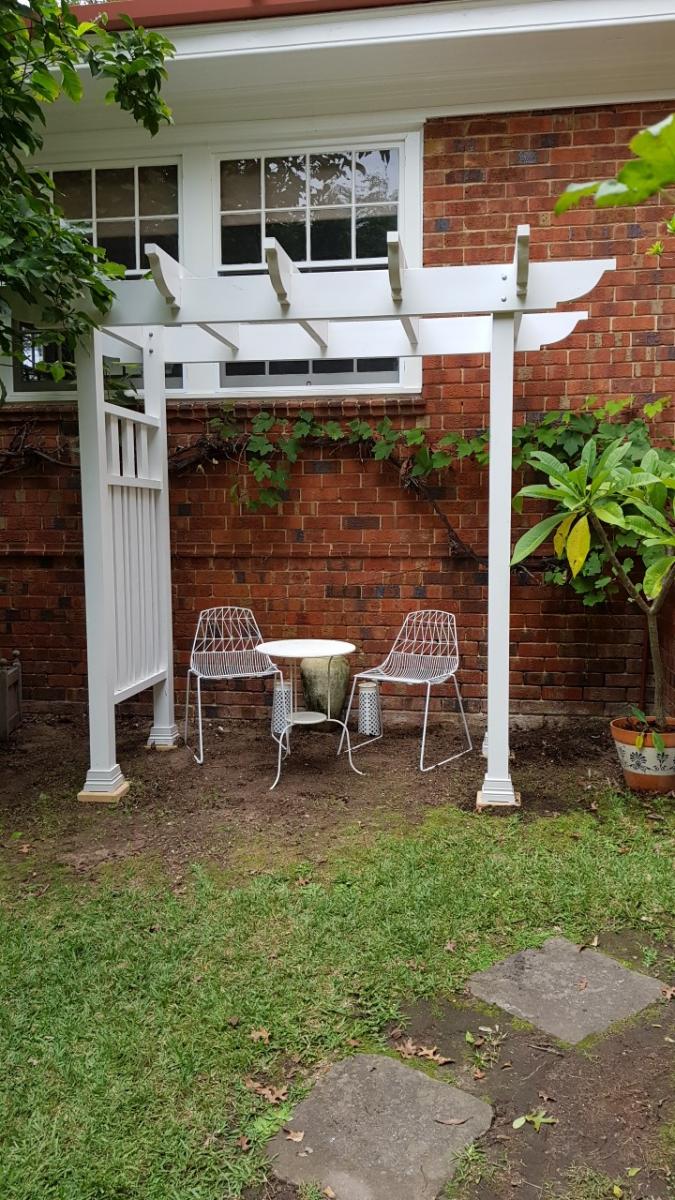
Wedding Arbour
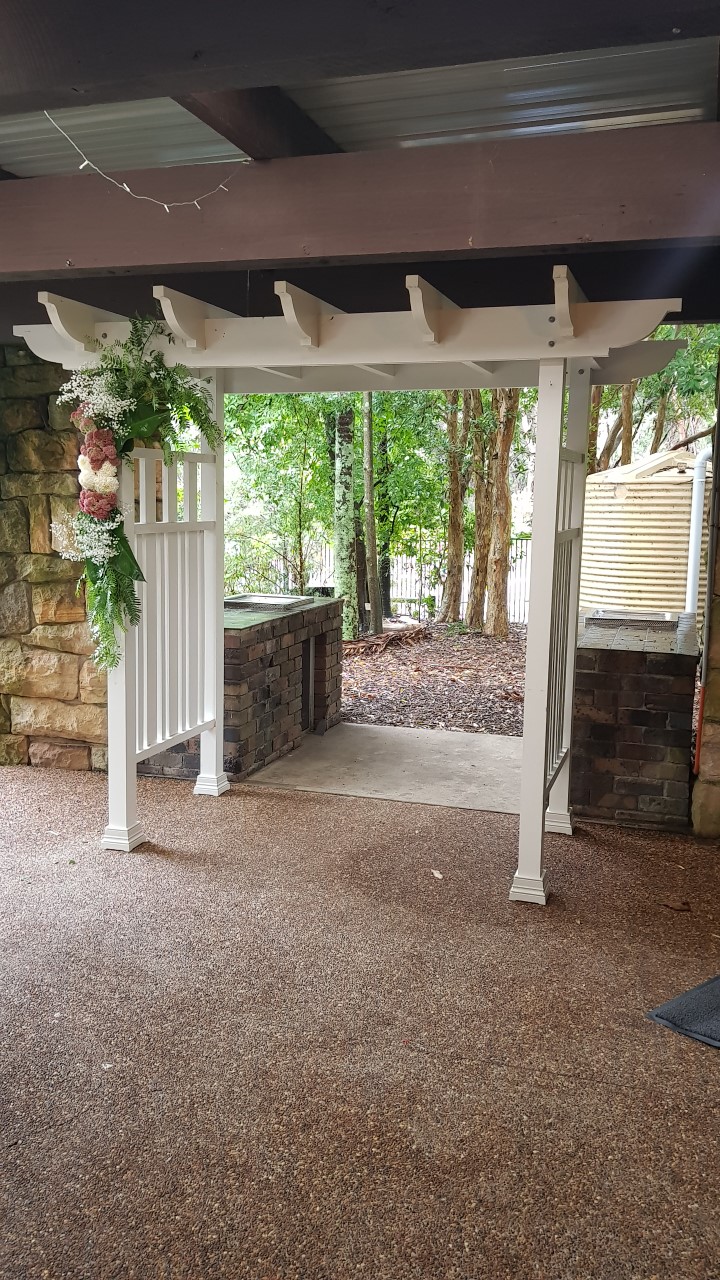
Hi, I built this wedding Arbour for my daughters wedding a while ago and unfortunately, I have no plans as I built from my head. It now sits in pride of place within thier garden as arch for thier garden.
I built this with a drop saw, hand saw, router, drill and hammer only.
I follow Ana's plans every release and save her plans for when I retire in two years to build for our house as well as try to run a small business from my shed.
Thank you Ana for you continued plans and wonderful advice.

Built from Plan(s)
Comments
Tue, 10/05/2021 - 10:40
Loving tribute!
WOW, such a sweet gift and reminder of their special day! Thanks for sharing:)
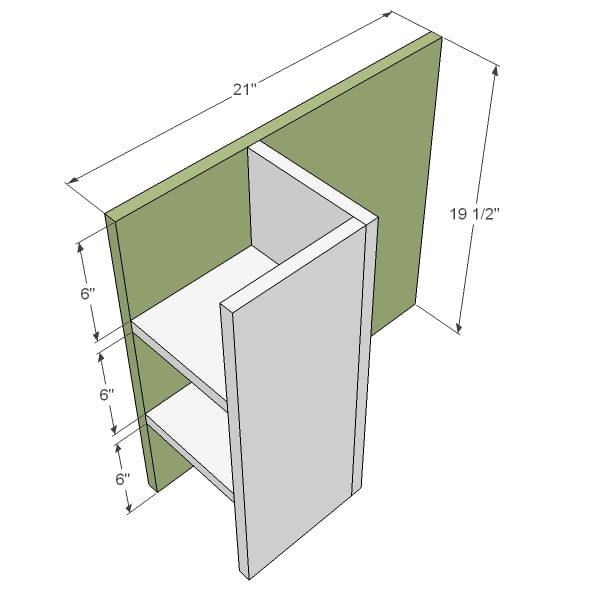
Rolling Laundry Cart
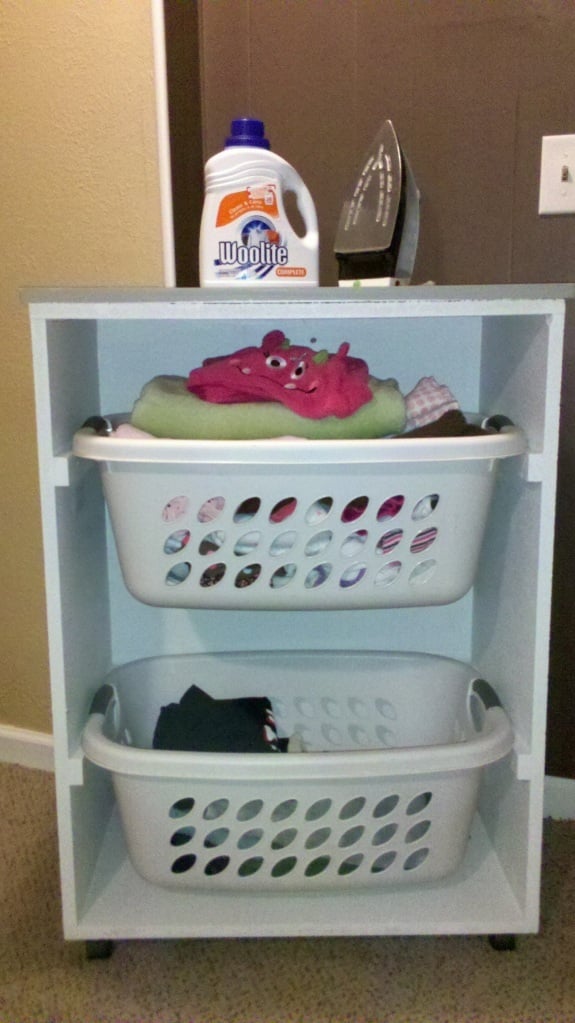
I built this entire project out of the scraps from the closet organizer and a 1×2 that I had. You could use the metal brackets Ana suggests, but the 1x2s are working great for me. The wheels are from an old rolling Target TV stand.
We used two tracks, instead of three, because I do huge loads of laundry in my front loaders. If you want to do the closet organize and this, do the closet first.This will be a free project. That's right, $0 out of pocket! Oh, and the top is scrap wood, just glued, and screwed (counter sunk).It made for a more finished “island” look. This step is completely optional. It's just for looks. I would love to add a towel bar to the side of this and a bracket to hold my iron too. The mini ironing board does fit on top!
Built from Plan(s)
Estimated Cost
$0 - Free after closet organizer!
Estimated Time Investment
An Hour or Two (0-2 Hours)
Finish Used
White Olympic paint on the sides and then early grey paint, diluted with white for the top boards.
Recommended Skill Level
Starter Project
Carrots and Lettuce Raised Beds

I made these for my Mother's Day present to myself. I painted them the color of Carrots and Lettuce. Working on the third one titled "tomatoes today." Easy to build, fun and quick....
Built from Plan(s)
Estimated Time Investment
An Hour or Two (0-2 Hours)
Finish Used
Lowes Orange and Lime Green Paint.
Recommended Skill Level
Starter Project
Comments
Sun, 05/19/2013 - 18:38
Love the colors! What a good
Love the colors! What a good idea! They look wonderful!
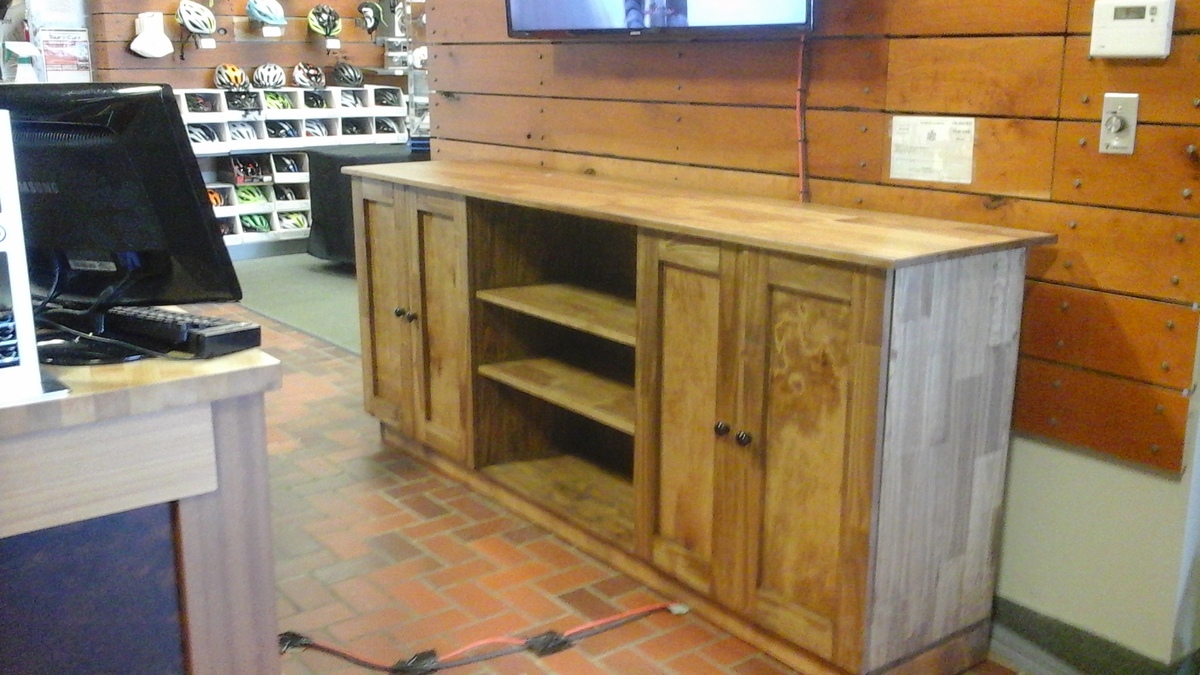
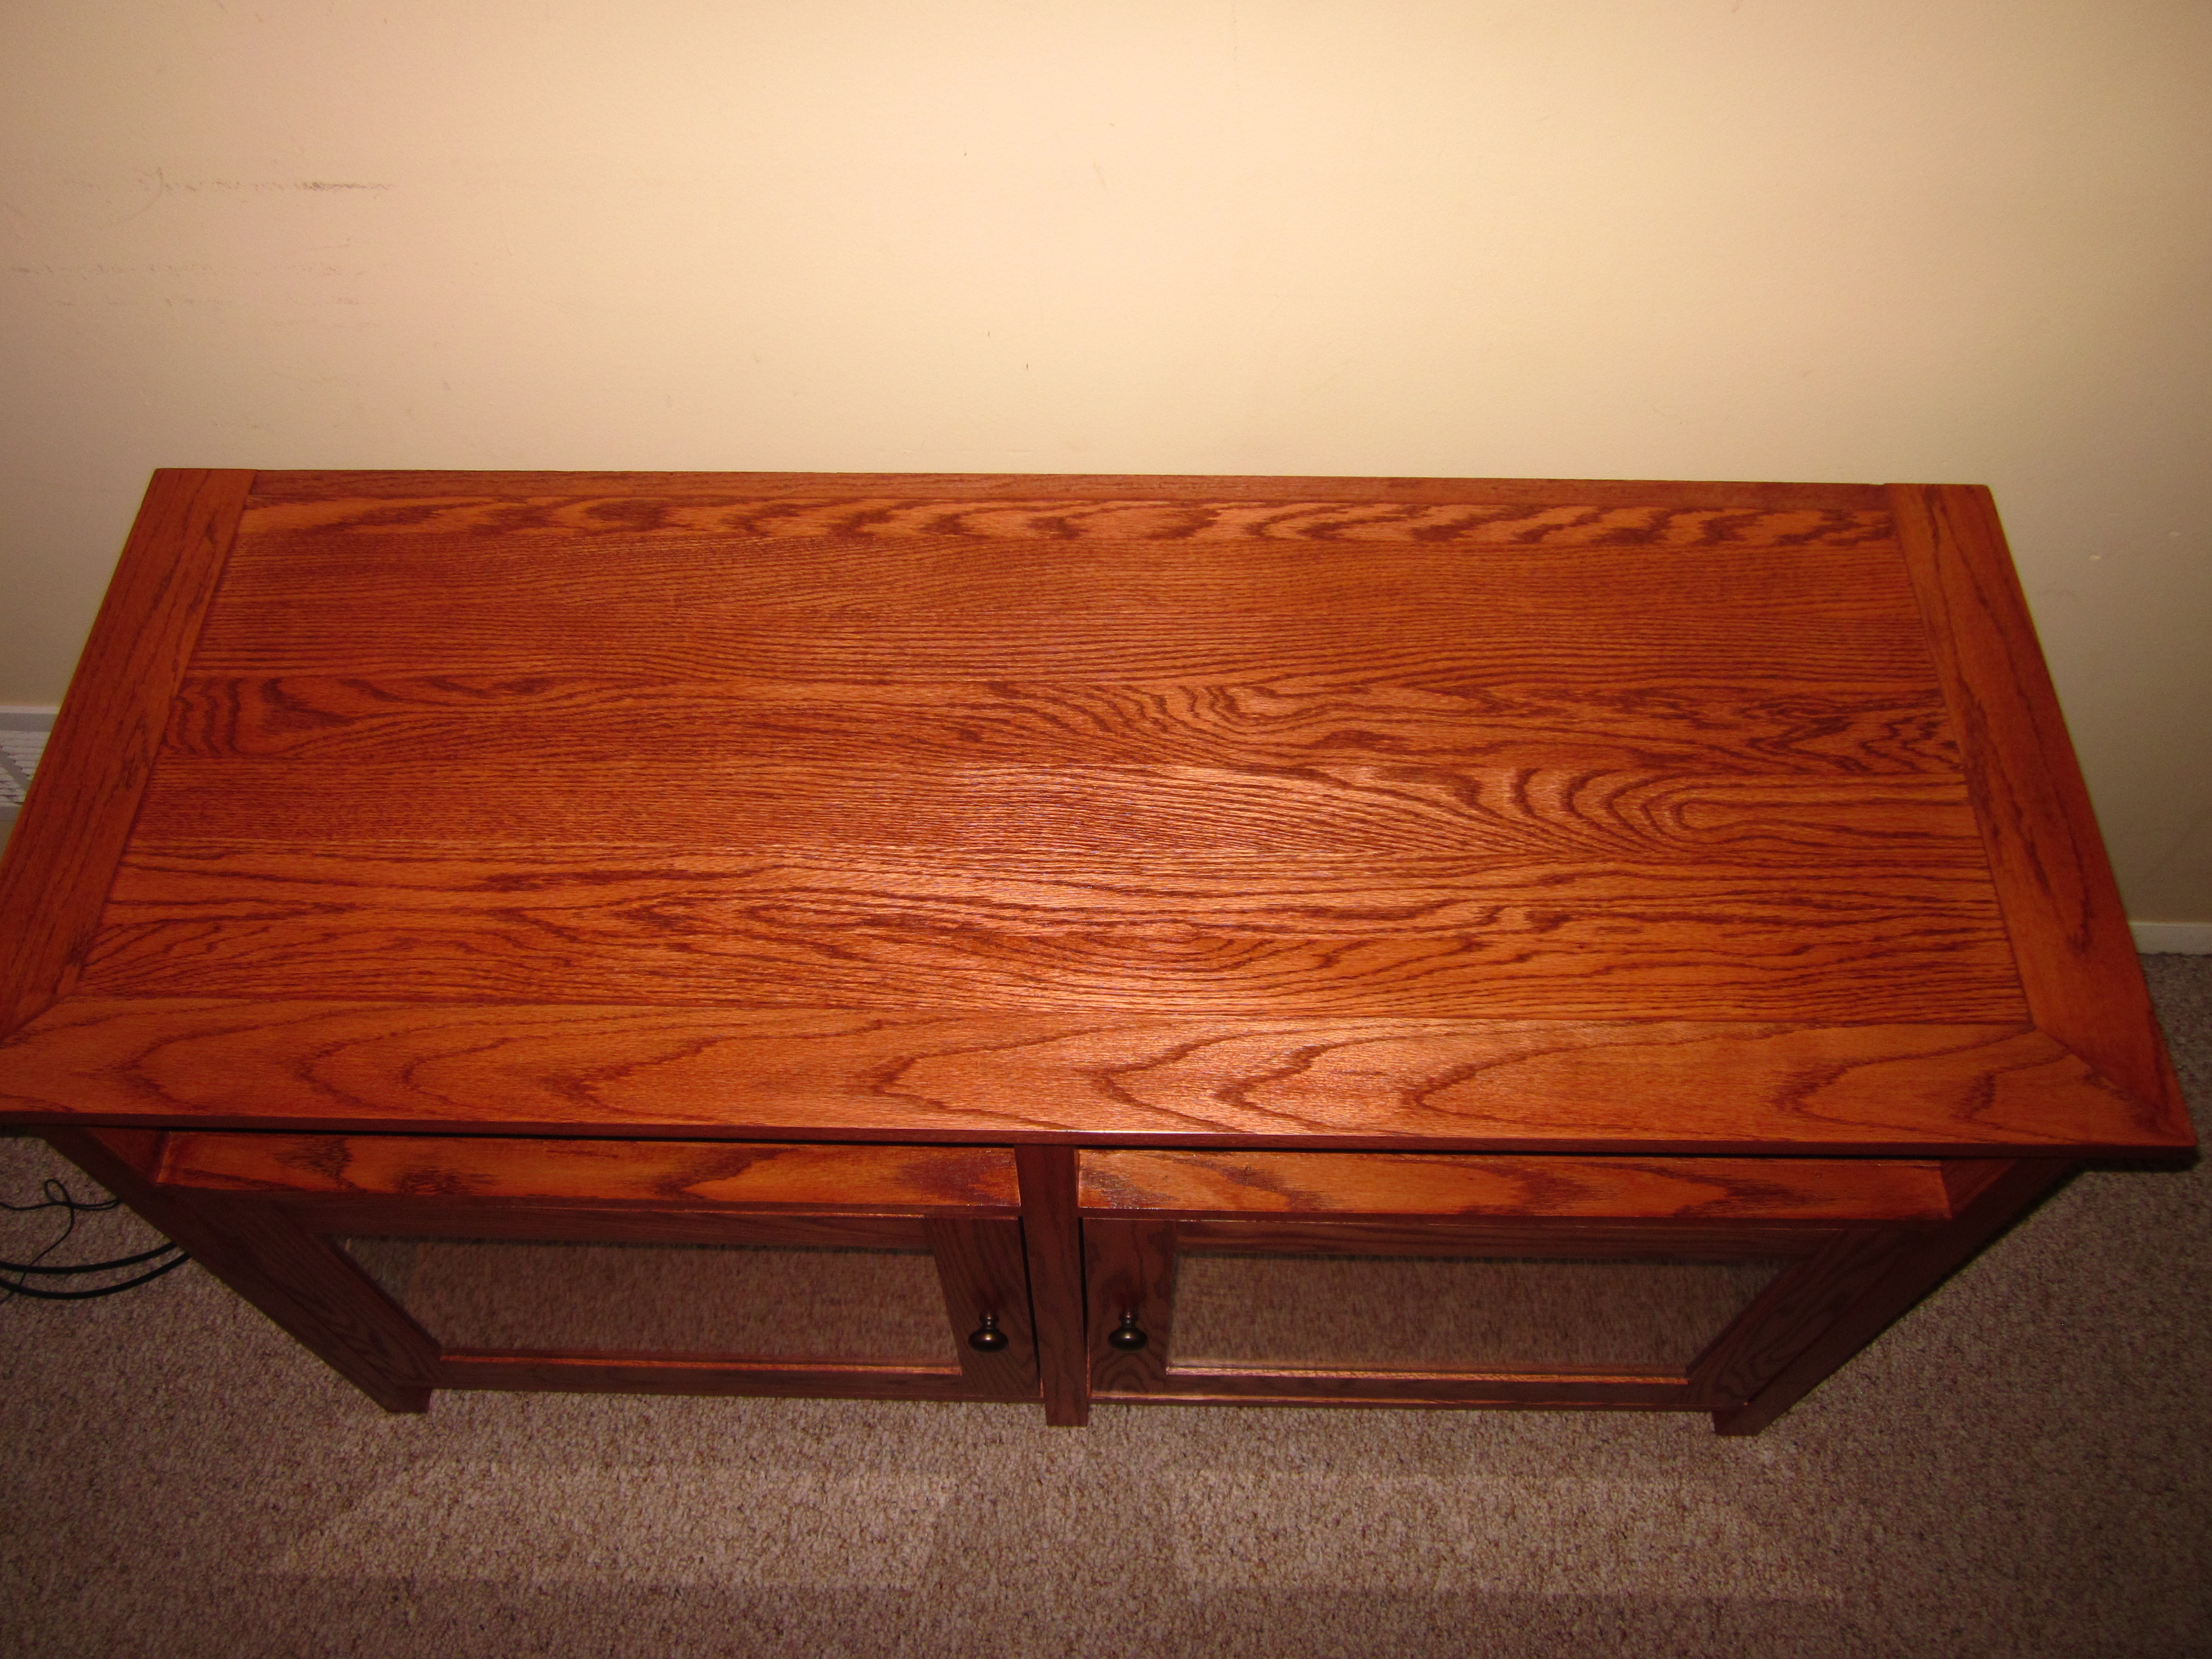
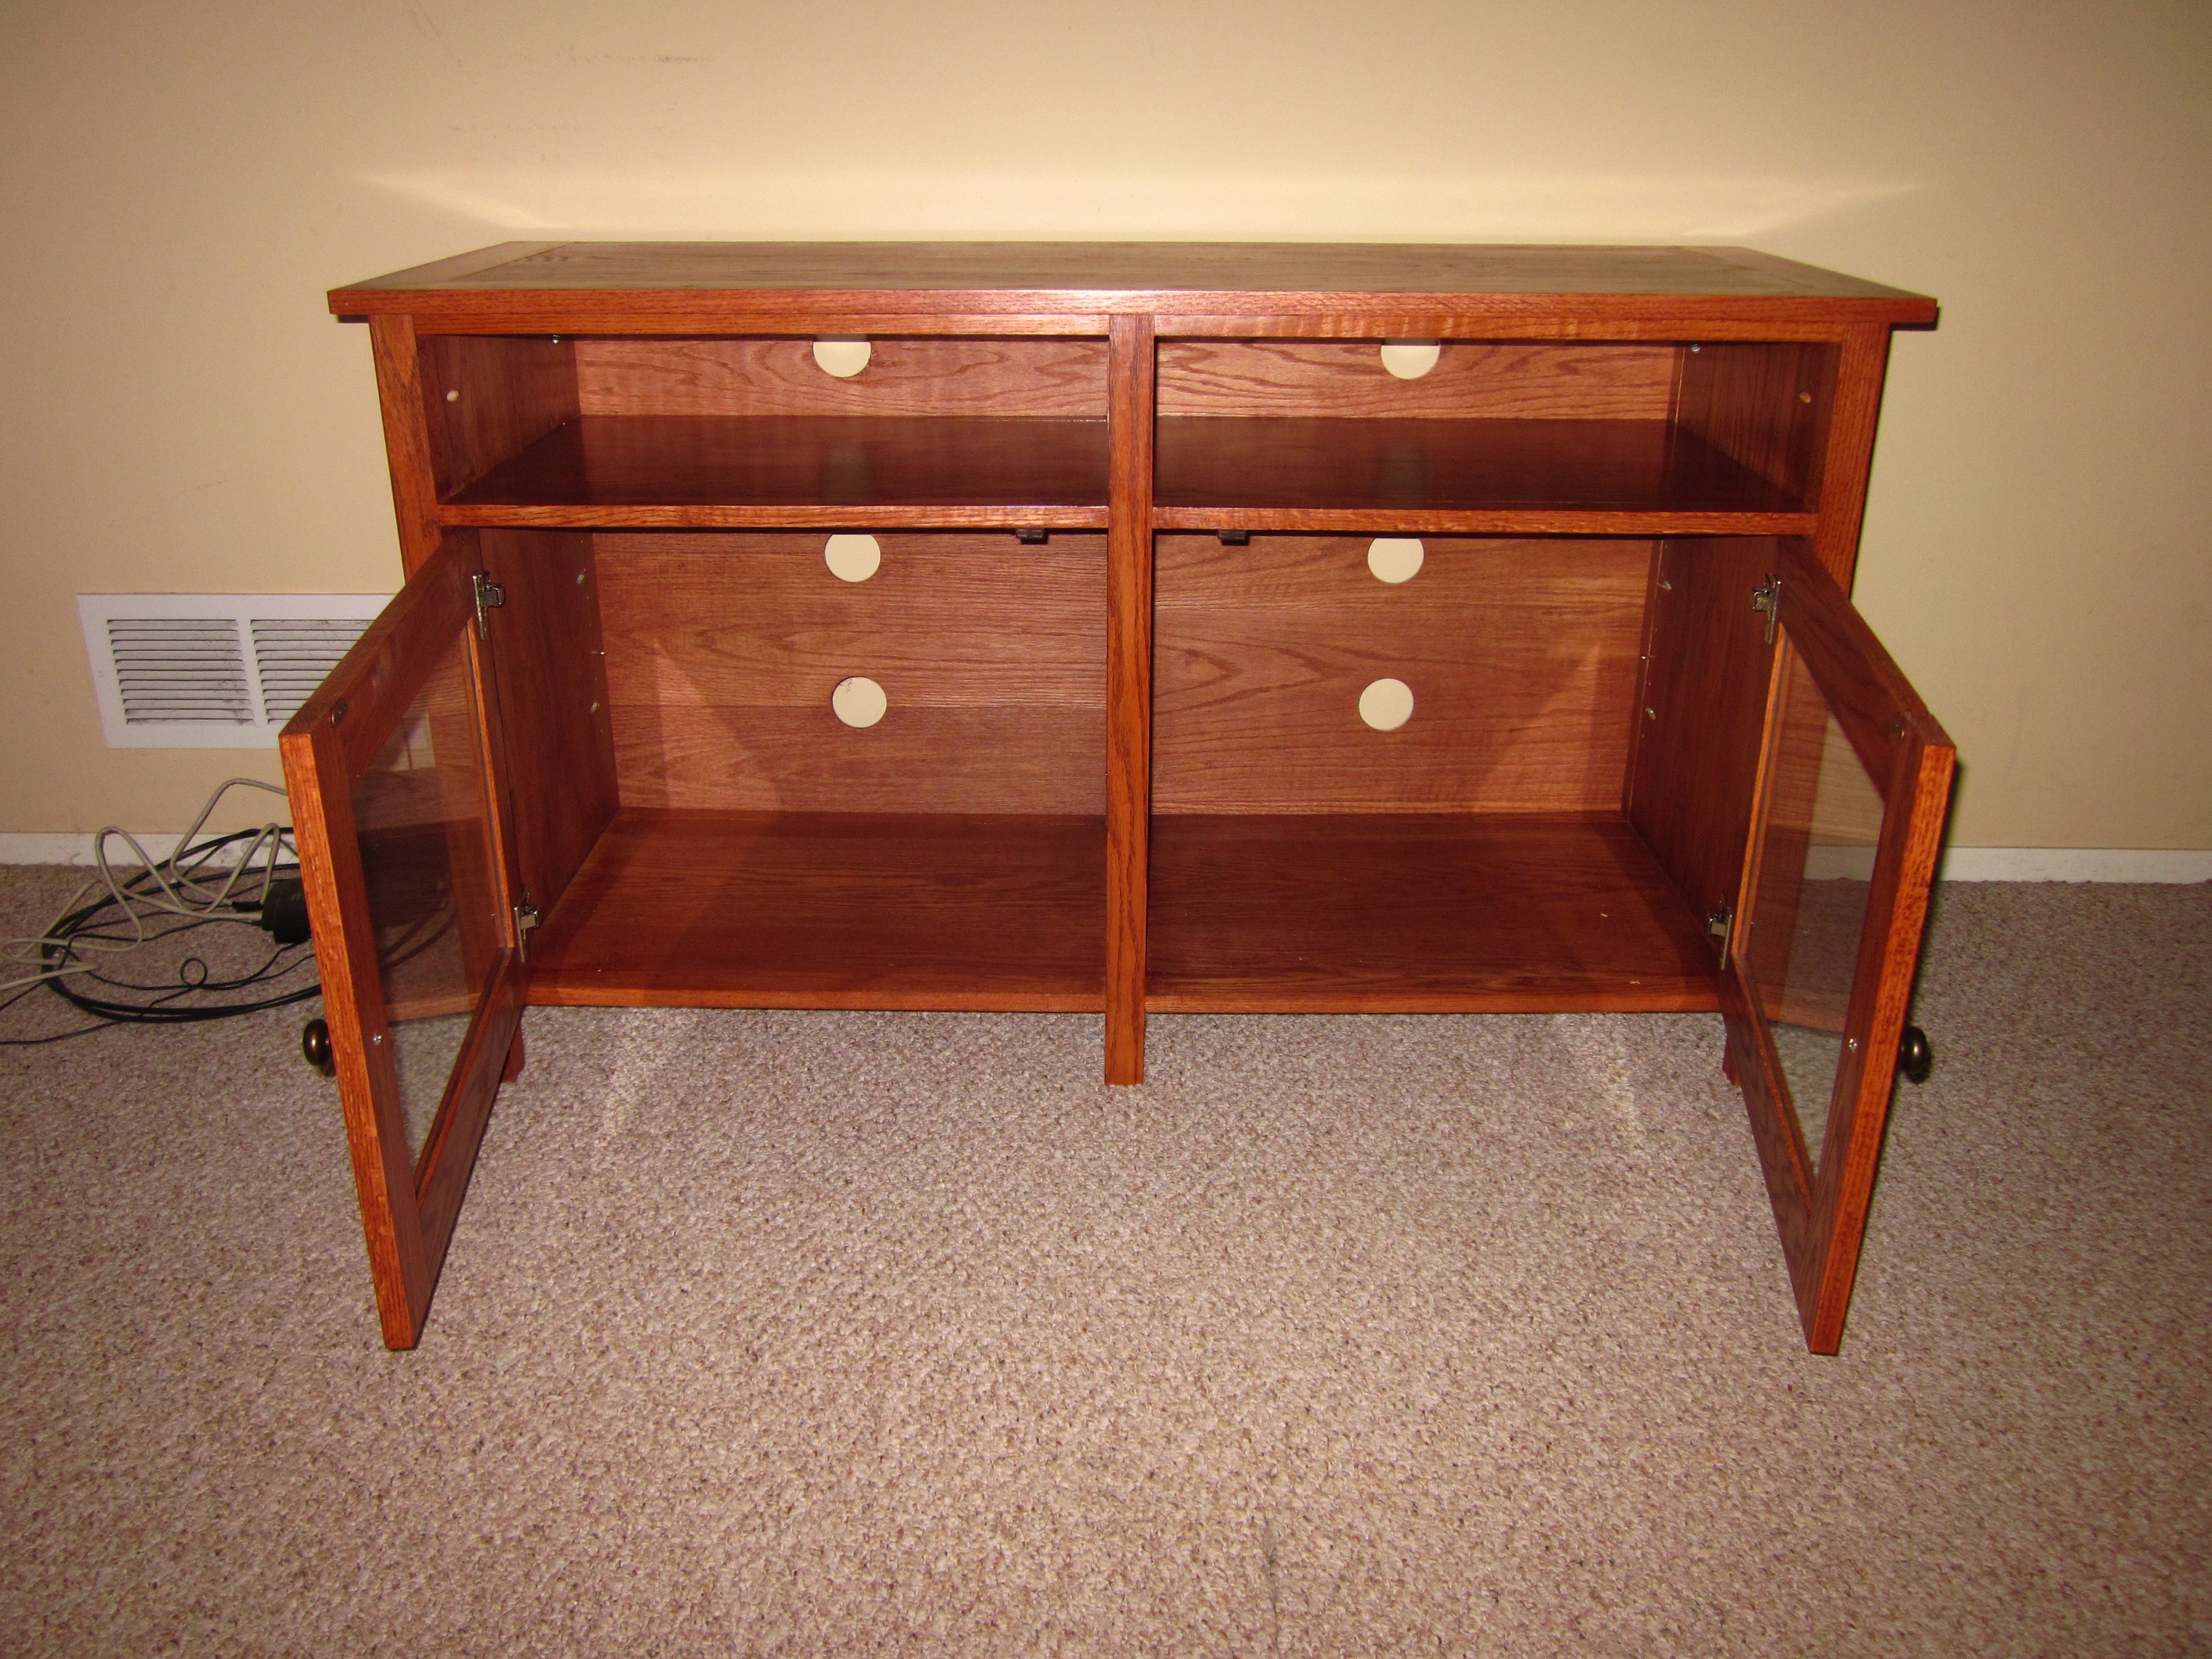
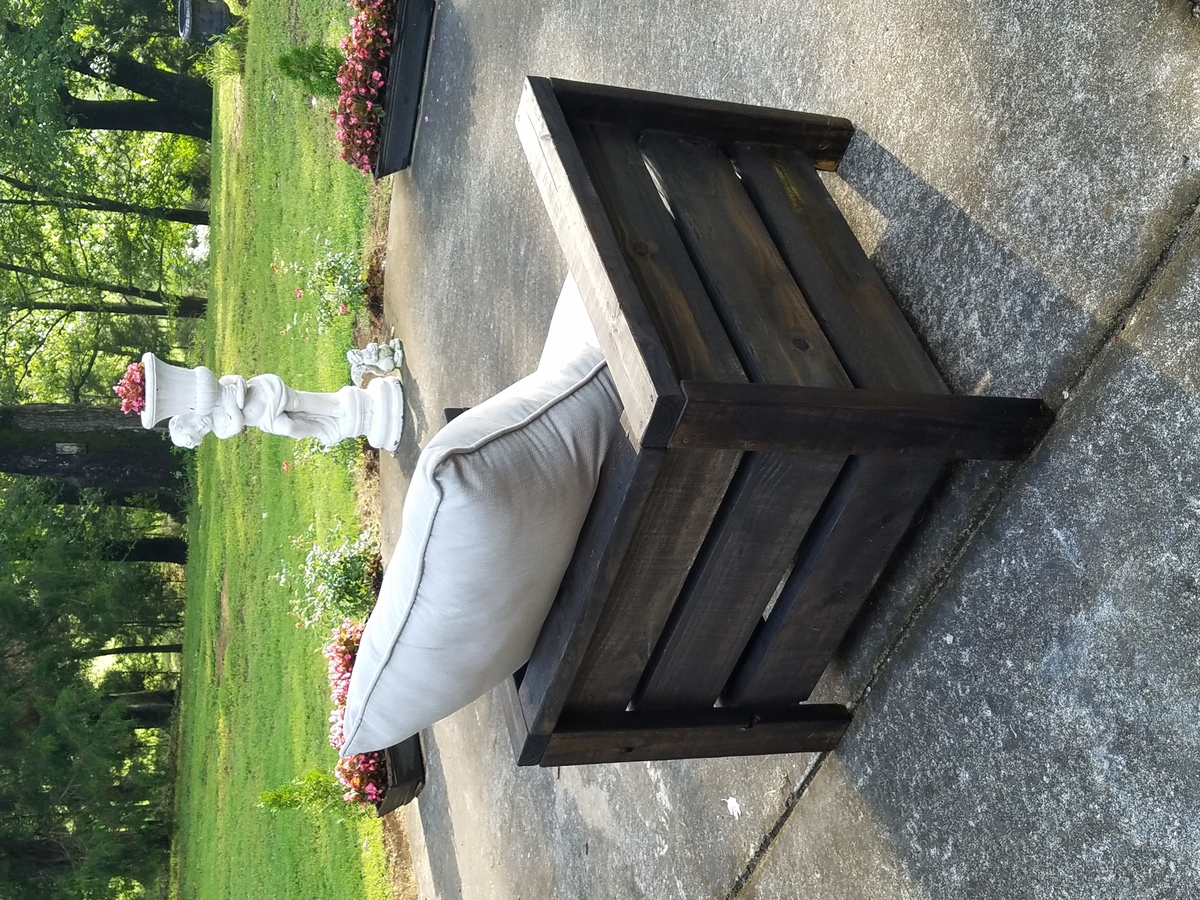
My 3rd build off this site
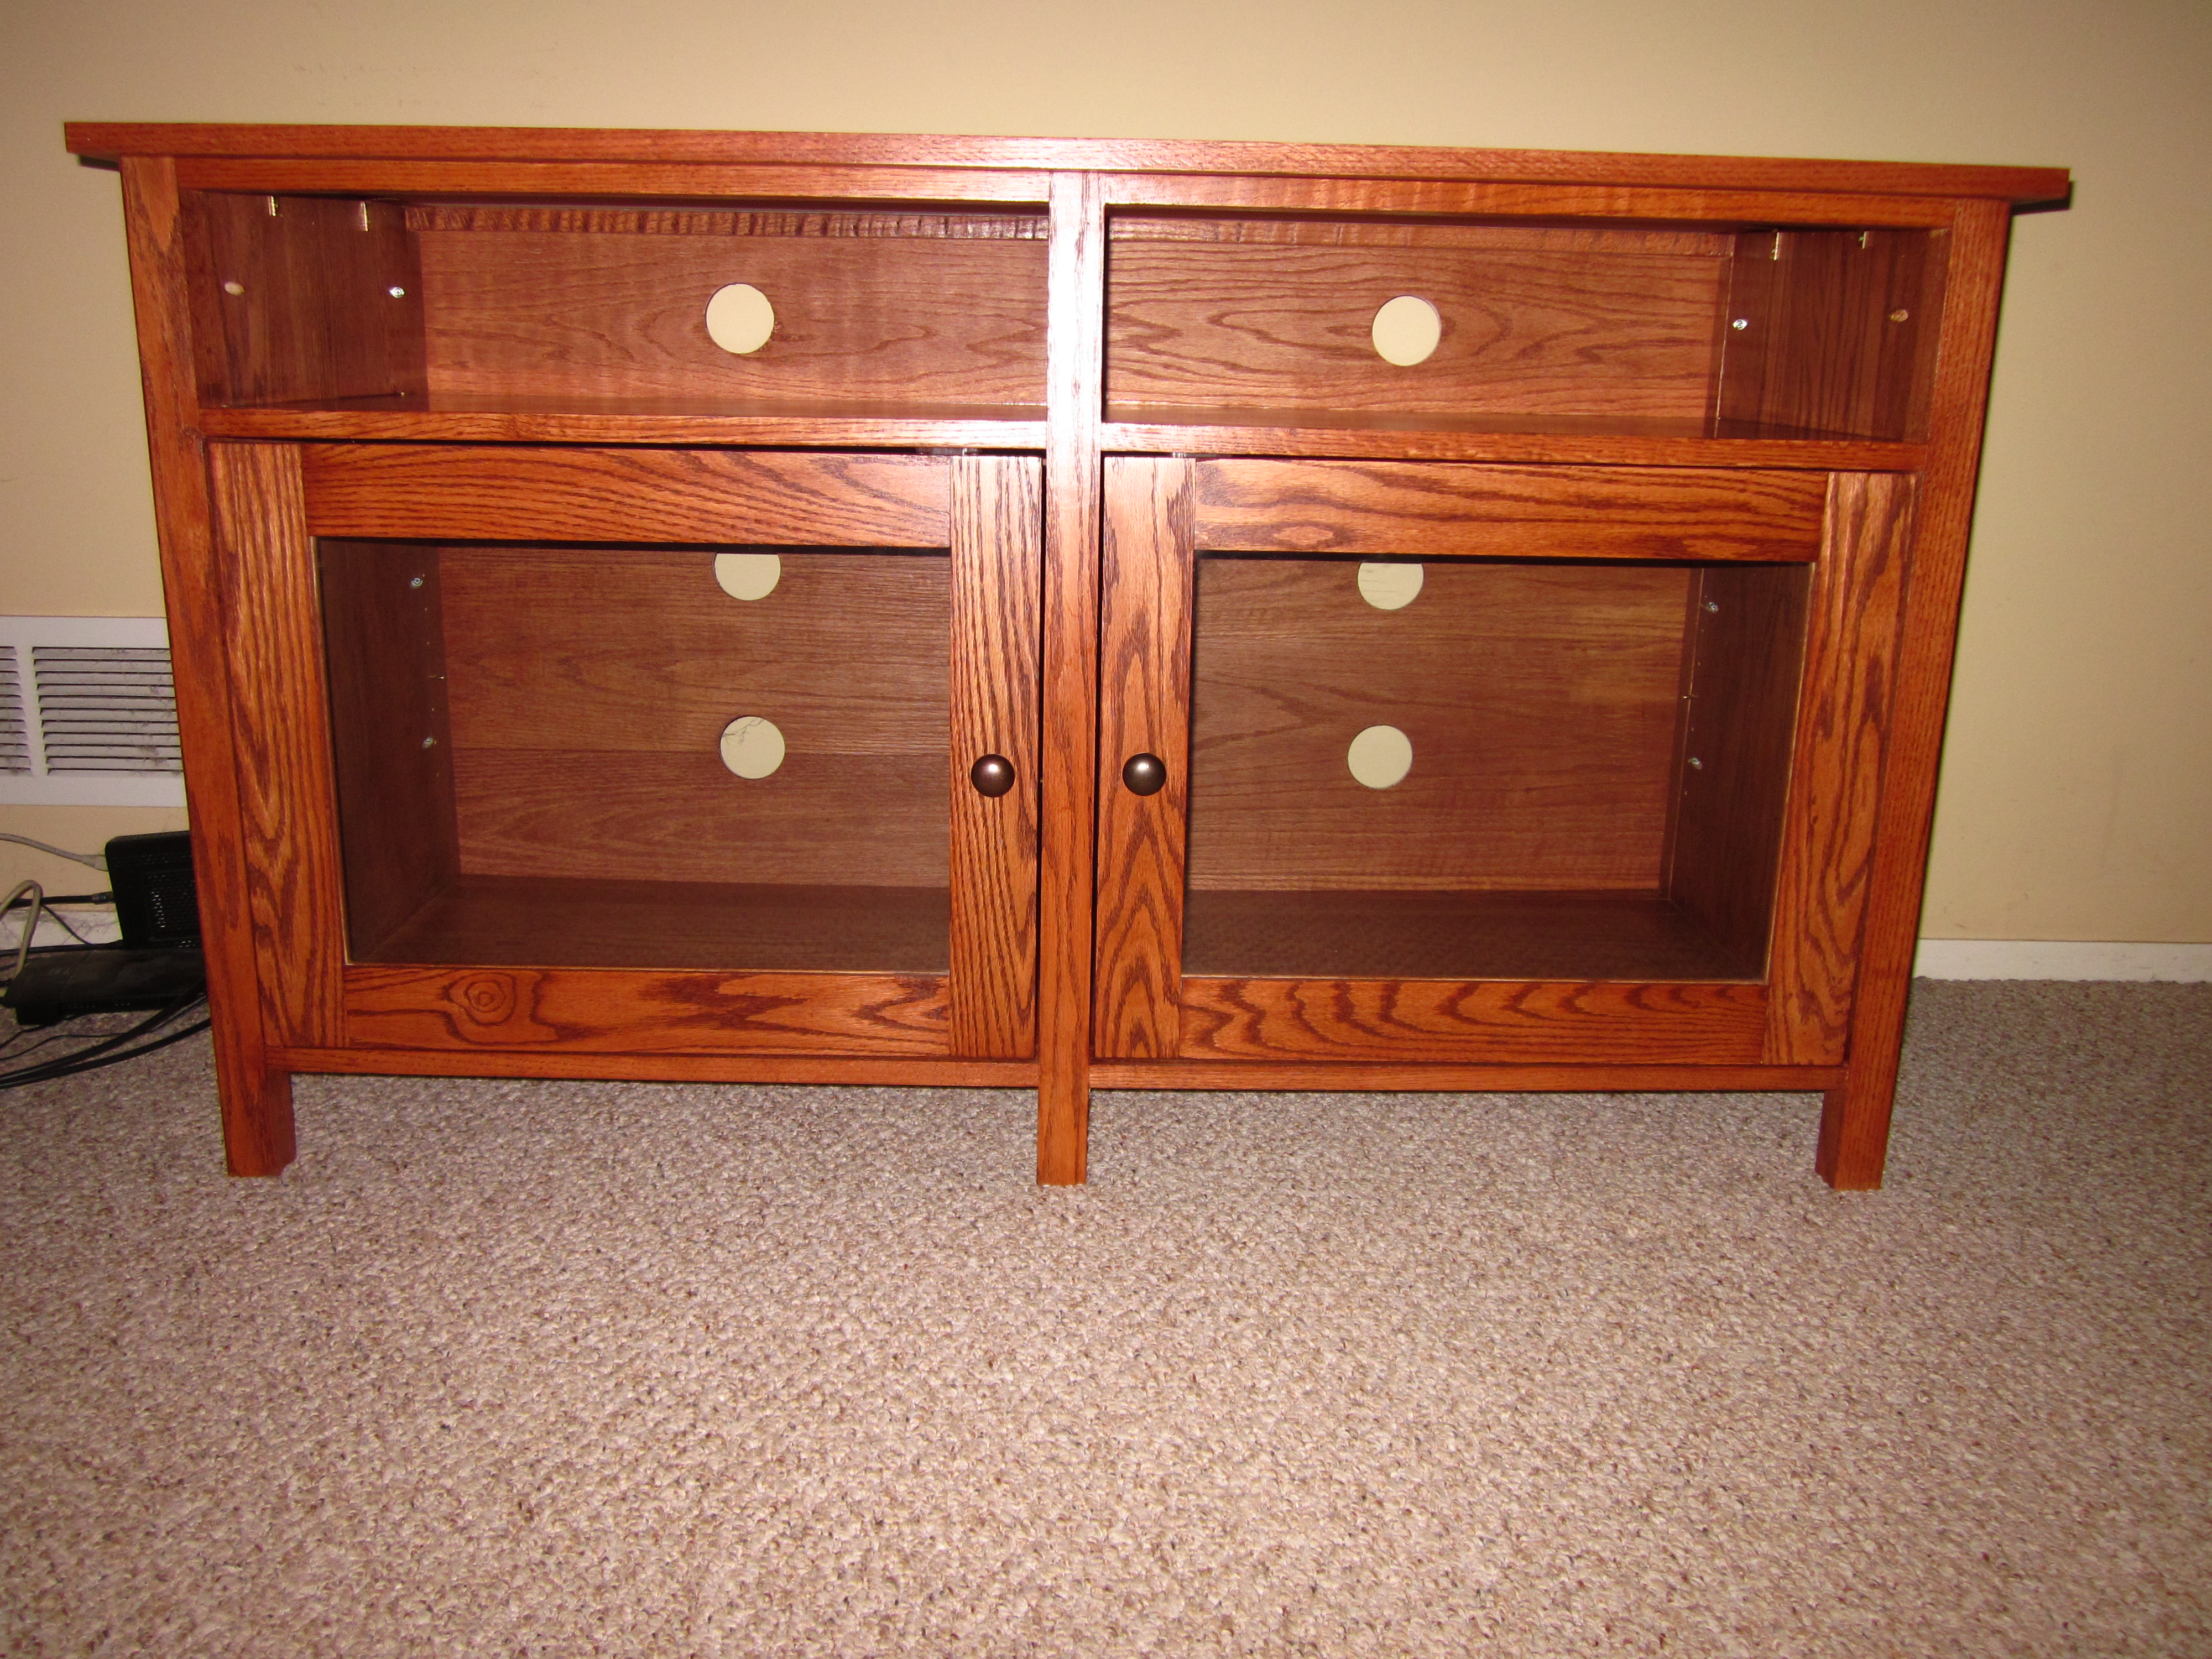
I modified the dimensions slightly and opted to not mount the fold down doors as I figured they would always be open anyway. I built this mostly from solid red oak save for the bottom panel and the middle panel, which are plywood. I crafted the top out of 5 pieces tongue and grooved with mitred corners on the front. I also tongue and grooved the doors with glass insets. I finished it in Minwax red cedar under poly.
Built from Plan(s)
Estimated Time Investment
Week Long Project (20 Hours or More)
Finish Used
Minwax red cedar
Recommended Skill Level
Intermediate
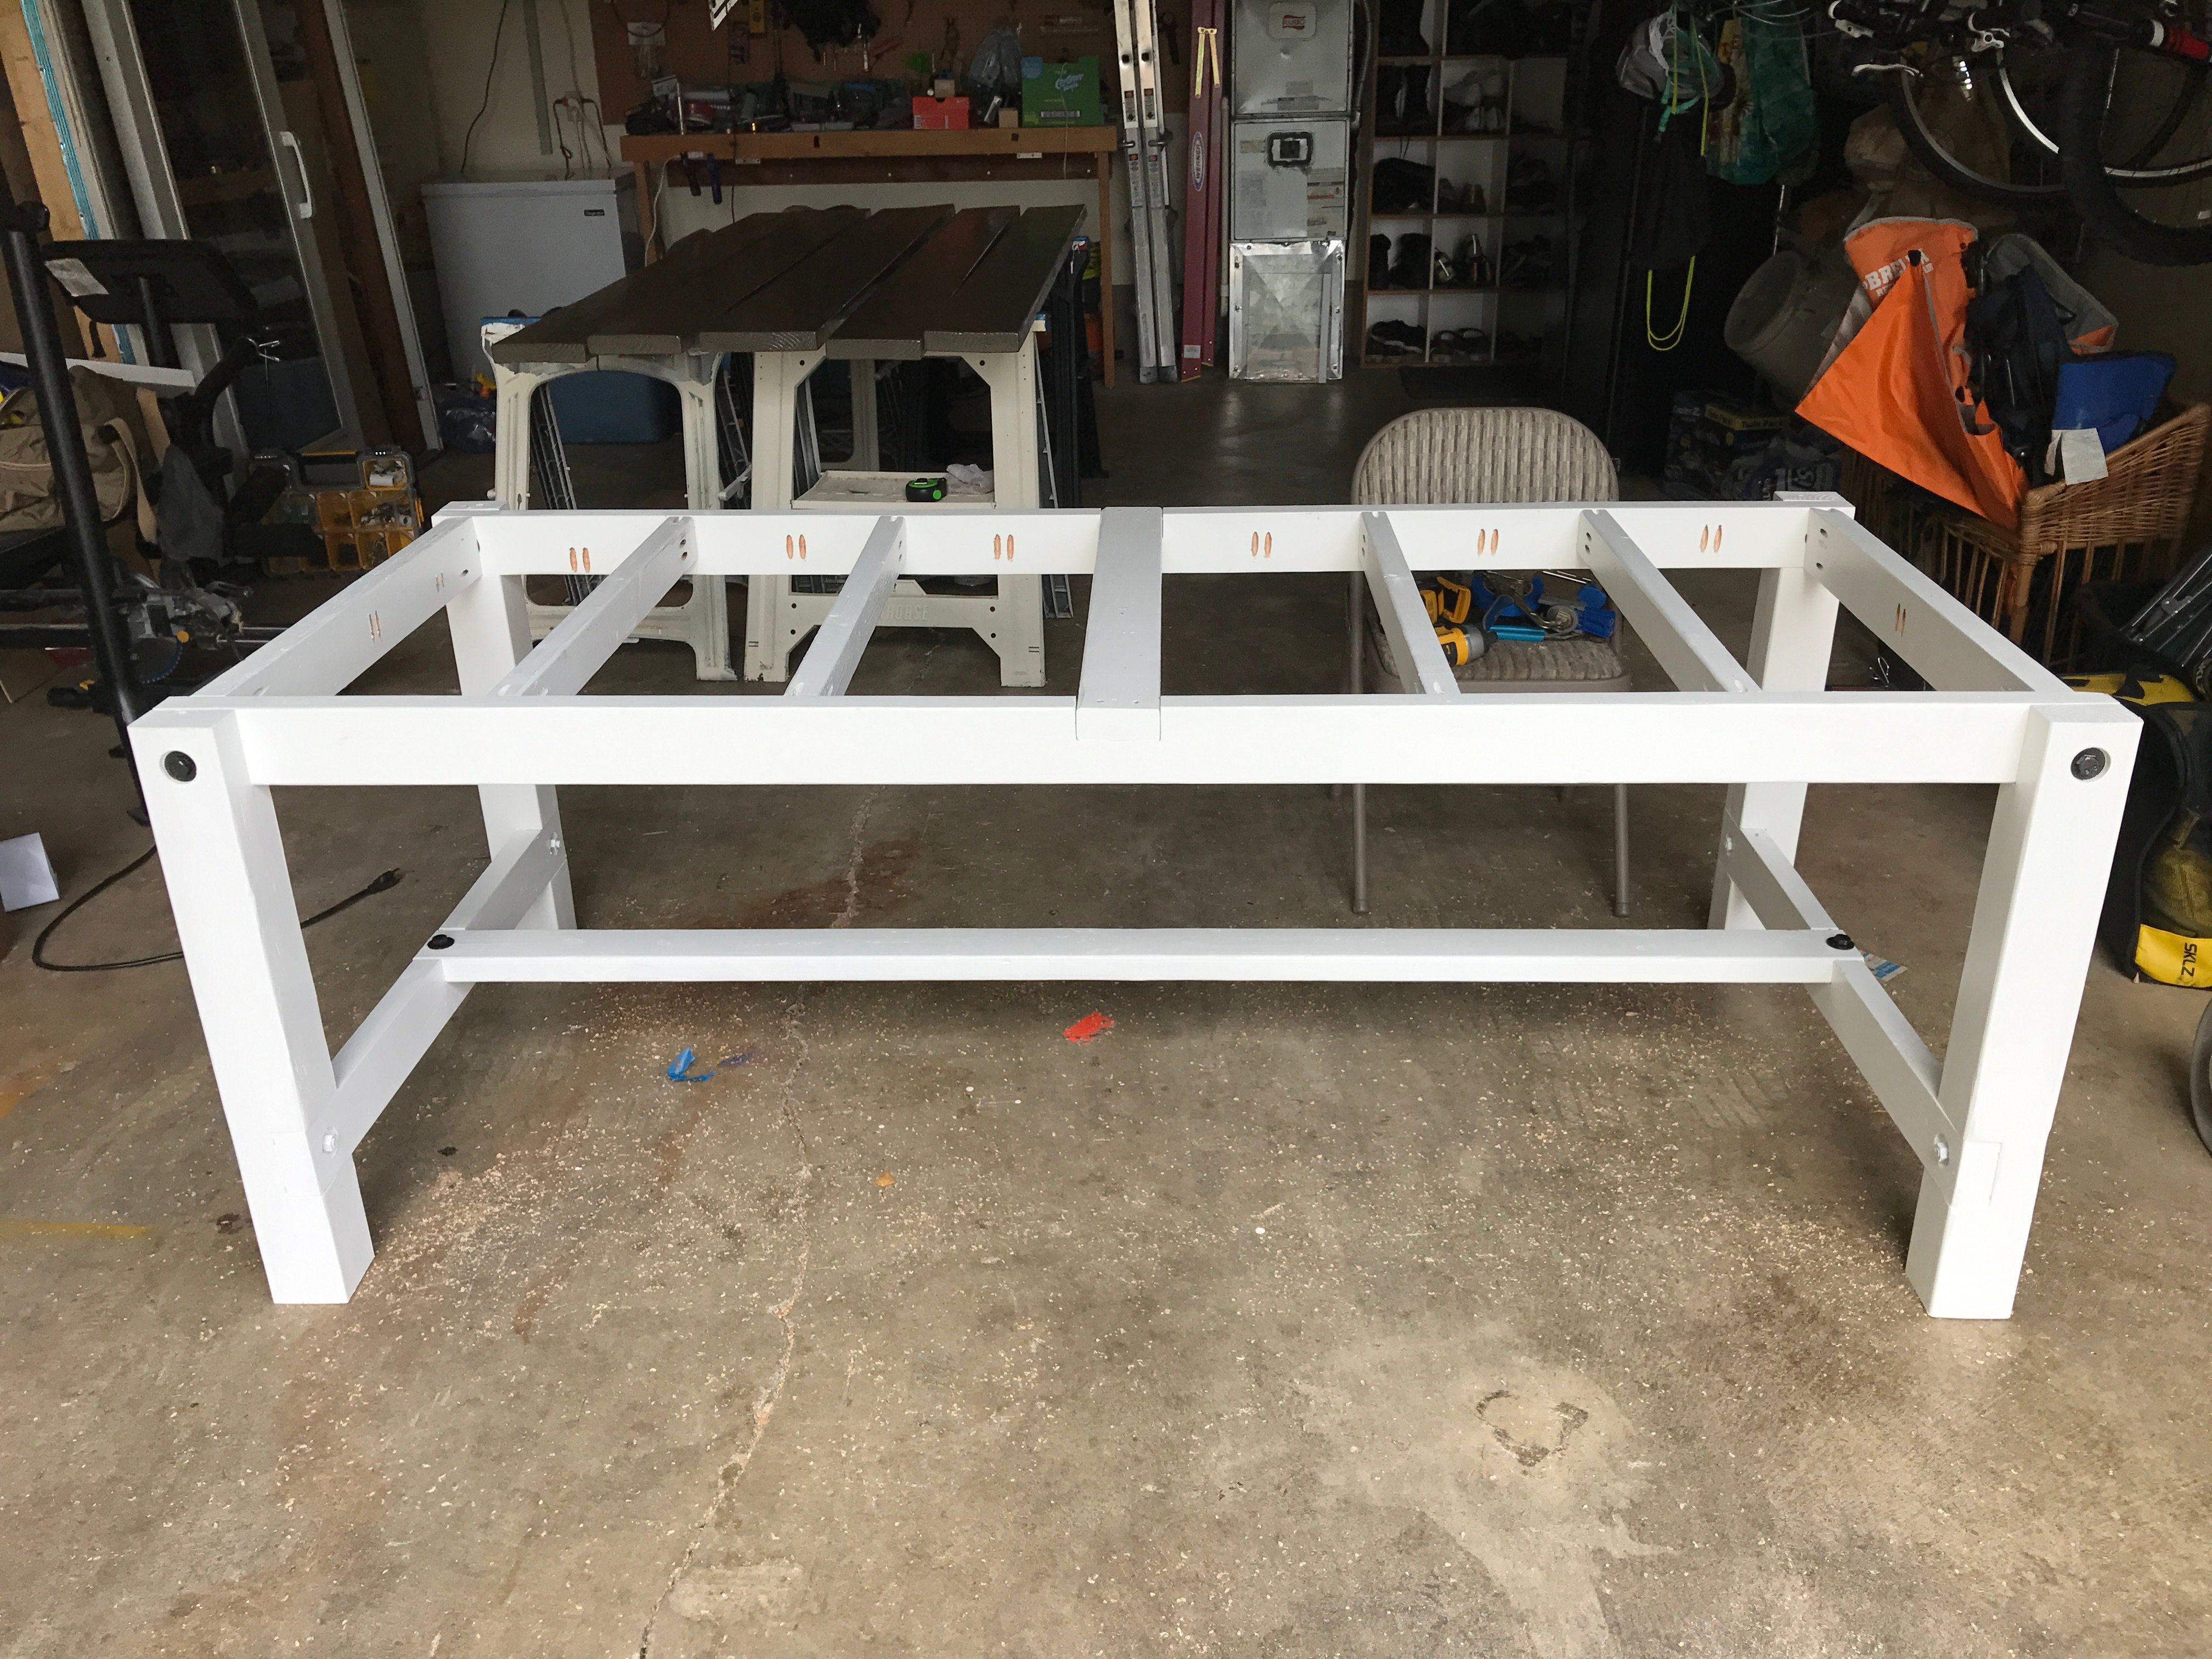
Easy DIY Workbench
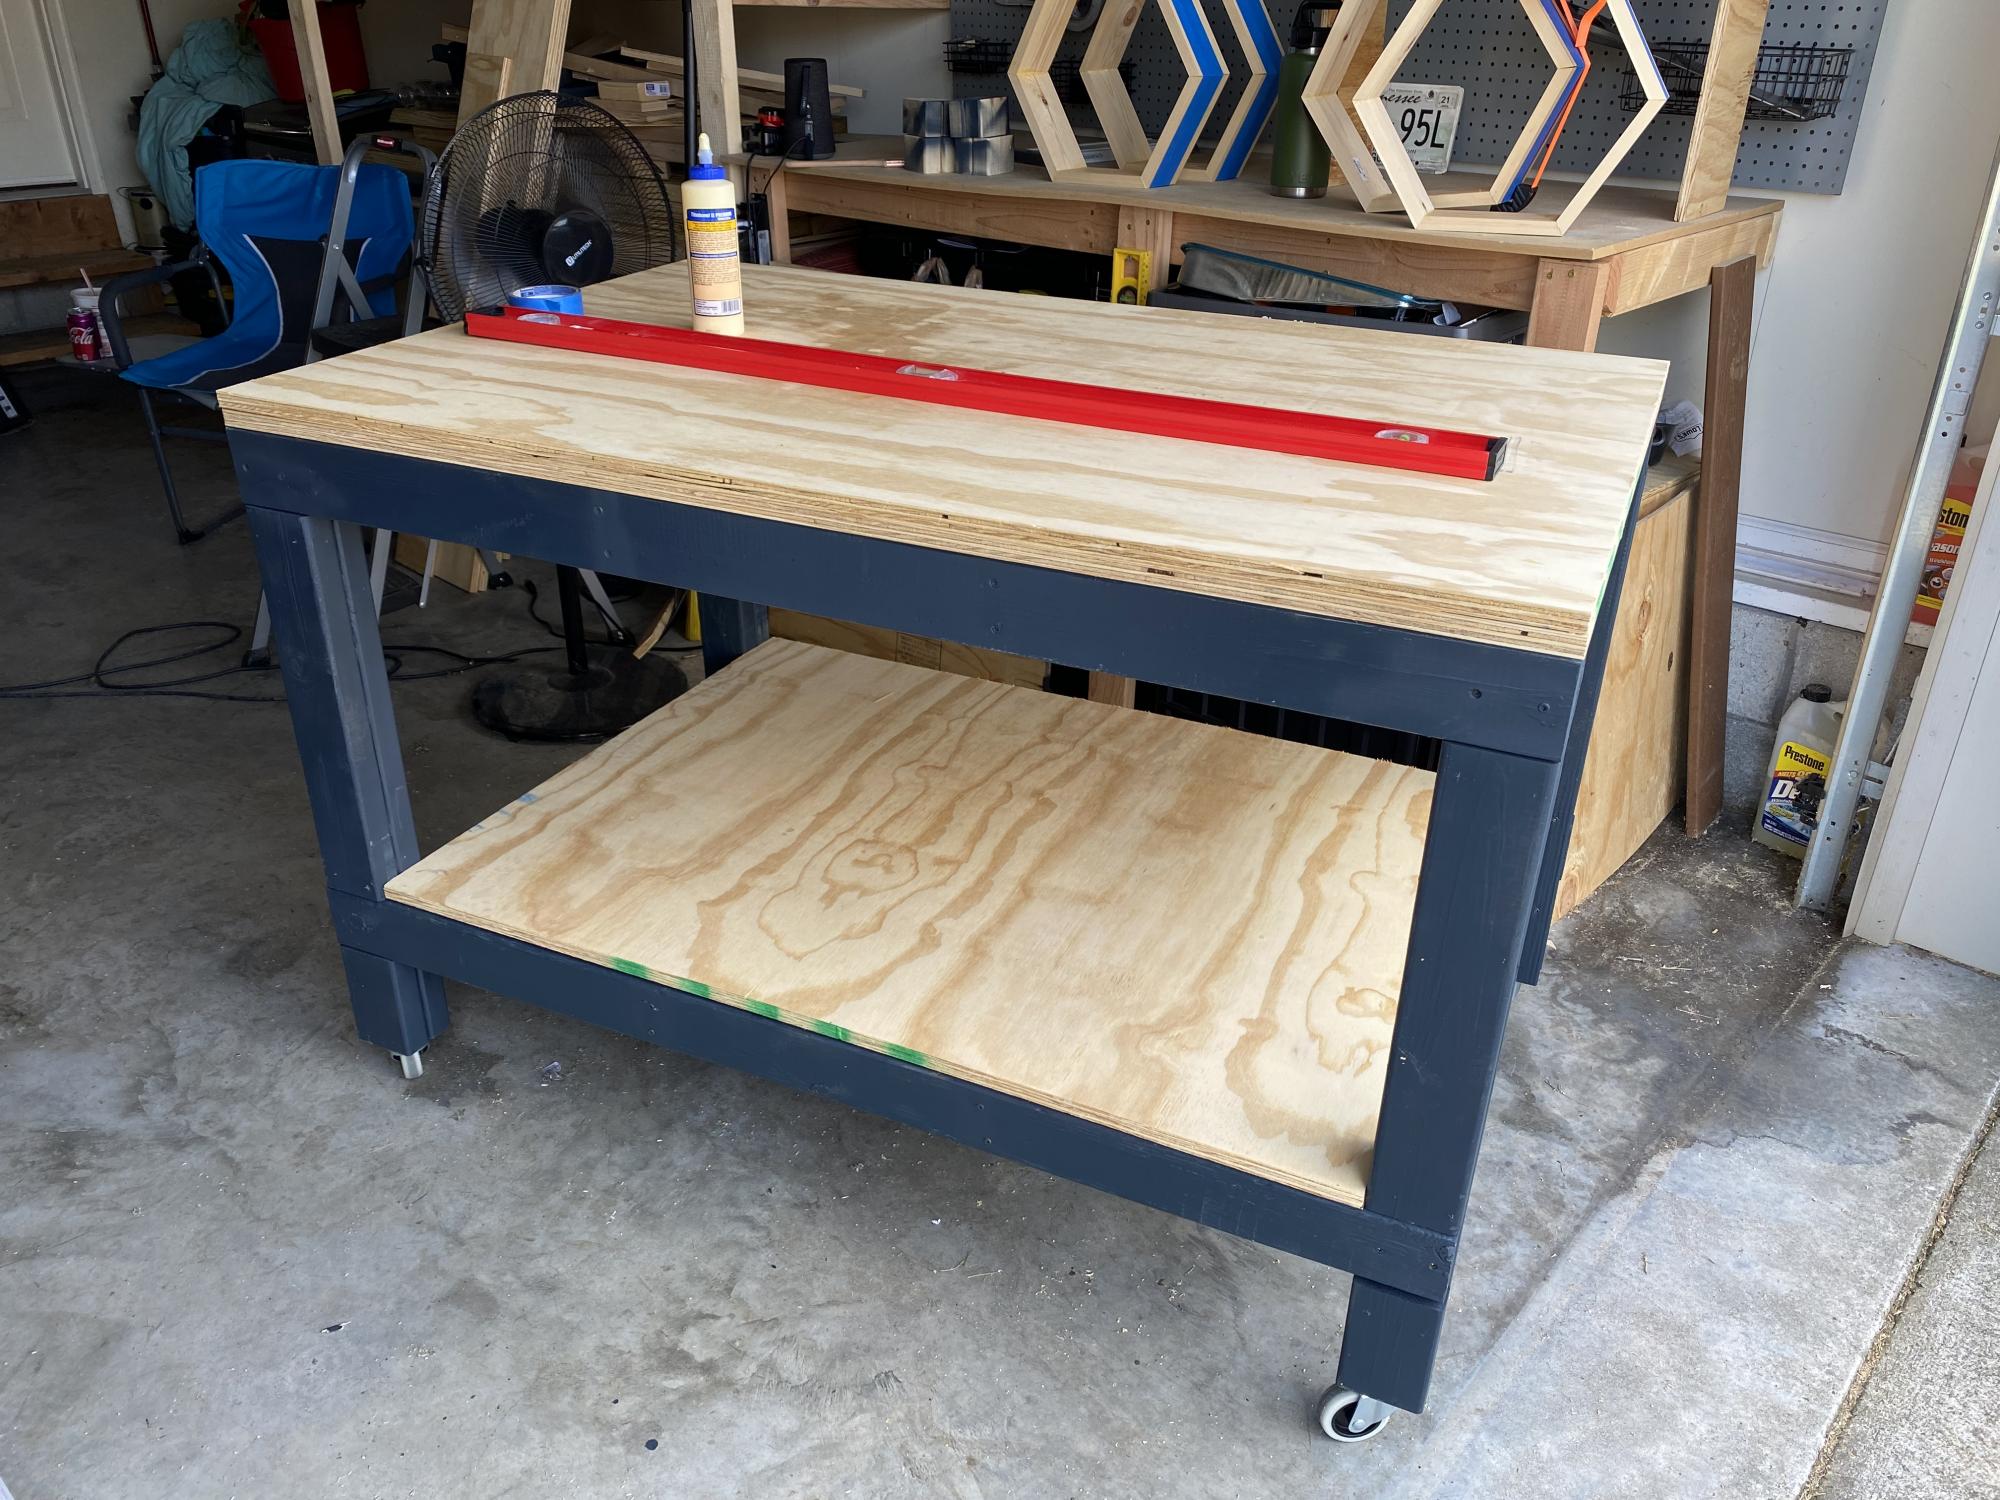
Ana I’m new to wood working and I really love your plans. They are so much easier to follow than a lot of other plans that I’ve seen. It makes me feel like I can build almost anything. Thank you.
Brandy
Built from Plan(s)
Comments
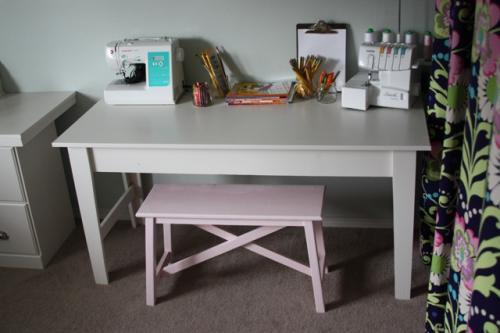
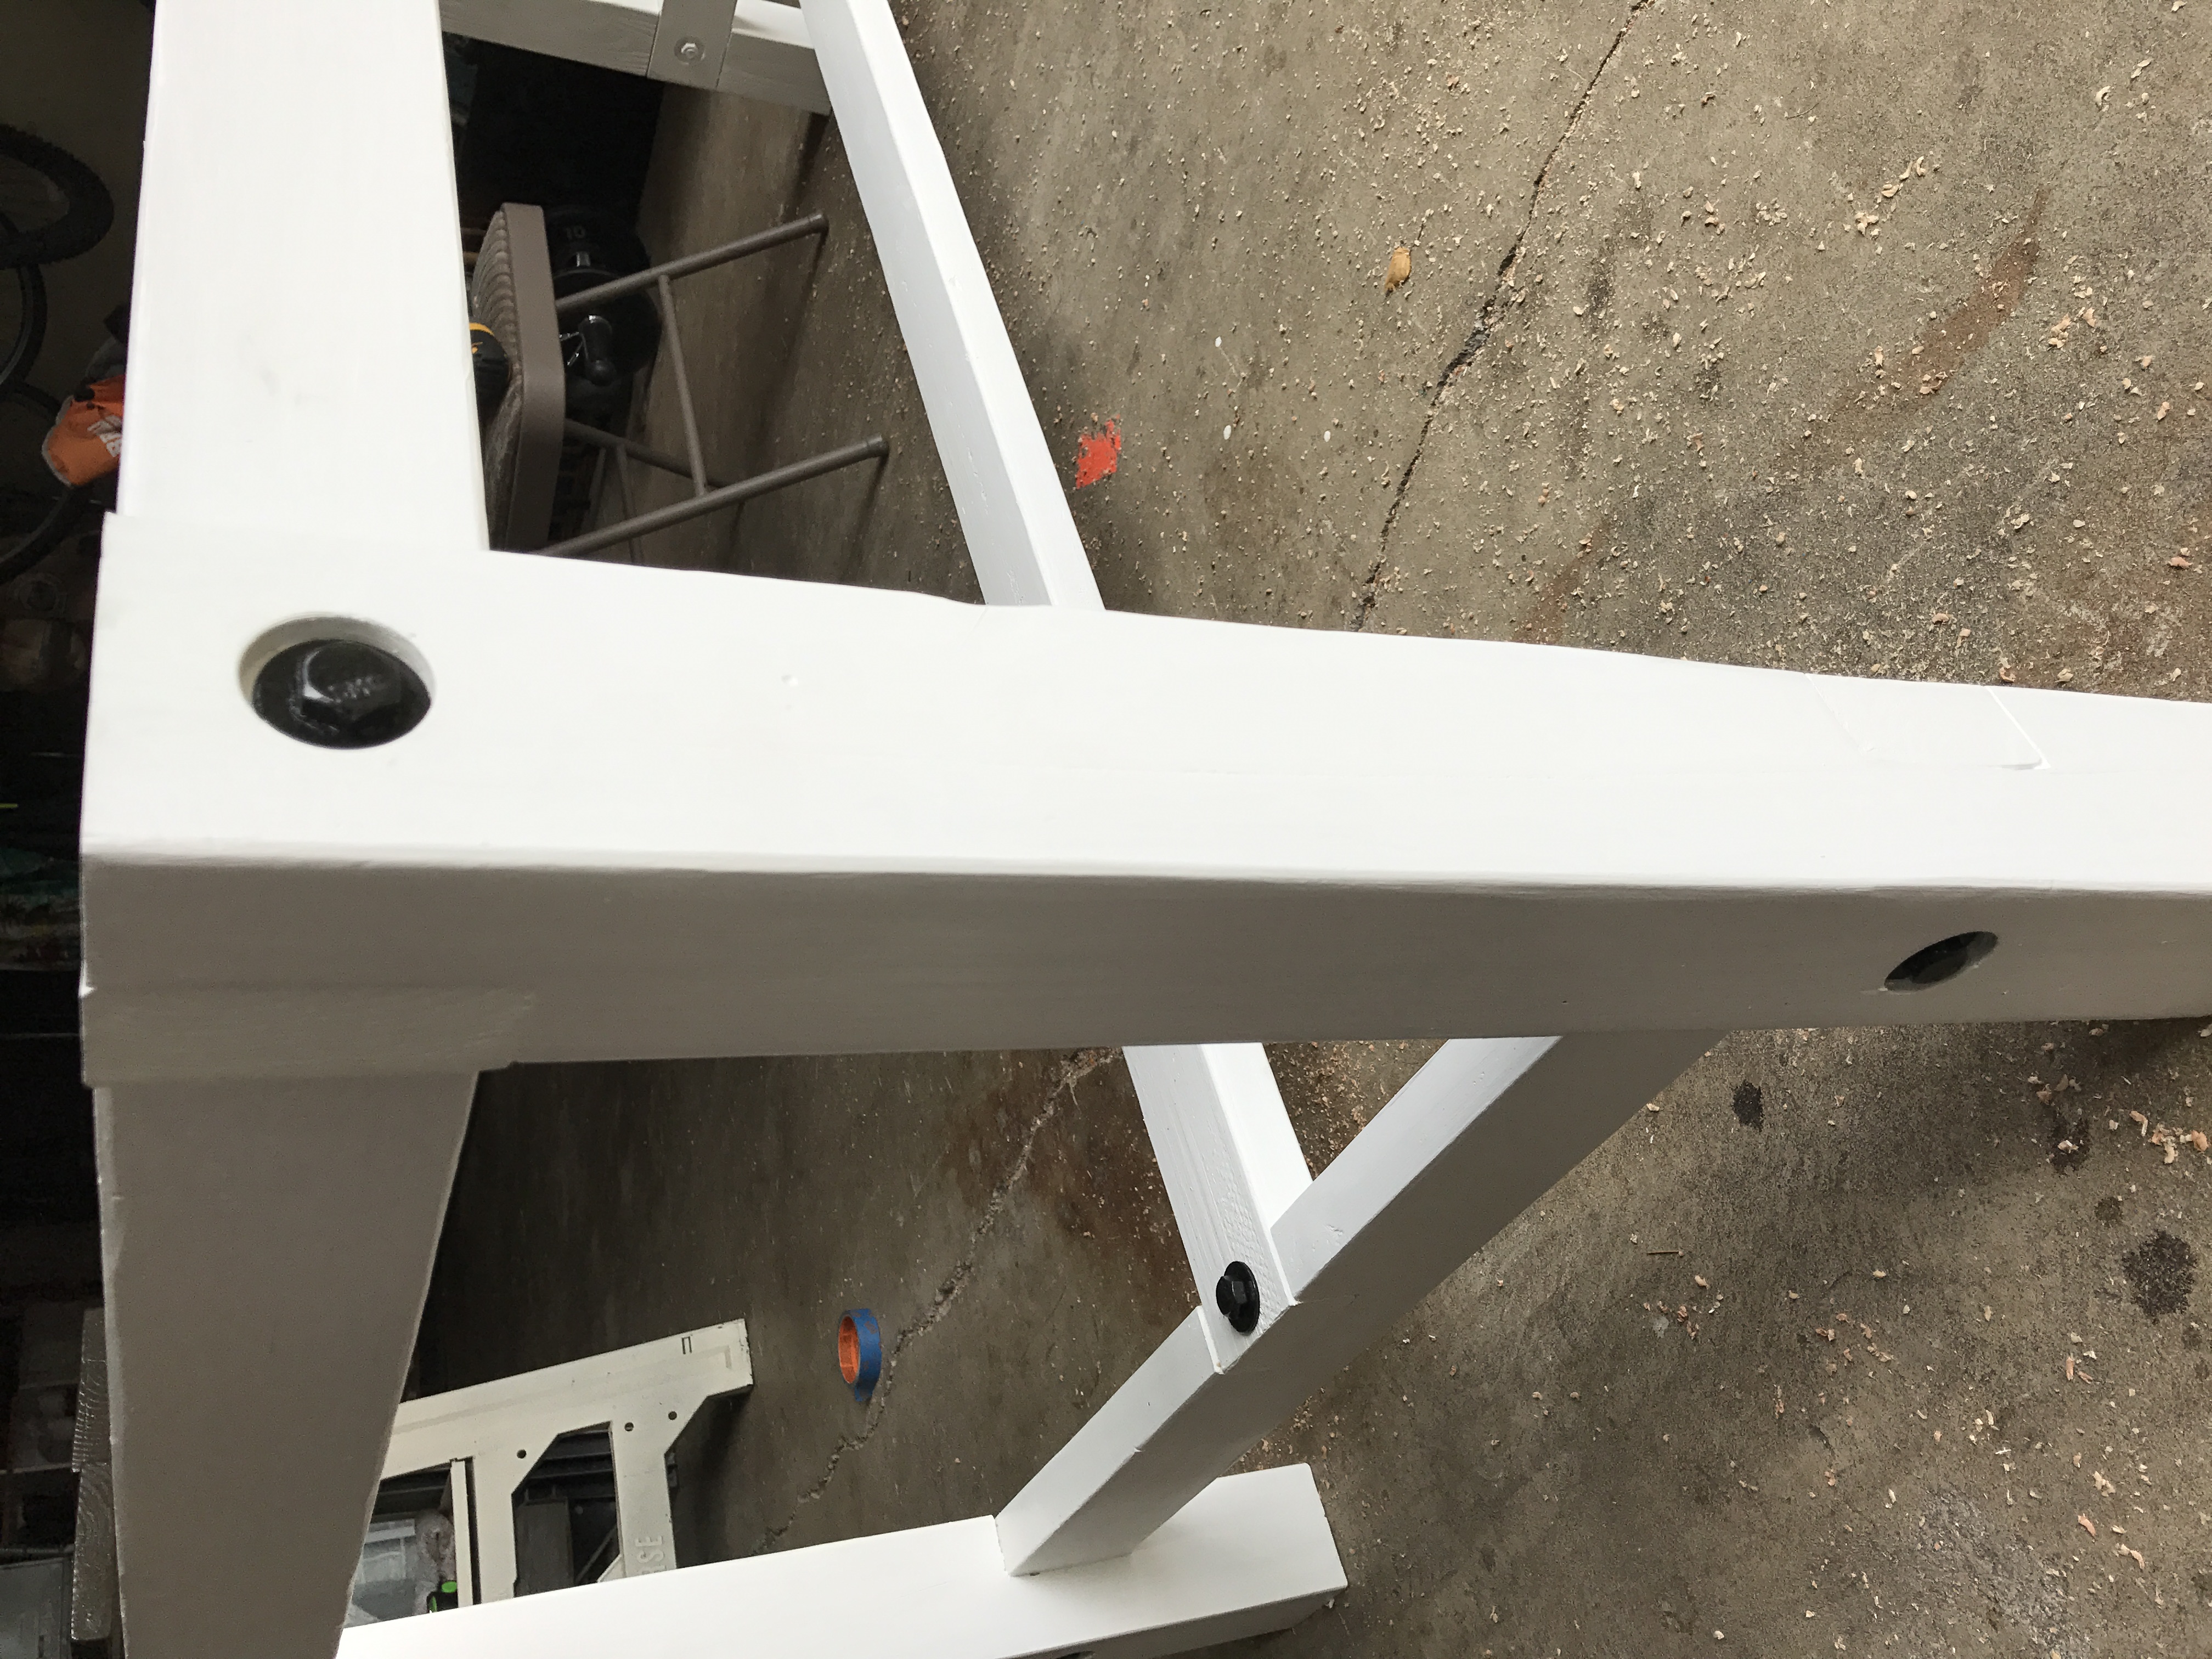
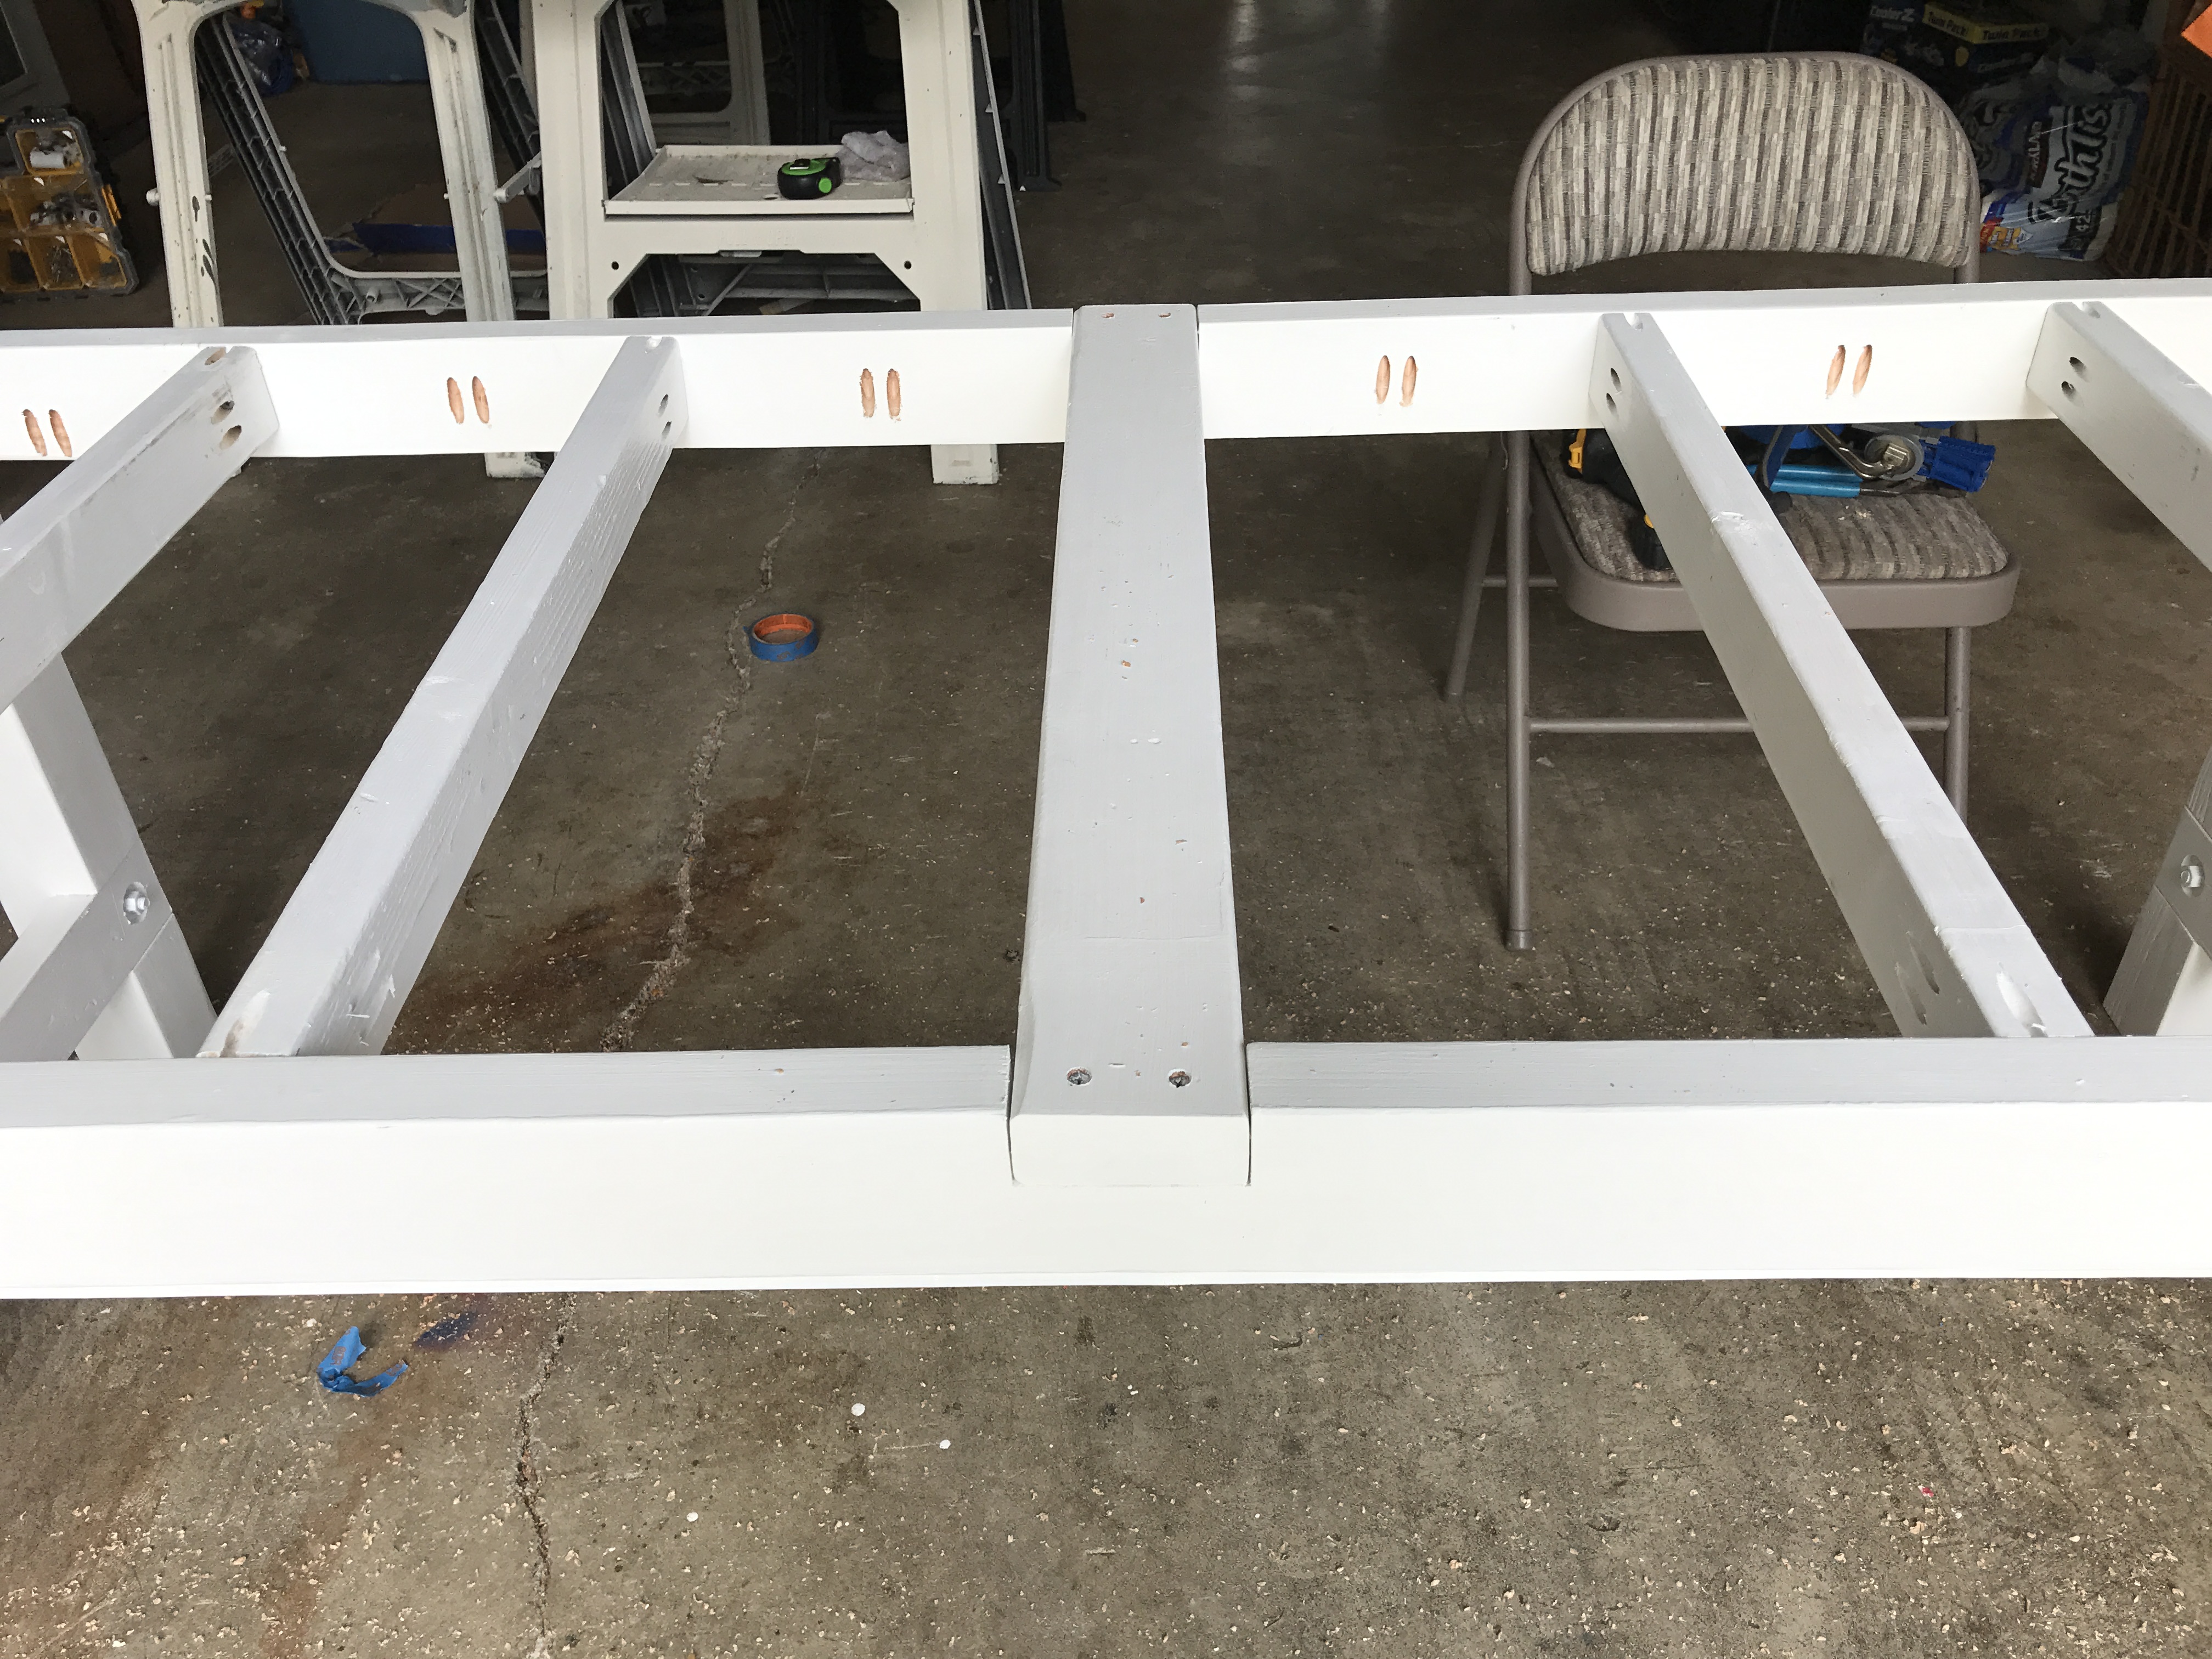
Narrow Farmhouse Table
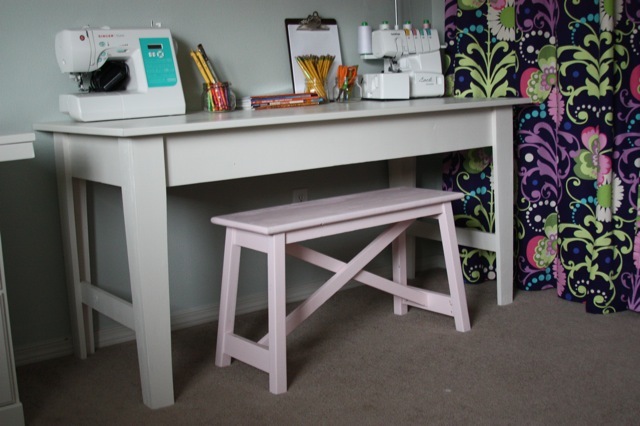
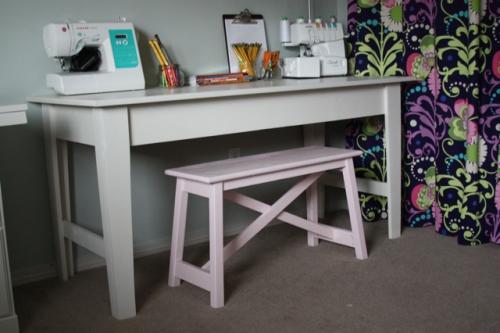
I really wanted a sewing table/desk for my office but wanted something that could be repurposed in a few years when we move. I chose the Narrow farmhouse table plan because it was a really sturdy plan that was easy to modify for our needs and was a timeless enough style that I can use it in another room if need be. I especially loved the look of the legs.
We made our table smaller to fit our space and also made it about 1 or 2 inches shorter because I’m really short and wanted a comfortable place to sew and craft. The top of our table is 58″ by 24″. We used MDF for the top instead of slats because my kids use this as a craft/coloring table when I’m not sewing. I didn’t want their pencils to poke through their papers if they got caught on the slats. We used thin molding for the edge of the MDF to give it a nice finished look.
Built from Plan(s)
Estimated Cost
$75
Estimated Time Investment
Afternoon Project (3-6 Hours)
Finish Used
Filled all the nail holes with wood filler. Sanded. Primed and then painted with 2 coats of Sherwin Williams Enamel paint in Dover white.
Recommended Skill Level
Beginner
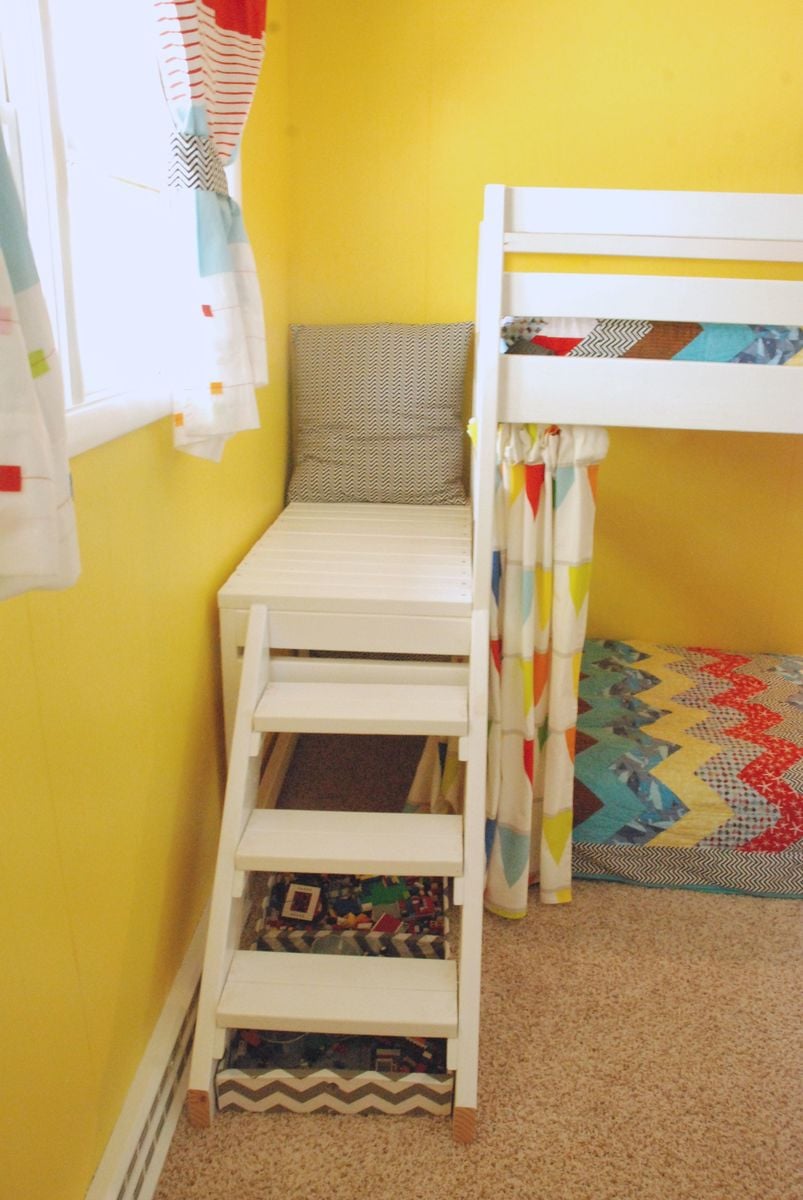
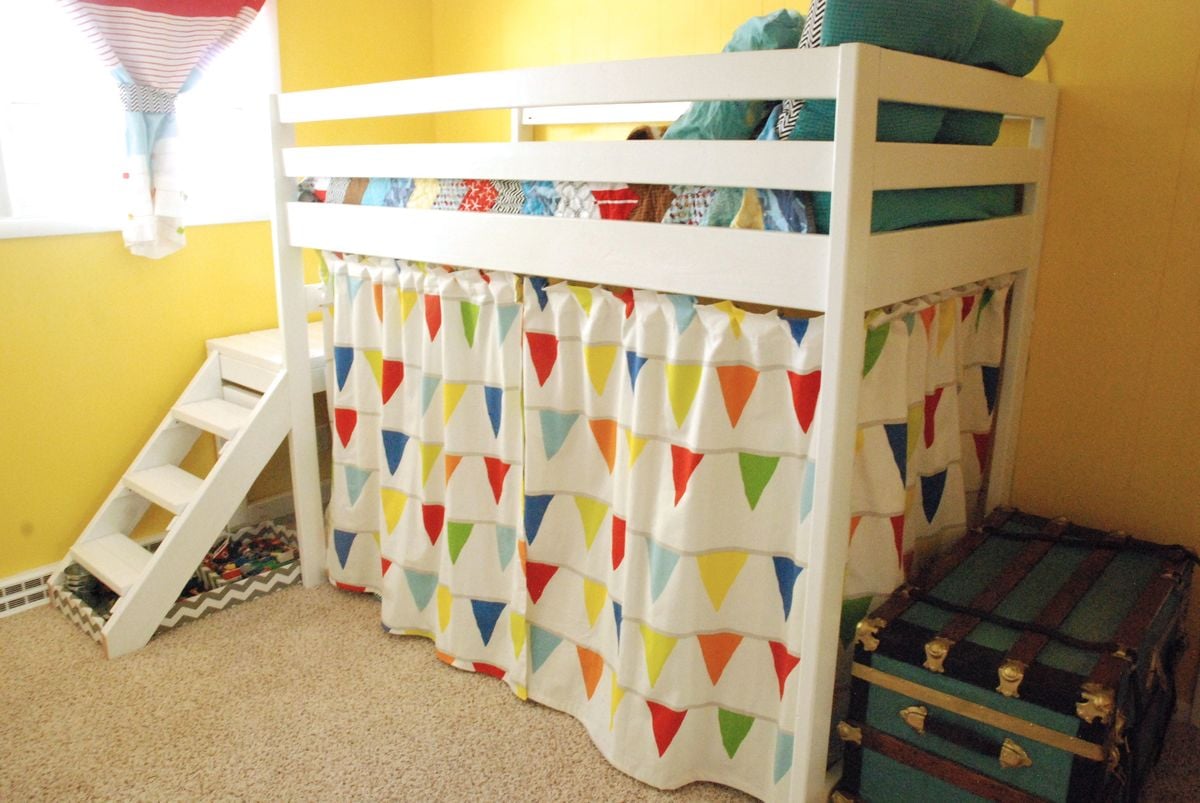
DIY Jr. Camp Loft Bed with Curtain
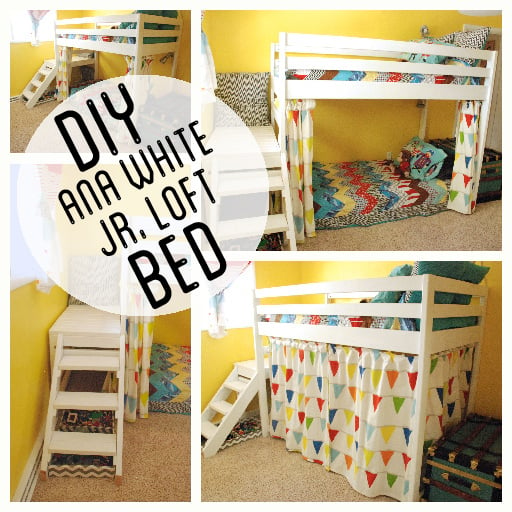
Check out the details about how we build the bed on my blog: http://www.brightgreendoor.com/2013/05/diy-ana-white-jr-loft-bed.html
Although nothing about it was difficult, it was time consuming, and consumed the greater part of two weekends.
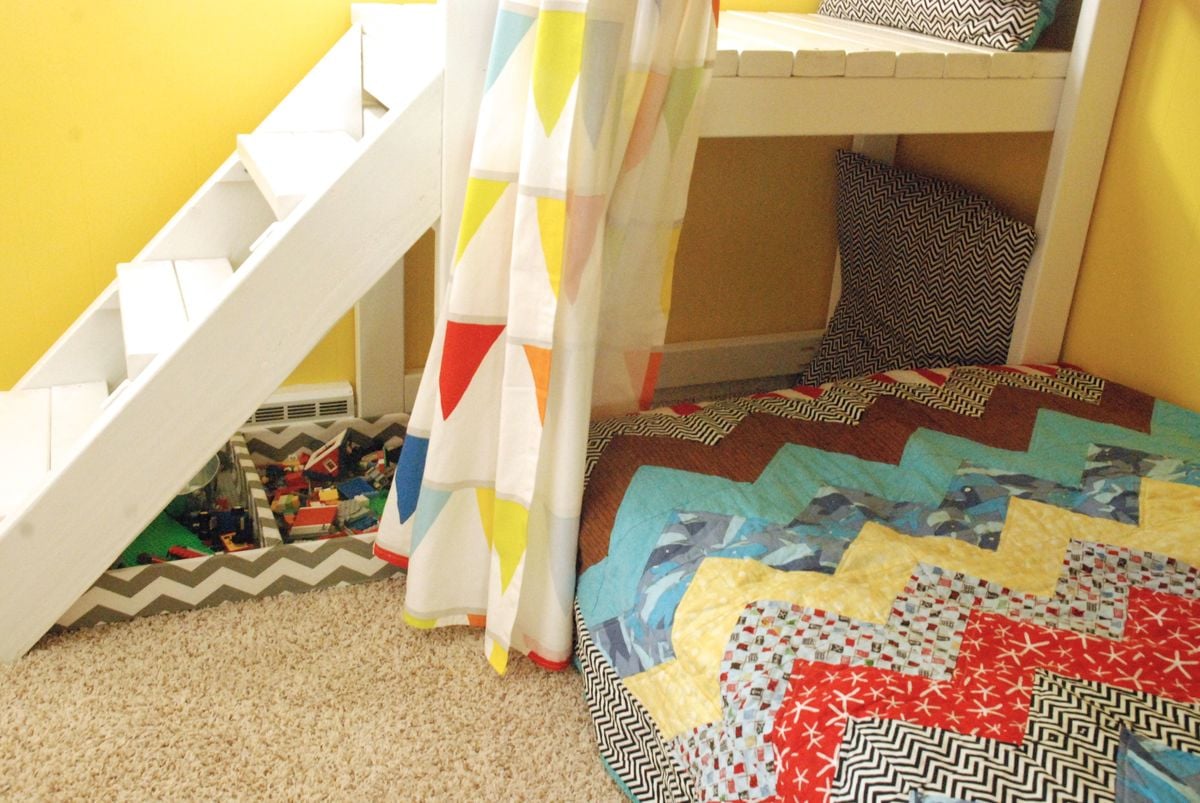
We followed the plans on Ana White’s blog pretty close, other than narrowing up the stairs by a few inches due to a furnace vent that would have been in the way.
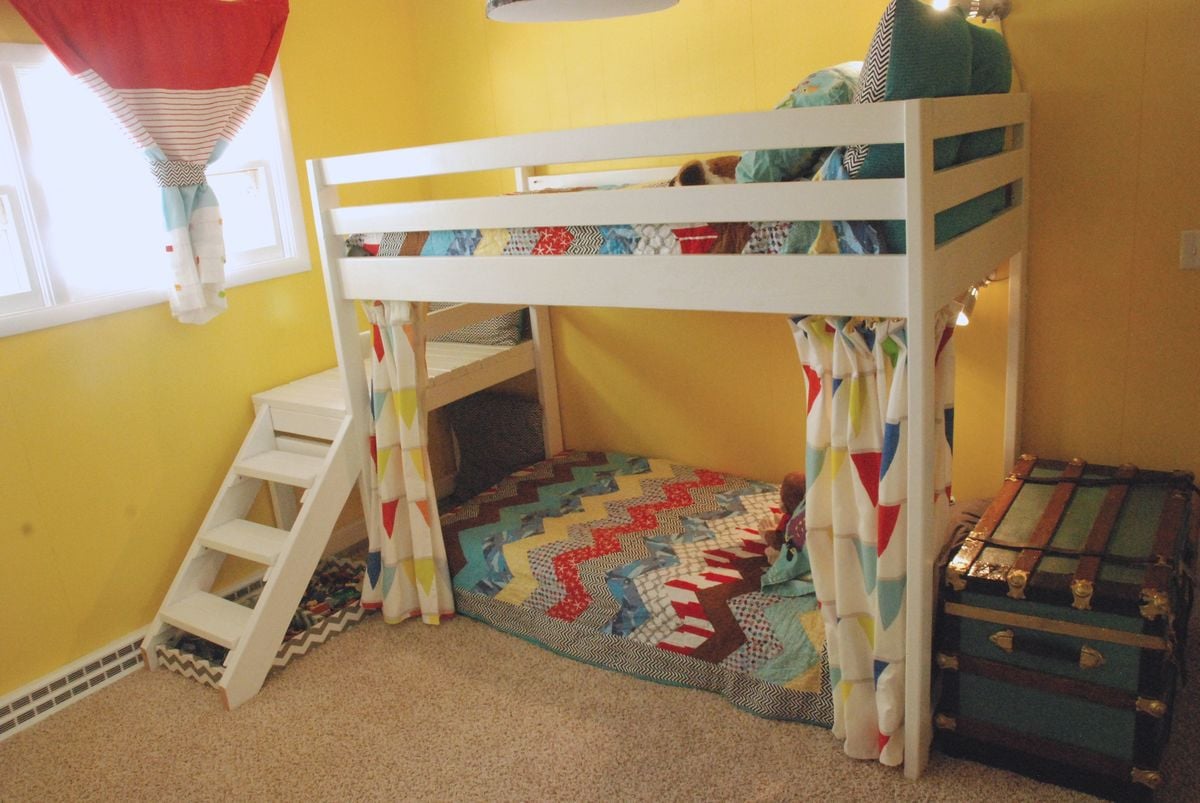
We bought all of our boards at Menards which came in just under $100 including the large piece of plywood. I spent chunks of time throughout the week getting all of the boards sanded. Then we spent a Saturday getting all the boards cut to the proper size. Then it was a week full of giving all the wood 2 coats of Bulls Eye primer and a top coat of high gloss cabinet paint.
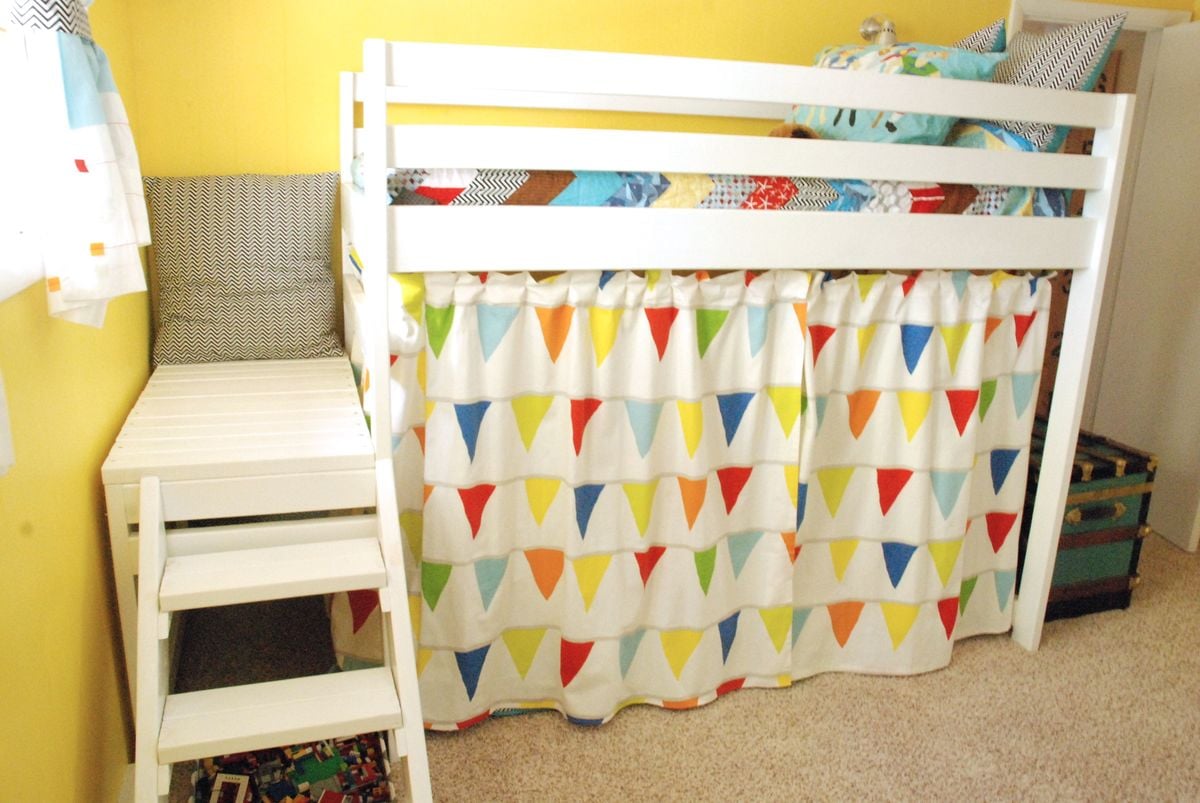
I also installed the Ikea Kvartal track system around the inside of the bottom bunk. I used leveler clips from Ace to hang Ikea curtains that I altered.
My boys were SO excited the whole time we were building it and love it. My little one calls the whole bed his “top bunk”, even though he sleeps on the bottom. They also have dubbed the area under the platform the “hideout” and think they are invisible when they are hiding in there.
Built from Plan(s)
Estimated Cost
$100 for bed, $50 for curtain and track
Estimated Time Investment
Weekend Project (10-20 Hours)
Finish Used
Two coats of Zinsser Bulls Eye 1-2-3 Primer and one coat of Ace Cabinet Paint in Bright White. Painted all wood before assembly.
Recommended Skill Level
Beginner
Comments
Fri, 06/21/2013 - 18:46
wonderful job
These are awesome and I think it's so smart you stained them after you cut them and before you drilled them! Thanks for that time saver! Question? Is the bottom bunk raised or did you raise the height of the planned bed? I want to make ours a bunkbed too, but don't want it to be too tall.
Thanks
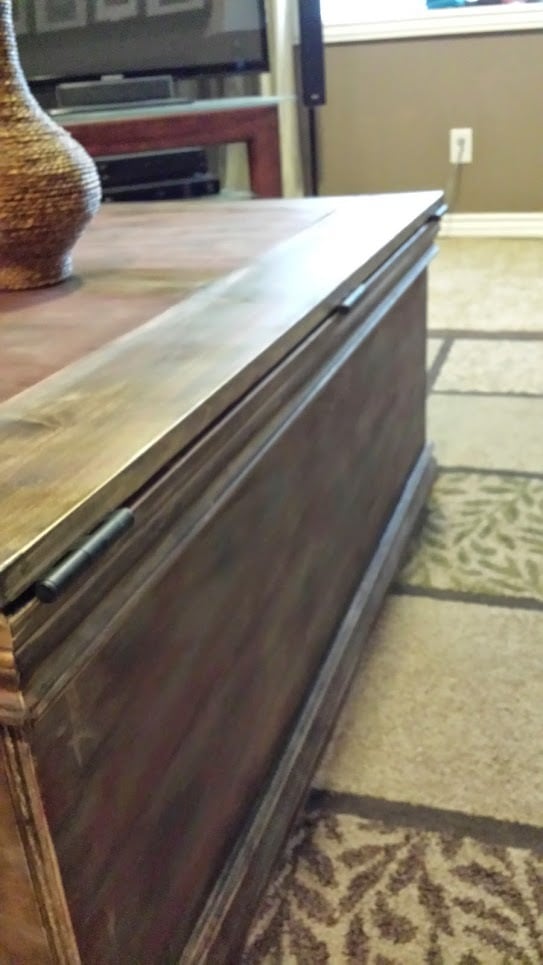
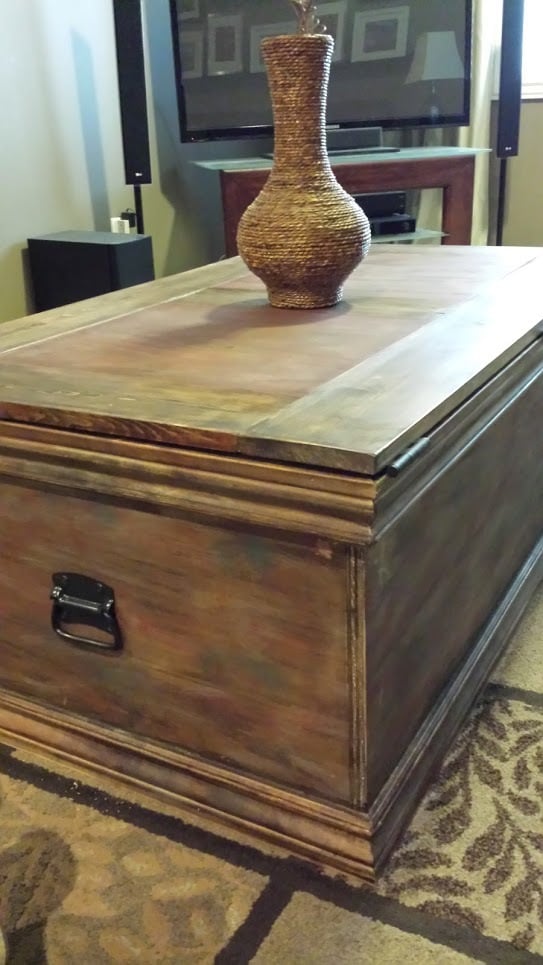
Becca trunk
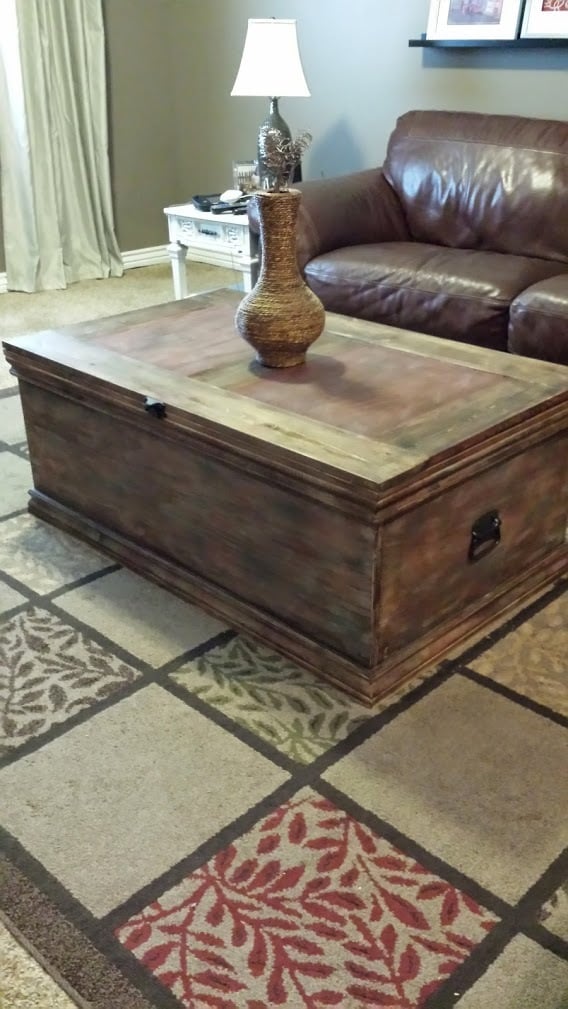
I adjusted the measurements to make it longer and wider. I also looked the original Pottery Barn trunk and tried to copy the multi color finish. I had so much fun building this!

Built from Plan(s)
Estimated Time Investment
Weekend Project (10-20 Hours)
Finish Used
stain and paint
Recommended Skill Level
Beginner
Comments


In reply to This is truly gorgeous! by Ana White
Tue, 04/28/2015 - 12:05
Thank you, Ana! Your comment
Thank you, Ana! Your comment means a lot to me! =-)
Tue, 04/28/2015 - 12:07
The handles are from Ace
The handles are from Ace hardware--I had to spray them antique bronze since they only had them in silver. I stained the trunk is dark walnut from minwax and then used diluted paint in barn red and teal to spread some color here and there. Finished with some polyurethane in satin (spray). That's it!
Tue, 12/25/2018 - 19:42
Hinges
I don't know if you will check the comments on this brag post since you posted almost 3 years ago, but I'm also curious about the hinges to use. I have watched some youtube videos that show how to chisel out a space for the hinge, but I know there must be an easier way and an easier hinge to put on this box.
Thanks so much ,
Apryl
Farmhouse Table for 10(ish)

We wanted a patio table to fit up to 10. Done with a mix of pocket holes & 1/2" hex bolts. Made small changes to the stretchers. Moved them inside because we liked that aestetic better. We made the top longer because we didnt want to do the breadboard ends. Used big 4" hex bolts & washers and painted them with "hammered steel" paint to give them a more vintage look.
Will be making the matching benches next. We wanted the benches to fit perfectly underneath the table for storage, so Ill be cutting the bench seats to fit under table leg to leg.

Built from Plan(s)
Estimated Cost
Wood materials including paint, stain & varnish, bolts & deck screws ~<$200.
(i didnt have a kreig jig, so that was another $40 at HomeDepot)
(i didnt have a kreig jig, so that was another $40 at HomeDepot)
Estimated Time Investment
Weekend Project (10-20 Hours)
Finish Used
- Behr Paint & Primer - Ultra White exterior 2 quarts
- Varathane Briar Smoke
- Varathane Spar Exterior - satin (i shoulda used natural/matte, to reduce shine, but its gonna hold up well outside)
- Varathane Briar Smoke
- Varathane Spar Exterior - satin (i shoulda used natural/matte, to reduce shine, but its gonna hold up well outside)
Recommended Skill Level
Intermediate
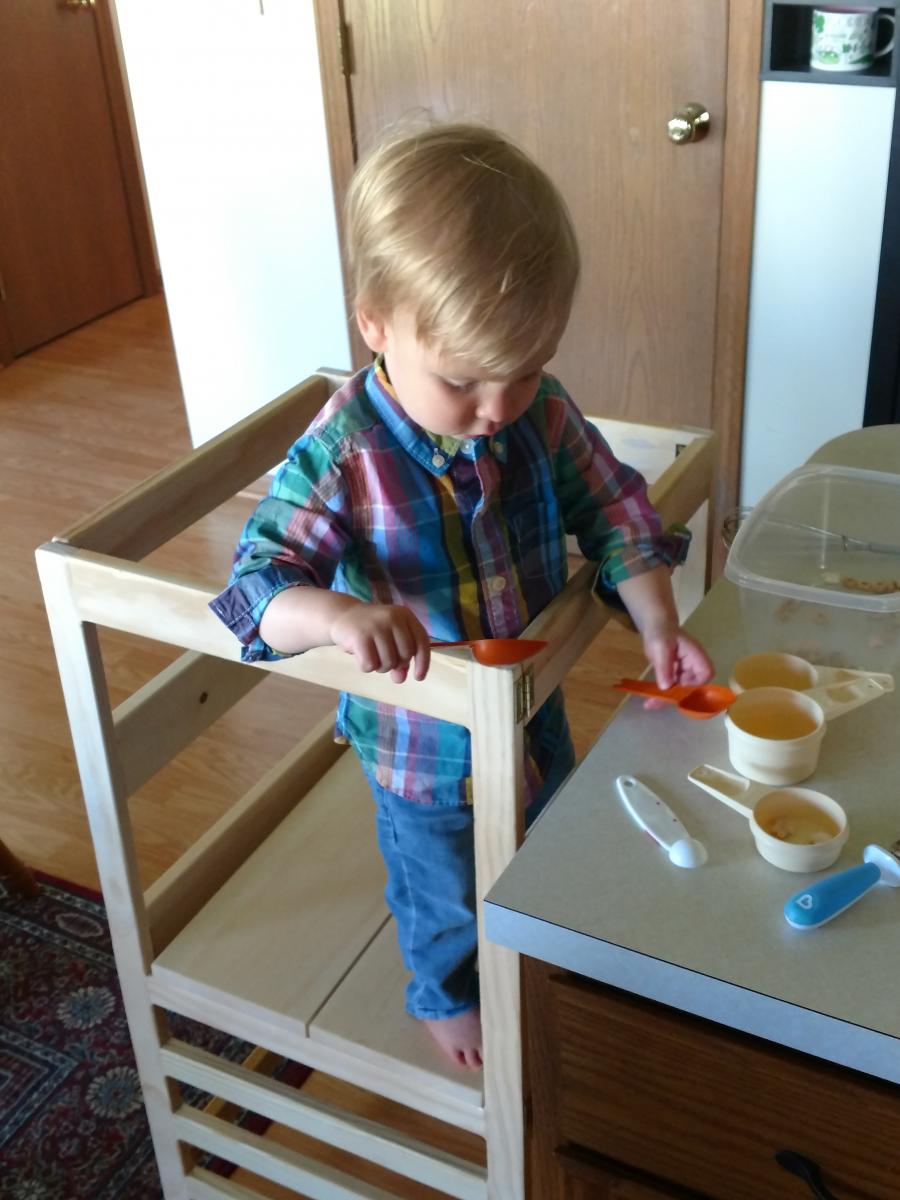
Helper Tower
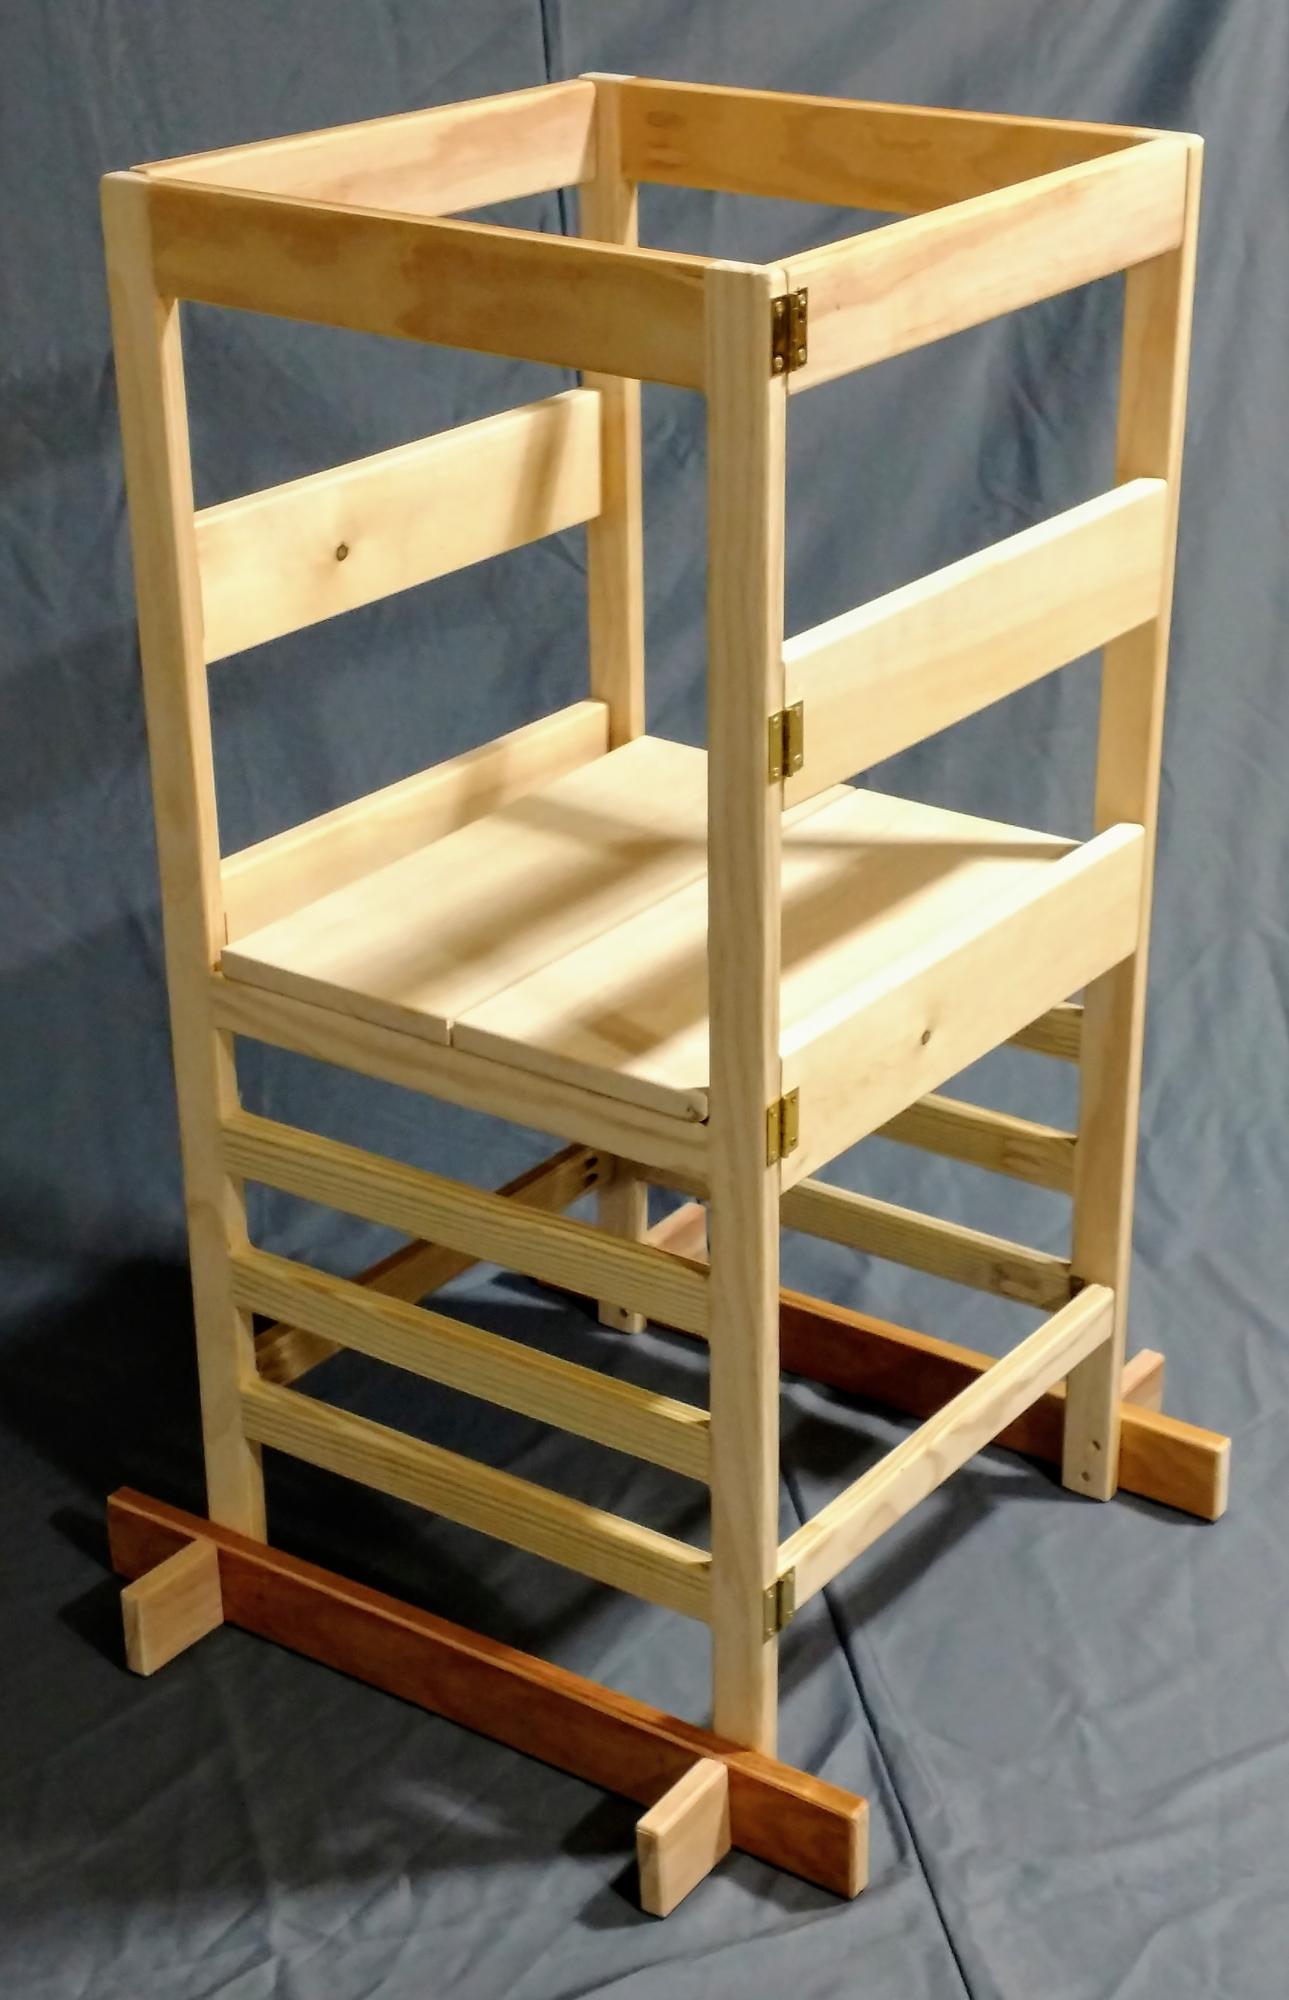
Built the Helper Tower for my grandson. It's the optional hinged version. He uses it every time he visits, and will get a lot of use out of it - platform is at its highest setting.
Built from Plan(s)
Comments
Mon, 10/04/2021 - 16:51
YAY for little helpers!
This is such a great way to include the children in learning and fun! Thank you for sharing, it looks amazing!
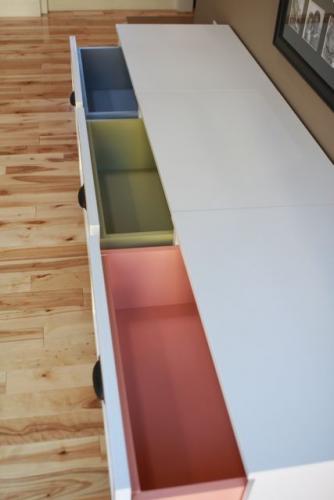
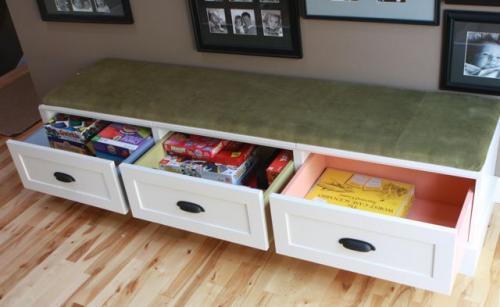
Drawer bases turned banquette
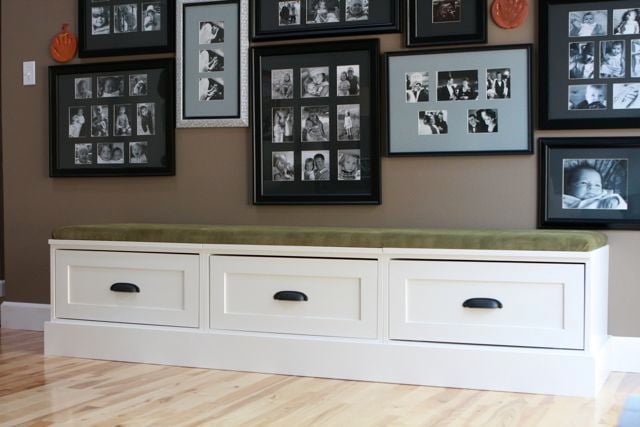
I took Ana's open base and drawer plans, added a few inches to the height (so that the base trim on the storage units would clear the base trim on our walls), and put them together to create a banquette-style bench with tons of storage underneath. We use the drawers for our family board games and photo albums.
Built from Plan(s)
Estimated Cost
$100-$150
Estimated Time Investment
Weekend Project (10-20 Hours)
Finish Used
Sherwin-Williams Pro-Classic in semi-gloss followed by Minwax Polycrylic.
Recommended Skill Level
Beginner
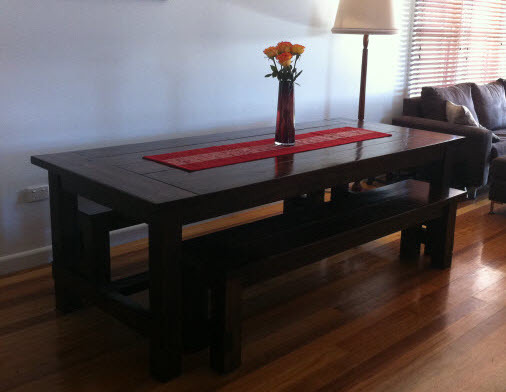
Farmhouse Table
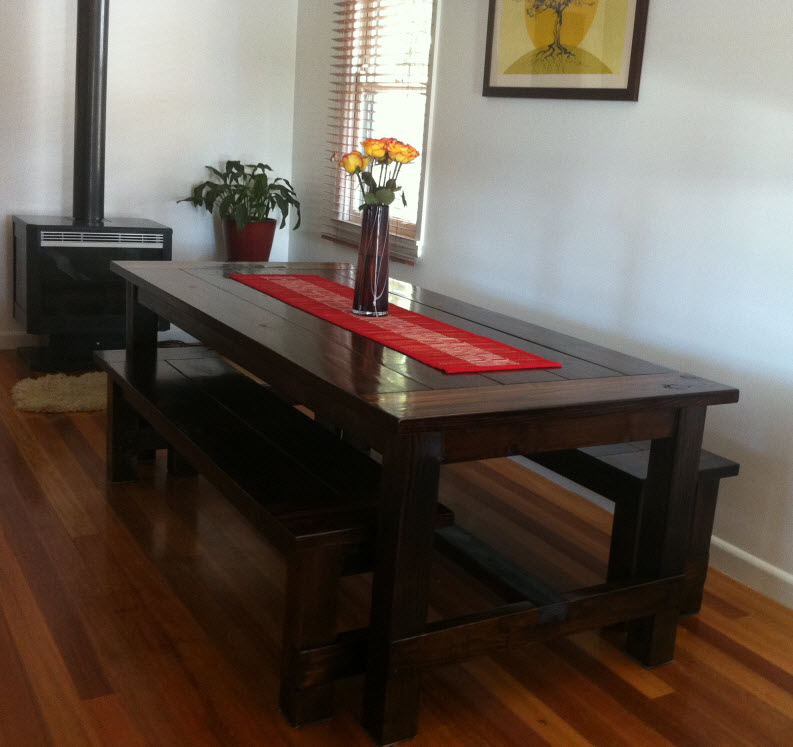
This was my first furniture building project. I made quite a few mistakes along the way, but I'm happy with how well it turned out. This project took me ages; I'm amazed that people can pull it off in a weekend! I made the table slightly lower and narrower than Ana's plan. It comfortably seats 6 people. I'm so grateful to Ana for her plans, and I also found the instructions at the tommy & ellie site very helpful.
Built from Plan(s)
Estimated Cost
$300
Estimated Time Investment
Week Long Project (20 Hours or More)
Finish Used
Minwax Dark Walnut stain and fast-drying semi-gloss polyurethane
Recommended Skill Level
Beginner
Comments
Mon, 01/20/2014 - 14:25
Your table looks amazing! I
Your table looks amazing! I am going to start my farmhouse table this week and I've been trying to decide on the color. I think the dark walnut looks awesome! Great job.
In reply to Your table looks amazing! I by tricia.flores
Wed, 02/26/2014 - 18:52
Good luck!
Thanks! I couldn't decide easily either. Good luck with the table :)
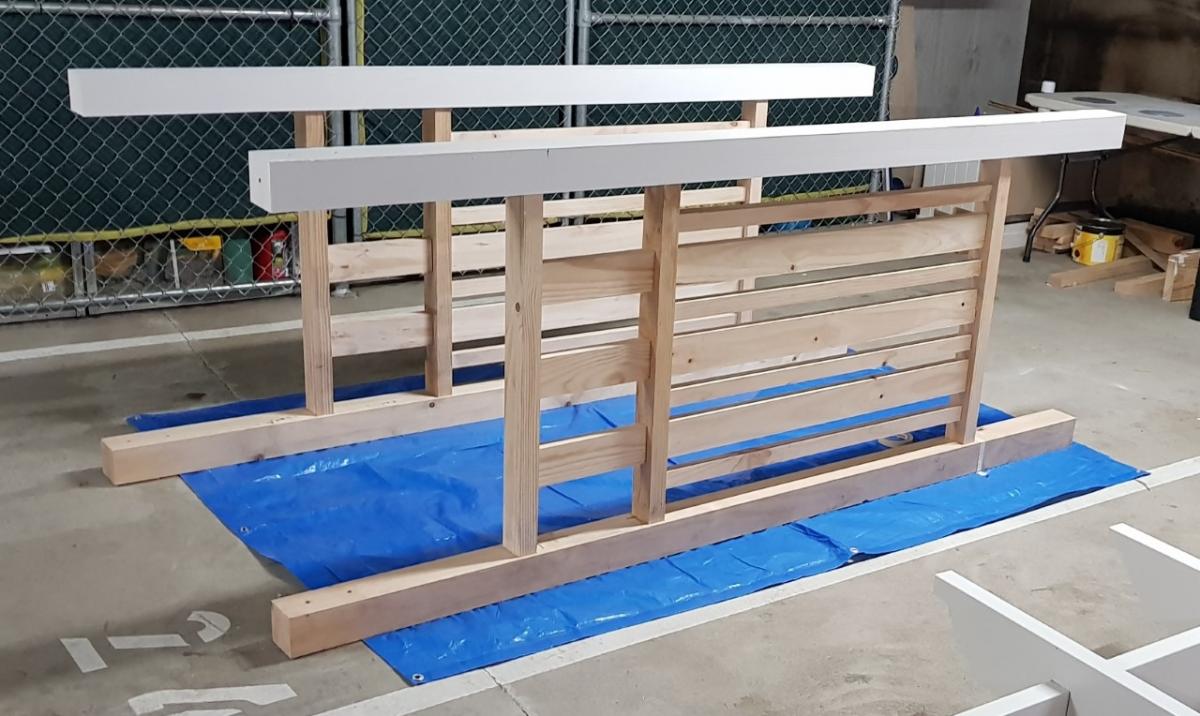
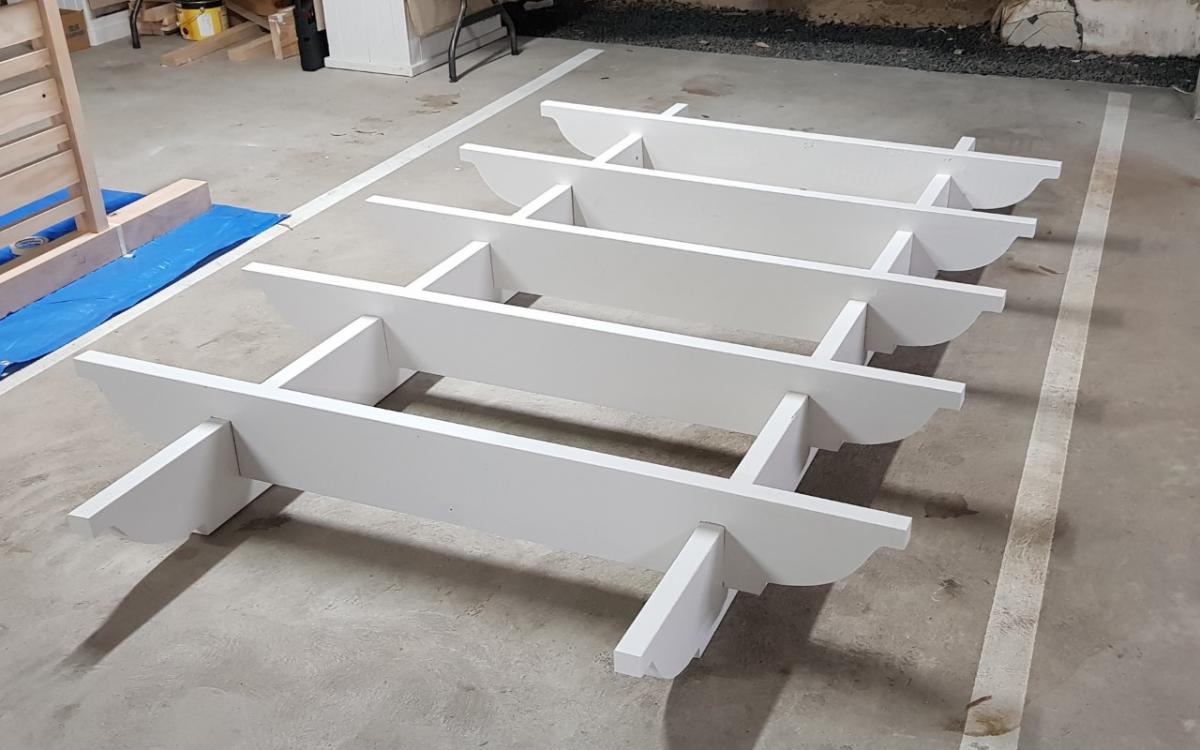
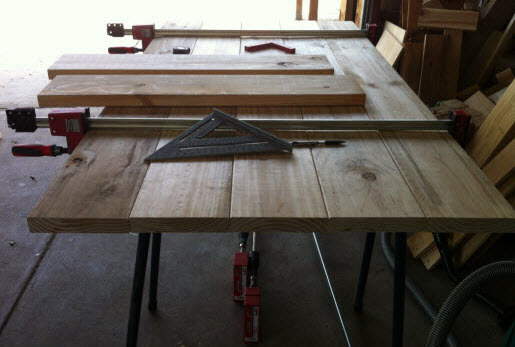
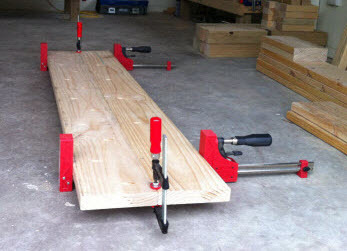
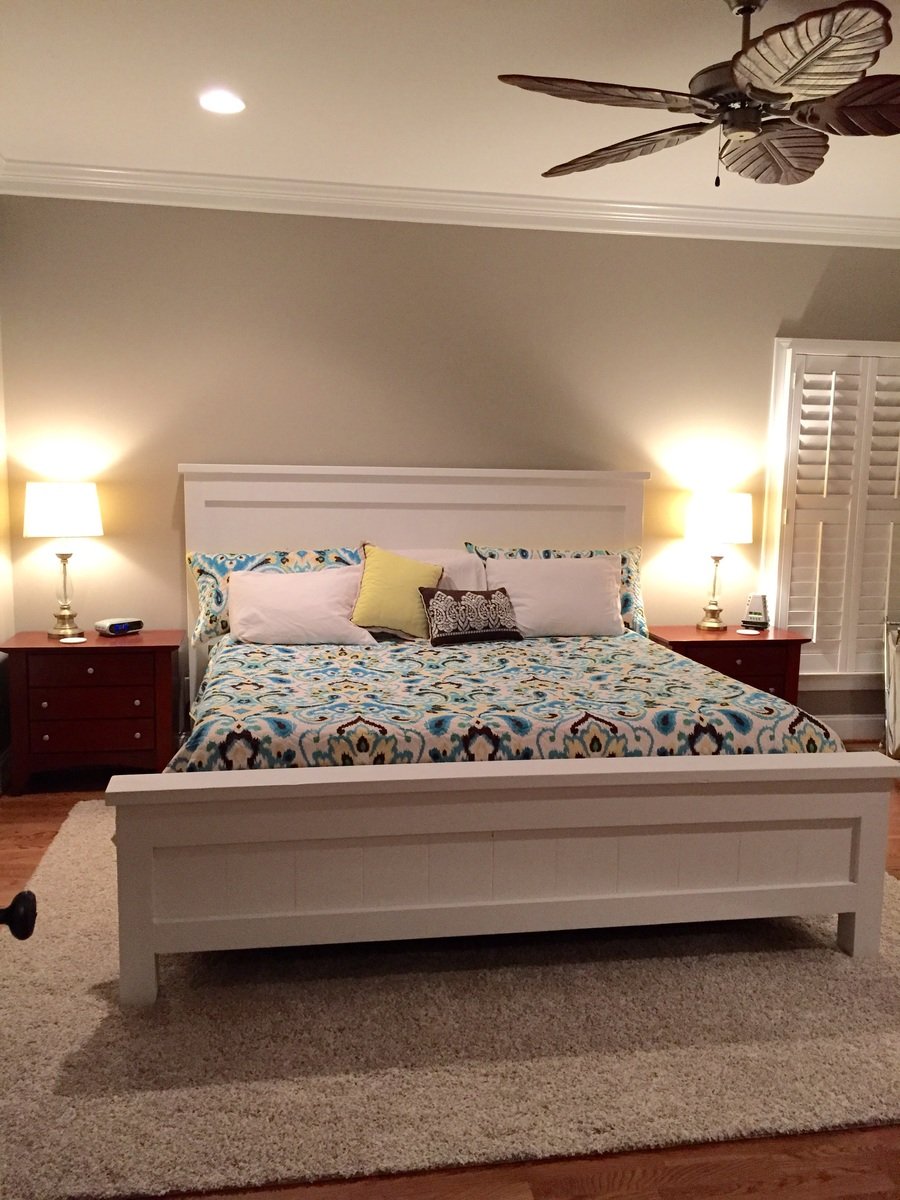
Farmhouse King Bed
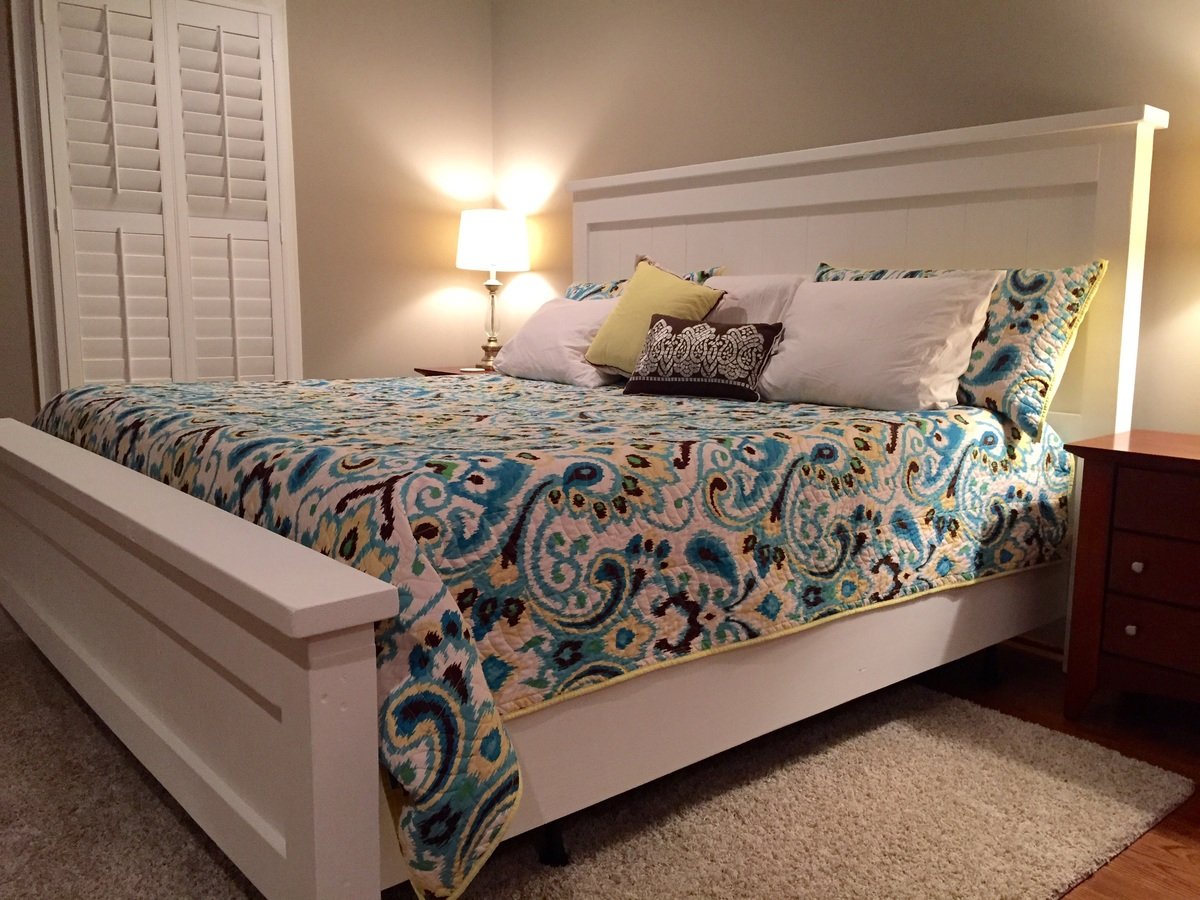
First project my husband and me attempted- turned out awesome! Very sturdy bed. The metal frame and box springs are not attached, it just sits inside the wood rails, headboard and footboard. We worked on this a few hours at a time on Saturdays and Sundays for one month since we work full time. Definitely more projects to come!
Built from Plan(s)
Estimated Cost
$200
Estimated Time Investment
Weekend Project (10-20 Hours)
Finish Used
Latex primer and latex white from Sherwin Williams
Recommended Skill Level
Starter Project
Comments
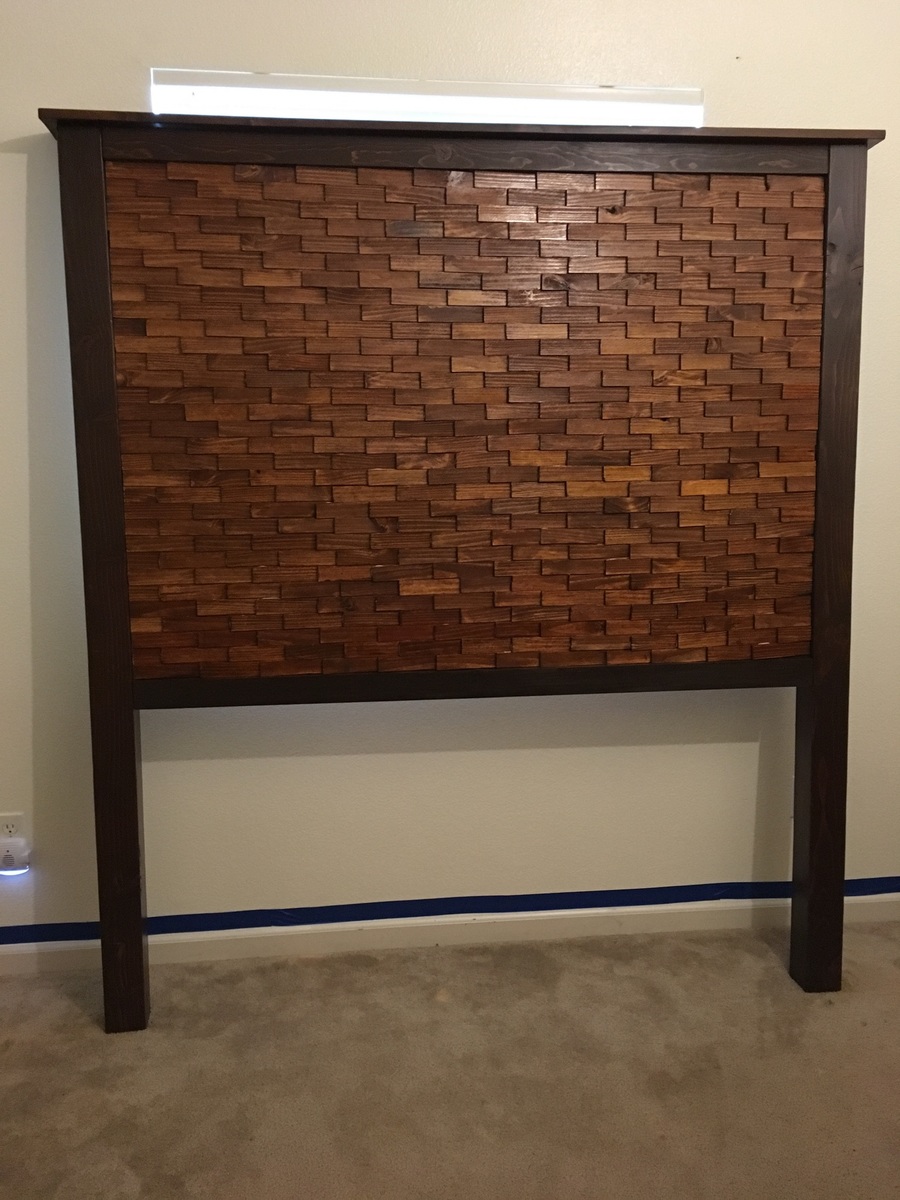
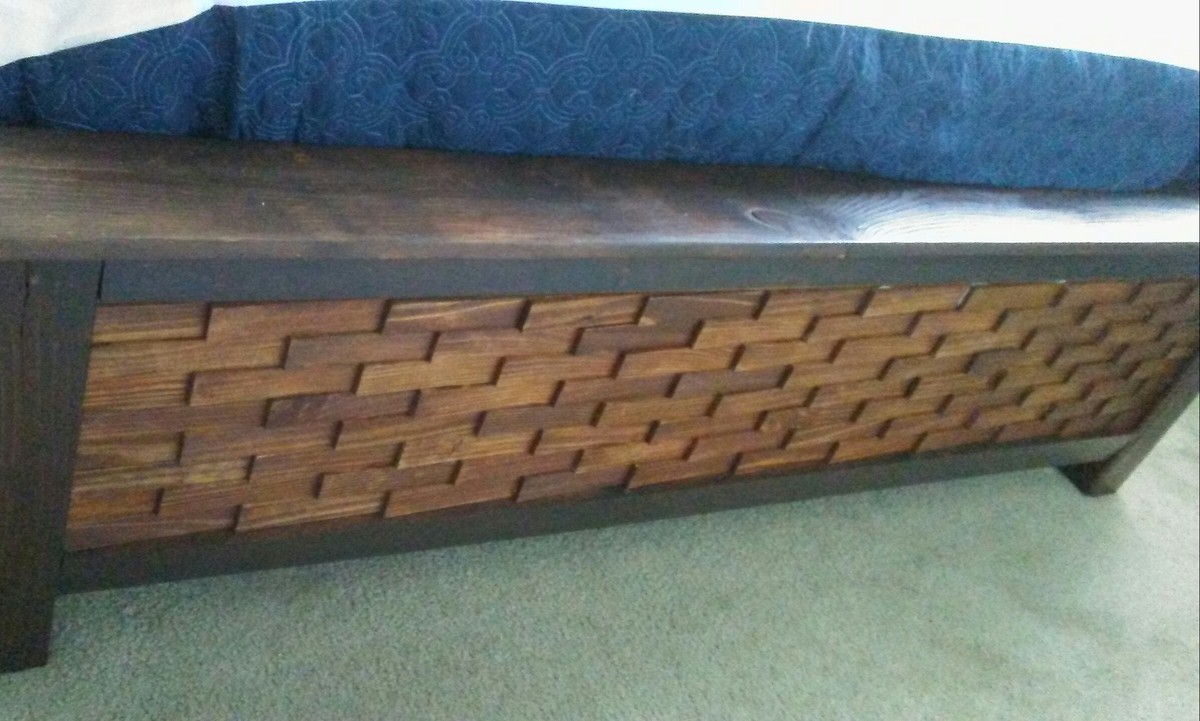
Queen Cassidy Bed
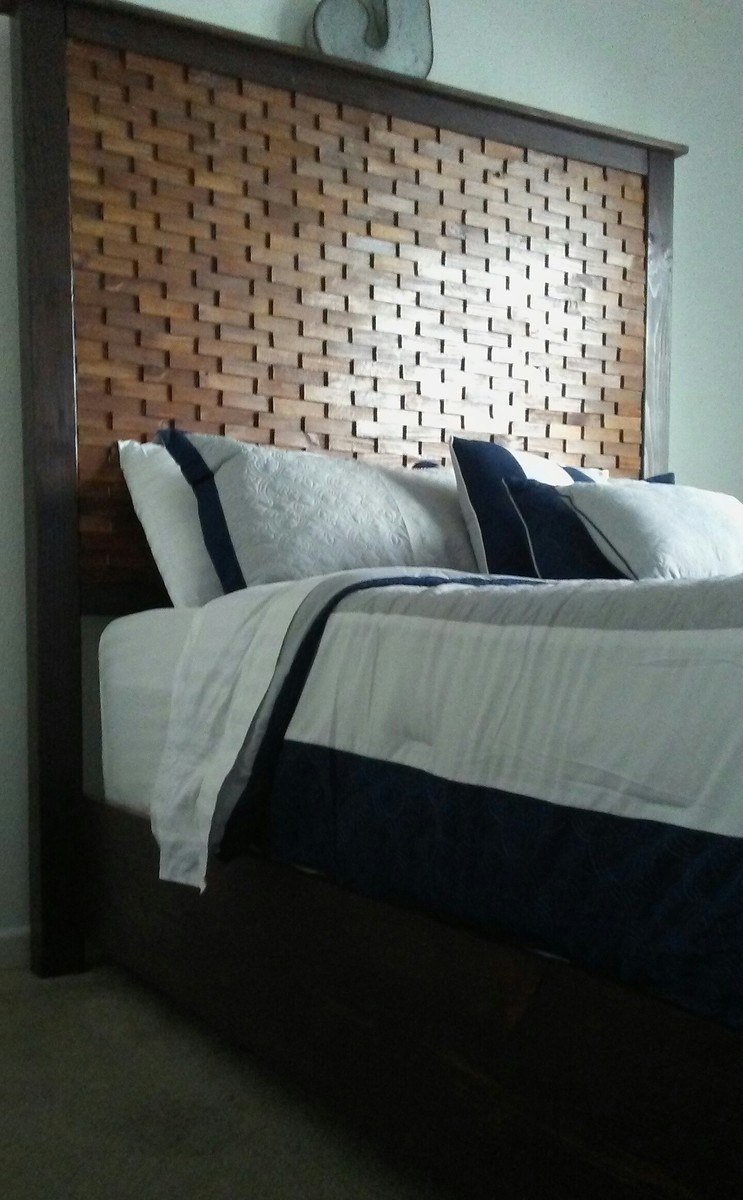
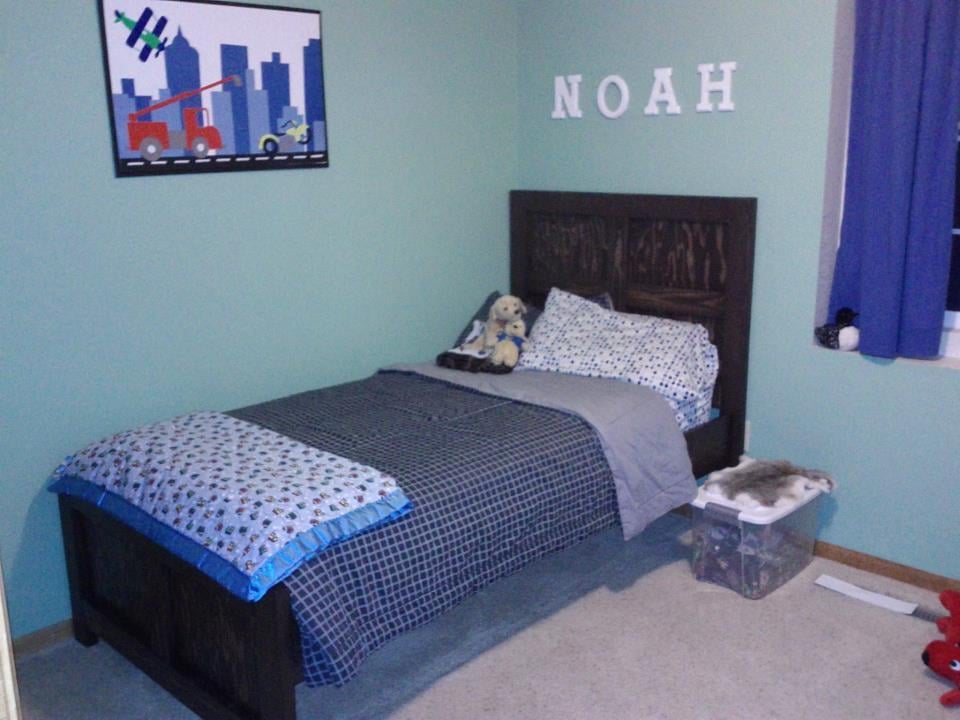
My oldest son grew out of his twin bed and we found the plans for the Cassidy bed and thought it'd be perfect. He couldn't think of a " theme" for his room so we decided to make the headboard taller to keep from having a "blank wall" to have to decorate. It turned out great! We used Colonial Maple, American Walnut and English Chestnut stains for the shims & Colonial Maple + Kona for the border. This was my first time building a queen bed. I am so excited with the way it turned out. This project was so much easier than I had anticipated. It took about 3 days for me because we had triple digit weather and that limited the amount of time I could work outside. I needed help with the final assembly, but other than that, it was a breeze. Thanks again for the awesome plans!
Built from Plan(s)
Estimated Time Investment
Week Long Project (20 Hours or More)
Finish Used
Colonial Maple +
American Walnut +
English Chestnut on wood shims
Colonial Maple + Kona on border pieces
Polyurethane, Clear Semi Gloss
American Walnut +
English Chestnut on wood shims
Colonial Maple + Kona on border pieces
Polyurethane, Clear Semi Gloss
Recommended Skill Level
Beginner
Comments
Laundry Room Organization
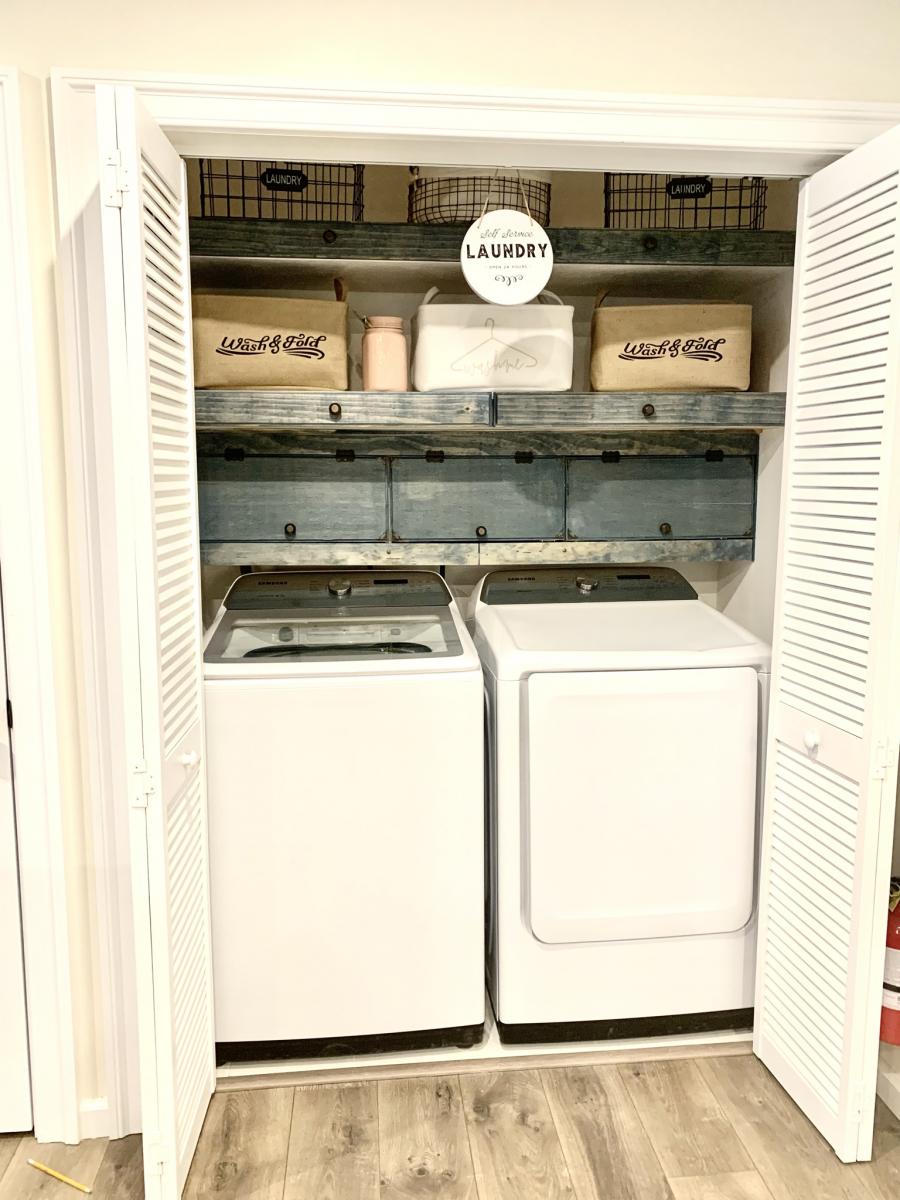
Check out the free plans for these laundry room projects!
Built from Plan(s)
My first building project ever. Thanks Ana!
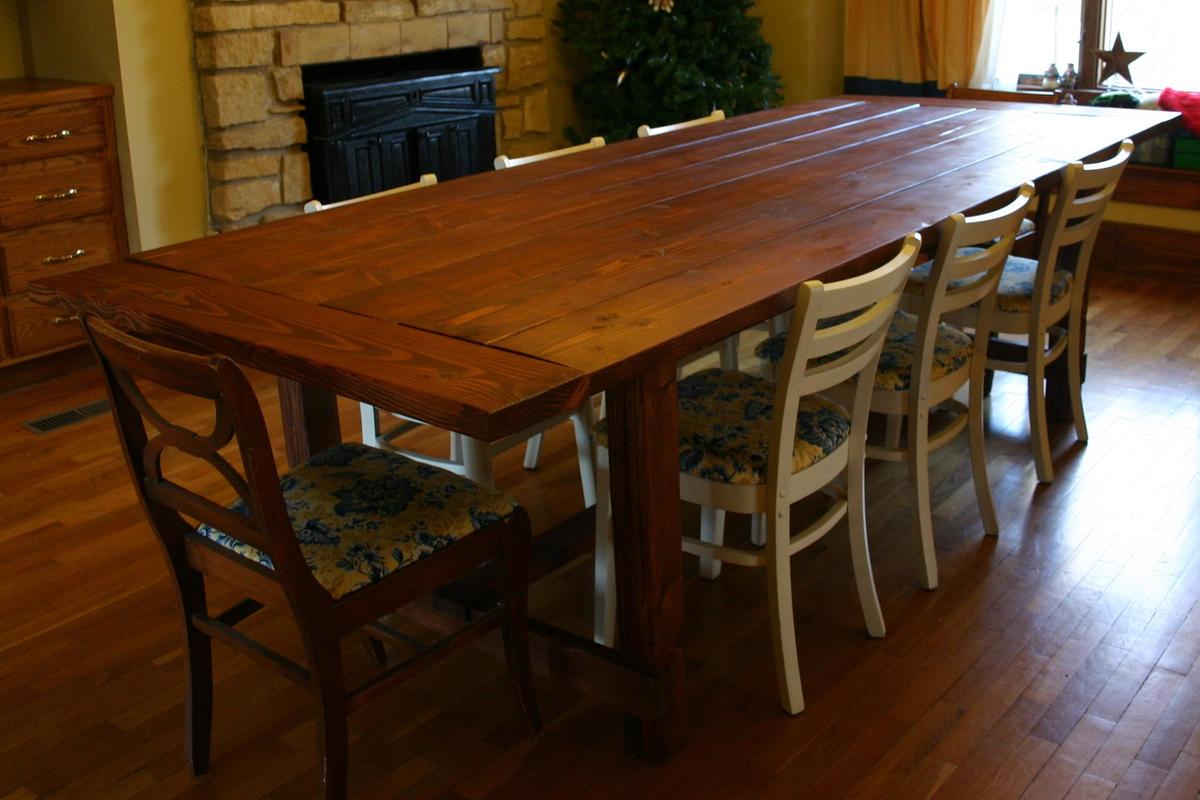
I made this table using Ana's design for the Farmhouse Table and the original from Restoration Hardware. I put the stretcher supports back on the outside and added the extensions.
I also switched out the 2x6 top for 2x8s and attached them all from the bottom; I didn't want to deal with concealing screws on the table surface. The switch meant the boards on the sides are attached only on the innermost 3 inches. I drilled up through the 2x4 aprons and used 3 1/2 inch screws every six inches to make sure they were secure.
It's enormous and seats 12 if needed.
Built from Plan(s)
Estimated Cost
$160 using free recycled stain and a ton of screws
Estimated Time Investment
Weekend Project (10-20 Hours)
Finish Used
I sanded it until I was pretty sure the risk of splinters was eliminated, but it was far from perfectly smooth. After pre-stain conditioner, it got a coat of Minwax Red Chestnut. The result was a little too red so my mom saved the day with a coat of Minwax Provincial and sealed it with wax. It's a tough finish and I'm not taking any special care of it. The goal is for it to look like it's really old, not pristine, so I make a point of not using place mats or protecting the surface.
Recommended Skill Level
Beginner
Emme Twin Bed, turned out better than the pottery barn one !!
This bed is made exactly the same as the plans. Pretty easy. Very sturdy, I did use the kreg jig to assemble, even to attach the sides to the headboard and footboard. I'm not able to use the box spring anymore, since it makes it too high.
Built from Plan(s)
Estimated Cost
$80.00
Estimated Time Investment
Weekend Project (10-20 Hours)
Finish Used
same as the shanty-2-chic bed, Kona rustoleum with a satin finish.
Recommended Skill Level
Starter Project
Porch Swing - I LOVE IT!
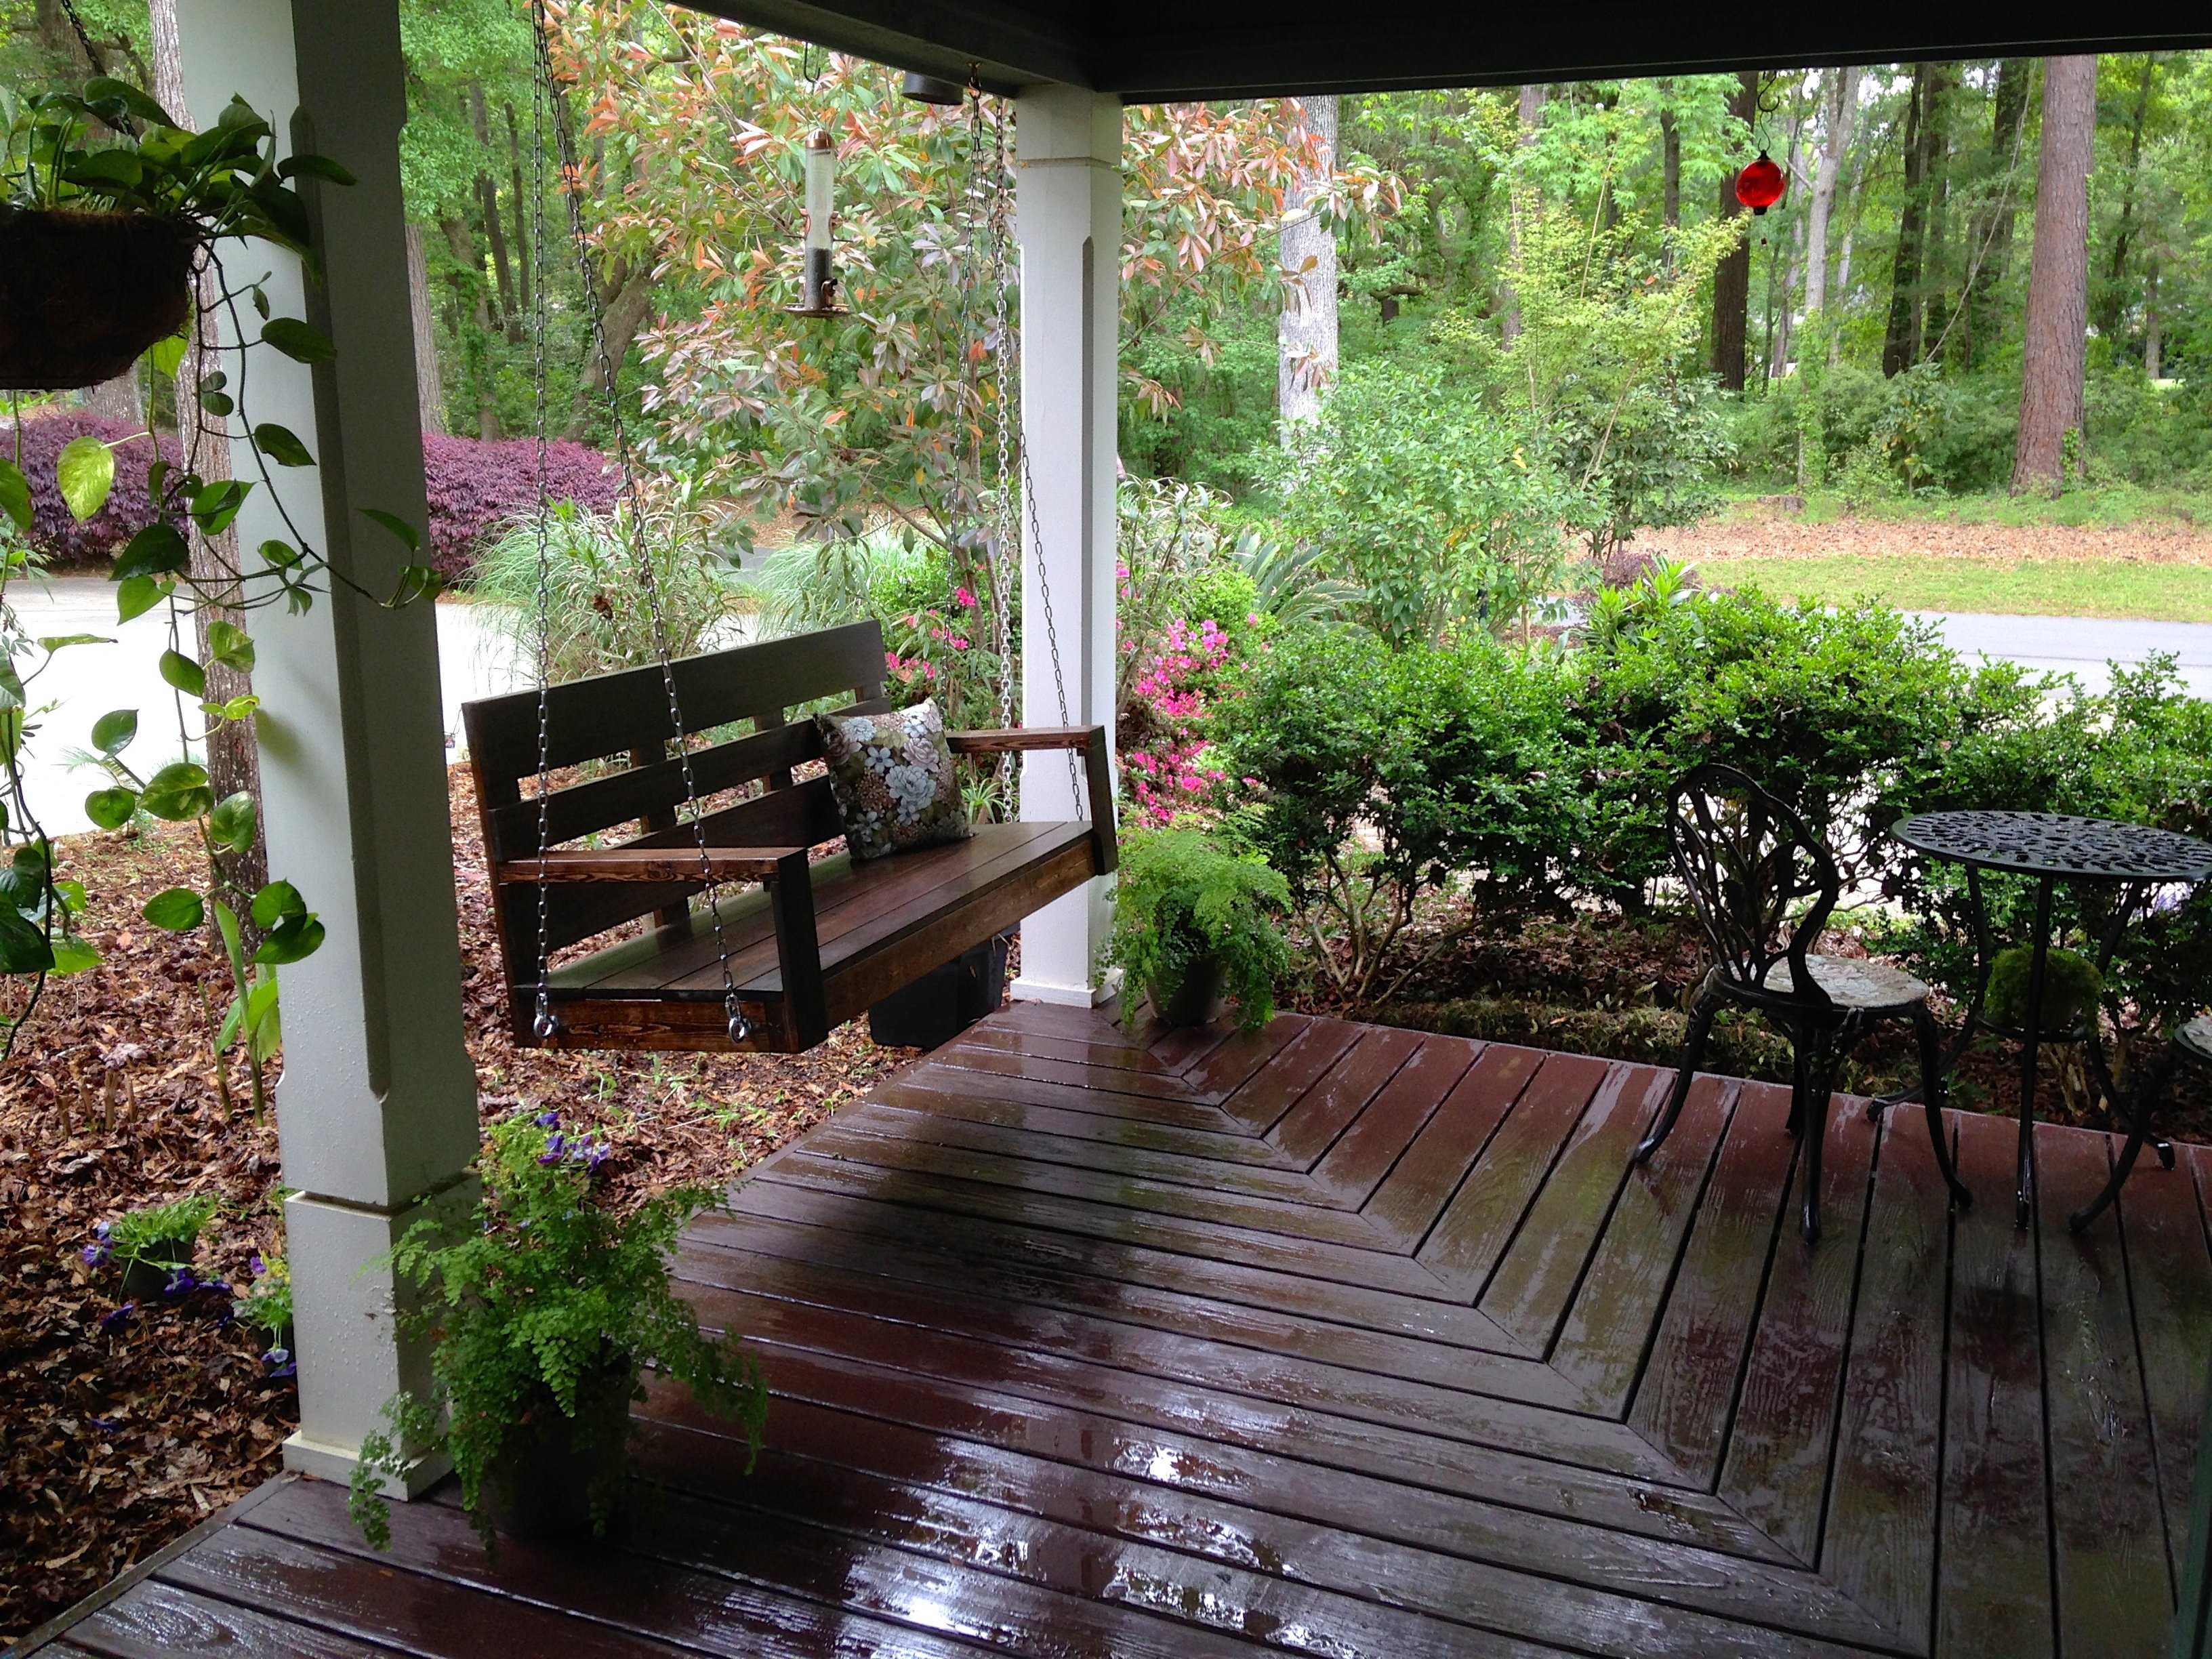
I've been wanting to build this swing for a year now, and finally it's completed. I LOVE it! The modern design is perfect for our front porch as our home is more of a contemporary style. It was the first project I've done using the Kreg Jig Kit, which is AWE-SOME!
I modified the plan a bit: I made the swing 52" long, and used 1x4's for the back support instead of 2x4's. I also upgraded the top and back 1x4's and 1x6's to poplar wood so the grain would be finer. The plan was simple to build. Thank you for your blog and providing plans! There are other things on your site that I look forward to making.

Built from Plan(s)
Estimated Cost
$150
Estimated Time Investment
Weekend Project (10-20 Hours)
Finish Used
Stain and polyurethane
Recommended Skill Level
Beginner
Comments
Sun, 04/12/2015 - 06:29
Very Nice!
That porch swing looks great! I have to say that its a great addition to an already sweet looking porch area you have there.