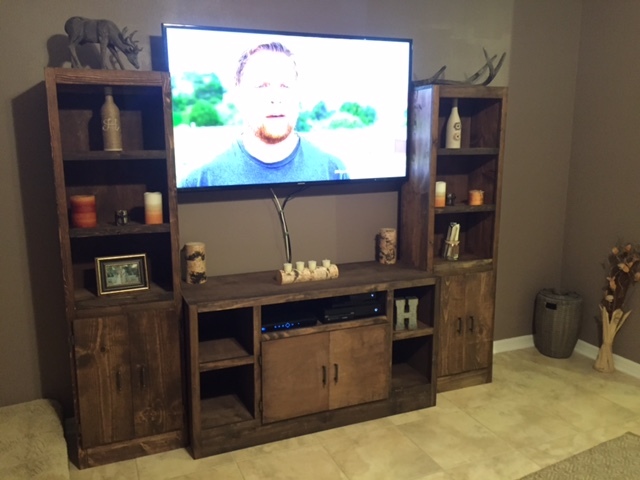
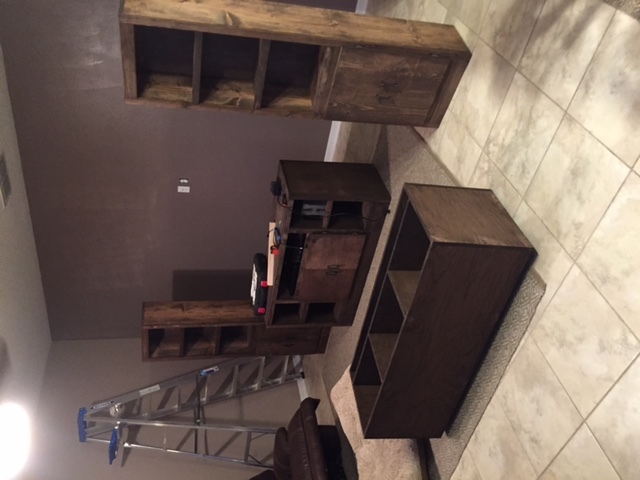
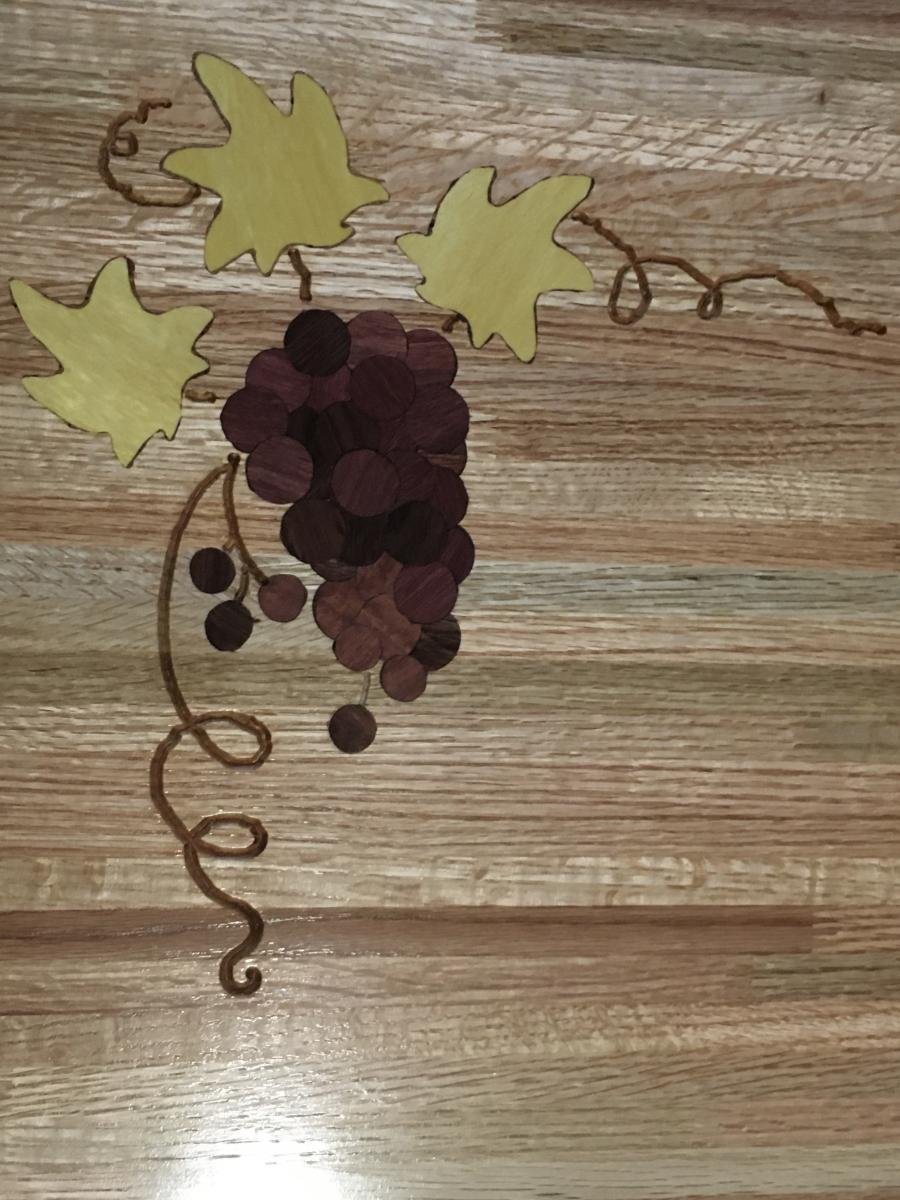
Community Brag Posts
My take on the toy box
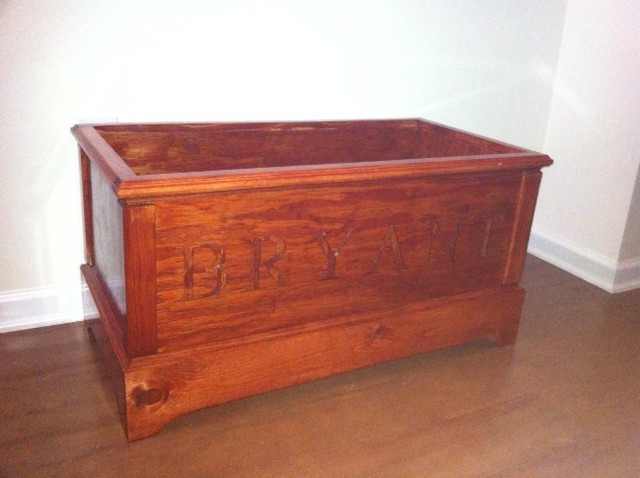
I chose to go with regular plywood, and I used thin pieces of wood to cover the screw holes in the corners. I just rounded the edges of the corner pieces to make them meet up with the molding better. Then I routered the top to smooth it out. I stained and clear coated it instead of painting it. For the lettering I chose to router it out instead of drawing it on.
Built from Plan(s)
Estimated Time Investment
Weekend Project (10-20 Hours)
Finish Used
minwax gunstock and spray on clear coat
Recommended Skill Level
Beginner
Comments

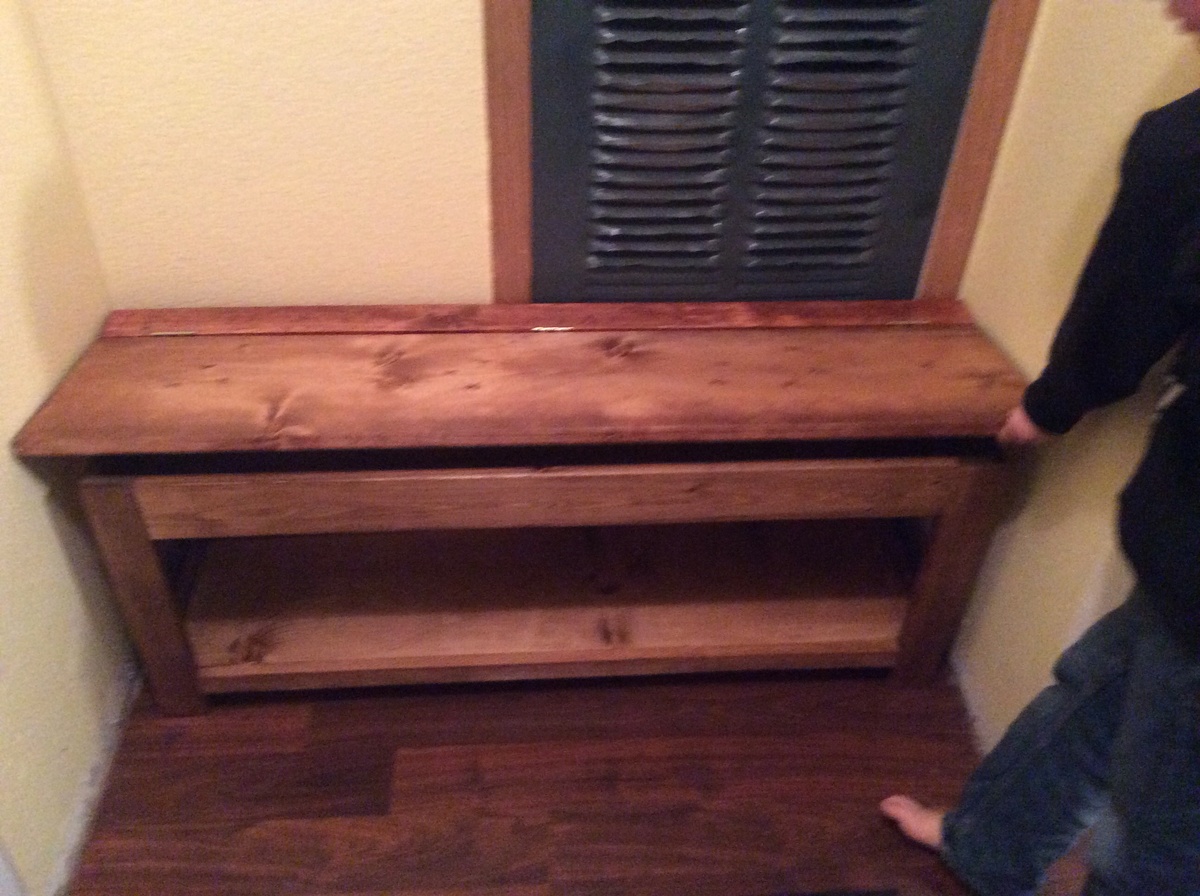
Storage Bench
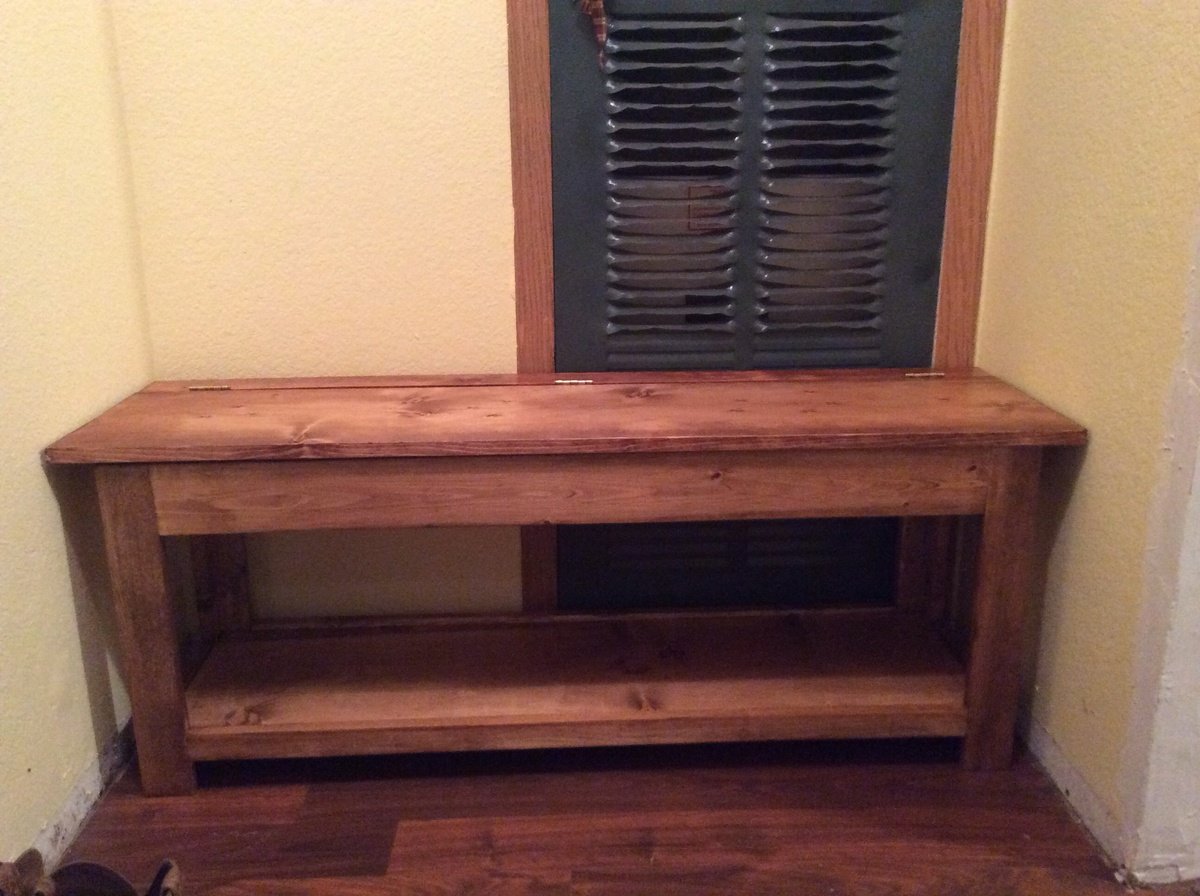
I have a small mud room and this bench was perfect for keeping shoes organized on the bottom shelf, as well as storing hats and gloves inside. The storage area isn't very deep but it holds a decent number of hats and gloves.
Built from Plan(s)
Estimated Time Investment
Afternoon Project (3-6 Hours)
Finish Used
One coat of Minwax Early American stain with a satin sheen polyurethane over the top.
Recommended Skill Level
Beginner
Entry closet turned bench

The coat closet in our entry was always cluttered with too many coats, oddly placed mittens and hats, and shoes were piled on the floor. This was our solution. After this picture was taken I attached several hooks I found at a local antique store along the rail for the coats or sweaters we wear daily, and shoe bins were added below for each of our three daughters.
Estimated Cost
$20 plus accessories
Estimated Time Investment
Afternoon Project (3-6 Hours)
Finish Used
Sample paint jar purchased from large chain grocery market
Recommended Skill Level
Intermediate
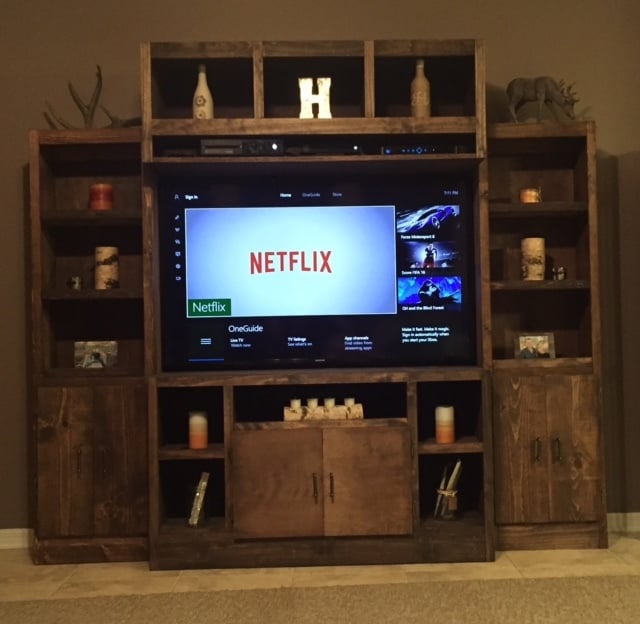
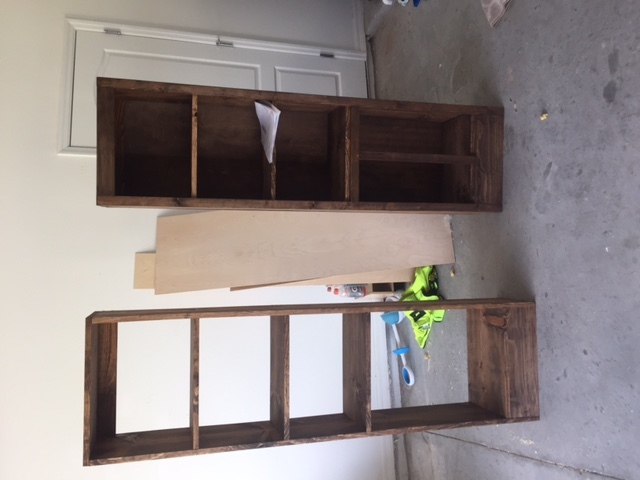
Industrial Bookcase for my office
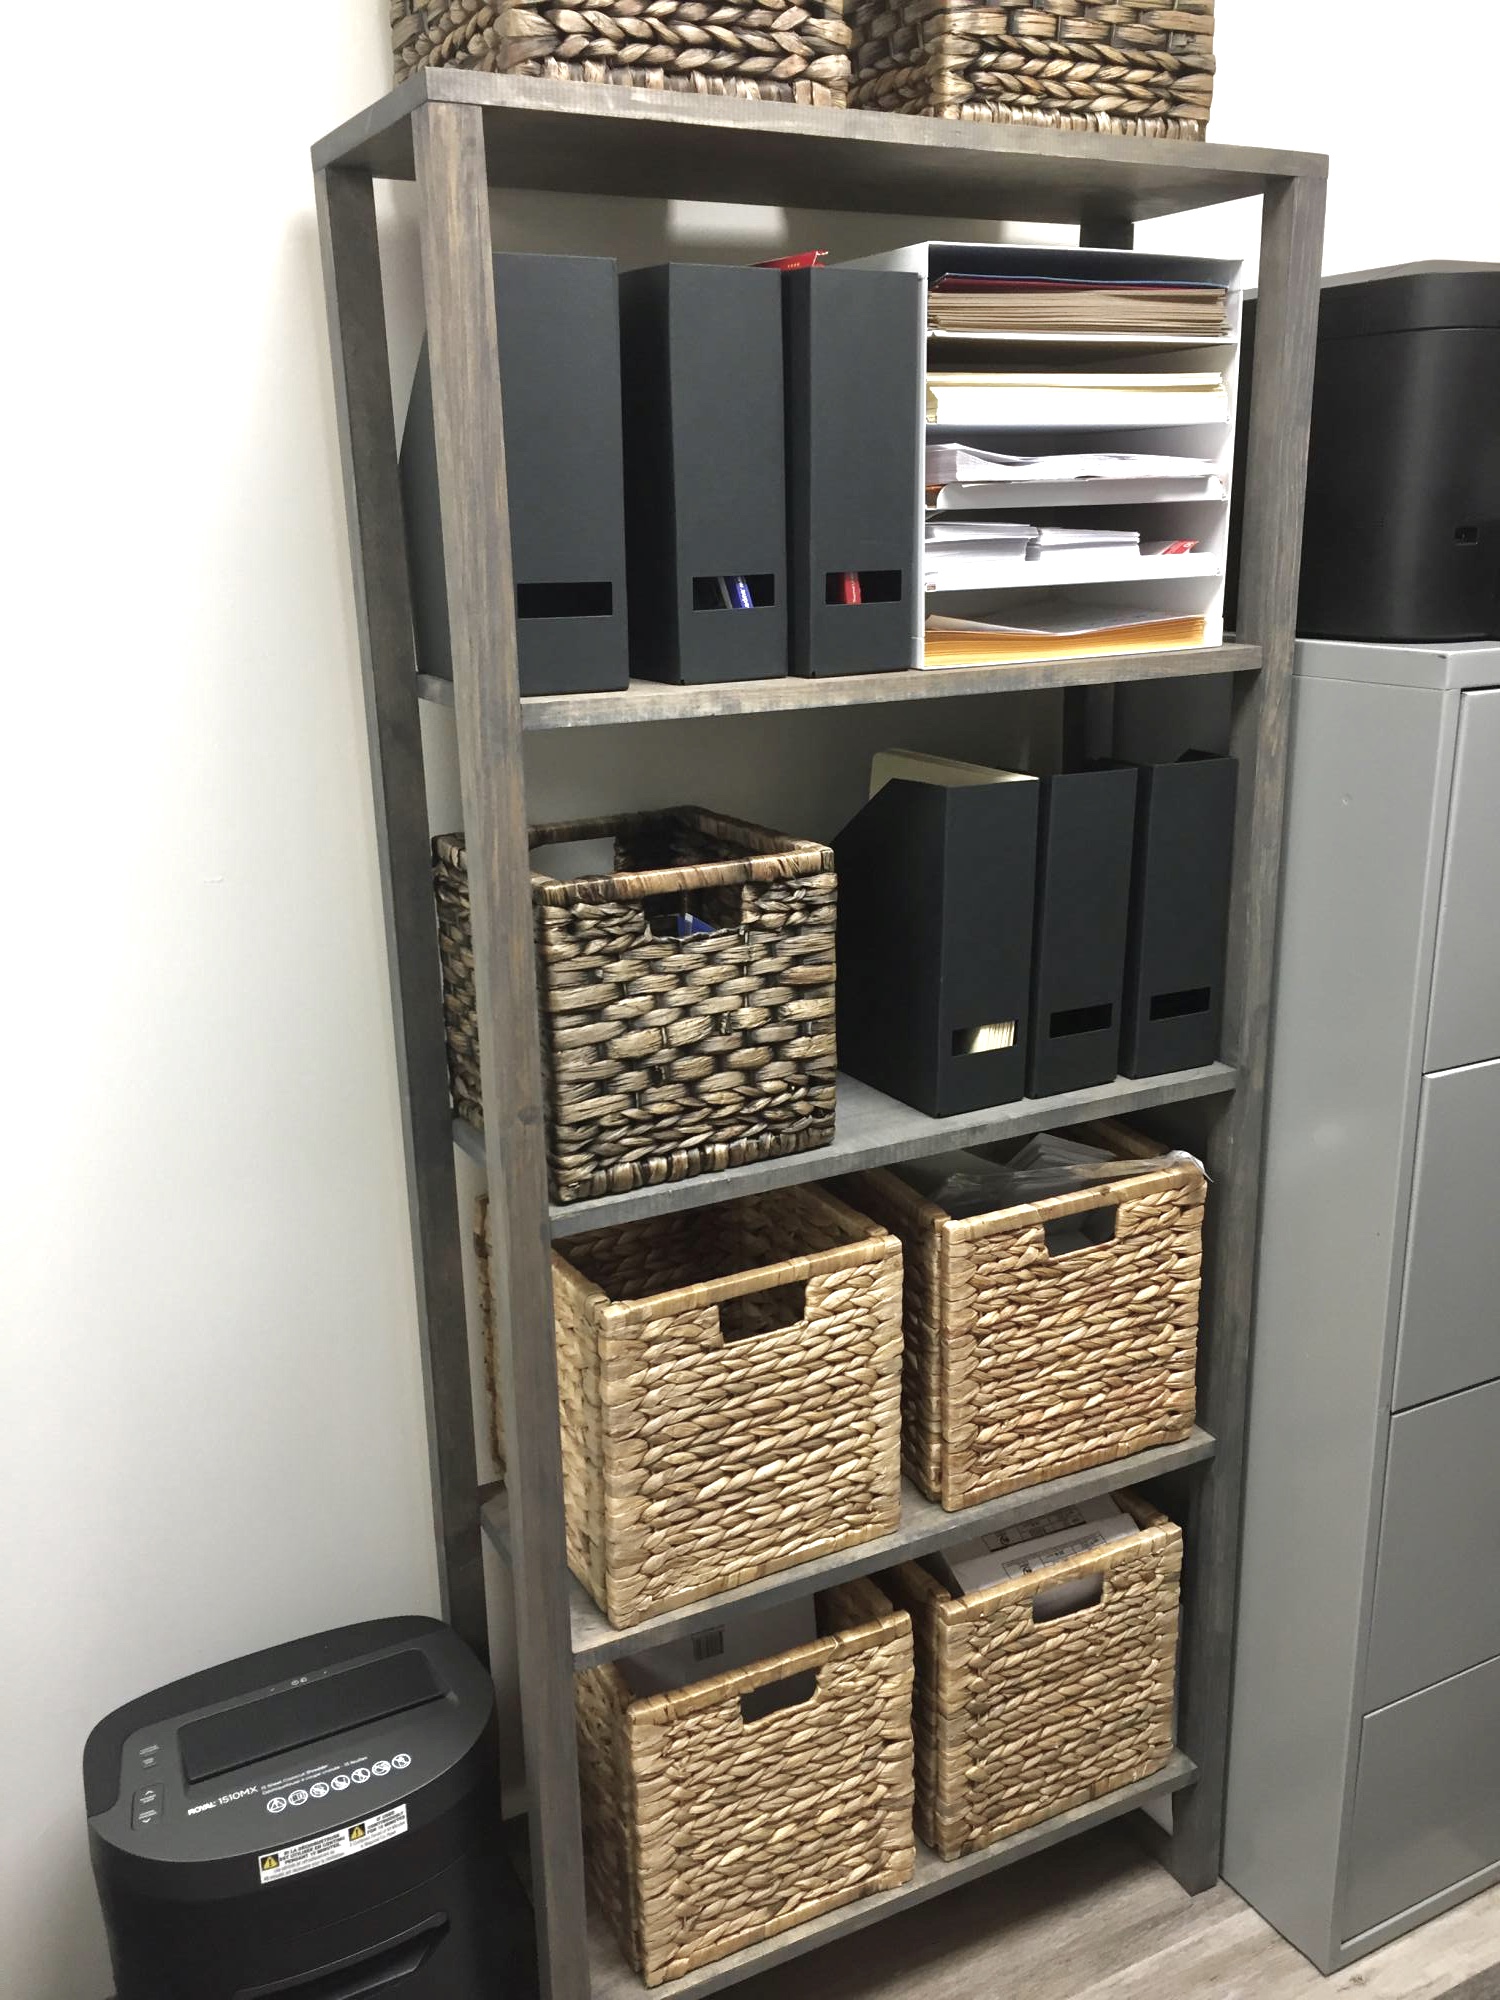
I built this bookcase for some office storage.
Built from Plan(s)
Recommended Skill Level
Beginner
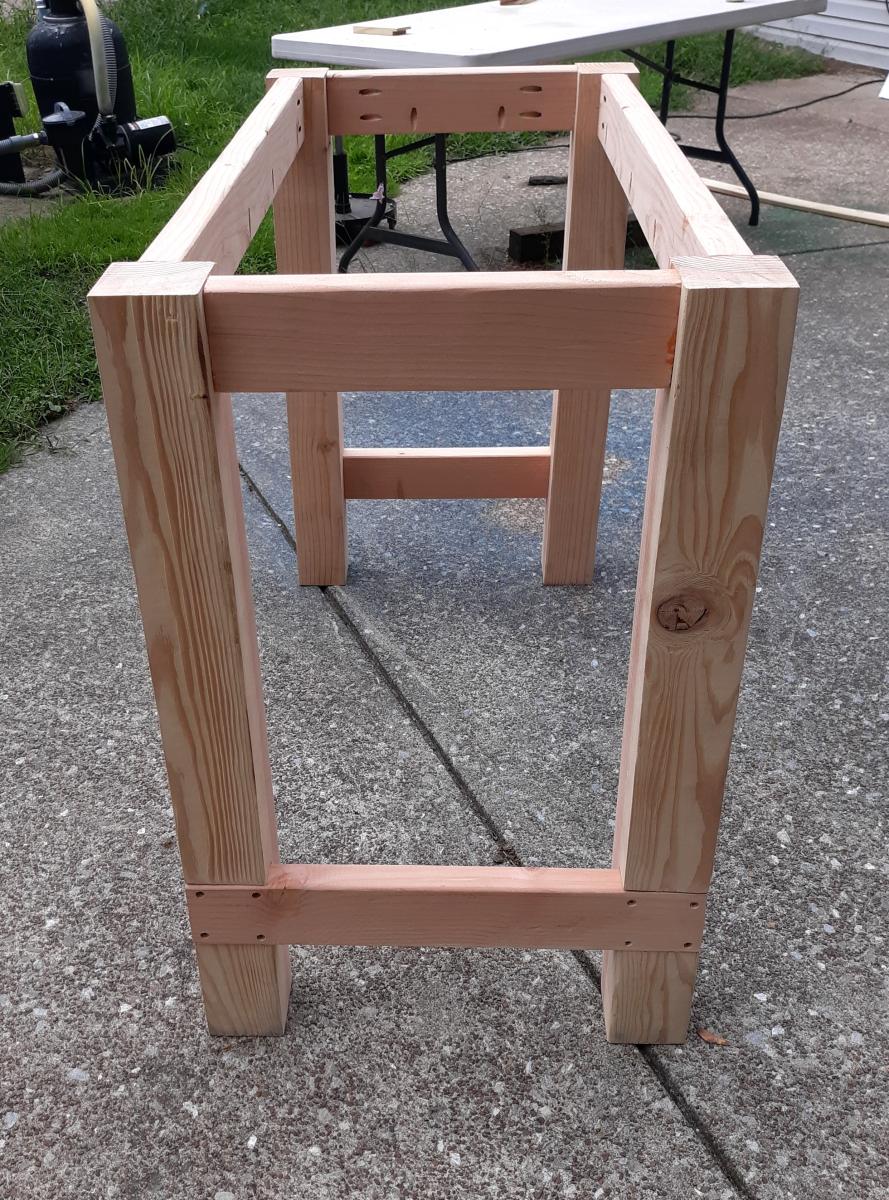
Dorm Room Counterheught Table
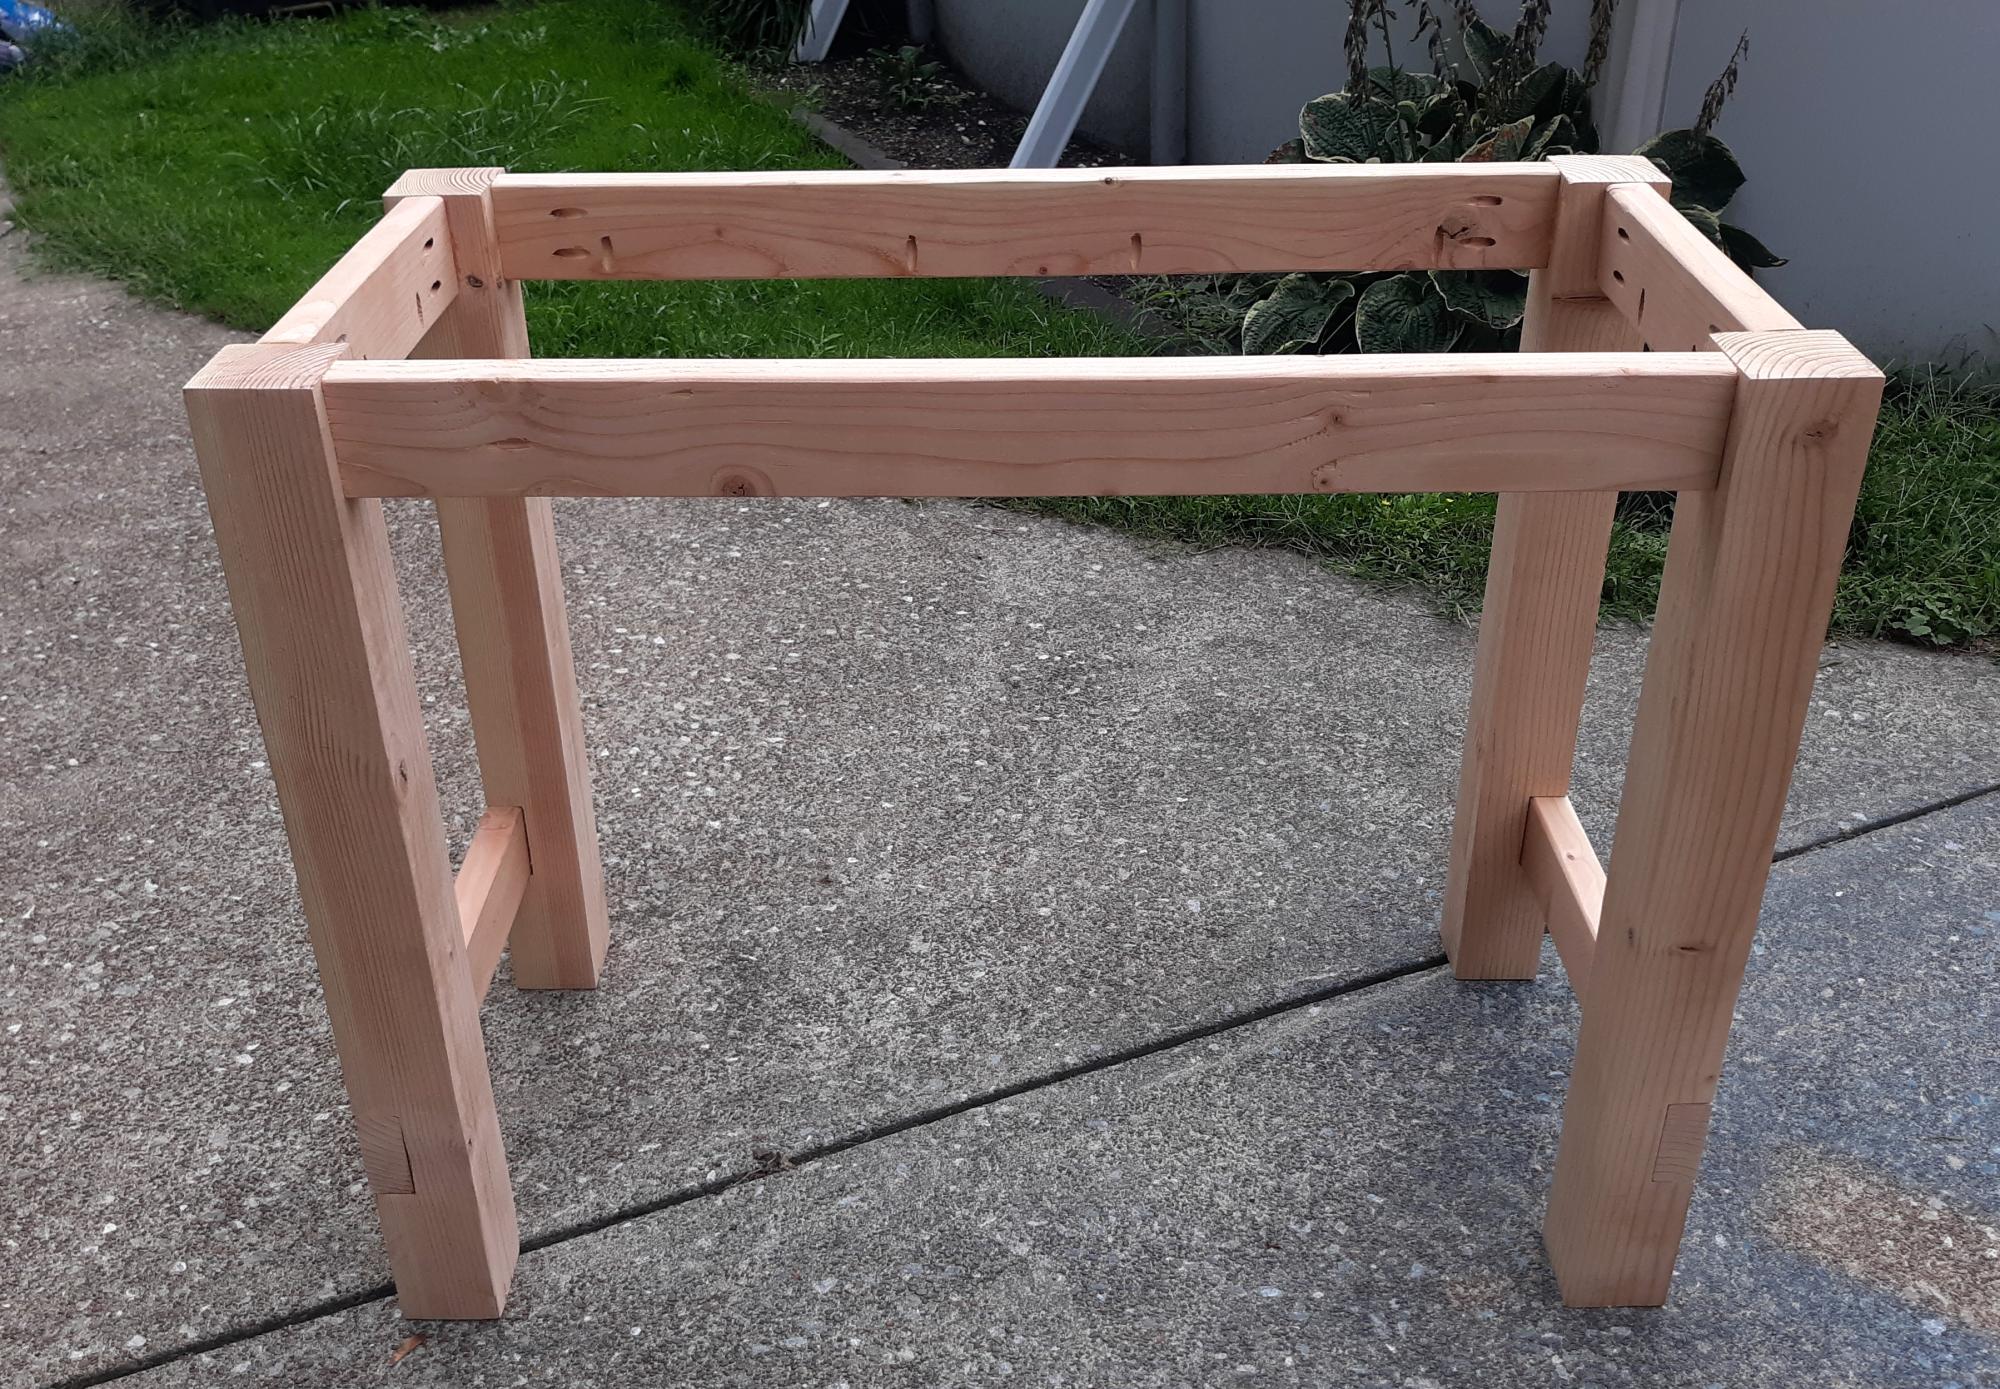
My grandson is in his second year college. He just got his first apartment and needed a table for homework and eating and folding clothes. We made a scaled down version of a farm table and it turned out exactly the way we wanted it.
Roger H
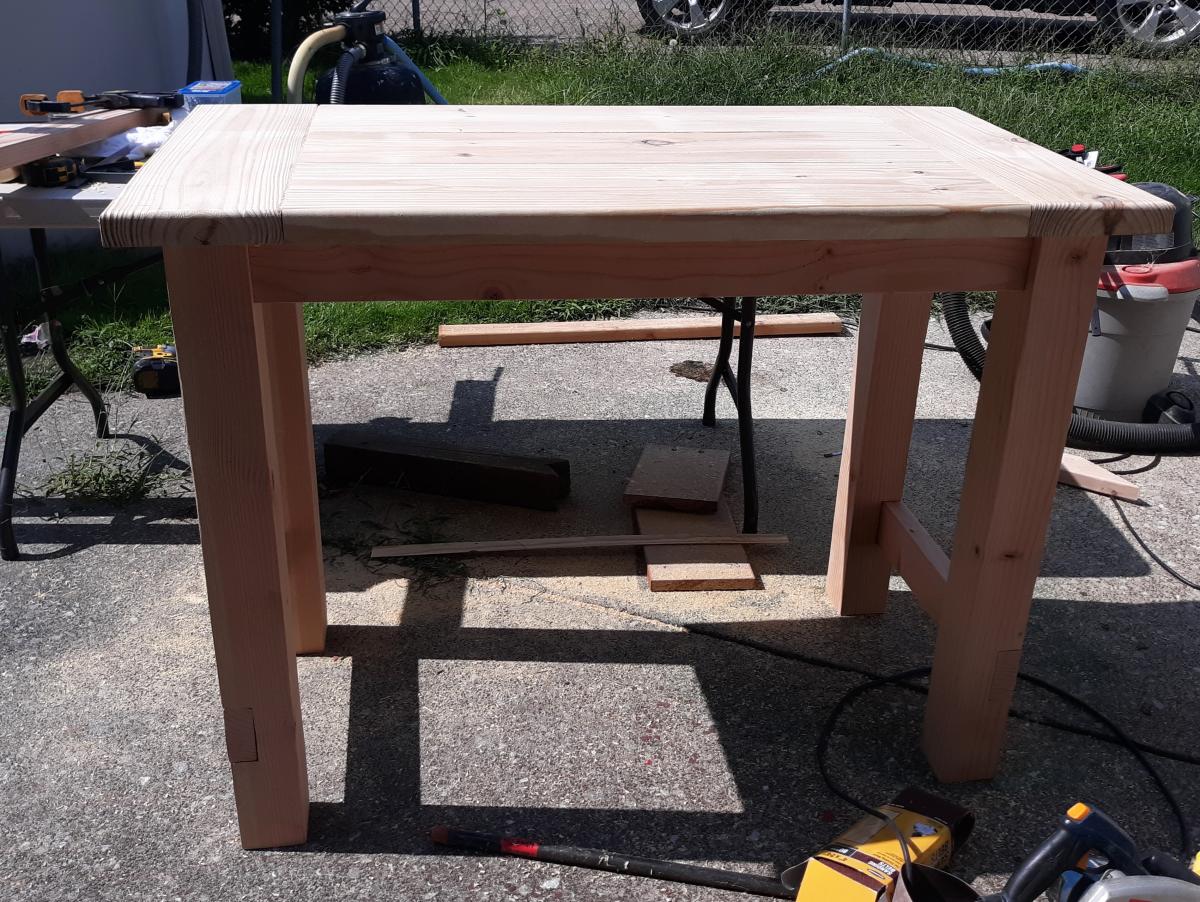
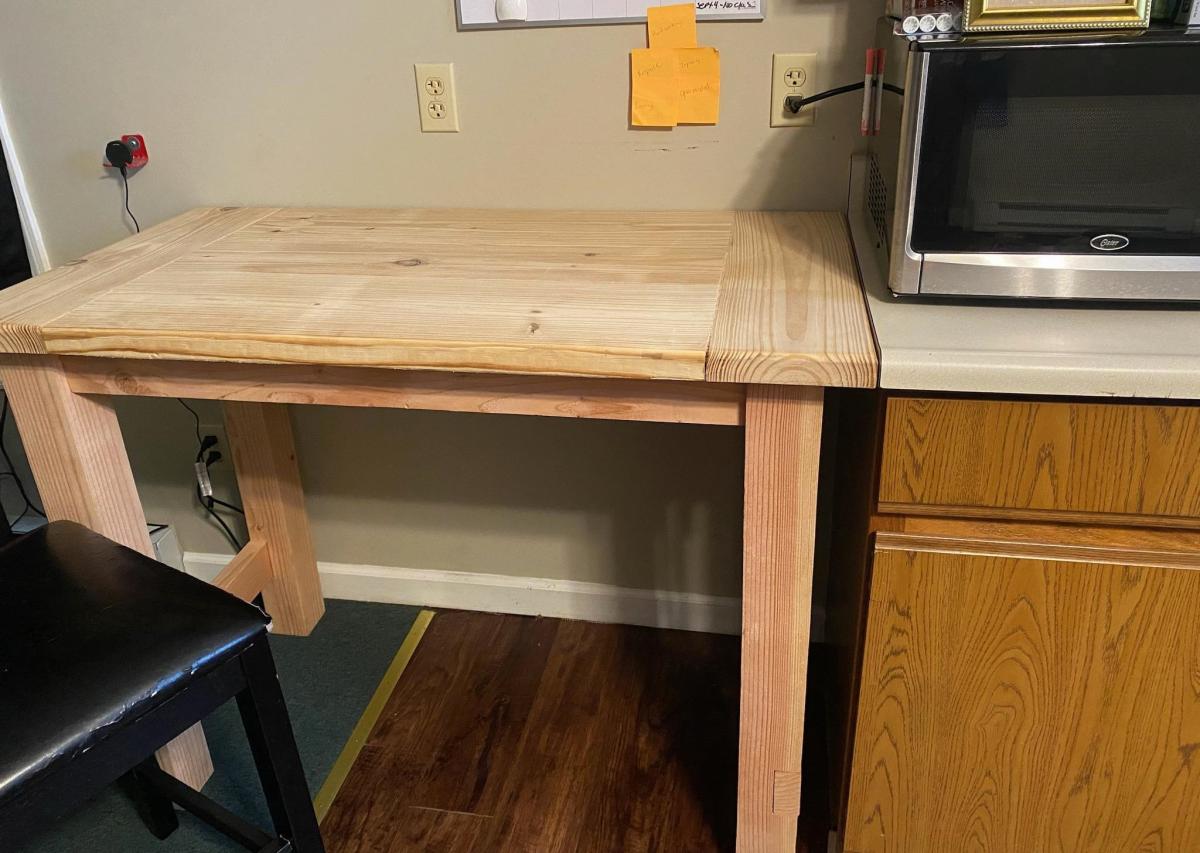
Built from Plan(s)
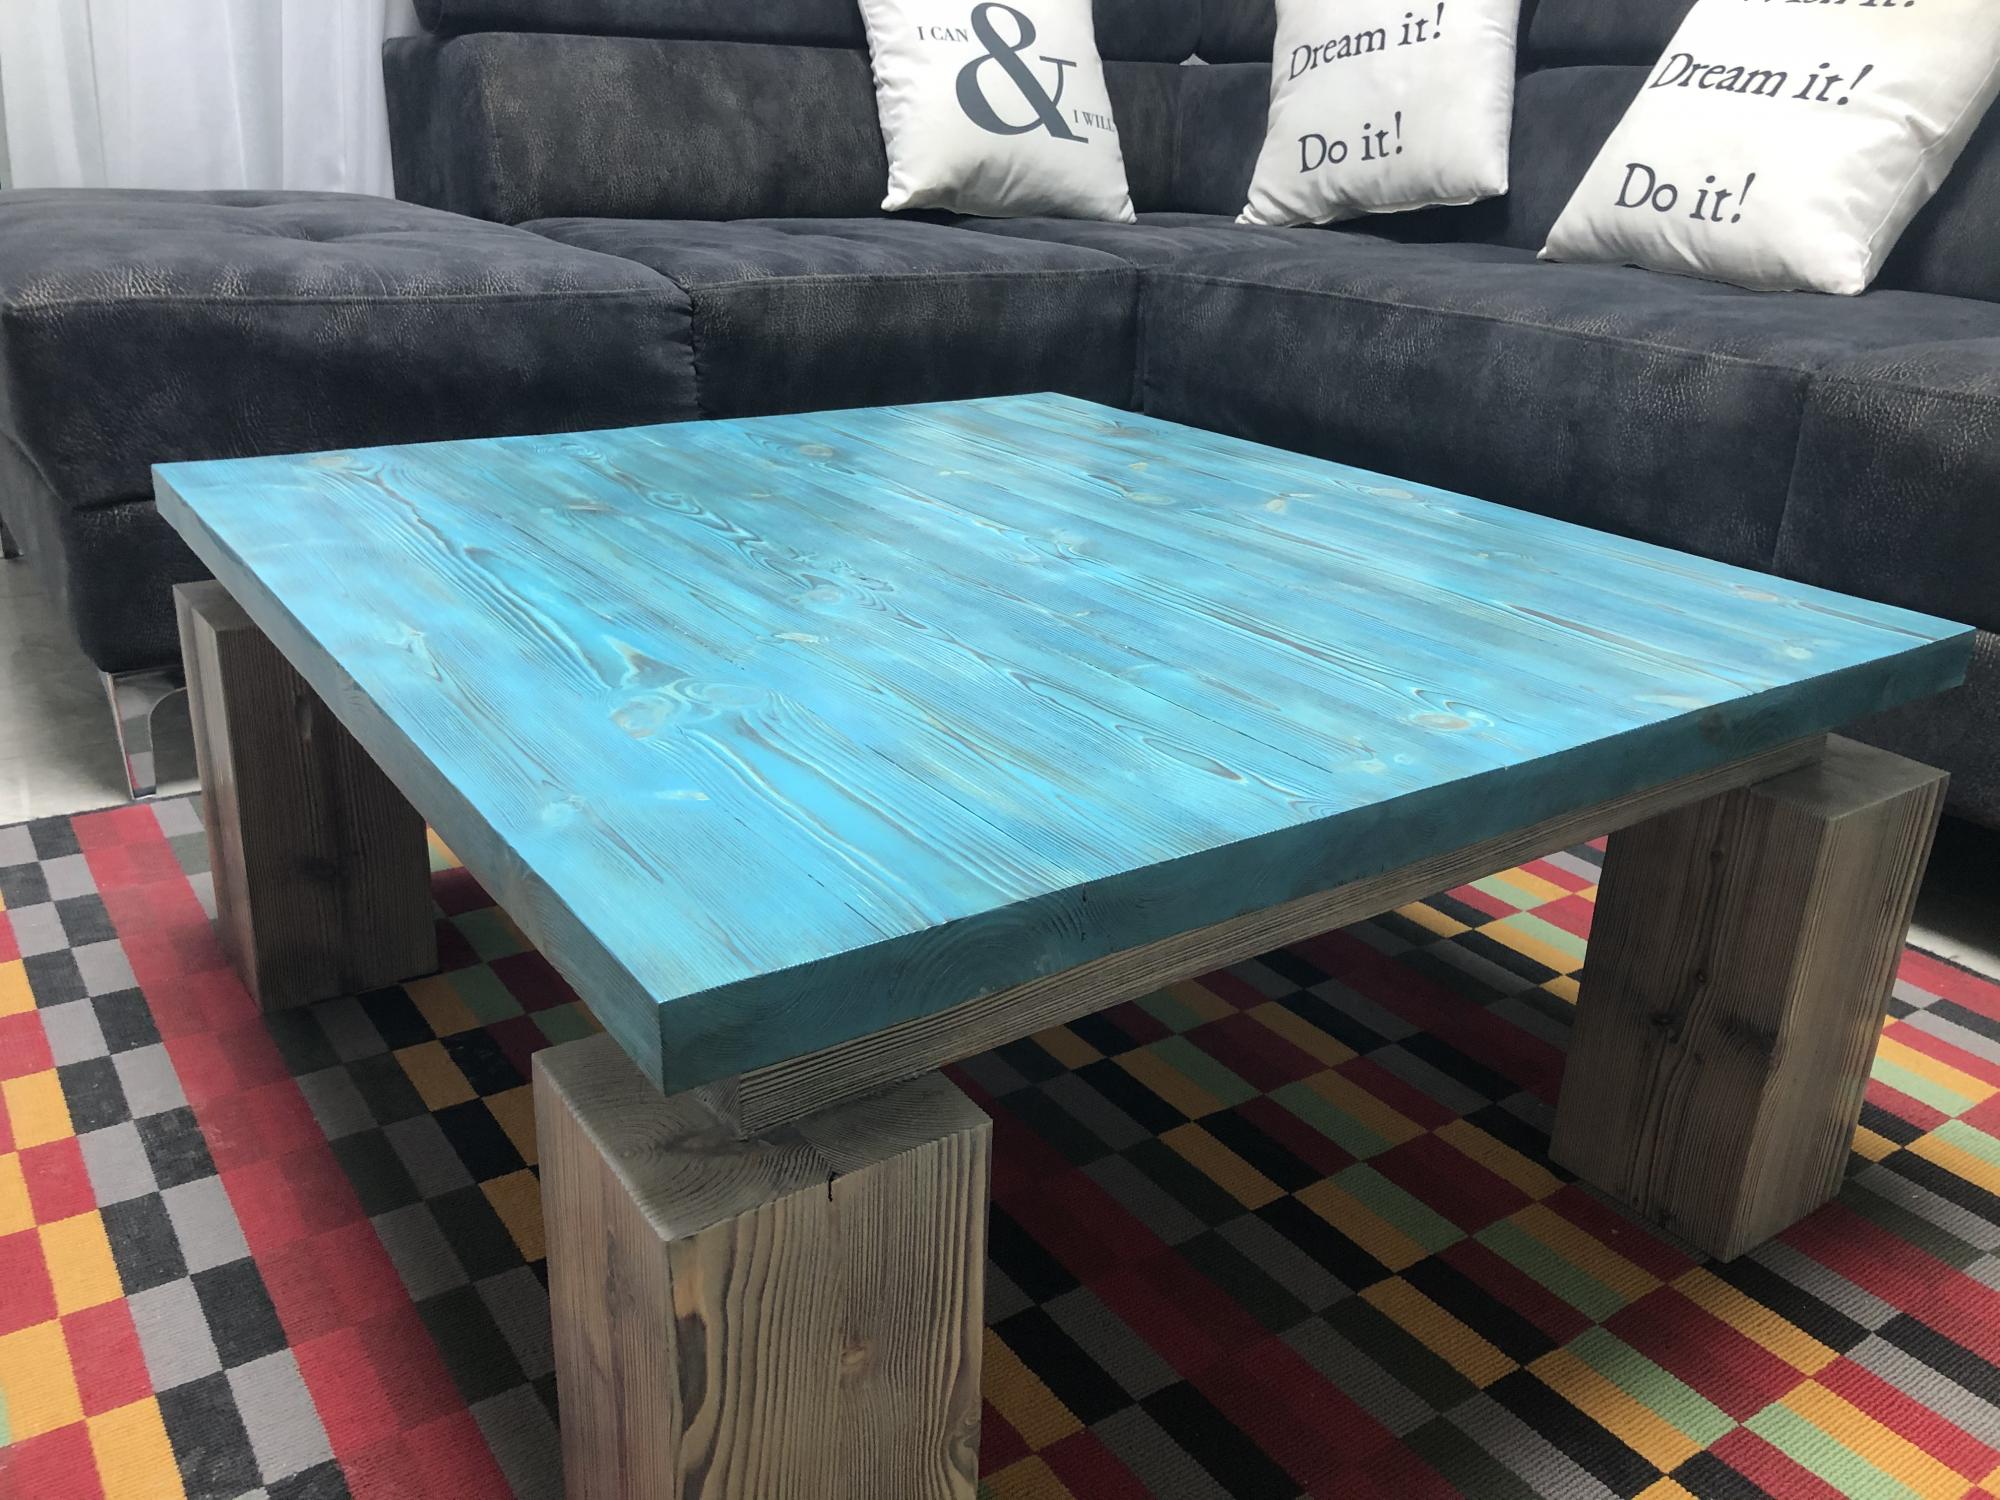
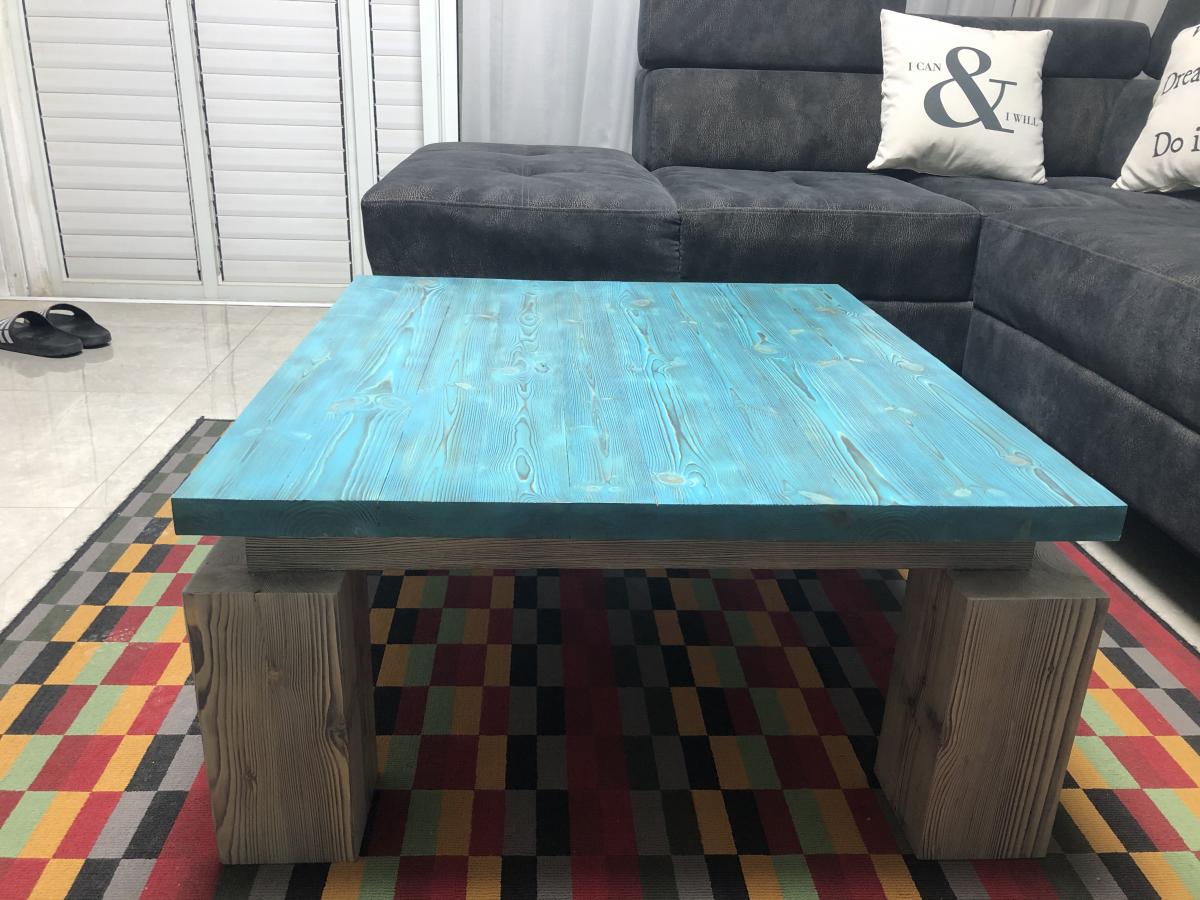
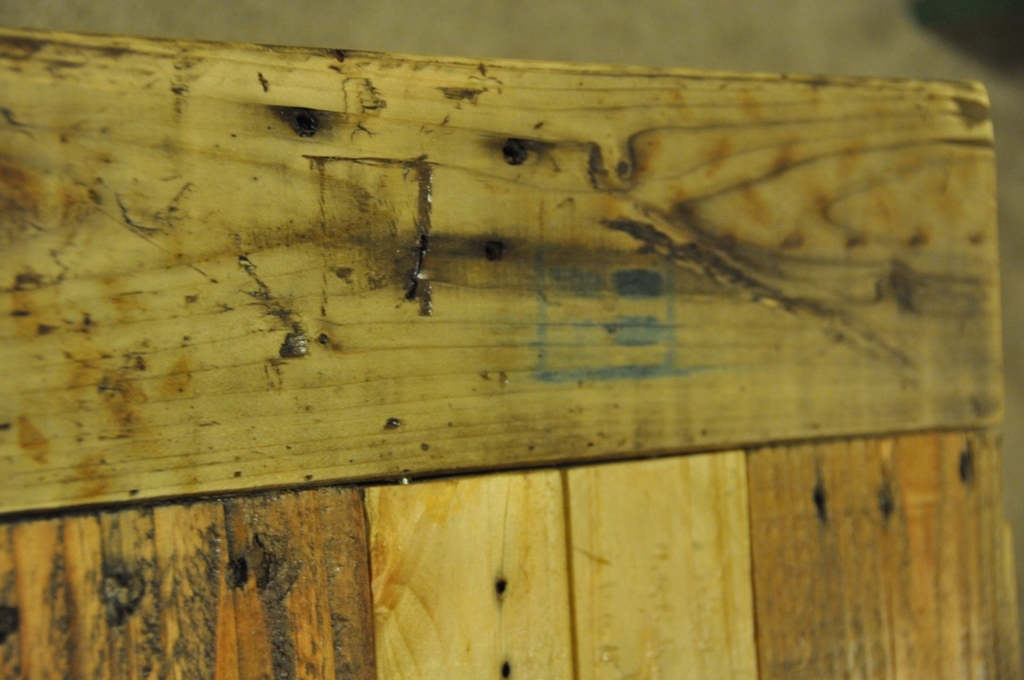
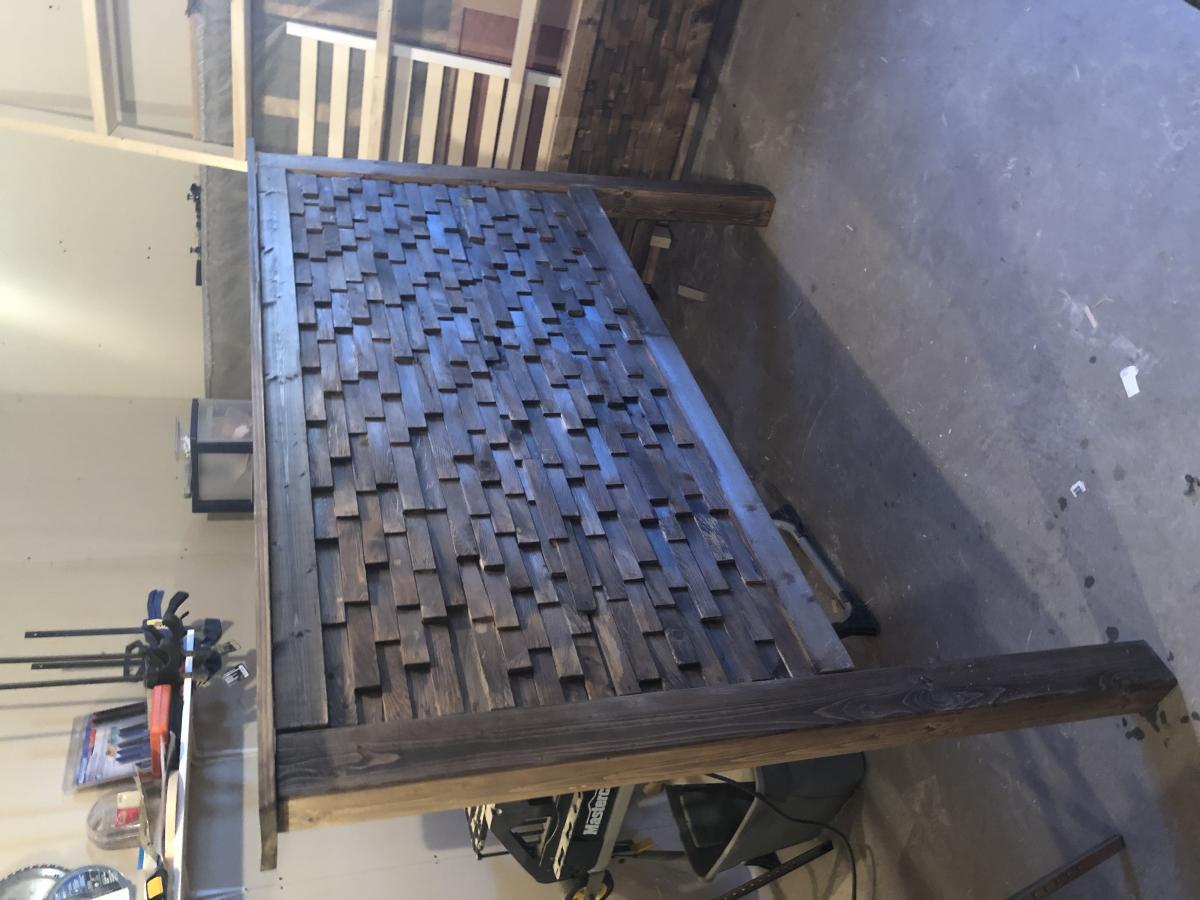
Reclaimed wood coffee table
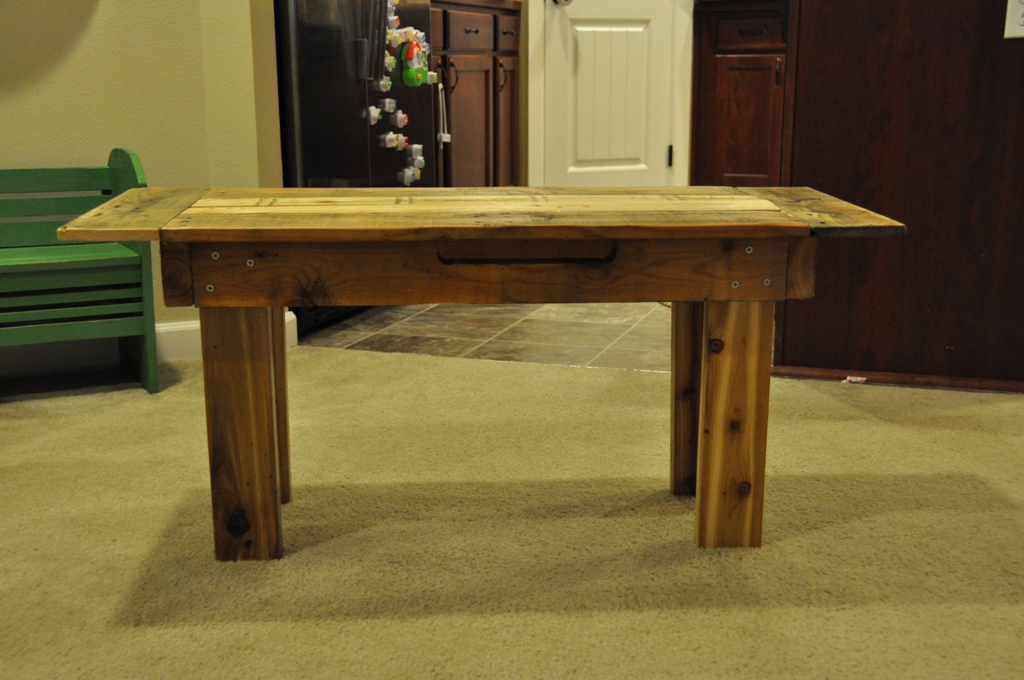
I had a bunch of extra wood sitting around the garage, so I decided to build this. Reclaimed wood 41 1/2 long by 17 1/2 wide and 19 inches tall. I used natural stain so it could keep it's beat up charm.
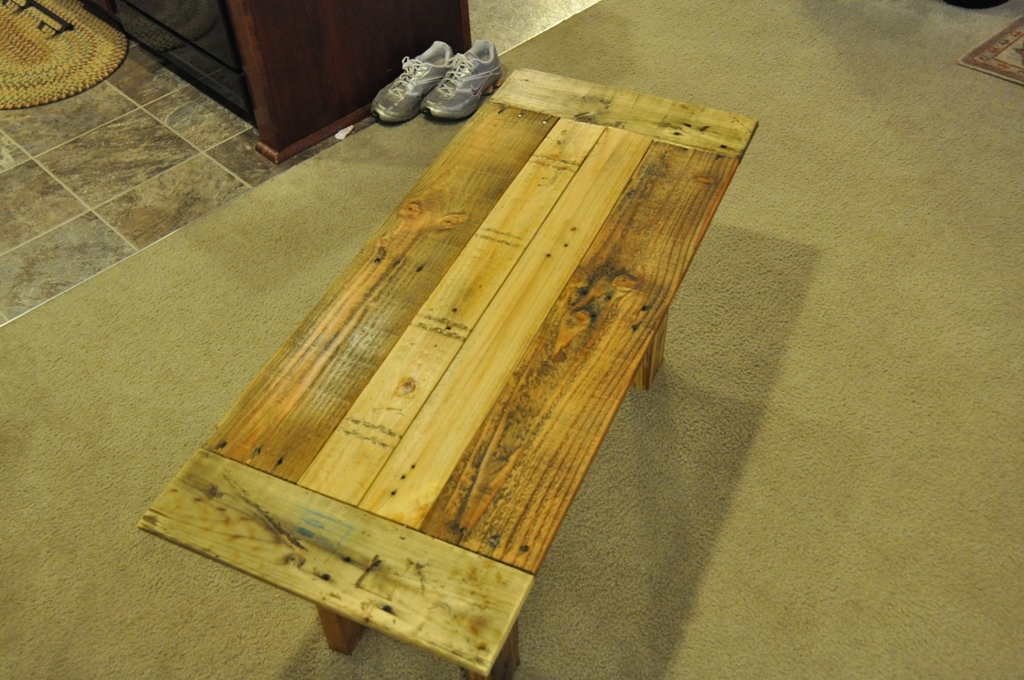
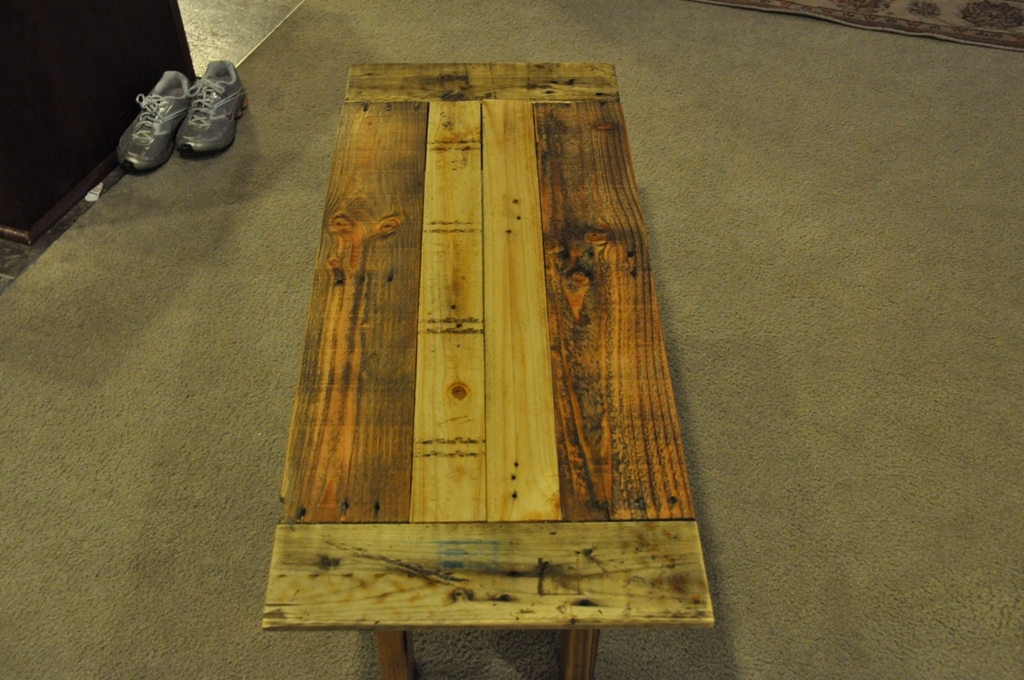
Built from Plan(s)
Estimated Cost
Free wood, money spent for stain $8.00
Estimated Time Investment
Afternoon Project (3-6 Hours)
Finish Used
Natural Stain with 2 coats of poly.
Recommended Skill Level
Beginner
Porch Swing

My first project!
Estimated Time Investment
Afternoon Project (3-6 Hours)
Recommended Skill Level
Starter Project
Comments
Fri, 01/24/2014 - 22:16
Good job on your first project!
Congrats on your first project! Looks great. I will start my first project as well in the next few months. I am guessing that the edges were well sanded to avoid splinters?
Balin TV Stand
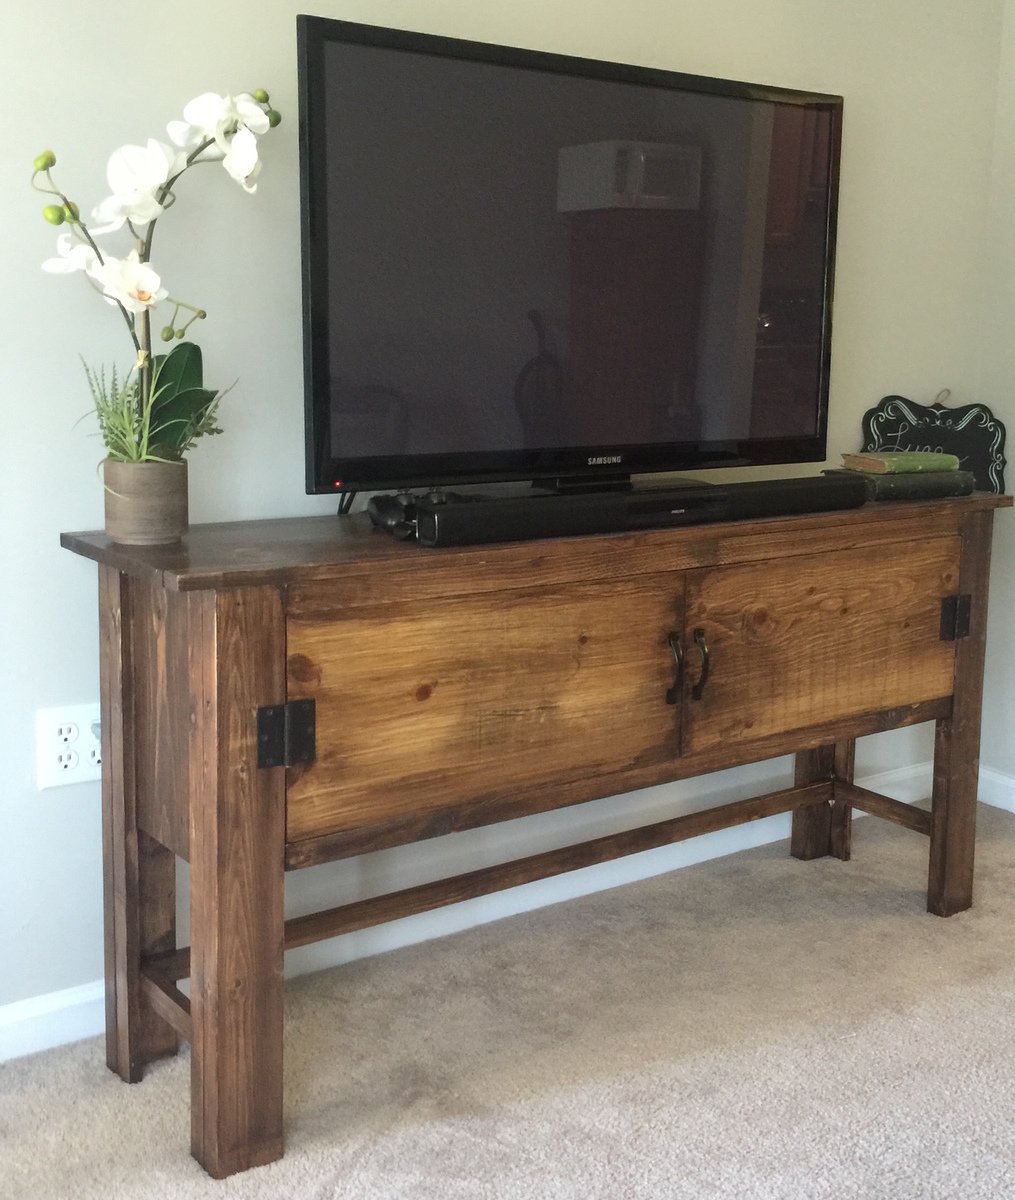
This was my first furniture project and I simply wanted to hide all of the cords for my TV. My husband and I opted out of the drawers since we wanted a big area to store all of the other items (DVDs, playstation, etc.). We also did not put a back on the table so the electronics stored inside could properly ventilate without overheating.
Built from Plan(s)
Estimated Cost
We bought all lumber from Lowe's and it totaled to $180 for the lumber, sand paper, wood conditioner, stain, and polyurethane finish.
Estimated Time Investment
Week Long Project (20 Hours or More)
Finish Used
Wood conditioner, Varathane dark walnut wood stain (1 coat, applied a heavy coat with brush and wiped excess stain with a rag about 3-5 minutes after initial application), and finished with Minwax fast-drying polyurethan clear satin (1 coat).
Recommended Skill Level
Intermediate
Communion Table from truss Sofa table plans

Wanted to make a Communion Table for church found these plans here on Ana White and just had to use it. I modified them to make the table 24 inches wide and only 52 inches long. I had fun making this and had help from all five of my kids with the oldest being 11 and the youngest 3. Thanks for recommending these plans they were awesome. 👍
Estimated Cost
$250
Estimated Time Investment
Week Long Project (20 Hours or More)
Finish Used
Shellac on top white paint with coffee glaze finished with polyurethane
Recommended Skill Level
Beginner
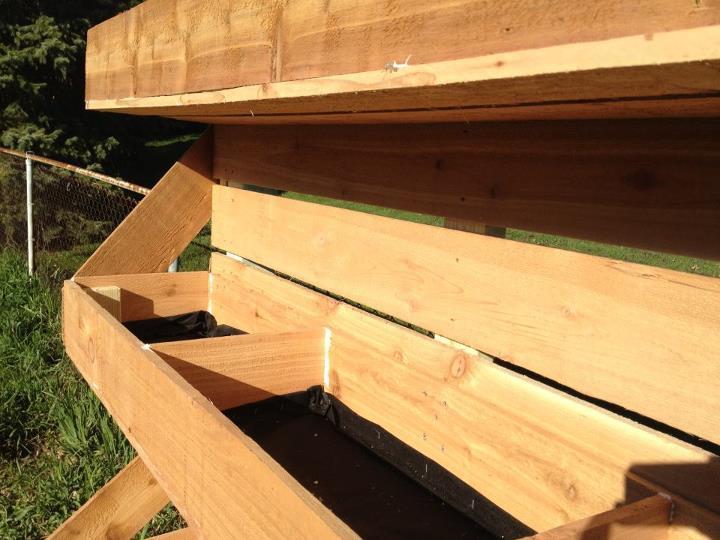
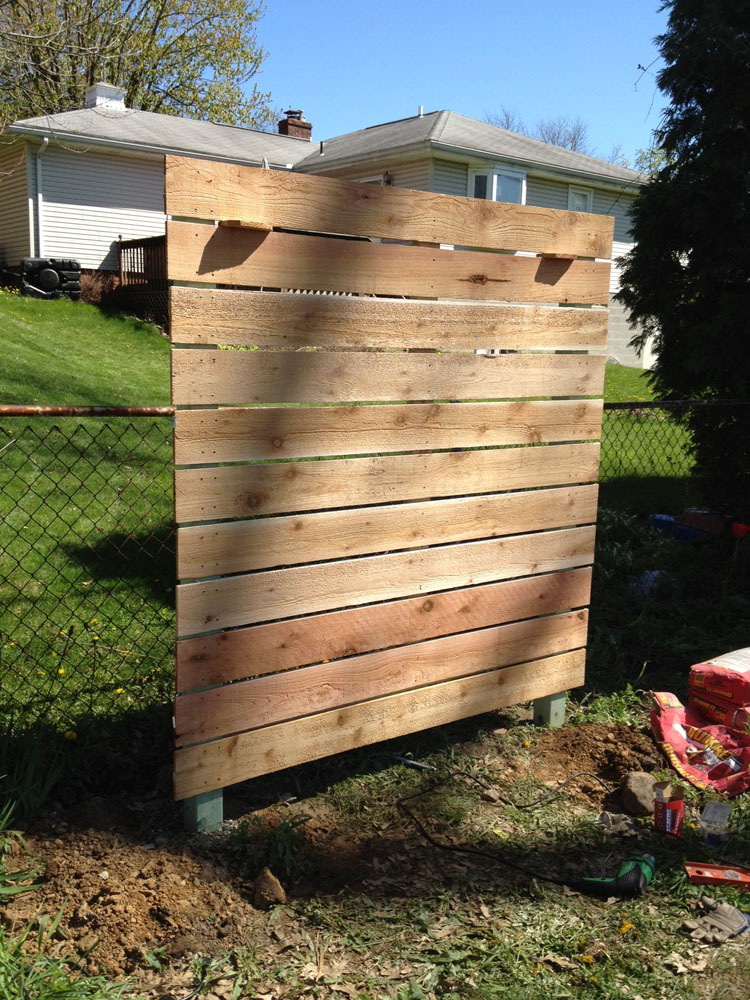
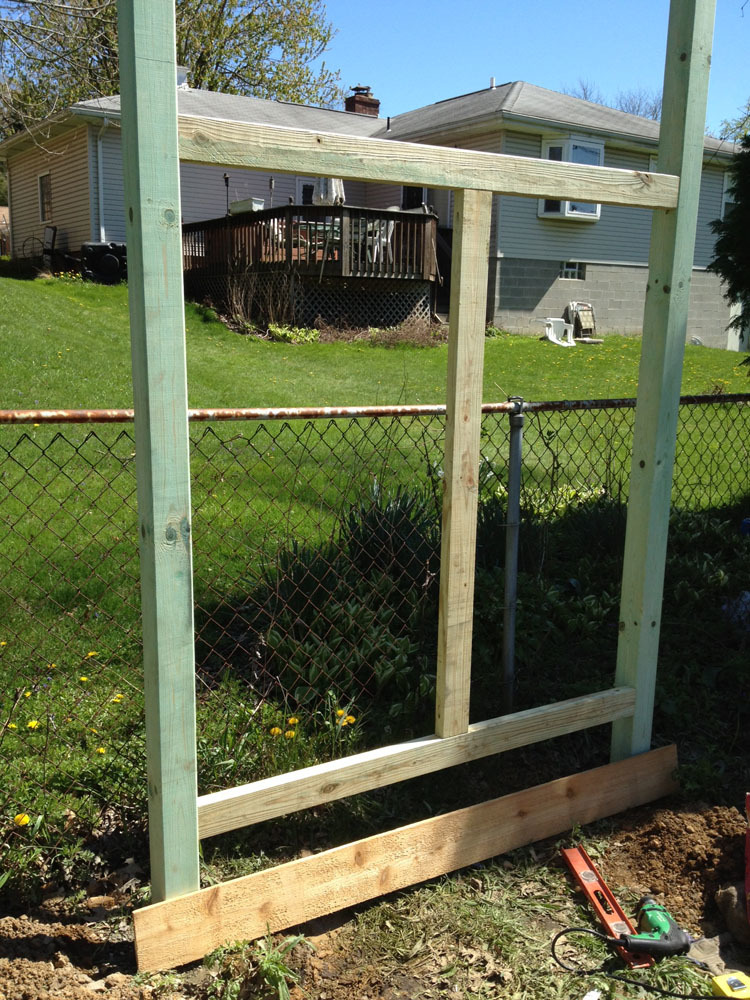
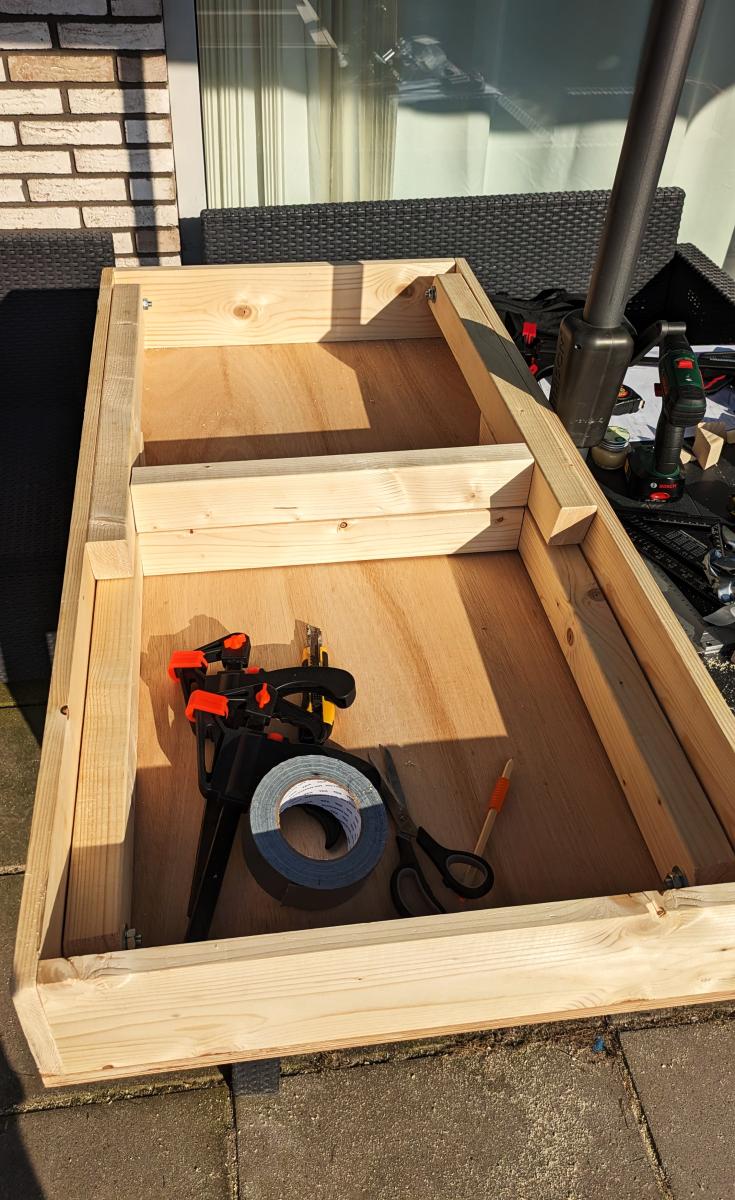
Vertical Garden
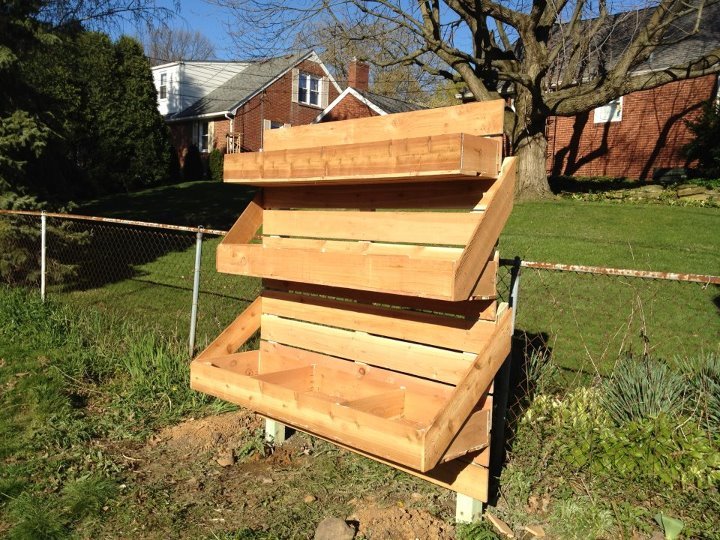
We don't have a ton of space in our back yard thats in direct sunlight. Also we have an ugly old chain-link fence. I saw a lot of vertical gardens and decided that would help two issues, maximize sun space and obscure part of that ugly fence. It's super easy to put together and was pretty cheap as well. I took some inspiration from the cedar raised beds on the site and built all the planter boxes out of cedar fence pickets. I added some extra supports so that the weight of the boxes wouldn't rip down the planters.

Built from Plan(s)
Estimated Cost
$120 (including material, posts, cement and hardware)
Estimated Time Investment
Afternoon Project (3-6 Hours)
Finish Used
None
Recommended Skill Level
Beginner
Comments
Sun, 07/08/2012 - 10:32
Great Idea!
Thanks for this great idea and the photos of the details. What did you decide to plant? (Btw, all you need for that fence is a few cans of black spray paint!)
My work bench
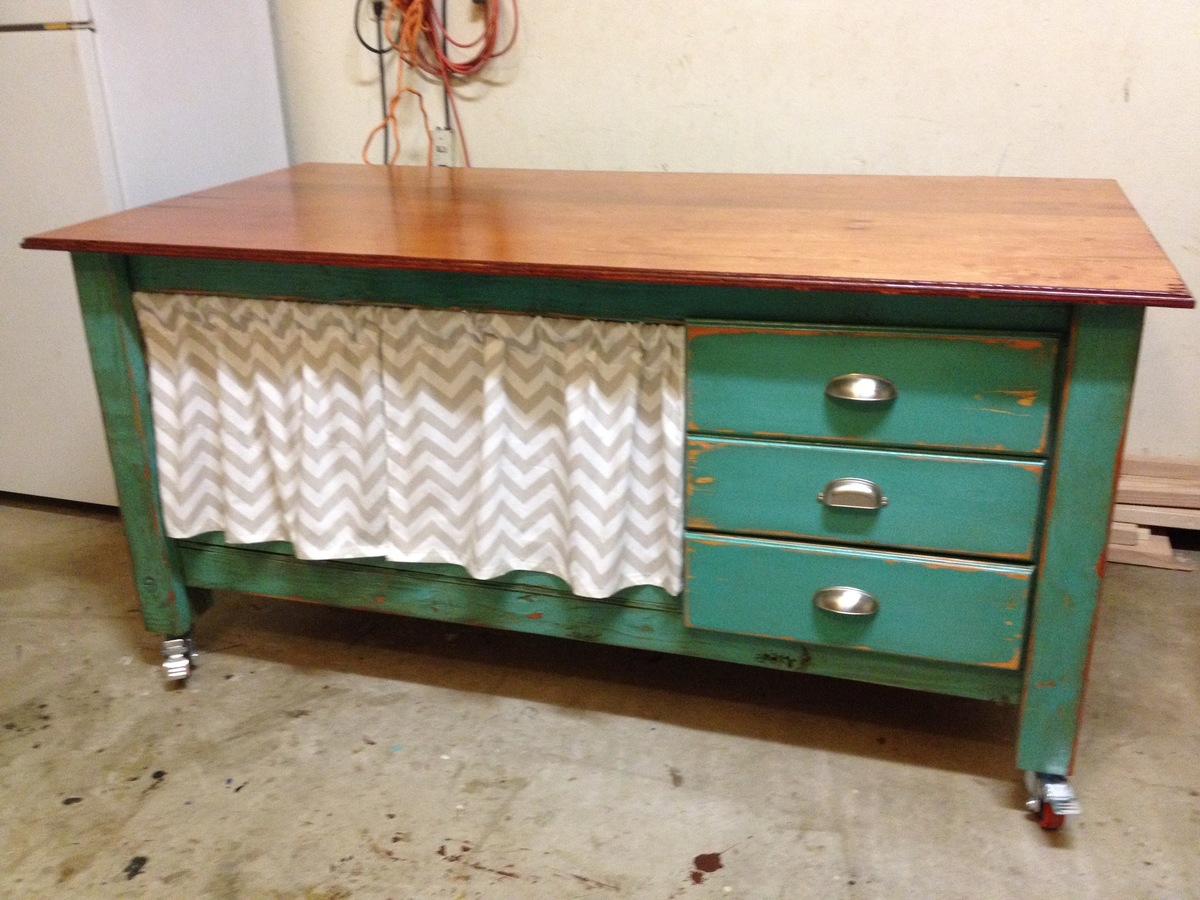
I'm so excited. I have my very own work bench! Thank you Ana for the sturdy work bench plans. I've added drawers and some curtains to keep the dust out. My brother did most of the work on this but I did some of the build at the end and all of the painting. Even though this will be stored in the garage, I wanted it to look like a piece of furniture found inside the house. I love the distressed look and I think I've succeeded in making it look old. I've made a few of your projects which I will post later. Right now I'm enjoying my new (old looking) work bench and I think it's really cool that it looks like it belongs to a girl.
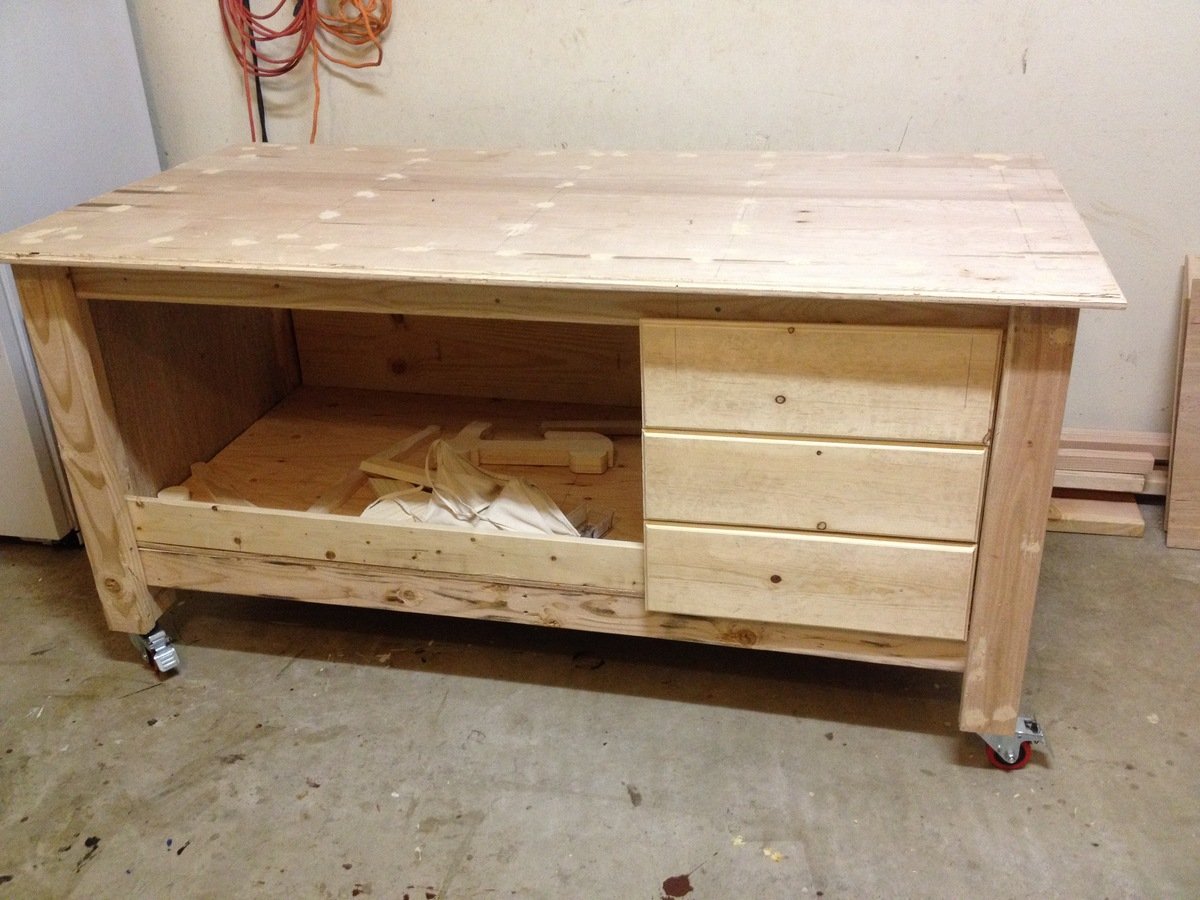
Built from Plan(s)
Estimated Cost
200.00
Estimated Time Investment
Weekend Project (10-20 Hours)
Finish Used
Color paint: A day at the jewelers from Lowes. Minwax Gunstock stain mixed with a glaze for distressed areas.
Recommended Skill Level
Beginner
Comments

Modified Raised Planter Box

I always wanted a raised planter box, but never took the time to try building 1 and certainly didn't want to buy 1. My hubbie saw these plans and decided to make it for me. He used wood from our deck that we just pulled up, so the only cost was for the 4x4s and the plywood used for the bottom shelf.
Built from Plan(s)
Estimated Cost
$14
Estimated Time Investment
An Hour or Two (0-2 Hours)
Finish Used
We have not yet added a finish and I don't know that we will. We added a bottom shelf and I have been debating whether to paint the piece, tile the bottom shelf, some combination, or leave the whole box natural.
Recommended Skill Level
Starter Project
DIY Outdoor Table
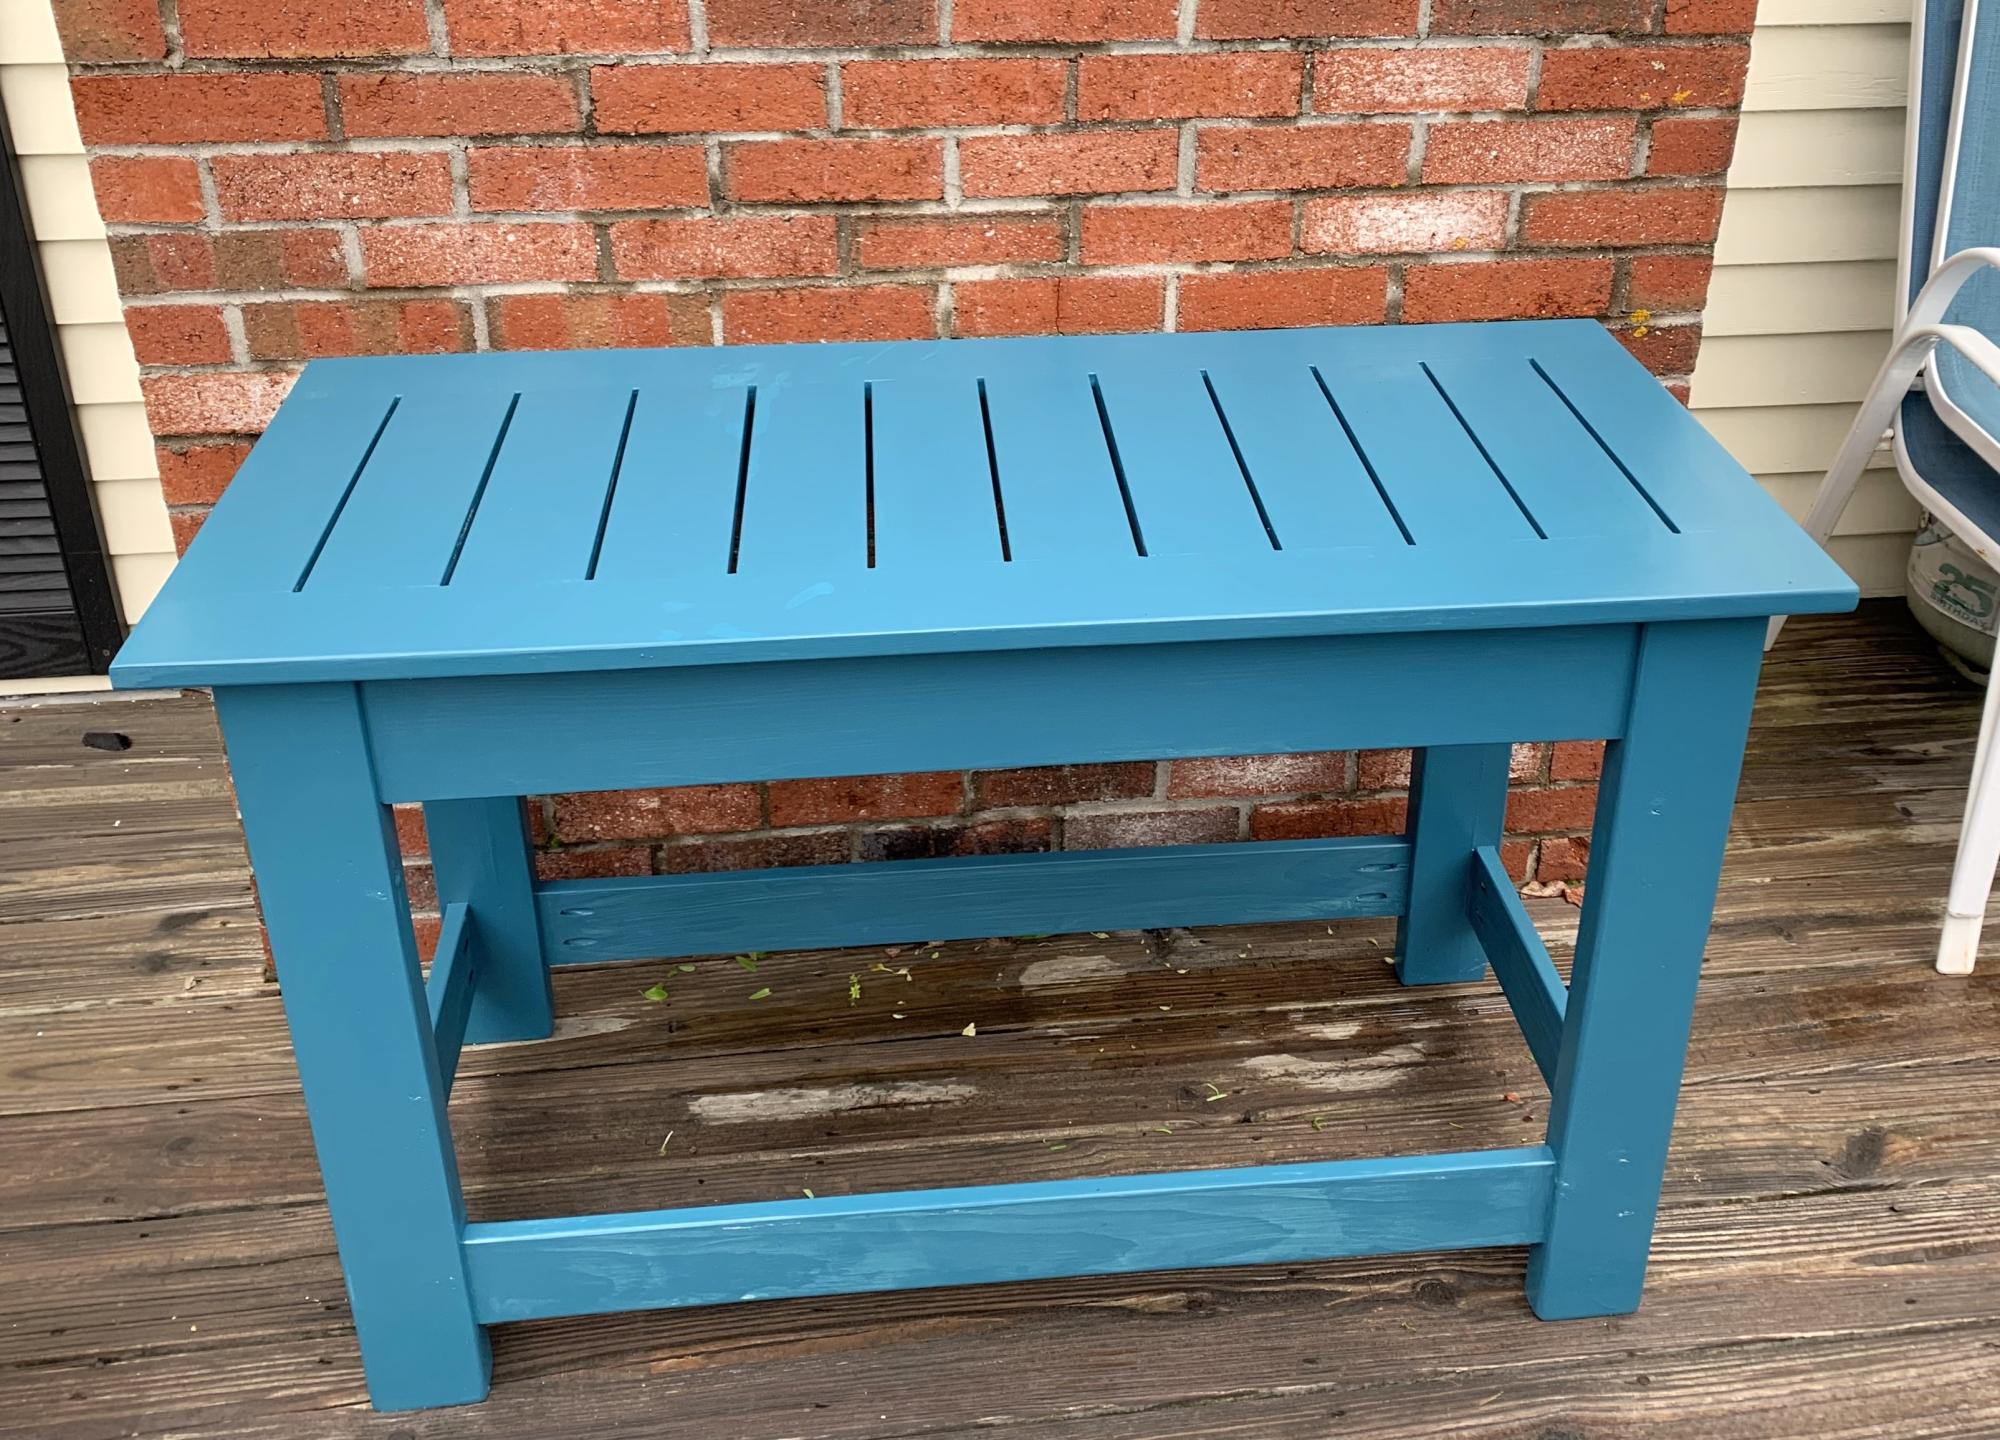
Parents wanted an outdoor table on the deck. They had scrap wood in the basement from when the house was built. Found the design from Ana White, inspired, and adapted it. It was a small project, but the success of this inspired me to get back into building furniture. It doesn't have to be complicated and the satisfaction of building something from materials that exist and working with what one has in terms of tools and skills is very satisfying.
Modified Toy Box with upholstered lid.

My daughter's school needed a personalized item, (a class gift) to be auctioned off at the annual Spring Gala. The project needed to be personalized by the children in the class. I used the plans from Ana's toy box project plan, changed the footer to bun feet, and added a lid. The lid is also an upholstered top that can be used as a bench. I used two slow close hinges, one on the left one on the right, then two regular hinges to hold the lid on. We sent in blank tiles for each of the children (4 year olds) to paint in class. They turned out pretty abstract but cute. The tiles on the front are supposed to be bee's, the school's mascot. It turned out great! Having a hard time uploading other pics of it, specifically how I did the lid inside and attached it to the box.
Built from Plan(s)
Estimated Cost
200
Estimated Time Investment
Week Long Project (20 Hours or More)
Finish Used
Satin ivory whitish paint.
Recommended Skill Level
Beginner
Comments

Fri, 12/07/2012 - 10:36
love the lid!
I love the addition of the lid! Do you have those plans to share?
Fri, 12/07/2012 - 10:51
love the lid! would you be
love the lid! would you be willing to share your plans for it?
Spice rack modified for BIG spice containers.
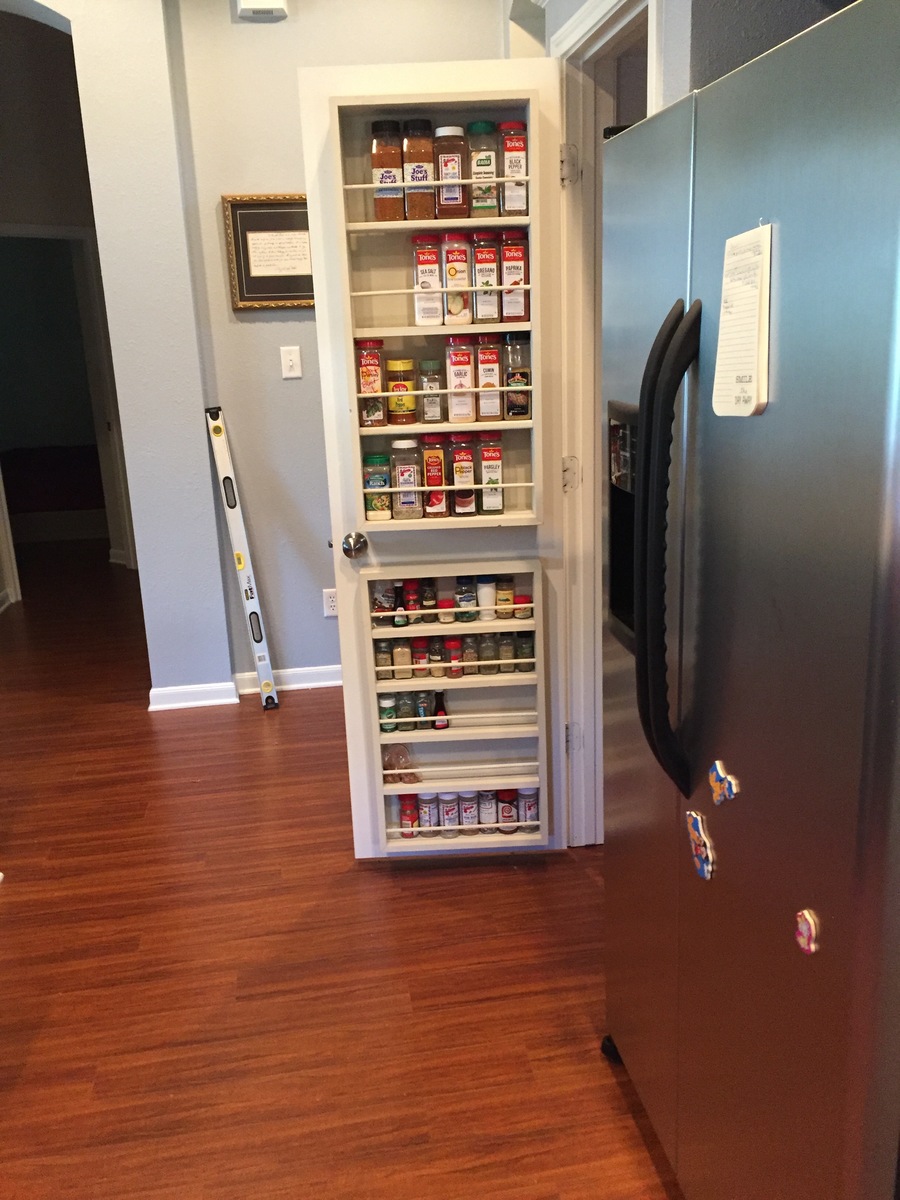
I made some modifications for bigger spice containers. The big ones you get at Sams/Costco are too big for the original design. The top portion was made with 1x6 sides to take care of the bigger containers.
Estimated Time Investment
Afternoon Project (3-6 Hours)
Finish Used
Paint
Recommended Skill Level
Beginner
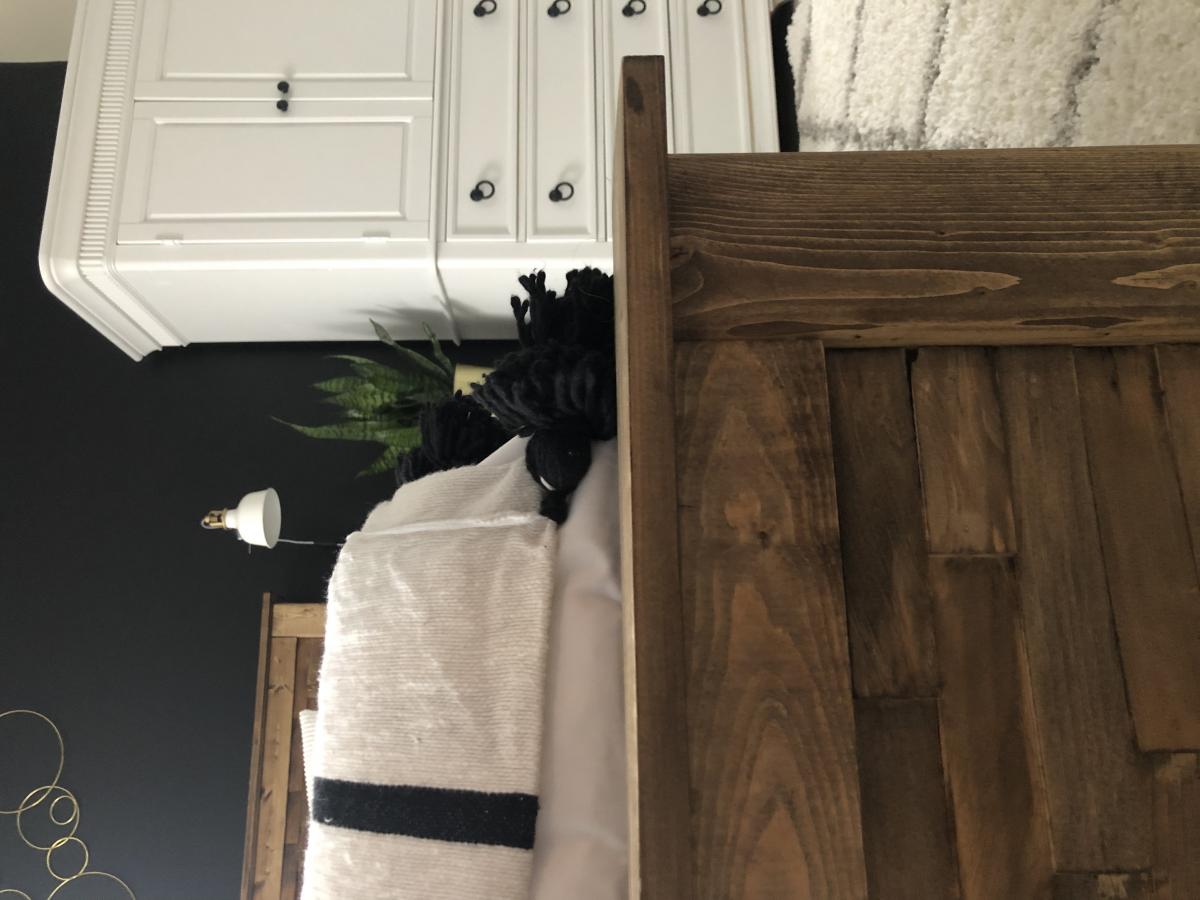
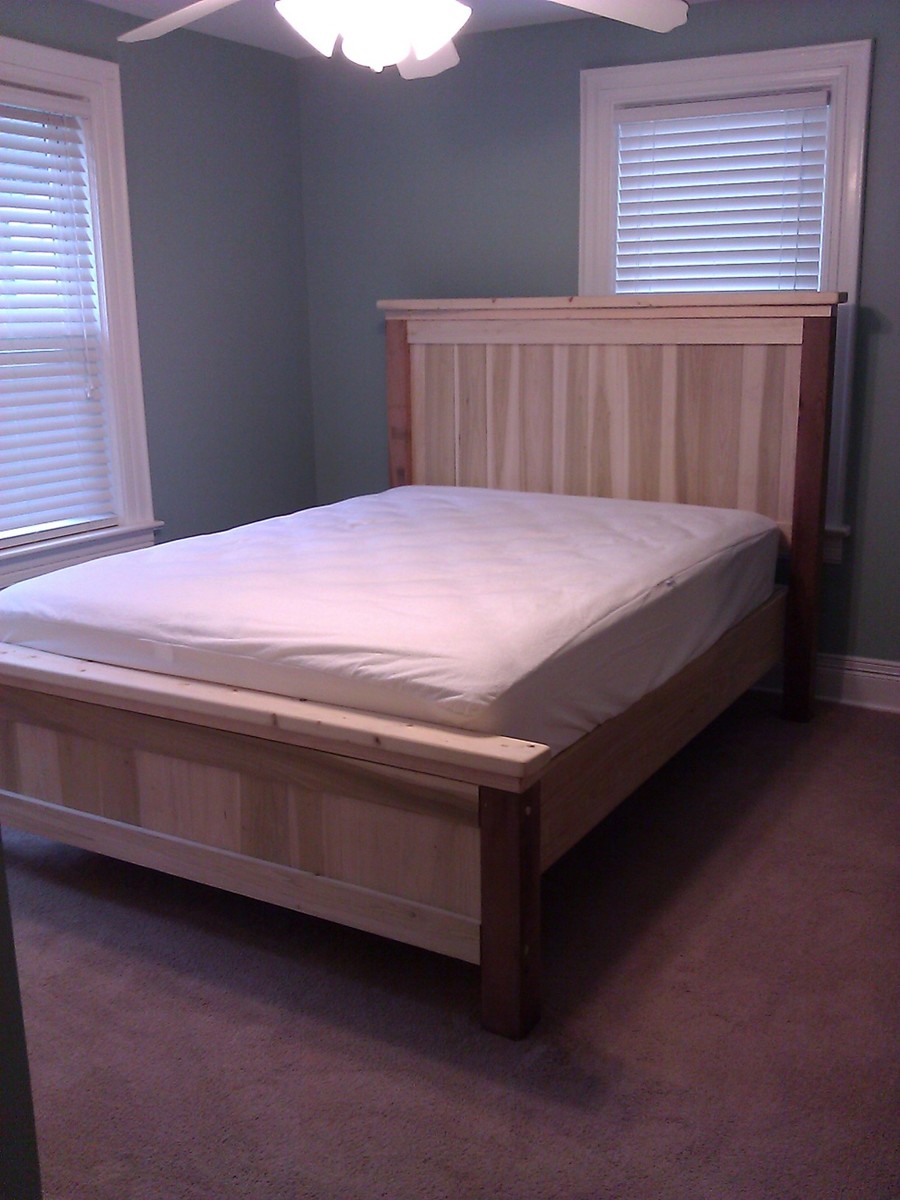
Shim Queen bed
My husband and created this bed using a plan we found on the website. We were doing the One room Challenge and wanted to redo our room on a budget. It was our first major build and it turned out really well. When my husband said we were going to use wood shims I was skeptical but the end result was awesome! We made the headboard and footboard and all the other pieces in our basement shop and then moved them up to our second floor and assembled them in the room. If you have any questions check us out on Instagram @ home_on_the_bluff
Built from Plan(s)
Estimated Cost
$300 CAD
Estimated Time Investment
Weekend Project (10-20 Hours)
Finish Used
Minwax Dark Walnut
Minwax Poly in Clear Matte
Minwax Poly in Clear Matte
Recommended Skill Level
Intermediate
Folding Work Table First Project!
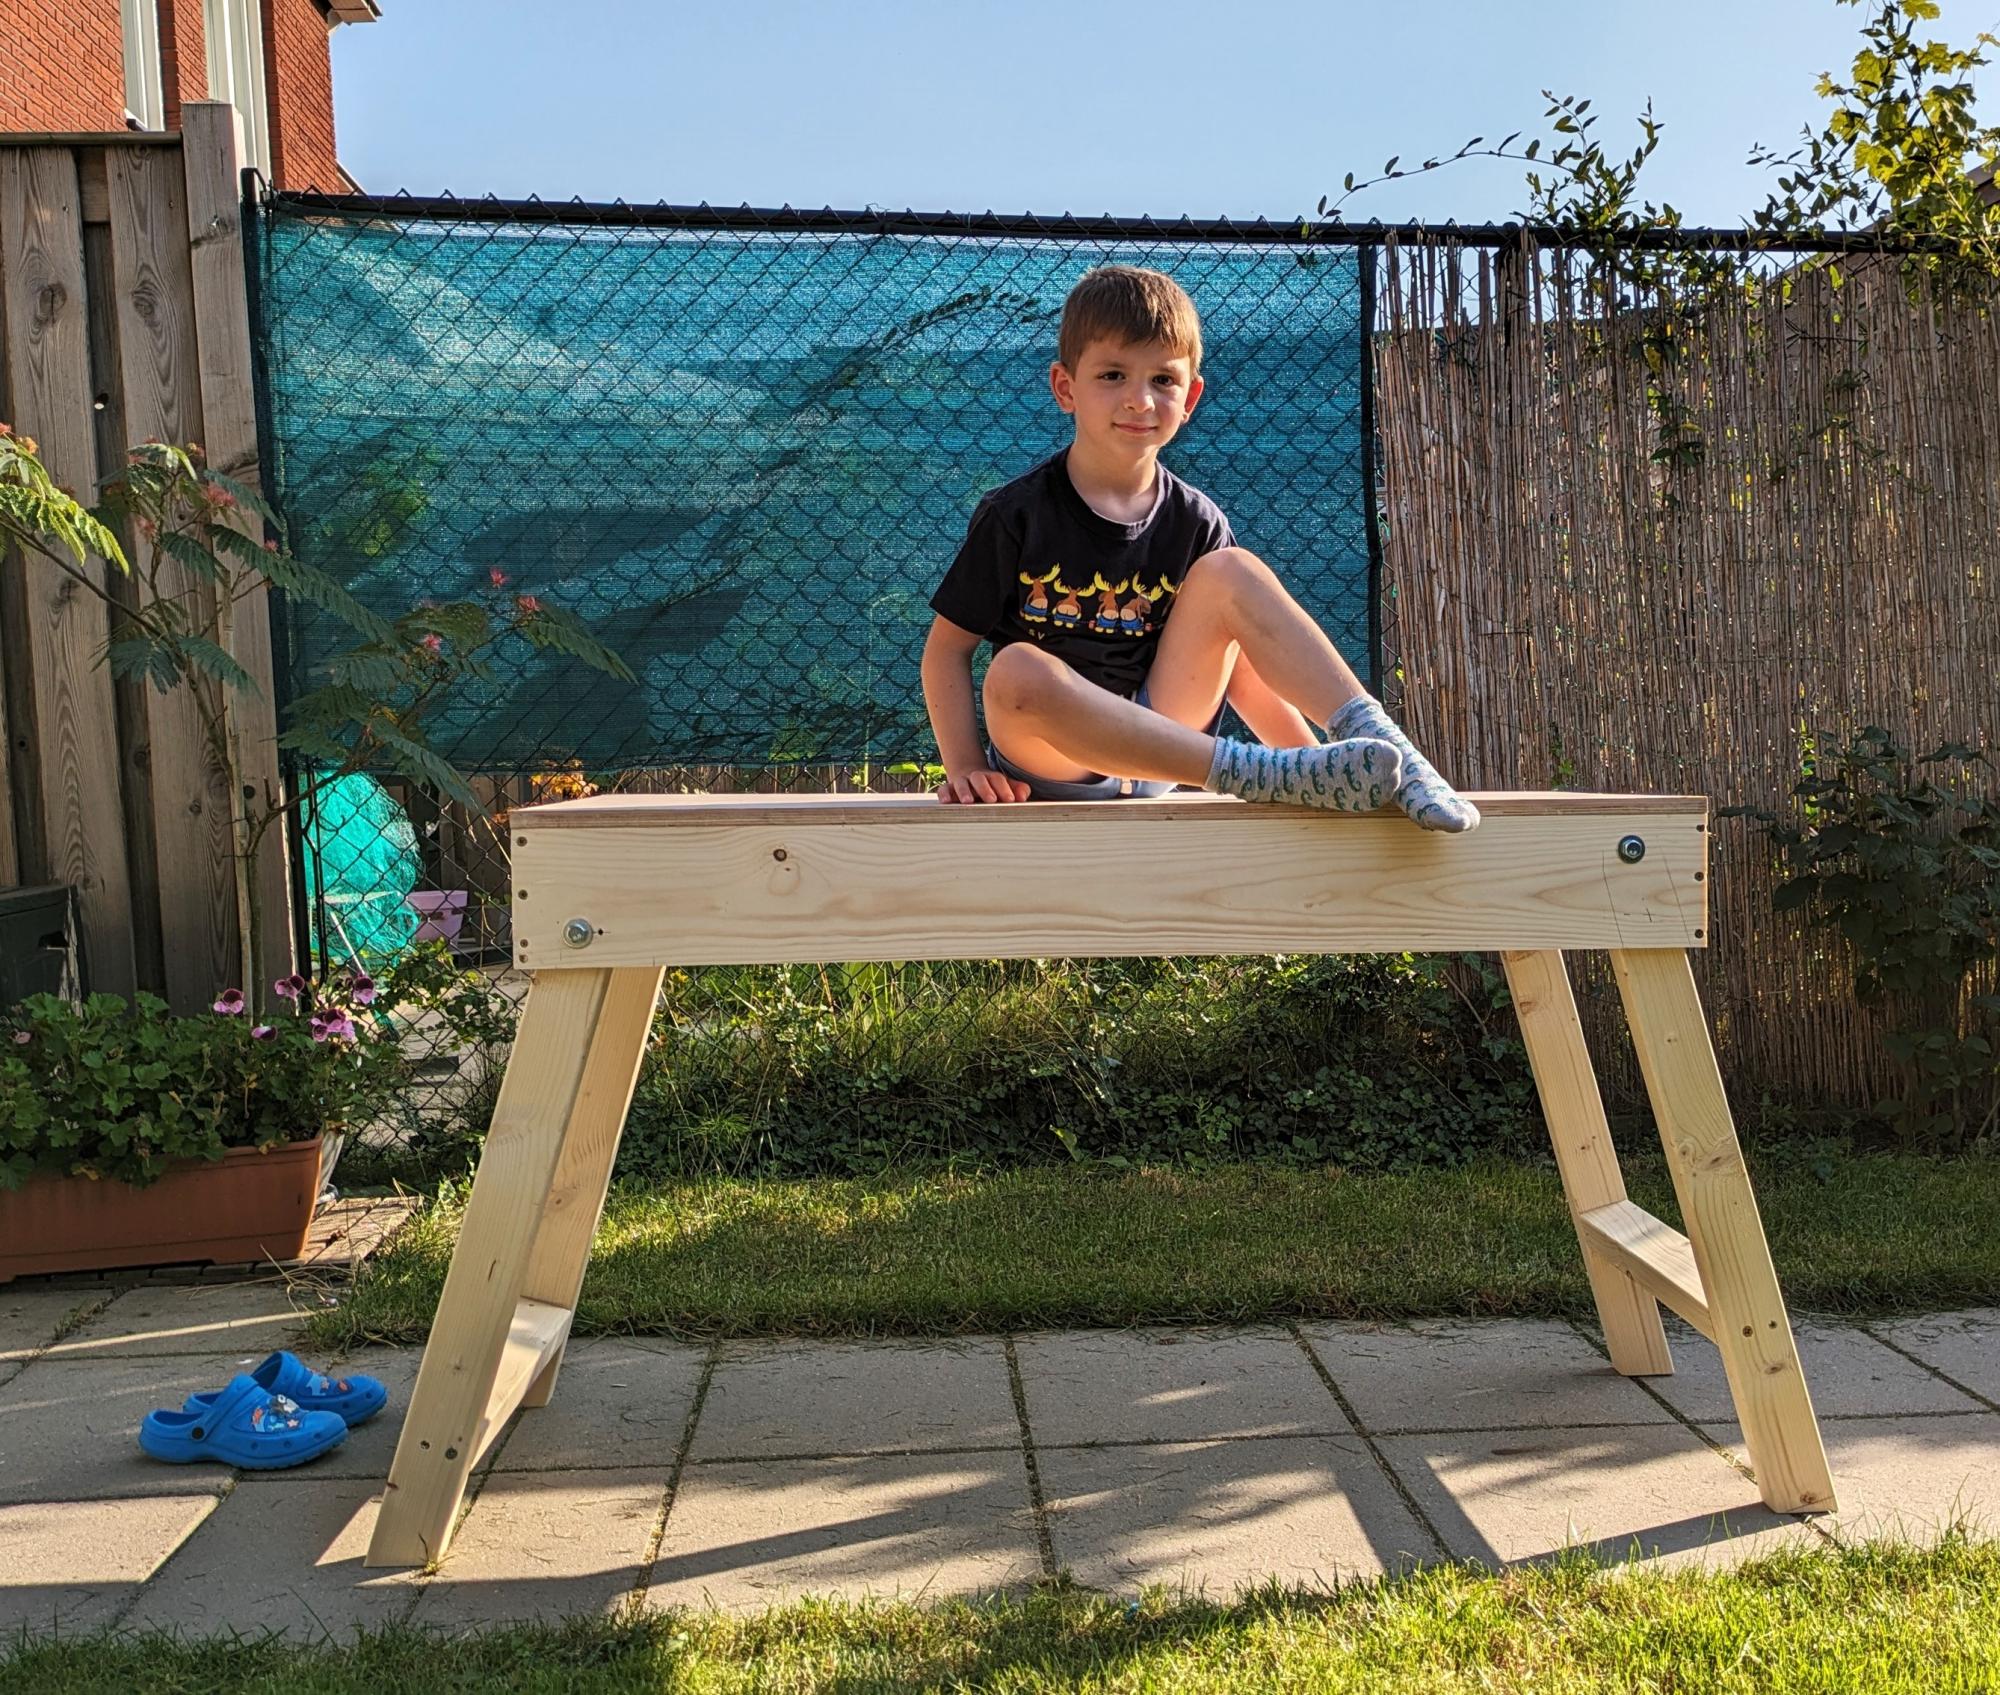
This is my very first project. I have no other tools yet besides the drill, so I had to make all the cuts with the hand saw, but it worked out well :) As I am in Europe, the imperial metrics mean nothing to me. The wood they sell here is of different sizes. That is overall not an issue, although I had a tough time calculating the holes for the legs. Luckily, only one error hole, and all came out level on the first try. No waste of wood! I also had a good helper.
Thank you, Ana
Ventsi
Built from Plan(s)
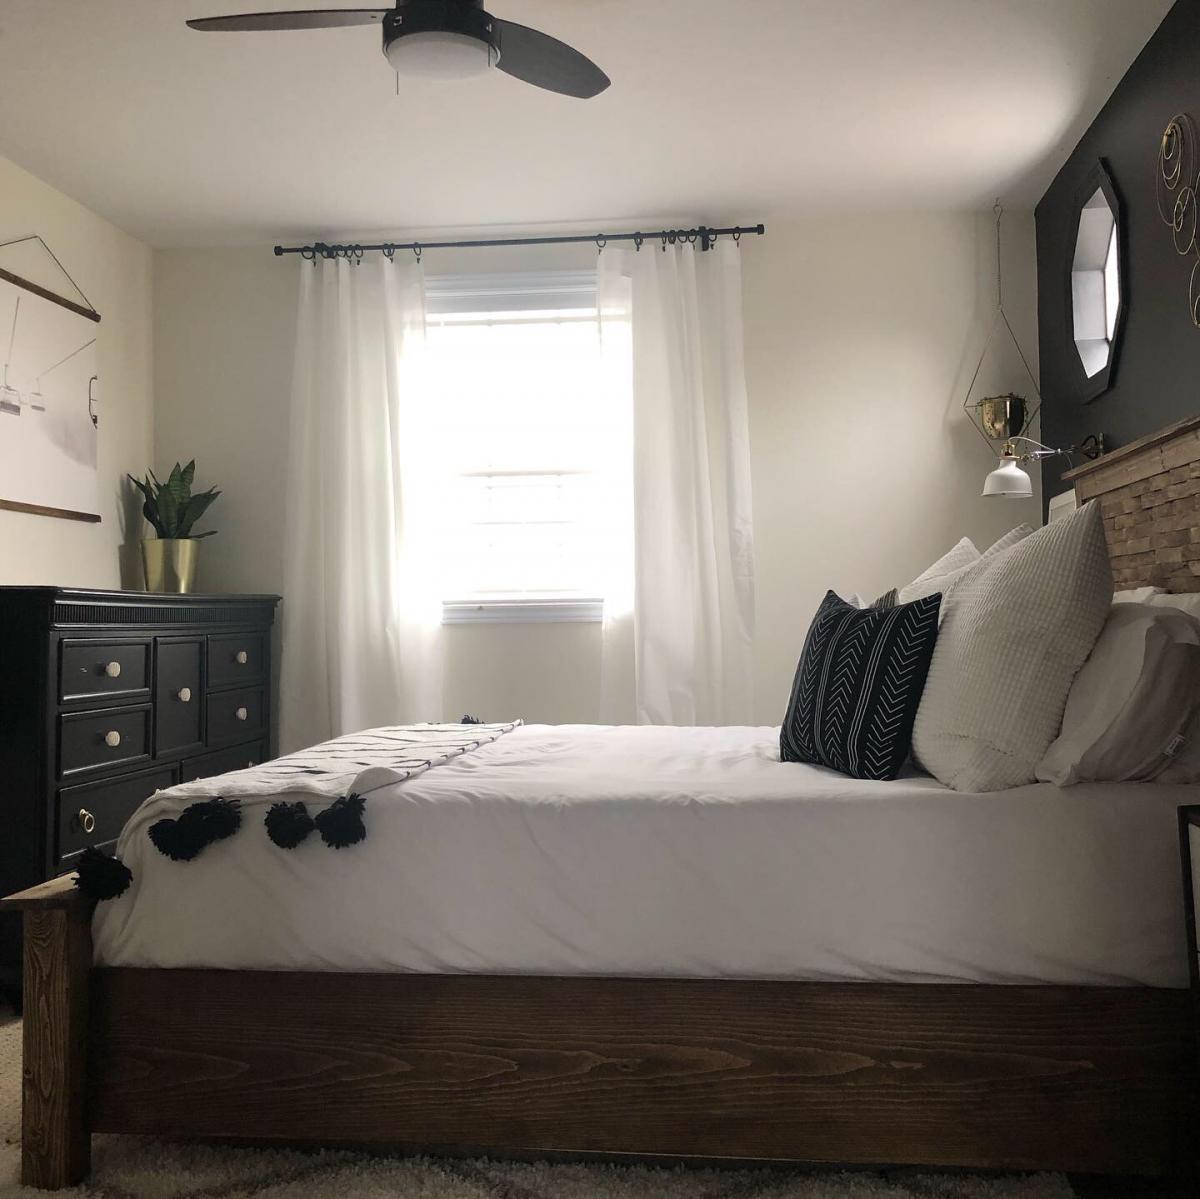
Queen Farmhouse Bed
We ended up going with a combination of pine, cedar (posts - from Ace Hardware) and regular ole 2xs. We ordered our hardware from Rockler ( http://www.rockler.com/product.cfm?page=10).The bed can be easily disassembled down to the headboard, footboard, side rails, support beams, and platform. It's a quirky combination of woods, but overall we are happy how it turned out. We thought of painting it, but have really been enjoying it as is.
Built from Plan(s)
Estimated Time Investment
Day Project (6-9 Hours)
Recommended Skill Level
Beginner
Comments

Tue, 05/01/2012 - 13:40
This is so beautiful! I agree
This is so beautiful! I agree with you, the woods beauty is best as is, without paint hiding it. You could put a coat of poly to seal and preserve the wood without losing any of its natural beauty. Great job!
Thu, 10/25/2012 - 07:25
Bedrail hardware
I clicked the link for the rockler hardware that you used. I noticed that it required mortising. Did you find that difficult to do? Did you use a router to mortise the wood?
Thu, 10/25/2012 - 11:01
They also have surface mount
They also have surface mount hardware
http://woodworking.rockler.com/search?asug=&w=bed+brackets&Search.x=0&S…
My Modern Craft Table

Only change in the plans was decreasing the width by 6 inches to fit our room, turned out to be 48x32in. I used old wood floor we tore up to make the table top. Glued it over plywood.
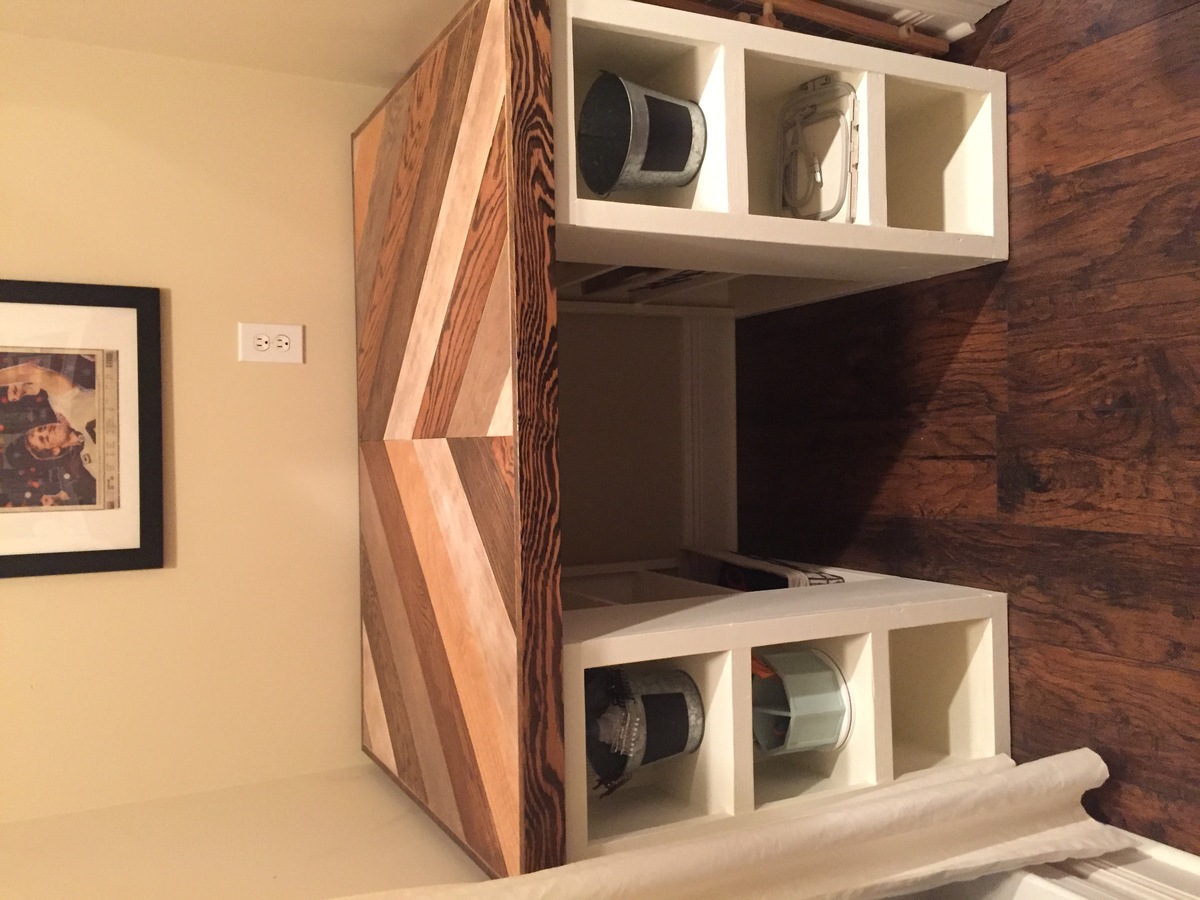

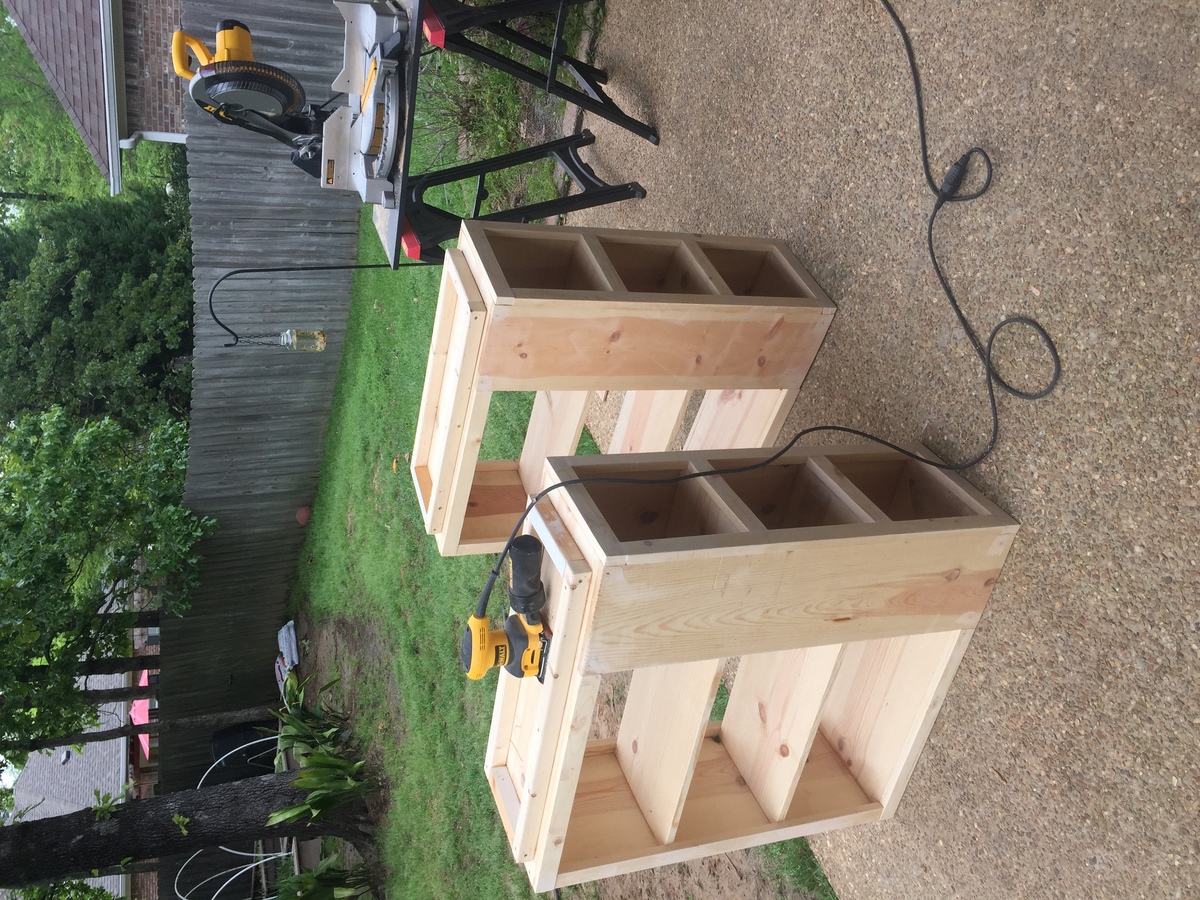
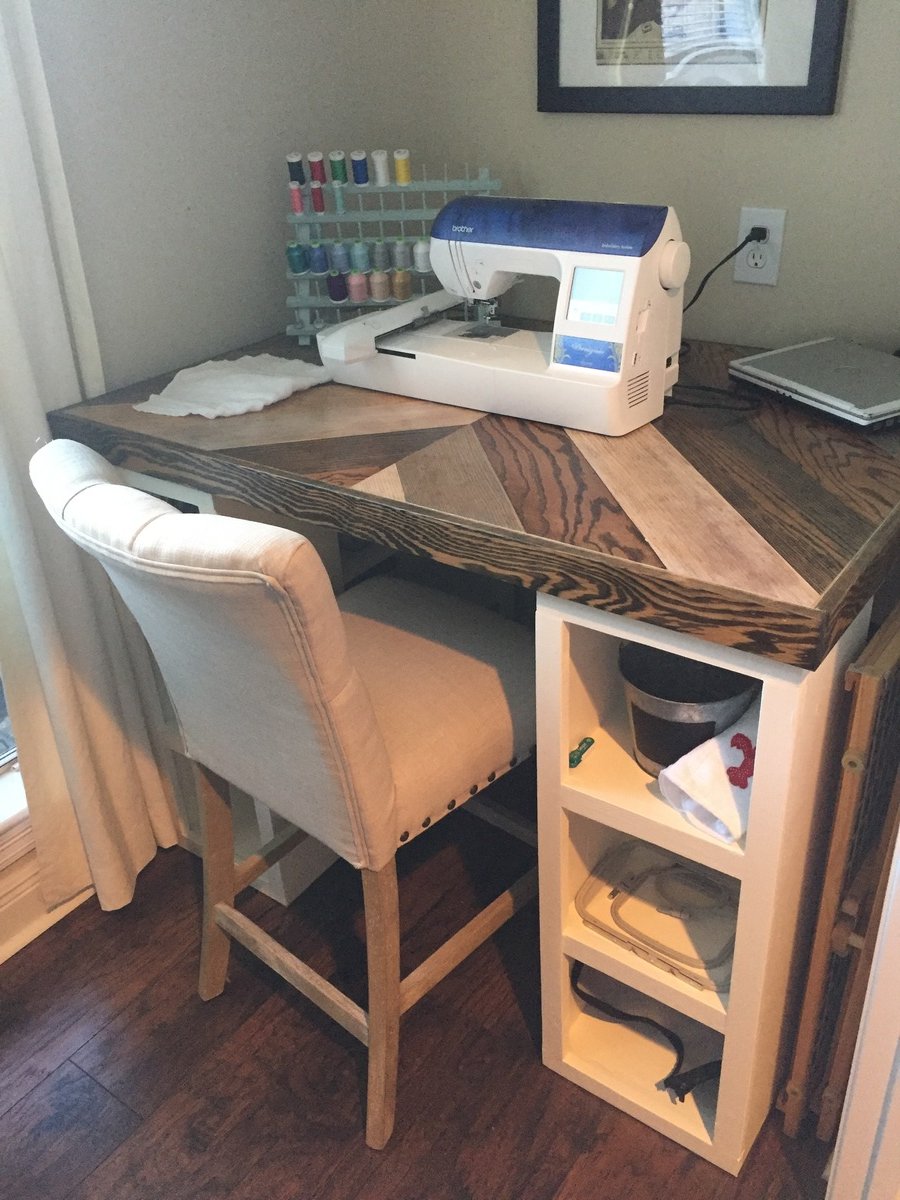
Built from Plan(s)
Estimated Cost
$160
Estimated Time Investment
Weekend Project (10-20 Hours)
Finish Used
Different stains and good ole white paint. I finished the top with a polycrylic
Recommended Skill Level
Intermediate