Trash cabinet with diamond plate
![](/sites/default/files/can.jpg)
Built this by the plans with one modification. I bought this diamond plate when it was on sale at lowes. It fit perfect. Used small self taping screws to hold it in. Stained the same color(kona) as our caninets.
![](/sites/default/files/20160928_164622.jpg)
Built this by the plans with one modification. I bought this diamond plate when it was on sale at lowes. It fit perfect. Used small self taping screws to hold it in. Stained the same color(kona) as our caninets.
I built this easel for my wife who teaches 2nd grade using the plan on this site. I used a jigsaw to make all the cuts which is why some of them are not perfect. All holes were countersunk and covered with wood filler as I have not yet purchased a Kreg Jig. One sample jar of paint was just enough to cover the whole project with 2 coats. Home Depot sells the whiteboard in 2' x 4' pieces for about $10 in my area. The toughest part was getting the holes to line up just right for the bolts that fix the four main pieces together. Some of them I had to use a little bit of force to make fit. The plan was easy to follow and worked well. I added a curtain rod to the top to hang a paper pad from which I bought for about $5. The big whiteboard behind the easel was hung over the existing chalkboard using industrial strength velcro strips. I bought the whiteboard material from Home Depot for $13 for a 4' x 8' sheet (it is actually called a "hardboard panel board". It works very well with dry erase markers and was an easy, cheap way to install a whiteboard over the current chalkboard.
I recently discovered your blog and got really inspired. After building a couple of beginner projects following your plans, i started to think about making something that can be used as medicine cabinet and does not take much space. Came up with the idea for this over the toilet storage rack.
My goal was to recycle/reuse some of the stuff that was sitting in my garage.
Started with building a frame using 1x6s (24 inch for shelves and 72 inch height). Used plastic table mats were used as sliding windows. Found a PVC trim (8 ft) for $2 at lowes that has been used as the rails/track for the windows. The back is piece of cardbord that was scrap from an old broken ikea bookshelf.
I am pretty happy that i recycled some stuff and made this in less than $15.
Tue, 12/01/2020 - 14:20
Did you do anything to the bottoms of the legs to prevent wet floors from wicking into the wood? I am wanting to build something similar to replace a particle board cabinet-in-a-box because the particle board did soak up water and get ruined. What I'd REALLY like are metal end caps with an adjustable foot (like you put at the bottom of a table leg) but I can't find a combination of the two anywhere.
Fun weekend project to build together. We are loving the fresh look to our master bedroom.
I built this pergola in 3 days and added mason jar solar lights.
Vonda Jones
more details on my blog. I built 2 of the laundry dressers. adjusted the placement of my baskets due to restrictions in the overall height of my unit (I have a ironing board cabinet built into 1 wall that I still wanted to be able to open and use :) I used MDF, but it was a bear to work with and next time I would spend the extra $$ on birch. i painte the bottom in a semi gloss. and plan to add the doors (which will have a beadboard backing) they will be painted white with a dark walnut glaze. The top and shelf /brackets are all done in a distressed finish with ebony and mahogany stain mixed then 2 coats of poly very sturdy even filled!
Fri, 06/26/2015 - 00:00
I have been wanting to make the laundry basket dresser but am holding off because we are moving. What color did you us on the walls, I love it.
As a beginner woodworker I was searching for a router table project and came across this one. I constructed it entirely out of birch plywood. I will admit is was a challenge for me as I had never done drawers before. The biggest challenge was the small drawer for bit storage. I used a Rockler table top and it worked perfect. Overall I’m pleased with the way it turned out and have already used it in several projects
My handy husband whipped this little bed up from the leftover wood of the rustic "X" end table! I love it so much, a great toy / newborn prop!! I wanted to finish it with the steel wool/vinegar method, but it was too late, he already painted it. I love it just the way it is! Thank you for the awesome plan!!
This was my first building project from scratch! I have modified some thrift store finds, but this was the first from lumber. I learned to countersink! I was amazed at how easy this was, and I'm so excited that this bench will sit by our front door for my three boys to perch on when they put on or take off their shoes. I went with 3 cubbies to hold three pairs of shoes. It also works great for a couple of kids to sit on at the table for when we have guests and need some spare seating.
My son Jack, has Down syndrome. He's had the same preschool teacher for the last 3 years, and now it's time to move on to kindergarten. Not only does he have a dedicated teacher, but he has two paraprofessionals (teacher's aides) that take turns in helping him 1:1 all day long. I figured that it was time for all three of them to relax this summer. So, in appreciation, I made three of the adult sling chairs so they can enjoy their much deserved relaxation.
Tue, 06/21/2011 - 00:00
As an OT in the schools, I can understand your connection to the dedicated teacher and staff that work for your son. I'm sure that these gorgeous chairs will show your appreciation! What great choices in fabric, too!
Tue, 06/21/2011 - 15:18
Seriously so thoughtful! I love how they turned out!!!
Tue, 06/21/2011 - 18:20
I made this same chair for my husband and I got my fabric at JoAnn on sale! They have a great selection of outdoor fabric. :)
Fri, 09/23/2011 - 19:31
Would you mind sending the instructions for these chairs. I think this is something that I could do and would love to make a set for my husband for Christmas. We are all about homemade. That would be so great!
Wed, 09/28/2011 - 20:05
Hi Sherry. To find the page where I got the plans, just click on the words "Wood folding sling chair - adult" next to the bolded "From Plan" listed above. That will take you directly to Ana's plan.
Fri, 02/10/2012 - 03:45
would love to make could i get these instuction thanks
We are so excited about have an organized way to store our lumber and scraps. We only had to purchase 4 2x4’s for this project and were able to use a lot of on-hand scrap pieces. The plans were so clear and easy to follow. Thank you for sharing!!
Wed, 08/24/2022 - 09:50
This looks awesome and that 's great you had so much on hand to make it happen! Thanks for sharing.
Amazing stair railing upgrade shared by Sara and Chris!
Built this table and bench according to Ana's plans worked out great.
Built for my sisters house. I pulled a pic of a mission style table from the internet and then matched the details to her existing hutch. Color match took some work!
Just a tip for Florida folks. If it is humid and raining...stop and wait for another day to stain and poly. Trust me.
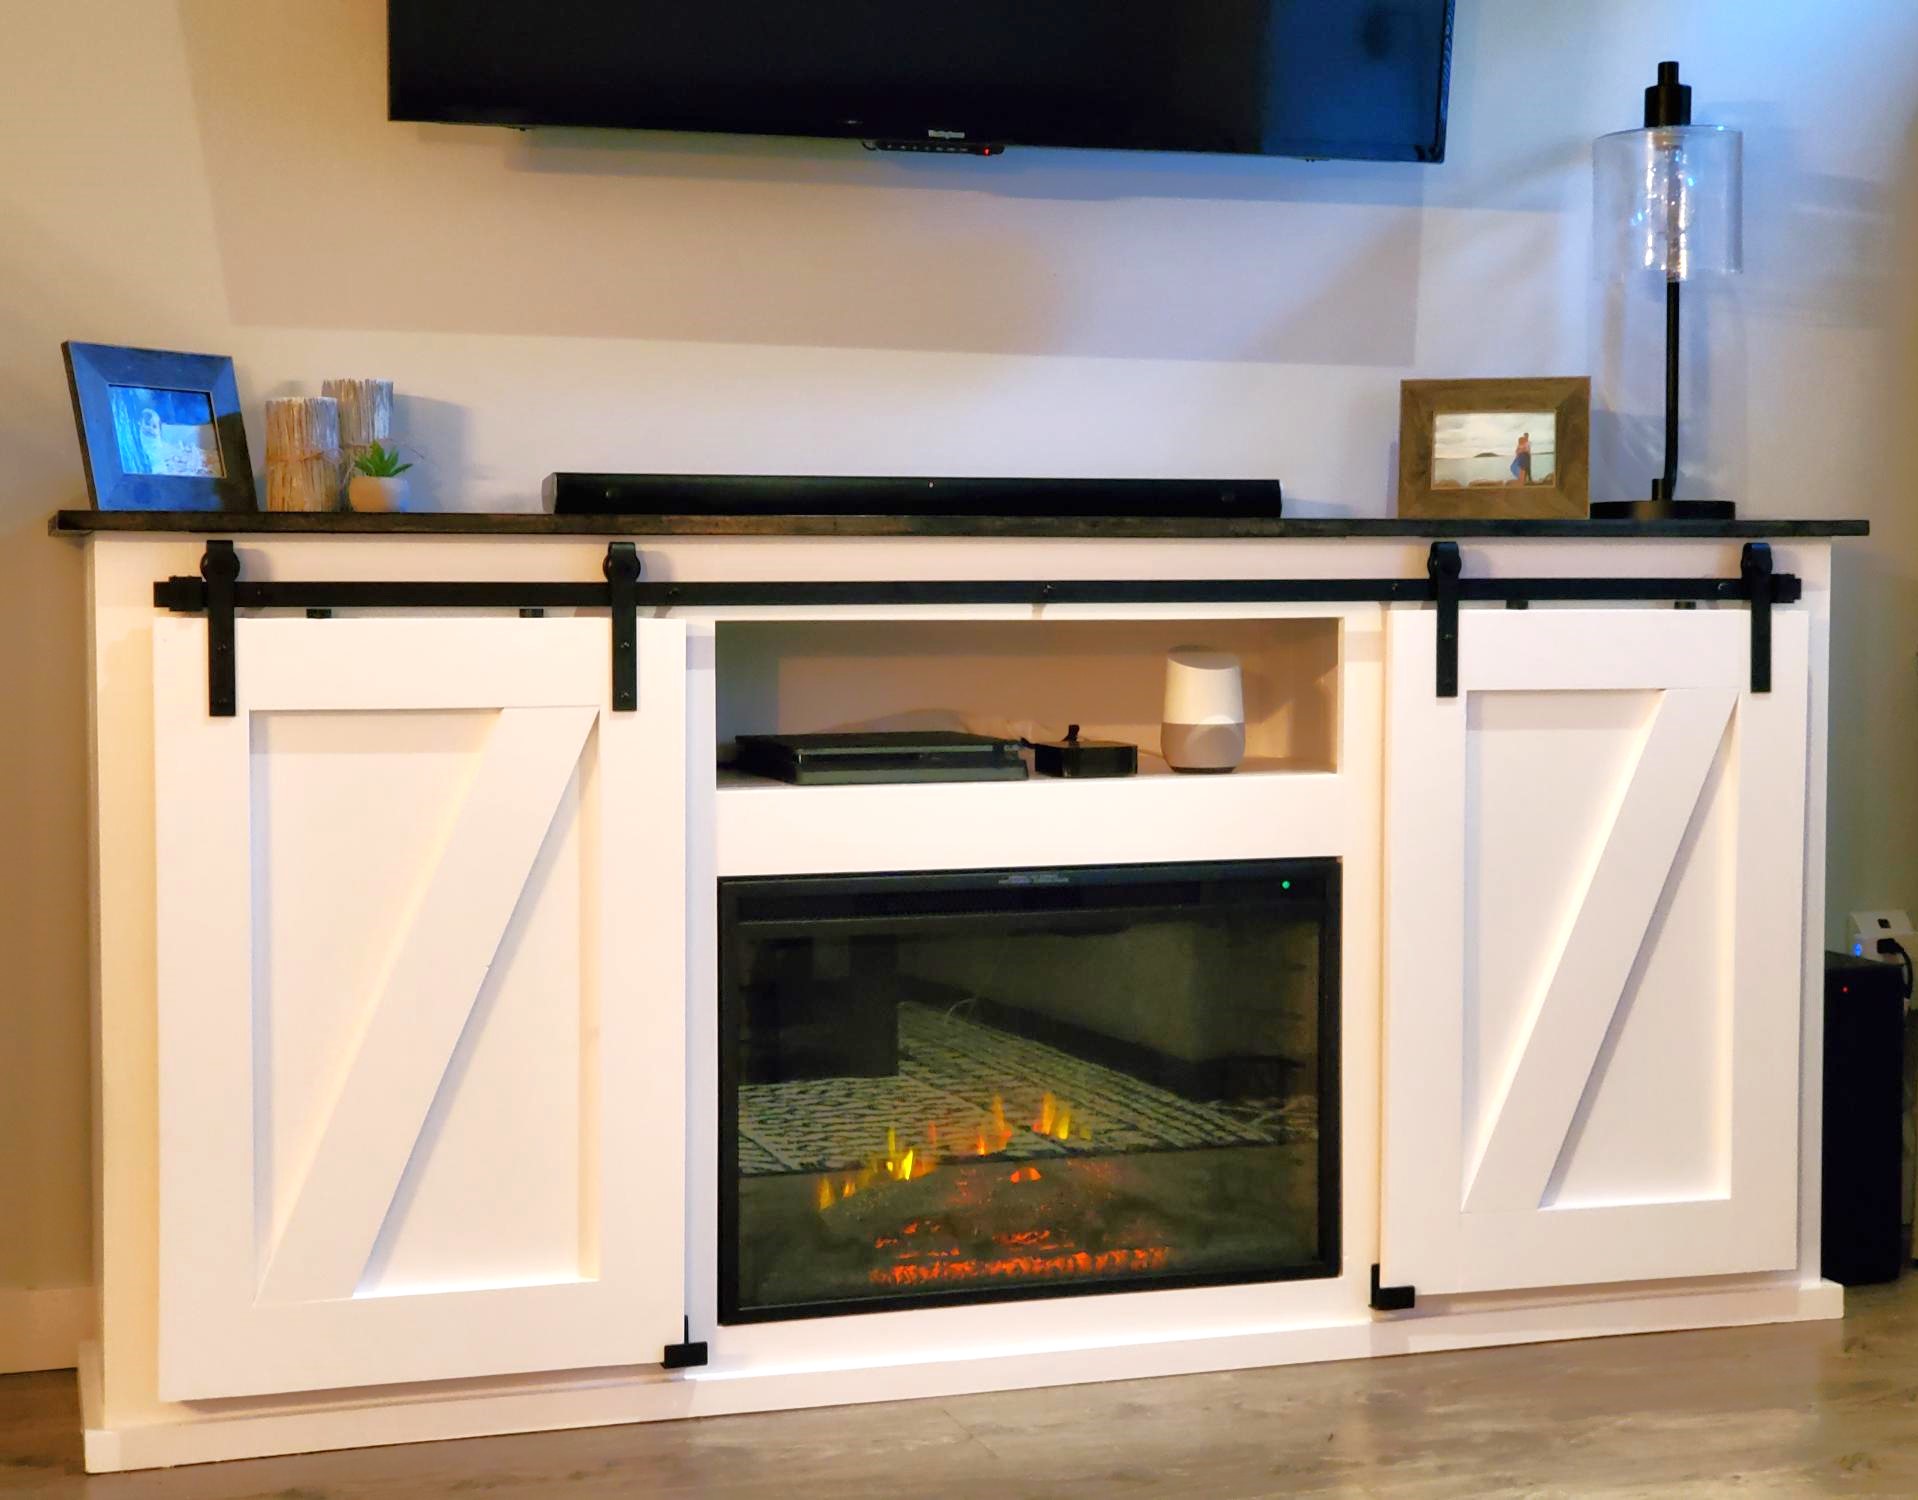
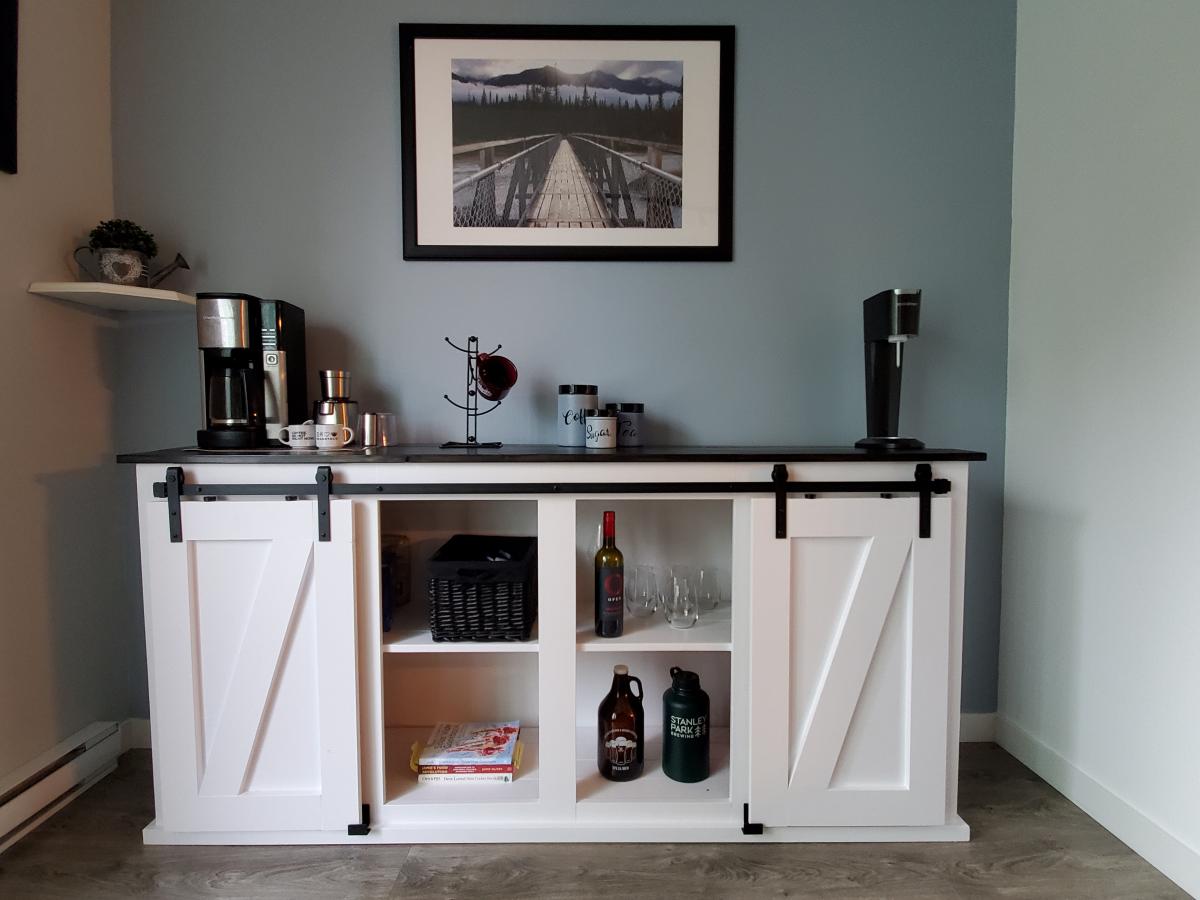
We originally built the original console a while ago as an entertainment unit for underneath our television. We enjoyed the console so much that we decided that we wanted to do another modified console with a fireplace in it and make the other one into a buffet/storage area for the dining room.
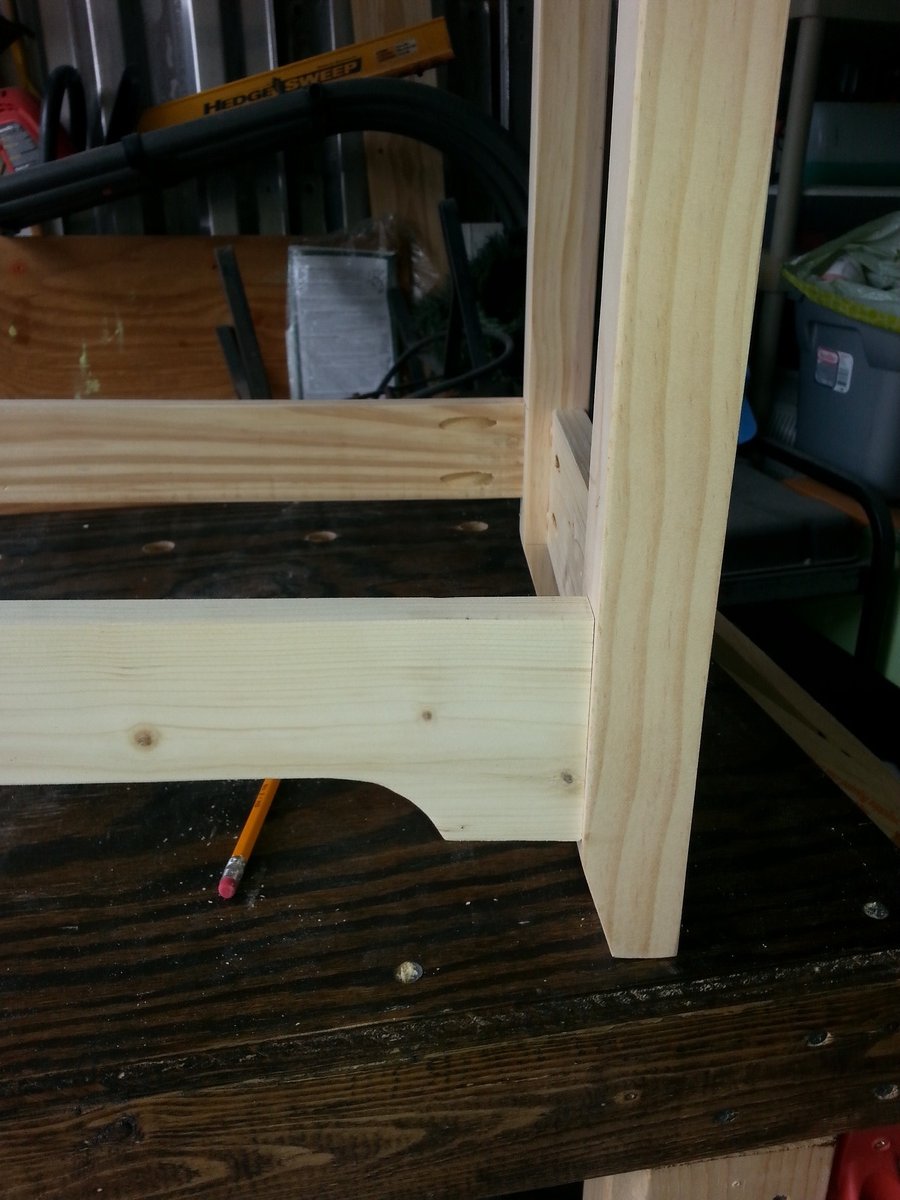
Both of these are fairly modified from the plan, however the basic concepts remain the same. One big thing that we did was use 1x4s as much as possible to reduce the different sizes of lumber we were buying to both reduce complexity and end up with as little as possible scraps.
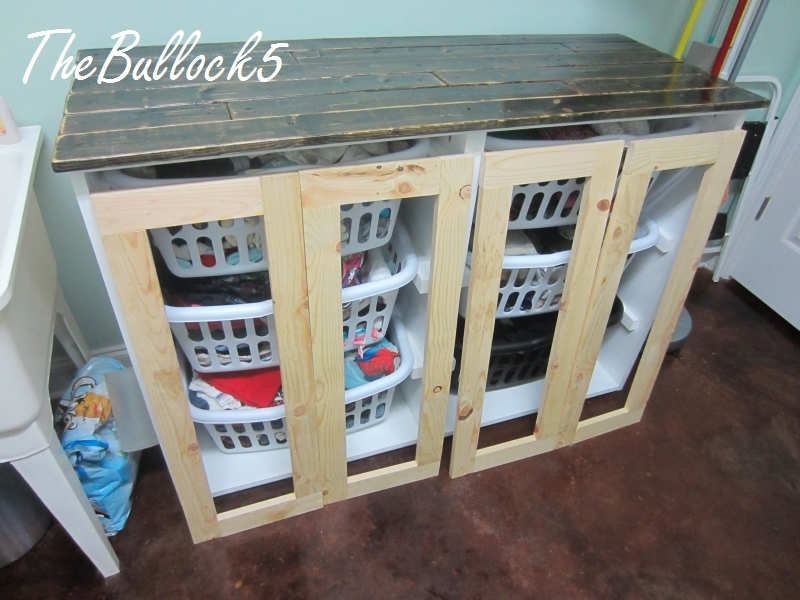
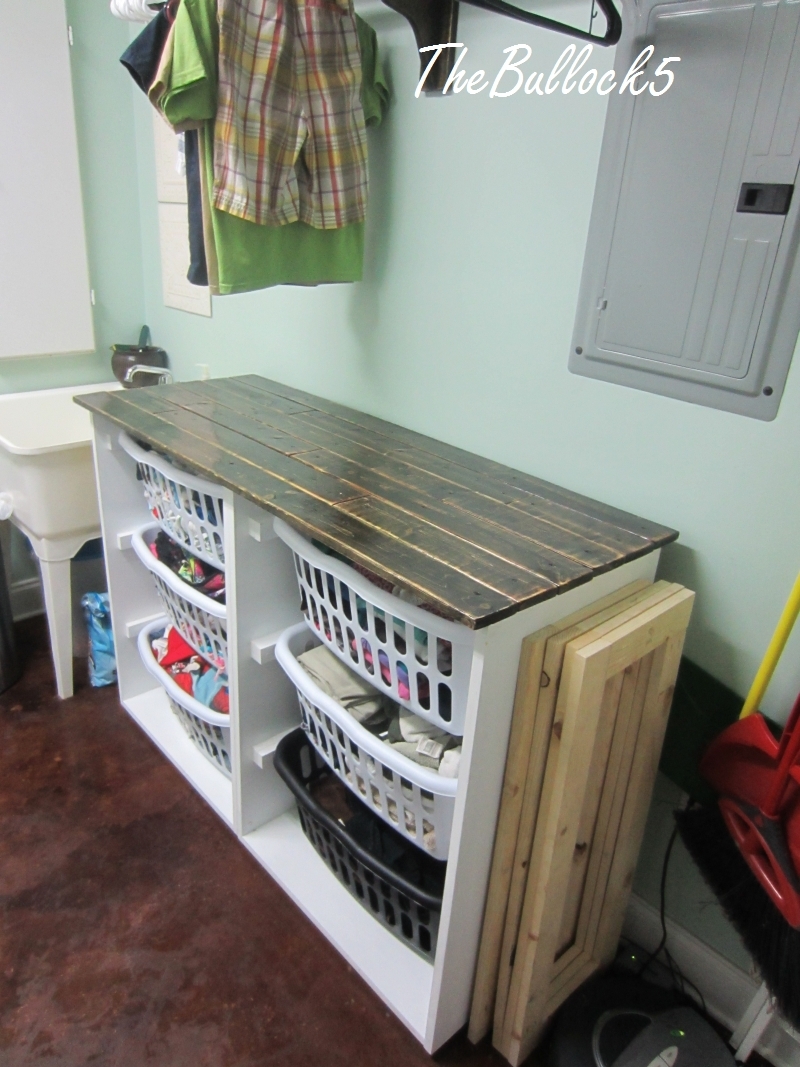
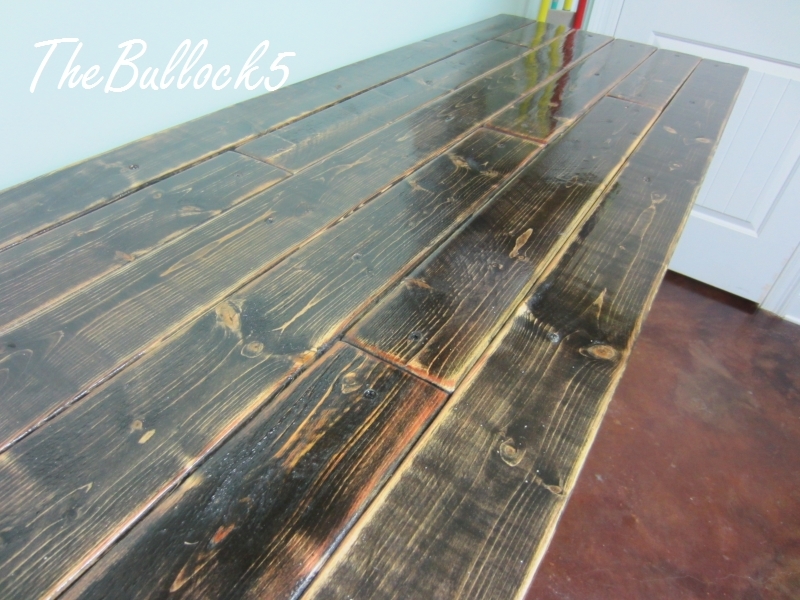
The frames are made of the 2x3s, The sides (4 deep), shelves, middle shelves and face frame are all 1x4s. The back and inside frames are scrap plywood. The top is 1x6s.
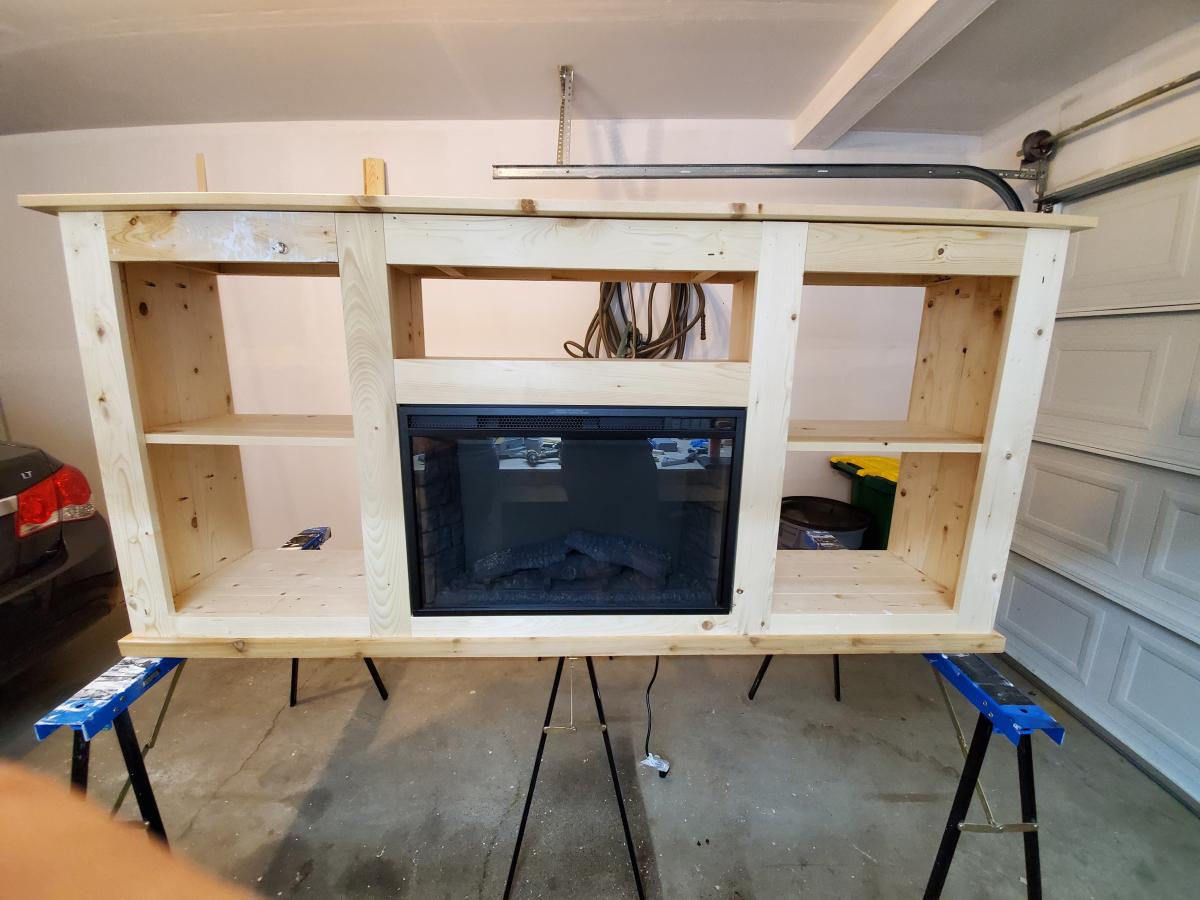
The addition of the fireplace was not difficult. What it did require us to do was to add the centre section and essentially create a box that is closed to the outside cabinets. If it were not closed off it wouldn't support the fireplace insert correctly. The important piece with the fireplace is to ensure you have enough clearance on the top and sides to allow the fireplace to mount safely without overheating. The nice thing about this setup is the additional shelf above the fireplace which we used for electronics. The wires go through the back of the cabinet and it looks very clean.
These are probably my favorite things I've built this year. They're simple to make and add a lot to any living space.
Tue, 01/12/2021 - 19:34
This is beautiful! Any tips on how your built the box around the fireplace?or pictures?
A great plan that was so easy to follow! My hubby and I had a great time building this, even though it took us about a year from start to finish, actual work time on this project was not huge. The Kreg jig was brilliant and made everything so easy.
Tue, 01/20/2015 - 13:43
This is beautiful! I love the picture of your cat. :)
I LOVE these plans. This was my first project, and although it was a big one to start with, the plans were easy to follow. If I can do it, anyone can. I added the rock wall. My kids and I love it. Total cost for me (including all lumber, nails, paint, slide, etc.) is about $850.
We added a shelf for the flowers otherwise it’s too deep
Love the Modern Craft Table! It has lots of storage space and tons of workspace on top. We used pine for the shelves and plywood for the top and edged the top with pine.
There is a spot for two counter stools at the opposite ends of the table which is perfect to give kids their own spot to craft/color.
Sun, 01/15/2012 - 20:10
I love this table but I wonder how do you use it to sew with? or do you sew on this table?
Sun, 01/15/2012 - 21:57
Brook, wow!!! This table is simply amazing! Thank you for sharing such beautiful photos too!
Mon, 01/16/2012 - 10:03
the whole room is beautifull. how many of the other pieces of furniture were built using Anna's plans?
Mon, 01/16/2012 - 10:03
the whole room is beautifull. how many of the other pieces of furniture were built using Anna's plans?
In reply to looks great by Guest (not verified)
Mon, 01/16/2012 - 20:49
Everything but the dresser/hutch and barstools we built using Ana-White plans!
Mon, 01/16/2012 - 12:06
This table is fabulous and I'm really in love with the color! Thank you for sharing. So many new ideas for my room now!
Mon, 01/16/2012 - 12:06
This table is fabulous and I'm really in love with the color! Thank you for sharing. So many new ideas for my room now!
Mon, 01/16/2012 - 17:32
You won't believe this...but today I was shopping for the wood to make the Modular Craft Table, but I did not buy the wood because I was trying to tweek the plans to change the "cubbies" and size. So, I came back to this sight and here is this craft table that would be much better. I want to make it table height rather than counter height so I can sit down and sew at it. I also want to be able to drop the back 12 inches of the table if I do not need it and so it will fit better in my room, wheels on the bottom to pull it out easily so I can extend the 12 inch table when needed. I love what you have done!
Tue, 01/17/2012 - 11:36
You did a fantastic job on this project! Love the way it looks and the color!
Great job!
Sat, 01/21/2012 - 07:00
I love this table, but I can't seem to find the directions to make it. Can you point me in the right direction to find it?
Wed, 01/25/2012 - 17:24
Is there a reason you can't sew on this (from what I gathered from a previous comment)? I want to build something for my wife's craft room and love this, but she will need to sew as well. Help?
Wed, 01/25/2012 - 17:32
Joe,
It would be hard to sew at this table because the table is counter height. You wouldn't be able to reach the foot peddle to run your sewing machine. You could alter the plans to fit a spot that could hold the peddle foot. I sew on a different table in my craft room and use this for cutting fabric and general crafts.
Brook
Wed, 01/25/2012 - 19:26
at one time I had my sewing machine in a spot that was counter height. I used a wood box to put the foot peddle on. One of anna's steep stool plans or the bathroom platform for kids plan might be good to build with this. It was also nice when I was sewing small pieces that needed lots of ironing to stand and sew at the counter.
Wed, 02/01/2012 - 14:25
I have a modern sewing machine (within last 5 years) and I routinely sew at counter height with no problem. I prefer it because it really helps my back. I cannot wait to make this!
Fri, 02/24/2012 - 22:36
Joe,
I think it would work to mount the foot pedal on the inside of the shelf area. She would use her lower outer thigh to depress the pedal while seated.
Tue, 05/08/2012 - 07:47
I love this table! I'm with Brook and don't sew on mine. Height issue is easily worked around - main issue is usually back support. Sewing at a huge workstation tends to leave you feeling unsupported and sitting on a stool (I have a nice wide comfy one from Target) leaves your back unsupported so you usually slouch (bad! bad!). I sew at my smaller desk in a good supporting chair and use my table for everything else. I use this table for a true work area including cutting. I have an Accuquilt Studio and that sucker is HUGE and heavy!
Mon, 11/12/2012 - 11:22
I just talked my fiance' into building this for me to use as a desk. I need a desk for my work from home position where I can store everything as well as have a large area to spread things out. I loved this the moment I saw it and talked him into building it for me. Can't wait to post the pictures when it is finished.
Thu, 02/28/2013 - 16:15
My husband made this FABULOUS Craft Table for me last weekend, it turned out PERFECT! Thank you so much for posting this with such detailed directions....
What do you have in your galvanized pails? What do the labels say?
Thank you!
Built using your sewing table as the base idea. Pine cabinet, drawers and drawer fronts. The top is Hickory, poplar and red oak. base top dimension is 30x30 and folds out to 30x90. Mary will get this as a surprise on Christmas day. Cabinet and to is Varathane 3x. Casters are from Woodcraft and drawer slides are Hickory Hardware.
Mon, 12/28/2020 - 07:05
build the size of cutting mat. Add roller for fabric.
This is a modified butcher block kitchen island built from ana white's plan. Instead of using doug fir (2x4) material for the top, I used hard maple to build an edge grain butcher block top that if knife friendly and food safe. I also altered the dimensions to fit my space.
Sat, 05/10/2014 - 11:05
Yet another beautiful kitchen island. Love the finish and butcher block top on this one! Thanks for sharing!