Bench, storage shelf
![](/sites/default/files/image_212.jpeg)
I made this taller and added and extra shelf. I also didn't add the angle cuts and for the front pieces. It was so easy and I built it within three hours with my 8 yr. old son.
I used the stick on drawer organizer tutorial to divide a giant dresser drawer
With the divider, the drawer can hold more and is so much neater and easier to use
i love there is ZERO planning or sourcing of dividers with this method just have the basic materials on hand, open up a drawer and get it done
I made this work bench for the Make Two Challenge but haven't found someone to give it away to yet. We did have fun building it though. Check out my blog for more details!
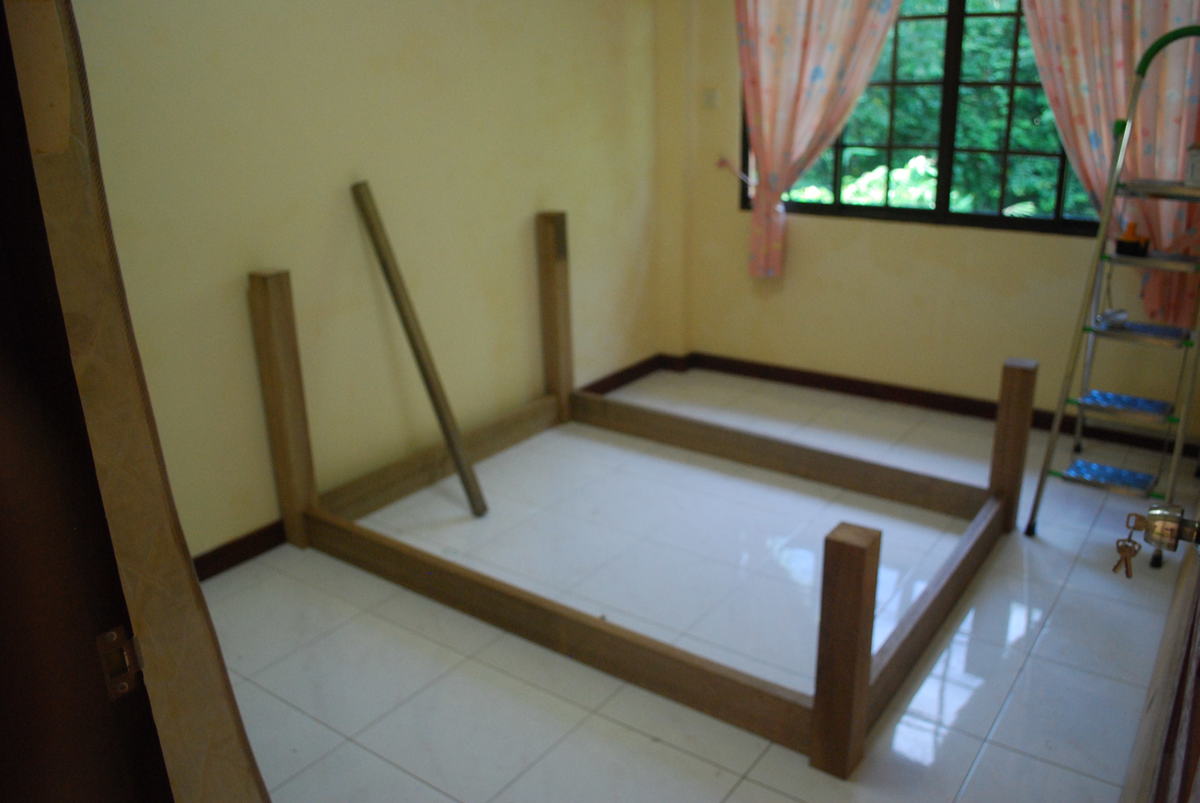
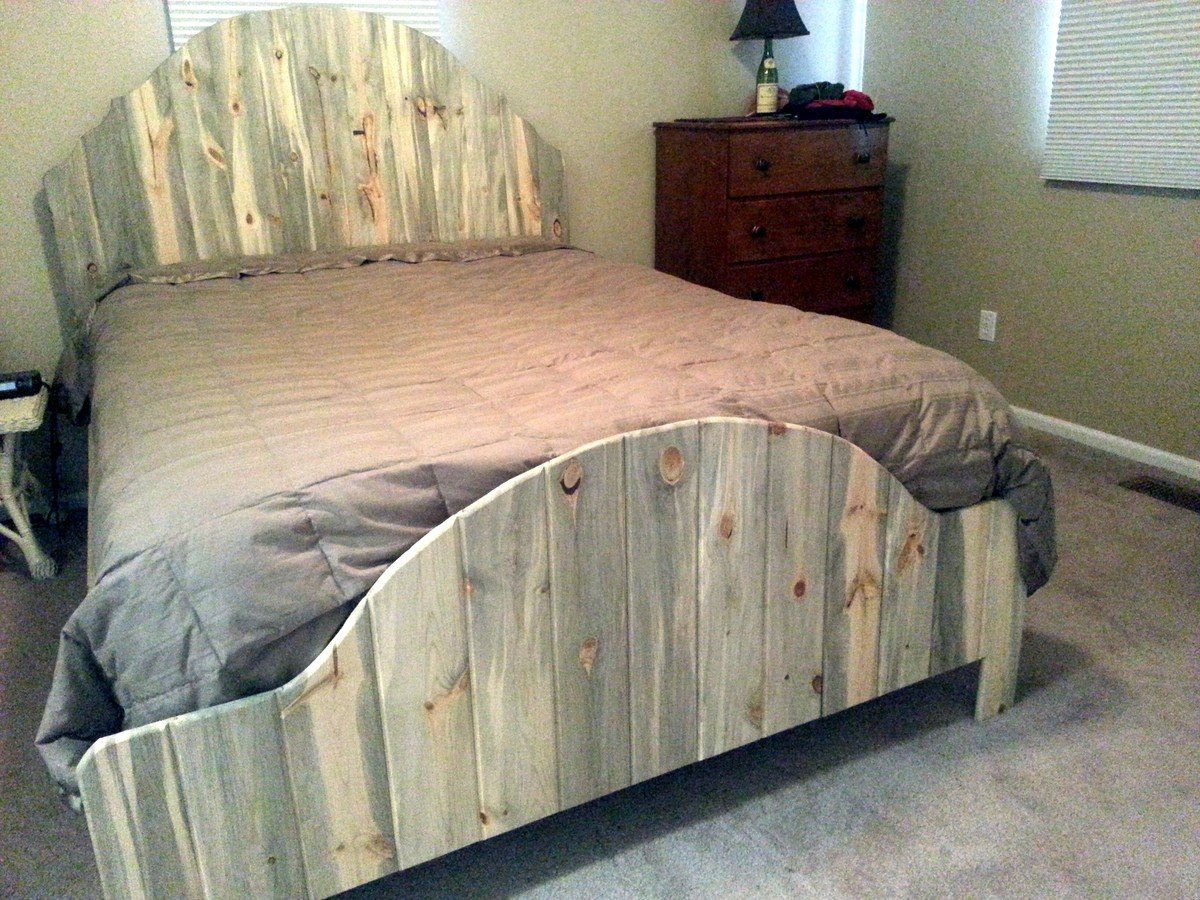
I needed a new double bed for one of our spare rooms (that had been used for storing suitcases, etc.) and looking at what was available, decided to make my own.
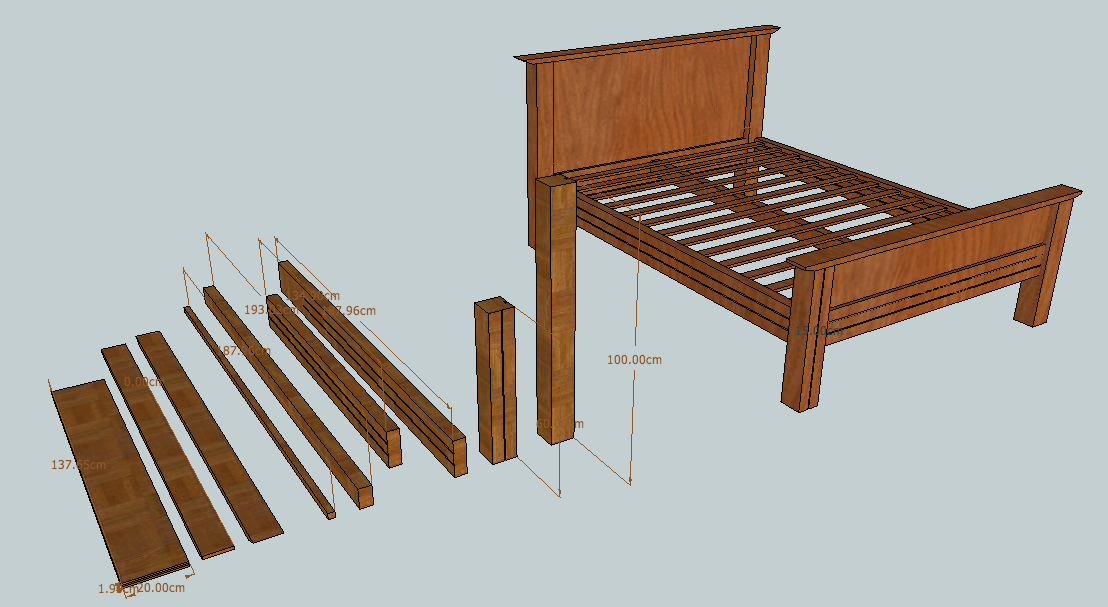
I settled on standard timber sizes - 4x4, 6x4, 8x1, 4x2, 1x1, etc. and used pocket-hole joinery to tie it all together.
As far as tools, a drop saw, battery drill and hand router/trimmer, along with measuring/marking/squaring tools.
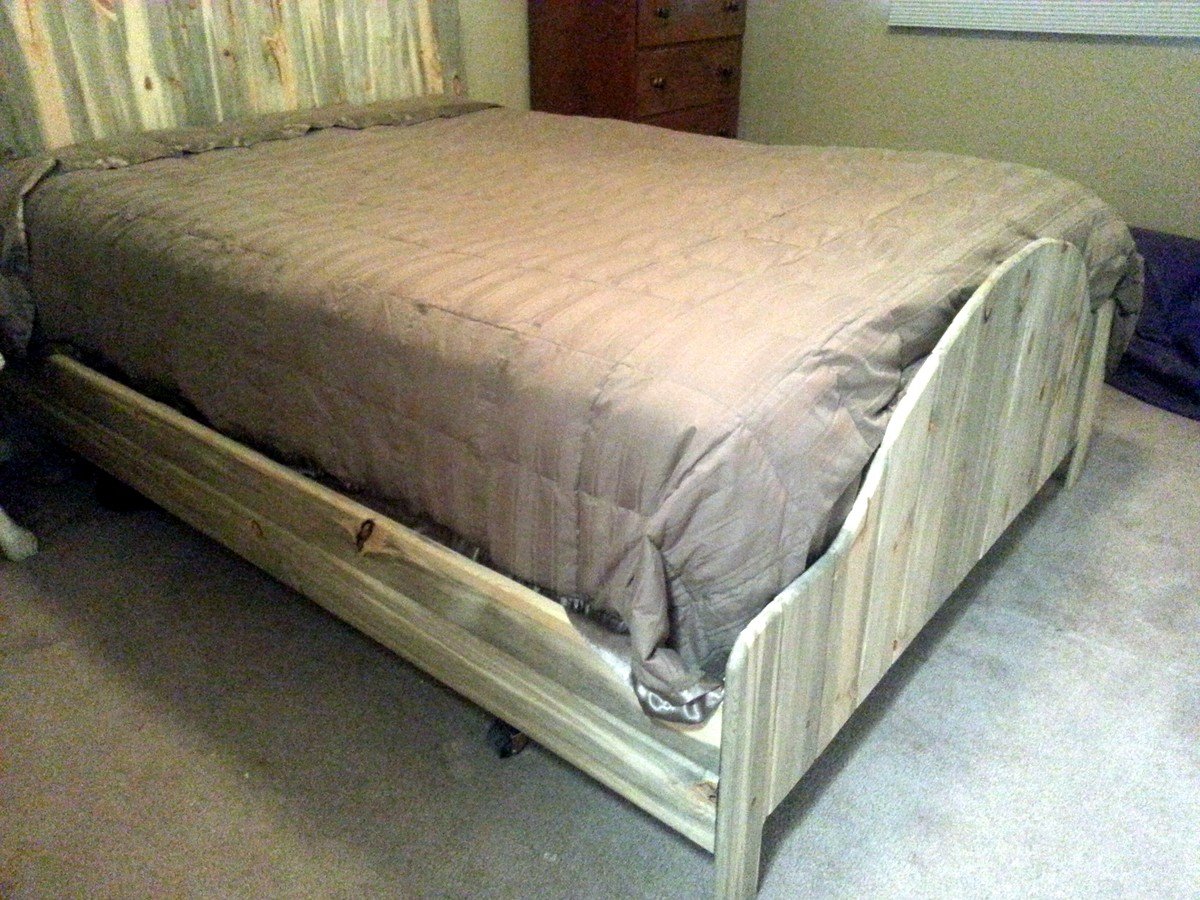
The bed rails and stretchers are 6x2 Meranti (a local timber in SE Asia where I live), the posts are 4x4s, the support rail in the centre is a 4x2, the head and footboards are finished with 8x1s.
The slat support cleats and centre support rail were rough-sawn, the rest of the timber was planed - my thinking being that no-one would see either of those and I had a bunch of 4x2s lying around.
Very little measuring was done, other than for cutting the lengths of timber - I just cut a piece of timber to act as a spacer to ensure I had the rails and stretchers at an even height and set back from the edge of the 4x4s.
All measuring was done in metric, as that's what I am used to - so the 4x4s are really 100x100 - and after planing, 90x90, but my router bits are imperial, so I decided to use inch measurements in descriptions. The plans are in metric, but if you want them in inch, just change the 'model' to inch.
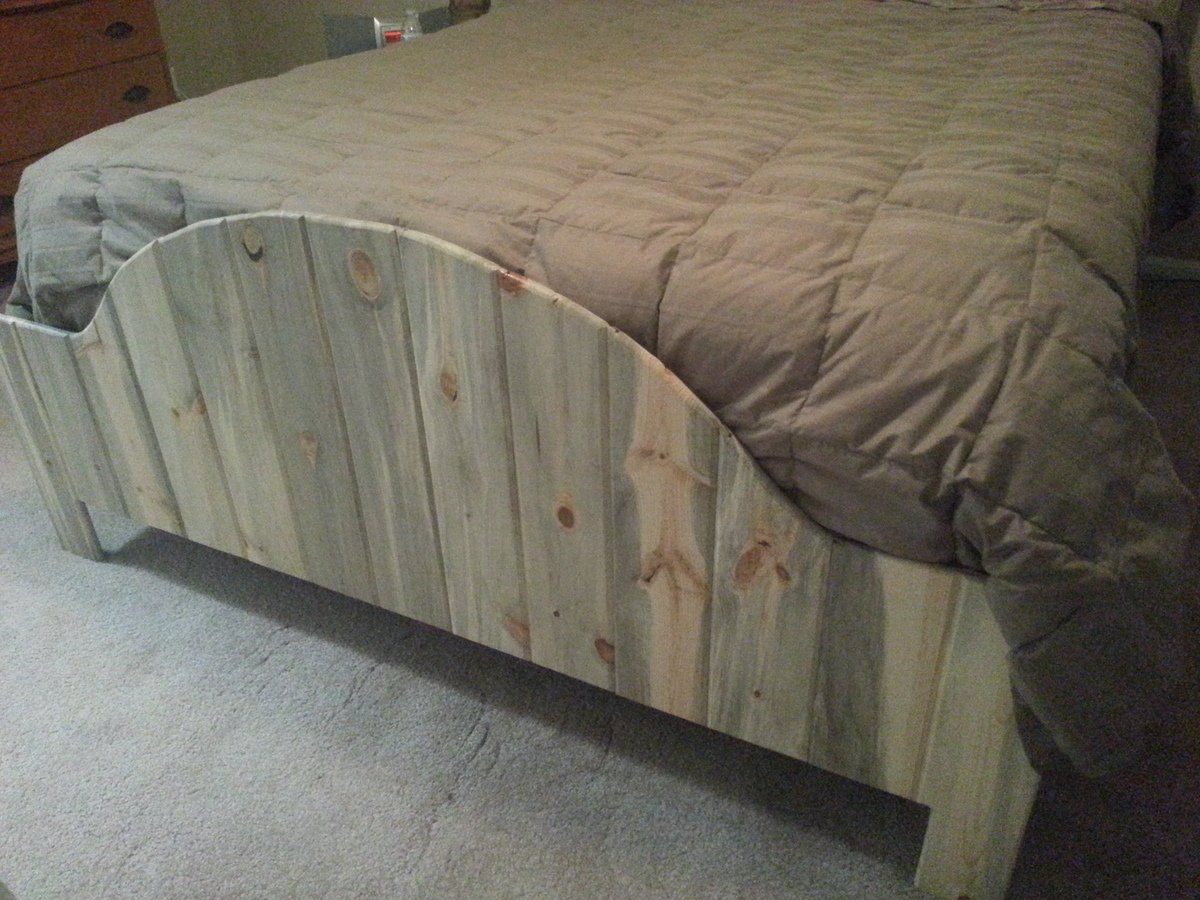
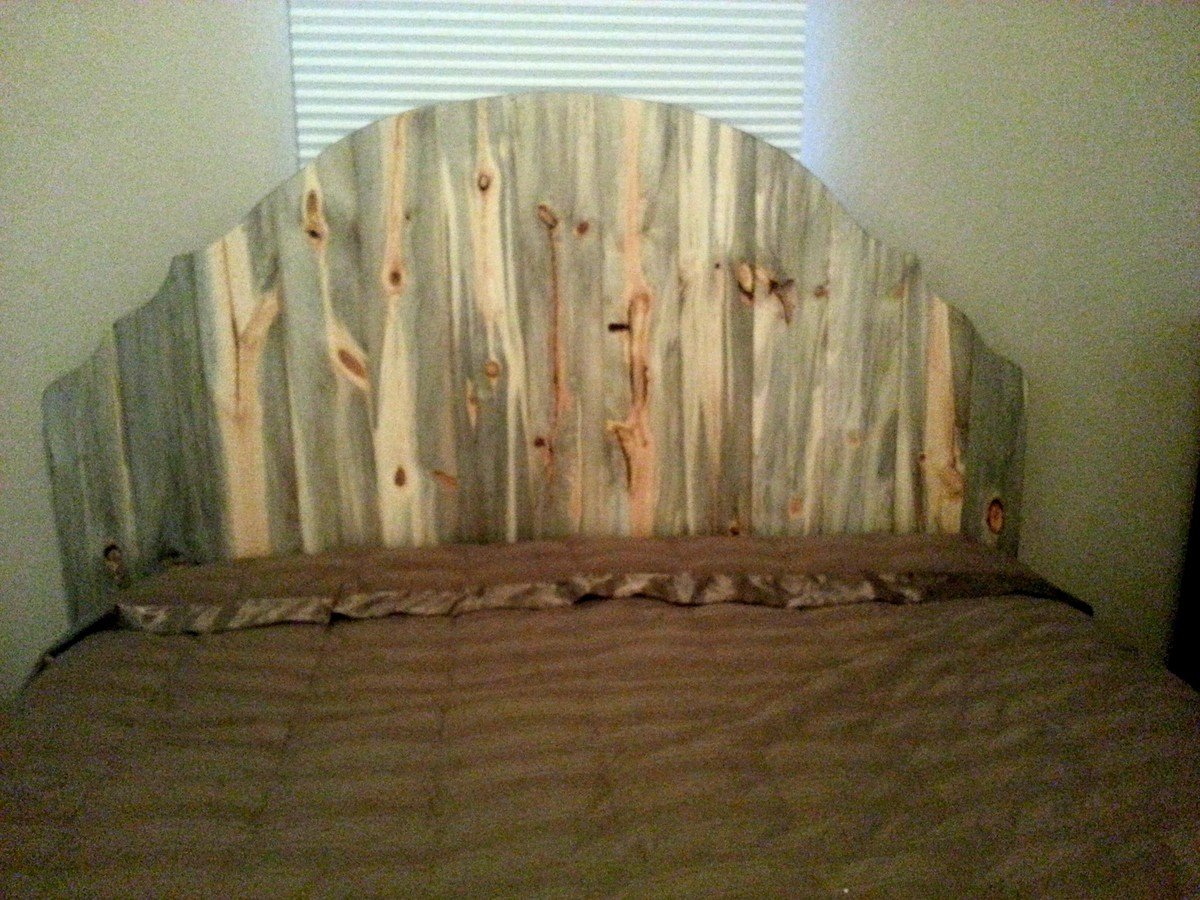
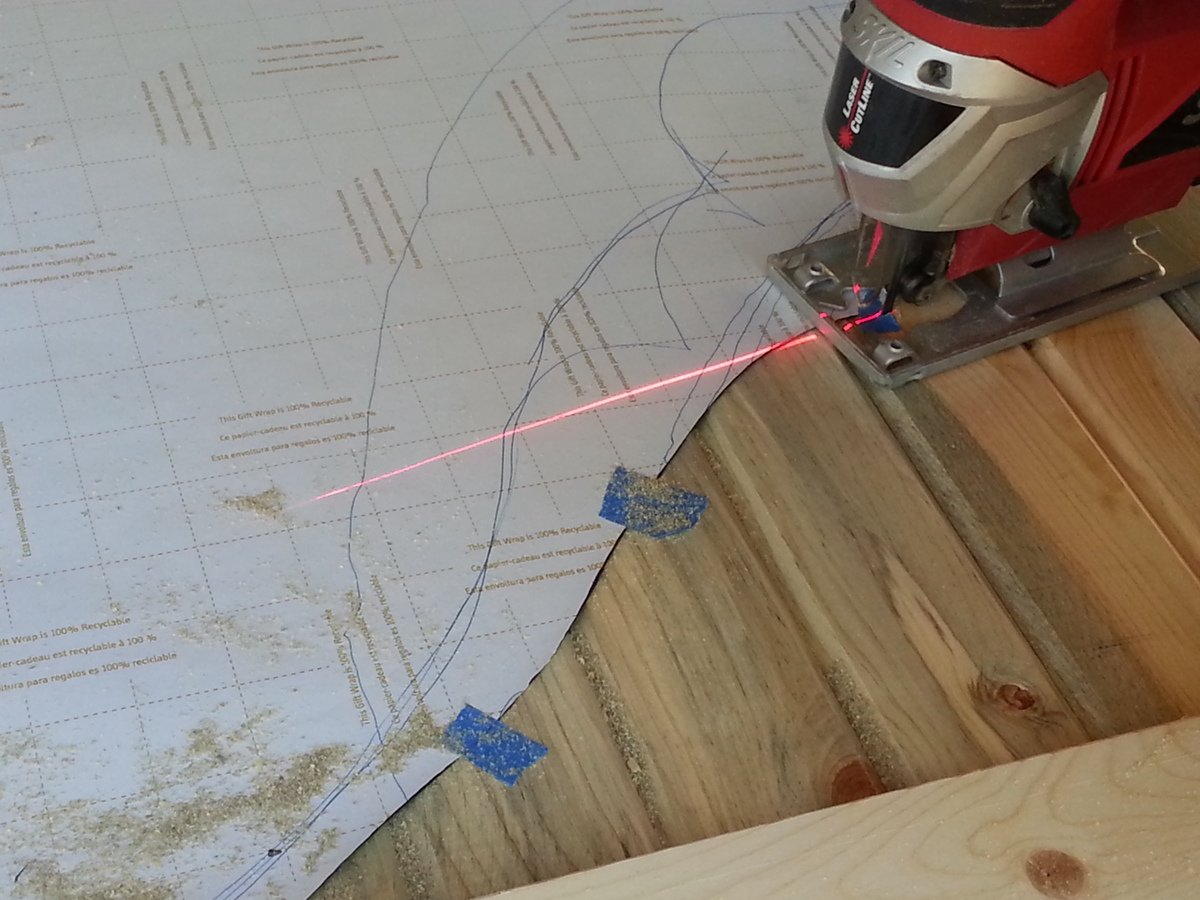
The 4x4s had a 1/4" groove 7/8" deep routed in to take a matching 'tongue' routed into the boards, which were glued in place. one 8x1 board in the foot and three in the headboard gave it a nice balance and reduced the need to rip any planks. The 4x4s were cut to accommodate those plank dimensions. The tops of the head/footboards were a ripped and shaped 8x1 board.
I routed a v-groove in the sides and foot to break up the expanse of timber, sanded it all down and used a dark stain - local meranti varies so much in colour, from golden blonde to ashy dark, that staining is pretty much compulsory.
As to method:
Cut rails, cut posts, cut stretchers - test fit.
Make 'spacer'
Drill pocket-holes in rails and stretchers
Route groove in posts, route v-groove in rails and foot stretcher.
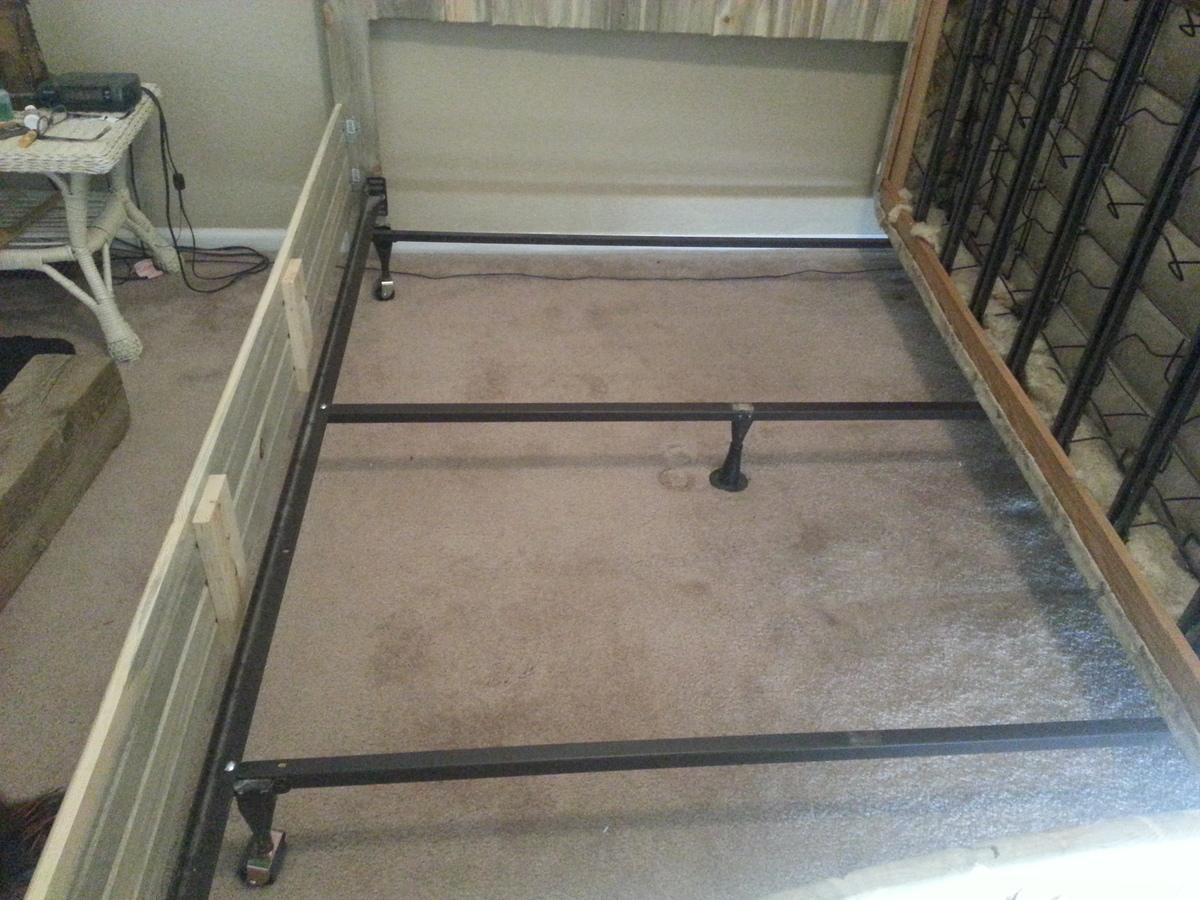
Support end of rail, use spacer to get correct height against post and seat pocket-hole screws - same at the other end and for stretchers. This almost completed construction :)
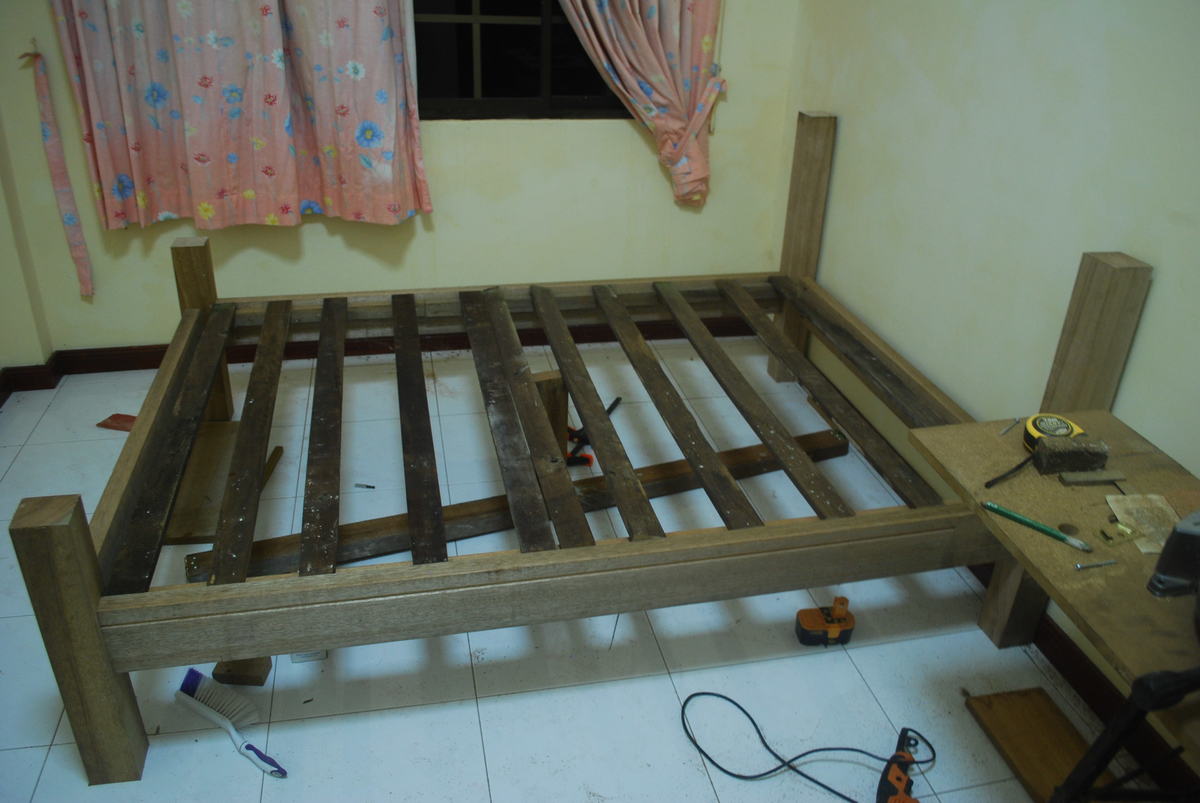
Measure and cut slat - fit support cleats and centre support rail using slat as template/guide.
Use slat as template for cutting the rest of the slats - test layout/fit slats.
Glue boards in footboard and headboard.
Cap footboard and headboard with ripped board - panel pins and glued.
Finish sand, wipe down, varnish.
All in all, it is very sturdy - Meranti is heavy stuff. I could have used much lighter gauges of timber, but apart from the 6x2s, it was what I had lying around, so the dimensions almost dictated themselves.
I did do some further 'trim', by shaping the capping planks on my table saw - a quick and effective way of 'raising' a panel.
You can find the plans here: https://www.dropbox.com/sh/k99w5pik5pezmxa/pUU2TUwlKM
Needed to add a buffet console to the empty wall in our formal dining room.
I used the Modern Park Bench plans and modified the size for our patio space. I also modified the bottom and used 2x2’s to give it a different look.
My 12 year old son expressed some interest in learning how to build things. We looked for several "kit" projects but they all seemed too juvenile to him. In the meantime his "Grandma" (an old family friend) asked me to find her a tray that she could use to carry her cup of tea on so when it sloshed it wasn't running down her arm. I looked and looked but couldn't find one in the stores that had a handle that she could grip. I was very surprised and relieved to find the pefect project: this wonderful serving tray!
We printed the PDF, drove to the store and a few hours later- her tray was finished and my son was hooked on wood working.
Overall it was a very simple project- the thing that caused the some difficulty was figuring out the process for shaping the handle- that grid diagram was very confusing to us, but it may be because we are novices.
Aside from that- we could not be happier and we are looking forward to completing some other projects together.
Wed, 01/04/2012 - 05:30
Absolutely fantastic job! Welcome to the world of woodworkers, and keep up the good work! And please post your next project for us all to see!
Sun, 03/10/2013 - 11:55
Just let him know that he did a fabulous job for his first project. When all of us started we made many many mistakes but learned valuable lessons. Woodworking requires math, geometry, patience, planning, preciseness, and a lot of other things. You do not need a bunch of expensive tools. Some of the best projects I have seen were all built with hand tools. Clamps are a must however. Folks on this site will gladly share ideas and direction anytime your son needs it. By the way I still make a lot of mistakes, but only me and my shadow know.
2nd project. Made this for me! Love it. I bought 5 towels at Walmart for $2.86 each, extra firm pillows for $3.50 each and made the cushions. It is like sinking into Heaven. Glass of wine and a good book. Set for the day. I added another support half way through since people used it as a seat during parties and I was afraid it would sag in the middle.
The table was an after thought. I had leftover wood and and just gestimated measurements.
FYI, I'm a slow project person, so most could probably finish faster than I did.
Thank you so much for these plans! 2 weeks worth of nap time building and my daughter has an awesome new bed!
Sat, 02/06/2016 - 12:30
WOw, that looks amazing! I see that great toy storage too, thanks for sharing!
Made using knotty pine.
I used HD pocket screws and glued all top pieces except for the breadboard ends, to allow for wood swelling/contracting.
I took Anna's Narrow Farmhouse table and downsized it to make a bench for my kitchen table. For the bench top, I used what I had on hand to make a comfortable seat.
When it was time to re-do my son's bedroom (past time, really), I decided to build him a loft bed to help maximize space in his small room. A quick search to the internet brought me to Ana's site, saving me lots of hassle on trying to design my own loft bed for him from scratch. My son, who loves everything science and is especially fond of volcanoes, wanted a volcano themed room, and I had the bright idea to make the bed itself into a volcano.
I modified the loft plans slightly to create a bookcase headboard - because I always wonder when looking at loft/bunk beds where the kids put all their STUFF (books, reading lights, glasses, special treasures, etc) - but other than that its just the plans from this site minus the rails and with plywood tacked on to the exterior (the plywood takes the place of the rails). The plywood was cut with a jigsaw after it was put up so I could get all the ridges and holes in just the right spot and height.
Honestly, the painting took much MUCH longer than cutting and assembling the bed did, but I think it really turned out well. The inside of the volcano on the cave's back wall is my favorite part. There's still a few things left to do, but no project of mine is ever really completely finished anyway! On on end inside the "cave" under the loft I built a cushioned reading bench and bookshelf, but the other end of the cave is still empty. Eventually it will house a built-in desk that looks out of the lava holes in the walls.
The cave under the bed is so cozy, I've found myself sitting on the reading bench more than once while working on the project, enjoying some me-time when the kids are at school!
Sat, 03/22/2014 - 10:49
Hi -
Great job!! I'm planning on adding a slide too for my son. Did you do anything extra to support the slide?
Thanks!
Sat, 03/22/2014 - 10:49
Hi -
Great job!! I'm planning on adding a slide too for my son. Did you do anything extra to support the slide?
Thanks!
We Recently moved into a new house and this project was a great break from the regular work on the house. The instructions were great and easy to follow. The 2 x 6s on the sides makes it hard to use carriage bolts though I settled for lag screws. Can't wait to do my next project.
Ana's favorite Adirondack chairs made from redwood.
Tue, 09/10/2019 - 07:38
I noticed that your stingers and apron are different. Can you tell me how you modified?
My kid-o's love to sell lemonade. So, we made a trip to the local hardware store. Because I am terrified to use my husbands electric saw, any wood we purchased would have to be cut with a hack saw and a miter box. And since the stand is to be stored in the backyard, we opted to build it from cedar. We ended up purchasing 8 fence pickets for about $15 total. This was also to be a great way for my kids to apply the some of the knowledge they have picked up this year, our first year of homeschooling. My children, ages 7 and 9, measured all of the boards that needed to be cut. It turned out GREAT! We already had some extra boards, spray paint and screws on hand; so, the grand total was $15.00 for the entire project!
I started this project so my children could use them at the x-desk art table. But as they came together I decided that I would use them for nightstands in our new bedroom.
They are fabulous as a stool or a table I love them.
I used the providence bench instructions as my base, but made the legs longer and the top 1 board wider. It took a total of 7 2x4's. Cheap, easy, and fun addition to my entry way! Thanks Ana White!
This was a labor of love. I built it over a Christmas vacation. It took just under two weeks. The tables between the chairs were made to be removable, so each chair is an individual and we can take apart any of the chairs or tables on a whim. Very happy with this one. Thanks Ana!
I built the shed during the summer of 2018, following Ana's plans but with the addition of a green roof. After almost a year the vegetation -- a variety of native plants from the upper Midwest -- has started to fill in pretty well. (The dangling "vines" are wild strawberry plants.)
My carpentry skills are rudimentary so the project took a long time but was worth the effort.
I saw this beautiful tongue & groove beetle kill wood at our local Home Depot and immediately knew I wanted to make a bed with it. I had seen several similar headboards on various websites, but just drew my own. I used wrapping paper that had 1" graphs on the reverse side. This time of year, I stock up on this paper and keep for projects. After we drew the headboard on the paper, we taped it to the wood and cut it out with a jigsaw. Then, we routed the edges to give it a more finished look and lightly sanded it. I didn't want the color to change any, so I just sanded it and used Minwax Polycrylic Satin (water based) for a finish). We just attached the side rails with metal braces. We decided to just use this as a frame on the outside of our metal bed frame, but you could put slats in it too. By making it a frame, it's easier to move the bed. We might eventually put slats in it. Anyway, I love it!
I used this plan to build this cabinet space around the fridge. Before this was built, we just had a small dinky counter space and the overhead cabinet. I had to make a few minor adjustments in order for it to fit in the space.
Fri, 08/05/2022 - 08:38
This is awesome. I love the utilization of space. Is this a shelf that you built ? How deep are the shelves?