Community Brag Posts

Afternoon bench

Submitted by Colindidit on Thu, 05/07/2015 - 19:11

I went this up this afternoon after seeing the plans. It's only 3 feet long because I only had one board that was salvaged from a friends garage. I could not bring myself to use another piece of lumber I went this up this afternoon after seeing the plans. It's only 3 feet long because I only had one board that was salvaged from a friends garage. I could not bring myself to use another piece of lumber different

Recommended Skill Level
Beginner

Outdoor Storage Bench/ Coffee Table

I love this storage bench!  I modified the cut sizes to make it a coffee table also.  I made it shorter and thinner.  Now I can put my feet up on it, put a drink on it, and store some toys or garden tools in it!  You can check out modifications by clicking here.  Thank you Ana for the great plans!

Estimated Cost
$45
Estimated Time Investment
Afternoon Project (3-6 Hours)
Finish Used
Spray paint and spar urethane spray
Recommended Skill Level
Beginner

Ultimate Roll Away Workbench with Miter Saw Stand

Submitted by mbaylis on Mon, 10/18/2021 - 14:05

So nice and tidy in the garage now!

Comments

PB & Ana Inspired Hampton Bed

This started out a project driven by inspiration. I wanted a bed similar to the Hampton Bed in the Pottery Barn Teen Catalog, and I wanted a handful of beds from the newest Crate and Barrell Catalog. So, I sat down with a piece of paper, and a felt tip marker, and sketched out the bed. I had just built the farmhouse bed, and knew it was strong, so thats how I designed the frame. Then I used plans from the Simple Bed to get another reference point and for full size dimesniosn. Then I built it. I journaled each step of the way on my blog, if you want more info on how building went, or the learning process. I am truly very proud of this bed. Thank you Ana for giving me the courage to do this one without step by step instruction. You rock. 

Estimated Cost
$100
Estimated Time Investment
Day Project (6-9 Hours)
Finish Used
General Finishes Water Based Stain: Walnut
General Finishes Polyacrylic top coat, 4 coats
Recommended Skill Level
Intermediate

Guest Bathroom Open Vanity

This plan from Ana's site fit the bill perfectly for the vanity in our guest bathroom. Only a short four years after building our home, our guest bath finally has a functioning sink vanity! We also added a Kraus brand faucet and vessel sink, as well as tiling the back wall and installing faux board and batten. The estimated cost is for the entire bathroom project.

Estimated Cost
$1000
Estimated Time Investment
Week Long Project (20 Hours or More)
Finish Used
General Finishes High Performance Flat clear coat
Recommended Skill Level
Intermediate

Left Coast Adirondack Chairs

Submitted by Anonymous (not verified) on Tue, 10/26/2021 - 16:24

Thank you for the plans!

Comments

I love reclaimed wood!

Submitted by melaniesue on Mon, 03/28/2011 - 21:45

Built from Plan(s)
Estimated Cost
FOR FREE
Estimated Time Investment
An Hour or Two (0-2 Hours)
Finish Used
I made my own version of milk paint and stain and stenciled a bird I drew, then heavy sanding to create the, "old look". I have tons of pallets, my neighbors are always dropping them off at my house, my RV pad is a WRECK from all sorts of old wood, and pallets. I love it, but I am looking like a hoarder, I.AM.NOT!

I also made this table out of an old shutter my neighbor dropped off for me, I took it apart, and that was the hardest part, other than the sanding... so much sanding! I finally got out the belt sander, which I really try not to use. The table is not quite finished, it's still wet in the pics, and not attached, I am painting the bottom white, and adding one more coat of stain on the table top. My number one rule, sand, sand, sand!
Recommended Skill Level
Starter Project

Rustic Sideboard

Submitted by Chopper on Sun, 06/09/2013 - 18:59

Rustic Sideboard Project.

We had so much fun doing this! Took about 3 weeks with significant effort.

We only made it with the center drawer. The cabinets were enlarged on the outside to account for this.

We didn't tack the backing on. We routed in 1/4 inch in the back to inset the entire back. Very simple and easy.

The finish was fantastic. We did the following (Sanding heavily between each step):
-Minwax Provincial Stain
-Miss Mustard Seed Luckets Green (1 coat)
-Minwax Furniture wax.

We used the same hardware as on the website. Lowe's and Home Depot don't care a lot of inset hinges and I was concerned about ordering on line.

The plans were great and the project came out fantastic. Thanks for the plans and guidance!

Estimated Cost
400
Estimated Time Investment
Week Long Project (20 Hours or More)
Finish Used
-Minwax Provincial Stain
-Miss Mustard Seed Luckets Green (1 coat)
-Minwax Furniture wax.
Recommended Skill Level
Intermediate

Comments

Rustic X Consule

Thank You Ana White for posting the plans to make this great project! Mine is a little different without the "X" on the sides....maybe mine should be rustic ( / ) consule....

Built from Plan(s)
Estimated Time Investment
Day Project (6-9 Hours)
Recommended Skill Level
Beginner

Farm table

Submitted by Anonymous (not verified) on Fri, 11/05/2021 - 14:15

I had just had a bad experience with a furniture company that sent me the wrong table after I had waited for many weeks for it. I was so exasperated I decided I would make my own from your instructions. I am a 62 yo woman and I had a blast making it. I am now planning to make a bedroom set next!!!

Comments

Three 4'x8' Raised Cedar Beds for $45 total.

Submitted by amberhibbs on Fri, 04/01/2011 - 13:41

I finished these last weekend and finally took pictures.

I found 44 5' cedar pickets on craigslist for $30 and built these raised beds. I built them according to Ana's instructions except I made them bigger (4'x8'). Since my boards were 5' long I couldn't span the entire length and went with a brickwork style overlap so there wasn't one seam in the center or a weird off-center seam. And, of course, I blogged about it.

Estimated Cost
$15 per bed, $45 total
Estimated Time Investment
Weekend Project (10-20 Hours)
Finish Used
None.
Recommended Skill Level
Intermediate

Master Bedroom closet organizer. Before and After.

Submitted by jmtlaw5 on Tue, 06/11/2013 - 08:40

The closet had a divider when I moved in. I removed that. It opened up the room nicely. I modified the master bedroom closet plans just a bit to fit my needs and space. The closet divider had to first be removed which opened up the room nicely.
It is roughly 94 inches wide, 18 deep, and approximately 84 inches tall.

I used Soft-Close drawer slides. I also installed motion lights under the top to both add a touch of something special and simply because it was kind of dark with the floor being black wood and the closet system stained black. I sanded it to 400 grit smooth by hand. It soaked up over 4 coats of minwax polyshades ( black) applied with a brush and then rubbed smooth with a soft cloth.

Estimated Cost
master bedroom closet
Estimated Time Investment
Week Long Project (20 Hours or More)
Finish Used
polyshades by Minwax, black.
Recommended Skill Level
Intermediate

Single Wine Hutch

Submitted by Shane15 on Thu, 05/14/2015 - 10:31

Wine hutch with added trim to give a finished look.

Estimated Cost
150
Estimated Time Investment
Week Long Project (20 Hours or More)
Finish Used
Minwax Oil based red walnut. with a semi-gloss oil based poly-urethane coat.
Recommended Skill Level
Intermediate

Weekend Project: DIY Kitchen Island

Submitted by bdel on Fri, 11/10/2017 - 11:09

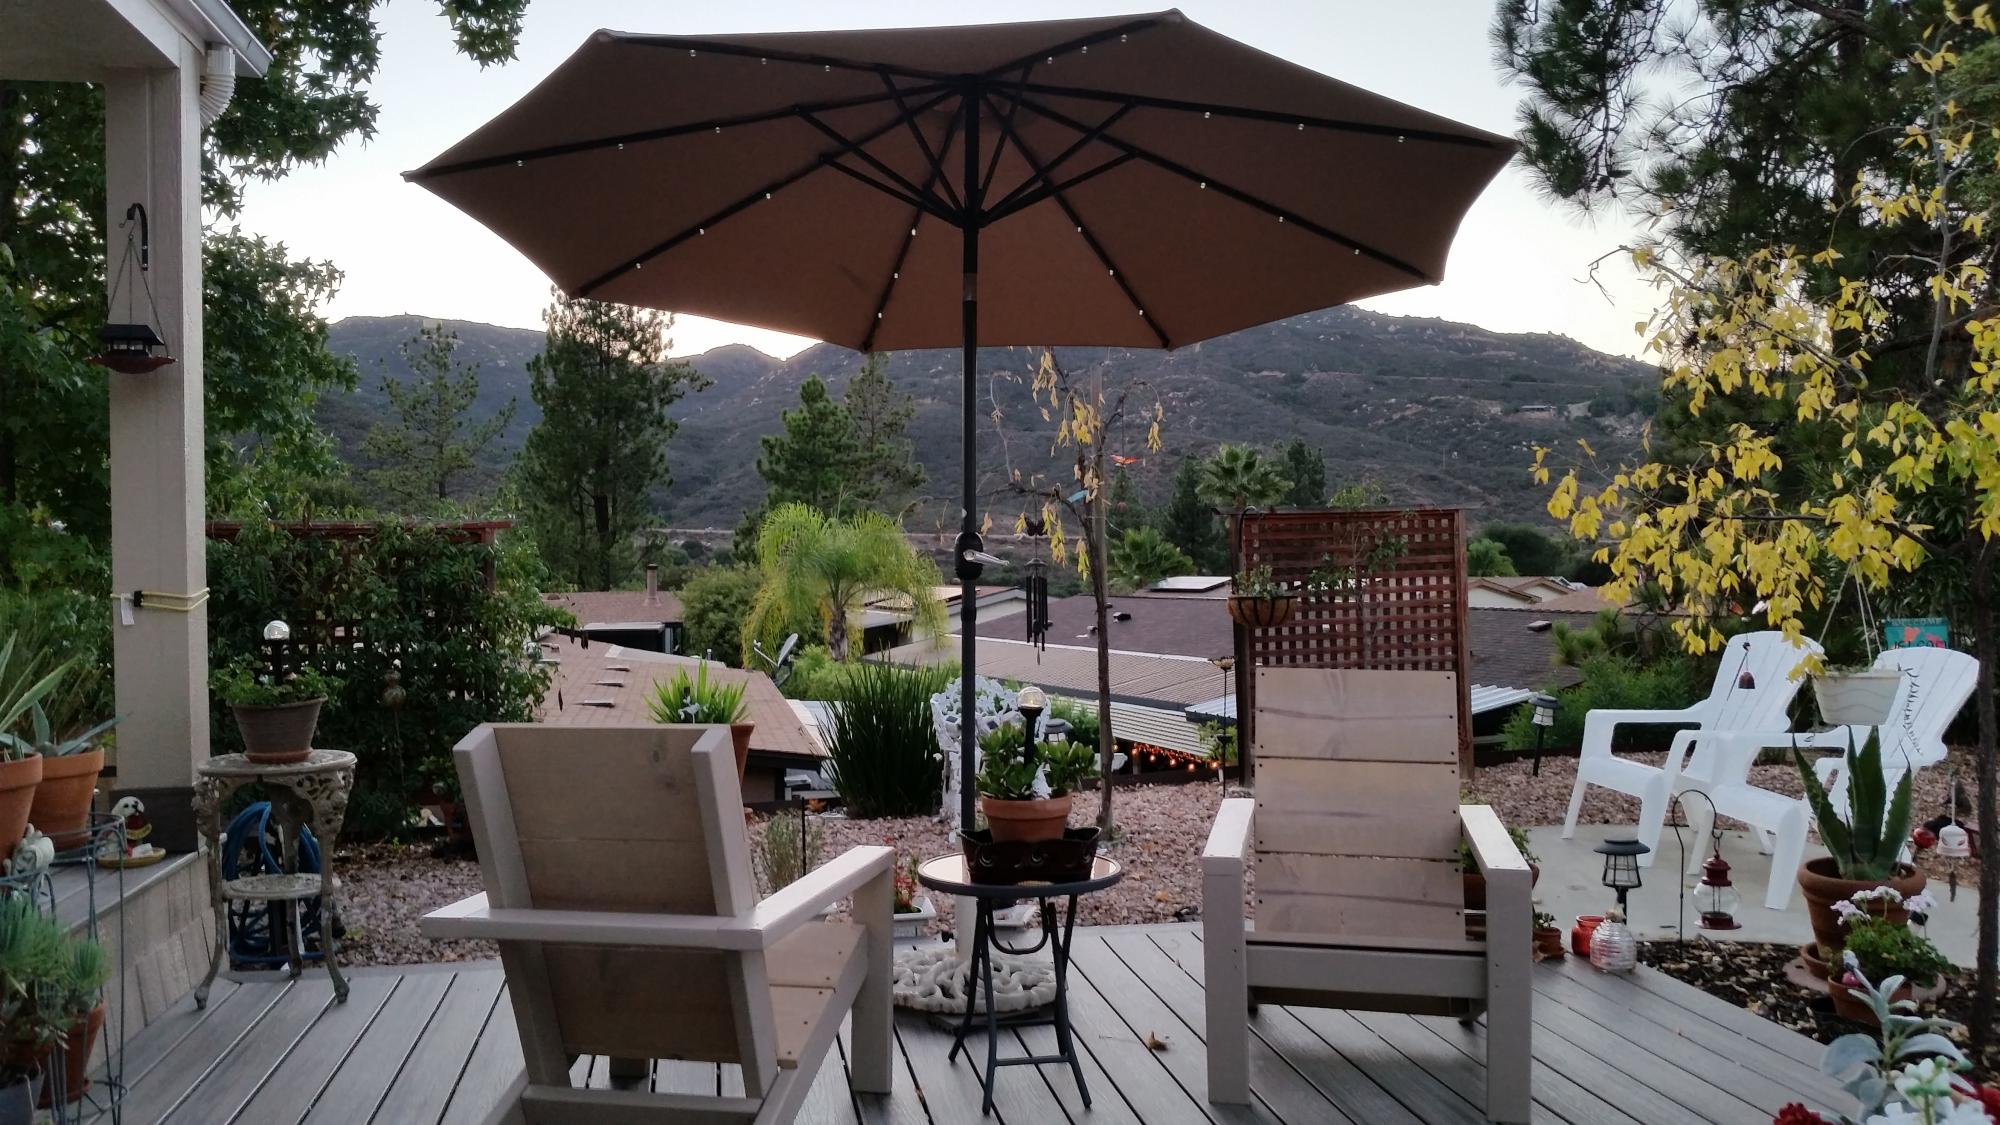
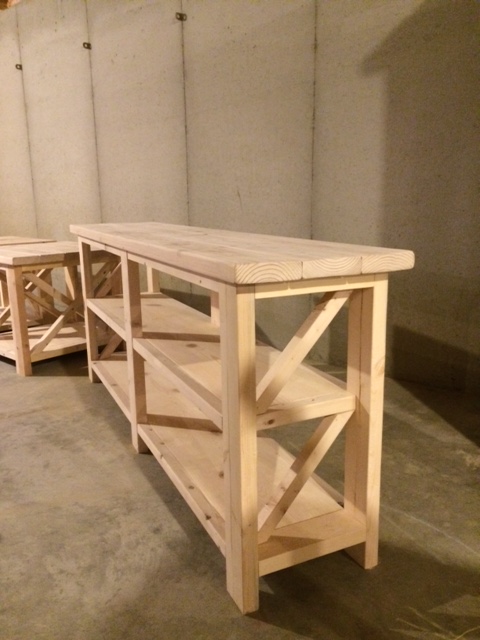
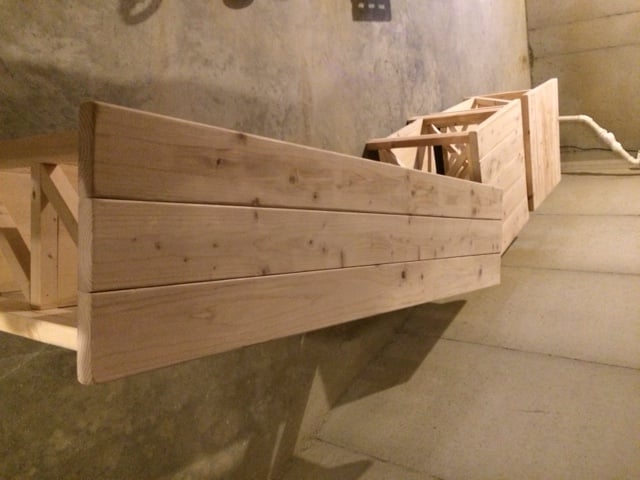
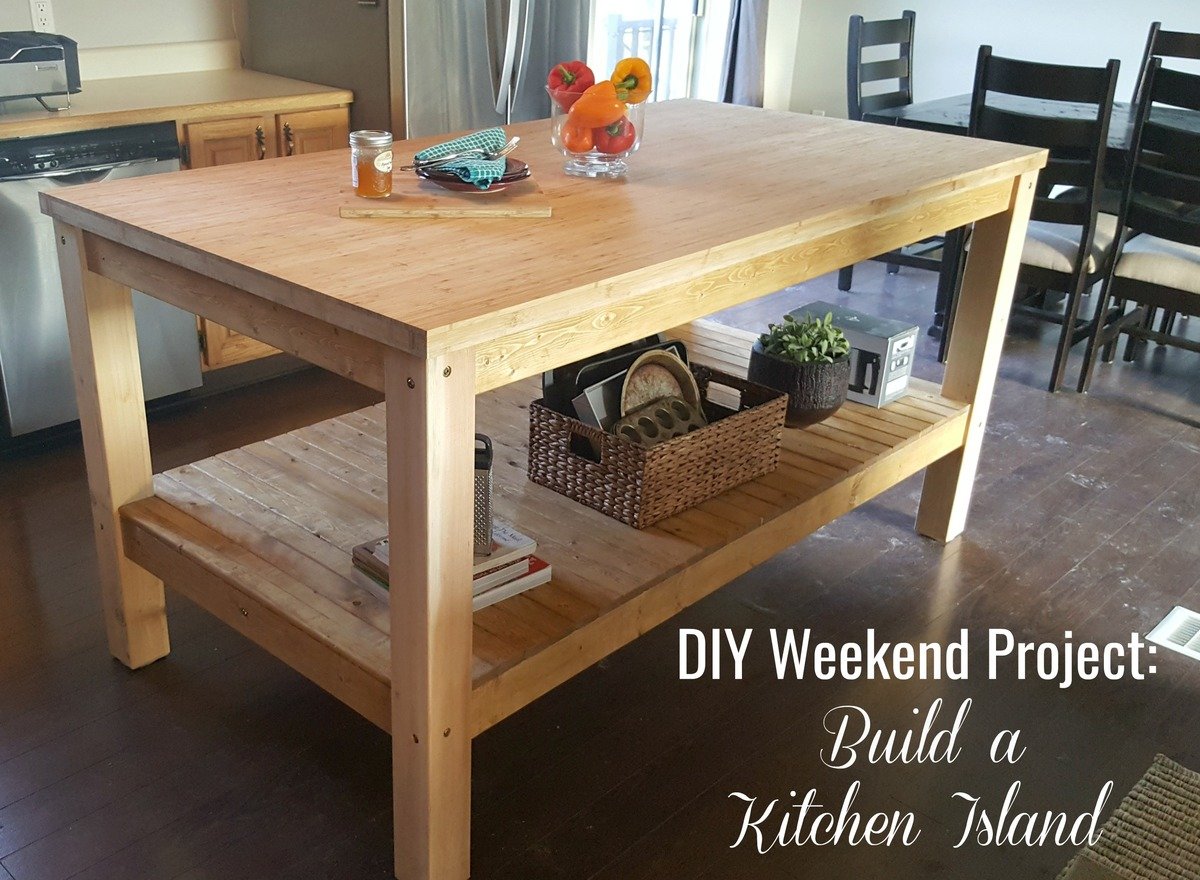
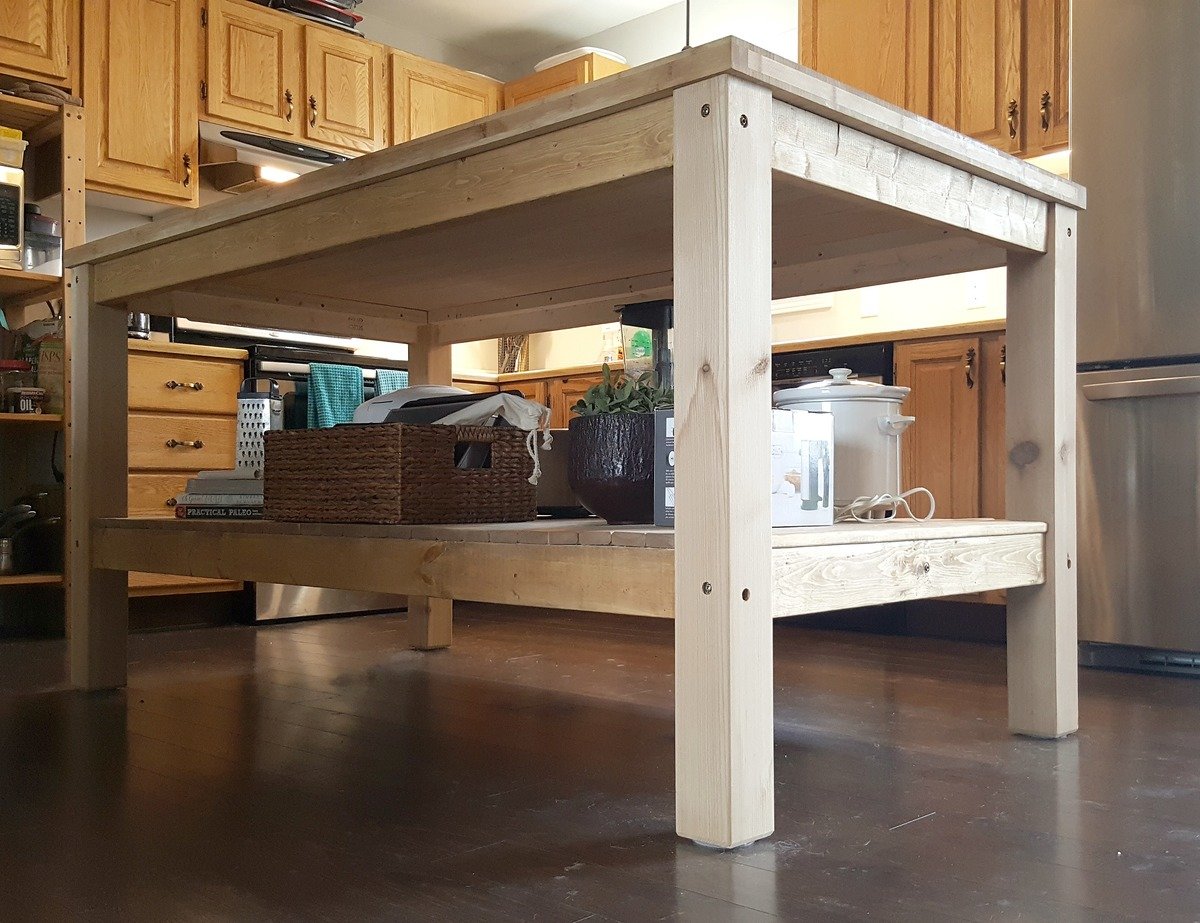
We have a limited amount of counter space in our kitchen, while also having a large open space that is unused. We've always planned on including an island once we renovate, but we didn't want to wait. We decided to build a butcher block-style island with open shelving underneath - a simple design that would give us all the counter space we needed and some additional storage space.

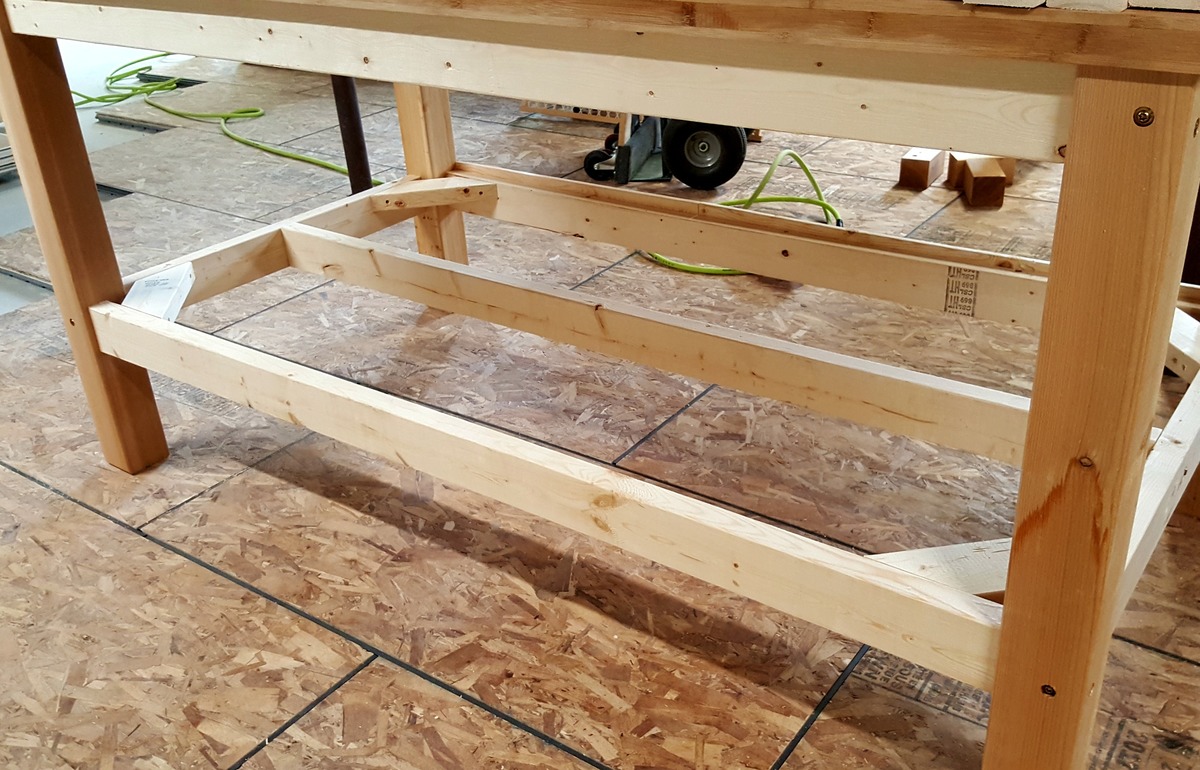
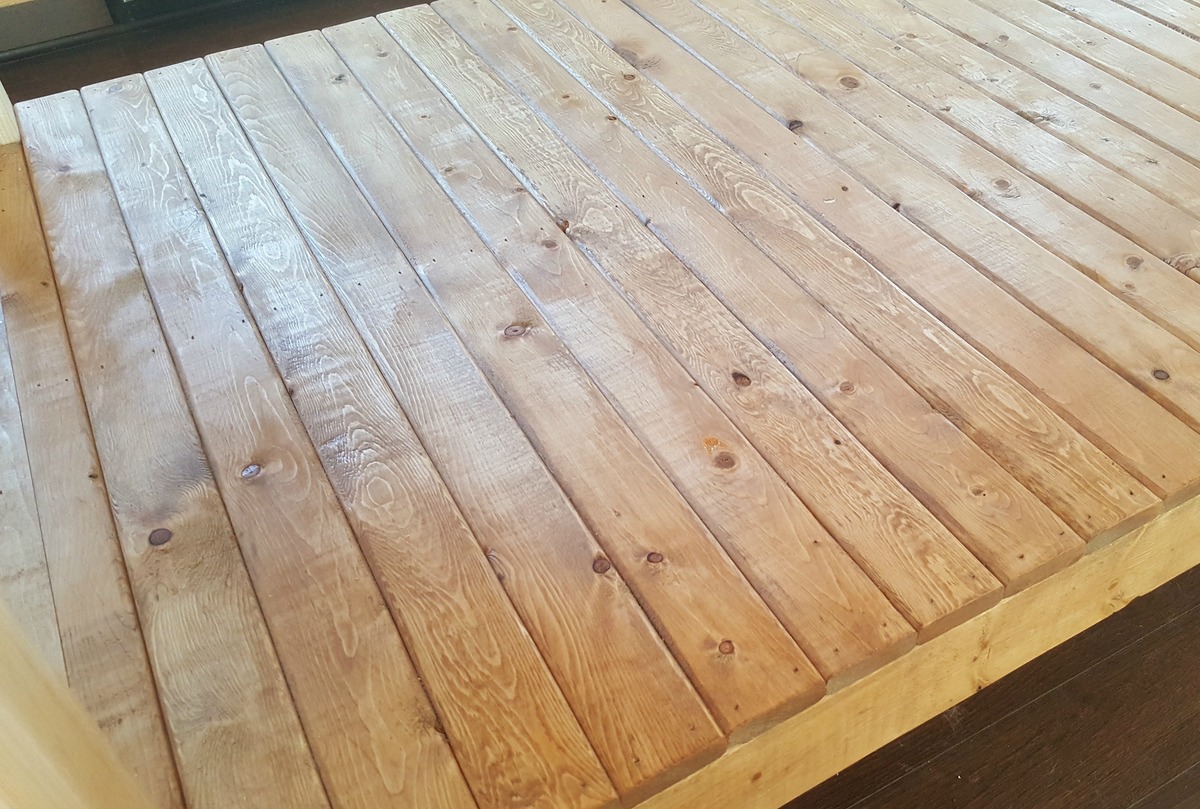
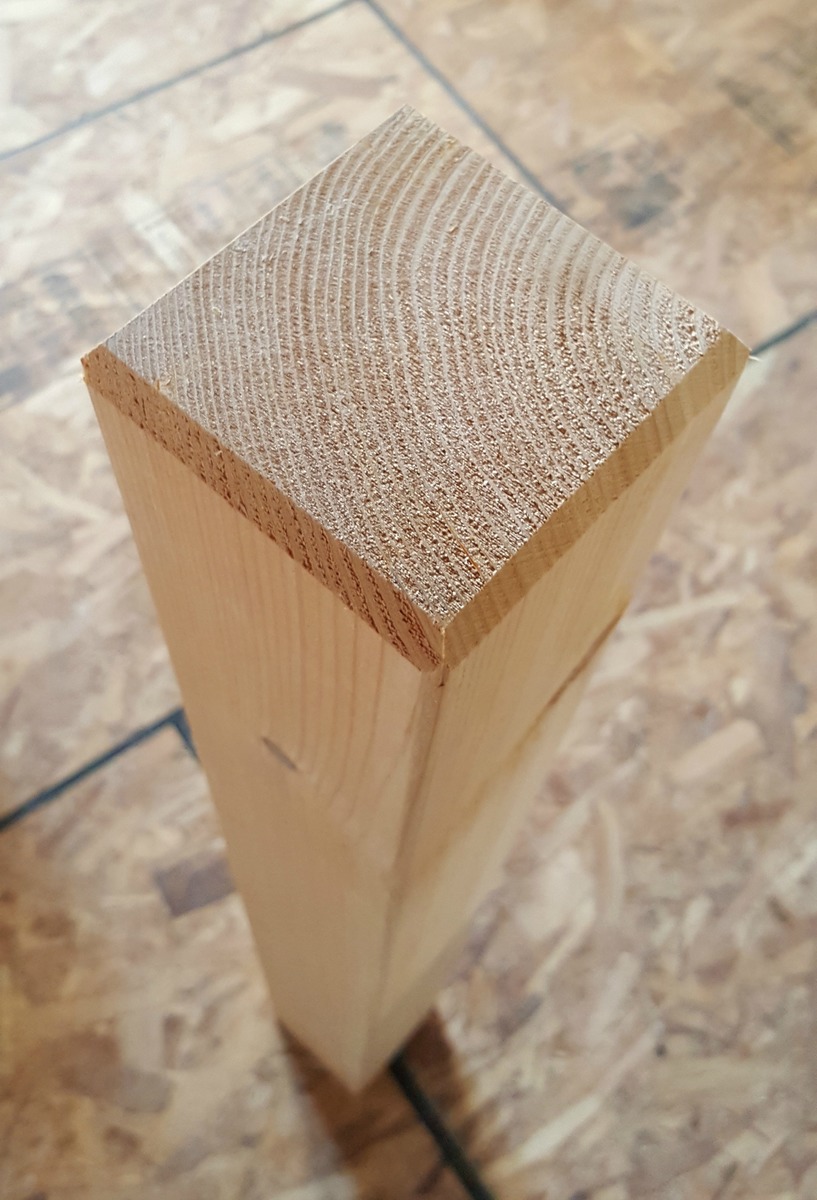
We bought a premade bamboo tabletop, as well as 4x4 cedar posts for the legs, 2x4s for the framework, and 1x2 slats for the shelf.

You can see all of the details of how we built it in the blog post, but here are a few of the features:

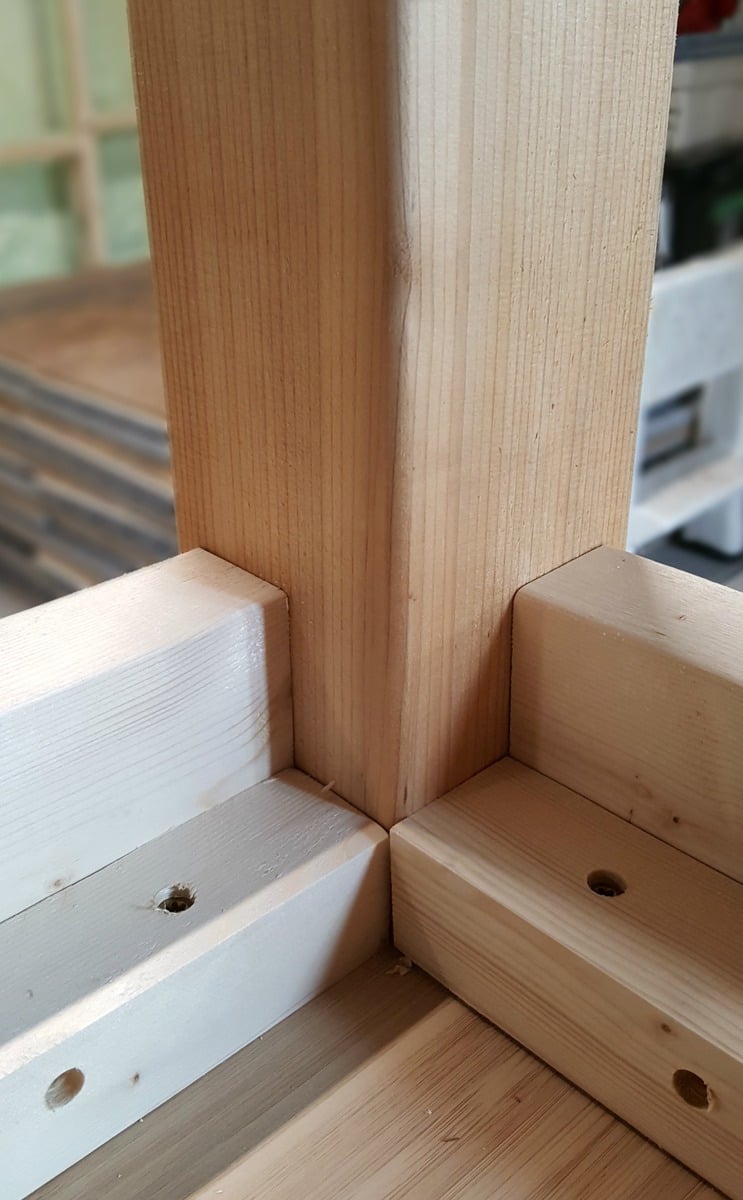
- an interior framework that connects to the tabletop and outer framework so that no screws are visible on the outside

- countersunk GRK structural screws used to attach the legs htat look like carriage bolts

-feet are angle cut so that floor is less likely to be scratched if the island is moved


We're really proud of this build and are enjoying having so much extra counter space. It's amazing what you can get done in a weekend!

Estimated Cost
$200 - $250 - pre-made top, cedar 4x4s, pine 2x4s, pine 1x2s, assorted screws, finishing nails, stain.
Estimated Time Investment
Weekend Project (10-20 Hours)
Finish Used
Minwax Provincial stain on pine (2 coats), mineral oil on bamboo top, no finish on cedar.
Recommended Skill Level
Intermediate

Modified Wide Bookshelf

Submitted by DTeague on Mon, 04/04/2011 - 10:47

I added an additional shelf to the plan so the sides were longer. Used the pine plywood and Benjamin Moore Super Spec paint in black to match the desk I made.

Estimated Cost
$50.00
Estimated Time Investment
Weekend Project (10-20 Hours)
Finish Used
Benjamin Moore Super Spec Paint in Black
Recommended Skill Level
Beginner

First Project - Loft Bed!

This is my first ever piece of furniture. I bought the Kreg Jig, which is awesome. My son has a fairly small room, so extra floor space is handy. I plan on turning the bottom into a reading nook with come comfy pillows, some lighting and a few small bookcases.

I used 2x6s to support the mattress. put in 6 slats, but I think I'll add one more for extra support. I also want to add a 2x4 across the back to keep the legs in place. Pretty sturdy though. I got up there with my son and between the two of us we're about 230lbs.

Can't wait to build something else!

Estimated Cost
$150
Estimated Time Investment
Weekend Project (10-20 Hours)
Finish Used
Minwax Walnut and 3 coats of Poly
Recommended Skill Level
Beginner

Loft Bed

Submitted by kdins31 on Sun, 12/10/2017 - 06:19

Built this loft bed for my tween girl who needed/wanted a hangout area and has always dreamed of having a loft. It may look daunting but it's actually quite simple.  2x8"s built to size in the shape of the bed, screwed into the studs in the wall with lag bolts.  A 4x4" holds the frame up where it is not supported by the wall. I considered a pole or chain or other suspension method from the ceiling but decided that a nicely trimmed 4x4" would look nicer and it really doesn't get in the way since the ladder is there anyways.  I built the bed frame bigger than I needed for the twin mattress to accommodate free space for clutter, e.g. books, pillows, etc. Once the frame is up I added supports for the mattress, with 2x2"s spanning length and width, then plywood.  2x4"s are screwed in vertically and then topped with a flat 1x3" and spanned with a 1x2" to protect her from falling.  Since she's older I didn't feel that I needed to add as much support around both open sides.  It has not been an issue at all and I am fully comfortable with it.  I installed small LED color changing lights in the underside of the bed.  The headboard was made from standard 5" t&g boards and has a small shelf to hold "stuff."  A custom in-wall shelf holds more of her "stuff."  The wood color is just a dark walnut Danish oil that I love working with.

Finally, I built the base for the couch with 1x3". The couch itself is two separate futon style chairs that open up into single beds, perfect for sleepovers!  They are meant to just lay on the floor but I wanted to make it look more like a couch. We bought those from Walmart. I recommend!  Hope you like. Let me know if you have any questions. I don't have formal plans but can try an answer all questions best I can! Cheers!

Estimated Cost
$200-$300 excluding couch
Estimated Time Investment
Weekend Project (10-20 Hours)
Finish Used
Dark walnut Danish oil
Recommended Skill Level
Intermediate