Modern Adirondack chairs
![](/sites/default/files/modernizepin.jpg)
2 simple chairs that look great
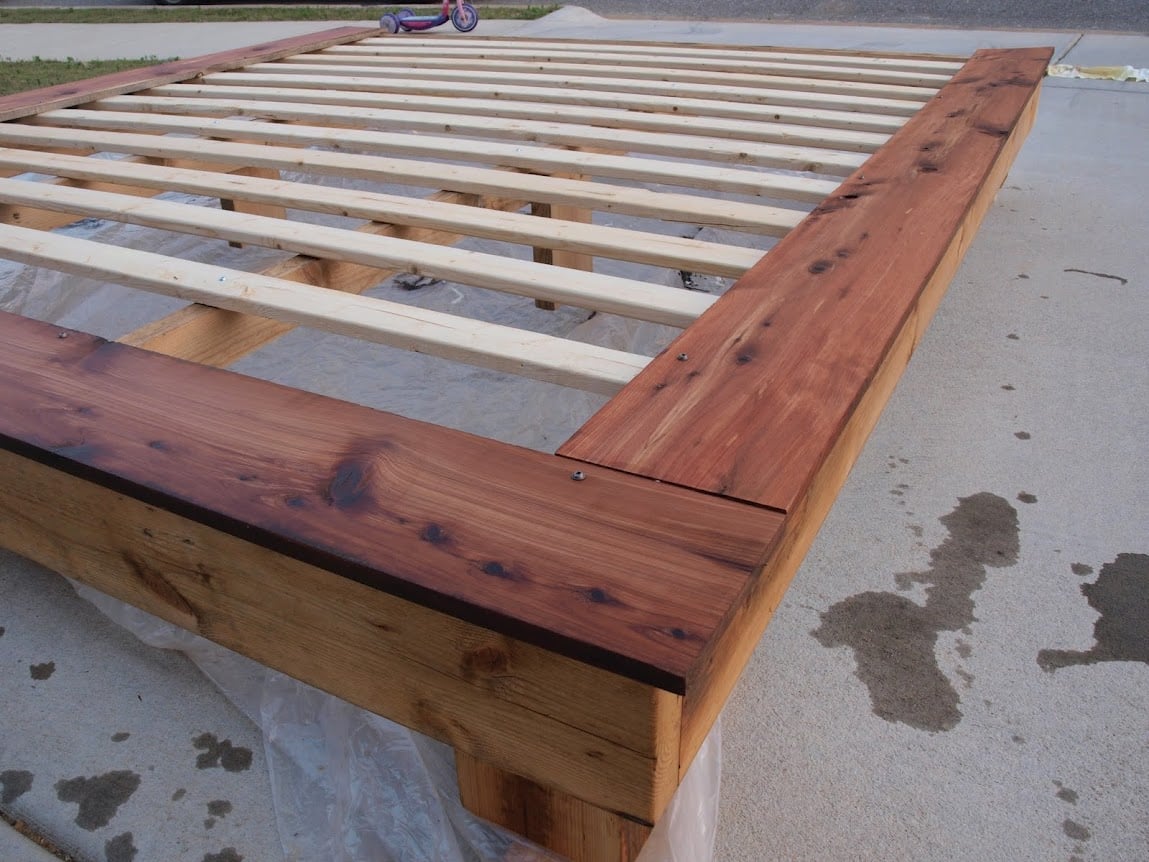
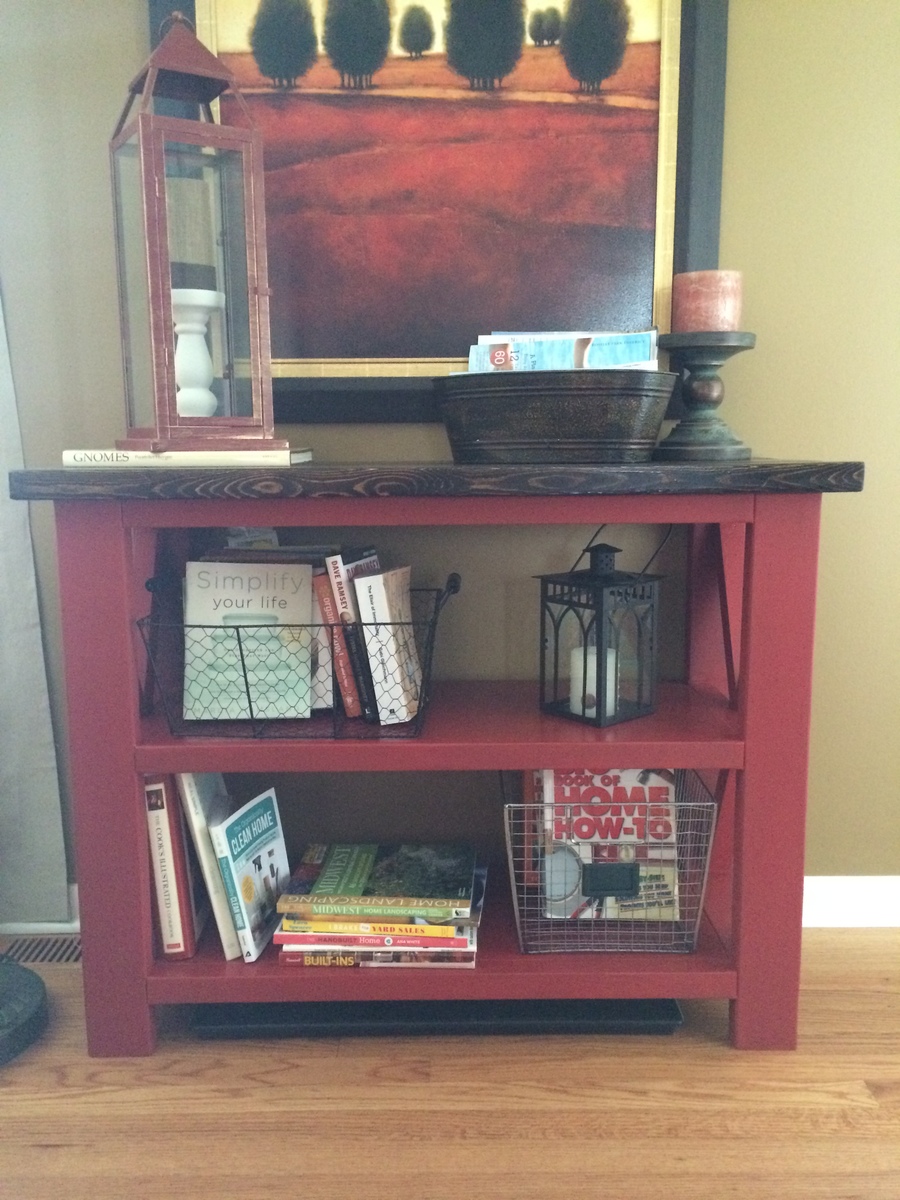
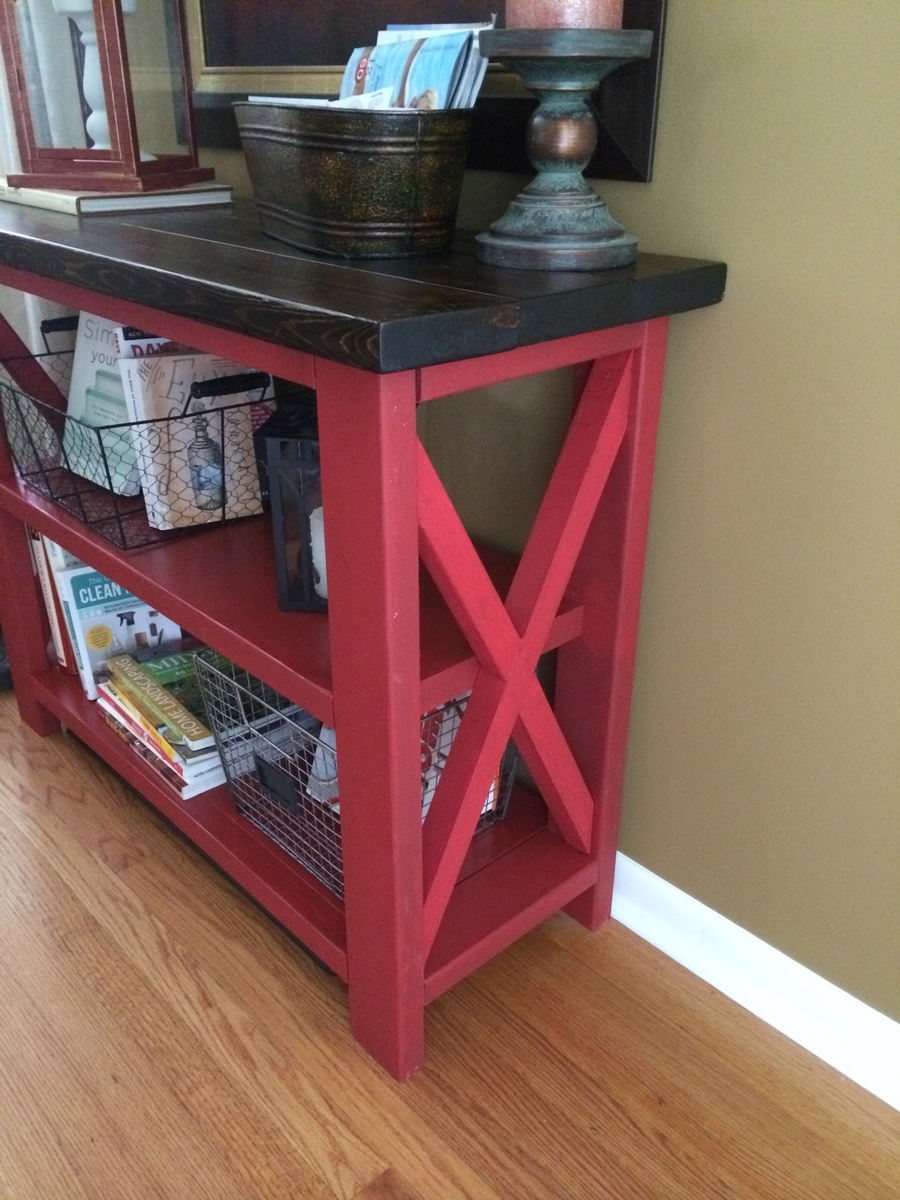
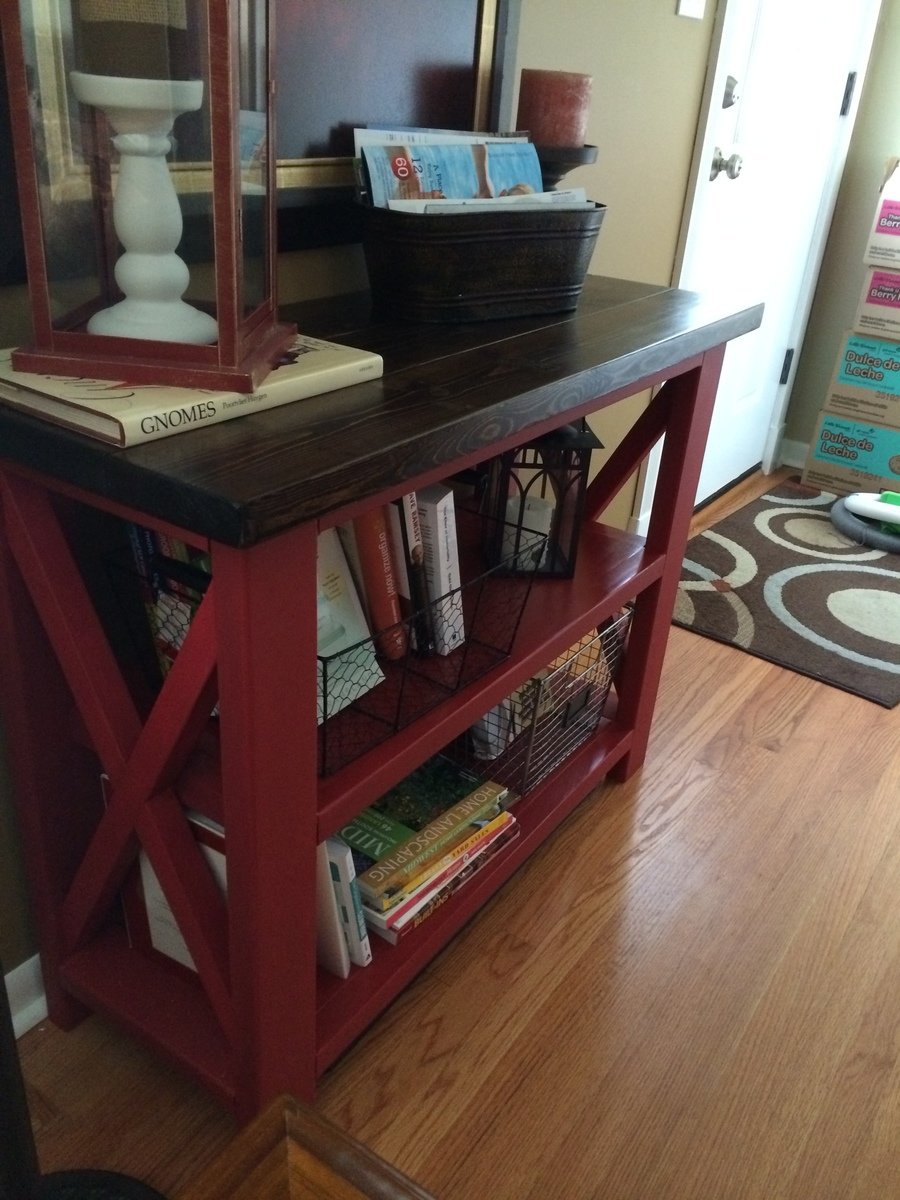
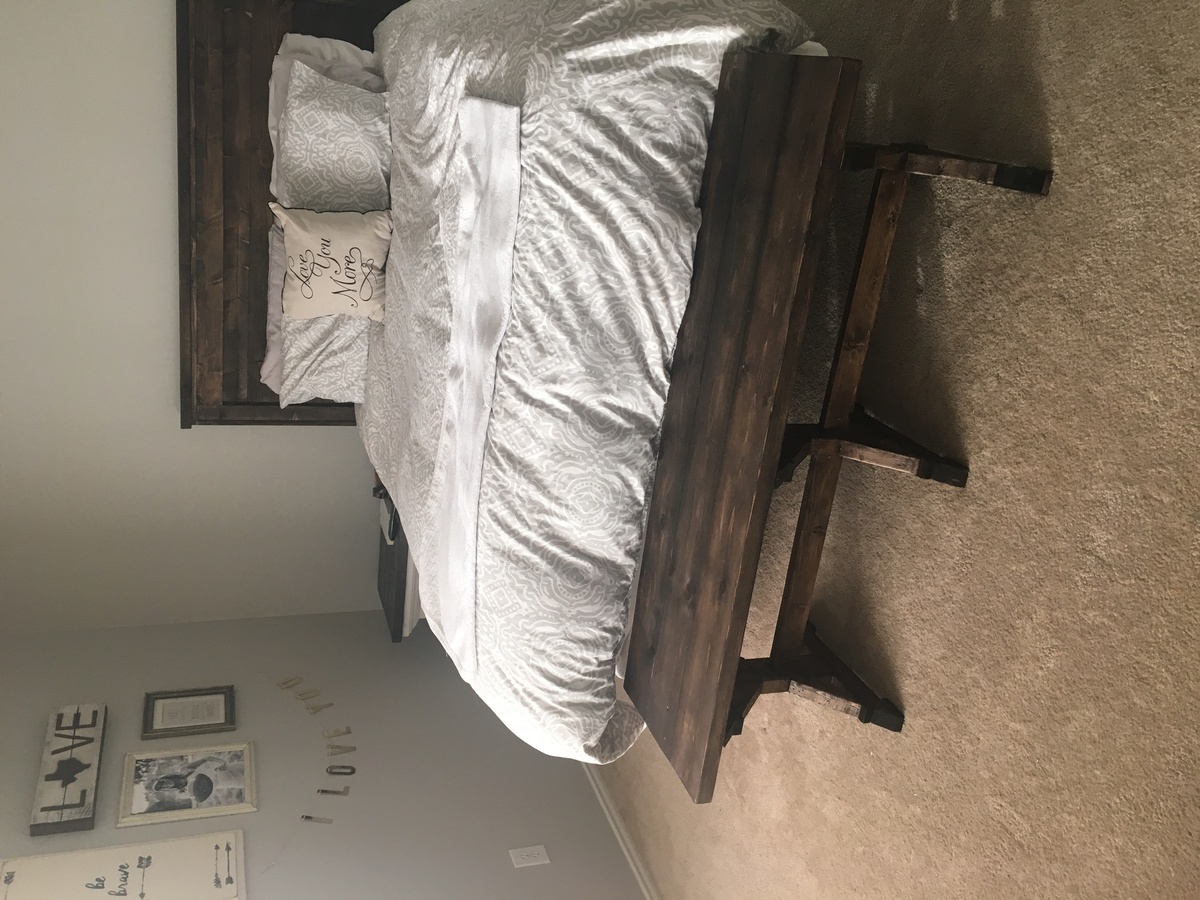
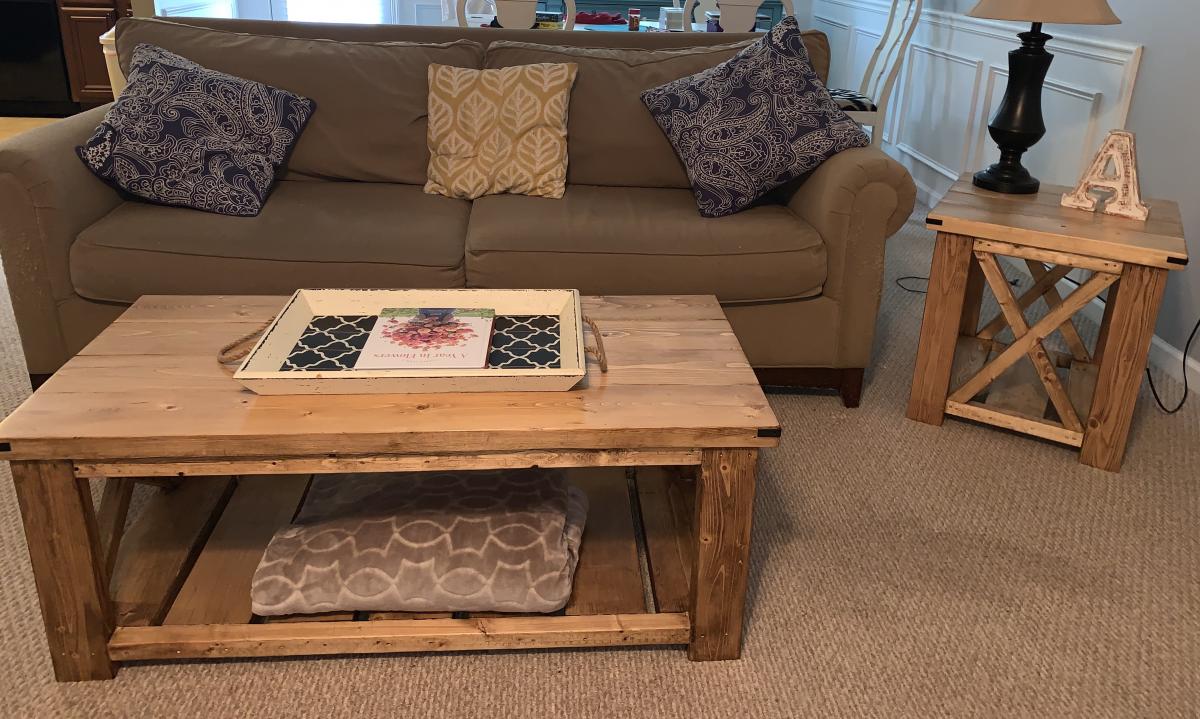
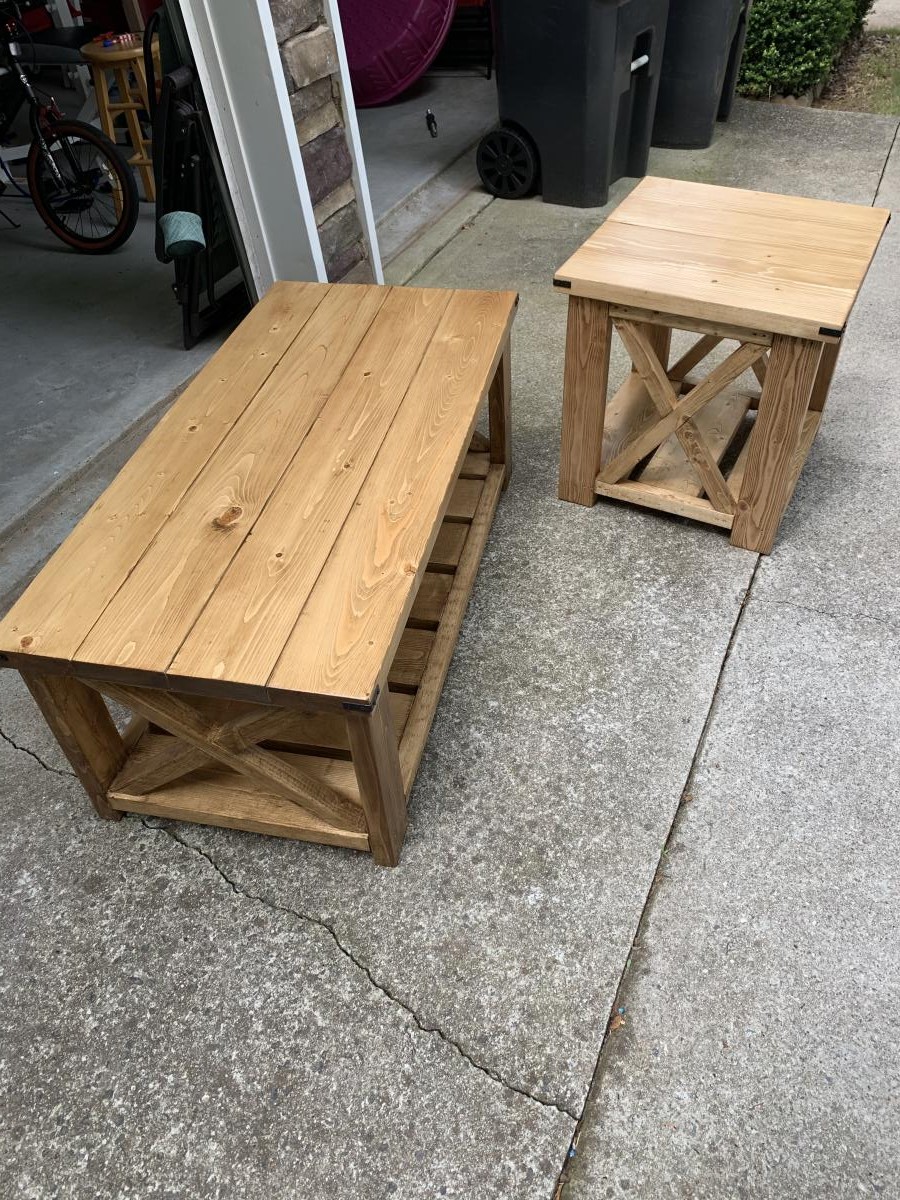
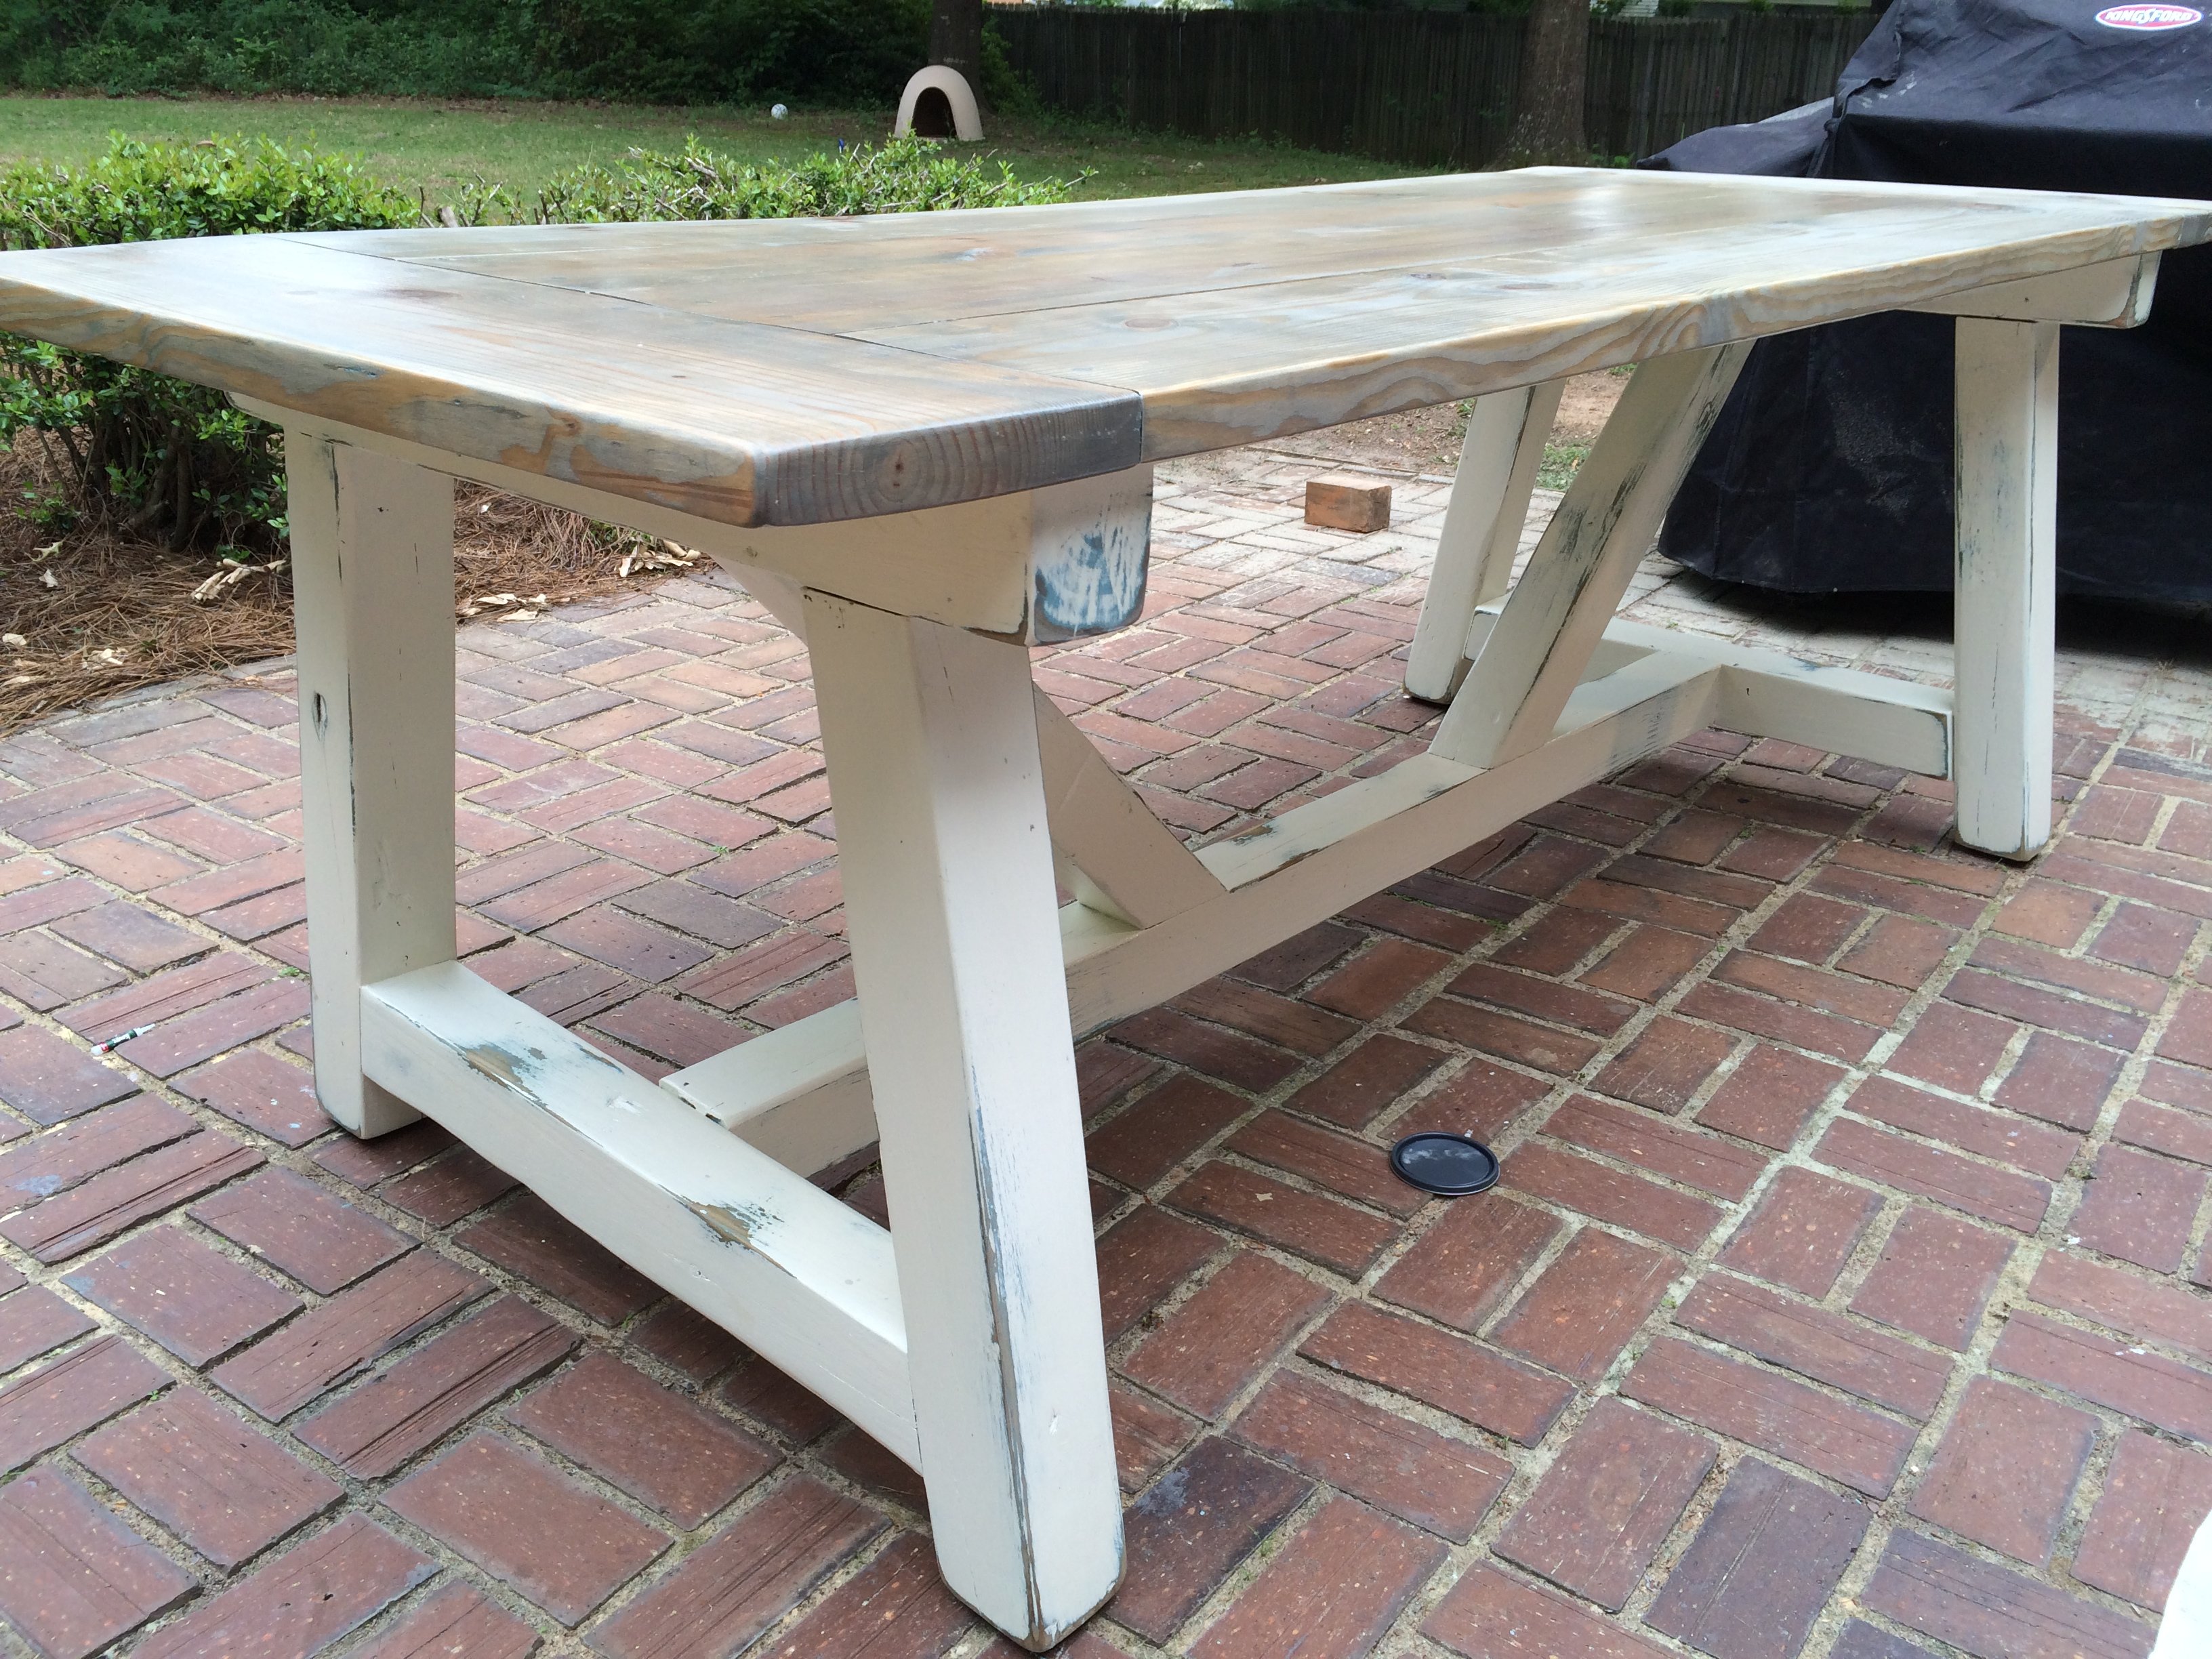
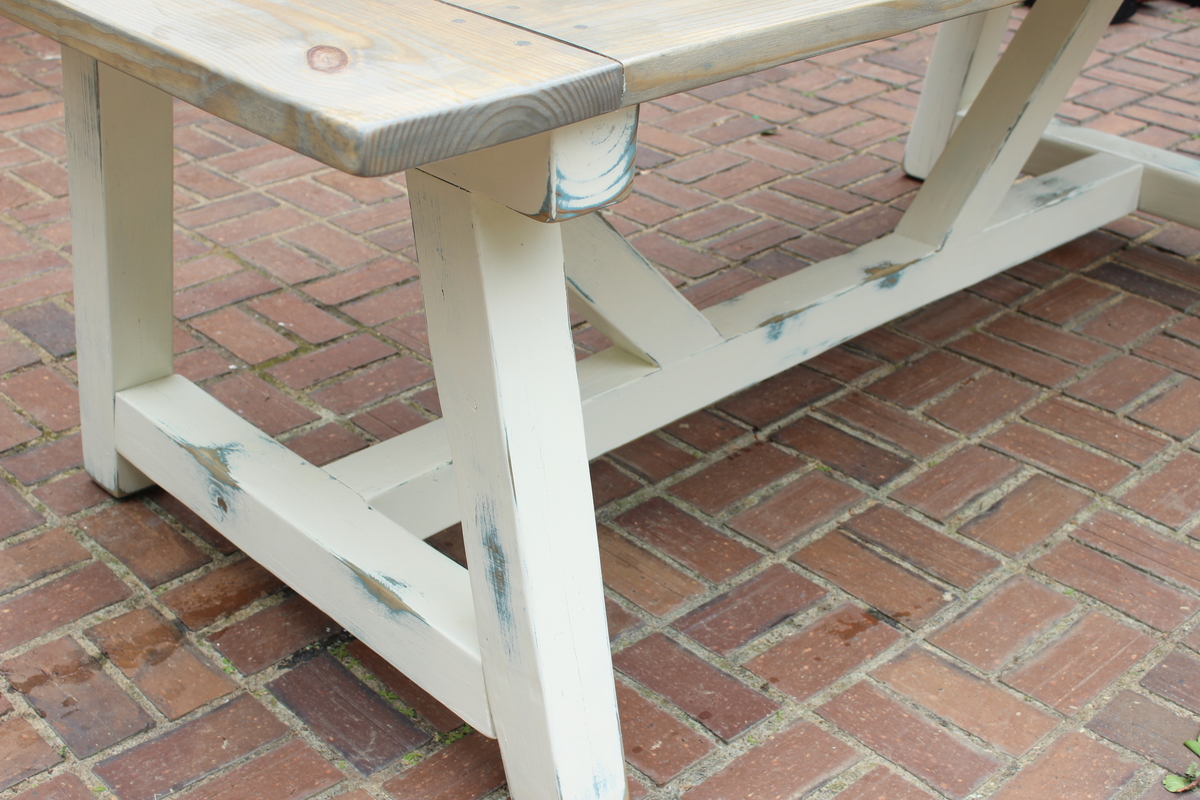
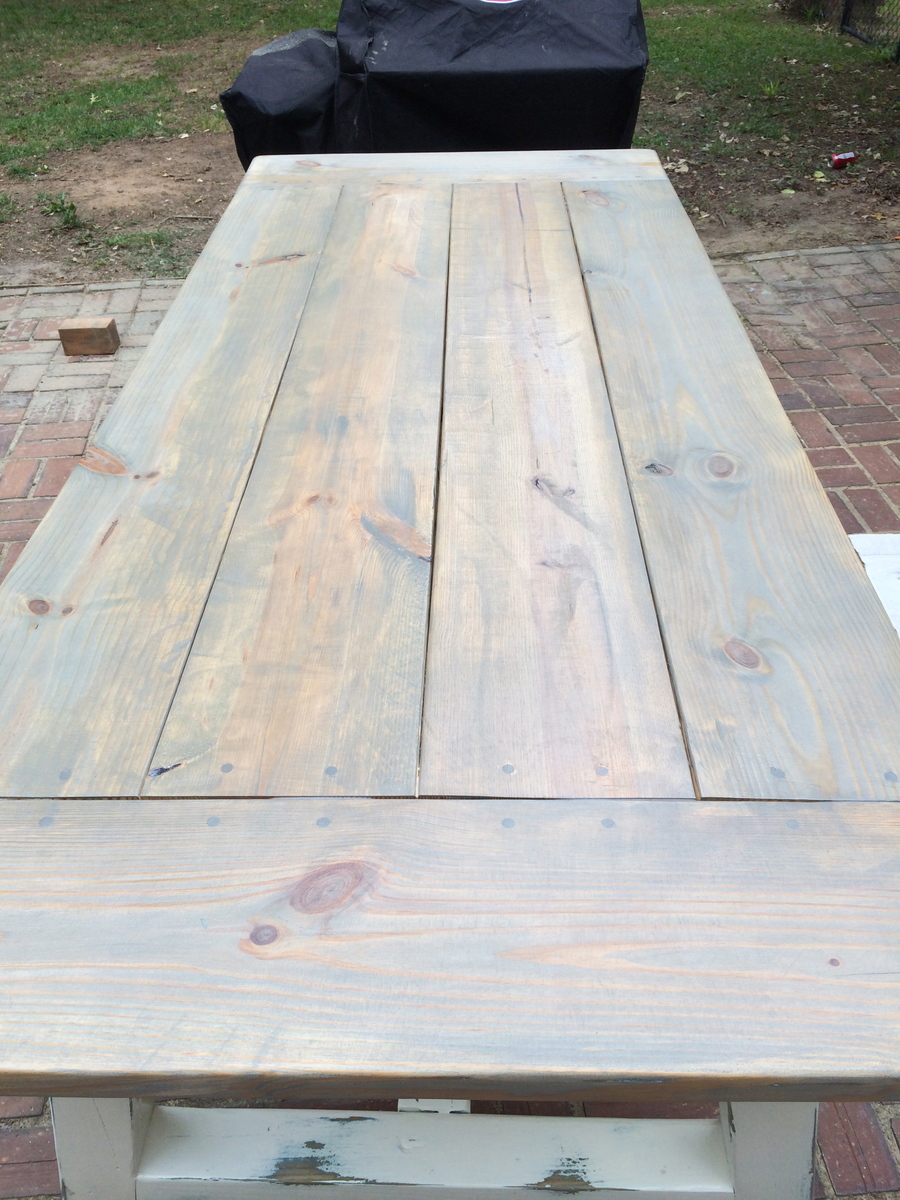
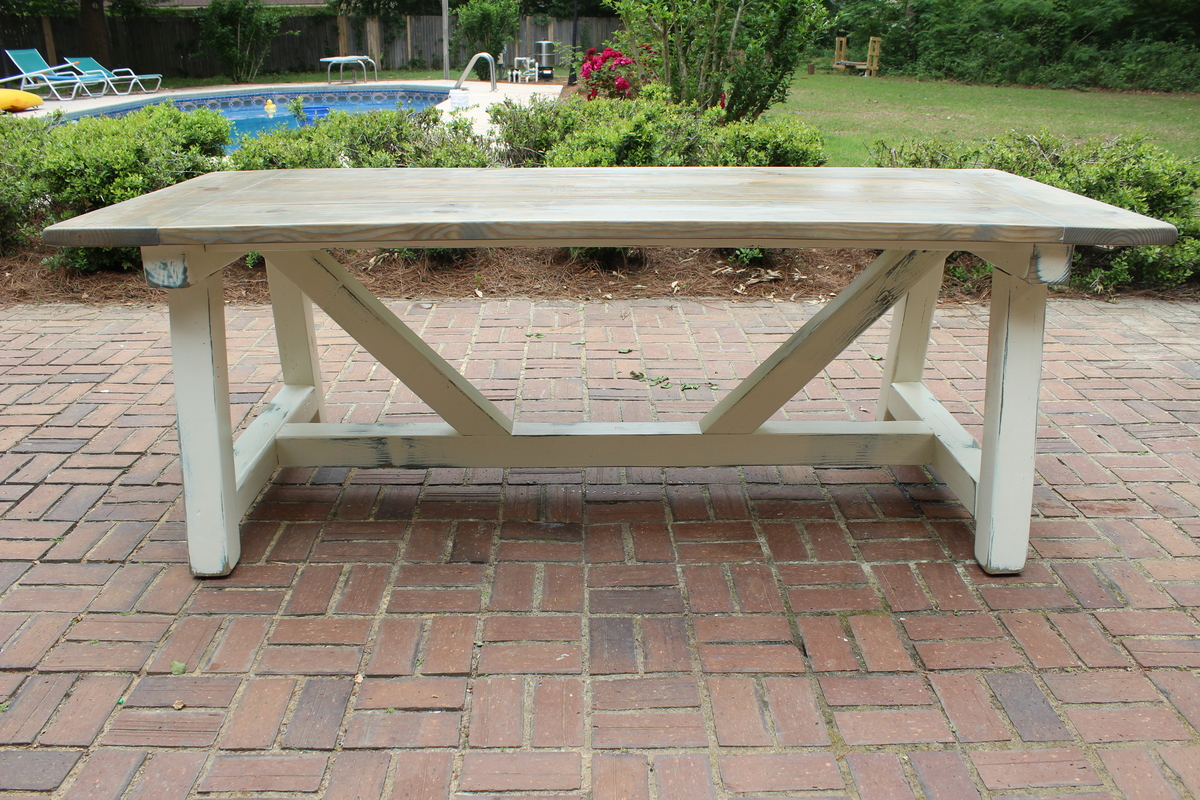
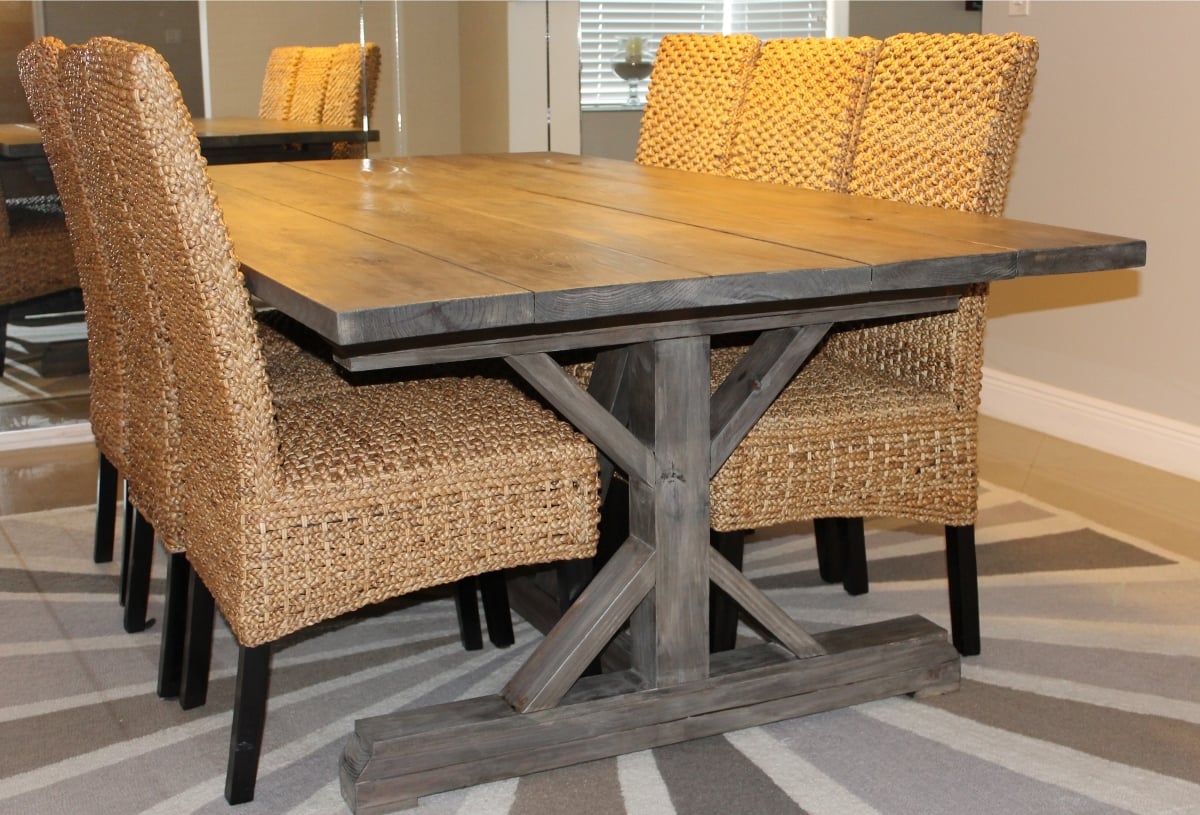
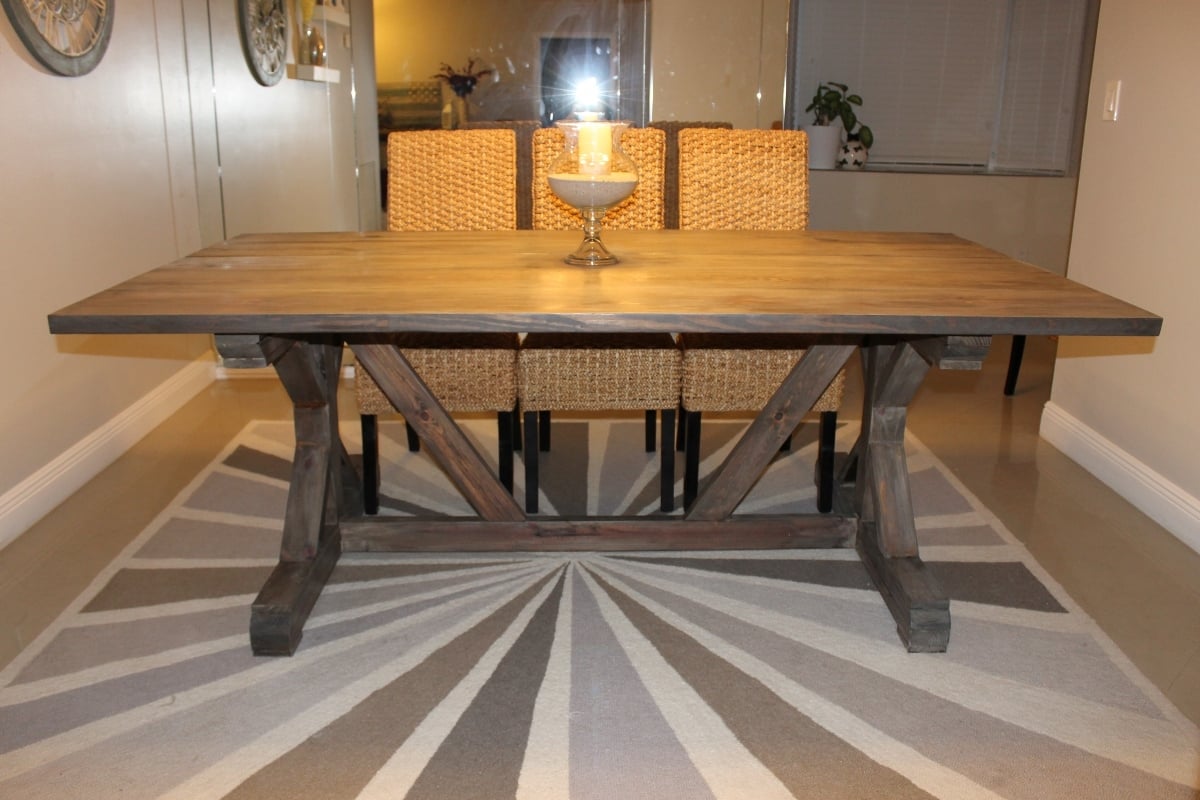
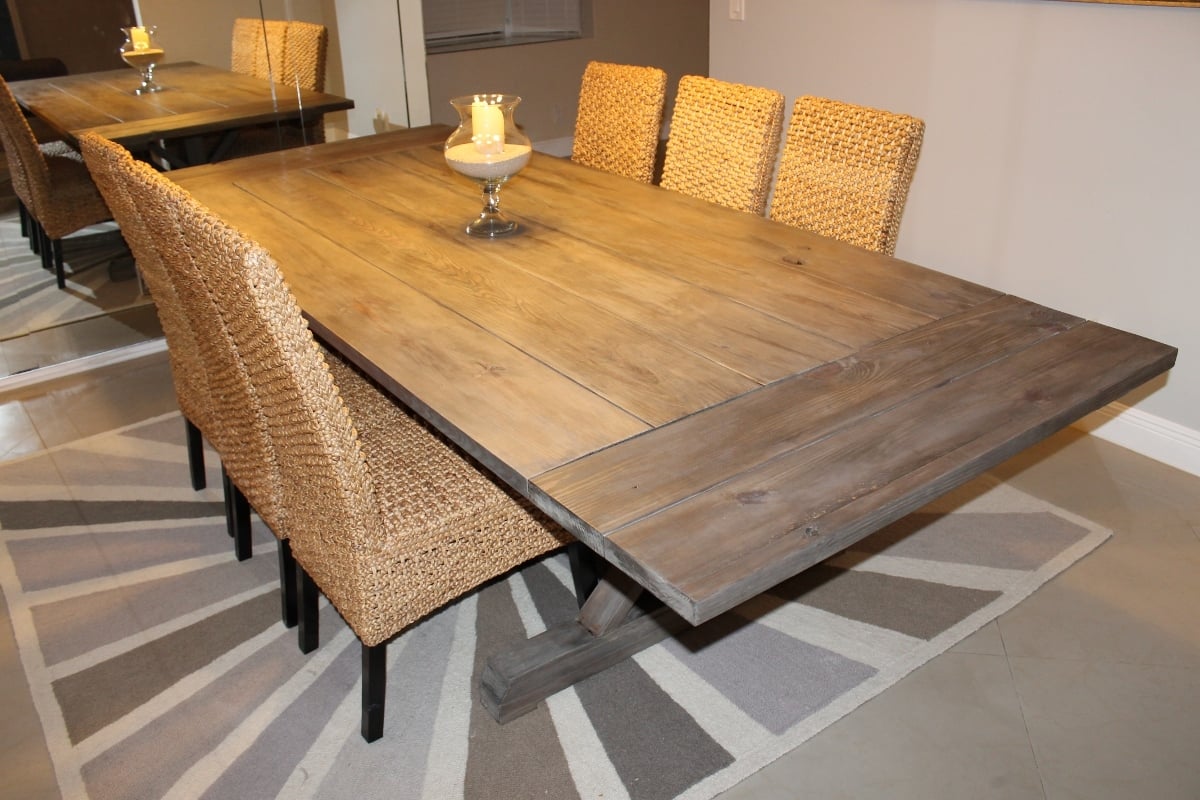
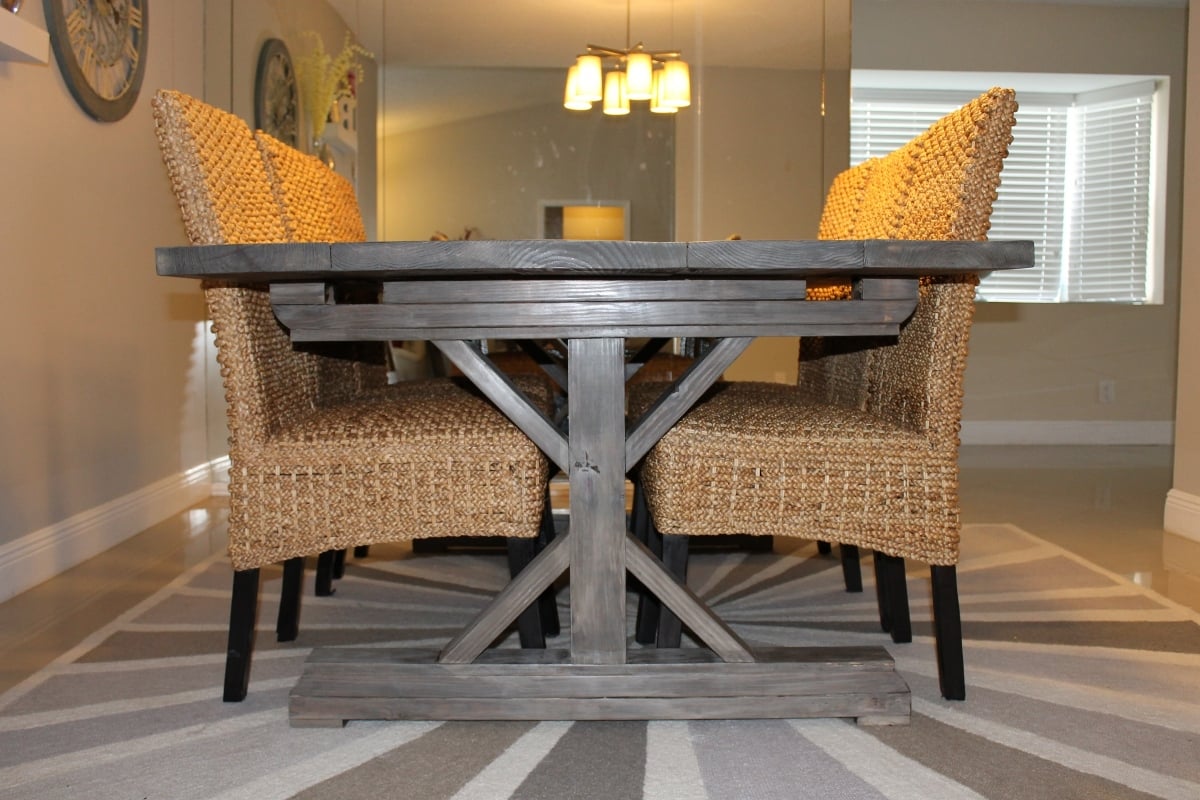
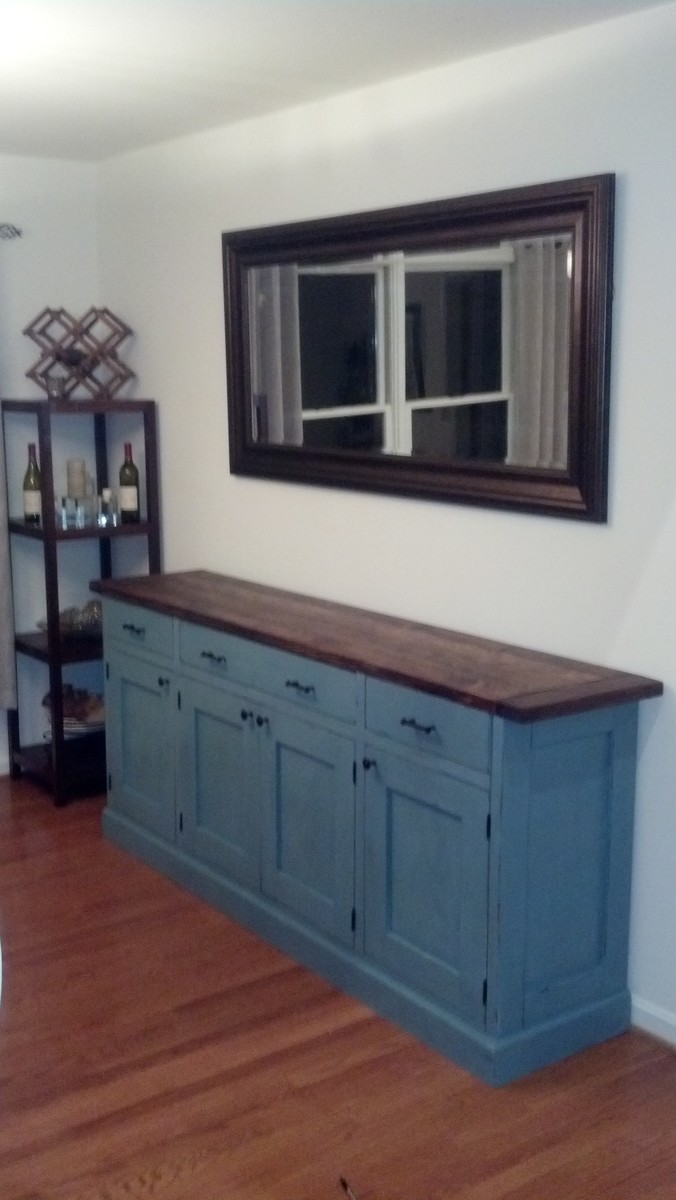
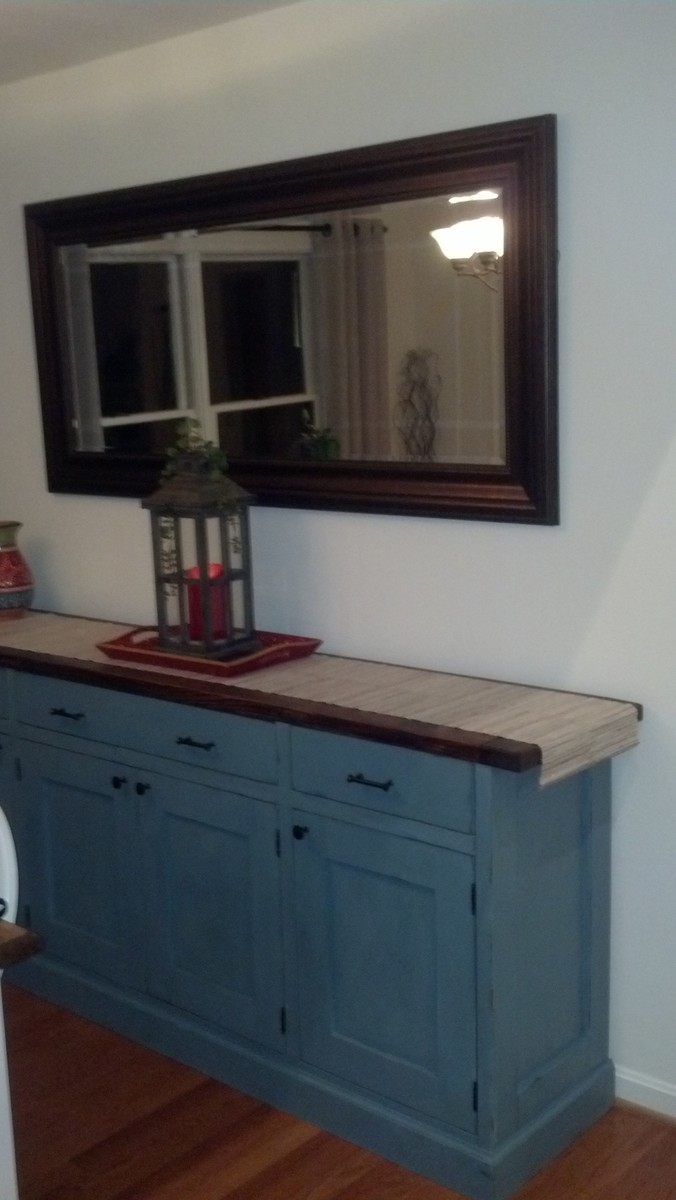
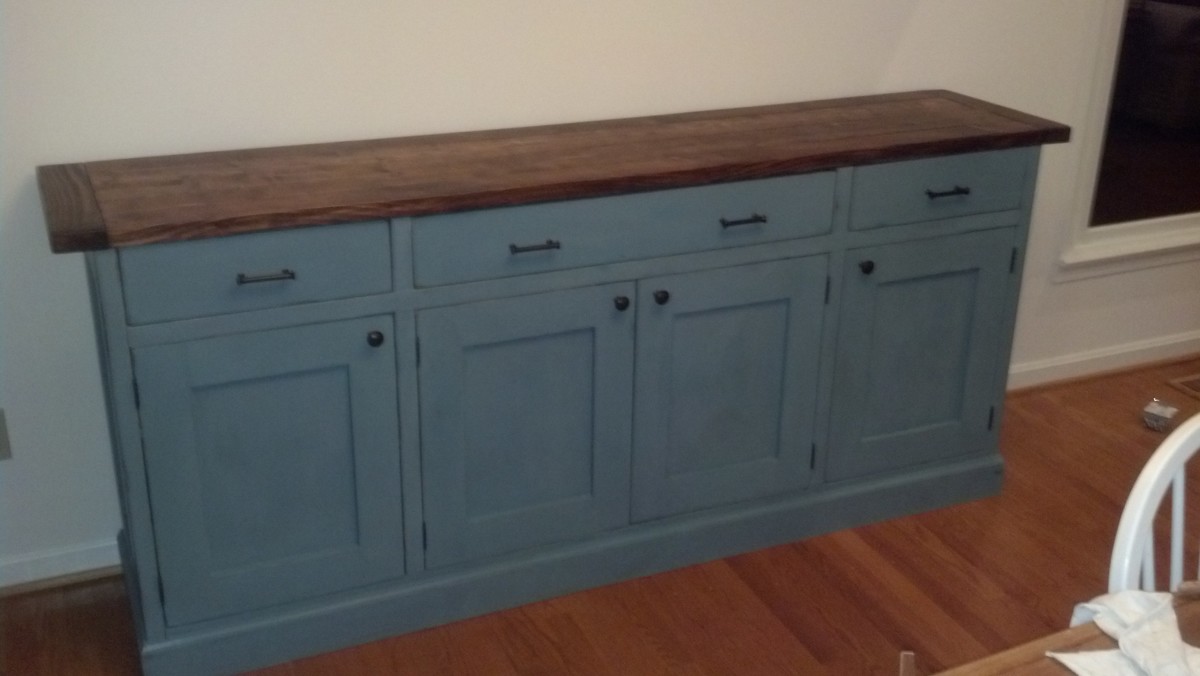
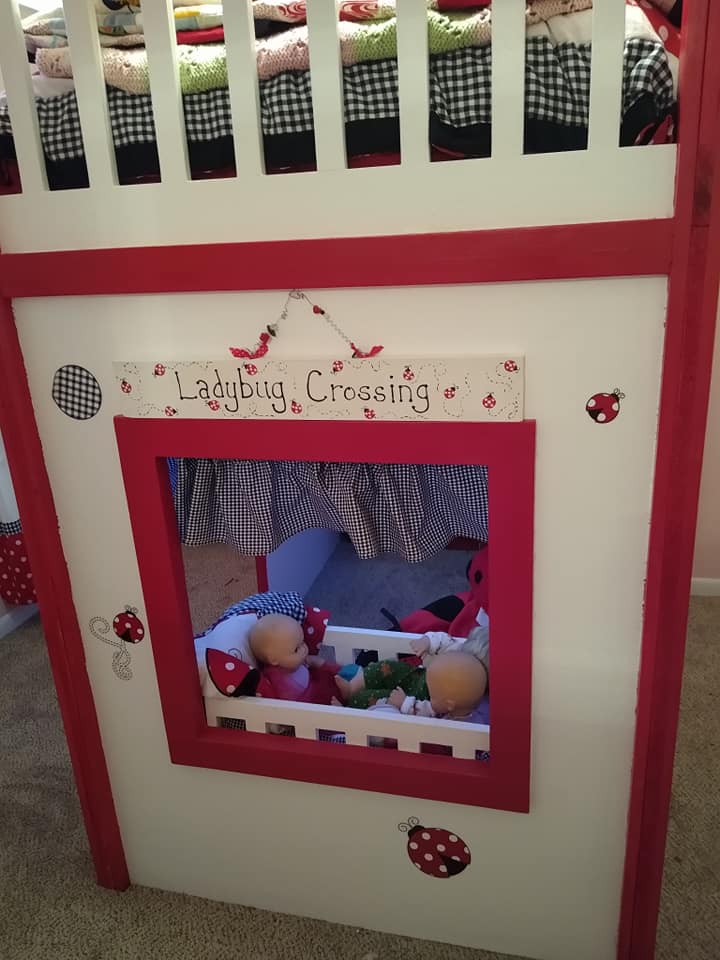
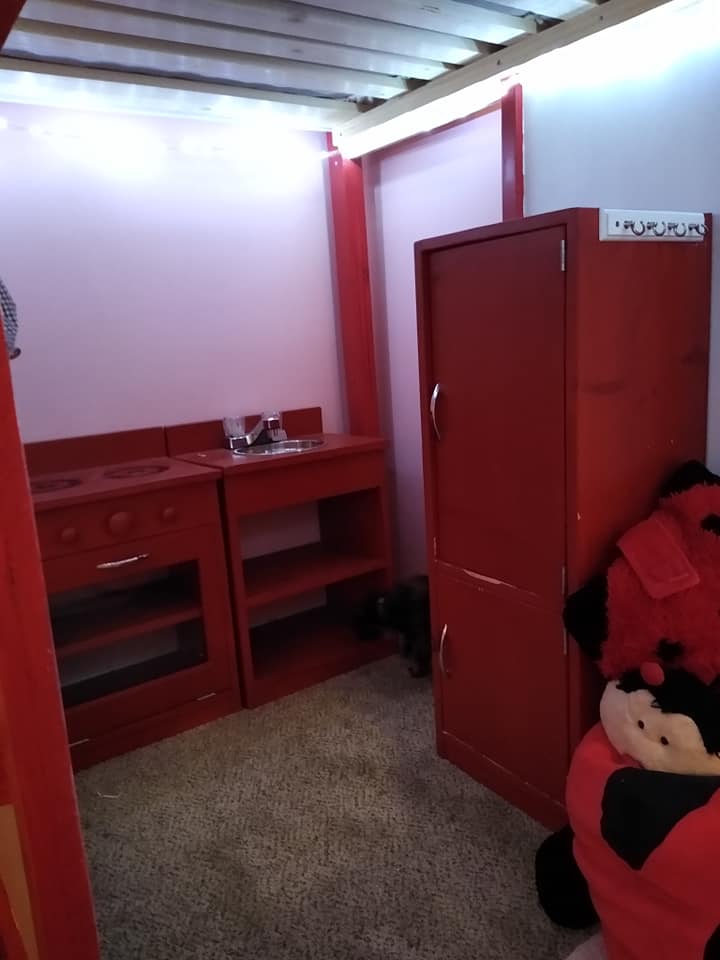
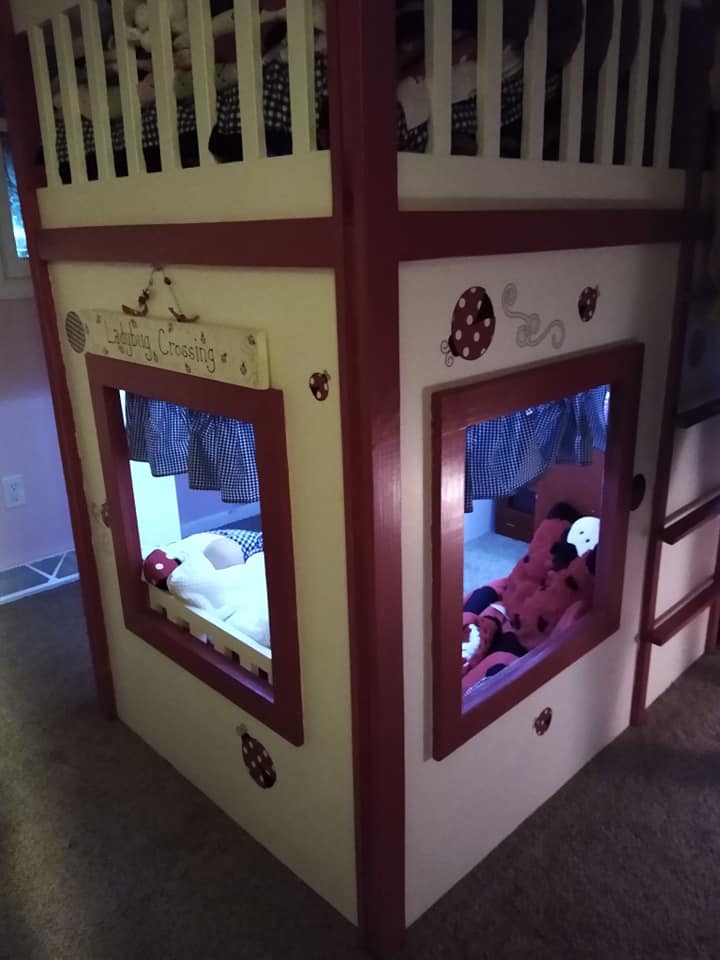
This is the first project I tried, and it really took a whole lot longer than it should have. I started it without all the tools I really needed to do it the way that I wanted to, so it sat upstairs with no trim on it being used for probably 2-3 months. I managed to pick up a sander, and then I finally saw a sale at Lowe's for a finish nailer and air compressor combo that was too good to pass up, and was ready to put the trim on it. Then when I finally had everything, I was able to finish it in about a week, between the sanding and the sanding and the sanding.. and then the sanding! The stain and finish took a few days too. I definitely learned a lot from this project, definitely check for square to cut down on sanding time to make things line up, and go easy on the wood glue. Trying to sand it off of the exposed parts of the wood are a real pain. Then a big thing I learned the hard way was to be careful with the stainable wood putty, I read that it would be good to use a Qtip to put wood putty in the holes. Sanding all of the excess putty off the wood was a really time consuming process, but I do think that mistake did make for an extra smooth finish, I must have spent an entire day sanding all the excess wood putty off that was dried on from my original mistakes. All in all it was a great learning experience, and I really did have a lot of fun with this one. Can't wait to start my next project, thanks a lot Ana! You really are an inspiration to those of us who are still learning, and I can't wait to explore my new hobby a little further in the future and see where I can go with it.
I been wanting to make this for a long time and today I just went out to my work shop and did it. It was fun to make. I didnt have any 1x6s so I used 9 1x4 and 1/8" spacing it worked and looks amazing!
These lounge chairs were made from 100% redwood. The cushions were from Pottery Barn and were about $130 each.
I went off Ana's plans but also had inspiration from other sources.
We live in an old house with lots of windows in the kitchen but not much storage space. Having previously tackled a kitchen island with the help of ana-white.com, I knew that the Under Sink Kitchen Organizer Shelf would be a much simpler project. We already had the tools and screws, so I picked up a couple of 3-foot 1x8s for about $7. The organizer is 20 inches high, 15 inches wide, and 7-1/4 inches deep. The shelf is only about 6-1/2 inches deep because I used 1x8 for the back, but it works.
I based my bed off of the Fillman Platform Bed plans. Just bumped the dimensions up to fit my mattress and added the mid supports. The frame was built using 2x6 boards taken from a fallen barn. I ripped 2 2x6 boards down the center to make the the supports for the slats. My feet are 3 2x6's screwed together and then attached to the frame. Next time I will cut a notch out of the feet so that I can rest the bed on them and then try to find some old lag bolts to attach them to the bed. The frame was put together using a Kreg Jig. I put the Cedar boards on to dress the front and sides up some and to help keep the slats from showing when the sheets were tucked in. My finish is 1 coat of Linseed Oil and 2 coats of Teak Oil.
Let me know if you have any further questions on this build. As soon as I find some doors I will be building a head board for this bed.
I needed a console table for an area by our front door. The plan as written was too long, so I adjusted the length to 42". I also needed it to hold books and files, so I adjusted the shelf heights, changing the overall height to 32".
This was my first building project. It was a easy build even for a beginner. Make sure you measure your bed frame and that it will fit into your headboard.
My 2nd ever build! Made to match farmhouse beginner coffee table. This is the smaller size posted. So Easy! Thank you for the plan and for the videos. I love them and am learning so much!
We used the wonderful Fancy X Farmhouse table plan with modifications. We needed the table to be shorter for our space, so we shortened it by 12" - this brought the angled pieces closer - we chose to do this instead of altering the angles. Also, we used 4 X 4 posts for the double 2 X 4's and also the cross pieces and angled pieces. I posted two blog posts about the process with lots of pictures, including how we rounded the ends per the plan. The finish is a equal mix of dark walnut and classic grey, finished with Trewax.
Great plan - we are so pleased with the results, and the price tag!!
Thu, 07/19/2012 - 07:35
I love it! The 4x4's were a nice change. So pretty in your space.
Thu, 07/19/2012 - 07:45
Thanks Whitney - we are lucky to have access to untreated 4 X 4's at our local orange store. I tend to buy an extra one every time as I am afraid they will stop carrying them!
In reply to Thank you! by Dananichols
Thu, 07/19/2012 - 08:21
lol we have them at my Blue too. Guess we are lucky!
Mon, 07/23/2012 - 15:12
I am a newby to wood working and am in love with this table. I have all the pieces cut for the sides, will also be changing the length and will make those cuts later. I am a little insecure on the nailing/screw directions...placement, size, where to hide?, etc. would love to know where yours are placed and what you used. (I did purchase a Kreg jig for pocket screws).
Thanx for any support you might have.
Mon, 07/23/2012 - 15:14
I am a newby to wood working and am in love with this table. I have all the pieces cut for the sides, will also be changing the length and will make those cuts later. I am a little insecure on the nailing/screw directions...placement, size, where to hide?, etc. would love to know where yours are placed and what you used. (I did purchase a Kreg jig for pocket screws).
Thanx for any support you might have.
Mon, 07/23/2012 - 18:31
Barbara -
I posted a link above to my blog - I have two posts about the table and lots of pictures, including pics of where I placed the screws. The only place I used the pocket screws (great purchase by the way, have used mine so much!) was to attach the 4 X 4 cross beams (you can use them on 2 X 4's as well if you are following the plan). Hop over and have a look - lots of pictures - and hopefully that will help with you questions!
Thanks - and have fun!
Dana
Mon, 07/30/2012 - 03:37
Dana,
This table is just gorgeous! My husband and I are building a house and have been looking to find the perfect table for weeks now. Just stumbled upon yours and fell in love! We are going to try and use your modifications to the original plan as well, thank you so much for sharing. Hope we can do this too!!!!!
Thanks!
Kristine
Sat, 10/27/2012 - 06:45
NEED one of these...
I've NEVER done a project like this and i'm not even near crafty but this is the first thing I see on Pintrest that made me even want to attempt doing it!
Is it wide enough that the cross beams don't annoy you when you are sitting?
Wed, 02/12/2014 - 11:20
Dana thanks to your informative blog detailing what you did for the rounded legs you have saved my project! I really did not want to resort to the the angled leg cuts. I just could not figure out the 30 & 45 degree cuts. I as well was originally trying to make them on the same piece. THANK YOU!
I came across some old 4x4s left over at my job so I decided to do something with them. I was in desperate need of an outdoor table. I found the plans for this table, grabbed the 4x4s I needed and went to work. The 4x4s where in really rough shape. It took me about 7 hours to sand them down to bare wood. In a way I was ok with how old they where because I didn't have to wait to stain them. One thing I would do if I could do it over again is stain, paint and protect the wood before I assembled the table. I had a hard time protecting the table top cracks. Down the road I may epoxy resin the top. I also have the wood ready for the matching 4x4 truss benches, so those are soon to come.
I made these windows to layer with an actual antique window I have. I made a template out of kraft paper, traced it on wood, and cut it out with a jigsaw. There are step by step instructions for making the template on my blog!
This is our attempt at the Fancy X Farmhouse Table. My husband and I built this over a weekend. We modified our table from the plans, making ours shorter and wider. We also added extensions and changed out a few boards for a bit of a different look from the exact plan. We created a custom finish with a few cheap and easy steps to get the look we wanted. Our table is 84" long by 46" wide. The original plans for the table called for it to be 96" long by 37" wide. We added a fifth board to our table top, thus making our tabletop 9.25" wider (since a 2x10 is actually 9.25" wide.) To account for this, we simply increased the width of the base boards by 9.25". As for the length, since our table was 12" shorter than the plan, we decreased the length of the two support boards running between the bases by 12" to account for that. We had to adjust the length of our decorative pieces somewhat, because of the wider base and shorter length. It was bit of trial and error but we were happy with what came out of it. For the center base post, instead of using 2x4's we used one 4x4 which was clean, square, and straight. We were happy with how things turned out for the base. Perhaps our biggest alteration was the fact that we added extensions to each end. To do this, we cut out 3.5" slots in the top of the base so a 2x4 could slide in. We then took two 2x8's and used pocket holes to bring them nice and tight. With the extensions in place, our table is nearly 10 feet long! As for the finish, we wanted a weathered gray color and were able to come up with it through a three step process. Its really beautiful in person! Thanks again for the plan
Sun, 07/22/2012 - 15:26
Your new table is really very beautiful. The previous one was also very nice, great job!
Thu, 07/26/2012 - 06:37
Wow! Great addition of the extensions. I'm saving this for our build.
Tue, 08/07/2012 - 03:10
Could you possibly give me a detailed explanation of how you finished this table? I love, love, love the color and want to replicate it.
Thanks!
Darcy
Tue, 09/25/2012 - 09:06
Beautiful table, but I really want some information on the 3-step process you used to get the weathered gray look. Can you please provide that information? Thanks!
Tue, 10/23/2012 - 07:46
How did you create that Gray Weatered finish? Also what type of wood did you use?
Sun, 04/07/2013 - 20:40
Thank you for your interest in the finish....we used regular pine from Orange and Blue. We used a mixture of steel wool and vinegar in a glass jar, let it sit for a night or two, then brushed it on evenly over each board. We then let that sit for a night or two and then proceed to whitewash the entire table (two parts water one part paint.) After that, we took Dark Walnut Stain and wiped it over each board, then quickly wiped/scrubbed it off after just a minute or two. That's how we did it!
Id suggest practicing first with some scrap , esp. with the steel wool mixture so you can see how the wood changes. :)
Fri, 09/23/2016 - 15:24
Hi Emily!
I love your table. We are about to make one and love your stain. Would you be so kind to give me details of what you used to achieve the look? I read the above post, but could you give me brands and colors? I don't understand what is steel wash- is that the color?
Thank you so much!
FLKS
Mon, 09/09/2013 - 11:40
but when we brushed on the steel wool/vinegar mixture, the holes on the table top and base that we had filled in with putty didn't really stain...did you run across the problem? I don't see any areas on the top of your table where you can tell where the holes were??
Wed, 04/09/2014 - 09:05
I'm curious if you made the extensions permanent or if they can be removed and added as you need? I love this table!
Thanks,
Wed, 08/13/2014 - 11:50
I am not understanding how you made the extensions from your description and then looking at the end pictures... Would you please explain this a little further and how they are stored and placed for use and how this works? Thank you!
Tue, 10/07/2014 - 17:39
LOVE the finished product! I aim to get the hubby to make this one at some point! But for now, we have just a bench in our kitchen that he made and I'd like to apply the same finish you did. I've looked at a bunch of different tutorials but I like yours the best. Here's the question...how long after I apply the paint/water mixture to I apply the walnut stain? Do I apply the water/paint and wipe off right away? A few seconds later? A minute later? Do I allow the applied/wiped water/paint mixture to dry completely before adding the stain or do I want to apply the stain before it's throughly dry so that it mixes a bit for a softer look? Thanks so much!
Made this for our dining room and it was my first major furniture project. Learned a lot. Looking for the next project
This was so much fun to build and it turned out really great. It was the perfect gift for my son on his fourth birthday.
I had to change around a bit of the plan because my daughter's room has a weird shape. So she gets into bed on one side of the bed, but the playhouse side is opposite so that it would be able to accommodate a window and a door on that side. We were able to put in 3 full sized windows this way.
Inside her playhouse is the play kitchen set I built her several years ago (it's seen a ton of use), as well as the doll crib that I built her (which has also seen a ton of use.)
Inside, we used coated mug hooks around the top of the inside to hang rope lights, and we used the same hooks as curtain rod hangers for the cafe tension rod curtain rods we used for the windows.
Custom built-in desk and bookshelves. We combined plans for a massive desk with bookshelves. Working from home, I needed to maximize my storage space but wanted to create beauty and function at the same time. I love the finished results! I admire my new desk everyday I "go to work."